


PenCam 400
Table of contents
 Loading...
Digital
Digital
Camera
Camera
E-MANUAL

English
Chapter 1: How to Use Your Digital Camera
Introduction
The built-in memory of your camera is 64 Mbits or 128Mbits memory.(It
depends on your model) It supports two kinds of quality - high quality(640x480 VGA)pictures and normal quality ( 640x480 VGA ) pictures. It
also supports AVI Movie mode(SIF 320x240) for high quality and normal
quality. Besides, your camera offers several functions on the LCD, showing
the number of taken pictures as well. With a USB cable, you can transfer all
the pictures to your PC.
Installing batteries
Your camera is powered by 2 AAA alkaline batteries or by a PC via a USB
cable.
When batteries are removed, all of the stored pictures are cleared.
(Alkaline battery Capacity: continuous snapshot for 1.5 hours,
stand by works for approximately 1 week.)

English
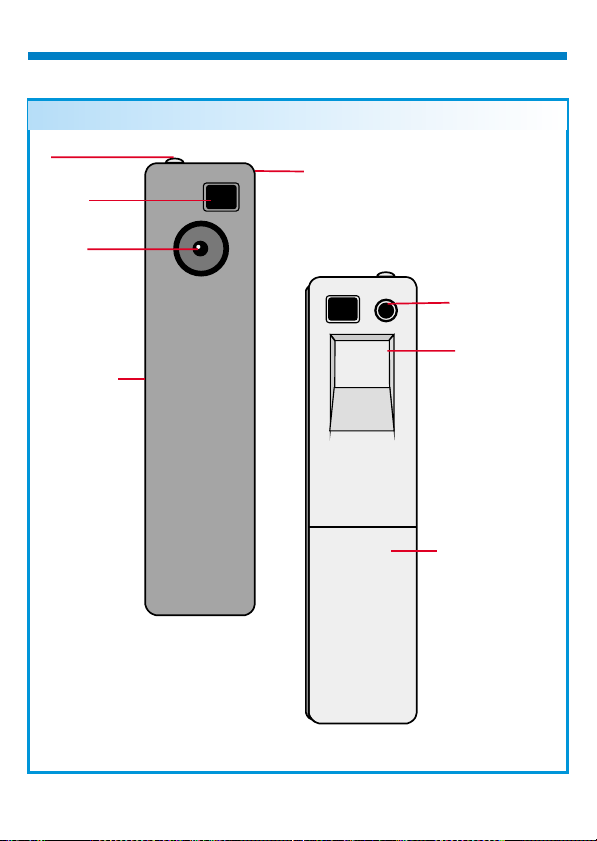
Shutter Switch
()Sw1
View Finder
Lens
USB Port
Your camera
Strap Ring
Mode Switch
()Sw2
LCD Display
Battery Cover
English
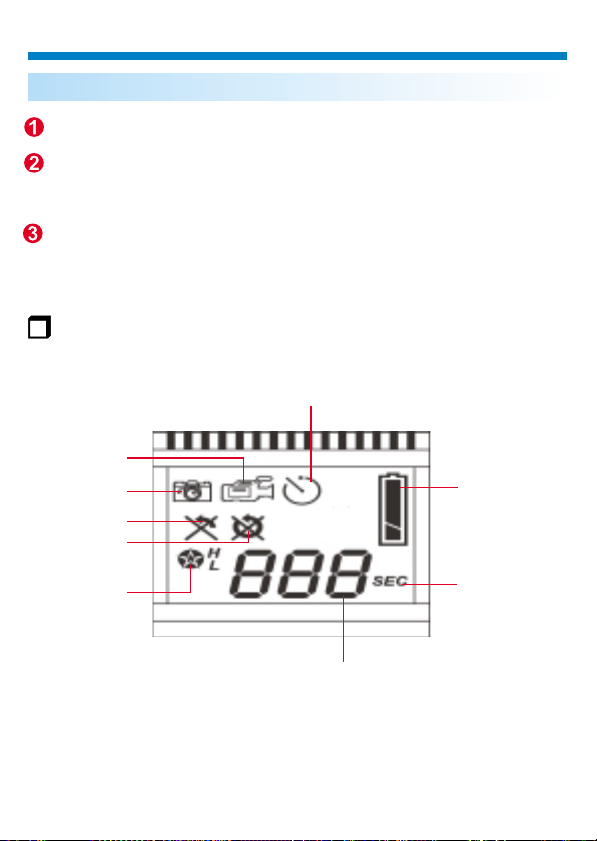
The LCD display
Press the mode button and the LCD is activated.
Press the mode button, the LCD indicates still image,AVI movie,
self-timer, erase last, erase all, quality and good battery icons
in order.
To select the function of the icons, press the shutter button.
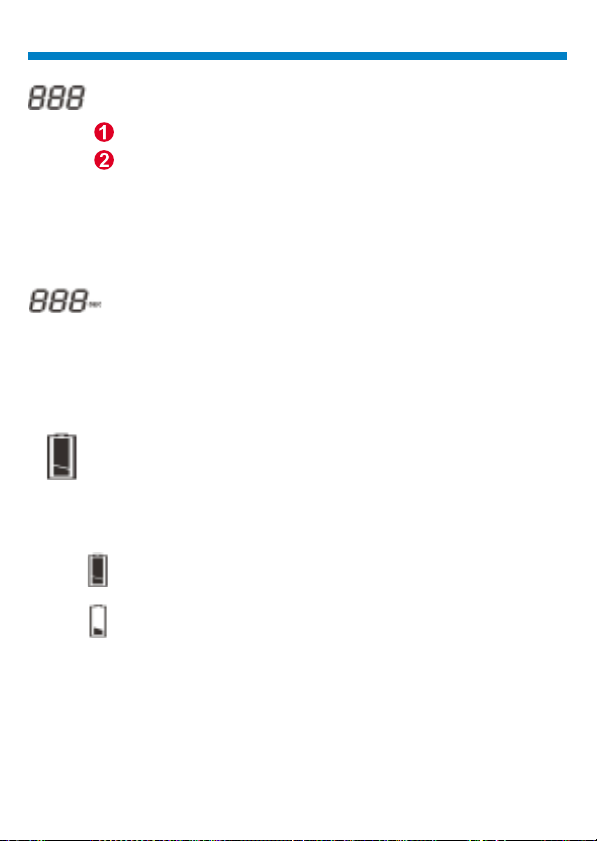
LCD Dispaly
Self Timer
AVI Movie Mode
Still Image
Erase Last
Erase All
Good Battery
Quality
Second Counter
Digit Counter

English
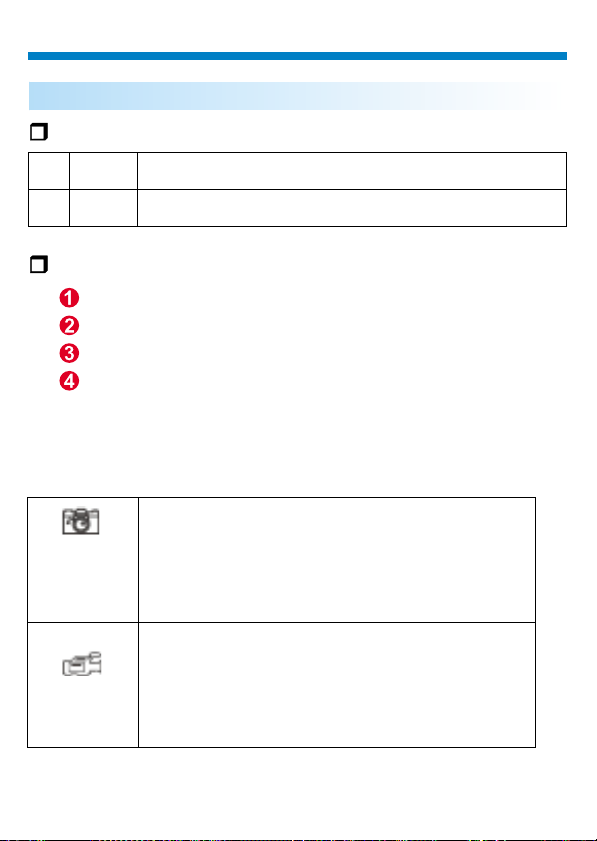
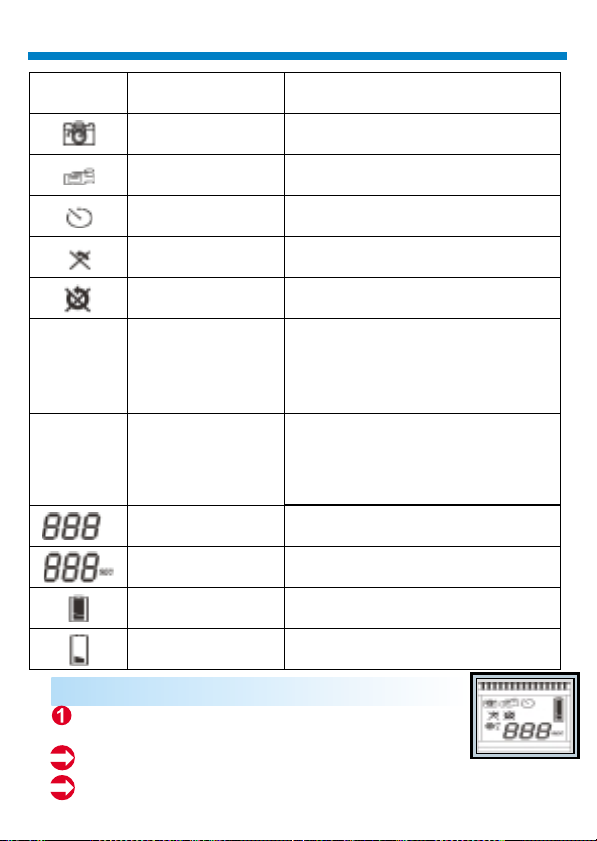
Icon
H
L
Functions
Still Image mode
AVI Movie mode
Self Timer
Erase Last
Erase All
High quality
Normal quality
Digit Counter
Second Counter
Good battery
Low battery
Description
- takes still pictures
- takes AVI Movie pictures
- starts 10 second self-timer to take a picture
- erases the last picture
- erases all of the pictures in the memory
(Still Image)
-VGA (640x480), up to 49 pictures ( 128Mbit)
-VGA(640x480),up to 22 pictures (64Mbit)
(AVI Movie)
-SIF (320X240), up to120 sec.(128Mbit)
-SIF(320X240), up to 60 sec. (64Mbit)
(Still Image)
-VGA (640x480), up to 400 pictures (128Mbit)
-VGA(640x480),up to 200 pictures(64Mbit)
(AVI Movie)
-SIF(320X240),up to 200 sec.(128Mbit)
-SIF(320X240), up to 100 sec.(64Mbit)
- displays the number of the pictures you take
- displays seconds.
- indicates good battery status
- indicates low battery status
Turning on / off your camera
Press the mode button to activate your camera.
Your camera turns off automatically when idle over
s
30 econds.
After installing the batteries, you have to wait for 5 seconds to
activate your camera.
ON
English
Chapter 2: Taking Pictures
Taking a picture
Press the shutter switch to take a picture. A high pitched beep indicates that a
picture is taken successfully and the counter increases as well. A low beep
with blinking LCD display suggests that the camera is full.
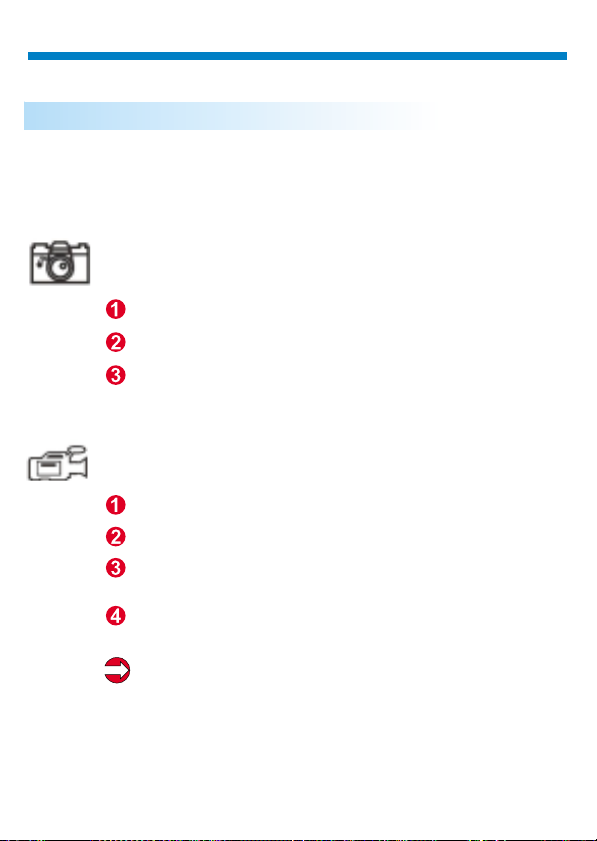
Still Image Mode
Press the mode button.
The LCD shows the Still Image Mode icon.
Press the shutter button to take a single picture.
AVI Movie Mode
Press the mode button.
The LCD shows the AVI Movie Mode icon.
Keep pressing the shutter button to take AVI Movie.
Release the shutter button to stop AVI Movie Mode.
Pictures taken in AVI Movie Mode are stored as AVI files in your camera.
You don't need to do extra work to transfer the taken pictures into AVI files
on the preview window of Digital Camera Manager.
English
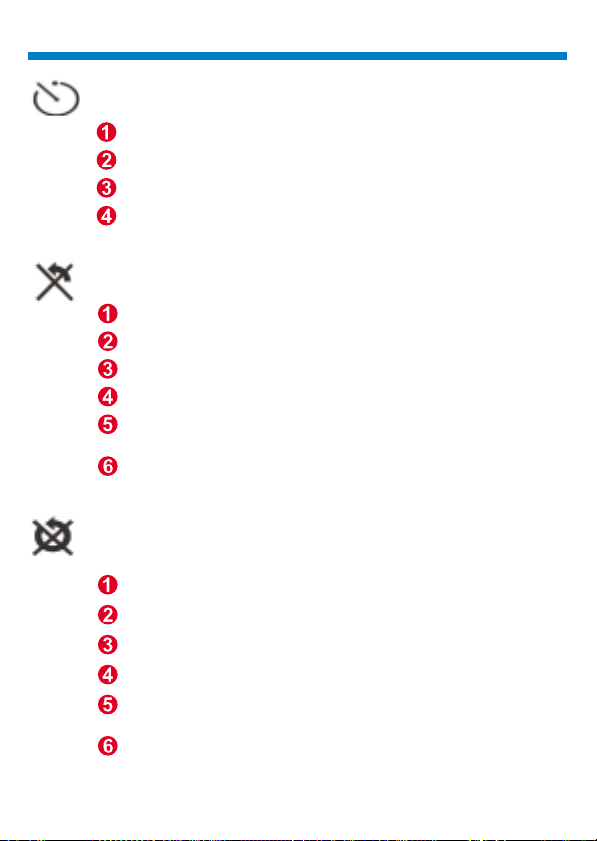
Self Timer
Erase Last
Erase All
Press the mode button.
The LCD shows the Self Timer icon.
Press the shutter button.
Your camera starts a 10-second countdown and takes a picture.
Press the mode button.
The LCD shows the Erase Last icon.
Press the shutter button.
The Erase Last icon starts to blink.
Press the shutter button again and the last stored picture
or AVI Movie is cleared.
Press the mode button to select the other function icon.
Press the mode button.
The LCD shows the Erase All icon.
Press the shutter button.
The Erase All icon starts to blink.
Press the shutter button again and all the stored picture
and AVI Movie are cleared.
Press the mode button to select the other function icon.
English
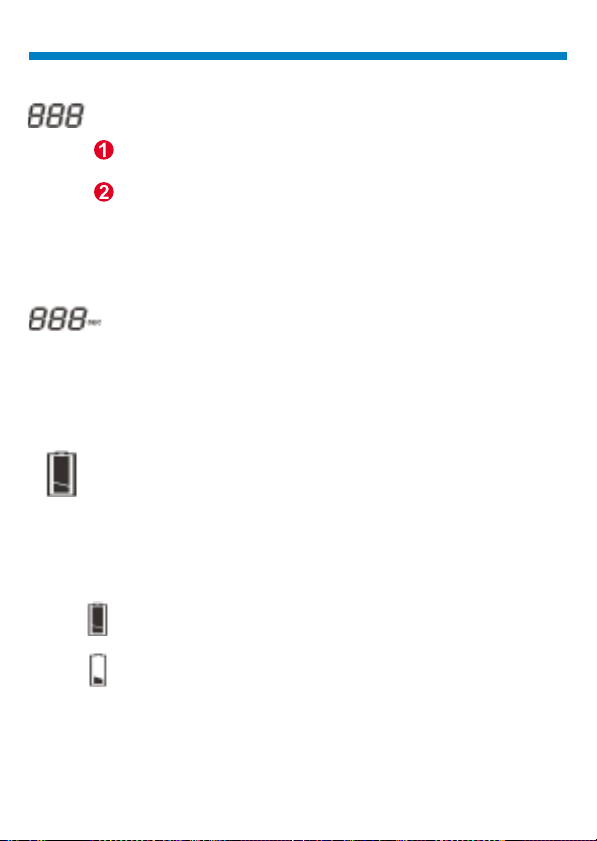
Digit Counter
This icon appears to show how many seconds you are taking AVI
movies.
Battery Indicators
When running out of power, the LCD changes from a good battery
icon to a low battery icon. It tells you to replace batteries.
It shows the total taken images and AVI Movies.
Your camera beeps with blinking LCD to remind you the
memory is full.
Second Counter
Good Battery
Low Battery
English
Quality
Quality
H Good
Normal
L
You should use high quality when you need very good image quality.
You should use low quality when you need standard image quality.
Choosing the Quality
Press the mode button until a star icon with H or L is shown.
To change "H" or "L" quality, press the shutter.
Select a function icon to take a picture, such as Still Image mode.
Press the shutter and a picture is taken.
Note : Still image mode and AVI Movie mode automatically selects different resolutions.
The following chart shows the differences.
(128Mbit)
Still image mode
AVI Movie mode
High quality:
Normal quality:
(64Mbit)
High quality:
Normal quality:
(128Mbit)
High quality: SIF ( 320x240 ), up to 120sec.
Normal quality: SIF ( 320x240 ), up to 200sec .
(64Mbit)
High quality: SIF ( 320x240 ), up to60sec.
Normal quality: SIF ( 320x240 ), up to 100sec .
VGA (640x480), up to 49 pictures
VGA (640x480), up to 400 pictures
VGA (640x480), up to 22 pictures
VGA (640x480), up to 200 pictures

English
Tips for Taking Pictures
Half-length photos are better than whole-body photos,
for the image looks much sharper.
The subjects should avoid standing in the shade of
trees or buildings. It results in dark image and
enhanced background.
Hold your camera with two hands, for shaking results
in vague image.
Clean your camera with a dry, soft cloth if the lens is
covered with dirt or water.
When taking a picture, please pay attention not to cover
the viewfinder with your fingers.
English
How to Download Photo and Video to PC
Thank you for purchasing the Digital Camera. This guide will help you install
your camera onto your computer system.
Digital Camera Manager Installation
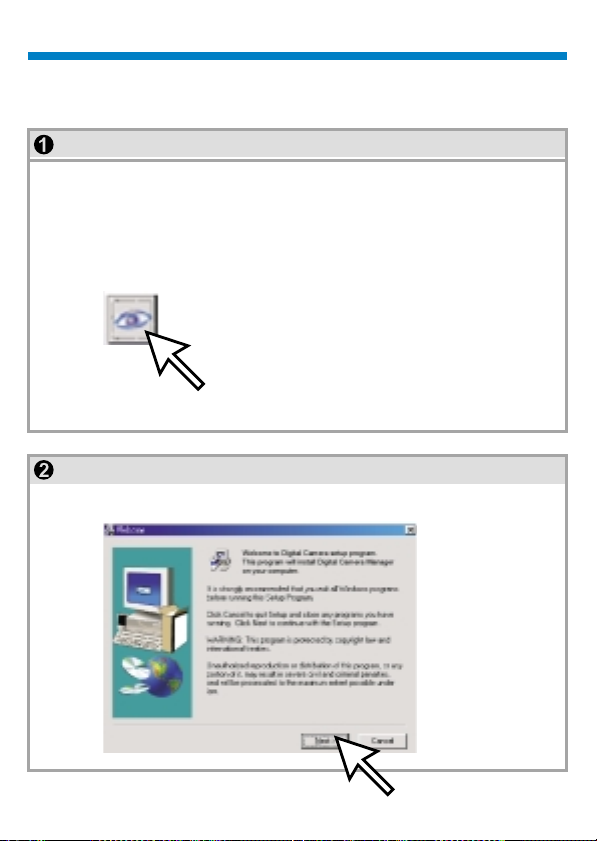
Place the CD into your CD-ROM and click on the Digital Camera
Manager Icon to begin the installation. If the CD does not automatically
display, simply go to "Start" then "Run" and select the path"D:\Setup.
exe". You may need to replace "D" with the letter that corresponds to
your CD-ROM drive.Now your computer is initializing the Wise Installation Wizard. Please wait.
Digital Camera Manager
After the welcome screen appears, click "Next".

English
The CD begins installing the driver to the proper location.
The dialog box that appears asks if you would like to restart your computer
now or later. Press "OK" to complete installation.

USB
English
Start Digital Camera Manager
The digital pictures can be transferred at all times, even if you take only one
image. To connect your camera with your PC, you need a USB cable and
USB port. Your camera double beeps when successfully connected with
your PC. Don't worry! All of the stored images in your camera are still alive.
Your PC offers power for your camera. When disconnecting the USB cable,
your camera turns off automatically.
Connect the smaller end of the USB cable to
the USB port of your camera.
Plug the larger end of the USB cable to
the USB port of your PC.
Note: When plugged into a USB port,
your camera is powered by the PC. You
may remove the batteries. However, all
pictures are cleared when the USB cable is
unplugged.

English
To start using the Digital Camera Manager, simply click on the "Start"
menu and go up to "Programs" Then go to the folder named "Digital
Camera Manager" and select it. This is the program where you can begin
to use your camera.
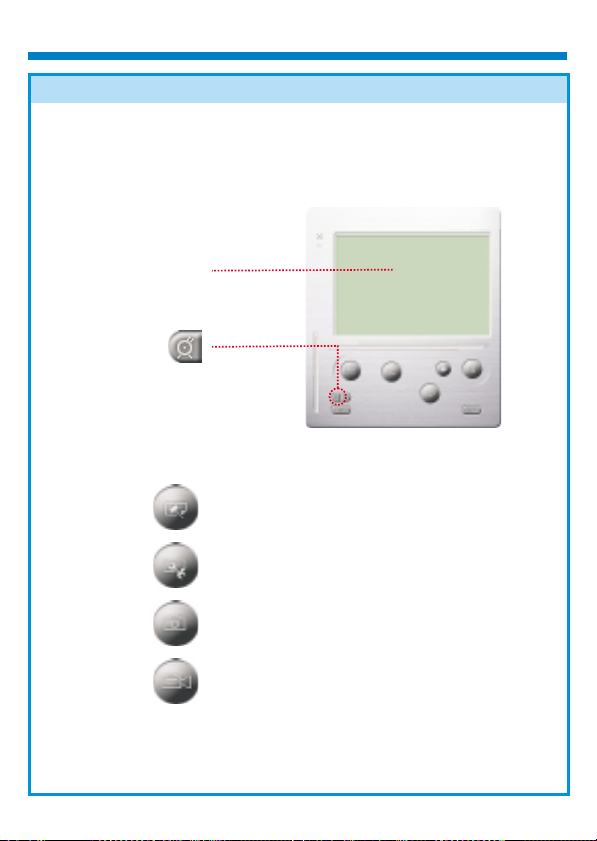
Mode Selecting
==Press the "Live View" button to change the camera to PC Camera mode.
=
Press the "DSC Function" button to change the camera to DSC &
=
Camcorder mode.
Live View (PC Camera Mode)
DSC Function (DSC Mode)
English
It is easy to attach your camera to your system. our camera
is used as a standard PC camera.
The current view is displayed in the "preview" window.
Live preview
PC Camera Mode
=
Press "Video Source" button to adjust
advanced settings.
=
Press "Video Format" button to set image
size.
=
Press "Snap Shot" button to capture an
image to the album window.
In this mode, y
PC Camera Mode
=
Press "Record button" to record a video clip
to album window.

English
DSC Mode
Transferring Photos:
This allows you to transfer photos in your camera.
Press the "Link" button to connect the camera and transfer photos.
<
Press the "Album" button to open the album window.
=
Press the "Transfer all" or "Transfer selected" button to transfer photos
>
to the album window.
=
Transfer pictures in your camera
to your PC
=
Open or close album window
=
Transfer selected photos to
album window
=
Transfer all photos to album
window
Enhanced Resolution Mode:
=
The Largest Resolution : XGA( 800K pixels )
=
=
Optical Resolution: VGA ( 300K pixels)
=
Your camera has particular enhanced image skills, which make images
sharper by enhancing the original VGA image to XGA image.
How to operate:
Click the setting button.
Click " picture ".
Choose " Enhanced resolution ".
You can download your images again.

English
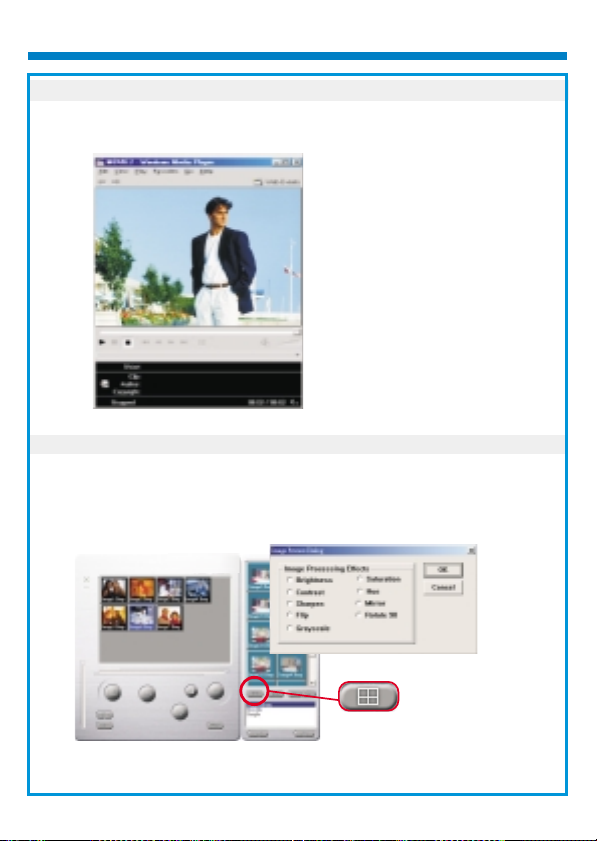
Playing picture:
You can play any picture file you want in the album
window by double clicking the picture icon to execute your default media
application.
Browerser
Picture icon
Editing Photos:
It is easy to edit any photo you want in the album window. Double click the
photo icon to execute your default image application (such as Imaging,
Paint....etc.) to edit your image file.
browser or in the
Album

English
Transferring Video:
After transferring images to the preview window, click AVI Creator and all
images are combined in one AVI file. This AVI file is saved in your album
folder.
Note: Pictures in AVI files can be placed forward or backward.
AVI Creator
(Reverse)
AVI Creator
AVI Creator:
Select Images you want.
<
Press "Setting" button to adjust frame rate.
=
Press "AVI Creator" button to create an AVI file.
>
English
Playing Video:
You can play any video clip file (AVI format) you want in album window by
double clicking the AVI file icon to execute your default media application.
AVI Creator
Image processing:
Click the" Image Process" button to choose image settings.
Image Process

English
Mail Function:
Click the "Mail" button to attach selected image to a new email document. it
is easy to send images to your family and friends!
Mail
Album window:
Delete
Click the button. All the files you select in the album window are cleared forever.
Therefore, you should be very careful with the delete button.
Select All
Click the button. You select all the files in the album window.
Making Your Album Folders
Click the button and key in your file name. Then you'll have a new album folder, which
can store lots of images or video files. If you want to cancel any of the album folders,
just select the album and click the delete button below.
Transferring Image and Sound Files
Click the button. You transfer all the images and sounds in your camera to your PC.

Deutsch
Handhabung der Kamera
Der eingebaute Speicher der Kamera beträgt 64 MB oder 128 MB (je nach
Model). Es werden zwei Auflösungsarten, High Quality( 640x480 VGA)
Bilder und Normal Quality (640x480 VGA) Bilder, unterstützt. Ebenso wird
ein AVI-Video Modus (SIF 320x240) für High Quality und Normal Quality
angeboten.
wird etwa die noch verbleibende Anzahl von Bildern angezeigt. Mit Hilfe
eines USB-Kabels können alle diese Bilder in den PC übertragen werden.
Außerdem bietet die Kamera eine Reihe LCD-Funktionen, so
Batterien einsetzen
Einführung
Die Stromversorgung der Digital Camera über zwei AAA-Batterien oder,
wenn sie mit dem PC verbunden ist, über den USB-Anschluß.
Hinweise:
Werden die Batterien entnommen, gehen alle gespeicherten Bilder verloren.
Deutsch
Auslöser
()Sw1
Sucher
Linse
USB-Anschluß
Ihrer Kamera
Riemen Ring
Modus-Wahlschalter
(Sw2)
LCD-Anzeige
Batterien einsetzen

Deutsch
Das LCD-Display
Das LCD-Display wird mit der Modus-Taste eingeschaltet.
Nach dem Drücken der Modus-Taste zeigt das LCD die Symbole für:
Standbild-Modus, AVI-Video, Selbstauslöser, Letztes Bild löschen
und Qualitäts- und Batterie, in dieser Reihenfolge.
Drücken Sie zumAuswählen einer Funktion denAuslöser.
LCD Display
Selbstauslöser
AVI-VideoModus
Standbild-Modus
Letztes Bildlöschen
Alles löschen
Batterieladezustand gut
Quality
Sekunden-Zählwerk
Zählwerk
Deutsch
Symbol
H
L
Funktion
Standbild-Modus
AVI-Video Modus
Selbstauslöser
Letztes Bild löschen
Alles löschen
High quality
Normal quality
Zählwerk
Sekunden-Zählwerk
Batterieladezustand gut
Batterieladezustand gut
Batterieladezustand niedrig
Batterieladezustand niedrig
Beschreibung
-Aufnahme von Stehbildern
- Aufnahme von AVI-Video Bildern
- Startet 10-Sekunden Selbstauslöser zur
Aufnahme eines Bildes
-Löscht das letzte Bild
-Löscht alle Bilder im Speicher
()Standbild-Modus
-VGA (640x480), ( 128Mbit)biszu49Bilder
-VGA(640x480), (64Mbit)biszu22Bilder
()AVI-Video Modus
-SIF (320X240), bis zu 120 sec.(128Mbit)
-SIF(320X240), bis zu 60 sec. (64Mbit)
()Standbild-Modus
-VGA (640x480), (128Mbit)bis zu 400 Bilder
-VGA(640x480), (64Mbit)
()AVI-Video Modus
-SIF(320X240),bis zu 200 sec.(128Mbit)
-SIF(320X240),bis zu 100 sec.(64Mbit)
-Zeigt die Anzahl der aufgenommenen Bilder an
- Sekundenanzeige
- Zeigt vollen Ladezustand der Batterie an
- Zeigt niedrigen Ladezustand der Batterie an
bis zu 200 Bilder
Ein / Ausschalten der Kamera
Die Kamera wird mit der Modus-Taste
Eingeschaltet.
Die Kamera schaltet sich nach 30 Sekunden Inaktivität
automatisch aus.
Nach dem Austauschen derBatterien dauert es 5 Sekunden bis die
Kamera einsatzbereit ist.
ON

Deutsch
Bilder aufnehmen
Bilder aufnehmen
Drücken Sie den Auslöser, um ein Bild aufzunehmen. Es ertönt ein
akustisches Signal. Ein hohes akustisches Signal signalisiert, daß das Bild
erfolgreich aufgenommen wurde. Die Kamera gibt tiefer Signaltöne und blinkt,
um einen vollen Speicher anzuzeigen.
Standbild-Modus
Drücken Sie die Modus-Taste
Das LCD zeigt das Standbild-Symbol
Drücken Sie zurAufnahme eines einzelnen Bildes den
Auslöser
AVI-Video Modus
Drücken Sie die Modus-Taste
Das LCD zeigt das -Symbol AVI Movie.
Ein mehrfaches Drücken dient der Aufnahme eines
AVI-Video.
Lassen Sie den Knopf los, um sie zu beenden.
Bilder die im AVI-Video Modus aufgenommen werden
als AVI-Dateien in der Kamera gespeichert. Es ist nicht
nötig, diese Bilder im Vorschaufenster des Digital
Camera Managers in AVI-Dateien umzuwandeln.

Deutsch
Selbstauslöser
Letztes Bild löschen
Alles löschen
Drücken Sie die Modus-Taste
Das LCD zeigt das Selbstauslöser-Symbol.
Drücken Sie denAuslöser
Die Kamera beginnt mit dem 10-Sekunden Countdown
und macht dieAufnahme
Drücken Sie die Modus-Taste
Das LCD zeigt das Letztes Bild löschen-Symbol.
Drücken Sie denAuslöser
Das “Letztes Bild Löschen” Symbol blinkt
Drücken Sie denAuslöser ein weiteres Mal um das letzte
gespeicherte Bild oderAVI-Video zu löschen.
Drücken Sie die Modus-Taste, um ein anderes
Funktionssymbol auszuwählen.
Drücken Sie die Modus-Taste
Das LCD zeigt das Alles löschen-Symbol.
Drücken Sie denAuslöser
Das “Alles löschen” Symbol blinkt
Drücken Sie denAuslöser ein weiteres Mal, um alle
gespeicherten Bilder undAVI-Videos zu löschen
Drücken Sie die Modus-Taste, um ein anderes
Funktionssymbol auszuwählen.
Deutsch
Zählwerk
Das Symbol gibt die Zeitdauer in Sekunden an, in der Sie eine
AVI-Videoaufnahme vornehmen.
Batterieanzeigen
Bei niedriger Stromversorgung wechselt das LCD von dem
Symbol, das einen vollen Ladezustand anzeigt zu dem Symbol,
das einen niedrigen Ladezustand angibt. Die Batterien m2ssen
ausgetauscht werden.
Zeigt die Anzahl der gemachten Aufnahmen und
AVI-Videos an.
Die Kamera gibt Signaltöne und blinkt, um einen vollen
Speicher anzuzeigen.
Sekunden-Zählwerk
Batterieladezustand gut
Batterieladezustand niedrig
Deutsch
Qualität
Qualität
H Gut
Normal
L
Eine hohe Bildqualitäterfordert High Quality
Für Standard-Bildqualität genügtNormal Quality
Wahl der Qualität
Drücke Sie die Modus-Taste solange bis ein Stern-Symbol
mit H oder L erscheint.
Durch Drücken desAuslösers wechseln Sie von “H” zu “L”.
Wählen Sie ein Funktionssymbol, um eineAufnahme zu
machen, etwa Stehbildmodus.
Drücken Sie denAuslöser, um eineAufnahme zu machen.
Hinweis: Im Stehbild- undAVI-Video Modus wirddieAuflösung automatisch
Standbild-Modus
AVI-VideoModus
gewählt. Die folgendeTabelle zeigt die Unterschiede.
(128Mbit)
High quality:
Normal quality:
(64Mbit)
High quality:
Normal quality:
(128Mbit)
High quality: SIF ( 320x240 ), bis zu 120sec.
Normal quality: SIF ( 320x240 ), bis zu 200sec .
(64Mbit)
High quality: SIF ( 320x240 ), bis zu 60sec.
Normal quality: SIF ( 320x240 ), bis zu 100sec .
VGA (640x480), bis zu 49 Bilder
VGA (640x480), bis zu 400 Bilder
VGA (640x480), bis zu 22 Bilder
VGA (640x480), bis zu 200 Bilder

Deutsch
Tipps zum aufnehmen von Bildern
Bilder mit halber Länge sind besser als Ganzkörperfotos, da
diese schärfer sind.
Personen oder Objekte sollten sich beiAufnahmen nicht im
Schatten von Bäumen oder Gebäuden befinden, da dies ein
dunkles Bild mit Hervorgehobenem Hintergrund zur Folge
hat.
Halten Sie die Kamera mit beiden Händen, um ein Wackeln zu
vermeiden.
Säubern Sie die Kamera mit einem trockenen weichen Tuch,
falls die Linse verschmutzt oder feucht ist.
Achten Sie beimAufnehmen von Bildern darauf, den Sucher
nicht mit Fingern zu verdecken.

Deutsch
So übertragen Sie Fotos und Videos auf den PC.
Vielen Dank, daß Sie sich für die Kamera von entschieden haben. DieseAnleitung zeigt
Ihnen die Schritte zur Installation Ihrer Kamera in Ihrem Computersystem.
Kamera-Manager installieren
Legen Sie die mitgelieferte CD-ROM in Ihr CD-ROM-Laufwerk ein, und klicken Sie
auf das Digital Camera-Manager-Symbol, um die Installation zu starten. Falls das
links abgedruckte Fenster nicht erscheint, klicken Sie auf die Schaltfläche "Start",
wählen Sie "Ausführen", und geben Sie "D:\setup.exe" ein. Ersetzen Sie ggf. "D"
durch den Buchstaben, der Ihr CD-ROM-Laufwerk kennzeichnet. Das
Installationsprogramm wird initialisiert. Dies kann einen Augenblick dauern.
Digital Camera Manager
Anschließend erscheint der Hauptbildschirm des Installationsprogramms. Klicken Sie
auf "Weiter".
Loading...