

Page 1

Aastra 673xi / 675xi
SIP Telephones
User Guide
Communications systems
Aastra 800
OpenCom X320
OpenCom 130/131/150
OpenCom 510
Page 2

Welcome to Aastra
Thank you for choosing this Aastra product. Our product meets the strictest
requirements with regard to quality and design.
This user guide will show you how to use your Aastra 673xi / 675xi and answer most of
the questions that may arise.
If you require further technical support or information about other Aastra products,
please refer to our website at http://www.aastra.de or http://www.aastra.com.
It provides additional notes and tips on the product.
We hope you enjoy using the Aastra 673xi / 675xi.
Aastra 800 and OpenCom 100
This user guide applies to the Aastra 800 and OpenCom 100 communications
systems. The OpenCom 100 product family comprises the OpenCom 130,
OpenCom 131, OpenCom 150, OpenCom 510 and OpenCom X320 communications
systems.
If individual features differ on the systems, a reference is made in this user guide.
Page 3

Contents
Aastra 673xi / 675xi SIP Telephones . . . . . . . . . . . . . . . . . . . . . . . . . . . . . . . . . . . . . . 3
Aastra 673xi / 675xi Key Description. . . . . . . . . . . . . . . . . . . . . . . . . . . . . . . . . . . . . . 6
About this Manual . . . . . . . . . . . . . . . . . . . . . . . . . . . . . . . . . . . . . . . . . . . . . . . . . . . . . . . . 9
Distinctive Features of the Communications System. . . . . . . . . . . . . . . . . . . . . 10
Using the Aastra 673xi / 675xi . . . . . . . . . . . . . . . . . . . . . . . . . . . . . . . . . . . . . . . . . . . . 11
Telephoning. . . . . . . . . . . . . . . . . . . . . . . . . . . . . . . . . . . . . . . . . . . . . . . . . . . . . . . . . . . . . . 11
Making Calls . . . . . . . . . . . . . . . . . . . . . . . . . . . . . . . . . . . . . . . . . . . . . . . . . . . . . . . . . . . . . . 11
Calling with Selective Line Seizure . . . . . . . . . . . . . . . . . . . . . . . . . . . . . . . . . . . . . . . . . 11
Answering a Call . . . . . . . . . . . . . . . . . . . . . . . . . . . . . . . . . . . . . . . . . . . . . . . . . . . . . . . . . . 12
Holding a Call . . . . . . . . . . . . . . . . . . . . . . . . . . . . . . . . . . . . . . . . . . . . . . . . . . . . . . . . . . . . . 12
Ending a Call . . . . . . . . . . . . . . . . . . . . . . . . . . . . . . . . . . . . . . . . . . . . . . . . . . . . . . . . . . . . . . 12
Three-Party Conference Calls . . . . . . . . . . . . . . . . . . . . . . . . . . . . . . . . . . . . . . . . . . . . 13
Enquiry . . . . . . . . . . . . . . . . . . . . . . . . . . . . . . . . . . . . . . . . . . . . . . . . . . . . . . . . . . . . . . . . . . . 13
Toggling . . . . . . . . . . . . . . . . . . . . . . . . . . . . . . . . . . . . . . . . . . . . . . . . . . . . . . . . . . . . . . . . . . 13
Transferring Call to Another Caller . . . . . . . . . . . . . . . . . . . . . . . . . . . . . . . . . . . . . . . . . 14
Conference. . . . . . . . . . . . . . . . . . . . . . . . . . . . . . . . . . . . . . . . . . . . . . . . . . . . . . . . . . . . . . . . 14
Other Device Functions . . . . . . . . . . . . . . . . . . . . . . . . . . . . . . . . . . . . . . . . . . . . . . . . . . 15
Handsfree / Open-Listening Mode . . . . . . . . . . . . . . . . . . . . . . . . . . . . . . . . . . . . . . . . . 15
Mute Function . . . . . . . . . . . . . . . . . . . . . . . . . . . . . . . . . . . . . . . . . . . . . . . . . . . . . . . . . . . . 15
Call Protection . . . . . . . . . . . . . . . . . . . . . . . . . . . . . . . . . . . . . . . . . . . . . . . . . . . . . . . . . . . . 16
Adjusting Volume Level . . . . . . . . . . . . . . . . . . . . . . . . . . . . . . . . . . . . . . . . . . . . . . . . . . . 16
Using Headset. . . . . . . . . . . . . . . . . . . . . . . . . . . . . . . . . . . . . . . . . . . . . . . . . . . . . . . . . . . . . 16
Speed Dialling . . . . . . . . . . . . . . . . . . . . . . . . . . . . . . . . . . . . . . . . . . . . . . . . . . . . . . . . . . . 17
Speed Dialling with Function Keys . . . . . . . . . . . . . . . . . . . . . . . . . . . . . . . . . . . . . . . . . 17
Speed Dialling with Number Keys . . . . . . . . . . . . . . . . . . . . . . . . . . . . . . . . . . . . . . . . . . 17
Caller Lists . . . . . . . . . . . . . . . . . . . . . . . . . . . . . . . . . . . . . . . . . . . . . . . . . . . . . . . . . . . . . . . 18
Phone Book . . . . . . . . . . . . . . . . . . . . . . . . . . . . . . . . . . . . . . . . . . . . . . . . . . . . . . . . . . . . . . 19
Call Forwarding . . . . . . . . . . . . . . . . . . . . . . . . . . . . . . . . . . . . . . . . . . . . . . . . . . . . . . . . . . 19
Voiceb ox . . . . . . . . . . . . . . . . . . . . . . . . . . . . . . . . . . . . . . . . . . . . . . . . . . . . . . . . . . . . . . . . . 20
Busy Lamp Field. . . . . . . . . . . . . . . . . . . . . . . . . . . . . . . . . . . . . . . . . . . . . . . . . . . . . . . . . . 20
Phone Lock. . . . . . . . . . . . . . . . . . . . . . . . . . . . . . . . . . . . . . . . . . . . . . . . . . . . . . . . . . . . . . . 21
1
Page 4

Presence . . . . . . . . . . . . . . . . . . . . . . . . . . . . . . . . . . . . . . . . . . . . . . . . . . . . . . . . . . . . . . . . . 22
Hot Desking . . . . . . . . . . . . . . . . . . . . . . . . . . . . . . . . . . . . . . . . . . . . . . . . . . . . . . . . . . . . . . 22
Main Menu on the Aastra 673xi / 675xi SIP Telephone. . . . . . . . . . . . . . . 23
1 Calls . . . . . . . . . . . . . . . . . . . . . . . . . . . . . . . . . . . . . . . . . . . . . . . . . . . . . . . . . . . . . . . . . . . . 24
2 Call Forwarding . . . . . . . . . . . . . . . . . . . . . . . . . . . . . . . . . . . . . . . . . . . . . . . . . . . . . . . . 24
3Messages. . . . . . . . . . . . . . . . . . . . . . . . . . . . . . . . . . . . . . . . . . . . . . . . . . . . . . . . . . . . . . . 25
5Protection. . . . . . . . . . . . . . . . . . . . . . . . . . . . . . . . . . . . . . . . . . . . . . . . . . . . . . . . . . . . . . 26
6Connections. . . . . . . . . . . . . . . . . . . . . . . . . . . . . . . . . . . . . . . . . . . . . . . . . . . . . . . . . . . . 27
9Applications. . . . . . . . . . . . . . . . . . . . . . . . . . . . . . . . . . . . . . . . . . . . . . . . . . . . . . . . . . . . 28
0 Central settings . . . . . . . . . . . . . . . . . . . . . . . . . . . . . . . . . . . . . . . . . . . . . . . . . . . . . . . . 29
“Main menu” Menu Tree . . . . . . . . . . . . . . . . . . . . . . . . . . . . . . . . . . . . . . . . . . . . . . . . . 29
Configuring the Aastra 673xi / 675xi . . . . . . . . . . . . . . . . . . . . . . . . . . . . . . . . . . . . 30
Settings . . . . . . . . . . . . . . . . . . . . . . . . . . . . . . . . . . . . . . . . . . . . . . . . . . . . . . . . . . . . . . . . . . 30
Function Keys Reference . . . . . . . . . . . . . . . . . . . . . . . . . . . . . . . . . . . . . . . . . . . . . . . . . 30
Aastra 673xi / 675xi Restarting. . . . . . . . . . . . . . . . . . . . . . . . . . . . . . . . . . . . . . . . . . . 33
Deleting a Local Configuration. . . . . . . . . . . . . . . . . . . . . . . . . . . . . . . . . . . . . . . . . . . 33
Restoring Factory Settings . . . . . . . . . . . . . . . . . . . . . . . . . . . . . . . . . . . . . . . . . . . . . . . 34
Aastra 673xi / 675xi Passwords . . . . . . . . . . . . . . . . . . . . . . . . . . . . . . . . . . . . . . . . . . 35
The Options Menu . . . . . . . . . . . . . . . . . . . . . . . . . . . . . . . . . . . . . . . . . . . . . . . . . . . . . . . 36
Index. . . . . . . . . . . . . . . . . . . . . . . . . . . . . . . . . . . . . . . . . . . . . . . . . . . . . . . . . . . . . . . . . . . . . . . . . . . 37
2
Page 5
Aastra 673xi / 675xi SIP Telephones
Aastra 673xi / 675xi SIP Telephones
The telephones of the product family Aastra 673xi / 675xi are Voice over IP (VoIP) telephones in accordance with the internationally standardised SIP standard (Session Initiation Protocol). Connected to the communications system OpenCom 100 /
Aastra 800 you have additional comfort functions available.
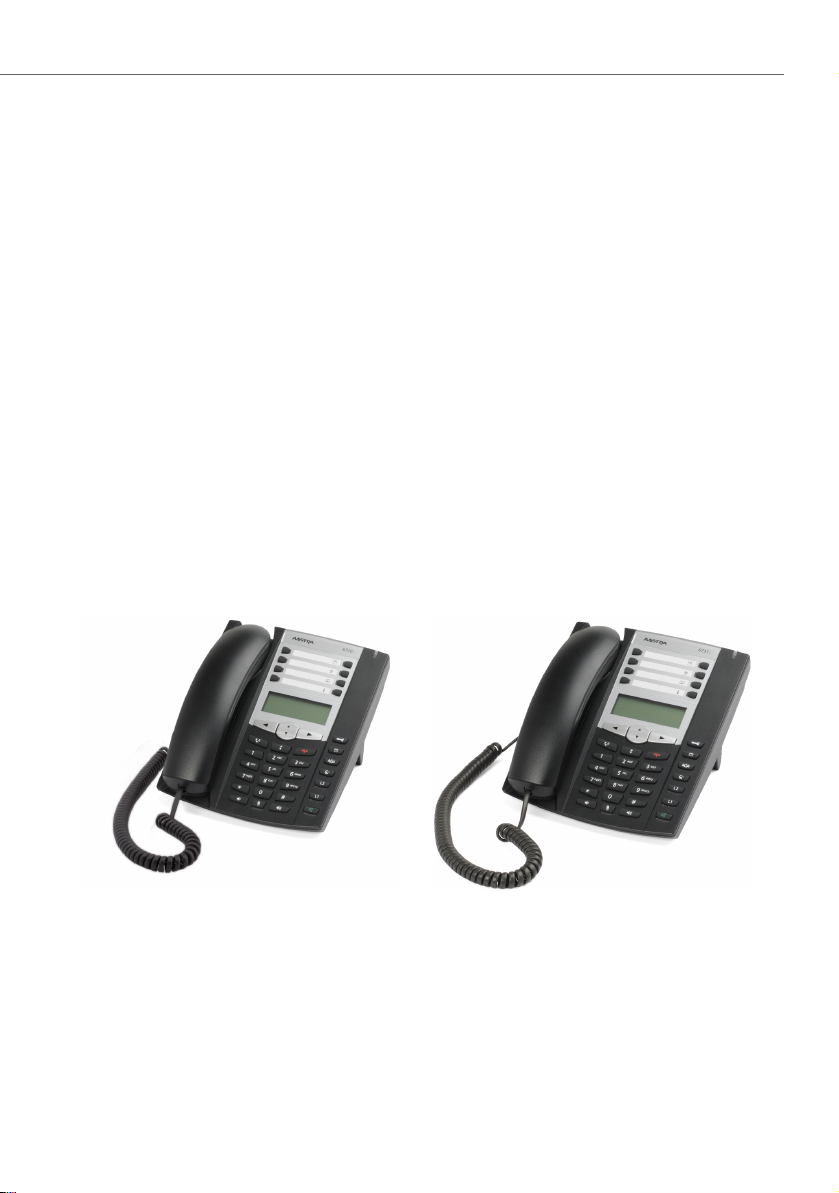
Models of the Aastra 673xi / 675xi product family
The Aastra 673xi / 675xi product family consists of the Aastra 6730i and Aastra 6731i
as well as the Aastra 6753i, Aastra 6755i and Aastra 6757i telephones. The models
differ primarily regarding the display size and number of programmable keys
(function keys). These keys are configured using the OpenCom 100 / Aastra 800 communications system and offer access to individually configurable system functions
such as e.g. configuring call forwarding, executing speed dialling, displaying a busy
lamp field or accessing the phone book of OpenCom 100 / Aastra 800 communications system.
Furthermore, the models of the Aastra 673xi / 675xi product family differ regarding
their controls.
Aastra 6730i – basic level version of the
Aastra 673xi product family
3
Aastra 6731i – with 802.3af (PoE), two
Ethernet ports for PC and LAN
Page 6
Aastra 673xi / 675xi SIP Telephones
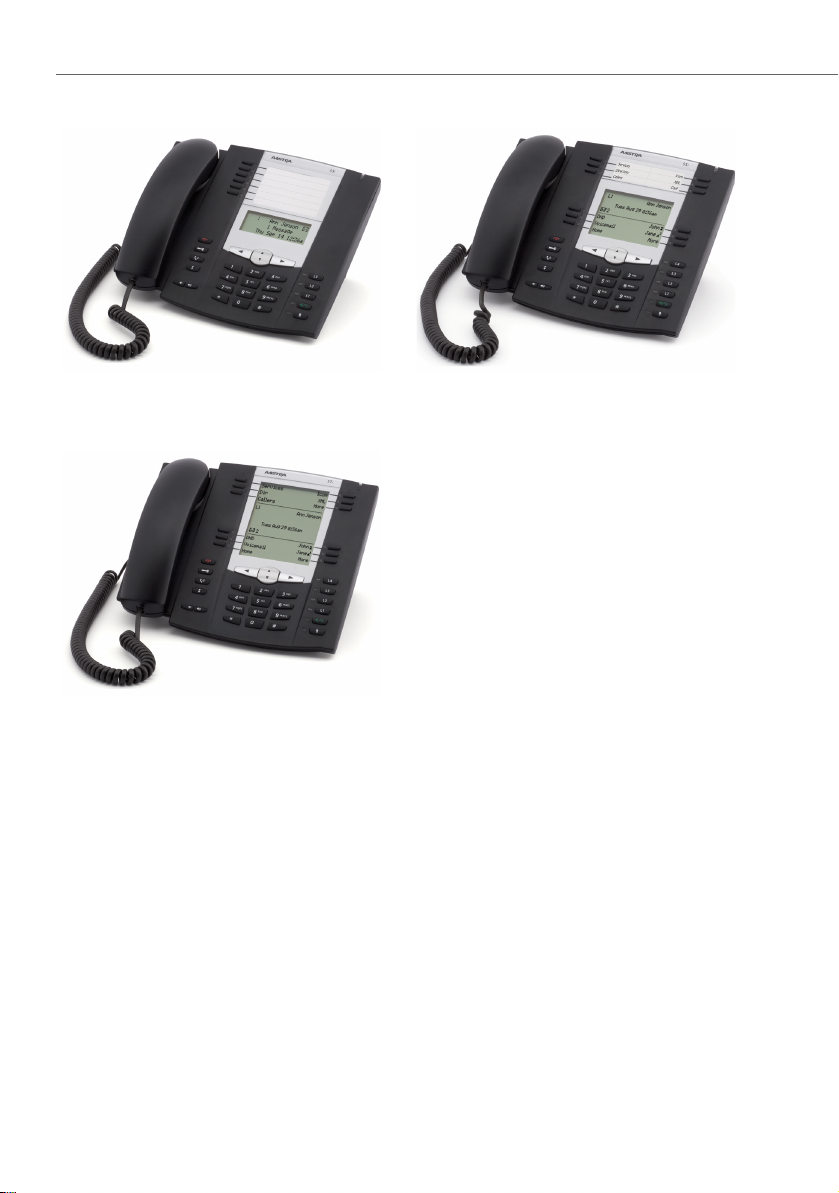
Aastra 6753i – headset jack and six function
keys
Aastra 6757i – premium display and twelve
softkeys
The Aastra 6755i and Aastra 6757i models have large and freely programmable displays for executing system functions.
Aastra 6755i – comfort display, six function
keys and six softkeys
4
Page 7
Aastra 673xi / 675xi SIP Telephones
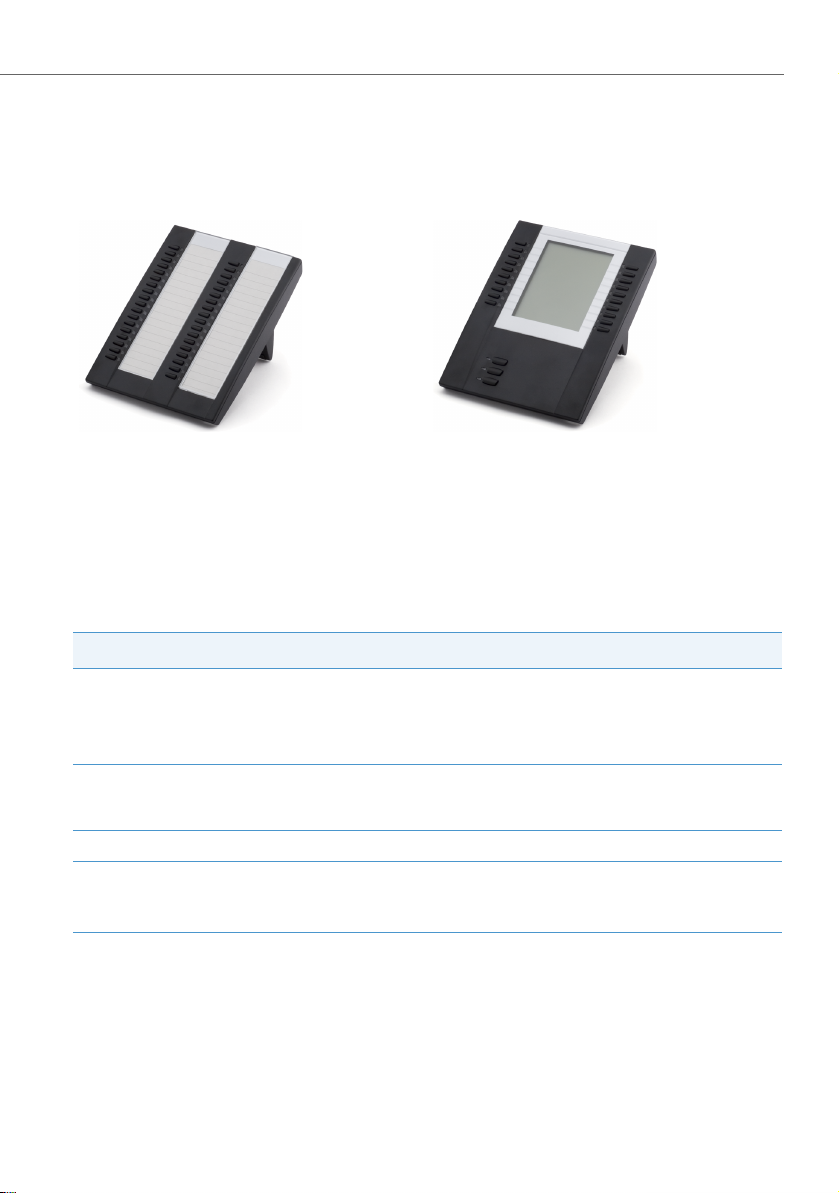
Key Extensions
With an Aastra M670i or Aastra M675i key extension the Aastra 6753i, Aastra 6755i
and Aastra 6757i telephones can provide additional function keys:
Aastra M670i: 36 function keys
Aastra M675i: 20 softkeys respectively
programmable on three levels (total of
60 storage locations)
Up to three key extensions can be connected to designated telephones: three key
extensions of either the M670i type or three of the M675i type. Key extensions cannot
be combined on the OpenCom 100 / Aastra 800 communications system:
Key Extension can be connected to the telephones
(up to three) M670i Aastra 6753i
Aastra 6755i
Aastra 6757i
(up to three) M675i Aastra 6755i
Aastra 6757i
Note
The Aastra 6730i or Aastra 6731i do not offer key extensions.
5
Page 8
Aastra 673xi / 675xi SIP Telephones
Aastra 673xi / 675xi Key Description
The following tables explain the existing keys for all Aastra 673xi / 675xi models.
Aastra 6730i and Aastra 6731i
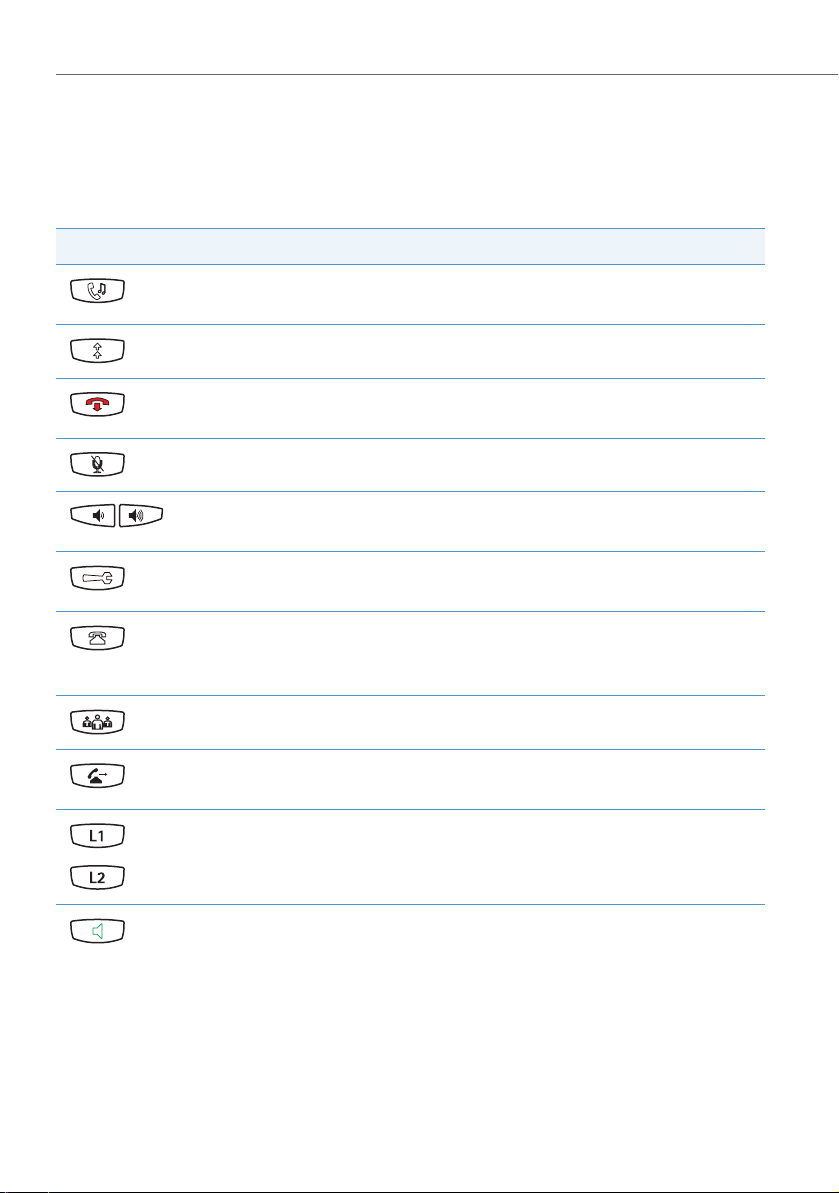
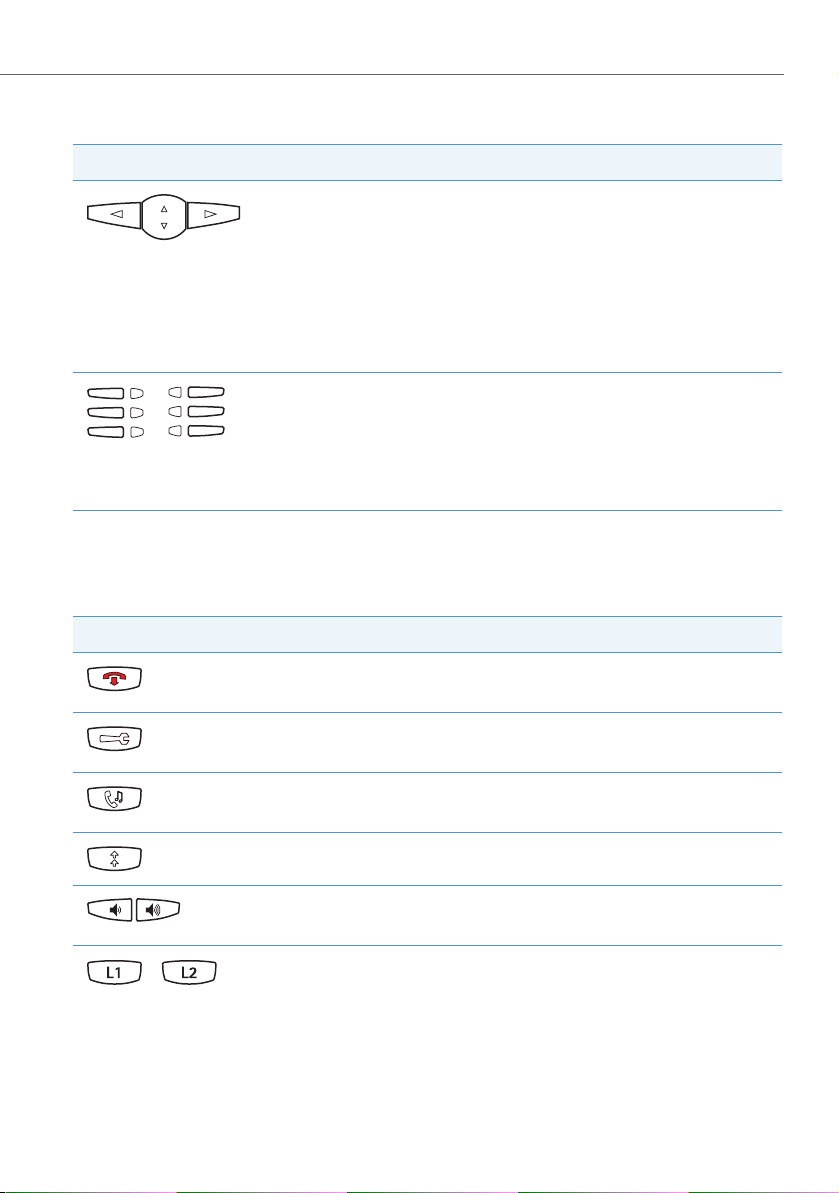
Keys Key Description and Function
Hold key: puts the current call on hold. Press this key
once again to retrieve the call on hold.
Redial key: redials previously dialled numbers.
Goodbye key: ends an active call or exits an open
menu page without saving any changes made.
Mute key: turns the microphone on or off.
Volume control keys: adjusts the volume for the hand-
set, ringer and speaker.
Options key: accesses the
(please refer to The Options Menu starting on page 36).
Caller List key: opens the caller list of the
OpenCom 100 / Aastra 800 communications system
(please refer to Caller Lists starting on page 18 also).
Conference key: establishes a conference
Transfer key: transfers the current call to another sub-
scriber
Trunk keys: connect you to a specific line or accept a
call which is signalled on the line.
Loudspeaker key: activates the Handsfree for making
and receiving calls without picking up the handset.
Options List
menu card
6
Page 9
Aastra 673xi / 675xi SIP Telephones
Aastra 6730i and Aastra 6731i
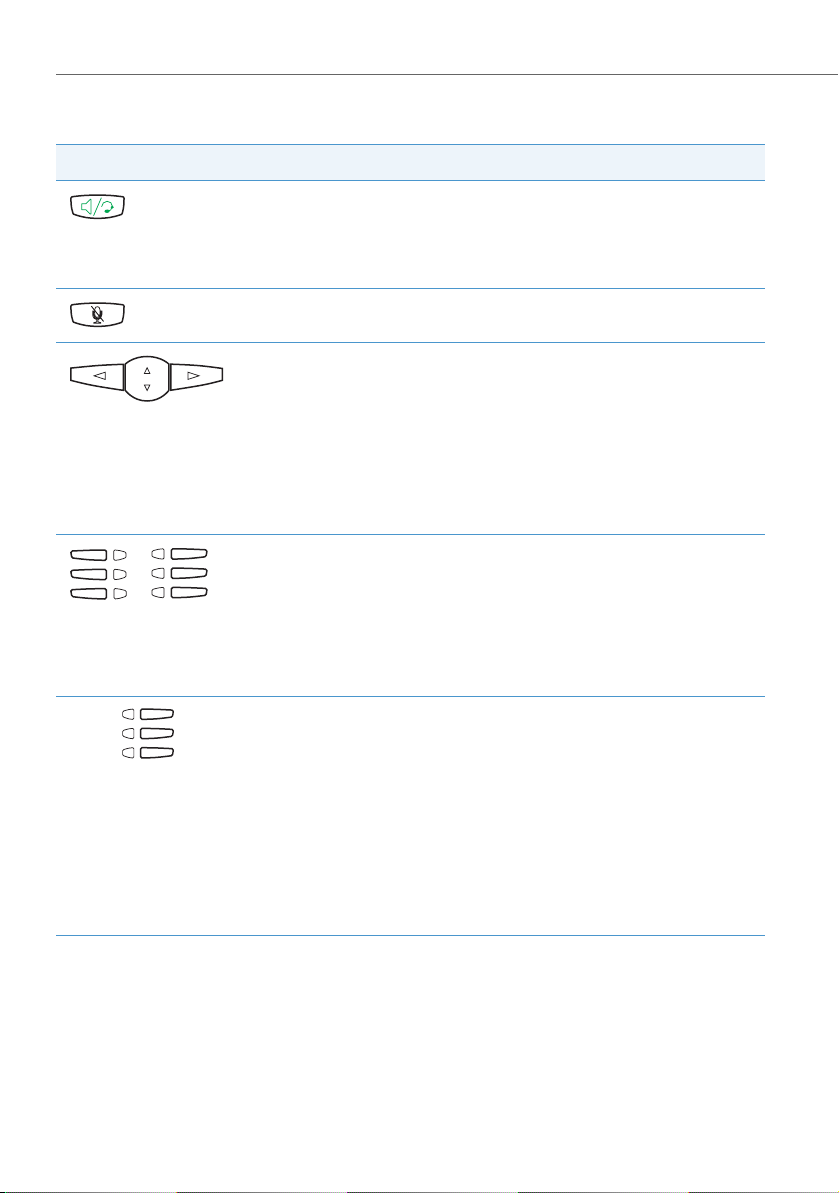
Keys Key Description and Function
Navigation keys: press the arrow keys up or down to
view different status and text pages on the display.
Press the arrow keys up or down to navigate within a
menu or on a menu page.
Press the left arrow key to exit a menu or menu page.
Press the right arrow key to select a menu selection or
menu page option displayed.
Function keys: the function of these keys is configured
with the OpenCom 100 / Aastra 800 communications
system. Keys are labelled on a paper strip.
Next to each function key there is an LED indicator to
show what function is in use.
The Aastra 6753i, Aastra 6755i and Aastra 6757i telephones are covered together as
these models only differ in the number and type of function keys.
Aastra 6753i, Aastra 6755i and Aastra 6757i
Keys Key Description and Function
Goodbye key: ends an active call or exits an open
menu page without saving any changes made.
Options key: accesses the
Options List
menu card
(please refer to The Options Menu starting on page 36).
Hold key: puts the current call on hold. Press this key
once again to retrieve the call on hold.
Redial key: redials previously dialled numbers.
Volume control keys: adjusts the volume for the hand-
set, ringer and speaker.
Trunk keys: connect you to a specific line or accept a
/
7
call which is signalled on the line.
Page 10
Aastra 673xi / 675xi SIP Telephones
Aastra 6753i, Aastra 6755i and Aastra 6757i
Keys Key Description and Function
Handsfree key: activates the Handsfree for making
and receiving calls without picking up the handset.
When a headset is connected, a call can be accepted
and ended using this key.
Mute key: turns the microphone on or off.
Navigation keys: press the arrow keys up or down to
navigate within a menu or on a menu page.
The left or right arrow key switches the line shown as
the default.
Press the left arrow key to exit a menu or menu page.
Press the right arrow key to select a menu selection or
menu page option displayed.
Function keys: the function of these keys is configured
with the OpenCom 100 / Aastra 800 communications
system. Keys are labelled either on a paper strip or via
the display depending on the model.
Next to each function key there is an LED indicator to
show what function is in use.
Call forw.
Ph.book
More
Softkeys (Aastra 6755i and Aastra 6757i only): the
function of these keys is configured with the
OpenCom 100 / Aastra 800 communications system.
The labelling is via the display.
The function and labelling of the softkeys changes depending on call state, for example when called or when
talking.
Next to each softkey there is an LED indicator to show
what function is in use.
With the Aastra 6755i and Aastra 6757i models the administrator of the
OpenCom 100 / Aastra 800 communications system can configure the function and
labelling of the softkeys next to the main display in four key levels. Press the
More
softkey (lower right) multiple times to reach the key level desired. With the
Aastra 6757i model the upper softkeys can be configured in two levels.
8
Page 11

Aastra 673xi / 675xi SIP Telephones
About this Manual
This manual describes how to use an Aastra 673xi / 675xi SIP telephone which is connected to the OpenCom 100 / Aastra 800 communications system. If you require
further information, please consult the following manuals available for the models of
the Aastra 673xi / 675xi product family:
Aastra 675xi resp. Aastra 675xi IP Telephone: Installation Guide (print version
included with the product): describes features, controls and possible connections of
your SIP telephone. A specific manual is provided for each model of the product
family. You may download a PDF version of the installation guide for the Aastra 6730i,
Aastra 6731i, Aastra 6753i / Aastra 53i, Aastra 6755i / Aastra 55i and Aastra 6757i /
Aastra 57i terminals from the Aastra website.
Aastra 673xi resp. Aastra 675xi IP Telephone: User Guide: describes the most frequently used IP telephony features for the telephone user. A specific manual is provided for each model of the product family. You may download a PDF version of the
installation guide for the Aastra 6730i, Aastra 6731i, Aastra 6753i / Aastra 53i,
Aastra 6755i / Aastra 55i and Aastra 6757i / Aastra 57i terminals from the Aastra
website.
Model 675xi Series Phones: Administrator Guide (English): contains extensive
information for the administrator and describes how to configure the SIP telephone
within the network. You may download a PDF version of this user guide (valid for the
Aastra 9143i, Aastra 9480i, Aastra 9480i CT, Aastra 673xi and Aastra 675xi) from the
Aastra website.
9
Page 12

Aastra 673xi / 675xi SIP Telephones
Distinctive Features of the Communications System
When you operate an Aastra 673xi / 675xi on the OpenCom 100 / Aastra 800 communications system, some functions deviate from how they are described in the installation guide and in the user guide.
This applies especially to functions which are provided locally on the device as well as
via the OpenCom 100 / Aastra 800 communications system. In these cases, the functions provided by the communications system are used. The corresponding local
device menus will not appear then.
• The Aastra 673xi / 675xi does not offer call forwarding. This means that in the sim-
plified Options menu the item 1.Call Forward is not available (please refer to The
Options Menu starting on page 36). Use the call forwarding function of the
OpenCom 100 / Aastra 800 communications system (please refer to Call Forwarding starting on page 19).
The Aastra 673xi / 675xi does not save any call numbers in the local caller list nor
does it offer a local phone book. Configure function keys instead to access the
callers list (Caller Lists starting on page 18) and the phone book (please refer to
Phone Book starting on page 19) of the OpenCom 100 / Aastra 800 communications system.
• The Aastra 673xi / 675xi has a separate Web interface. This is blocked by the
OpenCom 100 / Aastra 800 communications system.
10
Page 13
Using the Aastra 673xi / 675xi
Using the Aastra 673xi / 675xi
Te le ph oni ng
Making Calls
1. In order to establish a connection,
– pick up the handset or
– press the Handsfree key , to make the following call in the handsfree mode
(see Handsfree / Open-Listening Mode starting on page 15).
2. Dial a call number:
– Enter the call number using the number keys.
– Or: press the Redial key to call back a previously dialled call number. Then
select an entry with the navigation keys . Confirm with the
pick up the handset.
– Or: Press the function key with the phone book function (please refer to Phone
Book starting on page 19). This function is for selecting a call number from the
phone book of the OpenCom 100 / Aastra 800 communications system.
Dial out
softkey or
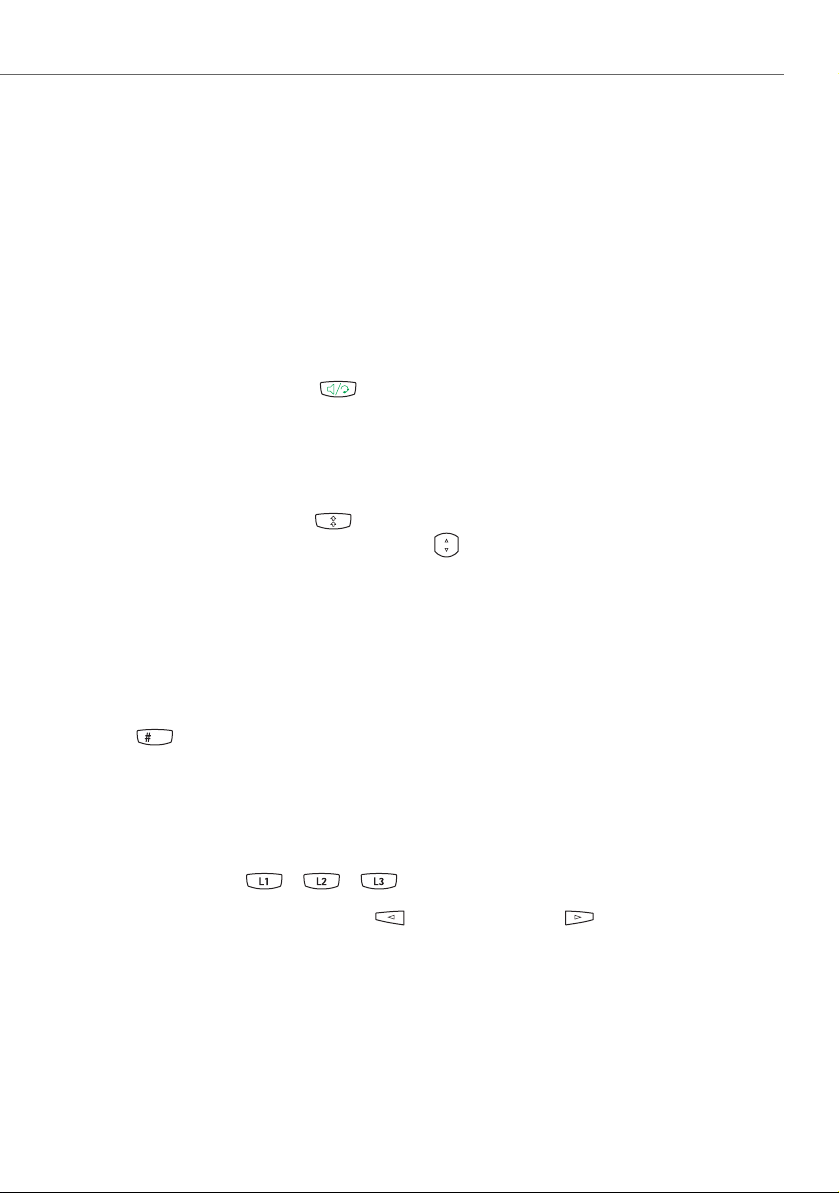
3. Wait for the connection to be set. After about five seconds, the Aastra 673xi / 675xi
accepts the entire call number and dials. To speed up dialling, press the hash
key after entering the call number.
Calling with Selective Line Seizure
If multiple trunk keys are configured for your telephone, you can seize a line selectively
1. Press a trunk key / / to seize a specific line.
Optional: Use the left arrow key or right arrow key to select a line.
In the display the line numbers (L1, L2...) are shown and indicate whether this line
is free and can thus be seized.
2. Dial a call number (see page 11).
11
Page 14
Using the Aastra 673xi / 675xi
Note
If the administrator has linked a trunk key / / with a SIP user account,
you will be calling under the call number of the SIP user account. If the trunk key is
not linked, the call number of trunk key 1 is used.
Answering a Call
An incoming call is signalised via ringer, a blinking trunk key and the blinking red LED
indicator to the upper right:
To ac cept the ca ll, you:
• pick up the handset or
• press the blinking trunk key / / or
• press the Handsfree key to accept the following call in the handsfree mode
(see page 15).
During call signalling you can press the
the Aastra 6755i / 6757i). The person calling now hears the busy tone.
Ignore
softkey to suppress call signalling (on
Holding a Call
You can briefly interrupt an ongoing call:
1. Press the Hold key . The person calling now hears music on hold.
2. Press the Hold key again or press the
Pickup
softkey to continue the call.
Ending a Call
To end a call you do as follows:
• Put down the handset.
or
• press the Goodbye key .
12
Page 15

Using the Aastra 673xi / 675xi
Three-Party Conference Calls
You are making a call, e.g. on the trunk key 1 , its LED indicator is lit. You can now
forward the call, execute an enquiry, switch back and forth between two subscribers
(“toggle”) or set up a conference. You can use any available trunk key / /
for three-party conference calls.
Enquiry
While telephoning, you can make an enquiry to another subscriber.
Note
The enquiry function cannot be used to transfer calls on SIP telephones. Alternatively, use the
Press the up arrow key on the Aastra 6753i.
1. Press an unassigned trunk key, e.g. trunk key 2 .
You hear the internal dialling tone. The person calling is put on hold and now
hears music on hold.
2. Now dial the call number of the subscriber desired and make the enquiry call.
Xfer
softkey resp. the Transfer key on the Aastra 6730i / 6731i.
3. Press the Goodbye key to terminate the enquiry call.
4. on the Aastra 6730i / 6731i / 6753i / 6755i / 6757i: Press the trunk key where the
first caller is waiting. You are now connected with the caller on hold once again.
If after ending the enquiry call you put down the handset, after a few seconds you
will automatically be called back with the connection on hold.
Toggling
On the Aastra 6730i / 6731i / 6753i / 6755i / 6757i
While you are conducting an enquiry call, the first caller is put on hold (see page 13).
Now you can toggle between callers (switch back and forth).
1. Press the trunk key (e.g. ) of the caller waiting currently. The other caller is put
on hold. The LED indicator of the trunk key of the respectively held caller blinks
during this process. The held caller hears music on hold.
2. Press the trunk key of the caller waiting to switch to that caller. The other caller is
now put on hold.
13
Page 16

Using the Aastra 673xi / 675xi
Tip: While you are talking with the first caller (the second caller is on
hold), you can initiate a conference with both callers. To do so,
press the
Aastra 6730i / 6731i. To end the conference specifically, please
read the description on page 15.
3. Ending toggling: Press the Goodbye key to terminate the current call.
4. Then press the trunk key where the other caller is waiting. You are now connected
with the caller on hold once again.
Transferring Call to Another Caller
Conf
softkey resp. the Conference key on the
1. Press the
Press the up arrow key on the Aastra 6753i.
You hear the internal dialling tone. The person calling is put on hold and now
hears music on hold.
2. Dial the call number of the internal subscriber desired.
– Transferring a call with notification: When the subscriber answers, announce
the call transfer. Then press the
Aastra 6730i / 6731i. Press the up arrow key on the Aastra 6753i.
– Transferring a call without notification: When you wish to wish to transfer the
call without notification, wait for the ringing tone. Then press the
resp. the Transfer key on the Aastra 6730i / 6731i. Press the up arrow key on
the Aastra 6753i. The caller on hold now hears the ringing tone of the transfer destination and waits for the call to be accepted.
Xfer
softkey resp. the Transfer key on the Aastra 6730i / 6731i.
Xfer
softkey resp. the Transfer key on the
Xfer
softkey
Conference
You can speak with two callers simultaneously in a so-called “Three-Party Conference”.
1. Dial the call number of the first caller.
2. Press the
Press the down arrow key on the Aastra 6753i.
3. Press the available trunk key (e.g. ) and dial the call number of the second
caller.
Conf
softkey resp. the Conference key on the Aastra 6730i / 6731i.
The other caller is put on hold.
14
Page 17

Using the Aastra 673xi / 675xi
4. When the second caller answers, announce the conference. Press the
resp. the Conference key on the Aastra 6730i / 6731i once again. Press the
down arrow key on the Aastra 6753i.
You are now connected with both callers in a three-party conference. The display
shows the list of conference partners.
5. Do the following to end the conference:
– Dropping an individual subscriber from the conference: Use the navigation
keys to select one subscriber and press the
nection to the selected subscriber.
Dropping an individual conference participiant cannot be done using a softkey on
the Aastra 6730i / 6731i or on the Aastra 6753i. Please refer to the user guide of the
respective device for more details on this function.
– Ending a conference: Put down the handset or press the Goodbye key to
end the conference (connection to both subscribers).
Drop
softkey. This ends the con-
Conf
softkey
Other Device Functions
Handsfree / Open-Listening Mode
You can make a call in the handsfree mode, e.g. to let anyone present in the room
listen in. Before or during a call, press the Handsfree key (on the Aastra 6730i /
6731i: the Loudspeaker key ). The speaker is switched on. The red LED indicator
next to the Handsfree key lights up. Press the key once again to switch the speaker off.
Mute Function
If you do not want the caller to listen in to what, e.g. you are discussing with someone
in the room, you can temporarily mute the telephone. During a call press – the Mute
key . The microphone is switched off. The red LED indicator next to the key blinks
and your caller can no longer hear you. Press the Mute key once again to switch
the microphone back on.
15
Page 18

Using the Aastra 673xi / 675xi
Call Protection
You can configure a function key with the do not disturb function (please refer to
Function Keys Reference starting on page 30).
1. Press the function key to activate the do not disturb function.
The LED indicator next to the function key lights up. The person calling hears the
ringing tone, but your telephone does not signal the call.
2. Press the function key once again to deactivate the do not disturb function.
Adjusting Volume Level
You can adjust the volume of the ringer, of the handset or of the speaker with the
Volume keys .
• During call signalling you can adjust the volume of the ringer.
• While making a call, you adjust the volume of the handset or – in the handsfree
mode – the volume of the speaker.
Using Headset
A headset can be connected to an Aastra 673xi / 675xi. You can press the Handsfree
key in this case in order to accept and end calls . You can configure via the
Options menu of the Aastra 673xi / 675xi, whether to use the headset or the speaker
for handsfree operation (see Settings starting on page 30).
The Aastra 6730i / 6731i does not provide a separate headset connector. With these
telephones, you can replace the handset with a headset.
Note
Establishing a call can be delayed with SIP telephony. When using a headset, e.g. you
should wait a second before you begin to speak.
16
Page 19

Using the Aastra 673xi / 675xi
Speed Dialling
You can save call numbers either to the function keys or to the number keys of your
telephone as speed dialling destination.
Speed Dialling with Function Keys
If the administrator of the OpenCom 100 / Aastra 800 communications system has
programmed speed dialling destinations:
• Pick up the handset and press the function key where the speed dialling desti-
nation is programmed.
alternatively – when you wish to call in the handsfree mode:
• Press the function key – with the handset down – where the speed dialling desti-
nation is programmed.
Speed Dialling with Number Keys
Select speed dialling destination
• Pick up the handset. Press the number key where the desired call number is saved
for a few seconds.
alternatively – when you wish to call in the handsfree mode:
• Press the number key – with the handset down – where the speed dialling desti-
nation is programmed.
Configuring a speed dialling destination
You can configure the number keys as speed dialling keys directly on your
Aastra 673xi / 675xi:
1. Press one of the number keys for a few seconds.
Aastra 6755i / 6757i: The display shows the Enter Number: menu card.
Aastra 6730i / 6731i and Aastra 6753i: The display shows Speeddial-> Enter
Number. Confirm with the down arrow key.
2. Enter the destination call number using the number keys. To correct a mistaken
number use the
arrow key or right arrow key .
17
Backspace
function key. Slide the cursor horizontally with the left
Page 20

Using the Aastra 673xi / 675xi
3. Use the navigation keys to move the cursor onto the Line: field and press the
Change
dialling.
softkey. This selects a trunk key which is to be linked with the speed
4. Press the
on the Aastra 6753i.
The speed dialling is now saved.
Note
You cannot remove speed dialling destinations saved to number keys (please refer to
the Deleting a Local Configuration starting on page 33).
Save
softkey resp. the right arrow key on the Aastra 6730i / 6731i or
Caller Lists
The administrator of the OpenCom 100 / Aastra 800 communications system can configure “Missed calls” or “Accepted calls” function keys (seeFunction Keys Reference
starting on page 30). Use these function keys to access the caller lists managed on the
OpenCom 100 / Aastra 800 communications system. The LED indicator next to the
“Missed calls” function key additionally blinks when the caller list contains new
entries.
1. Press the function key with the caller list function.
The caller list appears.
2. Use the navigation keys to go to the desired entry.
3. Press the
Dial out
softkey to call the selected entry.
4. To show detailed information on the entry selected, press the
–
Delete
–
Dial out
5. Press the Goodbye key to exit the menu card display.
Note
The list of dialled call numbers is displayed with the Redial key .
18
to remove the entry displayed or
to call the entry displayed.
Info
softkey. Press
Page 21

Using the Aastra 673xi / 675xi
Phone Book
You can configure a function key with a phone book function (please refer to Function
Keys Reference starting on page 30). Use this function key to access the phone books
managed on the OpenCom 100 / Aastra 800 communications system.
1. Press the function key with the phone book function.
The Phonebook menu card appears.
2. Enter one or multiple first letters into the Search field to find the phone book
entry you are looking for. Use the number keys to do so. To correct a mistaken
entry use the
key or right arrow key. Confirm the entry using the
A list of phone book entries of the OpenCom 100 / Aastra 800 communications
system will appear.
Delete
softkey. Slide the cursor horizontally with the left arrow
OK
softkey.
3. Use the navigation keys to go to the desired entry. Use the
softkeys to go from page to page.
4. Press the
5. Press the
6. Press the Goodbye key to exit the menu card display.
Dial out
Info
softkey to call the selected entry.
softkey to show detailed information on the entry selected.
Next
and
Prev
Call Forwarding
You can configure a function key with a call forwarding function (please refer to
Function Keys Reference starting on page 30).
1. Press the function key to show the Call Forwarding menu. Use the navigation
keys to get to the desired input line or option on the menu cards. Confirm with
the
OK
or
Change
the previous menu card. The following menu cards appear:
– select the unconditional, busy or no reply option
– select the option on (to activate), off (to deactivate) or Change (for entering the
call number manually)
– after entry: select the internal, external or int.+ext. call type
2. Press the Goodbye key to exit the menu card display.
softkeys respectively. Press the
Backspace
softkey to return to
19
Page 22

Using the Aastra 673xi / 675xi
Voicebox
The OpenCom 100 / Aastra 800 communications system provides you with a voicebox
which serves as an “answering machine” if desired. To operate the voicebox, it is recommended to configure a key with the Speech function (see Function Keys Reference
starting on page 30). Activating or deactivating the voicebox is done via call forwarding to a voicebox call number (please refer to Call Forwarding starting on page 19).
Any time there are new messages on your OpenVoice voicebox, the Aastra 673xi /
675xi display shows the symbol
next to it. Additionally, the LED indicator next to the Speech function key lights up.
1. Press the function key with the Speech function.
The Speech menu card shows a list of existing voice messages.
2. Use the navigation keys to select the desired voice message. Confirm with the
Info
softkey to display details about the voice message.
‚
and the number of voicebox messages received
– Press the
– Press the
– Press the
3. Press the Goodbye key to exist the Speech menu card.
It is possible, however, to configure a voicebox function key. Use this function key to
call your voicebox.
1. Press the function key with the Voi cebox function.
The voicebox is called.
2. The next steps are voice controlled. Follow the Voice menu instructions.
3. Press the Goodbye key to exit the OpenVoice system.
Delete
Dial out
Backspace
softkey, to remove the entry displayed from the list.
softkey to call back the selected entry.
softkey to show the list of voice messages.
Busy Lamp Field
Use the Busy Lamp Field function key (BLF, busy lamp) to view the free or busy state of
another internal subscriber. For every desired call number of a subscriber you have to
configure a separate BLF function key (please refer to Function Keys Reference
starting on page 30). The LED indicator next to the function key shows the state of the
subscriber connected:
20
Page 23

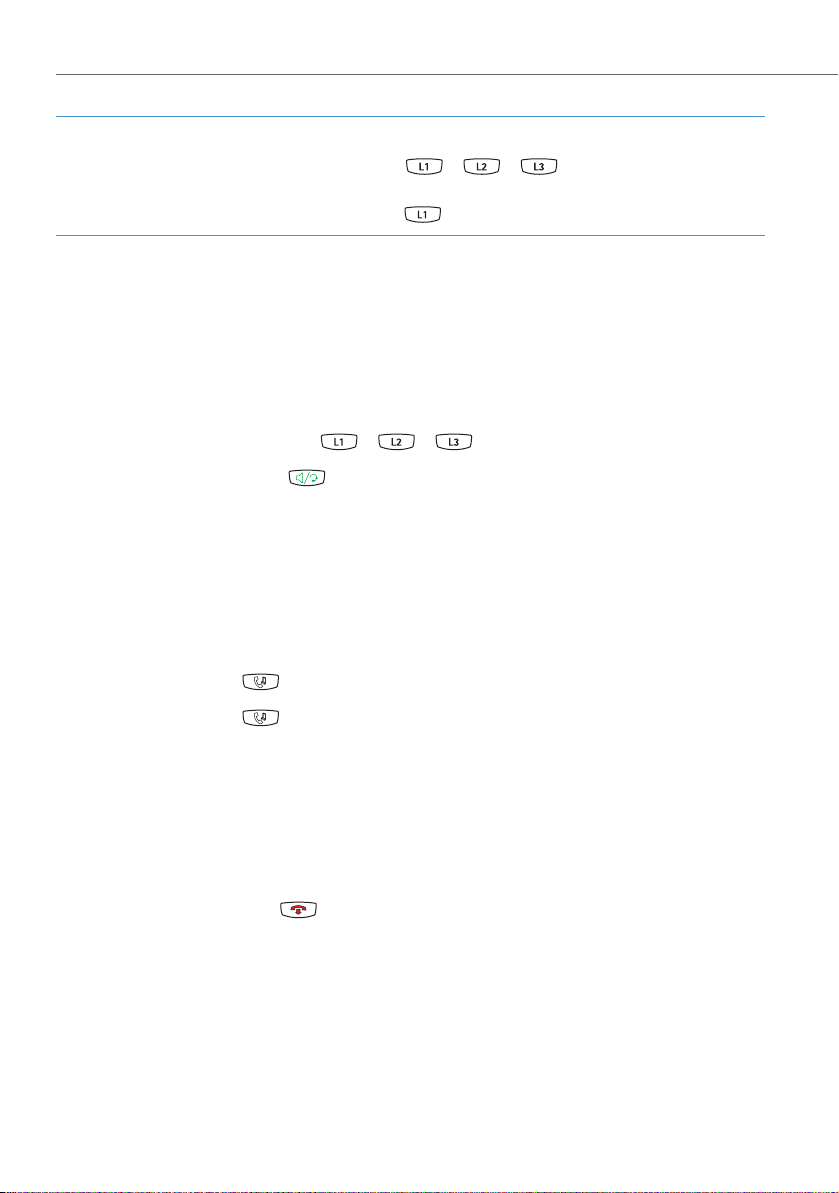
Using the Aastra 673xi / 675xi
• Unlit ( ): The subscriber is free. Press the BLF function key to call the subscriber.
• Blinking ( ): The subscriber is being called. Press the BLF function key to accept
the call (“Pickup”).
• Lit ( ): The subscriber is busy.
You can also programme a softkey with the BLF function to one of the additional key
levels. In this case, you must activate the level with the
indicator shows the state of the subscriber connected.
More
softkey so that the LED
Phone Lock
You can lock the Aastra 673xi / 675xi to prevent unauthorised use. Unlocking is possible only with your user PIN. This function can be executed via a function key or via
the Options menu.
1. Press the Options key .
The Options List menu card appears.
2. Use the navigation keys to select the 3.Phone Lock menu entry. Confirm with
the right arrow key or with the
Select
softkey.
3. Confirm Lock the phone? on the display with the
Phone is locked appears on the display. When in this state, no functions can be
triggered and no calls made. It is possible, however, to accept incoming calls.
You can unlock the phone:
1. Press the Options key .
To unlock the phone and Password: appear on the display.
2. Enter the user PIN using the number keys. Confirm with the right arrow key or
with the
Note
When the Aastra 673xi / 675xi is locked, emergency calls to predefined call numbers
can still be made. The admitted call number depend on the special lists assigned to
the user group (Telephony: Lists: Special lists menu). The default contains the 110
and 112 call numbers.
21
Enter
softkey.
Lock
softkey.
Page 24

Using the Aastra 673xi / 675xi
Presence
With the presence function you communicate your presence status to an internal
caller. Change your status using a Presence function key (see Function Keys Reference
starting on page 30).
1. Press the function key with the Presence function.
The My Status menu card appears.
2. Use the navigation keys to select the desired status. Confirm using the
softkey.
The presence status is changed.
By selecting the “Available” status, you switch off the status display for callers.
Change
Hot Desking
The Aastra 673xi / 675xi communications system supports the “Hot desking” feature.
This feature allows you to transfer your user configuration to any Aastra 673xi / 675xi
of equal type.
1. If the designated Aastra 673xi / 675xi is currently in operation, press the
function key and confirm restarting with the
The Login Phone menu card appears.
2. Confirm using the
The Phone No. menu card appears.
3. Enter your call number. Confirm using the
The PIN menu card appears.
4. Enter your user PIN. Confirm using the
The Aastra 673xi / 675xi restarts – it is configured with your configuration. If your
configuration is currently active on another Aastra 673xi / 675xi, the other
Aastra 673xi / 675xi will be logged out automatically.
OK
softkey.
OK
OK
softkey.
OK
softkey.
softkey.
logout
22
Page 25

Main Menu on the Aastra 673xi / 675xi SIP Telephone
Main Menu on the Aastra 673xi / 675xi
SIP Telephone
Most features which the system administrator can program to a separate function key
of the Aastra 673xi / 675xi SIP telephone can be set and used via the main menu of
the OpenCom 100 / Aastra 800 communications system. To do so, the administrator
has to configure a Main menu function key on the Aastra 673xi / 675xi SIP telephone
(see Function Keys Reference starting on page 30).
The main menu contains the system features of the OpenCom 100 / Aastra 800 communications system. These features are arranged in a menu tree. The main menu contains the following menu groups:
1 Calls
This is where the most important call-related features are grouped together.
Menu description: see page 24
2 Call forwarding
This menu group provides all types of call forwarding which you can programme on your telephone.
Menu description: see page 24
3Messages
This menu group offers information on e-mails and short messages which you
have sent or received. Furthermore you can activate prepared message texts.
Menu description: see page 25
5Protection
Among other things, you can activate the call protection or the telephone lock
in this menu group.
Menu description: see page 26
6Connections
This menu group provides you with all the features that can affect a call.
Menu description: see page 27
9Applications
This menu group contains all functions offered by your system telephone in
conjunction with additional programme packages of your communications
system.
Menu description: see page 28
23
Page 26

Main Menu on the Aastra 673xi / 675xi SIP Telephone
0 Central settings
This is where you can configure central settings for the communications
system. This is an optional menu item, it is only available if your system administrator has configured the appropriate authorisation for your user group.
Menu description: see page 29
1Calls
1 Call lists: Displays the lists of missed and accepted calls.
1Missed calls: You see the call numbers of the callers who most recently tried
to reach you.
2 Accepted calls: You see the call numbers or the names of the callers with
whom you last spoke.
3Voicebox mess. (voicebox messages): You see the list of received voicebox
messages and can listen to them and edit them.
4 Hunt group: If your telephone belongs to one or multiple hunt group(s), use this
menu entry to switch hunt call signalling for your telephone on or off.
HG No.: [internal call number]: The pick-list of hunt group call numbers
appears. Activated hunt group calls have a “+” prefixing the hunt group
call number; deactivated ones have a “-”.
On/Off: switching hunt group calls on or off
All: switching all hunt group calls On/Off for your telephone
Note: If you are the last reachable member of the hunt group and you log out
then any further callers will hear a busy signal. Depending on the system configuration additional calls can also be directed to the exchange.
2Call Forwarding
1 Call diversion: Programming call diversions for your own telephone. The display
shows a separate line with Immediately, After delay or Busy for each type of
call forwarding along with the current status (“+” = on, “-” = off).
6 Follow Me: This type of call forwarding diverts calls from another terminal (source)
to your telephone. The PIN of the source terminal is required for this function. If
24
Page 27

Main Menu on the Aastra 673xi / 675xi SIP Telephone
the “follow me” function is active, all call numbers of the other device are forwarded immediatelyto your telephone.
Source: Enter the internal call number from which calls are to be forwarded
and press the Enter softkey.
PIN: Enter the user PIN of the source and press the Enter softkey.
On/Off: Switching call forwarding on or off. You can switch “Follow me” call
forwarding off again on your own telephone or on the other terminal
via the Off option. You can also switch off “Divert call immediately” on
the other terminal. The menu entry displays the current status: “+” = on,
“-” = off.
3Messages
1 Short messages: You can exchange short messages with other communications
system users with a system terminal.
1 Received mail: A list of senders of received messages is displayed. You can
display, forward or delete these messages.
2Outgoing mail: Short messages sent by you are displayed. These messages
can also be displayed, forwarded or deleted.
3New message: You can send a message to another user. Activate the
Message: input field. First enter the text (max. 160 characters) and then
press the Enter softkey. Then activate the No.: input field. Enter the call
number of the message recipient and press the Enter softkey.
2E-Mail: A list of senders who have sent you e-mails is displayed and you can query
the relevant e-mail information (sender, subject line, date/time received).
4Presence: You can inform other communications system users of your presence
status.
25
Page 28

Main Menu on the Aastra 673xi / 675xi SIP Telephone
5Protection
1 Call protect: Switching signalling of calls on/off for all call numbers of your device.
The menu entry displays the current status: “+” = on, “-” = off.
int./ext. calls (internal & external calls): You can activate call protection for
internal calls only, for external only or for all calls.
On/Off: Switching call signalling on or off
3 Telephone lock: If you wish to temporarily allow another person to use your tele-
phone, you can activate the telephone lock. Then your telephone is given the
authorisations for the “Guests” user group. This user group is configured by the
system administrator and prevents unauthorised persons from accessing,
reading or making changes in the Main menu and its menu entries and lists on
your telephone. Dialling rights may also be restricted.
Please contact your system administrator for information on the altered range
of functions when the telephone lock is on. Telephone lock access is user-PIN
protected (default “0000”). After entering the PIN, activate / deactivate the
function with the On or Off option. The menu entry displays the current status:
“+”= on, “-”= off.
4 Baby call: The “Baby call” function dials a previously programmed internal or
external call number a specific time interval after picking up the handset. The
default time interval on the communications system is 5 seconds. The system
administrator can change this value. If you begin dialling a call number within
the specified time interval, the baby call is cancelled. The menu entry displays
the current status: “+” = on, “-” = off.
Dest.: Enter the destination call number for a baby call.
On/Off: switching baby call on or off
8 Call wait. prot. (call waiting protection): Switches baby call on/off. The menu entry
displays the current status: “+” = on, “-” = off.
On/Off: switching call-waiting protection on or off
0 Logout: If the system administrator for the system telephone has configured the
“Hot Desking” function and you are logged in to this system telephone as a
user, you can use this menu entry to log out.
26
Page 29

Main Menu on the Aastra 673xi / 675xi SIP Telephone
6 Connections
The following features are executed if the current connection state of your telephone
permits.
1 Call pick-up
1Pick-up: You pick up the call intended for another telephone in your pick-up
group.
If the called subscriber belongs to a user group with pick-up protection
activated, you cannot pick up calls for that person's call number.
2 Pick-up select. (pick-up selective): After entering the call number, you pick
up the call for any other telephone.
If the called subscriber belongs to a user group with pick-up protection
activated, you cannot pick up calls for that person's call number.
Note: If the other telephone is already in the call state (e. g. an answering
machine is making an announcement), you can pick up the call with “Pickup select.”. The subscriber for whom you picked up the call must belong to a
user group for which “Call removal” authorisation is activated, otherwise “Pickup select” is not possible.
3Take: You wish to take a current call from one terminal over to your tele-
phone and continue the call on the telephone. To be able to do so, your
telephone and the other terminal have to have the same internal call
number.
2Dial
1 Announcement: You direct an announcement to other system terminals.
Under Dest: you enter the call number and press the Enter softkey.
Announcements can be configured on the following terminals: corded
Aastra 677x, OpenPhone 6x/7x type system telephones and DECT
Aastra 6x0d, Aastra 142d, OpenPhone 26/27/28 type system telephones.
Announcements can also be directed to call numbers where multiple
subscribers can be reached (e.g. a hunt group call number).
Note: If a called subscriber has announcement protection on, this
feature is not executed.
27
Page 30

Main Menu on the Aastra 673xi / 675xi SIP Telephone
2Intercom: This function is for directing an announcement to a single system
terminal and the microphone is switched on on the system terminal
called. The subscriber called can answer you immediately without
having to press a key. Enter the device ID of the terminal under Device-
ID: and press the Enter softkey. For information on the device IDs
available, contact your system administrator.
The Intercom function is for contacting the following terminals: corded
Aastra 677x, OpenPhone 6x/7x type system telephones and DECT
Aastra 6x0d, Aastra 142d, OpenPhone 26/27/28 type system telephones.
Note: If a called subscriber has call waiting protection on, this feature is
not executed.
4 Phone book: You open the OpenCom 100 / Aastra 800 phone book and can
call one of the subscribers listed there.
6Suppress number: Your call number is not transmitted to the called person
for the following (external or internal) call. This menu entry is
dependent on the system setting.
7 Transmit number: Your call number is transmitted to the person you call for
the following call. This menu entry is dependent on the system setting.
9 Applications
This menu card is only shown if the system administrator has set up additional programme packages for your communications system and you have the user authorisation to use these programmes.
1Voicebox: This menu entry is only shown if the system administrator has installed
the additional programme package OpenVoice or Aastra Voice and con-
figured a voicebox for you.
1Voicebox mess. (voicebox messages): You see the list of received voicebox
messages and can listen to them and edit them.
2 Call voicebox: You call your voicebox. The next steps are voice-controlled.
For detailed information please refer to the guide for the voicebox programmes OpenVoice and Aastra Voice.
28
Page 31

Main Menu on the Aastra 673xi / 675xi SIP Telephone
0 Central settings
The Central settings menu card is where you can set the date and time of the
OpenCom 100 / Aastra 800 communications system. The Date / Time menu entry is
available if the user group of your telephone has been granted Configurator - Expert
authorisation by the system administrator.
2Date/ Time: The date and time are taken over from the exchange on the first
external outgoing call. If this information is not transmitted by your network
operator, you can set the date and time here yourself.
Select the desired entry (time with hh:mm, date with dd.mm.yy). Overwrite
the active setting. To save the setting activate the Save menu entry.
“Main menu” Menu Tree
Main menu
1 Calls
2 Call forwarding
3 Messages
5Protection
6 Connections
9 Applications
0 Central settings
1 Calls
1 Call lists
4Hunt group
2 Call forwarding
1 Call diversion
6Follow Me
3 Messages
1 Short messages
2 E-Mail
4 Presence
5 Protection
1± Call protect
3± Telephone lock
4± Baby call..
8± Call wait. prot.
0Logout
6 Connections
1 Call pick-up
2 Dial
9 Applications
1Voicebox
0 Central settings
2 Datum / Time
1 Call lists
1 Missed calls
2 Accepted calls
3 Voicebox mess.
1 Call diversion
1± immediately
2± After delay
3± Busy
1 Short messages
1 Received mail
2 Outgoing mail
3 New message
1 Call pick-up
1Pick-up
2 Pick-up select.
3Take
2 Dial
1 Announcement
2Intercom
4 Phone book
6 Suppress number
7 Transmit number
1 Voicebox
1 Voicebox mess.
Call voicebox
2
29
Page 32

Configuring the Aastra 673xi / 675xi
Configuring the Aastra 673xi / 675xi
Settings
A description of all possible settings of the Aastra 673xi / 675xi can be found in the
user guide of your Aastra 673xi / 675xi telephone (please refer to About this Manual
starting on page 9).
Note
The operation is analogous on the Aastra 6730i / 6731i and on the Aastra 6753i. The
key assignment is proposed on the bottom display line.
1. Press the Options key .
The Options List menu card appears.
2. Confirm the 1.Preference menu entry with the right arrow key or with the
Select
3. Go to the desired setting (please refer to The Options Menu starting on page 36
and change the setting or the option. Confirm using the
softkey.
Done
softkey.
4. Press the Goodbye key to exit the menu.
Function Keys Reference
Depending on the device type there are various types available and a varying number
of function keys available (please refer to Models of the Aastra 673xi / 675xi product
family starting on page 3).
Note
By activating up to four levels, the assignment capacities of each softkey are multiplied on the Aastra 6755i and on the Aastra 6757i.
30
Page 33

Configuring the Aastra 673xi / 675xi
With the Web Configurator, the administrator of the OpenCom 100 / Aastra 800 communications system can configure and change the following function keys for your
Aastra 673xi / 675xi.
Function keys for Aastra 6730i / 6731i and Aastra 6753i / 6755i / 6757i
Key type Parameter Function
none – none
Destination Call number
Labelling
BLF Call number
Labelling
,
Direct dialling of a call number or code
procedure.
,
Busy Lamp Field; LED indicator shows when
subscriber is busy
Main menu Labelling Display of entire menu of the SIP system tele-
phone features supported on the
OpenCom 100 / Aastra 800 communicationssystem
Phone book Labelling Shows phone book managed by the
OpenCom 100 / Aastra 800 communications
system.
Missed Calls Labelling Shows the list of missed calls which is managed
on the OpenCom 100 / Aastra 800 communications system; LED indicates available calls
Answered
calls
Labelling Shows list of answered calls
OpenCom 100 / Aastra 800 communications
accepted by the
system.
Speech Labelling Shows the list of recorded voice messages; LED
indicates available messages
Voicebox Labelling Calls your voice box
Messages Labelling Shows the list of received short messages and e-
mails; LED indicates new messages
Presence Labelling Displays and changes your presence status; LED
indicates activated status (exception: “Available”
status is not indicated via LED)
31
Page 34

Configuring the Aastra 673xi / 675xi
Function keys for Aastra 6730i / 6731i and Aastra 6753i / 6755i / 6757i
Key type Parameter Function
Call forward Labelling,
Int. + ext.
calls / Int.
calls / Ext.
calls
Call protection
Call waiting
protection
Pickup from
group
Take Labelling Transfers an active call from another device
Phone lock Labelling Locks or unlocks the telephone
Logout Labelling Logs out the telephone and shows the Login
XML URL,
Transfer Labelling On the Aastra 6753i only: starts a transfer call
Labelling Switches call protection on or off; LED indicator
Labelling Switches call waiting protection on or off; LED
Labelling Picks up a call from another device in your
Labelling Calls the defined URL from a Web server.
Shows the “call forwarding” menu
indicates active function
indicator indicates active function
pick-up group.
operated on you internal call number.
Display
Programmable function control via XML data
retrieval (please refer to the “IP Phone Admin
Guide” administrator guide)
Conference Labelling On the Aastra 6753i only: starts a three party
conference
32
Page 35

Configuring the Aastra 673xi / 675xi
Aastra 673xi / 675xi Restarting
You have to restart the Aastra 673xi / 675xi sometimes, for example, to activate a
changed trunk key assignment.
Note
The operation is analogous on the Aastra 6730i / 6731i and on the Aastra 6753i. The
key assignment is proposed on the bottom display line.
1. Press the Options key .
The Options List menu card appears.
2. Use the navigation keys to select the 2.Phone Status menu entry. Confirm
with the right arrow key or with the
The Phone Status menu card appears.
3. Select the 6.Restart Phone menu entry. Confirm with the right arrow key or
with the
Select
softkey.
Select
softkey.
4. Confirm the restart query with the
The Aastra 673xi / 675xi starts and is quickly ready for operation once again.
Restart
softkey.
Deleting a Local Configuration
The Aastra 673xi / 675xi stores speed dialling numbers and possibly concurrent
function key programmings in a local configuration. This can make it necessary to
delete the local configuration of the Aastra 673xi / 675xi.
Note
The operation is analogous on the Aastra 6730i / 6731i and on the Aastra 6753i. The
key assignment is proposed on the bottom display line.
1. Press the Options key .
The Options List menu card appears.
33
Page 36

Configuring the Aastra 673xi / 675xi
2. Use the navigation keys to select the 2.Phone Status menu entry. Confirm
with the right arrow key or with the
The Phone Status menu card appears.
3. Use the navigation keys to select 8.Erase Local Config menu entry. Confirm
with the right arrow key or with the
The display shows Please enter the administrator password.
4. Enter the administrator password with the number keys (please refer to
Aastra 673xi / 675xi Passwords starting on page 35). Confirm with the right arrow
key or with the
Enter
softkey.
Select
Select
softkey.
softkey.
5. Confirm the display Erase local config? with the
Delete
softkey.
Restoring Factory Settings
It is possible that you have been operating the Aastra 673xi / 675xi with another communications system or with an Internet SIP provider. To operate the Aastra 673xi /
675xi with the OpenCom 100 / Aastra 800 communications system, you should
restore factory settings.
Note
The operation is analogous on the Aastra 6730i / 6731i and on the Aastra 6753i. The
key assignment is proposed on the bottom display line.
1. Disconnect the Ethernet connection of the Aastra 673xi / 675xi.
2. If the telephone is not in operation, turn on the power supply. Wait until the
Aastra 673xi / 675xi has started. Press the Options key now.
If the Aastra 673xi / 675xi has already been operated on the OpenCom 100 /
Aastra 800 communications system, the Options List menu card with 3 menu
entries appears in German. Continue with step 3.
If the Aastra 673xi / 675xi has factory settings only partially active, the Options
List menu card appears with 7 menu entries in English. Continue with step 4.
3. Use the navigation keys to select the 2.Phone Status menu entry. Confirm
with the right arrow key or with the
34
Select
softkey.
Page 37

Configuring the Aastra 673xi / 675xi
–The Phone Status menu card appears. Use the navigation keys to select the
7.Factory Default menu entry. Confirm with the right arrow key or with the
Select
– The display shows Please enter the administrator password. Enter the administrator password with the number keys (please refer to Aastra 673xi / 675xi Passwords starting on page 35). Confirm with the right arrow key or with the
Enter
softkey.
softkey.
– Confirm the display Reset phone to factory defaults? with the
softkey.
4. Use the navigation keys to select the 5.Administrator Menu menu entry.
Confirm with the right arrow key or with the
– The display shows Please enter the administrator password. Enter the administrator password with the number keys (please refer to Aastra 673xi / 675xi Passwords starting on page 35). Confirm with the right arrow key or with the
Enter
softkey.
– Select the 4.Factory Default option. Confirm with the right arrow key or
with the
– Confirm the display Reset phone to factory defaults? with the
softkey.
Enter
softkey.
Select
softkey.
Default
Default
Aastra 673xi / 675xi Passwords
Certain functions of the Aastra 673xi / 675xi can only be accessed via password for
security reasons:
• Login of the Aastra 673xi / 675xi: Under Phone No. enter your call number.
Under PIN enter your user PIN (see Hot Desking starting on page 22).
• Local settings on the telephone: The factory settings password is “22222”. After
the first log in of the Aastra 673xi / 675xi onto the OpenCom 100 / Aastra 800 communications system this password is overwritten by the OpenCom 100 /
Aastra 800 communications system for security reasons.
35
Page 38

Configuring the Aastra 673xi / 675xi
The Options Menu
Press the Options key in order to directly configure local settings on the
Aastra 673xi / 675xi. Below every menu card the softkeys available for the Aastra 6755i
and the Aastra 6757i respectively are shown. The Aastra 6730i / 6731i and the
Aastra 6753i show the corresponding key assignment in the lower line of the display.
Options List
1.Call Forward
Key:
Option
Option
2.Preferences
3.Phone Status
4.User Password
5.Administrator Menu
6.Restart Phone
7.Phone Lock
Factory default menu
Key:
PABX operated menu
Options List
1.Preferences
2.Phone Status
3.Phone Lock
Select -
--
- Done
Preferences
1.Tones
2.Display
3.Set Audio
Select -
--
- Done
Phone Status
1.IP&MAC Addresses
2.LAN Port
3.PC Port
4.Firmware Info
5.Error Messages
6.Restart Phone
7.Factory Default
8.Erase Local Config.
Select -
--
- Done
Phone Lock
Lock the phone?
-Lock
--
-Cancel
Telephone Options menu reference
Ring Tone:
[1 to 5]
Silent
--
-Cancel
-Done
Ton es
1.Ring Tone
2.Tone Set
Select -
--
- Done
Display
1.Contrast Level
2.Backlight
Select -
--
- Done
Set Audio
1.Audio Mode
2.Headset Mic Volume
Select -
--
- Done
Restart phone
Are you sure?
- Restart
--
-Cancel
Please enter the ad-
ministrator password.
Password:
Enter -
Backspace Clear Quit
Ton e Se t
US
[further countries]
--
-Cancel
-Done
Contrast Level
<-- [brighter]
--> [darker]
--
-Cancel
-Done
Backlight
* Off
* Auto
-Advanced
-Cancel
-Done
Audio Mode
Speaker
Headset
Speaker/Headset
Headset/Speaker
--
-Cancel
-Done
Headset Mic Volume
Low
Medium
High
--
-Cancel
-Done
When factory settings are restored no additional language files are available. In this
case, the display language is set to English.
36
Page 39

Index
Index
A
Aastra 6730i 3
Aastra 6731i 3
Aastra 6753i 4
Aastra 6755i 4
Aastra 6757i 4
Aastra M670i 5
Aastra M675i 5
Administrator password 34, 35
Announcement 27
Answered calls 31
B
Baby call 26
Busy lamp field 31
C
call diversion 24
Follow me 24
Call forwarding 19, 32
Call lists 24
Call number
suppress 28
transmit 28
Call protection 16, 32
call protection 26
Call waiting protection 32
Caller list 18
Callers List key 6
Calls
pick-up 27
Call-waiting protection 26
Conference 13, 14, 32
Connections
Call pick-up 27
Dial 27
D
Date
set 29
Destination 31
E
e-mail 25
Emergency calls 21
Enquiry 13
F
Factory settings 34
Follow me 24
Function keys 7, 8
G
Goodbye key 6, 7, 12
H
Handsfree 15
Handsfree key 8
Hash key 11
Hold key 6, 7
Hot Desking 22
hunt group 24
I
Intercom 28
K
Key extensions 5
Aastra M670i 5
Aastra M675i 5
37
Page 40

Index
L
Log out 32
Logout 26
Loudspeaker key 6
M
Main menu 31
applications 28
Call forwarding 24
Calls 24
central settings 29
Connections 27
Menu tree 29
messages 25
protection 26
Messages 31
Missed calls 31
Mute key 6, 8
N
Navigation keys 7, 8
O
Open-listening 15
Options key 6, 7
S
Short messages 25, 31
Softkeys 8
Speech 31
Speed dialling 17
T
Tak e 27 , 32
Telephone lock 26
Telephone options
(German) 36
Time
set 29
Toggling 13
Transfer 13, 14, 32
Trunk keys 6, 7
U
User PIN 21
V
Voicebox 28, 31
Volume
setting 16
Volume control keys 6, 7
P
Password 35
Phone book 19, 28, 31
Phone Lock 32
Pick-up 27
select 27
Pickup from group 32
Presence 25, 31
R
Redial key 6, 7
Restarting 33
38
X
XML 32
Page 41

Notes
Notes
39
Page 42

Notes
Notes
40
Page 43

Page 44

Copyright 2011 www.aastra.com
All rights reserved
As of 01.10.2011
Subject to changes
 Loading...