

Page 1
Handy
Recorder
H1
Quick Start Guide
Safety and Operation
Precautions must be read
before using the unit.
ZOOM CORPORATION
4-4-3 Surugadai, Kanda, Chiyoda-ku, Tokyo
101-0062 Japan
www.zoom.co.jp
Copying or reproduction of this document in part or in whole
without permission is prohibited.
H1-5001-2
Page 2
Prepare
Turning the unit ON and OFF is easy.
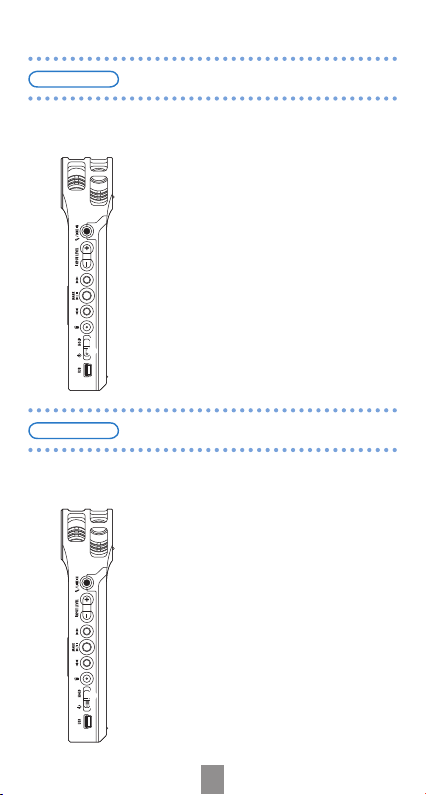
Turning the power on/off
To turn the unit ON, slide the power
1.
switch down for about 1 second.
To turn the unit OFF, slide the
2.
power switch down for about 1
second again.
↓
Prepare
The buttons can be disabled to prevent recording from
being stopped accidentally, for example.
Disabling the buttons
To disable the buttons, slide the
1.
power switch upward to HOLD.
To enable use of the buttons again,
2.
slide the power switch back to the
middle position.
↑
1
Page 3
Prepare
Prepare
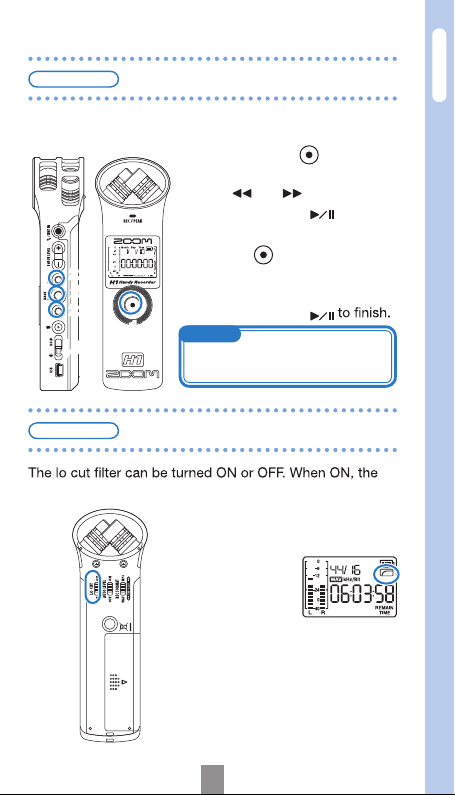
Set the date and time on the unit.
↓
Prepare
sound of wind and other noise can be reduced.
Setting the date and time
While pressing , turn the
1.
power on.
Use and to set the
2.
value, and press
to the next item.
• Press
2
2,3
2
1,2
1
previous item.
After setting the last item
3.
(seconds), press
MEMO
If the date/time setting is initialized,
this screen opens automatically.
Reducing noise
Slide the LO CUT switch to
•
ON. The LO CUT icon appears
on the
screen.
to return to the
Power / Disabling buttons / Setting the date and time / Reducing noise
to move
2
Page 4
Prepare
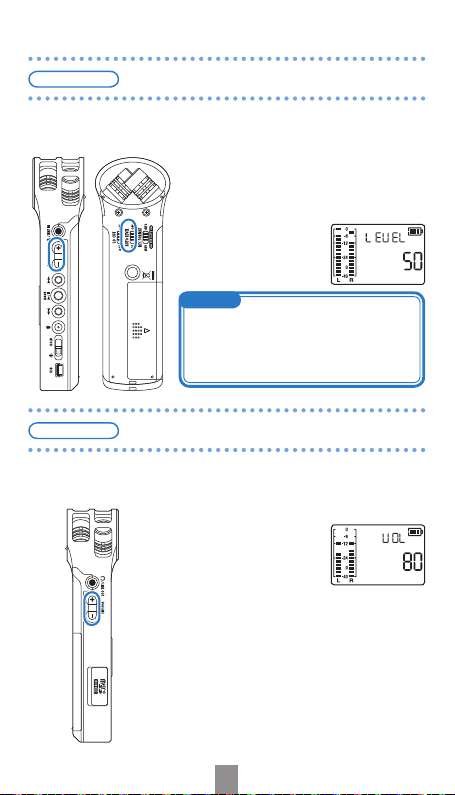
Adjusting the input level
Adjust the level of the input signal. The unit can also be set to
automatic adjustment.
Use the +/– INPUT LEVEL buttons
•
to adjust the level. For automatic
adjustment, set the AUTO level
switch to ON.
• During adjustment, the
value is shown on the
screen.
MEMO
When the AUTO level switch is ON, the input
level adjustment buttons have no effect.
If the PEAK/REC LED blinks rapidly, the
sound might be distorted. In this case, lower
the input level.
Prepare
Adjusting the output level
Adjust the output level (volume) from the line/headphones
output jack and built-in speaker.
Use the +/– VOLUME
•
buttons to adjust the
level.
• Press and hold the + or –
button to change the value
rapidly.
3
Page 5
Prepare
Prepare
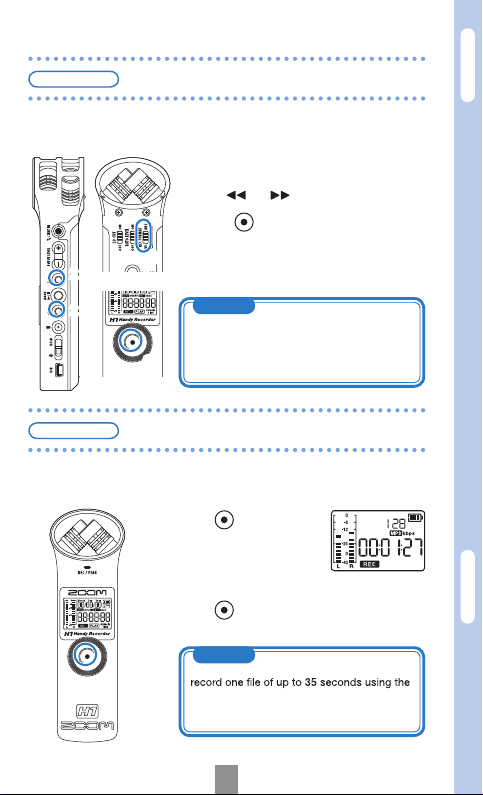
Setting the recording format
Set the recording format and bit rate.
Select MP3 or WAV format.
1.
Use and to select the bit rate and
2.
press
.
• The screen shows the remaining recording
2
2
Operate
1
Back
2
Front
Recording
time for the current bit rate.
MEMO
Since the MP3 format uses data compression, its sound quality is not as good as WAV
format, but it uses less microSD card capacity. For both formats, higher rates provide
higher quality.
After turning on the unit, you can start recording from the home
screen with the press of one button.
Press to start
1.
recording.
• The recording time appears
on the screen.
Press again to stop recording and
2.
return to the home screen.
MEMO
If no microSD card is in the unit, you can still
unit's built-in memory. Be aware that recording again without a card will overwrite the
recording already in the built-in memory.
Adjusting input and output levels / Setting recording format
Operate
Recording
4
Page 6

Operate
Play back recorded audio.
Play
Press to play the last
•
• The remaining playback time
• Main button functions during playback
appears on the screen.
/ . . . Press during playback to select files
. . . . . . Press to pause/resume
. . . . . . . Press to return to the home screen
MEMO
been played.
Operate
2
1,2
Delete
2
Press during play-
1.
you want to delete.
Press
2.
Press
deletion.
, , or to cancel
5
Page 7

Operate
Prepare
You can add track marks to a recording.
Prepare
If a microSD card that is not properly formatted is inserted into this
Adding track marks
During recording, press
•
to add a mark at that
time.
• and during
playback to jump to mark positions.
• Marks can only be added when the recording format is set
to WAV.
MEMO
Formatting microSD cards
Press to format the
1.
card.
Press
After formatting completes or is
2.
cancelled, the home screen reappears.
, , or
to cancel.
Playback / File deletion
Prepare
Adding track marks / Formatting microSD cards
MEMO
You can also open this screen by pressing
while turning the power ON.
6
Page 8

Connect
Connecting with a computer <Supplement>
With the power off, connect this unit to a Windows PC or a Macintosh us-
1.
function
ing a USB cable.
<To use as a MicroSD card reader>
2.
Press while “CArd” is displayed.
<To use as an audio interface>
Press while “AUdIo” is displayed.
MEMO
If no action is performed for 10 seconds, it will automatically
start working as a MicroSD card reader.
<When “CArd” is selected>
3.
Displayed alternately at
one-second interval
It starts working as a MicroSD card reader.
<When “AUdIo” is selected>
When the screen to select the sampling frequency appears,
use / to select the frequency and press
/
.
MEMO
The sampling frequency should be set to the same value
as the recording software and playback files.
It starts working as an audio interface.
4.
This unit’s input signal is sent to the com-
puter, and you can use this unit to moni-
tor the playback signal on the computer.
1
1 Adjusts the output level
2 Switches on/off the LO CUT function
3 Switches on/off the AUTO level function
4 Adjusts the input level
5 Disables the keys
6 The playback signal of the computer can be monitored
when line/headphone output jack is not used.
2 3
Input/output level
New
in Ver.2
Blink
Blink
4
5
6
Page 9

Part names and functions
• Parts of the unit
9
4
1
2
3
5
6
7
• Screen indications
2
1
5
10
11
12
8
13
14
15
16
17
18
19
20
21
• Inserting the battery
3
4
Note: Use alkaline or NiMH batteries.
Open the cas e
while pressing
here and then in-
sert the battery.
7
Page 10

• Parts of the unit
1 Line/headphones output jack Outputs sound to headphones or external equipment.
2 Volume adjustment buttons Use to adjust the output level.
3 microSD card slot Insert a microSD or microSDHC card here for use with the unit.
4 LO CUT switch Use to turn the low cut filter (noise reduction) ON or OFF.
5 AUTO LEVEL switch Use to turn automatic recording level adjustment ON or OFF.
6 REC FORMAT switch Use to select the recording format.
7 Tripod mount Attach a tripod here to use the unit in a fixed position.
8 Battery compartment cover Install one AA battery under here.
9 Stereo microphone Record sound in stereo in a 90º field in front of the unit.
10 Recording/peak indicator This lights during recording and blinks rapidly if the input signal
11 Liquid crystal display (LCD) This shows various information.
12 Record button Use to start and stop recording, and to confirm file deletion, for
13 Built-in speaker (mono) Use to listen to recordings when not using the line/headphones
14 Mic/line input jack Connect and record another device or microphone here. Mics
15 Input level buttons Use to adjust the recording level manually.
16 Fast forward button During playback, use to select files and to fast forward. On the
17 Play button Use to start and stop file playback. On the home screen, use to
18 Fast reverse button During playback, use to select files and fast reverse. On the
19 Delete button Use to erase files that are not needed.
20 Power button Turn the power ON/OFF. Set to HOLD to disable other keys.
21 USB jack Connect to a computer to power the unit by USB or to trans-
• Screen indications
1 Level meters These show input and output levels.
2 File/format information This a rea shows the recording format and the recording date
3 Battery level indicator This shows the remaining batter y charge. It does not appear
4 Time display This shows the re maining reco rdable time of the inserted
5 Status indicators These show the current operating state.
is too loud (peak detection).
example.
output jack.
that require plug-in power can be used with this jack.
home screen, use to set the recording format.
add track marks.
home screen, use to set the recording format.
and file number of the playing file.
when power is being supplied by USB.
microSD card, the playback time or the name of a file that is
about to be erased, for example.
8
Page 11

FCC regulation warning (for the U.S.A.)
This equipment has been tested and found to comply with the limits for a Class B digital device,
pursuant to part 15 of the FCC Rules. These limits are designed to provide reasonable protection
against harmful interference in a residential installation. This equipment generates, uses and can radiate
radio frequency energy and, if not installed and used in accordance with the instructions, may cause
harmful interference to radio communications. However, there is no guarantee that interference will not
occur in a particular installation. If this equipment does cause harmful interference to radio or television
reception, which can be determined by turning the equipment off and on, the user is encouraged to try
to correct the interference by one or more of the following measures:
Reorient or relocate the receiving antenna.•
Increase the separation between the equipment and the receiver.•
Connect the equipment to an outlet on a circuit different from that •
to which the receiver is connected.
Consult the dealer or an experienced radio/TV technician for help.•
For EU Countries
Declaration of Conformity:
This product complies with the requirements of
EMC Directive 2004/108/EG and
Low Voltage Directive 2006/95/EC
Windows is a trademark of Microsoft Corporation (USA). Macintosh and Mac OS are registered trademarks or trademarks of Apple Inc. in the USA and other countries. The microSD and microSDHC logos
are trademarks. Other product names, registered trademarks and company names in this document are
the properties of their respective companies.
• MPEG Layer-3 audio compression technology has been licensed from Fraunhofer IIS and Sisvel S.p.A.
• Recording concerts, lectures and other events without the permission of the rights-holders is illegal.
9
Page 12

.
MEMO
unit is starting up. Version 1.00 is shown
as “1/00,” for example.
1.
•
from our web site (www.zoom.co.jp).
While pressing , slide the power switch to start the
2.
unit in version upgrade mode.
The version currently used by
the unit and the upgrade version are shown on the screen
alternately.
If the version upgrade shown is the one desired, press the
3.
to start the upgrade.
again
10
Page 13

Items included with this product
• H1 unit
• One AA battery (to test the unit)
Note: Use alkaline or NiMH batteries.
• Quick Start Guide (this manual)
• microSD card (2 GB)
Connect
With this unit’s power off, connect it to a computer running
Windows or Macintosh OS using a USB cable. This allows the
unit to be used as a microSD card reader.
Files recorded to the microSD card are saved in the
“FOLDER01” subfolder inside the “STEREO” folder on the card.
“BLT-IN” subfolder inside the
“STEREO” folder.
Connecting with a computer
11
Page 14

Safety and Operation Precautions
This indicates that if a user ignores this warning and handles
the device incorrectly, serious injury or death could result.
Warning
This indicates that if a user ignores this caution and handles
the device incorrectly, bodily injury or damage to equipment
could occur.
Caution
Observe the following precautions to use this unit safely.
• Power and batteries
Use only the ZOOM AD-17 (DC5V 1A) USB-connection type AC •
adapter (sold separately).
Unplug the AC adapter when the unit will not be used for a long time.•
Warning
This unit cannot recharge batteries. •
Carefully read the precautions of batteries before using them. •
When using a battery, insert one commercially-available alkaline or •
NiMH AA battery with the correct orientation.
Remove the battery from the unit if it will not be used for a long time.•
• Operation environment
Avoid using the unit in the following types of places, because doing so
could cause malfunction.
Places that become extremely hot or cold•
Caution
Near heating devices or other sources of heat•
Places that are extremely humid or where the unit could become wet•
Sandy or dusty places•
Places with frequent vibrations•
• Handling
Do not disassemble or modify this device. Doing so could cause injury or
malfunction. ZOOM Corporation will not take responsibility for malfunctions
resulting from disassembly or modification.
Warning
Do not apply excessive force to switches and other controls.
Use of excessive force, dropping, bumping and other shocks could break
the unit.
Caution
You might need this Quick Start Guide in the future.
Always keep it in a place where you can access it easily.
12
H1
 Loading...