

Page 1

YAMAHA
B
Owner's Guide
Spielanleitung
Mode d'emploi
Manual del Propietario
Page 2

Congratulations!
Herzlichen
Glückwunsch
Félicitations!
Enhorabuena!
i
You are the proud owner of a Yamaha
PortaTone. Your PortaTone is a high-quality
musical instrument that incorporates
advanced Yamaha digital technology and
many versatile features. In order to obtain
maximum performance and enjoyment
from your PortaTone, we urge you to read
this Owner's Guide thoroughly while trying
out the various features described. Keep
the Owner’s Guide in a safe place for later
reference.
Und vielen Dank für den Kauf des
Yamaha PortaTones PSR-38. Bei Ihrem
Portalbne PSR-38 handelt es sich um
ein hochwertiges Keyboard, das auf der
wegweisenden Yamaha
Digitaltechnologie basiert und Ihnen
zahlreiche praktische Funktionen bietet.
Bitte lesen Sie sich zunächst diese
Anleitung sorgfältig durch und
probieren Sie gleichzeitig die
beschriebenen Funktionen aus, damit
Sie das großartige Potential dieses
Instruments kennenlernen. Danach
sollten Sie diese Anleitung zur späteren
Bezugnahme an einem sicheren Ort
aufbewahren.
Vous voilà à présent le fier propriétaire
d'un PortaTone Yamaha. Votre PortaTone
est un instrument de musique de très
grande qualité incorporant les toutes
dernières innovations de la technologie
numérique de Yamaha et une très grande
variété de fonctions ultra-perfectionnées.
Afin d'obtenir des performances
maximales de votre PortaTone et d'en tirer
le plus de satisfactions possibles, nous
vous conseillons de lire très attentivement
ce mode d'emploi tout en essayant les
fonctions qui y sont décrites. Conserver le
mode d'emploi en lieu sûr afin de pouvoir
vous y reporter ultérieurement si besoin
est.
Usted es un orgulloso propietario de un
Yamaha PortaTone. Su PortaTone es un
instrumento musical de alta calidad que
incorpora la avanzada tecnología digital
de Yamaha y muchas versátiles
características. Para aprovechar al
máximo su rendimiento y disfrutar con
el PortaTbne, le aconsejamos que lea
toda este Manual del Propietario
mientras intenta las diversas
características descritas. Guarde el
Manual del Propietario en un lugar
seguro para poderlo consultar en el
futuro.
CONTENTS
1. BEFORE YOU BEGIN
Power Supply........................................3
Using Batteries.................................3
Using an Optional
Power Adaptor
Remove the Protective Film..................4
Setting Up the Music Stand
Taking Care of Your PortaTone
2. NOMENCLATURE
Top Panel Controls
Rear Panel Connectors ........................7
3. ENJOY THE
DEMONSTRATION
.....................
.................................
.................
.........................
..............................
........................
............
INHALT
3
L VOR DEM SPIELEN
Stromversorgung..........................................3
Stromversorgung über
Batterien .................................................3
4
4
4
6
6
9
Stromversorgung über getrennt
erhältlichen Adapter................................4
Entfernen der Schutzfolie
Anbringen des Notenständers
Vorsichtsmaßnahmen
2. BEZEICHNUNG
DER TEILE
Bedienelemente ...........................................6
Anschlüsse auf der Rückseite
3. DEMO-WIEDERGABE
...............
............................
.....................
...................................
..............................
......................
...........
TABLE DES MATIERES
3
1. AVANT DE COMMENCER ..............3
Alimentation électrique
Fonctionnement sur piles.................3
Utilisation d'un adaptateur secteur
en option
4
4
4
6
7
9
Retrait de la pellicule protectrice
Mise en place du pupitre.......................4
Entretien du PortaTone.........................4
2- NOMENCLATURE
Commandes du panneau
supérieur...............................................6
Prises du panneau arrière
3. ECOUTE DE LA MUSIQUE DE
DEMONSTRATION
..........................................
........................
.........................
........................
...........
...................
INDICE
1. ANTES DE COMENZAR
3
4
4
6
Alimentación
Empleo de las pilas
Empleo de un adaptador de
alimentación opcional
Extracción de la película
protectora
Colocación del portapartituras
Cuidados del PortaTbne
2. NOMENCLATURA
Controles del panel superior.........................6
7
Conectores del panel posterior
3. DEMOSTRACION....................9
9
................................................
..........
.............................
......................................................
..............................
............
......................
....................
..................
.....................
3
3
3
4
4
4
4
6
7
Page 3

4. SELECTING AND PLAYING
VOICES
Selecting a Voice
.......................................................
.................................
10
10
Adjusting the Volume ........................12
Adding Effects.........................................12
Tuning: Fine Pitch Control
...............
13
The SPLIT Mode: Separate Left- and
Right-hand Voices.................................14
5. USING THE ACCOMPANIMENT
SECTION
Rhythm Accompaniment
.................................................
...................
17
17
Selecting an Accompaniment
Style ..........................................................17
Adjusting the
Accompaniment Volume....................18
Setting the Tempo
Starting the Accompaniment
..............................
...........
19
20
Starting the Accompaniment with an
Introduction
............................................
21
Adding Fill-ins .......................................22
Stopping the Accompaniment.........22
Auto Bass Chord
Accompaniment
Single Finger Accompaniment
....................................
........
23
23
Setting the Accompaniment
Volume ...............................................26
Setting the Tempo
Fingered Accompaniment
Solo Styleplay
.......................................
........................
...............
26
26
29
6. KEYBOARD PERCUSSION .................30
7. THE CHORD SEQUENCER
Recording ...............................................32
Playback ..................................................34
8. MIDI FUNCTIONS
.................................
A Brief Introduction to MIDI
The PSR-38 MIDI Connectors
Simple MIDI Control............................37
MIDI Sequence Recording
PSR-38 MIDI Settings &
Functions
................................................
9. OPTIONAL ACCESSORIES..................46
10. SPECIFICATIONS ...............................47
..................
............
.........
................
31
36
36
36
38
39
4. WAHLEN UND SPIELEN
VON STIMMEN
Stimmenwahl .............................................10
Einstellen der Lautstärke ...........................12
Zuschalten von Effekten
Feinstimmen: Die
Feinstimmtasten
Manualteilung: Verschiedene
Stimmen für linke und
rechte Hand ................................................14
5. DIE BEGLEITUNGS
FUNKTIONEN
Schlagzeugbegleitung
Wahl des Begleitungsstils
Einstellen der
Begleitungslautstärke
Einstellen des Tempos
Auslösen der Begleitung
Beginnen der Begleitung mit
Auftakt .......................................................21
Einfügen von Fill-ins
Stoppen der Begleitung
Auto-Baß/ Akkordbegleitung ... 23
Single Finger-Funktion
Einstellen der
Begleitungslautstärke ...........................26
Einstellen des Tempos
Fingered-Funktion
Solo Styleplay-Funktion
6. MANUELLE
PERCUSSION
7. DIE SEQUENZER
FUNKTION ...............................................31
Aufzeichmmg
Wiedergabe ................................................34
8. MIDI-FUNKTIONEN................................36
Eine kurze Einführung in
MIDI...........................................................36
Die MIDI-Anschlüsse des
PSR-38 .......................................................36
Einfache MIDI-Steuerung .........................37
MIDI-Sequenzaufnahme
MIDI-Einstellungen und
Funktionen des PSR-38 .............................39
9. SONDERZÜBEHÖR ................................46
la TECHNISCHE DATEN
.......................................
............................
.........................................
.........................................
................................
.........................
................................
..............................
...........................
.................................
..............................
..............................
.........................
.........
...........................
...........................
...........................................
.............................................
............................
..............................
4. SELECTION ET EXECUTION
10
12
13
17
17
17
18
19
20
22
22
23
26
26
29
30
32
38
47
D'UNE VOIX
Sélection d'une voix............................10
Réglage du volume.............................12
Addition d'effets
Accord: Réglage précis de
la hauteur............................................13
Mode SPLIT: Voix de la main
droite et voix de la main gauche
indépendantes
5. UTILISATION DE LA SECTION
D'ACCOMPAGNEMENT
Accompagnement
rythmique ...........................................17
Sélection d'un style
d'accompagnement.............................17
Réglage du volume de
raccompagnement..............................18
Réglage du tempo
Début de l'accompagnement .............20
Début de l'accompagnement avec
introduction
Addition de fill-ins
Arrêt de l’accompagnement
Accompagnement automatique en
accords et basses...............................23
Accompagnement à Un Seul
Doigt
Réglage du volume de
l'accompagnement ........................26
Réglage du tempo
Accom pag neme nt
à Plusieurs Doigts...............................26
Mode Solo Styleplay...........................29
6. PERCUSSION AU CLAVIER ...30
7. SEQUENCEUR D'ACCORDS ... 31
Enregistrement
Reproduction
8. FONCTIONS MIDI..............................36
Quelques mots sur l'interface
MIDI
Connecteurs MIDI du PSR-38
Commande MIDI simple
Enregistrement de séquences
MIDI
Réglages et fonctions MIDI du
PSR-38 ..............................................40
9. ACCESSOIRES EN OPTION .... 46
10. FICHE TECHNIQUE ..........................47
......................................
.................................
...................................
.............................
.......................................
...............................
..................................................
.........................
..................................
.....................................
...................................................
...................................................
....................
...............
...........
....................
4. SELECCION E
10
12
14
17
19
21
22
22
23
26
32
34
36
36
37
38
INTERPRETACION DE
VOCES
5. EMPLEO DE LA SECCION
6. PERCUSION DEL
7. SEQUENCIADOR DE
8. FUNCIONES MIDI....................................36
9. ACCESORIOS
10. ESPECIFICACIONES
......................................................
Selección de una voz
Ajuste del volumen ....................................12
Adición de efectos
Afinación: Control preciso
del tono
.......................................................
El modo SPLIT; Voces de
la izquierda y de
la derecha separadas
DE ACOMPAÑAMIENTO
Acompañamiento rítmico
Selección de un estilo de
acompañamiento.........................................17
Ajuste del volumen del
acompañamiento
Ajuste del tempo
Inicio del acompañamiento
Inicio del acompañamiento
con unam introducción
Adición de rellenos
Parada del acompañamiento
Acompañamiento automático de
bajo y acordes
Acompañamiento de un dedo
Ajuste del volumen del
acompañamiento
Ajuste del tempo
Acompañamiento para acordes .... 26
Para tocar solos
TECLADO..................................................30
ACORDES .................................................31
Grabación....................................................32
Reproducción
Una breve introducción a MIDI.... 36
Conectores MIDI PSR-38
Control MIDI simple
Grabación de secuencias
MIDI
...........................................................
Ajustes y funciones
MIDI PSR-38 .............................................40
OPCIONALES
.................................
.....................................
..................................
.......................
...........................
.........................................
........................................
.......................
..............................
....................................
......................
.............................................
.....................
...................................
..................................
..........................................
.............................................
.........................
.................................
..........................................
..............................
10
10
12
13
14
17
17
18
19
20
21
22
22
23
23
26
26
29
34
36
37
38
46
47
2
Page 4
BEFORE YOU
VOR DEM
AVANT DE
ANTES DE
BEGIN
Power Supply
Your PSR-38 will run either from batteries
or the optional power adaptor. Follow the
instructions below according to the power
source you intend to use.
Using Batteries
Six 1.5V SUM-1. "D” size, R-20 or
equivalent alkaline batteries (sold
separately) must first be installed in the
PSR-38 battery compartment.
1. Open the battery compartment cover
located on the instrument's bottom
panel.
2. Insert the six batteries, being careful
to follow the polarity markings on the
inside of the compartment.
3. Replace the compartment cover,
making sure that it locks firmly in
place.
SPIELEN
Stromversorgung
Ihr PSR-38 kann über Batterien oder
aber über einen getrennt erhältlichen
Netzadapter betrieben werden. Befolgen
Sie die nachfolgenden Anweisungen für
die jeweilig verwendete Stromquelle.
Stromversorgung über Batterien
Legen Sie zunächst sechs 1,5 V
Monozellen der Größe "D", R—20 oder
entsprechende Alkalibatterien (getrennt
erhältlich) in das Batteriefach des
PSR-38 ein.
1. Öffnen Sie den Batteriefachdeckel
auf der Unterseite des PSR-38.
2. Richten Sie die Batteriepole
entsprechend den Markierungen im
Batteriefach aus und legen Sie die
Batterien ein.
3. Bringen Sie den Batteriefachdeckel
wieder an und achten Sie darauf,
daß er einrastet.
COMMENCER
Alimentation électrique
Le PSR-38 peut être alimenté au moyen
de piles ou au moyen de l'adaptateur
secteur en option. Suivre les instructions
appropriées en fonction de la source
d'alimentation utilisée.
Fonctionnement sur piles
Utiliser six piles de 1,5 V SUM-1, R-20. de
format "D" ou des piles alcalines
équivalentes (vendues séparément) et les
placer dans le compartiment des piles du
PSR-38.
1. Ouvrir le couvercle du compartiment
des piles situé sur le panneau
inférieur de l'instrument.
2. Introduire les six piles en prenant bien
soin de respecter les indications de
polarité se trouvant à l'intérieur du
compartiment.
3. Reposer le couvercle et veiller à ce
qu'il se verrouille bien en place.
COMENZAR
Alimentación
Su PSR-38 funcionará con pilas o con el
adaptador de alimentación opcional.
Siga las instrucciones siguientes de
acuerdo con la fuente de alimentación
que desee utilizar.
Empleo de las pilas
Deben instalarse seis pilas SUM-1,
tamaño "D" de 1,5V o pilas alcalinas
equivalentes (que se venden por
separado) en el compartimiento de las
pilas del PSR-38.
1. Abra la tapa del compartimiento de
las pilas situado en el panel inferior
del instrumento.
2. Inserte seis pilas, teniendo cuidado
de respetar las marcas de las
polaridades del interior del
compartimiento.
3- Vuelva a colocar la tapa del
compartimiento, cerciorándose de
que queda bien cerrada.
Cautipn:
1. When th6 batteries run down, replace them with
a complete set of six new batteries. NEVER mix
old and new batteries.
2. To prevent possible damage due to battery
leakage, remove the batteries from the
instrument if it is not to be used for an extended
period of time.
Achtung:
1. Yienn die Batterien schwach werden, stets alle
Batterien zugleich als Satz austauschen.
NIEMALS alte und neue Batterien zusammen
verwenden.
2. Bei längerem Nichtgebrauck die Batterien aus
dem Keyboard entfernen, um mögliche
Schäden durch auslaufende Batterien zu
verhindern.
a
Attention:
1. Lorsque les piles se vident, ¡es remplacer toutes
à la fois. NE JAhdAIS utiliser en même temps
des piles neuves et des piles usées.
2. Pour prévenir tout endommagement que
pourrait provoquer une fuite des piles, retirer les
piles de l’instrument lorsqu’il ne doit pas être
utilisé pendant une période prolongée.
Precaución:
1. Cuando se gastan las pilas, reemplácelas por
un juego completo de seis pilas nuevas.
NUNCA mezcle pilas usadas y pilas nuevas.
2. Para evitar posibles daños debidos a fugas de
las pilas, extraiga las pilas del instrumento si
no tiene la intención de utilizarlo durante
periodos largos de tiempo.
Page 5

Using an Optional Power Adaptor
For
AC
Use ONLY a Yamaha PA-1, PA-1 B. PA-3.
PA-4 or PA-40 AC Adaptor to power your
instrument from the AC mains. Refer to
"Rear-panel Connectors" on page 7 for
more details.
Mains Power
Stromversorgung über getrennt
erhältlichen Adapter
Netzadapter
Nur den Yamaha Netzadapter PA-1,
PA-IB, PA-3, PA-4 oder PA—40 für den
Netzanschluß verwenden. Einzelheiten
hierzu finden Sie unter "Anschlüsse auf
der Rückseite " auf Seite 7.
Utilisation d'un adaptateur secteur en option
Fonctionnement sur secteur
SEUL un adaptateur secteur Yamaha
PA-1, PA-1 B, PA-3, PA-4 ou PA—40 peut
être utilisé pour alimenter l'instrument sur
secteur. Pour plus de détails, voir "Prises
du panneau arrière" à la page 7.
Empleo de un adaptador de
alimentación opcional
Para la red eléctrica de CA
Emplee SOLO un adaptador de CA
Yamaha PA-1, PA-lb, PA-3, PA-4 o
PA—40 para alimentar el instrumento
con la red eléctrica de CA. Consulte las
"IbmEis del panel posterior" de la página
7 para más detalles.
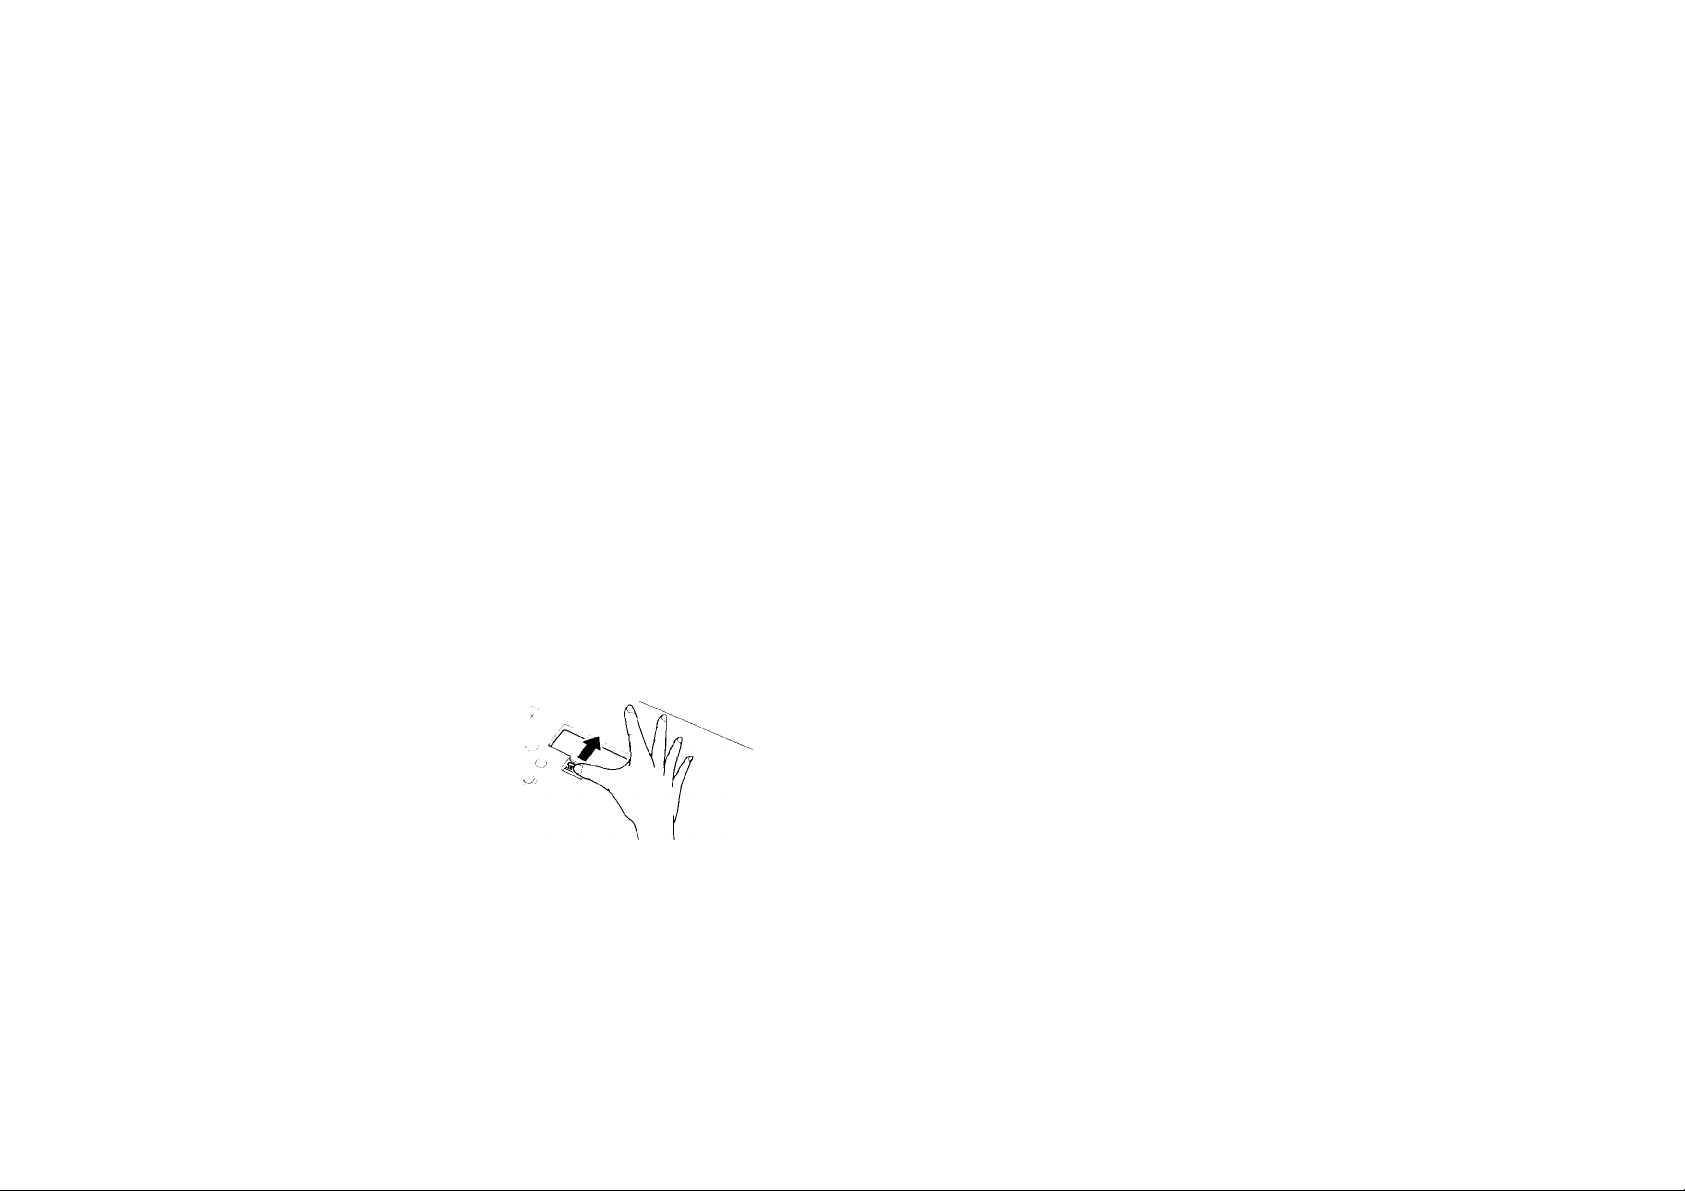
Remove the Protective Film
Before using your instrument, please
remove the protective film covering the
display section.
Setting Up the Music Stand
Insert the two pegs protruding from the
bottom edge of the music stand into the
two hoies tocated at the top of the PSR-38
control panel.
Taking Care of Your
PortaTone
Your PortaTone will remain in excellent
playing condition if care is taken
concerning the following.
1. When you use AC power, be sure to
use the optional AC Power PA-1/
PA-1 B/ PA-3/ PA—4/ PA-40 adaptor.
Before use, read the adaptor
instructions carefully.
In particular, please note that in some
cases the PA-1/ PA-4 is provided
with a voltage selector, so confirm that
this seiector is correctly set.
Entfernen der Schutzfolie
Ziehen Sie vor der Inbetriebnahme die
Schutzfolie vom Display ab.
Anbringen des Notenständers
Führen Sie die zwei Füße an der
Unterseite des Notenständers in die
zwei Löcher oben auf der Bedienkonsole
des PSR—38 ein.
Vorsichtsmaßnabmen
Wenn Sie die nachfolgenden Hinweise
zur Pflege befolgen, bleiben Aussehen
und Leistung Ihres Keyboards über
Jahre erhalten.
1. Zum Netzanschluß nur den getrennt
erhältlichen Yamaha Netzadapter
PA-1/ PA-IB/ PA-3/ PA—4 oder
PA—40 verwenden.
Vor dem Anschluß die Bedienungs
anleitung des Netzadapters lesen.
Außerdem ist zu beachten, daß der
PA-1/ PA-4 für verschiedene
Bestimmungsländer mit einem
Spannungswähler ausgestattet ist.
Daher vor dem Anschließen
sicherstellen, daß der
Spannungswähler korrekt auf die
Örtliche Netzspannung eingestellt
ist.
Retrait de la pellicule protectrice
Retirer la pellicule protectrice recouvrant
l'affichage avant d'utiliser l'instrument.
Mise en place du pupitre
Introduire les deux chevilles se trouvant
sur le bord inférieur du pupitre dans les
orifices situés sur le panneau de
commande du PSR-38.
Entretien du PortaTone
Le PortaTone restera en excellent état si
les points suivants sont observés.
1. En cas d'alimentation sur secteur,
veiller à utiliser un adaptateur secteur
PA-1/ PA-1 B/ PA-3/ PA-4/ PA-40 en
option. Lire attentivement le mode
d’emploi de l'adaptateur avant
d'utiliser celui-ci.
A noter que dans certains cas le
PA-1/ PA—4 est muni d'un sélecteur
de tension; le cas échéant, veiller
donc à régler correctement ce
sélecteur.
Extracción de la pebcula protectora
Antes de utilizar el instrumento, saque
la película protectora que cubre la
sección del visualizador.
Colocación del
portaparti turas
Inserte los dos apéndices que sobresalen
del borde inferior del portapíartituras en
los dos orificios situados en la parte
superior del panel de control del
PSR-38.
Cuidados del PortaTone
El PortaTone permanecerá en excelentes
condiciones de interpretación si se tiene
cuidado con lo siguiente.
1. Cuando emplee la red eléctrica de
CA, cerciórese de utilizar el
adaptador de CA opcional PA-1/
PA-IB/ PA-3/ PA-4 o PA-40.
Antes de su utilización, lea las
instrucciones del adaptador.
En particular, tenga presente que en
algunos casos el PA-1 o PA—4 está
provisto de un selector de tensión,
por lo que deberá confirmar si el
selector está correctamente
ajustado.
te
Page 6

2. Connections made between the
PortaTone and any other device
should be made with both units turned
off.
3. Do not set the MASTER VOLUME
control at MAX when you connect the
PotaTone to a stereo system. Use the
stereo system's volume control to
adjust the sound level.
4. Avoid placing the instrument in
excessively humid areas.
5. Do not subject the unit to physical
shock, and avoid placing an^hing
heavy on it.
6. The PortaTone should not be placed
in direct sunlight for a long time.
7. Do not place the instrument near any
heating appliance, or leave it inside a
car in direct sunlight for any length of
time. Direct sunshine can raise the
interior temperature of a car with
closed doors and windows to as high
as 80°C. Temperatures in excess of
can cause physical and/ or
electrical damage not covered by
warranty.
8. Use a dry or damp cloth for cleaning.
9. When you areni using the PortaTone,
we recommend keeping it in the case
to protect it.
2. Vor dem Anschluß von
Zusatzgeräten diese Geräte und das
PortaThne ausschalten.
3. Den MASTER VOLUME-Regler
NICHT auf MAX stellen, wenn das
PortaTbne an eine Stereoanlage
angeschlossen ist. Die Lautstärke
über die Stereoanlage einstellen.
4. Das Gerät vor Feuchtigkeit
schützen.
5. Das Gerät vor Stoß schützen und
keine schweren Gegenstände auf
das Gerät stellen.
6. Das PortaTbne niemals über längere
Zeit direkter Sonneneinstrahlung
aussetzen.
7. Das (ierät nicht in der Nähe von
Wärmequellen aufstellen. Ebenso
das (Jerät nicht über längere Zeit in
einem Fahrzeug lassen, das im
prallen Sonnenlicht steht. Direkte
SonneneinstTEihlung kann die
Temperatur im Fahrzeuginnem auf
bis zu 80 Grad erhöhen.
Temperaturen von über 60 Grad
können mechanische und
elektrische Schäden am Instrument
verursachen, die nicht von der
Garantie abgedeckt sind.
8. Zum Reinigen das Instrument mit
einem trockenen oder leicht
angefeuchteten Tuch abwisehen.
9. Nach dem Spielen das PortaTone
zur Aufbewahrung wieder in die
Schutzhülle stecken.
2. Avant de procéder à tout
branchement, veiller à couper
l'alimentation du PortaTone et de
l'autre appareil.
3. En cas de branchement du PortaTone
sur un système de sonorisation
stéréo, ne jamais mettre la commande
MASTER VOLUME sur MAX. Utiliser
la commande de volume de la chaîne
stéréo pour régler le niveau sonore.
4. Eviter de placer l’instrument dans un
endroit extrêmement humide.
5. Ne pas soumettre l'instrument à des
chocs et ne pas y placer d'objets
lourds.
6. Ne pas laisser le PortaTone en plein
soleil pendant longtemps.
7. Ne pas placer l'instrument à proximité
d'un appareil de chauffage et ne
jamais le laisser à l'intérieur d'un
véhicule stationné au soleil. La
température à l'intérieur d'un véhicule
fermé stationné au soleil peut
atteindre 80®C. Exposer l'instrument à
des températures dépassant 60°C
peut provoquer des dommages
physiques et/ou électriques qui ne
seront pas couverts par la garantie.
8. Utiliser un chiffon sec ou légèrement
humide pour nettoyer l'instrument.
9. Pour protéger l'instrument, il est
conseillé de le laisser dans son étui
torsqu'il n'est pas utilisé.
2. Las conexiones efectuadas entre el
PortaTbne y cualquier otro
dispositivo deberán realizarse con
ambos aparatos desconectados.
3. NO ajuste el control MASTER
VOLUMEN en la posición MAX
cuando conecte el PortaTbne a un
sistema estéreo. Emplee el control
de volumen del equipo estéreo para
ajustar el nivel de sonido.
4. No coloque el instrumento en
lugares demasiado húmedos.
5. No someta el aparato a golpes
físicos, y no ponga nada pesado
encima del mismo.
6. El PortaTone no debe colocarse bajo
la luz directa del sol durante
períodos prolongados.
7. No coloque el instrumento cerca de
aparatos de calefacción, ni lo deje
dentro de un automóvil bajo la luz
directa del sol durante mucho
tiempo. La luz directa del sol puede
elevar la temperatura del interior
del automóvil con las puertas y
ventanillas cerradas hasta a 80°C,
Las temperaturas que excedan 60°C
pueden causar daños físicos y/ o
eléctricos que no quedan cubiertos
por la garantía.
8. Emplee un paño seco o húmedo para
la limpieza.
9. Cuando no utilice el PortaTbne, le
recomendamos que lo guarde en el
estuche para protegerlo.
Page 7
NOMENCLATURE
BEZEICHNUNG DER TEILE
NOMENCLATURE
NOMENCLATLTRA
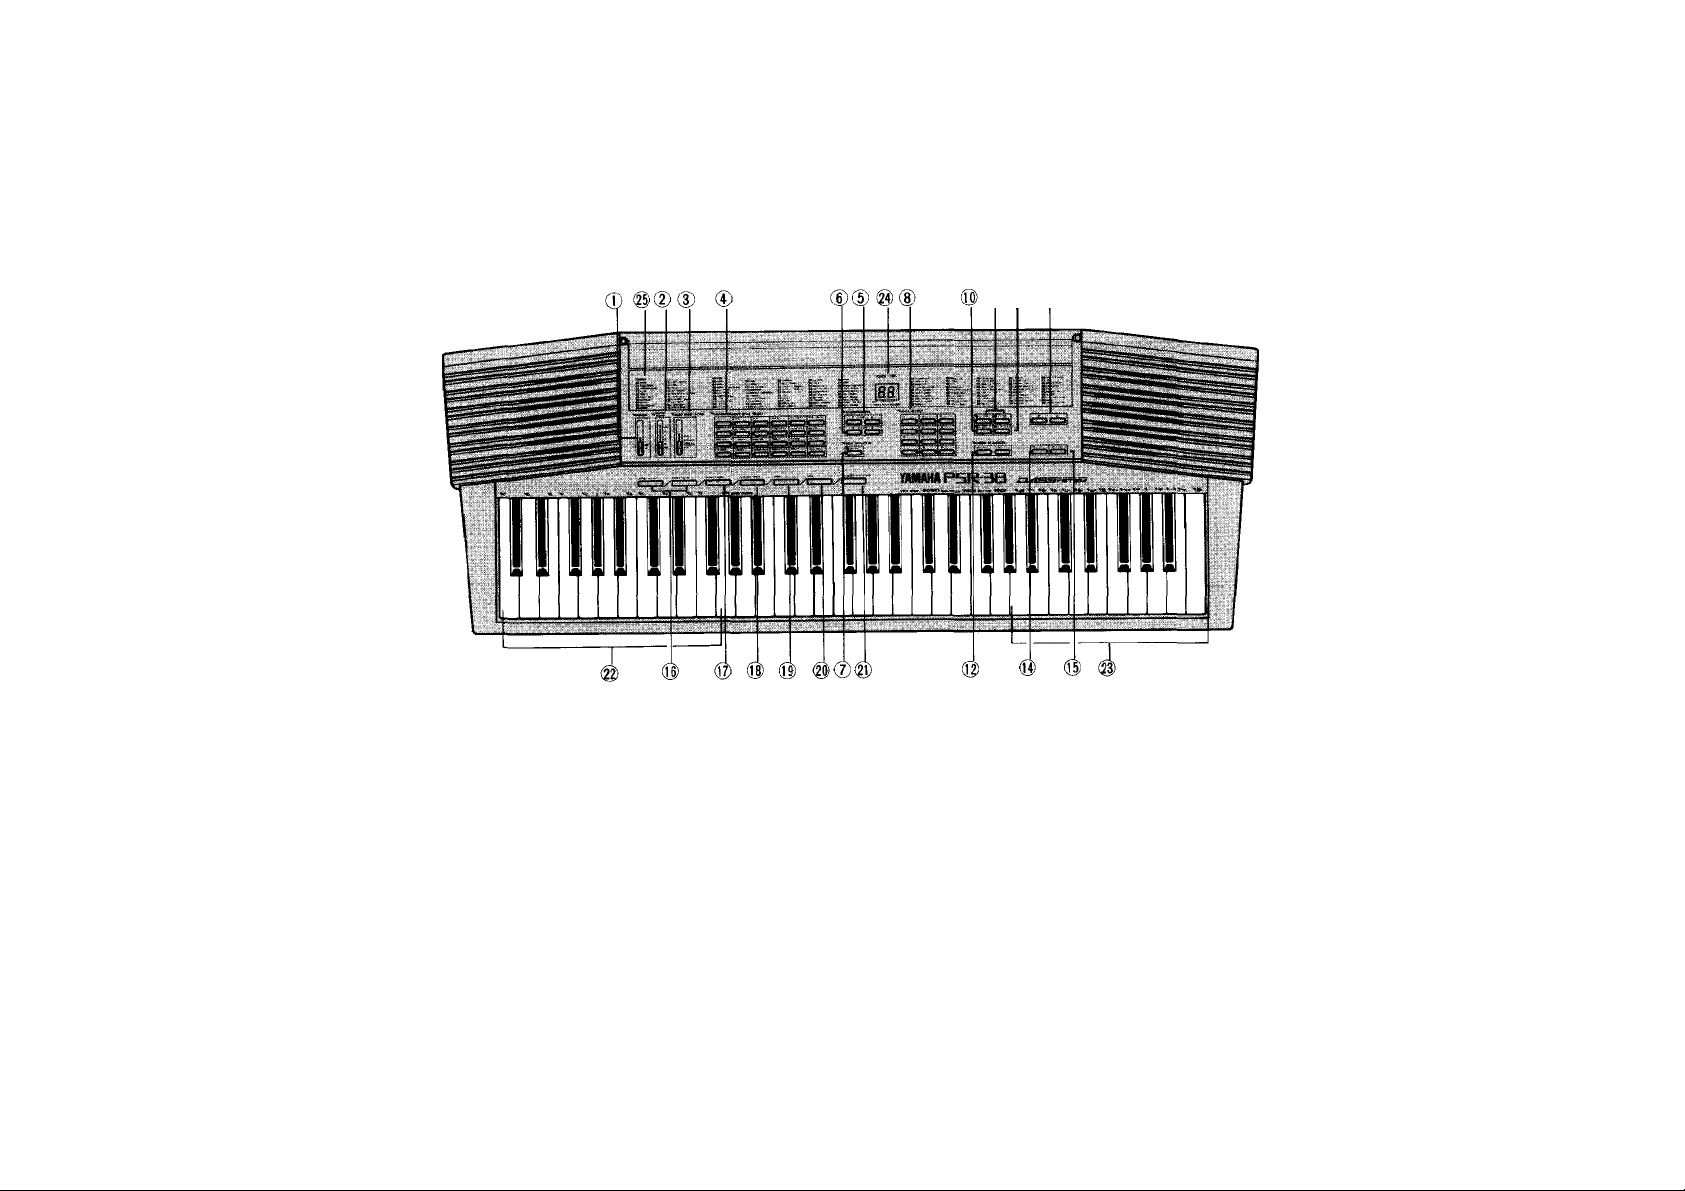
Top Panel Controls
© POWER Switch (page 9)
0 MASTER VOLUME Control
(page 9)
0 AUTO BASS CHORD Selector
(page 14, 23 and 26)
0 ACCOMPANIMENT STYLE SELECT
Buttons (page 17)
0 ACCOMPANIMENT TEMPO Buttons
{page 19)
© ACCOMPANIMENT VOLUME
Buttons (page 18)
© SOLO STYLEPLAY Button
(page 29)
0 VOICE SELECT Buttons (page 10)
0 SUSTAIN 1 and SUSTAIN 2 Buttons
(page 12)
LOWER Button (page 15)
Bedienelemente
Ein/ Aus-Schalter
Lautstärkeregler
Auto-Begleitfunktionswähler
(Seite 14, 23 und 26)
Begleitstil-Wahltasten
Begleittempotasten
Begleitungslautstärketasten
(Seite 18)
Solobegleitfunktionstaste
©
(Seite 29)
Stimmenwahltasten
Halleffekttasten 1 & 2
0
Funktionstaste für linken
(0)
Manualbereich
(Seite 9)
(Seite 9)
(Seite 19)
(Seite 15)
(Seite 17)
(Seite 10)
(Seite 12)
Commandes du panneau supérieur
®® O
Interrupteur d'alimentation
©
(page 9)
Commande de volume principale
©
(page 9)
Sélecteur accords et basses
0
automatique (pages 14, 23 et 26)
Touches de sélection des styles
0
d'accompagnement
Touches de réglage du tempo
0
d'accompagnement (page 19)
Touches de réglage du volume
0
d'accompagnement (page 18)
Touche solo styleplay
©
(page 29)
Touches de sélection des voix
0
(page 10)
Touches d'effet sustain 1, 2
0
(page 12)
Touche basse (page 15)
0)
(page 17)
Controles del panel superior
© Interruptor de alimentación
(página 9)
(D Control de volumen principal
(página 9)
© Elector de acompañamiento
automático de bgjo y acordes
(página 14, 23 y 26)
© Botones de selección del estilo
de acompañamiento
(5) Botones del tempo de
acompañamiento
© Botones de volumen de
acompañamiento
© Botón de interpretación de solos
(página 29)
© Botones selectores de voces
(página 10)
© Botones 1 y 2 de sostenido
(página 12)
(19) Botón de la sección inferior
(página 15)
(página 17)
(página 19)
(página 18)
Page 8
(Ц) DUAL VOICE Button (page 13)
(Q) CHORD SEQUENCER RECORD and
PLAY Buttons (page 32 a nd 34)
(Q) PITCH Buttons (page 14)
(0) MIDI Button (pag e 39)
® DEMO Button (page 9)
CB) INTRO/ FILL IN Buttons
(page 21 a nd 22)
® INTRO./ ENDING Button (page 22)
® SYNCHRO START Button (page 20)
(||) START Button (page 20)
@ STOP Button (page 22)
® KEYBOARD PERCUSSION Button
(page 31)
Auto Bass Chord Key Section
(page 23)
Ф Keyboard Percussion Key Section
(page 30)
® voice TEMPO/ PITCH/ volume
Display (page 10, 1 1, 15, 16 and 18)
® VOICE LIST Граде 11)
(jj) Zweistimmentaste (Seite 13)
@ Akkordaufnahme- und
@ Touche deux voix (page 13)
(0) Touches d'enregistrement et
Wiedergabetaste reproduction du séquenceur
(Seite 32 und 34)
d'accords (pages 32 et 34)
(0) Feinstimmtasten (Seite 14) (0) Touches de hauteur tonale
(0) MIDI-Taste (Seite 39) (page 14)
(0) Demo-Taste (Seite 9) @ Touche MIDI (page 39)
(0) Auftakt/ Zwischentakttasten
(Seite 21 und 22)
(0) Auftakt/ Schlußtakttaste
(Seite 22)
(0) Synchronstarttaste (Seite 20)
® Starttaste (Seite 20)
@ Stopptaste (Seite 22)
(U) Schlagzeugspieltaste (Seite 31)
@ Auto-Baß/ Akkordbegleittasten
(Seite 23)
Schlagzeugspiel-Manualbereich
(Seite 30)
@ Display für Stimmennr, Tempo,
Tonhöhe, Lautstärke
(Seite 10, 11, 15, 16 und 18)
® Stimmenliste (Seite 11)
® Touche démonstration (pag e 9)
® Touches d'introduction/fill-in
(pages 21 et 22)
(0) Touche d'introduction/finale
(page 22)
® Touche de début synchronisé
(page 20)
® Touche de début (page 20)
@ Touche d'arrêt (pa ge 22)
0 Touche de percussion au clavier
(page 31)
(g) Section accords et basses
automatiques (page 23)
® Section des touches de percussion
au clavier (page 30)
® Affichage de voix/ tempo/ hauteur/
volume
(pages 10, 11, 15, 16 et 1 8)
(g) Liste des voix (page 11)
(jj) Botón de voz doble (página 13)
(B) Botones de grabación y
reproducción del secuenciador
de acordes (página 32 y 34)
(J|) Botones del tono (página 14)
(j|) Botón MEDI (página 39)
(J|) Botón de demostración
(página 9)
(jj) Botones de preludio/ relleno
(página 21 y 22)
(2) Botón de preludio/ coda
(página 22)
(Q) Botón de inicio sincronizado
(página 20)
(B) Botón de inicio (página 20)
@) Botón de parada (página 22)
(|]) Botón de percusión del teclado
(página 31)
Sección de teclas de
acompañamiento automático de
bajo y acordes (página 23)
® Sección de teclas de percusión
del teclado (página 30)
(§) Visualización de voces/ tempo/
tono/ volumen (página 10, 11, 15,
16 y 18)
@ Lista de voces (página 11)
Rear Panel Connectors
® DC (9-12V} IN Jack
The DC output cord from the optional
Yamaha PA-1/ PA-1 B/ PA-3/ PA-4/
PA-40 Power Adaptor should be
plugged in here when the PSR-38 is
to powered from the AC mains supply
(refer to "Power Supply" on page 3 for
more details).
Anschlüsse auf der
1 Rückseite
Gleichspannungsbuchse
(DC (9-12V) IN)
An diese Buchse wird das
Ausgangskabel des getrennt
erhältlichen Yamaha Netzadapters
PA-1/ PA-IB/ PA-3/ PA-A/ PA-AO
angeschlossen, wenn das PSR-38
über Netzstrom betrieben werden
soll. (Einzelheiten, siehe unter
"Stromversorgung auf Seite 3").
Prises du panneau arrière
Prise d'entrée CC (DC (9-12V) IN)
Le cordon de sortie CC de
l'adaptateur secteur Yamaha PA-1/
PA-1 B/ PA-3/ PA-4/ PA-40 en option
doit être branché à cette prise lorsque
le PSR-38 doit être alimenté par le
secteur (Pour plus de détails, voir
"Alimentation électrique" à la page 3).
Conectores del panel posterior
Toma de entrada de
alimentación exterior
(DC (9-12V) IN)
El cable de salida de CC del
adaptador de alimentación Yamaha
PA-1/ PA-3/
enchufarse a esta toma cuando se
desee alimentar el PSR-38 con la
red eléctrica de CA (consulte
"Alimentación" de la página 3 para
más detalles).
PA-AJ PA-40 debe
Page 9

® HEADPHONES/ AUX. OUT Jack
A standard pair of stereo headphones
can be plugged in here for private
practice or late-night playing. The
internal speaker system is
automatically shut off when a pair of
headphones is plugged into the
HEADPHONE jack. The HEAD
PHONES/ AUX. OUT jack can also be
used to deliver the output of the
PSR-38 to a keyboard amplifier,
stereo hi-fi system, mixing console or
tape recorder (refer to page 46)
* Use a relatively low MASTER
VOLUME control setting when
connecting the PSR-38 to a stereo
sound system. Use the stereo
system’s volume control to adjust
volume.
(3) MIDI IN and OUT Connectors
The MIDI IN connector receives MIDI
data from an external MIDI device
which can be used to control the
PSR-38. The MIDI OUT connector
transmits MIDI data generated by the
PSR-38 (e.g. note and velocity data
produced by playing the keyboard).
More details on MIDI are given in
"MIDI FUNCTIONS" on page 36.
®
Kopfhörer/ Zusatzausgang
An diese Buchse können Sie für
mitternächtliche Etüden einen
herkömmlichen Stereokopfhörer
anschließen. Beim Anschluß eines
Kopfhörers an die HEADPHONESBuchse wird das interne
Lautsprechersystem des PSR-38
automatisch stummgeschaltet. Die
Buchse HEADPHONES/AUX. OUT
dient auch zum Anschließen an
einen Keyboard-Verstärker, eine
Hifi- Stereoanlage, ein Mischpult
oder ein Cassettendeck.
(Siehe Seite 46)
* Beim Anschluß an eine
Stereoanlage den MASTER
VOLUME-Regler des PSR-38 auf
einen relativ niedrigen Wert
einstellen. Die Lautstärke über
den Lautstärkeregler der
Stereoanlage einstellen.
@ MIDI-Ein/ Ausgang
Der MIDI IN-Anschluß dient zum
Empfang von MIDI-Daten von
einem externen MIDI-Grerät, um das
PSR—38 zu steuern. Die MIDI OUT-
Buchse gibt die vom PSR-38
erzeugten MIDI-Daten ab, wie z. B.
die Noten- und Dynaxnikdaten, die
durch Spielen auf dem Manual
generiert werden.
Einzelheiten zu MIDI finden Sie
unter "MIDI-FUNKTIONEN" auf
Seite 36.
® Prise de sortie aux/casque
d'écoute Un casque d'écoule stéréo
standard peut être branché à cette
prise
pour une utilisation de l’instrument en
silence ou la nuit. Les haut-parleurs
internes sont automatiquement
coupés lorsqu’un casque est branché
à la prise HEADPHONES. La prise
HEADPHONES/ AUX. OUT peut être
également utilisée pour transmettre la
sorti© du PSR-38 à un amplificateur
de davier, une chaîne Hi-Fi stéréo,
une table de mixage ou un
enregistreur de bande, (voir page 46)
* Le réglage de ta commande
MASTER VOLUME doit être
relativement bas lorsque le PSR-38
est connecté à un système de
sonorisation stéréo. Utiliser la
commande de volume du système
de sonorisation stéréo pour régler le
niveau sonore.
® Connecteurs MIDI IN et MIDI OUT
Le connecteur MIDI IN reçoit les
données MIDI transmises par un
appareil externe MIDI pouvant alors
être utilisé pour commander le
PSR-38. Le connecteur MIDI OUT
transmet les données MIDI générées '
par le PSR-38 (par ex. données de
note et de vélocité générées en jouant
au clavier).
Pour plus de détails sur MIDI, voir
"FONCTIONS MIDI" à la page 36.
®
Toma de auriculares/ salida
auxiliar
Pueden enchufarse unos auriculares
normales a esta toma para poder
practicar en privado o para tocar por
la noche. £1 sistema de altavoces
interino queda automáticamente
desactivado cuando se enchufan los
auriculares a la toma
HEADPHONE. La toma
HEADPHONE/AUX. OUT también
puede utilizarse para suministrar la
salida del PSR—38 a un amplificador
de teclado sistema de sonido estéreo,
de alfa fidelidad, consola de mezcla o
grabadora de cintas.
(consulte la página 46)
* Emplee un ajuste del control
MASTER VOLUME relativamente
bajo cuando conecte el PSR—38 a
un sistema estéreo. Emplee el
control del volumen del sistema
para ajustar el volumen.
@ Conectores de entrada y salida
MIDI (MIDI IN y OUT)
El conector MIDI IN recibe datos
MIDI de un dispositivo MIDI
exterior que puede usarse para
controlar el PSR—38. El conector
MIDI OUT transmite los datos MIDI
generados por el PSR-38 (por
ejemplos, datos de notas y de
velocidad producidos al tocar el
teclado). En el apartado
"FUNCIONES MIDI" de la página
36 se dan más detales sobre MIDI.
8
Page 10
ENJOY THE
DEMO
ECOUTE DE LA
DEMOSTRACION
DEMONSTRATION
To give you an idea of the PSR-38's
sophisticated capabilities, it is
programmed with a demonstration
sequence which play automatically while
demonstrating a number of the
instrument's voices.
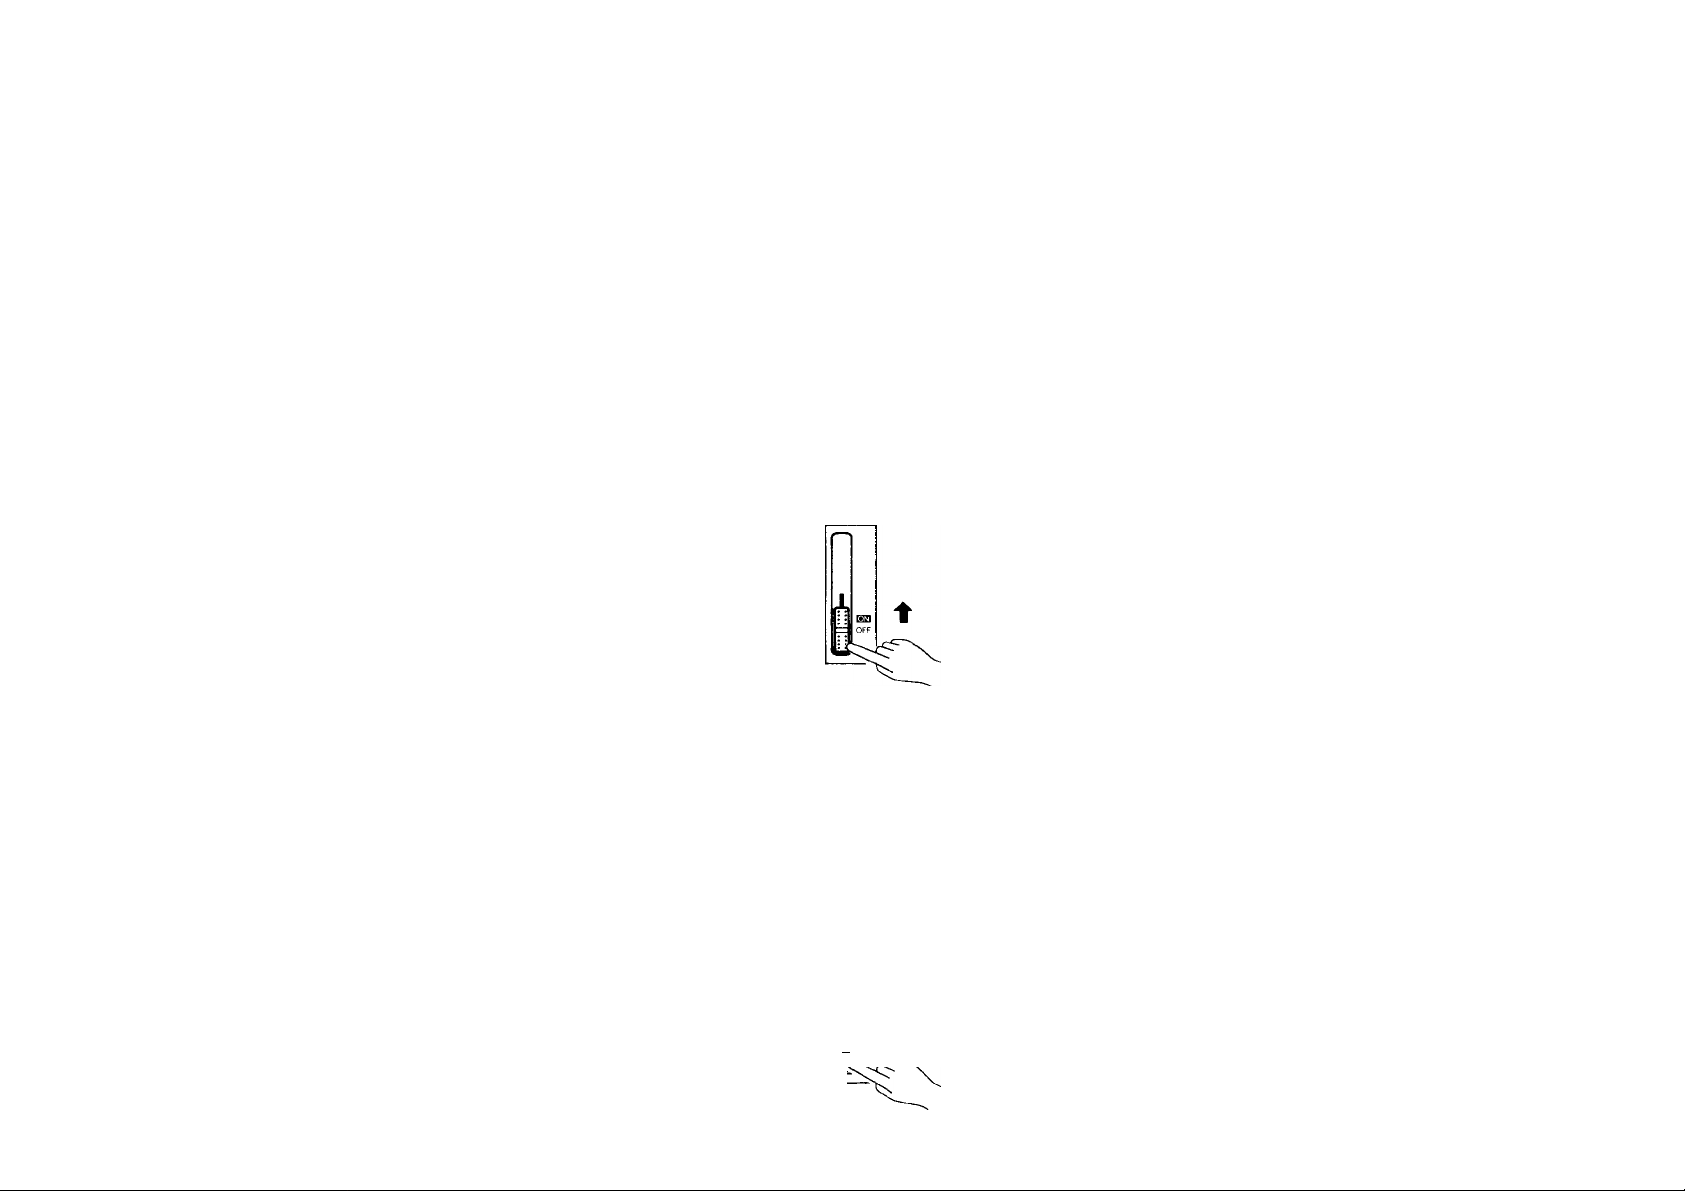
1. Switch ON
Slide the POWER switch ©to the ON
position. The VOICE/ TEMPO display
light when the power is ON.
2. Set an Initial Volume Level
Slide the MASTER VOLUME control
©to a position about half way
between the "MIN" and "MAX" setting.
You can set this control for the most
comfortable volume levb! after
playback begins.
WIEDERGABE
Um Ihnen eine Vorstellung von den
vielseitigen Funktionen des PSR-38 zu
geben, haben wir ein kleines Demostück
einprogrammiert, das automatisch
abgespielt werden kann und Ihnen
einige Stimmen des PSR—38
demonstriert.
L Das Gerät einschalten.
Schieben Sie den POWER-Schalter
©in die Position ON. Bei
eingeschaltetem Keyboard leuchtet
das VOICE/ TEMPO/ PITCH/
VOLUME-Display (g)auf.
2. Die Anfangslautstärke
einstellen.
Schieben Sie den MASTER
VOLUME-Regler ©ungefähr in die
Mitte zwischen "MIN"- und "MAX"Stellung. Nach Spielbeginn können
Sie den Regler dann auf die
gewünschte Lautstärke einstellen.
MUSIQUE DE
DEMONSTRATION
Afin de donner une idée des possibilités
sophistiquées de l'instrumenî, le PSR-38 a
été programmé avec une séquence
musicale reproduite automatiquement qui
démontre un certain nombre des voix de
l'instrument.
1. Mise sous tension
Faire coulisser l'interrupteur POWER
©sur la position ON. L' affichage
VOICE/ PITCH/ TEMPO/ VOLUME
s'allume lorsque l'instrument est mis
sous tension.
2. Réglage d'un niveau de volume
initial
Faire coulisser la commande
MASTER VOLUME ©sur une
position à mi-chemin entre les
positions "MIN" et "MAX". Régler cette
commande pour un niveau d'écoute
confortable après le début de la
reproduction.
Para que usted se haga una idea de las
sofisticadas capacidades del PSR—38,
está programado con una secuencia de
demostración que reproduce
automáticamente mientras demuestra
ciertas voces del instrumento.
L Conexión
Deslice el interruptor POWER © a
la posición ON. Se encenderá la
visualización de VOICE/ TEMPO/
PITCH/VOLUME cuando se conecte
la alimentación.
2. Ajuste un nivel de volumen
inicial
Deslice el control MASTER
VOLUMEN ©a una posición
intermedia entre "MIN" y MAX".
Podrá ajustar este control al nivel de
volumen más apropiado después de
haberse iniciado la reproducción.
MAX
1
:
—I M(N ■
Page 11

3. Press the DEMONSTRATION Button
®
The demonstration music will begin
playing as soon as you press the
DEMONSTRATION button.
The demonstratbn will play
continuously, providing samples of
different voices and accompaniment
styles, until the DEMONSTRATION
button is pressed a second time or the
STOP button @is pressed.
3. Die DEMONSTRATION-Taste ®
drücken.
Durch Drücken der
DEMONSTRATION-Tkste lösen Sie
die Demo-Wiedergabe aus.
Das Demostück wird kontinuierlich
mit wechselnden Stimmen und
Begleitstilen abgespielt. Zum
Abbrechen der Demo-Wiedergabe
müssen Sie nur die
DEMONSTRATION-Thste erneut
oder die STOP-Taste (3) drücken.
3. Appuyer sur la touche DEMONSTRATION ®
La reproduction de la séquence de
démonstration commence dès que la
touche DEMONSTRATION est
enfoncée. La séquence de
démonstration est reproduite d'une
manière continue, donnant un
échantillon des voix et styles
d'accompagnement, jusqu'à ce que la
touche DEMONSTRATION ou la
touche STOP @soit enfoncée.
3. Presione el botón
DEMOSTRATION
Se iniciará la música de
demostración así que usted presione
el botón DEMOSTRATION. La
demostración se tocará
continuamente, proporcionando
muestras de diferentes voces y
estilos de acompañamiento, hasta
que se presione por segunda vez el
botón DEMONSTRATION o hasta
que se presione el botón STOP
®
* A different voice, tempo, transposition or
other parameter can be selected at any
time while the demonstration is playing
(refer to the appropriate sections of this
manual for instructions). Such changes,
however, will only remain in effect until
the next automatic voice or
accompaniment style change.
SELECTING AND
* Sie können während der Wiedergabe
andere Stimmen wählen, das Tbmpo,
die Transponierung und andere
Parameter verändern (schlagen Sie
dazu in den entsprechenden Kapiteln
dieser Anleitung nach).
Solche Änderungen wirken jedoch nur
bis zum nächsten automatischen
Stimmenwechsel.
WÄHLEN UND
PLAYING VOICES SPIELEN VON
STIMMEN
Selecting a Voice
The PSR-38 provides two methods of
selecting any of its 100 voices:
Stimmenwahl
Beim PSR-38 können Sie auf zwei
verschiedene Arten zwischen den 100
Stimmen wählen:
* II est possible de changer la voix, le
tempo, la hauteur tonale, et autres
paramètres, pendant la reproduction de
la séquence de démonstration (voir les
instructions données dans les chapitres
de ce manuel se rapportant à ces
fonctions). Ces changements ne seront
effectifs, toutefois, que jusqu'au
changement automatique suivant de la
voix.
SELECTION ET
* Puede seleccionarse en cualquier
momento una voz, tempo o parámetros
distintos mientas se está reproduciendo
la demostración (consulte las secciones
apropiadas de este manual para ver las
instrucciones.) Sin embargo, estos
cambios, sólo tendrán efecto hasta la
siguiente voz automática.
SELECCION E
EXECUTION D'UNE INTERPRETA
VOIX CION DE VOCES
Sélection d'une voix
Le PSR-38 permet de sélectionner Tune
de ses 100 voix de deux manières
différentes:
Selección de una voz
El PSR-38 ofrece dos métodos para
seleccionar cualquiera de sus 100 voces:
10
Page 12
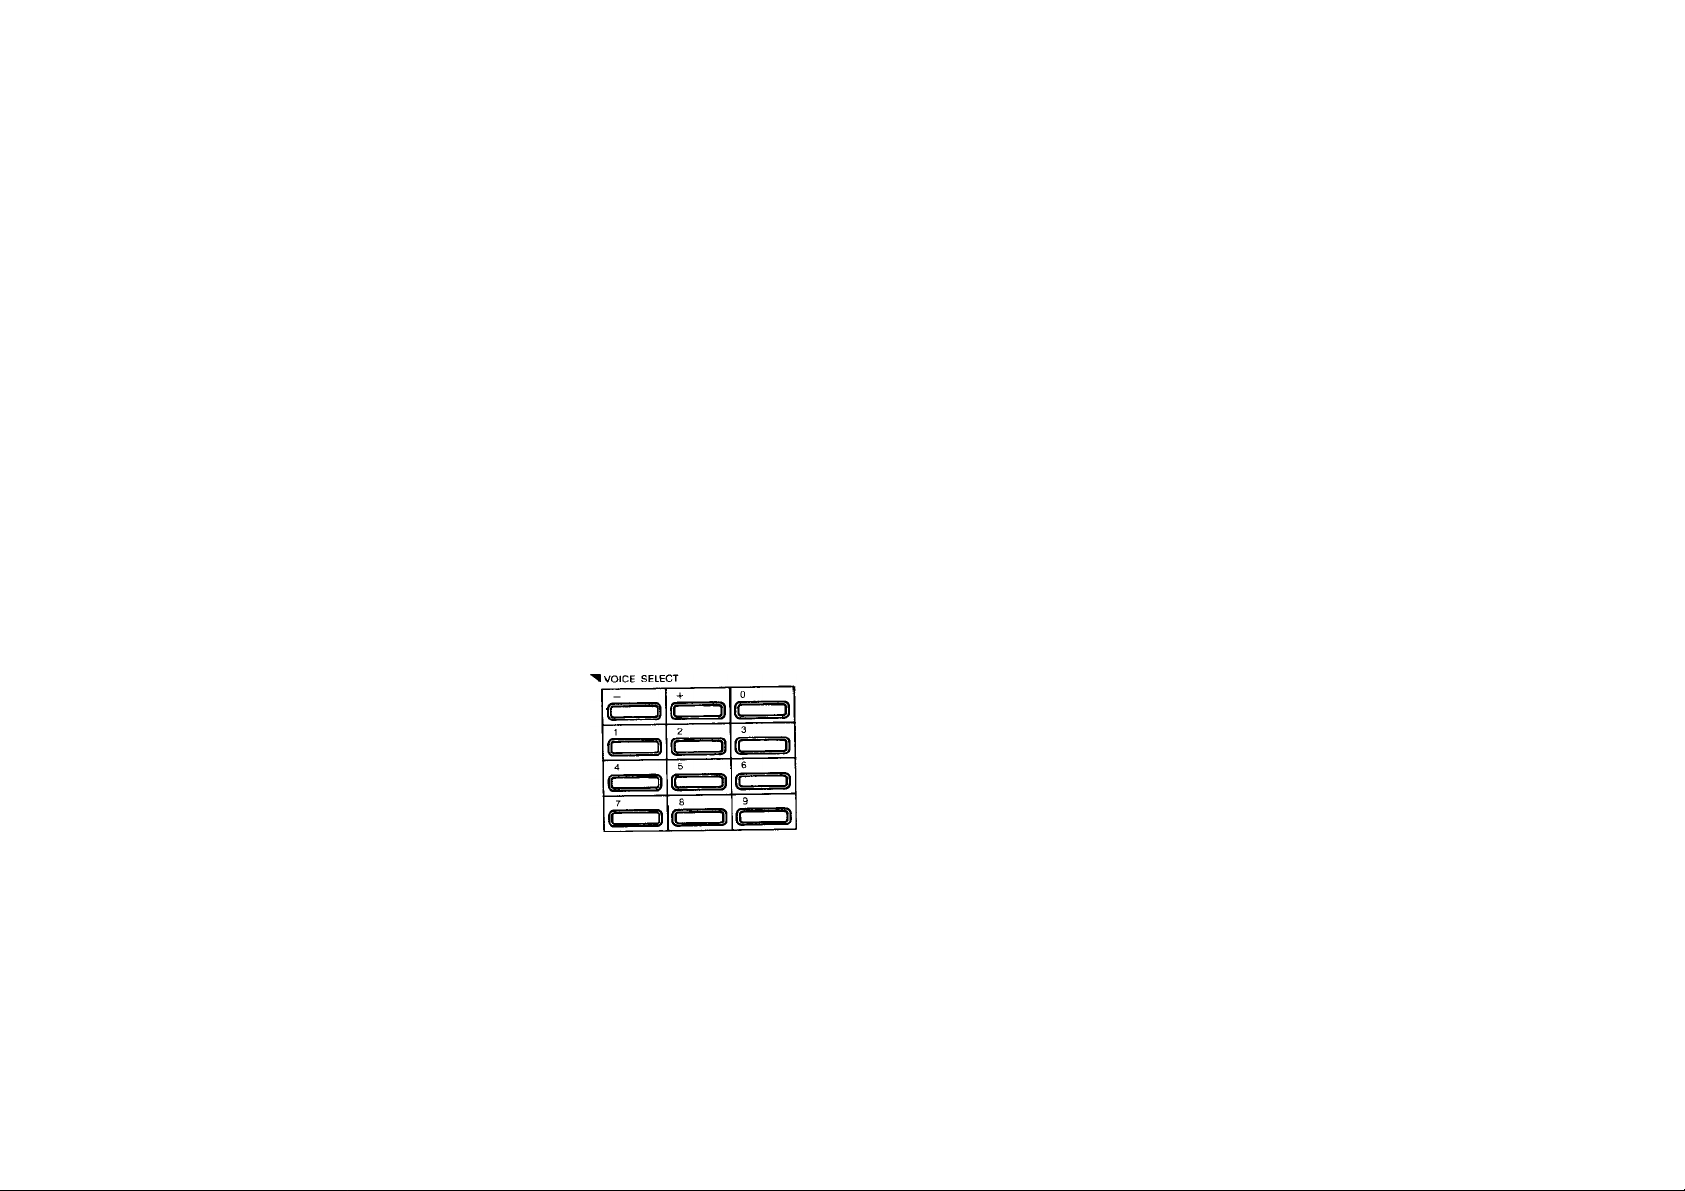
1) Choose one of the 100 voices —
numbered "00" through "99" — shown
on the VOICE LIST ©("UPPER"
section) then enter its number using
the numbered VOICE SELECT
buttons d). To select XYLOPHONE
(number 12), for example, first press
"1" and then "2". The number "12"
should then be displayed on the
VOICE/ TEMPO/ PITCH/ VOLUME
display ©.
2) The + and - buttons in the VOICE
SELECT group can be used to
increment (increase by one) or
decrement (decrease by one) the
current voice number. Press the +
button briefly to select the voice one
number higher than the current voice,
or the - button to select the voice one
number lower than the current voice. If
you hold the + or - button down, the
voice number will increment or
decrement continuously — simply
release the button when the desired
voice number has been reached.
1) Sie können eine der 100 Stimmen,
die entsprechend der Stimmenliste
© (UPPER-Bereich) von "00" bis
"99" durchnumeriert sind, durch
Eingabe der Stimmennummer
direkt abrufen. Geben Sie dazu die
Stimmennummer mit den
numerischen VOICE SELECTTasten (Dein. Wenn Sie z. B.
XYLOPHONE (Nr. 12) wählen
wollen, müssen Sie zuerst die "1"
und dann "2" antippen. Die Nummer
"12" sollte danach im VOICE/
TEMPO/ PITCH/ VOLUME-Display
©erscheinen.
2) Sie können aber auch die Stimmen
mit den Tasten + und — im VOICE
SELECT-Tastenfeld der Reihe nach
durchgehen. Durch Drücken der
Taste + wird die Stimme mit der
nächsthöheren Nummer gewählt,
während die Taste - auf die Stimme
mit der nächstniedrigeren Nummer
schaltet. Wenn Sie die Taste + oder kontinuierlich drücken, erhöht oder
senkt sich die Stimmennummer
fortlaufend. Sie brauchen dann nur
die Taste loslassen, wenn die
Nummer der gewünschten Stimme
angezeigt wird.
1) Choisir une des 100 voix (numérotées
de "00" à "99") de la liste VOICE LIST
©{section UPPER) et introduire son
numéro à l'aide des touches VOICE
SELECT (D- Pour sélectionner
XYLOPHONE (numéro 12), par
exemple, appuyer d'abord sur la
touche "1 " et ensuite sur la touche "2".
"12" sera indiqué sur l’affichage
VOICE/ TEMPO/ PITCH/ VOLUME ©
2) Les touches + et-du groupe VOICE
SELECT peuvent être utilisées pour
augmenter (de 1) ou diminuer (de 1 )
le numéro de la voix active.
Appuyer brièvement sur la touche +
pour sélectionner la voix qui suit la
voix active, ou sur la touche - pour
sélectionner celle qui la précède. Sî
les touches + ou - sont nnaintenues
enfoncées, les numéros défilent d’une
manière continue. Relâcher
simplement la touche + ou - lorsque
le numéro de la voix recherchée est
affiché.
1)
Seleccione una de las 100 voces,
numeradas de la "00" a la "99",
mostradas en la VOICE LIST ®
(sección superior "UPPER") e
introduzca entonces el número
empleando los botones numerados
VOICE SELECT ®. Para
seleccionar XYLOPHONE (el
número 12), por ejemplo,presione
primero el "1" y luego el "2".
Entonces se visualizará el número
"12" en el visualizador VOICE/
TEMPO/ PITCH/ VOLUME ©.
2) Los botones + y — del grupo VOICE
SELECT pueden usarse para
incrementar (en una) o reducir (en
una) el número de la voz actual.
Presione el botón + brevemente para
seleccionar la voz del número
inmediatamente superior a la
actualmente seleccionada, y el botón
— para seleccionar la
inmediatamente inferior de la
actualmente seleccionada. Si
mantiene presionado el botón + o
el número de voz irá incrementando
o reduciéndose continuamente;
suelte el botón cuando se haya
llegado al número de la voz deseada.
The selected voice can now be played
on the instrument's keyboard.
* When the power is initially turned ON.
the PIANO 1 voice is automatically
selected and its number ("00") is shown
on the VOICE/ TEMPO/ PITCH/
VOLUME display
* The PSR-38 features 8-note polyphony,
so up to 8 notes can be played on the
keytoard simultaneously when the
automatic accompaniment, dual voice or
chord sequencer features of this
instrument are not used.
11
Danach können Sie die gewählte
Stimme auf dem Maniial spielen.
* Beim Einschalten des Keyboards wird
die Stimme PIANO 1 automatisch
vorgewählt und deren Nummer ("00")
auf dem VOICE/ TEMPO/ PITCH/
VOLUME-Display ©angezeigt.
* Das PSR-38 bietet 8-Noten
Polyphonie, weshalb bei
ausgeschalteter DUAL VOICE, PIANO
ABC- oder SOLO STYLEPLAYFunktion bis zu 8 Noten gleichzeitig
erzeugt werden können.
nn
U U
TEMPO'PlTCHVOLüWE
qcj
TÈMPO PiTCm VOLUME
La voix sélectionnée peut alors être
jouée sur le clavier de Tinstrument.
’ La voix PIANO 1 est automatiquement
sélectionnée à la mise sous tension de
l'instrument et son numéro ("00")
apparaît sur l'affichage VOICE/ TEMPO/
PITCH/ VOLUME©.
' Le PSR-38 a une polyphonie à 8 notes,
ce qui signifie que 8 notes peuvent être
jouées simultanément sur le clavier,
lorsque les fonctions accompagnement
automatique, deux voix ou séquenceur
d'accords de l'instrument ne sont pas
utilisées.
La voz seleccionada podrá ahora
interpretarse en el teclado del
instrumento.
* Cuando se conecta la alimentación, la
voz PIANO 1 se selecciona
automáticamente y se visualiza su
número ("00") en el visualizador
VOICE/ TEMPO/ PITCH/ VOLUME
* El PSR-38 tiene polifonía de 8 notas,
por lo que pueden tocarse hasta 8 notas
simultáneamente en el teclado cuando
no se usan las caracterísicas de
accompañamiento automático, división
, conjunto, o voz doble de este
Page 13
The above mentioned features alt reduce
the number of available notes.
Bei Zuschalten einer dieser
Funktionen verringert sich die Anzahl
der gleichzeitig spielbaren Noten.
Ces fonctions réduisent le nombre de
notes disponibles.
instrumento. Las características arriba
mencionadas reducen el número de
notas disponibles.
Adjusting the Volume
Adjust the MASTER VOLUME control (2)
while playing to set the desired overall
volume level.
Adding Effects
SUSTAIN:
The PSR-38 offers two sustain effects —
SUSTAIN 1 and SUSTAIN 2. Press the
SUSTAIN 1 or SUSTAIN 2 button (9)once
(the corresponding indicator will light) and
notes played on the keyboard will decay
gradually after you lift your fingers from the
keys. Press the SUSTAIN 1 or SUSTAIN 2
button a second time (it's indicator will go
out) to turn the sustain effect off. The
SUSTAIN 2 button produces a longer
sustain effect than the SUSTAIN 1 button,
although the actual length of the SUSTAIN
1 and SUSTAIN 2 effects varies from voice
to voice.
Einstellen der Lautstärke
Stellen Sie nun die Lautstärke mit dem
MASTER VOLUME-Regler ©während
dem Spielen auf den gewünschten Pegel
ein.
Zuschalten von Effekten
SUSTAIN:
Ihr PSR-38 bietet zwei SUSTAIN- oder
NachhallefTekte — SUSTAIN 1 und
SUSTAIN 2. Wenn Sie die Taste
SUSTAIN 1 bzw. SUSTAIN 2 ©einmal
antippen (die entsprechende
Tastenanzeige leuchtet auf), klingen die
Noten nach dem Loslassen der Tasten
allmählich aus. Zum Ausschalten des
SUSTAIN-EflFekts wird die
entsprechende SUSTAIN-Taste einfach
ein zweites Mal gedrückt. Dadurch
erlischt auch die Tastenanzeige.
SUSTAIN 2 bewirkt grundsätzlich eine
langsamere Abklingung als SUSTAIN 1,
die Abklingzeiten sind jedoch von
Stimme zu Stimme unterschiedlich.
• sustain t
Réglage du volume
Utiliser la commande MASTER VOLUME
©tout en jouant joour régler
le niveau du volume d'ensemble.
I
Addition d'effets
SUSTAIN:
Le PSR—38 offre deux effets de sustain,
SUSTAIN 1 et SUSTAIN 2.
Appuyer une première fois sur la touche
SUSTAIN 1 ou SUSTAIN 2 ©(le témoin
correspondant s'allume) pour que les
notes jouées sur le clavier chutent
graduellement une fois que les doigts ont
quittés les touches. Appuyer une
deuxième fois sur la touche SUSTAIN 1 ou
SUSTAIN 2 (le témoin correspondant
s'éteint) pour arrêter l'effet de sustain.
L'effet SUSTAIN 2 est plus long que l’effet
SUSTAIN 1, bien que la durée réelle des
effets SUSTAIN 1 et SUSTAIN 2 varie
selon la voix.
o
SUSTAIN 2
3
Ajuste del volumen
Ajuste el control MASTER VOLUMEN
©mientras toca para ajustar el nivel del
volumen general.
Adición de efectos
SUSTAIN:
EL PSR-38 ofrece dos efectos de
sostenido, SUSTAIN 1 y SUSTAIN 2.
Presione el botón SUSTAIN 1 o el
SUSTAIN 2 ©una vez (se encenderá el
indicador correspondiente) y las notas
tocadas en el teclado disminuirán
gradualmente después de soltar las
teclas. Presione otra vez el botón
SUSTAIN 1 o SUSTAIN 2 (se apagará
su indicador) para desactivar el efecto de
sostenido. El botón SUSTAIN 2 produce
un efecto de sostenido más largo que el
botón SUSTAIN 1, aunque la duración
real de SUSTAIN 1 y de SUSTAIN 2
varía según la voz seleccionada.
' SUSTAIN 1 and SUSTAIN 2 cannot be
selected simultaneously.
‘ The SUSTAIN effects cannot be applied
to accompaniment or rhythm.
' SUSTAIN 1 und SUSTAIN 2 können
nicht gleichzeitig zugeschaltet werden.
' Die SUSTAIN-Effekte wirken nicht auf
Rhythmus- oder BaJV
Akkordbegleitung.
J
* Les effets SUSTAIN 1 et SUSTAIN 2 ne
peuvent pas être sélectionnés
simultanément.
* Les effets SUSTAIN ne peuvent pas être
appliqués à l'accompagnement ou au
rythme.
* No pueden seleccionarse
simultáneamente SUSTAIN 1 y
SUSTAIN 2.
* Los efectos de SUSTAIN no pueden
aplicarse al acompañamiento o ritmo.
12
Page 14

DUAL VOICE:
The DUAL VOICE feature makes it
possible to select and play two different
voices simultaneously. To activate the
DUAL VOICE feature press the DUAL
VOICE button ®(the DUAL VOICE button
indicator will light). When the DUAL
VOICE feature is ON, the last two voices
selected will sound simultaneously. For
example, if you selected PIANO 1 and
then HARP, the PIANO 1 and HARP
voices will be combined. If you then select
the VIBES voice, HARP and VIBES will be
combined, and so on. Of course, if you
turn the DUAL VOICE feature OFF (by
pressing the DUAL VOICE button a
second time), only the last selected voice
will sound.
DUAL VOICE:
Dank der DUAL VOICE-Funktion
können Sie zwei Stimmen gleichzeitig
über das ganze Manual legen. Zum
Aktivieren des DUAL VOICE-EfFekts
wird die DUAL VOICE-Ikste (Jpeinmal
angetippt (die LED-Anzeige über der
Taste leuchtet auf). Bei eingeschalteter
DUAL VOICE-Funktion erklingen die
beiden zuletzt gewählten Stimmen
gleichzeitig. Wenn Sie z. B. zuvor
PIANO 1 und dann HARP gewählt
haben, erklingen diese beiden Stimmen
beim Anschlägen von Noten zusammen.
Wenn Sie danach die Stimme VIBES
abrufen, werden die Stimmen HARP
und VIBES miteinander kombiniert
usw. Wenn Sie die DUAU VOICEFunktion durch erneutes Drücken der
DUAL VOICE-Taste ausschalten, hören
Sie nur noch die zuletzt gewählte
Stimme alleine.
DUAL VOICE:
La fonction DUAL VOICE permet de
sélectionner et de jouer simultanément
deux voix différentes. Pour activer la
fonction DUAL VOICE, appuyer sur la
touche DUAL VOICE (jj) (le témoin DUAL
VOICE s'allume). Lorsque la fonction
DUAL VOICE est activée, les deux
dernières voix sélectionnées seront jouées
ensemble. Par exemple, si la voix PIANO
1 et la voix HARP ont été sélectionnées
l'une après l'autre, les voix PIANO 1 et
HARP seront combinées. Si la voix VIBES
est ensuite sélectionnée, les voix HARP et
VIBES seront alors combinées et ainsi de
suite. Il va sans dire que si la fonction
DUAL VOICE est désactivée (en appuyant
une deuxième fois sur la touche DUAL
VOICE), seule la dernière voix
sélectionnée sera jouée.
#OUAL VOICE
DUAL VOICE:
La característica de DUAL VOICE hace
posible seleccionar y tocar dos voces
distintas simultáneamente. Para activar
la función DUAL VOICE presione el
botón DUAL VOICE (Jj)(se encenderá el
indicador DUAL VOICE). Cuando la
función DUAL VOICE esté activada, las
dos últimas voces seleccionadas sonarán
simultáneamente. Por ejemplo, si usted
seleccionó PIANO 1 y luego HARP, las
voces de PIANO 1 y HARP se
combinarán. Si entonces usted
selecciona la voz VIBES, se combinarán
HARP y VIBES, etc. Naturalmente, si
usted desactiva la función DUAL VOICE
(presionando otra vez el botón DUAL
VOICE), sólo sonará la última voz
seleccionada.
* DUAL VOICE cannot be applied to
accompaniment or rhythm.
* When DUAL VOICE is ON, the number
of notes that can be played
simuhaneously is reduced by half.
Tuning: Fine Pitch Control
Pitch control makes it possible to tune the
PSR-38 over a ±50-cent range in
approximately 3.4-cent intervals. A
hundred "cents" equals one semitone, so
the tuning range provided allows fine
tuning of overall pitch over a range of
approximately a semitone. Pitch control is
useful for tuning the PSR-38 to match
other instruments or recorded music.
13
* Der DUAL VOICE-Effekt wirkt nicht
auf Rhythmus- oder Baß/
Akkordbegleitung.
* Bei aktiviertem DUAL VOICE-Effekt
reduziert sich die Anzahl der simultan
erzeugbaren Noten auf die Hälfte.
Feinstimmen: Die Feinstimmtas ten
Mittels der PITCH-Tasten ©können Sie
das PSR-38 in einem Bereich von ±50
Cent in Schritten von ca. 3,4 Cent
feinstimmen. Da 100 Cent einem
Halbton entsprechen, beträgt der
Feinstimmbereich insgesamt einen
Halbton. Diese Feinstimmfunktion ist
äußerst praktisch, um das PSR—38 auf
andere Instrumente oder Aufnahmen
einzustimmen.
* La fonction DUAL VOICE ne peut pas
être appliquée à l'accompagnement ou
au rythme.
* Lorsque la fonction DUAL VOICE est
activée, le nombre de notes pouvant être
jouées simultanément est réduit de
moitié.
Accord: Réglage précis de la hauteur
Cette fonction de réglage de la hauteur
permet d'accorder le PSR-38
sur une plage de ±50 centièmes par bonds
approximatifs de 3 à 4 centièmes. Cent
centièmes égalent un demi-ton, de sorte
qu'il est possible d’accorder avec une
grande précision la hauteur d'ensemble
sur une plage approximative d'un demi-
ton. Cette fonction est utile pour accorder
le PSR-38 sur un autre instrument ou sur
de la musique enregistrée.
* DUAL VOICE no puede aplicarse al
acompañamiento ni ritmo.
* Cuando la función DUAL VOICE está
activada, el número de notas que
pueden tocarse simultáneamente se
reduce a la mitad.
Afinación: Control preciso
del tono
El control del tono hace posible afinar el
PSR-38 en un margen de ±50
centésimas en aproximadamente
intervalos de 3,4 centésimas. Cien
centésimas es igual a un semitono, por lo
que el margen de afinación ofrecido
permite la afinación precisa del tono
general en un margen aproximado de un
semitono. El control del tono es útil para
afinar el PSR-38 para que corresponda
con otros instrumentos o música
grabada.
Page 15
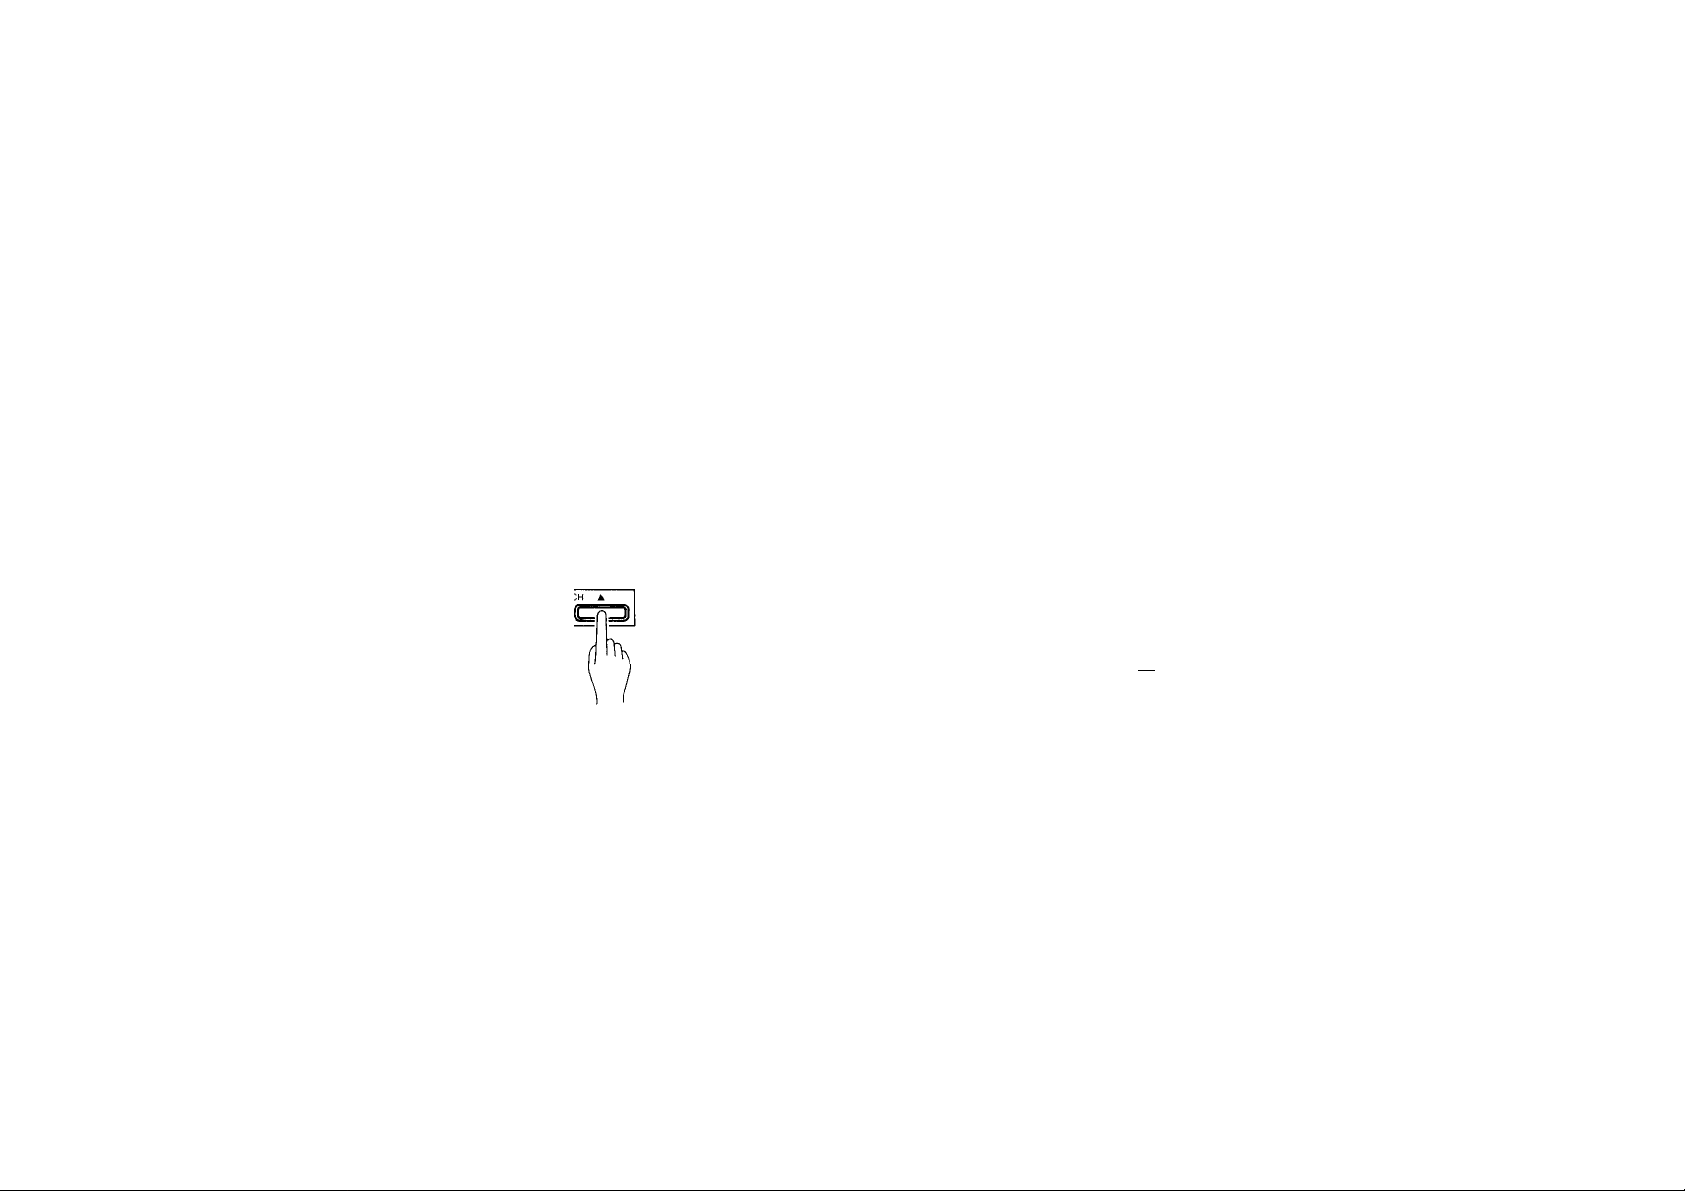
Press the PITCH A button (Q)to tune up,
or the PITCH T button to tune down. The
selected degree of tuning will be displayed
on the VOICE/ TEMPO/ PITCH/ VOLUME
display @while the PITCH A or T button
is pressed, and for approximately 3
seconds after either PITCH button is
released.
The tuning range is from -16 to 16, with
-16 corresponding to downward tuning by
approximately 50 cents (one quarter tone),
and 16 corresponding to upward tuning by
approximately 50 cents. 0 is the "normal"
pitch value, at which the A3 key (the A
above middle C) produces "concert pitch":
440 Hertz. The normal pitch value (0) can
be recalled at any time by pressing both
the PITCH A and T buttons at the same
time (the pitch value is automatically set to
0 whenever the power switch is turned
ON).
Drücken Sie die Taste PITCH A (¡J), urn
die Tbnlage zu erhöhen und PITCH ▼,
um die Ibnlage zu senken. Der
eingegebene Stimmw'ert wird vom
VOICE/ TEMPO/ PITCH/ VOLUME-
Display @ während des Drückens der
PITCH-Tasten und bis zu 3 Sekunden
nach Loslassen der Taste angegeben.
Der Stimmbereich liegt zwischen —16
und 16, wobei -16 einer
Tonlagensenkung von ca, 60 Cent (1
Viertelten) entspricht, während 16 eine
Tonlagenerhöhung um 50 Cent bedeutet.
0 ist die Standardstimmung, bei der die
Manual taste A3 (das A über dem
mittleren C) einen Kammerton A
erzeugt. Sie können jederzeit durch
gleichzeitiges Drücken der PITCH-
Tasten A und ▼ auf die
Standardstimmung rückstellen. Nach
Einschalten des PSR-38 ist stets die
Standardstimmung voreingestellt.
Appuyer sur la touche PITCH A @pour
monter l’instrument et sur la touche PITCH
▼ pour le baisser. L'ampleur de la
modification de la hauteur est indiquée sur
l'affichage VOICE/ TEMPO/ PITCH/
VOLUME (S*pendant que la touche PITCH
A ou ▼ est maintenue enfoncée et
pendant 3 secondes environ après qu'elle
soit relâchée.
La plage de réglage va de -16 à 16, -16
correspondant à une baisse
de la hauteur d'environ 50 centièmes (un
quart de ton) et 16 à une montée de 50
centièmes. "0" correspond à la hauteur
"normale", c'est-à-dire la hauteur à
laquelle la touche A3 (la touche A au-
dessus de la touche C centrale) produit la
"hauteur de concert", à savoir 440 Hertz.
La hauteur normale (0) peut être rétablie à
tout moment en appuyant simultanément
sur les touches PITCH A et T (la hauteur
est automatiquement réglée à 0 à chaque
mise sous tension de l'instrument).
Presione el botón A de PITCH @ A para
afinar más alto, o el botón ▼ de PITCH
para afinar más bajo. El grado
seleccionado de afinación se visualizará
en el visualizador de VOICE/ TEMPO/
PITCH/ VOLUME ©mientras se
presiona el botón A o ▼ de PITCH, y
durante unos 3 segundos después de
haber soltado el botón PITCH.
El margen de transposición es de -16 a
16, siendo -16 el valor correspondiente a
la afinación descendiente en unas 50
centésimas (un cuarto de tono), y 16 el
valor correspondiente a la afinación
ascendiente aproximadamente en 50
centésimas. 0 es el valor del tono
"normal", en el que la tecla A3 (la A
encima de la C del medio) produce el
"tono de concierto"; 440 Hz. El valor de
tono normal (0) puede reactivarse en
cualquier momento presionando al
mismo tiempo ambos botones A y T de
PITCH (el valor del tono se ajusta
automáticamente a 0 siempre que se
conecta la alimentación).
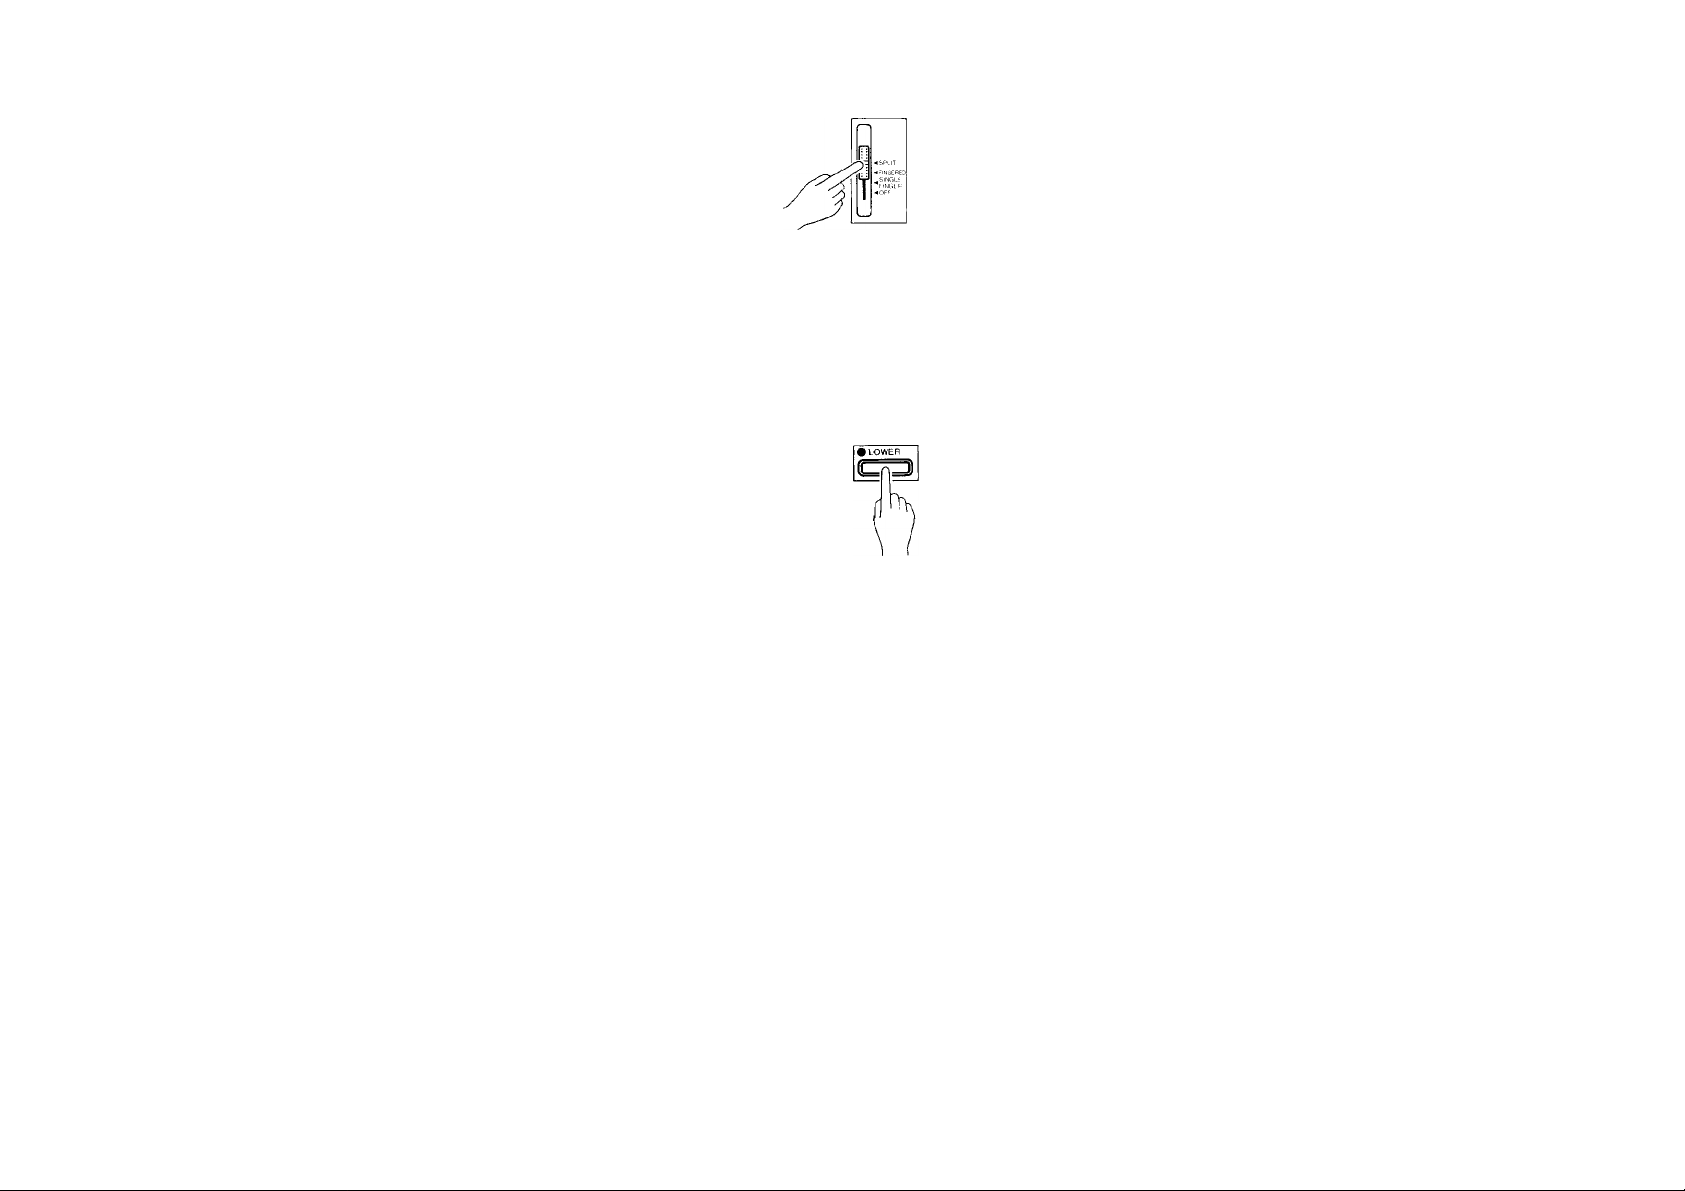
The SPLIT Mode: Separate
Left- and Right-hand Voices
The PSR-38 allows you to play two voices
at once — one with the left hand and one
with the right. The lower voice can be
played on the Auto Bass Chord keys, up to
one the"]" marking immediately above
the keyboard. The "]" marking is called the
SPLIT POINT
1. Select the SPLIT Mode
Slide the AUTO BASS CHORD
selector (3)to the SPLIT position.
Manualteilung:
Verschiedene Stimmen für
linke und rechte Hand
Mit der Manual teil - bzw. SPLITPunktion des PSR-38 können Sie zwei
verschiedene Stimmen für tiefen
(linken) und hohen (rechten)
Manualbereich wählen. Die tiefe
Stimme wird in dem durch Auto Bass
Chord gekennzeichneten und durch die
Markierung "]" abgegrenzten
Manualbereich gespielt. Die Markierung
"]" wird als Teilungspunkt bezeichnet.
L Auf SPLIT-Modus schalten.
Schieben Sie den AUTO BASS
CHORD-Wähler Q)in die SPLITStellung.
n
~lb
TEMPO PI’‘CH VOLUME TEMPO'PIlCH VOLUME
U
Mode SPLIT: Voix de la main
droite et voix de la main
gauche indépendantes
Le PSR-38 permet de jouer deux voix en
même temps; une voix de la main gauche
et une voix de la main droite. La voix
basse peut être jouée sur les touches de
la section accords et basses automatique,
allant jusqu'au repère "]" marqué
immédiatement au-dessus du clavier. Le
repère "]" est appelé POINT DE SPLIT.
1. Sélectionner le mode SPLIT
Faire coulisser le sélecteur AUTO
BASS CHORD Q)s ur la position
SPLIT.
I c
I U
/ J'
TEMPO PITCH VOLUME
El modo SPLIT: Voces de
la izquierda y de la
derecha separadas
El PSR-38 permite tocar dos voces a la
vez, una con la mano izquierda y la otra
con la derecha. La voz inferior puede
tocarse en las teclas de acompañeimiento
automático de bajo y acordes hasta la
tecla de la marca "]" de encima del
teclado. La marca "]" se denomina punto
de división (SPLIT POINT).
L Seleccione el modo SPLIT.
Deslice el selector AUTO BASS
CHORD d)a la posición SPLIT.
14
Page 16
^^UTO BASS CHORD
2. Press the LOWER Button ®
The LOWER button LED will light,
indicating that is now possible to
select a voice for the lower keyboard
(i.e. the Auto Bass Chord key section).
3. Select the Lower Voice
Select a lower voice from the
"LOWER” section of the PSR-38
VOICE LIST (00 through 19) using the
normal voice-selection procedure.
The number of the selected voice will
appear on the VOICE/ TEMPO/
PITCH/ VOLUME display®). Once
the lower voice(s) has been selected,
the VOICE/ TEMPO/ PITCH/
VOLUME display will revert to the
upper voice number in about 5
seconds.
4. To Select an Upper Keyboard Voice
Press the LOWER button ® so that
the LOWER button LED goes out,
then select the desired upper voice (if
the DUAL effect is selected, you can
select two voices one after the other).
2. Die LOWER-Taste (0) drücken.
Damit leuchtet die LED-Anzeige der
LOWER-Taste auf und Sie können
jetzt eine Stimme für den tiefen, d.
h. linken Manualbereich (Auto Bass
Chord-Bereich) wählen.
3. Die Stimme für den tiefen
Manualbereich wählen.
Wählen Sie nun eine Stimme aus
der LOWER-Stimmenliste (00 bis
19) mit dem normalen Verfahren.
Die Nummer der gewählten Stimme
wird vom VOICE/ TEMPO/ PITCH/
VOLUME-Display ® angegeben.
Nach dem Wählen der Stimme(n)
für den tiefen Manualbereich,
schaltet das VOICE/ TEMPO/
PITCH/VOLUME-Display nach ca.
5 Sekunden auf die Stimmennr. für
den rechten (UPPER)
Manualbereich zurück.
4. Eine Stimme für den oberen
Manualbereich wählen.
Drücken Sie zunächst die LOWERTaste damit deren LED-Anzeige
ausgeht und wählen Sie dann die
Stimme für den oberen
Manualbereich. Bei zugeschaltetem
DUAL VOICE-Effekt können Sie
zwei Stimmen nacheinander
wählen.
2. Appuyer sur la touche LOWER®
Le témoin à LED LOWER s’allume, ce
qui indique qu'il est possible de
sélectionner une voix pour la partie
basse du clavier (c’est-à-dire la
section AUTO BASS CHORD).
3. Sélectionner la voix basse
Sélectionner la voix basse dans la
section "LOWER" de la liste des voix
(00 à 19) du PSR-38 de la manière
normale. Le numéro de la voix ainsi
sélectionnée apparaîtra sur l'affichage
VOICE/ TEMPO/ PITCH/ VOLUME (g)
. Une fois que la ou les voix basses
ont été sélectionnées, l'affichage
VOICE/ TEMPO/ PITCH/ VOLUME
revient à l'indication du numéro de la
voix de la section haute au bout
d'environ 5 secondes.
4. Sélection de la voix de la section haute
Appuyer sur la touche LOWER ®,
afin d'éteindre le témoin à LED
LOWER, et sélectionner ensuite la
voix de la section haute (si l'effet
DUAL a été activé, il est possible de
sélectionner deux voix l'une après
l'autre).
2. Presione el botón LOWER ®.
Se encenderá el LED del botón
LOWER, indicando que ahora es
posible seleccionar una voz para el
teclado inferior (es decir, para la
sección de teclas de AUTO BASS
CHORD).
3. Seleccione la voz de la sección
inferior
Seleccione una voz de la sección
inferior en la sección "LOWER" de la
lista VOICE LIST del PSR-38 (00 a
19) empleando el procedimiento
normal de selección de voces. El
número de la voz seleccionada
aparecerá en el visualizador VOICE/
TEMPO/PITCH/ VOLUME ®. Una
vez se haya seleccionado la voz (o
voces) de la sección inferior, el
visualizador de VOICE/ TEMPO/
PITCH/VOLUME cambiará al
número de la voz de la sección
superior en unos 5 segundos.
4. Para seleccionar una voz del
teclado superior
Presione el botón LOWER ® de
modo que se apague el LED de
LOWER, y seleccione entonces la
voz superior deseada (si se
selecciona el efecto DUAL, usted
podrá seleccionar dos voces, una
después de otra).
15
Page 17

5. Lower and Upper Voice Volume Control
In the SPLIT mode, the volume of the
lower keyboard voice is controlled by
the ACCOMPANIMENT VOLUME
buttons. Press the ▲ button to
increase the volume, or the T button
to decrease the volume. The selected
volume level will be displayed on the
VOICE/ TEMPO/ PITCH/ VOLUME
display while the volume is being
adjusted, and for approximately 3
seconds after either VOLUME button
is released.
The volume range is from 0 to 9, with
0 being the lowest volume (no sound)
and 9 the highest. The "normar
volume value of 7 can be recalled at
any time by pressing both the
ACCOMPANIMENT VOLUME A and
T buttons (6)at the same time (the
volume is automatically set to 7
whenever the power switch is turned
ON). Use the ACCOMPANIMENT
VOLUME buttons and the MASTER
VOLUME control to set the balance
between the lower and upper voices.
* If the SPLIT mode is selected when the
power switch 0 is turned ON, the
PIANO (00) voice is automatically
selected for both the upper and lower
keyboard.
* In the SPLIT mode, 4 notes can be
played simultaneously on the lower
keyboard and 4 notes can be played
simultaneously on the upper keyboard (if
the DUAL function Is used, 2 notes can
be played on the upper keyboard).
5. Abstimmen der Lautstärke von
oberer und unterer Stimme
Im SPLIT-Modus wird die
Lautstärke der Stimme(n) des
unteren Manualbereichs über die
ACCOMPANIMENT VOLUME-
Tasten (Deingestellt. Die Taste A
erhöht und die Taste ▼ vermindert
die Lautstärke der Begleitung. Die
Lautstärke wird während und bis 3
Sekunden nach Drücken einer der
ACCOMPANIMENT VOLUMEIhsten ®vom VOICE/ TEMPO/
PITCH/ VOLUME-Display
angezeigt.
Die Einstellbereich liegt zwischen 0
und 9, wobei 0 den niedrigsten
(kein Ihn) und 9 den höchsten Pegel
repräsentiert. Die normale
Lautstärke liegt bei 7. Sie können
jederzeit durch gleichzeitiges
Drücken der ACCOMPANIMENT
VOLUME-Tasten A und ▼ auf
diesen Wert rückstellen. Beim
Einschalten des PSR-38 wird die
Begleitungslautstärke automatisch
auf 7 eingestellt. Gleichen Sie das
Lautstärkeverhältnis zwischen
Melodie- und Begleitstimmen mit
dem MASTER VOLUME-Regler und
den ACCOMPANIMENT VOLUME-
Tasten ab.
* Falls der AUTO BASS CHORD-Wähler
beim Einschalten in der SPLITPosition steht, wird die Stimme PIANO
1 (00) automatisch der oberen und
unteren Manualhälfte zugewiesen.
* Im SPLIT-Modus können auf der
oberen Manualhälfte maximal 4 Noten
zugleich erzeugt werden. Bei
aktiviertem DUAL VOICE-Effekt kann
der rechte Manualbereich nur zwei
Stimmen gleichzeitig erzeugen.
5. Réglage du volume de la voix basse et de la voix haute
En mode SPLIT, le volume de la voix
de la section basse du clavier peut
être réglé à l'aide des touches
ACCOMPANIMENT VOLUME.
Appuyer sur la touche A pour
augmenter le volume et sur la touche
▼ pour le diminuer. Le niveau
sélectionné sera indiqué sur
l’affichage VOICE/ TEMPO/ PITCH/
VOLUME pendant le réglage du
volume et pendant environ 3
secondes après que la touche
VOLUME sollicitée soit relâchée.
La plage de réglage du volume va de
0 à 9, 0 étant le niveau le plus bas
(pas de son) et 9 le niveau le plus
haut. Le niveau "normar, ou niveau 7,
peut être rétabli à tout moment en
appuyant simultanément sur les
touches ACCOMPANIMENT
VOLUME A et T ®{\e volume est
automatiquement réglé à 7 à chaque
mise sous tension de l’instrument).
Utiliser les touches
ACCOMPANIMENT VOLUME et la
commande MASTER VOLUME pour
régler l'équilibre entre les voix de la
section haute et de la section basse.
* Si le mode SPLIT a été sélectionné
avant la mise sous tension de
l'instrument, la voix PIANO (00) sera
automatiquement sélectionnée pour la
section haute et la section basse du
clavier.
* En mode SPLIT, 4 notes peuvent être
jouées simultanément sur la partie basse
du clavier et 4 notes sur la partie haute.
(Si la fonction DUAL est utilisée, 2 notes
peuvent être jouées sur la partie haute
du clavier).
5. Contx^l del volumen de las voces
inferior y superior
En el modo SPLIT, el volumen de la
voz del teclado inferior se controla
con los botones ACCOMPANIMENT
VOLUME. Presione el botón A para
aumentar el volumen, o el botón ▼
para reducirlo. El nivel de volumen
seleccionado se visualizará en el
visualizadoT de VOICE/ TEMPO/
PITCH/VOLUME mientras se
ajusta el volumen, y durante unos 3
segundos después de haber soltado
cualquiera de los botones
ACCOMPANIMENT VOLUME.
El margen de volumen es de 0 a 9,
siendo 0 el nivel más bajo de
volumen (sin sonido) y 9 el más alto.
El valor de volumen "normal" de 7
puede reactivarse en cualquier
momento presionando los botones A
y ▼ de ACCOMPANIMENT
VOLUME 0al mismo tiempo (el
volumen se ajusta automáticamente
a 7 siempre que se conecta el
interruptor de la alimentación.)
Emplee los botones
ACCOMPANIMENT VOLUME y el
control MASTER VOLUME para
ajustar el balance entre las voces
inferior y superior.
* Si se selecciona el modo SPLIT cuando
se conecta el interruptor de la
alimentación 0, se selecciona
automáticamente la voz de PIANO (00)
para el teclado superior e inferior.
* En el modo SPLIT, pueden tocarse 4
notas simultáneamente en el teclado
inferior y pueden tocarse 4 notas
simultáneamente en el teclado superior
(si se usa la función DUAL, pueden
tocarse 2 notas en el teclado superior).
16
Page 18

Try playing this in the Split mode.
(A Little Brown Jug)
Play the bass part on the lower keyboard
section and the melody part on the upper
keyboard.
Panel Settings
Accompaniment Style: Big Band
Tempo: 16 ( J =120)
AUTO BASS CHORD Selector; SPLIT position
Upper Voice: 30 Clarinet
Lower Voice: 17 Elec. Bass
Versuchen Sie einmal dieses
Stück im SPLIT-Modus zu
spielen
(A Little Brown Jug)
Spielen Sie die BaBstimme im tiefen, und die
Melodiestimme im oberen Manualbereich.
Einstellungen:
Begleitungsstil: Big Band
Tempo: 16 ( J =120)
AUTO BASS CHORD-Wähler: SPUTPosition
Stimme für oberen Manualbereich: 30
Clarinet
Stimme für tiefen Manualbereich: 17 Elec.
Bass
Essayer de jouer ceci en mode
SPLIT
(A Little Brown Jug)
Jouer la partie basse de la main gauche et
la mélodie de la main droite.
Réglages de panneau
Style d'accompagnement: Big Band
Tempo: 16 (J =120)
Sélecteur AUTO BASS CHORD: Position SPLIT
Voix section haute: 30 Clarinet
Voix section basse: 17 Elec. Bass
A Intente tocar esto en el modo
SPLIT
(A Little Brown Jug)
Ibque 1 aparte del bajo en la sección del
teclado inferior y la parte de la melodía en el
teclado superior.
Ajustes del panel
Estilo de acompañamiento: Big Bsind
Tempo: 16 ( J =120)
Selector AUTO BASS CHORD: Posición
SPLIT
Voz superior: 30 Clarinet
Voz inferior 17 Elec. Bass
USING THE
ACCOMPANIMENT
SECTION
Rhythm Accompaniment
Selecting an Accompaniment
Style
The PSR-38 provides 24 different
accompaniment styles that can be
selected simply by pressing the
appropriate button ®.
17
DIE
BEGLEITUNGS
FUNKTIONEN
Schlagzeugbegleitung
Wahl des Begleitungsstils
Beim PSR-38 können Sie durch
Drücken der entsprechenden
ACCOMPANIMENT STYLE SELECTTaste ® zwischen 24 Begleitstilen
wählen.
UTILISATION DE
LA SECTION
□'ACCOM PAG N EM
ENT
Accompagnement rythmique
Sélection d'un style
d'accompagnement
Lg PSR-38 offre 24 styles
d'accompagnement différents qui peuvent
être sélectionnés en appuyant sur la
touche correspondante ®.
EMPLEO DE LA
SECCION DE
ACOMPAÑAMIEN
TO
Acompañamiento rítmico
Selección de un estilo de
acompañamiento
El PSR—38 ofrece 16 estilos de
acompañamiento distintos que pueden
seleccionarse presionando simplemente
el botón apropiado.
Page 19

* When the power is initially turned ON,
the DISCO 1 accompaniment style is
automatically selected.
* Only one accompaniment style can be
selected at a time.
ACCOWPANIMFNT STYl F SELFCT
DISCC i- POPS
DISCO I
(i
----------------
PAP BIG BÄMD
(í
----------------
r.nuNTRY RATiTlWF
PAROOl ir
GAMBA
RMUMD&
U
----------------
ü
il
-------------
* Beim Einschalten des Keyboards wird
der Stil DISCO 1 automatisch
vorgewählt.
* Sie können jeweils nur einen
Begleitungsstil auf einmal wählen.
i «—«
A
J
SWING
Il li
r=*m
B03GA NCVA
B II
ICBEAT
«
-----------------
ll
BOuNce HOCK
r=— ii
TANÍ'.n RFGGAF
(1
_____
J
»✓ AnCH fOLKA
<1 ti
ROCK N ROLL
ti
________
SLOW ROCK
l(
----------------
(Î
----------------
WALT.-:
(í
________
hEAVY METAL
i(
---------------
!l
BALLAD
«
SA( SA
»
i
-----------------
JAZZ waltz
It J
Ï
Ji
D
* Le style d’accompagnement DISCO 1 est
automatiquement sélectionné à la mise
sous tension.
* Il n'est possible de sélectionner qu’un
seul style d'accompagnement à la fois.
* Cuando se conecta la alimentación, se
selecciona automáticamente el estilo de
acompañamiento DISCO 1.
* Sólo puede seleccionarse un estilo de
acompañamiento a la voz.
Adjusting the Accompaniment Volume
The ACCOMPANIMENT VOLUME A and
▼ buttons can be used to adjust the
volume of the accompaniment in relation
to the overall volume set by the MASTER
VOLUME control. Press the A button to
increase the volume, or the ▼ button to
decrease the volume. The selected
volume level will be displayed on the
VOICE/TEMPO/ PITCH / VOLUME
f
display while the volume is being adjusted,
and for approximately 3 seconds after
either VOLUME button is released.
The volume range is from 0 to 9, with 0
being the lowest volume (no sound) and 9
the highest. The "normal" volume value of
7 can be recalled at any time by pressing
both the ACCOMPANIMENT VOLUME A
and ▼ buttons cDat the same time (the
volume is automatically set to 7 whenever
the power switch is turned ON).
Einstellen der Begleitungslautstärke
Während der MASTER VOLUMERegler (|)die Gesamtlautsttärke festlegt,
dienen die Tasten ACCOMPANIMENT
VOLUME-Tasten A und T zum
Einstellen des Lautstärkeverhältnis
zwischen der Begleitung und der von
Ihnen gewählten SpielstiTnme(n), wobei
A die Begleitungslautstärke erhöht und
▼ sie vermindert. Der eingegebene
Lautstärkepegel wird vom VOICE/
TEMPO/ PITCH/ VOLUME-Display @
angezeigt, während und bis zu 3
Sekunden nach Einstellen der
Lautstärke mit den ACCOMPANIMENT
VOLUME-Tasten.
Der Einstellbereich liegt zwischen 0 und
9, wobei 0 den niedrigsten und 9 den
höchsten Pegel bewirkt. Bei 0 ist die
Begleitung stummgeschaltet. Der
Normalwert liegt bei 7. Durch
gleichzeitiges Drücken der beiden
ACCOMPANIMENT VOLUME-Thsten
A und ▼ (Dkönnen Sie jederzeit auf den
Normalwert 7 rückstellen. Die
Lautstärke ist beim Einschalten
Réglage du volume de
l'accompagnement
Les touches ACCOMPANIMENT
VOLUME A et ▼ permettent de régler le
volume de l’accompagnement par rapport
au volume d'ensemble réglé à l'aide de la
commande MASTER VOLUME. Appuyer
sur la touche
et sur la touche T pour le diminuer. Le
niveau sélectionné sera indiqué sur
l’affichage VOICE/ TEMPO/ PITCH/
VOLUME pendant le réglage du volume et
pendant environ 3 secondes après que la
touche VOLUME sollicitée soit relâchée.
La plage de réglage du volume va de 0 à
9, 0 étant le niveau le plus bas (pas de
son) et 9 le niveau le plus haut. Le niveau
"normal", ou niveau 7, peut être rétabli à
tout moment en appuyant simultanément
sur les touches ACCOMPANIMENT
VOLUME A et ▼ 0(le volume est
automatiquement réglé à 7 à chaque mise
sous tension de l'instrument).
A pour augmenter le volume
Ajuste del volumen del
acompañamiento
Los botones A y ▼ de
ACCOMPANIMENT VOLUME le
permiten ajustar el volumen del sonido
de acompañamiento con relación al
volumen general ajustado con el control
MASTER VOLUME. Presione el botón
A para aumentar el volumen o el botón
▼ para reducirlo. El nivel de volumen
seleccionado se visualizará en el
visualizador VOICE/ TEMPO/ PITCH/
VOLUME mientras se ajusta el
volumen, y durante unos 3 segundos
después de haber soltado cualquiera de
los botones VOLUME.
El margen de volumen es de 0 a 9,
siendo 0 el nivel más bajo de
volumen (sin sonido) y 9 el más alto. El
valor de volumen "normal"
de 7 puede reactivarse en cualquier
momento presionando los botones A y ▼
de ACCOMPANIMENT VOLUME ® al
mismo tiempo (el volumen se ajusta
automáticamente a 7 siempre que se
conecta el interruptor de la
alimentación.)
automatisch auf 7 eingestellt.
18
Page 20

Setting the Tempo
Press the ACCOMPANIMENT TEMPO ▲
button (Dto increase the tempo, or the
ACCOMPANIMENT TEMPO ▼ button to
decrease the tempo.
Einstellen des Tempos
Durch Drücken der ACCOMPANIMENT
TEMPO-Taste A ©erhöhen Sie und
durch die ACCOMPANIMENT TEMPOTaste ▼ vermindern Sie das Tempo der
Begleitung.
Í ACCOMPANIMENT
n
I
LI
—n
TEMPO'PITCHVOLUMF
01
(J=40)
Réglage du tempo
Appuyer sur la touche ACCOMPANIMENT
TEMPO A ©pour accélérer le tempo et
sur la touche ACCOMPANIMENT TEMPO
▼ pour le ralentir.
15 35
TÈMPC/PITCH'VOLUME
16
(>120)
TEMPO'PITC-HA'OLUME
35
(J=280)
Ajuste del tempo
IVesione el botón A de
ACCOMPANIMENT TEMPO ©para
aumentar el tempo, o eì botón ▼ de
ACCOMPANIMENT TEMPO ©para
reducirlo.
The selected tempo will be displayed on
the VOICE/ TEMPO/ PITCH/ VOLUME
display while the ACCOMPANIMENT
TEMPO A or ▼ button ® is pressed as
follows;
Das gewählte Tempo wird vom VOICE/
TEMPO/ PITCH/ VOLUME-Display @
folgendermaßen während dem Drücken
einer der ACCOMPANIMENT TEMPOTasten ©angezeigt:
Dtsplay
Beats/Mínute
Ot
02
03
04
05
06
07 62
06
09 92
10
11
12
13
14 112
16
16
17
40
46
56 20
64
70 22
76
88
96 £7
100
104
106
116
120
126
Le tempo sélectionné est indiqué de la
manière suivante sur l'affichage VOICE/
TEMPO/ PITCH/ VOLUME ©pendant que
la touche ACCOMPANIMENT TEMPO A
ou ▼ ©est maintenue enfoncée.
Diaplay
Beats/Minute
18 132
19 138
144
?1
23
24 176
25 1B4
26
2B 208
29 216
30 226
31
32 246
33
34
35 280
152
160
160
192
200
236
256
268
E1 tempo seleccionado se visualizará en
el visualizador VOICE/ TEMPO/ PITCH/
VOLUME mientras se presiona el botón
A o ▼, de ACCOMPANIMENT TEMPO
©del modo siguiente:
19
Page 21

The available tempo range is from 40 to
280 beats per minute. 120 is the "normal"
tempo value. The normal tempo (120) can
be recalled at any time by pressing both
the ACCOMPANIMENT TEMPO A and ▼
buttons (5)at the same time (the tempo is
automatically set to 120 whenever the
power switch is turned ON).
It is also possible to adjust the tempo
after starting playback of the
accompaniment. This allows you to set
the optimum tempo by ear.
* About 3 seconds after the tempo value
has been set, the display will revert to
the voice number.
Der Einstellbereich liegt zwischen 40
und 280 Thktschlägen pro Minute. Das
Normaltempo ist 120 ikktschläge pro
Minute. Das Normaltempo kann durch
gleichzeitiges Drücken der
ACCOMPANIMENT TEMPO-Tksten A
und T ©jederzeit rückgerufen werden.
Beim Einschalten des PSR-38 wird
automatisch das Normaltempo von 120
eingestellt.
* Sie können das Tempo auch nach dem
Starten der Begleitung verändern,
wodurch Sie es optimal nach Gehör
einstellen können.
* Ca. 3 Sekunden nach der
Tempoeingabe zeigt das Display wieder
die Stimmennr.
La plage de réglage du tempo va de 40 à
280 temps par minute. La valeur "normale"
du tempo est de 120. Le tempo normal
(120) peut être rétabli à tout moment en
appuyant simultanément sur les touches
ACCOMPANIMENT TEMPO A et ▼ ® (à
la mise sous tension le tempo est
automatiquement réglé à 120).
" Il est également possible de régler le
tempo après le début de
l'accompagnement. Ceci permet de
régler le tempo à roreille.
* Une fois que le tempo a été réglé
l'affichage revient à l'indication de la voix
au bout de 3 secondes environ.
El margen de tempo disponible es de 40
a 280 tiempos рог minuto. 120 es el
valor del tempo "normal". El tempo
normal (120) podrá reactivarse en
cualquier momento presionando los
botones A y T de ACCOMPANIMENT
TEMPO ©al mismo tiempo (el tempo se
ajusta automáticamente al valor normal
de 120 siempre que se conecta el
interruptor de la alimentación).
* También puede ajustarse el tempo
después de haber iniciado la
reproducción del acompañamiento.
Este permitirá ajustar el tempo óptimo
por oído.
* Aproximadamente 3 segundos después
de haber ajustado el valor del tempo, el
visualizador volverá al número de voz.
Starting the Accompaniment
Press the START button ©to start the
selected accompaniment immediately, or
press the SYNCHRO START ©button if
you want the accompaniment to start
when you play the first note on the Auto
Bass Chord keys @. If you press the
SYNCHRO START button, the leftmost dot
in the VOICE/ TEMPO/ PITCH/ VOLUME
display (8)will flash at the selected tempo.
Auslösen der Begleitung
Wenn Sie die gewählte Begleitung direkt
starten wollen, müssen Sie nur die
START-Taste ©antippen. Falls die
Begleitung jedoch erst mit dem
Anschlägen der ersten Note im AUTO
BASS CHORD-Manualbereich @)
einsetzen soll, müssen Sie stattdessen
SYNCHRO START ©drücken. Wenn
Sie die Taste SYNCHRO START
betätigen, blinkt der Punkt ganz links
im VOICE/ TEMPO/ PITCH/ VOLUME-
Display ©im gewählten Ibmpo.
SYNCHRO START
Début de raccompagnement
Appuyer sur la touche START ©pour
lancer immédiatement l'accompagnement
sélectionné, ou appuyer sur la touche
SYNCHRO START ©pour que
l’accompagnement commence lorsque la
première note est jouée sur la section
AUTO BASS CHORD ® du clavier.
Lorsque la touche SYNCHRO START a
été sollicitée, le point le plus à gauche de
l’affichage VOICE/ TEMPO/ PITCH/
VOLUME © se met à clignoter au tempo
sélectionné.
3X|
Inicio del acompañamiento
Presione el botón START ©para iniciar
inmediatamente el acompañamiento
seleccionado, o presione el botón
SYNCHRO START ©si desea que se
inicie el acompañamiento cuando usted
toca la primera nota de las teclas de
AUTO BASS CHORD ®. Si presiona el
botón SYNCHRO START, el punto de la
izquierda del visualizador VOICE/
TEMPO/ PITCH/ VOUME ©
parpadeará en el tempo seleccionado.
20
Page 22

* The two LED dots at the bottom of the
VOICE/ TEMPO/ PITCH/ VOLUME
display @ provide a visual indication of
the selected tempo as follows:
* Die zwei LED-Punkte im VOICE/
TEMPO/ PITCH/ VOLUME-Display ®
geben eine visuelle Tfempoanleitung,
wie folgt:
Les deux LED situées à ia partie
inférieure do l'affichage VOICE/ TEMPO/
PITCH/ VOLUME ©donnent une
indication visuelle du tempo sélectionné
de la manière suivante:
* Los dos puntos LED de la parte inferior
del visualizador de VOICE/ TEMPO/
PITCH/ VOLUME ©proporcionan una
indicación visual del tempo
seleccionado del modo siguiente:
The above 4 beats (one 4/4 measure)
repeat.
* If the AUTO BASS CHORD selector (J) is
set to OFF, the accompaniment will
consist only of rhythm (drums &
percussion) sounds. Operation of the
AUTO BASS CHORD SINGLE FINGER
and FINGERED modes is described on
page 23 and 26.
* A different accompaniment style can be
selected at any time while the
accompaniment is playing.
Starting the Accompaniment with an Introduction
Any of the PSR-38 accompaniment
patterns can be started with a 1-measure
introductory pattern by pressing either the
INTRO./ FILL IN 1 or INTRO./ FILL IN 2
button (3) before pressing the START (0)
or SYNCHRO START ® button. The
INTRO/ ENDING button (JJproduces a 2-
measure introduction.
1st BEAT
TCMf’O PI'^'Ch/VOLüWE
Die obigen 4 Taktschläge (ein 4/4-Takt)
werden wiederholt.
* Palls der AUTO BASS CHORD-Wähler
d)auf OFF steht, besteht die
Begleitung nur aus Schlagzeug und
Percussion. Der SINGLE FINGERund FINGERED-Modus der AUTO
BASS CHORD-Funktion sind auf Seite
23 und 26 erklärt.
* Während der Wiedergabe der
Begleitung kann jederzeit auf einen
anderen Begleitungsstil geschaltet
werden.
2nd BEAT
Beginnen der Begleitung mit Auftakt
Wenn Sie vor dem Drücken der START(@)oder SYNCHRO START-Taste (©eine
der INTROy FILL IN-Tasten (1 oder 2 )
(©antippen, beginnt die Begleitung mit
einem 1-taktigen Auftakt.
Durch Drücken der INTROy ENDINGTakte ©wird eine zweitaktige
Einführung erzeugt.
INTRO /FILL IN l INTRO/FILL IN 2
3rd BEAT
TEyPO PHCm VOLUME
Ces 4 temps (une mesure de 4/4) se
répètent.
* Si le sélecteur AUTO BASS CHORD (D
est mis sur la position OFF,
l'accompagnement ne comprendra que
des sons rythmiques (batterie et
percussion). Les modes
ACCOMPAGNEMENT A UN SEUL
DOIGT et ACCOMPAGNEMENT A
PLUSIEURS DOIGTS sont décrits aux
pages 23 et 26.
* Un style d'accompagnement différent
peut être sélectionné à tout moment
pendant que l'accompagnement joue.
4th BEAT
1EWPO PaCHVOLUME
Début de l'accompagnement
avec introduction
Tous les styles d'accompagnement du
PSR-38 commenceront avec une
introduction de 1 mesure lorsque la touche
INTRO./ FILL IN 1 ou INTRO./ FILL IN 2
® est sollicitée avant la touche START ®
ou la louche SYNCHRO START (©. La
touche INTRO./ ENDING ©permet de
produire une introduction de 2 mesures.
INTFIO /EN0IN3
Los cuatro tiempos de arriba (un compás
de 4/4) se repiten.
* Si el selector AUTO BASS CHORD ®
se pone en la posición OFF, el
acompañamiento constará sólo del
sonido del ritmo (batería y percusión).
La operación de los modos AUTO BASS
CHORD en SINGLE FINGER y
FINGERED se describe en la página 23
y 26.
* Puede seleccionarse un estilo de
acompañamiento distinto en cualquier
momento mientras se reproduce el
acompañamiento.
Inicio del acompañamiento con una introducción
Cualquiera de los patrones de
acompañamiento del PSR-38 puede
iiciarse con un patrón de introducción de
1 compás presionando el botón INTROV
FILL IN 1 o INTR07 FILL IN 2 ©antes
de presionar el botón START ©o
SYNCHRO START ©. El botón INTR07
ENDING ©produce una introducción de
dos compases.
21
Page 23

Adding Fill-ins
To add a fill-in (rhythm variation) at any
time while the accompaniment is playing,
press the INTRO./ FILL IN 1 or INTRO./
FILL IN 2 button (0). The fill-ins have a
maximum length of one measure, but the
actual length depends on precisely when
in the current measure you press a FILL
IN button (i.e. the fill-in lasts from the point
at which the button is pressed until the end
of the current measure). You can stop a
fill-in pattern before the current measure
by pressing the FILL IN button a second
time. If you hold one of the FILL IN
buttons, the fill-in pattern will repeat until
the button is released.
Einfügen von Fill-ins
Sie können jederzeit während der
Begleitung ein Fill-in
(Rhythmusvariation) einfügen, indem
Sie die INTRO./ FILL IN-Tkste 1 oder 2
(0) antippen. Diese Fill-ins gehen
maximal über einen ganzen Takt, die
genaue Länge hängt jedoch vom
Zeitpunkt ab, zu dem Sie die Taste
antippen. Das Fill-in dauert vom
Zeitpunkt des Tastendrucks bis zum
Ende des gegenwärtigen Takts. Sie
können ein Fill-in vor dem Taktende
abbrechen, indem Sie die gleiche
INTRO./ FILL IN-Taste ein zweites Mal
drücken. Wenn Sie eine der Tasten
kontinuierlich drücken, wiederholt sich
das Fill-in, bis Sie die Taste loslassen.
INTflO./FILL IN
Addition de fiil-ins
Appuyer sur la touche INTRO./ FILL IN 1
ou INTRO./ FILL IN 2 ©pour
introduire un fill-in (variation rythmique) à
tout moment pendant la reproduction d'un
accompagnement. Bien que le fill-in ait
une durée maximale de 1 mesure, sa
durée réelle dépend du moment de la
mesure où la touche FILL IN a été
sollicitée (le fill-in commence au moment
où la touche est sollicitée et se termine à
la fin de la mesure en cours). L'addition de
fill-in peut être arrêtée avant la fin de la
mesure en appuyant une deuxième fois
sur la touche RLL IN. Si une touche FILL
IN est maintenue enfoncée, le fill-in sera
répété jusqu'à ce que la touche soit
relâchée.
INTRO .'FILL IN 2
Adición de rellenos
Рага añadir un relleno (variación
rítmica) en cualquier momento durante
la intepretación del acompañamiento,
prsione el botón INTROV FILL IN 1 o
INTROy PILL IN 2 (0). Los rellenos
tienen una longitud máxima de un
compás, pero la duración real depende
de la precisión con la que usted presiona
el botón FILL IN en el compás actual (es
decir, el relleno dura desde el punto en
que se presiona el botón hasta el final
del compás actual). Usted podrá detener
un patrón de relleno antes del compás
actual presionando otra vez el botón
FILL IN. Si usted retiene uno de los
botones FILL IN, el patrón de relleno se
repetirá hasta que se suelte el botón.
stopping the Accompaniment
An accompaniment in progress can be
stopped immediately by pressing the
STOP button (gl), or it can be stopped with
a two-measure ending by pressing the
INTRO./ ENDING button (0). If the
INTRO./ ENDING button is used, the
ending will start from the current measure
if the button is pressed during the first half
of the measure, or from the beginning of
the next measure if the button is pressed
during the second half of the current
measure.
Stoppen der Begleitung
Eine Begleitung kann durch Drücken
der STOP-Ihste @ direkt gestoppt
werden. Wenn Sie jedoch INTRO./
ENDING (0) drücken, wird zunächst ein
zweitaktiger Schlußtakt gespielt, bevor
die Begleitung stoppt. Wenn Sie die
INTRO./ ENDING-Taste in der ersten
Hälfte des gegenwärtigen Takts
drücken, beginnt die Schlußsequenz in
diesem Takt. Wird die Ikste in der
zweiten Hälfte des gegenwärtigen Thkts
gedrückt, beginnt der Schlußtakt mit
Anfang des nächsten Takts.
INTRO ENDING
3/
Arrêt de raccompagnement
Un accompagnement peut être arrêté
immédiatement en appuyant sur
la touche STOP ®, ou il peut être arrêté
avec un ending de 2 mesures en appuyant
sur la touche INTRO./ ENDING (0). Si la
touche INTRO./ ENDING est sollicitée
pendant la première moitié d'une mesure,
Tending commencera pendant cette
mesure, alors qu'il commencera sur le
premier temps de la mesure suivante, si la
touche INTRO./ ENDING est sollicitée
pendant la deuxième moitié de la mesure.
Parada del acompañamiento
Un acompañamiento puede detenerse
inmediatamente presionando el botón
STOP o puede detenerse con una
coda de dos compases presionando el
botón INTRO./ ENDING (0). Si se usa el
botón INTRO./ ENDING, la coda se
iniciará desde el compás actual si se
presiona el botón durante la primera
mitad del compás, o desde el principio
del compás siguiente si se presiona el
botón durante la segunda mitad del
compás actual.
22
Page 24

Auto Bass Chord
Accompaniment
The PSR-38 includes a sophisticated Auto
Bass Chord accompaniment system that
can provide automated bass and chordal
backing in a number of ways.
* The maximum number of notes that can
be played simultaneously on the PSR-38
keyboard is reduced when the Auto Bass
Chord feature is used.
Auto-Baß/
Akkordbegleitung
Das PSR-38 bietet Ihnen interessante
automatische Baß- und
Akkordbegleitungsfunktionen, die Ihnen
beim Spielen auf verschiedenste Weise
Baß- und Akkordbegleitung liefern.
* Die maximale Anzahl von Noten, die
simultan gespielt werden kann,
verringert sich wenn die AUTO BASS
CHORD-Funktionen aktiviert werden.
Accompagnement
automatique en accords
et basses
Le PSR-38 offre un système sophistiqué
d'accompagnement automatique AUTO
BASS CHORD permettant de produire un
accompagnement en accords et basses
automatique de diverses manières.
* Le nombre maximal de notes pouvant
être jouées simultanément sur le clavier
du PSR-38 est réduit lorsque la fonction
AUTO BASS CHORD est utilisée.
Acompañamiento
automático de bajo y
acordes
El PSR-38 incluye un sistema de
acompañamiento sofisticado automático
de bajo y acordes que puede
proporcionar el bajo y los acordes
automáticos de muchas formas.
* El número máximo de notas que
pueden tocarse simultáneamente en el
teclado del PSR—38 se reduce cuando se
usa la característica de bajo y acordes
automáticos.
Single Finger Accompaniment
SINGLE FINGER accompaniment makes
it simple to produce beautifuliy
orchestrated accompaniment using major,
seventh, minor and minor-seventh chords
by pressing a minimum number of keys in
the Auto Bass Chord Keys section ®of
the keyboard. The bass and chord
accompaniment produced is perfectly
matched to the currently selected
accompaniment style.
1. Select the SINGLE FINGER Mode
Slide the AUTO BASS CHORD
selector ®to the SINGLE FINGER
position.
Single Finger-Funktion
Mit der SINGLE FINGER-Funktion
können Sie ganz einfach eine
interessante, im Takt erklingende
Orchesterbegleitung aus Dur-, Sept-,
Moll- und Moll-Septakkorden erzeugen,
indem Sie nur maximal drei Tasten im
AUTO BASS CHORD-Manualbereich (g)
zugleich anschlagen, während eine
Baßlinie automatisch dazu gespielt wird.
Die Baß/ Akkordbegleitung ist exakt auf
den gewählten Begleitungsstil
abgestimmt.
L Auf SINGLE FINGER-Modus
schalten.
Schieben Sie den AUTO BASS
CHORD-Wähler @in die Stellung
SINGLE FINGER.
Accompagnement à Un Seul Doigt
L'accompagnement en mode SINGLE
FINGER permet de produire facilement un
très bel accompagnement orchestral,
utilisant des accords majeur, septième,
mineur et septième mineure, en appuyant
sur un nombre minimal de touches de la
section AUTO BASS CHORD (g)du
clavier. L’accompagnement en accords et
basses produit s'harmonise toujours
parfaitement au style d'accompagnement
sélectionné.
1. Sélectionner le mode SINGLE RNGER
Faire coulisser le sélecteur AUTO
BASS CHORD (3)sur la positiort
SINGLE FINGER.
I AUTO BASS CHORD
Acompañamiento de un
dedo
El acompañamiento SINGLE FINGER
simplifica la producción de bellos
acompañamiento orquestales empleando
acordes mayores, de séptima, menos y
menores de séptima, presionando un
número mínimo de teclas en la sección
de teclas de acompañamiento
automático de bajo y aocrdes del teclado
g). El acompañamiento de bajo y
acordes producido se adapta
perfectamente con el estilo de
acompañamiento actualmente
seleccionado.
L Seleccione el modo SINGLE
FINGER.
Deslice el selector AUTO BSS
CHORD (3)a la posición SINGLE
FINGER.
23
Page 25

2. Select an Accompaniment Style
Select the desired accompaniment
style in the normal way. Although you
can select the melody (upper
keyboard) voice you intend to use, the
PSR-38 automatically determines the
voices to be used for the
accompaniment bass and chords
according the accompaniment style
you select.
3. Start the Accompaniment
Press the START button (0),
SYNCHRO START button (0)or one of
the INTRO, buttons ©©to determine
how the accompaniment will be
started. If you press the START button
(0), the rhythm will begin playing
immediately without chordal
accompaniment.
4. Press a Key In the Auto Bass Chord Keys Section ©
Pressing any of the 19 lowest keys on
the keyboard will cause the automatic
chord and bass accompaniment to
begin, if you press a "C" key, for
example, a C-major accompaniment
will be played. Press another key in
the Auto Bass Chord Keys section to
select a new chord. The key you press
will always determine the "roor of the
chord played (i.e. "C" for a C chord).
2. Einen Begleitstil wählen.
Wählen Sie einen Begleitstil, wie an
vorangehender Stelle erklärt. Sie
können zwar für die obere, d. h.
rechte Manualhälfte eine Stimme
wählen, das PSR-38 wählt jedoch
automatisch die Stimmen für Baßund Akkordbegleitung entsprechend
dem gewählten Begleitstil.
3. Die Begleitung starten.
Drücken Sie START SYNCHRO
START ©oder eine der INTRO.Tasten ©@, um festzulegen, wie
die Begleitung einsetzen soll. Wenn
Sie die START-Taste ©drücken,
beginnt die Rhythmusbegleitung
sofort ohne Akkordspiel.
4. Eine Taste im AUTO BASS
CHORD-Manualbereich ©
anschlagen.
Wenn Sie eine der 19 tiefsten Tasten
auf dem Manual anschlagen, setzt
die Rhythmusbegleitung mit Bass
und Akkorden ein. Wenn Sie z. B.
ein "C " anschlagen, spielt die
Begleitung mit C-Dur Akkorden und
entsprechender Baßlinie. Um auf
einen anderen Akkord zu wechseln,
müssen Sie nur eine andere Taste
im AUTO BASS CHORD-Feld
anschlagen. Die gedrückte Taste
bestimmt jeweils den Grundton des
gespielten Akkords (z. B. C für CAkkorde).
2. Sélectionner un style d'accompagnement.
Sélectionner le style
d'accompagnement de la manière
normale. La voix qui sera utilisée pour
la mélodie (section haute du clavier)
peut être sélectionnée, alors que celle
qui sera utilisée pour
l'accompagnement en accords et
basses sera automatiquement
sélectionnée par le PSR-38 en
fonction du style d'accompagnement
sélectionné.
3. Lancer l'accompagnement
Appuyer sur la touche START ©, sur
la touche SYNCHRO START ©, ou
sur l'une des touches INTRO, ©ou ©
pour déterminer comment
l'accompagnement sera lancé.
Lorsque la touche START est
sollicitée, le rythme commence
immédiatement sans
accompagnement en accords.
4. Appuyer sur une touche de la
section AUTO BASS CHORD du
clavier ©
Le fait d'appuyer sur l’une des 19
touches graves du clavier lance
l'accompagnement en accords et
basses automatique. Si on appuie sur
une touche "Do", par exemple, un
accompagnement en Do majeur sera
joué. Appuyer sur une autre touche de
la section AUTO BASS CHORD du
clavier pour sélectionner un autre
accord. La touche enfoncée détermine
toujours la note fondamentale de
l'accord joué (par ex. "Do" pour un
accord en Do).
2. Seleccione un estilo de
acompañamiento
Seleccione el estilo de
acompañamiento deseado de la
forma normal. Aunque usted puede
seleccionar la voz de la melodía
(teclado superior) deseada, el
PSR—38 determina
automáticamente las voces a usarse
para el acompañamiento de bajo y
acordes de acuerdo con el estilo de
acompañamiento seleccionado.
3. Inicie el acompañamiento
Presione el botón START ©, el
botón SYNCHRO START ©o uno de
los botones INTRO. ©© para
determinar cómo se iniciará el
acompañamiento. Si presiona el
botón START, el ritmo se iniciará
inmediatamente sin
acompañamiento de acordes.
4. Pulse una tecla de la sección de
acompañamiento automático de
bajo y acordes ©
Al presionar cualquiera de las 19
teclas inferiores del teclado hará que
se inicie el acompañamiento
automático de bajo y acordes. Si
presiona una tecla "C", por ejemplo,
se tocará un acompañamiento el C
mayor. Presione otra tecla de la
sección de acompañamiento
automático de bajo y acordes para
seleccionar un nuevo acorde. La
tecla que usted presione siempre
determinará la "raíz" del acorde
tocado (es decir, "C" para un acorde
deC).
24
Page 26

Playing Min or, Seve nth, and Mi nor-
seve nth Chor ds in the Sing le-fing er
Mode
• For a minor chord, press the root key
and the first black key to its left.
• For a seventh chord, press the root
key and the next white key to its left.
• For a minor-seventh chord, press the
root key and both the next white and
black keys to its left.
Spielen von Moll-, Sept- und MollSeptakkorden im SINGLE
FINGER-Modus.
• Für Moll-Akkorde den Grundton
und die nächste schwarze Taste
links davon anschlagen.
• Für Septakkorde den Grundton
und die nächste weiße Thste links
davon anschleigen.
• Für Moll-Septakkorde den
Grundton und die nächste weiße
und schwarze Taste links davon
anschlagen.
Exé cution d'acc ords m ineur ,
septième et septième mineu re en
mode SIN GLE F INGER
• Pour un accord mineur, appuyer sur
la touche de la note fondamentale et
sur la touche noire immédiatement à
gauche.
• Pour un accord septième, appuyer
sur la touche de la note
fondamentale et sur la touche
blanche immédiatement à gauche.
• Pour un accord septième mineure,
appuyer sur la touche de la note
fondamentale et sur la touche
blanche et la touche noire
immédiatement à gauche.
Interpretación de acordes menores,
de séptima, y menores de séptima en
el modo SINGLE FINGER
• Para un acorde menor, presione la
tecla de raíz y la primera tecla
negra de su izquierda.
• Para un acorde de séptima,
presione la tecla de raíz y la tecla
blanca de su lado de la izquierda.
• Para un acorde menor de séptima,
presione la tecla de raíz y las teclas
blanca y negra de su lado de la
izquierda.
* The automatic accompaniment will
continue playing even if you lift your
fingers from the Auto Bass Chord
keys (gl. You only need to press the
Auto Bass Chord keys when
changing cords.
5. Stop the Auto Accompaniment
Press the STOP button @or INTRO./
ENDING button ®to stop the
Accompaniment.
* The FILL IN button (@)can be used in
the Auto Bass Chord mode to create
pattern variations in exactly the
same way that they are used with
rhythm accompaniment patterns
(refer to the ^Adding Fill-ins" section
on page 22 for details).
Cm
* Die automatische Begleitung spielt
auch nach Loslassen der AUTO
BASS CHORD-Tasten ©weiter.
Sie müssen nur Tasten drücken,
wenn Sie den Akkord wechseln
wollen.
5. Stoppen der automatischen
Begleitung
Zum Stoppen der Begleitung die
STOP-Taste ©oder die INTRO./
ENDING-Taste ©drücken.
* Die FILL IN-Taste ©kann wie bei
der Rhythmusbegleitungauch
während der AUTO BASS
CHORD-Begleitung zum Variieren
der Begleitmuster verwendet
werden (siehe Hinzufügen von Fill-
ins auf Seite 22)
Cm7
* L'accompagnement automatique se
poursuivra même une fois que les
touches de la section AUTO BASS
CHORD ©sont relâchées. Il n'est
nécessaire d'appuyer sur ces
touches que pour changer d'accords.
5. Arrêter l'accompagnement automatique
Appuyer sur la touche STOP ©ou
INTRO./ ENDING ©pour arrêter
l'accompagnement.
* En mode AUTO BASS CHORD la
touche FILL IN ©peuve être utilisée
pourcrér de nouvelles variatbns
rythmiques de la manière dont elle
est utilisée avec les patterns
d'accompagnement rythmiques (Pur
plus des détails, voir "Addition de fill-
ins" à ta page 22).
* E1 acompañamiento automático
seguirá aunque usted suelte las
teclas de AUTO BASS CHOD ©.
Usted sólo necesita presionar la
teclas de acompañamiento
automático de bajo y acordes para
cambiair de acordes.
5. Pare el acompañamiento
automático
Presione el botón STOP ©o el botón
INTR07 ENDING ©para detener el
acompañamiento.
* El botón FILL IN ©puede usarse
en el modo de acompañamiento
automático de bajo y acordes para
crear variaciones de patrones
exactamente del msimo modo que
cuando se usan patrones de
acompañamiento rítmico (consulte
la sección "Adición de rellenos" en
la página 22 para más detalles.
25
Page 27

Setting the Accompaniment Volume
Set the volume of the Auto
Accompaniment sound using the
ACCOMPANIMENT VOLUME buttons ®.
The MASTER VOLUME control ®can be
used to set the overall volume level.
Einstellen der
Begleitungslautstärke
Die Lautstärke der Begleitung kann mit
den ACCOMPANIMENT VOLUMETasten (D eingestellt werden. Die
Gesamtlautstärke hingegen wird vom
MASTER VOLUME-Regler (Dfestgelegt.
Réglage du volume de l'accompagnement
Régler le volume de l'accompagnement
automatique à l'aide des touches
ACCOMPANIMENT VOLUME ®. La
commande MASTER VOLUME (2)peut
être utilisée pour régler le volume
d'ensemble.
Ajuste del volumen de
acompañamiento
Ajuste el volumen del sonido del
acompañamiento automático empleando
los botones ACCOMPANIMENT
VOLUME ®. El control MASTER
VOLUME ®puede usarse para ajustar
el nivel de volumen general.
Setting the Tempo
Use the ACCOMPANIMENT TEMPO
controls (Dto set the desired
accompaniment tempo (see "Setting the
Tempo” on page 19 for details).
Fingered Accompaniment
The FINGERED mode is ideal if you
already know how to play chords on a
keyboard, since it allows you to supply
your own chords for the Auto Bass Chord
feature.
1. Select the FINGERED Mode
Slide the AUTO BASS CHORD
selector (3)to the FINGERED position.
Einstellen des Tempos
Stellen Sie das Tfempo der Begleitung
mit den ACCOMPANIMENT TEMPO-
Tasten (5)ein (siehe Einzelheiten hierzu
unter "Einstellen des Tfempos " auf Seite
19).
Fingered-Funktion
Der FINGERED-Modus ei^et sich
besonders für diejenigen, die bereits die
Akkordgriffe beherrschen und eigene
Akkorde für die Auto-Baß/
Akkordbegleitung liefern können.
1. Auf FINGERED-Modus schalten.
Schieben Sie den AUTO BASS
CHORD-Wähler (3)in die Stellung
FINGERED.
Réglage du tempo
Utiliser les commandes
ACCOMPANIMENT TEMPO ®pour
régler le tempo de l'accompagnement
(Pour plus de détails, voir "Réglage du
tempo" à la page 19).
Accompagnement à
Plusieurs Doigts
Le mode FINGERED est idéal pour ceux
qui savent déjà jouer des accords sur un
clavier, du fait qu'il permet de produire des
accords personnels pour la fonction
d'accompagnement automatique.
1. Sélectionner le mode FINGERED
Faire coulisser le sélecteur AUTO
BASS CHORD ® sur la position
FINGERED.
^AUTO BASS CHORO
Ajuste del tempo
Emplee los controles de TEMPO ®para
ajustar el tempo deseado del
acompañamiento (vea "Ajuste del tempo"
de la página 19 para más detalles).
Acompañamiento para acordes
El modo FINGERED es ideal si usted ya
sabe tocar acordes en un teclado, porque
le permitirá suministrar sus propios
acordes para la función de
acompañamiento automático de bajo y
acordes.
L Seleccione el modo FINGERED.
Deslice el selector AUTO BASS
CHROD ®a la posición
FINGERED.
26
Page 28

2. Select an Accompaniment Style
Select the desired accompaniment
style in the normal way. Although you
can select the melody (upper
keyboard) voice you intend to use, the
PSR-38 automatically determines the
voices to be used for the
accompaniment bass and chords
according the accompaniment style
you select.
3. Start the Accompaniment
Press the START button (0),
SYNCHRO START button or the
INTRO, button (0)to determine how
the accompaniment will be started, if
you press the START button, the
rhythm will begin playing immediately
without chordal accompaniment.
4. Play a Chord on the Auto Bass
Chord Keys ®
As soon as you play any chord in the
Auto Bass Chord section of the
keyboard, the PSR-38 will
automatically begin to play the chord
along with the selected rhythm and an
appropriate bass line. The
accompaniment will continue playing
even if you release the Auto Bass
Chord keys. When changing chords,
be sure to release all keys before
playing a new chord.
2. Einen Begleitstil wählen.
Wählen Sie einen Begleitstil, wie an
vorangehender Stelle erklärt. Sie
können zwar für die obere, d. h.
rechte Manualhälfte eine Stimme
wählen, das PSR—38 wählt jedoch
automatisch die Stimmen für Baß-
und Akkordbegleitung entsprechend
dem gewählten Begleitstil.
3. Die Begleitung starten.
Drücken Sie START C@), SYNCHRO
START (©oder die INTRO.-Taste ®,
um festzulegen, wie die Begleitung
einsetzen soll. Wenn Sie die START-
Taste drücken, beginnt die
Rhythmusbbegleitung sofort ohne
Akkordspiel.
4. Einen Akkord im AUTO BASS
CHORD-Manualbereich (§)
an Q/*Ma cfan
Sobald Sie im AUTO BASS CHORDManualbereich einen Akkord
anschlagen, beginnt das PSR-38
diesen Akkord im gewählten
Rhythmus zu spielen und liefert
eine passende Baßlinie dazu. Die
Begleitung setzt sich auch nach
Loslassen der Tasten fort. Wenn Sie
daher einen Akkordwechsel
vornehmen wollen, müssen Sie
zunächst alle Begleitakkordtasten
vor dem Anschlägen des neuen
Akkords loslassen.
2. Sélectionner un style
d'accompagnement
Sélectionner le style
d'accompagnement de la manière
normale. La voix qui sera utilisée pour
la mélodie (section haute du clavier)
peut être sélectionnée, alors que celle
qui sera utilisée pour
l'accompagnement en accords et
basses sera automatiquement
sélectionnée par le PSR-38 en
fonction du style d'accompagnement
sélectionné.
3. Lancer l'accompagnement
Appuyer sur la touche START (0), sur
la touche SYNCHRO START ®, ou
les touches INTRO. (З)® pour
déterminer comment
l'accompagnement sera lancé.
Lorsque la touche START est
sollicitée, le rythme commence
immédiatement sans
accompagnement en accords.
4. Jouer un accord sur les touches
AUTO BASS CHORD ®
Dès que l'on joue un accord sur la
section AUTO BASS CHORD du
clavier, le PSR-38 commence
automatiquement à jouer l'accord, en
même temps que le rythme
sélectionné et une ligne de basses
appropriée. L'accompagnement
continue à être joué, même lorsque
les touches AUTO BASS CHORD
sont relâchées. Pour changer
d'accord, relâcher toutes les touches
avant de jouer un nouvel accord.
2. Seleccione un estilo de
acompañamiento
Seleccione el estilo de
acompañamiento deseado de la
forma normal. Aunque usted podrá
seleccionar la voz deseada para la
melodía (teclado superior), el
PSR-38 determinará
automáticamente las voces a
utilizarse para el acompañamiento
de bajo y acordes de acuerdo con el
estilo de acompañamiento
seleccionado.
3. Inicie el acompañamiento.
Presione el botón START (0), el
botón SYNCHRO START @0 el
botón INTRO. ® para determinar
cómo se iniciará el acompañamiento.
Si presiona el botón START, el ritmo
se iniciará inmediatamente sin
acompañamiento de acordes.
4. Toque un acorde en las teclas de
la sección de acompañamiento
automático de bajo y acordes
Al presionar cualquiera acorde en la
sección AUTO BASS CHORD del
teclado, el PSR—38 iniciará
automáticamente a tocar el acorde
junto con el ritmo seleccionado y una
linea de bajo apropiada. El
acompañamiento seguirá tocando
aunque usted suelte las teclas del
acompañamiento automático de bajo
y acordes. Cuando cambie de
acordes, cerciórese de haber soltado
todas las teclas antes de tocar un
®
nuevo acorde.
The PSR-38 will accept the following
chord types, although the resultant
accompaniment pattern will be either
major, minor or seventh:
27
mm ■ шш iwm iffli
Das PSR-38 erkennt die folgenden
Akkordtypen, obwohl die resultierende
Begleitung stets in Dur, Moll oder
Septimen angelegt ist.
Le PSR-38 accepte les types d'accords
suivants, mais le pattern
d'accompagnement sera toujours majeur,
mineur ou septième.
E1 PSR-38 aceptará los siguientes tipos
de acordes, aunque el patrón de
acompañamiento resultante será mayor,
menor, o de séptima.
Page 29

• Major
• Minor
• Major seventh
• Sixth
• Minor sixth
• Minor seventh
• Minor seventh flat five
• Seventh
• Seventh flat five
• Seventh suspended fourth
• Minor major seventh
• Augmented
• Diminished
Sixth, minor sixth and seventh flat five
chords will only be properly detected if
they are played in the "root position".
For diminished and augmented
chords, the lowest key pressed is
assumed to be the root of the chord.
' All other FINGERED mode operations
are the same as in the SINGLE FINGER
mode.
• Dur
• Moll
• Dur mit großer Septime
• Sextakkord
• Moll-Akkord mit hinzugeftigter Sexte
• Moll-Septakkord mit
verminderter Quinte
• Dur-Septakkord
• Dur-Septakkord mit verminderter
Quinte
• ^ptakkord mit vorgehaltener
Quarte
• Moll mit großer Septime
• Übermäßig
• Vermindert
Dur-, Moll-Akkorde mit
hinzugefügter Sexte und
Septakkorde mit verminderter
Quinte können nur erkannt
werden, wenn der Grundton die
tiefste angeschlagene Taste
darstellt. Bei übermäßigen und
verminderten Akkorden wird
angenommen, daß die niedrigste
Taste der Grundton ist.
* Alle anderen Bedienvorgänge von
FINGERED- und SINGLE
FINGERED-Modus sind identisch.
• Majeur
• Mineur
• Septième majeure
• Sixte
• Sixte mineure
• Septième mineure
• Quinte bémol septième mineure
• Septième
• Quinte bémol septième
• Quarte suspendue septième
• Septième majeure mineure
• Augmenté
• Diminué
Les accords de sixte, de sixte mineure
et de quinte bémol septième ne seront
détectés correctement que lorsqu'ils
sont joués en "position fondamentale".
Dans le cas des accords augmentés
et diminués, il est assumé que la
touche la plus grave est le son
fondamental de l'accord.
Pour toutes les autres opérations, le
mode FINGERED est identique au mode
SINGLE FINGER.
• Mayor
• Menor
• Mayor de séptima
• Sexta
• Menor de sexta
• Menor de séptima
• Menor de séptima quinta bemol
• Séptima
• Séptima quinta bemol
• Séptima cuarta suspendida
• Menor séptima mayor
• Aumentada
• Disminuida
Los acordes de sexta, menor de sexta
y de séptima quinta bemol sólo se
detectarán adecuadamente si se
tocan en la "posición de raíz". Para
acordes disminuidos y aumentados,
la tecla más baja pulsada se asume
ser la raíz del acorde.
* Ibdas las otras operaciones del modo
FINGERED son las mismas que en el
modo SINGLE FINGER.
Try playing this using the Single Finger Chord mode or Fingered mode.
(Brahms' Lullaby)
Play the chord part on the lower keyboard
sectbn and the melody part on the upper
keyboard. Chords can be played using
either the Single Finger or Fingered
method.
Panel Settings
Accompaniment Style: Waltz
Tempo: 17 ( J =126)
AUTO BASS CHORD Selector: SINGLE
FINGER or FINGERED position
Upper Voice: 52 Whistle
Versuchen Sie einmal dieses
Stück im SINGLE FINGER- oder
FINGERED-Modus zu spielen.
(Brahms’ Wiegenlied)
Spielen Sie die Akkorde im tiefen
Manualbereich mit SINGLE FINGER oder
FINGERED und die Melodiestimme im
rechten Manualbereich.
Einstellungen
Begleitstil: Waltz
Tempo: 17 (J =126)
AUTO BASS CHORD-Wähler: SINGLE
FINGER oder FINGERED
Stimme ihr rechte Manualhälile: 52 Whistle
Essayer de Jouer ceci en mode SINGLE FINGER ou en mode FINGERED.
(Berceuse de Brahms)
Jouer les accords sur la section basse du
clavier et la mélodie sur la section haute. Les
accords peuvent être joués en mode SINGLE
FINGER ou en mode FINGERED.
Réglages de panneau
Style d'accompagnement: Waltz
Tempo: 17 ( J =126)
Sélecteur AUTO BASS CHORD: Position
SINGLE FINGER ou FINGERED
Voix section haute: 52 Whistle
Intente tocar esto empleando el
modo de acordes SINGLE
FINGER o modo FINGERED.
(Brahms’ Lullaby)
Toque la parte de acordes en la sección del
teclado inferior y la parte de melodía en el
teclado superior. Los acordes pueden tocarse
empleando el método SINGLE FINGER o
FINGERED.
Ajustes del panel
Estilo de acompañamiento: Waltz
Tempo: 17 ( J =126)
Selector AUTO BASS CHORD: Posición
SINGLE FINGER o FINGERED
Voz superior 52 Whistle
28
Page 30

SOLO STYLEPLAY
This sophisticated feature automatically
adds appropriate harmony notes and
effects to a melody you play on the upper
keyboard according to the selected
accompaniment style. For example, with
the ROCK'N ROLL style the SOLO
STYLEPLAY feature automatically adds
harmony, counter mebdy and glissando to
what you play. With the REGGAE style, a
melody you play on the upper keyboard is
repeated in the next measure, creating a
"round" or "call and answer" type effect.
" Only a single note can be played at a
time on the PSR-38 upper keyboard
sectbn when the SOLO STYLEPLAY
feature is used.
SOLO STYLEPLAYFUNKTION
I>iese So]o-Beg}eitfunktion )iefert Ihnen
automatisch die Harmonienoten im
gewählten Begleitspiel zur Melodie, die
Sie auf der rechten Manualhälfte
spielen. Wenn Sie z. B. bei aktiviertem
ROCK'N ROLL-Stil die SOLO
STYLEPLAY-Funktion zuschalten,
werden Ihrer Melodie automatisch
Harmonienoten, Kontramelodie und
Glissando zugefügt. Beim Stil REGGAE
wird Ihre Melodie im nächsten Takt
wiederholt, wodurch ein Frage- und
Antwort-Effekt entsteht.
* Bei aktivierter SOLO STYLEPLAY-
Funktion können nur einzelne Noten
im oberen Manualbereich gespielt
werden.
MODE SOLO STYLEPLAY
Cette fonction sophistiquée ajoute
automatiquement des effets et
notes d'harmonie à une mélodie exécutée
sur ta partie haute du clavier sebn le style
d'accompagnement sélectionné. Par
exemple, lorsque le style ROCK’N ROLL
est sélectionné, la fonction SOLO
STYLEPLAY ajoute automatiquement une
harmonie, une contre mélodie et un
glissando au morceau joué. Dans le cas
du style REGGAE, la mélodie jouée sur la
section haute du clavier est répétée dans
la mesure suivante, ce qui produit un effet
de type "en rond" ou "d'appel et réponse".
* Une seule note à la fois peut être jouée
sur la section haute du clavier du
PSR-38 lorsque !a fonction SOLO
STYLEPLAY est utilisée.
PARA TOCAR SOLOS
Esta sofisticada característica añade
automáticamente las notas y efectos de
armonía apropiados a la melodía que
usted toca en el teclado superior de
acuerdo con el estilo de acompañamiento
seleccionado. Por ejemplo, con el estilo
ROCK'N ROLL, la cacacterística de
SOLO STYLEPLAY añade
automáticamente armom'a,
contramelodía y glissando a lo que usted
toca. Con el estilo REGGAE, la melodía
que usted toca en el teclado superior se
repite en el compás siguiente, creando
un efecto tipo "conversación".
* Sólo puede tocarse una nota a la vez en
la sección del teclado superior del
PSR-38 cuando se usa la característica
SOLO STYLEPLAY.
1. Select the Desired Auto Bass Chord Mode
Use the Auto Bass Chord selector (3)
to select either the SINGLE FINGER
or FINGERED mode.
2. Turn SOLO STYLEPLAY ON
Press the SOLO STYLEPLAY button
0. The SOLO STYLEPLAY LED will
light indicating that the SOLO
STYLEPLAY feature is ON. The
SINGLE FINGER Auto Bass Chord
mode will be selected if the AUTO
BASS CHORD selector @ is in any
position other than FINGERED.
Play
The SYNCHRO START mode is
automatically selected when SOLO
STYLEPLAY is turned ON, so all you
have to do is play the required chords
L Die gewünschte Auto-Baß/
Akkordbegleitfunktion wählen.
Wählen Sie mit dem AUTO BASS
CHORD-Wähler (J) zwischen
SINGLE FINGER- und FINGEREDModus.
2. Die SOLO STYLPEPLAYFunktion einschalten.
Drücken Sie die SOLO STYLEPLAYTaste 0. Damit leuchtet die LEDAnzeige über dieser Taste auf, um
daraufhinzuweisen, daß die SOLO
STYLEPLAY-Funktion aktiviert ist.
Das PSR-38 schaltet auf SINGLE
FINGER-Modus, falls der AUTO
BASS CHORD-Wähler @in einer
anderen Stellung als FINGERED
steht.
3. Spielen
Beim Aktivieren der SOLO
STYLEPLAY-Funktion wird
automatisch auf Synchronstart
geschaltet. Sie müssen jetzt nur
1. Sélectionner le mode
2. Activer le mode SOLO STYLEPLAY
'^SOLO STYLEPLAY
3. Jouer
d'accompagnement automatique
désiré
Utiliser le sélecteur AUTO BASS
CHORD ©pour sélectbnner le mode
SINGLE FINGER ou le mode
FINGERED.
Appuyer sur la touche SOLO
STYLEPLAY 0. Le témoin à LED
SOLO STYLEPLAY s'allume pour
indiquer que ce mode est activé. Le
mode d'accompagnement
automatique SINGLE FINGER sera
sélectionné si le sélecteur AUTO
BASS CHORD 0est sur une position
autre que FINGERED.
Le mode SYNCHRO START est
automatiquement sélectionné lorsque
la fonction SOLO STYLEPLAY est
activée; ainsi, la seule chose à faire
L Seleccione elmodo deseado de
AUTO BASS CHORD.
Emplee el selector AUTO BASS
CHORD 0para seleccionar el modo
SINGLE FINGER o FINGERED.
2. Active la función SOLO
STYLEPLAY.
Presione el botón SOLO
STYLEPLAY 0. Se encenderá el
LED de SOLO STYLEPLAY
indicando que se ha activado la
función SOLO STYLEPLAY. El
modo de SINGLE FINGER de
AUTO BASS CHORD se
seleccionará si el selector AUTO
BASS CHORD 0está en una
posición que no es la de FINGERED.
3. Toque.
El modo SYNCHRO START se
selecciona automáticamente cuando
se activa SOLO STYLEPLAY, por lo
que todo lo que usted deberá hacer
29
Page 31

(SINGLE FINGER or FINGERED) on
the lower keyboard while playing a
single-note melody line on the upper
keyboard. The SOLO STYLEPLAY
feature automatically selects the
appropriate voice.
noch die Begleitakkorde im linken
Manualbereich (mit SINGLE
FINGER oder FINGERED)
anschlagen und die Melodie aus
einzelnen Noten auf der rechten
Manualhälfte spielen. Die SOLO
STYLEPLAY-Funktion wählt
automatisch die passende Stimme.
est de jouer les accords voulus
(SINGLE FINGER ou FINGERED) sur
la partie basse du clavier, tout en
jouant une ligne de mélodie à une
seule note sur la partie haute. La
fonction SOLO STYLEPLAY
sélectionne automatiquement la voix
appropriée.
será tocar los acordes requeridos
(SINGLE FINGER o FINGERED)
en el teclado inferior mientras se
toca una línea de melodía de una
sola nota en el teclado superior. La
función de SOLO STYLEPLAY
selecciona automáticamente la voz
apropiada.
4. Stop the Accompaniment
Stop the accompaniment using the
STOP ® or INTRO./ ENDING ®
button (and turn SOLO STYLEPLAY
OFF, if necessary, by pressing the
SOLO STYLEPLAY button 0again so
that its LED goes out).
KEYBOARD
PERCUSSION
The 16 highest keys on the PSR-38
keyboard let you play percussion to
accompany other instruments, or add
original rhythm fills and breaks to your
performances. The percussion instruments
played by each key are identified by
symbols above each key:
4. Die Begleitung stoppen.
Stoppen Sie die Begleitung mit der
STOP- ©oder INTR07 ENDINGTaste (2)(und schalten Sie SOLO
STYLEPLAY durch erneutes
Drücken der SOLO STYLEPLAYTaste 0aus, damit deren LED
erlischt).
MANUELLE
PERCUSSION
Die 16 höchsten Tasten des Manuals des
PSR—38 können als "Schlagzeug "
dienen, mit dem Sie andere Instrumente
begleiten oder eigene Rhj^hmus-Breaks
usw, für Ihre Darbietung spielen
können. Die den einzelnen Tksten
zugeordneten Schlagzeug- und
Percussion-Klänge sind durch Symbole
Über den Tasten angezeigt:
4. Arrête de l'accompagnement
Pour arrêter Taccompagnement,
utiliser la touche STOP @ou la
touche INTR07 ENDING (g)(si
nécessaire, désactiver le mode SOLO
STYLEPLAY en appuyant à nouveau
sur la touche SOLO STYLEPLAY ©
pour éteindre le témoin à LED).
PERCUSSION AU
CLAVIER
Les seize touches les plus hautes du
clavier du PSR-38 permettent de produire
des sons de percussion pour
accompagner d'autres instruments, ou
d'ajouter des sons et Interruptions
rythmiques au morceau exécuté. Les
instruments à percussion reproduits par
chaque touche sont identifiés par les
symboles marqués au-dessus des
touches.
4. Pare el acompañamiento.
Pare el acompañamiento empleando
el botón STOP ®o el INTRO,/
ENDING ® (у desactive la función
SOLO STYLEPLAY, si es necesario,
presionando de nuevo SOLO
STYLEPLAY ©para que se apague
su LED).
PERCUSION DEL TECLADO
Las 16 teclas más altas de teclado del
PSR-38 le permiten tocar percusión
para acompañar a otros instrumentos, o
añadir rellenos y cambios de ritmos
originales a sus interpretaciones. Los
instrumentos de percusión tocados por
cada tecla se identifican mediante los
símbolos de encima de cada tecla:
30
Page 32

To use the percussion keys @}, simply
press the KEYBOARD PERCUSSION
button (|J), then play the keys as rf they
were actual percussion instruments. The
volume of the percussion pads is
controlled by the ACCOMPANIMENT
VOLUME buttons (D-
Urn auf diese Klänge zuzugreifen,
müssen Sie nur die KEYBOARD
PERCUSSION-lkste (g) drücken und
dann die Tasten rhythmisch anschlagen.
Die Lautstärke des "Schlagzeugs " wird
über die ACCOMPANIMENT VOLUMETasten (D eingestellt.
KEYBOARD PERCUSSION
Pour utiliser les touches de percussion g
du clavier, appuyer simplement sur la
touche KEYBOARD PERCUSSION gel
utiliser les touches comme si elles étaient
de vrais instruments à percussion. Le
volume des touches de percussion est
réglé au moyen de touches
ACCOMPANIMENT VOLUME ®.
PC
Para emplear las teclas de percusión g,
presione simplemente el botón
KEYBOARD PERCUSSION g, y toque
las teclas como si fueran instrumentos
de percusión reales. El volumen de la
percusión se controla con los botones de
ACCOMPANIMENT VOLUME ®.
' The Keyboard Percussion feature cannot
be used while any of the PSR--38 preset
ACCOMPANIMENT STYLE rhythms are
playing.
' If you press the KEYBOARD
PERCUSSION button ® while one of
the PSR-38 ACCOMPANIMENT STYLE
rhythms is playing, the rhythm will stop
so you can play your own break or fill
using the KEYBOARD PERCUSSION
keys ®. To restart the the rhythm
accompaniment, press the KEYBOARD
PERCUSSION button ® again.
THE CHORD SEQUENCER
* Während dem Spielen von
vorporgrammierten Begleitstilen, kann
die KEYBOARD PERCUSSION-
Funktion nicht verwendet werden.
* Wenn Sie die KEYBOARD
PERCUSSION-Taste g) während des
Abspielens eines der Begleitrhythmen
des PSR-38 drücken, stoppt dessen
Wiedergabe und Sie können Ihr Break
mit den Tksten im PercussionManualbereich g) spielen. Um die
automatische Rhythmusbegleitung
wieder fortzusetzen, wird einfach
erneut auf die KEYBOARD
PERCUSSION-Taste g) gedrückt.
DIE
SEQUENZER
FUNKTION
* La fonction de percussion au clavier ne
peut pas être utilisée lorsqu'un style de
rythme préprogrammé du PSR-38 est en
cours de reproduction.
• Si la touche KEYBOARD PERCUSSION
gest enfoncée, alors que l'un des styles
de rythme préprogrammés du PSR-38
est en cours de reproduction, le rythme
s'arrête, ce qui permet d'introduire ses
propres sons ou interruptions au moyen
des touches de percussion g. Pour
relancer le rythme d'accompagnement,
appuyer à nouveau sur la touche
KEYBOARD PERCUSSION g.
SEQUENCEUR
D’ACCORDS
* La característica de percusión del
teclado no se puede usar mientras se
esten reproduciendo cualquiera de los
ritmos preajustados
ACCOMPANIMENT STYLE del
PSR-38.
* Si presiona el botón KEYBOARD
PERCUSSION g mientras se está
reproduciendo alguno de los ritmos
ACCOMPANIMENT STYLE del
PSR-38, el ritmo se parará para que
pueda tocar su propio cambio o relleno
usando las teclas KEYBOARD
PERCUSSION g. Para reiniciar el
acompañamiento rítmico, presione otra
vez el botón KEYBOARD
PERCUSSION g.
SECUENCIADOR
DE ACORDES
The PSR-38 CHORD SEQUENCER
allows you to "record" and play back
chord sequences created using the Auto
Bass Chord feature. You can record a
complete accompaniment part, for
31
Mit der CHORD SEQUENCERFunktion des PSR-38 können Sie die
mit der AUTO BASS CHORD^Funktion
gespielten Akkorde aufzeichnen und
wiedergeben. Falls Sie die Begleitung
Le séquenceur d'accords du PSR-38
permet "d’enregistrer" et de reproduire
des séquences d'accords créées en
utilisant la fonctbn AUTO BASS CHORD.
H est possible, par exemple, d'enregistrer
El CHORD SEQUENCER del PSR-38
le permite "grabar" y reproducir
secuencias de acordes creadas usando la
característica de acompañamiento
automático de bajo y acordes. Puede
Page 33

example, and then play along with it using
both hands — you're free to use the entire
keyboard for your performance rather than
being limited to only the upper keyboard
area.
* Chord sequences containing a maximum
of 200 chords can be recorded.
* Chords are recorded at 16th note
resolution.
* Material recorded using the CHORD
SEQUENCER will be lost as soon as the
PSR-38 POWER switch 0 is turned
OFF.
* The following data is recorded in addition
to chords: accompaniment style, tempo,
intro, fill in, ending, stop, accompaniment
volume.
zuerst aufzeichnen, können Sie dann
deren Wedergabe mit beiden Händen
begleiten und es steht Ihnen dadurch
das gesamte Manual für das
Melodiespiel zur Verfügung.
* Eine Sequenz kann aus max. 200
Akkorden bestehen.
* Die Akkorde werden mit einer
Auflösung von Sechzehntelnoten
aufgezeichnet.
* Aufzeichnungen werden mit
Ausschalten des PSR-38 aus dem
Speicher gelöscht.
* Neben den Akkorden werden folgende
Daten aufgezeichnet: Begleitstil,
Tempo, Intro, Fill-in, Schlußtakt,
Stopp, Begleitungslautstärke.
un accompagement complet, ce qui
permet ensuite d'utiliser la totalité du
clavier pour l'exécution au lieu d'être limité
à sa seule section haute.
* Il est possible d'enregistrer des
séquences comprenant un maximum de
200 accords.
* Les accords sont enregistrés à une
résolution au 16èmede note.
* Tous les enregistrements effectués en
utilisant le séquenceur d'accords seront
perdus lorsque le PSR-38 est mis hors
tension.
* Les données suivantes sont enregistrées
en plus des accords: style
d'accompagnement, tempo, intro, fill-in,
ending, arrêt, volume
d'accompagnement.
grabar una parte de compañamiento
completo, por ejemplo, y luego tocar
usando ambas manos - usted estará libre
de usar el teclado entero para sus
interpretaciones en lugar de limitarse
sólo a la parte superior del teclado.
* Las secuencias de acordes que
contienen un máximo de 200 acordes
pueden grabarse.
* Los acordes se graban con una
resolución de semicorchea.
* El material grabado usando el CHORD
SEQUENCER se perderá tan pronto
como se desconecte el interruptor
POWER 0 del PSR-38.
* Se graban los datos siguientes además
de los acordes; estilo de
acompañamiento, tempo, preludio,
relleno, coda, parada, volumen de
acompañamiento.
Recording
1. Select the Desired Accompaniment
Style
Pick out an accompaniment style that
is appropriate for the type of music
you want to record.
2. Select the SINGLE RNGER or
FINGERED Auto Bass Chord Mode
Use the AUTO BASS CHORD
selector to select either the SINGLE
FINGER or FINGERED mode (if the
AUTO BASS CHORD selector is set
to any position other than FINGERED,
the SINGLE FINGER mode will
automatically be selected when
recording is begun).
3. Set the Record Ready Mode
Press the CHORD SEQUENCER
RECORD button (g). This engages
the "record ready" mode: the
metronome will sound and the
leftmost dot in the display will flash at
the currently selected tempo, and
recording wil begin as soon as you
play a note on the keyboard
(SYNCHRO START type operation).
Aufzeichnung
1. Einen Begleitstil wählen.
Wählen Sie einen Begleitstil, der
zum aufzuzeichnenden Stück paßt.
2. Zwischen SINGLE FINGER- und
FINGERED-Modus wählen.
Schieben Sie den AUTO BASS
CHORD-Wähler ® auf SINGLE
FINGER oder FINGERED. (Falls
der AUTO BASS CHORD-Wähler in
einer anderen Position als
"FINGERED * steht, wird am
' Aufnahmebeginn automatisch auf
SINGLE FINGER-Modus
geschaltet.)
3. Auf Aufiiahmebereitschaft
schalten.
Drücken Sie die Taste CHORD
SEQUENCER RECORD ®. Damit
ist auf Aufnahmebereitschaft
geschaltet. Sie hören das Metronom
und der Leuchtpunkt ganz links im
Display leuchtet im gewählten
Tempo. Die Aufzeichnung startet
mit der ersten von Ihnen
angeschlagenen Note
(Synchronstart).
Enregistrement
1. Sélectionner le style
d'accompagnement voulu
Choisir un style d'accompagnement
convenant au type de musique à
enregistrer.
2. Sélectionner le mode SINGLE
FINGER ou FINGERED
Utiliser le sélecteur AUTO BASS
CHORD 0pour sélectionner le mode
SINGLE FINGER ou FINGERED (si le
sélecteur AUTO BASS CHORD est
mis sur une position autre que
FINGERED, le mode SINGLE
FINGER sera automatiquement
sélectionné lorsque l'enregistrement
commence).
3. Mettre en mode prêt à
renregistrement
Appuyer sur la touche CHORD
SEQUENCER RECORD ®. Ceci
active le mode "prêt à
l'enregistrement": le métronome
commence à jouer, le point le plus à
gauche de l'affichage se met à
clignoter au tempo sélectionné et
l'enregistrement commence dès
qu'une note est jouée sur le clavier
(mode de fonctionnement du type
SYNCHRO START).
Grabación
L Seleccione el estilo de
acompañamiento deseado.
Active el estilo de acompañamiento
que es más apropiado para el tipo de
música que quiere grabar.
2. Seleccione el modo de
acompañamiento automático de
bajo y acordes SINGLE FINGER
o FINGERED.
Use el selector AUTO BASS CHORD
para seleccionar entre el modo
SINGLE FINGER o FINGERED (si
el selector AUTO BASS CHORD
está ajustado en otra posición que no
sea FINGERED, el modo SINGLE
FINGER se seleccionará
automáticamente cuando se empiece
la grabación).
3. Ajuste el modo de grabación
preparada
Presione el botón CHORD
SEQUENCER RECORD ®. Esto
activa el modo "grabación
preparada": el metrónomo sonará y
el punto más hacia la izquierda
parpadeará en el tempo seleccionado
actual, y la grabación empezará tan
pronto empiece a tocar una nota en
el teclado (operación tipo SYNCHRO
START).
32
Page 34

íCHORD SEQUENCER
lUnJ
4. Set the Tempo
Before actually beginning to record,
you should select a tempo that will be
easy to record at.
5. Choose an Alternative Start Mode If
Necessary
H you do not perform this step,
recording will begin as soon as you
play a chord on the keyboard. At this
point, however, you can choose to
start recording immediately by
pressing the START button (@), or
start recording immediately with an
introduction by pressing one of the
INTRO, buttons ® eg).
6. Start Recording
If you haven't already started
recording as in step 5, above,
recording will begin automatically as
soon as you begin playing. Play the
chord sequence you require for your
accompaniment.
7. Stop Recording
Press either the STOP button @)or
INTRO./ ENDING button ®to stop
recording. Recording actually ends the
instant the rhythm accompaniment
stops playing. It is also possible to
stop recording immediately by
pressing either the RECORD or PLAY
button Recording will stop
automatically if you exceed the
PSR-38's memory capacity (200
chords).
4» Das Tempo einstellen.
Sie sollten ein leicht zu spielendes
Tempo bereits vor der Aufnahme
einstellen.
5. Erforderlichenfalls auf anderen
Startmodus schalten.
Falls Sie diesen Schritt nicht
durchführen, beginnt die Aufnahme
mit der ersten gespielten Note. Sie
können jedoch die Aufnahme direkt
starten, indem Sie die START-Taste
©drücken. Falls Sie die Aufnahme
mit einem Intro einleiten wollen,
müssen Sie eine der INTRO.-Tksten
drücken.
6. Autiiahme beginnen.
Falls Sie die Aufnahme nicht schon,
wie unter 5 erläutert, ausgelöst
haben, wird sie durch Anschlägen
der ersten Note gestartet, Spielen
Sie nun die Akkordsequenz.
7. Aufnahme stoppen.
Drücken Sie dazu entweder die
STOP-Taste ©oder die INTRO./
ENDING-Taste (ß). Die Aufnahme
stoppt im Grunde genommen, wenn
die Begleitung aufhört. Sie können
die Aufnahme auch direkt stoppen,
indem Sie die RECORD- oder PLAYTaste ©drücken. Bei Überschreiten
der Speicherkapazität (max. 200
Akkorde) des PSR-38 stoppt die
Aufnahme automatisch.
4. Régler le tempo
Avant de commencer effectivement à
enregistrer, il est préférable de régler
le tempo à une valeur qui facilitera
l'enregistrement.
5. Choisir un autre mode de début, si nécessaire
Lorsque cette opération n'est pas
effectuée, l'enregistrement
commencera dès qu'une note ou un
accord est joué sur le clavier. I) est
possible, cependant, de choisir de
commencer l'enregistrement
instantanément, en appuyant sur la
touche START ©, ou de commencer
l'enregistrement avec une
introduction, en appuyant sur l'une
des touches INTRO, ©ou ©.
6. Lancer l'enregistrement
Si l'enregistrement n'a pas été lancé
de la manière décrite à l'étape 5, il
commencera automatiquement en
même temps que l'exécution.
Commencer à jouer la séquence
d'accords d'accompagnement.
7. Arrêter l'enregistrement
Appuyer sur la touche STOP ©ou sur
la touche INTRO./ ENDING ©pour
arrêter l'enregistrement.
L'enregistrement s'arrête en fart au
moment précis où l'accompagnement
s'arrête. Il est également possible
d'arrêter l'enregistrement
instantanément en appuyant sur la
touche RECORD ou PLAY ®.
L'enregistrement s'arrêra
automatiquement lorsque la capacitó
de la mémoire du PSR-38 est atteinte
(200 accords).
4. Ajuste el tempo
Antes de empezar la grabación, debe
seleccionar el tempo con el que sea
más fácil de grabar.
5. Elija si es necesario un modo de
inicio alternativo
Si no realiza este paso, la grabación
empezará tan pronto toque un
acorde en el teclado. En este punto,
sin embargo, puede elegir entre
iniciar la grabación inicialmente
presionando el botón START ©, o
iniciar la grabación inmediatamente
con una introducción presionando
uno de los botones INTRO. ©®.
6. Inicio de la grabación
Si todavía no ha iniciado la
grabación como en el paso 5, encima,
la grabación empezará
automáticamente tan pronto
empiece a tocar. Tbque la secuencia
de acorde que requiera para el
acompañamiento.
7. Parada de la grabación
Presione entre el botón STOP ©o el
botón INTROy ENDING ©para
parar la grabación. También es
posible parar la graduación
inmediatamente presionando el
botón RECORD o PLAY ©. La
graduación se parará
automáticamente si se excede de la
capacidad de la memoria del
PSR-38 (200 au^ordes).
33
Page 35

Whenever you record using the
CHORD SEQUENCER, any
previously recorded material will be
erased.
If you make a mistake while recording,
simply press the SYNCHRO START
button ®and begin again from step 5,
above.
Bei jeder Neuaufnahme werden
vorangehende Aufnahmen im
CHORD SEQUENCER gelöscht.
Falls Sie einen Fehler gemacht
haben, müssen Sie SYNCHRO
START (0) drücken und zu Schritt 5
zurückgehen.
Tous les matériaux précédemment
enregistrés seront effacés lorsque la
fonction séquenceurs d’accords est
utilisée.
En cas d'erreur en cours
d'enregistrement, appuyer simplement
sur la touche SYNCHRO START
recommencer à partir de l'étape 5.
* Siempre que grabe usando el
CHORD SEQUENCER, cualquier
material grabado previamente se
borrará.
* Si realiza algún error mientras
graba, presione simplemente el
botón SYNCHRO START ©y
empiece de nuevo desde el paso 5 de
encima.
Playback
1. Engage the Start Ready Mode
Press the CHORD SEQUENCER
PLAY button ©to engage the start
ready mode.
2. Start Playback
Press the START button ©or a key
on the keyboard to begin playback.
Your chord sequence will begin with
an introduction if you start playback by
pressing one of the INTRO, buttons ©
3. Play Along If You Like
Play along on the PSR-38 keyboard if
you like. You can also add fill-ins
using the INTRO./ FILL IN button ©,
or change the tempo during playback.
4. Stop Playback
Playback will stop automatically when
the end of the recorded sequence Is
reached. You can also stop playback
at any time by pressing the STOP or
INTRO./ ENDING button ®.
Wiedergabe
L Auf Wiedergabebereitschaft
schalten*
Drücken Sie CHORD SEQUENCER
PLAY ©, um auf
Wedergabebreitschaft zu schalten.
2. Auf Wiedergabe schalten.
Drücken Sie die Thste START ©
oder schlagen Sie eine Taste auf
dem Manual an, um die Wiedergabe
auszulösen. Die Wedergabe beginnt
mit einem Intro, falls Sie zum
Starten eine der INTRO.-Tasten @
©an tippen.
3. Die Wiedergabe begleiten.
Falls Sie wollen, können Sie die
Wiedergabe auf dem Manual
begleiten. Außerdem können Sie mit
der INTROy FILL IN-Thste ©Fillins einfügen oder das Tbmpo der
Wiedergabe verändern.
4. Wiedergabe stoppen
Die Wiedergabe stoppt automatisch
am Ende der Aufzeichnung. Sie
können die Wedergabe durch
Drücken der STOP- oder der
INTROyENDING-Tkste ©
abbrechen.
CHORD SEQUENCER
(Cn3)
Reproduction
1. Mettre en mode prêt à la
reproduction
Appuyer sur la touche CHORD
SEQUENCER PLAY ©pour activer le
mode prêt à la reproduction.
2. Lancer la reproduction
Appuyer sur la touche START ©ou
sur une des touches du clavier pour
lancer la reproduction. La séquence
d'accords commencera avec une
introduction lorsque la reproduction
est lancée en appuyant sur une des
touches INTRO, ©ou ©.
3. Jouer pendant la reproduction
Il est possible de jouer au clavier du
PSR-38 pendant ta reproduction. Il
est également possible d'ajouter des
fill-ins en utilisant la touche INTRO./
FILL IN ©et de changer le tempo
pendant la reproductbn.
4. Arrêt de ta reproduction
La reproduction s'arrêtera
automatiquement à la fin de la
séquence enregistrée. Il est
également possible d'arrêter la
reproduction à tout moment en
appuyant sur la touche STOP ©ou
sur la touche INTRO./ ENDING ©.
Reproducción
L Active el modo de inicio
preparado
Presione el botón CHORD
SEQUENCER ©para activar el
modo de inicio preparado.
2. Inicio de reproducción
Presione el botón START ©o una
tecla del teclado para empezar la
reproducción. La secuencia de
acordes empezará con una
introducción si inicia la reproducción
presionando uno de los botones
INTRO.©o®.
3* Toque tanto como quiera
Toque tanto como quiera en el
teclado del PSR—38. También puede
añadir rellenos usando el botón
INTROy FILL IN ©o cambiando el
tempo durante la reproducción.
4. Parada de la reproducción
La reproducción se parará
automáticamente ciiando se alcance
el fín de la secuencia grabada.
También puede parar la
reproducción en cualquier momento,
presionando el botón STOP o
INTROy ENDINO®.
34
Page 36

When playback is stopped by any
means other then by pressing the
STOP button, the CHORD
SEQUENCER re-enters the playback
ready mode. This can be exited by
pressing the PLAY button
* Falls die Wiedergabe nicht mit
STOP abgebrochen wird, geht der
CHORD SEQUENCER in
Wiedergabebereitschaft über. Sie
können auf Normalbetrieb schalten,
indem Sie erneut die PLAY-Taste
drücken.
* Lorsque la reproduction a été arrêtée
autrement qu'en appuyant sur la
touche STOP, le séquenceur
d'accords revient au mode prêt à la
reproduction. Il est possible de sortir
de ce mode en appuyant sur la touche
PLAY (2).
* Cuando se para la reproducción con
algún medio que no es presionando
el botón STOP, el CHORD
SEQUENCER se reintroduce en el
modo de reproducción preparada.
También puede salir presionando el
botón PLAY (2).
Try recording chords using the
CHORD SEQUENCER function.
(When The Saints Go
Marching In)
Record the chords in CHORD
SEQUENCER, then play the melody on
the keyboard as the CHORD
SEQUENCER play back. Chords can be
played using either the Single Finger or
Fingered method.
Panel Settings
Accompaniment Style: Big Band
Tempo: 20 ( J =144)
AUTO BASS CHORD Selector: SINGLE
FINGER or FINGERED position
(OFF durir>g playback)
Upper Voice: 37 TRUMPET
Melody
Versuchen Sie einmal dieses
Stück mit der CHORD
SEQUENCER-Funktion
aufzuzeichnen.
(When The Saints Go
Marching In)
Nehmen Sie die Begleitakkorde mit dem
CHORD SEQUENCER auf. (5eben Sie dann
das Stück wieder und spielen Sie die Melodie
dazu.
Akkorde können mit SINGLE FINGER oder
FINGERED gespielt werden.
Einstellungen.
Begleitstü: Big Band
Tempo: 20 ( J =144)
AUTO BASS CHORD-Wähler: SINGLE
FINGER oder FINGERED
(während Wiedeigabe OFF)
Stimme für rechte (upper) Manualhälfte: 37
Trumpet
Single Finger
Chord
Fingered
Chord
Essayer d*enregistrer le morceau
suivant au moyen de la fonction
CHORD SEQUENCER
(When The Saints Go
Marching In)
Enregistrer les accords en utilisant le
séquenceur d'accords et jouer ensuite la
mélodie sur le clavier pendant la reproduction
de la séquence d'accords. Les accords peuvent
être joués en mode SINGLE FINGER ou en
mode FINGERED.
Réglages de panneau
Style d'accompagnement: Big Band
Tempo: 20 ( J =144)
Sélecteur AUTO BASS CHORD: Position
SINGLE FINGER ou FINGERED (OFF pendant
la reproduction)
Voix section haute: 37Trumpet
Pruebe a grabar acordes usando
la función de CHORD
SEQUENCER
(When The Saints Go
Marching In)
Grabe los acordes en CHORD SEQUENCER
y luego toque la melodía en el teclado como la
reproducción de CHORD SEQUENCER. Loas
acordes pueden tocarse usando entre el
método SINGLE FINGER o FINGERED
Ajustes del pane]
Estilo de acompañamiento: Big Band
Tempo: 20 ( j =144)
Selector AUTO BASS CHORD: Posición
SINGLE FINGER o FINGERED
(en OFF durante la reproducción)
Voz superior: 37 Trumpet
35
Iffln
lE N D I N G|
uni
llSM!
Page 37

MIDI FUNCTIONS
MIDI-
FONCTIONS MIDI
FUNCIONES
A Brief Introduction to MIDI
MIDI, the Musical Instrument Digital
Interface, is a world-standard
communication interface that allows MIDIcompatible musical instruments and
equipment to share musical information
and control one another. This makes it
possible to create "systems" of MIDI
instruments and equipment that offer far
greater versatility and control than is
available with isolated instruments.
The PSR-38 MIDI Connectors
The PSR-38 MIDI IN connector receives
MIDI data from an external MIDI device
which can be used to control the PSR-38.
The MIDI OUT connector transmits MIDI
data generated by the PSR-38 (e.g. note
and velocity data produced by playing the
keyboard).
FUNKTIONEN
Eine kurze Einführung in MIDI
MIDI steht für Musical Instrument
Digital Interface und stellt einen
weltweiten Standard für
Datenkommunikation zwischen
elektronischen Musikinstrumenten dar.
MIDI-kompatible Instrumente können
Daten austauschen und sich gegenseitig
steuern. Dadurch können komplexe
Systeme aus MIDI-Instrumenten
zusammengestellt werden, die
wesentlich mehr Vielseitigkeit und
umfassendere kreative Steuerung
erlauben als einzelne Instrumente.
Die MIDI-Anschlüsse des
PSR-38
Der MIDI IN-Eingang des PSR-38 kann
MIDI-Daten von einem externen MIDI-
Gerät empfangen, die dann das PSR—38
steuern. Der MIDI OUT-Ausgang
überträgt wiederum die MIDI-Daten, die
im PSR-38 erzeugt werden (z, B. Noten-
und Dynamikdaten, die beim Spielen
auf dem Manual erzeugt werden).
Quelques mots sur l'interface MIDI
MIDI, de l'anglais "Musical Instrument
Digital Interface** {interface pour
instruments de musique numériques), est
une interface de communication utilisée
mondialement qui permet le partage de
données musicales entre divers
instruments ou appareils musicaux MIDI et
la commande mutuelle de ces appareils.
Ceci permet de créer des "systèmes"
d'instruments et appareils MIDI offrant une
plus grande souplesse et davantage de
possibilités de commande qu'un
instrument isolé.
Connecteurs MIDI du PSR-38
Le connecteur MIDI IN du PSR-38 reçoit
les données MIDI transmises par un
appareil MIDI externe pouvant être utilisé
pour commander le PSR-38. Le
connecteur MIDI OUT transmet les
données MIDI générées par le PSR—38
(par ex. données de note et vélocité
générées en jouant sur le clavier).
MIDI
Breve introducción a MIDI
MIDI, la interfaz digiteJ para
instrumentos musicales, es una interfaz
de comunicación estandarizada en todo
el mundo que permite a los
instrumentos musicales y equipos
compatibles MIDI compartir información
musical y controlarse el uno al otrol
Esto hace posible crear "sistemas" de los
instrumentos y equipos MIDI que
ofrecen una versatilidad y control mucho
mayor que los que pueden ofrecer los
intrumentos aislados.
Conectores MIDI del PSR-38
El conector MIDI IN del PSR-38 recibe
datos MIDI desde el dispositivo extemo
MIDI que puede usarse para controlar el
PSR-38. El conector MIDI OUT
transmite datos MIDI generados
mediante el PSR-38 (por ejemplo, datos
de nota y velocidad producidos tocando
el teclado).
* To connect the PSR-38 MIDI connectors
to other MIDI devices, always use highquality MIDI cables such as the Yamaha
MIDI-15 (15-meter type) or MIDI-03 (3meter type).
' Zum Verbinden der MIDI-Anschlüsse
des PSR-38 mit anderen MIDIGeräten stets hochwertige MIDI-Kabel
wie z. B. das Yamaha MIDI-15 (15 m
lang) oder MIDI-03 (3 m lang)
verwenden.
I ©_© I
* Toujours utiliser des câbles MIDI de
qualité supérieure, tels que les câbles
Yamaha MIDl-15 (15 mètres) ou
MIDI-03 (3 mètres) pour relier les
connecteurs MIDI du PSR-38 à d'autres
appareils MIDI.
' Рага conectar los conectores MIDI del
PSR-38 a otros dispositivos MIDI, use
siempre cables MIDI de alta calidad
como el Yamaha MIDI—15 (tipo 15
metros) o el МГО1-03 (tipo 3 metros).
36
Page 38

Simple MIDI Control
Most MIDI keyboards (including the
PSR-38, of course) transmit note and
velocity (touch response) information via
the MIDI OUT connector whenever a note
is played on the keyboard. If the MIDI OUT
connector is connected to the MIDI IN
connector of a second keyboard
(synthesizer, etc.) or a tone generator
(essentially a synthesizer with no
keyboard), the second keyboard or tone
generator will respond precisely to notes
played on the original transmitting
keyboard. The result is that you can
effectively play two instruments at once,
providing thick multi-instrument sounds.
The PSR-38 also transmits "program
change" data when one of its voices is
selected. Depending on how the receiving
device is set up, the corresponding voice
will be automatically selected on the
receiving keyboard or tone generator
whenever a voice is selected on the
PSR-38.
Einfache MIDI-Steuerung
Die meisten MIDI-Keyboards, wie
natürlich auch das PSR-38, übertragen
Noten- und Dynamikdaten
(Anschlagsdaten) über Ihre MIDI OUTBuchse, wenn ein Thste angeschlagen
wird. Falls der MIDI OUT-Anschluß mit
dem MIDI IN-Eingang eines zweiten
Keyboards (Synthesizer) oder
Tbngenerators (praktisch ein
Synthesizer ohne Manual) verbunden
wird, reproduziert das angeschlossene
Cllerät die Noten mit der Dynamik, wie
sie auf dem sendenden Keyboard
gespielt werden. Damit würden
praktisch zwei Instrumente zugleich
spielen und es würde ein wesentlich
vollerer Klang entstehen. Das PSR-38
überträgt außerdem eine
Programm Wechselmeldung, wenn ein
Stimmenwechsel vorgenommen wird. Je
nach Einstellung des empfangenden
Instruments, wird dadurch eine Stimme
mit der entsprechenden
Programmwechselnummer in diesem
Instrument abgerufen, wenn eine
Stimme im PSR-38 gewählt wird.
Contrôle MIDI simple
La plupart des claviers MIDI (y compris
bien sCir le PSR-38) transmettent, via le
connecteur MIDI OUT, des données de
note et de vélocité (réponse au toucher)
chaque fois qu'une note est jouée sur le
clavier. Si le connecteur MIDI OUT est
relié au connecteur MIDI IN d'un second
clavier (synthétiseur, etc.) ou d'un
générateur de sons (essentiellement un
synthétiseur sans clavier), le second
clavier ou le générateur de sons
répondront avec précision aux notes
jouées sur le clavier de transmission. Ceci
signifie qu'il est possible de jouer
effectivement de deux instruments en
même temps, ce qui donne un son multi-
instrumental d'une grande richesse. Le
PSR-38 transmet également des données
de "changement de programme" chaque
fois qu'une de ses voix est sélectionnée.
Selon la manière dont l'appareil de
réception a été réglé, la voix
correspondante sera automatiquement
sélectionnée sur le clavier ou générateur
de sons de réception chaque fois qu'une
nouvelle voix est sélectionnée sur le
PSR-38.
Control MIDI simple
La mayoría de los teclados MIDI (Por
supuesto incluyendo el PSR-38)
transmiten información de nota y
velocidad (respuesta de pulsación)a
través del conector MIDI OUT aunque
se toque una nota en el teclado. Si el
conector MIDI OUT se conecta al
conector MIDI IN de un segundo teclado
(sintetizado^ etc.) o un generador de
tonos (esencial para un sintetizador sin
teclado), el segundo teclado o generador
de tonos respondrá precisamente las
notas tocadas en el teclado de
transmisión original. El resultado es que
puede tocar efectivamente dos
instrumentos a la vez, suministrando
sonidos gruesos de varios instrumentos.
Dependiendo de como se ajuste el
dispositivo de recepción, la voz
correspondiente se seleccionará
automáticamente en el teclado de
recepción o generador de tonos aunque
la voz se seleccione en el PSR-38.
37
Page 39

The PSR-38 is capable of receiving the
same MIDI data, so a second MIDI
keyboard connected to the PSR-38 MIDI
IN connector can be used to remotely play
the PSR-38 and select voices as required.
Da das PSR—38 auch MIDI-Daten
empfangen und verarbeiten kann,
könnten Sie ein zweites MIDI-Keyboard
an die MIDI IN-Buchse des PSR-38
anschließen und dann durch Spielen auf
dem zweiten Keyboard das PSR—38
steuern (Noten, Dynamik und
Stimmen).
Le PSR-38 est capable de recevoir les
mêmes données MIDI, de sorte qu'un
deuxième clavier MIDI branché au
connecteur NIDI IN du PSR-38 peut être
utilisé pour jouer à distance du PSR-38 et
sélectionner les voix requises.
E1 PSR—38 es capz de recibir los mismos
datos MIDI, por lo que un segundo
teclado MIDI conectado al conector
MIDI IN PSR-38 puede usarse para
tocar remotamente el PSR—38 y
seleccionar las voces que se requieren.
MIDI Sequence Recording
The same type of musical information
transfer described above is used for MIDI
sequence recording. A MIDI sequence
recorder can be used to "record" MIDI
data received from a PSR-38, for
example. When the recorded data is
played back, the PSR-38 automatically
"plays" the recorded performance in
precise detail.
Nat»:
Always use a high-quality MIDI cable to connect MIDI
OUT to MIDI IN terminals. Never use MIDI cables
longer than about 15 meters, since cables longer than
this can pick up noise which can cause data errors.
MIDI-Sequenzaufnahme
Die oben beschriebenen
Datenübertragungen werden auch bei
der Sequenzaufnahme und -Wiedergabe
verwendet. Sie können z. B. die vom
PSR-38 erzeugten Daten mit einem
angeschlossenen MIDI-Sequenzer
aufzeichnen. Wenn Sie danach die
Aufnahme wiedergeben, spielt das
PSR—38 die Aufzeichnung mit allen
Details präzise ab.
Hinweis:
Für die MIDI-Anschlüsse stets hochwertige MIDIKabel verwenden. Niemals Kabel von mehr als 15 nt
Länge verwenden, da dies zu Rauscheinstreuungen
und Datenfehlem führen kann.
Enregistrement de séquences MIDI
Le meme type de transfert de données
musicales est utilisé pour l'enregistrement
de séquences MIDI. Un séquenceur MIDI
peut être utilisé pour "enregistrer" les
données MIDI transmises par le PSR-38.
Lorsque les données enregistrées sont
reproduites, le PSR-38 "joue"
automatiquement la séquence enregistrée
dans ses moindres détails.
PLAYBACK
Remarque:
Utiliser toujours un câble MIDI de bonne qualité pour
relier les bornes MIDI IN et MIDI OUT. Ne jamais
utiliser un câble ayant une longueur supérieure à 15
m environ car de tels câbles peuvent capter du bruit,
ce qui risque de provoquer des erreurs dans la
transmission des données.
Grabación de secuencias MIDI
El mismo tipo de información musical
transferida descrita encima se usa para
la grabación de secuencias MIDI. La
grabadora de secuencias MIDI puede
usarse para "grabar" datos MIDI
recibidos desde el PSR-38, por ejemplo.
Cuando se reproducen los datos
grabados, el PSR-38 automáticamente
"reproduce" las interpretaciones
grabadas en detalle preciso.
Nota:
Siempre use un cable MIDI de alta calida para
conectar lo terminales MIDI OUT y MIDI IN.
Nunca use cables MIDI más largos de 15 metros,
puesto que los cables más largos pueden seleccionar
ruido que puede causar errores en los datos.
38
Page 40

PSR-38 MIDI Settings & Functions
MIDI Operations Summary
MIDI-Einstellungen und Funktionen des PSB-38
Zusammenfassung der MlUI-Bedienvorgänge
Function
Fimktkm
1. Remote control/ etanderd voice mode
eeleetion.
L Intenieteiier/ Externeteucrmodue
2. MIDI trimmH channel aelectlon.
S. MIDI-Übertragungskanalwahl
3. MIDI receive ch«>nel selection.
3. MIDI-Ei]u>fangskaiudwahl
4. Split tranamH mode ON/OFF aelection
(only available in the REMOTE
CONTROL mode).
4. SFLIT-Übertragungemodue ON/
OFF'Einetdlung
(nur bei EXTERNSTEUERMODUS)
5. Program change and control change
cancel ON/ OFF aelection.
5. Übertragung von
Progranunwechael- und
Sieuerungemeldüngen EIN/ AUS.
6. External/ internal dock aelectiort.
6. Wahl xwiechen internem und
externem Ibktgeber
7. Local control ON/ OFF selection.
7. Lokalflteuerung EIN/ AUS
8. Rhythm receive channel selection
(only available in the standard voice
mode).
8. Rhythmua-Empfangakanalwahl Die VOICE SELECT-TasU 7 drücken. Bereich drücken.
(nur bei Extemateuermodua)
Slap 1 (WMIa heldbia lha MIDI button)
Schritt 1 (WUhtend Drücken der
MlDl-Tteate)
Press VOICE SELECT button 0.
Die VOICE SElECT-lkBte 0 drücken.
Press VOICE SELECT button 1.
Die VOICE SElECT-lkste 1 drücken.
Press VOICE SELECT button 2.
Die VOICE SELECT-lkste 2 drücken.
Press VOICE SELECT button 3.
Die VOICE SELECT-Tkstc 3 drücken. Mit den VOICE SELECT-Tbsten +/— einateU en.
Press VOICE SELECT button 4. Select using the VOICE SELECT -►/ - buttons.
Die VOICE SELECT-Taste 4 drücken. Mit den VOICE SELECT-Tbsten +/- einstellen.
Press VOICE SELECT button 5.
Die VOICE SELECT-Tkite 5 drücken. Mit den VOICE SELECT-Tbsten W — einstellen.
Press VOICE SELECT button 6.
Die VOICE SELECT-Taste 6 drücken.
Press VOICE SELECT button 7.
Step 2 (White hoMng tita MIDI button)
Sdvtki S (WMlireDd IMkAen dar MIDtTtealc)
Press the appropriate AUTO BASS CHORD Key
(refer to the illustration below).
Die entsprechende Taste im AUTO BASS CHORDBereich drucken.
(Siehe Abb. unten).
Press the appropriate AUTO BASS CHORD Key
(refer to the illustration below).
Die entsprechende Ikste im AUTO BASS CHORD*
Bereich drücken.
(Siehe Abb. unten).
Select using the VOICE SELECT -►/ - buttons.
Select using the VOICE SELECT ■*■/ - buttons.
Select using the VOICE SELECT W - buttons.
Mit den VOICE SELECT-Tasten +/ — einstellen.
Press the appropriate AUTO BASS CHORD Key
(refer to the illustration below).
Die entsprechende Taste im AUTO BASS CHORD(Siehe Abb. unten).
Dlapiay/ Centeoi Ranga
Diifilay/ Bingabebaraich
RFMOTF CONTROL MODF
LNTERNSTEUEKMODLS
Ea
CHANNEL 1
KANAL 1
□
OMNI ON + CHANNEL 1 OMNI OFF + CHANNEL 1 OMNI OFF + CHANNEL 16
OMNI ON * KANAL 1 OMNI OFF ♦ KANAL 1 OMNI OFF ♦ KANAL 16
If the standard voice mode is selected ...
Falls IntemsteuennoduB aktiv ist....
STEP 3: Select "on" or "off" for the channel selected in step 2 by using the VOICE SELECT W buttons while holding the MIDI button.
SCHRITT 3: Bei Kanalwahl in Schritt 2 mit VOICE SELECT +/ - ON oder OFPiWählen,
wahrend die MIDI-Taste gedrückt wird.
STEP 4: Repeat steps 2 and 3 to set other channels.
SCHRITT 4: Schritt 2 und 3 wiederholen, um die anderen Kanäle eimustellen.
02 . 02
ON
Hfl
ON
n=¡—1
EXTERNAL CLOCK
STANDARD VOICE MODE
EXTKH.NSTKUERMODL'S
[^ . a ra
ON OFF
, 02
Q
CHANNEL 16
KANAL 16
QU
OFF
HB
OFF
INTERNAL CLOCK
E2 o
, 02
OFF
CHANNEL 16
KANAL 16
UE\
ON
ES
CHANNEL 1
KANAL ]
□
39
CH 2 4 7 9 11 14 16
CH
OMNI OFF OMNI ON (ALL)
1315
Page 41

Réglages et fonctions MIDI du PSR-38
Résumé des opérations MIDI
Ajustes y funciones MIDI PSR-38
Sumario de operaciones MEDI
FoneHon
FuBCiAii
1. Séleelion du mode de commande à
dietance ou du mode de voix standard
1. S^eoción dd modo de control
remoto/ voz estándar
2. Sélection dea canaux de tranamisaîon
MIDI
2. Sdeoclôn de canal de tmnamisián
MIDI
3. Séleclion dea canaux de réception
MIDI
S. S^eoción d^ cañad de recepción
MIDI
4. Séleclion du mode de trartainieeion
spirt (possible en mode de commande
i distance uniquement).
4. S^eoción ON/ OFF del modo de
trmnamiaión de división (sólo
disponible en el modo REMOTE
CONTROL).
5. Sélection de l'annuietíon de
changement de commande et
changement de programme.
5. Sdeoción ON/ OFF de cancelación
de cambioB de control y cmmbioe de
programan
6. Sélection horloge irtteme/externe
6. S^eoctón reloj interno/ externo
7. Sélection de commerxJe locale
activée/déeectivée
7. Selección ON/ OFF del control locad
S. Séleclion du canal de réception du
rythme (possible en mode de voix
standard uniquamant}
S. S^eoción de cañad de recepción de
ritmo (sólo aiponible en tA modo
de voz estándar).
Etape 1 (tout en meinlanant la louche
MOI enfoncée)
Paeo 1 ( Aientraa preeioan el botón
MIDD
Appuyer sur la touche VOICE SELECT *0".
Presione el botto VOICE SELECT 0.
Appuyer sur la touche VOICE SELECT "1".
Presione el bolón VOICE SELECT 1
/\ppuyersur la touche VOICE SELECT "2".
Presione el botón VOICE SELECT 2.
Appuyer sur ta touche VOICE SELECT "3".
Presione el botón VOICE SELECT 3.
Appuyer sur la touche VOICE SELECT "4".
Presione el botón VOICE SELECT 4.
Appuyer sur la touche VOICE SELECT “5".
Presione el botón VOICE SELECT 5.
Appuyer sur la touche VOICE SELECT “6".
Presione el botón VOICE SELECT 6.
Appuyer sur la touche VOICE SELECT "7".
Presione el botón VOICE SELECT 7.
Bape2(toutenmaÎnlanBnlletouehe MOI enfoncée)
Fiaao S (mlenbraa preelona et botón MIDD
Appuyer sur la touche AUTO BASS CHORO appropriée
(voir rillustration ci-après).
Presione la tecla apropiada AUTO BASS CHORD
(consulte la ilustración de abajo).
Appuyer sur la touche AUTO BASS CHORD appropriée
(wir l'illustration ci-après).
Presione la tecla apropiada AUTO BASS CHORD
(consulte la la ilustración de encima).
Sélectionner au moyen des touches VOICE SELECT
Seleccione usando los botones VOICE SELECT W -
Sélectionner au rrxryen des touches VOICE SELECT W -.
Seleccione usando los botones VOICE SELECT W -
Sélectionner au moyen des touches VOICE SELECT W
Seleccione usando los botones VOICE SELECT -»>/ -
Sélectionner au moyen des touches VOICE SELECT W
Seleccione u sando los botones VOICE SELECT +/ -
Appuyer sur la touche AUTO BASS CHORD appropriée
(wir rillustration ci-eiprès).
Presione la tecla AUTO BASS CHORD apropiada
(consulte a la ilustración de abajo).
Affichage/ Plage de réglage
Margen de eoBtroi/ vbmaliaacriôii
MODE COMMANDE A DISTANCÉ MODE DE VOIX STANDARD
E3 . CJ
CANAL 1 CANAL 16
a DU
OMNI ON ♦ CANAL 1 OMNI OFF ♦ CANAL 1 OMNI OFF CANAL 16
DD . □ DU
Si le mode voix standard est sélectionné...
Si se selecciona el modo de voz estándar..
ETAPE 3: Sélectionner "on* ou *off" pour le canal sélectionné à rétape 2 au moyen des touches
VO ICE SELECT +/ - tout en maintenant la touche M IDt entoncée.
Paso 3: seleccione ON u OFF para el canal seleccionado en el paso 2 usando los botones
VOICE SELECT +/ —mientras presiona el botón MIDI.
ETAPE 4: Répéter les étapes 2 et 3 pour régler les canaux.
Paso 4: Repita los pasos 2 y 3 para ajustar los otros canales.
ON OFF
DU , DU
ON OFF
DE , Dp]
ON OFF
DD , DD
HORLOGE EXTERNE HORLOGE INTERNE
ED . O
ON OFF
ED . ES
CANAL 1 CANAL 16
□ DD
CH 2 4 7 9 11 14 16
OMNI OFF OMNI ON (ALL)
40
Page 42

1. Remote Control/ Standard Voice Mode Selection
The Remote Control mode should be
used when the PSR-38 is to be
connected to a second keyboard or
tone generator which it is to control. In
this mode, the PSR-38 can only
receive on a single MIDI channel.
The Standard Voice mode should be
used when the PSR-38 is to be used
as atone generator, for example,
receiving data from a second MIDI
device (such as a sequencer). In this
mode the PSR-38 can receive on
multiple MIDI charnels, each channel
corresponding to a different voice.
* Refer to "MIDI Channel Selection"
below for more information on MIDI
channels.
* This setting has no effect when the
PSR-38 is used for transmission
only.
* The number of notes that can be
played simultaneously via external
control when the Standard Voice
mode is selected; 5 melody, 3
rhythm.
2.3. MIDI Channel Selection
The MIDI transmit and receive
channels can be set independently.
* The transmit channel is
automatically set to channel 1 and
the receive channel is automatically
set to OMNI OFF + channel 1 when
the power is initially turned ON.
* OMNI ON means that receptton can
occur simultaneously on all available
channels (1 through 16). When
OMNI OFF is selected, reception
only occurs on the specified channel.
4. Split Transmit Mode ON/ OFF Selection
и the SPLIT Transmit Mode is turned
ON, lower and upper keyboard notes
played in the Single Finger, Fingered
or Split modes are transmitted on
different MIDI channels, and can thus
be used to control different MIDI
devices.
41
1. Wahl zwischen Intern- und Extemsteuermodus
Der Internsteuermodus muß
aktiviert werden, wenn das PSR—38
ein angeschlossenes MIDI-Keyboard
oder einen Tbngenerator steuern
soll. In diesem Modus empfangt deis
PSR—38 nur auf einem Kanal.
Der Externsteuermodus hingegen
wird verwendet, wenn das PSR—38
als Tongenerator, d. h. als
gesteuertes Gerät eingesetzt wird
und z. B. Daten von einem
Sequenzer empfangen soll. In
diesem Modus kann das PSR—38 auf
mehreren MIDI-Kanälen
empfangen, wobei jede Stimme
einen eigenen MIDI-Kanal belegt.
* Einzelheiten zur MIDI-Kaneilwahl
erfahren Sie nachfolgend unter
"MIDI-Kanalwähl ".
* Diese Einstellung hat keinen
Effekt, wenn das PSR-38 nur zum
Übertragen von Daten verwendet
wird.
* Die Anzahl der gleichzeitig
spielbaren Noten im Externmodus:
5 Melodie-, 3 Rhythmusnoten.
2.3. MIDI-Kanalwahl
Der MIDI-Übertragungs- und
Empfangskanal kann getrennt
eingestellt werden.
* Beim Einschalten wird der
Übertragungskanal automatisch
auf Kanal 1 und der
Empfangskanal wird auf Kanal 1 +
OMNI OFF (Empfang auf allen
Kanälen) voreingestellt.
* OMNI ON bedeutet, daß auf allen
Kanälen (1 -16) simultan
empfangen werden kann. Wenn
OMNI OFF eingegeben wird,
erfolgt der Empfang nur auf dem
gewählten Kanal.
4. Split-Übertragtingsmodus EIN/AUS
Wenn die SPLIT-Funktion
{Manualteilung) aktiviert ist,
werden die Noten, die auf der linken
(im SINGLE FINGER- oder
FINGERED-Modus) und rechten
1. Sélection du mode de
commande à distance ou du
mode de voix standard
Le mode de commande à distance
doit être utilisé lorsque le PSR-38 est
connecté à un deuxième clavier ou à
un générateur de sons qu'il doit
commander. Dans ce mode, le
PSR-38 ne peut recevoir que sur un
seul canal MIDI. Le mode de voix
standard doit être utilisé lorsque le
PSR-38 est utilisé comme un
générateur de sons et qu'il doit
recevoir des données transmises par
un autre appareil MIDI (par exemple
un séquenceur). Dans ce mode le
PSR-38 peut recevoir sur plusieurs
canaux MIDI, chaque canal
correspondant à une voix différente.
* Pour plus de détails sur les canaux
MIDI, voir "Sélection des canaux
MIDI" ci-après.
* Ce réglage n'a aucun effet lorsque le
PSR-38 est utilisé pour la
transmission uniquement.
* Le nombre de noies pouvant être
jouées simultanément par
commande externe en mode de voix
standard est de 5 pour la mélodie et
3 pour le tythme.
2.3. Sélection des canaux MIDI
Les canaux MIDI de transmission et
de réception peuvent être
sélectionnés indépendamment.
* A la mise sous tension, le canal de
transmission est automatiquement
réglé sur 1 et les canaux de
réception sur OMNI OFF + CANAL
1.
* OMNI ON signifie que la réception
peut se faire simultanément sur tous
les canaux disponibles (1 à 16).
Lorsque OMNI OFF est sélectionné,
la réception ne peut se faire que sur
les canaux spécifiés.
4. Sélection du mode de
transmission split
Si le mode de transmission SPLIT est
réglé sur ON, les notes jouées sur la
section haute et sur la section basse
du clavier en mode SINGLE FINGER,
FINGERED ou SPLIT sont transmises
1. Selección del modo de
control remoto/ voz estándar
El modo de control remoto debe
usarse cuando el PSR-38 se conecta
a un segundo teclado o generador de
tonos el cual es para controlar. En
este modo, el PSR-38 puede recibir
sólo en un canal MIDI sencillo. El
modo de voz estándar debe usarse
cuando el PSR-38 se va a usar como
generador de tonos, por ejemplo,
datos de recepción desde un segundo
dispositivo MIDI (tal como un
secuenciador). En este modo el
PSR—38 puede recibir en canales
MIDI múltiples, cada canal
correspondiente a una voz diferente.
* Consulte a "Selección de canal
MIDI" abajo para más información
sobre los canales MIDI.
* Este ajuste no tiene efecto cuando
el PSR-38 se usa sólo para la
transmisión.
* El número de notas que pueden
tocarse simultáneamente a través
del control externo cuando se
selecciona el modo de voz estándar;
5 melodías, 3 ritmos.
2.3. Selección de canal MIDI
Los canales de transmisión y
recejKión MIDI pueden ajustarse
indejjendientemente.
‘ El canal de transmisión se ajusta
automáticamente al canal 1 y el
canal de recejxjión se ajusta
automáticamente a OMNI OFF -tcanal 1 cuando se conecta
inicialmente la alimentación.
* OMNI ON significa que la
recepción puede ocurrir
simultáneamente en todos los
canales disponibles (1 a 16).
CuEuido se selecciona OMNI OFF,
la recepción sólo ocurre en el canal
especificado.
4. Selección ON/ OFF del modo
de transmisión de división
Si se se activa el modo de
transmisión de división, la notas del
teclado inferior y superior tocadas
en los modos SINGLE FINGER,
FINGER o SPLIT se transmiten en
Page 43

* Lower-keyboard note data is
transmitted on MIDI channel 2, so be
sure to set the MIDI device which is
to receive the lower-keyboard data
to receive on channel 2. The upper-
keyboard note data is transmitted on
the MIDI channel selected using the
MIDI Channel Selection functbn,
described above.
* Upper and lower keyboard data can
be recorded to a MIDI sequencer on
different channels, so that different
voices set to the corresponding
channels can be independently
controlled when the recorded
sequence is played back.
* This function has no effect when the
PSR-38 is used for reception only.
* This function cannot be used when
the Standard Voice mode is
selected.
* When the power is initially turned
ON. the Split Transmission Mode is
automatically turned OFF.
5. Program Change & Control
Change Cancel ON/ OFF
Selection
Normally the PSR-38 will respond to
MIDI program change and control
change data received from an external
keyboard or other MIDI device,
causing the correspondingly
numbered PSR-38 voice to be
selected and the corresponding
"contror operations to be performed.
The PSR-38 will normally also send
MIDI program change data whenever
one of its voices is selected or control
change data when one of its controls
are operated, causing the
corresponding operation to be
performed on an external MIDI device.
This function makes it possible to
cancel program change and control
change data reception and
transmission so that voices can be
selected on the PSR-38 without
affecting the external MIDI device, etc.
Program Change & Control Change
Cancel is automatically turned OFF
when the power is initially turned ON.
Manualhälfte angeschlagen werden,
auf verschiedenen MIDI-Kanälen
übertragen, und können deshalb
verschiedene MIDI-Geräte separat
steuern.
* Die Notendaten der linken, das
heißt tiefen Manualhälfte werden
auf Kanal 2 gesendet, weshalb Sie
den Empfangskanal des Geräts,
das diese Daten verarbeiten soll,
auf Kanal 2 einstellen müssen. Die
Daten, die auf der rechten
Manualhälfte erzeugt werden,
werden auf dem Kanal übertragen,
der entsprechend 2. MIDI-
Kanalwahl eingestellt wurde.
* Die Daten der linken und rechten
Manualhälfte können von einem
MIDI-Sequenzer auf separaten
Kanälen getrennt aufgezeichnet
werden. Daher können dann bei
der Wiedergabe verschiedene
Stimmen, die auf die
entsprechenden Kanäle eingestellt
sind, getrennt gesteuert werden.
* Diese Funktion hat keinen Effekt,
wenn das PSR-38 nur auf
Empfang eingestellt ist.
* Diese Funktion kann nicht bei
Externsteuermodus verwendet
werden.
* Beim Einschalten, wird der Split-
Übertragungsmodus automatisch
auf OFF gestellt.
5. Übertra^ng von Programmwechsel- und Steuermeldungen EIN/ AUS
Normalerweise spricht das PSR-38
auf Programm Wechsel- und
Steuerungsdaten an, die von einem
externen Keyboard oder anderen
MIDI-Gerät übertragen werden.
Dadurch ruft das PSR—38
entsprechend numerierte Stimmen
ab und führt die den
Steuermeldungen entsprechenden
Einstellungen aus. Ebenso sendet
das PSR—38 Programmwechseldaten
oder Steuerungsmeldungen, wenn
eine seiner Stimmen abgerufen wird
bzw. ein Regler oder Bedienelement
sur des canaux différents et peuvent
donc être utilisées pour commander
deux appareils MIDI.
* Les données de note de la section
basse du clavier sont transmises sur
le canal MIDI 2 et l'appareil devant
recevoir ces données doit donc être
réglé pour recevoir sur le canal 2.
Les données de note de la section
haute du clavier sont transmises sur
le canal MIDI sélectionné en utilisant
la fonction de sélection des canaux
MIDI décrite plus haut.
* Les données de note de la section
haute et de la section basse peuvent
être enregistrées sur des canaux
différents par un séquenceur MIDI,
de sorte que les voix assignées aux
canaux correspondants peuvent être
contrôlées indépendamment lorsque
la séquence enregistrée est
reproduite.
* Cette fonction n'a aucun effet
lorsque le PSR-38 est utilisé pour la
réception uniquement.
* Cette fonction ne peut pas être
utilisée lorsque le mode de voix
standard a été sélectionné.
* A la mise sous tension, le mode de
transmission Split est
automatiquement désactivé.
5. Sélection de l'annulation de
changement de commande et
changement de programme
En mode de fonctionnement normal,
le PSR-38 répond aux données de
changement de commande et aux
données de changement de
programme transmises par un clavier,
ou autre appareil MIDI externe, ce qui
provoque la sélection de la voix du
PSR-38 portant le numéro
correspondant ou l'exécution de la
commande. De la même manière, le
PSR-38 transmet normalement des
données de changement de
programme lorsque l'une de ses voix
et sélectionnée et des données de
changement de commande lorsque
l'une de ses commandes est
actionnée, ce qui provoque l'exécution
diferentes canales MIDI, у puede
usarse para controlar los diferentes
dispositivos MIDI.
* Ix)s datos de notas del teclado
inferior se transmiten en el canal 2
MIDI, por eso asegúrese de ajustar
el dispositivo MIDI que recibe los
datos del teclado inferior para
recibir en el canal 2. Los datos de
notas del teclado superior se
transmiten en el canal MIDI
seleccionado usando la función de
selección de canal MIDI, descrita
encima.
* Los datos del teclado superior e
inferior pueden grabarse en el
secuenciador MIDI en diferentes
canales, de forma que las
diferentes voces ajustadas a los
canales correspondientes puedan
controlarse independientemente
cuando se reproduzca la secuencia
grabada.
* Esta función no tiene efecto cuando
el PSR-38 se usa sólo para la
recepción.
* Esta función no se puede usar con
el modo VOICE STANDARD
seleccionado.
* Cuando se conecta la alimentación,
el modo de transmisión de división
se desconecta automáticamente.
5. Selección ON/ OFF de
cancelación de cambios de
control y cambios de
programa
Normalmente el PSR-38 respondrá
al cambio de programa MIDI y a los
datos de cambio de control recibidos
desde el teclado externo u otro
dispositivo MIDI, haciendo que la
voz del PSR-38 numerada
correspondientemente se seleccione
y las operaciónes de control
correspondientes se realicen. El
PSR-38 también enviará
normalmente datos de cambio de
programa MIDI siempre que se
seleccione una de sus voces o los
datos de cambio de control cuando
uno de sus controles se opere,
haciendo que la operación
42
Page 44

External/ Internal Clock
Selection
This function determines whether the
PSR-38 rhythm and accompaniment
timing is controlled by the PSR-38*s
own internal clock or an external MIDI
cbck signal received from external
equipment connected to the MIDI IN
connector. The Clock Mode is
automatically set to INTERNAL when
the power is initially turned ON.
* To synchronize playback of an
external sequencer or rhythm
programmer to the PSR-38. for
example, set this functbn to
INTERNAL and make sure that the
external device is set up to receive
EXTERNAL clock data.
* To synchronize the PSR-38 to
playback of an external sequencer or
rhythm programmer, set this function
to EXTERNAL.
NOTE:
If the dock mode is set to EXTEfiNAL and a
MIDI dock signal is not being received from an
external source, the PS/Wfl rhythm,
accompaniment and other dock-dependent
features wifi not operate.
des PSR-38 bewegt wird. EHese
Daten lösen dann im empfangenden
Instrument entsprechende Vorgänge
aus.
Mit dieser Funktion können Sie nun
die Übertragung und den Empfang
von Programmwechsel- und
Steuerungsmeldungen zulassen oder
verhindern. Bei letzterem würde
eine Stimmenwahl auf dem PSR-38
das empfangende Instrument nicht
beeinflus^n usw. Beim Einschalten
wird die Übertragung von
Programmwechsel- und
Steuerungsmeldungen automatisch
zugelassen.
6. Wahl zwischen internem und externem Taktgeber
Diese Funktion bestimmt, ob das
Timing von Rhythmusbegieitung
und automatischer Baß/
Akkordbegleitung vom internen
Taktgeber, d. h. dem Ihktgeber des
PSR-38 oder aber durch ein
externes MIDI-Taktgebersignal, das
von einem angeschlossenen MIDI-
Gerät gesendet wird, gesteuert wird.
Beim Einschalten wird automatisch
der interne Taktgeber vorgewählt.
* Um die Wiedergabe eines externen
Sequenzers oder oder
Rhythmusgeräts mit dem PSR-38
zu synchronisieren, müssen Sie
diese Funktion auf INTERNAL
schalten und den Ihktgeber der
externen Geräte auf EXTERNAD
einstellen.
* Um die Wiedergabe des PSR—38
mit der eines externen Sequenzers
oder Rhjrthmusgeräts zu
synchronisieren, müssen Sie diese
Funktion auf EXTERNAD
schalten.
HINWEIS:
Falls dieser Parameter auf EXTERN AL
gestellt ist und keine MIDI-Taktgebersignale
von externen Geräten empfangen werden,
funktionieren die Rhythmus-, Akkord (
Baßbegleitung und andere
taktgeberabhängige Betriebsarten des
PSR-38 nicht.
de cette commande par l'appareil
MIDI externe.
Cette fonction permet d'annuler la
réception et la transmission de
données de changement de
commande et de données de
changement de programme, de sorte
que les voix du PSR-38 peuvent être
sélectionées sans affecter Pappareil
MIDI externe, etc. A la mise sous
tension, la fonction d'annulation de
changement de commande et
changement de programme est
automatiquement désactivée.
6. Sélection horloge Interne/ externe
Cette fonction détermine si le rythme
et l'accompagnement seront
commandés par l'horloge interne du
PSR-38 ou par un signal d'horloge
MIDI externe transmis par l'appareil
branché au connecteur MIDI IN. A la
mise sous tension le mode horloge est
automatiquement réglé sur interne.
* Pour synchroniser la reproduction
d'un séquenceur ou d'un
programmeur de rythme externe sur
le PSR-38, par exemple, régler cette
fonction sur interne et veiller à ce
que l'appareil externe soit réglé pour
recevoir des données d'horloge
externes.
* Pour synchroniser le PSR-38 sur la
reproduction d'un séquenceur ou
d'un programmeur de rythme
externe, régler cette fonction sur
externe.
REMARQUE:
Si le mode d’horloge est réglé sur externe et si
aucun signai d’horloge MIDI n'est transmis par
une source externe, le rythme,
taccompagnement, et autres fonctions
dépendantes des signaux d'horioge du
PSR-36 ne fonctionneront pas.
correspondiente se realice en el
dispositivo MIDI extemo. Esta
función hace posible la cancelación
de los cambios de programa y la
transmisión y recepción de los datos
de cambios de control de forma que
las voces pueden seleccionarse en el
PSR—38 sin afectar el dispositivo
MIDI extemo, etc. Los cambios de
programa y la transmisión de
cambios de control se activa
automáticamente cuando se conecta
la alimentación.
6. Selección de reloj extemo/ interno
Esta función determina si el ritmo
del PSR—38 y la distribución de
acompañamiento se controla por el
reloj interno del PSR-38 o la señal
del reloj MIDI externo recibida
desde el equipo externo conectado en
el conector MIDI IN. El modo del
reloj se ajusta automáticamente a
INTERNAD cuando se conecta la
alimentación.
* Para sincronizar la reproducción
del secuenciador externo o
programador de ritmos al PSR-38,
por ejemplo, ajuste esta función a
INTERNAD y asegúrese de que el
dispositivo extemo está ajustado
para recibir los datos del reloj
EXTERNAD.
* Para sincronizar el PSR-38 para la
reproducción de un secuenciador
extemo o programador de ritmos,
ajuste esta función a EXTERNAD.
NOTA:
Si el modo del reloj está ^justado a
EXTERNAL y la señal del reloj MIDI no se
recibe desde la fuente externa, el ritmo del
PSR—38, acompañamiento y otras
características dependientes del reloj no
opensrún.
43
Page 45

7. Local Control ON/ OFF Selection
"Local Control" refers to the fact that,
normally, the PSR-38 keyboard
controls Its internal tone generator,
allowing the internal voices to be
played directly from the keyboard.
This situation is "Local Control ON"
since the internal tone generator is
controlled locally by its own keyboard.
Local control can be turned OFF.
however, so that the PSR-38
keyboard does not play the internal
voices, but the appropriate MIDI
information is still transmitted via the
MIDI OUT connector when notes are
played on the keyboard. At the same
time, the internal tone generator
responds to MIDI information received
via the MIDI IN connector. This means
that while an external MIDI sequence
recorder, for example, plays the
PSR-38's internal voices, an external
tone generator can be played from the
PSR-38 keyboard. Local Control is
automatically turned ON when the
power is initially turned ON.
" This function has no effect when the
PSR-38 is being used for reception
only.
8. Rhythm Receive Channel Selection
This function is used to select the
MIDI receive channel that will be used
to receive rhythm data (the channel
selected using the MIDI Channel
Selection function described earlier
applies to non-rhythm parts and
voices). The Rhythm Receive Channel
must be matched to the transmit
channel of the device from which the
rhythm data is to be received.
7. LiOkalsteuerungEIN/AUS
Lokal Steuerung bedeutet, daß das
Manual des PSR-38 normalerweise
seinen eigenen, internen
Tbngenerator steuert, wodurch die
internen Stimmen über das Manual
gespielt werden. In diesem Falls ist
"Local Control ON ", da der interne
Tongenerator lokal, d. h. über das
Manual des PSR-38 gesteuert wird.
Sie können die Lokalsteuerung
jedoch auch ausstellen (OFF),
wodurch das Manual des PSR-38
nicht mehr die internen Stimmen
steuert, jedoch nach wie vor die
enstprechenden MIDI-Information
erzeugt und über MIDI OUT abgibt.
Gleichzeitig spricht der interne
Tbngenerator des PSR-38 auf MIDI-
Informationen an, die am MIDI INEingang empfangen werden. Damit
könnte z. B. ein externer MIDI-
Sequenzer die internen Stimmen
des PSR—38 steuern, während ein
externer Tbngenerator wiederum
durch das Manual des PSR—38
gesteuert wird. Beim Einschalten
wird die Lokal Steuerung
automatisch aktiviert (ON).
* Diese Funktion hat keinen Effekt,
falls das PSR-38 nur Daten
empfängt.
8. Wahl des
Rhythmusempfangskanals
Mit dieser Funktion wählen Sie den
MIDI-Empfangskanal für
Rhythmusdaten. Die zuvor erklärte
Empfangskanal wähl bezieht sich
nur auf Melodiestimmen und nicht
rhythmusgebundene Stimmen). Der
Rhythmus-Empfangskanal muß auf
den Rhythmus-Übertragungskanal
des sendenden Geräts eingestellt
werden.
7. Sélection de la commande locale
Le terme "commande locale" fait
référence au fart que le clavier du
PSR-38 commande normalement le
générateur de sons incorporé, ce qui
permet de jouer directement les voix à
partir du clavier. Ceci correspond au
mode "commande locale ON" du fait
que le générateur de sons incorporé
est commandé localement par son
propre clavier. La commande locale
peut être désactivée afin que le clavier
du PSR-38 ne joue pas les voix
internes, mais que les données MIDI
soient malgré tout transmises, via la
borne MIDI OUT, lorsque des notes
sont jouées sur le clavier.
Parallèlement, le générateur de sons
incorporé répondra aux données MIDI
reçues via le connecteur MIDI IN. Ceci
signifie, par exemple, qu'un
séquenceur MIDI externe peut
commander les voix internes du
PSR-38, alors qu'un générateur do
sons externe peut être commandé à
partir du clavier du PSR-38. A la mise
sous tension, la fonction de
commande locale est
automatiquement activée.
* Cette fonction n'a aucun effet
lorsque le PSR-38 est utilisé pour la
réception uniquement.
8. Sélection du canal de réception du rythme
Cette fonction permet de sélectionner
le canal MIDI de réception des
données de rythme (les canaux
sélectionnés grâce à la fonction de
sélection des canaux MIDI décrite
plus haut ne peuvent être utilisés que
pour les parties non rythmiques et les
voix). Le numéro du canal de
réception de rythme doit correspondre
au numéro du canal de transmission
de l'appareil transmettant les données
de rythme.
?• Selección ON/ OFF de control
local
"Control local" se refiere al hecho de
que normalmente, el teclado del
PSR-38 controla su generador de
tonos internos, permitiendo tocar las
voces internas directamente desde el
teclado. Esta situación es "Control
local en ON" puesto que el
generador de tonos intemos se
controla localmente por su propio
teclado. El control local puede
desactivarse, sin embargo, de forma
que el teclado del PSR-38 no toque
las voces internas, pero la
información MIDI apropiada siga
transmitiéndose desde el conector
MIDI OUT cuando las notas se
tocan desde el teclado. Al mismo
tiempo el generador de tonos
internos responde a la información
MIDI recibida a través del conector
MIDI IN. Esto significa que
mientras la grabadora de secuencia
MIDI extema, por ejemplo toca las
voces internas del PSR-38, un
generador de tonos externos puede
tocarse desde el teclado del PSR-38.
El control local se activa
automáticamente cuando se conecta
inicialmente la alimentación.
* Esta función no tiene efecto cuando
se empieza a usar el PSR-38 sólo
para la recepción.
8. Selección del canal de
recepción de ritmos
Esta función se usa para seleccionar
el canal de recepción MIDI que se
usará para recibir los datos de
ritmos (el canal seleccionado usando
la función de selección de canal
MIDI descrita anteriormente se
aplica a las partes y voces no
rítmicas). El canal de recepción de
ritmos debe corresponderse para el
canal de transmisión del dispositivo
desde el cual los datos de ritmos se
reciben.
44
Page 46

* If the assigned Rhythm Receive
Channel Is the same as a channel
assigned for reception of non-rhythm
data, the rhythm data takes prbrity.
* When the power switch is turned
ON, the Remote Control Mode is
selected and the OMNI OFF +
receive channel 1 mode is selected,
if the Standard Voice Mode is then
selected, this function is
automatically set to channel 16.
* This function has no effect if the
Remote Control Mode is selected.
* Falls der Rhythmus-
Empfangskanal die gleiche
Nummer hat, wie der MIDIEmpfangskanal für die anderen
Stimmendaten, haben die
Rhythmusdaten Vorrang.
* Beim Einschalten wird auf
Intemsteuermodus geschaltet und
OMNI OFF + Empfangskanal 1
wird voreingestellt. Falls dann auf
Externsteuermodus geschaltet
wird, wird diese Funktion
automatisch auf Kanal 16
voreingestellt.
* Bei aktiviertem Intemsteuermodus
hat diese Funktion keinen Effekt.
* Si le même canal est assigné à la
réception de données de rythme et
de données non rythmiques, les
données de rythme auront la priorité.
* A la mise sous tension, le mode de
commande à distance et le mode
OMNI OFF + canal de réception 1
sont sélectionnés. Si le mode de
voix standard est ensuite
sélectionné, cette fonctbn est
automatiquement assignée au canal
16.
* Cette fonctbn n’a aucun effet
lorsque le mode de commande à
distance est sélectionné.
* Si el canal de recepción de ritmos
eisignado es el mismo que el canal
asignado para la recepción de los
datos no rítmicos, los datos
rítmicos toman prioridad.
* Cuando se conecta la alimentación,
el modo de control remoto se
selecciona y el modo 1 de OMNI
OFF + canal de recepción se
selecciona. Si luego se selecciona el
modo de voz estándar, esta función
se ajusta automáticamente al canal
16.
* Esta función no tiene efecto si se
selecciona ei modo de control
remoto.
MIDI Error Display
During MIDI reception, if the data cannot be
properly transferred or the amount of data
transferred exceeds the capacity of the
transmit/ receive buffer, the following MIDI error
display will appear.
If this occurs, try turning the power switch OFF
and then ON again. If the problem is caused by
a buffer overflow, the data rate or amount of
data sent should be reduced until the problem
disappears.
MIDI-Fehleranzeige
Falls während der MIDI-Übertragung
Datenfehler auftreten oder zuviele Daten auf
einnial übertragen werden und der
Übertragungs/ Empfangspuflerspeicher
überlastet wird, erscheint die folgende MIDIFehleranzeige.
Falls dies auftritt, sollten Sie zunächst das
PSR—38 aus-, dann wieder einschalten. Falls
der Fehler durch Überlauf des Puffers
verursacht wird, sollte die
Übertragungsgeschwindigkeit oder die
Datenmenge so weit reduziert werden, bis
kein Fehler mehr auftritt.
Affichage d'erreur MIDI
Pendant la réception MIDI, si des données ne
peuvent pas être transmises correctement ou si
le volume des données transmises dépasse la
capacité de la mémoire tampon de
transmission/ réception, le message d’erreur
MIDI suivant sera affiché. Lorsque ced se
produit, mettre l'instrument hors tension et te
remettre sous tension. Si )e problème est dû à
un débordement de la mémoire tampon, la
vitesse de transmission ou le volume des
données transmises doit être réduit jusqu'à ce
que le problème ne se produise plus.
V^ualización de errores MIDI
Durante la recepción MIDI, si los datos no
pueden transmitirse correctamente o la
cantidad de datos transmitidos excede de la
capacidad del registro intermedio de
transmisión/ recepción, aparecerá la siguiente
visualización de errores MIDI. Si esto ocurre,
pruebe a desconectar el interruptor de la
alimentación y luego conéctelo otra vez. Si el
problema es causado por un sobreñujo del
registro intermedio, la relación de datos o la
cantidad de datos enviados debe reducirse
hasta que el problema desaparezca.
45
Page 47

OPTIONAL
SONDERZUBE
ACCESSOIRES EN
ACCESORIOS
ACCESSORIES
• AC Power Adaptor
(РА-1/ РА-1В/ РА-3/ РА-4/ PA-40)
Transforms AC voltage to DC voltage.
• Headphones (НРЕ-3/ HPE-5)
These specially designed lightweight
headphones feature extra-comfortable
ear pads.
• Stand (L-2/ L-4)
This lightweight, portable stand provides
a sturdy, convenient support for your
PSR-38.
• Bench (BC-8)
• Stereo Connection Cord (PSC-3)
Use this cord to connect your PSR-38 to
a stereo hi-fi system.
• Stereo Conversion Plug (PCP-1)
Converts stereo pin jacks to a stereo
phone plug.
HÖR
• Netzadapter
(PA-i; PA-IB/ PA-3/ PA-4/ PA-40)
Wandelt Netzspannung in
Gleichspannung um.
• Kopfhörer (HPE-3/ HPE-5)
Diese speziell konzipierten leichten
Kopfhörer bieten besonders
komfortable Ohrmuscheln.
• Ständer (L-2/ L-4)
Dieser leichte, trage Ständer dient als
solides, praktisches (bestell für das
PSR-38
• Bank (BC-6)
• Stereo-Anschlußkabel (PSC-3)
Dieses Kabel dient zum Anschließen
des PSR—38 an eine HiFi-Stereoanlage.
• Stereo-Adapterstecker (PCP-1)
Dieser Stereo-Klinkenstecker erlaubt
den Anschluß von Cinchsteckerkabeln.
OPTION
• Adaptateur secteur (PA-1/ PA-3/
PA-4/ PA^)
Transforme le courant alternatif en
courant continu.
• Casque d'écoute (HPE-3/ HPE-5)
Ces casques d'écoute ultra-légers,
spécialement conçus pour cet
instrument, sont pourvus de coussinets
d'oreille extrêmement confortables.
• Support (L-2/ L-4)
Ce support portable, léger et solide, est
parfait pour le PSR-38.
• Banc (BC-6)
• Câble de raccordement stéréo
{PSC^)
Utiliser ce câble pour connecter le
PSR-38 à une chaîne Hi-Fi stéréo.
• Connecteur stéréo (PCP-1)
Pour brancher des prises à broche
stéréo à une prise de jack stéréo.
OPCIONALES
• Adaptador de alimentación de CA
(PA-1/ PA-3/ PA-4/ PA-40)
Transforma la tensión de CA en
tensión de CC.
• Auriculares (HPEi-3/ HPE-5)
Estos auriculares ligeros especialmente
diseñados están preparados para
ofrecer gran comodidad a los oídos.
• Soporte (L-2/ L-4)
Este soporte portátil, y ligero le
proporciona resistente y conveniente
soporte para su PSR-38.
• Banqueta (BC-6)
• Cable de conexión estéreo (PSC-3)
Emplee este cable para conectar el
PSR-38 a un sistema estéreo de alta
fidelidad.
• Clavija de conversión estéreo
(PCP-1)
Convierte las clavijas normales estéreo
a clavijas telefónicas estéreo.
* So me op tional acces sories may not be
ava ilable in all a reas.
* Manches Sonderzubehör ist in * Ce rtains acces soires peuvent ne pas
gewissen Bestimmungsländern nicht
erhältlich.
être dispo nibles dans certai nes régions.
* Algunos accesorios opcionales no están
disponibles en todos los países.
46
Page 48

SPECIFICATIONS
TECHNISCHE
FICHE TECHNIQUE
ESPECIFICACIO
keyboard
61 keys (Cl -C6)
Voices (UPPER, 00 - 99)
Piano 1. Piano 2. Honky-Tonk Piano. Elec. Piano 1. Elec. Piano
2, Harpsichord, Clavi, Synlh Clavi, Celesta. Toy Piano, Vibes,
Chimes. Xylophone, Marimba, Bamboo Marimba, Tirrpani,
Steel Drum. Kalirrba, Gameian. Music Box, Strings, Pl2Z.
Strings, Synth Strings 1, Synth Strings 2. Vk^in, Cello, Harp,
Flute. Pan Flute, Recorder, Clarinet, Oboe, Bassoon.
Saxophone. Harmonica, Accordion. Bagpipe, Trumpet, Mute
Trurrpet. Trorrtwne. Horn. Tuba. Brass Enserr4)le, Synth Brass
1, Synth Brass 2. Pipe Organ, Jazz Organ, Rock Organ, Street
Organ, Reed Organ, Human Vox, Synth Vox, Whistle, Classic
Guitar, Folk Guitar, Jazz Guitar, Rock Guitar, Distortion Guitar.
Mute Guitar, Banjo, Mandolin, Sitar, Koto, Shamisen, Acoustic
Bowed Bass, Elec. Bass. Slap Bass, Fretless Bass. Synth
Bass 1, Synth Bass 2, Synth Bass 3, Analog Synth, Reed
Synth. Synth Music Box. Space Flute, Aqua. Landscape,
Metallic Blow, Metallic Reed, Crystal, Ice Block, Synth Tom,
Sarrba Whistle. African Percuss, Birds. Digi Sweep, Hammer
Shot, Crystal Block, Invader, Shock Alarm, Owl, Water Drop,
Emergency, Zing, Racing Circuit, Scrape. Construction. Wave.
Orchestra HI
VolCM(LOWER,00-19)
Piano, Elec Piarx>, Harpsichord, Clavi, Vbes, Music Box,
Strings. Flute. Accordion. Brass. Synth Brass, Horn, Organ,
Jazz Guitar, Distortion Gular, Synth Vox, Acoustic Bass, Elec
Bass, Synth Bass 1, Synth Bass 2
Controls:
Voice Select Buttons (0-9, *. -), Voice List (00 - 99)
Effects
Sustain, Dual Voice
Accompaniment Styles
Disco 1, Disco 2, Pops, 16 Beat, Rockn Roll. Heavy Metal, Rap,
Big Band, Swing, Bounce Rock, Slow Rock, Ballad, Baroque,
Country. Ragtime, Tango. Reggae, Salsa, Rhumba, Samba,
Bossanova, March/ Polka, Waltz, Jazz Waltz
Controls:
Accompaniment Style Select Buttons. Tempo Control Buttons
(▲, T). Acconpaniment Volume Buttons (A, ▼), Synchro Start
Button. Start Button. Stop Button. IntroJ FIN In Button 1, Intros
Fill In Button 2. Introi Ending Button
Keyboard Percussion
Bass Drum, Low Conga, High Conga, Low Tom, High Tom, Low
Snare Drum, High Snare Drum, Rimshot, Low Agogo, High
Agogo, Ck>s^ Hi-Hat, Open HFHat, Ride Cymbal, Crash
Cymbal, Claves. Clape
Controls:
Keyboard Percussion Button, Keyboard Percussion Keys.
DATEN
Manual
61 Tasten (С 1 • C6)
Stimmen (Melodiestimmen 00 - 99)
Piano 1, Piano 2, Honl^-Tbnk Piano, Elee. Piano 1, Elee.
Piano 2, Harpsichord, Clavi, Synth Clavi, Celesta, Tc^ Piano,
Vibee, Chimes, Xylophone, Marimba, Bamboo Marimba,
Timpani, Steel Drum, Kalimba, Gameian, Music Box,
Strings, PizE. Strings, Synth Strings 1, Synth Strings 2,
Violin, Cello, Harp, Flute, Pan Flute, Recorder, Clarinet,
Oboe, Bassoon, Saxofone, Hann<mica, Accordion, Bag^pe,
Trumpet, Mute Trumpet, ТгснпЬопе, Нот, Tuba, Brass
Ensemble, Synth Brass 1, Synth Brasa 2, Йре Organ, Jazz
Organ, Rock Organ, Street Organ, Reed Organ, Human Vox,
Synth Vox, Whistle, Classic Guitar, Folk Guitar, Jazz Guitar,
Rock Guitar, Distortion Guitar, Mute Guitar, Banjo,
Mandolin, Sitar, Koto, Shamisen, Acoustic Bass, Bowed Bass,
Elec. Bass, Slap Baas, Pretless Baas, ^nth Bass 1, Synth
Bass 2, Synth Bass 3, Analog Synth, Reed Synth, Synth
Music Box, Space Flute, Aq\ia, Landscape, Metallic Blow,
Metallic Reed, Crystal, Ice Block, Synth Tbm, Samba
Whistle, African Percuss, Birds, Digi Sweep, Hammer Shot,
Crystal Block, Invader, Shock AJarm, Ow!, Water Drop,
Emergency, Zing, Racing Circuit, Scrape, Construction,
Wave, Orchestra Hit
Stimmen (Beg^eitstimmen 00 - 19)
Piano, Elec l^ano, Harpsichord, Clavi, Vibes, Music Box,
Strings, Flute, Accordion. Brass, Synth Brass. Horn, Organ,
Jazz Guitar, Distortion Guitar, Synth Vox, Acoustic Bass,
Elec Bass, ^nth Bass 1, Synth Bass
Bedienelemente:
VOICE SELECT-Tasten (0 — 9, +, —), Stimmenliste (00 - 99)
Effekte
Sustain, Dual Voice
Be^eitstile
Disco 1, Disco 2, Pops, 16 Beat, Rock'n Roll, Heavy Metal,
Rap, Big Band, Swing, Bounce Rock, Slow Rock, Ballad,
Baroque, Country, Ragtime. Tango, Reggae, Salsa, Rhximba,
Samba, Bossanova, March/ Polka, Waltz, Jazz Waltz
Steuerelemente:
Accompaniment Style Select-Wahltasten, Tempo-listen (A ,
▼), Accompaniment Volume^Ikaten (A , ▼), Synchro Start
liste, Start-liste, STOP-Taste, Intro7 Fill in-Taste, Intro./
Ending-liste,
KEYBOARD PERCUSSION
Bass Drum, Low Conga, High Conga, Low Ibm, High Ibm,
Low Snare Drum, High Snare Drum, Rimshot, Low Agogo,
High Agogo, Closed Hi-Hat, Open Hi-Hat, Ride Cymbal,
Crash Cymbal, Claves, Claps
Bedienelemente:
Keyboard Percussion-Taste, Percussion-Tasten
2
Clavier
61 touches (Dol - Do€)
Volx (UPPER 00-99)
Piano 1, Piano 2. Honky-Tonk Piano, Elec. Piano 1, Elec. Piano
2, Harpsichord. Clavi, Synth Clavi. Celesta, Toy Piano, Vibes,
Chimes, Xylophone, Marimba, Bamboo MarintDa, Timpani,
Steel Drum. K^ini>a. Gameian. Music Box. Strings. Pizz.
Strings, Synth Strings 1. Synth Strings 2, Violin, Celb, Harp.
Flute. Pan Flute, Recorder, Clarinet. Oboe, Bassoon,
Saxophone, Harmonica, Accordion, Bagpipo, Trumpet, Muto
Trurriwt, Trorrtoor>e, Horn, Tuba. Brass Ensemble, Synth Brass
1, Synth Brass 2. Pipe Organ. Jazz Organ. Rock Organ. Street
Organ, Reed Organ, Human Vox. Synth Vox, Whistle. Classic
Guitar, Folk Guitar, Jazz Guitar. Rock Guitar. Distortion Guitar,
Mute Guitar. Banjo. Mandolin, Sitar, Koto, Shamisen, Acoustic
Bass, Bowed Bass. Elec. Bass. Slap Bass. Fretless Bass. Synth
Bass 1, Synth Bass 2. Synth Bass 3. Analog Synth. Reed
Synth. Synth Music Box. Space Fiuta, Aqua, Landscape.
Metailic Blow, Metallic Reed. Crystal. Ice Block, Synth Tom,
SatTi>a Whistle, African Percuss. Birds, Digi Svveep, Hammer
Shot. Crystal Block. Invader. Shock Alarm. Owl. Water Drop.
Emergency, Zing, Racing Circuit, Scrape, Construction. Wave,
Orchestra Hit
Vòix (LOWER 00-19)
Piano, Elec Piano, Harpsichord, Clavi, Vibes, Music Box,
Strings. Flute, Accordion, Brass. Synth Brass, Horn. Organ,
Jazz Guitar, Distortion Guitar, Synth Vox. Acoustic Bass. Elec
Bass, Synth Bass 1, Synth Bass 2
Commandes:
Touches de sélection des wix (0 - 9. 4. -). Liste des voix (00 -
99)
Effets
Sustain. Dual Voice
Stylos d'accompagnement
Disco 1, Disco 2. Pops, 16 Beat. Rockn Roll, Heavy Melai, Rap,
Big Band, Swing. Bounce Rock, Slow Rock. Ballad. Baroque.
Country, Ragtime, Tango. Reggae, Salsa, Rhumba, Samba,
Bossanova, March/ Polka, Waltz. Jazz Waltz
Commandos:
Touches de sélection des styles dacconpagnement. touches
de réglage du tempo (A . T), touche de réglage du volume
d’aocorTpagnement. touche de début synchronisé, touche de
début, touche d'arrêt, touche tntroV Fill in 1 et 2, touche IntroV
Ending
Poreuooion au clavlor
Basa Drum, Low Conga, High Conga, Low Tom. High Tom, Low
Snare Drum, High Snare Drum. Rimshot. Low Agogo. High
Agogo. Closed Hi-Hat. Open HFHat, Ride Cyni>al, Crash
Cymbal, Claves, Claps
Commandos:
Touche de percussion au clavier, Touches de percussion du
clavier
NES
Teclado
61 teclas (C1-C6)
Vocee (UPPER 00-99)
Piano 1, Piano 2, Honky-Tonk ТЧапо, Elec. Piano 1, Elec.
Piano 2, Harpsichord, Clavi, Synth Clavi, Celesta, T<^ Piano,
Vibes, Chimes, Xylophone, Marimba, Bamboo Marimba,
Timpani, Steel Drum, Kalimba, Gameian, Music Box,
Stringa, Pzz. Strings, Synth Strings 1, Synth Strings 2,
Violin, Cello, Harp, Flute, Pan Flute, Recorder, Clarinet,
Oboe, Be »soon. Saxophone, Harmonica, Accordim, Bagpipe,
Trumpet, Mute Trumpet, Trombone, Horn, Tuba, Brass
Ensemble, Synth Brass 1, Synth Brass 2, Pipe Organ, Jazz
Organ, Rock Organ, Street Organ, Reed Organ, Human Vox,
Synth Vox, Whistle, Classic Guitar, Folk Guitar, Jazz Guitar,
Rock Guitar, Distortion Guitar, Mute Guitar, Banjo,
Mandolin, Sitar, Koto, Shamisen, Acoustic Bass, Bowed Bass,
Elec. Bass, Slap Bass. Pretless Base, ^nth Bass 1, Synth
Bass 2, Synth Bass 3, Analog Synth, Reed Synth, Synth
Musk Boar, Space Flute, Aqua, Landscape, Metallic Blow,
Metallic Reed, Crystal, Ice Block, Synth Tom, Samba
Whistle, African Percuss, Birds, Digi Sweep, Hammer Shot,
Crystal Block, Invader, Shock Alarm, Ow!, Water Drop,
Emergency, Zing, Racing Circuit, Scrape, Construction,
Wave, Orchestra Hit
Voces (LOWER 00 - 19)
Piano, Elec Иапо, Harpsichord, Clavi, Vibes, Music Boa,
Strings, Flute, Accordion, Brass, Synth Brass, Horn, Organ,
Jazz Guitar, Distortion Guitar, Synth Vox, Acoustic Bass,
Elec Base, i^nth Base 1, Synth Base 2
Controles:
Botones selectores de voces (О - 9,4, lista de voces (00 -
99)
Efectos
Sostenido, voz doble
Estilos de acompañamiento
Disco 1, Disco 2, Pope, 16 Beat, Rock'n Roll, Heavy Metal,
Rap, Big Band, Swing, Bounce Rock, Slow Rock, Ballad,
Baroque, Country, Ragtime, Tkngo, Reggae, Salsa, Rhumba,
Samba, Bossanova, March/Polka, Waltz, Jazz Waltz
Controles:
Botones de selección de estilo de acompañamiento botones de
control de lempo (A , ▼), botones del volumen del
acompañamiento (A , T), botón de inicio sincronizado, botón
de inicio, botón de parada, botones de introducción/ relleno 1
y 2, botón de preludio/ coda
Perensión del teclado
Base Drum, Low Conga, High Conga, Low Тио, High Ibm,
Low Snare Drum, High Snare Drum, Rimshot, Low Agogo,
High Agogo, Closed Hi-Hat, Open Hi-Hat, Ride Cymbal,
Crash Cymbal, Claves, Claps
Controles:
Botones de percusión del teclado, teclas de percusión del
teclado
47
Page 49

Auto Bass Chord
Controls:
Auto Bass Chord Selector (Off, Single Finger, Fingered, Split)
Chord Sequencer
Controls:
Record Button, Play Button
Displays
Voice/ Terrpo/ Pitch/ Volume Display
Other Controls
Power Switch, Master Volume, Pitch (A. T), Demonstration
Button
Auxiliary Jacks
HEADPHONES/AUX. OUT, DC (9-12V) IN
Main Amplifier
2.5WX 1 (RMS)
Speaker
12cm (4-3/ 4“)x2
Rated VoHage
DC 9V(Six SUM-1, "D” size, R-20 or equrvaient batteries). AC
Power Adaptor(PA-1. PA-1 B, PA-3, PA-4, PA-40)
Dimen8ions<W x D x H)
958 mm X 365 mm X 123 mm (37-11/16" x 1 4-3/8 " x 4-13/ 16“)
Weight
6.0 Kg (13.2 lbs)
' ^)ecfHcatfons are subject to char>ge without rn^ice.
Auto Bms Chord
Bedienelemente:
Auto Bass Chord-Wahler (Off, Single Finger, Fingered, Split)
Chord Sequencer
Bedienelemente:
Record-Taste, PLAY-Taste
Display
Stimmt Temped Tbnhfthe/ Lautstarke
Andere Bedxenelemente
Power-Schalter, Master Volume, Pitch-Thsten (A , ▼),
Demonstration-Taste
Zusatz buchsen
HEADPHONES/AUX. OUT, DC (9-12V) IN
Hauptverstärker
2,5W X 1 (RMS)
Lautsprecher
12 cm X 2
Stromversorgung
9V Gleichspannung (sechs SUM-1, Monozellen, Große “D“
oder entsprechend), Netzadapter (PA-1, PA-IB, PA-3. PA-4,
PA-40)
Abmessungen (B X H X T)
958 mm x 365 mm x 123 mm
Gewicht
6.0 kg
* Das Recht zu Änderu7\gtn ohne Vorankündigung bleibt
Vorbehalten,
Accords et basses automatiques
Commandes:
Sélecteur accords et basses automatiques (Off, Single Finger.
Fingered, Split)
Sóquenceur d’accords
Commandes:
Touche d'enregistrement, touche de reproduction
Affichages
Affichage Voix/Tempo/ Hauteur/ Volume
Autres commandes
Interrupteur d'alimentation, Master Volume, Hauteur (A , T),
Touche de démonstration
Prises auxiliaires
HEADPHONES/ AUX. OUT. DC (9-12V) IN
Amplificateur principal
2.5W X 1 (eff.)
Haut-parleurs
12cm X 2
Tension nominale
CC. 9V (six piles SUM-1. R-20. de format ”D" ou dee piles
équivalentes), adaptateur secteur (PA-1. PA-1 B. PA-3. PA-4.
PA-^0)
Dimensions (L x P x H)
958 mmx 365 mm x 123 mm
Poids
6.0 kg
* Les spóc^icatiorK sont susœptibies (fétre modifiées sans
autre forme d'avis
Acompañamiento automático de bi^o y
acordes
Controles:
Selector de acompañamiento automático de bajo y acordes
(Off, Single Finger, Fingered, Split)
Secuenciador de acordes
Controles:
Botón de grabación, botón de reproducción
Visualizaciones
Visualizaciones de voz/ tempo/ tono/ volumen
Otros controles
Interruptor de alimentación, volumen principal, tono (A , ▼),
botón MIDI,botón de demostración.
Tomas auxiliares
HEADPHONES/AUX. OUT, DC (9-12V) IN
Amplificador principal
2.5W X 1 (RMS)
Altavoz
12 cm X 2
Tensión nominal
DC 9V (seis SUM-1, tamaño "D",R-20 o pilas equivalentes).
Adaptador de alimentación de CA (PA-1, PA-lb, PA-3, PA-4
o PA-40)
Dimensiones (An x Prf x Al)
956 mm x 366 mm X 123 mm
Peso
6,0 kg
* Las especificaciones están sujetas a cambios sin previo
aviso.
48
Page 50

4:^
<o
YAMAHA [ Portatone ]
Model PSR-38 MIDI Implementation Chart
Date : 03/29 1990
Version ; 1.0
Function
Basic
Default
1
Channel Changed 1-16
3
X
Mode
Default
Messages
Altered
Note
Number : True voice
Velocity
Note on
Note off
After Key’s
Touch
Ch’s
Pitch Bender
36-96
:f;^
X 9nH, v=64 *3
X 9nH, v=0
X
X
X 0
Transmitted
Recognized
1
1-16
3
OMNI on, OMNI off
X
36-96
36-96
v= 1-127
0
X
X
X
0-2 semi
Remarks
Remote Control Mode
*1
*2
*4
*4 Tbit resolution
X 0
7
Control
64 0 0
Change
Program
Change
: True #
System Exclusive
System : SongPos
0 0-99
*************
X
X X
: SongSel X X
Common
: Tune
X
System : Clock 0 0
Real Time : Commands
Aux :
Local ON/OFF
0
X
All Notes OFF X
Mes-
Active Sense
sages : Reset
0 0
X X
0 0-99
0-99
0
X
0
0
(122-125)
0
*4 Volume
Sustain
*5
Only Remote
Control mode
Notes
Mode 1 :
Mode a •-
: *1 1 -127 if
*2 24 -102 if standard voice mode is on
standard voice mode is on
*3 v=127 if standard voice mode is on
*4 only standard voice mode
*5 0 -120 if
OMNI ON, POLY
OMNI OFF, POLY
standard voice mode is on
' Mode 2 : OMNI ON, MONO
Mode 4 :
OMNI OFF. MONO
0 : Yes
X No
Page 51

STANDARD VOICE MODE OUTPUT VOICE NUMBER CHART
PSRrdS
NO
01
02 HOÌJKY-TONK PIANO 25
03
04
05 HARPSICHORD
06 CLAVI 30
07
08
09 TOY PIANO
10
11 CHIMES
12 XYLOPHONE
13 MARIMBA
rm
15
16
17 KALIMBA
»ANEL VOICES
PIANO 1 03 PIANO 1
PIANO 2
E. PIANO 1 05 ELECTRIC PIANO 1
E. PIANO 2 54 ELECTRIC PIANO 2
SYNTH CLAVI
CELESTA
VIBRAPHONE
BAMBOO MARIMBA
TIMPANI
STEEL DRUM 09 STEEL DRUM
irsi GAMELAN
19 MUSIC BOX
20 STRINGS 41
21 PIZZ. STRINGS
22
SYNTH STRINGS 1
23 SYNTH STRINGS 2
VIOLIN 10 VIOLIN 1
24
CELLO
25
HARP 37 HARP
26
FLUTE 20 FLUTE
27
28 PAN FLUTE
RECORDER 88
29
CLARINET
30
OBOE 21 OBOE
31
BASOON 97
[Ш
SAXOPHONE
33
34
HARMONICA
35 ACCORDION
36
BAG PIPES
37
TRUMPET
38 MUTE TRUMPET
39 TROMBONE 16 TROMBONE
HORN 17 HORN
40
TUBA 84
41
BRASS ENSEMBLE 92 BRASS ENSEMBLE 1
42
43 SYNTH BRASS 1
44 SYNTH BRASS 2
45 PIPE ORGAN
46 JAZZ ORGAN
47 ROCK ORGAN 27 ROCK ORGAN
STREET ORGAN 57 STREET ORGAN
48
49
REED ORGAN
NO
52
04 HARPSICHORD 1
60
06
26 TOY PIANO
07 VIBRAPHONE
64 CARILLON
59
08 MARIMBA
65 PIZZICATO VIOLIN
66
61 KALIMBA
62 TUBULA BELLS
24 MUSIC BOX
78 PIZZICATO STRINGS
50
51
11
47 PAN FLUTE
19 CLARINET
18
22 HARMONICA
31 ACCORDION
43 BAGPIPE
15 TRUMPET
44 MUTE TRUMPET
00 SYNTH BRASS 1
82 SYNTH BRASS 2
29 PIPE ORGAN 2
01 JAZZ ORGAN
49 REED ORGAN
MIDI OUT
SIANDARD VOICE*?
PIANO 2
HONKY TONK PIANO
FUNKY CLAVI
SYNTH(PERCUSSIVE)
CELESTA
XYLOPHONE
TIMPANI
STRINGS 1
STRINGS 2
SYNTH STRINGS
CELLO
RECORDER
KAZOO
SAX
TUBA
Р8Я-38
NO
51
52
53
54
55
56
57
58
59 BANJO
60
61
62 KOTO
63
64
65
66 ELEC. BASS
67 SL^P BASS
68
[Ml
70
71 SYNTH BASS 3
Г721 ANALOG SYNTH
73
[751
[7g1
П2]
[781
79
rsül
81
[Ml
83
Ш
Ml
fWI DIGI SWEEP
[S71
rssi
1891
[8Ü1
SB
sa
\ш
[Ш
ss
[Ш
S71 CONSTRUCTION
ЭН
sa
PANEL VOICES
HUMAN VOX 96 human'chorus
SYNTH VOX 94 HUMAN VOICE 1
WHISTLE 23 WHISTLE
CLASSIC GUITAR 73 CLASSIC GUITAR
FORK GUITAR 36 FORK GUITAR
JAZZ GUITAR 12 JAZZ GUITAR
ROCK GUITAR 68 ROCK GUITAR 2
DISTORTION GUITAR 13 ROCK GUITAR 1
MUTE GUITAR 70 ROCK GUITAR 4
MANDOLIN 74 MANDOLIN
SITAR
SHAMISEN
ACOUSTIC BASS 14 WOOD BASS 1
BOWED BASS 35 BOWED BASS
FRETLESS BASS 80 ELECTRIC BASS 3
SYNTH BASS 1 81
SYNTH BASS 2 58 SYNTH BASS 1
REED SYNTH 85 SYNTH REED 2
SYNTH MUSIC BOX
SPACE FLUTE 98 MUSIC SAW
AQUA 28
LANDSCAPE 99
FUZZ BRASS 90 PIPE ORGAN 1
METALLIC REED 45 SYNTH REED
CRYSTAL 33 HAWAIIAN GUITAR
ICE BLOCK
SYNTH TOM 63
SAMBA WHISTLE 91
AFRICAN PERCUSS.
BIRDS
HAMMER SHOT 79 ELECTRIC BASS 2
CRYSTAL BLOCK
INVADER 93 WOODWIND ENSEMBLE
SHOCK ALARM 83 WOW TRUMPET
OW!
WATER DROP
EMERGENCY 56 BANDONEON
ZING
RACING CIRCUIT
SCRAPE 71 PEDAL STEEL GUITAR
WAVE
ORCHESTRA HIT 90 ORCHESTRA HIT
'no
34
75
76
77
38 ELECTRIC BASS 1
39
86 SYNTH BASS 2
89
32 GLOCKENSPIEL
48
55 GLASS CELESTA
42 ALPENHORN
95
72 12 STRING GUITAR
69
40 UKULELE
46 JUG
67
87
53 HARPSICHORD 2
MIDI OUI
STA NDARD VOICES
BANJO
SITAR
KOTO
SHAMISEN
SLAP BASS
WOOD BASS 2
OCALINA
TREMOLO ORGAN
SINE WAVE
ICE BLOCK
HAND BELL
SAMBA WHISTLE
HUMAN VOICE 2
R.GUITAR 3
VIOLIN 2
FLUGELHORN
• Voice numbers not enclosed in boxes are common panel and standard voices,
• Die Stimmennummem, die nicht durch Rechtecke gekennzeichnet sind, stehen für allgemeine Intern- und Standardstimmen.
• Les numéros de voix qui ne sont pas encadrés sont des voix standard et panneau communes.
• Los números de voces que no están dentro de rectángulos son voces estándar y del panel común.
Page 52

STANDARD VOICE MODE INPUT VOICE NUMBER CHART
MIDI IN
NO.
00 SYNTH BRASS 1
01
02 PIPE ORGAN 1
03 PIANO 1
04 HARPSICHORD 1
05 ELECTRIC PIANO 1
06 CELESTA
07
08
09 STEEL DRUM
10 VIOLIN 1
11
STA NDARD VOICFS Ñ0.
JAZZ ORGAN
Щ]
VIBRAPHONE 10
MARIMBA
CELLO
43 SYNTH BRASS 1
46
00 PIANO 1
06
03 E. PIANO 1
08 CELESTA
13 MARIMBA
16 STEEL DRUM
24 VIOLIN
25 CELLO
12 JAZZ GUITAR 55
13 R.GUITAR (DIST.)
14 WOOD BASS 1
15 TRUMPET
16 TROMBONE
17
HORN
SAX 33 SAXOPHONE
18
CLARINET 30
19
20 FLUTE
21 OBOE
22 HARMONICA ■
23 WHISTLE
24
MUSIC BOX
25
HONKY-TONK PIANO
26 TOY PIANO
27
ROCK ORGAN
28 TREMOLO ORGAN
PIPE ORGAN 2 45 PIPE ORGAN
29
30 FUNKY CLAVI
31 ACCORDION
32 GLOCKENSPIEL
HAWAIIAN GUITAR
33
34
BANJO
35 BOWED BASS
36 FOLK GUITAR
37 HARP
38 ELECTRIC BASS 1
39 SLAP BASS
40 UKULELE
41
STRINGS 1
42 ALPENHORN
BAGPIPE 36 BAG PIPES
43
57 DISTORTION GUITAR
64 ACOUSTIC BASS
37
39 TROMBONE
40
27 FLUTE
31 OBOE
34
52 WHISTLE
19 MUSIC BOX
02
09 TOY PIANO
47 ROCK ORGAN
~4ü1 JAZZ ORGAN
06 CLAVI
35
[W1
ES
59 BANJO
65 BOWED BASS
54 FOLK GUITAR
26
66 ELEC. BASS
67
Г5Р1
20
35]
44 MUTE TRUMPET 38
45 SYNTH REED 1
46 JUG
47 PAN FLUTE
79
{Ш
28 PAN FLUTE
PSR-3B
PANEL VOICES
JAZZ ORGAN
FLUTE
HARPSICHORD
VIBRAPHONE
JAZZ GUITAR
TRUMPET
HORN
CLARINET
HARMONICA
HONKY-TONK PIANO
ACCORDION
TOY PIANO
FOLK GUITAR
HARP
SLAP BASS
MANDOLIN
STRINGS
HORN
MUTE TRUMPET
METALLIC REED
ZING
48 ICE BLOCK 81 ICE BLOCK
49 REED ORGAN
50 STRINGS 2
51 SYNTH STRINGS
52
PIANO 2
HARPSICHORD 2 05
53
54 ELECTRIC PIANO 2
GLASS CELESTA
55
56 BANDONEON
57 STREET ORGAN
58
SYNTH BASS 1
59 XYLOPHONE
SYNTH(PERCUSSIVE) rOTI
60
61
KALIMBA
62 TUBULA BELLS
63 HAND BELL rrai
49
REED ORGAN
22
SYNTH STRINGS 1
23 SYNTH STRINGS 2
01
PIANO 2
HARPSICHORD
04
E. PIANO 2
AFRICAN PERCUSS.
[M]
ACCORDION
BS
48 STREET ORGAN
70 SYNTH BASS 2
12 XYLOPHONE
SYNTH CLAVI
17
KALIMBA
CHIMES
Ш]
MUSIC BOX
MIDI IN
STANDARD VO.CES
NO.
CARILLON 1 1 CHIMES
64
PIZZICATO VIOLIN
65
TIMPANI 15
66
VIOLIN 2 24 VIOLIN
67
R.GUITAR 2 56
68
R.GUITAR 3
69
R.GUITAR 4
70
PEDAL STEEL GUITAR
71
12 STRING GUITAR
72
CLASSIC GUITAR
73
MANDOLIN 60
74
SITAR
75
76 KOTO
SHAMISEN 63
77
PIZZICATO STRINGS 21 PIZZ. STRINGS
78
ELECTRIC BASS 2 66
79
ELECTRIC BASS 3
80
WOOD BASS 2
81
82 SYNTH BASS 2
WOW TRUMPET Г371
83
TUBA 41
84
SYNTH REED 2 73
85
SYNTH BASS 2 71 SYNTH BASS 3
86
FLUGELHORN Г401
87
RECORDER 29
88
OCARINA
89
ORCHESTRA HIT
90
SAMBA WHISTLE
91
92 BRASS ENSEMBLE 1
WOODWIND ENSEMBLE
93
HUMAN VOICE 1 51
94
HUMAN VOICE 2 1511
95
HUMAN CHORUS 50
96
KAZOO
97
MUSIC SAW 1751
98
99 SIN WAVE
- 14 BAMBOO MARIMBA
100
-
101
-
102
-
103
-
104
-
105
-
106
-
107
-
108
-
109
-
110
-
1 1
-
112
-
1 13
-
114
-
115
-
116
-
117
-
118
-
119
-
120
-
121
-
122
-
123
-
124
-
125
-
126
127
-
NO.
PIZZ. STRINGS
fm
TIMPANI
ROCK GUITAR
ROCK GUITAR
1 56 1
ROCK GUITAR
EM]
Г541 FOLK GUITAR
FOLK GUITAR
SS
CLASSIC GUITAR
53
MANDOLIN
SITAR
61
KOTO
62
SHAMISEN
ELEC. BASS
FRETLESS BASS
68
ACOUSTIC BASS
64
44
SYNTH BRASS 2
TRUMPET
TUBA
REED SYNTH
HORN
RECORDER
WHISTLE
Ш
42 ORCHESTRA HIT
SAMBA WHISTLE
83
BRASS ENSEMBLE
42
CLARINET
\Ш
SYNTH VOX
SYNTH VOX
HUMAN VOX
BASOON
за
SPACE FLUTE
771 FLUTE
GAMELAN
18
74 SYNTH MUSIC BOX
AQUA
76
LANDSCAPE
77
78 FUZZ BRASS
CRYSTAL
80
82 SYNTH TOM
BIRDS
85
86 DIGI SWEEP
87 HAMMER SHOT
CRYSTAL BLOCK
88
INVADER
89
SHOCK ALARM
90
91 OW!
92 WATER DROP
93 EMERGENCY
RACING CIRCUIT
95
96 SCRAPE
97 CONSTRUCTION
WAVE
98
XX NO CHANGE
XX NO CHANGE
XX NO CHANGE
XX NO CHANGE
XX NO CHANGE
XX
NO CHANGE
XX
NO CHANGE
PSR-Зв
"panel voices"
• Voi ce num bers not en cbsed in bo xes ar e œmm on panel and sta ndard voices.
• Die Stimmennummem, die nicht durch Rechtecke gekennzeichnet sind^ stehen für allgemeine Intern- und Standardstimmen.
• Les num éros d e voix qui ne sont pas en cadré s sont des voix sta ndard et pa nneau comm unes.
•Los números de voces que no están dentro de rectángulos son voces estándar y del panel común.
Page 53

STANDARD VOICE MODE RHYTHM INSTRUMENT CHART
MIDI IN
NO, KEY
37 C#1 TRIANGLE MUTE AGOGO LOW 1
38
39 D#1 TRIANGLE OPEN ГАШЗС^ТН! ]
40 E 1 SYNTH TOM BASS 1 LOW TOM 1
41 F 1 SYNTH TOM LOW 1 LOW TOM 1
42 F#1 SYNTH TOM MID 1 HI TOM 1
43 G 1
44
45
46 A#1 RIM SHOT 2
47 В 1 BASS TOM
48 C 2 LOW TOM
49 Ш SNARE HI SNARE HI
50 D 2 MID TOM 1 HI TOM 1
51 D#2 RIM SHOT RIM SHOT
52 E 2 SNARE LOW SNARE LOW
53
54 F#2 HAND CLAP HAND CLAP
55 G 2
56 Gif2 SHAKER(CABASA) 1 HI-HAT CLOSE 1
57 A 2 HI-HAT CLOSE HI-HAT CLOSE
58
59 В 2 HI-HAT OPEN HI-HAT OPEN
60 C 3 CRASH CYMBAL CRASH SYMBAL
61 C#3 SPLASH CYMBAL
62 D 3 RIDE CYMBAL CUP 1 RIDE CYMBAL 1
63 D#3
64 E 3 CONGA LOW
65
66 F#3 CONGA HI MUTE 1 CONGA HI 1
67
68 G#3 BONGO HI 1 CONGA HI 1
69
70 A#3
71 В 3 TAMBOURINE 1 HI-HAT CLOSE 1
72 C 4 CASTANET
73 C#4 CLAVES WOOD BLOCK
74 D 4
75
76
77 F 4
78 F;f4 WHISTLE 1 WOOD BLOCKi
79 G 4 BRUSH 1 HI-HAT CLOSE 1
stANMD тШц
D 1 SYNTH SNARE i SN“ARE“LDWl
SYNTH TOM HI 1 HI TOM 1
BASS DRUM 2 BASS DRUM
GÍÍ1
A 1 BASS DRUM 1 BASS DRUM
F 2 HI TOM HI TOM
COWBELL 1 WOOD BLOCK 1
AÍÍ2 BRUSH HIT 1 HI-HAT CLOSE 1
RIDE CYMBAL RIDE CYMBAL
F 3 CONGA HI OPEN CONGA HI
G 3 BONGO LOW
A 3 TIMBALE LOW 1 LOW TOM 1
TIMBALE HI 1 HI TOM 1
AGOGO LOW AGOGO LOW
D#4
AGOGO HI AGOGO HI
E 4 CUICA LOW
CUICA HI 1 AGOGO HI 1
PSR-38
RHYTHM VOICES
RIM SHOT
LOW TOM
LOW TOM
1 RIDE CYMBAL I
CONGA LOW
1 CONGA HI 1
j
RIM SHOT
1 AGOGO LOW 1
1
1
Ni
• Voice numbers not enclosed in boxes are common PSR-48 and standard voices.
• Die Stimmennummem, die nicht durch Rechtecke gekennzeichnet sind, stehen für allgemeine Internstimmen des PSR-48 und
Standardstimmen.
• Les numéros de voix qui ne sont pas encadrés sont des voix standard et PSR-48 communes.
•Los números de voces que no están dentro de rectángulos son voces estándar y comunes del PSR-48.
Page 54

FCC INFORMATION
IMPORTANT NOTICE : DO NOT MODIFY THIS UNIT!
This product, when installed, as indicated in the instructions
contained in this manual, meets FCC requirements. Modifications
not expressly approved by Yamaha may void your authority, granted
by the FCC, to use the product.
IMPORTANT :
When connecting this product to accessories and/or another
product use only high quality shielded cables. Cable/s supplied
with this product MUST be used. Follow all installation instructions.
Feulure to follow instructions could void your FCC authorization to
use this product in the USA.
NOTE:
This product has been tested and found to comply with the
requirements listed in FCC Regulations, Part 15 for Class "B" digital
devices. Compliance with these requirements provides a
reasonable level of assurance that your use of this product in a
residential environment will not result in harmful interference with
other electronic devices. This equipment generates/uses radio
frequencies and, if not installed and used according to the
' This applies only to products distributed by Yamaha Corporation of America.
’ Dies bezieht sich nur auf die von der Yamaha Corporation of America vetiiebenen Produkte.
’ Ced ne s'applique qu'aux produits distribués par Yamaha Corporation of America.
' Esto se aplica solamente a productos distribuidos por Yamaha Coporation of America.
instructions found in the users manual, may cause interference
harmful to the operation of other electronic devices. Compliance
with FCC regulations does not guarantee that interference will not
occur in all installations. If this product is four>d to be the source of
interference, which can be determined by turning the unit "OFF" and
*'ON", please try to eliminate the problem by using one of the
following measures;
Relocate either this product or the device that is being affected by
the interference.
Utilize power outlets that are on different branch (circuit breaker or
fuse} circuits or install AC line filters.
In the case of radio of TV interference, relocate/reorient the
antenna. If the antenna lead-in is 300 ohm ribbon lead, change the
lead-in to co-axial type cable.
If these corrective measures do not produce satisfactory results,
please contact the local retailer authorized to distribute this type of
product. If you can not locate the appropriate retailer, please
contact: Yamaha Corporation of America, Electronic Service
Division, 6600 Orangethorpe Ave, Buena Park CA,90620
THIS DIGITAL APPARATUS DOES NOT EXCEED THE "CLASS B" LIMITS FOR RADIO
NOISE EMISSIONS FROM DIGITAL APPARATUS SET OUT IN THE RADIO
INTERFERENCE REGULATION OF THE CANADIAN DEPARTMENT OF COMMUNICATIONS.
LE PRESENT APPAREIL NUMERIQUE N'EMET PAS DE BRUITS RADIOELECTRIQUES
DEPASSANT LES LIMITES APPLICABLES AUX APPAREILS NUMERIQUES DE LA
"CUSSE B' PRESCRITES DANS LE REGLEMENT SUR LE BROUILLAGE
RADIOELECTRIQUE EDICTE PAR LE MINISTERE DES COMMUNICATIONS DU CANADA.
* This applies only to products distributed by Yamaha Canada Music Ltd.
* Dies bezieht sich nur auf die von der Yamaha Canada Music Ltd vertriebenen Produkte.
* Ced ne s'applique qu'aux produits distribués par Yamaha Canada Music Ltd.
* Ë8to ae aplica solamente a productos dîstribuidos por Yamaha Canada Muaic Ltd.
Wichitiger Hinweis für die Benutzung in der Bundesrepublik Deutschland.
Bescheinigung des Importeurs
Hiermit wird bescheinigt, da0 der/die/das
Musikinstrument Typ PSR^d
(Gerät, Typ, Bezeichnung)
in Übereinstimmung mit den Bestimmungen der
VERFÜGUNG 1046/84
(Amtablattverfbgung)
funk-entstört ist.
Der Deutschen Bundespost wurde das Inverkehrbringen dieses Gerätes
angezeigt und die Berechtigung zur Überprüfung der Serie auf Einhal
tung der Bestimmungen eingeräumt.
Yamaha Europa GmbH
Name des Importeurs
53
* This applies only to products distributed by Yamaha Europa GmbH.
* Dies bezieht sich nur auf die von der Yamaha Europa GmbH vertriebenen
Produkte.
* Cecl ne s'applique qu'aux produits distribués par Yamaha Europa GmbH.
* Esto se aplica solamente a productos dîstribuidos por Yamaha Europa
GmbH.
A
Page 55

YAM AH A
YAMAHA CORPORATION
P.O.Box 1. Hamamatsu, Japan
The serial num ber of this product may be found on
the bottom of the unit. You should note this serial
number in the space provided below and retain this
manual as a permanent record of your purchase to
aid identification in the event of theft.
Model No. PSR-38
Serial No.
Concerning the Warranty
This product was made for international distribution,
and since the warranty for this type of product varies
from marketing area to marketing area, please
contact the selling agency for information
concerning the applicable warranty and/or service
policies.
Die Seriennummer befindet sich an der
Unterseite des Instruments. Wir empfehlen, diese
Nummer sicherheitshalber an der unten
vorgesehenen Stelle cinzutragen, um sie auch im
Falle eines Diebstahls jederzeit zur Hand zu
haben.
Model-Nr. PSR-38
Serien-Nr.
Hinweis zur Garantie
Dieses I^odukt wird international vertrieben,
und die Garantiebedingungen sind von
Vertriebsland zu Vetriebsland verschieden. Ihr
Händler gibt Ihnen gerne ganauere
Informationen zu den in Ihrem Land gültigen
Garantie und'oder Servicebedingungen..
Le numéro de série de ce produit figure sur le socle
de l’apparetl. 1! conviendra de noter ce num éro de
série dans l'espace réservé ci'-dessous et de
conserver ce manuel: celui-ci constitue le document
perm anent de votre achat et permet l'identification
en cas de vol.
Modèle No, PSR-38
No. de série:
Rem arque relative à la garantie
Ce modèle est destiné à être distribué à l'échelle
internationale. Etant donné que les conditions de
garantie pour ce type de produit varient en fonction
des zones de commercial sation, prière de prendre
contact avec l'agence chargée des ventes pour tous
renseignem ents relatifs aux conditions de garantie
et de service après-vente.
E1 número de serie de este producto se encuentra :
en la parte inferior de la unidad. Sírvase anotar
este número de serie en el espacio proporcionado
debajo y guarde este manual como comprobante ,
de compra para ayudar a la identificación en caso
de robo. i
de m odelo PSR-38
N"" de serie
Concerniente a la garantía
Este producto ha sido fabricado para ser ;
distribuido intcrnacionalmeote y, como la
garantía para este tipo de producto varía en
relación a
consultar con el agente de ventas sobre la
información en tomo a la garantía aplicable y/o
políticas de servicio.
bu área de comercialización, sírvase
9004 VJ42660 Pnntea n Japan :a;
 Loading...