

Page 1
INSTRUCTION MANUAL
HS-613
REVISION B
Hoffman Specialty
®
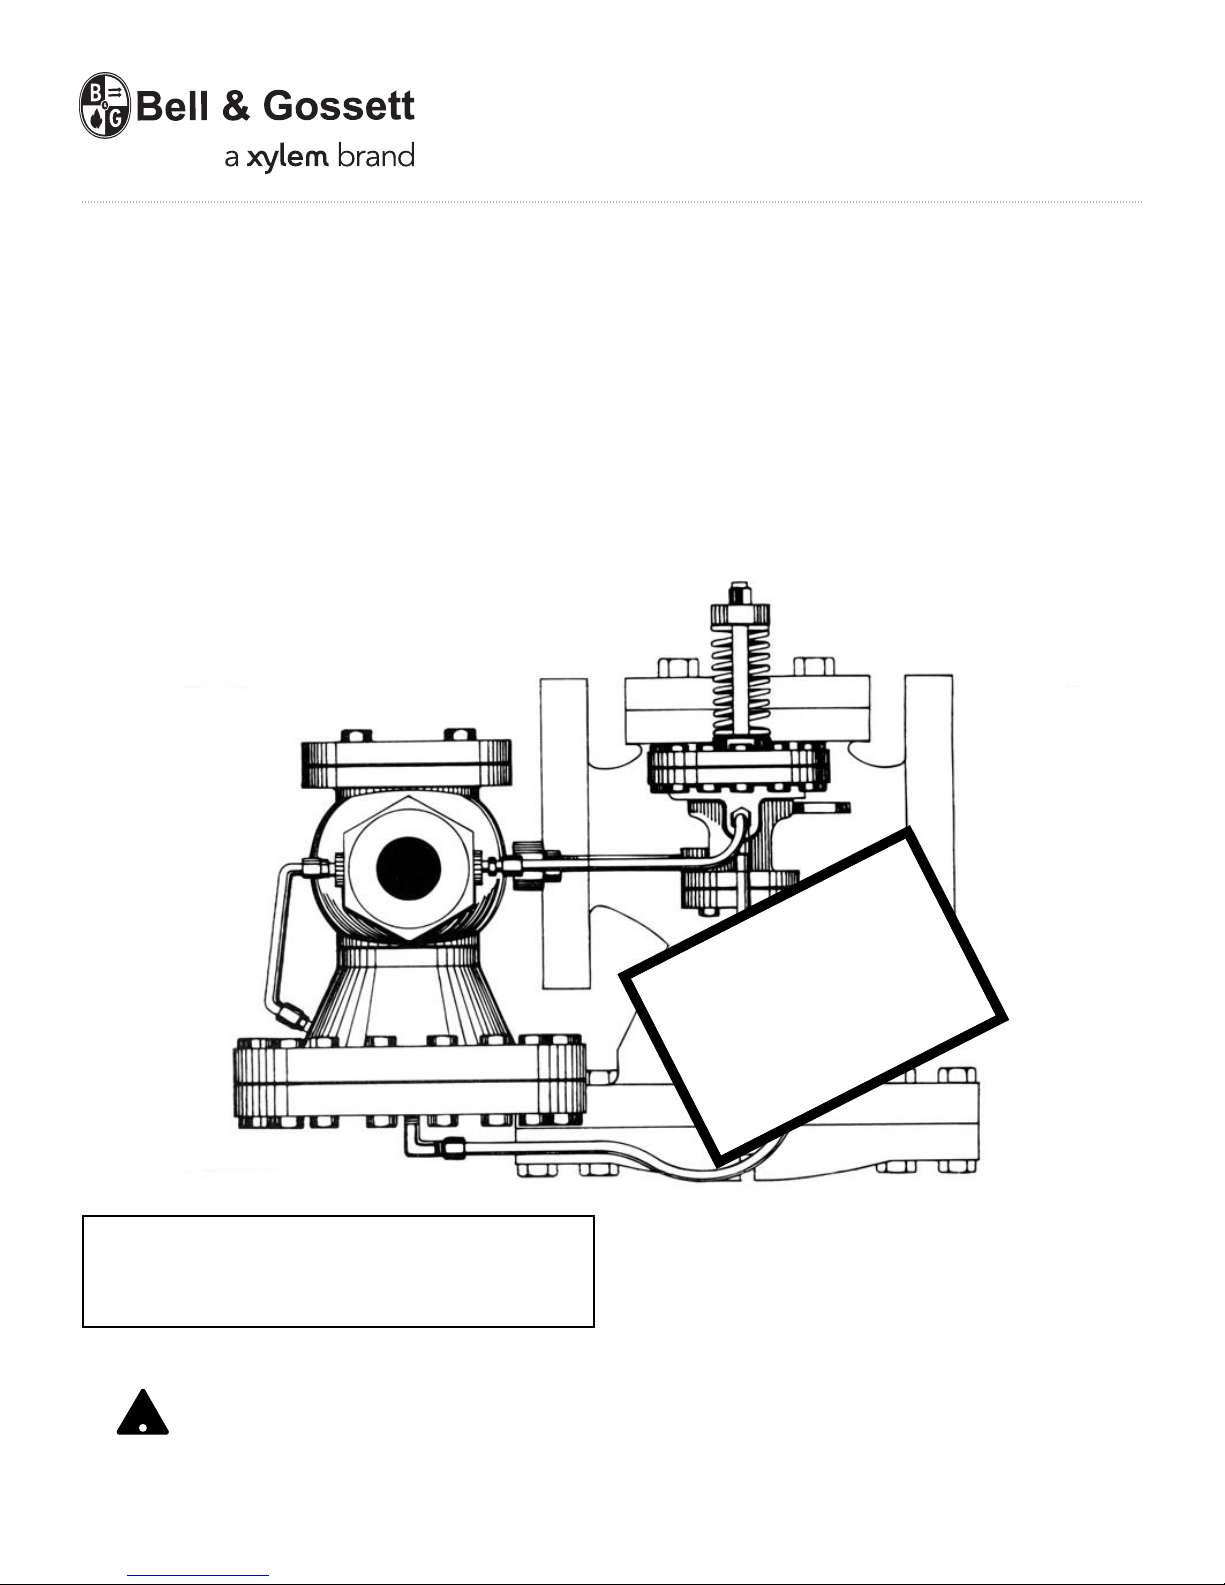
Series 2000 Air and Spring
Pilot Replacement Parts
Models AP-1, AP-3, AP-5
and SP-12, SP-30, SP-60, SP-175, SP225
(Not currently manufactured)
PLEASE READ INSTRUCTIONS CAREFULLY BEFORE
STARTING WORK. ALL WORK MUST BE PERFORMED
BY QUALIFIED PERSONNEL IN ACCORDANCE WITH
ALL APPLICABLE CODES AND ORDINANCES.
CAUTION:
!
BEFORE ANY VALVE SYSTEM IS DISASSEMBLED CLOSE ALL STEAM
LINES WHICH COULD PRESSURIZE
ANY OF THE VALVE CHAMBERS. ANY
VALVE CHAMBER MAY HAVE HOT CONDENSATE TRAPPED, USE CAUTION
WHEN OPENING ANY SECTION OR
CHAMBER.
NOTICE!
No regulator will work satisfactorily if
improperly installed. Read these
instructions carefully before making the
installation and follow directions as
outlined. Handle the regulator with
extreme care. Do not lift a regulator by
any external tubing.
Pressure Pilots
(SPRING AND AIR)
Remove the pilot from the main valve. In order to determine the malfunction before disassembling the valve, hook
the pilot to air and test. Attach shop air to the pilot inlet,
install a line with a shutoff valve and a pressure gauge at
the pilot outlet and plug the feed back port.
Page 2

Pressure Pilot Test
Pressure Pilot Repair
SEAT AND BALL LEAKAGE
Release the loading force. (Spring tension or air presure).
Open the inlet and outlet valves.
LOOK FOR: Leakage at the outlet, allow only a
very small leakage.
INDICATES: Seat and Ball are worn or held
open by dirt.
ACTION: Clean parts and retest, replace
parts if cleaning fails.
STICKING VALVE MOVEMENT
Close the outlet valve and adjust outlet pressure to half of
the inlet. Open and close the outlet valve several times.
LOOK FOR: Outlet pressure on valve closure,
the pressure should be approximately the same each time.
INDICATES: Moving parts are sticking.
ACTION: Clean parts and retest,
replace parts if cleaning fails.
DIAPHRAGM DAMAGE
Close the outlet valve pressurizing the downstream side
of the pilot.
LOOK FOR: Leakage to atmosphere at spring
button and cover or middle
diaphragm case vent, allow none.
INDICATES: Broken diaphragms.
ACTION: Replace diaphragms.
The instructions describe how to disassemble and rebuild
a pilot. For assembly the steps are reversed. Please note
that if the air test has indicated a specific problem some
of the steps may be skipped. For example, if the test
indicates a bad diaphragm, there is no need to open the
cover at the other end.
1. Unbolt Lower Cover.
REASSEMBLY TORQUE 175 in-lb.
2. Remove; Screen, Spring Ball Button, Ball and Stem.
Stem should drop out when the valve is inverted.
3. Clean the parts and inspect for wear on seat, ball and
stem. If there is no wear and it appears dirt was the
problem, assemble and retest the valve.
4. On the Spring Pilot remove the nuts and washers,
yoke, spring and spring button.
4a. On the air pilots unbolt the large diaphragm case.
Remove the case, diaphragms and button.
REASSEMBLY TORQUE 425 in-lb.
5. Move the pilot valve diaphragm button up and down
by hand. Movement should be smooth and free.
6. Unbolt the diaphragm cover. Remove it and the
diaphragm button.
REASSEMBLY TORQUE 175 in-lb.
7. Lift off the diaphragms and inspect for damage.
USE NEW DIAPHRAGMS FOR REASSEMBLY.
8. Lift out the cup and unthread the seat.
ASSEMBLY - THREAD IN UNTIL SEAT BOTTOMS.
9. Clean all gasket and diaphragm sealing surfaces. Use
steel wool or fine (400 grit) paper to clean diaphragm
seal areas.
IF PILOT PASSES
If the pilot valve passes the above tests it is functional
and the problem is somewhere else, proceed to main
valve.
Xylem Inc.
8200 N. Austin Avenue
Morton Grove, Illinois 60053
Phone: (847) 966-3700
Fax: (847) 965-8379
www.xyleminc.com/brands/bellgossett
Bell & Gossett is a trademark of Xylem Inc. or one of its subsidiaries.
© 2012 Xylem Inc. HS-613B October 2012 Part No. 514306
10. Clean all parts before reassembly. Polish sliding
surface with steel wool until movement is free.
REPLACE ALL WORN PARTS.
11. Reassemble the valve. Insert seat gasket and apply
non-hardening sealant to seat threads. Start at number 8
above and work backwards.
REASSEMBLY COMPLETED
When the assembly is completed retest with air.
 Loading...