


OWNER’S MANUAL
HOME PROJECTOR
TDP-MT500
SAFETY PRECAUTIONS
CAUTION
RISK OF ELECTRIC SHOCK
DO NOT OPEN
CAUTION: TO REDUCE THE RISK OF ELECTRIC SHOCK,
DO NOT REMOVE COVER (OR BACK)
NO USER-SERVICEABLE PARTS INSIDE
REFER SERVICING TO QUALIFIED
SERVICE PERSONNEL.
The lightning flash with arrowhead symbol, within an equilateral triangle, is intended to alert the user to the presence of uninsulated "dangerous voltage" within the product's enclosure that may be of sufficient magnitude to constitute a risk of electric shock to persons.
The exclamation point within an equilateral triangle is intended to alert the user to the presence of important operating and maintenance (servicing) instructions in the literature accompanying the appliance.
WARNING: TO REDUCE THE RISK OF FIRE OR ELECTRIC SHOCK, DO NOT EXPOSE THIS APPLIANCE TO RAIN OR MOISTURE. DANGEROUS HIGH VOLTAGES ARE PRESENT INSIDE THE ENCLOSURE. DO NOT OPEN THE CABINET. REFER SERVICING TO QUALIFIED PERSONNEL ONLY.
USA only
WARNING: Handling the cord on this product or cords associated with accessories sold with this product, will expose you to lead, a chemical known to the State of California to cause birth defects or other reproductive harm. Wash hands after handling.
FCC NOTICE: This equipment has been tested and found to comply with the limits for a Class B digital device, pursuant to part 15 of the FCC Rules. These limits are designed to provide reasonable protection against harmful interference in a residential installation. This equipment generates, uses and can radiate radio frequency energy and, if not installed and used in accordance with the instructions, may cause harmful interference to radio communications. However, there is no guarantee that interference will not occur in a particular installation.
If this equipment does cause harmful interference to radio or television reception, which can be determined by turning the equipment off and on, the user is encouraged to try to correct the interference by one or more of the following measures:
-Reorient or relocate the receiving antenna.
-Increase the separation between the equipment and receiver.
-Connect the equipment into an outlet on a circuit different from that to which the receiver is connected.
-Consult the dealer or an experienced radio/TV technician for help.
WARNING: Changes or modifications made to this equipment, not expressly approved by Toshiba, or parties authorized by Toshiba, could void the user’s authority to operate the equipment.
Use the attached RS-232C cable and mini D-SUB 15P - DVI conversion cable with this equipment so as to keep interference within the limit of a FCC class B device.
CANADA only
Notice: This Class B digital apparatus complies with Canadian ICES-003.
WARNING
Use the attached specified power cord. If you use another power cord, it may cause interference with radio and television reception, too.
This apparatus must be grounded.
CAUTION
Not for use in a computer room as defined in the Standard for the Protection of Electronic Computer/Data Processing Equipment, ANSI/NFPA 75.
When using the projector in Europe COMPLIANCE NOTICE
This Home Projector complies with the requirements of the EC Directive 89/336/EEC “EMC Directive” as amended by Directive 93/68/EEC and 73/23/EEC “Low Voltage Directive” as amended by Directive 93/68/EEC.
WARNING
Use the attached RS-232C cable and mini D-SUB 15P - DVI conversion cable with this equipment so as to keep interference within the limits of a EN55022 Class B. Use the shielded DVI cable with this equipment so as to keep interference within the limits of a EN55022 Class B. Please follow WARNINGS instructions.
2

IMPORTANT SAFETY INSTRUCTIONS
CAUTION: PLEASE READ AND OBSERVE ALL WARNINGS AND INSTRUCTIONS PROVIDED IN THIS OWNER'S MANUAL AND THOSE MARKED ON THE PROJECTOR. KEEP THIS OWNER'S MANUAL FOR FUTURE REFERENCE.
This projector has been designed and manufactured to assure personal safety. Improper use can result in electric shock or fire hazard. The safeguards incorporated in this projector will protect you if you observe the following procedures for installation, use and servicing. This projector is fully transistorized and does not contain any parts that can be repaired by the user.
1.Read Owner's Manual
After unpacking this projector, read the owner's manual carefully, and follow all the operating and other instructions.
3.Source of Light
Do not look into the lens while the lamp is on. The strong light from the lamp may cause damage to your eyes or sight.
2. Power Sources |
4. Ventilation |
This product should be operated only from the type of power source indicated on the marking label. If you are not sure of the type of power supply to your home, consult your product dealer or local power company.
Openings in the cabinet are provided for ventilation and to ensure reliable operation of the product and to protect it from overheating, and these openings must not be blocked or covered.
The openings should never be blocked by placing the product on a bed, sofa, rug or other similar surface. This product should not be placed in a built-in installation such as a bookcase or rack unless proper ventilation is provided or the manufacturer's instructions have been followed.
3
IMPORTANT SAFETY INSTRUCTIONS
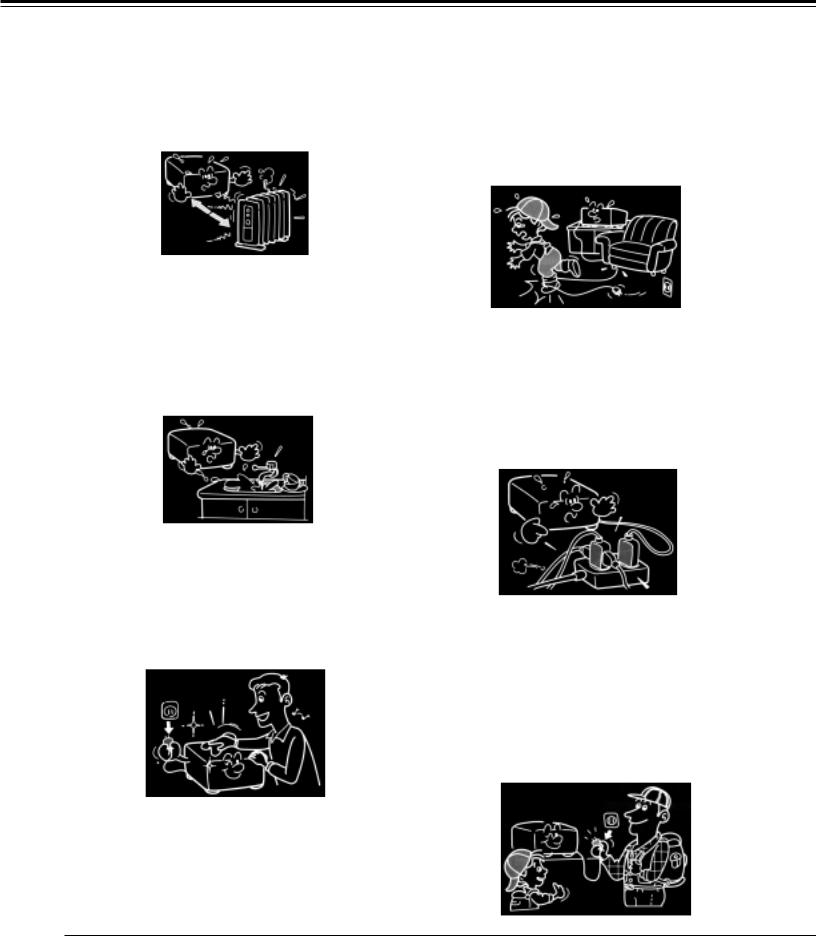
5.Heat
The product should be situated away from heat sources such as radiators, heat registers, stoves, or other products (including amplifiers) that produce heat.
8.Power-Cord Protection
Power-supply cords should be routed so that they are not likely to be walked on or pinched by items placed upon or against them, paying particular attention to cords at plugs, convenience receptacles, and the point where they exit from the product.
6.Water and Moisture
Do not use this product near water. - for example, near a bath tub, wash
bowl, kitchen sink, or laundry tub; in a wet basement; or near a swimming pool and the like.
7.Cleaning
Unplug this product from the wall outlet before cleaning. Do not use liquid cleaners or aerosol cleaners.
Use a soft cloth for cleaning.
9.Overloading
Do not overload wall outlets, extension cords, or integral convenience receptacles as this can result in a risk of fire or electric shock.
10. Lightning storms
During a storm, do not touch the product and the power cord. When it is left unattended or unused for a long period of time, unplug it from the wall outlet.
This will prevent damage to the product due to lightning and power-line surges.
4

IMPORTANT SAFETY INSTRUCTIONS
11. Object and Liquid Entry
Never push objects of any kind into this product through openings as they may touch dangerous voltage points or short-out parts that could result in a fire or electric shock. Never spill liquid of any kind on the product.
12. Do not place the product vertically
Do not use the product in the upright position to project the pictures at the ceiling, or any other vertical positions. It may fall down.
13. Stack Inhibited
Do not stack other equipment on this product or do not place this product on the other equipment.
Top and bottom plates of this product may develop heat and damage other equipment.
14. Attachments
Do not use attachments not recommended by the product manufacturer as they may cause a hazard.
15. Accessories
Do not place this product on an unstable cart, stand, tripod, bracket, or table. The product may fall, causing serious injury to a child or adult, and serious damage to the product.
Any mounting of the product should follow the manufacturer's instructions, and should use a mounting accessory recommended by the manufacturer. A product and cart combination should be moved with care. Quick stops, excessive force, and uneven surfaces may cause the product and cart combination to overturn.
5

IMPORTANT SAFETY INSTRUCTIONS
16. Damage Requiring Service
Unplug this product from the wall outlet and refer servicing to qualified service personnel under the following conditions:
a)When the power-supply cord or plug is damaged.
b)If liquid has been spilled, or objects have fallen into the product.
c)If the product has been exposed to rain or water.
d)If the product does not operate normally by following the operating instructions. Adjust only those controls that are covered by the operating instructions as an improper adjustment of other controls may result in damage and will often require extensive work by a qualified technician to restore the product to its normal operation.
e)If the product has been dropped or damaged in any way.
f)When the product exhibits a distinct change in performance.
18. Servicing
Do not attempt to service this product yourself as opening or removing covers may expose you to dangerous voltage or other hazards. Refer all servicing to qualified service personnel.
19. Replacement Parts
When replacement parts are required, be sure the service technician has used replacement parts specified by the manufacturer or have the same characteristics as the original part. Unauthorized substitutions may result in fire, electric shock, or other hazards.
17.If glass components, including lens and lamp, should break, contact your dealer for repair
service.
This product incorporates glass components, including a lens and a lamp. If such parts should break, please handle with care to avoid injury and contact your dealer for repair service. The broken pieces of glass may cause to injury. In the unlikely event of the lamp rupturing, thoroughly clean the area around the projector.
20. Safety Check
Upon completion of any service or repairs to this product, ask the service technician to perform safety checks to determine that the product is in proper operating condition.
6

IMPORTANT SAFETY INSTRUCTIONS
21.Do not leave thermal-paper documents or easily damaged items on top of the projector
or near the air exhaust.
The heat from the projector could erase the information on the thermal paper, or cause damage or warping. Also, when you touch a metal object put near the air exhaust, it could be hot and burn you.
22.Unplug the power plug after you are finished using the
projector.
Turn off the POWER button to bring the projector into its standby state with the light-source lamp off. Then, wait about 2 minutes and turn off the main power switch, and be sure to unplug the power plug for safety. Wait about 2 minutes while the projector is in standby, because during this time the intake/exhaust fan is operating to cool down the light-source lamp. Turning off the main power switch or unplugging the power plug immediately
after use may harm the projector.
7

SELECTING THE POWER CORD
If your line voltage is 220 to 240 V, use one of the following types of cord.
Plug |
|
|
Plug |
|
configuration |
Plug type Line voltage |
|
configuration |
Plug type Line voltage |
EURO |
220 – 240 V |
UK |
220 – 240 V |
Australian 240 V
10 A
Switzerland 200 – 240 V 240 V
6 A
Use a 5 A fuse which is approved by ASTA or BSI to BSI362.
Always replace the fuse cover after changing the fuse.
IMPORTANT PRECAUTIONS
Save Original Packing Materials
The original shipping carton and packing materials will come in handy if you ever have to ship your projector. For maximum protection, repack the projector as it was originally packed at the factory.
Avoid Volatile Liquid
Do not use volatile liquids, such as an insecticide, near the projector. Do not leave rubber or plastic products touching the projector for a long time. They will leave marks on the finish. If cleaning with a chemically saturated cloth, be sure to follow the product’s precautions.
Moisture Condensation
Never operate this projector immediately after moving it from a cold location to a warm location. When the projector is exposed to such a change in temperature, moisture may condense on the crucial internal parts. To prevent the projector from possible damage, do not use the projector for at least 2 hours when there is an extreme or sudden change in temperature.
Place and Manner of Installation
•Do not place in hot locations, such as near heating equipment. Doing so could cause malfunction, and shorten the life of the projector.
•Avoid locations with oil or cigarette smoke. If exposed to these conditions, you could dirty the projector’s optical parts, shortening its life, and darkening the screen.
•Do not use at an angle of 15 degrees or more. Doing so could shorten the life of the lamp.
•If used at high altitudes, the projector may cease the operation even if used within the rated temperature range. This is because the thinner air at high altitudes decreases the internal cooling efficiency. Therefore, please lower the ambient temperature if using at high altitudes.
•Contact your dealer for the ceiling mount bracket. As installation requires technical knowledge and skill, be sure to ask your dealer for installation.
•When mounted on the ceiling, the product shall be installed by the dealer with the bracket designed for this product. If you attempt to install the product by yourself, you may fall and be injured or the product may fall causing injury.
8

IMPORTANT PRECAUTIONS
Exemption Clauses
•Toshiba Corporation bears no responsibility in the case of damages arising from earthquakes, fire not liable to Toshiba Corporation, operating by third parties, other accidents, or use under abnormal conditions including erroneous or improper operation and other problems.
•Toshiba Corporation bears no responsibility for incidental damages (lost profit, work interruption, corruption or loss of the memory contents, etc.) arising from the use of or the inability to use this projector.
•Toshiba Corporation accepts no liability whatsoever for any damages arising from not having followed the descriptions in this Owner’s Manual.
•Toshiba Corporation accepts no liability whatsoever for any damages arising from malfunctions arising from combination with equipment or software that is not related to Toshiba Corporation.
Disposal
This product contains the following materials harmful to human body and environment.
•Solder used in manufacture of its printed board contains lead.
•Its lamp uses inorganic mercury
When to dispose this product or its used lamp, carry out disposal processing according to ordinance or regulations of your local self-government. As for details, consult your local self government.
In the spaces provided below, record the Model and Serial No. located at the bottom of your projector.
Model No. |
Serial No. |
Keep this information for future reference.
DECLARATION OF CONFORMITY
TRADE NAME: HOME PROJECTOR
MODEL NAME: TDP-MT500
RESPONSIBLE PARTY: TOSHIBA CORPORATION
1-1, Shibaura 1-chome,
Minato-ku, Tokyo, Japan
This device complies with part 15 of the FCC Rules.
Operation is subject to the following two conditions:
(1)this device may not cause harmful interference, and
(2)this device must accept any interference received, including interference that may cause undesired operation.
9

TABLE OF CONTENTS
PREPARING YOUR PROJECTOR |
|
Checking accessories ............................................................................................................................................................ |
11 |
Inserting the batteries into the remote control .................................................................................................................... |
11 |
Understanding the parts of the projector ............................................................................................................................ |
12 |
Using the remote control ........................................................................................................................................................ |
13 |
Operational range of the remote control ............................................................................................................................. |
14 |
SETTING UP YOUR PROJECTOR |
|
Setting up the screen .............................................................................................................................................................. |
15 |
Basic setup .............................................................................................................................................................................. |
15 |
Screen size and projection distance .................................................................................................................................... |
16 |
VIEWING VIDEO IMAGES |
|
A. Connecting the projector to video equipment ................................................................................................................ |
17 |
B. Plugging in the power cord .............................................................................................................................................. |
18 |
C. Projection the image .......................................................................................................................................................... |
19 |
D. Setting the ASPECT ........................................................................................................................................................... |
21 |
VIEWING COMPUTER IMAGES ............................................................................................ |
22 |
A. Connecting the projector with a computer ..................................................................................................................... |
22 |
B. Plugging in the power cord .............................................................................................................................................. |
22 |
C. Projection the image .......................................................................................................................................................... |
23 |
USING THE MENUS |
|
Menu construction .................................................................................................................................................................. |
25 |
How to make a menu setting: ................................................................................................................................................ |
26 |
Items that can be set with the menus .................................................................................................................................. |
27 |
On the memory for projected image quality ........................................................................................................................ |
29 |
Adjusting projected images ................................................................................................................................................... |
29 |
Adjusting picture images sent from computers ................................................................................................................. |
32 |
INDICATORS .......................................................................................................................... |
33 |
REPLACING THE LAMP / CLEANING THE PROJECTOR .................................................. |
34 |
TROUBLESHOOTING ............................................................................................................ |
36 |
SPECIFICATIONS |
|
Dimensional drawings (for references) ................................................................................................................................ |
38 |
Type of connectable signals .................................................................................................................................................. |
39 |
Terminals ................................................................................................................................................................................. |
39 |
TRADEMARKS
•Macintosh is registered trademark of Apple Computer Inc.
•DLP, Digital Micromirror Device and DMD are all trademarks of Texas Instruments.
•Each name of corporations or products in the owner’s manual is a trademark or a registered trademark of its respective corporation.
COPYRIGHT
By use of this product, showing or distributing commercial image software or broadcasting and wire broadcasting programs for profit purpose or charges from audience publicly, and/or modifying commercial image software or broadcasting and wire broadcasting programs by freezing and resizing functions and the like without permission of their copyright owners, may infringe upon copyright and/or rights incidental to copyright of the commercial image software or broadcasting and wire broadcasting programs, therefore, appropriate right process such as to acquire permission of the right owners concerned in advance or so shall be taken.
10
PREPARING YOUR PROJECTOR
Checking accessories
The following accessories are provided with this projector. Check to be sure that all of the accessories are packed in the package.
|
Power supply parts |
|
Remote control parts |
|
|
R03 (Size-AAA) |
Power cord (two) |
Remote control |
batteries (two) |
Personal computer parts |
Video parts |
D-SUB 9P |
Mini D-SUB 15P |
|
 Others
•Lens cap (Attached to the main unit)
•Owner’s manual
•Remote control photo-sensor protection sticker
8P |
DVI |
RS-232C cable |
Mini D-SUB 15P DVI-conversion cable |
NOTE
•The attached power cords are to be used exclusively for this product. Never use them for other products.
Inserting the batteries into the remote control
1 |
1. |
Remove the rear lid of the remote control. |
2. |
Check the polarity (+), (-) of the batteries, and set them |
|
3 |
|
correctly, inserting their (-) side first. |
|
• If the battery is inserted from the (+) side first, inserting |
|
|
|
the (-) side is difficult because the coil spring end hits |
2 |
|
on the battery side. If the battery is forced to insert in |
|
this way, the outer label of the battery may get ripped |
|
and it may cause a short-circuit and heating. 3. Attach the rear lid.
•Use two size-AAA batteries (R03).
• Replace the two batteries with new ones when the remote control is slow to operate.
•If the batteries are treated incorrectly, they may cause fire or other contamination due to leakage of the liquid, heating, or they may burst. (Read the cautions indicated on the battery, too.)
•Do not use a new battery with an old one.
•Load batteries in the correct position.
•Do not heat, take apart, or throw batteries into fire.
•Do not try to recharge batteries. Do not use rechargeable batteries.
•If the solution of batteries comes in contact with your skin or clothes, rinse with water. If the solution comes in contact with your eyes, rinse them with water and then consult your doctor.
11

PREPARING YOUR PROJECTOR
Understanding the parts of the projector
Remote control photo-sensor (Front) 14
Intake vent
Operation panel (Top)
Focus ring: 19 23
Adjusts focus.
Operation panel |
Remote control photo-sensor (Rear) 14 |
|
|
|
Angle adjusting |
Terminal panel |
|
|
button 15 |
|
|
Kensington Security |
|
|
|
|
|
Angle adjusting 15 |
|
|
Lock Standard |
button |
|
|
connector 33 |
Angle adjusting foot |
15 |
Exhaust vent |
Power cord inlet 18 |
|
|
||
|
|
|
Main power switch |
|
|
|
I: Turn-on |
|
|
|
O: Turn-off |
|
|
Zoom ring: 19 |
23 |
|
|
Expands projected picture images when |
|
turned to the right (WIDE). Contracts projected picture images when turned to the left (TELE).
POWER button / POWER indicator: 19 23 33 36
MENU/EXIT button: 26
Displays menu when pressed. Erases menu when pressed again.
LAMP indicator 33 34 36
TEMP (temperature) indicator 33 36
ENTER button: 26
Used to determine menu item.
Directional button: 26
Used to shift menu item and adjust values.
Terminal panel (Side)
VIDEO terminal: 17
Connects to such equipment as video players with composite video signals.
S-VIDEO terminal: 17
Connects to such equipment as video players with S-video capability.
DVI terminal: 18 22
Connects to such equipment as video equipment with DVI-D terminal and computers.
COMPONENT 1, 2 terminals: 17
Connects to such equipment as DVD players with chrominance signals.
CONTROL terminal (Mini DIN 8P):
Used mainly for adjustments made by service personnel.
12
 Loading...