


|
N |
|
A |
|
|
B |
M |
|
L |
||
C |
||
K |
||
|
||
D |
J |
|
|
I |
E
F
G
1
2
3
4
5
6
7
H
8
9
10
11
12
13
14
15
16
17
18
19
20
21
1

Welcome to your fax machine
A B C D E
Exit document extension tray
Exit document tray
Control panel
Recording paper tray
Recording paper cassette
F G H I J
Recording paper cassette (accessories)
Recording paper cassette (accessories)
Side cover
Top cover release button
Extension of document tray
K
L
M N
Telephone connections
Document tray
Control panel release button
Document guides
1 DISPLAY |
4 DIAL KEYPAD |
Displays indications about the operating |
Used for entering telephone numbers or |
modes of your fax machine. Your con- |
selecting characters. |
trol monitor for all function settings. |
|
14 JOB CANCEL KEY
Use this key if you wish to cancel a job which has been stored or which is due to be handled.
2 Warning lamps
If there is a malfunction on your fax machine, the lamp under the corresponding symbol will light up.
Paper jam:
Indicates that there is a document jam or copy paper jam. (see page 115/116)
Paper out:
Indicates that the user must replenish the copy paper. (see page 8)
Toner out:
Indicates that the user will use have to replenish the toner. (see page 6)
5
6
7
8
MONITOR
When you press this key, the fax machine connects to the line and the speaker enabling the user to listen into the call establishment attempt is activated. The subsequent fax connection is handled directly, i.e. without job administration via the memory.
REDIAL / PAUSE
Activates the last number dialled, inserts a dialling pause.
SPEED DIAL
Press this key to select a stored alphabet dial number, a name or a group.
Line 1 lamp
Indicates transmission on line 1.
15MULTI KEY
To create a group consisting of onetouch dial, ABB dial and manual dial numbers. Available for group dialling as well as for group polling.
16 MODE KEY, with status lamps
Use this key to select the resolution for the current fax job. The status lamps represent the selected mode. If no status lamp lights up, the STD resolution has been set.
17 COPY / JOURNAL KEY
The user is able to make copies of documents which have been inserted. If no document has been inserted, press this key to request the journal.
Drum operating time: Indicates that the printing unit will soon have to be replaced. (see page 5)
Alarm lamp:
Indicates an operating malfunction which cannot be clearly identified. Please contact service personnel in these cases.
3 MENU KEYS
Use these keys to select the menu or a specific menu item.
DTMF key (▼)
When the pulse dialling mode has been selected (see page 14), this button temporarily switches over the dialling procedure to DTMF.
9 Line 2 lamp |
18 TX REPORT KEY |
Indicates transmission on line 2 (the |
Use this key to set the output criteria for |
second line is optional.) |
the transmission report. |
10 PC COMM lamp
If this lamp flashes, it indicates that data are being transmitted form the PC to the interface (the PC interface is optional).
11 One-touch dial cover for onetouch dial keys 36-69 and function keys.
12 ONE TOUCH DIAL KEYS
Sends documents at the push of a button.
13 JOB STATUS KEY
You can use this key to query the status of individual jobs.
19 ENTER KEY
Activates selected menu items and also used for terminating data input.
20 STOP KEY
Cancels error messages and terminates menu input.
21 START KEY
Activates transmission, reception (offhook) and selected menu items.
GB 2 |
Welcome to your fax machine |
TOSHIBA TF 831/861 |

ContentsPreparation
Preparation |
|
Unpacking ................................................... |
4 |
Remove transport: ...................................... |
5 |
How to install the process unit: ................... |
5 |
To make a good impression: the toner pack 6 |
|
Connection to the mains ............................. |
7 |
How to insert the recording paper: ............. |
8 |
How to install the exit paper tray: ............... |
8 |
Insert memory card(s).... ............................ |
9 |
Installation |
|
The Menu-system ..................................... |
10 |
Enter user name ....................................... |
11 |
Enter terminal ID ....................................... |
13 |
Setting dialling method ............................. |
14 |
Connection to PABX, |
|
obtaining a public line ............................... |
15 |
Set language ............................................ |
16 |
Set date and time ..................................... |
17 |
Reception of documents |
|
Set standby mode ..................................... |
18 |
Automatic reception ................................. |
18 |
Manual reception ...................................... |
18 |
Reception reduction ................................. |
19 |
Memory reception ..................................... |
20 |
SECURE RX ............................................... |
21 |
Activate and deactivate |
|
Secure Rx ................................................. |
24 |
Correct sequence of printout .................... |
25 |
Multiple printout ........................................ |
26 |
Cancel reception ...................................... |
27 |
Reception protection ................................ |
28 |
Local copy ................................................ |
29 |
Copy reduction .......................................... |
30 |
Transmit documents |
|
Document format ..................................... |
31 |
Automatic fax messages ........................... |
32 |
Stack mode .............................................. |
33 |
Useful job-management ............................ |
34 |
Important transmission .............................. |
35 |
Direct transmission ................................... |
36 |
Transmission using alpha dial .................... |
37 |
Transmission one-touch dial ...................... |
38 |
Transmission using telephone directory ..... |
39 |
Single multi-address transmission ............. |
40 |
Stored broadcast ...................................... |
41 |
Monitoring (direct) .................................... |
42 |
Monitoring (Job) ....................................... |
43 |
Set resolution ........................................... |
44 |
Set contrast .............................................. |
45 |
Transmission options, ECM on/off ............. |
46 |
Transmission options, number of pages .... |
47 |
Transmission options, secure transmission |
48 |
Transmission options, reduced speed ........ |
49 |
Transmission options, send cover sheet .... |
50 |
Transmission options, transmission stamp (if |
|
installed) ................................................... |
51 |
Chain dialling ............................................ |
52 |
Redial ....................................................... |
53 |
Resend (retained job) ................................ |
54 |
Cancel a job placed on hold |
|
(with job placed on hold) .......................... |
55 |
Cancel transmission .................................. |
56 |
Polling |
|
Reserve polling .......................................... |
57 |
Polling protection ...................................... |
58 |
Reserve polling, permanent |
|
(general info box) ...................................... |
59 |
Reserve polling, append documents ......... |
60 |
Cancel polling reservation ......................... |
61 |
Single polling ............................................ |
62 |
Multiple polling .......................................... |
63 |
Cancel polling ........................................... |
65 |
Program continous polling ......................... |
66 |
Reverse direction ...................................... |
68 |
Store numbers |
|
Alphabet dial memory ............................... |
70 |
Alphabet dial options ................................ |
72 |
Modify ABB numbers ................................. |
73 |
Delete ABB numbers ................................. |
74 |
One-touch dial keys ................................... |
75 |
Cancel one-touch dial keys ....................... |
77 |
Define groups ........................................... |
78 |
Edit groups ................................................ |
80 |
Cancel groups ........................................... |
81 |
Report Prints |
|
Program selection list ................................ |
82 |
Transmission reports ................................. |
82 |
Transmission and reception journal ........... |
85 |
Reservation list .......................................... |
86 |
The function list ........................................ |
86 |
The dial number lists ................................. |
87 |
Department list ......................................... |
88 |
Mains error report ..................................... |
88 |
Advanced settings |
|
Delayed fax job ......................................... |
89 |
Set transmission header position .............. |
90 |
Reception bottom line (RTI) ...................... |
91 |
Permanent monitoring .............................. |
91 |
Last-number redial .................................... |
92 |
Adjust ringer volume ................................. |
93 |
Power saver (stand by) .............................. |
94 |
Cost centre administration ........................ |
95 |
Department code ...................................... |
96 |
Modify or delete a department ................. |
97 |
Deactivate department code .................... |
98 |
Cover sheet ............................................... |
99 |
Retain jobs .............................................. |
100 |
Query job status ...................................... |
101 |
Line 2 mode (optional) ............................ |
102 |
Basic setting, document length ............... |
103 |
Basic setting, transmission memory ........ |
103 |
Basic setting, resolution and contrast ..... |
104 |
Basic setting, ECM (error correction |
|
method ................................................... |
105 |
Basic setting, protected transmission ...... |
105 |
Basic setting, TX stamp (optional) ........... |
106 |
Basic setting, |
|
Superfine reception (only TF 861) ........... |
106 |
Divider sheet ........................................... |
107 |
Additional paper cassettes (optional) ...... |
107 |
Possible problems |
|
Diagnosis programs ................................. |
108 |
Error messages in display ........................ |
109 |
Error codes in journal .............................. |
111 |
Transmission problems ............................ |
113 |
Receiving problems ................................. |
114 |
Cleaning document scanner ................... |
115 |
Document jam ........................................ |
115 |
How to clear a recording paper jam ....... |
116 |
Filling the stamp ink ................................ |
116 |
Remote maintenance (COMLINE) ........... |
117 |
Connection to PABX ................................ |
117 |
UK Connection information |
|
UK Connection information ..................... |
118 |
Index |
|
Index ....................................................... |
119 |
TF 831/861 TOSHIBA |
PreparationContents |
3 GB |

Preparation
Unpacking
When unpacking your machine, please check that all parts shown here are present and in perfect condition.
1. Fax machine
2. User manual
3. Powercable
4.Process unit with toner
5. Fixer cleaner
6. |
Exit document tray |
|
|
|
|
7. |
Recording paper |
|
|
|
|
|
indicator |
A4 |
B5 |
B4 |
A5 |
8. |
Ozone filter |
|
|
|
|
The correct location
for your fax machine is easily found:
•near a 230 V AC socket*,
•near a telefphone connection, ideally with a single line reserved for your fax machine.
*No other equipment with high power consumption (such as a photocopier) or equipment which generates electrical noise (such as a radio, computer, radio transmitting and receiving equipment) should be connected to this mains supply.
AC power
You will find the mains connection on the back of the machine. The ON/OFF switch is situated above the mains jack. Now switch your machine on.
Please protect your machine from:
vibration
direct sunlight
dust
humidity
heat
GB 4 |
Preparation |
TOSHIBA TF 831/861 |

Preparation
Remove transport |
• Press the unlocking button and open the |
|
housing of your fax machine. |
||
fittings: |
||
|
• Remove the three cross-head screws which secure the laser unit.
• Screw these screws into the three retainer holes.
• Remove the remaining paper and plastic fittings.
How to install the process unit:
In order to transport or move the machine the toner pack and the process unit has to be removed.
In order to prevent transport damage, the highquality process unit of your new fax machine is delivered in special packaging to provide additional protection. Please follow the enclosed instructions. This is how to install the unit:
Open the top cover
by pressing the release button.
Install the process unit...
by inserting the pins into the lateral guides and then, by applying slight pressure, lower it into the correct position.
A damaged drum will affect the copy quality. Therefore: Never touch the drum surface or expose the drum to sunlight for more than three minutes.
TF 831/861 TOSHIBA |
Preparation |
5 GB |

Preparation
To make a good impression: the toner pack
When installing the machine for the first time or later when the message TONER LOW or TONER EMPTY is displayed, you must replace the toner pack in your fax machine. At the same time also replace the fixer cleaner.
When replacing toner:
Release the green Stopper and pull the pack out of its support in the direction of the arrow, as shown.
When installing for the first time:
Unpack the toner pack supplied.
Do not touch any sensitive parts of the printer system.
First shake the new toner pack,
insert in the direction of the arrow and slide forward.
Now remove the seal.
When holding the protective foil, be sure to avoid contact with any toner residue.
The toner pack latch locks into place with a click.
Replacing the fixer cleaner
(or installing for the first time): If necessary, pull the used cleaner ribbon upwards: when inserting the new cleaner, be sure that the white felt side is facedown.
Do not touch any parts inside the machine other than those described. The fixer cover can
be very hot - even after the machine has been switched off.
GB 6 |
Preparation |
TOSHIBA TF 831/861 |

Preparation
Now
close the cover
until it locks firmly into place.
Never throw the old pack into an open fire. Use packaging from exchanged parts to ensure proper disposal as inorganic waste.
CAUTION:
In case you come into contact with toner:
•Wash hands in cold water and clean thoroughly with soap.
•Wash eyes with plenty of water.
•If you have inhaled toner, breathe deeply in the open air.
•If toner gets in your mouth, wash it out with plenty of water.
•In an emergency, call al doctor.
...and now: the ozone filter
As you see, it is inserted in its support underneath the cover. When inserting, hold the filter only by the ribbons in order to avoid clogging the filter mesh.
Connection to the mains |
|
|
|
Telephone connection |
|
|
|
Connect your fax machine (LINE jack) to the telephone socket, as |
|
|
|
shown on the right. |
|
|
|
|
Line 1 |
|
|
|
Line 2 |
|
|
|
optional |
|
|
|
On/off switch |
|
|
|
Power cable |
|
|
TF 831/861 TOSHIBA |
Preparation |
7 |
GB |

Preparation
How to insert the recording paper:
Remove the paper cassette
Insert a stack of A4 paper.
Prepare the recording paper by flexing and fanning out the stack to separate the sheets.
Place the paper so that it lies straight in the cassette with the side to be printed facedown and don’t forget:
The paper cassette holds a maximum 250 sheets (80 g/sm).The paper is never stacked above the limit mark. (as shown on the left)
Then: Slide the cassette into the slot until you hear it lock in place.
Do not use damp, wrinkled on torn paper.
How to install the exit paper tray:
Install the exit paper tray fits in the slots on the left side of the fax.
GB 8 |
Preparation |
TOSHIBA TF 831/861 |

Preparation
Insert memory card(s) |
1. |
Switch your fax machine OFF. |
|
|
|
|
|
Stack memory is deleted when a |
|
|
memory expansion is inserted. Please |
|
|
ensure that, before the memory |
|
expansion is inserted, the memory display is |
|
|
100 % in order to prevent the transmission job |
|
|
being lost. |
|
|
|
|
|
2. |
Open the housing cover. |
3. Remove the cover for the memory modules.
4. Insert the memory expansion card so that the soldered side is pointing upwards. Close the cover for the memory modules. Close the housing cover.
Insert the card into the left-hand slot, unless another card has already been
inserted. In this case, use the righthand slot.
TF 831/861 TOSHIBA |
Preparation |
9 GB |
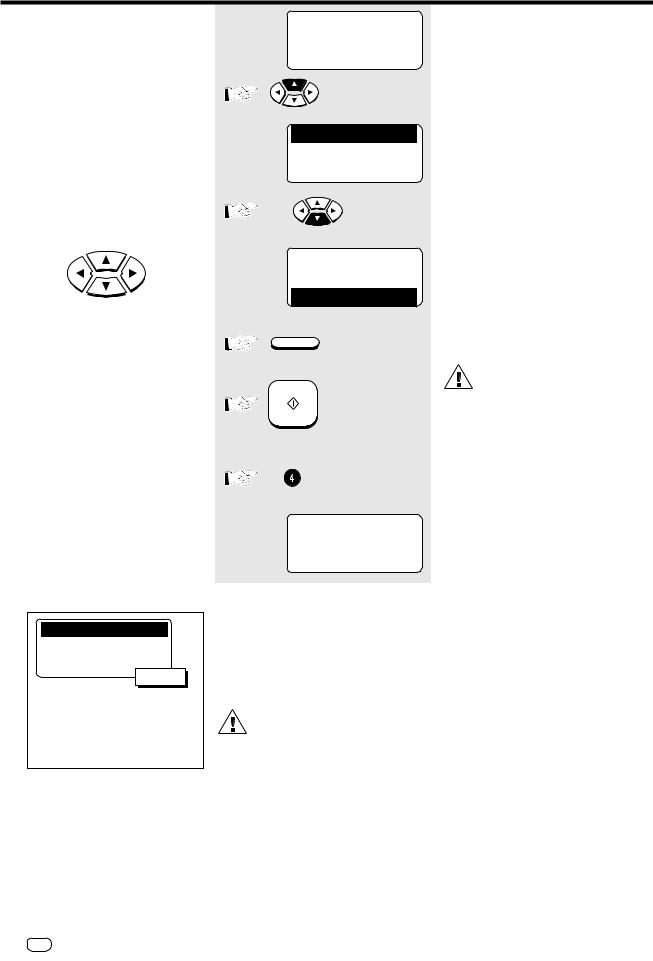
Installation
The menu system
Your fax machine is equipped with a fourline display which provides you with information concerning all operating modes.
This display makes it more easy for you to work with the various functions of your fax machine, and everything is set out in a clear menu. Up to four menu items are displayed on each occasion, and a number is assigned to each of these items.
A special group of keys is used for activating the menu as well as for control activities within the various menu levels.
The M key activates the menu and moves the highlight bar up.
The N key moves the highlight bar down. The P key selects the appropriate submenu level.
The O key selects the superior menu level.
Once a menu item has been selected with the highlight bar via these control keys, it is activated by pressing the (ENTER) key. Alternatively, you can use the START key for this purpose. It may well happen that more than four items are displayed in one menu. In this case, press the M/N control keys several times to display these concealed menu items. Example: Menu 3, 1 (Installation, Setup,
1.Menu item highlighted)
1.AUTO RECEIVE MODE
2.LANGUAGE
3.TERMINAL ID
4.DATE & TIME
visible part
5.DIAL TYPE
6.VOLUME
7.POWER SAVER
8.DEPARTMENT CODE
9.ACCOUNT CODE
10.COVER SHEET
15-03-97 SAT 19:56 TRANSMIT AVAILABLE RESIDUAL MEMORY 100 % LOAD DOCUMENT
1.COMM. OPTIONS 2.LISTS 3.INSTALLATION 4.MENU LIST
3x
1.COMM. OPTIONS 2.LISTS 3.INSTALLATION
4.MENU LIST
ENTER 

or
START or
15-03-97 SAT 19:56 TRANSMIT AVAILABLE RESIDUAL MEMORY 100 % PRINTING LIST
One version of the menu selection procedure is to enter the corresponding number of the particular menu item. It is not necessary to press the INPUT button. As soon as the relevant number has been entered, the menu item is executed. This is also applicable for the concealed menu items.
When entries are being made, it is not possible to receive. Because of this, the machine returns to idle status if no entry is made within one minute.
Consider the following example in order to familiarise yourself with the menu system. The system prints out the program selection list, on which you receive the complete menu structure of your fax machine.
Standby mode
Start the menu
The first 4 menu items are displayed.
Select a menu item
Select a menu item
To select a sub menu, there is no need to see it in the LCD.
The only requirement is that this menu item has to be in the same menu level.
The report is printed.
GB 10 Installation |
TOSHIBA TF 831/861 |
Installation
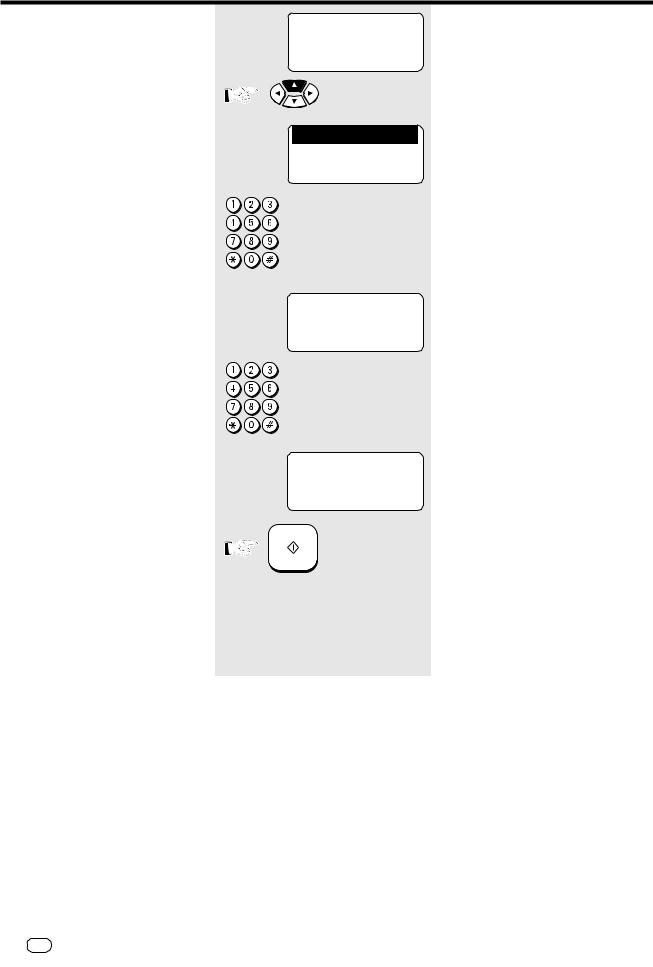
Enter user name
In order to ensure that a transmitted fax document can also be uniquely identified, a transmission header is printed on the top 5 mm of the document. This transmission header contains various items of information, incl. the user name and the sender ID of the fax machine which transmitted the documents.
User name:
You can enter any 40 characters (max.) for the user name.
Use the number keypad for entering the characters. Several characters are assigned to each number, and the characters can be selected by repeatedly pressing the corresponding key.
The following table sets out all characters which are allocated to the various number keys.
Key |
Allocated characters |
1 |
1 |
2 |
ABC2abcАБВГДЕЖЯабвгдежз |
3 |
DEF3defИЙКЛийкл |
4 |
GHI4ghiÌÍÎÏ |
5 |
JKL5jkl |
6 |
MNO6mnoСстуфхц |
7 |
PQRS7pqrs |
|
|
8 |
TUV8tuvЩЪЫЬщъыь |
9 |
WXYZ9wxyz |
0 |
(+)0 space Øø!'#S%&*-/:=@? |
Place character:
The character of your choice is placed wherever the flashing cursor is located. Please use the O / P keys to control the highlighted input.
Cancel characters:
Move the highlighting to the appropriate position and press the DELETE key on the one-touch dial key field. The character is then deleted and is replaced by an empty character. If you do not wish to have an empty character, press the INSERT key on the one-touch dial keyfield before deleting the character. In this mode, the characters to the right move one position to the left. The insert mode is indicated by a corresponding symbol in the display. Press the INSERT key again to exit this mode.
TF 831/861 TOSHIBA |
Installation 11 GB |
Installation
Replace character:
Move the highlighting to the appropriate position and proceed as detailed under the procedure for entering a new character. The character is then overwritten.
Insert character:
Press the INSERT key before you insert a character. To exit this mode, press the INSERT key again.
If a character has just been inserted, you cannot delete it immediately. In this case, move the cursor to the next field and then return immediately to the previous position. The character can then be deleted.
When the name is complete, press the
START key.
Example: TOSHIBA
15-03-97 SAT 19:56 TRANSMIT AVAILABLE RESIDUAL MEMORY 100 % LOAD DOCUMENT
1.COMM. OPTIONS
2.LISTS
3.INSTALLATION 4.MENU LIST
 /
/ /
/ 

SET TERMINAL ID
ID NAME=(MAX40)
J
SET TERMINAL ID
ID NAME=(MAX40)
TOSHIBA J
START
Standby mode
Start the menu
The first 4 menu items are displayed.
Select a menu item
Make your selection
Enter the name
Example: Toshiba
1 x 8 > T |
7 x 4 |
> i |
7 x 6 > o |
6 x 2 |
> b |
9 x 7 > s |
5 x 2 > a |
|
6 x 4 > h |
|
|
Name is ready...
Confirm with START
Continue with „Enter the terminal ID“
GB 12 Installation |
TOSHIBA TF 831/861 |

Installation
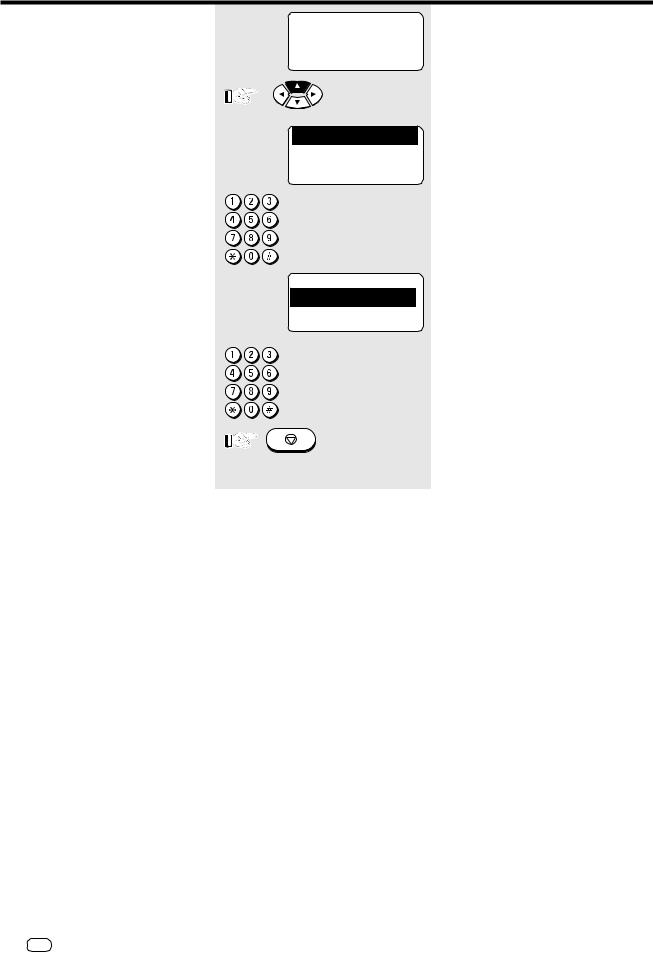
Enter terminal ID
The terminal ID which is part of the transmissing header contains the number under which your fax machine can be reached. The number should be entered in the international format:
Example: +44-2131-12345678
 Fax number
Space (to improve legibilitly)
Area code (without initial 0)
Country code (here: Germany)
Plus symbol (for the international form)
In Germany it is obligatory to enter the terminal ID!
If you have installed the second line (optional), enter an additional code.
INT. CODE ? LINE-1 1.ADD +
2.NOT NEEDED
SET TERMINAL ID
TEL NUMBER =(MAX20)
+ J
SET TERMINAL ID
TEL NUMBER =(MAX20) +44-2131-123456 J
START
STOP
Continued from “Enter user name”
Option for selecting the national or international form.
Please always select the international form.
Select a menu item
Make your selection
Now enter the code
Insert a pause with pause button
Code is complete...
Confirm with START
Press STOP, return to standby mode
TF 831/861 TOSHIBA |
Installation 13 GB |

Installation
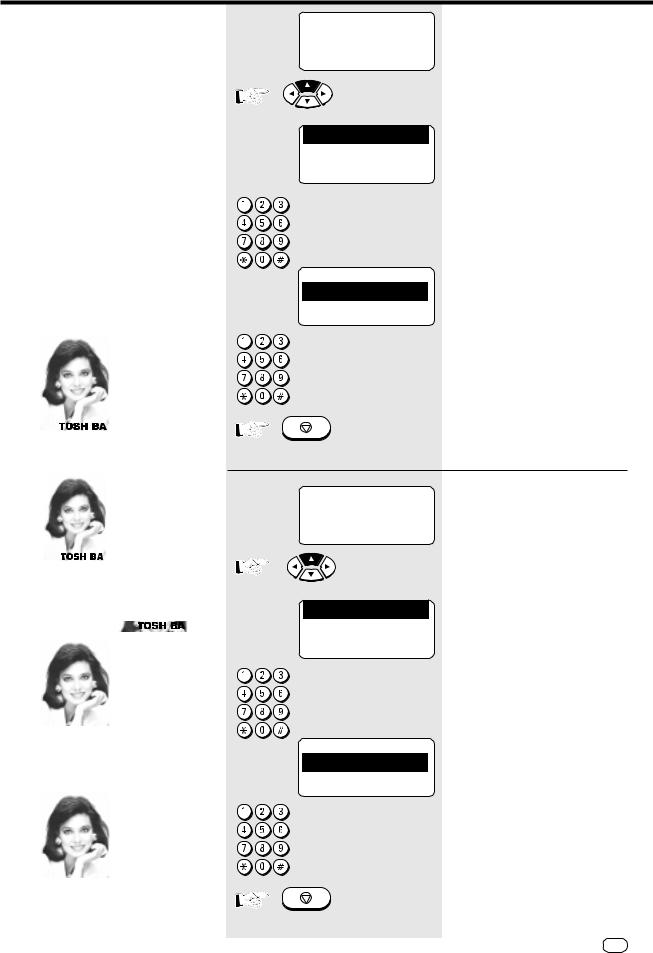
Setting dialling method
There are two dialling methods. The pulse-dialling method is normally used in the public switched telephone network. If your fax machine is connected to a PABX, the DTMF dialling method may also be used. As the public network is modernised, this dialling method may also be used in the public network. If you are in any doubt, first try the pulse-dialling method (basic setting). If the dialling procedure fails, try DTMP dialling.
If you have installed a second line (optional), enter the dialling method for each line separately.
15-03-97 SAT 19:56 TRANSMIT AVAILABLE RESIDUAL MEMORY 100 % LOAD DOCUMENT
1.COMM. OPTIONS 2.LISTS 3.INSTALLATION 4.MENU LIST
 /
/ /
/ 

DIAL TYPE LINE-1 1.MF
2.DP
SET EXCHANGE TYPE
1.PSTN
2.PABX
EXCHANGE PSTN |
|
EXCHANGE PABX |
Go to A |
|
Go to B |
|
|
|
Standby mode
Start the menu
The first 4 menu items are displayed.
Select a menu item
The current dialling method is highlighted
Select a menu item
The current connection type is highlighted
Continue with “Connection to main line / PABX’s”
GB 14 Installation |
TOSHIBA TF 831/861 |

Installation
A
PSTN
SET EXCHANGE TYPE
1.PSTN
2.PABX
Select a menu item
Press STOP, return to standby mode
|
|
STOP |
|
|
|
|
|
|
|
Connection to PABX, |
B |
PABX |
|
|
obtaining a public line |
|
|
|
|
|
|
|
|
SET EXCHANGE TYPE
The TF 861 can be connected not only to the public switched telephone network (public line) but also to a PABX. In this case, additional parameters have to be entered.
With PABXs, the public line is obtained in various ways:
1.PSTN
2.PABX
Select a menu item
• Number |
Dial one digit (or several |
|
digits) in order to obtain |
|
the public line |
• Earth key |
Earth potential is con- |
|
nected to the line in |
|
order to obtain the public |
|
line. |
• Flash key |
With this method of |
|
obtaining the public line, |
|
the connection circuit is |
|
interrupted briefly. |
When the method of obtaining a public line has been entered,
you must always press the key "*" before the actual number when you dial your fax partner. This is also applicable for saving the fax numbers (see page 70ff).
SET ACCESS TYPE Make your selection
1.EARTH
2.FLASH
3.DIGIT
SET ACCESS TYPE
SET ACCESS TYPE
ACCESS DIGIT = (1-3)
Select a menu item
Example: digit
n
Enter the digit(s) for obtaining public line
Example: 0
SET ACCESS TYPE
ACCESS DIGIT = (1-3)
0
Confirm with START
START
Press STOP, return to standby mode
STOP
TF 831/861 TOSHIBA |
Installation 15 GB |
Installation
Set language
Your fax machine is set to English. Please carry out the following menu steps if you wish to use another language for the menu and the list prints.
15-03-97 SAT 19:56 TRANSMIT AVAILABLE RESIDUAL MEMORY 100 % LOAD DOCUMENT
1.COMM. OPTIONS 2.LISTS 3.INSTALLATION 4.MENU LIST
 /
/ /
/ 

LANGUAGE
01.ENGLISH
02.ITALIANO
03.DEUTSCH
Standby mode
Start the menu
The first 4 menu items are displayed.
Select a menu item
Select a menu item
Press STOP, return to standby mode
STOP
GB 16 Installation |
TOSHIBA TF 831/861 |

Installation
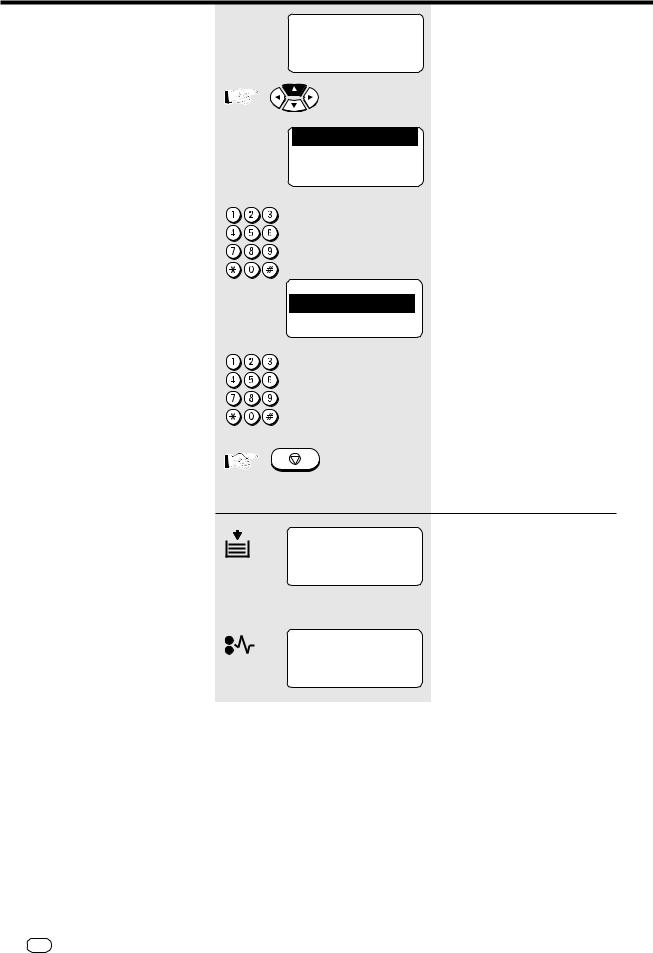
Set date and time
Enter the current date and time at this point so that all details relating to date and time is correct. The internal clock of your fax machine then runs automatically - even in the event of a power failure.
15-03-97 SAT 19:56 TRANSMIT AVAILABLE RESIDUAL MEMORY 100 % LOAD DOCUMENT
1.COMM. OPTIONS 2.LISTS 3.INSTALLATION 4.MENU LIST
 /
/ /
/ 

SET TIME FORMAT 1.24HOURS 2.12HOURS
SET DATE & TIME
DD-MM-YY HH:MM WWW 15-03-97 SAT 19:56
START
SET DATA MODE 1.MM-DD-YY
2.DD-MM-YY
3.YY-MM-DD
SET MONTH MODE 1.NUMERIC 2.NAME
STOP
Standby mode
Start the menu
The first 4 menu items are displayed.
Select a menu item
Make your selection
for 12or 24-hour format
Select a menu item
Example: 24-hour format
Enter the date and the time
Confirm with START
Make your selection for the date format
Select a menu item
Make your selection
for the month (using figures or the name)
Select a menu item
Press STOP, return to standby mode
TF 831/861 TOSHIBA |
Installation 17 GB |

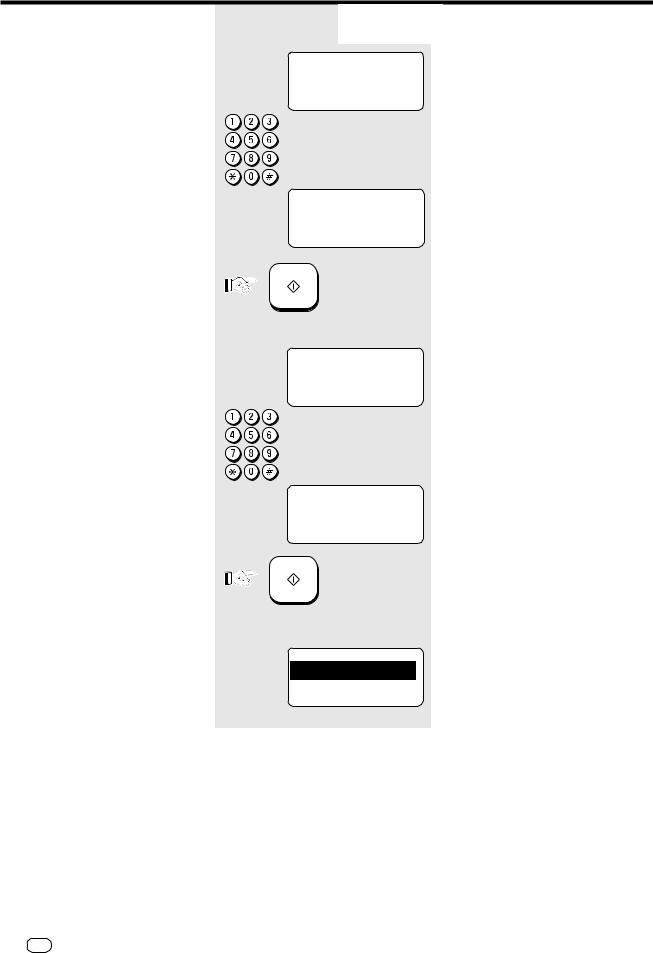
Reception of documents
Set standby mode
If your fax machine is connected to the PSTN or the PABX, there are two different ways of receiving documents.
Automatic reception |
If the line is reserved exclusively for fax |
The fax machine switches over to recep- |
|
||
|
operation. |
tion as soon as the line rings. (The |
|
|
number of ringing signals before the fax |
|
|
machine switches on can be set by the |
|
|
operator) |
|
|
The fax machine is always |
|
|
activated, even if the call is |
|
|
initiated by a voice partner. |
|
|
|
|
If the line is used primarily for telephone traffic. |
The call must be accepted manually; the |
Manual reception |
fax machine is not activated when the |
|
|
|
line rings. The call must be accepted |
|
manually; the fax machine is not |
|
activated when the line rings. The call |
|
must be accepted by an additional |
|
telephone. |
|
If you wish to transmit a |
|
document, you must press the |
|
START key of the fax machine. |
|
Ensure that any fax calls can be |
|
accepted. The START key is only effective |
|
when the handset is off-hook. |
|
|
To set reception mode do the following:
15-03-97 SAT 19:56 TRANSMIT AVAILABLE RESIDUAL MEMORY 100 % LOAD DOCUMENT
1.COMM. OPTIONS 2.LISTS 3.INSTALLATION 4.MENU LIST
 /
/ /
/ 

AUTO RECEIVE MODE
1.AUTO RECEIVE
2.MANUAL RECEIVE
Standby mode
Start the menu
The first 4 menu items are displayed.
Select a menu item
Make your selection
1.Automatic reception
2.Manual reception
Select a menu item
Example: Automatic reception
AUTO RECEIVE
RING DELAY = (01-05)
Make your selection
for the number of ringing signals before
the fax machine connects to the line.
01
Enter the required number
Confirm with START
START |
Press STOP, return to standby |
|
mode |
STOP
GB 18 Reception of documents |
TOSHIBA TF 831/861 |
Reception of documents
Reception reduction
Your fax machine uses A4 paper. For technical reasons the entire length of this page cannot be used. So the fax machine reduces the length of the incoming document (max. 90%). This means that the received image may be slightly compressed.
In general, this effect is not problematical. However, if the sizes of the documents must be absolutely identical, it is necessary to deactivate the reception reduction facility. In this case, that part of the copy which no longer fits on the page is printed out on a second page. If you are able to do without the "rest" of the page, activate the discard facility to suppress printout on the second page.
Original (A4)
|
|
|
|
|
|
|
|
|
|
Reception reduction: |
ON |
|||
|
|
|
|
|
|
|
|
|
|
|
|
|
|
|
|
|
|
|
|
Reception reduction: |
OFF |
||||
Discard: |
OFF |
||||
|
|
|
|
|
|
|
|
|
|
|
|
|
|
|
|
|
|
Reception reduction: |
OFF |
||
Discard: |
ON |
||
|
|
|
|
|
|
|
|
15-03-97 SAT 19:56 TRANSMIT AVAILABLE RESIDUAL MEMORY 100 % LOAD DOCUMENT
1.COMM. OPTIONS 2.LISTS 3.INSTALLATION 4.MENU LIST
 /
/ /
/ 

RX REDUCTION
1.ON
2.OFF
Reception reduction
ON/OFF
Standby mode
Start the menu
The first 4 menu items are displayed.
Select a menu item
Make your selection
1.Reception reduction ON
2.Reception reduction OFF
Select a menu item
Press STOP, return to standby
mode
STOP
15-03-97 SAT 19:56 TRANSMIT AVAILABLE RESIDUAL MEMORY 100 % LOAD DOCUMENT
1.COMM. OPTIONS 2.LISTS 3.INSTALLATION 4.MENU LIST
 /
/ /
/ 

DISCARD
1.ON
2.OFF
Discard ON/OFF
Standby mode
Start the menu
The first 4 menu items are displayed.
Select a menu item
Make your selection
1.Discard ON
2.Discard OFF
Select a menu item
Press STOP, return to standby mode
STOP
TF 831/861 TOSHIBA |
Reception of documents |
19 GB |
Reception of documents
Memory reception
Under certain circumstances, the machine cannot print out any further incoming copies:
•If there is no recording paper
•If there is a paper jam
In order to prevent problems with reception, the remaining pages are buffered in the memory of your fax machine. Once the problem has been solved, the document is printed out automatically.
15-03-97 SAT 19:56 TRANSMIT AVAILABLE RESIDUAL MEMORY 100 % LOAD DOCUMENT
1.COMM. OPTIONS 2.LISTS 3.INSTALLATION 4.MENU LIST
 /
/ /
/ 

SET MEMORY RX
1.ON
2.OFF
STOP
Memory reception ON/ OFF
Standby mode
Start the menu
The first 4 menu items are displayed.
Select a menu item
Make your selection
1.Memory reception ON
2.Memory reception OFF
Select a menu item
Press STOP, return to standby mode
15-03-97 SAT 19:56 PAPER EMPTY
RESIDUAL MEMORY 100 % MEMORY RECEPTION
15-03-97 SAT 19:56 PAPER JAM
RESIDUAL MEMORY 100 % MEMORY RECEPTION
Display messages for memory reception
Display in case of paper low.
or
Display in case of paper jam.
GB 20 Reception of documents |
TOSHIBA TF 831/861 |
Reception of documents
SECURE RX
In the SECURE RX mode, the fax machine is ready to receive documents, although the incoming fax documents are not printed out. Instead, they are retained in the machine’s memory for a specific period. This arrangement prevents documents for instance which are received outside office hours from falling into the “wrong hands”. You can specify the period during which SECURE RX is active for each individual day of the week. Outside this period, all stored fax documents are automatically printed out and all further documents are received without any restriction.
Secure RX can only be activated if memory reception has been activated (see page 20).
15-03-97 SAT 19:56 Standby mode TRANSMIT AVAILABLE
RESIDUAL MEMORY 100 % LOAD DOCUMENT
Start the menu
1.COMM. OPTIONS 2.LISTS 3.INSTALLATION 4.MENU LIST
 /
/ /
/ 

SECURE RX
1.SECURITY CODE 2.ACTIVITY MODE
Enter security |
|
Security |
|
Activate / |
code for first |
|
code edit |
|
deactivate |
time |
|
|
|
Secure RX |
Go to A1 |
|
Go to A2 |
|
Go to B |
|
|
|
|
|
|
|
|
|
|
The first 4 menu items are displayed.
Select a menu item
Make your selection
1.Enter / edit security code (see A)
2.Activate Secure RX (only possible if security code is used - see B)
Select a menu item
A1 |
Enter security code |
|
|
for first time |
|
|
|
|
SECURITY CODE ENTRY |
Make your selection |
|
for security code |
||
NEW CODE |
||
|
||
SECURITY CODE= |
|
|
nnnn |
|
Enter the security code
SECURITY CODE ENTRY
NEW CODE
SECURITY CODE=
1234
Confirm with START
START
SECURE RX |
Make your selection |
||
1. |
Enter / edit security code |
||
1.SECURITY CODE |
|||
2. |
Activate Secure RX (only possible of |
||
|
|||
2.ACTIVITY MODE |
security code is used) |
|
TF 831/861 TOSHIBA |
Reception of documents |
21 GB |
Reception of documents
A2 Security code edit
SECURITY CODE ENTRY CURRENT CODE SECURITY CODE=
nnnn
SECURITY CODE ENTRY NEW CODE
SECURITY CODE=
****
START
SECURITY CODE ENTRY NEW CODE
SECURITY CODE=
nnnn
SECURITY CODE ENTRY NEW CODE
SECURITY CODE=
9876
START
SECURE RX
1.SECURITY CODE 2.ACTIVITY MODE
Make your selection for (old) security code
Enter the old security code
Confirm with START
Make your selection for new security code
Enter the new security code
Confirm with START
Make your selection
1.Enter / edit security code
2.Activate Secure RX (only possible if security code is used)
GB 22 Reception of documents |
TOSHIBA TF 831/861 |
Reception of documents
B |
Activate / deactivate |
|
|
Secure RX |
|
|
|
|
SECURE RX
SECURITY CODE=
nnnn
SECURE RX 1.ON
2.OFF
SECURE RX
TIME PERIOD =
16:00 - 09:00
START
SECURE RX
FOR EACH DAY?
1.YES
2.NO
MONDAY
SET ALL DAY SECURE 1.YES
2.NO
STOP
Make your selection
for the current security code
Enter the current security code
Make your selection
for configuration of Secure RX
1.Configure and activate Secure RX
2.Deactivate Secure RX
Select a menu item
Make your selection for the period in which Secure Rx is active.
(Move the cursor with the F/E keys)
Enter the period
Confirm with START
Make your selection for Secure RX
1.Settings for each individual day
2.Same setting for all days
Select a menu item
(Example: Menu item 1)
Make your selection
Is set period applicable for Monday?
1.YES
2.NO
Select a menu item
All days of the week (up to Sunday) can be set individually.
Press STOP, return to standby mode
TF 831/861 TOSHIBA |
Reception of documents |
23 GB |
Reception of documents
Activate and deactivate Secure Rx
You can also activate the Secure Rx mode outside the set period, if for instance staff leave the office early. You can also deactivate the Secure Rx mode at any time (assuming that you know the security code) in order to obtain a printout of the saved documents. The Secure Rx mode is then deactivated for the rest of the day. If the appropriate settings are used, this facility is again activated automatically at midnight.
If you wish to reactivate Secure Rx within a specific period, please follow the steps set out on page 23.
15-03-97 SAT 19:56 |
Activate Secure Rx permanently |
TRANSMIT AVAILABLE |
(without time restriction) |
RESIDUAL MEMORY 100 % |
Standby mode |
LOAD DOCUMENT |
|
Open the one-touch dial cover
SHIFT |
SECURE RX |
Press the Shift key and then the |
|
|
|
corresponding function key |
|
SECURE RX |
|
Make your selection |
|
|
1. |
for unlimited Secure Rx mode |
|
1.START |
|
||
|
2. |
Deactivate Secure Rx mode |
|
|
|
||
2.STOP
Select a menu item
The Secure Rx mode is now permanently activated without any time restriction.
This mode can be set only if Secure Rx has been configured (see page 23).
15-03-97 SAT 19:56 |
Deactivate Secure Rx for the rest |
TRANSMIT AVAILABLE |
of the day |
RESIDUAL MEMORY 100 % |
Standby mode |
LOAD DOCUMENT |
|
Open the one-touch dial cover
SHIFT |
SECURE RX |
SECURE RX
1.START
2.STOP
SECURE RX
SECURITY CODE=
nnnn
START
Press the Shift key and then the corresponding function key
Make your selection
1.for unlimited Secure Rx mode
2.Deactivate Secure Rx mode
Select a menu item
Make your selection
for the current security code
Enter the current security code Confirm with START
The Secure Rx mode is now permanently deactivated without any time restriction. The contents of the memory are printed out.
This mode can be set only if Secure Rx has been configured (see page 23).
GB 24 Reception of documents |
TOSHIBA TF 831/861 |
Reception of documents
Correct sequence printout
If more than one document is transmitted, it is normal to start with the first page. As received copies are printed out face-up, this means that the received stack of documents is in reversed order. This would mean that the first page is the last page to be printed. You can set your fax machine to cope with this factor.
Please note that the entire reception procedure is first stored in memory before it is subsequently printed out. If the capacity of the memory is not sufficient, there will be a delay in printing out the documents in the correct sequence.
If you find that the memory is frequently too small, ask your dealer for a memory expansion!
15-03-97 SAT 19:56 TRANSMIT AVAILABLE RESIDUAL MEMORY 100 % LOAD DOCUMENT
1.COMM. OPTIONS |
|
2.LISTS |
|
3.INSTALLATION |
R |
4.MENU LIST |
 /
/ /
/ 
COLLATED PRINT
1.ON
2.OFF
Standby mode
Start the menu
The first 4 menu items are displayed.
Select a menu item
Make your selection
1.Correct sequence printout ON
2.Correct sequence printout OFF
Select a menu item
Press STOP, return to standby mode
STOP
TF 831/861 TOSHIBA |
Reception of documents |
25 GB |

Reception of documents
Multiple printout
As your fax machine handles all reception jobs via its memory, it is possible for several copies instead of merely one copy to be printed out (up to 99). This means that the operator does not have to go to the photocopier. Please note that great strain is placed on the memory if you increase the number of copies and if several jobs are received simultaneously.
If you find that the memory is frequently too small, ask your dealer for a memory expansion!
15-03-97 SAT 19:56 TRANSMIT AVAILABLE RESIDUAL MEMORY 100 % LOAD DOCUMENT
1.COMM. OPTIONS |
|
2.LISTS |
|
3.INSTALLATION |
|
4.MENU LIST |
R |
 /
/ /
/ 
RX MULTI COPY
COPY NUMBER=(01-99)
01
RX MULTI COPY
COPY NUMBER=(01-99)
08
START
STOP
Standby mode
Start the menu
The first 4 menu items are displayed.
Select a menu item
Make your selection
Number of incoming copies
Select the required quantity
Example: 8 copies
Confirm with START
Press STOP, return to standby mode
GB 26 Reception of documents |
TOSHIBA TF 831/861 |

Reception of documents
Delete reception
It is not possible to immediately recognise whether your fax machine is transmitting or receiving a document. The LINE 1 and LINE 2 lamps do not provide any specific information in this respect. You can only identify that a document is being received after you press the JOB STATUS key.
15-03-97 SAT 19:56 TRANSMIT AVAILABLE RESIDUAL MEMORY 77 % LOAD DOCUMENT
LINE 1
LINE 2
JOB STATUS
LINE-1 RECEIVE |
P001 |
FILE NBR = |
122 |
EC 14400 BPS
+44 2131 123456
JOB STATUS |
|
LINE-2 RECEIVE |
P001 |
FILE NBR = |
123 |
EC 14400 BPS
+44 2131 123456
JOB CANCEL |
|
CANCEL ? |
|
FILE NBR = |
123 |
1.YES
2.NO
START
Standby mode
The LINE lamp lights up and indicates activity on the line
Press the JOB STATUS key
The current status is displayed (RECEPTION is displayed)
If the second line is also active (optional)
Press the JOB STATUS key (again)
The current status of the second line is displayed
(RECEPTION is displayed)
Press the JOB CANCEL key
Confirmation prompt
Confirm with START
Current reception is terminated
TF 831/861 TOSHIBA |
Reception of documents |
27 GB |

Reception of documents
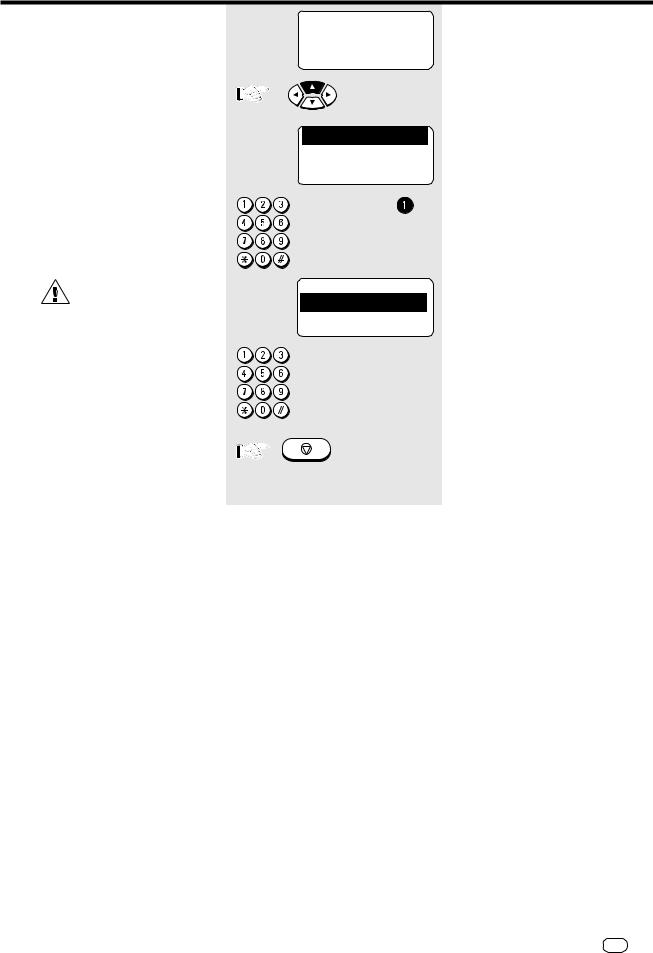
Reception protection
The process of receiving documents is not subject to any restriction in principle. However, if reception protection is activated, it is only possible for the machine to receive fax documents from partners whose fax number is stored in the fax machine. The transmitted code of the transmitter is compared against the contents of your alphabet dial memory or one-touch dial keys. If the comparison is not successful, the transmission is rejected.
Please note that fax reception is limited when the reception
protection facility has been activated. If you have not stored any fax numbers, no further fax documents can be received!
15-03-97 SAT 19:56 TRANSMIT AVAILABLE RESIDUAL MEMORY 100 % LOAD DOCUMENT
1.COMM. OPTIONS 2.LISTS 3.INSTALLATION 4.MENU LIST
 /
/ /
/ 

SET PRIVILEGED RX 1.ON
2.OFF
STOP
Standby mode
Start the menu
The first 4 menu items are displayed.
Select a menu item
Make your selection
1.Reception protection ON
2.Reception protection OFF (normal)
Select a menu item
Press STOP, return to standby mode
GB 28 Reception of documents |
TOSHIBA TF 831/861 |

Reception of documents
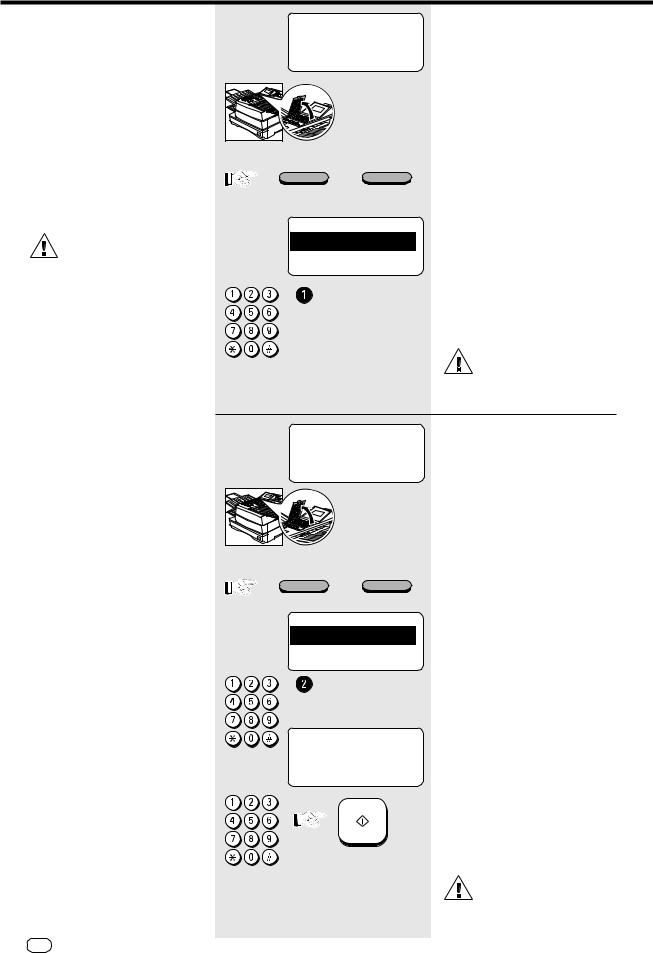
Local copy
You can use your fax machine to make one or more copies (up to 99).
You can select a sorter function if several copies of various documents are to be made simultaneously. The copies are sorted and reproduced in the sequence in which the original documents were inserted into the document feed.
Sorter function ON
3
2
1 3
2 1
3
2
1
15-03-97 SAT 19:56 TRANSMIT AVAILABLE RESIDUAL MEMORY 100 % LOAD DOCUMENT
Standby mode
Load original
Remember:
Printed side face down
15-03-97 SAT 19:56 TRANSMIT AVAILABLE RESIDUAL MEMORY 100 % LOAD DOCUMENT
COPY
JOURNAL
COPY |
|
|
PAPER |
A4 |
|
COLLATE |
ON |
OFF |
COPIES =(1-99) |
n |
|
Document ready
Press COPY key
Make your selection
•Copies are sorted automatically.
•Requires adequate memory (if memory is full, the copying process is terminated. If you find that the memory is frequently too small, ask your dealer for a memory expansion!
•All documents are scanned into the machine, resulting in a longer copying procedure.
Sorter function OFF
1
1
1 2
2 2
3
3
3
•Copies are sorted manually.
•Not much memory required.
•The copying procedure is shorter.
The copy is also reduced (see page 30).
The copy is always made with “fine” resolution (see page 44).
/ |
Activate or deactivate COLLATE |
|
|
|
Enter amount of copies |
Confirm with START
START
TF 831/861 TOSHIBA |
Reception of documents |
29 GB |

Reception of documents
Copy reduction
If the document to be copied is 10 mm larger than A4 format, the additional length is automatically printed on a second page. If you wish to prevent a second page from being printed, you can activate the copy reduction facility. In this case, the copy is reduced to max. 90%. If the reduction scale is not sufficient, a second page is automatically printed.
15-03-97 SAT 19:56 TRANSMIT AVAILABLE RESIDUAL MEMORY 100 % LOAD DOCUMENT
1.COMM. OPTIONS 2.LISTS 3.INSTALLATION 4.MENU LIST
 /
/  /
/ 

COPY REDUCTION 1.ON
2.OFF
STOP
Standby mode
Start the menu
The first 4 menu items are displayed.
Select a menu item
Make your selection
1.Copy reduction ON
2.Copy reduction OFF
Select a menu item
Press STOP, return to standby mode
GB 30 Reception of documents |
TOSHIBA TF 831/861 |
 Loading...