


INSTRUCTION MANUAL
To ensure that you use the Toshiba PDR-5300 Digital Still Camera safely and correctly, read this Instruction Manual carefully before you start using the camera. Once you have finished reading this Instruction Manual, keep it handy at all times.
DIGITAL STILL CAMERA
PDR-5300

 Attention


For customers in the U.S.A.
! "! ! ! #
FCC Statement
This device complies with Part 15 of the FCC Rules. Operation is subject to the following two conditions:
(1)This device may not cause harmful interference, and
(2)This device must accept any interference received, including interference that may cause undesired operation.
NOTE
This equipment has been tested and found to comply with the limits for a Class B digital device, pursuant to Part 15 of the FCC Rules. These limits are designed to provide reasonable protection against harmful interference in a residential installation.
This equipment generates, uses and can radiate radio frequency energy and, if not installed and used in accordance with the instructions, may cause harmful interference to radio communications. However, there is no guarantee that interference will not occur in a particular installation. If this equipment does cause harmful interference to radio or television reception, which can be determined by turning the equipment OFF and ON, the user is encouraged to try to correct the interference by one or more of the following measures:
•Change the direction of the radio or TV antenna.
Move the equipment or the radio or TV. For example, if the equipment is to the right of the TV, move it to the left of the TV.
Or, move the equipment farther away from the radio or TV.
•Plug the equipment into a different outlet. Don’t plug your radio or TV into the same circuit as your equipment.
•Ensure that all expansion slots (on the back or side of the equipment) are covered. Also, ensure that all metal retaining brackets are tightly attached to the equipment.
•If these suggestions don’t help, consult your equipment dealer or experienced radio/TV technician for help.
CAUTION
Changes or modification made to this equipment not expressly approved by Toshiba or parties authorized by Toshiba could void the user 's authority to operate the equipment.
TOSHIBA AMERICA INFORMATION SYSTEMS, INC.
Imaging Systems Division
9740 Irvine Boulevard,
Irvine, California 92618-1697
Phone Number: (800)288-1354
For customers in Canada
CAUTION
This Class B digital apparatus complies with Canadian ICES-003.
In the space provided below, please record the model and
Serial No. of your camera.
Model No. |
|
Serial No. |
Please retain this information for future reference.
2

Preface
Before Using Your Camera
Accessories
Safety Precautions
Contents
Handling Your Camera
Notes On Handling Battery
Handling the AC Adapter Correctly Handling the Supplied SD Card Correctly


 Before Using Your Camera


|
Thank you for purchasing this TOSHIBA Digital Still Camera. |
Preface |
To ensure that you use the Toshiba PDR-5300 Digital Still Camera safely and correctly, |
read this Instruction Manual carefully before you start using the camera. Once you have |
|
|
finished reading this Instruction Manual, keep it handy at all times. |
|
The design, specifications, software and contents of this Instruction Manual are subject to |
|
change without notice in the interest of product improvement. |
The illustrations in this manual are exaggerated and simplified for ease of viewing, so there can be slight differences between them and the actual product.
Getting |
Ready |
Trademark Information |
|
|
|
||
|
|
• Microsoft, Windows, DirectX and Windows Media are trademarks or registered trademarks |
|
|
|
|
in the U.S. and other countries by the U.S. Microsoft Corporation. Windows is an abbrevi- |
|
|
|
ated term referring to the Microsoft Windows Operating System. |
Taking |
Photographs |
• Macintosh and Mac OS are trademarks or registered |
|
|
trademarks of Apple Computer, Inc. |
||
|
|
|
|
|
|
• ACDSee is a trademark of ACD Systems Co. |
|
|
|
• SD logo is a trademark. |
|
|
|
• MultiMediaCard is a trademark of Infineon Technologies AG in Germany. |
|
|
|
• Other company or product names are trademarks or registered trademarks of the respec- |
|
|
|
|
tive companies. |
Back/DeletingPlaying |
PhotographedImages |
Copyright Notice |
|
Images taken with digital still cameras are for personal enjoyment only and must not be |
|||
|
|
used, indicated, distributed, or exhibited, etc. otherwise without the permission of the |
|
|
|
copyright holder as per copyright laws. |
|
|
|
Note that photographing some performances, exhibitions, etc., is restricted even when |
|
|
|
photographs are taken for personal enjoyment. In addition, the transfer of memory cards |
|
to |
thePC |
(SD cards, etc.) containing copyrighted images and files is limited to purposes within the |
|
Connecting |
• |
Windows 98 |
|
|
|
range permitted by copyright laws. |
|
|
|
About the Used Terms |
|
|
|
|
Windows 98 refers to Microsoft® Windows® 98 Operating System. |
UsefulOther |
|
• |
Windows 2000 |
Information |
|
Windows 2000 refers to Microsoft® Windows® 2000 Operating System. |
|
• |
Windows Me |
||
|
|
|
Windows Me refers to Microsoft® Windows® Millennium Edition Operating System. |
|
|
• |
Windows XP |
|
|
|
Windows XP refers to Microsoft® Windows® XP Operating System. |
|
|
U.S.A. Only |
|
Additional |
Information |
“WARNING: Handling the cord on this product or cords associated with accessories |
|
|
|
||
sold with this product, will expose you to lead, a chemical known to the State of California to cause [cancer, and] birth defects or other reproductive harm. Wash hands after handling.”
This digital still camera supports Exif Print.
4
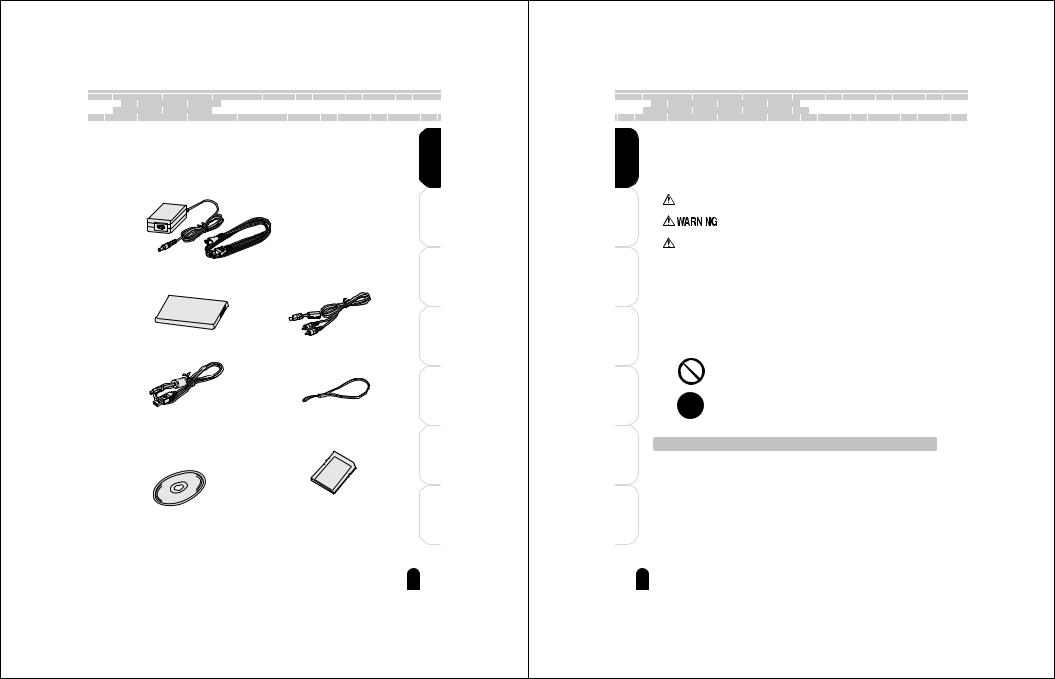

 Accessories


Make sure that you have all of the items below. If any item is missing, damaged or |
|
mismatched, promptly contact your dealer. |
Preface |
In addition to the accessories below, printed materials such as notices or product |
|
descriptions may also be included. |
|
AC adapter: (CEX0107A) or (ADP-15HH A) included.
|
|
Ready |
Getting |
Lithium-ion battery (PDR-BT3) |
AV cable |
Photographs |
Taking |
|
|
||
USB cable |
Hand strap |
PhotographedImages |
PlayingBack/Deleting |
|
|
||
|
|
thePC |
Connecting |
|
|
|
to |
Software CD-ROM (1) |
SD Memory card |
Information |
UsefulOther |
Software application |
|
||
|
|
|
|
USB driver (for Windows 98) |
|
|
|
• Instruction Manual (this manual) |
|
Information |
Additional |
|
|
|
|
|
|
5 |
|

 Safety Precautions


|
|
● Read these safety precautions carefully before using this product. |
|||||
Preface |
|
● These precautions provide valuable safety instructions that you must observe. |
|||||
|
● The indications used for the precautions have the following meanings: |
||||||
|
|
|
Indication definitions |
||||
|
|
|
|||||
|
|
|
|
|
|
|
|
|
|
|
|
Indication |
Meaning |
||
|
|
|
|
DANGER |
Indicates the existence of an imminent hazard such that death or |
||
Getting |
Ready |
|
|
serious bodily injury (*1) may result from improper use. |
|||
|
|
|
|
|
|
||
|
|
|
|
|
injury (*1) may result from improper use. |
||
|
|
|
|
|
|
|
Indicates the existence of a hazard such that death or serious bodily |
|
|
|
|
|
|
|
|
|
|
|
|
CAUTION |
Indicates the existence of a hazard such that bodily injury (*2) or |
||
|
|
|
|
property damage (*3) may result from improper use. |
|||
Taking |
Photographs |
|
|
|
|
|
|
|
|
|
|
|
*2: “Bodily injury” means injuries, burns, electric shock, etc. which does |
||
|
|
|
|
|
|
|
*1: “Serious bodily injury” means loss of eyesight, injuries, burns (high |
|
|
|
|
|
|
|
and low temperature), electric shock, fracture, poisoning, etc. which |
|
|
|
|
|
|
|
leaves a sequela and requires hospitalization or prolonged |
|
|
|
|
|
|
|
treatment. |
|
|
|
|
|
|
|
not require hospitalization or prolonged treatment. |
Back/DeletingPlaying |
ImagesPhotographed |
|
|
|
|
|
*3: “Property damage” means extended harm to home, household |
|
|
|
|
|
effects, domesticated animals, pets, etc. |
||
|
|
|
|
Graphic symbol definitions |
|||
|
|
|
|
||||
|
|
|
|
|
|
||
|
|
|
Graphic symbol |
|
Meaning |
||
|
|
|
|
|
|
|
Indicates a prohibited action that must not be carried out. The actual |
to |
|
|
|
|
|
|
prohibited action is indicated in the symbol or nearby graphically, or |
|
|
|
|
|
|
described in text. |
|
Connecting |
thePC |
|
|
|
|
|
|
|
|
|
|
|
|
||
|
|
|
|
|
described in text. |
||
|
|
|
|
|
|
|
Indicates a necessary action that must be carried out. The actual |
|
|
|
|
|
|
|
necessary action is indicated in the symbol or nearby graphically, or |
UsefulOther |
Information |
|
|
|
|
||
|
intentional or negligent misuse by the user, or use under other abnormal operating conditions. |
||||||
|
|
Liability of Disclaimer |
|||||
|
|
• |
Toshiba Corporation bears no responsibility in the case of damages arising from natural |
||||
|
|
|
disasters such as earthquakes, lightning, fire, acts by third parties, other accidents, either |
||||
|
|
• Toshiba Corporation bears no responsibility for incidental damages (lost profit, suspension |
|||||
|
|
|
of business activities, corruption or loss of the memory contents, etc) arising from the use |
||||
Additional |
Information |
• |
of or the inability to use this product. |
||||
Toshiba Corporation accepts no liability whatsoever for any damages arising from repair or |
|||||||
• Toshiba Corporation accepts no liability whatsoever for any damage arising from not having followed the descriptions in the Instruction Manual.
• Toshiba Corporation accepts no liability whatsoever for any damages arising from malfunctions resulting from combination with equipment or software that is not related to Toshiba Corporation.
modifications made by the user or an unauthorized third party.
• Toshiba’s liability for the product shall not exceed the purchase price of the product under any circumstances within the limits of the law.
6

When using the product
 WARNING
Should you ever notice a strange odor, smoke, or excessive heat coming from the camera, remove the batteriy and AC adapter.
Continued use in this state might cause fire, electric shock, or burns. Take care not to burn yourself if the battery gets hot. For details on repair, consult the store of purchase.
If foreign objects or water have entered the camera, turn the power OFF and remove the batteriy and AC adapter.
Continued use in this state might cause fire or electric shock. Consult the store of purchase.
If the camera has fallen or its case has been damaged, turn the power OFF and remove the batteriy and AC adapter.
Continued use in this state might cause fire or electric shock. Consult the store of purchase.
Do not allow metallic objects or flammable foreign matter inside the camera.
This might cause fire or electric shock. Do not insert or drop foreign objects in the battery/SD card slot, terminals, other holes or openings.
Do not use the camera in areas near water.
This might cause fire or electric shock. Take special care during rain, snow, on the beach, or near the shore.
Do not use the camera in the bath or shower.
This might cause fire or electric shock.
Do not place the camera on inclined or unstable surfaces.
This might cause the camera to fall or tilt over, causing injury.
Do not disassemble, change, or repair the camera.
This might cause fire or electric shock. For repair or internal inspection, ask the store of purchase.
Do not touch power cables and TV cables during a thunderstorm.
This might cause electric shock.
Do not use the camera while walking, driving, or riding a motorcycle.
This might cause you to fall over or result in a traffic accident.
 CAUTION
If you want to use the camera on an airplane, consult the airline company and follow their instructions.
Use of the camera is sometimes restricted because of potential radio interference.
Do not use the camera in humid, steamy, smoky, or dusty places.
This might cause fire or electric shock.
Do not leave the camera in places where the temperature may rise significantly, such as inside a car.
This might adversely affect the case or the internal parts, resulting in fire.
Do not play the supplied CD-ROM with a music CD player or a similar device.
This might damage the headphone or speaker, and/or may damage your ears.
Do not drop or subject the camera to strong impact.
This might cause fire, electric shock.
Before moving the camera, disconnect the cables.
Neglecting this might damage the cables, resulting in fire or electric shock.
|
Preface |
Ready |
Getting |
Photographs |
Taking |
PhotographedImages |
PlayingBack/Deleting |
thePC |
Connecting |
|
to |
Information |
OtherUseful |
Information |
Additional |
7
Preface |
|
Getting |
Ready |
Taking |
Photographs |
PlayingBack/Deleting |
PhotographedImages |
Connectingto |
thePC |
OtherUseful |
Information |
Additional |
Information |
8
Safety Precautions (Continued) 


Do not wrap the camera or place it cloth or blankets.
This might cause heat to build up and deform the case, resulting in fire. Use the camera in a well-ventilated place.
 CAUTION (Continued)
Do not fire the flash near the eyes.
This might cause temporary damage to the eyesight.
Do not subject the LCD monitor to impact.
Do not swing the camera while walking.
If you hold the strap and swing the camera, the camera might come into contact to other people or any object, resulting in injury.
Before cleaning the camera, remove the batteriy and AC adapter.
Neglecting this might cause electric shock.
This might damage the glass on the screen or cause the internal fluid to leak. If the internal fluid enters your eyes or comes into contact with your body or clothes, rinse with fresh water. If the internal fluid has entered your eyes, consult a physician to receive treatment.
For the internal cleaning of the camera, consult the store of purchase every two years.
Do not look at the sun through the |
|
If dust accumulates inside the camera, |
viewfinder. |
|
this might result in fire. Consult the |
This might cause damage to the |
|
store of purchase regarding the |
|
cleaning costs. |
|
eyesight. |
|
|
|
|
|
|
|
|
About the AC adapter
Use the supplied AC with the indicated power voltage.
Use with any other power
voltage might cause fire or electric shock.
Do not disassemble, repair the AC adapter.
This might cause fire or
If dirt or dust has adhered plug on the AC adapter plug joints, remove the the power source and
The insulation decrease of the plug might result in fire.
blankets over connected with
place the adapter an electric
This might cause fire.
Do not damage, modify heat the AC
the AC adapter
heavy on it, or pinch it. twist, or bundle the AC with an excessive force.
cause fire or electric

 CAUTION
Do not connect or disconnect the AC adapter plug with a wet hand.
This might cause electric shock.
Do not remove the AC adapter plug from a wall outlet by pulling the actual cable.
This might damage the cable or plug, resulting in fire or electric shock. Make sure to hold the plug when removing it.
Use only the supplied AC adapter and power cable.
Use of an AC adapter other than specified might cause fire.
If you plan not to use the camera for a long period of time, remove the AC adapter plug from a wall outlet.
Malfunction on the camera, if it happens, might result in fire.
Do not use the AC adapter with another model or device.
This might cause fire or malfunction.
Firmly insert the AC adapter plug into a wall outlet.
Neglecting this might cause fire or electric shock.
About batteries
 DANGER
Do not hit the batteries with a hammer, or step, drop, or subject the batteries to strong impact.
This might cause the batteries to rupture, ignite or heat up, resulting in fire or serious injury.
Do not heat, disassemble or throw the batteries into fire or water.
This might cause the batteries to rupture, ignite or heat up, resulting in fire or serious injury.
Do not charge the battery by a method other than the specified charging method.
Failing to do so may cause an explosion or fire.
Cover the electrodes (+ and - terminals) with insulating tape before taking the batteries to a recycling service.
Short-circuiting of the electrodes could cause an explosion or fire.
Use the batteries only for specified applications.
Use of the batteries for other applications might cause them to rupture, ignite or heat up, resulting in fire or serious injury.
|
Preface |
Ready |
Getting |
Photographs |
Taking |
PhotographedImages |
PlayingBack/Deleting |
thePC |
Connecting |
|
to |
Information |
OtherUseful |
Information |
Additional |
9
Preface |
|
Getting |
Ready |
Taking |
Photographs |
PlayingBack/Deleting |
PhotographedImages |
Connectingto |
thePC |
OtherUseful |
Information |
Additional |
Information |
10
Safety Precautions 
WARNING
Do not leave batteries within the reach of small children.
Swallowing batteries might cause poisoning. If you accidentally swallow the battery, contact a doctor immediately.
If fluid leaks from the batteries and comes into contact with your eyes, immediately wash your eyes with clean, running water, and ask a physician for treatment.
Leaving your eyes in this condition might cause eye damage.
Use only the specified batteries (PDR-BT3).
Use of a battery other than specified might cause fire.
Do not connect the battery electrodes (+ or - terminals) with wire or other metallic objects. Also, do not carry or store batteries together with metallic necklaces, or pins or other metallic objects.
Short-circuiting of the electrodes might cause the batteries to heat up, rupture or ignite.
 CAUTION
Insert the battery carefully making sure that their polarities (marked by + and -) are facing the correct way.
Inserting the battery with its polarities facing the wrong way, this might cause fire or injury, or damage to the surrounding area due to the battery rupturing or leaking.
Apply tape or otherwise cover the electrodes and then store or dispose of the used batteries.
Storing or disposing of batteries as they are might cause the batteries to leak fluid, heat up or rupture, resulting in burns or injury.
Do not leave unusable or discharged battery in the camera.
Doing so could result in the battery exploding, catching fire, or heating and could cause fire, burns or injury.
Do not remove the battery immediately after long period of continuous use.
The battery become hot during use. Touching a hot battery might cause burns.


 Contents


Attention ....................................................... |
2 |
Preface
Before Using Your Camera .......................... |
4 |
Accessories .................................................. |
5 |
Safety Precautions ....................................... |
6 |
Contents ..................................................... |
11 |
Handling Your Camera ............................... |
12 |
Notes On Handling Battery ........................ |
13 |
Handling the AC Adapter Correctly ............ |
14 |
Handling the Supplied SD Card Correctly .. |
15 |
Getting Ready
Names of the Parts .................................... |
18 |
Inserting and Removing the Battery ........... |
20 |
Charging the Battery .................................. |
22 |
Inserting and Removing the SD Card ........ |
24 |
Turning the Power On/Off .......................... |
25 |
Setting the Language and Date ................. |
26 |
Taking Photographs
[ |
] Taking Photographs in Auto |
|
Photography Mode ..................................... |
28 |
|
LCD Monitor Indications When Photographing ... |
30 |
|
Zoom Photography ..................................... |
31 |
|
Setting the Flash ........................................ |
32 |
|
Setting the Focus ....................................... |
34 |
|
Self-timer/Photographing at Intervals ......... |
36 |
|
Setting the Scene Mode ............................. |
38 |
|
[ |
] Taking Photographs in Program |
|
(Automatic Exposure) Mode ....................... |
39 |
|
[ |
] Taking Photographs in Shutter Speed |
|
Priority Mode .............................................. |
40 |
|
[ |
] Taking Photographs in Aperture |
|
Priority Mode .............................................. |
42 |
|
[ ] Taking Photographs in Manual Mode ... |
43 |
|
Exposure Compensation/Backlight Correction .... |
44 |
|
Taking Movies ............................................ |
45 |
|
Changing the Settings of the Photography |
|
|
Menu (Picture) ............................................ |
46 |
|
• |
Size ............................................................. |
47 |
• |
Quality ........................................................ |
48 |
• |
Sharpness .................................................. |
48 |
• |
Contrast ...................................................... |
49 |
• |
Color ........................................................... |
49 |
Changing the Settings of the Photography |
|
|
Menu (Function) ......................................... |
50 |
|
• |
Capture Mode ............................................. |
51 |
• |
Voice Memo ................................................ |
51 |
• |
LCD Bright. ................................................. |
52 |
• |
Digital Zoom ............................................... |
52 |
• |
Preview ....................................................... |
53 |
• |
Interval ........................................................ |
54 |
Changing the Settings of the Photography |
|
|
Menu (AE/AWB) ......................................... |
55 |
|
• |
White Balance ............................................ |
56 |
• |
Metering ..................................................... |
56 |
• |
ISO ............................................................. |
57 |
• |
Manual WB ................................................. |
58 |
Playing Back/Deleting Photographed Images |
||
Playing Back Photographed Images .......... |
60 |
|
Displaying Image Information ..................... |
61 |
|
Displaying a List of Images |
|
|
(Thumbnail Display) ................................... |
62 |
|
Displaying Images Enlarged ...................... |
63 |
|
Playing Back Movies .................................. |
64 |
|
Changing the Playback Menu Settings ...... |
66 |
|
• |
Slide Show .................................................. |
67 |
• |
DPOF ......................................................... |
67 |
• |
Protect ........................................................ |
67 |
• |
LCD Bright. ................................................. |
67 |
Protecting Images ...................................... |
68 |
|
DPOF Settings ........................................... |
70 |
|
Recording Voice Memos ............................ |
73 |
|
Erasing Images .......................................... |
74 |
|
|
Connecting to the PC |
|
About Your Software .................................. |
78 |
|
Connecting to the PC ................................. |
79 |
|
Connecting to a Windows PC .................... |
80 |
|
Connecting to a Macintosh ......................... |
84 |
|
Changing the Image Size ........................... |
87 |
|
Copying Computer Images to the |
|
|
Camera ...................................................... |
88 |
|
Disconnecting the Camera from the PC ..... |
89 |
|
|
Other Useful Information |
|
Changing the System Settings (Basic) ....... |
92 |
|
• |
Card Info. .................................................... |
93 |
• |
Fr. No. Reset .............................................. |
93 |
• |
Format ........................................................ |
94 |
• |
Sound ......................................................... |
94 |
• |
Beep ........................................................... |
95 |
• |
Auto OFF .................................................... |
95 |
Changing the System Settings (Custom) ... |
96 |
|
• |
Date/Time ................................................... |
97 |
• |
Sys. Reset .................................................. |
97 |
• |
Language ................................................... |
98 |
• |
Video Output ............................................... |
98 |
• |
System Info. ............................................... |
99 |
LED Color ................................................. |
100 |
|
Taking and Playing Back |
|
|
Photographs on a TV ............................... |
101 |
|
|
Additional Information |
|
Specifications ........................................... |
104 |
|
Warning Messages ................................... |
105 |
|
Troubleshooting ........................................ |
106 |
|
Q&A .......................................................... |
108 |
|
Glossary ................................................... |
109 |
|
Global Contacts ........................................ |
110 |
|
Index ........................................................ |
111 |
|
|
Preface |
Ready |
Getting |
Photographs |
Taking |
PhotographedImages |
PlayingBack/Deleting |
thePC |
Connecting |
|
to |
Information |
OtherUseful |
Information |
Additional |
11
|
|
|
|
|
|
|
|
|
|
|
|
|
|
|
|
|
|
|
|
|
|
|
|
|
|
|
|
|
|
|
|
|
|
|
|
|
|
|
|
|
|
|
|
|
|
|
|
|
|
|
|
|
|
|
|
|
|
|
|
|
|
|
|
|
|
|
|
|
|
|
|
|
|
|
|
|
|
|
|
|
|
|
|
|
|
|
|
|
|
|
|
|
|
|
|
|
Handling |
|
|
|
|
|
|
|
Your |
|
|
|
|
|
Camera |
|
|
|
|
|
|
|
|
|
|
|
|
|
|
|
|
|
|
|
|
|
|
|
|
|
|
|
|
|
|
|
|
|
|
|
|
|
|||||||||||||||||||||
|
|
|
|
|
|
|
|
|
|
|
|
|
|
|
|
|
|
|
|
|
|
|
|
|
|
|
|
|
|
|
|
|
|
|
|
|
|
|
|
|
|
|
|
|
||||||||||||||||||||||||||||||||||||||||
|
|
|
|
|
|
|
|
|
|
|
|
|
|
|
|
|
|
|
|
|
|
|
|
|
|
|
|
|
|
|
|
|
|
|
|
|
|
|
|
|
|
|
|
|
|
|
||||||||||||||||||||||||||||||||||||||
|
|
|
|
|
|
|
|
|
|
|
|
|
|
|
|
|
|
|
|
|
|
|
|
|
|
|
|
|
|
|
|
|
|
|
|
|
|
|
|
|
|
|
|
|
|
|
|
|
|
|
|
|
|
|
|
|
|
|
|
|
|
|
|
|
|
|
|
|
|
|
|
|
|
|
|
|
|
|
|
|
|
|
|
|
|
|
|
|
|
|
|
|
|
Before using the camera, carefully read and strictly observe the Safety Precautions |
|
|
|
|
|
||||||||||||||||||||||||||||||||||||||||||||||||||||||||||||||||||||||
|
Preface |
|
|
|
|
|
|
( page 6) and the notes described below: |
|
|
|
|
|
|||||||||||||||||||||||||||||||||||||||||||||||||||||||||||||||||||||||
|
|
|
|
|
|
|
Avoid Using or Storing the Camera in the Following Places |
|
|
|
|
|
||||||||||||||||||||||||||||||||||||||||||||||||||||||||||||||||||||||||
|
|
|
|
|
|
|
|
|
• Places subject to humidity, dust, and dirt |
|
|
|
|
|
||||||||||||||||||||||||||||||||||||||||||||||||||||||||||||||||||||||
|
|
|
|
|
|
|
|
|
• Places subject to direct sunlight |
|
|
|
|
|
||||||||||||||||||||||||||||||||||||||||||||||||||||||||||||||||||||||
|
|
|
|
|
|
|
|
|
• Places subject to high or low temperature |
|
|
|
|
|
||||||||||||||||||||||||||||||||||||||||||||||||||||||||||||||||||||||
|
Getting |
Ready |
|
• Places filled with highly flammable gas |
|
|
|
|
|
|||||||||||||||||||||||||||||||||||||||||||||||||||||||||||||||||||||||||||
|
|
• Places near gasoline, benzene, or paint thinner |
|
|
|
|
|
|||||||||||||||||||||||||||||||||||||||||||||||||||||||||||||||||||||||||||||
|
|
|
|
|
|
|
|
|
• Places subject to strong vibration |
|
|
|
|
|
||||||||||||||||||||||||||||||||||||||||||||||||||||||||||||||||||||||
|
|
|
|
|
|
|
|
|
• Places subject to smoke or steam |
|
|
|
|
|
||||||||||||||||||||||||||||||||||||||||||||||||||||||||||||||||||||||
|
|
|
|
|
|
|
|
|
• Places subject to strong magnetic fields (near electric motors, transformers, magnets, etc.) |
|
|
|
|
|
||||||||||||||||||||||||||||||||||||||||||||||||||||||||||||||||||||||
|
|
|
|
|
|
|
|
|
• Places contacting chemicals (such as pesticides), rubber or vinyl products for a long period |
|
|
|
|
|
||||||||||||||||||||||||||||||||||||||||||||||||||||||||||||||||||||||
|
Taking |
Photographs |
|
|
|
of time |
|
|
|
|
|
|||||||||||||||||||||||||||||||||||||||||||||||||||||||||||||||||||||||||
|
|
it will also no longer be repairable. |
|
|
|
|
|
|||||||||||||||||||||||||||||||||||||||||||||||||||||||||||||||||||||||||||||
|
|
|
|
|
|
|
|
|
Do not Expose the Camera to Sand |
|
|
|
|
|
||||||||||||||||||||||||||||||||||||||||||||||||||||||||||||||||||||||
|
|
|
|
|
|
|
|
|
If the camera comes into contact with sand, not only will the camera become damaged, |
|
|
|
|
|
||||||||||||||||||||||||||||||||||||||||||||||||||||||||||||||||||||||
|
|
|
|
|
|
|
|
|
Take special care when using the camera at the seaside, sandy areas or places where |
|
|
|
|
|
||||||||||||||||||||||||||||||||||||||||||||||||||||||||||||||||||||||
|
Back/DeletingPlaying |
PhotographedImages |
|
sand dust is likely to occur. |
|
|
|
|
|
|||||||||||||||||||||||||||||||||||||||||||||||||||||||||||||||||||||||||||
|
|
Pay Attention to Condensation |
|
|
|
|
|
|||||||||||||||||||||||||||||||||||||||||||||||||||||||||||||||||||||||||||||
|
|
|
|
|
|
|
|
|
|
|
|
|
|
|||||||||||||||||||||||||||||||||||||||||||||||||||||||||||||||||||||||
|
|
|
|
|
|
|
|
|
Due to a sudden change in temperature, such as when you move the camera from a |
|
|
|
|
|
||||||||||||||||||||||||||||||||||||||||||||||||||||||||||||||||||||||
|
|
|
|
|
|
|
|
|
cold location to a warm one, water droplets (condensation) may form on the inside of |
|
|
|
|
|
||||||||||||||||||||||||||||||||||||||||||||||||||||||||||||||||||||||
|
|
|
|
|
|
|
|
|
the camera or on the lens. |
|
|
|
|
|
||||||||||||||||||||||||||||||||||||||||||||||||||||||||||||||||||||||
|
to |
thePC |
|
When this occurs, turn the power OFF, and wait an hour before using the camera. If |
|
|
|
|
|
|||||||||||||||||||||||||||||||||||||||||||||||||||||||||||||||||||||||||||
|
Connecting |
|
When Cleaning the Camera |
|
|
|
|
|
||||||||||||||||||||||||||||||||||||||||||||||||||||||||||||||||||||||||||||
|
|
|
|
|
|
|
|
|
condensation forms on the SD Memory card, remove the SD card, wipe off any |
|
|
|
|
|
||||||||||||||||||||||||||||||||||||||||||||||||||||||||||||||||||||||
|
|
|
|
|
|
|
|
|
condensation and wait a short time before using it again. |
|
|
|
|
|
||||||||||||||||||||||||||||||||||||||||||||||||||||||||||||||||||||||
|
|
|
|
|
|
|
|
|
• To prevent the lens and the surface of the LCD monitor from being scratched, blow off any |
|
|
|
|
|
||||||||||||||||||||||||||||||||||||||||||||||||||||||||||||||||||||||
|
UsefulOther |
Information |
|
|
|
dust from them with a blower brush and lightly wipe with a soft dry cloth. |
|
|
|
|
|
|||||||||||||||||||||||||||||||||||||||||||||||||||||||||||||||||||||||||
|
|
• Clean the body of the camera with a soft dry cloth. Do not use volatile liquids such as paint |
|
|
|
|
|
|||||||||||||||||||||||||||||||||||||||||||||||||||||||||||||||||||||||||||||
|
|
|
|
|
|
|
|
|
|
|
thinner, benzene, or insecticide because these may react with the camera body and cause |
|
|
|
|
|
||||||||||||||||||||||||||||||||||||||||||||||||||||||||||||||||||||
|
|
|
|
|
|
|
|
|
|
|
deformation or remove the coating. |
|
|
|
|
|
||||||||||||||||||||||||||||||||||||||||||||||||||||||||||||||||||||
|
|
|
|
|
|
|
|
|
Be Careful of Magnetic Fields |
|
|
|
|
|
||||||||||||||||||||||||||||||||||||||||||||||||||||||||||||||||||||||
|
Additional |
Information |
|
Please do not allow items that are easily affected by magnetic fields to come close to |
|
|
|
|
|
|||||||||||||||||||||||||||||||||||||||||||||||||||||||||||||||||||||||||||
|
|
the speaker of the camera; these include credit and cash cards, magnetic passes, |
|
|
|
|
|
|||||||||||||||||||||||||||||||||||||||||||||||||||||||||||||||||||||||||||||
|
|
|
|
|
|
|
|
|
computer diskettes, etc. Doing so could result in data loss and render the item |
|
|
|
|
|
||||||||||||||||||||||||||||||||||||||||||||||||||||||||||||||||||||||
|
|
|
|
|
|
|
|
|
unusable. |
|
|
|
|
|
||||||||||||||||||||||||||||||||||||||||||||||||||||||||||||||||||||||
|
|
|
|
|
|
|
|
|
Firmware Version Upgrade |
|
|
|
|
|
||||||||||||||||||||||||||||||||||||||||||||||||||||||||||||||||||||||
|
|
|
|
|
|
|
|
|
For better use, the firmware of the camera may be upgraded after shipment. The |
|
|
|
|
|
||||||||||||||||||||||||||||||||||||||||||||||||||||||||||||||||||||||
|
|
|
|
|
|
|
|
|
methods of version upgrade are available in our website. |
|
|
|
|
|
||||||||||||||||||||||||||||||||||||||||||||||||||||||||||||||||||||||
|
|
|
12 |
|
“Global Contacts” page 110. |
|
|
|
|
|
||||||||||||||||||||||||||||||||||||||||||||||||||||||||||||||||||||||||||

 Notes On Handling Battery


When you use the battery, carefully read and strictly observe the Safety Precautions |
|
( page 6) and the notes described below. |
Preface |
* The battery is not fully charged when you buy your battery. Be sure to charge the |
|
battery before use. |
|
About Battery Use
• The battery gradually discharges even when not used. Charge the battery one or two days
before use. |
|
• To maximize the battery life, switch the camera OFF as often as possible when it is not |
Ready Getting |
fully charged battery. You can also increase the amount of power produced by putting the |
|
being used. |
|
• In cold locations, the number of frames that can be taken decreases. Take along a spare |
|
battery in your pocket or another warm place to heat it and then loading it into the camera |
|
just before you take a picture. |
|
• Always keep the terminals in a clean state. |
Photographs Taking |
• If the battery is used for a long time, the battery itself will become warm. This is normal and |
|
not a malfunction. |
|
• The batteries are consumable products. At normal temperatures (+77°F <+25°C>), this |
|
battery can be recharged for use about 300 times. If the battery runs out quickly, this |
|
indicates that the battery has reached the end of its effective life and should be replaced. |
|
When Not Using the Battery for a Long Time
• When the battery is not in use, be sure to remove it from the camera body. If the battery is |
PhotographedImages |
PlayingBack/Deleting |
|
left attached to the camera body or battery charger, a minute current will flow even if the |
|
|
|
power is turned OFF. This will result in over discharge and the battery may no longer be |
|
|
|
useable. |
|
|
|
• If the battery is not to be used for a while, store it after there is no power left. If the battery |
|
|
|
is stored for a long time in a fully charged state, its performance may be impaired. |
|
|
|
• When the battery is to be stored for a long time, fully charge the battery and then use the |
|
|
|
battery until there is no power left once every year and then store it. |
|
|
|
• Store the battery in a cool place. We recommend a dry place with a surrounding temperature |
thePC |
Connecting |
|
of +59°F (+15°C) to +77°F (+25°C). Avoid storing the battery in extremely hot or cold places. |
|||
|
|
Charging the Battery
• When you use the battery for the first time or when the battery has not been used for a long |
to |
|
time, be sure to charge the battery before use. |
|
|
• Use only the specified AC adapter. |
Information UsefulOther |
|
• This battery does not need to be fully discharged or exhausted before being charged. |
||
• The battery may feel warm after it has been charged or immediately after being used. This |
||
is normal and not a malfunction. |
|
|
• The battery can be charged at temperatures between +41°F (+5°C) and +104°F (+40°C), |
|
|
but should be charged between +50°F (+10°C) and +86°F (+30°C) to obtain maximum |
|
|
battery performance. |
|
|
• Do not recharge a fully charged battery. |
Information Additional |
|
Nominal voltage |
: 3.7V |
|
Specifications |
|
|
Lithium-ion battery (PDR-BT3) |
|
|
Nominal capacity |
: 1035 mAh |
|
Operating Temperature : +41°F (+5°C) to +104°F (+40°C) |
|
|
Dimensions |
: 35.2 mm (W) x 53.0 mm (H) x 7.0 mm (D) |
|
Weight |
: Approx. 28g |
|
13

 Handling the AC Adapter Correctly


Be sure to use only the specified AC adapter (CEX0107A or ADP-15HH A). Using a different AC adapter might cause the camera to malfunction.
Preface |
|
Before using the AC adapter, carefully read and strictly observe the Safety Precautions |
||||
|
|
( page 6) and the notes described below: |
|
|||
|
|
• Do not allow the connectors on the AC adapter to contact any other metal object because |
||||
|
|
this might cause a short circuit. |
|
|||
|
|
• To connect the AC adapter, fully insert the plug on the AC adapter into the DC IN 5V |
||||
|
|
terminal on the camera. |
|
|
|
|
Getting |
Ready |
• When removing the AC adapter cable, turn the camera off, then disconnect the cable while |
||||
holding its plug. Do not disconnect the cable by pulling the actual cable. |
||||||
|
|
• Do not drop the AC adapter or subject it to strong impacts. |
|
|||
|
|
• Do not use the AC adapter in very hot and humid places. |
|
|||
|
|
• Do not insert the plug on the AC adapter while the battery is being used. Switch the camera |
||||
|
|
off first. |
|
|
|
|
Taking |
Photographs |
• The AC adapter is for indoor use only. |
|
|||
• If you remove the battery or AC adapter while the camera is in operation, the date may be |
||||||
|
|
• Do not connect the supplied AC adapter to a device other than this camera. |
||||
|
|
• The AC adapter may sometimes become warm during use. This does not designate |
||||
|
|
malfunction. |
|
|
|
|
|
|
• Buzzing noises may come form inside the camera. This does not designate malfunction. |
||||
|
|
• Do not use the AC adapter near a radio because it could interfere with the radio. |
||||
Back/DeletingPlaying |
PhotographedImages |
lost from the memory. If this happens, reset the date. |
|
|||
Specifications |
AC adapter (CEX0107A) |
AC adapter (ADP-15HH A) |
||||
|
|
|
|
|
||
|
|
|
|
|
||
|
|
|
|
|
|
|
|
|
Input |
100 to 240 V AC, 50/60 Hz |
|||
to |
|
|
|
|
|
|
|
Rated output |
5 V DC, 3 A |
||||
Connecting |
PCthe |
|
|
|
|
|
Operating temperature |
32°F (0°C) to +104°F (+40°C) |
|||||
|
|
|
|
|
||
|
|
Storage temperature |
-4°F (-20°C) to +149°F (+65°C) |
|||
|
|
|
|
|
|
|
|
|
Dimensions (W x H x D) |
40mm X 30.5mm X 94.2mm |
|
50mm X 28.0mm X 65.0mm |
|
|
|
|
|
|
||
|
|
Weight |
Approx.150g |
|||
|
|
|
|
|
||
OtherUseful |
Information |
Accessory |
AC cord |
|||
|
|
|
|
|||
Memo • Use the power supply indicated on the supplied AC cable. When using power supply |
||||||
|
|
|||||
|
|
other than the displayed voltage in other countries/region, please purchase the AC |
||||
Additional |
Information |
cord that applies to the standard of the country/region. |
|
|||
• The AC adapter can be used with 100V to 240V. |
|
|||||
14


 Handling the Supplied SD Card Correctly


In this Instruction Manual, the SD memory card is called an SD card. Read and observe the following when handling the supplied SD card.
Cautions
•The SD card includes a non-volatile semiconductor memory (NAND Flash memory). Under normal use data saved in the SD card is not damaged or lost. If used improperly, however, the data may be damaged or lost. Please be aware that Toshiba Corporation will accept no responsibility whatsoever for damaged or lost data, regardless of the type or cause of the problem or damage.
•The SD card uses part of the memory as its system area. The actually usable memory capacity is therefore lower than the indicated capacity.
•The supplied SD card has been already formatted for image storage. Always use this camera when reformatting the card to erase images or folders. Formatting the SD card on other devices (PC, etc.) may result in problems such as inability to read or write data.
•We strongly recommend that you make backups of important data.
•When the SD card comes to the end of its life, it does not allow image data to be written or deleted. If this happens, purchase a new SD card.
•This camera conforms to the SD standard Ver. 1.01.
|
Preface |
Ready |
Getting |
Photographs |
Taking |
Write Protection
To prevent valuable data from being erased |
|
|
|
||
accidentally, switch the write protection tab at the |
|
|
|
||
side of the SD card to “LOCK.” To save, edit, or |
LOCK |
LOCK |
|
||
erase data in the card, cancel the write protection |
|
PhotographedImages |
PlayingBack/Deleting |
||
state. |
Write protection |
||||
Write protection |
|
||||
|
|
||||
|
tab |
|
state |
Connecting |
|
Specifications |
|
|
thePC |
||
|
|
|
to |
||
Memory type |
: NAND Flash memory |
|
|
||
|
|
|
|||
Operating temperature |
: +32°F (0°C) to +131°F (+55°C) |
|
|
|
|
Storage temperature |
: –4°F (–20°C) to +149°F (+65°C) |
|
Information |
OtherUseful |
|
Operating/Storage humidity : 30% to 80% (no condensation) |
|
||||
Dimensions |
: 24.0 mm × 32.0 mm × 2.1 mm (W × H × D) |
||||
Weight |
: Approx. 2g |
|
|||
|
|
|
|||
Important
• They are checked up with SD card published by June 2003.
• The operation of all SD cards available on the market cannot be guaranteed.
Information |
Additional |
15

Getting Ready
Names of the Parts
Inserting and Removing the Battery
Charging the Battery
Inserting and Removing the SD Card
Turning the Power On/Off
Setting the Language and Date

 Names of the Parts


Preface |
|
Getting |
Ready |
Taking |
Photographs |
PlayingBack/Deleting |
PhotographedImages |
Connectingto |
thePC |
OtherUseful |
Information |
Additional |
Information |
Mode dial
Shutter button
 Page 28
POWER button
 Page 25
Lens
Viewfinder
Diopter adjustment dial
 Page 28
LCD monitor
MENU Button
 (Erase) Button
 Page 74, 75
DISP button
 Page 61
Tripod mount
 Attaching the Hand Strap
Attach the strap as illustrated in the diagram below.
Microphone
Self-timer LED (AF auxiliary light)
Viewfinder window
Flash
 Page 32
A/V OUT/DIGITAL terminal  Page 80, 84, 101
DC IN 5V terminal
 Page 22
Viewfinder LED
 Page 28, 100
T(Tele) W(Wide) button
 Page 31, 63 Speaker Search dial
OK/Direction button
Strap holder
Battery/SD card cover  Page 20
18

 OK/Direction button
|
(Exposure compensation |
(Focus) button |
|
|
|
Page 34 |
|
||
|
button Page 44 |
|
|
|
|
|
|
|
|
|
|
|
(Flash) button |
|
|
|
|
Page 32 |
|
|
OK button |
|
/INT. (Self-timer) button |
|
|
|
|
Page 36 |
|
Mode dial |
|
|
|
|
Aperture priority mode |
|
Manual photography mode |
||
|
Page 42 |
|
Page 43 |
|
Shutter speed priority mode |
|
Portrait mode |
|
|
|
Page 40 |
|
Page 38 |
|
Program (auto exposure) mode |
|
Sports mode |
|
|
|
Page 39 |
|
Page 38 |
|
Auto photography mode |
|
Night scene mode |
|
|
|
Page 28 |
|
Page 38 |
|
Playback mode |
|
Movie mode |
|
|
|
Page 60, 64 |
|
Page 45 |
|
PC mode |
|
SET-UP mode |
|
|
|
Page 80, 84 |
|
Page 92 |
|
|
: photography mode |
|
|
|
Icon |
Mode |
Description |
Page |
|
|
SET-UP |
Performs basic settings of the camera. |
92 |
|
|
Movie |
Takes movies. |
|
45 |
|
Night scene |
Select this when photographing evening or night scenes. |
38 |
|
|
Sports |
Select this when photographing fast-moving subjects. |
38 |
|
|
Portrait |
Select this when you wish to photograph a person |
38 |
|
|
and blur the background. |
|
||
|
|
|
|
|
|
Manual photography |
Select this when you wish to manually set the |
43 |
|
|
shutter speed and aperture. |
|
||
|
|
|
|
|
|
Aperture priority |
Select this when you wish to photograph with |
42 |
|
|
aperture priority. |
|
||
|
|
|
|
|
|
Shutter speed priority |
Select this when you wish to photograph with |
40 |
|
|
shutter speed priority. |
|
||
|
|
|
|
|
|
Program (auto exposure) |
This permits the shutter speed and aperture to be |
39 |
|
|
set automatically and other factors to be set manually. |
|||
|
Auto photography |
The camera is automatically set for exposure, etc. |
28 |
|
|
Playback |
Performs image playback, deletion, and writing of |
60,64 |
|
|
the print information. |
|
||
|
|
|
|
|
|
PC |
Downloads the image to the personal computer. |
80,84 |
|
|
Preface |
Ready |
Getting |
Photographs |
Taking |
PhotographedImages |
PlayingBack/Deleting |
thePC |
Connecting |
|
to |
Information |
OtherUseful |
Information |
Additional |
19
|
|
|
|
|
|
|
|
|
|
|
|
|
|
|
|
|
|
|
|
|
|
|
|
|
|
|
|
|
|
|
|
|
|
|
|
|
|
|
|
|
|
|
|
|
|
|
|
|
|
|
|
|
|
|
|
|
|
|
|
|
|
|
|
|
|
|
|
|
|
|
|
|
|
|
|
|
|
|
|
|
|
|
|
|
|
|
|
|
|
|
|
|
|
|
|
|
Inserting |
|
|
|
|
|
|
|
and |
|
|
|
|
|
|
|
Removing |
|
|
|
|
|
the |
|
|
|
|
Battery |
|
|
|
|
|
|
|
|
|
|
|
||||||||||||||||||||||||||||||||||
|
|
|
|
|
|
|
|
|
|
|
|
|
|
|
|
|
|
|
|
|
|
|
|
|
|
|
|
|
|
|
|
|
|
|
||||||||||||||||||||||||||||||||||||||||||||||||||
|
|
|
|
|
|
|
|
|
|
|
|
|
|
|
|
|
|
|
|
|
|
|
|
|
|
|
|
|
|
|
|
|
||||||||||||||||||||||||||||||||||||||||||||||||||||
|
|
|
|
|
|
|
|
|
|
|
|
|
|
|
|
|
|
|
|
|
|
|
|
|
|
|
|
|
|
|
|
|
|
|
|
|
|
|
|
|
|
|
|
|
|
|
|
|
|
|
|
|
|
|
|
|
|
|
|
|
|
|
|
|
|
|
|
|
|
|
|
|
|
|
|
|
|
|
|
|
|
|
|
|
|
|
|
|
|
|
|
|
|
This camera must be used with dedicated rechargeable lithium-ion battery (PDR-BT3). |
|
|
|
|
|
||||||||||||||||||||||||||||||||||||||||||||||||||||||||||||||||||||||
|
Preface |
|
|
|
This battery is merely called battery in this Instruction Manual. You cannot use other types |
|
|
|
|
|
||||||||||||||||||||||||||||||||||||||||||||||||||||||||||||||||||||||||||
|
|
|
|
|
|
|
|
Before starting |
|
|
|
|
|
|||||||||||||||||||||||||||||||||||||||||||||||||||||||||||||||||||||||
|
|
|
|
|
|
|
|
|
of battery. Charge the battery before using the camera. ( page 22) |
|
|
|
|
|
||||||||||||||||||||||||||||||||||||||||||||||||||||||||||||||||||||||
|
|
|
|
|
|
|
|
|
|
|
|
|
Confirm that the power of the camera is off. |
|
|
|
|
|
||||||||||||||||||||||||||||||||||||||||||||||||||||||||||||||||||
|
Getting Ready |
|
|
|
Inserting the Battery |
|
|
|
|
|
||||||||||||||||||||||||||||||||||||||||||||||||||||||||||||||||||||||||||
|
|
|
|
|
|
|
|
|
|
Open the battery/SD card cover. |
|
|
|
|
|
|||||||||||||||||||||||||||||||||||||||||||||||||||||||||||||||||||||
Taking Photographs |
1 |
2 |
Slide the battery/SD cover in the arrow direction 1, then open it 2.
Insert the battery in the correct orientation shown.
Back/DeletingPlaying ImagesPhotographed |
Tilt the battery lock lever in the direction of the arrow |
|
and orient the battery so that the label is at the LCD |
|
monitor side, then insert the battery. |
|
You should insert the battery as far as they go. |
to |
thePC |
|
Battery lock lever |
Connecting |
Close the battery/SD card cover. |
||
|
|
||
|
|
|
Close the battery/SD card cover 1, then slide it in |
|
|
2 |
the arrow direction 2. |
|
|
|
|
UsefulOther |
Information |
|
Make sure that the cover is firmly closed. |
1 |
|
||
Additional Information |
Important • When the battery is inserted without having properly performed the completion |
|
operation, the camera might not operate properly. Should this happen, please switch |
||
|
||
|
the power on one more time. |
20
Removing the Battery
Open the battery/SD card cover and then release the battery lock lever. When the battery has come out a little, slowly pull it out the rest of the way.
Important • When removing the battery, be sure to turn off the power of the camera beforehand. Removing the battery while the power is on could cause breakdown or the loss of important data.
•Removing the battery while the power is on could result in the camera settings returning to the initial default settings. Should this happen, please perform the settings again.
•When removing the battery, please be careful not to drop it by mistake.
|
Preface |
Ready |
Getting |
Photographs |
Taking |
PhotographedImages |
PlayingBack/Deleting |
thePC |
Connecting |
|
to |
Information |
OtherUseful |
Information |
Additional |
21

 Charging the Battery


Charge the battery before the camera is used for the first time or when the battery reserve is low. It takes approximately 4 hours to complete charging.
Preface |
|
Before starting |
||
|
|
|||
|
|
Confirm that the power of the camera is off and then load the battery ( page 20). |
||
Getting |
Ready |
|
|
|
Taking |
Photographs |
|
|
|
Back/DeletingPlaying |
ImagesPhotographed |
Insert the AC plug on the AC adapter to an wall outlet. |
||
|
|
|||
|
|
Insert the appropriate end of the AC cable into the AC |
||
to |
|
adapter. |
||
thePC |
|
|
||
Connecting |
Insert the plug of the AC adapter into the DC IN 5 V |
|||
|
|
|||
|
|
connector of the camera. |
||
|
|
The Viewfinder LED lights green when charging is started and goes off when |
||
UsefulOther |
Information |
charging is completed. It lights orange when a charging error occurs. |
||
If you wish to use the camera when the battery charging is in progress, use the |
||||
|
|
|||
|
|
camera with the AC adapter connected. |
||
|
|
Important • |
If any problem occurs during charging, pull the AC adapter plug out from the wall |
|
|
|
|
outlet, then remove the battery from the camera. |
|
Additional |
Information |
• |
Before connecting or disconnecting the AC adapter, make sure to turn the camera |
|
|
off. Neglecting this could cause malfunction and/or damage the saved image data |
|||
|
|
|
||
|
|
|
even with the battery loaded. |
|
|
|
• |
When using the AC adapter after incorrectly terminating the camera, the camera may |
|
|
|
|
not be correctly initiated. If this happens, turn the power off, then turn it on again. |
|
|
|
• |
If the camera has been used at high temperatures, for example, under the blazing |
|
|
|
|
sun, charging may not start immediately because heat piled up inside the camera |
|
|
|
|
causes the internal sensor to operate. If this happens, wait until the camera cools off |
|
|
|
|
and then perform charging. |
|
22

 Memo • Use of the AC adapter is recommended when the camera will be used indoors over an extended period, or when images will be transferred to a personal computer, etc.
•The battery must be charged when the ambient temperature is in the range from +50°F (+10°C) to +86°F (+30°C).
Battery Wear
When the power is turned on, the camera shows the remaining battery power on the LCD monitor.
Display |
|
|
Meaning Sufficient amount left |
Fairly consumed |
Nearly exhausted |
About battery wear
The battery wear may vary depending on length of storage since manufacture of the battery, temperature of the camera and battery, and operating condition such as flash. Moreover, if the polarities of the battery (+ or –) and the terminal of the camera that come in contact with the electrodes are contaminated, electricity will not flow properly and the camera will decide that the battery are exhausted. When removing and loading the battery, be careful not to tap these parts. If the parts are contaminated, clean with a dry cloth.
When using the supplied Lithium-ion battery pack, the number of photographs that can be taken are shown as below.
Photography mode |
|
Conditions |
: +77°F (+25°C), Flash use rate 100% |
Photography interval |
: 1 frame every 30 seconds |
Possible number of frames |
: Approx. 130 frames |
Playback mode |
|
Conditions |
: +77°F (+25°C), Slideshow executed |
Playback time |
: Approx. 90 minutes |
*The number of frames and playback time mentioned here are only reference values, they are not guaranteed.
Using the battery efficiently
•This camera consumes electricity even with the power off while the amount is extremely small. We therefore recommend that the battery be removed when not using the camera for a long period of time. If the camera is left without battery about four hours, the date, time and other settings may be reset to the factory defaults. If this happens, set the correct date and time again before using the camera.
•When using the camera in cold areas, keep the camera and battery warm by holding them inside your outer cloth.
Battery performance lowered through low temperature will return to normal when a normal temperature is restored (+77°F <+25°C>).
|
Preface |
Ready |
Getting |
Photographs |
Taking |
PhotographedImages |
PlayingBack/Deleting |
thePC |
Connecting |
|
to |
Information |
OtherUseful |
Information |
Additional |
23


 Inserting and Removing the SD Card

|
Images photographed with this camera will be stored in the SD card. Without inserting the |
|
Preface |
SD card, you cannot take photographs using the camera. |
|
Before starting |
||
|
||
|
Before inserting or removing the SD card, make sure that the power of the camera |
|
|
is off. |
Inserting the SD card
Getting |
Ready |
Open the battery/SD card cover. |
|
|
Taking |
Photographs |
Insert the SD card in the correct orientation shown. |
||
|
|
|||
|
|
Hold the SD card with its metal contact end surface |
||
|
|
facing the LCD monitor side, then insert the card as |
||
|
|
far as it can go. |
|
|
PlayingBack/Deleting |
PhotographedImages |
Close the battery/SD card cover. |
|
|
|
|
|
||
to |
thePC |
|
|
|
Connecting |
Removing the SD card |
|
||
|
|
|
||
|
|
Open the battery/SD card cover, push the card once so that |
||
OtherUseful |
Information |
the card is slightly ejected, then remove the card slowly. |
||
Important • Never open the battery/SD card cover or remove the card while the card is being |
||||
|
|
|||
|
|
recorded (the viewfinder LED lights red). Neglecting this could damage the SD |
||
|
|
card or the data in the SD card. |
|
|
|
|
• An SD card used with another model or device cannot be used with this camera |
||
Additional |
Information |
as it is. Reformat it by this camera before taking photographs ( |
page 94). |
|
• This camera does not support MultiMediaCardTM. |
|
|||
|
|
|
||
24


 Turning the Power On/Off


 Before starting
Load the battery and insert the SD card. See “Inserting and removing the Battery” |
Preface |
page 20, “Charging the Battery” page 22 and “Inserting and Removing the SD |
|
Card” page 24 |
|
Turning the power on
Press the POWER button to turn the power ON. |
Ready |
Getting |
|||
|
|
|
initiated. |
||
|
|
|
The Viewfinder LED lights green and the camera is |
|
|
|
|
|
When the power is turned on, the camera will start in |
|
|
|
|
|
the mode that was set with the mode dial. |
|
|
|
|
|
|
Photographs |
Taking |
Memo • |
The power is turned off automatically when the camera has not been operated for a |
||||
|
|
fixed period of time. This function is called Auto OFF. To return to the operating |
|
|
|
|
|
condition, turn the power on again. |
PhotographedImages |
PlayingBack/Deleting |
|
|
|
“Auto OFF” page 95 |
|||
|
|
|
|
||
|
• |
After the power is turned on, it may take several seconds to charge the flash. While |
|
|
|
|
|
the flash is being charged, the Viewfinder LED lights orange, then the camera is not |
|
|
|
|
|
yet ready for photography. Start photography after the Viewfinder LED is turned off. |
|
|
|
Turning the Power OFF |
thePC |
Connecting |
|||
The power turns OFF. |
|||||
Press the POWER button to turn the power OFF. |
|
|
|||
|
|
|
|
|
to |
|
|
|
|
Information |
OtherUseful |
|
|
|
|
Information |
Additional |
25


 Setting the Language and Date


|
When the camera is used for the first time, the message [Date/Time data has been lost] is |
|
Preface |
displayed on the LCD monitor. Please set the display language and the date and time. |
|
The same message will also be displayed when the camera is used after being left for a |
||
|
||
|
long time without the battery installed. Please set the date and time. |
Set the mode dial to [  ] and press the
  button.
Getting |
|
|
|
|
|
[Custom] of the set-up menu is displayed. |
|
|
Ready |
|
|
|
|
|
|
|
|
Taking |
Photographs |
Select the [Language] with the |
buttons and |
|||||
|
|
|||||||
|
|
press the OK button. |
|
|
||||
|
|
Basic |
Custom |
The Language setting screen will be displayed. |
||||
|
|
Date/Time |
|
English |
Select the display language with the |
buttons |
||
Back/DeletingPlaying |
ImagesPhotographed |
Sys. Reset |
|
Français |
||||
Language |
|
Deutsch |
and press the OK button. |
|
||||
|
|
Video Output |
Español |
|
||||
|
|
|
|
|
||||
|
|
System Info. |
|
The setting will be stored. |
|
|||
|
|
|
|
|
|
|||
|
|
|
|
|
|
|
|
|
|
|
|
|
or : Select Page |
|
|
|
|
|
|
OK : Adjust |
or : Select Item |
|
|
|
||
to |
PCthe |
Select the [Date/Time] with the |
buttons and |
|||||
Connecting |
press the OK button. |
|
|
|||||
|
|
|
|
|||||
|
|
The Date/Time setting screen will be displayed. |
|
|
||||
|
|
Select the setting items with the |
buttons and set |
|||||
UsefulOther |
Information |
the date and time with the |
buttons. |
|
||||
Basic |
Custom |
|
|
|
||||
|
|
Date/Time YYYY/MM/DD |
|
|
|
|||
|
|
2003 |
01 |
|
01 |
|
|
|
|
|
|
00 |
: |
15 |
|
|
|
Additional |
Information |
|
|
or |
: Select Item |
|
|
|
OK : Adjust |
or |
: Change Value |
|
|
|
|||
 Check the setting contents and press the OK button.
The setting will be stored and the screen will return to the set-up menu.
26

Taking Photographs
[  ] Taking Photographs in Auto Photography Mode LCD Monitor Indications When Photographing
Zoom Photography
Setting the Flash
Setting the Focus
Self-timer/Photographing at Intervals
Setting the Scene Mode
[ 
 ] Taking Photographs in Program (Automatic Exposure) Mode [
  ] Taking Photographs in Shutter Speed Priority Mode [
  ] Taking Photographs in Aperture Priority Mode [
  ] Taking Photographs in Manual Mode Exposure Compensation/Backlight Correction
Taking Movies
Changing the Settings of the Photography Menu (Picture)
Changing the Settings of the Photography Menu (Function)
Changing the Settings of the Photography Menu (AE/AWB)

 [
[  ] Taking Photographs in Auto Photography Mode

|
Auto photography is a typical method of photography. Photographs can be taken simply |
|
Preface |
because the exposure (i.e., the combination of shutter speed and aperture setting) is |
|
controlled automatically to suit the photographic conditions. |
||
|
||
|
Prepare for photography. |
Insert the battery ( page 20) and the SD card (
 page 24) into the camera.
Getting Ready |
Press the POWER button to turn the power on. |
||
Set the mode dial to [ |
]. |
||
|
|||
Taking Photographs |
|
|
|
Back/DeletingPlaying ImagesPhotographed |
Compose the picture while viewing the LCD monitor or |
|
|
|
the viewfinder. |
|
When using the viewfinder, turn the “diopter adjustment dial” until the viewfinder |
|
image is displayed clearly. |
When the LCD monitor is too bright or too dark, adjust the brightness.
to |
|
“LCD Bright.” |
page 52 |
|
|
Connecting |
thePC |
|
|
automatically focuses and calculates the exposure, and at |
|
|
|
Press the shutter button halfway 1, and press it fully 2. |
|||
|
|
1Press down halfway. |
At the shutter button halfway down position, the camera |
||
|
|
|
|
the fully pressed position the camera takes the photograph. |
|
|
|
|
|
The focus area frame turns light blue and the viewfinder |
|
UsefulOther |
Information |
|
|
LED lights green when the camera is in focus and the |
|
|
|
exposure is calculated. |
|||
|
|
|
|
When the focus or exposure is not suitable, the frame of the |
|
|
|
|
|
focus area turns yellow and the viewfinder LED flashes red. |
|
|
|
|
|
If the photographic preview is set to “ON”, the |
|
|
|
2Press down fully. |
preview image (captured image) will be displayed |
||
|
|
while the image is being recorded onto the SD card. |
|||
|
|
|
|
||
Additional |
Information |
|
|
“Preview” |
page 53 |
Important• After you have taken photographs, the viewfinder LED stays flash red while the image |
|||||
|
|
When the voice memo is set to “ON”, [VOICE RECORDING] will be displayed on the |
|||
|
|
screen immediately after the photography, and the voice memo recording will start. |
|||
|
|
“Recording Voice Memos” |
page 51, 73 |
|
|
|
|
is recorded onto the SD card. While the viewfinder LED is flashing red, do not open the |
|||
|
|
battery/ SD card cover, nor remove the battery or SD card. Doing so might damage the |
|||
|
|
SD card or destroy the data of the SD card. |
|||
•When taking photographs, be careful not to allow the strap or your fingers to come in contact with the lens or flash.
28

Focusing
•If you want to focus and set exposure for a subject which is not in the center of the screen, move the camera so that the subject is located at the center of the screen, press the shutter button down halfway (to engage the Auto Focus/Auto Exposure lock) and keep the shutter button in this position while you reframe your picture and press the shutter button the rest of the way to complete the photograph.
•This product uses an accurate auto-focus mechanism. However, under conditions and for subjects such as the following, auto focusing might be difficult or the subject might not be in focus:
·When there are objects in front of or behind the subject (such as animals inside cages or people in front of trees)
·Subjects with luster such as a mirror or car body
·Subjects that do not readily reflect light such as hair or fur
·When the contrast is extremely low (such as people wearing clothes that are the same color as the background)
·Subjects moving at high speed
·Subjects that lack solid form such as smoke or flame
·Subjects viewed through glass
·When subjects are far away and dark
 Memo • Constantly bright or dark spots, or colored spots may be visible in the LCD monitor; however, this is not a malfunction. Also note that such spots do not exist in the recorded images.
•The image of the LCD monitor sometimes darkens during the time between pressing the shutter button down halfway and achieving focus.
•Moving the camera while pressing the shutter button will cause the photograph to blur.
•When the camera cannot focus on a subject when engaged in auto focus photography, the focus is fixed at about the 2 m position. During macro photography, depending on the position of the zoom, the focus is fixed at between about 20 cm at the Wide side
and about 70 cm at the Tele side. “Setting the Focus”  page 34
•It sometimes takes several seconds for the flash to recharge. During flash recharging, the viewfinder LED lights orange. Photographs cannot be taken while the viewfinder LED is lit orange.
•When taking photographs in a dark location, the shutter speed becomes slower and
an unsteady fold warning icon [  ] is displayed when the shutter button is pressed down halfway. To prevent hand-held blur, use of a tripod is recommended.
•When the subject is dark, the self-timer LED will light as an auxiliary light for focusing.
•A press of the OK button in the photography mode permits playback of the image that was last photographed. One more press of the OK button returns the camera to the photography mode.
|
Preface |
Ready |
Getting |
Photographs |
Taking |
PhotographedImages |
PlayingBack/Deleting |
thePC |
Connecting |
|
to |
Information |
OtherUseful |
Information |
Additional |
29

 LCD Monitor Indications When Photographing

Preface |
Photography modes [ ] [ ] [ |
] [ |
] |
The indicated characters, numbers, icons, and other information will differ depending on |
|||
the contents that are set.
|
|
|
Zooming status |
Page 31 |
|
|
Voice memo icon |
|
|
|
|
|
|
|
|
|
Page 73 |
|
|
|
|
|
|
|
|
Remaining battery |
Getting |
|
Mode icon |
W |
|
T |
|
|
status |
Ready |
|
|
|
Page 23 |
||||
Focus icon |
|
|
|
|
|
Flash icon |
||
|
|
|
|
|
|
|
||
|
|
Page 34 |
|
|
|
|
|
|
|
|
|
|
|
|
|
Page 32 |
|
|
|
|
|
|
|
|
|
|
|
|
White balance icon |
|
|
|
|
|
Image size |
|
|
|
|
|
|
|
Page 47 |
|
|
|
Page 56 |
|
|
|
|
|
|
|
|
|
|
|
|
|
Quality |
|
Taking |
Photographs |
Page 44 |
|
08 . 3 0 . 2 0 03 |
0 0 0 6 |
|||
|
Page 36 |
|||||||
|
|
Metering icon |
|
|
|
|
|
Page 48 |
|
|
Page 56 |
|
|
|
|
|
Capture mode icon |
|
|
Backlight |
|
|
|
|
|
Page 51 |
|
|
|
|
|
|
|
|
|
|
|
Correction |
|
|
|
|
|
Self-timer icon |
Back/DeletingPlaying |
PhotographedImages |
Unsteady hold |
|
Focus area |
] [ |
] [ |
] |
Possible number |
Photography modes [ |
] [ |
of shots |
||||||
|
|
warning icon |
|
(When the shutter button |
|
|||
|
|
Page 29 |
|
is pressed halfway.) |
|
|
|
|
The indicated characters, numbers, icons, and other information will differ depending on
to |
|
the contents that are set. |
|
|
|
|
Connecting |
|
|
|
|
||
thePC |
|
|
W |
|
T |
|
OtherUseful |
Information |
|
|
|
|
|
|
|
Exposure |
+ 0 . 3 |
|
|
|
Additional |
Information |
compensation |
|
|
|
|
Page 44 |
|
0 . 6 s |
F 2 . 8 |
0 0 0 6 |
||
|
|
|
||||
|
|
|
|
|||
|
|
Long time exposure mode icon |
Shutter speed |
Aperture |
||
|
|
|
Page 40 |
Page 40 |
|
Page 42 |
 Memo • Each press of the DISP button switches one step in the sequence of Normal display (displaying the icons, etc.), display OFF, LCD monitor OFF.
30


 Zoom Photography


Using a combination of 3 times optical zoom and 4 times digital zoom permits zoom photography of up to 12 times to suit the subject and the distance.
Set the mode dial to one of the photography modes. |
|
Preface |
|
|
|
||
Adjust the degree of zoom with the T (Tele) button or |
|
|
|
the W (Wide) button to determine the composition. |
Ready |
Getting |
|
|
Pressing the T button engages the zoom so that |
||
|
distant subjects can be photographed larger. |
||
|
Pressing the W button allows a wide area to be |
|
|
|
photographed. |
|
|
|
The position of the lens changes depending on the |
Photographs |
Taking |
|
condition of the T/W buttons. |
||
|
T (Tele) button |
|
|
|
W (Wide) button |
|
|
Press the shutter button halfway, and press it fully. |
PhotographedImages |
PlayingBack/Deleting |
|
Memo • The digital zoom can be set on or off with the photography menu. |
|||
“Digital Zoom” page 52 |
|
|
|
• The settings of the T button and W button will be cancelled automatically when the |
thePC |
Connecting |
|
power is turned off or when Auto OFF is activated. |
|||
• The digital zoom is cancelled when the DISP button is pressed and the LCD monitor |
|
|
|
is switched off. |
|
|
|
• You can check the zoom state in the screen. |
|
|
|
|
|
Information |
to |
Optical zoom 1X to 3X |
Digital zoom 1X to 4X |
OtherUseful |
|
|
|
Information |
Additional |
31

 Setting the Flash


Set the flash for taking photographs. The flash firing mode can be set to suit to the
Preface |
photographic conditions. |
|
The distance over which the flash is effective is about 0.8m to 3.0m (for sensitivity ISO 200). |
||
|
||
|
The setting will be maintained even after the power is turned off or Auto OFF is activated. |
Set the mode dial to one of the photography modes.
|
The flash setting is limited depending on the selected photography mode, scene |
|
Getting Ready |
mode, and capture mode. |
|
“Setting the Scene Mode” page 38, “Capture Mode” page 51 |
||
|
Press the  button and select the type of flash.
Taking Photographs |
|
Each press of the |
button moves the icon one step |
||||
|
through the sequence and displays it on the screen. |
||||||
|
OK |
For the modes of [ |
]: |
|
|
||
|
|
|
|
|
|
|
|
|
|
[ Blank ]Auto |
[ |
]Red-eye Reduction |
|||
|
|
[ |
]Suppressed Flash |
[ |
]Forced Flash |
||
PlayingBack/Deleting |
PhotographedImages |
[ |
]Red-eye Reduction |
[ |
]Forced Flash |
|||
|
|
For the modes of [ |
], [ |
|
], [ |
], and [ ]: |
||
Connectingto |
|
|
[ |
]Suppressed Flash |
|
|||
thePC |
|
|
|
|
|
|
|
|
OtherUseful |
Information |
|
|
|
|
|
|
|
Additional |
Information |
|
|
|
|
|
|
|
|
|
32 |
|
|
|
|
|
|

[Blank] Auto
The flash fires automatically to suit the photographic conditions. This is only effective |
Preface |
|
when the camera is set to the [ |
] mode. |
|
[ |
|
] Red-eye Reduction |
|
|
|
|
|
||
|
|
|
||
Use this mode to reduce the red-eye phenomenon when you wish to take natural- |
Ready Getting |
|||
subject (person) to look at the camera or get as close to the camera as possible. |
||||
looking pictures of people and animals in low-light conditions. ( |
“Glossary” page 109) |
|
||
When taking photographs, the red-eye phenomenon can be reduced by asking the |
|
|||
The flash always fires twice, and the photograph is taken at the second firing. |
|
|||
When the camera is set to the [ ] mode, the flash will fire to suit the brightness of the |
|
|||
subject. |
|
Photographs Taking |
||
[ |
|
] Forced Flash |
|
|
|
|
|
||
In this mode, the flash always fires. Use this mode for photographing under artificial light such as backlighting, fluorescent lighting, etc..
competitions, and when the subject is too far away for the flash to be effective. |
PhotographedImages |
PlayingBack/Deleting |
|
[ |
] Suppressed Flash |
|
|
Use this mode when taking pictures using indoor lighting, for stages and indoor |
|
|
|
Memo • |
When the scene mode is [ |
], [ |
] Red-eye Reduction is fixed. |
thePC |
Connecting |
||
• |
When the scene mode is [ |
], [ |
] Suppressed Flash is fixed. |
|
|
||
• |
When the scene mode is [ |
], [ ] Forced Flash is fixed. |
|
|
|||
• |
The flash cannot be used in the [ ] mode and capture mode [Continuous], [Auto Exp.]. |
to |
|||||
• |
When [ |
] has been set for the focus, the camera will be set for [ |
] Suppressed |
||||
|
|||||||
|
Flash. |
|
|
|
|
|
|
|
|
|
|
|
Information |
OtherUseful |
|
|
|
|
|
|
Information |
Additional |
|
33

 Setting the Focus


|
Photographs can be taken with the distance to the subject set by auto focus, [ |
] macro, |
|||
Preface |
[ |
] infinity, [ |
] fixed at 3 m, or [ |
] fixed at 1 m, etc. |
|
mode. |
|
|
|
||
|
The settings will be maintained even when the power is turned off or when Auto OFF is |
||||
activated. The focus settings will be limited depending on the selected photography
 Set the mode dial to one of the photography modes.
Getting Ready |
Press the |
button and select the type of focus. |
|
||||||
|
|
||||||||
|
|
Each press of the |
button moves the icon one step |
||||||
Taking Photographs |
|
through the sequence and displays it on the screen. |
|||||||
OK |
For the modes of [ |
], [ |
], [ |
], [ |
], [ |
], |
|||
|
|
||||||||
|
|
[ |
] and [ |
] : |
|
|
|
|
|
|
|
[ Blank ] Auto focus |
[ |
] Macro |
[ |
] Infinity |
|
||
|
|
|
[ ] Fixed at 1 m |
[ ] Fixed at 3 m |
|
||||
Back/DeletingPlaying |
PhotographedImages |
For the modes of [ |
] and [ |
] : |
|
|
|||
|
|
[ Blank ] Auto focus |
[ ] Infinity |
|
|
|
[ ] Fixed at 1 m [ |
] Fixed at 3 m |
|
Connectingto |
thePC |
|
|
|
OtherUseful |
Information |
|
|
|
Additional |
Information |
|
|
|
|
|
34 |
|
|
 Loading...