


 Loading...
Digital Terrestrial HD Receiver
SRT 8211
Picture similar
Installation Instructions |
Instrukcja instalacji |
Installationsanleitung |
Pokyny k instalaci |
Instructions d'installation |
Pokyny k inštalácii |
Istruzioni per l'installazione |
Upute za instalaciju |
Instrucciones de instalación |
Telepítési Utasítás |
Installationsanvisning |
Εγχειρίδιο χρήστη |
|
|
|
|
|
|
|
|

Fig. 1
1 |
2 |
3 |
4 |
5 |
Fig. 2
6
Model: Digital Terrestrial HD Receiver SRT 8211 |
TV SCART |
||
Supplied by STRONG Austria |
|
|
|
|
|
COAXIAL |
|
|
ANT IN |
ETHERNET S/PDIF |
HDMI |
5 V |
50 mA max. |
USB: 5 V |
500 mA max. |
OFF
ON
AC 100-240 V ~ 50/60 Hz, 12 W max.
1 2 3 4 5 7
Fig. 3 |
|
Fig. 4 |
Fig. 5 |
1 |
2 |
|
|
3 |
|
|
|
4 |
5 |
|
|
6 |
8 |
|
|
7 |
10 |
1. |
|
9 |
|
||
|
|
||
11 |
12 |
|
|
12 |
|
|
|
11 |
13 |
|
|
14 |
15 |
|
|
|
17 |
|
|
16 |
19 |
|
|
|
|
2. |
|
18 |
22 |
|
|
20 |
23 |
|
|
21 |
|
|
|
|
|
|
|
24 |
26 |
|
|
25 |
29 |
|
|
27 |
|
|
|
28 |
|
|
|
30 |
|
|
|
|
|
3. |
|

Fig. 6 |
|
|
|
|
|
Antenna |
|
|
|
|
|
Coaxial |
|
|
HDMI |
SCART cable |
|
|
|
cable |
|||
cable |
|
|
|
|
|
Model: Digital Terrestrial HD Receiver SRT 8211 |
|
TV SCART |
|
||
Supplied by STRONG Austria |
|
|
|
|
|
|
|
|
|
OFF |
ON |
ANT IN |
ETHERNET |
COAXIAL |
|
|
|
S/PDIF |
HDMI |
|
AC 100-240 V ~ |
||
5 V 50 mA max. |
|
USB: 5 V |
500 mA max. |
|
50/60 Hz, 12 W max. |
USB device
100-240V~
/12V
Fig. 7
Model: Digital Terrestrial HD Receiver SRT 8211 |
TV SCART |
||
Supplied by STRONG Austria |
|
|
|
|
|
COAXIAL |
|
|
ANT IN |
ETHERNET S/PDIF |
HDMI |
5 V |
50 mA max. |
USB: 5 V |
500 mA max. |
 Router
OFF |
ON |
AC 100-240 V ~ 50/60 Hz, 12 W max.
Fig. 8
|
Coaxial cable |
|
||
Model: Digital Terrestrial HD Receiver SRT 8211 |
TV SCART |
|||
Supplied by STRONG Austria |
|
|
|
|
|
|
|
|
OFF |
|
ANT IN |
ETHERNET |
COAXIAL |
|
|
S/PDIF |
HDMI |
||
5 V |
50 mA max. |
|
USB: 5 V |
500 mA max. |
ON
AC 100-240 V ~ 50/60 Hz, 12 W max.
Supplied by STRONG Austria Represented by STRONG Ges.m.b.H. Franz-Josefs-Kai 1
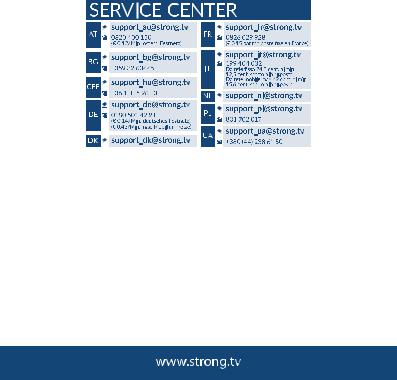
1010Vienna, Austria Email: support_at@strong.tv
03 Oct 2018 14:45

Licenses
THIS PRODUCT IS LICENSED UNDER THE AVC PATENT PORTFOLIO LICENSE FOR THE PERSONAL AND NONCOMMERCIAL USE OF A CONSUMER TO (i) ENCODE VIDEO IN COMPLIANCE WITH THE AVC STANDARD (“AVC VIDEO”) AND/OR (ii) DECODE AVC VIDEO THAT WAS ENCODED BY A CONSUMER ENGAGED IN A PERSONAL AND NON-COMMERCIAL ACTIVITY AND/OR WAS OBTAINED FROM A VIDEO PROVIDER LICENSED TO PROVIDE AVC VIDEO. NO LICENSE IS GRANTED OR SHALL BE IMPLIED FOR ANY OTHER USE. ADDITIONAL INFORMATION MAY BE OBTAINED FROM MPEG LA, L.L.C. SEE HTTP://WWW.MPEGLA.COM
This product contains one or more programs protected under international and U.S. copyright laws as unpublished works. They are confidential and proprietary to Dolby Laboratories. Their reproduction or disclosure, in whole or in part, or the production of derivative works therefrom without the express permission of Dolby Laboratories is prohibited. Copyright 2003-2009 by Dolby Laboratories. All rights reserved.
THIS PRODUCT IS SOLD WITH A LIMITED LICENSE AND IS AUTHORIZED TO BE USED ONLY IN CONNECTION WITH HEVC CONTENT THAT MEETS EACH OF THE THREE FOLLOWING
QUALIFICATIONS: (1) HEVC CONTENT ONLY FOR PERSONAL USE; (2) HEVC CONTENT THAT IS NOT OFFERED FOR SALE; AND (3) HEVC CONTENT THAT IS CREATED BY THE OWNER OF THE PRODUCT. THIS PRODUCT MAY NOT BE USED IN CONNECTION WITH HEVC ENCODED CONTENT CREATED BY A THIRD PARTY, WHICH THE USER HAS ORDERED OR PURCHASED FROM A THIRD PARTY, UNLESS THE USER IS SEPARATELY GRANTED RIGHTS TO USE THE PRODUCT WITH SUCH CONTENT BY A LICENSED SELLER OF THE CONTENT. YOUR USE OF THIS PRODUCT IN CONNECTION WITH HEVC ENCODED CONTENT IS DEEMED ACCEPTANCE OF THE LIMITED AUTHORITY TO USE AS NOTED ABOVE.
English
1

TABLE OF CONTENTS
1.0 INTRODUCTION |
3 |
4.0 STARTING UP FOR THE FIRST TIME |
8 |
1.1 Safety Instructions |
3 |
5.0 QUICK GUIDE TO USING YOUR RECEIVER9 |
|
1.2 Storage |
3 |
6.0 OPERATION |
9 |
1.3 Equipment Set-up |
4 |
6.1 Changing channels |
10 |
1.4 Accessories |
4 |
6.2 Info Banner |
10 |
1.5 Usage of external USB devices |
4 |
6.3 Selection of audio language |
10 |
2.0 YOUR RECEIVER |
5 |
6.4 Teletext |
10 |
2.1 DEFAULT PIN: 0000 |
5 |
6.5 Subtitles |
11 |
2.2 Front Panel |
5 |
6.6 EPG (Electronic Programme Guide) |
11 |
2.3 Rear Panel |
5 |
6.7 Record, Timeshift and Format |
11 |
2.4 Remote control |
5 |
7.0 MAIN MENU |
12 |
2.5 Installing the batteries |
6 |
7.1 Installation of channels |
12 |
2.6 Using the remote control |
6 |
7.2 Channel Editing and Programme |
|
3.0 CONNECTION |
7 |
information |
13 |
3.1 Connecting to a terrestrial antenna |
7 |
7.3 Settings |
15 |
3.2 Connecting to TV with HDMI cable |
7 |
7.4 Multimedia |
17 |
3.3 Connecting to TV with SCART cable |
7 |
7.5 Network |
20 |
3.4 Connecting a USB storage device |
7 |
7.6 Upgrade by USB |
20 |
3.5 Connecting to Ethernet for RSS feeds |
|
8.0 TROUBLESHOOTING |
21 |
and weather forecasts |
7 |
9.0 TECHNICAL SPECIFICATIONS |
22 |
3.6 Connection to main power supply |
7 |
|
|
3.7 Extended connections for your home |
|
|
|
entertainment |
8 |
|
|
STRONG declares that this item complies with the basic requirements and other relevant regulations of directives EMC 2014/30/EU, LVD 2014/35/EU and RoHS 2011/65/EU.
Subject to alterations. In consequence of continuous research and development technical specifications, design and appearance of products may change. HDMI, the HDMI logo and High-Definition Multimedia Interface are trademarks or registered trademarks of HDMI Licensing LLC in the United States and other countries. Manufactured under license from Dolby Laboratories. Dolby Audio, Dolby Digital, Dolby Digital Plus and the double-D symbol are registered trademarks of Dolby Laboratories. All other product names are trademarks or registered trademarks of their respective owners.
© STRONG 2018. All rights reserved.
2

1.0INTRODUCTION
1.1Safety Instructions
DO NOT INSTALL YOUR RECEIVER:
In a closed or poorly ventilated cabinet; directly on top of or under any other equipment; on a surface which might obstruct the ventilation slots.
DO NOT EXPOSE THE RECEIVER OR ITS ACCESSORIES:
To direct sunlight or any other equipment that generates heat; to rain or intense moisture; to intense vibration and to any shock which may cause permanent damage to your receiver or to any magnetic objects, such as loudspeakers, transformers, etc.
Do not use a damaged power cord. It may cause a fire or an electric shock. Do not touch a power cord with wet hands. It may cause an electric shock.
When the receiver is not used for a long period of time, you should unplug the power cord from the wall socket.
Do not use alcohol or ammonia based liquids to clean the receiver. If you wish, you may clean your receiver with a soft lint-free cloth slightly made damp with a mild soap solution, and only after disconnecting from the mains voltage supply. Make sure no foreign objects fall through the ventilation slots because this could cause fire or an electric shock.
Do not place any objects on top of the receiver because this might prevent proper cooling of the components inside.
Safety Precautions
Never try to open the receiver. It is dangerous to touch the inside of the receiver due to high voltages and possible electrical hazards. Opening the receiver will void the warranty of the product. Refer all maintenance or servicing to suitably qualified personnel.
When you are connecting cables, be sure that the receiver is disconnected from the mains supply voltage. Wait a few seconds after switching off the receiver before you move the receiver or disconnect any equipment.
It is a necessity that you only use an approved extension and compatible wiring that is suitable for the electrical power consumption of the installed equipment. Please ensure that the electrical power supply corresponds with the voltage on the electrical identification plate at the back of the receiver.
If the receiver does not operate normally even after strictly following the instructions in this user manual, it is recommended to consult your dealer.
1.2 Storage
Your receiver and its accessories are stored and delivered in a packaging designed to protect against mechanical shocks and moisture. When unpacking it, make sure that all the parts are included and keep the packaging away from children. When transporting the receiver from one place to another or if you are returning it under warranty conditions, make sure to repack the receiver in its original packaging with its accessories. Failing to comply with such packaging procedures could damage the product and void your warranty.
English
3

1.3 Equipment Set-up
We recommend you to consult a professional installer to set up your equipment. Otherwise, please follow the instructions below:
Refer to the user manual of your TV and, if applicable, your antenna.
Make sure that the HDMI cable and, if applicable, outdoor components are in a good condition.If you use the TV SCART connection, use a well shielded SCART cable.
This manual provides complete instructions for installing and using this receiver. The following symbols will serve as follow.
WARNING: |
Indicates warning information. |
NOTE: |
Indicates any other additional important or helpful information. |
MENU |
Represents a button on the remote control or the receiver. |
Move to |
(Bold characters) |
Represents a menu item within a window. |
|
|
(Italic characters) |
1.4 Accessories
Installation instructions1 remote control unit2x batteries (AAA type)
WARNING: The batteries should not be recharged, disassembled, electrically shortcircuited, be mixed or used with other types of batteries. If rechargeable accumulators instead of batteries are going to be used (e.g. NiMH), we
recommend using types with low self-discharge to ensure long time operation of your remote control.
1.5 Usage of external USB devices
It is recommended to use USB 2.0 storage devices or higher. If your device is not compatible to USB 2.0 specifications, recording, playback and other multimedia functions of the receiver might not work properly.
STRONG cannot guarantee the playback of files although extensions are listed, as it depends on codec, data bit rate and resolution used (all MPEG codec formats are supported).
It is advised not to store important information on USB storage devices used with the receiver.Always make backups of data on your USB storage device before using it with this receiver.STRONG will not take responsibility for any loss of information or circumstances caused by loss
of information.
4

2.0YOUR RECEIVER
2.1DEFAULT PIN: 0000
2.2Front Panel
|
IR Sensor |
Fig. 1 |
1. |
Receives commands from the remote control |
|
2. |
LED Display |
Shows channel number and time in standby |
3. |
Mode Indicator LED |
|
|
|
RED indicates that the receiver is in STANDBY mode. |
4. |
Standby/ON button |
|
|
USB |
Switches the receiver ON or into Standby |
5. |
To connect your USB storage device. |
|
2.3 Rear Panel
|
ANT IN |
Fig. 2 |
1. |
To connect to your antenna for reception of broadcast signals. |
|
2. |
ETHERNET |
To connect to your Ethernet cable (RJ-45) for RSS feeds and |
|
S/PDIF Coaxial |
weather forecasts |
3. |
To connect your receiver to a digital home cinema set, AV |
|
|
HDMI |
receiver or digital audio amplifier |
4. |
To connect your receiver with your TV-set using an HDMI cable. |
|
5. |
TV SCART |
To connect your receiver with your TV-set using a SCART cable. |
6. |
Power cord |
To connect to the main power (100 - 240 V AC ~ 50/60 Hz) |
7.Power switch To switch the receiver on or off.
2.4Remote control
|
|
Fig. 3 |
1. |
q |
Switches the receiver On/Standby. |
2. |
! |
Mutes all audio outputs of the receiver |
3. |
0~9 |
Enter channel number in TV mode or value input in menu |
4. |
TV/R |
Toggles between TV or RADIO mode. |
5. |
|
No function |
6. |
FAV |
Opens the favourite group selection. |
7. |
9 |
One step back in menu or back to previous channel. |
8. |
AUDIO |
Opens the audio* language selection |
9. |
|
Opens the current channel information; 2x opens the current |
10. EPG |
event information and 3x the next event information.* |
|
Opens the EPG* (Electronic Programme Guide) in TV mode. |
||
11. pq |
Change channel to next/previous. |
|
|
|
Menu: Moves the cursor up/down. |
12. tu |
Decreases/increases the volume level. |
|
|
OK |
Menu: Change settings for specific menus. |
13. |
Opens the current channel list in menu: for confirmation |
|
14. MENU |
Opens the main menu, in a menu you will get one step back. |
|
English
5
Loading...