


3-260-754-11 (1)
CD Radio
Cassette-Corder
Operating Instructions page 2GB |
GB |
CFD-CD777S MK2
© 2003 Sony Corporation
Warning
To prevent fire or shock hazard, do not expose the player to rain or moisture.
To avoid electrical shock, do not open the cabinet. Refer servicing to qualified personnel only.
Warning
Do not install the appliance in a confined space, such as a bookcase or built-in cabinet.
To prevent fire or shock hazard, do not place objects filled with liquids, such as vases, on the appliance.
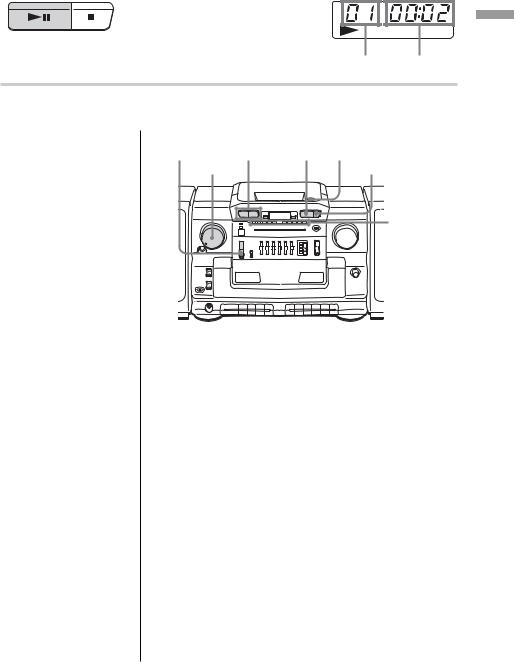
The FUNCTION selector is located at the front. When you turn on the player, the OPR/BATT indicator lights up.
2GB

Table of contents |
|
Basic Operations |
|
Playing a CD .................................................. |
4 |
Listening to the radio ...................................... |
6 |
Playing a tape ................................................. |
8 |
Recording on a tape ...................................... |
10 |
Dubbing ........................................................ |
12 |
The CD Player |
|
Using the display .......................................... |
14 |
Locating a specific track ............................... |
14 |
Playing tracks repeatedly (Repeat Play) ....... |
15 |
Creating your own program |
|
(Program Play) ......................................... |
16 |
The Tape Player |
|
Recording through a microphone/Using |
|
as a PA system .......................................... |
17 |
The Audio Emphasis |
|
Selecting the audio emphasis |
|
(DYNAMIC SOUND SYSTEM) ............. |
18 |
Setting Up |
|
Choosing the power sources ......................... |
19 |
Connecting optional components ................. |
21 |
Additional Information |
|
Precautions ................................................... |
22 |
Troubleshooting ............................................ |
24 |
Maintenance ................................................. |
26 |
Specifications ............................................... |
27 |
Index ............................................................. |
28 |
Operations Basic
GB
3GB

Basic Operations
Playing a CD
1 |
2,3 |
4 |
|
|
|
|
|
|
|
|
|
|
|
|
|
1
2
3
For hookup instructions, see pages 19 – 20.
Set FUNCTION to CD.
Press Z PUSH OPEN/CLOSE down to open the lid of the CD compartment and place a CD
on the CD compartment.
With the label side up
Close the lid of the CD compartment.
4GB
|
|
|
|
|
|
|
|
|
|
|
|
|
|
|
|
|
|
4 |
Press |
u N |
on the remote). |
Display |
|
( |
|
||||
The player plays all the tracks once.
Track number Playing time
Tip
During operation, the level meter shows the frequency level of the sound.
Adjusting the volume will not affect the level meter.
Use these buttons for additional operations
FUNCTION ., > u Z PUSH OPEN/CLOSE
VOLUME x
Level meter
|
|
|
|
|
|
|
|
|
|
|
|
|
|
|
|
|
|
|
|
|
|
|
|
|
|
|
|
|
|
|
|
|
|
|
|
To |
Do this |
|||||||
|
|
|
|
|
|
|
|
|
adjust the volume |
Turn VOLUME. |
|||||||
|
|
|
|
|
|
|
|
|
stop playback |
Press x. |
|||||||
|
|
|
|
|
|
|
|
|
pause playback |
Press u. (On the remote, press |
|||||||
|
|
|
|
|
|
X.) |
||
|
|
|
|
|
|
Press the button again to resume |
||
|
|
|
|
|
|
play after pause. |
||
|
|
|
|
|
|
|
|
|
go to the next track |
Press >. |
|||||||
|
|
|
|
|
|
|
|
|
go back to the previous track |
Press .. |
|||||||
|
|
|
|
|
|
|
|
|
remove the CD |
Press ZPUSH OPEN/CLOSE. |
|||||||
|
|
|
|
|
|
|
|
|
turn off the player |
Set FUNCTION to TAPE• CD/ |
|||||||
|
|
|
|
|
|
RADIO OFF. |
||
|
|
|
|
|
|
|
|
|
Operations Basic
5GB

Listening to the radio
1 2 3 3
For hookup instructions, see pages 19 – 20.
1 |
Set FUNCTION to RADIO. |
2 |
|
Set BAND to select the band you |
|
|
want. |
|
|
|
3 |
Turn TUNING to tune in the station |
|
you want. |
For better SW reception, use FINE
TUNING.
6GB

Tips
•During operation, the level meter shows the frequency level of the sound.
Adjusting the volume will not affect the level meter.
•If the FM broadcast is noisy, set ISS•FM MODE at the rear to “MONO”. Radio will play in monaural.
Use these buttons for additional operations
FUNCTION VOLUME |
Level meter |
|
|
|
|
|
|
|
Operations Basic
To |
Do this |
|
|
adjust the volume |
Turn VOLUME . |
|
|
turn off the radio |
Set FUNCTION to TAPE• CD/ |
|
RADIO OFF. |
|
|
To improve broadcast reception
Reorient the antenna for FM. Reorient the player itself for MW. For SW, extend the antenna vertically.
for FM |
for MW |
for SW
7GB

Playing a tape
3 |
1 |
2 |
|
3 |
2 |
||||
|
|
|
|
|
|
|
|
|
|
|
|
|
|
|
|
|
|
|
|
|
|
|
|
|
|
|
|
|
|
|
|
|
|
|
|
|
|
|
|
|
|
|
|
|
|
|
|
|
|
|
|
|
|
|
|
|
|
|
|
1
2
3
For hookup instructions, see pages 19 – 20.
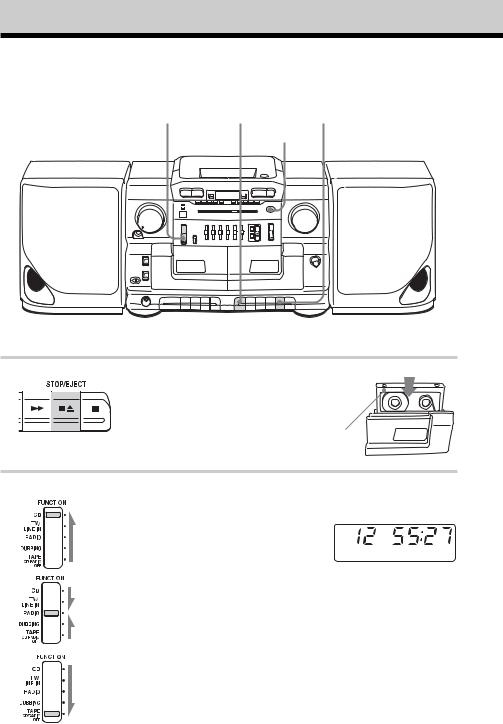
Set FUNCTION to TAPE•CD/
RADIO OFF.
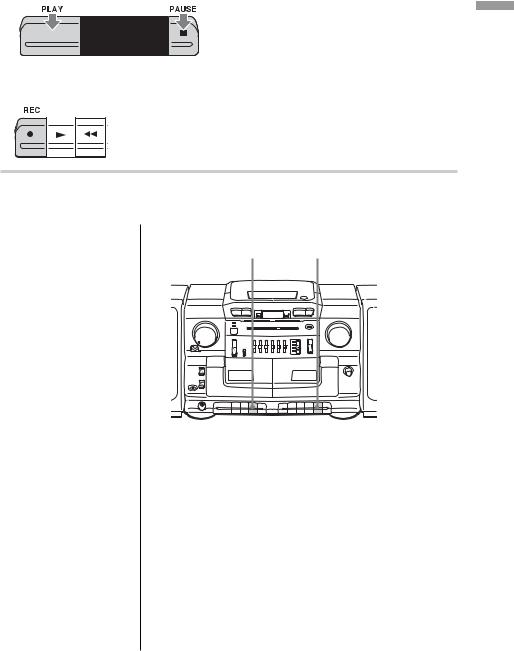
Press xZ to open tape compartment and insert a recorded tape. Use TYPE I (normal) tape only. Close the compartment.
With the side you want to play facing you
Press PLAY N.
The player starts playing.
8GB
Note
During playback, do not press M, m or N on the other deck as this causes excessive wow and flutter.
Tips
•During operation, the level meter shows the frequency level of the sound.
Adjusting the volume will not affect the level meter.
•To play tapes in both decks successively, press N on deck B and then press PLAY and X on deck A as the same time. When the tape ends on deck B, the playback starts automatically on deck A.
Use these buttons for additional operations
DIRECTION |
DIR MODE |
Level meter |
|
h H |
|
||
VOLUME |
|
Basic |
|
|
|
|
|
|
|
m, M |
Operations |
|
|
|
|
|
|
xZ |
|
|
|
X |
|
|
|
m, M |
|
|
|
X |
|
|
|
xZ |
|
To |
|
Do this |
|
adjust the volume |
Turn VOLUME. |
|
|
stop playback |
Press xZ. |
|
|
fast-forward or rewind the tape |
Press m or M. |
|
|
pause playback |
Press X. |
|
|
|
|
Press the button again to |
|
|
|
resume play after pause. |
|
play the opposite side of |
Press down DIRECTION |
|
|
the tape (deck A only) |
once. |
|
|
|
|
DIRECTION h H (reverse/ |
|
|
|
forward) indicators show the |
|
|
|
tape direction of deck A. |
|
eject the cassette |
Press xZ. |
|
|
To select the direction of the tape (deck A only)
To play |
Set DIR MODE to |
both sides of the tape repeatedly
both sides of the tape from the front side to reverse side only*
*If play begins from the reverse side, the tape stops at the end of that side.
9GB
Recording on a tape
2 3 1
MIC
1
2
For hookup instructions, see pages 19 – 20.
Press xZ to open the tape compartment on deck B and insert a blank tape. Use TYPE I (normal) tape only. Close the compartment.
With the side you want to record on facing you
|
|
|
Select the program source you want |
|
|
|
|
to record. |
Display |
|
|
|||
|
|
|||
|
|
|
To record from the CD player, set |
|
|
|
|
FUNCTION to CD and insert a CD |
|
|
|
|
(see page 4). |
|
|
|
|
To record from the radio, set |
|
|
|
|
|
|
|
|
|
|
|
|
|
|
|
|
|
|
|
FUNCTION to RADIO, and tune in |
|
|
|
|
the station you want using BAND |
|
|
|
|
and TUNING (see page 6). |
|
|
|
|
To record from the built-in |
|
|
|
|
|
|
|
|
|
|
|
|
|
|
|
|
|
|
|
microphone (MIC), set FUNCTION |
|
|
|
|
|
|
|
|
|
to TAPE•CD/RADIO OFF. |
|
|
|
|
|
|
10GB
|
|
|
|
|
|
|
|
|
3 |
Start recording. |
|
Deck B
Press z on deck B (N is depressed automatically).
Notes
•During recording, do not press M, m or PLAY on deck A as this causes excessive wow and flutter.
•While recording from the built-in microphone (MIC), no sound comes from the speakers or the headphones.
•When you connect the microphone to the MIX MIC jack, you cannot record from the built-in microphone.
Tips
•Adjusting the volume or selecting the audio emphasis (see page 18) will not affect the recording level.
•If the MW program makes a whistling sound after you've pressed z in step 3, set the ISS•FM MODE (Interference Suppress Switch) at the rear to the position that most decreases the noise.
•For the best results, use the AC power as a power source.
•To erase a recording, proceed as follows:
1Insert the tape into deck B.
2Disconnect the audio source if connected to the TV/LINE IN jack at the rear.
3Set FUNCTION to TV/ LINE IN.
4Press z on deck B.
Use these buttons for additional operations
xZ X
|
|
|
|
|
|
|
|
|
|
|
|
|
|
|
|
|
|
|
|
|
|
|
|
|
|
|
|
|
|
|
|
|
|
|
|
|
|
|
|
|
|
|
|
|
|
|
|
|
|
|
|
|
|
To |
|
Press |
||||||
|
|
|
|
|
|
|
|
|
stop recording |
|
xZ on deck B |
||||||
|
|
|
|
|
|
|
|
|
pause recording |
|
X on deck B |
||||||
|
|
|
|
|
Press the button again to resume |
|||
|
|
|
|
|
recording. |
|||
|
|
|
|
|
|
|
|
|
Operations Basic
11GB
Dubbing
4 3 2 1 4 5 1
1
2
3
For hookup instructions, see pages 19 – 20.
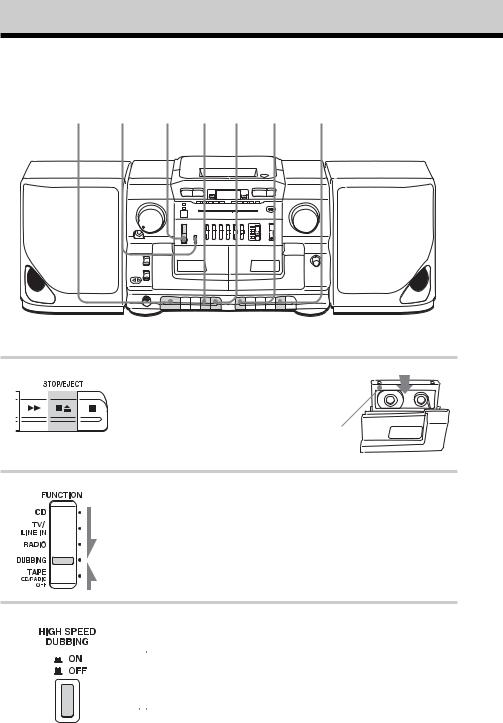
Insert a recorded tape into deck A and a blank tape into deck B. Use TYPE I (normal) tape only.
Close the compartment.
With the side you want to record on facing you
Set FUNCTION to DUBBING.
To dub at high speed, press HIGH SPEED DUBBING to
 ON.
ON.
To dub at normal speed, press HIGH SPEED DUBBING to
 OFF.
OFF.
12GB
|
|
|
|
|
|
|
|
|
|
|
|
|
|
|
|
|
|
4 |
|
Press X and then press PLAY on |
|||
|
Deck A |
|
deck A. |
||
|
|
|
|||
|
|
|
|
|
|
|
|
|
|
|
|
|
|
|
|
|
|
5 Start dubbing.
Deck B
Press z on deck B (N is depressed automatically).
Operations Basic
Note
During dubbing, do not set FUNCTION or press HIGH SPEED DUBBING as this causes excessive wow and flutter.
Tips
•Adjusting the volume or selecting the audio emphasis (see page 18) will not affect the recording level.
•For the best results, use the AC power as a power source.
•When the tape in deck A ends first, deck B will continue recording till the tape end. When the tape in deck B ends first, deck A plays on according to the setting of the DIR MODE switch.
Use these buttons for additional operations
xZ xZ
To stop dubbing
Press xZ on deck A and B.
13GB
The CD Player
Using the display
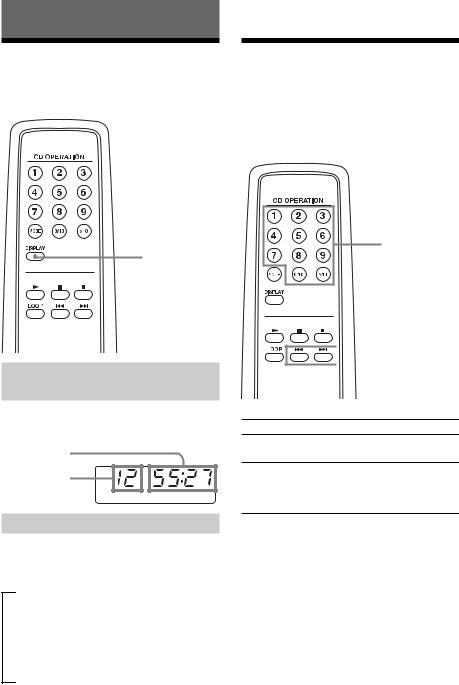
You can check information about the CD using the display.
DISPLAY
Checking the total track
number and playing time
Press DISPLAY (DISPLAY/ENTER on the player) in stop mode.
Total playing time
Total track number
Checking the remaining time
Press DISPLAY (DISPLAY/ENTER on the player) while playing a CD. The display changes as follows:
tthe current track number and playing time
r
the current track number and the remaining time on the current track* r
the number of tracks left and remaining time on the CD
*For a track whose number is more than 20, the remaining time appears as “– –:– –”.
Locating a specific track
You can quickly locate any track using the number buttons. You can also find a specific point in a track while playing a CD.
Number buttons
 ., >
., >
To locate |
Press |
a specific track directly |
the number button of |
|
the track. |
a point while listening to > (forward) or . the sound (backward) while
playing and hold down until you find the point.
a point while observing |
> (forward) or . |
the display |
(backward) in pause |
|
and hold down until |
|
you find the point. |
Note
You cannot locate a specific track if “SHUF REP” or “PGM” is lit in the display. Turn off the indication by pressing x.
Tip
When you locate a track numbered over 10, press >10 first, then the corresponding number buttons. Example:
To play track number 23, press >10 first, then 2 and 3.
14GB
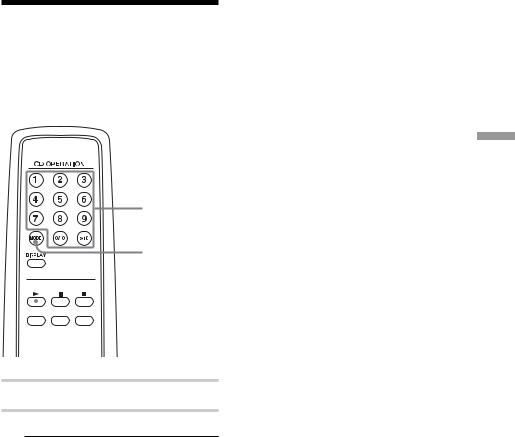
Playing tracks
repeatedly (Repeat Play)
You can play tracks repeatedly in normal, shuffle or program play modes (see page 16).
Number buttons
MODE


 N
N
1 Set FUNCTION to CD on the player.
2 Proceed as follows:
|
To repeat |
Do this |
|
|
a single track |
1 Press MODE until “REP 1” |
|
|
|
|
appears. |
|
|
2 |
Press the number button to |
|
|
|
select the track that you |
|
|
|
want to repeat. |
|
|
3 |
Press N. |
|
all the tracks |
1 Press MODE until “REP |
|
|
|
|
ALL” appears. |
|
|
2 |
Press N. |
|
tracks in |
1 Press MODE until “SHUF |
|
|
random order |
|
REP” appears. |
|
|
2 |
Press N. |
|
programed |
1 Press MODE until “PGM |
|
|
tracks |
|
REP” appears. |
|
|
2 |
Program tracks (see step 3 |
|
|
|
on page 16). |
|
|
3 |
Press N. |
|
|
|
|
On the player
Use PLAY MODE instead of MODE, . or > to select the track instead of the number button, and u instead of N.
To cancel Repeat Play
Press MODE until “REP” disappears from the display.
Tip
Press and hold LOOP on the remote during play to repeat a selected part of a CD. When you release LOOP, the player returns to normal play.
Player CD The
15GB
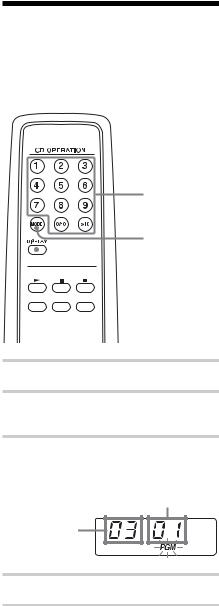
Creating your own
program (Program Play)
You can arrange the playing order of up to 20 tracks on a CD.
Number buttons
MODE  DISPLAY
 N
N
1 Set FUNCTION to CD on the player.
2 Press MODE until “PGM” appears in the display.
3 Press the number buttons for the tracks you want to program in the order you want.
Playing order
Programed track
4 Press N to start program play.
On the player
1 Set FUNCTION to CD.
2 Press PLAY MODE until “PGM” appears in the display.
3 Press . or > then press DISPLAY/ ENTER for the tracks you want to program in the order you want.
4 Press u.
To cancel Program Play
Press MODE until “PGM” disappears from the display.
To check the order of tracks before play
Press DISPLAY.
Every time you press the button, the track number appears in the programed order.
To change the current program
Press x once if the CD is stopped and twice if the CD is playing. The current program will be erased. Then create a new program following the programing procedure.
Tips
•You can play the same program again, since the program is saved until you open the CD compartment or switch FUNCTION.
•The current program will be erased if you switch FUNCTION or open the CD compartment.
•You can record your own program. After you’ve created the program, insert a blank tape into deck B and press z on deck B to start recording.
16GB

The Tape Player
Recording through a microphone/Using as a PA system
You can record sound using a microphone (not supplied) or use the player as a public address system.
MIX MIC FUNCTION z
Recording through a microphone
1 Plug the microphone into the MIX MIC jack and turn on the microphone if it has a power switch.
2 Set FUNCTION to TAPE•CD/RADIO OFF.
3 Insert a blank tape into deck B and press z to start recording.
Using as a PA system
1 Plug the microphone into the MIX MIC jack and turn on the microphone if it has a power switch.
2 Set FUNCTION to TV/LINE IN.
3 Sing or speak into the microphone and adjust the volume.
Notes |
The |
|
• Acoustic feedback (howling) tend to occur when |
||
|
||
you use a microphone with echo function. |
|
|
• If acoustic feed back (howling) occurs, turn |
Tape |
|
down the volume or move the microphone away |
||
from the speakers. |
||
You can mix CD or radio sounds and record them |
Player |
|
Tip |
|
|
by adding your voice or other audio through the |
|
|
microphone. |
|
17GB
 Loading...