


 Loading...
Sony Ericsson
Aspen™
Extended User guide
Contents
Getting started.............................................................................. |
5 |
User guide in the phone...................................................................... |
5 |
Additional help.................................................................................... |
5 |
Assembly............................................................................................ |
5 |
Turning the phone on and off.............................................................. |
7 |
Aligning the screen.............................................................................. |
7 |
Getting to know your phone........................................................ |
9 |
Phone overview................................................................................... |
9 |
Charging the battery......................................................................... |
10 |
Stereo portable handsfree................................................................. |
10 |
Status bar......................................................................................... |
11 |
Status icons...................................................................................... |
11 |
Screen lock....................................................................................... |
12 |
Navigating......................................................................................... |
12 |
Personalizing the start menu............................................................. |
13 |
Time and date................................................................................... |
13 |
Alarms and notifications.................................................................... |
14 |
Communication Manager.................................................................. |
14 |
Owner information............................................................................. |
15 |
Internet and messaging settings........................................................ |
15 |
Networks.......................................................................................... |
15 |
Handling content with the File Explorer in the phone......................... |
16 |
Searching information....................................................................... |
16 |
Entering text...................................................................................... |
16 |
Settings............................................................................................. |
17 |
Recommended accessories.............................................................. |
18 |
Updating your phone................................................................. |
20 |
SlideView..................................................................................... |
21 |
Panels.......................................................................................... |
22 |
Switching between panels and applications...................................... |
22 |
Managing panels............................................................................... |
22 |
Auto panel switching......................................................................... |
23 |
Panel manager settings..................................................................... |
23 |
Sony Ericsson panel.......................................................................... |
24 |
Support panel................................................................................... |
24 |
MS Today panel................................................................................ |
24 |
Spb Mobile Shell panel...................................................................... |
24 |
On the Road panel............................................................................ |
25 |
Skype™ panel.................................................................................. |
25 |
2 |
|
This is an Internet version of this publication. © Print only for private use.
Facebook panel................................................................................ |
25 |
YouTube™ panel.............................................................................. |
25 |
Downloading new panels.................................................................. |
25 |
Calling.......................................................................................... |
26 |
Making and receiving calls................................................................. |
26 |
More call features.............................................................................. |
27 |
Contacts ..................................................................................... |
29 |
Using Contacts................................................................................. |
29 |
SIM contacts..................................................................................... |
30 |
Finding company contacts using Microsoft® Exchange Server......... |
31 |
Calendar...................................................................................... |
32 |
Using the calendar............................................................................ |
32 |
Managing meeting requests using Microsoft® Outlook®................... |
32 |
Synchronizing............................................................................. |
34 |
Synchronization methods.................................................................. |
34 |
Synchronizing using Sony Ericsson Sync.......................................... |
34 |
Synchronizing with a Microsoft® Windows® computer using |
|
Microsoft® ActiveSync®................................................................... |
35 |
Synchronizing wirelessly with a Microsoft® Exchange Server............ |
37 |
Messaging................................................................................... |
40 |
SMS and MMS................................................................................. |
40 |
E-mail............................................................................................... |
41 |
Windows™ Live Messenger.............................................................. |
44 |
Getting connected...................................................................... |
45 |
Bluetooth™ technology..................................................................... |
45 |
Wi-Fi™.............................................................................................. |
47 |
Internet sharing................................................................................. |
48 |
Web browser............................................................................... |
50 |
Before browsing the Web.................................................................. |
50 |
Browsing the Web............................................................................. |
50 |
Menu options.................................................................................... |
50 |
Zooming........................................................................................... |
51 |
Managing favorites............................................................................ |
51 |
History pages.................................................................................... |
52 |
Accessing other functions when browsing......................................... |
52 |
Applications and games............................................................ |
53 |
Installing applications........................................................................ |
53 |
Closing an application....................................................................... |
53 |
Removing applications...................................................................... |
53 |
Green ideas from the EcoMate application........................................ |
53 |
Express News™............................................................................... |
53 |
3 |
|
This is an Internet version of this publication. © Print only for private use.
Games.............................................................................................. |
54 |
Media........................................................................................... |
55 |
Photos.............................................................................................. |
55 |
Music................................................................................................ |
56 |
Video................................................................................................ |
59 |
Streaming media............................................................................... |
60 |
FM radio........................................................................................... |
60 |
PlayNow™........................................................................................ |
62 |
Camera........................................................................................ |
63 |
Using the camera.............................................................................. |
63 |
Photo and video storage................................................................... |
64 |
Using the still camera........................................................................ |
64 |
Using the video camera..................................................................... |
66 |
Transferring content.................................................................. |
68 |
Transferring files between your phone and a computer..................... |
68 |
Media Go™...................................................................................... |
68 |
Location services....................................................................... |
70 |
Using the internal GPS receiver......................................................... |
70 |
FastGPS........................................................................................... |
70 |
Google Maps™................................................................................. |
70 |
Getting driving directions................................................................... |
71 |
Locking and protecting your phone......................................... |
72 |
IMEI number..................................................................................... |
72 |
SIM protection.................................................................................. |
72 |
Phone protection.............................................................................. |
73 |
Antivirus............................................................................................ |
73 |
Troubleshooting......................................................................... |
74 |
Resetting the phone.......................................................................... |
74 |
I cannot use Internet-based services................................................. |
74 |
Legal information....................................................................... |
75 |
Index............................................................................................ |
77 |
4
This is an Internet version of this publication. © Print only for private use.

Getting started
Important information
Please read the Important information leaflet before you use your mobile phone.
This User Guide may reference services or applications provided by third parties. Use of such programming or services may require separate registration with the third party provider and may be subject to additional terms of use. For applications accessed on or through a third-party Web site, please review such Web sites’ terms of use and applicable privacy policy in advance. Sony Ericsson does not warrant or guarantee the availability or performance of any third-party Web sites or offered services.
Some of the services and features described in this User guide are not supported by all networks and/or service providers in all areas. Without limitation, this applies to the GSM International Emergency Number 112. Please contact your network operator or service provider to determine availability of any specific service or feature and whether additional access or usage fees apply.
User guide in the phone
An extended User guide and a help function are available in your phone.
To access the User guide in the phone
•Tap  > Help > Sony Ericsson Help.
Additional help
To use the help function in the phone
•Tap  > Help.
To use Getting started
•Tap  > Getting started.
Assembly
Before you start using the phone, you have to insert the SIM card and the battery.
To insert the SIM card
 1
1 

2
1Remove the battery cover.
2Slide the SIM card into its holder with the gold-colored contacts facing down.
5
This is an Internet version of this publication. © Print only for private use.

To insert the battery
1
2.1
2.2
1Remove the battery cover.
2Insert the battery with the Sony Ericsson hologram side up and the connectors facing each other.
To insert a memory card
1Remove the battery cover.
2Insert the memory card with the gold-colored contacts facing down.
To remove a memory card
1Remove the battery cover.
2Press the edge of the memory card to release and remove it.
6
This is an Internet version of this publication. © Print only for private use.
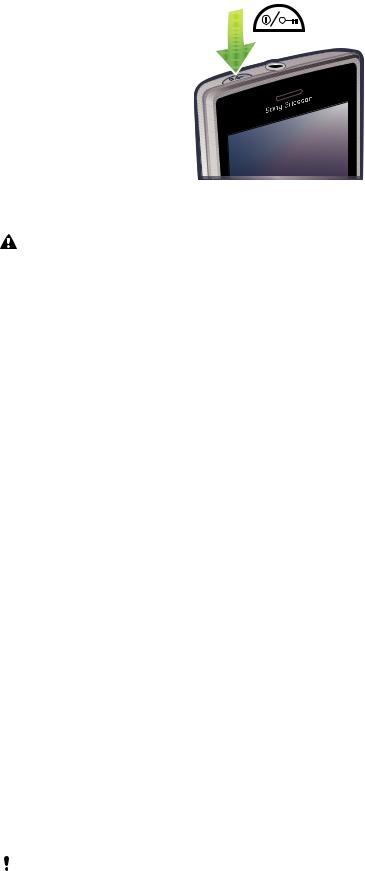
Turning the phone on and off
To turn on the phone
1Press and hold down the power key until the phone starts.
2At first startup, a setup guide leads you through the essential settings of the phone.
You need to set the phone language when you start the device for the first time. Be careful when you set this language. If you choose a wrong language you will have to re-install your phone software.
To turn off the phone
1Press and hold down the power key until a message appears.
2Tap Yes.
To turn on sleep mode
•To turn off the screen temporarily and switch the phone to sleep mode, briefly press the power key.
To turn off sleep mode
•To activate the screen, briefly press the power key. The phone is also activated when you receive a call or a message.
To turn on flight mode
1Tap  > Settings > Connections > Communication Manager.
2Tap Flight.
To turn on phone mode
1Tap  > Settings > Connections > Communication Manager.
2Tap Phone.
Automatic turn off
Automatic turn off function helps you to set the phone to turn off automatically. You can also set the backlight to turn off automatically if your phone is not used for a specified time.
To set automatic turn off functions
1Tap  > Settings > System > Backlight and Power Management > the Advanced tab.
2Mark the checkboxes and shorten the time before the different functions are turned off.
Aligning the screen
The first time you turn on the phone, you need to align the screen. You can also re-align your screen, if necessary.
You need to use the stylus to align the screen.
7
This is an Internet version of this publication. © Print only for private use.

To align the screen
1Tap  > Settings > System > Screen > the Alignment tab.
2Tap Align Screen.
3Use the stylus and tap each target firmly and accurately.
You need to align the screen in order to align the touch points on it.
8
This is an Internet version of this publication. © Print only for private use.

Getting to know your phone
Phone overview
13.5 mm headset
2Power key
3Ear speaker
4Touch screen
5Connector for charger/USB cable
6Selection key
7Call key
8SlideView key
9Navigation key
10End call key
11OK key
12Stylus
13Volume key
14Loudspeaker
15Camera lens
16Strap holder
1 |
2 |
3 |
4
5
6 |
10 |
|
|
|
|
|
|
|
|
OK |
11 |
7 |
|
|
|
|
|
+ |
/ |
@ |
|
|
|
|
|
* |
P |
||||
|
|
|
|
|
|
|
O |
||
|
|
|
|
3 |
I |
|
|
||
|
|
|
|
|
) |
|
|||
8 |
|
1 |
2 |
Y |
U |
|
( |
|
|
|
|
L |
|
||||||
|
T |
# |
K |
|
|
||||
|
E |
R |
5 |
6 |
J |
|
: |
|
|
|
W |
4 |
G |
H |
0 |
, |
; |
. |
|
|
Q |
F |
9 |
|
! |
Sym |
|||
|
8 |
M |
|
||||||
|
D |
|
- |
au |
|||||
|
7 |
N |
|
||||||
|
S |
B |
|
|
, |
|
? |
|
|
9 |
A |
V |
|
|
|
|
|
|
|
C |
|
|
|
|
|
|
|
||
|
X |
|
|
|
|
|
|
|
|
|
Z |
|
|
|
|
|
|
|
|
12
13 |
14 |
15 |
16
To use the strap hole
1Remove the cover.
2Wrap the strap around the strap hole.
3Attach the cover.
9
This is an Internet version of this publication. © Print only for private use.

Charging the battery
The phone battery is partly charged when you buy the phone. When you start to charge, it may take a few minutes before the battery icon appears on the screen. You can still use your phone while it is charging.
The battery will start to discharge a little after it is fully charged and then charges again after a certain time. This is to extend battery life and may result in the charge status showing a level below 100 percent, even though the battery is fully charged.
To save energy you can unplug the charger from the wall socket when the phone is fully charged.
2
@ OK
P /
)
O +
|
au |
|
|
|
|
|
|
|
|
Sym |
! |
? |
|
|
|
|
|
|
|
|
|
|
|
|
||
: . |
- , |
|
|
|
|
|||
L |
; , |
M |
|
|
|
|
||
( |
K |
J |
0 |
|
N |
|
|
|
I |
# |
|
9 |
|
B |
|
||
*U |
6 |
H |
|
|
8 |
V |
||
|
G |
7 |
||||||
|
3 |
Y |
5 |
|
||||
|
|
|
F |
|
||||
|
|
2 |
T |
|
4 |
|
||
|
|
|
1 |
R |
|
|
D |
|
|
|
|
|
E |
|
|||
|
|
|
|
|
|
|
|
|
|
|
|
|
|
|
|
W |
|
C
X
S
A
Q
Z 
1
To charge the phone using the power adapter
•Connect the phone to a power outlet using the USB cable provided and the power adapter.
To charge the phone using a computer
•Connect the phone to a USB port on a computer using the included USB cable provided.
Stereo portable handsfree
10
This is an Internet version of this publication. © Print only for private use.
To use the handsfree
1Connect a portable handsfree.
2To answer a call, press the call handling key. If you are listening to music, it stops when you receive a call and resumes when the call has ended.
3To end a call, press the call handling key.
If a portable handsfree is not included with the phone, you may purchase one separately.
Status bar
A status bar at the top of the screen displays phone status information and notifications. You can access the displayed applications direct from the status bar.
To access an application from the status bar
1Tap the status bar.
2Tap one of the displayed icons.
Status icons
You can tap an icon in the status bar to get more information or to start an application.
20:40
The following status icons may appear on your status bar:
|
|
|
GPRS available |
|
|
Wi-Fi™ function enabled |
|
|
|
HSDPA available |
|
|
Scanning for available Wi-Fi™ network connections |
|
|
|
EDGE available |
|
|
Wi-Fi™ network connected |
|
||||||
|
|
|
3G/UMTS available |
|
|
Signal strength |
|
|
|
GPRS in use |
|
|
No signal |
|
|
|
||||
|
|
|
HSDPA in use |
|
|
Phone radio turned off |
|
|
|
|
|
||
|
|
|
||||
|
|
|
3G/UMTS in use |
|
|
Voice call in progress |
|
|
|
|
|
||
|
|
|
||||
|
|
|
EDGE in use |
|
|
Call on hold |
|
|
|
|
|
||
|
|
|
Connection is active |
|
|
Sound on |
|
|
|
Connection is not active |
|
|
Sound off |
|
|
|
Missed call |
|
|
Battery charging |
|
|
|
New incoming text message |
|
|
Battery full |
|
|
|
|
|||
|
|
|
New incoming multimedia message |
|
|
Bluetooth™ function on |
|
|
|
|
|
||
|
|
|
Multiple notifications. Tap to view all |
|
|
Bluetooth™ headset connected |
|
|
|
|
|
||
|
|
|
|
|
||
|
|
|
Synchronization ongoing |
|
|
Roaming |
|
|
|
|
|
11
This is an Internet version of this publication. © Print only for private use.

Screen lock
To lock the screen
•Press and hold  .
.
To unlock the screen
•Drag  towards left or right.
To use a screen lock code
1Select  > Settings > Lock.
2Checkmark the Prompt if phone unused for box, select a time interval, and enter a code for unlocking the screen.
3Tap OK, then confirm by selecting Yes.
Navigating
You can use the following means to navigate around the screen:
•The stylus, or your finger, on the touch screen
•The navigation key
Using the touch screen
 Q
Q
 A
A
 Z
Z
 W
W
 S
S
 X
X
 E
E
 D
D
 C
C
 R
R
4 F 7  V
V
2 |
3 |
|
Y |
||
T |
||
6 |
||
5 |
||
H |
||
G |
||
9 |
||
8 |
||
N |
||
B |
||
|
•To highlight or open an item, tap the item.
•To copy, rename or send a file, touch and hold down the file or folder. Select the preferred action from the options dialog.
•To scroll up or down, flick your finger or stylus up or down on the screen. On some pages you can also flick to the sides.
•To stop the screen from scrolling, tap the screen.
•To pan a page, drag your finger or stylus on the screen.
Using the navigation key
To use the navigation key
OK
12
This is an Internet version of this publication. © Print only for private use.

•Press the navigation key upwards, downwards, left or right to move around the screen. Press the selection key (at the center of the navigation key) to select an item.
Personalizing the start menu
You can customize what to display on the start menu. Some of the customized changes may also be applicable to the MS Today panel.
To use a custom background image
1Tap  > Settings > Home.
2Tap the Appearance tab and mark the Use this picture as the background check box.
3Tap Browse to view a list of your picture files.
4Tap the file name of the picture you want to use.
5Tap OK.
For best viewing it is recommended that the image is saved in 480x800 pixel resolution for WVGA (Wide Video Graphics Array) and 800x480 pixel resolution for landscape display mode.
Display settings
To increase or decrease the size of text on the screen
1Tap  > Settings > System > Screen > the Text Size tab.
2Move the slider to increase or decrease the text size.
To decrease the screen brightness
1Tap  > Settings > System > Backlight and Power Management > the Backlight tab.
2Drag the slider to decrease the brightness.
Regional settings
The style in which numbers, currency, dates, and times are displayed is specified in regional settings.
To change regional settings
1Tap  > Settings > System > Regional Settings.
2On the Region tab, select your region from the list.
3To customize settings further, tap the appropriate tabs and select the desired options.
Changing region does not change the Operating System language of your phone. The region you select determines which options will be available on the other tabs.
Time and date
To set the time and date
1Tap  > Settings > Clock & Alarms.
2Tap the Time tab.
To set the time and date for a different location
1Tap  > Settings > Clock & Alarms.
2Tap the Time tab.
3Select the correct time zone and change the time or date.
13
This is an Internet version of this publication. © Print only for private use.

Alarms and notifications
To set an alarm
1Tap  > Settings > Clock & Alarms > the Alarms tab.
2Tap Description and enter a name for the alarm.
3Tap the day of the week for the alarm. You can select multiple days by tapping each desired day.
4Tap the time and set the time for the alarm.
5To choose a sound, tap the list next to the Play button and select a sound. Tap OK to confirm.
The alarm will not sound if the phone is turned off.
To choose how to be notified about events or actions
1Tap  > Settings > Sounds & Notifications.
2On the Sounds tab, choose how you want to be notified by marking the appropriate check boxes.
3On the Notifications tab, tap an event name and choose how you want to be notified by selecting a ring type and a ring tone.
Ringer settings
To change the ring type and ring tone for an incoming call
1Tap  > Settings > Sounds & Notifications > the Notifications tab.
2Tap Ring type > Ring tone.
Communication Manager
Wi-Fi™ and Bluetooth™ technology, as well as data connections are battery consuming. It is recommended to turn off such connections if you do not need them and want to save battery power.
To turn off connections
1Tap  > Settings > Connections > Communication Manager.
2Tap  next to Phone or Power save depending on your selected communication profile.
3Turn off the connections you do not need.
Using Wi-Fi™ technology, Bluetooth™ technology and Microsoft® Direct Push technology consumes battery power. Turning these functions off, will save the battery power.
Power saving
Animated pictures, music, videos, games and some older types of SIM cards can consume a lot of battery power. You can improve battery time by closing applications running in the background and disabling unnecessary functions.
You can also turn on power save mode, in which some settings are changed to increase the power efficiency.
When you turn on power save mode, the screen brightness is turned down, the back light automatically turns off after 10 seconds, the phone goes into sleep mode after 40 seconds, and all other power-intensive communication options are turned off.
By saving power you will contribute to a greener world.
To turn on power save mode
1Tap  > Settings > Connections > Communication Manager.
2Tap Power save.
Power save mode can also be turned on or off in the Sony Ericsson panel.
14
This is an Internet version of this publication. © Print only for private use.

Owner information
To enter owner information
1Tap  > Settings > Personal > Owner Information.
2On the Identification tab, enter your personal information.
Phone name
The phone name is used to identify your phone in the following situations:
•Synchronizing with a computer
•Using Bluetooth™ wireless technology
•Restoring information from a backup
If you synchronize multiple phones with the same computer, each phone must have a unique name.
To change the phone name
1Tap  > Settings > System > About.
2Tap the Device ID tab.
3Enter a new name.
4Tap OK.
The phone name must begin with a letter, consist of letters from A to Z, numbers from 0 to 9, and cannot contain spaces. Use the underscore character to separate words.
Internet and messaging settings
You can connect to the Internet using a 2G/3G mobile data connection or Wi-Fi™ if you have the correct Internet settings in your phone. You can install these settings using the Ready to run application in your phone. You can also go to www.sonyericsson.com/support from your computer to download the settings to your phone. Internet settings can also be added or changed manually.
To download Internet settings
1Tap  > Settings > Connections > Ready To Run.
2Tap Start to download and set.
To configure Internet settings manually
To get the required information for manual configuration of Internet settings, please contact your service provider.
1Tap  > Settings > Connections > Connections.
2Under My ISP, tap Add a new modem connection.
3Enter a name for the connection, then select Cellular line (GPRS, 3G) in the dropdown box, then tap Next.
4Enter the Access point name, then tap Next.
5If required, edit User name, Password, Domain and Advanced settings. Tap Finish.
6Under My ISP, tap Manage existing connections and select the connection you just created.
Networks
You can view which mobile phone networks are available and arrange them in the order that you want your phone to access them. For example, if your first preferred network is unavailable, your phone will try to access your second preferred network.
When you turn on your phone, it automatically selects your home network if it is within range. If it is not within range, you can use another network that is accepted by your operator. This is called roaming.
To make or receive a phone call, your phone must be within the range of a network.
15
This is an Internet version of this publication. © Print only for private use.
To view available networks
1Press  .
.
2Tap Menu > Tools > Options, then find and tap the Network tab.
3Under Network selection, select Manual. The list of available networks appears.
To set preferred networks
1Press  .
.
2Tap Menu > Tools > Options and tap the Network tab.
3Tap Set Networks and follow the instructions on the screen.
4After arranging the networks in the preferred order, tap OK to return to the
Network tab.
5In the Network selection list, select Automatic.
6Tap OK.
Handling content with the File Explorer in the phone
You can use File Explorer in your phone to handle content saved in the phone memory or on a memory card. If the memory is full, delete some content to create space.
To use the File Explorer in the phone
•To open File Explorer, tap  > File Explorer.
The following functions are available in File Explorer:
Task |
Action |
|
|
Go up one level in File Explorer |
Select Up |
|
|
Open a folder in the current view |
Tap the folder |
|
|
Create a new folder |
Select Menu > New Folder |
|
|
Open a file |
Tap the file |
|
|
Copy, cut or paste a file or folder |
Tap the file or folder, then select Menu > Edit |
|
|
Rename a file or folder |
Tap the file or folder, then select Menu > Rename |
|
|
Delete a file or folder |
Tap the file or folder, then select Menu > Delete |
|
|
Go directly to a folder |
Use the drop-down boxes in the top left and top right of the screen |
|
|
Searching information
You can search for files and other items stored in your phone by file name or by key words located in the item.
To search for a file or an item
1Tap  > Universal Search.
2In the search field, you can enter the key words for the information you want to search for.
3Tap Search Phone.
4In the results list, tap the item you want to open.
Entering text
You can use the hardware keyboard to enter text and characters.
Using the hardware keyboard
•To type lower-case letters, press the relevant letter keys.
•To type a single upper-case letter, press  and then press the relevant letter key.
•To use all upper-case letters, press  twice. To change back to all lower-case letters, press
  again.
16
This is an Internet version of this publication. © Print only for private use.

•To type accented characters, press the letter key first, and then press Symau until the required character appears.
•To enter a number or a symbol, press  and then press the relevant key.
•To use all number or symbol keys, press  twice and enter the relevant numbers or symbols.
•To verify entries or exit the program in use, press  .
.
Input language
Before you start entering letters, you need to select the languages you want to use when writing. You can switch to one of your selected input languages when you enter text by tapping  .
.
To select input languages
1Tap  > Settings > Personal > Keyboard > Languages.
2Mark the language check boxes that you want to add to the list.
To change input language
1When you enter text, tap  .
.
2Select an option.
To add words to the keyboard dictionary
1When you enter text, tap  .
.
2Tap Options > My words > Add.
3Write a word and tap OK.
Text correction options
Text correction helps you enter text faster by suggesting words as you enter letters. You can set different options in the text correction menu, for example, spell correction, next word prediction, auto-append and auto-substitution.
To set text correction options
1Tap  > Settings > Personal > Keyboard > Text correction.
2Select options.
For more information about the different options in the text correction menu go to  > Settings >
Personal > Keyboard > Text correction > Help.
Settings
You can set up the phone with general and specific settings, to suit your requirements.
To see all available settings
1Tap  > Settings.
2Tap and view one of the following settings:
•The Personal folder
•The System folder
•The Connections folder
•Bluetooth
•Clock & Alarms
•Lock
•Home
•Microsoft My Phone
•Sounds & Notifications
Personal folder overview
Buttons |
Customize buttons. Set the key response time |
|
|
Owner Information |
Enter your personal information in the phone |
17
This is an Internet version of this publication. © Print only for private use.

Phone |
Customize phone settings such as ring tone, setting a SIM PIN |
|
|
TTY Setting |
Enable or disable TTY. |
|
|
Keyboard |
On screen keyboard |
|
|
System folder overview
About |
View basic information such as the Windows® Mobile version and the type of processor |
|
|
used in your phone. You can also specify a name for your phone |
|
|
|
|
Certificates |
View information about certificates that are installed in your phone |
|
|
|
|
Backlight and |
Power saving settings |
|
Power Management |
|
|
|
|
|
Customer |
Make Windows® Mobile better by participating in the Customer Experience |
|
Feedback |
Improvement Program |
|
|
|
|
Device Information |
See information about the firmware version, hardware and identity |
|
|
|
|
Encryption |
Allow files on your memory card to be encrypted. Encrypted files are readable only in |
|
|
your phone |
|
|
|
|
Error Reporting |
Enable or disable the phone error reporting function. When this function is enabled and |
|
|
a program error occurs, technical data about the state of the program and your phone |
|
|
is logged in a text file and delivered to Microsoft technical support if you choose to send |
|
|
it |
|
|
|
|
External GPS |
Set the appropriate GPS communication ports, if required. You may need to do this |
|
|
when there are programs in your phone that access GPS data or when you have |
|
|
connected a GPS receiver to your phone. See Help for details |
|
|
|
|
Java |
Download and install Java applications, such as games and tools, to your phone |
|
|
|
|
Managed Programs |
See the installation history for programs managed in your phone |
|
|
|
|
Memory |
Check the phone memory allocation status and memory card information. You can also |
|
|
stop currently running programs |
|
|
|
|
Master Reset |
Reset all settings to manufacture default |
|
|
|
|
Regional Settings |
Set the regional configuration to use, including the format for displaying numbers, |
|
|
currency, date, and time in your phone |
|
|
|
|
Remove Programs |
Remove programs you installed in your phone |
|
|
|
|
Task Manager |
Stop running programs and/or set the |
button to end programs immediately |
|
|
|
Connections folder overview
Beam |
Set your phone to receive incoming Bluetooth™ beams |
|
|
Connections |
Configure your phone data connections so your phone can connect to the Internet |
|
or a private local network |
|
|
Domain Enroll |
Enroll in a domain and connect your phone with company resources |
|
|
USB to PC |
Set up a USB serial connection between your phone and a computer |
|
|
Wi-Fi |
Set up connections to available wireless networks |
|
|
SMS Service |
Select which data connection to use when sending text messages |
|
|
Communication Manager Enable or disable different communication channels |
|
|
|
Ready To Run |
Set your phone ready to run by downloading various settings like Internet, |
|
Multimedia meaasge, GPRS |
Recommended accessories
The following accessories are recommended for the phone:
•Bluetooth™ Noise Shield Handsfree VH700
•Twin charger EP750
18
This is an Internet version of this publication. © Print only for private use.

•4 or 8 GB SD card
•Car charger AN300
For more information, go to www.sonyericsson.com/support.
19
This is an Internet version of this publication. © Print only for private use.

Updating your phone
You can update your phone to the most recent software for optimal performance and to get the latest enhancements. Updates can be downloaded using the Update Service application on your computer. You will need to connect your phone to the computer using a supported USB cable.
Make sure you back up and save all data contained in your phone before you start updating the phone.
To use the Update Service application
1Connect your phone to the computer using the USB cable.
2Computer: Go to www.sonyericsson.com/update from the Web browser of your computer.
3Follow the instructions to install the latest available Update Service application in your phone.
20
This is an Internet version of this publication. © Print only for private use.
SlideView
Slideview gives you quick access to:
•Messages
•Calendar
•Media
•Panels
To open SlideView
•Press  .
.
To navigate SlideView
1
2
3
4
5
1To open a phone activity, tap the activity.
2To minimize SlideView and go back to the default panel or an application, tap the icon from the Slideview main view.
3To go to a sub menu in the activity, tap one of the icons.
4To go back to the previous view, tap the bar on the left.
5To go back to the SlideView main view, tap the bar on the left or press  .
.
You can also use the navigation key to navigate SlideView.
To switch between an application and SlideView
1From any application, press  .
.
2Tap  in SlideView to go back to the application.
If you are not using any application, tapping  in SlideView will bring you back to the default panel.
21
This is an Internet version of this publication. © Print only for private use.

Panels
Panels let you personalize your phone with the content you want most. Your phone comes with a number of panels pre-loaded. You can view your chosen panels in different views, set panels to switch automatically, and also download new panels.
Some panels described in this User guide are not supported by all networks and/or service providers in all areas.
To return to the most recently used panel
•Press  or tap
  > Home.
Switching between panels and applications
•In a panel or an application, double press  to go to Favorites view.
•From a panel view, press  to return to the most recently used panel.
•In an application you started from the Start menu, press  to return to the most recently used panel.
Managing panels
When you open a panel, the following icons appear:
Favorites view
All panels view
Auto Panel switching
Settings
To open and close panel views
|
|
|
|
|
|
|
|
|
OK |
|
|
|
|
|
|
|
|
|
1 |
2 |
3 |
|
|
+ |
|
/ |
@ |
|
|
|
|
|
|
|
|
|
|
|
|
|
|||||||
Q |
W E R T Y U* I |
|
O P |
|
|
|
|||||||||
A |
S |
|
4 |
5 |
6 |
# |
|
( |
|
) |
|
|
|
|
|
D |
F |
G |
H |
J |
K |
; |
L |
: |
|
|
|
|
|
||
Z |
X |
C |
7 |
8 |
9 |
0 |
, |
. |
|
|
|
|
|
||
V |
B |
N |
M |
- |
! |
|
|
|
|
|
|||||
|
|
|
|
|
|
|
, |
? |
Sym |
|
|
|
|||
|
|
|
|
|
|
|
|
au |
|
|
|
|
|||
|
|
|
|
|
|
|
|
|
|
|
|
|
|
|
|
|
|
|
|
|
|
|
|
|
|
|
|
|
|
|
|
1Press  .
.
2Tap a panel.
You can double press  to enter a panel view directly.
Favorites view
Your six favorite panels are displayed in this view. You can set panels as favorites from the All panels view.
22
This is an Internet version of this publication. © Print only for private use.

To open a panel from the Favorites view
•Tap the panel you want to open.
All panels view
In All panels view you can view all the panels including favorites and downloaded panels. You can also read information about some of them.
To open a panel from All panels view
1Flick right or left through the panels until the desired panel is highlighted.
2Tap Activate.
To add a panel to your Favorites
1From the List view, select a panel.
2Tap Favorite.
Auto panel switching
Auto panel switching changes the current panel automatically at a selected time.
1 2 3
9:00
13:00
17:00
1Timeline
2Added panels in timeline
3Available panel list
To change the time in the timeline
•In Auto panel switching view, tap  or
or  .
.
To add panels to the timeline
•Drag the panels you want from the available panel list to the timeline.
To remove panels from the timeline
•Drag the panels you want to remove from the timeline to the available panel list.
Panel manager settings
1 |
2 |
3 |
23
This is an Internet version of this publication. © Print only for private use.

1Auto panel switching on/off - Turn Auto panel switching on or off
2Release information/Update - Download the latest version of the Panel manager application. If the current Panel manager application is the latest version, the Update is disabled
3Get more panels - Download new panels for your device
Sony Ericsson panel
This panel shows the time, weather, messaging and other useful shortcuts to manage your phone and to show its status.
8 7 6
1 |
|
|
|
|
|
|
|
5 |
|
|
|
||||||||
2 |
|
|
|
|
|
|
|
|
4 |
|
|
|
|
|
|
|
|
|
|
|
|
|
|
|
|
|
|
|
|
|
|
|
|
|
|
|
|
|
|
|
3 |
|
|
|
|
||||
1Weather
2Email
3Call log
4Messaging
5Internet browser
6Alarm
7Power save mode
8Time and date
Support panel
If you have any questions and queries, you can use the Support panel. It gives you easy access to help and the answers to your questions. There are quick links to the User guide, support-related news and mobile Web support.
MS Today panel
The MS Today panel gives you access to all basic phone features such as communication, media and browsing. You can personalize this panel to suit your individual preferences.
To personalize the Home panel
1Tap  > Settings > Home.
2Adjust the settings according to your preferences.
Spb Mobile Shell panel
There are two types of Spb Mobile Shell panel: Lifestyle and Professional. The Spb Mobile Shell Professional panel is more work-oriented, with your calendar and appointments as the main view. Both the Lifestyle and Professional panels can be customized to your own needs. The panels extend outside the screen so you have more space to add shortcuts and widgets.
See www.spbsoftwarehouse.com for more information.
24
This is an Internet version of this publication. © Print only for private use.
Loading...