

Page 1
kÉï=~ë=çÑW=
MQKOMNT
qbkbl=L=pfkfrp=L=fkqbdl
lйЙк~нзкDл=г~ем~д=Сзк=pfabufp=Q=sбЗЙз=mдмЦбе
Cover page
bеЦдблЬ
=
Page 2

Table of Contents Sirona Dental Systems GmbH
Operator's manual for SIDEXIS 4 Video Plugin TENEO / SINIUS / INTEGO
Table of Contents
1
2
3
4
Description of plugin................................................................................................. 3
1.1 Functionalities ............................................................................................... 3
1.2 Supported intraoral cameras......................................................................... 3
Installation ................................................................................................................ 4
2.1 Prerequisites ................................................................................................. 4
2.2 Calling up the installation wizard................................................................... 4
2.3 To install the video plugin.............................................................................. 5
Operation.................................................................................................................. 7
3.1 Select camera ............................................................................................... 7
3.1.1 Selecting SIVISION digital intraoral cameras................................... 7
3.1.2 Selecting and configuring third-party cameras................................. 8
3.2 Options for the Video plugin.......................................................................... 10
3.3 To display and close live images .................................................................. 11
3.4 Generate and display a still image ................................................................ 12
3.5 Save or discard still images in Sidexis 4 ....................................................... 14
Known limitations ..................................................................................................... 15
5
Corrective action ...................................................................................................... 16
2 D3509.208.01.03.02 04.2017
64 93 204 D3509
Page 3

Sirona Dental Systems GmbH 1Description of plugin
Operator's manual for SIDEXIS 4 Video Plugin TENEO / SINIUS / INTEGO 1.1Functionalities
Description of plugin
1
1.1
1.2
Functionalities
The Video plugin includes the following functionalities:
● Presentation of live images and still images from an intraoral camera
in Sidexis 4
● Importing still images into Sidexis 4
Some of these functions can be configured via the EasyTouch user
interface on the treatment center. See SIUCOM plus / SIVISION connect
installation and configuration instructions.
Supported intraoral cameras
SIVISION digital intraoral cameras:
● SiroCam AF
● SiroCam AF+
● SiroCam F
● SIROCAM digital
Other cameras connected by USB or video grabbers are possible.
bеЦдблЬ
64 93 204 D3509
D3509.208.01.03.02 04.2017
3
Page 4
2Installation Sirona Dental Systems GmbH
2.1Prerequisites Operator's manual for SIDEXIS 4 Video Plugin TENEO / SINIUS / INTEGO
Installation
2
2.1
2.2
Prerequisites
● Sidexis 4 is installed.
● SIUCOM Plus is installed.
● SIVISION connect is installed.
Calling up the installation wizard
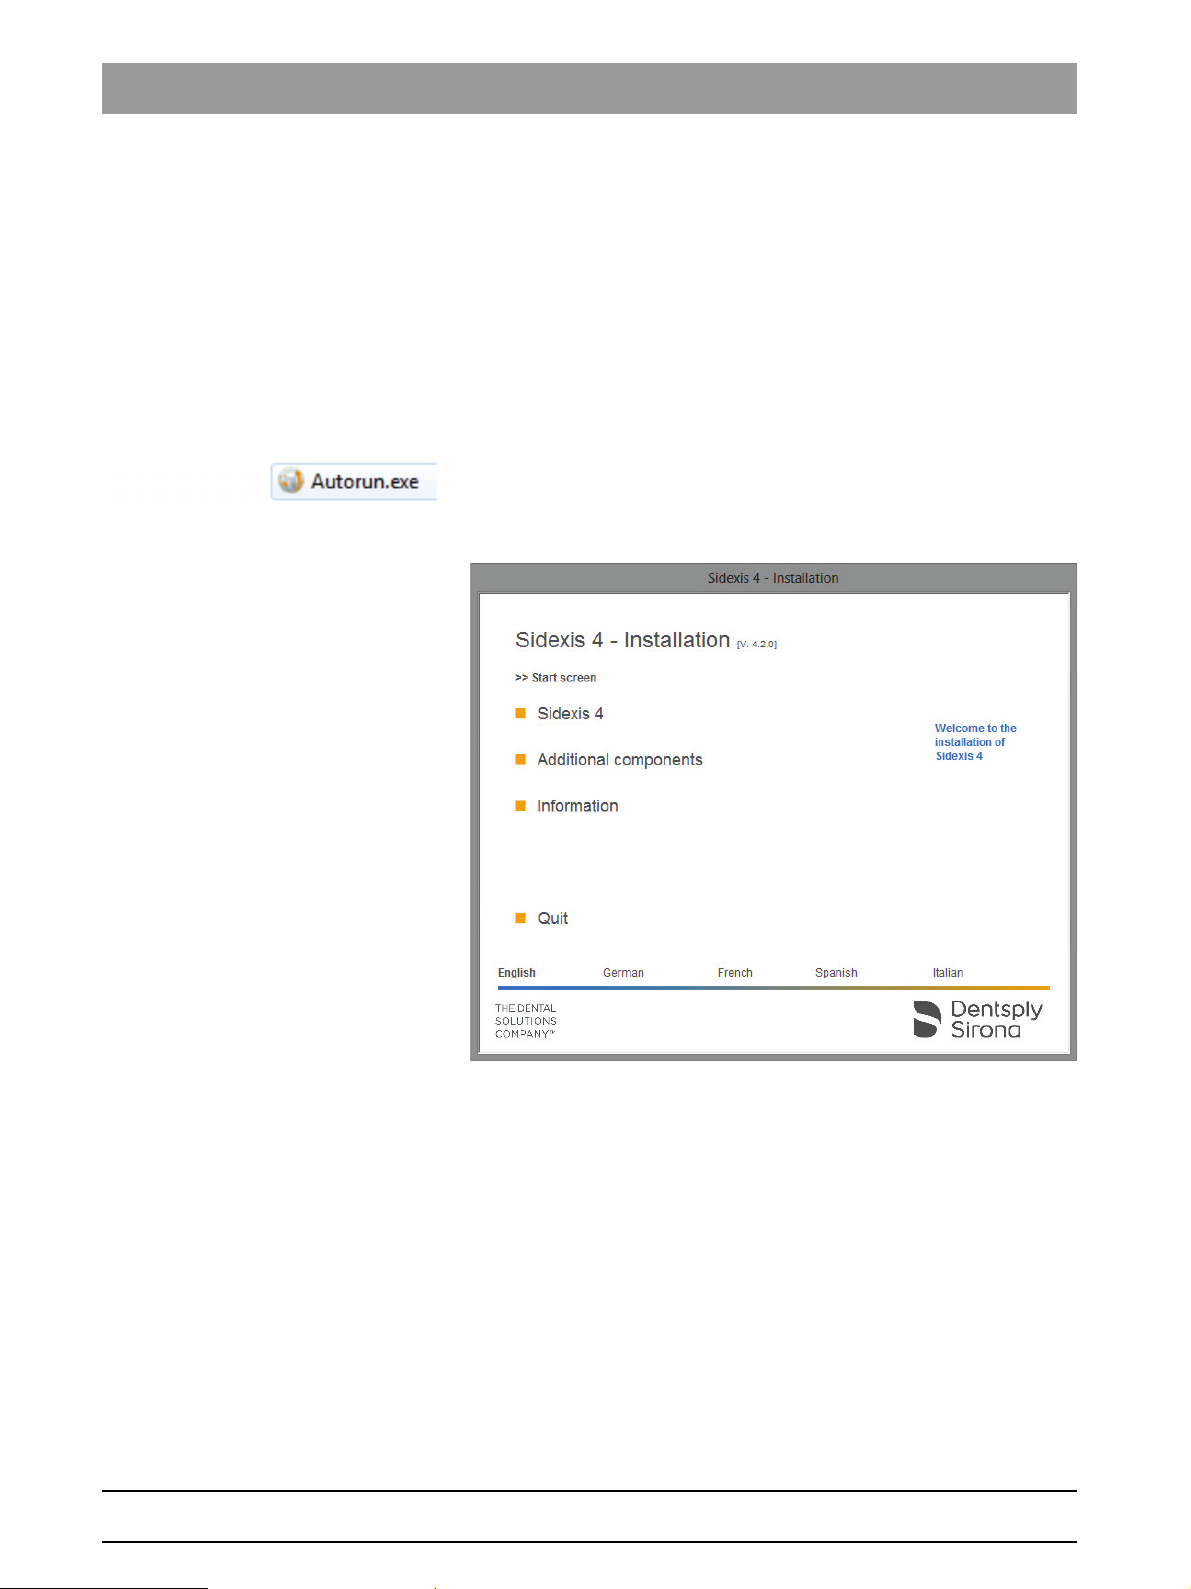
1. Insert the Sidexis 4 DVD in the computer's DVD drive.
NOTE: The Sidexis 4 installation wizard should start automatically by
default. If this is not the case, open the "Autorun.exe" file in the root
directory of the Sidexis 4 DVD.
Sidexis 4 Installation wizard/home page
The home page of the Sidexis 4 installation wizard opens.
NOTE: The installation wizard detects the language of the
installed operating system. If the language of the operating
system is available as a Sidexis 4 program language, this is used
automatically as the installation language. If the language of the
operating system is not available as an installation language,
English is used as the installation language.
If Sidexis 4 is to be installed in a different language, you must
change the language manually.
2. Click the language you prefer in the bottom bar on the home screen.
The installation language is changed.
64 93 204 D3509
4 D3509.208.01.03.02 04.2017
Page 5
Sirona Dental Systems GmbH 2Installation
Operator's manual for SIDEXIS 4 Video Plugin TENEO / SINIUS / INTEGO 2.3To install the video plugin
2.3
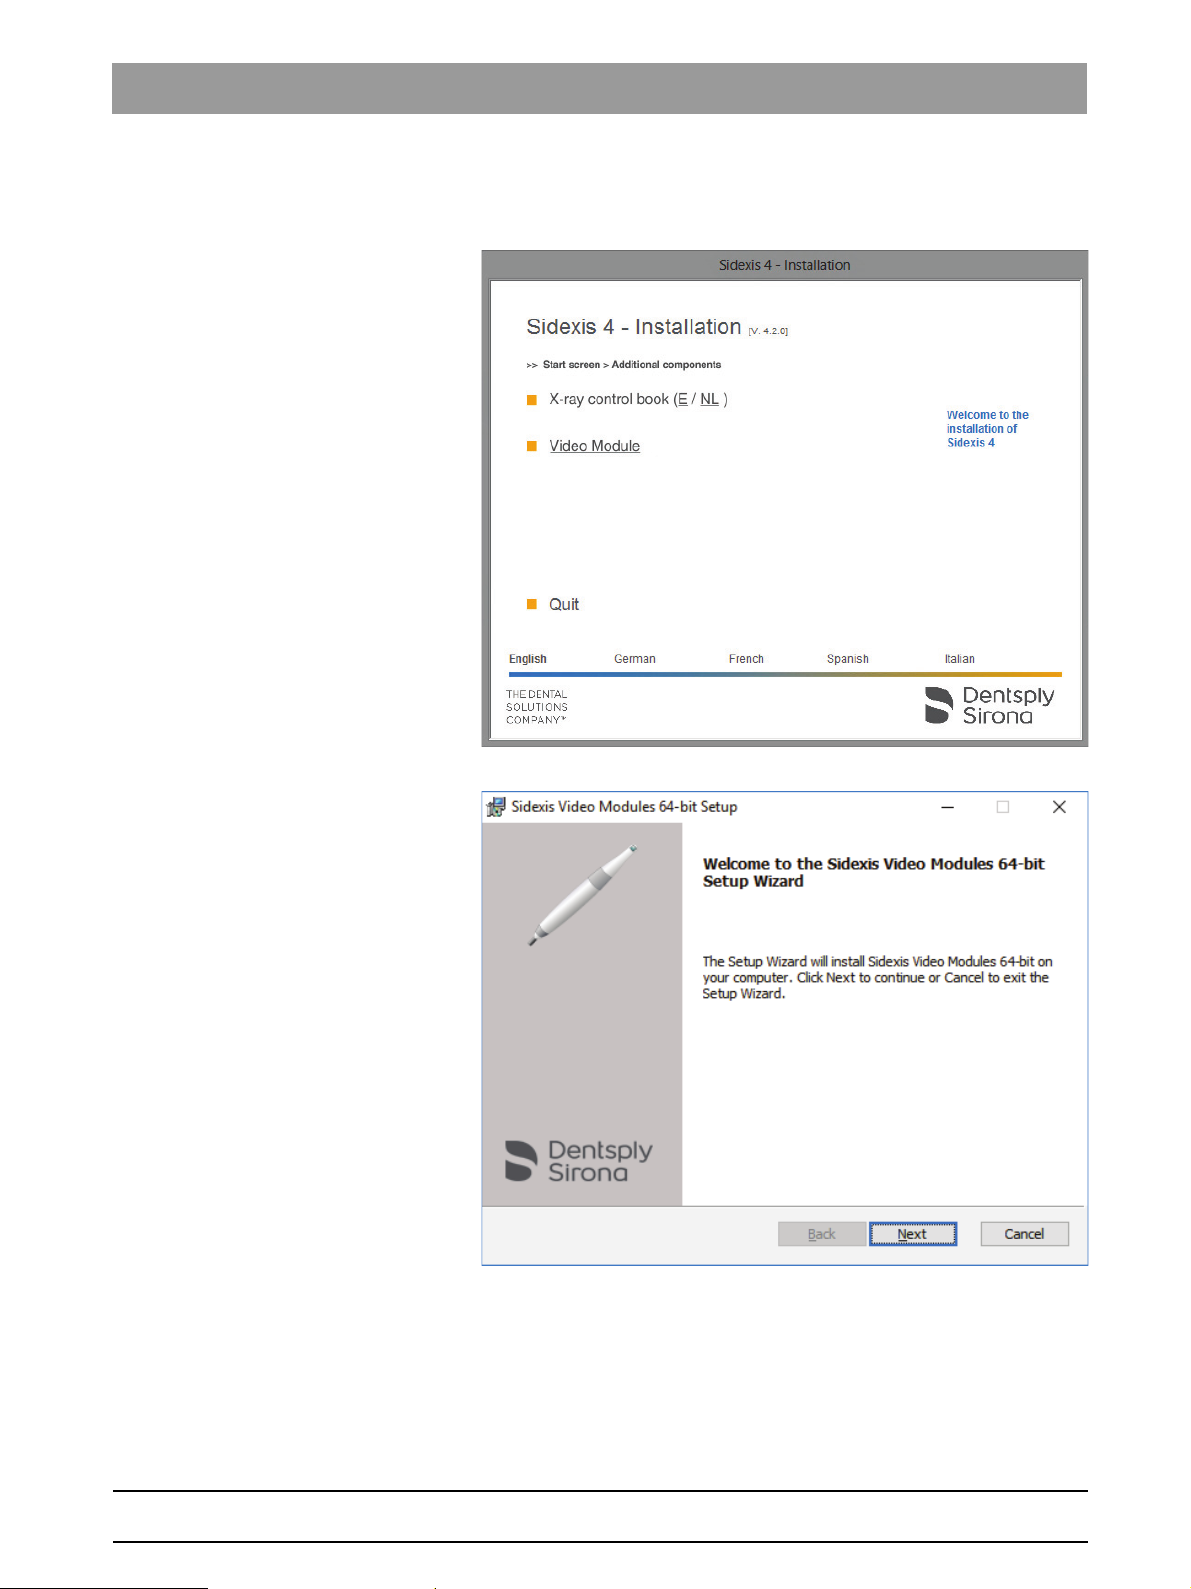
To install the video plugin
1. In the installation wizard, click on Additional components.
bеЦдблЬ
2. Click the Video module button in the window that appears.
The setup program for the video plugin is started.
3. Click the Next button to start the installation.
64 93 204 D3509
D3509.208.01.03.02 04.2017
5
Page 6
2Installation Sirona Dental Systems GmbH
2.3To install the video plugin Operator's manual for SIDEXIS 4 Video Plugin TENEO / SINIUS / INTEGO
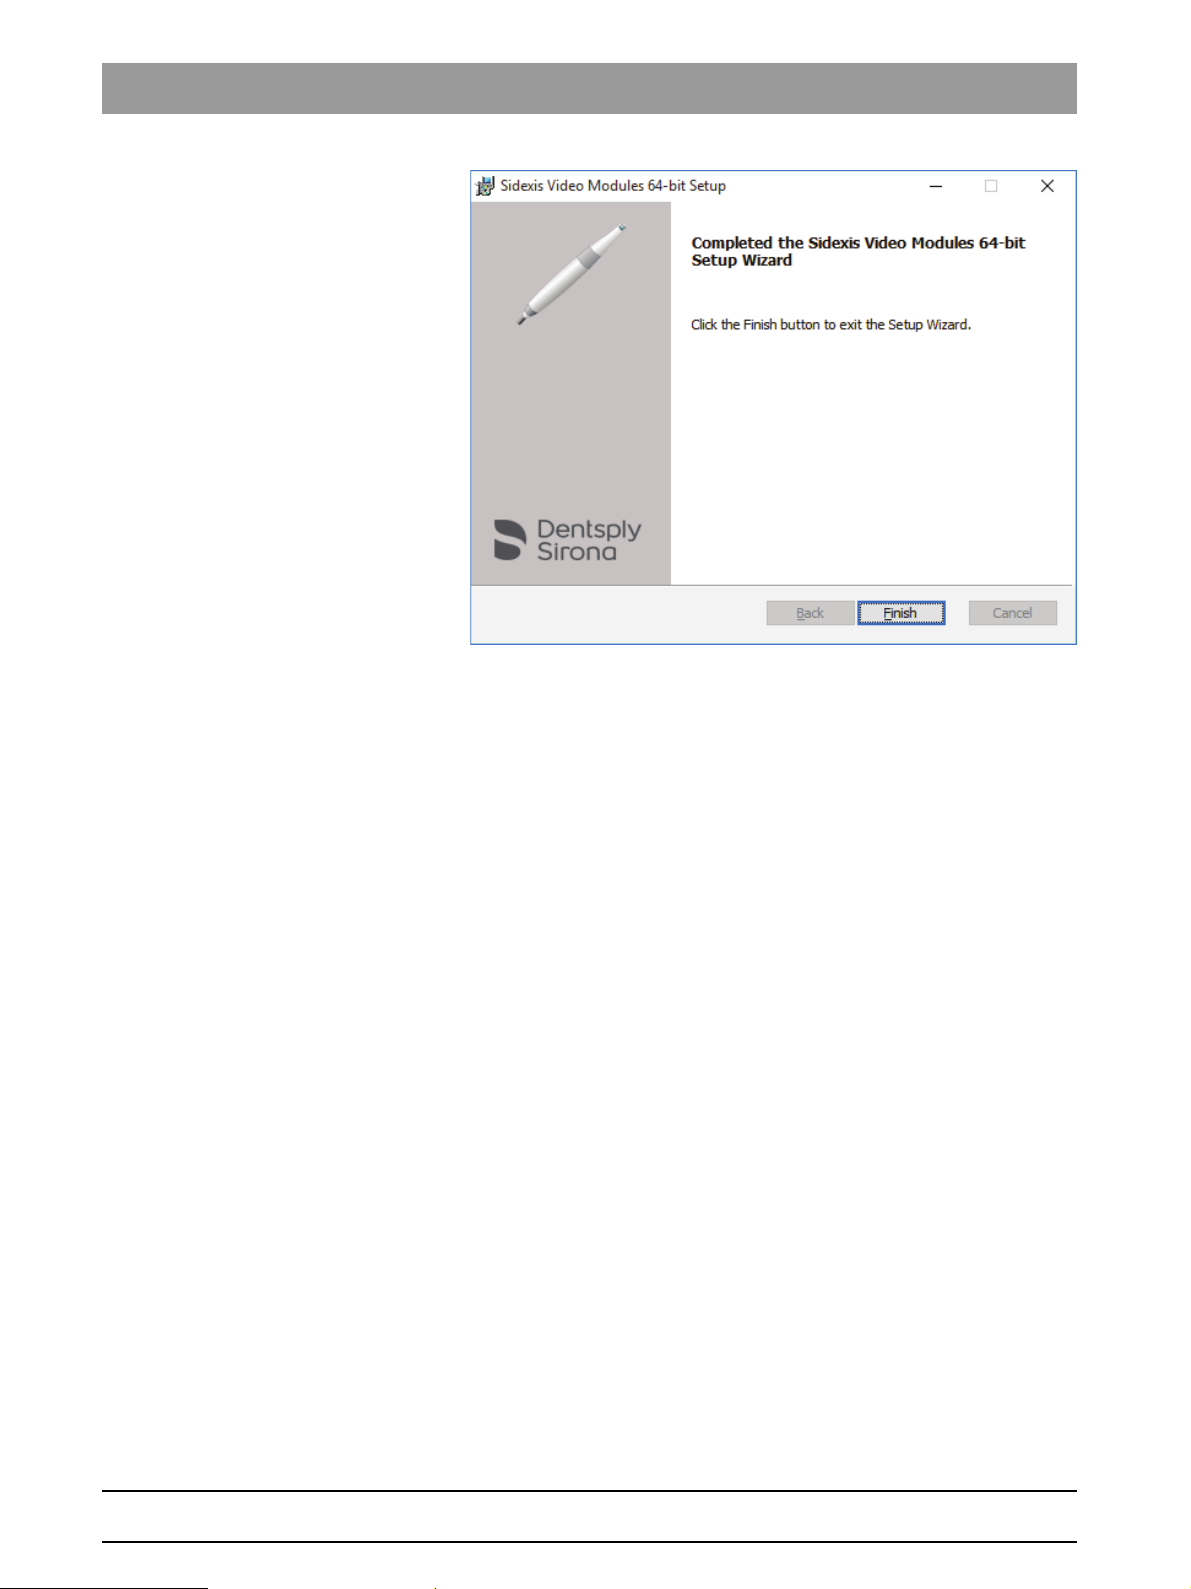
A confirmation message window appears once the installation
has completed
4. Click on the Finish button.
The video plugin is installed.
6 D3509.208.01.03.02 04.2017
64 93 204 D3509
Page 7

Sirona Dental Systems GmbH 3Operation
Operator's manual for SIDEXIS 4 Video Plugin TENEO / SINIUS / INTEGO 3.1Select camera
Operation
3
3.1
Select camera
3.1.1 Selecting SIVISION digital intraoral cameras
1. Start Sidexis 4.
2. Click on the toothed wheel icon (A) in the header line of the software.
The configuration menu opens.
bеЦдблЬ
64 93 204 D3509
D3509.208.01.03.02 04.2017
3. Click the Cameras ⇒ SIVISION digital buttons in the structure tree
(B).
4. Place a check in Activate camera for video images (C) in the region
you wish to use with Sidexis 4.
5. Click on the Save button (D).
The selected intraoral cameras can be used with Sidexis 4.
NOTE! The selected intraoral cameras are only available for Sidexis 4.
7
Page 8

3Operation Sirona Dental Systems GmbH
3.1Select camera Operator's manual for SIDEXIS 4 Video Plugin TENEO / SINIUS / INTEGO
3.1.2 Selecting and configuring third-party cameras
Third-party cameras connected via USB and USB video grabber can be
selected and configured.
Selecting a third-party camera
1. Start Sidexis 4.
2. Click on the toothed wheel icon (A) in the header line of the software.
The configuration menu opens.
3. Click the Cameras ⇒ Other buttons in the structure tree (B).
4. In the Cameras region (C), select the camera you wish to use with
Sidexis 4.
5. Click the Save button (E):
The selected camera can be used with Sidexis 4.
64 93 204 D3509
8 D3509.208.01.03.02 04.2017
Page 9

Sirona Dental Systems GmbH 3Operation
Operator's manual for SIDEXIS 4 Video Plugin TENEO / SINIUS / INTEGO 3.1Select camera
Configuring a third-party camera
In the Settings region (D), the following options are available for the
selected camera:
● Properties
button Set the camera-specific parameters appearing in the dialog
box (e.g. filter, color, sharpness).
The dialog is part of the camera driver software and various options
are available depending on the camera.
● Video settings
button Set the resolution of the video image appearing in the dialog
box.
The dialog is part of the camera driver software.
The selected resolution is displayed next to the button.
● Video input button (optional)
Select the video input to be used (e.g. composite or S-video).
This setting option is only available if the selected video unit features
selection options for the video input.
● Show video...
button The live camera image is displayed in order to check the
configuration. By pressing the Esc key, you can close the live image
again.
bеЦдблЬ
64 93 204 D3509
D3509.208.01.03.02 04.2017
➢ Click the Save button (E) to save the configuration.
9
Page 10

3Operation Sirona Dental Systems GmbH
3.2Options for the Video plugin Operator's manual for SIDEXIS 4 Video Plugin TENEO / SINIUS / INTEGO
3.2
Options for the Video plugin
1. Start Sidexis 4.
2. Click on the toothed wheel icon (A) in the header line of the software.
The configuration menu opens.
3. Click the Cameras ⇒ Options buttons in the structure tree (B).
You can apply the following settings in the Video Plugin Options area (C):
"Close video form right after
camera deactivation. Save stored
video images."
check box
"Mark saved video images for later
import."
check box
The plugin is closed automatically
once the intraoral camera is put
back in its storage tray.
The still images saved are
highlighted automatically for import
into Sidexis 4.
64 93 204 D3509
10 D3509.208.01.03.02 04.2017
Page 11

Sirona Dental Systems GmbH 3Operation
Operator's manual for SIDEXIS 4 Video Plugin TENEO / SINIUS / INTEGO 3.3To display and close live images
3.3
To display and close live images
1. Start Sidexis 4.
2. Select a patient.
3. For SIVISION digital intraoral cameras: Remove the intraoral camera
from the holder.
or
➢ For third-party cameras: Click on the camera icon (A) in the
status bar.
bеЦдблЬ
64 93 204 D3509
D3509.208.01.03.02 04.2017
The camera is switched on and the live image is displayed in Sidexis
4.
➢ For SIVISION digital intraoral cameras: Place the intraoral camera in
the holder.
or
➢ For third-party cameras: Press the Esc key.
The camera is switched off and the live image is closed.
11
Page 12

3Operation Sirona Dental Systems GmbH
3.4Generate and display a still image Operator's manual for SIDEXIS 4 Video Plugin TENEO / SINIUS / INTEGO
3.4
Generate and display a still image
Generate a still image
NOTE: There are several options for focusing the camera. See also:
SIUCOM Plus / SIVISION connect Installation and Configuration REF 63
94 323
1. For SIVISION digital intraoral cameras: Press the foot control pedal.
or
➢ For third-party cameras: Press the Return button.
The camera focuses and a still image is generated.
The live image is then displayed again.
The still image is saved in the plugin. A thumbnail of the still
image is displayed in the bar (A).
2. Press the foot control pedal or the Return button once again to
generate further still images.
12 D3509.208.01.03.02 04.2017
64 93 204 D3509
Page 13

Sirona Dental Systems GmbH 3Operation
Operator's manual for SIDEXIS 4 Video Plugin TENEO / SINIUS / INTEGO 3.4Generate and display a still image
Display a still image
✔ The camera is in the storage tray.
1. Click on a thumbnail in the bar (A).
You can scroll with buttons (B) and (C).
The still image is displayed. The thumbnail is marked with a
yellow frame.
2. Remove the camera from the storage tray to display the live image
once again.
bеЦдблЬ
64 93 204 D3509
D3509.208.01.03.02 04.2017
13
Page 14

3Operation Sirona Dental Systems GmbH
3.5Save or discard still images in Sidexis 4 Operator's manual for SIDEXIS 4 Video Plugin TENEO / SINIUS / INTEGO
3.5
Save or discard still images in Sidexis 4
Highlight still images for saving in Sidexis 4
➢ Click on the icon at the top left in the thumbnails (D) / (E).
Icon (D): Image is highlighted.
Icon (E): Image is not highlighted.
You can highlight or remove the highlighting for all still images using the
(F) button.
Save still images in Sidexis 4
➢ Click on the (H) button.
The still images selected are saved in Sidexis 4 and displayed in the
light box.
The still images that are not highlighted are discarded.
The plugin closes.
NOTE! If no patient is registered in Sidexis 4 then the Sidexis 4 import
dialog appears. Register the patient to import the images.
Discard all still images.
➢ Click on the (G) button.
All still images are discarded.
The plugin closes.
14 D3509.208.01.03.02 04.2017
64 93 204 D3509
Page 15

Sirona Dental Systems GmbH 4Known limitations
Operator's manual for SIDEXIS 4 Video Plugin TENEO / SINIUS / INTEGO
Known limitations
4
Power options / screen savers
Using power saving options or screen savers on the PC may lead to
malfunctions if actions are triggered from the treatment center while the
sleep options are active.
Remedy:
Deactivate the corresponding power options or the screen saver on the
PC.
Still image is not saved by placing the intraoral camera in the holder
when using SiroCam Digital
Saving a still image by placing the intraoral camera in the holder is not
available when using SiroCam Digital.
bеЦдблЬ
64 93 204 D3509
D3509.208.01.03.02 04.2017
15
Page 16

5Corrective action Sirona Dental Systems GmbH
Operator's manual for SIDEXIS 4 Video Plugin TENEO / SINIUS / INTEGO
Corrective action
5
Possible sources of error
1. Intraoral camera is not connected to the SIDEXIS PC.
Solution: Connect the intraoral camera to the SIDEXIS PC.
2. The IP address of the treatment center is not stored in all programs.
Solution: Check and store the IP address in all programs. See
SIUCOM Plus / SIVISION connect installation instructions.
3. SIVISION connect server service is not running.
Solution: Start SIVISION connect server service. See SIUCOM Plus
/ SIVISION connect installation instructions.
4. No communication between the treatment center and the PC.
Solution: Make sure that the IP addresses of the treatment center and
of the PC are in the same subnet.
16 D3509.208.01.03.02 04.2017
64 93 204 D3509
Page 17

Page 18

tЙ=кЙлЙкоЙ=нЬЙ=кбЦЬн=нз=г~вЙ=~еу=~днЙк~нбзел=пЬбЕЬ=г~у=ДЙ=кЙимбкЙЗ=ЗмЙ=нз=нЙЕЬебЕ~д=бгйкзоЙгЙенлK
«=pбкзе~=aЙен~д==pулнЙгл=dгДe pйк~ЕЬЙW ЙеЦдблЕЬ mкбенЙЗ=бе=dЙкг~еу
aPRMVKOMUKMNKMPKMO MQKOMNT ûKJkêKW= NOP=UNR
pбкзе~=aЙен~д=pулнЙгл=dгДe `çåí~Åí=áå=íÜÉ=rp^W
pбкзе~=aЙен~дI=fеЕK
c~Дкбвлнк~≈Й=PN
SQSOR=_ЙелЬЙбг
dЙкг~еу
пппKлбкзе~KЕзг
QUPR=páêçå~=aêáîÉ
`Ь~кдзннЙI=k`=OUOTP
rp^
lêÇÉê=kç
SQ=VP=OMQ=aPRMV
 Loading...