


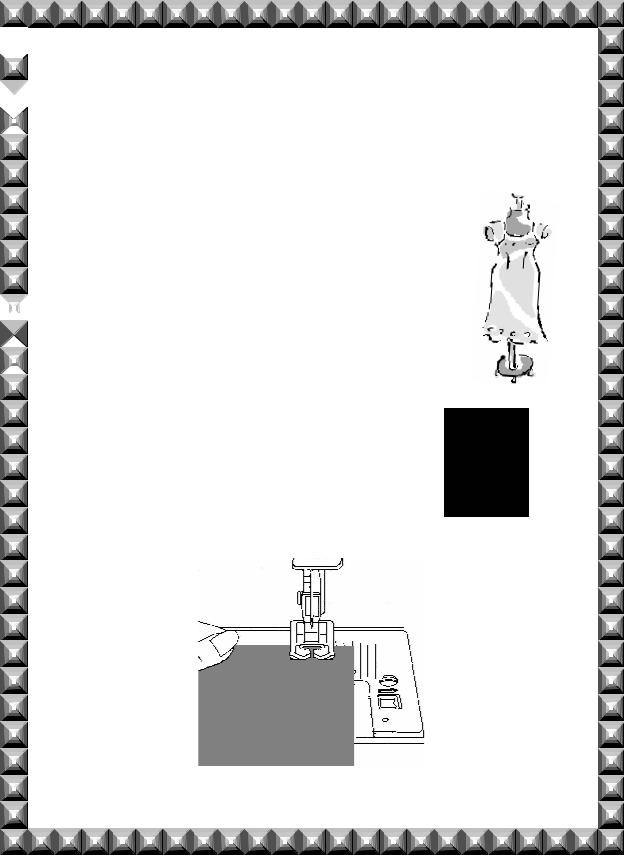
M O D E L C G - 5 9 0
C O M M E R C I A L G R A D E S E W I N G M A C H I N E
W O R K B O O K

 Congratulations on the purchase of your new SINGER®
 Sewing Machine! This commercial grade sewing machine
 is ideal for all types of sewing, including fashion sewing,
 home decorating, quilting and crafts. Your machine is

 designed to deliver the ultimate combination of power,
 performance and durability.
 This workbook has been created as a tool for learning
 various sewing techniques, which you can apply to your
own projects. We are certain that your creativity will be
 inspired, and that you will have many hours of sewing
 enjoyment with this easy-to-use machine, feature-packed
  machine!
 Enjoy!

 The SINGER® Education Department
SINGER® is a registered trademark of the Singer Company Ltd.
 © 2004 Singer Sewing Company
All Rights Reserved.
 Part # 640 5052550GM
Straight Stitch |
1 |
Straight Stitch for Topstitching |
2 |
Create Quilted Fabric |
3 |
Speed Basting |
4 |
Making Piping |
5 |
Attaching Purchased Piping |
6 |
Centered Zippers |
7 |
Satin Stitch Applique |
9 |
Lace Insertion |
11 |
Button Sewing |
13 |
Four-Step Buttonholes |
15 |
Free-Motion Monogramming |
17 |
Free-Motion Embroidery |
19 |
Blindstitch Hem |
21 |
Attaching Beaded Trims |
23 |
Mending with Multi-Stitch Zigzag |
24 |
Crazy Quilting |
25 |
Straight Stretch Stitch for Woven Fabrics |
26 |
Straight Stretch Stitch for Stretch Fabrics |
27 |
Ribbing Application |
28 |
Overedge Stitching |
29 |
Seam Allowence with Stretch Overedge Seam Stitch |
30 |
Attaching Elastic |
31 |
Sewing with a Wing Needle |
32 |
Twin Needle Sewing |
33 |
Applying Ribbon with a Twin Needle |
34 |
Sewing on Leather |
35 |
Decorative Stitching |
36 |
Joining Fabric with Herringbone Stitch |
37 |
Decorative Stippling |
38 |
Scallop Edges |
39 |
Narrow Hem |
40 |
Gathering with the Cording Foot |
41 |
Applying Trims, Cords & Braids |
42 |
Shirring with the Gathering Foot |
43 |
Using the Even Feed Foot to Sew Multiple Fabric Layers |
45 |
Using the Even Feed Foot to Sew Plaid Fabrics |
46 |
Using the Even Feed Foot to Sew Pile Fabrics |
47 |
Sewing with the Side Cutter |
48 |
Sewing with the Ruffler |
50 |

Heavy Duty Commercial Grade
|
CG-590 |
Up to 1100 Stitches-Per- |
Machine sews faster than a standard sewing machine. |
Minute Sewing Speed |
|
|
|
Electronic Foot Control |
Guarantees consistent speed with no jump starts. |
|
Includes a regulating dial that allows for slower speeds, |
|
regardless of the pressure applied. |
|
|
60% Stronger Motor |
The motor is stronger than a standard sewing machine |
|
motor, which means it can sew heavyweight fabrics with |
|
ease. |
Steel Plate on Machine |
Sewing pins won’t damage the steel surface of the |
Bed |
machine free arm. This feature is particularly beneficial |
|
for quilting. |
|
|
Duratec™ Frame |
A SINGER® Exclusive. This provides rigid support and |
|
helps prevent rusting. |
Double Insulated |
Double insulation protects against electric shock by |
|
creating a non-conducting barrier between the operator |
|
and the electrical components inside. |
|
|
Finger Guard |
Provides additional protection to keep fingers from |
|
getting too close to the needle area. This is especially |
|
helpful and desirable for high speed sewing. |
|
|
Free Arm |
Provides professional results and easy access to cuffs, |
|
collars, pant hems and other difficult-to-reach areas. |
|
|
Automatic Needle |
Effortless threading of the machine, including the eye of |
Threader |
the needle. |
|
|
Drop Feed |
By moving the drop feed lever, conveniently located in |
|
the front of the machine, the feed dogs lower for free |
|
motion embroidery, stippling, or attaching a button. No |
|
plates or covers required, just push a lever. |
Utility Stitches |
A variety of stitches for fashion sewing, home dec and |
|
quilting. |
|
|
Stretch Stitches |
Specially designed stitches that add strength and |
|
flexibility to seams, especially useful when sewing on |
|
knitwear and super-stretch fabrics. |
|
|
Additional Decorative and |
An extensive variety of stitches for fabric |
Stretch Stitches |
embellishment, quilting, and more. |
|
|
6mm Stitch Width |
Most stitches can be set for a maximum width of 6mm. |
|
|

Touch-N-Wind™ Declutch |
Needle bar easily disengages for winding the bobbin. |
Bobbin Winder |
|
Automatic Built-In Four |
Buttonhole sewing is a 4-step simple process that |
Step Buttonhole |
provides reliable results. |
Balance Adjustment Dial |
Guarantees control for even stitching of buttonholes |
|
and stretch stitches, even on difficult fabrics. |
Infinitely Variable Stitch |
Settings for length and width can be adjusted as |
Length and Width |
desired, to suit any project. |
Adjustment |
|
|
|
Multiple Needle Positions |
Needle position can be changed for individual |
|
projects, such as inserting zippers or cording and |
|
topstitching. |
|
|
Jam-Resistant Bobbin System |
This is a system in which the bobbin case actually |
|
floats above the hook, precluding thread jams. The |
|
machine will not jam, even when sewing on sheer |
|
fabric or no fabric at all! |
Top-Loading Drop-In Bobbin |
The bobbin conveniently inserts-no bobbin cases to |
|
remove or adjust. It is easy to monitor the thread |
|
supply. |
|
|
Extra-High Presser Foot Lifter |
There are 2 heights to the presser foot lifter. The |
|
second height offers ¼” more clearance, which is |
|
needed when placing multiple layers of bulky fabric |
|
under the presser foot. |
Thread Cutter |
Located for precise thread cutting, eliminating the |
|
extra step of cutting thread with scissors. |
|
|
Automatic Pressure System |
This feature automatically adjusts the pressure for |
|
sewing on fabrics from the lightest weight tricots to |
|
the heaviest denim, to maximize feed accuracy. |
|
|
Twin Needle Capable |
Stitches are automatically adjusted for twin needle |
|
sewing by just moving a lever. |
Suction Cup Machine Base |
Holds the machine securely to the table, even when |
|
sewing at maximum speed. |
Built In Accessory Storage |
A back panel storage area for accessories is |
|
conveniently located in the freearm extension bed. |
Accessories |
Special Purpose Presser Foot |
|
Buttonhole Presser Foot |
|
Blindstitch Hem Presser Foot |
|
Zipper Foot |
|
General Purpose Foot |
|
Finger Guard |
|
Needle Pack |
|
Bobbins |
Self-Lubricating |
Because the machine is permanently lubricated, there is |
|
no need to oil the machine, and no oil gets on fabric. |
|
|
25 Year Limited Commercial, |
Peace of mind knowing the machine has a 25 year |
School and Home Warranty |
limited warranty. |
|
|
Portable |
Machine has a built-in carry handle, making it easy to |
|
transport the machine. |
|
|
Cabinet Mountable |
Machine can be mounted into a cabinet. |
|
|
SINGER® is a registered trademark of the Singer Company Ltd. © 2004 Singer Sewing Company.
 All Rights Reserved.
 Straight Stitching

 The Straight Stitch is generally used to join seams or do topstitching. It is the
 most basic of the stitches and is the most commonly used. For a longer stitch
  or for thicker fabrics, lengthen the Stitch Length.
Machine Set-Up: |
|
Stitch: |
Straight Stitch |
Pattern Selector: |
A |
Stitch Width: |
1, no width |
Stitch Length: |
3-4 |
Presser Foot: |
General Purpose Foot |
Needle Position: |
Center |
 Materials:
 (2) 4” x 4” pieces of cotton, right sides together
 Procedure:
Place fabrics under the foot, matching the raw edges with the ⅝” seam guide.
Sew the length of the fabric.
Use the Reverse Button to reinforce the seam.
1

 Straight Stitch for Topstitching

 The Straight Stitch can be sewn “on top” of the fabric so that the stitches are
 visible. This is different from using the straight stitch to join a seam hidden
inside the project. A topstitch provides a decorative touch while holding the  seam allowances flat. It is also sturdy and durable.
Machine Set-Up: |
|
Stitch: |
Straight Stitch |
Pattern Selector: |
A |
Stitch Width: |
1, no width |
Stitch Length: |
3-4 |
Presser Foot: |
General Purpose Foot |
Needle Position: |
Center |
 Materials:
 (1) 5” x 5” piece of cotton
 Procedure:
Press a 1” hem on one side of the edge.
Align the folded edge to the edge of the foot.
Sew.
Use the Reverse Button to reinforce the seam.
2
 Create Quilted Fabric
 Create your own quilted fabric with the Straight Stitch. Texture can be added to
 plain fabric by just adding consecutive rows of straight stitches!
Machine Set-Up: |
|
Stitch: |
Straight Stitch |
Pattern Selector: |
A |
Stitch Width: |
1, no width |
Stitch Length: |
3-4 |
Presser Foot: |
General Purpose Foot |
Needle Position: |
Center |
 Materials:
(2) 5” x 5” pieces of cotton with batting between the two fabrics, 
 creating a quilt-type sample
 Procedure:
Sew diagonally from the top left corner to the bottom right corner.
Use the Reverse Lever to reinforce the seam.
Position the foot’s edge so that it rides on the previous row of stitching.
Sew successive rows using the edge of the foot to ensure even spacing and 
 straight lines.
Change the direction, sew diagonally from the top right corner to the bottom left corner.
3
 Speed Basting
 Basting is used to temporarily hold fabrics together. Stitch length and tension
 are adjusted to create a looser stitch. This stitch can easily be removed with a
  seam ripper or simply pulled out.
Machine Set-Up: |
|
Stitch: |
Straight Stitch |
Pattern Selector: |
A |
Stitch Width: |
1, no width |
Stitch Length: |
5 |
Presser Foot: |
General Purpose Foot |
Tension: |
Adjust the tension setting to a smaller number |
Needle Position: |
Center |
 Materials:
 (2) 4” x 4” pieces of cotton, right sides together
 Procedure:
Place under the foot, matching the raw edges with the ⅝” seam guide.
Sew the length of the fabric.
Use the seam ripper to remove a portion of the basting, or simply pull the bobbin thread to completely remove basting.
4
 Making Piping
 Piping adds a beautiful finish to projects such as pillows, sleeve edges, collars
 and more. The design of the Zipper Foot allows for the needle to stitch very
closely to the edge of the foot. This is important when inserting zippers,
 applying piping or when topstitching close to the fabric’s edge. Only the

 Straight Stitch can be used when sewing with the Zipper Foot.
Machine Set-Up: |
|
Stitch: |
Straight Stitch |
Pattern Selector: |
A |
Stitch Width: |
1, no width |
Stitch Length: |
3-4 |
Presser Foot: |
Zipper Foot |
Needle Position: |
Center |
 Materials:
5” x 6” home décor fabric  7” piping cord
 Procedure:
Fold fabric, wrong sides together.
Place piping inside of the fold.
On the right side of the fabric, sew a straight stitch close to the piping.
Note: The Zipper Foot can be attached right or left, allowing for the piping to be inserted from either side.
5
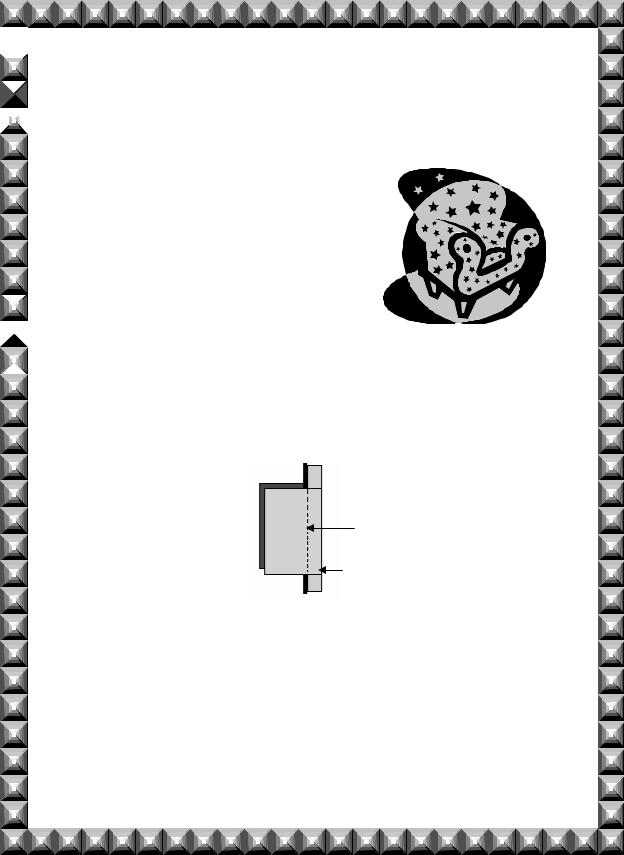
 Attaching Purchased Piping
 Attach pre-packaged piping to make a bold finish on home decorating
  projects, crafts or garments.
Machine Set-up: |
|
Stitch: |
Straight Stitch |
Pattern Selector: |
A |
Stitch Width: |
1, no width |
Stitch Length: |
3-4 |
Presser Foot: |
Zipper Foot |
Needle Position: |
Center |
 Materials:
(2) 3” x 6” pieces of home décor fabric

 7” pre-packaged piping
 Procedure:
Place fabric right sides together.
Place piping between the fabrics, matching the piping’s raw edge with the fabric’s raw edges.
 Piping Raw Edges
Stitching Line
Raw Edge of Fabric
On the wrong side of the fabric, sew a straight stitch close to the piping.
Note: The Zipper Foot can be attached right or left, allowing for the piping to be inserted from either side.
6

 Centered Zippers
 There are several ways of inserting zippers. The pattern envelope of the
 project or garment will designate the best type of zipper application, as well as
  the length and type of zipper to use. Most applications require a zipper foot.
Machine Set-Up: |
|
Stitch: |
Straight Stitch |
Pattern Selector: |
A |
Stitch Width: |
1, no width |
Stitch Length: |
For basting: 5 |
|
For stitching: 3-4 |
Presser Foot: |
Zipper Foot |
Tension: |
For basting: loosen the tension |
|
For stitching: 3 |
Needle Position: |
Start with needle in left position |
The needle can be moved to the left or right. This will allow stitching closer to  the zipper than when the needle is in the center position.
 Materials:
 (1) 7” zipper
 (2) 8” x 4” pieces of medium weight fabric
 Transparent tape
Fabric glue stick
 Procedure:
Place fabric under the foot, matching the raw edges with the ⅝” seam guide.
Starting at the top of the fabric, baste 7”. Then change the stitch length to 3 and finish seaming the remaining length of the fabric.
7
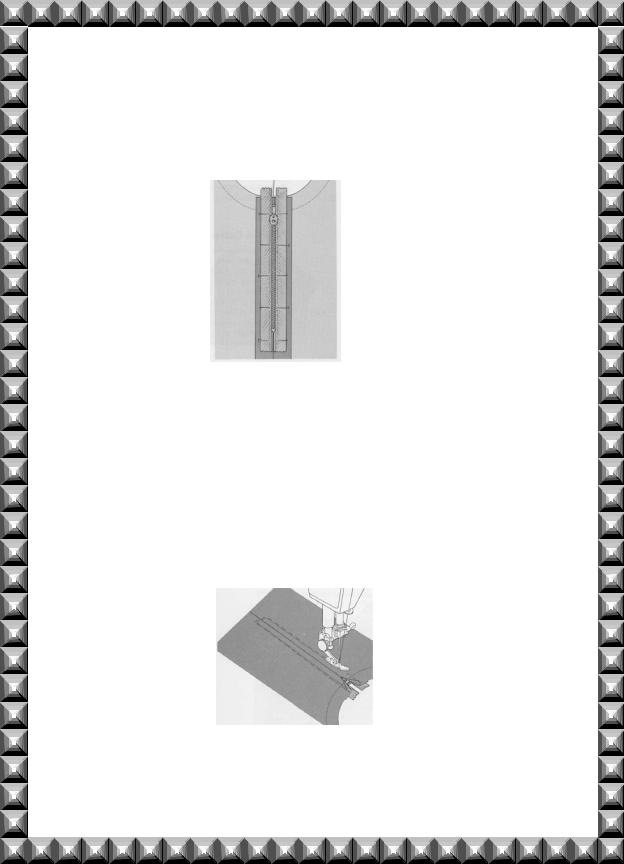
Press the seam open. Finish raw edges if necessary.
Apply glue stick lightly on the right side of the zipper.
Place the zipper face-down, so that the zipper’s coils or teeth are directly over the machine-basted seam. Pin in place, if necessary.
Spread fabric flat, right side up and place ½” wide transparent or perforated marking tape on top of the centered seam line. The tape should be the length of the zipper (7” long for this exercise).
Replace the Standard Presser Foot with the Zipper Foot. Adjust the foot to the left of the needle.
On the right side of the fabric, stitch around the zipper. Pivot the fabric on the needle at the corners, using the edge of the tape as a guide.
Turn fabric to right side and remove the tape and the basting. Press.
8
 Satin Stitch Appliqué
 Satin Stitching is a series of closely spaced zig-zag stitches. Satin Stitching
 can be used for monograms, embroidery and appliqué work to produce a
smooth satin-like appearance. Try a rayon thread for a smoother looking  finish.
Machine Set-Up: |
|
Stitch: |
Zigzag Stitch |
Pattern Selector: |
A |
Stitch Width: |
2-3 |
Stitch Length: |
0.5-1 |
Presser Foot: |
Special Purpose Foot (J) |
Needle Position: |
Center |

 Materials:
 2” x 3” cotton fabric for appliqué
2” x 3” fusible stabilizer

 6” x 6” cotton foundation fabric
 6” x 6” tear-away stabilizer
 Procedure:
Press the fusible stabilizer onto the appliqué.
Fuse the appliqué onto the cotton foundation fabric.
(Fusing the appliqué into place will keep the appliqué from shifting while stitching.)
Place a tear-away stabilizer underneath the fabric. (This is used to ensure quality stitching when using dense stitches.)
Place the applique under the foot, so that half of the stitch will form on the applique and half on the base fabric.
Sew around the applique.
Widen the stitch width to 4 and change the stitch length to below 1.
 .
.
9
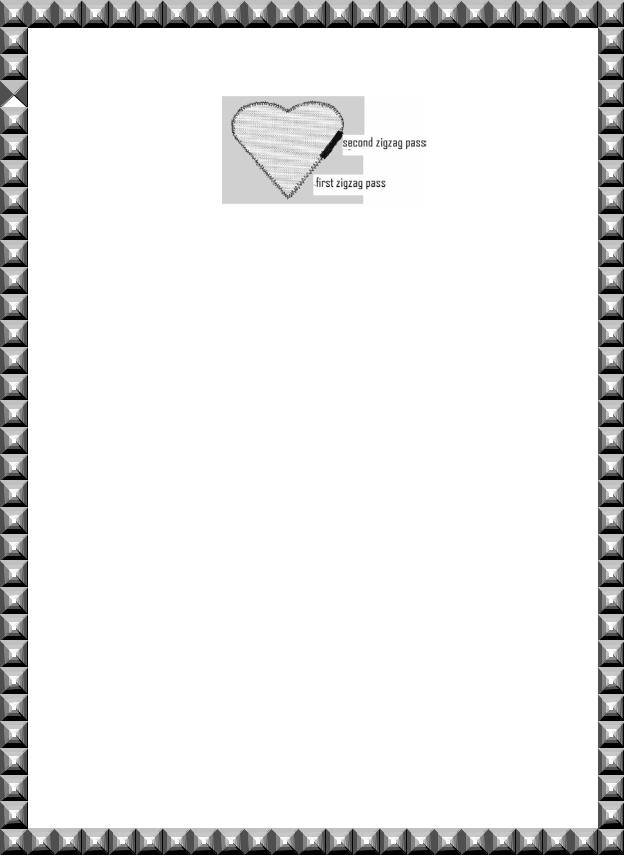
Sewing around the applique again, covering the previous stitching.
 .
.
Sewing over an applique twice is not always necessary, however, it does give a beautiful full-covered effect.
10
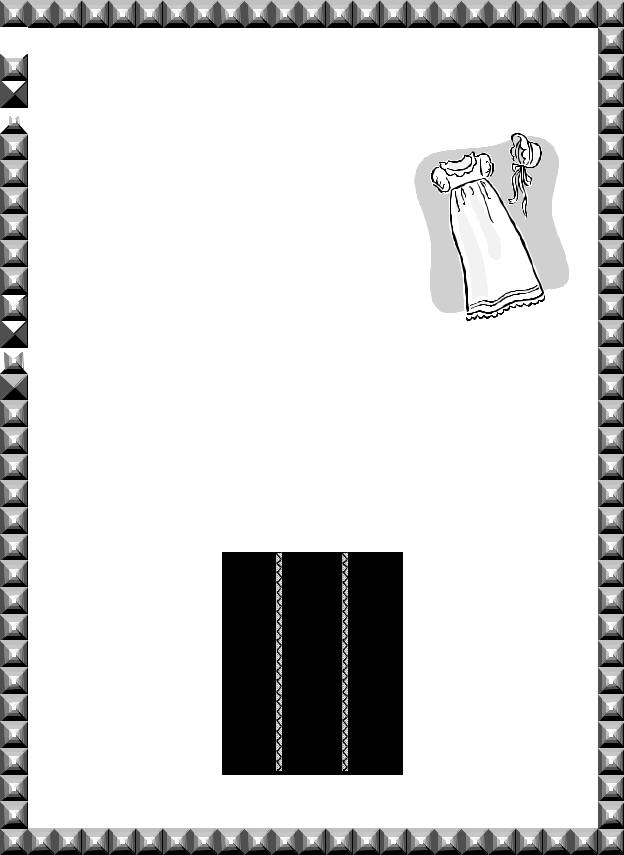
 Lace Insertion
 Insert lace into a special occasion garment or a home decorating project
  to create a beautiful heirloom keepsake.
Machine Set-Up: |
|
Stitch: |
Zigzag Stitch |
Pattern Selector: |
A |
Stitch Width: |
2-3 |
Stitch Length: |
1 |
Presser Foot: |
Special Purpose Foot (J) |
Needle Position: |
Center |
 Materials:
5” x 3” of batiste
 6” strip of lace
 60-80 weight fine cotton thread

 Procedure:
Spray starch and iron the lace and batiste.
Center the lace right side up, lengthwise on batiste.
Stitch lace to fabric by sewing a zigzag stitch down both edges of the lace. Try to just clear the heading of the lace.
11
 Loading...