

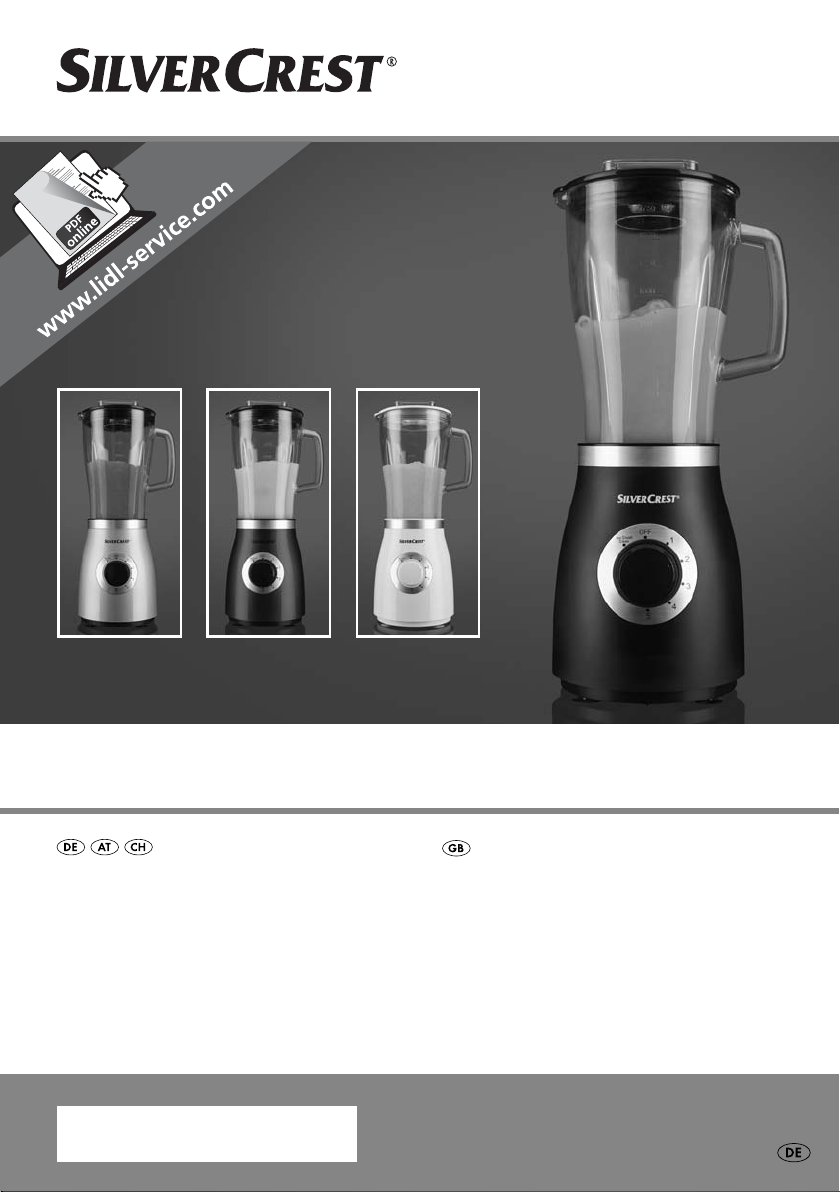
STANDMIXER SSM 550 D1
STANDMIXER
Bedienungsanleitung
IAN 272905
BLENDER
Operating instructions

Klappen Sie vor dem Lesen die Seite mit den Abbildungen aus und machen Sie sich anschließend mit allen
Funktionen des Gerätes vertraut.
Before reading, unfold the page containing the illustrations and familiarise yourself with all functions of
the device.
DE / AT / CH Bedienungsanleitung Seite 1
GB Operating instructions Page 13


INHALTSVERZEICHNIS SEITE
Einleitung 2
Bestimmungsgemäßer Gebrauch 2
Lieferumfang 2
Gerätebeschreibung 2
Technische Daten 2
Sicherheitshinweise 3
Auspacken 5
Aufstellen 5
Bedienen 5
Mixaufsatz befüllen und montieren ................................................................................................5
Geschwindigkeitsstufe wählen ........................................................................................................5
Einfüllen im Betrieb...........................................................................................................................6
Mixaufsatz abnehmen .....................................................................................................................6
Nützliche Hinweise 6
Rezepte 7
Bananen-Shake.................................................................................................................................7
Vanille-Shake.....................................................................................................................................7
Cappucino-Shake .............................................................................................................................7
Tropical-Mix .....................................................................................................................................7
Nuss-Nougat-Shake..........................................................................................................................7
Möhren-Shake...................................................................................................................................7
Johannisbeer-Mix..............................................................................................................................7
Hawaii-Shake....................................................................................................................................8
Fruchtiger Ananas-Erdbeer-Mix.......................................................................................................8
Andalusische kalte Suppe (Gazpacho).........................................................................................8
Reinigen 8
Mixaufsatz reinigen ........................................................................................................................9
Motorblock reinigen ......................................................................................................................10
Nach dem Reinigen.......................................................................................................................10
Aufbewahren 10
Entsorgen 10
Garantie und Service 10
Importeur 11
- 1 -

Standmixer
Einleitung
Herzlichen Glückwunsch zum Kauf Ihres neuen
Gerätes.
Sie haben sich damit für ein hochwertiges Produkt
entschieden. Die Bedienungsanleitung ist Bestandteil dieses Produkts. Sie enthält wichtige Hinweise
für Sicherheit, Gebrauch und Entsorgung. Machen
Sie sich vor der Benutzung des Produkts mit allen
Bedien- und Sicherheitshinweisen vertraut. Benutzen
Sie das Produkt nur wie beschrieben und für die angegebenen Einsatzbereiche. Händigen Sie alle
Unterlagen bei Weitergabe des Produkts an Dritte
mit aus.
Bestimmungsgemäßer
Gebrauch
Dieses Gerät ist ausschließlich bestimmt für ...
– das Mischen, Pürieren und Rühren von Lebens-
mitteln sowie Zerkleinern von Eiswürfeln (sog.
“Crushen”),
– haushaltsübliche Mengen und nur in privaten
Haushalten in trockenen Räumen.
Dieses Gerät ist nicht bestimmt für ...
– das Zerkleinern von harten Lebensmittelanteilen
wie z.B. Nüsse, Kerne, große Körner oder Stiele,
– das Verarbeiten von Materialien, die nicht
Lebensmittel sind,
– den Einsatz für gewerbliche oder industrielle
Zwecke,
– die Verwendung in feuchter Umgebung oder im
Freien,
– das Verarbeiten von heißen/kochenden Flüssig-
keiten.
Lieferumfang
Kontrollieren Sie nach dem Auspacken die Lieferung
auf Vollständigkeit. Im Lieferumfang enthalten ist:
1 x Motorblock, mit Netzkabel und Netzstecker
1 x Mixaufsatz, mit fest montiertem Schneidmesser
1 x Deckel
1 x Dosierkappe
1 x Bedienungsanleitung
Gerätebeschreibung
Dosierkappe
q
Deckel
w
Mixaufsatz
e
Schneidmesser
r
Schalter
t
Netzkabel
y
Motorblock
u
Kabelaufwicklung
i
Skala
o
Technische Daten
Nennspannung: 220 - 240 V~, 50 Hz
Nennleistung: 550 Watt
Max. Einfüllmenge: 1,75 l
Schutzklasse: II
KB-Zeit: 3 Minuten
Die KB-Zeit (Kurzbetriebszeit) gibt an, wie lange
man ein Gerät betreiben kann, ohne dass der
Motor überhitzt und Schaden nimmt. Nach der
angegebenen KB-Zeit muss das Gerät solange
ausgeschaltet werden, bis sich der Motor auf
Raumtemperatur abgekühlt hat.
Verwenden Sie nur Zubehör- und Ersatzteile, die für
dieses Gerät bestimmt sind. Andere Teile sind möglicherweise nicht ausreichend geeignet oder sicher!
- 2 -

Sicherheitshinweise
Um Lebensgefahr durch elektrischen Schlag zu vermeiden:
• Stellen Sie sicher, dass der Motorblock, das Netzkabel oder der Netzstecker
niemals in Wasser oder andere Flüssigkeiten getaucht wird.
• Verwenden Sie das Gerät ausschließlich in trockenen Räumen, niemals im
Freien oder in feuchter Umgebung.
• Achten Sie darauf, dass im Betrieb das Netzkabel niemals nass oder feucht
wird. Führen Sie es so, dass es nicht eingeklemmt oder anderweitig beschädigt
werden kann.
• Lassen Sie beschädigte Netzstecker oder Netzkabel sofort von autorisiertem
Fachpersonal oder dem Kundenservice austauschen, um Gefährdungen zu
vermeiden.
• Ziehen Sie nach Gebrauch immer den Stecker aus der Steckdose. Ausschalten
alleine genügt nicht, weil noch immer Netzspannung im Gerät anliegt, solange
der Netzstecker in der Steckdose steckt.
• Kontrollieren Sie vor jedem Gebrauch das Gerät auf seinen einwandfreien
Zustand. Das Gerät darf nicht verwendet werden, wenn Schäden erkennbar
sind, insbesondere an dem Motorblock oder gläsernen Mixaufsatz.
• Ziehen Sie sofort den Netzstecker aus der Steckdose, wenn Sie eine ungewöhnliche Geräusch- oder Geruchsentwicklung wahrnehmen oder bei erkennbarer Fehlfunktion.
Um Überhitzung und Brandgefahr zu vermeiden:
• Verwenden Sie das Gerät nicht im Bereich direkter Sonneneinstrahlung oder
Wärmeeinwirkung hitzeerzeugender Geräte.
• Füllen Sie niemals kochende Flüssigkeiten oder sehr heiße Lebensmittel in den
Mixaufsatz! Lassen Sie diese erst auf handwarme Temperatur abkühlen.
Andernfalls kann das Gerät überhitzen und auch das Glas des Mixaufsatzes
springen!
• Betreiben Sie das Gerät niemals im Leerzustand, d.h. ohne Zutaten im Mixaufsatz.
- 3 -

Um Unfall- und Verletzungsgefahr zu vermeiden:
• Greifen Sie niemals in den Mixaufsatz, insbesondere nicht im Betrieb.
Die Messer sind extrem scharf!
• Öffnen Sie nicht den Deckel, wenn das Gerät in Betrieb ist. Andernfalls können
Lebensmittelteile mit hoher Geschwindigkeit herausfliegen!
• Führen Sie niemals Besteckteile oder Rührgegenstände in den Mixaufsatz,
solange das Gerät in Betrieb ist. Es besteht erhebliche Verletzungsgefahr,
wenn diese das sich sehr schnell drehende Messer berühren!
• Lassen Sie das Gerät nicht unbeaufsichtigt arbeiten, um bei Gefahr sofort
reagieren zu können.
• Kinder sollten beaufsichtigt werden, um sicherzustellen, dass sie nicht mit dem
Gerät spielen.
• Missbrauchen Sie das Gerät nicht für andere Zwecke, als in dieser Anleitung
beschrieben.
• Das Gerät ist bei nicht vorhandener Aufsicht und vor dem Zusammenbau, dem
Auseinandernehmen oder Reinigen stets vom Netz zu trennen.
• Das Gerät darf nicht von Kindern benutzt werden.
• Das Gerät und seine Anschlussleitung sind von Kindern fernzuhalten.
• Dieses Gerät kann von Personen mit reduzierten physischen, sensorischen oder
mentalen Fähigkeiten oder Mangel an Erfahrung und/oder Wissen benutzt werden, wenn sie beaufsichtigt oder bezüglich des sicheren Gebrauchs des Gerätes
unterwiesen wurden und die daraus resultierenden Gefahren verstanden haben.
• Kinder dürfen nicht mit dem Gerät spielen.
• Seien Sie vorsichtig beim Umgang mit dem Gerät. Die Messer sind sehr scharf!
• Gehen Sie vorsichtig beim Leeren des Mixaufsatzes vor! Die Messer sind sehr
scharf!
• Gehen Sie vorsichtig beim Reinigen des Gerätes vor! Die Messer sind sehr scharf!
• Schalten Sie das Gerät aus und ziehen Sie den Netzstecker, bevor Sie Zubehör
wechseln oder Teile anfassen, die sich während des Betriebs bewegen.
• Verwenden Sie den Mixaufsatz nur mit dem mitgelieferten Motorblock!
• Stellen Sie sicher, dass der Mixer immer ausgeschaltet ist, bevor Sie ihn vom
Motorblock heben!
- 4 -

Auspacken
Bedienen
• Entfernen Sie alle Verpackungsteile oder Schutzfolien vom Gerät. Bewahren Sie die Verpackung
auf, um das Gerät geschützt lagern oder einsenden zu können, z.B. im Reparaturfall.
• Bevor Sie das Gerät verwenden, überzeugen
Sie sich davon, dass das Gerät unbeschädigt ist,
ebenso das Netzkabel mit Netzstecker und alle
Zubehör- und Geräteteile.
• Reinigen Sie sorgfältig alle Bestandteile vor dem ersten Gebrauch des Standmixers (siehe “Reinigen”).
Aufstellen
Wenn Sie alle Teile gereinigt haben, wie unter
“Reinigen” beschrieben:
Stellen Sie das Gerät so auf, ...
³
– dass das Netzkabel
an der Rückseite geführt wird,
– dass der Netzstecker sofort erreichbar ist, um
diesen bei Gefahr aus der Steckdose ziehen zu
können,
– dass es stabil und rutschfest steht, so dass die
Saugnäpfe Halt finden, damit bei Vibrationen
das Gerät nicht umkippt,
– dass das Netzkabel
bereich ragt und durch versehentliches Ziehen
daran das Gerät umkippen kann.
durch die Aussparung
y
nicht in den Arbeits-
y
Warnung!
Der Motor schaltet sich aus, sobald der Mixaufsatz
vom Motorblock uentfernt wird. Es wird dann
vielleicht übersehen, dass die Maschine noch eingeschaltet ist. Der Motor startet dann unvermutet,
sobald der Mixaufsatz
Deshalb:
• Stecken Sie den Netzstecker erst dann in die
Steckdose, sobald der Mixaufsatz
füllt und verschlossen montiert ist.
• Vergewissern Sie sich vor dem Montieren stets,
dass das Gerät ausgeschaltet oder der Netzstecker gezogen ist.
• Schalten Sie erst aus, ziehen Sie den Netzstecker
und warten Sie den Stillstand des Motors ab,
bevor Sie den Mixaufsatz
montiert wird:
e
e
e
abnehmen.
e
fertig be-
Mixaufsatz befüllen und montieren
Nehmen Sie den Mixaufsatz evom Motor-
³
block
Befüllen Sie den Mixaufsatz eund drücken Sie
³
anschließend den Deckel
Mixaufsatz
Ausgießnase am Mixaufsatz
Stecken Sie die Dosierkappe qin die Deckelöff-
³
nung und drehen Sie diese im Uhrzeigersinn zu.
Setzen Sie den fertig befüllten und verschlosse-
³
nen Mixaufsatz
hen Sie den Mixaufsatz
herunter drücken können. Nur wenn der Mixaufsatz
starten.
und entfernen Sie den Deckel w.
u
wieder fest auf den
w
. Achten Sie darauf, dass auch die
e
verschlossen ist.
e
auf den Motorblock u. Dre-
e
leicht, bis Sie diesen
e
bündig aufgesetzt ist, kann der Motor
e
Geschwindigkeitsstufe wählen
Wenn der Mixaufsatz efertig befüllt und vollständig
verschlossen auf dem Motorblock
Sie das Gerät einschalten.
- 5 -
steht, können
u

Stellen Sie den Schalter tauf ...
³
– Stufe 1-3
für flüssige oder mittelfeste Lebensmittel, zum
Mischen, Pürieren und Rühren
– Stufe 3-5
für festere Lebensmittel oder zum Zerkleinern
– Stufe Ice Crush/Clean
für kurzen, kraftvollen Impulsbetrieb, z.B. zum
Crushen von Eiswürfeln oder zur Reinigung. Der
Schalter
den Motor nicht zu überlasten. Halten Sie den
Schalter
rastet in dieser Stellung nicht ein, um
t
deshalb nur kurz in dieser Stellung.
t
Hinweis
Befüllen Sie den Mixaufsatz emit maximal 180 g
Eiswürfeln. Ansonsten zerkleinert das Gerät die Eiswürfel nicht optimal.
Einfüllen im Betrieb
Warnung!
Wenn Sie bei laufendem Betrieb etwas einfüllen
möchten, dürfen Sie ausschließlich die dafür
eigens vorgesehene Dosierkappe
• Öffnen Sie keinesfalls den Deckel
Lebensmittelteile mit hoher Geschwindigkeit
herausfliegen!
• Führen Sie niemals Besteckteile oder Rührgegenstände in den Mixaufsatz
in Betrieb ist. Es besteht erhebliche
Verletzungsgefahr, wenn diese das sich sehr
schnell drehende Schneidmesser
Um bei laufendem Betrieb etwas einfüllen zu
können, ...
drehen Sie die Dosierkappeqentgegen dem
³
Uhrzeigersinn auf und nehmen diese heraus.
Füllen Sie die Zutaten ein.
³
Anschließend stecken Sie die Dosierkappe
³
wieder in die Deckelöffnung und drehen Sie
diese im Uhrzeigersinn zu.
öffnen.
q
. Es können
w
, solange das Gerät
e
berühren!
r
q
Mixaufsatz abnehmen
Wenn die Bearbeitung der eingefüllten Lebensmittel
beendet ist:
Stellen Sie immer erst den Schalter tin Aus-
³
Stellung („OFF“) und ziehen Sie den
Netzstecker.
Warten Sie erst den Stillstand des Motors ab,
³
bevor Sie den Mixaufsatz
herausheben. Der Mixaufsatz
nicht gedreht zu werden.
gerade nach oben
e
braucht dabei
e
Nützliche Hinweise
– Um beim Pürieren fester Zutaten beste Ergeb-
nisse zu erzielen, geben Sie nach und nach nur
kleine Portionen in den Mixaufsatz
eine große Menge auf einmal einzufüllen.
– Wenn Sie feste Zutaten verarbeiten, schneiden
Sie diese in kleine Stücke (2-3 cm).
– Beim Mixen flüssiger Zutaten beginnen Sie zu-
nächst mit einer geringen Menge Flüssigkeit. Geben Sie dann nach und nach mehr Flüssigkeit
durch die Deckelöffnung hinzu.
– Wenn Sie bei laufendem Betrieb Ihre Hand
oben auf den verschlossenen Standmixer legen,
können Sie das Gerät damit gut stabilisieren.
– Für das Rühren von festen oder sehr dickflüssi-
gen Lebensmitteln kann es nützlich sein, die Stufe
Ice Crush/Clean zu verwenden, um ein Festsetzen des Schneidmessers
zu verhindern.
r
Hinweis
Benutzen Sie das Gerät nicht, um die Körnung von
Speisesalz, Raffinadezucker oder weißem Zucker
zu verringern. Zum Beispiel, um Puderzucker herzustellen.
, anstatt
e
- 6 -

Rezepte
Bananen-Shake
2 Bananen
ca. 2 Esslöffel Zucker (je nach Reifegrad der Bananen und persönlichem Geschmack)
1/2 Liter Milch
1 Spritzer Zitronensaft
Schälen Sie die Bananen und pürieren Sie sie auf
Stufe 2. Geben Sie nach und nach die Milch, dann
den Zucker und den Zitronensaft hinzu. Mixen Sie
alles so lange, bis eine gleichmäßige Flüssigkeit entsteht.
Servieren Sie den Shake eisgekühlt.
Vanille-Shake
1/4 Liter Milch
250 g Vanilleeis
125 ml Eiswürfel
1 1/2 Teelöffel Zucker
Crushen Sie die Eiswürfel mit der Stufe Ice
Crush/Clean. Füllen Sie die restlichen Zutaten in
den Mixer. Mixen Sie alles so lange auf Stufe 2, bis
eine gleichmäßige Flüssigkeit entsteht.
Cappucino-Shake
65 ml kalten Espresso (oder sehr starken Kaffee)
65 ml Milch
15 g Zucker
65 ml Vanille Eis
100 ml gecrushte Eiswürfel
Crushen Sie die Eiswürfel mit der Stufe Ice
Crush/Clean. Geben Sie den Espresso, die Milch
und den Zucker hinzu. Mixen Sie alles auf der Stufe
2, bis sich der Zucker aufgelöst hat. Geben Sie zum
Schluss das Vanilleeis hinzu und mixen Sie alles
kurz auf der Stufe 1 durch.
Tropical-Mix
125 ml Ananassaft
60 ml Papayasaft
50 ml Orangensaft
1/2 kleine Dose Pfirsiche mit Saft
125 ml Eiswürfel
Crushen Sie die Eiswürfel mit der Stufe Ice
Crush/Clean.
Geben Sie alle Zutaten in den Mixer und mischen
Sie alles auf Stufe 3 durch.
Nuss-Nougat-Shake
1/2 Liter Milch
200 g Nuss-Nougat-Creme
1 Kugel Vanilleeis
50 ml Sahne
Vermengen Sie alle Zutaten im Mixer auf Stufe 3,
bis alles gleichmäßg vermengt ist.
Möhren-Shake
300 ml Apfelsaft
500 ml Möhrensaft
4 Esslöffel Öl (Weizenkeim- oder Rapsöl)
4 Esslöffel Zitronensaft
Ingwerpulver
Pfeffer
Geben Sie den Apfelsaft, das Öl und den Zitronensaft in den Mixer und mischen Sie alles auf Stufe 2.
Geben Sie dann den Möhrensaft hinzu und mixen
Sie alles auf Stufe 2 durch. Schmecken Sie dann
den Shake mit Ingwerpulver und Pfeffer ab.
Johannisbeer-Mix
2 Teelöffel Honig
2 Bananen
1/4 Liter Buttermilch
1/4 Liter Johannisbeersaft (schwarz)
Geben Sie alle Zutaten in den Mixer und mixen Sie
alles auf Stufe 3 durch.
- 7 -

Hawaii-Shake
4 Bananen
1/4 Liter Ananassaft
1/2 Liter Milch
2 EL Honig
1/4 Liter Rum
Schälen Sie die Bananen und pürieren Sie sie auf
Stufe 2. Geben Sie die weiteren Zutaten hinzu und
vermengen Sie alles auf Stufe 1.
Fruchtiger Ananas-Erdbeer-Mix
250 ml Ananassaft
200 g Erdbeeren
300 ml Apfelsaft
4 Eiswürfel
Crushen Sie die Eiswürfel mit der Stufe Ice
Crush/Clean. Waschen Sie die Erdbeeren und entfernen Sie das Grün. Pürieren Sie sie auf Stufe 2.
Geben Sie dann die restlichen Zutaten hinzu und
mixen Sie alles auf Stufe 1.
Andalusische kalte Suppe (Gazpacho)
1/2 Gurke
1 Fleischtomate
1 Grüne Paprika
1/2 Zwiebel
1 Knoblauchzehe
1/2 weißes Brötchen
1/2 Teelöffel Salz
1 Teelöffel Rotweinessig
1 Esslöffel Olivenöl
Schneiden Sie das Gemüse in ca. 2 cm große
Stücke. Geben Sie zuerst die Tomatenstücke und
danach die Gurke in den Mixer. Pürieren Sie diese
auf Stufe 3. Fügen Sie die restlichen Zutaten hinzu
und pürieren/durchmengen Sie alles auf Stufe 3,
bis eine gleichmäßige Suppe entsteht.
Servieren Sie das ganze mit Brot.
Hinweis
Rezepte ohne Gewähr. Alle Zutaten- und Zubereitungsangaben sind Anhaltswerte. Ergänzen Sie diese Rezeptvorschläge um Ihre persönlichen Erfahrungswerte.
Hinweis
Bei Laktose-Intoleranz empfehlen wir Ihnen laktosefreie Milch zu verwenden. Bedenken Sie dabei jedoch, dass laktosefreie Milch ein wenig süßer ist.
Reinigen
Vorsicht!
Bevor Sie den Standmixer und seine Teile reinigen:
• Stellen Sie sicher, dass das Gerät ausgeschaltet
und der Netzstecker gezogen ist.
Auf keinen Fall darf der Motorblock
Wasser oder andere Flüssigkeiten getaucht
werden. Hierdurch kann Lebensgefahr durch
elektrischen Schlag entstehen und das Gerät
kann beschädigt werden.
• Öffnen Sie niemals das Gehäuse des Gerätes.
Andernfalls kann Lebensgefahr bestehen durch
elektrischen Schlag.
• Demontieren Sie niemals das Schneidmesser
und greifen Sie auch niemals in den Mixaufsatz
. Das Schneidmesser rist extrem scharf!
e
• Verwenden Sie keine Lösungs- oder Scheuermittel für die Kunststoffflächen, diese können
andernfalls beschädigt werden.
u
in
r
- 8 -

Mixaufsatz reinigen
Reinigen Sie den Mixaufsatz enur mit einer
³
langstieligen Spülbürste, so dass Sie sich nicht
am Schneidmesser
Bei hartnäckiger Verschmutzung können Sie den
³
Mixaufsatz
gen lassen. Demontieren Sie dafür immer den
Mixaufsatz
Reinigen Sie den Deckel wund die Dosierkap-
³
pe
q
Geschirrspülen.
Wenn Sie direkt nach der Benutzung den Standmixer reinigen, erzielen Sie eine in den meisten
Fällen ausreichende hygienische Reinigung durch
folgende Alternative:
Füllen Sie den Mixaufsatz emit 750 ml Wasser
³
und geben Sie einige Tropfen eines milden Spülmittels dazu. Schließen den Deckel
den Mixaufsatz
Stecken Sie den Netzstecker in die Steckdose
und betätigen Sie ein paar Mal den Ice Crush/
Clean-Betrieb, so dass das Schneidmesser
maximaler Drehzahl durch das Wasser pflügt.
Spülen Sie danach den Mixaufsatz
klarem Wasser aus, so dass alle Spülmittelreste
beseitigt sind.
e
e
in der Spülmaschine oder beim normalen
verletzen können.
r
auch in der Spülmaschine reini-
, wie später beschrieben.
und setzen
w
auf den Motorblock u.
e
mit viel
e
r
Sollte sich der Schmutz nicht lösen, können Sie den unteren Plastikteil des Mixaufsatzes
messer
mit
vom Glasteil des Mixaufsatzes elösen:
r
Glasteil
Dichtungsring
Messer
Plastikteil
mit dem Schneid-
e
Nehmen Sie den Mixaufsatz evom Motor-
³
block
Drehen Sie das Plastikteil des Mixaufsatzes
³
e
vom Glasteil des Mixaufsatzes
- 9 -
.
u
gegen den Uhrzeigersinn, so dass es sich
lösen lässt.
e

Achtung!
Gehen Sie vorsichtig mit den Messern um. Sie
sind sehr scharf. Verletzungsgefahr!
Reinigen Sie beide Teile gründlich in milder Sei-
³
fenlauge oder in der Spülmaschine.
Setzen Sie das Plastikteil des Mixaufsatzes
³
wieder auf den Glasteil des Mixaufsatzes e.
Achten Sie darauf, dass der Dichtungsring
eingesetzt ist.
e
Motorblock reinigen
Verwenden Sie ein trockenes oder höchstens
³
leicht angefeuchtetes Tuch, um die Oberflächen
zu reinigen.
Kontrollieren Sie bei jeder Reinigung, dass der
³
Kontaktschalter in der Aufnahme für den Mixaufsatz
nicht durch Schmutzreste blockiert ist.
e
Wenn Sie eventuelle Blockierungen nicht mit der
Ecke von einem Blatt Papier lösen können, wenden
Sie sich an den Kundendienst. Verwenden Sie auf
keinen Fall einen harten Gegenstand, der Kontaktschalter könnte dadurch beschädigt werden.
Entfernen Sie eventuelle Verschmutzungen an der
³
Unterseite des Motorblocks
einem trockenen Tuch oder einem Staubpinsel.
Achten Sie darauf, dass nichts durch die Lüftungsöffnungen in das Gerät gelangt.
ausschließlich mit
u
Nach dem Reinigen
Lassen Sie alle Teile wieder gut trocknen, bevor Sie
den Standmixer wieder zusammensetzen und verwenden.
Aufbewahren
Wenn Sie den Standmixer längere Zeit nicht ver-
³
wenden, reinigen Sie ihn gründlich (siehe Kapitel
„Reinigen“).
Wickeln Sie das Netzkabel yum die Kabelauf-
³
wicklung
Bewahren Sie den Standmixer an einem kühlen,
³
trockenen Ort auf.
am Boden des Motorblocks u.
i
Entsorgen
Werfen Sie das Gerät keinesfalls in den
normalen Hausmüll. Dieses Produkt
unterliegt der europäischen Richtlinie
2012/19/EU.
Entsorgen Sie das Gerät über einen zugelassenen
Entsorgungsbetrieb oder über Ihre kommunale
Entsorgungseinrichtung.
Beachten Sie die aktuell geltenden Vorschriften.
Setzen Sie sich im Zweifelsfall mit Ihrer Entsorgungseinrichtung in Verbindung.
Führen Sie alle Verpackungsmaterialien
einer umweltgerechten Entsorgung zu.
Garantie und Service
Sie erhalten auf dieses Gerät 3 Jahre Garantie ab
Kaufdatum. Das Gerät wurde sorgfältig produziert
und vor Anlieferung gewissenhaft geprüft.
Bitte bewahren Sie den Kassenbon als Nachweis
für den Kauf auf. Bitte setzen Sie sich im Garantiefall mit Ihrer Servicestelle telefonisch in Verbindung.
Nur so kann eine kostenlose Einsendung Ihrer Ware
gewährleistet werden.
Die Garantieleistung gilt nur für Material- oder
Fabrikationsfehler, nicht aber für Transportschäden,
Verschleißteile oder für Beschädigungen an zerbrechlichen Teilen, z. B. Schalter oder Akkus. Das
Produkt ist lediglich für den privaten und nicht für
den gewerblichen Gebrauch bestimmt.
Bei missbräuchlicher und unsachgemäßer Behandlung, Gewaltanwendung und bei Eingriffen, die
nicht von unserer autorisierten Service-Niederlassung vorgenommen wurden, erlischt die Garantie.
Ihre gesetzlichen Rechte werden durch diese
Garantie nicht eingeschränkt.
- 10 -

Die Garantiezeit wird durch die Gewährleistung
nicht verlängert. Dies gilt auch für ersetzte und reparierte Teile. Eventuell schon beim Kauf vorhandene
Schäden und Mängel müssen sofort nach dem
Auspacken gemeldet werden, spätestens aber zwei
Tage nach Kaufdatum. Nach Ablauf der Garantiezeit anfallende Reparaturen sind kostenpflichtig.
Service Deutschland
Tel.: 0800 5435 111
(Kostenfrei aus dem dt. Festnetz/Mobilfunknetz)
E-Mail: kompernass@lidl.de
IAN 272905
Service Österreich
Tel.: 0820 201 222 (0,15 EUR/Min.)
E-Mail: kompernass@lidl.at
IAN 272905
Service Schweiz
Tel.: 0842 665566 (0,08 CHF/Min.,
Mobilfunk max. 0,40 CHF/Min.)
E-Mail: kompernass@lidl.ch
IAN 272905
Erreichbarkeit Hotline:
Montag bis Freitag von 8:00 Uhr - 20:00 Uhr (MEZ)
Importeur
KOMPERNASS HANDELS GMBH
BURGSTRASSE 21
44867 BOCHUM
GERMANY
www.kompernass.com
- 11 -

- 12 -

CONTENT PAGE
Introduction 14
Intended Use 14
Items supplied 14
Appliance description 14
Technical data 14
Safety Notices 15
Unpacking 17
Preparing for use 17
Operation 17
Filling and mounting the mixer jug...............................................................................................17
Selecting operating speeds...........................................................................................................17
Filling when in use..........................................................................................................................18
Removing the mixer........................................................................................................................18
Useful tips 18
Recipes 19
Banana Shake................................................................................................................................19
Vanilla Shake..................................................................................................................................19
Cappucino Shake ..........................................................................................................................19
Tropical Mix ..................................................................................................................................19
Nut-Nougat Shake.........................................................................................................................19
Carrot Shake ..................................................................................................................................19
Blackcurrant Mix............................................................................................................................19
Hawaii Shake.................................................................................................................................20
Fruity Pineapple-Strawberry Mix..................................................................................................20
Andalusian Cold Soup (Gazpacho)............................................................................................20
Cleaning 20
Cleaning the mixer .......................................................................................................................21
Cleaning the motor block..............................................................................................................22
After cleaning.................................................................................................................................22
Storage 22
Disposal 22
Warranty & Service 22
Importer 23
- 13 -

Blender
Introduction
Congratulations on the purchase of your new appliance.
You have clearly decided in favour of a quality
product. These operating instructions are a part of
this product. They contain important information in
regard to safety, use and disposal. Before using the
product, familiarise yourself with all of these operating and safety instructions. Use the product only as
described and only for the specified areas of application. In addition, pass these documents on, together
with the product, to any future owner.
Intended Use
This appliance is intended for ...
– the mixing, blending and stirring of foodstuffs
as well as the crushing of ice cubes,
– exclusively for normal domestic amounts and
only for private use in a domestic environment
in dry rooms.
This appliance is not intended for ...
– the hacking of hard foodstuffs, such as nuts,
seeds, large kernels or stalks,
– the processing of materials that are not foodstuffs,
– utilisation for commercial or industrial purposes,
– for use in moist environments or outdoors,
– processing hot/boiling liquids.
Use only the accessories and spare parts that are
specified for this appliance. Other parts are possibly
not sufficiently suitable or safe!
Items supplied
After unpacking, check to ensure all items are
available. Being supplied are:
1 x Motor block, with power cable and plug
1 x Mixer jug, with permanently assembled cutters
1 x Lid
1 x Filling cap
1 x Operating instruction
Appliance description
Filling cap
q
Cover
w
Mixer jug
e
Cutter
r
Switch
t
Power cable
y
Motor block
u
Cable storage
i
Scale
o
Technical data
Nominal voltage: 220 - 240 V ~, 50 Hz
Nominal power
consumption: 550 Watt
Max. capacity: 1.75 l
Protection class: II
CO time: 3 Minutes
The C.O. Time (Continuous Operation) details how
long an appliance may be used without the motor
overheating and being damaged. When the specified
C.O. Time has been reached, the appliance must be
switched off until the motor has cooled itself down.
- 14 -

Safety Notices
To avoid the risk of a potentially fatal electric shock:
• Ensure that the motor block, the power cable and the power plug are never sub-
mersed in water or other fluids.
• Only use the appliance in dry rooms, never use it outdoors or in moist environ-
ments.
• Make sure that the power cable never becomes wet or damp during opera-
tion. Lay the cable such that it does not get clamped or otherwise damaged.
• Arrange for defective power plugs and/or cables to be replaced at once by
qualified technicians or our Customer Service Department.
• Always remove the plug from the power socket after use. Switching off the ap-
pliance is not sufficient because the appliance receives power as long as the
power plug is connected to the socket.
• Check to ensure that the appliance is in a service-able condition before taking it
into use. The appliance may not be used if there is recognisable damage on it,
especially to the motor block and the glass mixing jug.
• Immediately remove the plug from the socket should you hear or smell any-
thing unexpected from the appliance when it is in use or there is
an evident malfunction.
To avoid overheating and the risk of fire:
• Do not use the appliance in locations with direct sunlight or in the vicinity of
heat generating appliances.
• NEVER fill the mixing jug with boiling fluids or other foods!
Allow these to cool to a handwarm temperature. Otherwise, the appliance
could overheat and/ or the glass of the mixing jug could crack!
• NEVER operate the appliance when it is empty, i.e. without ingredients in the
mixing attachment.
- 15 -

To reduce the risk of fire or injury:
• NEVER insert your hand or fingers in the mixing jug, especially when it is in
use. The cutters are extremely sharp!
• DO NOT open the cover when the appliance is in operation. Should you do
so, pieces of the foodstuff could be thrown out at high speeds!
• Do not insert cutlery items or mixing tools into the mixing jug when the appliance
is in use. There is a considerable risk of injury should these make contact with
the swiftly rotating cutters!
• In order to be able to react immediately in the event of danger, always have
the appliance under supervision when it is in use.
• Children should be supervised to ensure that they do not play with the appliance.
• Never use the appliance for purposes other than those described in these
instructions.
• The appliance should always be disconnected from the mains when not super-
vised and before assembly, disassembly or cleaning.
• This appliance shall not be used by children.
• The appliance and its connecting cable must be kept away from children.
• This appliance may be used by people with reduced physical, sensory or men-
tal capabilities or lack of experience and/or knowledge if they are supervised
and have been instructed in how to use the appliance safely and have under-
stood the potential risks.
• Children must not play with the appliance.
• Be careful when handling the appliance. The blades are very sharp!
• Take care when emptying the blender jug! The blades are very sharp!
• Take care when cleaning the appliance! The blades are very sharp!
• Switch the appliance off and disconnect the plug from the power supply before
changing accessories or getting hold of parts that move during operation.
• Use the mixer jug only with the supplied motor block!
• Always make sure that the blender is switched off before removing the mixer
jug from the motor block!
- 16 -

Unpacking
Operation
• Remove all packaging materials or protective fo-
ils from the appliance. Retain the packaging, so
that you can store the appliance with protection
or send it by post, e.g. should it need repair.
• Before taking the appliance into use, check to
ensure that it is free of damage, check also that
the power cable and plug as well as all accesso-
ries and appliance parts are undamaged.
• Carefully clean all components before
taking the appliance into use for the first time
(see “Cleaning”).
Preparing for use
When all components have been cleaned as described
under “Cleaning”:
Position the appliance such that, ...
³
– that the power cable
cess at the rear of the appliance,
– the power plug is immediately accessible, so that
it can be quickly withdrawn in the event of danger,
– that it is stable and not liable to slip, and such
that the suction cups find a firm hold so that the
appliance cannot tip over due to vibration,
– that the power cable
area and thus not presenting a risk of being inad-
vertently snagged and tipping the appliance
over.
passes through the re-
y
is not in the working
y
Warning!
The motor switches itself off as soon as the mixer
jug
is removed from the motor block u. It could
e
then be overlooked that the appliance is still switched on. The motor will thus start of its own accord
as soon as the mixer jug
Therefore:
• First insert the power plug into the wall socket
when the mixer jug
its lid fitted and closed.
• Before mounting the mixing jug always check to
see that the appliance is switched off or that the
power plug has been removed.
• Before removing the mixer jug
pliance off, remove the power plug and wait for
the motor to stop revolving.
is replaced on it:
e
is filled and mounted with
e
, switch the ap-
e
Filling and mounting the mixer jug
Take the mixer jug efrom the motor block
³
and remove the cover w.
Fill the mixer jug eand then press the cover
³
firmly back onto the mixer jug e. Ensure that the
pourer nose on the mixer jug
Insert the filling cap qinto the lid opening and
³
secure it by turning it clockwise.
Place the ready filled and sealed mixer jug
³
onto the motor block u. Lightly turn the mixer
jug
until you can press it down. The motor
e
can start only when the mixer jug
positioned.
is also closed.
e
e
u
w
e
is securely
Selecting operating speeds
When the mixer jug eis filled, completely sealed
and securely fitted to the motor block
then switch the appliance on.
- 17 -
u
, you can

Place the switch ton ...
³
– Level 1 - 3
for fluid or soft foodstuffs, for mixing, blending
and stirring
– Level 3 - 5
for firmer foodstuffs or for hacking
– Level Ice Crush/Clean
for short, powerful impulse operation, e.g. for
crushing icecubes or when cleaning. So as not
to overburden the motor, the switch
engage in this position. Hence, hold the switch
in this position for short periods only.
t
does not
t
Note
Fill the mixer jug ewith a maximum of 180 g of
ice cubes. If filled with more than this, the appliance
cannot optimally crush them.
Filling when in use
Warning!
Should you wish to insert further foodstuffs during
operation, you may ONLY open the filling cap
provided for this purpose.
• Under no circumstance should you open the cover w. Pieces of the foodstuff could be thrown
out at high speeds!
• Do not insert cutlery items or mixing tools into
the mixer jug
There is a considerable risk of injury should these
make contact with the swiftly rotating cutters
when the apliance is in use.
e
q
r
Removing the mixer
When the processing of the foodstuffs is complete:
Always first place the switch tinto the OFF
³
position ("OFF") and remove the power plug.
Wait until the motor has come to a complete
³
standstill before lifting the mixer jug
up. The mixer jug
does not need to be turned.
e
Useful tips
– The best results when blending firm ingredients
are achieved by placing small portions one after
the other into the mixer jug
ting a single large portion.
– When processing firm ingredients, cut them into
small pieces (2-3 cm).
– When mixing liquid ingredients begin first of all
with a small measure of fluids. Gradually add
more fluids to the mixture through the filling cap.
– The appliance can be stabilised by placing your
hand on top of the closed liquidiser during operation.
– For the stirring of firm or very viscous foodstuffs
it can be beneficial to use the impulse-operation,
which helps avoid a blocking of the cutters
Note
Do not use the appliance to crush grains of cooking
salt, refined sugar or white sugar. For example, to
make powdered sugar.
!
instead of inser-
e
e
straight
r
.
To insert something when the appliance is in
operation, ...
turn the filling cap qanti-clockwise and remove it.
³
Fill in the ingredients.
³
Afterwards, replace the filling cap qinto the lid
³
and secure it by turning it clockwise.
- 18 -

Recipes
Banana Shake
2 Bananas
approx. 2 Tbsp. Sugar (depending on the ripeness
of the bananas and personal taste)
1/2 l. Milk
1 Dash of lemon juice
Peel the bananas and liquidise them with Level 2.
First gradually add the milk, then the sugar and
lemon juice. Continue mixing everything until a
smooth and uniform liquid results.
Serve the shake chilled.
Vanilla Shake
1/4 l. milk
250 g Vanilla ice cream
125 ml Icecubes
1 1/2 Tsp Sugar
Crush the ice cubes with the level Ice Crush/Clean.
Place the remaining ingredients into the mixer.
Mix everything at Level 2 until the liquid has a
smooth consistency
Cappucino Shake
65 ml cold Espresso (or a very strong coffee)
65 ml Milk
15 g Sugar
65 ml Vanilla ice cream
100 ml crushed Icecubes
Crush the ice cubes with the level Ice Crush/Clean.
Add the espresso, milk and sugar. Mix everything
together with level 2 until the sugar has dissolved.
Finally, add the vanilla ice cream and then briefly
mix everything together using level 1.
Tropical Mix
125 ml Pineapple juice
60 ml Papaya juice
50 ml Orange juice
1/2 small tin of Peaches with juice
125 ml Icecubes
Crush the ice cubes with the level Ice Crush/Clean.
Place all ingredients into the mixer and blend them
together using level 3.
Nut-Nougat Shake
1/2 l. Milk
200 g Nut-Nougat spread
1 ball of Vanilla ice cream
50 ml cream
Combine all ingredients in a mixer and use level 3
until everything is evenly blended together.
Carrot Shake
300 ml Apple juice
500 ml Carrot juice
4 Tbsp Cooking oil (Wheat germ oil or rapeseed oil)
4 Tbsp of Lemon juice
Ginger powder
Pepper
Place the apple juice, cooking oil and lemon juice
into the mixer and blend everything together using
level 2. Then, add the carrot juice and mix it all together using level 2. To finish, add the ginger powder and pepper to taste.
Blackcurrant Mix
2 Tsp Honey
2 Bananas
1/4 l. Buttermilk
1/4 l. Blackcurrant juice
Place all ingredients into the mixer and blend them
together using level 3.
- 19 -

Hawaii Shake
4 Bananas
1/4 l. Pineapple juice
1/2 l. Milk
2 tbsp. Honey
1/4 l. Rum
Peel the bananas and liquidise them using Level 2.
Then add the other ingredients and mix everything
together using level 1.
Fruity Pineapple-Strawberry Mix
250 ml Pineapple juice
200 g Strawberries
300 ml Apple juice
4 Ice cubes
Crush the ice cubes with the level Ice Crush/Clean.
Wash the strawberries and remove the green parts.
Liquidise them using level 2. Then add the remaining
ingredients and mix everything together using level 1.
Andalusian Cold Soup (Gazpacho)
1/2 Cucumber
1 Beef tomato
1 Green pepper
1/2 Onion
1 Garlic clove
1/2 White bread roll
1/2 Tsp Salt
1 Tsp Red wine vinegar
1 Tbsp Olive oil
Cut the vegetables into pieces approx. 2 cm
in size. First place the tomatoes and then the cucumber into the mixer. Liquidise them using level 3.
Add the remaining ingredients and then liquidise/
blend them all together at level 3 until a smooth
soup is created.
Serve the soup with bread.
Note
These recipes are provided subject to change. All
ingredients and preparation information are guiding
values. Expand these recipe suggestions based on
your personal experiences.
Note
For cases of lactose intolerance, we recommend
you use a lactose-free milk. Keep in mind, however,
that lactose-free milk is a little sweeter.
Cleaning
Caution!
Before starting to clean the liquidiser and its
components:
• Ensure that the motor is switched off and the
power plug removed from the socket.
Under no circumstance may the motor block
be submersed in water or other fluids.This
could result in you receiving a fatal electric
shock and the appliance could be damaged.
• Never open the housing of the appliance. This
brings with it the risk of receiving a fatal electric
shock.
• Never disassemble the cutters
ach into the mixer jug
tremely sharp!
• Do not use solvents or abrasive cleaners on the
plastic surfaces, they could be damaged by them.
e
and never re-
r
. The cutters rare ex-
u
- 20 -

Cleaning the mixer
So that you do not injure yourself on the cut-
³
ters
, clean the mixer jug eonly with a long
r
handled dishwasher brush.
In a case of stubborn soiling, the mixer jug
³
can also be cleaned in a dishwasher. For this,
always take the mixer jug
described later.
Clean the cover wand the filling cap qin a
³
dishwasher or with the normal washing up.
If you clean the liquidiser directly after use, you can
often achieve a satisfactory and hygienic level of
cleaning with the following alternative:
If you clean the liquidiser directly after use, you can
often achieve a satisfactory and hygienic level of
cleaning with the following alternative:
Fill the mixer jug ewith 750 ml of water and
³
add a few drops of mild detergent. Close the
cover
block
Insert the plug into a mains power socket and
activate the Ice Crush/Clean operation a few times, such that the cutter
water at full speed.
Afterwards, rinse the mixer jug
clean water to ensure that all detergent residues
have been removed.
and fit the mixer jug eonto the motor
w
.
u
apart, as
e
ploughs through the
r
out with lots of
e
e
Should this not dislodge the soiling, you can separate
the lower plastic part of the mixer jug
ters
) from the the glass part of the mixer jug e:
r
(with the cut-
e
Glass element
Sealing ring
Cutting blade
Plastic element
Remove the mixer jug efrom the motor block u.
³
Turn the plastic element of the mixer jug
³
anti-clockwise, such that it allows itself to be released from the glass element of the mixer jug
- 21 -
e
e
.

Attention!
Take care with the cutting blades . They are very
sharp. Risk of injury!
Clean both parts thoroughly in a mild soapy
³
solution or in a dishwasher.
Replace the plastic element of the mixer jug
³
back onto the glass element . Ensure that the
sealing ring is correctly fitted.
e
Cleaning the motor block
Use a dry cloth or, at the most, a lightly moistened
³
one for cleaning the plastic surfaces.
At every cleaning check that the contact switch
³
in the receptor for the mixer jug
ked by soiling residues. If you cannot dislodge
any blockages with the corner of a piece of paper, make contact with Customer Services. Under no circumstances should you use a hard object, this could damage the contact switch.
Remove any possible residues on the underside
³
of the motor block
stiff bristled brush. Ensure that nothing can enter
through the ventilation opening of the appliance.
only with a dry cloth or a
u
is not blok-
e
After cleaning
Allow all parts to dry well before re-assembling and
re-using the liquidiser.
Storage
If you do not intend to use the liquidiser for an
³
extended period, clean it thoroughly (see chapter
"Cleaning").
Wrap the power cable yaround the cable sto-
³
rage
on the base of the motor block u.
i
Store the liquidiser at a cool and dry location.
³
Disposal
Do not dispose of the appliance in your
normal domestic waste. This product is
subject to the European guideline
2012/19/EU.
Dispose of the appliance through an approved disposal centre or at your community waste facility.
Observe the currently applicable regulations.
In case of doubt, please contact your waste disposal
centre.
Dispose of all packaging materials in an
environmentally responsible manner.
Warranty & Service
The warranty for this appliance is for 3 years from
the date of purchase. The appliance has been manufactured with care and meticulously examined before delivery.
Please retain your receipt as proof of purchase. In
the event of a warranty claim, please make contact
by telephone with our Service Department. Only in
this way can a post-free despatch for your goods be
assured.
The warranty covers only claims for material and
maufacturing defects, but not for transport damage,
for wearing parts or for damage to fragile components, e.g. buttons or batteries. This product is for private use only and is not intended for commercial use.
The warranty is void in the case of abusive and improper handling, use of force and internal tampering
not carried out by our authorized service branch.
Your statutory rights are not restricted in any way by
this warranty.
- 22 -

The warranty period will not be extended by repairs
made under warranty. This applies also to replaced
and repaired parts. Any damage and defects extant
on purchase must be reported immediately after unpacking the appliance, at the latest, two days after
the purchase date. Repairs made after the expiration of the warranty period are subject to payment.
Service Great Brita
Tel.: 0871 5000 720 (£ 0.10/Min.)
E-Mail: kompernass@lidl.co.uk
IAN 272905
Hotline availability:
Monday to Friday 08:00 - 20:00 (CET)
Importer
KOMPERNASS HANDELS GMBH
BURGSTRASSE 21
44867 BOCHUM
GERMANY
www.kompernass.com
- 23 -

KOMPERNASS HANDELS GMBH
BURGSTRASSE 21
44867 BOCHUM
DEUTSCHLAND / GERMANY
www.kompernass.com
Stand der Informationen · Last Information Update:
06 / 2015 · Ident.-No.: SSM550D1-032015-1
IAN 272905
1
 Loading...