

Page 1
PASTA MAKER SPM 200 A1
PASTA MAKER
Operating instructions
TÉSZTAKÉSZÍTŐ
Kezelési útmutató
PŘÍSTROJ NA VÝROBU TĚSTOVIN
Návod k obsluze
MASZYNA DO MAKARONU
Instrukcja obsługi
APARAT ZA TESTENINE
Navodilo za uporabo
PRÍSTROJ NA PRÍPRAVU CESTOVÍN
Návod na obsluhu
PASTA-MAKER
Bedienungsanleitung
IAN 89212
RP89212_Pasta maker_Cover_LB4.indd 2 03.04.13 14:51
Page 2
RP89212 Pasta Maker LB4 Seite 1 Mittwoch, 29. Mai 2013 3:58 15
English . . . . . . . . . . . . . . . . . . . . . . . . . . . . . . . . . . . . . . . . . . 3
Be sure to note the fold-out page.
Polski . . . . . . . . . . . . . . . . . . . . . . . . . . . . . . . . . . . . . . . . . 18
Proszę zwrócić uwagę na informacje umieszczone na wewnętrznej stronie okładki
Magyar . . . . . . . . . . . . . . . . . . . . . . . . . . . . . . . . . . . . . . . . 34
Kérjük, figyeljen a kinyitható oldalra
Slovensko . . . . . . . . . . . . . . . . . . . . . . . . . . . . . . . . . . . . . . 50
Prosimo, upoštevajte tekst na zavihani strani.
Česky . . . . . . . . . . . . . . . . . . . . . . . . . . . . . . . . . . . . . . . . . 64
Povšimněte si vyklápěcí strany
Slovensky . . . . . . . . . . . . . . . . . . . . . . . . . . . . . . . . . . . . . . 78
Prosím, všimnite si vyklápaciu stranu.
Deutsch . . . . . . . . . . . . . . . . . . . . . . . . . . . . . . . . . . . . . . . . 94
Bitte beachten Sie die Ausklappseite
SPM200A1_13_V1.10_GB_PL_HU_SI_CZ_SK_DE
Page 3
RP89212 Pasta Maker LB4 Seite 1 Mittwoch, 29. Mai 2013 3:58 15
1
2
3
4
5
6
7
13 12
22
21
11
14
10
20
15
19
98
16
18
17
Page 4

RP89212 Pasta Maker LB4 Seite 2 Mittwoch, 29. Mai 2013 3:58 15
Page 5
RP89212 Pasta Maker LB4 Seite 3 Mittwoch, 29. Mai 2013 3:58 15
Contents
1. Device description . . . . . . . . . . . . . . . . . . . . . . . . . . . . . . . . . . . . . . . . . . . . . . . . . . . . . . . 3
2. Names of parts (see fold-out page). . . . . . . . . . . . . . . . . . . . . . . . . . . . . . . . . . . . . . . . . . . 4
3. Technical data . . . . . . . . . . . . . . . . . . . . . . . . . . . . . . . . . . . . . . . . . . . . . . . . . . . . . . . . . . 4
4. Safety information . . . . . . . . . . . . . . . . . . . . . . . . . . . . . . . . . . . . . . . . . . . . . . . . . . . . . . 4
5. Unpacking and setting up. . . . . . . . . . . . . . . . . . . . . . . . . . . . . . . . . . . . . . . . . . . . . . . . . . 7
6. Dismantle and assemble appliance . . . . . . . . . . . . . . . . . . . . . . . . . . . . . . . . . . . . . . . . . . . 7
7. Make pasta. . . . . . . . . . . . . . . . . . . . . . . . . . . . . . . . . . . . . . . . . . . . . . . . . . . . . . . . . . . . 9
8. Pasta recipes . . . . . . . . . . . . . . . . . . . . . . . . . . . . . . . . . . . . . . . . . . . . . . . . . . . . . . . . . 10
9. Recipes for pasta sauces . . . . . . . . . . . . . . . . . . . . . . . . . . . . . . . . . . . . . . . . . . . . . . . . . 12
10. Cleaning the appliance. . . . . . . . . . . . . . . . . . . . . . . . . . . . . . . . . . . . . . . . . . . . . . . . . . . 14
11. Disposal . . . . . . . . . . . . . . . . . . . . . . . . . . . . . . . . . . . . . . . . . . . . . . . . . . . . . . . . . . . . . 15
12. HOYER Handel GmbH Warranty. . . . . . . . . . . . . . . . . . . . . . . . . . . . . . . . . . . . . . . . . . . . 15
Service Centre . . . . . . . . . . . . . . . . . . . . . . . . . . . . . . . . . . . . . . . . . . . . . . . . 17
Supplier. . . . . . . . . . . . . . . . . . . . . . . . . . . . . . . . . . . . . . . . . . . . . . . . . . . . . . 17
Congratulations on the purchase of
your new product.
You have selected a high-quality product.
The operating instructions are a constituent
part of this product. They contain important
information about safety, use and disposal.
Familiarize yourself with all the operating
and safety instructions before using the
product. Use the product only as described
and for the stated spheres of application.
If you pass the product on to a third party,
always pass on all the documentation as
well.
1. Device description
1.1 Intended purpose
The SilverCrest SPM200A1pasta machine
is for making fresh pasta and piped biscuits.
This appliance should only be used in dry
rooms. It must not be used out in the open or
in humid rooms.
This appliance is intended for use in private
households and is not suitable for
commercial purposes.
The appliance is likewise suitable for:
SPM200A1 3
• use in staff kitchens in shops, offices and
other commercial areas,
• use in agricultural settings,
• customers in hotels, motels and other
accommodations,
• bed-and-breakfast establishments.
1.2 Scope of supply
• 1 pasta machine with kneader and
screw
Page 6
RP89212 Pasta Maker LB4 Seite 4 Mittwoch, 29. Mai 2013 3:58 15
•1 screwing tool
• 1 cleaning brush
• 1 dough scraper
• 5 attachments for different kinds of
pasta
• 1 attachment for piped biscuits
• 1 copy of the operating instructions
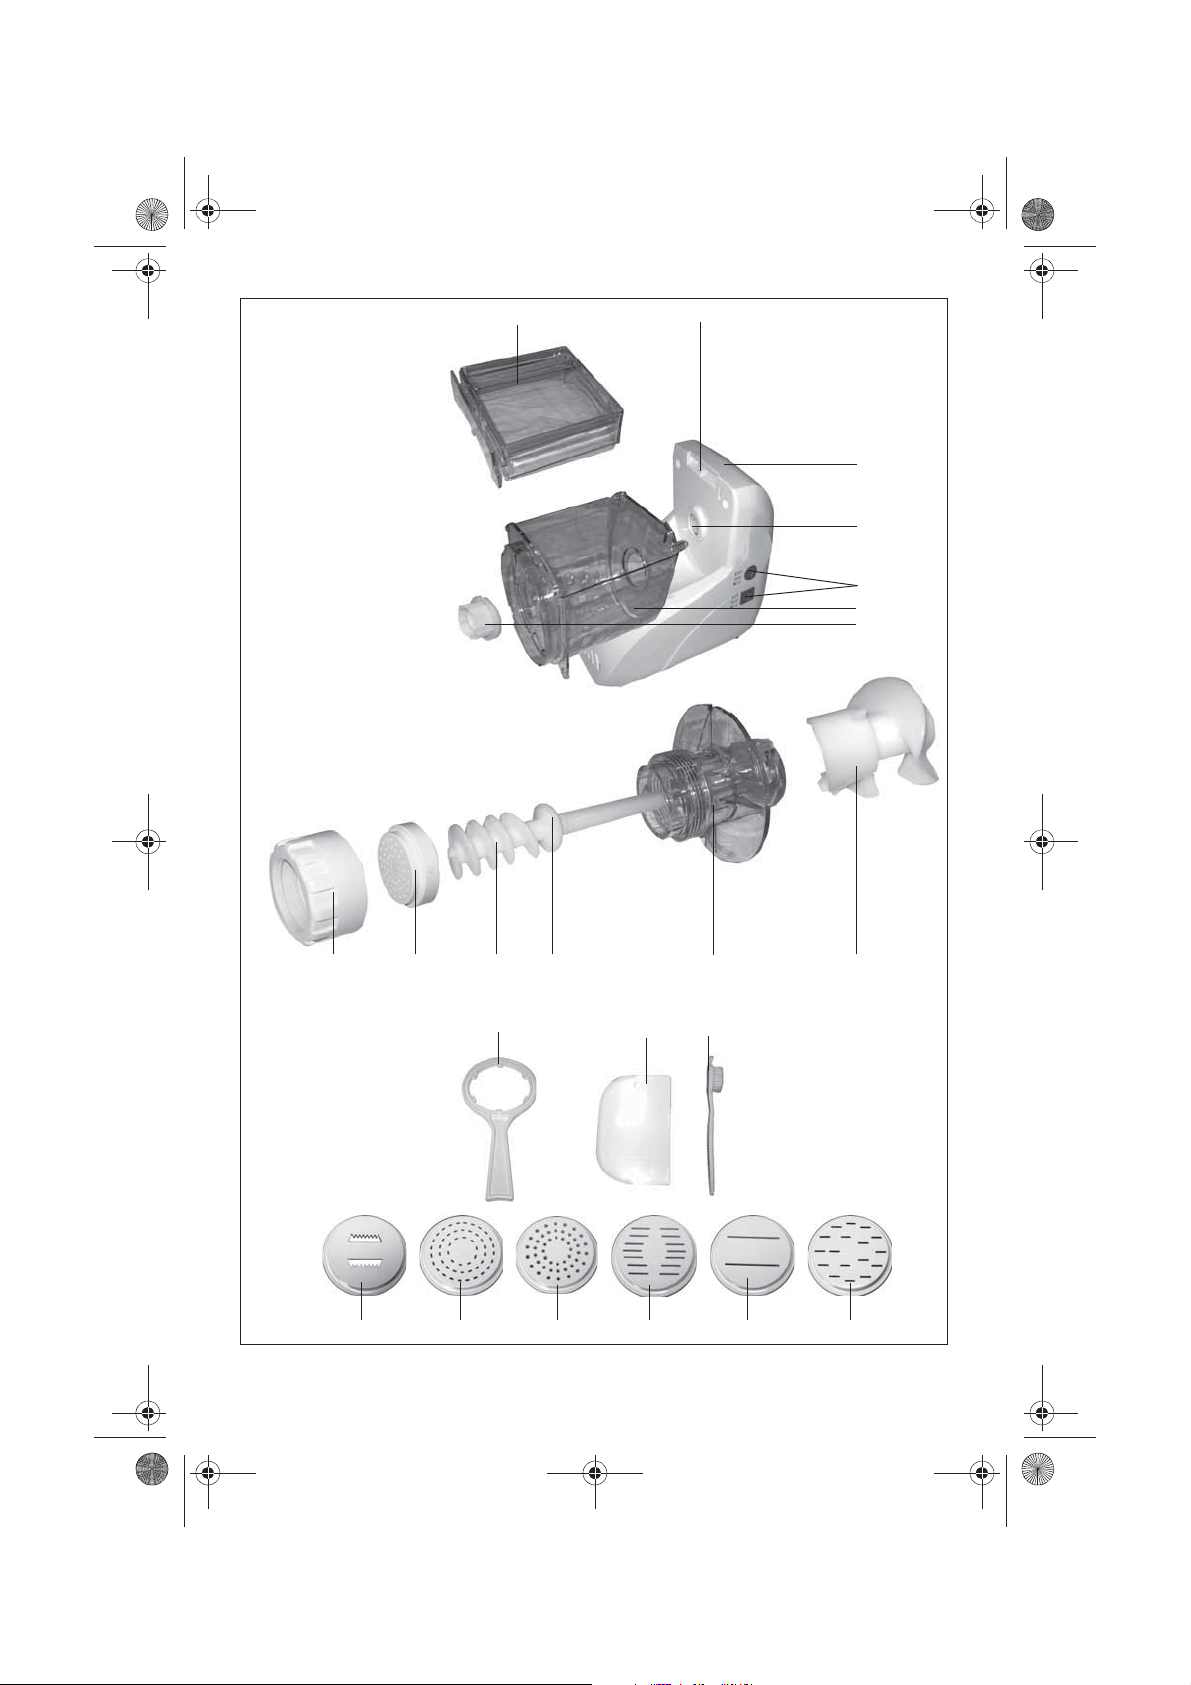
2. Names of parts (see fold-out page)
1 Lid
2 Lid locator
3 Motor housing
4 Motor shaft
5 Switches: both switches must be in the
same position
6 Dough compartment
7 Toothed sleeve
8 Kneader
9 Screw housing
10 Screw ring
11 Screw
12 Attachment for pasta (any of
attachments 17 to 22 as an option)
13 Screw ring
14 Screwing tool
15 Dough scraper
16 Cleaning brush
17 Tagliatelle attachment
18 Pappardelle attachment
19 Fettucine attachment
20 Spaghetti attachment
21 Linguine attachment
22 Piped biscuit attachment
3. Technical data
Power supply: 220 - 240 V~ / 50/60 Hz
Output: 200 watts
Protection class: II
4. Safety information
4.1 Explanation of terms
The following keywords are used in these
user instructions:
Warning!
High risk: ignoring this warning
could result in a risk to life and
limb.
Caution!
Medium risk: ignoring this warning may
result in damage.
Note:
Low risk: points to be noted when handling
the appliance.
4
Page 7
RP89212 Pasta Maker LB4 Seite 5 Mittwoch, 29. Mai 2013 3:58 15
4.2 Special information about
this appliance
Warning!
age, please observe the following
information.
• This appliance can be used by children
aged from 8 years and above and persons
with reduced physical, sensory or mental
capabilities or lack of experience and
knowledge if they have been given supervision or instruction concerning use of the
appliance in a safe way and understand the
hazards involved. Children shall not play
with the appliance.
• Cleaning and user maintenance shall not be
made by children unless they are older than
8 and supervised.
• Keep the appliance and its cord out of
reach of children less than 8 years.
• The appliance must not be operated with an
external timer or separate remote control
system such as a remote control socket.
• Always remove the power supply plug from
the mains socket before starting to clean the
appliance.
• Never immerse motor housing
• Never use abrasive, corrosive or scratching
cleaning materials. They could damage the
appliance.
4.3 General information
• Please read these user instructions
carefully before use. They are a
constituent part of the appliance and
must be kept to hand at all times.
• Use the appliance only for the purpose
described (see “1.1 Intended purpose”
on page 3).
To avoid injury or dam-
3
in water.
• To prevent damage, check that the
mains voltage required (see type plate
on the appliance) is compatible with
your mains voltage.
• Please note that any claim under the
warranty or for liability will be invalid if
accessories are used that are not
recommended in these user instructions,
or if original spare parts are not used for
repairs. This also applies to repairs
undertaken by unqualified persons. You
will find the service address in “Service
Centre” on page 17.
• If the appliance should develop a fault
during the warranty period, it may only
be repaired by our Service Centre.
Otherwise all claims under warranty are
null and void. You will find the service
address in “Service Centre” on
page 17.
4.4 Protection against electric shock
Warning! The following safety
information is intended to protect
you against electric shock.
• The appliance must not under any
circumstances be used if it is damaged.
Have the device repaired in such cases
by a qualified specialist. The contact
data can be found in “Service Centre”
on page 17.
• If the mains cable for this appliance is
damaged, it must be replaced by the
manufacturer or a person with similar
qualifications in order to avoid a
hazard.
• Under no circumstances may water or
other liquids penetrate motor housing 3.
For this reason:
– never use it outdoors
– never immerse motor housing 3 in
water
SPM200A1 5
Page 8
RP89212 Pasta Maker LB4 Seite 6 Mittwoch, 29. Mai 2013 3:58 15
– never place containers filled with
liquid, such as drinking glasses, vases
etc. on the appliance
– never use in very humid environments
– never use in the immediate vicinity of a
kitchen sink, bath, shower or a
swimming pool, as water may splash
into the appliance.
If liquid should enter the appliance,
unplug the mains plug immediately and
have the appliance repaired by a
qualified technician. The contact data
can be found in “Service Centre” on
page 17.
• Never touch the appliance, the mains
cable or the mains plug with wet hands.
• Always unplug it by pulling out the plug,
never pull on the cable itself.
• Ensure that the mains cable is not kinked,
twisted or crushed.
• Keep the mains cable away from hot
surfaces, such as the top of a stove.
• If you are not going to use the appliance
for a while, remove the plug from the
wall socket. Only then is the appliance
completely free of current.
• Avoid using extension cables. These
may only be used under very specific
conditions:
– the extension cable must be able to
handle the amount of current drawn
by the appliance,
– the extension cable must not be
"suspended". Keep children away
from it and ensure that it does not
present a trip hazard,
– under no circumstances use a
damaged extension cable,
– do not connect any other appliances
to the mains socket, since it could
cause an overload (do not use
multiple sockets of any kind).
4.5 Preventing injury
Warning! To prevent injury,
please observe the following
information.
• Make sure that the power cord never
becomes a trip hazard, that no-one can
get tangled in it or tread on it.
• During operation, avoid contact with the
moving parts of the appliance such as
kneader 8 or screw 11. Your hands or
hair could be dragged into the appliance, leading to injuries. Only switch on
the appliance if lid 1 is in the correct
position.
• Before any cleaning operation and
whenever you are dismantling the
appliance, take the plug out of the
socket.
4.6 For the safety of your child
Warning! Children are often
unaware of danger and are injured
as a result. Please note therefore:
• Only allow children to use this appliance
under the supervision of an adult.
• Ensure the appliance is always kept out
of the reach of children.
• Ensure that children cannot pull the
appliance down onto themselves with
the mains cable.
• Ensure that the packing foil does not
become a deadly trap for a child.
Packing foils are not toys.
6
Page 9
RP89212 Pasta Maker LB4 Seite 7 Mittwoch, 29. Mai 2013 3:58 15
4.7 Material damage
Caution! Follow the instructions below to
prevent material damage.
• Only place the appliance on a level,
dry, non-slip surface so that the
appliance can neither fall over nor slide
off.
5. Unpacking and setting up
1. Remove the individual parts from the
packaging.
2. Check that the individual parts are
complete (see “1.2 Scope of supply” on
page 3) and are undamaged.
3. Clean the appliance thoroughly before
using it for the first time (see
“10. Cleaning the appliance” on
page 14).
6. Dismantle and assemble appliance
• Do not place the appliance on a hot
cooking ring.
• Do not use any hot liquids.
• The appliance and accessories may not
be put in a microwave oven.
4. Place the appliance on a level, dry, nonslip surface so that the appliance can
neither fall over nor slide off.
5. Reassemble the appliance (see
“6.2 Assemble appliance” on page 8).
6. Switch both switches 5 to "OFF".
7. Put the plug in a suitable socket (see
“3. Technical data” on page 4).
The appliance is now ready to use.
Warning! To prevent the risk of an
electric shock, injury or damage:
– take the plug out of the socket
before any cleaning operation
and before you dismantle or
reassemble the appliance.
6.1 Dismantle appliance
1. Switch both switches 5 to "OFF".
Note: For safety reasons, this
appliance has 2 switches, both of which
always have to be switched to activate
the desired function. If both switches are
in different positions, the appliance
remains switched off. This prevents an
inadvertent malfunction.
SPM200A1 7
2. Ensure that lid 1 is correctly located,
otherwise screw housing 9 might fall out
when screw ring 13 is undone.
3. Undo screw ring 13.
Note: If screw ring 13 is too tight, use
screwing tool 14 to undo screw ring 13.
If screw ring 13 is too hard to undo even
with screwing tool 14, run the device on
"MIX" for 10 to 20 seconds and this
will loosen the screw ring a little. Take
the plug back out of the socket before
unscrewing.
4. Remove attachment 12.
5. Take off lid 1.
Page 10
RP89212 Pasta Maker LB4 Seite 8 Mittwoch, 29. Mai 2013 3:58 15
Note: There are two lugs on the front
edge of the lid. Pull these forward
slightly, lifting lid 1 as you do so, lift it up
and then take it off.
6. Turn screw housing 9 anticlockwise and
remove it.
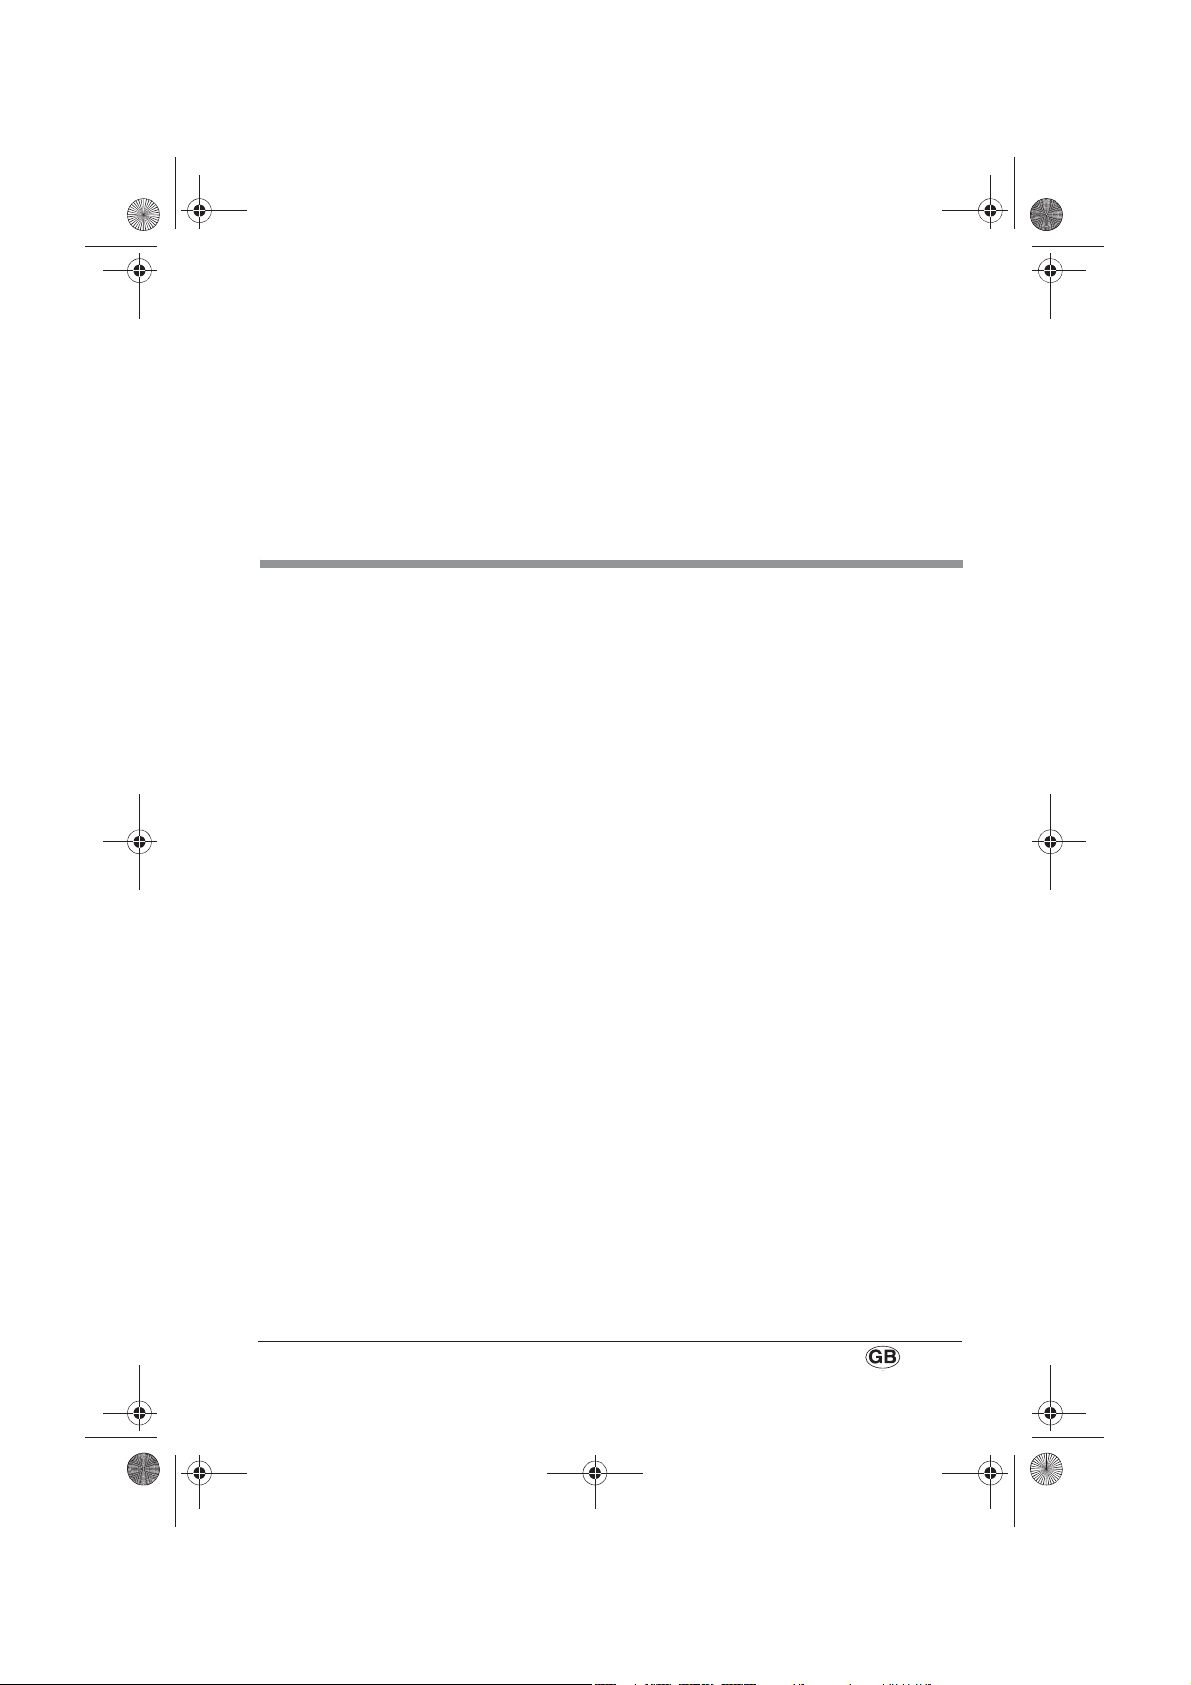
7. Re mo ve s cr ew 11 from screw housing 9.
8. Take screw ring 10 off
screw 11.
9. Take kneader 8 out of dough
compartment 6.
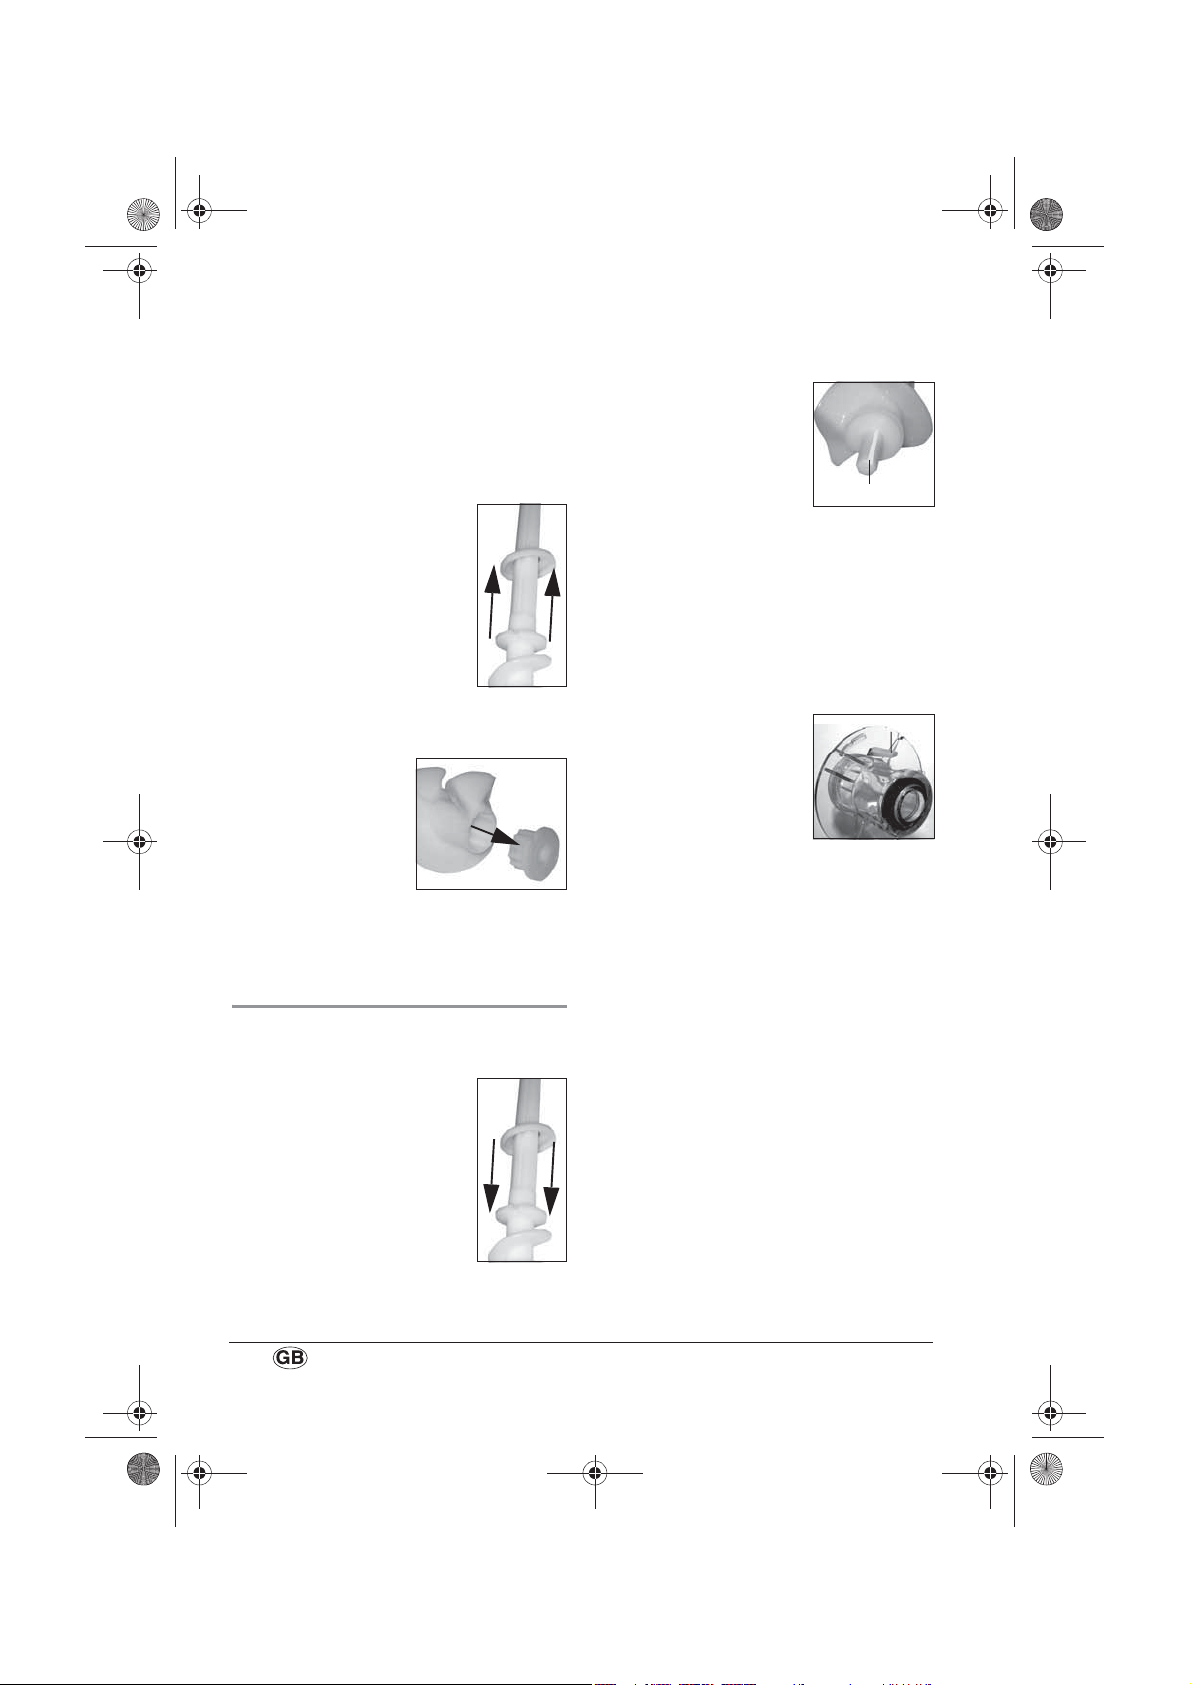
10.Take toothed
sleeve 7 off
kneader 8.
11.Take dough compartment 6 off motor
housing 3.
6.2 Assemble appliance
1. Put dough compartment 6 in motor
housing 3.
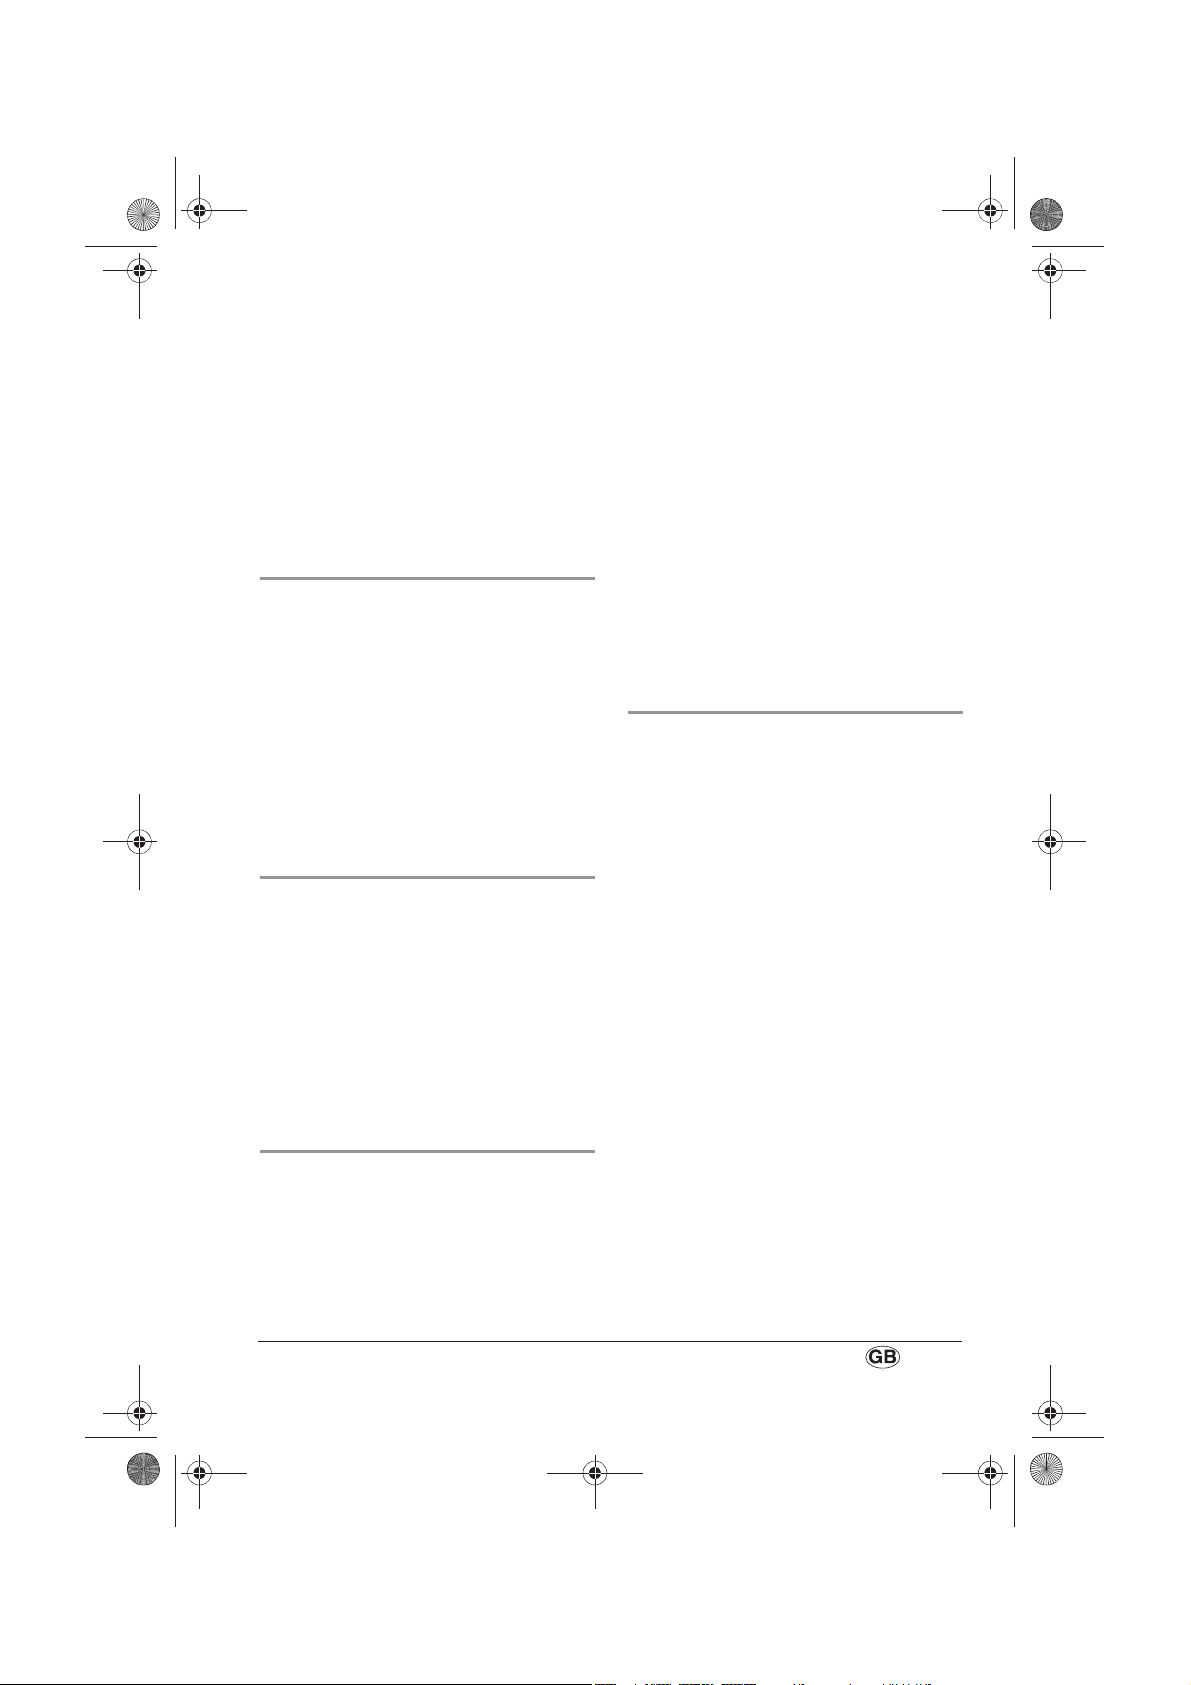
2. Push screw ring 10 onto
screw 11. Make sure that
the screw ring engages
correctly.
4. Push kneader 8 onto the shaft of
screw 11.
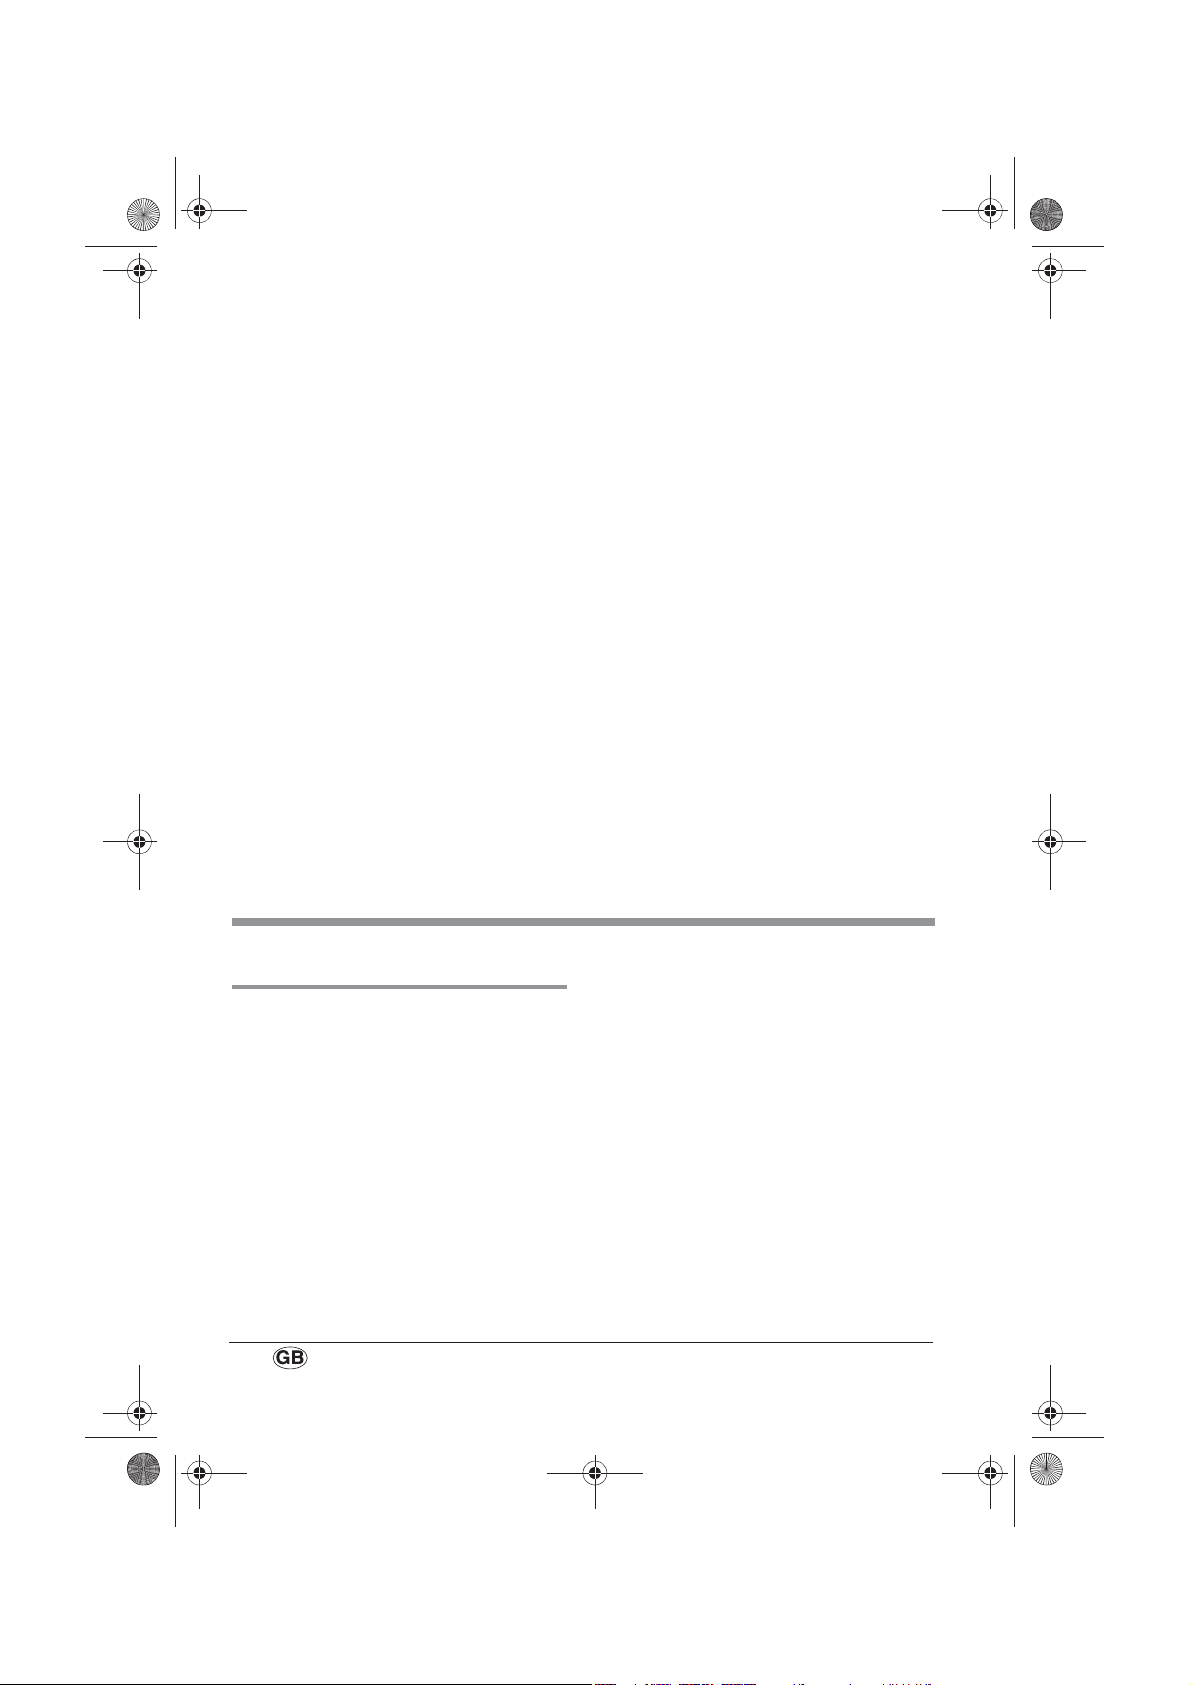
Note: The shaft of
screw 11 has a notch, A,
with the result that
kneader 8 only fits in one
position.
A
5. Push toothed sleeve 7 onto the shaft of
screw 11.
Note: The shaft of screw 11 has a
notch, with the result that toothed
sleeve 7 only fits in one position.
6. Push screw housing 9 assembled with
screw 11 and kneader 8 into dough
compartment 6.
Note: On the inside of
B
screw housing 9 is an
extension B which has to
face upwards when put in
so that screw housing 9
can be latched correctly.
7. Pus h sc rew ho usi ng 9 gently against
dough compartment 6 and latch it by
turning it clockwise until it engages.
8. Check that dough compartment 6 is
correctly located in motor housing 3.
9. Hold lid 1 at an angle and guide it into
lid locator 2 .
10.Push lid 1 down until it is correctly
located on dough compartment 6 and
audibly engages.
Note:
The safety switch which allows
the appliance to operate is activated
only if the lid is correctly engaged.
3. Put screw 11 in screw housing 9.
8
Page 11
RP89212 Pasta Maker LB4 Seite 9 Mittwoch, 29. Mai 2013 3:58 15
11.Take one of the inserts 17 to 22 and
use screw ring 13 to help screw it onto
screw housing 9.
Note: It is sufficient to screw up the
screw ring hand-tight. Screwing tool 14
is not required for this.
The appliance is now ready to use.
7. Make pasta
1. Select the appropriate attachment 12:
17tagliatelle attachment
18pappardelle attachment
19fettucine attachment
20spaghetti attachment
21linguine attachment
22piped biscuit attachment
2. Place desired attachment (17 to 22) in
hot water for about a minute.
3. Screw desired attachment (17 to 22)
onto screw housing 9 with the aid of
screw ring 13 (see “6. Dismantle and
assemble appliance” on page 7).
4. Take off lid 1.
Note: There are two lugs on the front
edge of the lid. Pull these forward
slightly, lifting lid 1 as you do so, lift it up
and then take it off.
5. Pour the desired quantity of flour into
dough compartment 6.
Note: If you are not using a very runny
liquid (like water, for example) but a
more viscous mixture or a mixture
containing solid components (such as
finely-chopped spinach, for example)
this will not pass easily through the lid. In
this case, put the liquid straight into
dough compartment 6.
6. Hold lid 1 at an angle and guide it into
lid locator 2.
7. Pu sh li d 1 down until it is correctly
located on dough compartment 6 and
audibly engages.
Note: The safety switch which allows
the appliance to operate is activated
only if the lid is correctly engaged.
8. Put the plug into a suitable earthed
socket (see “3. Technical data” on
page 4).
9. Switch both switches 5 to "MIX".
10.Slowly pour the desired quantity of
liquid into lid 1. From here, it will run into
the dough compartment.
Notes:
– If your recipe calls for eggs, lightly
beat these in a separate container.
– Pour the beaten egg and oil through
lid 1 during kneading.
11. Allow the appliance to knead for about
5 minutes until the dough is of the
desired consistency.
Note: Once ready, pasta dough
should not be sticky or crumbly. If
necessary, add a little more flour or
water through lid 1
drop into the dough compartment.
With a little experience, you will soon be
able to recognize the ideal consistency.
from where it will
SPM200A1 9
Page 12
RP89212 Pasta Maker LB4 Seite 10 Mittwoch, 29. Mai 2013 3:58 15
12.Switch both switches 5 to "OFF".
Caution! Before you extrude the pasta
dough, you need to leave both
switches 5 on "OFF" for at least
5 seconds to allow the dough to rest.
13.Place a container under the appliance to
catch the pasta.
14.Switch both switches 5 to "EXT".
The pasta is now extruded.
15.Use dough scraper 15 to cut the pasta
to the desired length directly at
attachment 12.
16.As soon as all the dough has been
extruded, switch both switches 5 to
"OFF".
Note: For technical reasons, a small
quantity of dough is always left behind
in dough compartment 6.
17. If you want to make a second portion of
pasta, remove the rest of the dough from
dough compartment 6.
8. Pasta recipes
Note: Weigh the remaining quantity
you have removed and reduce the total
quantity of ingredients for the second
batch of dough accordingly. You can
then add the remaining quantity of the
first batch of dough to the second batch
without exceeding the maximum total
quantity of approximately 520 g.
18.Proceed in the same way with the
second batch of dough as with the first.
19.When you have finished, take the plug
out of the socket.
Caution!
To prevent dough residues drying on, you
must dismantle the appliance immediately
after use. If dough residues dry on, it can
become difficult or even impossible to
dismantle the appliance.
20.Dismantle the appliance (see
“6.1 Dismantle appliance” on page 7).
21.Clean the appliance and the accessories
(see “10. Cleaning the appliance” on
page 14).
8.1 Tips on making pasta
• Semolina, spelt flour, special pasta flour
or instant flour (low-protein plain flour)
are especially suitable for making pasta.
• The total quantity of flour and liquid
should always be between 480 g and
520 g. The appliance works best with
this. A smaller quantity means the
ingredients will not be properly
kneaded, whilst a larger total quantity
may cause dough to be forced out of the
dough compartment.
• Less than 3 minutes' kneading time will
lead to ingredients not being properly
mixed.
10
• More than 5 minutes' kneading time will
lead to the dough getting too warm and
sticky.
• Spread the pasta out on a clean cloth
after removing it from the machine to
stop it sticking together.
• Herbs are to colour the pasta; they lose
their flavour when the pasta is cooked.
• You can dry the pasta to make it keep
longer. To do this, spread out the pasta
on a clean cloth and air-dry for a day or
so (or dry in an oven at about 40 °C for
1 - 3 hours) until it is dry.
• If pasta dough is stuck to the lid, you can
carefully push it down through the two
slots in the lid using dough scraper 15.
Page 13
RP89212 Pasta Maker LB4 Seite 11 Mittwoch, 29. Mai 2013 3:58 15
• Cook the pasta in plenty of water (3 - 4
litres for 500 g pasta). Add about 2-3
tbsp salt.
• The water foams more with fresh pasta
than with dried, so do not cover the pan.
• Fresh pasta cooks more quickly than
dried. Fresh pasta usually takes 1 - 3
minutes, whilst dried pasta usually takes
between 6 and 12 minutes to cook.
8.2 Basic recipe for pasta
Ingredients
• 340 g durum wheat semolina
• 140 g water
• 1 tbsp oil (10 g)
Preparation
See “7. Make pasta” on page 9.
Notes
• The pasta can be used fresh or dried.
• You can alter the consistency using flour
or a little water.
8.3 Egg pasta
Ingredients
• 340 g semolina
•3 medium eggs
Preparation
See “7. Make pasta” on page 9.
Notes:
• The pasta can be used fresh or dried.
• You can alter consistency using flour or
a little water.
8.4 Green spelt pasta
Ingredients
• 340 g spelt flour (pasta flour or instant
flour can be substituted)
• 175 g spinach (either freshly blanched
and chopped or deep-frozen. Do not
use creamed spinach, as the cream will
make the pasta too soft.)
• 1 clove garlic (can be included or not, to
taste)
• 1 pinch ground nutmeg
Preparation
1. Put all the ingredients straight into dough
compartment 6.
2. Prepare the pasta as described in
“7. Make pasta” on page 9.
Notes
• The pasta can be used fresh or dried.
• You can alter consistency using flour or
a little water.
8.5 Red pasta
Ingredients
• 340 g pasta flour (spelt flour or instant
flour can be substituted)
•1 egg
• 1 tbsp tomato ketchup
• approx. 80 - 100 g tomato purée
Preparation
1. Put the beaten egg and tomato ketchup
in a bowl.
2. Top up to a total weight of 160 g using
tomato purée.
3. Put the flour and the egg-and-tomato
mixture straight into dough
compartment 6.
4. Prepare the pasta as described in
“7. Make pasta” on page 9.
Notes
• The pasta can be used fresh or dried.
• You can alter consistency using flour or
a little water.
SPM200A1 11
Page 14
RP89212 Pasta Maker LB4 Seite 12 Mittwoch, 29. Mai 2013 3:58 15
8.6 Black pasta
Ingredients
• 340 g pasta flour (spelt flour or instant
flour can be substituted)
• 150 g egg
• 10 g sepia ink
Preparation
See “7. Make pasta” on page 9.
Notes
• The pasta can be used fresh or dried.
• You can alter consistency using flour or
a little water.
8.7 Piped biscuits
Ingredients
• 230 g plain flour (type 405, cake flour)
• 150 g butter, cold and cut into thin slices
• 100 g sugar
•1 egg
9. Recipes for pasta sauces
Hints for a good flavour
• Use freshly-milled salt and pepper
• Always use fresh herbs and ingredients
• Grate parmesan freshly
• Use cold-pressed olive oil
• Home-made pasta tastes best if heated
in the pan with a little olive oil and garlic
after cooking. In this case, you can also
brown mushrooms, meat or prawns to
taste (before adding the pasta). Add
freshly-milled salt and pepper and then
serve with torn basil or ruccolalettuce or
tomatoes. The parmesan cheese is
served at the table and tastes best
freshly grated.
• 1 sachet vanilla sugar
•1 pinch salt
Preparation
1. Put the ingredients in the dough
compartment.
2. Knead for approx. 5 minutes.
3. Then extrude the mixture through
attachment 22 for piped biscuits.
4. Use dough scraper 15 directly at
attachment 12 to cut off strands of
identical length.
5. Place the strands on a baking sheet in
an S-shape, in straight lines or in circles.
6. Bake at 180 °C for 10 minutes.
Notes:
• You can garnish the biscuits with
chopped walnuts or almonds before
baking.
• Once the biscuits have cooled after
baking, they can be iced.
9.1 Carbonara sauce
Ingredients
•2 tbsp olive oil for browning
• 2 cloves garlic, finely chopped
• 150 g diced ham
•4 eggs
•1 pinch salt
•1 tub whipping cream
• 100 ml milk
• 100 g parmesan cheese, grated
• Freshly-milled salt and pepper
• Nutmeg, ground, to season
Preparation
1. Combine eggs, cream, milk, salt, pepper
and nutmeg using a balloon whisk.
12
Page 15
RP89212 Pasta Maker LB4 Seite 13 Mittwoch, 29. Mai 2013 3:58 15
2. Stir in half the grated parmesan.
3. Heat the olive oil with the pan on a
medium heat, add the finely-chopped
garlic and fry briefly.
4. Now pour in the egg-and-milk mixture.
5. Finally add the diced ham.
9.2 Tomato sauce
Ingredients
• 850 ml tinned or fresh tomatoes
•1 small onion
•1 clove garlic
• 2 tbsp tomato purée
•Salt
•White pepper
•Sugar
•Oregano
• Herbs of Provence
•3 tbsp olive oil
Preparation
1. Heat olive oil in a 2-3 litre-capacity pan.
2. Finely chop the onion and sauté until
transparent, add the crushed garlic.
3. Blend the tinned tomatoes*. Add these
to the pan, add the tomato purée and
season with salt, pepper and a pinch of
sugar.
4. Let it all simmer for 10 minutes, stirring
occasionally.
5. Finally, season the tomato sauce with
salt, pepper, oregano and if you like
them, herbs of Provence.
Note:
• *Alternatively, scald fresh tomatoes, slip
off their skins and blend them in a food
processor or using a stick blender.
9.3 Gorgonzola sauce
Ingredients
• 200 ml cream
• 200 g gorgonzola
Preparation
1. Heat the cream.
2. Stir in the gorgonzola to melt it. Heat,
stirring continuously.
Note
• Diced ham can also be added if you like.
9.4 Aglio e Olio
Ingredients
• 4 tbsp oil (olive), cold-pressed
•2 cloves garlic
•Basil
•Oregano
• Pepper
•Salt
Preparation
1. Sweat the garlic in the olive oil, coat the
cooked spaghetti.
2. Season to taste with freshly-milled salt
and pepper.
3. Serve with freshly-grated parmesan to
taste.
9.5 Pesto (red)
Ingredients
• 150 g tomatoes (dried)
• 1 handful basil
•1 red onion (quartered)
• 2 tbsp pine nuts
•1-2 cloves garlic
• 2 tsp balsamic vinegar
•5 tbsp olive oil
•Salt
• Pepper
SPM200A1 13
Page 16
RP89212 Pasta Maker LB4 Seite 14 Mittwoch, 29. Mai 2013 3:58 15
Preparation
1. Finely process the tomatoes, the picked
basil leaves, pine nuts, garlic and onion.
2. Add vinegar and oil and mix.
3. Season with salt and pepper.
Note
• Keep pesto in a screw-top glass jar
covered with a layer of olive oil. In this
way, it will keep in the fridge for about 4
weeks.
9.6 Pesto (green)
Ingredients
• 1-2 handfuls fresh basil
•1-2 cloves garlic
• 2 tbsp pine nuts
10. Cleaning the appliance
Warning! To prevent the risk of
an electric shock, injury or
damage:
– disconnect the power plug from
the mains socket before any
cleaning step.
– Never immerse motor housing 3 in
water.
Caution! Under no circumstances use
scouring agents or corrosive or abrasive
cleaning materials, as these could damage
the appliance.
• Dismantle the appliance (see
“6.1 Dismantle appliance” on page 7).
10.1 Clean motor housing (3)
1. Clean motor housing 3 with a damp
cloth. A little detergent may also be
used.
2. Wipe off with fresh water.
•olive oil
• 2 tbsp parmesan
• Salt + and freshly-milled black pepper
Preparation
1. Toast the pine nuts in a pan.
2. Finely chop the basil, garlic and pine
nuts.
3. Add enough olive oil to form a creamy
paste.
4. Add the parmesan at the end.
5. Season with salt and pepper.
Note
• Keep pesto in a screw-top glass jar
covered with a layer of olive oil. In this
way, it will keep in the fridge for about 4
weeks.
3. Do not use motor housing 3 again until it
is completely dry.
10.2 Clean dough compartment (6), lid
(1) and screw housing (9)
Caution! The accessories are not
dishwasher-proof. The plastic might go dull
and brittle in the dishwasher.
1. Put the parts in cold or lukewarm water
to soften dough residues.
Note: You can also add a little
detergent to the water.
2. Remove softened dough residues using
cleaning brush 16.
3. Rinse off with clean water.
4. Allow parts to dry completely before
using them again.
14
Page 17
RP89212 Pasta Maker LB4 Seite 15 Mittwoch, 29. Mai 2013 3:58 15
10.3 Clean remaining accessories
Caution! The accessories are not
dishwasher-proof. The plastic might go dull
and brittle in the dishwasher.
1. Allow the dough to dry on for at least
24 hours. This makes it hard and brittle.
2. Remove the dried-on dough residues
using cleaning brush 16.
11. Disposal
11.1 Appliance
The symbol with the crossedout rubbish bin on wheels
means that within the European
Union, the product must be
disposed of to a sorted rubbish
collection. This applies to the
product and all accessories which are
marked with this symbol. Marked products
must not be disposed of via the regular
domestic waste but must be handed in to a
3. Tap attachments 17 to 22 gently on the
table to knock off the dried-on dough.
4. Use a toothpick to clean dough residues
out of the holes in attachments 17 to 22.
5. Wash the parts in hot washing-up water.
6. Rinse off with clean water.
7. Allow parts to dry completely before
using them again.
recycling centre for electrical or electronic
devices. Recycling helps to reduce the use of
raw materials and to relieve the
environment. It is therefore imperative that
you follow the disposal regulations
applicable in your country.
11.2 Packaging
If you wish to discard the packaging, please
observe the applicable environmental
regulations in your country.
12. HOYER Handel GmbH Warranty
Dear Customer,
You have a warranty on this product which
is valid for 3 years from the date of
purchase. In the event of this product being
defective, you have statutory rights against
the seller of the product. These statutory
rights are not limited by our warranty as set
out below.
Warranty conditions
The warranty period begins with the date of
purchase. Please keep the original till receipt
SPM200A1 15
in a safe place. This is required as your
proof of purchase.
If a defect in materials or workmanship
occurs within three years of the date your
product was purchased, we will repair or
replace the product at our discretion at no
charge to you. This service under warranty
assumes that the defective product and the
proof of purchase (till receipt) are submitted
within the three-year period and that a brief
description in writing is provided of what the
defect is and when it occurred.
Page 18
RP89212 Pasta Maker LB4 Seite 16 Mittwoch, 29. Mai 2013 3:58 15
If the defect is covered by our warranty, the
repaired product or a new one will be sent
back to you. There is no new warranty
period following repair or replacement of
the product.
Warranty period and statutory claims
relating to defects
The warranty period is not extended when a
service is provided under warranty. This also
applies to replaced and repaired parts. Any
damage or defects present at purchase must
be reported immediately the product is
unpacked. Repairs incurred once the warranty
period has expired are chargeable.
Scope of warranty
The product has been carefully
manufactured in accordance with strict
quality guidelines and was thoroughly
checked before being delivered.
The warranty applies to defective materials
or workmanship. This warranty does not
extend to product parts exposed to normal
wear and tear (and which can therefore be
considered wear parts) or to damage to
fragile parts such as switches, batteries or
parts made of glass.
This warranty is void if the product is
damaged or if it is not used or maintained
properly. All the information in the operating
instructions should be observed precisely to
ensure that the product is used properly.
It is essential to avoid intended uses and
actions which are discouraged or warned
against in the operating instructions.
The product is intended for only private use
and not for commercial purposes.
The warranty is void in the event of misuse,
incorrect treatment, use of force or
interference by anyone other than our
authorized service centre.
Warranty process
Please follow the instructions below to
ensure that your claim is processed quickly.
• In case of any enquiry, please keep the
article number (for this product:
IAN 89212) and the till receipt as proof
of purchase.
• The article number can be found on the
rating plate, as an engraving, on the
cover sheet of your instructions (bottom
left) or as a label on the back or
underside of your appliance.
• If malfunctions or any other defects
should occur, in the first instance contact
the Service Centre mentioned below by
telephone or e-mail.
• Once a product has been recorded as
defective, you can then send it Freepost
to the service address you are given,
enclosing the proof of purchase (till
receipt) and quoting what the defect is
and when it occurred.
You can download these
instructions and many other
manuals, product videos and
software from
www.lidl-service.com.
16
Page 19
RP89212 Pasta Maker LB4 Seite 17 Mittwoch, 29. Mai 2013 3:58 15
Service Centre
Service Great Britain
Tel.: 0871 5000 720 (£ 0.10/Min.)
E-Mail: hoyer@lidl.co.uk
Service Ireland
IR
Tel.: 1890 930 034
(0,08 EUR/Min., (peak))
(0,06 EUR/Min., (off peak))
E-Mail: hoyer@lidl.ie
Service Cyprus
CY
Tel.: 8009 4409
E-Mail: hoyer@lidl.com.cy
Service Malta
MT
Tel.: 80062230
E-Mail: hoyer@lidl.com.mt
IAN: 89212
Supplier
Please note that the address below is not a
service address. In the first instance,
contact the service centre mentioned above.
HOYER Handel GmbH
Kühnehöfe 5
D-22761 Hamburg
Germany
SPM200A1 17
Page 20
RP89212 Pasta Maker LB4 Seite 18 Mittwoch, 29. Mai 2013 3:58 15
Spis treści
1. Opis urządzenia . . . . . . . . . . . . . . . . . . . . . . . . . . . . . . . . . . . . . . . . . . . . . . . . . . . . . . . 18
2. Nazwy części (patrz strona rozkładana) . . . . . . . . . . . . . . . . . . . . . . . . . . . . . . . . . . . . . . 19
3. Dane techniczne . . . . . . . . . . . . . . . . . . . . . . . . . . . . . . . . . . . . . . . . . . . . . . . . . . . . . . . 19
4. Wskazówki bezpieczeństwa. . . . . . . . . . . . . . . . . . . . . . . . . . . . . . . . . . . . . . . . . . . . . . . 20
5. Rozpakowywanie i ustawianie. . . . . . . . . . . . . . . . . . . . . . . . . . . . . . . . . . . . . . . . . . . . . 23
6. Rozkładanie iskładanie urządzenia . . . . . . . . . . . . . . . . . . . . . . . . . . . . . . . . . . . . . . . . . 23
7. Przygotowanie makaronu . . . . . . . . . . . . . . . . . . . . . . . . . . . . . . . . . . . . . . . . . . . . . . . . 25
8. Przepisy na makaron. . . . . . . . . . . . . . . . . . . . . . . . . . . . . . . . . . . . . . . . . . . . . . . . . . . . 26
9. Przepisy na sosy do past . . . . . . . . . . . . . . . . . . . . . . . . . . . . . . . . . . . . . . . . . . . . . . . . . 29
10. Czyszczenie urządzenia . . . . . . . . . . . . . . . . . . . . . . . . . . . . . . . . . . . . . . . . . . . . . . . . . . 31
11. Utylizacja. . . . . . . . . . . . . . . . . . . . . . . . . . . . . . . . . . . . . . . . . . . . . . . . . . . . . . . . . . . . 32
12. Gwarancja firmy HOYER Handel GmbH. . . . . . . . . . . . . . . . . . . . . . . . . . . . . . . . . . . . . . . 32
Centrum serwisowe . . . . . . . . . . . . . . . . . . . . . . . . . . . . . . . . . . . . . . . . . . . . . 33
Dostawca . . . . . . . . . . . . . . . . . . . . . . . . . . . . . . . . . . . . . . . . . . . . . . . . . . . . . 33
Gratulujemy zakupu nowego
urządzenia.
Jest to wysokiej jakości produkt. Instrukcja
obsługi jest integralną częścią tego
produktu. Zawiera ona ważne wskazówki
dotyczące bezpieczeństwa, użytkowania i
utylizacji.
1. Opis urządzenia
1.1 Przeznaczenie
Maszyna do wyrobu makaronu SilverCrest
SPM200A1 służy do przygotowywania
świeżego makaronu ikruchych ciasteczek.
Urządzenie można użytkować tylko w
suchych pomieszczeniach. Użytkowanie
urządzenia na dworze lub w wilgotnych
pomieszczeniach jest niedozwolone.
18
Przed rozpoczęciem użytkowania produktu
należy się zapoznać z wszystkimi
instrukcjami dotyczącymi obsługi oraz
bezpieczeństwa. Produktu należy używać
tylko w opisany sposób i do opisanych
celów.
Przekazując produkt innym osobom, należy
razem z nimi przekazać całą jego
dokumentację.
Urządzenie przeznaczone jest do użytku
prywatnego, nie do stosowania
w działalności gospodarczej.
Urządzenie nadaje się również do:
• używania w kuchniach pracowniczych
w sklepach, biurach i innych
pomieszczeniach pracowniczych,
• używania w gospodarstwach rolnych,
Page 21
RP89212 Pasta Maker LB4 Seite 19 Mittwoch, 29. Mai 2013 3:58 15
• używania przez klientów w hotelach,
motelach i innych kompleksach
mieszkalnych,
• używania w pensjonatach podających
śniadania.
2. Nazwy części (patrz strona rozkładana)
1 pokrywa
2 gniazdo pokrywy
3 korpus silnika
4 wałek silnika
5 przełącznik: obydwa przełączniki
muszą pozostawać wtym samym
położeniu
6 pojemnik na ciasto
7 tuleja zębata
8 ugniatarka
9 korpus ślimaka
10 pierścień ślimakowy
11 ślimak
1.2 Zawartość opakowania
• 1 maszyna do wyrobu makaronu
zugniatarką iślimakiem
• 1 klucz do przykręcania
• 1 szczotka do oczyszczania
• 1 skrobak do ciasta
• 5 nakładek do różnych rodzajów
makaronu
• 1 nakładka do kruchych ciasteczek
• 1 instrukcja obsługi
12 wkład do makaronu (do wyboru,
wkłady od 17 do 22)
13 pierścień gwintowany
14 klucz do przykręcania
15 skrobak do ciasta
16 szczotka do oczyszczania
17 nakładka do makaronu Tagliatelle
18 nakładka do makaronu Pappardelle
19 nakładka do makaronu Fettuccine
20 nakładka do spaghetti
21 nakładka do makaronu Linguine
22 nakładka do kruchych ciasteczek
3. Dane techniczne
Zasilanie: 220–240 V~ / 50/60 Hz
Moc: 200 W
Klasa ochronności: II
SPM200A1 19
Page 22
RP89212 Pasta Maker LB4 Seite 20 Mittwoch, 29. Mai 2013 3:58 15
4. Wskazówki bezpieczeństwa
4.1 Wyjaśnienie haseł
Instrukcja obsługi zawiera następujące
hasła ostrzegawcze:
Ostrzeżenie!
Wysokie ryzyko: Nieprzestrzeganie
tego ostrzeżenia grozi utratą
zdrowia lub życia.
Uwaga!
Średnie ryzyko: Nieprzestrzeganie tego
ostrzeżenia może spowodować szkody
materialne.
Wskazówka:
Niskie ryzyko: Kwestie, które należy
uwzględnić przy eksploatacji urządzenia.
4.2 Specjalne wskazówki
dotyczące tego urządzenia
Ostrzeżenie!
zranień lub uszkodzeń, należy
przestrzegać następujących
wskazówek.
• Dzieci powyżej 8 roku życia i osoby o
ograniczonej sprawności fizycznej,
sensorycznej i umysłowej oraz osoby
nieposiadające dostatecznej wiedzy albo
wystarczającego doświadczenia mogą
używać tego urządzenia tylko pod opieką
lub pod warunkiem, że zostały
poinstruowane o bezpiecznym sposobie
używania urządzenia i zrozumiały
zagrożenia związane z używaniem
urządzenia. Dzieciom nie wolno bawić się
urządzeniem.
• Dzieciom nie wolno czyścić urządzenia ani
wykonywać przewidzianych do
wykonywania przez użytkownika czynności
Aby uniknąć
pielęgnacyjnych, chyba że są w wieku
powyżej 8 lat i znajdują się pod opieką.
• Dzieci w wieku poniżej 8 lat nie mogą mieć
kontaktu z urządzeniem i przewodem
sieciowym.
• Urządzenia nie wolno podłączać do
zewnętrznego programatora czasowego
lub osobnego systemu zdalnego
sterowania, np. gniazdka elektrycznego
sterowanego bezprzewodowo.
• Przed przystąpieniem do czyszczenia
zawsze odłączać wtyczkę od gniazdka
elektrycznego.
• Nigdy nie zanurzać korpusu silnika
3
wwodzie.
• Nigdy nie używać szorujących, żrących lub
rysujących środków czyszczących. Można
w ten sposób uszkodzić urządzenie.
4.3 Wskazówki ogólne
• Przed użyciem przeczytajcie Państwo
starannie instrukcję obsługi. Jest ona
częścią składową urządzenia i musi być
zawsze dostępna.
• Stosować urządzenie tylko zgodnie z
opisanym przeznaczeniem (patrz
"1.1 Przeznaczenie" na stronie 18).
• Sprawdzić zgodność wymaganego
napięcia sieciowego (patrz tabliczka
identyfikacyjna na urządzeniu) z
napięciem Waszego gniazda sieciowego.
• Pamiętajcie Państwo o tym, że w
wypadku stosowania innych akcesoriów
niż zalecanych w tej instrukcji obsługi
lub jeśli przy naprawach nie będą
stosowane wyłącznie części oryginalne,
zniesiona zostaje jakolwiek
odpowiedzialność i wygasają wszelkie
20
Page 23

RP89212 Pasta Maker LB4 Seite 21 Mittwoch, 29. Mai 2013 3:58 15
roszczenia gwarancyjne. Posiada to
również ważność odnośnie napraw
wykonywanych przez personel
niewykwalifikowany. Dane kontaktowe
znajdziesz w "Centrum serwisowe" na
stronie33.
• Przy wystąpieniu ewntualnych zakłóceń
funkcjonowania urządzenia w okresie
gwarancji może być ono naprawione
tylko przez nasze centrum serwisowe/
Service-Center. W przeciwnym
wypadku wygasają wszelkie roszczenia
gwarancyjne.
4.4 Ochrona przed porażeniem prądem
elektrycznym
Ostrzeżenie! Następujące
wskazówki bezpieczeństwa
powinny chronić Państwa przed
porażeniem prądem elektrycznym.
• W razie uszkodzenia urządzenia nie
należy w żadnym wypadku go używać.
Należy oddać urządzenie do naprawy
wykwalifikowanemu personelowi. Dane
kontaktowe znajdziesz w "Centrum
serwisowe" na stronie33.
• W razie uszkodzenia przewodu
sieciowego urządzenia musi on zostać
wymieniony przez producenta lub
podobnie wykwalifikowaną osobę, aby
uniknąć zagrożeń.
• Nie dopuścić do dostania się wody lub
innych cieczy do wnętrza korpusu silnika
3. Dlatego:
– nigdy nie używać urządzenia na
dworze
– nigdy nie zanurzać korpusu silnika 3
wwodzie
– nigdy nie stawiać na urządzeniu
pojemników napełnionych cieczą jak
szklanki, wazony etc.
– nigdy nie stosować w otoczeniu
wilgotnym
– nigdy nie stawiać w bezpośredniej
bliskości zlewozmywaków, wanny
kąpielowej, prysznicu lub basenu
kąpielowego, ponieważ pryskająca
woda mogłaby przedostać się do
urządzenia.
W przypadku, gdy do urządzenia
przedostanie się ciecz, natychmiast
wyjąć wtyczkę z sieci i przekazać
urządzenie do naprawy
wykwalifikowanemu personelowi. Dane
kontaktowe znajdziesz w "Centrum
serwisowe" na stronie33.
• Nigdy nie dotykać wilgotnymi rękoma
urządzenia, kabla sieciowego lub
wtyczki sieciowej.
• Kabel sieciowy odłączać zawsze
poprzez wyciągnięcie wtyczki. Nigdy
nie pociągać bezpośrednio za kabel
sieciowy.
• Przestrzegać, aby kabel sieciowy nigdy
nie był zgięty i przyciśnięty.
• Kabel sieciowy musi znajdować się
zawsze z daleka od powierzchni
gorących (np. kuchennych płyt
grzewczych).
• Jeśli urządzenie nie będzie użytkowane
przez dłuższy okres, należy wyciągnąć
wtyczkę z gniazda sieciowego. Tylko w
takim wypadku urządzenie jest
całkowicie wyłączone z prądu.
•Unikajcie Państwo korzystania z
przedłużaczy. Dozwolone jest to tylko w
określonych przypadkach:
– przedłużacz musi odpowiadać
natężeniu prądu urządzenia.
– przedłużacz nie może być ułożony
„wisząco“: nie może stawać się
pułapką lub znajdować się w zasięgu
dostępu dzieci.
– przedłużacz nie może być nigdy
uszkodzony.
SPM200A1 21
Page 24
RP89212 Pasta Maker LB4 Seite 22 Mittwoch, 29. Mai 2013 3:58 15
– do gniazda sieciowego, do którego
przyłączone jest urządzenie nie
wolno przyłączać innych dalszych
urządzeń, ponieważ mogłoby dojść
do przeciążenia sieci prądu (zakaz
używania przedłużacza
wielogniazdkowego!).
4.5 Ochrona przed zranieniami
Ostrzeżenie! Aby uniknąć
zranienia, należy przestrzegać
podanych niżej wskazówek.
• Uważać, by kabel sieciowy przebiegał
w sposób uniemożliwiający potknięcie
się, zaplątanie się w nim lub deptanie
po nim.
• Podczas użytkowania urządzenia
należy unikać kontaktu z jego
ruchomymi częściami, jak ugniatarka 8
lub ślimak 11. Ręce lub włosy mogłyby
zostać pochwycone przez urządzenie,
co mogłoby prowadzić do obrażeń.
Urządzenie uruchamiać tylko wtedy,
kiedy pokrywa 1 jest prawidłowo
nałożona.
• Przed każdym czyszczeniem i za
każdym razem, kiedy urządzenie ma
zostać rozłożone, należy wyciągnąć
wtyczkę sieciową zgniazdka.
poza zasięgiem dostępu dzieci, aby nie
mogły one pociągać za kabel sieciowy i
ściągnąć urządzenie do zabawy.
• Pamiętać o tym, że opakowanie foliowe
może stać się śmiertelną pułapką dla
dzieci. Opakowania foliowe nie są
zabawkami dla dzieci.
4.7 Szkody materialne
Uwaga! Aby uniknąć szkód materialnych,
należy przestrzegać podanych niżej
wskazówek.
• Urządzenie należy stawiać wyłącznie
na równej, suchej iprzeciwpoślizgowej
powierzchni, tak by nie mogło się
przewrócić lub zsunąć.
• Nigdy nie stawiać urządzenia na
gorącej płycie palnikowej.
• Nie stosować gorących cieczy.
• Ani urządzenia, ani jego akcesoriów nie
wolno wstawiać do kuchenki
mikrofalowej.
4.6 Bezpieczeństwo Waszego dziecka
Ostrzeżenie! Dzieci często nie
potrafią właściwie ocenić
niebezpieczeństwa, dlatego też
narażone są na niebezpieczństwo
zranienia. W związku z tym
należy przestrzegać:
• Produkt może być użytkowany tylko pod
nadzorem osób dorosłych, aby
zapewnić, by dzieci się nim nie bawiły.
• Przestrzegać skrupulatnie, aby
urządzenie znajdowało się zawsze
22
Page 25
RP89212 Pasta Maker LB4 Seite 23 Mittwoch, 29. Mai 2013 3:58 15
5. Rozpakowywanie i ustawianie
1. Wyjąć części z opakowania.
2. Sprawdzić, czy wszystkie części są
kompletne (patrz "1.2 Zawartość
opakowania" na stronie 19) i nie mają
uszkodzeń.
3. Przed pierwszym użyciem dokładnie
wyczyścić urządzenie (patrz
"10. Czyszczenie urządzenia" na
stronie 31).
4. Urządzenie należy stawiać na równej,
suchej i przeciwpoślizgowej
powierzchni tak, by nie mogło się
przewrócić lub zsunąć.
6. Rozkładanie iskładanie urządzenia
Ostrzeżenie! Aby uniknąć
porażenia prądem, zranienia lub
uszkodzenia urządzenia:
– przed każdym czyszczeniem
iza każdym razem, kiedy
urządzenie ma zostać rozłożone
lub ponownie złożone, należy
wyciągnąć wtyczkę sieciową
zgniazdka.
6.1 Rozkładanie urządzenia
1. Przełączyć obydwa przełączniki 5 na
„OFF”.
Wskazówka: Ze względów
bezpieczeństwa urządzenie posiada
2przełączniki, które za każdym razem
muszą zostać włączone równocześnie,
aby skorzystać z wybranej funkcji. Jeśli
obydwa znajdują się wróżnych
położeniach, urządzenie pozostaje
wyłączone. Wten sposób unika się
omyłkowego nieprawidłowego użycia
urządzenia.
5. Ponownie złożyć urządzenie (patrz
"6.2 Składanie urządzenia" na
stronie 24).
6. Ustawić oba przełączniki 5 w położeniu
„OFF”.
7. Wet kn ąć w t y cz kę si ec iow ą do
odpowiedniego gniazdka sieciowego
(patrz "3. Dane techniczne" na
stronie 19).
Urządzenie jest teraz gotowe do pracy.
2. Należy upewnić się, że pokrywa 1 jest
prawidłowo nałożona, ponieważ
wprzeciwnym razie korpus ślimaka 9
mógłby wypaść przy poluzowaniu
pierścienia gwintowanego 13.
3. Odkręcić pierścień gwintowany 13.
Wskazówka: Jeśli pierścień
gwintowany 13 jest osadzony zbyt
mocno, należy skorzystać zklucza do
przykręcania 14, aby odkręcić
pierścień gwintowany 13.
Jeśli pierścień gwintowany 13 trudno
odkręcić także przy użyciu klucza 14,
należy włączyć urządzenie na 10 do
20 sekund wtrybie „MIX”; wówczas
pierścień gwintowany nieco się
poluzuje. Przed odkręcaniem śrub
zawsze należy wyjąć wtyczkę sieciową
zgniazdka.
4. Wyjąć nakładkę 12.
5. Zdjąć pokrywę 1.
SPM200A1 23
Page 26
RP89212 Pasta Maker LB4 Seite 24 Mittwoch, 29. Mai 2013 3:58 15
Wskazówka: Na przedniej krawędzi
pokrywy znajdują się dwie wypustki.
Należy pociągnąć je nieco do przodu
ipodnieść pokrywę 1, odciągnąć ją,
anastępnie wyjąć zurządzenia.
6. Przekręcić korpus ślimaka 9 wkierunku
przeciwnym do ruchu wskazówek
zegara iwyjąć go.
7. Wyjąć ślimak 11 zkorpusu ślimaka 9.
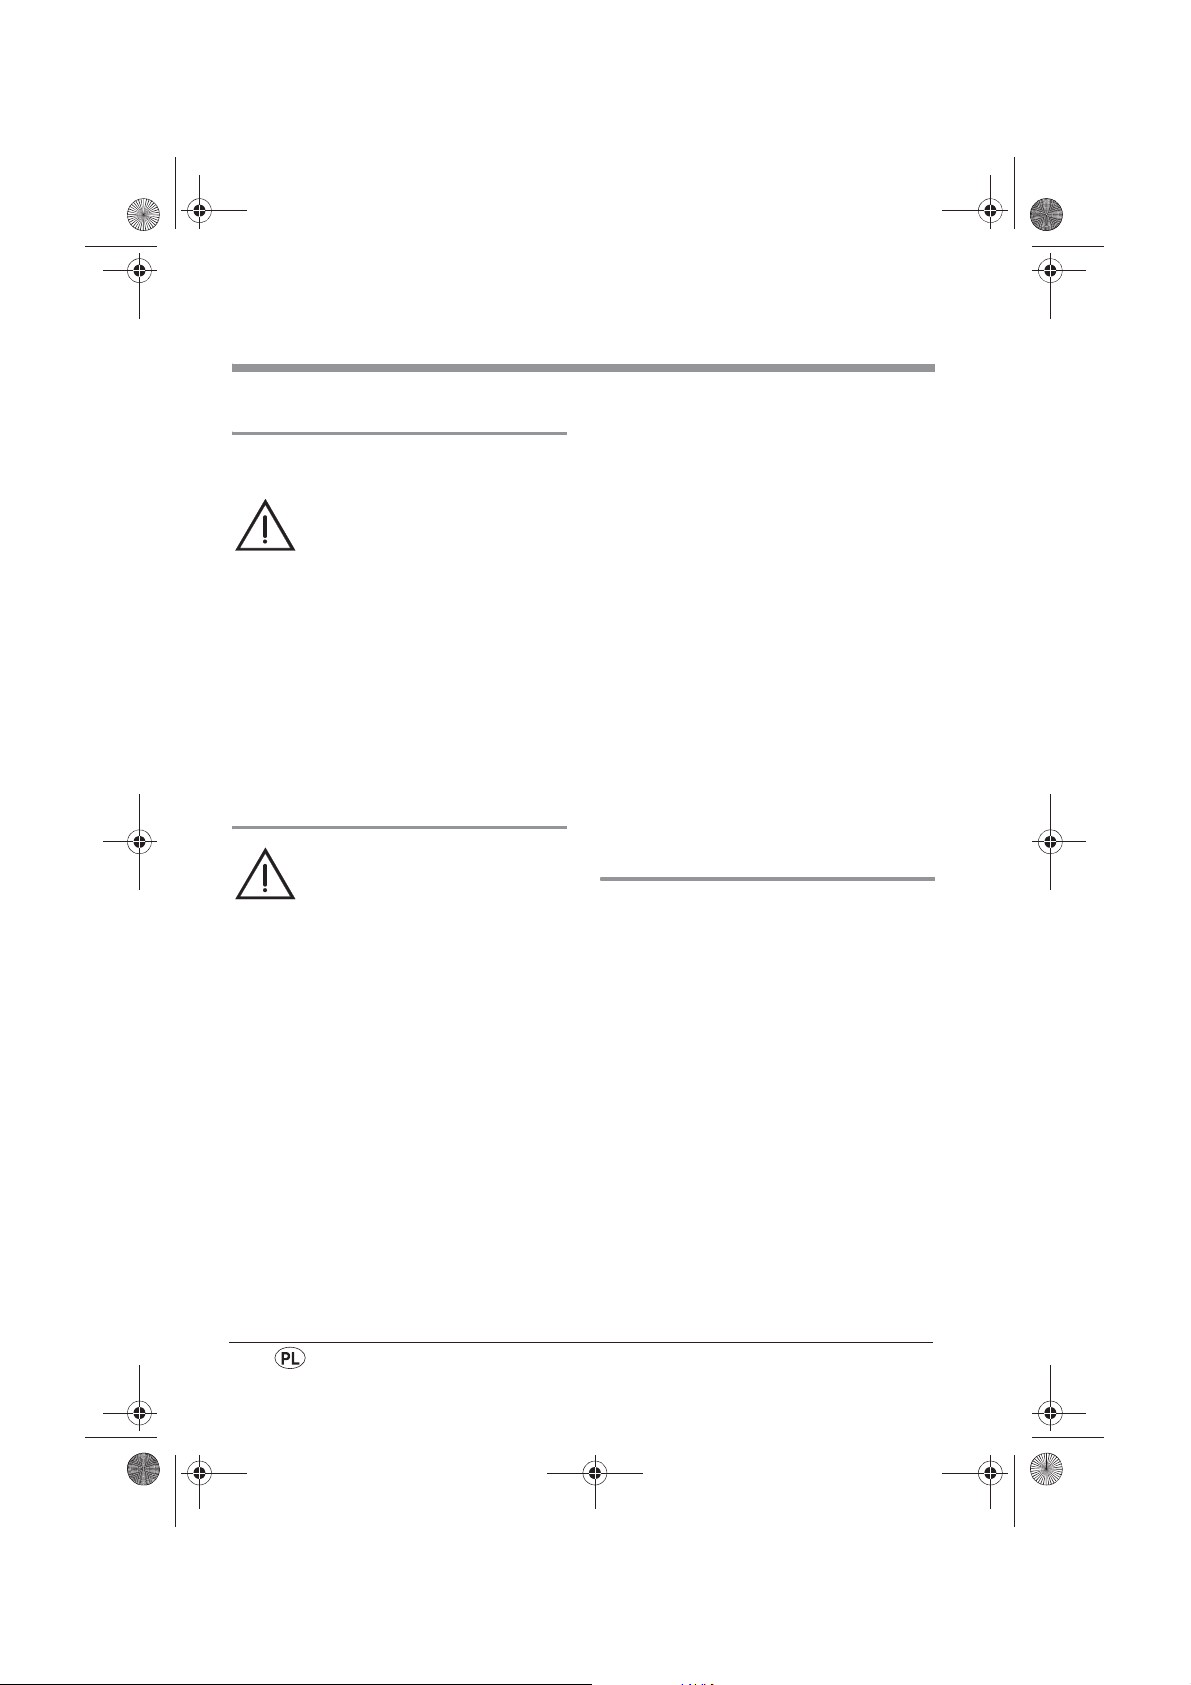
8. Wyciągnąć pierścień
ślimaka 10 ze ślimaka 11.
9. Wyciągnąć ugniatarkę 8 zpojemnika
na ciasto 6.
10.Wyciągnąć tuleję
zębatą 7
zugniatarki 8.
11.Wyciągnąć pojemnik na ciasto 6
zkorpusu silnika 3.
6.2 Składanie urządzenia
1. Włożyć pojemnik na ciasto 6 do
korpusu silnika 3.
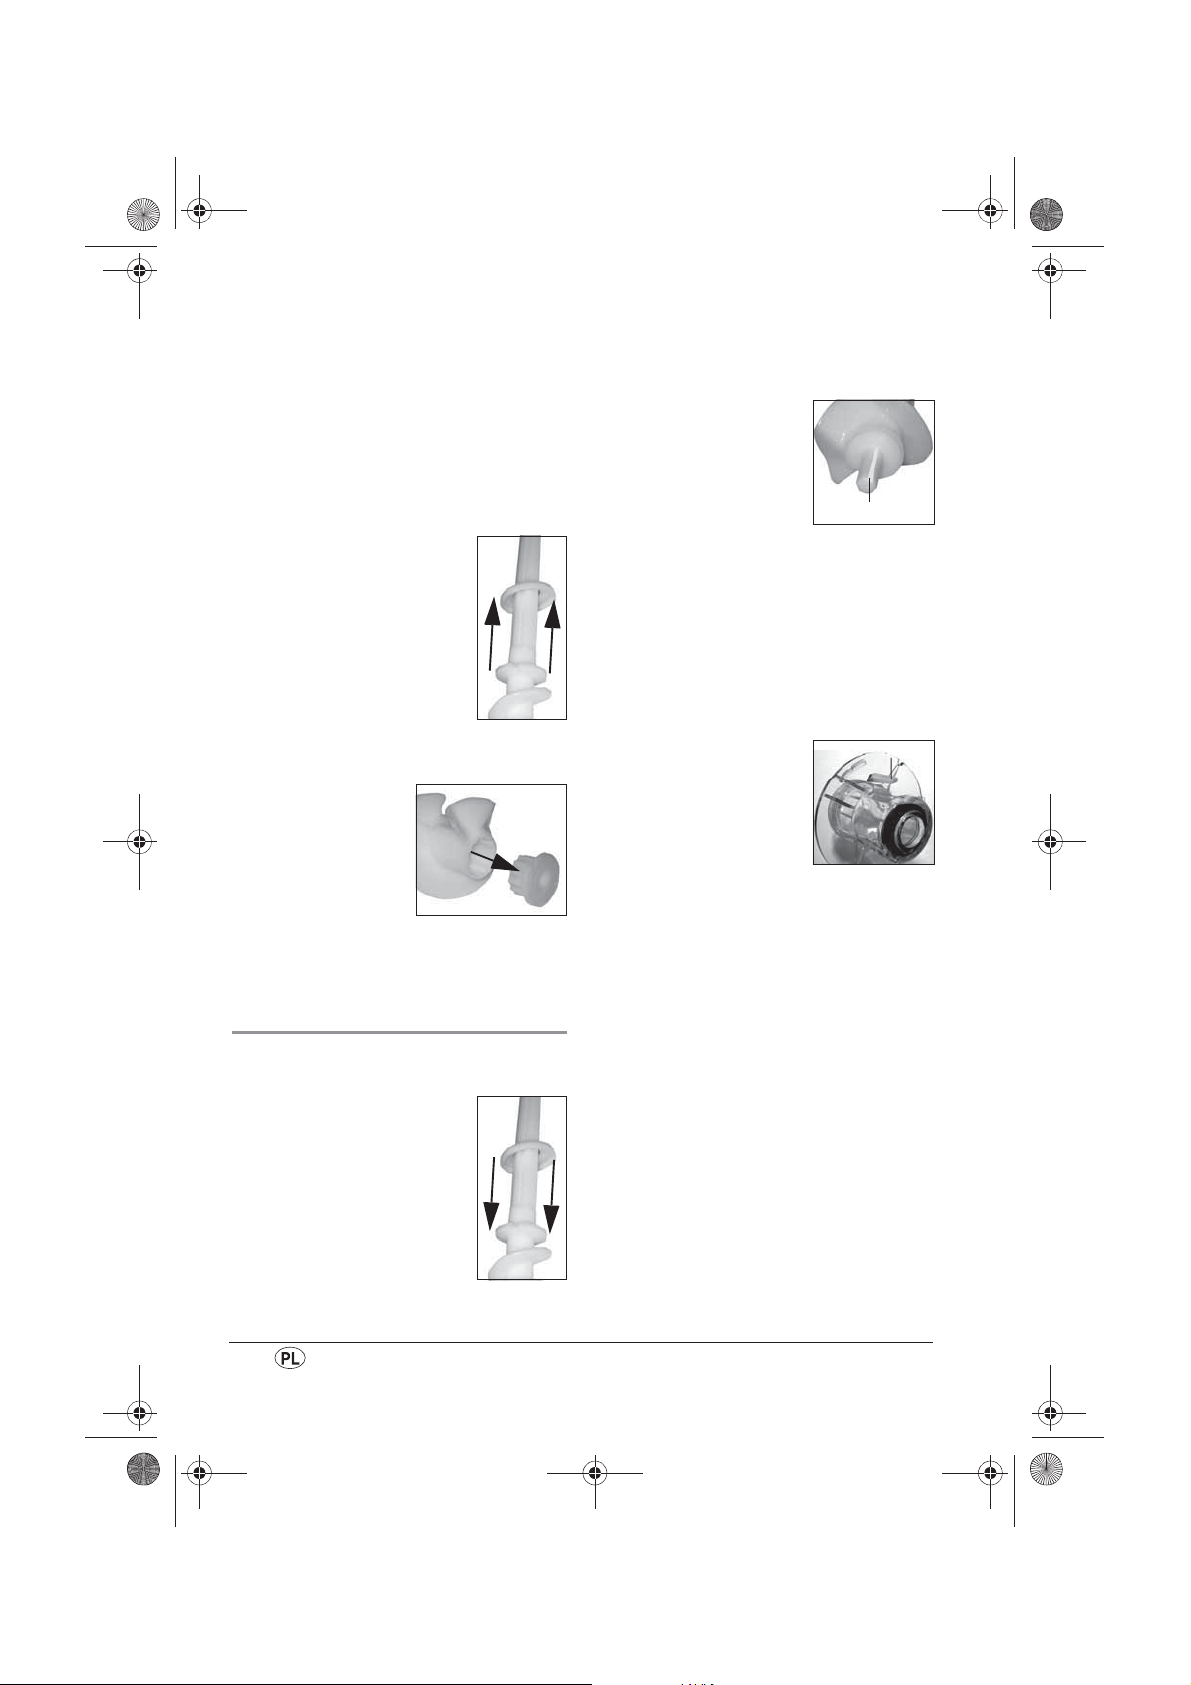
2. Nasunąć pierścień ślimaka
10 na ślimak 11.
Uważać, by pierścień
ślimaka poprawnie się
zablokował.
3. Włożyć ślimak 11 do korpusu ślimaka 9.
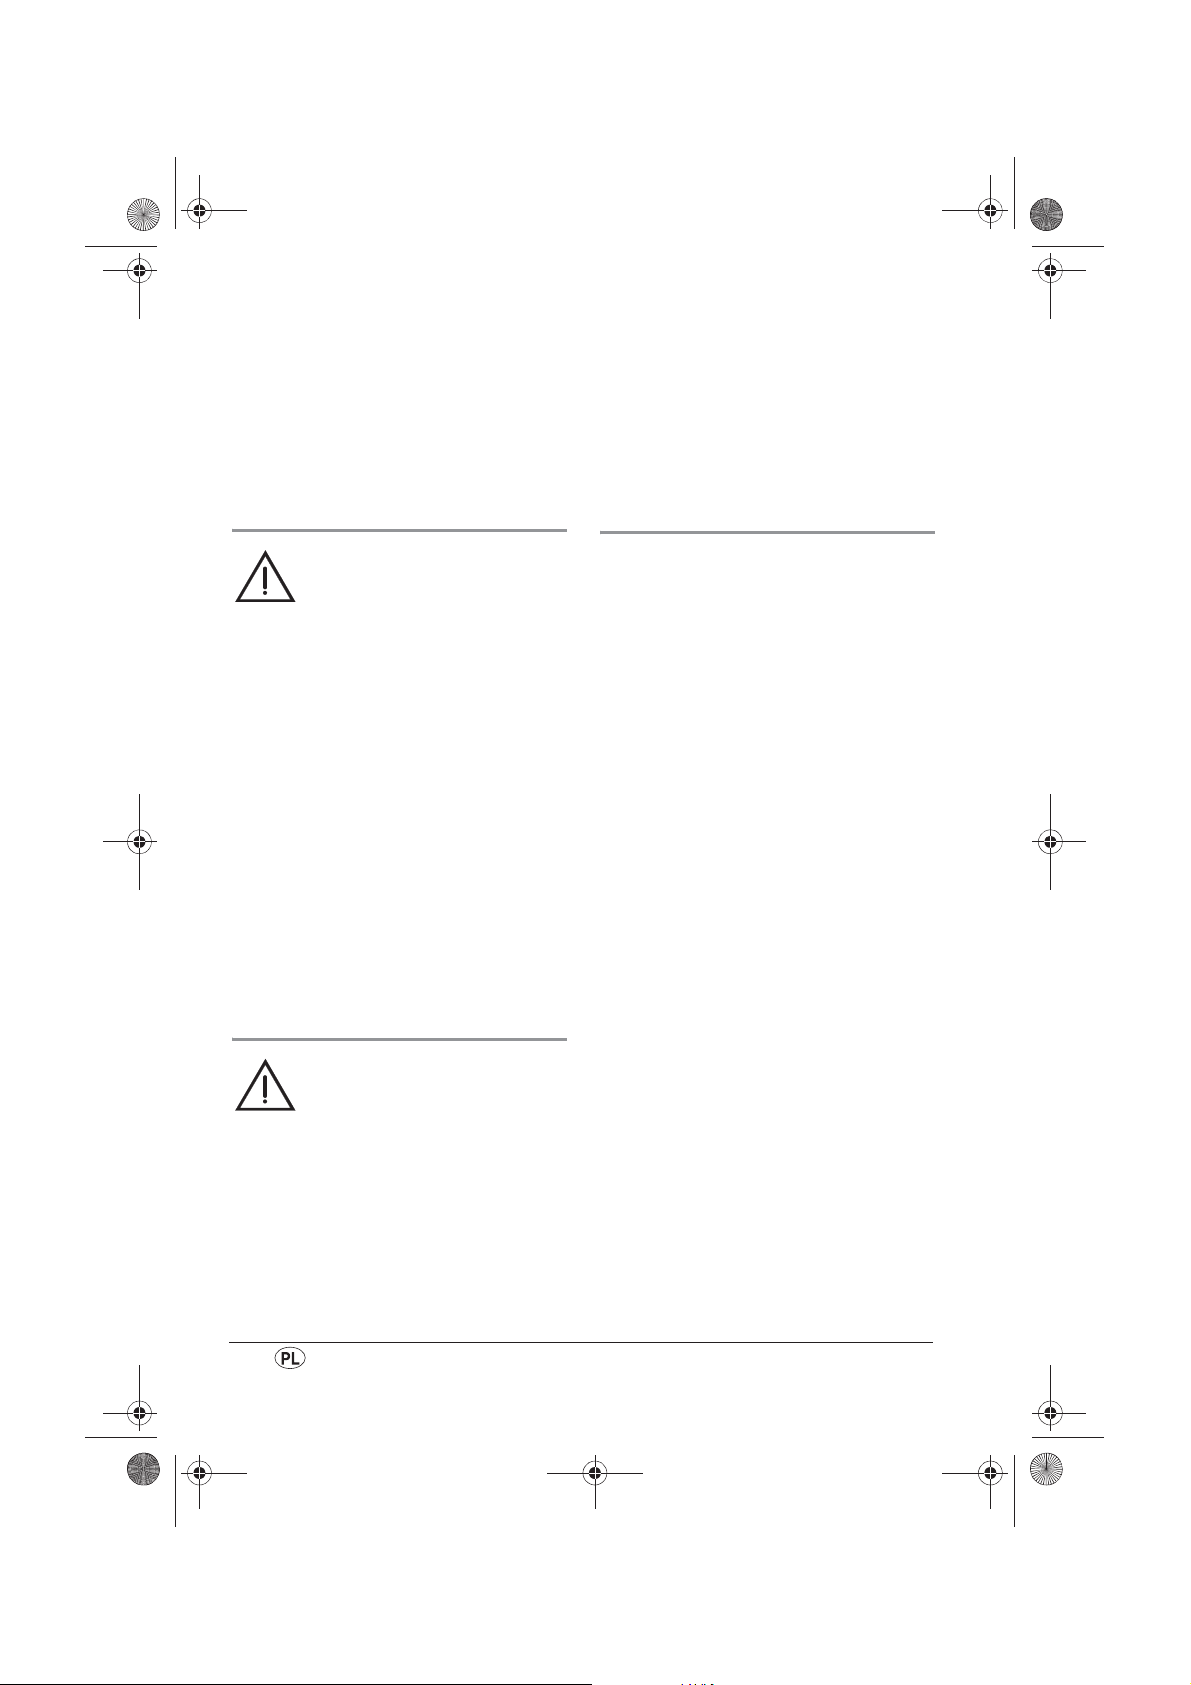
4. Wsunąć ugniatarkę 8 na wałek
ślimaka 11.
Wskazówka: Na wałku
ślimaka 11 znajduje się
karb A, zapewniający
właściwe umiejscowienie
ugniatarki 8.
A
5. Wsunąć tuleję zębatą 7 na wałek
ślimaka 11.
Wskazówka: Na wałku ślimaka 11
znajduje się karb, zapewniający
właściwe umiejscowienie tulei zębatej 7.
6. Wsunąć zmontowany korpus ślimaka 9
ze ślimakiem 11 i ugniatarką 8 do
pojemnika na ciasto 6.
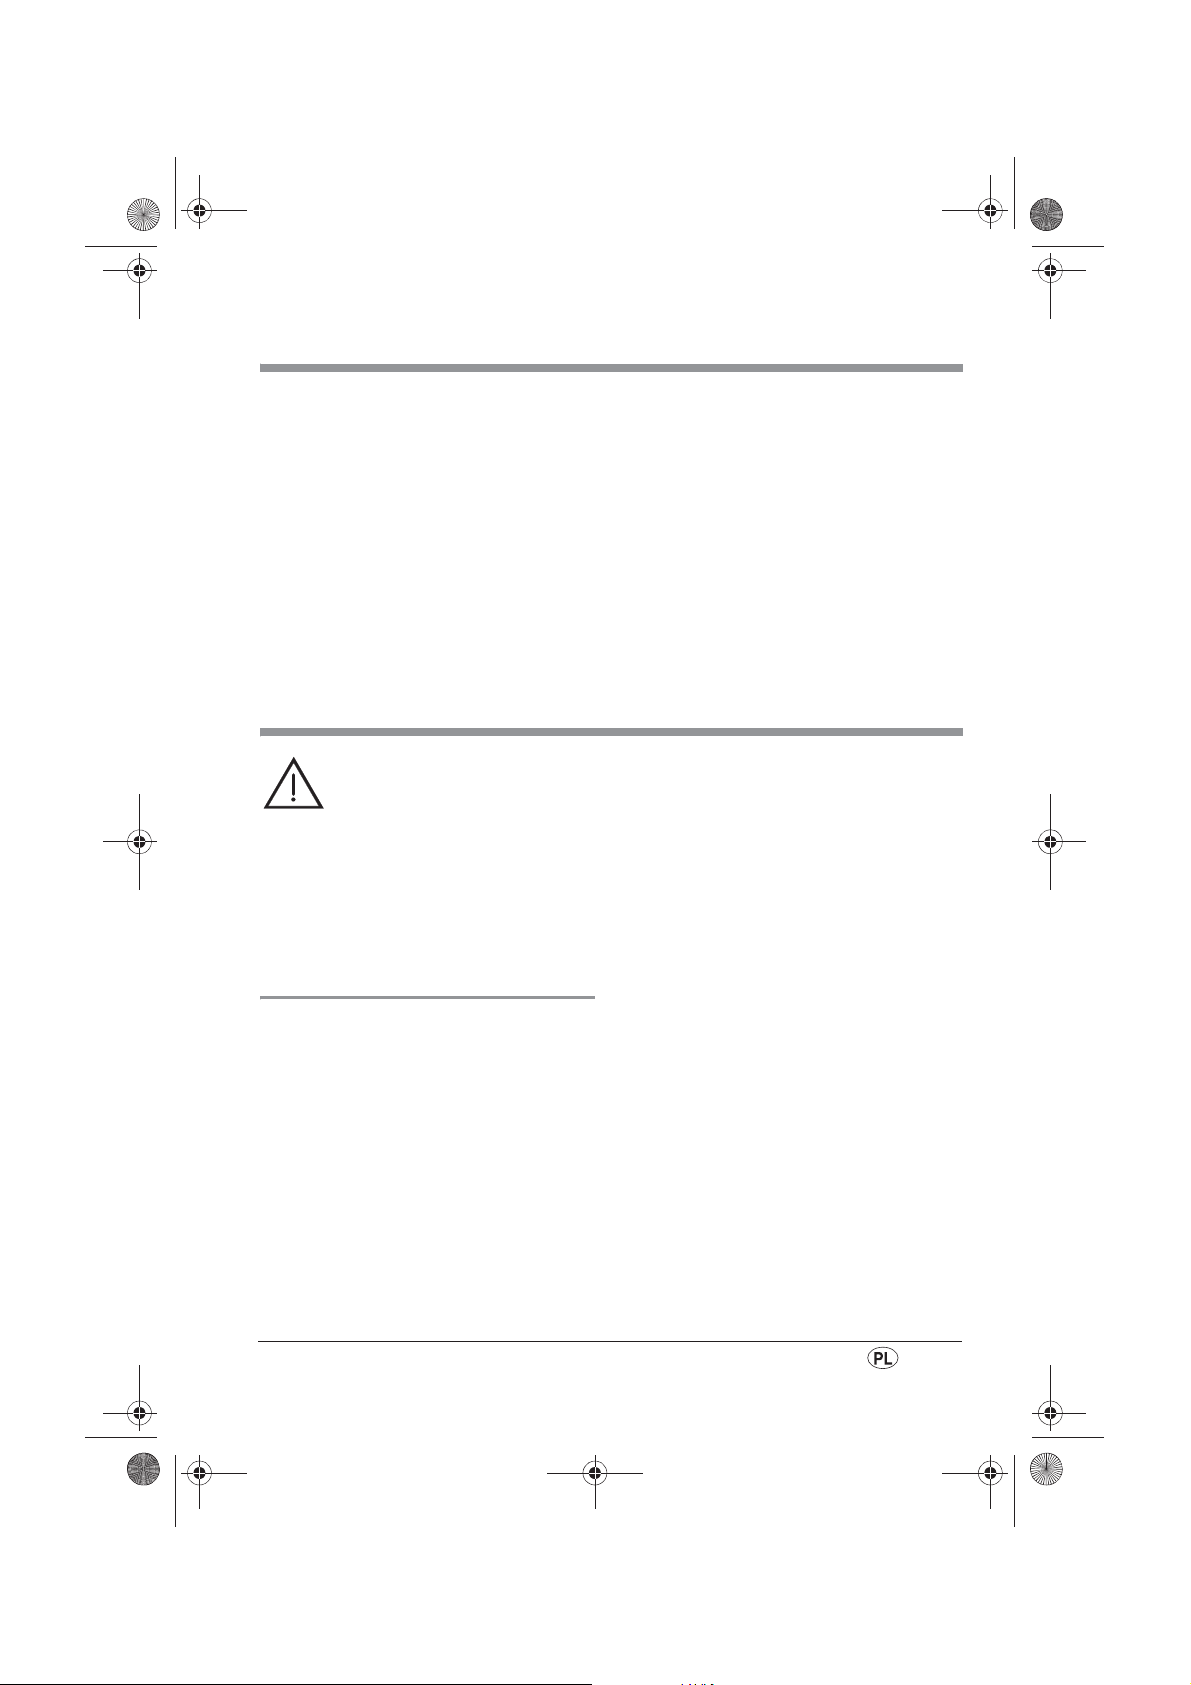
Wskazówka: Po stronie
B
wewnętrznej korpusu ślimaka 9 znajduje się
wypustka B, która przy
wkładaniu musi być zwrócona do góry, aby korpus
ślimaka 9 mógł zostać
zablokowany w prawidłowym położeniu.
7. Lekko przycisnąć korpus ślimaka 9 do
pojemnika na ciasto 6 izablokować go,
przekręcając wkierunku zgodnym
zruchem wskazówek zegara do
zatrzaśnięcia.
8. Upewnić się, że pojemnik na ciasto 6
jest prawidłowo umieszczony
wkorpusie silnika 3.
9. Przytrzymać pokrywę 1 poprzecznie i
wprowadzić ją do gniazda na
pokrywę 2.
10.Przycisnąć pokrywę 1 w dół, aż
zostanie prawidłowo usadowiona na
pojemniku na ciasto 6 i nastąpi
słyszalne zatrzaśnięcie.
24
Page 27
RP89212 Pasta Maker LB4 Seite 25 Mittwoch, 29. Mai 2013 3:58 15
Wskazówka: Tylko wówczas, kiedy
pokrywa jest prawidłowo nałożona,
aktywowany zostanie wyłącznik
bezpieczeństwa, pozwalający na
użytkowanie urządzenia.
11.Jeden z wkładów od 17 do 22 wkręcić
przy użyciu pierścienia gwintowanego 13
na korpus ślimaka 9.
7. Przygotowanie makaronu
1. Wybrać odpowiednią nakładkę 12:
17nakładka do makaronu Tagliatelle
18nakładka do makaronu Pappardelle
19nakładka do makaronu Fettuccine
20nakładka do spaghetti
21nakładka do makaronu Linguine
22nakładka do kruchych ciasteczek
2. Włożyć wybraną nakładkę (od 17 do
22) na około minutę do gorącej wody.
3. Przykręcić wybraną nakładkę (od 17
do 22) przy pomocy pierścienia
gwintowanego 13 na korpus ślimaka 9
(patrz "6. Rozkładanie iskładanie
urządzenia" na stronie 23).
4. Zdjąć pokrywę 1.
Wskazówka: Na przedniej krawędzi
pokrywy znajdują się dwie wypustki.
Należy pociągnąć je nieco do przodu
ipodnieść pokrywę 1, odciągnąć ją,
anastępnie wyjąć zurządzenia.
5. Wsypać odpowiednią ilość mąki do
pojemnika na ciasto 6.
Wskazówka: Jeśli nie używa się
rzadkiego płynu, np. wody, ale
mieszankę bardziej ciągliwą lub z
zawierającą cząstki stałe, np. drobno
siekany szpinak, płyn nie będzie
swobodnie przepływać przez pokrywę:
W takiej sytuacji płyn umieścić od razu
w pojemniku na ciasto 6.
Wskazówka: Wystarczy mocno
dokręcić pierścień gwintowany ręką.
Nie jest do tego potrzebny klucz do
przykręcania 14.
Urządzenie jest teraz gotowe do pracy.
6. Przytrzymać pokrywę 1 poprzecznie
iwprowadzić ją do gniazda na
pokrywę 2.
7. Przycisnąć pokrywę 1 w dół, aż
zostanie prawidłowo usadowiona na
pojemniku na ciasto 6 inastąpi
słyszalne zatrzaśnięcie.
Wskazówka: Tylko wówczas, kiedy
pokrywa jest prawidłowo nałożona,
aktywowany zostanie wyłącznik
bezpieczeństwa, pozwalający na
użytkowanie urządzenia.
8. Podłączyć wtyczkę sieciową do
odpowiedniego gniazdka ściennego
zzestykiem ochronnym (patrz "3. Dane
techniczne" na stronie 19).
9. Przełączyć obydwa przełączniki 5
wpołożenie „MIX”.
10.Powoli wlać do pokrywy 1
odpowiednią ilość płynu. Stamtąd
dostanie się on do pojemnika na ciasto.
Wskazówki:
– Jeżeli przepis wymaga dodania jajek,
należy je wymieszać w oddzielnym
pojemniku.
– Wymieszane jajka dodać w czasie
ugniatania przez pokrywę 1.
11. Pozostawić ugniatanie włączone przez
około 5 minut, aż ciasto uzyska
odpowiednią konsystencję.
SPM200A1 25
Page 28
RP89212 Pasta Maker LB4 Seite 26 Mittwoch, 29. Mai 2013 3:58 15
Wskazówka: Gotowe ciasto na
makaron nie powinno się kleić ani
kruszyć. Wrazie potrzeby dodać trochę
mąki lub wody przez pokrywę 1, skąd
dostanie się ona do pojemnika na
ciasto.
Po nabraniu nieco doświadczenia
określenie idealnej konsystencji stanie
się bardzo proste.
12.Przełączyć obydwa przełączniki 5 na
„OFF”.
Uwaga! Przed rozpoczęciem
wyciskania makaronu, należy
przytrzymać obydwa przełączniki 5
przynajmniej przez 5 sekund
wpołożeniu „OFF”, aby ciasto mogło
się odpowiednio ułożyć.
13.Ustawić pojemnik na makaron pod
urządzeniem.
14.Przełączyć obydwa przełączniki 5 na
„EXT”.
Rozpocznie się wyciskanie makaronu.
15.Przy pomocy skrobaka do ciasta 15
przycinać makaron bezpośrednio przy
nakładce 12 na odpowiednią długość.
16.Kiedy zostanie wyciśnięte całe ciasto,
przełączyć obydwa przełączniki 5 na
„OFF”.
Wskazówka: Ze względów
technicznych niewielka ilość ciasta
zawsze pozostaje wpojemniku 6.
17. Jeżeli ma zostać przygotowany
makaron dla drugiej osoby, wyjąć resztę
ciasta z pojemnika na ciasto 6.
Wskazówka: Zważyć wyjętą resztę i
odpowiednio zmniejszyć całkowitą ilość
składników na drugie ciasto. Można
dzięki temu dodać resztę pierwszego
ciasta do drugiego ciasta, nie
przekraczając maksymalnej ilości
wynoszącej około 520 g.
18.Drugie ciasto przygotować w taki sam
sposób jak pierwsze.
19.Po zakończeniu pracy odłączyć
wtyczkę od gniazda sieciowego.
Uwaga!
Aby pozostałości ciasta nie zaschły, należy
od razu po użyciu rozłożyć i wyczyścić
urządzenie. Kiedy resztki ciasta zaschną,
rozłożenie urządzenia może stać się bardzo
trudne lub wręcz niemożliwe.
20.Rozłożyć urządzenie (patrz
"6.1 Rozkładanie urządzenia" na
stronie 23).
21.Wyczyścić urządzenie lub jego
elementy dodatkowe (patrz
"10. Czyszczenie urządzenia" na
stronie 31).
8. Przepisy na makaron
8.1 Wskazówki dotyczące
przygotowania makaronu
• Do przygotowania makaronu
najbardziej odpowiednie są kasza
manna, mąka orkiszowa, specjalna
mąka makaronowa lub mąka instant.
• Całkowita ilość mąki i płynu powinna
wynosić od 480 g do 520 g.
26
Urządzenie działa wtedy optymalnie.
Przy mniejszych ilościach składniki nie
są dobrze ugniatane, a przy większych
ilościach masa może wypłynąć z
pojemnika na ciasto.
• Przy ugniataniu poniżej 3 minut może
się zdarzyć, że składniki nie zostaną
wystarczająco rozmieszane.
Page 29
RP89212 Pasta Maker LB4 Seite 27 Mittwoch, 29. Mai 2013 3:58 15
• Przy ugniataniu powyżej 5 minut ciasto
może się stać zbyt ciepłe izacząć się
kleić.
• Wyjęty makaron należy rozłożyć na
czystym ręczniku, aby się nie sklejał.
• Zioła służą tylko do zabarwienia, przy
gotowaniu makaronu tracą smak.
•Można wysuszyć makaron izapewnić
wten sposób jego dłuższą trwałość.
W tym celu rozłożyć makaron na czystej
ściereczce i suszyć go mniej więcej 1
dzień na powietrzu albo w nagrzanym
do temperatury ok. 40°C piekarniku
przez mniej więcej 1 - 3 godziny.
• Jeśli ciasto przyklei się do pokrywy,
można za pomocą skrobaka do
ciasta 15 ostrożnie przecisnąć je do
dołu przez dwie szczeliny wpokrywie.
• Gotować makaron wwystarczającej
ilości wody (3–4 litry na 500 g
makaronu). Dodać 2–3 łyżki stołowe
soli.
• Wprzypadku świeżego makaronu
woda pieni się bardziej niż
wprzypadku makaronu wysuszonego.
Dlatego nie należy całkowicie
przykrywać garnka.
• Świeży makaron gotuje się szybciej niż
wysuszony. Świeże makarony
wymagają wymagają gotowania przez
co najmniej 1 - 3 minuty, a suszone
makarony przeważnie przez od 6 do
12 minut.
8.2 Podstawowy przepis na makaron
Składniki:
• 340 g kaszki z pszenicy twardej
• 140 g wody
• 1 łyżka stołowa oleju (10 g)
Przygotowanie:
patrz "7. Przygotowanie makaronu" na
stronie 25.
Wskazówki:
• Makaron można stosować w postaci
świeżej lub po wysuszeniu.
• Konsystencję można zmieniać, dodając
mąki lub wody.
8.3 Makaron jajeczny
Składniki:
• 340 g kaszy manny
• 3 średniej wielkości jajka
Przygotowanie:
patrz "7. Przygotowanie makaronu" na
stronie 25.
Wskazówki:
• Makaron można stosować wpostaci
świeżej lub po wysuszeniu.
• Konsystencję można zmieniać, dodając
mąki lub wody.
8.4 Zielony makaron orkiszowy
Składniki:
• 340 g mąki orkiszowej (ewentualnie
mąki makaronowej lub mąki instant)
• 175 g szpinaku (świeżo zblanszowany
isiekany albo mrożony. Nie stosować
gotowego szpinaku ze śmietanką –
śmietanka sprawia, że makaron jest zbyt
miękki.)
• 1 ząbek czosnku (ze względu na smak
można go nie dodawać)
• 1 szczypta tartej gałki muszkatołowej
Przygotowanie:
1. Wsypać wszystkie składniki
bezpośrednio do pojemnika na ciasto 6.
2. Przygotować makaron, zgodnie z
opisem w"7. Przygotowanie makaronu"
na stronie 25.
Wskazówki:
• Makaron można stosować wpostaci
świeżej lub po wysuszeniu.
SPM200A1 27
Page 30
RP89212 Pasta Maker LB4 Seite 28 Mittwoch, 29. Mai 2013 3:58 15
• Konsystencję można zmieniać, dodając
mąki lub wody.
8.5 Makaron czerwony
Składniki:
• 340 g mąki makaronowej (ewentualnie
mąki orkiszowej lub mąki instant)
•1 jajko
• 1 łyżka stołowa keczupu
• ok. 80–100 g koncentratu
pomidorowego
Przygotowanie:
1. Wbić jajko do miski idodać do niego
keczup.
2. Dodać koncentratu pomidorowego do
uzyskania wagi całkowitej 160 g.
3. Wsypać mąkę i dodać zmieszane jajko i
pomidory bezpośrednio do pojemnika
na ciasto 6.
4. Przygotować makaron, zgodnie z
opisem w"7. Przygotowanie makaronu"
na stronie 25.
Wskazówki:
• Makaron można stosować wpostaci
świeżej lub po wysuszeniu.
• Konsystencję można zmieniać, dodając
mąki lub wody.
8.6 Makaron czarny
Składniki:
• 340 g mąki makaronowej (ewentualnie
mąki orkiszowej lub mąki instant)
• 150 g jajek
• 10 g barwnika ciemnobrunatnego
(sepia)
Przygotowanie:
patrz "7. Przygotowanie makaronu" na
stronie 25.
Wskazówki:
• Makaron można stosować wpostaci
świeżej lub po wysuszeniu.
• Konsystencję można zmieniać, dodając
mąki lub wody.
8.7 Kruche ciasteczka
Składniki:
• 230 g mąki pszennej typu 450 (mąka
tortowa)
• 150 g masła, zimnego ipociętego na
cienkie plasterki
• 100 g cukru
•1 jajko
• 1 torebka cukru waniliowego
•1 szczypta soli
Przygotowanie:
1. Włożyć składniki do pojemnika na
ciasto.
2. Ugniatać około 5 minut.
3. Następnie przecisnąć przez
nakładkę 22 do kruchych ciasteczek.
4. Przy pomocy skrobaka na ciasto 15
odcinać paski ozbliżonej długości przy
nakładce 12.
5. Układać paski na blasze do pieczenia
wkształt litery S, prosto lub wkółka.
6. Wypiekać przez 10 minut
wtemperaturze 180°C.
Wskazówki:
• Przed pieczeniem można udekorować
ciasteczka wiórkami zorzechów lub
migdałów.
• Po upieczeniu można udekorować
schłodzone ciasteczka kuwerturą.
28
Page 31

RP89212 Pasta Maker LB4 Seite 29 Mittwoch, 29. Mai 2013 3:58 15
9. Przepisy na sosy do past
Wskazówki dotyczące uzyskania
najlepszego smaku:
• stosować pieprz isól zmłynka
• zawsze stosować świeże zioła
iskładniki
• ucierać świeży parmezan
• stosować oliwę zoliwek tłoczoną na
zimno
• Domowa pasta smakuje najlepiej, kiedy
po ugotowaniu zostanie zarumieniona
na patelni z odrobiną oliwy z oliwek i
czosnku. W zależności od upodobań
smakowych można też (przed
dodaniem pasty) podsmażyć grzyby,
mięso lub krewetki. Dodać soli ipieprzu
(z młynka) anastępnie serwować
zrozdrobnioną bazylią lub rukolą albo
zpomidorami. Parmezan serwuje się
jako dodatek. Najlepiej smakuje świeżo
starty.
9.1 Sos carbonara
Składniki:
• 2 łyżki stołowe oliwy zoliwek do
podsmażenia
• 2 ząbki czosnku, drobno siekane
• 150 g szynki gotowanej, krojonej
wkostkę
• 4 jajka
•1 szczypta soli
• 1 kubek bitej śmietany
• 100 ml mleka
• 100 g tartego parmezanu
•sól ipieprz zmłynka
• gałka muszkatołowa, mielona, do
przyprawienia
Przygotowanie:
1. Roztrzepać jajka ze śmietaną, mlekiem,
solą, pieprzem igałką muszkatołową
przy użyciu trzepaczki do ubijania
piany.
2. Dodać połowę startego parmezanu,
cały czas mieszając.
3. Podgrzać oliwę zoliwek na patelni, na
średnim ogniu, dodać drobno siekany
czosnek ikrótko podsmażyć.
4. Wlać masę jajeczną.
5. Na koniec dodać pokrojoną w kostkę
szynkę.
9.2 Sos pomidorowy
Składniki:
• 850 ml pomidorów zpuszki
•1 mała cebula
•1 ząbek czosnku
• 2 łyżki stołowe koncentratu
pomidorowego
•sól
•biały pieprz
•cukier
•oregano
• zioła prowansalskie
• 3 łyżki stołowe oliwy zoliwek
Przygotowanie:
1. Rozgrzać oliwę zoliwek wnaczyniu
opojemności 2–3 l.
2. Drobno pokroić cebulę, dodać ją idusić
do zeszklenia; dodać przeciśnięty przez
praskę czosnek.
3. Rozgnieść pomidory na masę Włożyć
do garnka, dodać koncentratu
pomidorowego iprzyprawić solą,
pieprzem iszczyptą cukru.
4. Gotować przez 10 minut, od czasu do
czasu mieszając.
SPM200A1 29
Page 32

RP89212 Pasta Maker LB4 Seite 30 Mittwoch, 29. Mai 2013 3:58 15
5. Na koniec doprawić sos pomidorowy
solą, pieprzem, oregano oraz (w
zależności od upodobań smakowych)
ziołami prowansalskimi.
Wskazówka:
• Można też sparzyć pomidory, zdjąć
skórkę irozdrobnić je mikserem lub
ubijakiem do puree.
9.3 Sos gorgonzola
Składniki:
• 200 ml śmietany
• 200 g gorgonzoli
Przygotowanie:
1. Podgrzać śmietanę.
2. Dodawać gorgonzolę, cały czas
mieszając i rozpuścić ją wśmietanie.
Podgrzewać, cały czas mieszając.
Wskazówka:
• Można także dodać krojoną wkostkę
szynkę gotowaną.
9.4 Aglio e Olio
Składniki:
• 4 łyżki stołowe oliwy zoliwek tłoczonej
na zimno
• 2 ząbki czosnku
•bazylia
•oregano
•pieprz
•sól
Przygotowanie:
1. Zeszklić czosnek na oliwie zoliwek,
poczekać na przesiąknięcie
ugotowanego spaghetti smakiem.
2. Doprawić pieprzem isolą zmłynka.
3. Wzależności od preferencji można
serwować ze świeżo startym
parmezanem.
9.5 Pesto (czerwone)
Składniki:
• 150 g pomidorów (suszonych)
• 1 pęczek bazylii
• 1 cebula, czerwona (krojona
wćwiartki)
• 2 łyżki stołowe orzeszków piniowych
•1–2 ząbki czosnku
• 2 łyżeczki octu balsamicznego
• 5 łyżek stołowych oliwy zoliwek
•sól
•pieprz
Przygotowanie:
1. Rozdrobnić pomidory, listki bazylii,
orzeszki piniowe, czosnek icebulę do
uzyskania masy.
2. Dodać ocet i olej, anastępnie
zmiksować.
3. Doprawić solą ipieprzem.
Wskazówka:
• Należy przechowywać pesto
wzakręcanym słoiku, pod warstwą
oliwy zoliwek. Można je w ten sposób
przechowywać w lodówce przez ok. 4
tygodnie.
9.6 Pesto (zielone)
Składniki:
• 1–2 pęczki świeżej bazylii
•1–2 ząbki czosnku
• 2 łyżki stołowe orzeszków piniowych
•oliwy zoliwek
•2 łyżki stołowe parmezanu
• Sól + świeżo zmielony czarny pieprz
Przygotowanie:
1. Podprażyć orzeszki piniowe na patelni.
2. Drobno posiekać bazylię, czosnek i
orzeszki piniowe.
3. Dodawać oliwę z oliwek, aż powstanie
pasta o kremowej konsystencji.
30
Page 33

RP89212 Pasta Maker LB4 Seite 31 Mittwoch, 29. Mai 2013 3:58 15
4. Następnie dodać parmezanu.
5. Doprawić solą ipieprzem.
Wskazówka:
• Należy przechowywać pesto
wzakręcanym słoiku, pod warstwą
10. Czyszczenie urządzenia
Ostrzeżenie! Aby uniknąć
porażenia prądem, zranienia lub
uszkodzenia urządzenia:
– przed każdym czyszczeniem
wyjąć wtyczkę sieciową
zgniazdka sieciowego,
– nigdy nie zanurzać korpusu
silnika 3 wwodzie,
Uwaga! Nie stosować środków do
szorowania ani żrących lub rysujących
środków czyszczących. Można w ten
sposób uszkodzić urządzenie.
• Rozłożyć urządzenie (patrz
"6.1 Rozkładanie urządzenia" na
stronie 23).
10.1 Czyszczenie korpusu silnika (3).
1. Czyścić korpus silnika 3 wilgotną
ściereczką. Można też użyć niewielkiej
ilości płynu do mycia naczyń.
2. Następnie przetrzeć powierzchnię
czystą wodą.
3. Można ponownie użyć korpusu silnika 3
dopiero po jego całkowitym
wyschnięciu.
10.2 Czyszczenie pojemnika na
ciasto (
ślimaka (9)
Uwaga! Elementy urządzenia nie są
przystosowane do mycia wzmywarce.
Wzmywarce tworzywo sztuczne może stać
się łamliwe iulec uszkodzeniu.
6), pokrywy (1) ikorpusu
oliwy zoliwek. Można je w ten sposób
przechowywać w lodówce przez ok. 4
tygodnie.
1. Włożyć części do zimnej lub letniej
wody, aby zmiękczyć resztki ciasta.
Wskazówka: Do wody można
dodać odrobinę płynu do mycia naczyń.
2. Usunąć zmiękczone pozostałości ciasta
przy użyciu szczotki do cz yszczenia 16.
3. Wypłukać wczystej wodzie.
4. Poczekać na całkowite wyschnięcie
części przed ponownym użyciem
urządzenia.
10.3 Czyszczenie pozostałych
akcesoriów
Uwaga! Elementy urządzenia nie są
przystosowane do mycia wzmywarce.
Wzmywarce tworzywo sztuczne może stać
się łamliwe iulec uszkodzeniu.
1. Pozostawić ciasto do wyschnięcia
przynajmniej na 24 godziny. Wten
sposób stanie się ono twarde iłamliwe.
2. Usunąć zaschnięte pozostałości ciasta
przy użyciu szczotki do cz yszczenia 16.
3. Nakładkami 17 do 22 można lekko
postukać wstół, aby zaschnięte ciasto
odpadło.
4. Otwory wnakładkach 17 do 22 można
oczyścić z pozostałości ciasta przy
użyciu wykałaczki.
5. Części umyć w ciepłej wodzie w
płynem do zmywania naczyń.
6. Wypłukać wczystej wodzie.
7. Poczekać na całkowite wyschnięcie
części przed ponownym użyciem
urządzenia.
SPM200A1 31
Page 34

RP89212 Pasta Maker LB4 Seite 32 Mittwoch, 29. Mai 2013 3:58 15
11. Utylizacja
11.1 Urządzenie
Symbol przekreślonego kubła
na śmieci na kółkach oznacza,
że produkt w Unii Europejskiej
musi być zbierany oddzielnie.
Dotyczy to produktu i
wszystkich oznakowanych tym
symbolem części wyposażenia.
Oznakowane produkty nie mogą być
odprowadzane do odpadów
z gospodarstw domowych, lecz muszą być
oddane na składowiska, zbierające
12. Gwarancja firmy HOYER Handel GmbH
Szanowna Klientko, szanowny Kliencie,
dla tego urządzenia obowiązuje gwarancja
ważna przez 3 lata od daty zakupu. W
przypadku wad produktu Klient ma
ustawowe prawa wobec sprzedawcy.
Podane niżej warunki gwarancji nie
ograniczają zakresu tych praw
ustawowych.
Warunki gwarancji
Okres gwarancji zaczyna upływać w dniu
zakupu. Należy zachować oryginalny
paragon kasowy. Dokument ten jest
potrzebny jako dowód zakupu.
Jeżeli w ciągu trzech lat od daty zakupu
tego produktu wystąpi wada materiałowa
lub wada wykonania, produkt zostanie
przez nas – zgodnie z naszą decyzją –
nieodpłatnie naprawiony lub wymieniony.
Warunkiem skorzystania ze świadczenia
gwarancyjnego jest przedstawienie w ciągu
trzyletniego okresu gwarancji
produkty elektryczne oraz elektroniczne do
recyklingu. Recykling pomaga zredukować
zużycie surowców i odciąża środowisko. W
związku z tym ściśle przestrzegaj
obowiązujących w kraju użytkowania
przepisów dotyczących usuwania.
11.2 Opakowanie
Przy usuwaniu opakowania należy
stosować się do odpowiednich krajowych
przepisów.
uszkodzonego urządzenia i dowodu
zakupu (paragonu kasowego) wraz z
krótkim pisemnym opisem wady oraz czasu
jej wystąpienia.
Jeżeli defekt jest objęty naszą gwarancją,
Klient otrzyma z powrotem naprawiony
albo nowy produkt. Fakt naprawy lub
wymiany produktu nie powoduje
wznowienia upływu okresu gwarancji.
Okres gwarancji i prawa ustawowe
związane z wadliwymi produktami
Wykonanie świadczenia gwarancyjnego
nie przedłuża okresu gwarancji. Dotyczy to
również wymienionych i naprawionych
części. Ewentualne wady i braki, które
występowały już w chwili sprzedaży, Klient
ma obowiązek zgłosić natychmiast po
rozpakowaniu produktu. Naprawy
wykonywane po upływie okresu gwarancji
są odpłatne.
32
Page 35

RP89212 Pasta Maker LB4 Seite 33 Mittwoch, 29. Mai 2013 3:58 15
Zakres gwarancji
Urządzenie zostało wyprodukowane
zgodnie z surowymi normami jakościowymi
i starannie sprawdzone przed dostawą.
Gwarancja obejmuje wady materiałowe i
wady wykonania. Gwarancja nie obejmuje
części produktu, które ulegają normalnemu
zużyciu i mogą być uznane za części
zużywające się. a także uszkodzeń czułych
części, np. przełączników, akumulatorów i
elementów wykonanych ze szkła.
Gwarancja wygasa w przypadku
uszkodzenia produktu, jego niezgodnego z
przeznaczeniem użytkowania lub
nieprawidłowej pielęgnacji. Warunkiem
zgodnego z przeznaczeniem użytkowania
produktu jest dokładne przestrzeganie
wszystkich wskazówek zawartych w
instrukcji obsługi.
Należy wykluczyć takie sposoby używania
produktu i czynności, których zakazuje lub
przed którymi przestrzega instrukcja obsługi.
Produkt jest przeznaczony tylko do użytku
prywatnego, nie do użytku gospodarczego.
Niezgodne z przeznaczeniem i
nieprawidłowe obchodzenie się z produktem,
używanie siły i ingerencje ze strony osób
innych niż nasze autoryzowane centrum
serwisowe powodują utratę gwarancji.
obsługi (z lewej strony u dołu) albo na
naklejce znajdującej się na tylnej lub
dolnej części produktu.
• W razie wadliwego działania albo innych
wad należy się wstępnie skontaktować z
podanym niżej centrum serwisowym,
telefonicznie lub e-mailem.
• Produkt uznany za wadliwy można
następnie bezpłatnie wysłać na
otrzymany adres serwisu z dołączonym
dowodem zakupu (paragonem
kasowym) i informacją, na czym polega
i kiedy wystąpiła wada.
Na stronie www.lidlservice.com można pobrać tę
instrukcję obsługi i wiele innych
podręczników użytkownika i
filmów wideo oraz
oprogramowanie.
Centrum serwisowe
Serwis Polska
Tel.: 22 397 4996
E-Mail: hoyer@lidl.pl
IAN: 89212
Opracowywanie reklamacji objętych
gwarancją
Aby zapewnić szybkie opracowanie
reklamacji, należy się zastosować do
następujących wskazówek:
• Przy każdym kontakcie należy
przygotować numer artykułu (dla tego
urządzenia: IAN 89212) oraz paragon
kasowy jako dowód zakupu.
• Numer artykułu jest podany na tabliczce
znamionowej, na wygrawerowanym
polu, na stronie tytułowej instrukcji
SPM200A1 33
Proszę pamiętać, że podany niżej adres nie
jest adresem serwisu. Należy się
wcześniej skontaktować z podanym wyżej
centrum serwisowym.
HOYER Handel GmbH
Kühnehöfe 5
D-22761 Hamburg
Deutschland
Dostawca
Page 36

RP89212 Pasta Maker LB4 Seite 34 Mittwoch, 29. Mai 2013 3:58 15
Tartalom
1. A készülék leírása . . . . . . . . . . . . . . . . . . . . . . . . . . . . . . . . . . . . . . . . . . . . . . . . . . . . . . 34
2. Az alkatrészek megnevezése (lásd a kihajtható oldalon) . . . . . . . . . . . . . . . . . . . . . . . . . . 35
3. Műszaki adatok . . . . . . . . . . . . . . . . . . . . . . . . . . . . . . . . . . . . . . . . . . . . . . . . . . . . . . . 35
4. Biztonsági előírások . . . . . . . . . . . . . . . . . . . . . . . . . . . . . . . . . . . . . . . . . . . . . . . . . . . . 35
5. Kicsomagolás és felállítás . . . . . . . . . . . . . . . . . . . . . . . . . . . . . . . . . . . . . . . . . . . . . . . . 38
6. A készülék szétszerelése és összeszerelése . . . . . . . . . . . . . . . . . . . . . . . . . . . . . . . . . . . . 38
7. Tésztakészítés. . . . . . . . . . . . . . . . . . . . . . . . . . . . . . . . . . . . . . . . . . . . . . . . . . . . . . . . . 40
8. Tésztareceptek . . . . . . . . . . . . . . . . . . . . . . . . . . . . . . . . . . . . . . . . . . . . . . . . . . . . . . . . 41
9. Tésztamártások receptjei . . . . . . . . . . . . . . . . . . . . . . . . . . . . . . . . . . . . . . . . . . . . . . . . . 43
10. A készülék tisztítása . . . . . . . . . . . . . . . . . . . . . . . . . . . . . . . . . . . . . . . . . . . . . . . . . . . . 45
11. Ártalmatlanítás. . . . . . . . . . . . . . . . . . . . . . . . . . . . . . . . . . . . . . . . . . . . . . . . . . . . . . . . 46
12. Jótállási . . . . . . . . . . . . . . . . . . . . . . . . . . . . . . . . . . . . . . . . . . . . . . . . . . . . . . . . . . . . . 46
Gratulálunk az új készülék
megvásárlásához.
Ön egy kiváló minőségű termék mellett
döntött. A Kezelési utasítás a termék
szállítási terjedelméhez tartozik. Az utasítás
fontos biztonsági, kezelési és
hulladékkezelési utasításokat tartalmaz.
Használat előtt ismerkedjen meg a termékre
vonatkozó valamennyi kezelési és
biztonsági utasítással. A terméket csak a
leírás szerint, a megfelelő alkalmazási
területen használja.
A termékkel együtt az összes, a termékre
vonatkozó dokumentumot adja tovább.
1. A készülék leírása
1.1 Rendeltetési cél
A SilverCrest SPM200A1 friss házitészta
előállítására és tolófánk készítésére szolgál.
A készülék csak száraz helyiségben
használható. Alkalmazása szabadban vagy
nedves helyiségekben nem megengedett.
A készülék rendeltetése háztartási használat,
kereskedelmi felhasználásra nem alkalmas.
A készülék ugyancsak alkalmas az alábbi
célokra:
• üzletekben, irodákban és más
kereskedelmi ágazatban dolgozók
konyhájában történő használat,
• mezőgazdasági gazdaságban történő
használat,
34
• szállodák, motelek és más szállások
ügyfelei számára,
• reggeliztető panziók.
1.2 Szállítási terjedelem
• 1 db tésztagép tésztagyúróval és csigával
• 1 db csavarószerszám
• 1 db tisztítókefe
• 1 db tésztakaparó
• 5 db betét különböző tésztafélékhez
• 1 db tolófánkbetét
• 1 db kezelési útmutató
Page 37

RP89212 Pasta Maker LB4 Seite 35 Mittwoch, 29. Mai 2013 3:58 15
2. Az alkatrészek megnevezése (lásd a kihajtható oldalon)
1 Fedél
2 Fedélrögzítő
3 Motorház
4 Motortengely
5 Kapcsolók: mindkét kapcsolónak
ugyanabban az állásban kell lennie
6 Tésztatartó
7 Fogas hüvely
8 Gyúrólapát
9 Csigaház
10 Csigagyűrű
11 Csiga
12 Tésztabetét (választható betétek:
13 Menetes gyűrű
14 Csavarószerszám
15 Tésztakaparó
16 Tisztítókefe
17 Fészektészta- (tagliatelle-)betét
18 Extra széles- (pappardelle-)betét
19 Szélesmetélt- (fettuccine-)betét
20 Spagetti- betét
21 Szalagmetélt- (linguine-)betét
22 Tolófánkbetét
3. Műszaki adatok
Áramellátás: 220 - 240 V~ / 50/60 Hz
Teljesítmény: 200 Watt
Érintésvédelmi osztály: II
4. Biztonsági előírások
4.1 Fogalommagyarázat
A következő jelfogalmak szerepelnek a
kezelési útmutatóban:
Figyelmeztetés!
Magas fokú kockázat. A
figyelmeztetések be nem tartása
életveszélyes lehet.
Vigyázat!
Közepes kockázat. A figyelmeztetések be
nem tartása anyagi károkat okozhat.
Figyelem:
Kis fokú kockázat. A készülék használatakor
figyelembe veendő tények.
4.2 A készülékre vonatkozó
• Ezt a készüléket 8. életévüket betöltött,
valamint csökkentett fizikai, érzéki vagy
mentális képességekkel rendelkező, ill.
tapasztalatlan, alacsonyabb tudásszintű
személyek használhatják, ha a felhasználók
felügyelete, ill. a biztonságos használatra
vonatkozó tájékoztatásuk biztosított, és a
használatból eredő veszélyeknek
17 – 22)
külön utasítások
Figyelmeztetés!
megelőzése érdekében vegye
figyelembe a következő utasításokat.
A sérülések
SPM200A1 35
Page 38

RP89212 Pasta Maker LB4 Seite 36 Mittwoch, 29. Mai 2013 3:58 15
tudatában vannak. Ne hagyja, hogy
gyerekek játszanak a készülékkel.
• Gyerekek a készülék tisztítását vagy
karbantartását csak akkor végezhetik, ha 8.
életévüket betöltötték és felügyelet alatt
állnak.
• 8 évesnél kisebb gyerekek kezébe a
készülék és a csatlakozóvezeték nem való.
• A készüléket tilos külső időkapcsoló órával
vagy külön távkapcsoló rendszerrel, mint
például rádiós csatlakozó aljzattal
működtetni.
• Minden egyes tisztítás előtt húzza ki a
hálózati csatlakozódugót a hálózati
csatlakozóaljzatból.
• Soha ne merítse vízbe a motorházat (
3
).
• Semmiképpen se használjon súroló, maró
vagy karcoló tisztítószert. Ellenkező esetben
a készülék megsérülhet.
4.3 Általános tudnivalók
• Kérjük, használat előtt figyelmesen
olvassa el a kezelési útmutatót. Az
útmutató a készülék tartozéka, és mindig
rendelkezésre kell állnia.
• A készüléket kizárólag a megadott
rendeltetési célra használja (lásd
„1.1 Rendeltetési cél“ a 34. oldalon).
• Ellenőrizze, hogy a hálózati feszültség
megegyezik-e a szükséges hálózati
feszültséggel (lásd a készüléken lévő
típustáblán), mivel az eltérő hálózati
feszültség károsíthatja a készüléket.
• Kérjük, vegye figyelembe, hogy az
ebben a kezelési útmutatóban nem
szereplő tartozékok használata vagy az
eredetitől eltérő pótalkatrészekkel
történő javítás a garancia és
szavatosság megszűnését eredményezi.
Ez olyan javításokra is vonatkozik,
amelyeket nem képzett szakember
végez. A kapcsolatfelvételi adatok itt
találhatók: 46. oldalon a „12. Jótállási”.
• A garanciális időszak alatt bekövetkező
működési rendellenességek esetén
kizárólag szervizközpontunkhoz
forduljon javítás céljából. Máskülönben
megszűnik a garancia.
4.4 Áramütés elleni védelem
Figyelmeztetés! A következő
biztonsági tudnivalók célja, hogy
megvédjék Önt az áramütéstől.
• Semmiképp sem szabad a készüléket
használni, ha a készülék megsérült. Ilyen
esetben a készüléket képzett
szakemberekkel javíttassa meg. A
kapcsolatfelvételi adatok itt találhatók:
46. oldalon a „12. Jótállási”.
•Ha a készülék hálózati
csatlakozókábele megsérül, akkor a
veszélyek megelőzése érdekében azt a
gyártóval vagy hasonló képzettségű
személlyel kell kicseréltetni.
•A motorház (3) belsejébe ne kerüljön
víz vagy egyéb folyadék. Ezért:
– a készüléket soha ne használja a
szabadban
– a motorházat (3) soha ne mártsa vízbe.
– soha ne tegyen folyadékkal telt
edényeket a készülékre, mint például
poharat, vázát stb.
– soha ne használja túl nedves
környezetben
– soha ne használja mosogató,
fürdőkád, zuhany vagy úszómedence
közvetlen közelében, mert a
kifröccsenő víz a készülékbe kerülhet.
Ha mégis víz kerülne a készülékbe,
azonnal húzza ki a hálózati csatlakozó
dugót, és a készüléket vigye el
szakszervizbe javíttatni. A
kapcsolatfelvételi adatok itt találhatók:
46. oldalon a „12. Jótállási”.
36
Page 39

RP89212 Pasta Maker LB4 Seite 37 Mittwoch, 29. Mai 2013 3:58 15
•Soha ne nyúljon vizes kézzel a
készülékhez, a hálózati kábelhez vagy a
hálózati csatlakozó dugóhoz.
• A hálózati kábelt mindig a
csatlakozónál fogva húzza ki. Soha ne
húzza ki a kábeltől fogva.
• Figyeljen, hogy a hálózati kábelt soha
ne hajlítsa, vagy ne törje meg.
• A hálózati kábelt tartsa távol forró
felületektől (pl. a tűzhelytől).
• Ha a készüléket hosszabb ideig nem
használja, húzza ki a csatlakozó dugót
a csatlakozó aljzatból. A készülék csak
ebben az esetben van teljesen
áramtalanítva.
• Kerülje a hosszabbítók használatát.
Ezek használata csak bizonyos feltételek
mellett megengedett:
– A hosszabbító kábel megegyezik a
készülék áramerősségével.
– A kábelt ne hagyja rögzítetlen
állapotban: olyan helyre tegye, hogy
ne lehessen belebotlani, és ahol
gyerekek nem férhetnek hozzá.
– A hosszabbító ne rongálódjon meg.
– Ne csatlakoztasson egyéb készüléket
a hálózati csatlakozó dugóhoz, mivel
az megterhelheti a villamoshálózatot
(többszörös csatlakozó aljzat
használata tilos!).
4.5 Sérülések elleni védelem
Figyelmeztetés! A sérülések
megelőzése érdekében vegye
figyelembe a következő
utasításokat.
• Figyeljen arra, hogy a hálózati kábelbe
ne lehessen belebotlani, beleakadni
vagy arra rálépni.
• Üzem közben kerülje az érintkezést a
készülék mozgó alkatrészeivel, pl. a
gyúrólapáttal (8) vagy a csigával (11).
A mozgó alkatrészek behúzhatják az
Ön kezét vagy haját, ami sérüléseket
okozhat. A készüléket csak akkor
kapcsolja be, ha a fedél (1) tökéletesen
a helyén van.
• Minden tisztítás és szétszerelés előtt
húzza ki a hálózati csatlakozódugót a
hálózati csatlakozóaljzatból.
4.6 Gyermekei biztonsága érdekében
Figyelmeztetés! A gyerekek
gyakran nem tudják helyesen
felmérni a vészhelyzeteket, ezért
gyakran megsérülnek. Ezért
figyeljen a következőkre:
• A készüléket csak felnőtt felügyelete
mellett szabad használni.
• Vigyázzon, hogy a készüléket mindig
gyermekektől elzárva tartsa. Vigyázzon,
hogy a gyerekek soha ne tudják a
készüléket lehúzni vagy felborítani a
kábelnél fogva.
• Vigyázzon, hogy a csomagolófóliák ne
okozzanak halálos balesetet a gyerekek
számára. A csomagolófólia nem
játékszer.
4.7 Anyagi károk
Vigyázat! Az anyagi károk elkerülése
érdekében tartsa be a következő
előírásokat.
• A készüléket kizárólag sík, száraz és nem
csúszó felületen helyezze el, hogy a
készülék ne eshessen vagy csúszhasson le.
• Ne tegye a készüléket forró
tűzhelylapra.
• Ne használjon forró folyadékokat.
• Se a készüléket, se annak tartozékait ne
tegye mikrohullámú sütőbe.
SPM200A1 37
Page 40

RP89212 Pasta Maker LB4 Seite 38 Mittwoch, 29. Mai 2013 3:58 15
5. Kicsomagolás és felállítás
1. Vegye ki a tartozékokat a
csomagolásból.
2. Ellenőrizze, hogy az összes tartozék
meglegyen (lásd „1.2 Szállítási
terjedelem“ a 34. oldalon) és épségben
legyen.
3. Az első használat előtt alaposan tisztítsa
meg a készüléket (lásd „10. A készülék
tisztítása“ a 45. oldalon).
4. A készüléket sík, száraz és
csúszásmentes felületen állítsa fel, hogy
a készülék ne borulhasson fel és ne
csúszhasson le.
6. A készülék szétszerelése és összeszerelése
Figyelmeztetés! Az áramütés,
sérülés vagy károsodás
veszélyének elkerülése érdekében:
– Minden tisztítás és szét- vagy
összeszerelés előtt húzza ki a
hálózati csatlakozódugót a
hálózati csatlakozóaljzatból.
6.1 A készülék szétszerelése
1. Mindkét kapcsolót (5) kapcsolja „OFF”
állásba.
Figyelem: A készülék biztonsági
okokból 2 db biztonsági kapcsolóval
van ellátva, és a megfelelő funkció
aktiválásához mindkettőt működésbe
kell léptetni. Ha a két kapcsoló különböz
állásban van, a készülék kikapcsolva
marad. Ezzel megelőzhető a véletlen
működésbe léptetés.
2. Ügyeljen arra, hogy a fedél (1) jól
legyen felrakva, mert ellenkező esetben
a csigaház (9) a menetes gyűrű (13)
kicsavarásakor kieshet.
3. Lazítsa ki a menetes gyűrűt (13).
5. Szerelje össze a készüléket (lásd „6.2 A
készülék összeszerelése“ a 39. oldalon).
6. Mindkét kapcsolót 5 kapcsolja „OFF”
állásba.
7. Dugja be a hálózati csatlakozódugót
egy megfelelő hálózati
csatlakozóaljzatba (lásd „3. Műszaki
adatok“ a 35. oldalon).
A készülék most üzemkész.
Figyelem: Ha a menetes gyűrű (13)
túl szoros, akkor a menetes gyűrű (13)
kilazításához használja a
csavarószerszámot (14).
Ha a menetes gyűrű (13) a
csavarószerszámmal (14) is nehezen
oldható ki, működtesse a készüléket
10–20 másodpercig „MIX” állásban,
így a menetes gyűrű némileg meglazul.
Minden egyes kicsavarás előtt húzza ki
a hálózati csatlakozódugót a hálózati
csatlakozóaljzatból.
4. Vegye ki a betétet (12).
5. Vegye le a fedelet (1).
Figyelem: A fedél elülső szélén két
pecek található. Ezeket húzza egy kicsit
előre, közben a fedelet (1) tolja meg,
hajtsa fel és vegye le.
6. Fordítsa el a csigaházat (9) az
óramutató járásával ellentétesen, majd
vegye ki a házat.
7. Vegye ki a csigát (11) a
csigaházból (9).
38
Page 41

RP89212 Pasta Maker LB4 Seite 39 Mittwoch, 29. Mai 2013 3:58 15
8. Húzza le a csigagyűrűt
(10) a csigáról (11).
9. Húzza ki a gyúrólapátot (8) a
tésztatartóból (6).
10.Húzza le a fogas
hüvelyt (7) a
gyúrólapátról (8).
11.Vegye ki a tésztatartót (6) a
motorházból (3).
6.2 A készülék összeszerelése
1. Helyezze be a tésztatartót (6) a
motorházba (3).
2. Tolja a csigagyűrűt (10) a
csigára (11). Ügyeljen rá,
hogy a csigagyűrű a
helyére kerüljön és ott
bepattanjon.
3. Helyezze be a csigát (11) a
csigaházba (9).
4. Tolja rá a gyúrólapátot (8) a csiga (11)
tengelyére.
Figyelem: A csiga (11)
tengelye egy A rovátkával
van ellátva, ami biztosítja,
hogy a gyúrólapátot (8)
csak egy irányban
lehessen beszerelni.
A
5. Tolja rá a fogas hüvelyt (7) a csiga (11)
tengelyére.
Figyelem: A csiga (11) tengelye egy
A rovátkával van ellátva, ami biztosítja,
hogy a fogas hüvelyt (7) csak egy
irányban lehessen beszerelni.
6. Tolja az összeszerelt csigaházat (9) a
csigával (11) és a gyúrólapáttal (8) a
tésztatartóba (6).
Figyelem: A
B
csigaház(9) belső oldalán
van egy B nyúlvány,
amelynek behelyezéskor
felfelé kell mutatnia, mert
a csigaházat (9) csak így
lehet rendesen rögzíteni.
7. Nyomja a csigaházat (9) enyhén a
tésztatartóhoz (6) és az óramutató
járásának megfelelően elfordítva
rögzítse azt, amíg be nem kattan.
8. Győződjön meg arról, hogy a
tésztatartó (6) tökéletesen helyezkedik
el a motorházban (3).
9. Tartsa a fedelet (1) ferdén és illessze be
a fedélrögzítőbe (2).
10.Nyomja le a fedőt (1), hogy
kifogástalanul illeszkedjen a
tésztatartóra (6) és hallhatóan
bekattanjon.
Figyelem: A biztonsági kapcsoló csak
akkor teszi lehetővé a készülék
működését, ha a fedél rendesen a
helyére kattan.
11. Az egyik betétet (17) – (22) a menetes
gyűrűvel 13 csavarozza fel a
csigaházra 9.
Figyelem: Elég, ha a menetes gyűrűt
kézzel szorosra húzza. A
csavarószerszám (14) ehhez nem
szükséges
A készülék most üzemkész.
SPM200A1 39
Page 42

RP89212 Pasta Maker LB4 Seite 40 Mittwoch, 29. Mai 2013 3:58 15
7. Tésztakészítés
1. Válassza ki a kívánt betétet (12):
17Fészektészta- (tagliatelle-)betét
18Extra széles (pappardelle-)betét
19Szélesmetélt- (fettuccine-)betét
20Spagettibetét
21Szalagmetélt- (linguine-)betét
22Tolófánkbetét
2. Helyezze a kiválasztott betétet (17 –
22) kb. egy percre forró vízbe.
3. Rögzítse a kívánt betétet (17 – 22) a
menetes gyűrű (13) segítségével a
csigaházra (9) (lásd „6. A készülék
szétszerelése és összeszerelése“ a
38. oldalon).
4. Vegye le a fedelet (1).
Figyelem: A fedél elülső szélén két
pecek található. Ezeket húzza egy kicsit
előre, közben a fedelet (1) tolja meg,
hajtsa fel és vegye le.
5. Töltse a kívánt mennyiségű lisztet a
tésztatartóba (6).
Figyelem: Ha nem híg folyadékot, pl.
vizet használ, hanem pl. valamilyen
sűrűbb masszát vagy szilárd adalékokat
is tartalmazó keveréket, pl. apróra
vágott spenótot, akkor az nehezen folyik
át a fedélen. Ebben az esetben a
folyadékot közvetlenül a
tésztatartóba (6) töltse.
6. Tartsa a fedelet (1) ferdén és illessze be
a fedélrögzítőbe (2).
7. Nyomja le a fedőt (1), hogy
kifogástalanul illeszkedjen a
tésztatartóra (6) és hallhatóan
bekattanjon.
Figyelem: A biztonsági kapcsoló csak
akkor teszi lehetővé a készülék
működését, ha a fedél rendesen a
helyére kattan.
8. Dugja be a hálózati csatlakozódugót
egy megfelelő védőérintkezős hálózati
dugaszoló aljzatba (lásd „3. Műszaki
adatok“ a 35. oldalon).
9. Mindkét kapcsolót (5) kapcsolja
„MIX” állásba.
10.Lassan töltse a kívánt mennyiségű
folyadékot a fedélbe (1). A folyadék
innen a tésztatartóba folyik.
Figyelem:
– Ha az elkészítéshez tojás is
szükséges, akkor azt egy külön
tartóban verje fel.
– A felvert tojást és az olajat gyúrás
közben, a fedélen (1) keresztül töltse
be.
11.A gép kb. 5 perc alatt gyúrja a tésztát
megfelelő állagúvá.
Figyelem: A nyers tészta akkor
megfelelő állagú, ha nem ragad és nem
csomós. Adott esetben töltsön még
lisztet vagy vizet a fedélbe (1), ahonnan
az a tésztatartóba jut.
Egy kis tapasztalattal hamarosan fel
fogja ismerni, mikor ideális a tészta
állaga.
12.Mindkét kapcsolót (5) kapcsolja „OFF”
állásba.
Vigyázat! Mielőtt kinyomatja a nyers
tésztát, kapcsolja mindkét kapcsolót (5)
legalább 5 másodpercre „OFF”
állásba, hogy a tészta pihenhessen.
13.Állítson egy edényt a készülék alá,
amibe a tészta kinyomódhat.
14.Mindkét kapcsolót (5) kapcsolja „EXT”
állásba.
A tészta kipréselődik.
15.A tésztakaparóval (15) vágja a tésztát
közvetlenül a betétnél (12) megfelelő
hosszúságúra.
40
Page 43

RP89212 Pasta Maker LB4 Seite 41 Mittwoch, 29. Mai 2013 3:58 15
16.Ha az összes tésztát kinyomta, kapcsolja
mindkét kapcsolót (5) „OFF” állásba.
Figyelem: Műszaki okokból egy kis
tészta mindig a tésztatartóban (6)
marad.
17. A következő tésztaadag elkészítéséhez
a tésztamaradékot vegye ki a
tésztatartóból (6).
Figyelem: Mérje meg a tésztamaradék
súlyát, és ennek megfelelően adagolja a
következő tésztakészítéshez szükséges
adalékokat. Ezután az első készítésből
megmaradt tésztát ehhez hozzáadhatja,
így nem lépi túl a kb. 52 dkg-os
mennyiséget.
8. Tésztareceptek
8.1 Tippek a tésztakészítéshez
• A tésztakészítésre különösen dara,
tönkölybúzaliszt, különleges tésztaliszt
vagy instant liszt alkalmas.
• A liszt és a folyadék össztömege mindíg
48 és 52 dkg között legyen. Így
biztosítható a készülék kifogástalan
működése. Kevesebb mennyiség esetén
a készülék a tésztát nem tudja rendesen
átgyúrni, ha a mennyiség meghaladja
az előírt mértéket, akkor a tészta a
tésztatartóból kidagad.
• Ha a tésztát 3 percnél kevesebb ideig
gyúrja, akkor a hozzávalók nem
keverednek rendesen össze.
• Ha a tésztát 5 percnél hosszabb ideig
gyúrja, akkor az meleg és ragacsos lesz.
• A kinyomott tésztát terítse szét egy tiszta
kendőn, hogy ne ragadjon össze.
• A fűszernövények a tésztát csak színezik,
a főzés folyamán ízüket elveszítik.
18. A második tészta elkészítésekor ugyanúgy
járjon el, mint első alkalommal.
19. Ha elkészült, húzza ki a hálózati
csatlakozó dugót a hálózati
csatlakozóaljzatból.
Vigyázat!
A tésztamaradékok nem száradnak be a
készülékbe, ha azt használat után azonnal
szétszereli és megtisztítja. Ha a
tésztamaradékok beszáradnak, akkor nehéz
vagy adott esetben lehetetlen a készüléket
szétszerelni.
20.Szerelje szét a készüléket (lásd „6.1 A
készülék szétszerelése“ a 38. oldalon).
21. Tisztítsa meg a készüléket és az
alkatrészeket (lásd „10. A készülék
tisztítása“ a 45. oldalon).
• A tésztát szárítással tartósíthatja. Ennek
érdekében terítse ki a tésztát egy tiszta
ruhára és szárítsa szobahőmérsékleten
kb. egy napig vagy sütőben 40 °C-on
kb. 1 – 3 óráig, amíg az meg nem
szárad.
• Ha a fedélre tészta ragad, akkor azt a
tésztakaparóval (15) óvatosan
átnyomhatja a fedél két résén.
• A tésztát bő vízben főzze (50 dkg
tésztához 3–4 liter víz). Adjon hozzá
kb. 2–3 evőkanál sót.
• Friss tészták esetén a habképződés
intenzívebb, mind szárított tésztáknál.
Ezért a lábast vagy a fazekat ne fedje
le.
• A friss tészta hamarabb megfő, mint a
száraz. A friss tészta főzéséhez kb.
1 – 3 percre, míg a szárított tészta
főzéséhez általában 6 – 12 percre van
szükség.
SPM200A1 41
Page 44
RP89212 Pasta Maker LB4 Seite 42 Mittwoch, 29. Mai 2013 3:58 15
8.2 A tészta alapreceptje
Hozzávalók:
• 34 dkg durumbúzadara
•1,4 dl víz
• 1 evőkanál étolaj (1 dkg)
Elkészítés:
lásd: 40. oldalon a „7. Tésztakészítés”.
Tudnivalók:
• A tészta frissen vagy szárítva is
felhasználható.
• Az állagot liszt vagy egy kis víz
hozzáadásával befolyásolhatja.
8.3 Házitészta
Hozzávalók:
• 34 dkg dara
•3 közepes méretű
Elkészítés:
lásd: 40. oldalon a „7. Tésztakészítés”.
Tudnivalók:
• A tészta frissen vagy szárítva is
felhasználható.
• Az állagot liszt vagy egy kis víz
hozzáadásával befolyásolhatja.
8.4 Zöld tönkölytészta
Hozzávalók:
• 34 dkg tönkölybúzaliszt (esetleg
tésztaliszt vagy instant liszt)
• 17,5 dkg spenót (frissen forrázott és
apróra vagdalt vagy mirelit spenót.
tejszínes spenótot ne használjon, mert a
tejszín a tésztát túlpuhítja.)
• 1 gerezd fokhagyma (ízlés szerint el is
hagyható)
• 1 csipetnyi reszelt szerecsendió
Elkészítés:
1. Rakja az összes hozzávalót közvetlenül
a tésztatartóba (6).
2. Készítse el a tésztát a 40. oldalon a
„7. Tésztakészítés” fejezetben leírtaknak
megfelelően.
Tudnivalók:
• A tészta frissen vagy szárítva is
felhasználható.
• Az állagot liszt vagy egy kis víz
hozzáadásával befolyásolhatja.
8.5 Piros tészta
Hozzávalók:
• 34 dkg tésztaliszt (esetleg
tönkölybúzaliszt vagy instant liszt)
•1 tojás
• 1 evőkanál ketchup
• kb. 8–10 dkg sűrített paradicsom
Elkészítés:
1. Tegye a felvert tojást és a ketchupot egy
tálba.
2. Ebbe annyi sűrített paradicsomot tegyen,
hogy az összsúly 16 dkg legyen.
3. A lisztet és a tojás-paradicsom-keveréket
közvetlenül a tésztatartóba (6) rakja.
4. Készítse el a tésztát a 40. oldalon a
„7. Tésztakészítés” fejezetben leírtaknak
megfelelően.
Tudnivalók:
• A tészta frissen vagy szárítva is
felhasználható.
• Az állagot liszt vagy egy kis víz
hozzáadásával befolyásolhatja.
8.6 Fekete tészta
Hozzávalók:
• 34 dkg tésztaliszt (esetleg
tönkölybúzaliszt vagy instant liszt)
• 15 dkg tojás
•1 dkg szépiatinta
Elkészítés:
lásd: 40. oldalon a „7. Tésztakészítés”.
42
Page 45

RP89212 Pasta Maker LB4 Seite 43 Mittwoch, 29. Mai 2013 3:58 15
Tudnivalók:
• A tészta frissen vagy szárítva is
felhasználható.
• Az állagot liszt vagy egy kis víz
hozzáadásával befolyásolhatja.
8.7 Tolófánk
Hozzávalók:
• 23 dkg BL-55-ös liszt (finomliszt)
• 15 dkg vaj, hidegen, vékony szeletekre
vágva
• 10 dkg cukor
•1 tojás
•1 tasak vaníliás cukor
•1 csipet só
9. Tésztamártások receptjei
A jó íz alapjai:
• Borsot és sót frissen őröljön
• Mindig friss fűszernövényeket és
adalékokat használjon
• A parmezánt frissen reszelje
• Hidegen préselt olívaolajat használjon
• A házitészta akkor igazán finom, ha a
kifőzés után egy kis olívaolajjal és
fokhagymával, serpenyőben melegíti fel.
A serpenyőben (mielőtt a tésztát
beleteszi) ízlés szerint egy kis gombát,
húst vagy scampit is megpiríthat. Sózza
és borsozza (darálóból), végül
bazsalikommal és rukkola salátával
vagy paradicsommal körítse. A
parmezán sajtot csak az asztalnl tálalja,
frissen reszelve a legfinomabb.
9.1 Carbonara mártás
Hozzávalók:
• 2 evőkanál olívaolaj a dinszteléshez
• 2 gerezd apróra vagdalt fokhagyma
Elkészítés:
1. Adja a hozzávalókat a tésztatartóba.
2. Kb. 5 percig gyúrja.
3. Ezután préselje ki a
tolófánkbetéten (22) keresztül.
4. A tésztakaparóval (15) közvetlenül a
betétnél (12) vágjon egyforma
hosszúságú csíkokat.
5. A csíkokat S alakban, egyenesen vagy
kört formázva helyezze egy sütőlapra.
6. Süsse 180 °C-on 10 perc ig.
Tudnivalók:
• Sütés előtt a tolófánkot dió- vagy
mandulapehellyel díszítheti.
• Sütés után a kihűlt tolófánkot
csokoládébevonattal díszítheti.
• 15 dkg kockára vágott gépsonka
•4 tojás
•1 csipet só
•1 pohár tejszín
•1 dl tej
• 10 dkg reszelt parmezán
• frissen őrölt só, bors
• őrölt szerecsendió az ízesítéshez
Elkészítés:
1. A tojást, a tejet, a sót, a borsot és a
szerecsendiót keverje össze és verje fel
habverővel.
2. Keverje bele a reszelt parmezán felét.
3. Az olívaolajat közepes hőfokon egy
serpenyőben melegítse fel, majd ebben
dinsztelje meg az apróra vágott
fokhagymát.
4. Öntse rá a tojásos-tejes folyadékot.
5. Végül adja hozzá a kockára vágott
gépsonkát.
SPM200A1 43
Page 46

RP89212 Pasta Maker LB4 Seite 44 Mittwoch, 29. Mai 2013 3:58 15
9.2 Paradicsommártás
Hozzávalók:
• 850 ml konzervparadicsom
•1 kis fej hagyma
• 1 gerezd fokhagyma
• 2 evőkanál sűrített paradicsom
•só
•fehér bors
•cukor
•oregánó
• provanszi fűszerkeverék
• 3 evőkanál olívaolaj
Elkészítés:
1. Melegítse meg az olívaolajat egy 2–3
literes lábosban.
2. A hagymát vagdalja apróra, pirítsa az
olajban üvegesre, majd adjon hozzá
egy fokhagymaprésen átpréselt
fokhagymagerezdet.
3. A paradicsomból csináljon pépet. Ezt
tegye a lábosba, adja hozzá a sűrített
paradicsomot, ízesítse sóval, borssal és
egy csipet cukorral.
4. Az egészet kevergetés mellett kis tűzön
10 percig főzze.
5. Végül a paradicsommártást ízesítse
sóval, borssal, oregánóval, és ízlés
szerint provanszi fűszerekkel.
Figyelem:
• A paradicsomot úgy is előkészítheti,
hogy leforrázza, a héját lehúzza és
mixerrel vagy burgonyatörővel pürésíti.
9.3 Gorgonzolamártás
Hozzávalók:
•2 dl tejszín
• 20 dkg gorgonzola
Elkészítés:
1. Melegítse fel a tejszínt.
2. Keverje bele és olvassza fel benne a
gorgonzolát. Folyamatosan keverve kis
tűzön főzze.
Figyelem:
• Ízlés szerint kockára vágott gépsonkát is
adhat hozzá.
9.4 Aglio e Olio (fokhagymás tészta)
Hozzávalók:
• 4 evőkanál hidegen préselt olívaolaj
• 2 gerezd fokhagyma
•bazsalikom
•oregánó
•bors
•só
Elkészítés:
1. Dinsztelje meg a fokhagymát az
olívaolajban, majd adja hozzá a
megfőtt spagettit.
2. Ízesítse frissen őrölt borssal és sóval.
3. Ízlés szerint frissen reszelt parmezánnal
tálalja.
9.5 Pesto (vörös)
Hozzávalók:
• 15 dkg (szárított) paradicsom
• 1 csomó bazsalikom
• 1 fej lila hagyma (negyedelve)
• 2 evőkanál fenyőmag
• 1–2 fokhagymagerezd
• 2 teáskanál Balsamico ecet
• 5 evőkanál olívaolaj
•só
•bors
Elkészítés:
1. Pürésítse a paradicsomot, a letépkedett
bazsalikomleveleket, a fenyőmagot, a
fokhagymát és a hagymát.
2. Adja hozzá az ecetet és az olajat,
mindezt mixelje össze.
3. Ízesítse sóval, borssal.
44
Page 47

RP89212 Pasta Maker LB4 Seite 45 Mittwoch, 29. Mai 2013 3:58 15
Figyelem:
• Tárolja a pestot csavaros üvegben, fedje
be egy rétegnyi olívaolajjal. Így az
hűtőszekrényben kb. 4 hétig eltartható.
9.6 Pesto (zöld)
Hozzávalók:
• 1–2 csomó friss bazsalikom
• 1–2 fokhagymagerezd
• 2 evőkanál fenyőmag
•olívaolaj
• 2 evőkanál parmezán
• Só és frissen őrölt fekete bors
10. A készülék tisztítása
Figyelmeztetés! Az áramütés,
sérülés vagy károsodás
veszélyének elkerülése érdekében:
– Minden egyes tisztítás előtt
húzza ki a hálózati
csatlakozódugót a hálózati
csatlakozóaljzatból.
– Soha ne merítse vízbe a
motorházat (3.
Vigyázat! Semmiképpen se használjon
súroló, maró vagy karcoló tisztítószert. Ezek
miatt a készülék megsérülhet.
• Szerelje szét a készüléket (lásd „6.1 A
készülék szétszerelése“ a 38. oldalon).
10.1 A motorház (3) tisztítása
1. Tisztítsa meg a motorházat (3) nedves
ruhával. Használhat némi
mosogatószert is.
2. Ezután öblítse le tiszta vízzel.
3. A készüléket csak azután használja újra,
miután a motorház (3) teljesen
megszáradt.
Elkészítés:
1. Pirítsa meg a fenyőmagot egy
serpenyőben.
2. Vagdossa apróra a bazsalikomot, a
fokhagymát és a fenyőmagot.
3. Annyi olívaolajat adjon hozzá, hogy a
tészta krémszerű legyen.
4. Végül adja hozzá a parmezánt.
5. Ízesítse sóval, borssal.
Figyelem:
• Tárolja a pestot csavaros üvegben, fedje
be egy rétegnyi olívaolajjal. Így az
hűtőszekrényben kb. 4 hétig eltartható.
10.2 A tésztatartó (6), a fedél (1) és a
csigaház (9) tisztítása
Vigyázat! Az alkatrészek
mosogatógépben nem tisztíthatók. A
mosogatógépben a műanyag homályossá
és törékennyé válhatnak.
1. Áztassa be az alkatrészeket hideg vagy
langyos vízben, hogy a
tésztamaradékok felpuhuljanak.
Figyelem: A vízbe egy kis
mosogatószert is tehet.
2. Távolítsa el a felázott tésztamaradékokat
a tisztítókefével (16).
3. Öblítse át tiszta vízzel.
4. Ismételt használat előtt győződjön meg
arról, hogy az alkatrészek teljesen
megszáradtak.
10.3 A többi tartozék tisztítása
Vigyázat! Az alkatrészek
mosogatógépben nem tisztíthatók. A
mosogatógépben a műanyag homályossá
és törékennyé válhatnak.
SPM200A1 45
Page 48

RP89212 Pasta Maker LB4 Seite 46 Mittwoch, 29. Mai 2013 3:58 15
1. Hagyja a tésztát legalább 24 óráig
rászáradni. Így az kemény és törékeny
lesz.
2. Távolítsa el a rászáradt tésztamaradékokat
a tisztítókefével (16).
3. A 17-től 22-ig számozott alkatrészeket
ütögesse az asztal lapjához, így a
beszáradt tészta kihullik.
11. Ártalmatlanítás
11.1 A készülék
Az áthúzott szemeteskuka
szimbólum azt jelenti, hogy az
elhasználódott terméket az
Európai Unióban szelektív
hulladékgyűjtő-helyre kell vinni.
Ez a termékre és valamennyi
ilyen jellel ellátott tartozékára vonatkozik. A
jelzett termékeket nem szabad a normál
háztartási hulladékok közé dobni, hanem
valamely elektromos és elektronikus
készülék újrahasznosító gyűjtőhelyen kell
4. A 17-től 22-ig számozott alkatrészek
lukait fogpiszkálóval szabadíthatja meg
a tésztamaradékoktól.
5. Az alkatrészeket langyos vízben
mosogassa el.
6. Ezeket öblítse át tiszta vízzel.
7. Ismételt használat előtt győződjön meg
arról, hogy az alkatrészek teljesen
megszáradtak.
leadni. Az újrahasznosítás elősegíti a
nyersanyag-felhasználás csökkentését és a
környezet tehermentesítését. Ezért kérjük,
feltétlenül vegye figyelembe az Ön
országában érvényes ártalmatlanítási
előírásokat.
11.2 Csomagolás
A csomagolóanyag ártalmatlanítása során
vegye figyelembe a helyi környezetvédelmi
előírásokat.
12. Jótállási
JÓTÁLLÁSI TÁJÉKOZTATÓ
A termék megnevezése: Tésztagép Gyártási szám: 89212
A termék típusa: SPM200A1 A termék azonosításra alkalmas részeinek
meghatározása: Alsó rész
A gyártó cégneve, címe és email címe:
HOYER Handel GmbH
Kühnehöfe 5
D-22761 Hamburg
46
A szerviz neve, címe és telefonszáma:
Szerviz Magyarosrzag
Teknihall Elektronik GmbH
Breitefeld 15
D-64839 Münster
Tel.: 0640 102785
E-Mail: hoyer@lidl.hu
Page 49

RP89212 Pasta Maker LB4 Seite 47 Mittwoch, 29. Mai 2013 3:58 15
JÓTÁLLÁSI TÁJÉKOZTATÓ
Az importáló és forgalmazó cégneve és címe: Lidl Magyarország Kereskedelmi Bt.,
H-1037 Budapest, Rádl árok 6.
1. A jótállási idő a Magyar Köztársaság
területén, Lidl Magyarország
Kereskedelmi Bt. üzletében történt
vásárlás napjától számított 3 év.
2. A jótállási igény a jótállási jeggyel
érvényesíthető. A jótállási jegy
szabálytalan kiállítása, vagy
átadásának elmaradása nem érinti a
jótállási kötelezettség-vállalás
érvényességét. Kérjük, hogy a vásárlás
tényének és időpontjának bizonyítására
őrizze meg a pénztári fizetésnél kapott
jótállási jegyet (nyugtát).
3. A vásárlástól számított három napon
belül érvényesített csereigény esetén a
forgalmazó köteles a terméket kicserélni,
feltéve ha a hiba a rendeltetésszerű
használatot akadályozza.
A jótállási jogokat a termék
tulajdonosaként a fogyasztó
érvényesítheti az áruházakban, valamint
a jótállási tájékoztatóban feltüntetett
szervizekben.
A fogyasztó jótállási kifogásáról a
forgalmazó (szerviz) jegyzőkönyvet
köteles felvenni, amelyben rögzíteni kell
a fogyasztó nevét, címét, a fogyasztási
cikk (termék) megnevezését, vételárát, a
vásárlás időpontját, a hiba
bejelentésének időpontját, a hiba
leírását, a fogyasztó által érvényesíteni
kívánt igényt, a kifogás rendezésének
módját.
Amennyiben a kifogás rendezésének
módja a fogyasztó igényétől eltér, ennek
indokolását a jegyzőkönyvben meg kell
adni. A jegyzőkönyv másolatát a
fogyasztónak át kell adni. Ha a
nem tud nyilatkozni, álláspontjáról
legkésőbb három munkanapon belül
köteles értesíteni a fogyasztót.
A jótállás ideje alatt a fogyasztó kérheti
a termék kijavítását, kicserélését, vagy
ha a termék nem javítható vagy
cserélhető, árleszállítást kérhet, vagy
elállhat a szerződéstől és visszakérheti a
vételárat. Ha a forgalmazó, vagy
szerviz a termék kijavítását megfelelő
határidőre nem vállalja, vagy nem végzi
el, a fogyasztó a hibát a forgalmazó
költségére kijavíthatja, vagy mással
kijavíttathatja. A kijavítás során a
termékbe csak új alkatrész kerülhet
beépítésre.
4. A fogyasztó a hiba felfedezésé után a
lehető legrövidebb időn belül köteles a
hibát bejelenteni és a terméket a jótállási
jogok érvényesítése céljából átadni. A
hiba felfedezésétől számított két
hónapon belül bejelentett jótállási igényt
időben közöltnek kell tekinteni. A közlés
elmaradásából eredő kárért a fogyasztó
felelős. A jótállási igény
érvényesíthetőségének határideje a
termék, vagy fődarabjának kicserélése,
kijavítása esetén a kicserélt, vagy
kijavított termékre, illetve alkatrészre újra
kezdődik.
5. A rögzített bekötésű, illetve a 10 kg-nál
súlyosabb, vagy tömegközlekedési
eszközön nem szállítható terméket az
üzemeltetés helyén kell megjavítani.
Abban az esetben, ha a javítás a
helyszínen nem végezhető el, a termék
ki- és visszaszereléséről, valamint
szállításáról a forgalmazónak kell
gondoskodnia.
kötelezett a fogyasztó igényének
teljesíthetőségéről annak bejelentésekor
SPM200A1 47
Page 50

RP89212 Pasta Maker LB4 Seite 48 Mittwoch, 29. Mai 2013 3:58 15
6. A jótállás nem áll fenn, ha a hiba a nem
rendeltetésszerű használatból,
átalakításból, helytelen tárolásból, vagy
a használati utasítástól eltérő kezelésből,
vagy bármely a vásárlást követő
behatásból fakad, vagy elemi kár
okozta, és azt a forgalmazó, vagy a
szerviz bizonyítja. A jótállás nem
vonatkozik a mozgó kopó alkatrészek
(világítótestek, gumiabroncsok stb.)
rendeltetésszerű elhasználódására. A
szerviz és a forgalmazó a kijavítás során
nem felel a terméken a fogyasztó vagy
harmadik személyek által tárolt
adatokért vagy beállításokért.
A jótállás a fogyasztó törvényből eredő
szavatossági jogait és azok
érvényesíthetőségét nem érinti.
Ezt a dokumentumot, egyéb
kézikönyveinket, termékvideóinkat és szoftvereinket a
www.lidl-service.com
címről töltheti le.
48
Page 51

RP89212 Pasta Maker LB4 Seite 49 Mittwoch, 29. Mai 2013 3:58 15
- - - - - - - - - - - - - - - - - - -- - - - - - - - - - - -- - - - - - - - - - - - - - - - - - - - - - - - - - - - - - - - - - - - - - - - - - - -
13. Garanciakártya 89212
A jótállási igény bejelentésének
és javításra átvételi időpontja:
A hiba oka:
A fogyasztó részére történő
visszaadás időpontja:
A hiba javításának módja:
A szerviz bélyegzője, kelt és
aláírása:
A javításra tekintettel a jótállás
új határideje:
SPM200A1 49
Page 52

RP89212 Pasta Maker LB4 Seite 50 Mittwoch, 29. Mai 2013 3:58 15
Kazalo
1. Opis aparata. . . . . . . . . . . . . . . . . . . . . . . . . . . . . . . . . . . . . . . . . . . . . . . . . . . . . . . . . . 50
2. Poimenovanje delov (glejte pregibno stran) . . . . . . . . . . . . . . . . . . . . . . . . . . . . . . . . . . . 51
3. Tehnični podatki . . . . . . . . . . . . . . . . . . . . . . . . . . . . . . . . . . . . . . . . . . . . . . . . . . . . . . . 51
4. Varnostna navodila. . . . . . . . . . . . . . . . . . . . . . . . . . . . . . . . . . . . . . . . . . . . . . . . . . . . . 52
5. Razpakiranje in namestitev . . . . . . . . . . . . . . . . . . . . . . . . . . . . . . . . . . . . . . . . . . . . . . . 54
6. Razstavljanje in sestavljanje aparata . . . . . . . . . . . . . . . . . . . . . . . . . . . . . . . . . . . . . . . . 54
7. Izdelava testenin. . . . . . . . . . . . . . . . . . . . . . . . . . . . . . . . . . . . . . . . . . . . . . . . . . . . . . . 56
8. Recepti za testenine. . . . . . . . . . . . . . . . . . . . . . . . . . . . . . . . . . . . . . . . . . . . . . . . . . . . . 57
10. Čiščenje aparata . . . . . . . . . . . . . . . . . . . . . . . . . . . . . . . . . . . . . . . . . . . . . . . . . . . . . . . 61
10. Čiščenje aparata . . . . . . . . . . . . . . . . . . . . . . . . . . . . . . . . . . . . . . . . . . . . . . . . . . . . . . . 61
11. Odlaganje odpadkov . . . . . . . . . . . . . . . . . . . . . . . . . . . . . . . . . . . . . . . . . . . . . . . . . . . . 62
12. Garancija . . . . . . . . . . . . . . . . . . . . . . . . . . . . . . . . . . . . . . . . . . . . . . . . . . . . . . . . . . . . 63
Servisni Center . . . . . . . . . . . . . . . . . . . . . . . . . . . . . . . . . . . . . . . . . . . . . . . . . . . . . . . 63
Dobavitelj . . . . . . . . . . . . . . . . . . . . . . . . . . . . . . . . . . . . . . . . . . . . . . . . . . . . . . . . . . . 63
Prisrčne čestitke ob nakupu vaše
nove naprave.
S tem ste se odločili za kakovosten izdelek.
Navodila za uporabo so sestavni del tega
izdelka. Vsebujejo pomembna navodila za
varnost, uporabo in odstranjevanje.
Pred prvo uporabo izdelka se dobro
seznanite z vsemi navodili za uporabo in
varnostnimi opozorili. Izdelek uporabljajte
samo v skladu z opisi in samo za navedena
področja uporabe.
Če izdelek prevzame tretja oseba, le-tej
izročite tudi vso dokumentacijo.
1. Opis aparata
1.1 Namen uporabe
Aparat za testenine SilverCrest
SPM200A1 je namenjen izdelavi svežih
testenin in brizganega peciva.
Ta aparat lahko uporabljate samo v suhih
prostorih. Uporaba na prostem ali v vlažnih
prostorih ni dovoljena.
Naprava je primerna za uporabo v
zasebnih gospodinjstvih in ni namenjena za
komercialno uporabo.
50
Naprava je primerna tudi za:
• uporabo v kuhinjah za delavce v
trgovinah, pisarnah in drugih poslovnih
objektih,
• uporabo na kmetijskih posestvih,
• stranke v hotelih, motelih in drugih
stanovanjskih objektih,
•prenočišča z zajtrkom.
Page 53

RP89212 Pasta Maker LB4 Seite 51 Mittwoch, 29. Mai 2013 3:58 15
1.2 Obseg dobave
• 1 aparat za testenine z gnetilnim
mehanizmom in polžem
• 1 vijačno orodje
• 1 čistilna krtača
• 1 strgalnik za testo
• 5 nastavkov za različne testenine
• 1 nastavek za brizgano pecivo
• 1 navodila za uporabo
2. Poimenovanje delov (glejte pregibno stran)
1 Pokrov
2 Držalo za pokrov
3 Ohišje motorja
4 Gred motorja
5 Stikalo: obe stikali morata biti v istem
položaju
6 Posoda za testo
7 Ozobljena puša
8 Gnetilnik
9 Ohišje polža
10 Obroč polža
11 Polž
12 Nastavek za testenine (po želji nastavek
13 Navojni obroč
14 Vijačno orodje
15 Strgalnik za testo
16 Čistilna krtača
17 Nastavek za široke rezance tagliatelle
18 Nastavek za široke rezance
19 Nastavek za široke rezance fettuccine
20 Nastavek za špagete
21 Nastavek za rezance linguine
22 Nastavek za brizgano pecivo
3. Tehnični podatki
Napajalna napetost: 220 – 240 V~ / 50/60 Hz
Moč: 200 W
Razred zaščite: II
17 do 22)
pappardelle
SPM200A1 51
Page 54

RP89212 Pasta Maker LB4 Seite 52 Mittwoch, 29. Mai 2013 3:58 15
4. Varnostna navodila
4.1 Razlaga pojmov
V teh navodilih za uporabo boste našli
naslednje signalne pojme:
Opozorilo!
Veliko tveganje: Neupoštevanje
opozorila lahko povzroči nevarnost
telesnih poškodb ali življenjsko
nevarnost.
Previdno!
Srednje tveganje: Neupoštevanje opozorila
lahko povzroči materialno škodo.
Napotek:
Majhno tveganje: Stanja, ki jih je treba
upoštevati pri rokovanju s strojem.
4.2 Posebni napotki za ta aparat
Opozorilo!
poškodbe in materialno škodo,
upoštevajte naslednje napotke.
• To napravo lahko uporabljajo otroci od 8.
leta starosti dalje in osebe z zmanjšanimi
fizičnimi, čustvenimi ali duševnimi
sposobnostmi oz. s pomanjkanjem izkušenj
in/ali znanja, če so pod nadzorom oz. so
ustrezno poučeni z načinom uporabe
naprave in so razumeli, kakšne so možne
nevarnosti pri uporabi naprave. Otroci se
ne smejo igrati z napravo.
• Otroci lahko čistijo napravo in izvajajo
vzdrževalna dela samo, če so starejši od 8
let in so pod nadzorom.
• Otrokom, ki so mlajši od 8 let, preprečite
dostop do naprave in napajalnega kabla.
• Aparata ni dovoljeno uporabljati z zunanjo
stikalno uro ali ločenim sistemom
Da bi preprečili
daljinskega vodenja, kot je npr. daljinsko
vodena vtičnica.
• Pred vsakim čiščenjem izvlecite omrežni vtič
iz omrežne vtičnice.
3
•Ohišja motorja
nikoli ne potapljajte v
vodo.
• V nobenem primeru ne uporabljajte
abrazivnih, jedkih ali grobih čistil. Sicer se
lahko aparat poškoduje.
4.3 Splošna opozorila
• Pred uporabo naprave skrbno preberite
navodila za uporabo. Navodila so
sestavni del stroja in morajo biti vedno
na voljo.
• Stroj lahko uporabljate samo v namen, ki
je opisan v navodilih (glejte poglavje
»1.1 Namen uporabe« na strani 50).
• Preverite, če se zahtevana omrežna
napetost (glejte tipsko ploščico na stroju)
ujema z vašo omrežno napetostjo.
• Upoštevajte dejstvo, da vsaka zahteva
glede garancije in jamstva ugasne, če
boste uporabljali dele pribora, ki jih
navodila ne priporočajo ali če pri
popravilu niso bili uporabljeni originalni
nadomestni deli. To velja tudi za
popravila, ki jih opravijo nekvalificirane
osebe. Kontaktni podatki so na voljo v
»Servisni Center« na strani63.
• Pri morebitnih motnjah delovanja
v garancijskem roku lahko stroj popravi
samo naš servisni center. V nasprotnem
primeru vsi garancijski zahtevki
ugasnejo.
52
Page 55

RP89212 Pasta Maker LB4 Seite 53 Mittwoch, 29. Mai 2013 3:58 15
4.4 Zaščita proti električnemu udaru
Opozorilo! Spodaj navedena
varnostna opozorila vas bodo
zaščitila proti električnemu udaru.
• Če je naprava poškodovana, je v
nobenem primeru ne uporabljajte.
Popraviti jo mora strokovno
usposobljena oseba. Kontaktni podatki
so na voljo v »Servisni Center« na
strani63.
• V primeru poškodbe napajalnega kabla
na napravi mora kabel zamenjati
predstavnik proizvajalca ali druga
strokovno usposobljena oseba, da
preprečite morebitne nevarnosti.
• V notranjost ohišja motorja 3 nikakor ne
sme prodreti voda ali druge tekočine.
Zato:
– aparata nikoli ne uporabljajte na
prostem
– ohišja motorja 3 nikoli ne potapljajte v
vodo
– nikoli ne postavljajte na stroj polnih
posod z vodo, vaz in podobnega
– nkoli ne uporabljajte stroja v zelo
vlažnem okolju
– nkoli ne uporabljajte stroja v bližini
pomivalnega korita, kopalne kadi,
prhe ali plavalnega bazena. Vodni
curki lahko pridejo v stroj.
Če bi v stroj vseeno prišla tekočina, takoj
izvlecite omrežni vtikač iz vtičnice, stroj
pa naj popravi kvalificirana strokovna
oseba. Kontaktni podatki so na voljo v
»Servisni Center« na strani63.
• Nikoli se z vlažnimi rokami ne dotikajte
stroja, omrežnega kabla ali omrežnega
vtikača.
• Omrežni kabel vedno izvlecite tako, da
iztaknete vtikač. Nikoli ne vlecite za
kabel.
• Pazite, da omrežni kabel ne bo
prepognjen ali zmečkan.
• Zavarujte omrežni kabel pred vročimi
površinami (na primer štedilnik).
• Če stroja dalj časa ne boste uporabljali,
iztaknite vtikač iz vtičnice. Samo v tem
primeru bo stroj ločen od električne
napetosti.
• Izogibajte se uporabi kabelskih
podaljškov. Uporaba je dovoljena le
pod naslednjimi pogoji:
– Kabelski podaljšek mora ustrezati
jakosti toka stroja.
– Kabelski podaljšek ne sme biti speljan
»leteče«: onemogočeno mora biti
spotikanje obenj, speljite pa ga tako,
da ne bo dostopen otrokom.
– Kabelski podaljšek ne sme biti
poškodovan.
– Na omrežno vtičnico ne smejo biti
priključeni nobeni drugi stroji, ker
lahko pride do preobremenjenosti
omrežja (prepovedana uporaba
večkratnih vtičnic!)
4.5 Zaščita pred telesnimi poškodbami
Opozorilo! Upoštevajte
naslednje napotke, da ne pride do
poškodb.
• Pazite, da napajalni kabel ni napeljan
tako, da bi se lahko ob njega kdo
spotaknil, se vanj zapletel ali ga
pohodil.
• Med delovanjem se ne dotikajte
premikajočih se delov aparata, kot sta
gnetilnik 8 ali polž 11. Lahko se zgodi,
da se v aparat povlečejo roke ali lasje,
zaradi česar se lahko poškodujete.
Aparat lahko vklopite le, če je pokrov 1
pravilno nameščen.
• Pred vsakim čiščenjem in vsakič, ko
razstavljate aparat, izvlecite omrežni vtič
iz omrežne vtičnice.
SPM200A1 53
Page 56

RP89212 Pasta Maker LB4 Seite 54 Mittwoch, 29. Mai 2013 3:58 15
4.6 Varnost vašega otroka
Opozorilo! Otroci pogosto ne
morejo pravilno oceniti nevarnosti,
kar lahko povzroči telesne
poškodbe. Zato bodite pozorni na
naslednje:
• Ta izdelek se lahko uporablja samo pod
nadzorom odraslih oseb, kar bo
preprečili, da bo se otroci igrali z njim.
• Skrbno pazite, da bo stroj vedno izven
dosega otrok in da ga ne bodo mogli za
kabel potegniti dol in se igrati z njim.
5. Razpakiranje in namestitev
1. Iz embalaže vzemite posamezne dele.
2. Preverite, ali so posamezni deli popolni
(glejte poglavje »1.2 Obseg dobave«
na strani 51) in ali imajo kakšne
poškodbe.
3. Pred prvo uporabo napravo temeljito
očistite (glejte poglavje »10. Čiščenje
aparata« na strani 61).
4. Napravo postavite na ravno, suho in
nedrsečo površino, da se ne more
prevrniti in zdrsniti.
• Pazite, da embalažna folija ne bo
smrtna past za otroke. Embalažne folije
niso igrača.
4.7 Materialna škoda
Previdno! Da bi preprečili materialno
škodo, upoštevajte naslednje predpise.
• Aparat postavite samo na ravno, suho in
nedrsljivo površino, da se ne more
prevrniti ali zdrsniti na tla.
• Aparata ne postavite na vročo ploščo
štedilnika.
•Ne uporabljajte vročih tekočin.
• Aparata in pribora ne smete uporabljati
v mikrovalovni pečici.
5. Ponovno sestavite aparat (glejte
poglavje »6.2 Sestavljanje aparata« na
strani 55).
6. Obe stikali 5 preklopite na »OFF«
(izklop).
7. Omrežni vtič (glejte poglavje
»3. Tehnični podatki« na strani 51)
vtaknite v primerno omrežno vtičnico.
Aparat je zdaj pripravljen na delovanje.
54
6. Razstavljanje in sestavljanje aparata
Opozorilo! Da bi preprečili
nevarnost električnega udara,
telesnih poškodb ali poškodb
aparata:
– Pred vsakim čiščenjem in vsakič,
ko razstavljate aparat oz. ga
ponovno sestavljate, izvlecite
omrežni vtič iz omrežne vtičnice.
6.1 Razstavljanje aparata
1. Obe stikali preklopite na 5 »OFF«
(izklop).
Napotek: Iz varnostnih razlogov ima
ta aparat 2 stikali, ki jih je vedno treba
preklopiti skupaj, da bi aktivirali želeno
Page 57

RP89212 Pasta Maker LB4 Seite 55 Mittwoch, 29. Mai 2013 3:58 15
funkcijo. Če imata obe stikali različna
položaja, ostane aparat izključen. Tako
se prepreči nenamerno nepravilno
delovanje.
2. Prepričajte se, da je pokrov 1 pravilno
nameščen, saj lahko sicer ohišje polža 9
izpade, ko odvijete navojni obroč 13.
3. Odvijte navojni obroč 13.
Napotek: Če je navojni obroč 13
pretrdo pritrjen, uporabite vijačno
orodje 14, da sprostite navojni
obroč 13.
Če navojnega obroča 13 ni mogoče
odviti niti z vijačnim orodjem 14, naj
aparat 10 do 20 sekund deluje na
»MIX« (mešanje), s tem se navojni
obroč nekoliko sprosti. Pred odvijanjem
ponovno izvlecite omrežni vtič iz
omrežne vtičnice.
4. Odstranite nastavek 12.
5. Snemite pokrov 1.
Napotek: Na sprednjem robu
pokrova sta dva jezička. Povlecite ju
nekoliko naprej in pri tem dvignite
pokrov 1, poklopite ga navzgor in ga
nato snemite.
6. Ohišje polža 9 obrnite v levo in ga
odstranite.
7. Vz em it e p ol ža 11 iz njegovega
ohišja 9.
8. Snemite obroč polža 10 s
polža 11.
9. Izvlecite gnetilnik 8 iz posode za
testo 6.
10.Odstranite ozobljeno pušo 7 z gnetilnika 8.
11. Odstranite posodo za testo 6 iz ohišja
motorja 3.
6.2 Sestavljanje aparata
1. Posodo za testo vstavite 6 v ohišje
motorja 3.
2. Obroč polža 10 potisnite na polž 11.
Pazite, da se obroč polža pravilno
zaskoči.
3. Polža vstavite 11 v njegovo ohišje 9.
4. Gnetilnik 8 potisnite na gred polža 11.
Napotek: Na gredi
polža 11 je vdolbina A,
da se gnetilnik 8 prilega
samo v enem položaju.
A
5. Ozobljeno pušo 7 potisnite na gred
polža 11.
Napotek: Na gredi polža 11 je
vdolbina, da se ozobljena puša 7
prilega samo v enem položaju.
6. Sestavljeno ohišje polža 9 s polžem 11
in gnetilnikom 8 potisnite v posodo za
testo 6.
Napotek: Na notranji
strani ohišja polža 9 je
nastavek B, ki mora pri
namestitvi kazati navzgor,
da se ohišje polža 9
pravilno zaskoči.
7. Rahlo pritisnite ohišje polža 9 na
posodo za testo 6 in ga zapahnite tako,
B
SPM200A1 55
Page 58

RP89212 Pasta Maker LB4 Seite 56 Mittwoch, 29. Mai 2013 3:58 15
da ga obrnete v desno, dokler se ne
zaskoči.
8. Prepričajte se, da je posoda za testo 6
pravilno nameščena v ohišju motorja 3.
9. Pokrov 1 držite postrani in ga vstavite v
držalo za pokrov 2.
10.Potisnite pokrov 1 navzdol, dokler ni
pravilno nameščen v posodo za testo 6
in se pri tem slišno zaskoči.
7. Izdelava testenin
1. Izberite primerni nastavek 12:
17Nastavek za široke rezance
tagliatelle
18Nastavek za široke rezance
pappardelle
19Nastavek za široke rezance
fettuccine
20Nastavek za špagete
21Nastavek za rezance linguine
22Nastavek za brizgano pecivo
2. Želeni nastavek (17 do 22) za približno
eno minuto položite v vročo vodo.
3. Privijte želeni nastavek (17 do 22) z
navojnim obročem 13 na ohišje polža 9
(glejte poglavje »6. Razstavljanje in
sestavljanje aparata« na strani 54).
4. Snemite pokrov 1.
Napotek: Na sprednjem robu
pokrova sta dva jezička. Povlecite ju
nekoliko naprej in pri tem dvignite
pokrov 1, poklopite ga navzgor in ga
nato snemite.
5. Posodo za testo 6 napolnite z želeno
količino moke.
Napotek: Samo če se je pokrov
pravilno zaskočil, se varnostno stikalo
aktivira, da lahko aparat deluje.
11.Izberite želeni nastavek 17 do 22 in ga
z navojnim obročem 13 privijte na
ohišje polža 9.
Napotek: Dovolj je, če navojni obroč
dobro privijete z roko. Za to ne
potrebujete vijačnega orodja 14.
Aparat je zdaj pripravljen na delovanje.
Napotek: Če ne uporabljate redke
tekočine, kot je voda, ampak gosto
mešanico ali mešanico s trdimi
sestavinami, kot je drobno nasekljana
špinača, ta ne steče dobro skozi pokrov.
V tem primeru tekočino dolijte
neposredno v posodo za testo 6.
6. Pokrov 1 držite postrani in ga vstavite v
držalo za pokrov 2.
7. Po ti sni te p ok rov 1 navzdol, dokler ni
pravilno nameščen v posodo za testo 6
in se pri tem slišno zaskoči.
Napotek: Samo če se je pokrov
pravilno zaskočil, se varnostno stikalo
aktivira, da lahko aparat deluje.
8. Omrežni vtič priključite v ustrezno
omrežno vtičnico z varnostnim
kontaktom (glejte poglavje »3. Tehnični
podatki« na strani 51).
9. Obe stikali 5 preklopite na »MIX«
(mešanje).
10.Pokrov 1 počasi napolnite z želeno
količino tekočine. Ta odteče v posodo za
testo.
Napotek:
– Če so v vašem receptu uporabljena
jajca, jih umešajte v ločeni posodi.
56
Page 59

RP89212 Pasta Maker LB4 Seite 57 Mittwoch, 29. Mai 2013 3:58 15
– Umešana jajca in olje med gnetenjem
dodajte skozi pokrov 1.
11.Aparat naj približno 5 minut gneti testo,
dokler ne bo imelo želene konsistence.
Napotek: Končano testo za testenine
se ne sme lepiti ali drobiti. V pokrov 1
po potrebi dodajte še nekaj moke ali
vode, od koder pade v posodo za testo.
Z nekaj izkušnjami boste hitro prepoznali
idealno konsistenco.
12.Obe stikali 5 preklopite na »OFF«
(izklop).
Previdno! Preden začnete iztiskati
testo za testenine, morata biti obe
stikali 5 najmanj 5 sekund v položaju
»OFF« (izklop), da se testo umiri.
13.Pod aparat postavite posodo za
prestrezanje testenin.
14.Obe stikali 5 preklopite na »EXT«.
Zdaj se testenine iztisnejo.
15.S strgalnikom za testo 15 odrežite
testenine na želeno dolžino neposredno
na nastavku 12.
16.Ko je vso testo iztisnjeno, preklopite obe
stikali 5 na »OFF« (izklop).
Napotek: Iz tehničnih razlogov v
posodi za testo 6 vedno ostane nekoliko
testa.
17. Če želite pripraviti dodatno porcijo
testenin, odvzemite preostalo količino
testa iz posode za testo 6.
Napotek: Stehtajte odvzeto preostalo
količino in temu ustrezno zmanjšajte
skupno količino sestavin za naslednje
testo. Nato lahko preostalo količino
prvega testa dodate k drugemu testu in
pri tem ne presežete največje skupne
količine približno 520 g.
18.Drugo testo pripravite na enak način kot
prvo.
19. Ko ste končali, izvlecite omrežni vtič iz
omrežne vtičnice.
Pozor!
Da se ostanki testa ne strdijo, morate aparat
takoj po uporabi razstaviti. Če se ostanki
testa strdijo, bo razstavljanje aparata
oteženo ali celo nemogoče.
20.Razstavite aparat (glejte poglavje
»6.1 Razstavljanje aparata« na
strani 54).
21. Očistite aparat oz. dele opreme (glejte
poglavje »10. Čiščenje aparata« na
strani 61).
8. Recepti za testenine
8.1 Nasveti za izdelavo testenin
• Za izdelavo testenin so posebno
primerni zdrob, pirina moka, posebna
moka za testenine ali instant moka.
• Skupna količina moke in tekočine naj bo
vedno med 480 g in 520 g. Tako aparat
optimalno deluje. Če je količina manjša,
se sestavine ne pregnetejo dobro, pri
SPM200A1 57
preveliki skupni količini pa lahko masa
steče iz posode za testo.
• Če se testo gnete manj kot 3 minute,
sestavine niso dobro premešane.
• Če se testo gnete več kot 5 minut,
postane testo pretoplo in lepljivo.
• Izdelane testenine razprostrite na čisto
krpo, da se ne zlepijo.
Page 60

RP89212 Pasta Maker LB4 Seite 58 Mittwoch, 29. Mai 2013 3:58 15
• Zelišča so namenjena obarvanju, pri
kuhanju testenin izgubijo okus.
• Testenine lahko posušite in jim tako
podaljšate rok uporabe. Za to testenine
razprostrite na čisto krpo in jih sušite na
zraku približno en dan ali v pečici 1 do
3 ure pri pribl. 40 °C.
• Če se testo za testenine prilepi na
pokrov, ga lahko s strgalnikom za
testo 15 previdno potisnite navzdol
skozi zarezi v pokrovu.
• Testenine kuhajte v zadostni količini
vode (3–4 litre za 500 g testenin).
Dodajte 2–3 jedilne žlice soli.
• Pri svežih testeninah se voda peni bolj
kot pri posušenih. Zato lonca za kuhanje
ne pokrivajte.
• Sveže testenine so kuhane hitreje kot
posušene. Sveže testenine večinoma
potrebujejo 1 do 3 minute, posušene
testenine pa večinoma med 6 in 12
minutami, da so kuhane.
8.2 Osnovni recept za testenine
Sestavine:
• 340 g zdroba iz trde pšenice
• 140 g vode
• 1 jedilna žlica olja (10 g)
Priprava:
Glejte »7. Izdelava testenin« na strani 56.
Napotek:
• Testenine se lahko uporabljajo sveže ali
posušene.
• Na konsistenco lahko vplivate z moko
ali nekaj vode.
8.3 Jajčne testenine
Sestavine:
• 340 g zdroba
• 3 srednje velika jajca
Priprava:
Glejte »7. Izdelava testenin« na strani 56.
Napotek:
• Testenine se lahko uporabljajo sveže ali
posušene.
• Na konsistenco lahko vplivate z moko
ali nekaj vode.
8.4 Zelene pririne testenine:
Sestavine:
• 340 g pirine moke (lahko tudi moke za
testenine ali instant moke)
• 175 g špinače (lahko je sveže
blanširana in nasekljana ali zamrznjena.
Ne uporabljajte špinače s smetano, saj
postanejo testenine zaradi smetane
premehke.)
• 1 strok česna (po želji ga lahko
izpustite)
• 1 ščepec ribanega muškatnega oreščka
Priprava:
1. Vse sestavine dajte neposredno v
posodo za testo 6.
2. Pripravite testenine, kot je opisano v
razdelku »7. Izdelava testenin« na
strani 56.
Napotek:
• Testenine se lahko uporabljajo sveže ali
posušene.
• Na konsistenco lahko vplivate z moko
ali nekaj vode.
8.5Rdeče testenine
Sestavine:
• 340 g moke za testenine (lahko tudi
pirine moke ali instant moke)
•1 jajce
• 1 jedilna žlica paradižnikovega kečupa
• pribl. 80–100 g paradižnikove mezge
58
Page 61
RP89212 Pasta Maker LB4 Seite 59 Mittwoch, 29. Mai 2013 3:58 15
Priprava:
1. Ubito jajce in paradižnikov kečup dajte
v skledo.
2. Napolnite jo s paradižnikovo mezgo do
160 g skupne teže.
3. Moko ter mešanico jajc in paradižnika
dajte neposredno v posodo za testo 6.
4. Pripravite testenine, kot je opisano v
razdelku »7. Izdelava testenin« na
strani 56.
Napotek:
• Testenine se lahko uporabljajo sveže ali
posušene.
• Na konsistenco lahko vplivate z moko
ali nekaj vode.
8.6 Črne testenine
Sestavine:
• 340 g moke za testenine (lahko tudi
pirine moke ali instant moke)
• 150 g jajc
• 10 g sipinega črnila
Priprava:
Glejte »7. Izdelava testenin« na strani 56.
Napotek:
• Testenine se lahko uporabljajo sveže ali
posušene.
• Na konsistenco lahko vplivate z moko
ali nekaj vode.
8.7 Brizgano pecivo
Sestavine:
• 230 g pšenične moke tipa 405 (moka
za pecivo)
• 150 g masla, hladnega in narezanega
na tanke rezine
• 100 g sladkorja
•1 jajce
• 1 zavitek vanilijevega sladkorja
• 1 ščepec soli
Priprava:
1. Sestavine dajte v posodo za testo.
2. Pribl. 5 minut gnetite.
3. Nato ga iztisnite skozi nastavek 22 za
brizgano pecivo.
4. S strgalnikom za testo 15 neposredno
na nastavku 12 odrežite enako dolge
linije.
5. Linije položite na pekač v obliki črke S,
ravno ali v obliki kroga.
6. Pecite pri 180 °C 10 minut.
Napotek:
• Pred pečenjem lahko brizgano pecivo
okrasite z drobci orehov ali mandljev.
• Po pečenju lahko ohlajeno brizgano
pecivo okrasite s kuverturo.
9. Recepti za omake za testenine
Nasveti za dober okus:
• uporabite poper in sol iz mlinčka,
• vedno uporabljajte sveža zelišča in
sestavine,
• parmezan nastrgajte na sveže,
• uporabljajte hladno iztisnjeno olivno
olje,
SPM200A1 59
• doma narejene testenine so najboljše, če
jih po kuhanju nekoliko pogrejete v
ponvi z olivnim oljem in česnom. Po
okusu lahko popečete tudi (preden
dodate testenine) gobe, meso ali
škampe. Servirajte s soljo in poprom (iz
mlinčka) in nato še z nasekljano baziliko
ali solato iz rukole ali paradižniki.
Page 62

RP89212 Pasta Maker LB4 Seite 60 Mittwoch, 29. Mai 2013 3:58 15
Parmezan se servira pri mizi in ima
najboljši okus, če je sveže nastrgan.
9.1 Omaka carbonara
Sestavine:
• 2 jedilni žlici olivnega olja za pečenje
• 2 stroka česna, drobno nasekljana
• 150 g kuhane šunke, narezane na kocke
•4 jajca
• 1 ščepec soli
• 1 skodelica stepene smetane
• 100 ml mleka
• 100 g parmezana, nastrganega
• sol in poper, iz mlinčka
• muškatni orešček, mlet, za začiniti
Priprava:
1. Jajca, smetano, mleko, sol, poper, muškatni
orešček zmešajte z metlico za sneg.
2. Primešajte polovico nastrganega
parmezana.
3. Olivno olje segrejte v ponvi na srednji
temperaturi in dodajte drobno nasekljan
česen ter ga kratek čas pražite.
4. Zdaj dodajte mešanico z jajci.
5. Na zadnje dodajte še na kocke
narezano kuhano šunko.
9.2 Paradižnikova omaka
Sestavine:
• 850 ml paradižnikov, iz pločevinke
•1 majhna čebula
•1 strok česna
• 2 jedilni žlici paradižnikove mezge
•sol
• poper, beli
•sladkor
•origano
• provansalska zelišča
• 3 jedilne žlice olivnega olja
Priprava:
1. Olivno olje segrejte v 2–3-litrskem loncu.
2. Drobno nasekljajte čebulo in jo dodajte
ter počakajte, da postekleni, nato
dodajte stisnjen česen.
3. Spasirajte paradižnike. Dajte jih v lonec,
dodajte paradižnikovo mezgo in
začinite s soljo, poprom ter ščepcem
sladkorja.
4. Vse skupaj občasno premešajte in
pustite kuhati 10 minut.
5. Paradižnikovi omaki na koncu dodajte
še sol, poper, origano in po želji še
provansalska zelišča.
Napotek:
• Po želji lahko tudi oparite paradižnike,
jim odstranite povrhnjico in jih sesekljate
v mešalniku ali s paličnim mešalnikom.
9.3 Gorgonzolina omaka
Sestavine:
• 200 ml smetane
• 200 g gorgonzole
Priprava:
1. Segrejte smetano.
2. Primešajte gorgonzolo in jo raztopite.
Segrejte in pri tem stalno mešajte.
Napotek:
• Po želji lahko dodate tudi na kocke
narezano kuhano šunko.
9.4 Testenine s česnom in olivnim oljem
(aglio e olio)
Sestavine:
• 4 jedilne žlice olja (olivnega), hladno
iztisnjenega
• 2 stroka česna
• bazilika
•origano
60
Page 63

RP89212 Pasta Maker LB4 Seite 61 Mittwoch, 29. Mai 2013 3:58 15
•poper
•sol
Priprava:
1. Na olivnem olju prepražite česen in
dodajte kuhane špagete.
2. Začinite s poprom in soljo iz mlinčka.
3. Po želji servirajte s sveže nastrganim
parmezanom.
9.5 Pesto (rdeč)
Sestavine:
• 150 g paradižnikov (posušenih)
•1 šop bazilike
• 1 čebula, rdeča (razrezana na štiri dele)
• 2 jedilni žlici pinijevih semen
•1–2 stroka česna
• 2 čajni žlički balzamičnega kisa
• 5 jedilnih žlic olivnega olja
•sol
•poper
Priprava:
1. Fino spasirajte paradižnike, natrgane
bazilikine liste, pinijeva semena, česen in
čebulo.
2. Dodajte kis in olje ter zmešajte.
3. Začinite s soljo in poprom.
Napotek:
• Pesto hranite v kozarcu z zamaškom na
navoj in ga prelijte s slojem olivnega olja.
Tako je lahko v hladilniku pribl. 4 tedne.
9.6 Pesto (zelen)
Sestavine:
• 1–2 šopa sveže bazilike
•1–2 stroka česna
• 2 jedilni žlici pinijevih semen
•olivnega olja
• 2 jedilni žlici parmezana
• sol in sveže zmlet črni poper
Priprava:
1. V ponvi popražite pinijeva semena.
2. Na drobno narežite baziliko, česen in
pinijeva semena.
3. Dolijte toliko olivnega olja, da nastane
kremasta pasta.
4. Na koncu dodajte parmezan.
5. Začinite s soljo in poprom.
Napotek:
• Pesto hranite v kozarcu z zamaškom na
navoj in ga prelijte s slojem olivnega
olja. Tako je lahko v hladilniku pribl. 4
tedne.
10. Čiščenje aparata
Opozorilo! Da bi preprečili
nevarnost električnega udara,
telesnih poškodb ali poškodb
aparata:
– Pred vsakim čiščenjem izvlecite
omrežni vtič iz omrežne vtičnice.
–Ohišja motorja3 nikoli ne
potapljajte v vodo.
Previdno! Nikoli ne uporabljajte
abrazivnih, jedkih ali grobih čistil. Aparat se
lahko poškoduje.
SPM200A1 61
• Razstavite aparat (glejte poglavje
»6.1 Razstavljanje aparata« na
strani 54).
10.1 Čiščenje ohišja motorja (3)
1. Očistite ohišje motorja 3 z vlažno krpo.
Uporabite lahko tudi nekaj sredstva za
pomivanje.
Page 64

RP89212 Pasta Maker LB4 Seite 62 Mittwoch, 29. Mai 2013 3:58 15
2. Nazadnje obrišite s krpo, ki je
navlažena v čisti vodi.
3. Ohišje motorja 3 lahko uporabite šele, ko
je povsem suho.
10.2 Čiščenje posode za testo (6),
pokrova (1) in ohišja polža (9)
Previdno! Deli opreme niso primerni za
pomivalni stroj. V pomivalnem stroju lahko
plastika postane motna in krhka.
1. Dele položite v hladno ali mlačno vodo,
da zmehčate ostanke testa.
Napotek: V vodo lahko dodate tudi
nekaj sredstva za pomivanje.
2. Zmehčane ostanke testa očistite s čistilno
krtačo 16.
3. Zatem splaknite s čisto vodo.
4. Počakajte, da se deli popolnoma
posušijo, preden jih ponovno uporabite.
11. Odlaganje odpadkov
11.1 Naprava
10.3 Čiščenje ostalega pribora
Previdno! Deli opreme niso primerni za
pomivalni stroj. V pomivalnem stroju lahko
plastika postane motna in krhka.
1. Naj se testo suši najmanj 24 ur. S tem bo
postalo trdo in krhko.
2. Posušene ostanke testa očistite s čistilno
krtačo 16.
3. Z nastavki od 17 do 22 lahko rahlo
potolčete po mizi, da posušeno testo
odpade.
4. Ostanke testa v luknjah v nastavkih od
17 do 22 lahko odstranite z
zobotrebcem.
5. Dele očistite v topli vodi za pomivanje.
6. Zatem splaknite s čisto vodo.
7. Počakajte, da se deli popolnoma
posušijo, preden jih ponovno uporabite.
11.2 Embalaža
Simbol, prečrtan smetnjak na
kolesih pomeni, da je treba
proizvod v Evropski Uniji
odstraniti v ločene odpadke. To
velja za sam produkt in za vse
s tem simbolom označene dele
pribora. Označeni produkti ne spadajo v
normalne gospodinjske smeti, temveč jih je
treba oddati na zbirnem mestu za reciklažo
električnih in elektronskih naprav. Reciklaža
pripomore, da se potrošnja surovin zmanjša
in okolje razbremeni. Pri tem obvezno
upoštevajte predpise za odstranjevanje v
svoji državi.
62
Glede odlaganja pakirnega materiala,
morate spoštovati ustrezne predpise v vaši
deželi.
Page 65

RP89212 Pasta Maker LB4 Seite 63 Mittwoch, 29. Mai 2013 3:58 15
12. Garancija
Dobavitelj
Upoštevajte, da naslednji naslov ni naslov
servisnega centra. Najprej se obrnite
na zgoraj naveden servisni center.
HOYER Handel GmbH
Kühnehöfe 5
D-22761 Hamburg
Deutschland
Servisni Center
Servis Slovenija
Tel.: 080080917
E-Mail: hoyer@lidl.si
Garancijski list
1. S tem garancijskim listom jamčimo
Hoyer Handel GmbH, da bo izdelek v
garancijskem roku ob normalni in
pravilni uporabi brezhibno deloval in se
zavezujemo, da bomo ob izpolnjenih
spodaj navedenih pogojih odpravili
morebitne pomanjkljivosti in okvare
zaradi napak v materialu ali izdelavi oz.
po svoji presoji izdelek zamenjali ali
vrnili kupnino.
2. Garancija je veljavna na ozemlju
Republike Slovenije.
3. Garancijski rok za proizvod je
36 mesecev od dneva nabave.
4. Kupec je dolžan okvaro javiti
pooblaščenemu servisu oz. se informirati
o nadaljnjih postopkih na zgoraj
navedeni telefonski številki. Svetujemo
vam, da pred tem natančno preberete
navodila o sestavi in uporabi izdelka.
5. Kupec je dolžan pooblaščenemu servisu
predložiti garancijski list in račun, kot
potrdilo in dokazilo o nakupu.
6. V primeru, da proizvod popravlja
nepooblaščeni servis ali oseba, kupec
ne more uveljavljati zahtevkov iz te
garancije.
7. Vzroki za okvaro oz. nedelovanje
izdelka morajo biti lastnosti stvari same,
in ne vzroki, ki so zunaj proizvajalčeve
oz. prodajalčeve sfere. Kupec ne more
uveljavljati zahtevkov iz te garancije, če
se ni držal priloženih navodil za sestavo
in uporabo izdelka ali, če je izdelek
kakorkoli spremenjen ali nepravilno
vzdrževan.
8. Jamčimo servisiranje in rezervne dele za
minimalno dobo, ki je zahtevana s strani
zakonodaje.
9. Obrabni deli oz. potrošni material so
izvzeti iz garancije.
10.Vsi potrebni podatki za uveljavljanje
garancije se nahajajo na dveh ločenih
dokumentih (garancijski list, račun).
11.Ta garancija proizvajalca ne izključuje
pravic potrošnika, ki izhajajo iz
odgovornosti prodajalca za napake na
blagu.
Prodajalec:
Lidl d.o.o.k.d.,
Pod lipami 1,
SI-1218 Komenda
S spletne strani
www.lidl-service.com
lahko prenesete ta priročnik ter
mnoge druge priročnike, videe
izdelkov in programsko
opremo.
SPM200A1 63
Page 66

RP89212 Pasta Maker LB4 Seite 64 Mittwoch, 29. Mai 2013 3:58 15
Obsah
1. Popis přístroje . . . . . . . . . . . . . . . . . . . . . . . . . . . . . . . . . . . . . . . . . . . . . . . . . . . . . . . . 64
2. Označení dílů (viz odklopná stránka) . . . . . . . . . . . . . . . . . . . . . . . . . . . . . . . . . . . . . . . . 65
3. Technické údaje. . . . . . . . . . . . . . . . . . . . . . . . . . . . . . . . . . . . . . . . . . . . . . . . . . . . . . . . 65
4. Bezpečnostní pokyny . . . . . . . . . . . . . . . . . . . . . . . . . . . . . . . . . . . . . . . . . . . . . . . . . . . . 65
5. Vybalení a instalace . . . . . . . . . . . . . . . . . . . . . . . . . . . . . . . . . . . . . . . . . . . . . . . . . . . . 68
6. Rozložení a sestavení přístroje. . . . . . . . . . . . . . . . . . . . . . . . . . . . . . . . . . . . . . . . . . . . . 68
7. Výroba těstovin. . . . . . . . . . . . . . . . . . . . . . . . . . . . . . . . . . . . . . . . . . . . . . . . . . . . . . . . 70
8. Recepty na těstoviny . . . . . . . . . . . . . . . . . . . . . . . . . . . . . . . . . . . . . . . . . . . . . . . . . . . . 71
9. Recepty na omáčky . . . . . . . . . . . . . . . . . . . . . . . . . . . . . . . . . . . . . . . . . . . . . . . . . . . . . 73
10. Čištění přístroje . . . . . . . . . . . . . . . . . . . . . . . . . . . . . . . . . . . . . . . . . . . . . . . . . . . . . . . 75
11. Likvidace . . . . . . . . . . . . . . . . . . . . . . . . . . . . . . . . . . . . . . . . . . . . . . . . . . . . . . . . . . . . 76
12. Záruka společnosti HOYER Handel GmbH . . . . . . . . . . . . . . . . . . . . . . . . . . . . . . . . . . . . . 76
Servisní středisko . . . . . . . . . . . . . . . . . . . . . . . . . . . . . . . . . . . . . . . . . . . . . . . . . . . . . 77
Dodavatel. . . . . . . . . . . . . . . . . . . . . . . . . . . . . . . . . . . . . . . . . . . . . . . . . . . . . . . . . . . 77
Gratulujeme k zakoupení Vašeho
nového přístroje.
Zakoupením jste se rozhodli pro kvalitní
výrobek. Součástí tohoto výrobku je návod k
obsluze. Obsahuje důležitá upozornění
týkající se bezpečnosti, použití a likvidace.
Před použitím výrobku si pozorně pročtěte
všechny pokyny k obsluze a bezpečnostní
pokyny. Výrobek používejte pouze podle
pokynů a pro uvedenou oblast použití.
Při předání výrobku třetím osobám přiložte
k výrobku také všechny podklady.
1. Popis přístroje
1.1 Účel použití
Strojek na těstoviny SilverCrest
SPM200A1je určen na výrobu čerstvých
těstovin a stříkaného pečiva.
Tento přístroj se smí používat pouze
v suchých prostorách. Použití vně budov
nebo ve vlhkých prostorách není povoleno.
Přístroj je určen pro použití soukromých
osob, nikoli pro živnostenské účely.
Přístroj je rovněž vhodný pro:
• použití v kuchyňkách pro zaměstnance v
obchodech, kancelářích, službách a pod.,
• použití v zemědělských hospodářstvích,
64
CZ
• zákazníky v hotelech, motelech a jiných
ubytovacích zařízeních,
•penziony garni.
1.2 Obsah dodávky
• 1 strojek na těstoviny s hnětačem a šnekem
• 1 šroubovací nářadí
•1 čisticí kartáček
• 1 stěrka na těsto
• 5 násad pro různé druhy těstovin
• 1 násada na stříkané pečivo
•1 návod k obsluze
Page 67

RP89212 Pasta Maker LB4 Seite 65 Mittwoch, 29. Mai 2013 3:58 15
2. Označení dílů (viz odklopná stránka)
1 Víko
2 Uchycení víka
3 Kryt motoru
4 Hřídel motoru
5 Spínač: oba spínače musí být ve stejné
poloze
6 Zásobník na těsto
7 Ozubená objímka
8 Hnětač
9 Pouzdro šneku
10 Kroužek šneku
11 Šnek
12 Násada pro těstoviny (volitelně násada
13 Prstenec se závitem
14 Šroubovací nářadí
15 Stěrka na těsto
16 Čisticí kartáček
17 Násada na výrobu tagliatelle
18 Násada na výrobu pappardelle
19 Násada na výrobu fettuccine
20 Násada na výrobu špaget
21 Násada na výrobu linguine
22 Násada na výrobu stříkaného pečiva
3. Technické údaje
Napájení: 220 - 240 V~ / 50/60 Hz
Výkon: 200 Watt
Třída ochrany: II
4. Bezpečnostní pokyny
4.1 Vysvětlení pojmů
V tomto návodu k obsluze najdete
následující signální pojmy:
Výstraha!
Vysoké riziko. Nerespektování
výstrahy může způsobit škody na
životě a zdraví.
Pozor!
Střední riziko. Nerespektování varování
může způsobit hmotnou škodu.
Pokyn:
Nízké riziko. Okolnosti, kterých byste měli
dbát při zacházení s přístrojem.
4.2 Zvláštní pokyny k tomuto
• Tento přístroj mohou používat děti starší 8 let a
osoby se sníženými fyzickými, senzorickými nebo
mentálními schopnostmi nebo osoby s
nedostatkem zkušeností a/nebo vědomostí tehdy,
pokud jsou pod dozorem nebo jsou poučeny o
bezpečném používání přístroje a porozuměly
riziku možného nebezpečí. Děti si s přístrojem
nesmí hrát.
17 až 22)
přístroji
Výstraha!
pokyny, aby se zabránilo poranění nebo
poškození.
Dodržujte následující
SPM200A1 65
CZ
Page 68

RP89212 Pasta Maker LB4 Seite 66 Mittwoch, 29. Mai 2013 3:58 15
• Čištění a uživatelskou údržbu nesmí provádět děti,
výjimku tvoří děti starší 8 let pod dozorem dospělé
osoby.
• Děti mladší 8 let se nesmí zdržovat v blízkosti
přístroje a síťového přívodu.
• Přístroj nesmí být používán s připojením k externím
spínacím hodinám nebo k samostatnému systému
dálkového řízení, například k zásuvce s rádiovým
ovládáním.
• Před každým čištěním vytáhněte síťovou vidlici ze
síťové zásuvky.
• Kryt motoru
3
nikdy neponořujte do vody.
• V žádném případě nepoužívejte abrazivní,
leptavé nebo drsné čisticí prostředky. Mohly by
přístrojpoškodit.
4.3 Všeobecné informace
• Před použitím si tento návod k obsluze
prosím pečlivě přečtěte. Je součástí
přístroje a musí být stále k dispozici.
• Přístroj používejte jen pro popsaný účel
použití (glejte poglavje »1.1 Účel
použití« na strani 64).
• Zkontrolujte, zda potřebné síťové napětí
(viz typový štítek na přístroji) souhlasí s
Vaším síťovým napětím.
• Dbejte toho, že jakýkoli nárok na plnění
ze záruky a odpovědnost zaniká, pokud
se používají díly příslušenství, které
nejsou doporučeny v tomto návodu k
obsluze, nebo nebyly při opravách
použity výhradně originální náhradní
díly. Totéž platí pro opravy, které byly
provedeny nekvalifikovanými osobami.
Kontaktní údaje jsou uvedeny v »Servisní
středisko« na strani77.
• Při případných poruchách funkce v
záruční době smí být oprava provedena
pouze naším servisním střediskem. V
opačném případě veškeré nároky ze
záruky zanikají.
4.4 Ochrana před zasažením
elektrickým proudem
Výstraha! Následující
bezpečnostní pokyny Vás mají
chránit před zasažením elektrickým
proudem.
• Pokud je přístroj poškozen, nesmí se
používat. V tom případě nechejte přístroj
opravit kvalifikovanou osobou. Kontaktní
údaje jsou uvedeny v »Servisní
středisko« na strani77.
• Je-li poškozen přívodní kabel přístroje, je
nutno jej nechat vyměnit u výrobce nebo
podobně kvalifikovanou osobou –
poškozený kabel je nebezpečný!
• Do vnitřku krytu motoru 3 nikdy nesmí
proniknout voda nebo jiné tekutiny.
Proto:
– přístroj nikdy nepoužívejte venku
– kryt motoru 3 nikdy neponořujte do
vody
– nikdy na přístroj nestavte nádoby
naplněné tekutinou jako jsou sklenice
s nápoji, vázy a pod.,
– nikdy přístroj nepoužívejte ve velmi
vlhkém prostředí
– nikdy přístroj nepoužívejte v
bezprostřední blízkosti dřezu, vany,
sprchy nebo bazénu, protože stříkající
voda by se mohla dostat do přístroje.
Pokud by se přesto do přístroje dostala
tekutina, vytáhněte ihned síťovou
zástrčku a nechte přístroj opravit
kvalifikovanou osobou. Kontaktní údaje
jsou uvedeny v »Servisní středisko« na
strani77.
• Nikdy se nepokoušejte prostrkávat prsty
nebo předměty přes ochrannou mříž do
vnitřního prostoru přístroje.
• Nikdy na přístroj, síťový kabel nebo
zástrčku nesahejte mokrýma rukama.
66
CZ
Page 69

RP89212 Pasta Maker LB4 Seite 67 Mittwoch, 29. Mai 2013 3:58 15
• Síťový kabel vždy vytahujte za zástrčku.
Nikdy netahejte za kabel samotný.
• Dbejte na to, aby nedošlo k zalomení
ani k přimáčknutí přívodního kabelu.
• Dbejte na to, aby přívodní kabel nebyl
poškozen o ostré hrany.
• Dbejte na to, aby se přívodní kabel
nedostal do blízkosti horkých ploch
(např. plotýnky).
• Pokud přístroj delší dobu nepoužíváte,
vytáhněte síťovou zástrčku ze síťové
zásuvky. Jen pak není přístroj pod
proudem.
• Měli byste se vyhýbat používání
prodlužovacích kabelů. To je dovoleno
pouze za zcela určitých předpokladů:
– prodlužovací kabel musí být vhodný
pro intenzitu proudu přístroje;
– prodlužovací kabel nesmí být uložen
"ve vzduchu": nesmí být nástrahou,
o kterou se dá zakopnout a nesmí na
něj dosáhnout děti;
– prodlužovací kabel nesmí být v
žádném případě poškozený;
– na síťovou zásuvku nesmějí být kromě
tohoto spotřebiče připojeny žádné
další přístroje, neboť jinak může dojít k
přetížení elektrické sítě (zákaz
vícenásobných zásuvek!).
4.5 Ochrana před úrazem
Výstraha! Dodržujte následující
pokyny, aby se zabránilo zranění.
• Před každým čištěním a pokaždé, když
přístroj rozebíráte, vytáhněte síťovou
vidlici ze zásuvky.
4.6 Pro bezpečnost Vašeho dítěte
Výstraha! Děti často neumějí
správně odhadnout potenciální
nebezpečí a mohou si následkem
toho způsobit úraz. Řiďte se proto
těmito pokyny:
• Výrobek se smí používat pouze za
dohledu dospělých, aby bylo zajištěno,
že si s přístrojem nebudou hrát děti.
• Dbejte důsledně na to, aby byl přístroj
vždy umístěn mimo dosah dětí.
• Dávejte pozor, aby obalová fólie
nezavinila smrt dítěte. Obalové fólie
nejsou určeny ke hraní.
4.7 Věcné škody
Pozor!Aby se zabránilo vzniku věcných
škod, řiďte se následujícími ustanoveními:
• Přístroj instalujte výhradně na rovné,
suché a neklouzavé ploše, aby nemohlo
dojít k převrácení nebo sklouznutí
přístroje.
• Přístroj neumisťujte na horkou plotýnku.
• Nepoužívejte horké tekutiny.
• Přístroj a příslušenství se nesmí používat
v mikrovlnné troubě.
• Dbejte na to, aby byl síťový kabel veden
tak, aby o něj nemohl nikdo zakopnout,
zaplést se do něj nebo na něj šlápnout.
• Během provozu se nedotýkejte
pohyblivých dílů přístroje jako hnětač 8
nebo šnek 11. Mohlo by dojít ke vtažení
rukou nebo vlasů do přístroje a k
poranění. Přístroj zapínejte je tehdy,
pokud je správně nasazeno víko 1.
SPM200A1 67
CZ
Page 70

RP89212 Pasta Maker LB4 Seite 68 Mittwoch, 29. Mai 2013 3:58 15
5. Vybalení a instalace
1. Vyjměte zobalu jednotlivé díly.
2. Zkontrolujte, zda jsou obsaženy všechny
části (glejte poglavje »1.2 Obsah
dodávky« na strani 64) a zda nejsou
poškozené.
3. Před prvním použitím přístroj důkladně
umyjte (glejte poglavje »10. Čištění
přístroje« na strani 75).
4. Přístroj instalujte na rovné, suché a
neklouzavé ploše, aby nemohlo dojít k
převrácení nebo sklouznutí přístroje.
6. Rozložení a sestavení přístroje
Výstraha! K vyloučení
nebezpečí zasažení elektrickým
proudem, poranění nebo
poškození:
– Před každým čištěním a
pokaždé, když přístroj rozebíráte
nebo opět sestavujete, vytáhněte
síťovou vidlici ze zásuvky.
6.1 Rozložení přístroje
1. Nastavte oba spínače 5 do polohy
„OFF”.
Pokyn: Z bezpečnostních důvodů má
tento přístroj 2 spínače. Pro aktivaci
požadované funkce musí být vždy
sepnuty oba spínače. Pokud se spínače
nachází v různých polohách, zůstane
přístroj vypnutý. Tím je zabráněno
nechtěné chybné funkci.
2. Ujistěte se, že je víko 1 správně
nasazeno, jinak by mohlo dojít k
vypadnutí pouzdra šneku 9 při uvolnění
prstence se závitem 13.
3. Uvolněte prstenec se závitem 13.
5. Přístroj opět sestavte (glejte poglavje
»6.2 Sestavení přístroje« na strani 69).
6. Nastavte oba spínače 5 do polohy
„OFF”.
7. Zasuňte síťovou vidlici do vhodné síťové
zásuvky (glejte poglavje »3. Technické
údaje« na strani 65).
Nyní je přístroj připraven kprovozu.
Pokyn: Pokud je prstenec se
závitem 13 utažen příliš pevně, použijte
pro uvolnění prstence se závitem 13
šroubovací nářadí 14.
Pokud nelze prstenec se závitem 13
snadno uvolnit také pomocí
šroubovacího nářadí 14, nechte přístroj
10 až 20 sekund běžet v režimu
„MIX”, prstenec se závitem se tak
trochu uvolní. Před vyšroubováním opět
vytáhněte síťovou vidlici ze síťové
zásuvky.
4. Vyjměte násadu 12.
5. Sejměte víko 1.
Pokyn: Na přední hraně víka se
nachází dvě špičky. Potáhněte je trochu
směrem dopředu a přitom nadzvedněte
víko 1, odklopte ho a víko sejměte.
6. Otočte pouzdro šneku 9 proti směru
hodinových ručiček a sejměte ho.
7. Vyjměte šnek 11 z pouzdra šneku 9.
68
CZ
Page 71

RP89212 Pasta Maker LB4 Seite 69 Mittwoch, 29. Mai 2013 3:58 15
8. Stáhněte kroužek šneku 10
ze šneku 11.
9. Vytáhněte hnětač 8 ze zásobníku na
těsto 6.
10.Stáhněte ozubenou
objímku 7 z
hnětače 8.
11.Stáhněte zásobník na těsto 6 z krytu
motoru 3.
6.2 Sestavení přístroje
1. Umístěte zásobník na těsto 6 do krytu
motoru 3.
2. Nasuňte kroužek šneku 10
na šnek 11. Dbejte na to,
aby kroužek šneku řádně
zapadl.
3. Vložte šnek 11 do pouzdra šneku 9.
4. Nasuňte hnětač 8 na hřídel šneku 11.
Pokyn: Hřídel šneku 11
je opatřena vybráním A,
díky němu hnětač 8
zapadne jen v jedné
poloze.
A
5. Nasuňte ozubenou objímku 7 na hřídel
šneku 11.
Pokyn: Hřídel šneku 11 je opatřena
vybráním, díky němu ozubená
objímka 7 zapadne jen v jedné poloze.
6. Vsuňte složené pouzdro šneku 9 se
šnekem 11 a hnětačem 8 do zásobníku
na těsto 6.
Pokyn: Na vnitřní straně
B
pouzdra šneku 9 se
nachází výčnělek B, který
musí při vložení ukazovat
směrem nahoru, aby bylo
možné správně uzavření
pouzdra šneku 9.
7. Vtiskněte pouzdro šneku 9 mírně proti
zásobníku na těsto 6 a otáčením ve
směru hodinových ručiček ho uzavřete,
až zapadne.
8. Ujistěte se, že je zásobník na těsto 6
správně umístěn v krytu motoru 3.
9. Držte víko 1 šikmo a umístěte ho do
uchycení víka 2.
10.Stiskněte víko 1 dolů, až je správně
umístěno na zásobníku na těsto 6 a
přitom slyšitelně zapadne.
Pokyn: Přístroj může pracovat jen
tehdy, pokud víko správně zapadlo a tím
byl aktivován bezpečnostní spínač.
11. Vezměte některou z násad
17
až 22 a
našroubujte ji za pomoci prstence se
závitem 13 na pouzdro šneku 9.
Pokyn: Pevné dotažení prstence se
závitem rukou je dostačující. Není
potřebné šroubovací nářadí 14.
Nyní je přístroj připraven kprovozu.
SPM200A1 69
CZ
Page 72

RP89212 Pasta Maker LB4 Seite 70 Mittwoch, 29. Mai 2013 3:58 15
7. Výroba těstovin
1. Zvolte vhodnou násadu 12:
17Násada na výrobu tagliatelle
18Násada na výrobu pappardelle
19Násada na výrobu fettuccine
20Násada na výrobu špaget
21Násada na výrobu linguine
22Násada na výrobu stříkaného pečiva
2. Požadovanou násadu (17 až 22)
vložte na dobu cca 1 minuty do horké
vody.
3. Našroubujte požadovanou násadu (17
až 22) pomocí prstence se závitem 13
na pouzdro šneku 9 (glejte poglavje
»6. Rozložení a sestavení přístroje« na
strani 68).
4. Sejměte víko 1.
Pokyn: Na přední hraně víka se
nachází dvě špičky. Potáhněte je trochu
směrem dopředu a přitom nadzvedněte
víko 1, odklopte ho a víko sejměte.
5. Naplňte zásobník na těsto 6
požadovaným množstvím mouky.
Pokyn: Pokud nepoužijete řídkou
tekutinu jako např. vodu, ale hustější
směs s pevnými součástmi, jako např.
nadrobno nasekaný špenát, pak tato
směs víkem dobře neproteče. V takovém
případě přidejte tekutinu přímo do
zásobníku na těsto 6.
6. Držte víko 1 šikmo a umístěte ho do
uchycení víka 2 .
7. St is kn ět e v ík o 1 dolů, až je správně
umístěno na zásobníku na těsto 6 a
přitom slyšitelně zapadne.
Pokyn: Přístroj může pracovat jen
tehdy, pokud víko správně zapadlo a tím
byl aktivován bezpečnostní spínač.
8. Zasuňte síťovou vidlici do vhodné síťové
zásuvky sochranným kontaktem (glejte
poglavje »3. Technické údaje« na
strani 65).
9. Nastavte oba spínače 5 do polohy
„MIX”.
10.Pomalu naplňte požadované množství
tekutiny do víka 1. Tekutina odtud
proteče do zásobníku na těsto.
Pokyny:
– Pokud se mají podle Vašeho receptu
použít vejce, pak je rozmíchejte v
oddělené nádobě.
– Přidejte rozmíchaná vejce a olej
během hnětení skrz víko 1.
11.Nechte přístroj hnětat asi 5 minut, než
těsto získá požadovanou hustotu.
Pokyn: Hotové těsto na těstoviny by se
nemělo lepit a drobit. Případně do
víka 1
přidejte ještě mouku nebo vodu,
která proteče do zásobníku na těsto.
S trochou zkušeností již brzy rozeznáte
ideální hustotu.
12.Nastavte oba spínače 5 do polohy
„OFF”.
Pozor! Než necháte těsto vytlačit, musí
být oba spínače 5 nejméně 5 sekund v
poloze „OFF”, těsto se tak "uklidní".
13.Postavte pod přístroj nádobu na
zachycení těstovin.
14.Nastavte oba spínače 5 do polohy
„EXT”.
Těstoviny se nyní vytlačí.
15.Pomocí stěrky na těsto 15 těstoviny
zkraťte přímo u násady 12 na
požadovanou délku.
16.Jakmile je veškeré těsto protlačeno,
nastavte oba spínače 5 do polohy
„OFF”.
70
CZ
Page 73

RP89212 Pasta Maker LB4 Seite 71 Mittwoch, 29. Mai 2013 3:58 15
Pokyn: z technických důvodů zůstane
v zásobníku na těsto 6 vždy malé
množství těsta.
17. Pokud chcete připravit druhou porci
těstovin, vyjměte zbylé množství těsta ze
zásobníku na těsto 6.
Pokyny: Odvažte odebrané zbylé
množství a odpovídajícím způsobem
snižte celkové množství přísad pro druhé
těsto. Poté můžete zbývající množství
prvního těsta přidat k druhému těstu,
aniž by bylo překročeno maximální
celkové množství 520 g.
8. Recepty na těstoviny
8.1 Tipy pro přípravu těstovin
• Pro výrobu těstovin je obzvláště vhodné
použít krupici, špaldovou mouku,
speciální mouku na těstoviny nebo
instantní mouku.
• Celkové množství mouky a tekutiny by
mělo vždy být v rozmezí 480 g a 520 g.
Přístroj tak optimálně pracuje. Při menším
množství nedochází k řádnému
prohnětení přísad, při větším celkovém
množství může hmota vytékat ze
zásobníku na těsto.
• Při době hnětení kratší než 3 minuty
nedojde ke správnému promíchání
přísad.
• Doba hnětení delší než 5 minut způsobí
oteplení těsta, které se pak lepí.
• Aby se odebrané těstoviny nelepily,
rozprostřete je na čistou utěrku.
• Bylinky těstoviny obarví, ale při jejich
vaření ztratí svou chuť.
• Těstoviny můžete sušit a učinit je tak
trvanlivé. Rozložte těstoviny na čisté
18.Při přípravě druhého těsta postupujte
stejně jako při přípravě prvního těsta.
19. Jste-li hotovi, vytáhněte síťovou vidlici ze
síťové zásuvky.
Pozor!
Aby nedošlo k zaschnutí zbytků těsta, musíte
přístroj ihned po použití rozebrat. Pokud
dojde k zaschnutí zbytků těsta, může být
těžké nebo dokonce nemožné přístroj
rozebrat.
20.Přístroj rozeberte na díly (glejte poglavje
»6.1 Rozložení přístroje« na strani 68).
21. Přístroj resp. díly příslušenství vyčistěte
(glejte poglavje »10. Čištění přístroje«
na strani 75).
utěrce a nechte je cca 1 den proschnout
na vzduchu nebo při teplotě cca 40 °C
v troubě cca 1 - 3 hodiny.
• Pokud zůstane na víku přilepené těsto,
můžete ho pomocí stěrky na těsto 15
opatrně protlačit oběma drážkami ve
víku.
• Těstoviny vařte v dostatečném množství
vody (3 - 4 litry na 500 g těstovin).
Přidejte 2-3 lžíce soli.
• Při vaření čerstvých těstovin pění voda
více, než u sušených. Proto vařte bez
pokličky.
• Čerstvé těstoviny mají kratší dobu vaření
než sušené. Čerstvé těstoviny se vaří
zpravidla 1 - 3 minuty, sušené těstoviny
zpravidla mezi 6 a 12 minutami.
8.2 Základní recept na těstoviny
Přísady:
• 340 g pšeničné krupice, tvrdá
• 140 g vody)
• 1 lžíce oleje (10 g)
SPM200A1 71
CZ
Page 74

RP89212 Pasta Maker LB4 Seite 72 Mittwoch, 29. Mai 2013 3:58 15
Příprava:
viz »7. Výroba těstovin« na strani 70.
Pokyny:
• Těstoviny můžete použít čerstvé nebo
sušené.
• Hustotu těsta můžete ovlivnit moukou
nebo trochou vody.
8.3 Vaječné těstoviny
Přísady:
• 340 g krupice
• 3 středně velká vejce
Příprava:
viz »7. Výroba těstovin« na strani 70.
Pokyny:
• Těstoviny můžete použít čerstvé nebo
sušené.
• Hustotu těsta můžete ovlivnit moukou
nebo trochou vody.
8.4 Zelené špaldové těstoviny
Přísady:
• 340 g špaldové mouky (případně
mouka na těstoviny nebo instantní
mouka)
• 175 g špenátu (čerstvý blanšírovaný a
nasekaný nebo mražený. Nepoužívejte
špenát se smetanou, smetana by
způsobila změknutí těstovin.)
• 1 stroužek česneku (můžete podle chuti
vynechat)
• 1 špetka strouhaného muškátového
oříšku
Příprava:
1. Všechny přísady umístěte přímo do
zásobníku na těsto 6.
2. Připravte těstoviny podle popisu v
»7. Výroba těstovin« na strani 70.
Pokyny:
• Těstoviny můžete použít čerstvé nebo
sušené.
• Hustotu těsta můžete ovlivnit moukou
nebo trochou vody.
8.5Červené těstoviny
Přísady:
• 340 g mouky na těstoviny (případně
špaldová nebo instantní mouka)
•1 vejce
•1 lžíce kečupu
• cca 80 - 100 g rajčatového protlaku
Příprava:
1. Umístěte rozklepnuté vejce a kečup do
mísy.
2. Doplňte rajčatovým protlakem do
celkové hmotnosti 160 g.
3. Mouku a směs vejce a rajčat umístěte
přímo do zásobníku na těsto 6.
4. Připravte těstoviny podle popisu v
»7. Výroba těstovin« na strani 70.
Pokyny:
• Těstoviny můžete použít čerstvé nebo
sušené.
• Hustotu těsta můžete ovlivnit moukou
nebo trochou vody.
8.6Černé těstoviny
Přísady:
• 340 g mouky na těstoviny (případně
špaldová nebo instantní mouka)
• 150 g vejce
• 10 g sépiový inkoust
Příprava:
viz »7. Výroba těstovin« na strani 70.
Pokyny:
• Těstoviny můžete použít čerstvé nebo
sušené.
• Hustotu těsta můžete ovlivnit moukou
nebo trochou vody.
72
CZ
Page 75

RP89212 Pasta Maker LB4 Seite 73 Mittwoch, 29. Mai 2013 3:58 15
8.7 Stříkané pečivo
Přísady:
• 230 g pšeničné mouky, typ 405 (mouka
na koláče)
• 150 g másla, studené a nakrájené na
tenké plátky
• 100 g cukru
•1 vejce
•1 sáček vanilkového cukru
•1 špetka soli
Příprava:
1. Přísady umístěte do zásobníku na těsto.
2. Nechte cca 5 minut prohnětat.
9. Recepty na omáčky
Pro dobrou chuť:
• Používejte čerstvě mletý pepř a sůl.
• Vždy používejte čerstvé bylinky a
přísady
•Parmazán strouhejte čerstvý
• Používejte olivový olej lisovaný za
studena
• Domácí těstoviny chutnají nejlépe tehdy,
když jsou po uvaření společně s trochou
olivového oleje a česneku ohřáté na
pánvi. Na stejné pánvi (před přidáním
těstovin) můžete podle chuti opéct
houby, maso nebo langustini. Sůl a pepř
(mlýnek) a na závěr podávat s
nasekanou bazalkou, salátem rucola
nebo rajčaty. Parmazán podávejte
nejlépe až u stolu, nejlépe chutná
čerstvě nastrouhaný.
9.1 Omáčka Carbonara
3. Poté protlačte násadou 22 na výrobu
stříkaného pečiva.
4. Pomocí stěrky na těsto 15 odkrajujte
přímo u násady 12 rovnoměrné
proužky.
5. Proužky umístěte na plech ve tvaru S,
rovné nebo jako kolečka.
6. Při teplotě 180 °C pečte po dobu
10 minut.
Pokyny:
• Před pečením můžete stříkané pečivo
ozdobit plátky ořechů nebo mandlí.
• Po upečení můžete ochlazené pečivo
ozdobit polevou.
•4 vejce
•1 špetka soli
•1 kelímek šlehačky
• 100 ml mléka
• 100 g parmazánu, nastrouhaný
• Sůl a pepř, čerstvě namleté
• mletý muškátový oříšek na okořenění
Příprava:
1. Vejce, šlehačku, mléko, sůl, pepř,
muškátový oříšek rozšlehejte metličkou.
2. Vmíchejte polovinu nastrouhaného
parmazánu.
3. Na středně zahřáté pánvi zahřejte
olivový olej, přidejte nasekaný česnek a
krátce opečte.
4. Nyní nalijte směs vajec a mléka.
5. Nakonec přidejte šunku nakrájenou na
kostičky.
9.2 Rajčatová omáčka
Přísady:
• 2 lžíce olivového oleje na osmažení
• 2 stroužky česneku, jemně nasekaný
• 150 g šunky, na kostičky
SPM200A1 73
Přísady:
• 850 ml rajčat, plechovka
•1 malá cibule
CZ
Page 76

RP89212 Pasta Maker LB4 Seite 74 Mittwoch, 29. Mai 2013 3:58 15
• 1 stroužek česneku
• 2 lžíce rajčatového protlaku
•Sůl
• Bílý pepř
•Cukr
•Oregano
• Provensálská směs koření
• 3 lžíce olivového oleje
Příprava:
1. V hrnci o objemu 2-3 l ohřejte olivový
olej.
2. Přidejte nadrobno nasekanou cibuli a
poduste, až zesklovatí, přidejte
protlačený česnek.
3. Rozmixujte rajčata. Dejte do hrnce,
přidejte rajčatový protlak a ochuťte solí,
pepřem a špetkou cukru.
4. Za občasného míchání vařte 10 minut.
5. Nakonec omáčku ochuťte solí, pepřem,
oreganem a podle chuti provensálskou
směsí koření.
Pokyn:
• Alternativně spařte rajčata, stáhněte je a
rozmixujte.
9.3 Omáčka Gongonzola
Přísady:
• 200 ml smetany
• 200 g gorgonzoly
Příprava:
1. Zahřejte smetanu
2. Přidejte a nechte rozpustit gorgonzolu.
Za stálého míchání zahřejte.
Pokyn:
• Podle chuti můžete přidat také kostičky
šunky.
9.4 Aglio e Olio
Přísady:
• 4 lžíce oleje (olivový olej), lisovaný za
studena
• 2 stroužky česneku
•Bazalka
•Oregano
•Pepř
•Sůl
Příprava:
1. Na olivovém oleji poduste česnek a
nechte "protáhnout" uvařené špagety.
2. Dochuťte čerstvě mletým pepřem a solí.
3. Podle chuti podávejte s čerstvě
nastrouhaným parmazánem.
9.5 Pesto (červené)
Přísady:
• 150 g rajčat (sušených)
• 1 svazek bazalky
• 1 červená cibule (na čtvrtiny)
• 2 lžíce piniových semínek
• 1-2 stroužky česneku
• 2 čajové lžičky octu balsamico
• 5 lžic olivového oleje
•Sůl
•Pepř
Příprava:
1. Jemně rozmixujte rajčata, natrhané listy
bazalky, piniová semínka, česnek a cibuli.
2. Přidejte ocet a olej a mixujte.
3. Dochuťte solí a pepřem.
Pokyn:
• Pesto uchovávejte ve sklenici se
šroubovým uzávěrem, pokryté vrstvou
olivového oleje. V lednici tak vydrží cca.
4 týdny.
9.6 Pesto (zelené)
Přísady:
•1-2 svazky čerstvé bazalky
• 1-2 stroužky česneku
• 2 lžíce piniových semínek
•olivového oleje
74
CZ
Page 77
RP89212 Pasta Maker LB4 Seite 75 Mittwoch, 29. Mai 2013 3:58 15
• 2 lžíce parmazánu
• Sůl + čerstvě namletý černý pepř
Příprava:
1. Na pánvi osmažte piniová semínka.
2. Jemně nasekejte bazalku, česnek a
piniová semínka.
3. Přidejte takové množství olivového oleje,
až vznikne krémová pasta.
10. Čištění přístroje
Výstraha! K vyloučení
nebezpečí zasažení elektrickým
proudem, poranění nebo
poškození:
– Před každým čištěním vytáhněte
síťovou vidlici ze síťové zásuvky.
– Kryt motoru 3 nikdy neponořujte
do vody.
Pozor! V žádném případě nepoužívejte
abrazivní, leptavé nebo drátkovací čisticí
prostředky. Mohly by přístrojpoškodit.
• Spotřebič rozeberte na díly (glejte
poglavje »6.1 Rozložení přístroje« na
strani 68).
10.1 Čištění krytu motoru (3)
1. Vyčistěte kryt motoru 3 vlhkým hadříkem.
Můžete použít také malé množství
prostředku na mytí nádobí.
2. Nakonec vše otřete hadříkem
navlhčeným čistou vodou.
3. Kryt motoru 3 znovu použijte až tehdy,
když bude zcela suchý.
10.2 Čištění zásobníku na těsto (6),
víka (1) a pouzdra šneku (9)
Pozor! Díly příslušenství nejsou vhodné pro
mytí v myčce. V myčce by mohl plast ztratit
lesk a popraskat.
4. Nakonec přidejte parmazán.
5. Dochuťte solí a pepřem.
Pokyn:
• Pesto uchovávejte ve sklenici se
šroubovým uzávěrem, pokryté vrstvou
olivového oleje. V lednici tak vydrží cca.
4 týdny.
1.Za účelem odmočení zbytků těsta
umístěte díly do studené nebo vlažné
vody.
Pokyn: Do vody můžete přidat také
malé množství prostředku na mytí
nádobí.
2. Odmočené zbytky těsta odstraňte
pomocí čisticího kartáčku 16.
3. Nakonec opláchněte čistou vodou.
4. Před dalším použitím nechte díly zcela
oschnout.
10.3 Vyčistěte ostatní příslušenství
Pozor! Díly příslušenství nejsou vhodné pro
mytí v myčce. V myčce by mohl plast ztratit
lesk a popraskat.
1. Těsto nechte zaschnout nejméně 24
hodin. Těsto tak ztvrdne a láme se.
2. Zaschlé zbytky těsta odstraňte pomocí
čisticího kartáčku 16.
3. Násadami 17 až 22 můžete mírně
poklepat na stůl, aby odpadlo zaschlé
těsto.
4. Otvory v násadách 17 až 22 můžete
zbavit zbytků těsta pomocí párátka.
5. Části čistěte v teplé vodě s přísadou
prostředku na mytí nádobí.
6. Nakonec opláchněte čistou vodou.
7. Před dalším použitím nechte díly zcela
oschnout.
SPM200A1 75
CZ
Page 78
RP89212 Pasta Maker LB4 Seite 76 Mittwoch, 29. Mai 2013 3:58 15
11. Likvidace
11.1 Přístroj
Symbol přeškrtnuté popelnice
na kolečkách znamená, že je
přístroj v Evropské unii nutno
odevzdat ve sběrně zvláštního
odpadu. To platí pro výrobek a
pro všechny díly příslušenství
označené tímto symbolem. Takto označené
výrobky se nesmějí odhazovat do
domovního odpadu, ale je třeba je
odevzdat k recyklaci ve sběrně elektrických
12. Záruka společnosti HOYER Handel GmbH
Vážená zákaznice, vážený zákazníku,
na tento výrobek obdržíte záruku 3 roky od
data nákupu. V případě závad na tomto
výrobku Vám při jednání s prodejcem přísluší
zákonem stanovená práva. Tato zákonem
stanovená práva nejsou omezena naší níže
uvedenou zárukou.
Záruční podmínky
Záruční lhůta začíná dnem zakoupení.
Originální pokladní lístek dobře uschovejte.
Tento doklad je potřebný jako důkaz o
zakoupení.
Pokud se během tří let od data nákupu
tohoto výrobku vaskytne chyba materiálu
nebo výrobní závada, výrobek Vám
bezplatně, dle našeho uvážení, opravíme
nebo nahradíme. Podmínkou pro poskytnutí
této záruky je předložení defektního
přístroje a dokladu o zaplacení (pokladního
lístku) v rámci tříleté lhůty a krátký písemný
popis závady a okamžiku výskytu závady.
a elektronických přístrojů. Recyklace
pomáhá snižovat spotřebu surovin a
zatížení životního prostřední. Dbejte proto
vždy předpisů o likvidaci elektrospotřebičů
ve své zemi.
11.2 Obal
Při likvidaci obalu respektujte příslušné
předpisy o ochraně životního prostředí své
země.
Pokud se záruka vztahuje na tuto závadu,
obdržíte zpět opravený nebo nový výrobek.
Okamžikem opravy nebo výměny nezačíná
nová záruční lhůta.
Záruční lhůta a zákonné nároky na
odstranění vady
Záruční lhůta se poskytnutím záruky
neprodlužuje. To platí také pro vyměněné a
opravené díly. Případné škody a závady,
které se vyskytly již při zakoupení, musí být
nahlášeny ihned po rozbalení. Náklady na
opravy provedené po uplynutí záruční lhůty
budou zpoplatněny.
Rozsah záruky
Přístroj byl vyroben precizně za dodržení
přísných směrnic pro kvalitu a před expedicí
byl důkladně zkontrolován.
Poskytnutí záruky se vztahuje na chyby
materiálu nebo výrobní závady. Tato záruka
se nevztahuje na díly výrobku, které jsou
vystaveny normálnímu opotřebení a proto je
76
CZ
Page 79

RP89212 Pasta Maker LB4 Seite 77 Mittwoch, 29. Mai 2013 3:58 15
můžeme zařadit do skupiny dílů
podléhajícím rychlému opotřebení, nebo na
poškození křehkých dílů, jako např. spínačů,
baterií nebo skleněných dílů.
Tato záruka zaniká v případě poškozených,
neodborně používaných nebo neodborně
opravovaných výrobků. Pro odborné použití
výrobku se musí přesně dodržovat všechny
pokyny uvedené v návodu k obsluze.
Bezpodmínečně se vyvarujte účelu použití a
činnostem, od kterých se v návodu k obsluze
odrazuje nebo před kterými se varuje.
Přístroj je určen výhradně pro soukromé
použití, nikoli pro živnostenské účely.
V případě zneužití a neodborné
manipulace, použití násilí a zákroků, které
nebyly provedeny naším autorizovaným
servisním centrem záruka zaniká.
Postup při uplatnění záruky
Aby se zajistilo rychlé zpracování Vaší
žádosti, postupujte podle těchto pokynů:
• Při všech dotazech mějte připraveno
číslo zboží (pro tento přístroj: IAN
89212) a pokladní lístek jako důkaz o
zakoupení.
• Číslo zboží je uvedeno na typovém
štítku, gravuře, na titulním listu vašeho
návodu (vlevo dole) nebo jako nálepka
na zadní nebo spodní straně.
• V případě výskytu závad funkce nebo
jiných závad, kontaktujte nejprve
telefonicky nebo prostřednictvím e-mailu
níže uvedené servisní středisko.
• Registrovaný defektní výrobek pak
můžete s přiloženým dokladem o
nákupu (pokladním lístkem) a uvedením
příčiny a doby výskytu závady, zaslat na
naše náklady na adresu servisu, která
Vám byla sdělena.
Na stránkách
www.lidl-service.com
můžete stáhnout tuto a mnoho
dalších příruček,
videdokumentací o výrobcích a
software.
Servisní středisko
CZ
Servis Česko
Tel.: 0800143873
E-Mail: hoyer@lidl.cz
IAN: 89212
Dodavatel
Níže uvedená adresa není adresou
servisu. Kontaktujte nejprve výše uvedené
servisní středisko.
HOYER Handel GmbH
Kühnehöfe 5
22761 Hamburg
Deutschland
SPM200A1 77
CZ
Page 80

RP89212 Pasta Maker LB4 Seite 78 Mittwoch, 29. Mai 2013 3:58 15
Obsah
1. Popis prístroja . . . . . . . . . . . . . . . . . . . . . . . . . . . . . . . . . . . . . . . . . . . . . . . . . . . . . . . . 78
2. Označenie častí (pozri odklopnú stranu) . . . . . . . . . . . . . . . . . . . . . . . . . . . . . . . . . . . . . . 79
3. Technické údaje. . . . . . . . . . . . . . . . . . . . . . . . . . . . . . . . . . . . . . . . . . . . . . . . . . . . . . . . 79
4. Bezpečnostné pokyny . . . . . . . . . . . . . . . . . . . . . . . . . . . . . . . . . . . . . . . . . . . . . . . . . . . 80
5. Vybalenie a inštalácia . . . . . . . . . . . . . . . . . . . . . . . . . . . . . . . . . . . . . . . . . . . . . . . . . . . 82
6. Rozloženie a zloženie prístroja. . . . . . . . . . . . . . . . . . . . . . . . . . . . . . . . . . . . . . . . . . . . . 83
7. Výroba cestovín . . . . . . . . . . . . . . . . . . . . . . . . . . . . . . . . . . . . . . . . . . . . . . . . . . . . . . . 84
8. Recepty na cestoviny . . . . . . . . . . . . . . . . . . . . . . . . . . . . . . . . . . . . . . . . . . . . . . . . . . . . 86
10. Čistenie prístroja. . . . . . . . . . . . . . . . . . . . . . . . . . . . . . . . . . . . . . . . . . . . . . . . . . . . . . . 90
10. Čistenie prístroja. . . . . . . . . . . . . . . . . . . . . . . . . . . . . . . . . . . . . . . . . . . . . . . . . . . . . . . 90
11. Likvidácia . . . . . . . . . . . . . . . . . . . . . . . . . . . . . . . . . . . . . . . . . . . . . . . . . . . . . . . . . . . . 91
12. Záruka spoločnosti HOYER Handel GmbH . . . . . . . . . . . . . . . . . . . . . . . . . . . . . . . . . . . . . 91
Servisné stredisko . . . . . . . . . . . . . . . . . . . . . . . . . . . . . . . . . . . . . . . . . . . . . . . . . . . . . 93
Dodávateľ. . . . . . . . . . . . . . . . . . . . . . . . . . . . . . . . . . . . . . . . . . . . . . . . . . . . . . . . . . . 93
Blahoželáme vám ku kúpe vášho
nového prístroja.
Rozhodli ste sa pre kvalitný výrobok. Návod
na použitie je súčasťou tohto výrobku.
Obsahuje dôležité pokyny a upozornenia
týkajúce sa bezpečnosti, používania
alikvidácie.
1. Popis prístroja
1.1 Účel použitia
Stroj na výrobu cestovín SilverCrest
SPM200A1 slúži na výrobu čerstvých
cestovín a striekaného pečiva.
Prístroj používajte len v suchých priestoroch.
Používanie prístroja vexteriéri alebo vo
vlhkých priestoroch je zakázané.
Prístroj je určený na použitie v
domácnostiach, ale nie na živnostenské
účely.
78
Prv než začnete výrobok používať,
oboznámte sa so všetkými pokynmi a
upozorneniami týkajúcimi sa obsluhy a
bezpečnosti. Výrobok používajte len na
opísané účely auvedené oblasti použitia.
Ak výrobok postúpite tretej osobe,
odovzdajte jej spolu sním aj všetky
podklady.
Prístroj je vhodný taktiež na/pre:
• použitie v kuchyniach pre zamestnancov
v obchodoch, kanceláriách a iných
komerčných oblastiach,
• použitie na poľnohospodárskych
usadlostiach,
• zákazníkov v hoteloch, moteloch a iných
ubytovacích zariadeniach,
• penzióny poskytujúce raňajky.
Page 81

RP89212 Pasta Maker LB4 Seite 79 Mittwoch, 29. Mai 2013 3:58 15
1.2 Obsah dodávky
• 1 stroj na výrobu cestovín s hnetacím
zariadením a závitovkou
• 1 skrutkovací nástroj
• 1 kefa na čistenie
• 1 stierka na cesto
• 5 nadstavcov na rôzne cestoviny
• 1 nadstavec na striekané pečivo
• 1 návod na obsluhu
2. Označenie častí (pozri odklopnú stranu)
1 veko
2 uchopenie veka
3 kryt motora
4 hriadeľ motora
5 spínač: obidva spínače musia byť
vrovnakej polohe
6 nádoba na cesto
7 ozubené puzdro
8 hnetač
9 kryt závitovky
10 závitovkový krúžok
11 závitovka
12 nadstavec na cestoviny (voliteľne
13 krúžok so závitom
14 skrutkovací nástroj
15 stierka na cesto
16 kefa na čistenie
17 nadstavec na tagliatelle
18 nadstavec na pappardelle
19 nadstavec na fettuccine
20 nadstavec na špagety
21 nadstavec na linguine
22 nadstavec na striekané pečivo
3. Technické údaje
Napájanie: 220 – 240 V~ / 50/60 Hz
Výkon: 200 W
Druh krytia: II
nadstavec 17 až 22)
SPM200A1 79
Page 82
RP89212 Pasta Maker LB4 Seite 80 Mittwoch, 29. Mai 2013 3:58 15
4. Bezpečnostné pokyny
4.1 Vysvetlenie pojmov
V návode na obsluhu nájdete tie signálne
pojmy:
Výstraha!
Vysoké riziko: Neuposlúchnutie
výstrahy môže mať za následok
škody na zdraví a ohrozenie
života.
Pozor!
Stredné riziko: Neuposlúchnutie tejto
výstrahy môže mať za následok vecné
škody.
Upozornenie:
Nízke riziko: Skutočnosti, ktoré je pri
zachádzaní s prístrojom potrebné brať do
úvahy.
4.2 Špeciálne pokyny k tomuto
prístroju
Výstraha!
zraneniam alebo škodám,
dodržiavajte nasledujúce pokyny.
• Tento prístroj môžu používať deti od 8 rokov
a osoby so zníženými fyzickými,
senzorickými alebo psychickými
schopnosťami alebo nedostatkom
skúseností a/alebo vedomostí len vtedy, ak
sú pod dozorom alebo ak boli poučené o
bezpečnom používaní prístroja a
porozumeli, aké nebezpečenstvá z jeho
používania vyplývajú. Nenechajte deti, aby
sa hrali sprístrojom.
• Čistenie a používateľskú údržbu nesmú
vykonávať deti, s výnimkou prípadu, že ide
o deti staršie ako 8 rokov a že sú pod
dozorom.
Aby sa predišlo
• Zabezpečte, aby sa deti mladšie ako 8
rokov zdržiavali v bezpečnej vzdialenosti
od prístroja a sieťového prívodu.
• Prístroj sa nesmie používať spripojením
kexterným spínacím hodinám alebo k
samostatnému systému diaľkového
zariadenia, napríklad k zásuvke s rádiovým
ovládaním.
• Pred každým čistením vytiahnite konektor zo
zástrčky.
3
•Kryt motora
nikdy neponárajte do vody.
• Vžiadnom prípade nepoužívajte
abrazívne, leptajúce čistiace prostriedky
aprostriedky, ktoré by mohli prístroj
poškriabať. Prístroj by sa mohol poškodiť.
4.3 Všeobecné informácie
• Pred použitím si, prosím, starostlivo
prečítajte tento návod na obsluhu. Je
súčasťou prístroja aþmusí byť
kedykoľvek kþdispozícii.
• Prístroj používajte len pre popísaný účel
použitia (pozri »1.1 Účel použitia« na
strane 78).
• Zkontrolujte, zda potřebné síťové napětí
(viz typový štítek na přístroji) souhlasí
sþVaším síťovým napětím.
• Uvedomte si, že akýkoľvek nárok na
plnenie zo záruky a zodpovednosť
zaniká, ak sa používajú časti
príslušenstva, ktoré nie sú odporúčané v
tomto návode na obsluhu alebo pri
opravách neboli použité výhradne
originálne náhradné dielce. To isté platí
pre opravy, ktoré boli uskutočnené
osobami bez príslušnej kvalifikácie.
Kontaktné údaje nájdete v »Servisné
stredisko« na strane93.
80
Page 83

RP89212 Pasta Maker LB4 Seite 81 Mittwoch, 29. Mai 2013 3:58 15
• Pri prípadných poruchách funkcie v
záručnej dobe smie byť oprava
vykonaná výlučne naším servisným
strediskom. V opačnom prípade
zanikajú akékoľvek nároky na záručné
plnenie.
4.4 Ochrana pred úrazom elektrickým
prúdom
Výstraha! Nasledujúce
bezpečnostné pokyny vás majú
chrániť pred úrazom elektrickým
prúdom.
• Ak je prístroj poškodený, nesmie sa
prístroj vþžiadnom prípade používať.
Vþtomto prípade nechajte prístroj
opraviť kvalifikovanou osobou.
Kontaktné údaje nájdete v »Servisné
stredisko« na strane93.
• Ak bude sieťový prívod tohto prístroja
poškodený, musí byť nahradený
výrobcom alebo rovnako kvalifikovanou
osobou, aby sa predišlo ohrozeniu.
• Dovnútra krytu motora 3 sa nesmie v
žiadnom prípade dostať voda ani iné
kvapaliny. Preto:
– prístroj nikdy nepoužívajte v exteriéri
– kryt motora 3 nikdy neponárajte do
vody
– nikdy na prístroj neklaďte nádoby
naplnené tekutinou, ako sú poháre s
nápojmi, vázy atď.
– prístroj nikdy nepoužívajte vo veľmi
vlhkom prostredí
– prístroj nikdy nepoužívajte v
bezprostrednej blízkosti drezu, vane,
sprchy alebo bazénu, pretože
striekajúca voda by sa mohla dostať
do prístroja.
Pokiaľ by sa aj napriek tomu do prístroja
dostala tekutina, vytiahnite ihneď
sieťovú zástrčku a prístroj dajte opraviť
personálu s príslušnou kvalifikáciou.
Kontaktné údaje nájdete v »Servisné
stredisko« na strane93.
• Prístroj, sieťový kábel ani sieťovú
zástrčku nikdy nechytajte vlhkými
rukami.
• Sieťový kábel vyťahujte vždy za
zástrčku. Nikdy neťahajte za samotný
kábel.
• Dbajte na to, aby nedošlo k zalomeniu
ani k pomliaždeniu prívodného kábla.
• Dbajte na to, aby sa prívodný kábel
nedostal do blízkosti horúcich plôch
(napr. varná doska).
• Pokiaľ prístroj dlhšiu dobu nepoužívate,
vytiahnite sieťovú zástrčku zo zásuvky.
Len tak je prístroj úplne bez prúdu.
• Mali by ste sa vyvarovať používania
predlžovacích káblov. Je to dovolené len
za celkom určitých predpokladov:
– predlžovací kábel musí byť vhodný
pre intenzitu elektrického prúdu
prístroja;
– predlžovací kábel nesmie byť
položený "vo vzduchu“: nesmie byť
nástrahou pre zakopnutie, aniþnesmie
byť vþdosahu detí;
– predlžovací kábel nesmie byť
vþžiadnom prípade poškodený;
– do sieťovej zásuvky nesmú byť
pripojené žiadne iné prístroje, iba
tento prístroj, keďže vþopačnom
prípade môže dôjsť kþpreťaženiu
elektrickej siete (zákaz viacnásobných
zásuviek!).
4.5 Ochrana pred poraneniami
Výstraha! Ak sa chcete vyhnúť
poraneniam,dodržiavajte
nasledujúce pokyny.
• Dbajte na to, aby sieťový
prívodnemohol nikdy spôsobiť potknutie
SPM200A1 81
Page 84

RP89212 Pasta Maker LB4 Seite 82 Mittwoch, 29. Mai 2013 3:58 15
alebo aby sa do neho niekto nemohol
zachytiť alebo naň stúpiť.
• Počas prevádzky zabráňte kontaktu s
pohyblivými dielmi prístroja, ako je
hnetač 8 alebo závitovka 11. Ruky
alebo vlasy by sa mohli vtiahnuť do
prístroja a spôsobiť poranenia. Zapnite
prístroj iba vtedy, keď je veko 1 správne
nasadené.
• Pred každým čistením a vždy pred
rozložením prístroja vytiahnite sieťovú
zástrčku zo sieťovej zásuvky.
4.6 Pre bezpečnosť vášho dieťaťa
Výstraha! Deti často nevedia
správne odhadnúť možné
nebezpečenstvo a môžu si
následkom toho spôsobiť úraz.
Riaďte sa preto týmito pokynmi:
• Výrobok sa smie používať jedine pod
dohľadom dospelých, aby sa zaistilo, že
sa s prístrojom nebudú hrať deti.
5. Vybalenie a inštalácia
• Dbajte starostlivo na to, aby sa prístroj
nenachádzal v dosahu detí, ktoré by ho
mohli stiahnuť za prívodný kábel alebo
sa s ním hrať.
• Dbajte na to, aby obalová fólia
nezavinila smrť dieťaťa. Obalové fólie
nie sú určené na hranie.
4.7 Vecné škody
Pozor! Ak sa chcete vyhnúť vecným
škodám, dodržiavajte nasledujúce
ustanovenia.
• Prístroj postavte výhradne na rovnú,
suchú plochu, ktorá nie je klzká, aby sa
prístroj nemohol prevrhnúť ani skĺznuť na
zem.
• Prístroj neumiestňujte na horúci varič.
• Nepoužívajte horúce tekutiny.
• Prístroj a príslušenstvo sa nesmú dávať
do mikrovlnnej rúry.
1. Jednotlivé diely vyberte z obalu.
2. Skontrolujte, či sú jednotlivé diely úplné
(pozri »1.2 Obsah dodávky« na
strane 79) a či nemajú žiadne
poškodenia.
3. Pred prvým použitím prístroj dôkladne
umyte (pozri »10. Čistenie prístroja« na
strane 90).
4. Prístroj položte na rovnú, suchú plochu,
ktorá nie je klzká, aby sa nemohol
prevrhnúť, ani skĺznuť na zem.
5. Prístroj znovu zložte (pozri
»6.2 Zloženie prístroja« na strane 84).
6. Prepnite obidva spínače 5 do polohy
„OFF“.
82
7. Zastrčte sieťovú zástrčku do vhodnej
sieťovej zásuvky (pozri »3. Technické
údaje« na strane 79).
Prístroj je teraz pripravený na používanie.
Page 85

RP89212 Pasta Maker LB4 Seite 83 Mittwoch, 29. Mai 2013 3:58 15
6. Rozloženie a zloženie prístroja
Výstraha! Ak chcete vylúčiť
nebezpečenstvo úrazu elektrickým
prúdom, poranenia alebo
poškodenia:
– Pred každým čistením a vždy
pred rozložením alebo
opätovným zložením prístroja
vytiahnite sieťovú zástrčku zo
sieťovej zásuvky.
6.1 Rozloženie prístroja
1. Prepnite obidva spínače 5 do polohy
„OFF“.
Upozornenie: Z bezpečnostných
dôvodov má tento prístroj 2 spínače,
ktoré sa musia zapnúť vždy súčasne,
aby sa aktivovala požadovaná funkcia.
Ak sú obidva spínače v rôznych
polohách, zostane prístroj vypnutý.
Zabráni sa tým neúmyselným chybným
funkciám.
2. Ubezpečte sa, že veko 1 správne
prilieha, v opačnom prípade by mohol
vypadnúť kryt závitovky 9 pri uvoľnení
krúžka so závitom 13.
3. Uvoľnite krúžok so závitom 13.
Upozornenie: Ak je krúžok so
závitom 13 nasadený príliš pevne,
použite skrutkovací nástroj 14, aby ste
uvoľnili krúžok so závitom 13.
Ak sa krúžok so závitom 13 nedá
uvoľniť ani skrutkovacím nástrojom 14,
nechajte prístroj bežať 10 až 20 sekúnd
v polohe „MIX“, potom sa krúžok so
závitom trochu uvoľní. Pred každým
uvoľnením znova vytiahnite sieťovú
zástrčku zo sieťovej zásuvky.
4. Vyberte nadstavec 12.
5. Odoberte veko 1.
Upozornenie: Na prednej hrane
veka sa nachádzajú dva výstupky.
Potiahnite výstupky trochu vpred a
nadvihnite pritom veko 1, vyklopte ho
nahor a následne odoberte.
6. Otočte kryt závitovky 9 proti smeru
hodinových ručičiek a odoberte ho.
7. Vyberte závitovku 11 z krytu
závitovky 9.
8. Stiahnite závitovkový
krúžok 10 zo závitovky 11.
9. Vytiahnite hnetač 8 z nádoby na
cesto 6.
10.Stiahnite ozubené
puzdro 7 z
hnetača 8.
11. Stiahnite nádobu na cesto 6 z krytu
motora 3.
SPM200A1 83
Page 86

RP89212 Pasta Maker LB4 Seite 84 Mittwoch, 29. Mai 2013 3:58 15
6.2 Zloženie prístroja
1. Nasaďte nádobu na cesto 6 do krytu
motora 3.
2. Posuňte závitovkový krúžok
10 na závitovku 11.
Dávajte pozor, aby
závitovkový krúžok správne
zapadol.
3. Vložte závitovku 11 do krytu
závitovky 9.
4. Nasuňte hnetač 8 na hriadeľ
závitovky 11.
Upozornenie: Hriadeľ
závitovky 11 má zárez A,
vďaka ktorému sedí
hnetač 8 iba v jednej
polohe.
5. Nasuňte ozubené puzdro 7 na hriadeľ
závitovky 11.
Upozornenie: Hriadeľ závitovky 11
má zárez, vďaka ktorému sedí ozubené
puzdro 7 iba v jednej polohe.
6. Posuňte zmontovaný kryt závitovky 9
spolu so závitovkou 11 a hnetačom 8
do nádoby na cesto 6.
A
Upozornenie: Na
vnútornej strane krytu
závitovky 9 sa nachádza
výbežok B, ktorý musí pri
nasadení ukazovať nahor,
aby sa dal kryt
závitovky 9 správne
zablokovať.
7. Zatlačte kryt závitovky 9 zľahka na
nádobu na cesto 6 a zablokujte ho tak,
že ho otočíte v smere hodinových
ručičiek, kým nezapadne.
8. Skontrolujte, či nádoba na cesto 6
správne sedí v kryte motora 3.
9. Držte veko 1 v šikmej polohe a vložte ho
do uchopenia veka 2.
10.Zatlačte veko 1 nadol, kým nebude
správne sedieť na nádobe na cesto 6 a
pritom počuteľne nezapadne.
Upozornenie: Len ak veko správne
zapadlo, aktivuje sa bezpečnostný
spínač, aby prístroj mohol pracovať.
11.Zoberte jeden z nadstavcov 17 až 22 a
naskrutkujte ho pomocou krúžka so
závitom 13 na kryt závitovky 9.
Upozornenie: Stačí, ak krúžok so
závitom dobre ručne dotiahnete.
Nepotrebujete na to skrutkovací
nástroj 14.
Prístroj je teraz pripravený na používanie.
B
1. Zvoľte vhodný nadstavec 12:
17nadstavec na tagliatelle
18nadstavec na pappardelle
19nadstavec na fettuccine
20nadstavec na špagety
84
7. Výroba cestovín
21nadstavec na linguine
22nadstavec na striekané pečivo
2. Vložte požadovaný nadstavec (17 až
22) na približne jednu minútu do
horúcej vody.
Page 87

RP89212 Pasta Maker LB4 Seite 85 Mittwoch, 29. Mai 2013 3:58 15
3. Naskrutkujte požadovaný nadstavec
(17 až 22) pomocou krúžka so
závitom 13 na kryt závitovky 9 (pozri
»6. Rozloženie a zloženie prístroja« na
strane 83).
4. Odoberte veko 1.
Upozornenie: Ak nepoužívate riedku
tekutinu, ako napr. vodu, ale hustú zmes
alebo zmes s pevnými časťami, ako
napr. nadrobno nasekaný špenát,
nepreteká dobre cez veko. V tomto
prípade vylejte tekutinu priamo do
nádoby na cesto 6.
5. Naplňte požadované množstvo múky
do nádoby na cesto 6.
Upozornenie: Ak ešte nemáte veľa
skúseností, môžete na odmeranie múky
použiť veľkú odmerku 15 a na
odmeranie tekutiny malú odmerku 14.
Vďaka tomu by sa malo podariť bežné
cestovinové cesto.
6. Držte veko 1 v šikmej polohe a vložte ho
do uchopenia veka 2.
7. Zatlačte veko 1 nadol, kým nebude
správne sedieť na nádobe na cesto 6 a
pritom počuteľne nezapadne.
Upozornenie: Len ak veko správne
zapadlo, aktivuje sa bezpečnostný
spínač, aby prístroj mohol pracovať.
8. Zasuňte sieťovú zástrčku do vhodnej
sieťovej zásuvky s ochranným kontaktom
(pozri »3. Technické údaje« na
strane 79).
9. Prepnite obidva spínače 5 do polohy
„MIX“.
10.Pomaly naplňte požadované množstvo
tekutiny do veka 1. Odtiaľ sa dostane
do nádoby na cesto.
Upozornenie:
– Ak sa v recepte používajú vajcia,
rozhabarkujte ich v samostatnej
nádobe.
– Rozhabarkované vajcia a olej počas
miesenia prilejte cez veko 1.
11. Nechajte prístroj hniesť približne
5 minút, kým cesto nebude mať
požadovanú konzistenciu.
Upozornenie: Hotové cestovinové
cesto by nemalo byť lepkavé a drobivé.
Prípadne pridajte ešte trochu múky
alebo vody do veka 1, z ktorého sa
dostanú do nádoby na cesto.
Keď získate trochu viac skúseností,
onedlho sa naučíte rozpoznať ideálnu
konzistenciu.
12.Prepnite obidva spínače 5 do polohy
„OFF“.
Pozor! Skôr ako necháte cestovinové
cesto vytlačiť, musia byť obidva
spínače
5 minimálne na 5 sekúnd
v polohe „OFF“, aby mohlo cesto
odstáť.
13.Postavte nádobu na zachytávanie
cestovín pod prístroj.
14.Prepnite obidva spínače 5 do polohy
„EXT“.
Cestoviny sa teraz vytlačia.
15.Pomocou stierky na cesto 15 odrežte
cestoviny priamo pri nadstavci 12 v
požadovanej dĺžke.
16.Len čo vytlačíte všetko cesto, prepnite
obidva spínače 5 do polohy „OFF“.
Upozornenie: Z technických
dôvodov zostane vždy trochu cesta v
nádobe na cesto 6.
17. Ak chcete pripraviť druhú porciu
cestovín, odoberte zvyšok cesta z
nádoby na cesto 6.
SPM200A1 85
Page 88

RP89212 Pasta Maker LB4 Seite 86 Mittwoch, 29. Mai 2013 3:58 15
Upozornenie: Odobranú zvyšnú časť
cesta odvážte a príslušne zredukujte
celkové množstvo prísad na druhé cesto.
Potom môžete pridať zvyšok z prvého
cesta k druhému cestu bez toho, aby ste
prekročili maximálne celkové množstvo
cca 520 g.
18.Pri druhom ceste postupujte ako pri
prvom.
19.Keď skončíte, vytiahnite sieťovú zástrčku
zo zásuvky.
8. Recepty na cestoviny
8.1 Tipy na výrobu cestovín
• Na výrobu cestovín je mimoriadne
vhodné použiť krupicu, špaldovú múku,
špeciálnu múku na cestoviny alebo
instantnú múku.
• Celkové množstvo múky a tekutiny by
malo byť vždy v rozmedzí 480 g až
520 g. Takto prístroj pracuje optimálne.
Pri menšom množstve sa prísady dobre
nepremiesia, pri väčšom celkovom
množstve môže masa z nádoby na cesto
pretiecť.
• Menej ako 3 minúty hnetenia nestačia
na to, aby sa prísady dobre premiešali.
• Viac ako 5 minút hnetenia má za
následok, že sa cesto príliš zahreje a lepí.
• Rozprestrite odobraté cestoviny na čistej
utierke, aby sa nezlepili.
• Bylinky slúžia na zafarbenie, pri varení
stratia cestoviny ich chuť.
• Cestoviny môžete vysušiť, aby mali
dlhšiu trvanlivosť. Na to rozprestrite
cestoviny na čistú utierku a sušte ich
približne 1 deň na vzduchu alebo 1 – 3
hodiny v rúre na pečenie pri cca 40 °C,
až kým sa neusušia.
Pozor!
Aby zvyšok cesta nezaschol, musíte prístroj
ihneď po použití rozobrať. Ak zvyšok cesta
zaschne, môže byť ťažké alebo úplne
nemožné prístroj rozobrať.
20.Rozoberte prístroj (pozri
»6.1 Rozloženie prístroja« na
strane 83).
21.Vyčistite prístroj a diely príslušenstva
(pozri »10. Čistenie prístroja« na
strane 90).
• Ak sa cestovinové cesto nalepilo na
veko, môžete ho opatrne zatlačiť nadol
pomocou stierky na cesto 15 cez
obidve drážky.
• Cestoviny varte v dostatočnom množstve
vody (3 – 4 litre na 500 g cestovín).
Pridajte približne 2 – 3 PL soli.
• Pri čerstvých cestovinách voda pení viac
ako pri sušených. Hrniec preto
nezakrývajte pokrievkou.
• Čerstvé cestoviny sa uvaria rýchlejšie
ako sušené. Čerstvé cestoviny potrebujú
na uvarenie väčšinou 1 – 3 minúty,
sušené cestoviny väčšinou 6 až 12
minút.
8.2 Základný recept na cestoviny
Prísady:
• 340 g tvrdej pšeničnej krupice
• 140 g vody)
• 1 PL oleja (10 g)
Príprava:
pozri »7. Výroba cestovín« na strane 84.
Upozornenie:
• Cestoviny sa môžu používať čerstvé
alebo sušené.
86
Page 89

RP89212 Pasta Maker LB4 Seite 87 Mittwoch, 29. Mai 2013 3:58 15
• Konzistenciu môžete zmeniť pridaním
múky alebo malého množstva vody.
8.3 Vaječné cestoviny
Prísady:
• 340 g krupice
• 3 stredne veľké vajcia
Príprava:
pozri »7. Výroba cestovín« na strane 84.
Upozornenie:
• Cestoviny sa môžu používať čerstvé
alebo sušené.
• Konzistenciu môžete zmeniť pridaním
múky alebo malého množstva vody.
8.4 Zelené špaldové cestoviny
Prísady:
• 340 g špaldovej múky (prípadne múky
na cestoviny alebo instantnej múky)
• 175 g špenátu (buď čerstvo
blanšírovaného, nasekaného alebo
mrazeného. Nepoužívajte smotanový
špenát, pretože kvôli smotane cestoviny
príliš zmäknú.)
• 1 strúčik cesnaku (podľa chuti môžete
vynechať)
• 1 štipka nastrúhaného muškátového
orieška
Príprava:
1. Všetky prísady vložte priamo do nádoby
na cesto 6.
2. Pripravte cestoviny, ako je popísané v
časti »7. Výroba cestovín« na strane 84.
Upozornenie:
• Cestoviny sa môžu používať čerstvé
alebo sušené.
• Konzistenciu môžete zmeniť pridaním
múky alebo malého množstva vody.
8.5 Červené cestoviny
Prísady:
• 340 g múky na cestoviny (prípadne
špaldovej múky alebo instantnej múky)
•1 vajce
• 1 PL paradajkového kečupu
• cca 80 – 100 g paradajkového pretlaku
Príprava:
1. Vložte rozšľahané vajce a paradajkový
kečup do misy.
2. Doplňte paradajkový pretlak, kým
nedosiahnete celkovú hmotnosť 160 g.
3. Vložte múku a zmes z vajca a
paradajkového kečupu priamo do
nádoby na cesto 6.
4. Pripravte cestoviny, ako je popísané v
časti »7. Výroba cestovín« na strane 84.
Upozornenie:
• Cestoviny sa môžu používať čerstvé
alebo sušené.
• Konzistenciu môžete zmeniť pridaním
múky alebo malého množstva vody.
8.6 Čierne cestoviny
Prísady:
• 340 g múky na cestoviny (prípadne
špaldovej múky alebo instantnej múky)
• 150 g vajec
• 10 g sépiového atramentu
Príprava:
pozri »7. Výroba cestovín« na strane 84.
Upozornenie:
• Cestoviny sa môžu používať čerstvé
alebo sušené.
• Konzistenciu môžete zmeniť pridaním
múky alebo malého množstva vody.
SPM200A1 87
Page 90

RP89212 Pasta Maker LB4 Seite 88 Mittwoch, 29. Mai 2013 3:58 15
8.7 Striekané pečivo
Prísady:
• 230 g pšeničnej múky typu 405 (múka
na koláče)
• 150 g masla, studeného a nakrájaného
na tenké plátky
• 100 g cukru
•1 vajce
• 1 balíček vanilkového cukru
• 1 štipka soli
Príprava:
1. Vložte prísady do nádoby na cesto.
2. Nechajte hniesť cca 5 minút.
9. Recepty na cestovinové omáčky
Tipy na chutné jedlo:
• Používajte korenie a soľ z mlynčeka
• Používajte vždy čerstvé bylinky a
prísady
• Čerstvo nastrúhaný parmezán
• Používajte olivový olej lisovaný za
studena
• Domáce cestoviny chutia najlepšie, keď
ich po uvarení zohrejete v panvici s
trochou olivového oleja a cesnaku.
Podľa chuti môžete (pred pridaním
cestovín) pridať a opiecť aj hríby, mäso
alebo krevety. Pridajte soľ a korenie (z
mlynčeka) a následne podávajte s
natrhanou bazalkou, rukolou alebo
paradajkami. Parmezán sa podáva pri
stole a najlepšie chutí, keď je čerstvo
nastrúhaný.
9.1 Omáčka carbonara
Prísady:
• 2 PL olivového oleja na opekanie
• 2 strúčiky cesnaku, jemne nasekaného
3. Potom cesto pretlačte cez nadstavec 22
na striekané pečivo.
4. Odrežte rovnako dlhé pásy pomocou
stierky na cesto 15 priamo pri nadstavci
12.
5. Pásy vytvarujte do tvaru písmena S,
rovno alebo do kruhu a položte ich na
plech na pečenie.
6. Pečte 10 minút pri 180 °C.
Upozornenie:
• Pred pečením môžete striekané pečivo
posypať kúskami orechov alebo mandlí.
• Po pečení môžete vychladnuté pečivo
ozdobiť polevou.
• 150 g dusenej šunky, nakrájanej na
kocky
•4 vajcia
• 1 štipka soli
• 1 smotana na šľahanie
• 100 ml mlieka
• 100 g parmezánu, nastrúhaného
• soľ a korenie, z mlynčeka
• muškátový oriešok, mletý, ako korenie
Príprava:
1. Rozhabarkujte vajcia, smotanu, mlieko,
soľ, korenie, muškátový oriešok
pomocou šľahača.
2. Vmiešajte polovicu nastrúhaného
parmezánu.
3. Zohrejte olivový olej v panvici na
strednom plameni, pridajte nadrobno
nasekaný cesnak a krátko osmažte.
4. Teraz pridajte pripravenú zmes z vajec a
mlieka.
5. Napokon ešte pridajte na kocky
nakrájanú dusenú šunku.
88
Page 91

RP89212 Pasta Maker LB4 Seite 89 Mittwoch, 29. Mai 2013 3:58 15
9.2 Paradajková omáčka
Prísady:
• 850 ml paradajok z konzervy
•1 malá cibuľa
• 1 strúčik cesnaku
• 2 PL paradajkového pretlaku
•soľ
•biele korenie
•cukor
•oregano
•provensálske bylinky
• 3 PL olivového oleja
Príprava:
1. Zohrejte olivový olej v hrnci s objemom
2 – 3 l.
2. Cibuľu nakrájajte najemno, pridajte do
hrnca a duste, kým nebude sklovitá.
Pridajte prelisovaný cesnak.
3. Rozmixujte paradajky. Vložte ich do
hrnca, pridajte paradajkový pretlak a
okoreňte soľou, korením a štipkou cukru.
4. Zmes nechajte variť 10 minút za
občasného miešania.
5. Na záver paradajkovú omáčku
dochuťte soľou, korením, oreganom a
podľa chuti provensálskymi bylinkami.
Upozornenie:
• Paradajky prípadne sparte, stiahnite zo
šupky a rozmixujte v mixéri alebo
pomocou tyčového mixéra na pyré.
9.3 Gorgonzolová omáčka
Prísady:
• 200 ml smotany
• 200 g syru Gorgonzola
Príprava:
1. Zohrejte smotanu.
2. Vmiešajte syr Gorgonzola a nechajte ho
rozpustiť. Zohrejte za stáleho miešania.
Upozornenie:
• Podľa želania môžete pridať aj dusenú
šunku nakrájanú na kocky.
9.4 Aglio e Olio
Prísady:
• 4 PL oleja (olivového), lisovaného za
studena
•2 strúčiky cesnaku
• bazalka
•oregano
•korenie
•soľ
Príprava:
1. Cesnak opražte na olivovom oleji,
pridajte hotové špagety.
2. Dochuťte korením a soľou z mlynčeka.
3. Podľa chuti podávajte s čerstvo
nastrúhaným parmezánom.
9.5 Pesto (červené)
Prísady:
• 150 g paradajok (sušených)
• 1 zväzok bazalky
•1 červená cibuľa (rozštvrtená)
• 2 polievkové lyžice píniových orieškov
• 1 – 2 strúčiky cesnaku
• 2 čajové lyžičky balzamikového octu
• 5 polievkových lyžíc olivového oleja
•soľ
•korenie
Príprava:
1. Rozmixujte paradajky, natrhané
bazalkové lístky, píniové oriešky, cesnak
a cibuľu najemno.
2. Pridajte ocot a olej a premiešajte.
3. Dochuťte soľou a korením.
SPM200A1 89
Page 92

RP89212 Pasta Maker LB4 Seite 90 Mittwoch, 29. Mai 2013 3:58 15
Upozornenie:
• Uschovajte pesto v pohári so
skrutkovacím vekom, pokryté vrstvou
olivového oleja. V chladničke tak vydrží
približne 4 týždne.
9.6 Pesto (zelené)
Prísady:
• 1 – 2 zväzky čerstvej bazalky
•1 – 2 strúčiky cesnaku
• 2 polievkové lyžice píniových orieškov
• olivového oleja
• 2 polievkové lyžice parmezánu
• soľ + čerstvo pomleté čierne korenie
10. Čistenie prístroja
Výstraha! Ak chcete vylúčiť
nebezpečenstvo úrazu elektrickým
prúdom, poranenie alebo
poškodenie:
– Pred každým čistením vytiahnite
sieťovú zástrčku zo sieťovej
zásuvky.
– Kryt motora 3 nikdy neponárajte
do vody.
Pozor! Vžiadnom prípade nepoužívajte
abrazívne, leptajúce čistiace prostriedky
aprostriedky, ktoré by mohli prístroj
poškriabať. Prístroj by sa mohol poškodiť.
• Rozoberte prístroj (pozri
»6.1 Rozloženie prístroja« na
strane 83).
10.1 Čistenie krytu motora (3)
1. Očistite kryt motora 3 vlhkou handrou.
Môžete použiť aj malé množstvo
umývacieho prostriedku.
2. Nakoniec prístroj utrite handričkou
navlhčenou včistej vode.
Príprava:
1. V panvici opražte píniové oriešky.
2. Najemno nasekajte bazalku, cesnak a
píniové oriešky.
3. Pridajte toľko olivového oleja, až kým
vznikne krémová pasta.
4. Na záver pridajte parmezán.
5. Dochuťte soľou a korením.
Upozornenie:
• Uschovajte pesto v pohári so
skrutkovacím vekom, pokryté vrstvou
olivového oleja. V chladničke tak vydrží
približne 4 týždne.
3. Kryt motora 3 znova použite, až keď
bude úplne suchý.
10.2 Čistenie nádoby na cesto (6),
krytu (1) a krytu závitovky (9)
Pozor! Diely príslušenstva nie sú vhodné
na umývanie v umývačke riadu. V umývačke
riadu by sa plast mohol zakaliť a zlomiť.
1. Ponorte diely do studenej alebo vlažnej
vody, aby sa uvoľnili zvyšky cesta.
Upozornenie: Do vody môžete
pridať trochu prostriedku na umývanie
riadu.
2. Odstráňte uvoľnené zvyšky cesta
pomocou kefy na čistenie 16.
3. Nakoniec opláchnite čistou vodou.
4. Nechajte diely úplne vyschnúť, skôr ako
ich začnete opäť používať.
90
Page 93

RP89212 Pasta Maker LB4 Seite 91 Mittwoch, 29. Mai 2013 3:58 15
10.3 Čistenie zvyšného príslušenstva
Pozor! Diely príslušenstva nie sú vhodné
na umývanie v umývačke riadu. V umývačke
riadu by sa plast mohol zakaliť a zlomiť.
1. Nechajte cesto schnúť minimálne 24
hodín. Bude tvrdšie a drobivejšie.
2. Odstráňte zaschnuté zvyšky cesta
pomocou kefy na čistenie 16.
11. Likvidácia
11.1 Prístroj
Symbol prečiarknutej smetnej
nádoby na kolieskach
znamená, že prístroj je v
Európskej únii nutné odovzdať
v zberni zvláštneho odpadu. To
platí pre výrobok a pre všetky
diely príslušenstva označené týmto
symbolom. Takto označené výrobky sa
nesmú odhadzovať do domového odpadu,
ale je potrebné ich odovzdať na
3. Nadstavce 17 až 22 môžete zľahka
oklepať o stôl, aby opadlo zaschnuté
cesto.
4. Zvyšky cesta v otvoroch nadstavcov 17
až 22 môžete uvoľniť pomocou
špáradla.
5. Diely čistite v teplej oplachovacej vode.
6. Nakoniec opláchnite čistou vodou.
7. Nechajte diely úplne vyschnúť, skôr ako
ich začnete opäť používať.
recyklovanie v zberni elektrických a
elektronických prístrojov. Recyklácia
pomáha znižovať spotrebu surovín a
zaťaženie životného prostredia. Preto
bezpodmienečne dodržiavajte predpisy na
likvidáciu vo Vašej krajine.
11.2 Obal
Pri likvidácii obalu rešpektujte príslušné
predpisy o ochrane životného prostredia v
príslušnej krajine.
12. Záruka spoločnosti HOYER Handel GmbH
Vážená zákazníčka, vážený zákazník,
na tento prístroj platí záruka počas doby 3
rokov od dátumu kúpy. V prípade chyby
tohto výrobku vám prislúchajú zákonné
práva voči predajcovi výrobku. Tieto
zákonné práva nie sú obmedzené našou
nižšie uvedenou zárukou.
Záručné podmienky
Záručná doba začína plynúť od dátumu
kúpy. Odložte si originálny pokladničný
blok. Je potrebný ako doklad okúpe.
SPM200A1 91
Ak sa v priebehu troch rokov od dátumu
kúpy tohto výrobku vyskytne chyba
materiálu alebo výrobná chyba, výrobok
vám – podľa nášho rozhodnutia – zdarma
opravíme alebo vymeníme. Predpokladom
tohto záručného plnenia je v priebehu
trojročnej lehoty predložiť chybný výrobok a
doklad o kúpe (pokladničný blok) a
písomne v krátkosti opísať, v čom spočíva
chyba a kedy sa vyskytla.
Page 94

RP89212 Pasta Maker LB4 Seite 92 Mittwoch, 29. Mai 2013 3:58 15
Keď sa na chybu naša záruka vzťahuje,
dostanete naspäť opravený alebo nový
výrobok. Opravou alebo výmenou výrobku
nezačína plynúť nová záručná doba.
Záručná doba a zákonné nároky
vyplývajúce z chyby výrobku
Záručná doba sa poskytnutím plnenia
nepredlžuje. Platí to aj pre vymenené a
opravené dielce. Prípadne už pri kúpe
existujúce poškodenia a chyby je potrebné
nahlásiť hneď po vybalení výrobku. Opravy,
ktoré sa uskutočnia po uplynutí záručnej
doby, budú spoplatnené.
Záručná doba
Prístroj bol vyrobený s použitím prísnych
smerníc pre kvalitu a pred expedíciou bol
svedomito skontrolovaný.
Poskytnutie záruky platí na chyby materiálu
a výrobné chyby. Táto záruka sa nevzťahuje
na časti výrobku, ktoré podliehajú
normálnemu opotrebovaniu, a teda sa môžu
pokladať za opotrebovateľné súčiastky
alebo na poškodenia rozbitných častí, napr.
vypínačov, akumulátorov alebo častí
vyrobených zo skla.
Táto záruka zaniká, keď je výrobok
poškodený, nesprávne sa používa alebo
udržiava. Aby ste výrobok používali
správne, presne dodržiavajte všetky pokyny
uvedené vnávode na použitie.
Bezpodmienečne sa vyvarujte používania,
ktoré nie je vsúlade surčeným používaním
alebo konania, od ktorého odrádzajú alebo
pred ktorým varujú upozornenia uvedené
vnávode na použitie.
Prístroj je určený na len súkromné, nie na
komerčné použitie.
Pri nenáležitom anesprávnom
zaobchádzaní, násilnom používaní a
zásahoch, ktoré neuskutočnilo naše servisné
stredisko, záruka zaniká.
Postup vprípade nároku na záručné plnenie
Aby bola vaša žiadosť čo najskôr
spracovaná, postupujte podľa nasledovných
pokynov:
• Pri akejkoľvek požiadavke majte
pripravené číslo výrobku (pre tento
prístroj: IAN 89212) apokladničný
blok ako doklad o kúpe.
• Číslo výrobku nájdete na typovom štítku,
vygravírované, na titulnom liste vášho
návodu (vľavo dolu) alebo ako nálepku
na zadnej alebo dolnej strane.
• Ak by sa vyskytli chyby funkcií alebo iné
nedostatky, kontaktujte najprv
telefonicky alebo prostredníctvom
elektronickej pošty nižšie uvedené
servisné stredisko.
• Výrobok, na ktorom ste zistili chybu,
potom môžete s priloženým dokladom o
kúpe (pokladničný blok) auvedením,
včom spočíva chyba akedy sa vyskytla,
zaslať bez poštového poplatku na
adresu servisu, ktorá vám bola
oznámená.
Tento návod a mnoho ďalších
príručiek, videí o výrobkoch a
softvér si môžete stiahnuť na
www.lidl-service.com.
92
Page 95

RP89212 Pasta Maker LB4 Seite 93 Mittwoch, 29. Mai 2013 3:58 15
Servisné stredisko
Servis Slovensko
Tel.: 0850 232001
E-Mail: hoyer@lidl.sk
IAN: 89212
Dodávateľ
Všimnite si prosím, že nasledujúca adresa
nie je adresa servisu. Kontaktujte
najprv vyššie uvedené servisné stredisko.
HOYER Handel GmbH
Kühnehöfe 5
D-22761 Hamburg
Deutschland
SPM200A1 93
Page 96

RP89212 Pasta Maker LB4 Seite 94 Mittwoch, 29. Mai 2013 3:58 15
Inhalt
1. Gerätebeschreibung . . . . . . . . . . . . . . . . . . . . . . . . . . . . . . . . . . . . . . . . . . . . . . . . . . . . 94
2. Benennung der Teile (siehe Ausklappseite) . . . . . . . . . . . . . . . . . . . . . . . . . . . . . . . . . . . . 95
3. Technische Daten. . . . . . . . . . . . . . . . . . . . . . . . . . . . . . . . . . . . . . . . . . . . . . . . . . . . . . . 95
4. Sicherheitshinweise. . . . . . . . . . . . . . . . . . . . . . . . . . . . . . . . . . . . . . . . . . . . . . . . . . . . . 96
5. Auspacken und aufstellen . . . . . . . . . . . . . . . . . . . . . . . . . . . . . . . . . . . . . . . . . . . . . . . . 98
6. Gerät auseinanderbauen und zusammensetzen . . . . . . . . . . . . . . . . . . . . . . . . . . . . . . . . . 99
7. Pasta herstellen . . . . . . . . . . . . . . . . . . . . . . . . . . . . . . . . . . . . . . . . . . . . . . . . . . . . . . 101
8. Pasta-Rezepte. . . . . . . . . . . . . . . . . . . . . . . . . . . . . . . . . . . . . . . . . . . . . . . . . . . . . . . . 102
9. Rezepte für Pastasoßen . . . . . . . . . . . . . . . . . . . . . . . . . . . . . . . . . . . . . . . . . . . . . . . . . 104
10. Gerät reinigen . . . . . . . . . . . . . . . . . . . . . . . . . . . . . . . . . . . . . . . . . . . . . . . . . . . . . . . 106
11. Entsorgung . . . . . . . . . . . . . . . . . . . . . . . . . . . . . . . . . . . . . . . . . . . . . . . . . . . . . . . . . . 107
12. Garantie der HOYER Handel GmbH . . . . . . . . . . . . . . . . . . . . . . . . . . . . . . . . . . . . . . . . 108
Service-Center . . . . . . . . . . . . . . . . . . . . . . . . . . . . . . . . . . . . . . . . . . . . . . . . 109
Lieferant . . . . . . . . . . . . . . . . . . . . . . . . . . . . . . . . . . . . . . . . . . . . . . . . . . . . . 109
Herzlichen Glückwunsch zum Kauf
Ihres neuen Produktes.
Sie haben sich damit für ein hochwertiges
Produkt entschieden. Die Bedienungsanleitung ist Bestandteil dieses Produkts. Sie enthält wichtige Hinweise für Sicherheit,
Gebrauch und Entsorgung.
1. Gerätebeschreibung
1.1 Verwendungszweck
Der Pasta Maker SilverCrest SPM200A1
dient zur Herstellung frischer Pasta und von
Spritzgebäck.
Dieses Gerät darf nur in trockenen Räumen
verwendet werden. Eine Verwendung im
Freien oder in Feuchträumen ist nicht gestattet.
Dieses Gerät ist für den Einsatz in Privathaushalten und nicht für den gewerblichen
Einsatz geeignet.
94
Machen Sie sich vor der Benutzung des Produkts mit allen Bedien- und Sicherheitshinweisen vertraut. Benutzen Sie das Produkt
nur wie beschrieben und für die angegebenen Einsatzbereiche.
Händigen Sie alle Unterlagen bei Weitergabe des Produkts an Dritte mit aus.
Das Gerät ist ebenfalls geeignet für:
• den Einsatz in Küchen für Mitarbeiter in
Läden, Büros und anderen gewerblichen
Bereichen,
• den Einsatz in landwirtschaftlichen
Anwesen,
• Kunden in Hotels, Motels und anderen
Wohneinrichtungen,
• Frühstückspensionen.
Page 97

RP89212 Pasta Maker LB4 Seite 95 Mittwoch, 29. Mai 2013 3:58 15
1.2 Lieferumfang
• 1 Pasta Maker mit Knetwerk und
Schnecke
• 1 Schraubwerkzeug
•1 Reinigungsbürste
•1 Teigschaber
• 5 Einsätze für verschiedene Pasta
• 1 Einsatz für Spritzgebäck
• 1 Bedienungsanleitung
2. Benennung der Teile (siehe Ausklappseite)
1 Deckel
2 Aufnahme für den Deckel
3 Motorgehäuse
4 Motorwelle
5 Schalter: beide Schalter müssen
dieselbe Stellung haben
6 Teigbehälter
7 Zahnhülse
8 Kneter
9 Schneckengehäuse
10 Schneckenring
11 Schnecke
12 Einsatz für Pasta (wahlweise ein Einsatz
17 bis 22)
13 Schraubring
14 Schraubwerkzeug
15 Teigschaber
16 Reinigungsbürste
17 Einsatz für Tagliatelle
18 Einsatz für Pappardelle
19 Einsatz für Fettuccine
20 Einsatz für Spaghetti
21 Einsatz für Linguine
22 Einsatz für Spritzgebäck
3. Technische Daten
Spannungsversorgung: 220 - 240 V~ / 50/60 Hz
Leistung: 200 Watt
Schutzklasse: II
SPM200A1 95
Page 98

RP89212 Pasta Maker LB4 Seite 96 Mittwoch, 29. Mai 2013 3:58 15
4. Sicherheitshinweise
4.1 Begriffserklärung
Folgende Signalbegriffe finden Sie in dieser
Bedienungsanleitung:
Warnung!
Hohes Risiko: Missachtung der
Warnung kann Schaden für Leib
und Leben verursachen.
Vorsicht!
Mittleres Risiko: Missachtung der Warnung
kann einen Sachschaden verursachen.
Hinweis:
Geringes Risiko: Sachverhalte, die im Umgang mit dem Gerät beachtet werden sollten.
4.2 Besondere Hinweise für
dieses Gerät
Warnung!
Hinweise, um Verletzungen oder
Schäden zu vermeiden.
• Dieses Gerät kann von Kindern ab 8 Jahren
und von Personen mit reduzierten physischen, sensorischen oder mentalen Fähigkeiten oder Mangel an Erfahrung und/oder
Wissen benutzt werden, wenn sie beaufsichtigt oder bezüglich des sicheren Gebrauches des Gerätes unterwiesen wurden und
die daraus resultierenden Gefahren verstanden haben. Kinder dürfen nicht mit dem
Gerät spielen.
• Reinigung und Benutzer-Wartung dürfen
nicht durch Kinder durchgeführt werden, es
sei denn, sie sind älter als 8 Jahre und
beaufsichtigt.
• Kinder jünger als 8 Jahre sind vom Gerät
und der Netzanschlussleitung fernzuhalten.
Beachten Sie folgende
• Das Gerät darf nicht mit einer externen Zeitschaltuhr oder einem separaten Fernwirksystem, wie zum Beispiel einer Funksteckdose,
betrieben werden.
• Ziehen Sie vor jeder Reinigung den Netzstecker aus der Netzsteckdose.
3
• Tauchen Sie das Motorgehäuse
nie in
Wasser.
• Verwenden Sie keinesfalls scheuernde,
ätzende oder kratzende Reinigungsmittel.
Dadurch könnte das Gerät beschädigt
werden.
4.3 Allgemeine Hinweise
• Lesen Sie vor dem Gebrauch bitte sorg-
fältig diese Bedienungsanleitung. Sie ist
Bestandteil des Gerätes und muss jederzeit verfügbar sein.
• Verwenden Sie das Gerät nur für den
beschriebenen Verwendungszweck
(siehe „1.1 Verwendungszweck“ auf
Seite 94).
• Überprüfen Sie, ob die erforderliche
Netzspannung (siehe Typenschild am
Gerät) mit Ihrer Netzspannung übereinstimmt.
• Bitte beachten Sie, dass jeglicher
Anspruch auf Garantie und Haftung
erlischt, wenn Zubehörteile verwendet
werden, die nicht in dieser Bedienungsanleitung empfohlen werden oder wenn
bei Reparaturen nicht ausschließlich
Originalersatzteile verwendet werden.
Dies gilt auch für Reparaturen, die durch
nichtqualifizierte Personen durchgeführt
werden. Die Kontaktdaten finden Sie in
„Service-Center” auf Seite 109.
• Bei eventuellen Funktionsstörungen
innerhalb der Garantiezeit darf die
96
Page 99

RP89212 Pasta Maker LB4 Seite 97 Mittwoch, 29. Mai 2013 3:58 15
Instandsetzung des Gerätes nur durch
unser Service-Center erfolgen. Ansonsten erlischt jeglicher Garantieanspruch.
4.4 Schutz vor elektrischem Schlag
Warnung! Die folgenden Sicherheitshinweise sollen Sie vor einem
elektrischen Schlag schützen.
• Wenn das Gerät beschädigt ist, darf das
Gerät keinesfalls benutzt werden. Lassen
Sie das Gerät in diesem Falle von qualifiziertem Fachpersonal reparieren. Die
Kontaktdaten finden Sie in „Service-Center” auf Seite 109.
• Wenn die Netzanschlussleitung dieses
Gerätes beschädigt wird, muss sie durch
den Hersteller oder eine ähnlich qualifizierte Person ersetzt werden, um
Gefährdungen zu vermeiden.
• In das Innere des Motorgehäuses 3 dürfen keinesfalls Wasser oder andere
Flüssigkeiten gelangen. Daher:
– niemals im Freien einsetzen
– niemals das Motorgehäuse 3 in
Wasser eintauchen
– niemals mit Flüssigkeit gefüllte
Gefäße, wie Trinkgläser, Vasen etc.
auf das Gerät stellen
– niemals in sehr feuchter Umgebung
einsetzen
– niemals in unmittelbarer Nähe eines
Spülbeckens, einer Badewanne, einer
Dusche oder eines Schwimmbeckens
benutzen, da Spritzwasser in das
Gerät gelangen könnte.
Falls doch einmal Flüssigkeit in das
Gerät gelangt, ziehen Sie sofort den
Netzstecker und lassen das Gerät von
qualifiziertem Fachpersonal reparieren.
Die Kontaktdaten finden Sie in „ServiceCenter” auf Seite 109.
• Fassen Sie das Gerät, die Netzanschlussleitung oder den Netzstecker
niemals mit feuchten Händen an.
• Ziehen Sie die Netzanschlussleitung
stets am Netzstecker heraus. Ziehen Sie
niemals an der Netzanschlussleitung
selber.
• Achten Sie darauf, dass die Netzanschlussleitung nie geknickt oder
gequetscht wird.
• Halten Sie die Netzanschlussleitung von
heißen Flächen (z.B. Herdplatte) fern.
• Wenn Sie das Gerät längere Zeit nicht
benutzen, ziehen Sie den Netzstecker
aus der Netzsteckdose. Nur dann ist das
Gerät völlig stromfrei.
• Die Benutzung von Verlängerungskabeln
sollten Sie vermeiden. Sie ist nur unter
ganz bestimmten Voraussetzungen
gestattet:
– Das Verlängerungskabel muss für die
Stromstärke des Gerätes geeignet
sein.
– Das Verlängerungskabel darf nicht
„fliegend“ verlegt sein: es darf nicht
zur Stolperfalle werden oder von
Kindern erreichbar sein.
– Das Verlängerungskabel darf keines-
falls beschädigt sein.
– Es dürfen keine weiteren Geräte als
dieses Gerät an der Netzsteckdose
angeschlossen werden, da es sonst zu
einer Überlastung des Stromnetzes
kommen kann (Verbot von Mehrfachsteckdosen!).
4.5 Schutz vor Verletzungen
Warnung! Beachten Sie folgende
Hinweise, um Verletzungen zu vermeiden.
• Achten Sie darauf, dass die Netzanschlussleitung nie zur Stolperfalle wird
SPM200A1 97
Page 100

RP89212 Pasta Maker LB4 Seite 98 Mittwoch, 29. Mai 2013 3:58 15
oder sich jemand darin verfangen oder
darauftreten kann.
• Vermeiden Sie während des Betriebes
den Kontakt mit den beweglichen Teilen
des Gerätes wie Kneter 8 oder Schnecke 11. Hände oder Haare könnten in
das Gerät gezogen werden und zu Verletzungen führen. Schalten Sie das
Gerät nur ein, wenn der Deckel 1
korrekt aufgesetzt ist.
• Ziehen Sie vor jeder Reinigung und
jedesmal, bevor Sie das Gerät auseinanderbauen, den Netzstecker aus der
Netzsteckdose.
4.6 Zur Sicherheit Ihres Kindes
Warnung! Kinder können Gefahren oft nicht richtig einschätzen und
sich dadurch Verletzungen
zuziehen. Beachten Sie daher:
• Dieses Gerät darf nur unter Aufsicht von
Erwachsenen verwendet werden, um
sicherzustellen, dass sie nicht mit dem
Gerät spielen.
• Achten Sie sorgfältig darauf, dass sich
das Gerät immer außerhalb der Reichweite von Kindern befindet, damit diese
es nicht an der Netzanschlussleitung herunterziehen können oder damit spielen.
• Achten Sie darauf, dass die Verpackungsfolie nicht zur tödlichen Falle
für Kinder wird. Verpackungsfolien sind
kein Spielzeug.
4.7 Sachschäden
Achtung! Um Sachschäden zu vermeiden,
beachten Sie folgende Bestimmungen.
• Stellen Sie das Gerät ausschließlich auf
einer ebenen, trockenen und rutschfesten
Fläche auf, damit das Gerät weder
umfallen noch herunterrutschen kann.
• Stellen Sie das Gerät nicht auf eine
heiße Herdplatte.
• Verwenden Sie keine heißen Flüssigkeiten.
• Das Gerät und das Zubehör dürfen nicht
in ein Mikrowellengerät gestellt werden.
5. Auspacken und aufstellen
1. Nehmen Sie die Einzelteile aus der
Verpackung.
2. Überprüfen Sie, dass die Einzelteile vollständig sind (siehe „1.2 Lieferumfang“
auf Seite 95) und keine Beschädigungen aufweisen.
3. Reinigen Sie vor der ersten Benutzung
das Gerät gründlich (siehe „10. Gerät
reinigen“ auf Seite 106).
4. Stellen Sie das Gerät auf einer ebenen,
trockenen und rutschfesten Fläche auf,
damit das Gerät weder umfallen noch
herunterrutschen kann.
98
5. Setzen Sie das Gerät wieder zusammen
(siehe „6.2 Gerät zusammensetzen“ auf
Seite 100).
6. Schalten Sie die beiden Schalter 5 auf
„OFF”.
7. Stecken Sie den Netzstecker in eine
geeignete Netzsteckdose (siehe
„3. Technische Daten“ auf Seite 95).
Das Gerät ist nun betriebsbereit.
 Loading...