

Page 1
LUFTENTFEUCHTER SLE 420 A1
LUFTENTFEUCHTER
Bedienungsanleitung
DEUMIDIFICATORE
Istruzioni per l’uso
DÉSHUMIDIFICATEUR
Mode d’emploi
LUCHTONTVOCHTIGER
Gebruiksaanwijzing
DEHUMIDIFIER
Operating instructions
IAN 89301
RP89301_Luftentfeuchter_Cover_LB1_DE_AT.indd 2 19.04.13 10:40
Page 2

__RP89301_B1.book Seite 1 Donnerstag, 18. April 2013 3:20 15
Deutsch ................................................................................... 2
Français................................................................................. 16
Italiano.................................................................................. 30
Nederlands............................................................................ 44
English................................................................................... 58
ID: SLE420 A1_13_V1.6_DE
Page 3
5
7
6
1 2
3
4
10
12
11
8
9
9
11
10
8
14
16
1512 13
WASSERTANK VOLL
TIMER AKTIV
LUFTREINIGUNG
WÄSCHETROCKNUNG
DAUERBETRIEB
AUTOMATIK
BETRIEB
HOCH
MITTEL
NIEDRIG
rF%/STD.
EINSTELLUNG
TIMER PROGRAMM STAND-BY
A
B
__RP89301_B1.book Seite 2 Donnerstag, 18. April 2013 3:20 15
Übersicht / Aperçu de l'appareil / Panoramica / Overzicht /
Overview
D
171820 19
C
21
22
23
24
25
Page 4
__RP89301_B1.book Seite 2 Donnerstag, 18. April 2013 3:20 15
Inhalt
1. Übersicht ......................................................................................... 3
2. Bestimmungsgemäßer Gebrauch ...................................................... 4
3. Sicherheitshinweise ......................................................................... 5
4. Lieferumfang ................................................................................... 7
5. Inbetriebnahme ............................................................................... 7
6. Hinweise zum Betrieb ...................................................................... 7
7. Bedienung ....................................................................................... 8
7.1 Ein- und Ausschalten .............................................................................. 8
7.2 Anzeigen ............................................................................................. 8
7.3 Programme .......................................................................................... 9
7.4 Wassertank .......................................................................................... 9
7.5 Timer ................................................................................................. 10
8. Schlauchentwässerung .................................................................. 10
9. Filter reinigen und tauschen ........................................................... 10
10. Reinigen ........................................................................................ 11
11. Schutz vor Überhitzung .................................................................. 11
12. Aufbewahrung .............................................................................. 11
13. Problemlösung .............................................................................. 12
14. Entsorgen ...................................................................................... 12
15. Technische Daten ........................................................................... 13
16. Garantie der HOYERHandel GmbH ................................................ 13
2
DE
Page 5
__RP89301_B1.book Seite 3 Donnerstag, 18. April 2013 3:20 15
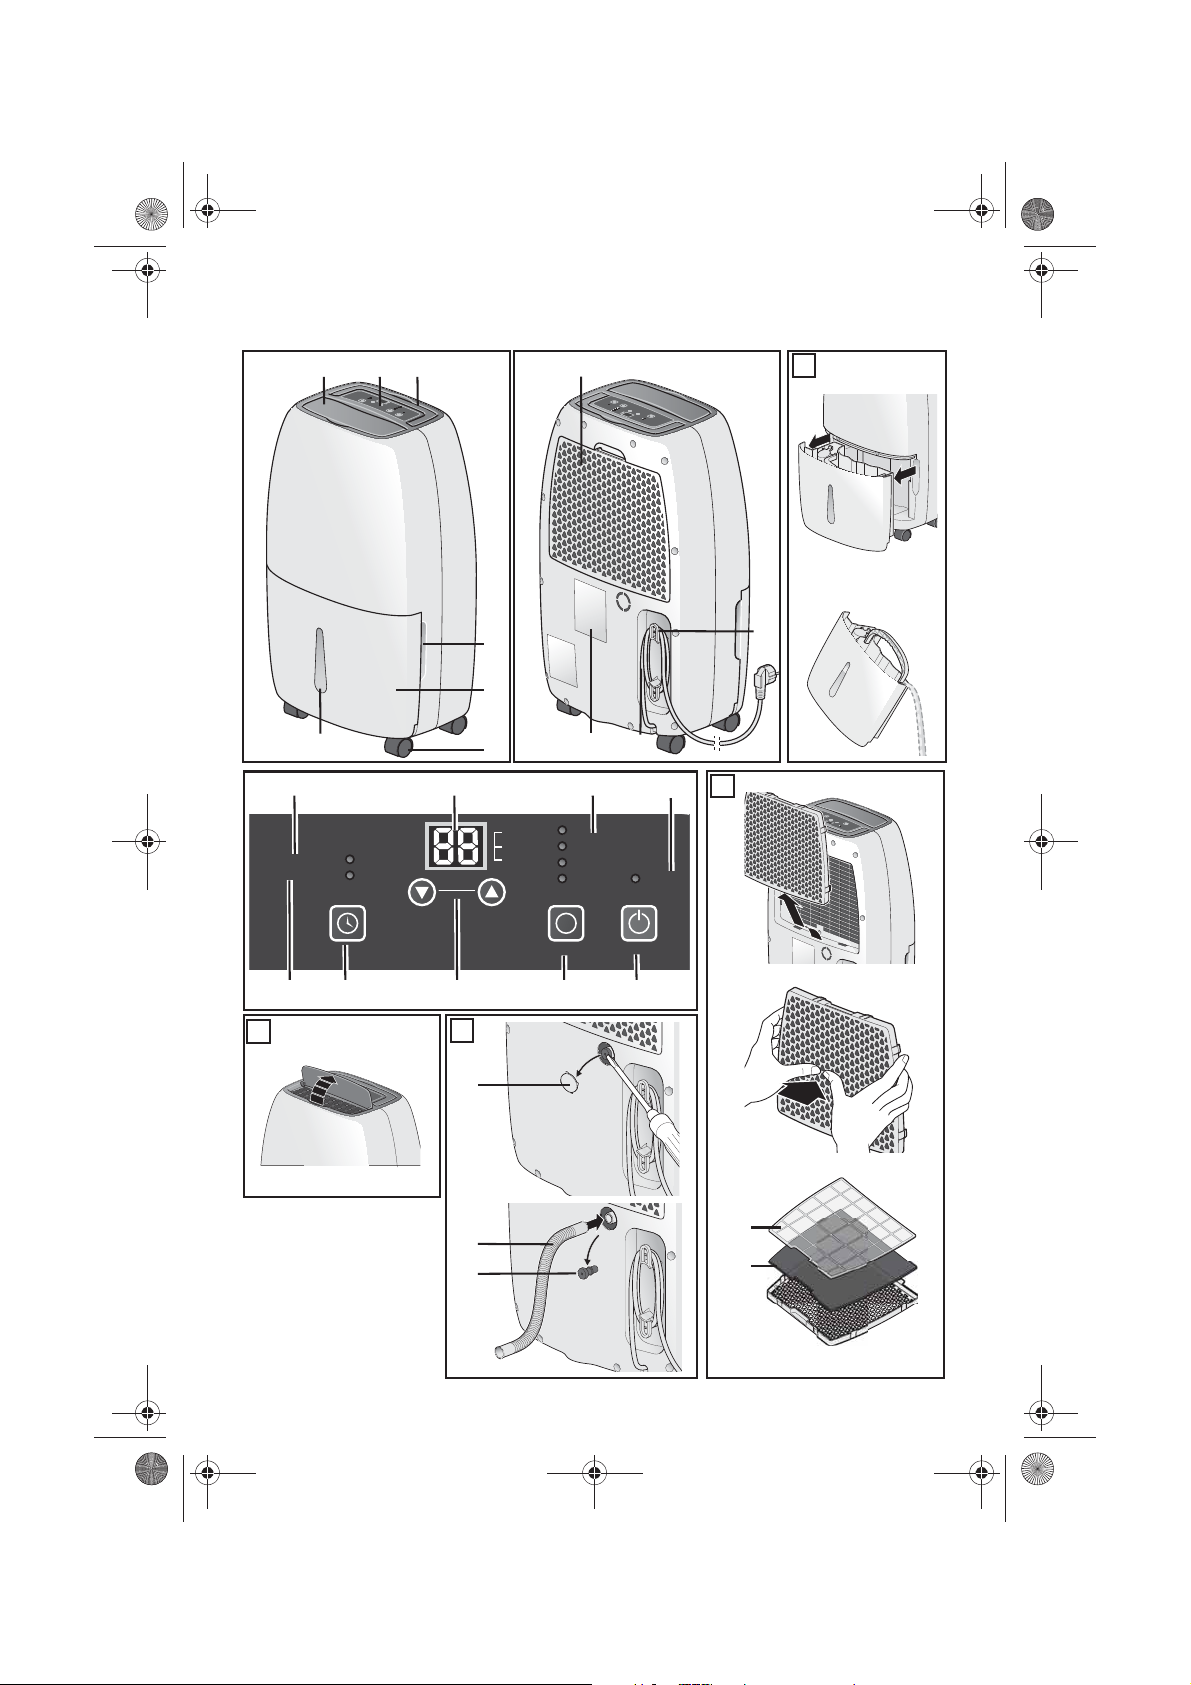
1. Übersicht
1 bewegliche Klappe für den Luftauslass
2 Bedienfeld
3 Trag egriff
4 Griffmulde für den Wassertank
5 Wassertank (5 L)
6 Rollen
7 Sichtfenster für Wasserstandskontrolle
8 Gitter für Lufteinlass (abnehmbar)
9 Haken zum Aufwickeln der Anschlussleitung
10 Anschlussleitung mit Schutzkontaktstecker
11 Typenschild
12 WASSERTANK VOLL LED leuchtet, wenn der Wassertank voll ist
13 HOCH/MITTEL/NIEDRIG Display zur Anzeige der gewählten Luftfeuchtigkeit und
Ausschaltzeit
14 Programme LEDs zeigen das aktive Programm an
15 BETRIEB LED leuchtet während des Betriebs
16 STAND-BY Schaltet das Gerät ein und aus
17 PROGRAMM schaltet zwischen den 4 Programmen um
18 rF%STD/ EINSTELLUNG Luftfeuchtigkeit und Timer einstellen
19 TIMER Zeitschaltuhr ein- und auschalten
20 TIMER AKTIV LED leuchtet, wenn der Timer aktiv ist
21 Verschluss für Anschluss des Schlauches (Entfernen Sie den Verschluss mit einem
Schraubendreher. Pfropfen entfernen und Schlauch anschließen)
22 Schlauch
23 Pfropfen
24 Kunststofffilter
25 Kohlefilter
DE
3
Page 6
__RP89301_B1.book Seite 4 Donnerstag, 18. April 2013 3:20 15
Herzlichen Dank für Ihr
Vertrauen!
Wir gratulieren Ihnen zu Ihrem neuen Luftentfeuchter.
Für einen sicheren Umgang mit dem Produkt
und um den ganzen Leistungsumfang kennenzulernen:
• Lesen Sie vor der ersten Inbetriebnahme diese Bedienungsanleitung gründlich durch.
• Befolgen Sie vor allen Dingen die
Sicherheitshinweise!
• Das Gerät darf nur so bedient
werden, wie in dieser Anleitung
beschrieben.
• Bewahren Sie diese Anleitung
auf.
• Falls Sie das Gerät einmal weitergeben, legen Sie bitte diese
Bedienungsanleitung dazu.
Wir wünschen Ihnen viel Freude mit Ihrem
neuen Luftentfeuchter!
2. Bestimmungsgemäßer
Gebrauch
Der Luftentfeuchter ist ausschließlich zum
Entfeuchten von Wohn-, Keller- oder Lagerräumen mit einer Temperatur von 5°C bis
35°C vorgesehen.
Das Gerät darf nur in Innenräumen benutzt
werden.
Dieses Gerät darf nicht für gewerbliche
Zwecke eingesetzt werden.
Vorhersehbarer Missbrauch
GEFAHR von Krankheiten!
G Das gesammelte Wasser ist nicht
zum Trinken oder Wässern geeignet. Es besteht Gesundheitsgefahr.
GEFAHR durch Stromschlag!
Stellen Sie das Gerät nicht in Wasser / auch nicht in Wasserlachen
oder Pfützen.
WARNUNG vor Sachschäden!
• Benutzen Sie das Gerät nicht in
Schwimmbädern, Wasch- oder ähnlichen Räumen.
• Das Gerät ist nicht für die Trocknung
von Dämmung geeignet. Falls nach einem Rohrbruch Isolierung oder Dämmmaterial feucht geworden sind, fragen
Sie auf jeden Fall einen Fachmann.
• Setzen Sie das Gerät niemals Tempera-
turen von 0 Grad C oder weniger aus.
Restwasser in den Leitungen könnte gefrieren und das System beschädigen.
• Verwenden Sie das Gerät nicht in stau-
biger oder chlorhaltiger Umgebung.
4
DE
Page 7
__RP89301_B1.book Seite 5 Donnerstag, 18. April 2013 3:20 15
3. Sicherheitshinweise
Warnhinweise
Falls erforderlich, werden folgende Warnhinweise in dieser Bedienungsanleitung verwendet:
GEFAHR! Hohes Risiko: Missachtung der Warnung kann Schaden
für Leib und Leben verursachen.
WARNUNG! Mittleres Risiko: Missachtung
der Warnung kann Verletzungen oder
schwere Sachschäden verursachen.
VORSICHT: geringes Risiko: Missachtung
der Warnung kann leichte Verletzungen
oder Sachschäden verursachen.
HINWEIS: Sachverhalte und Besonderheiten, die im Umgang mit dem Gerät beachtet
werden sollten.
Anweisungen für den sicheren Betrieb
• Dieses Gerät ist nicht dafür bestimmt, durch Personen (einschließlich Kinder) mit eingeschränkten physischen, sensorischen oder
geistigen Fähigkeiten oder mangels Erfahrung und/oder mangels
Wissen benutzt zu werden, es sei denn, sie werden durch eine für
ihre Sicherheit zuständige Person beaufsichtigt oder erhielten von
ihr Anweisungen, wie das Gerät zu benutzen ist.
• Kinder sollten beaufsichtigt werden, um sicherzustellen, dass sie
nicht mit dem Gerät spielen.
• Bauen Sie das Gerät nicht ein. Lassen Sie an den Seiten und hinten
einen Mindestabstand von ca. 20 cm sowie vorne 10 cm und oben
von 30 cm.
• Das Gerät darf nur in Räumen mit einer Temperatur von 5°C bis
35°C betrieben werden.
• Verwenden Sie das Gerät nur in Räumen bis max 20m
2
.
• Schließen Sie den Schutzkontaktstecker nur an eine ordnungsgemäß installierte, leicht zugängliche Steckdose mit Schutzkontakten
an, deren Spannung der Angabe auf dem Typenschild entspricht.
Die Steckdose muss auch nach dem Anschließen weiterhin leicht
zugänglich sein.
• Das Gerät muss entsprechend den nationalen Installationsvorschriften installiert werden.
DE
5
Page 8
__RP89301_B1.book Seite 6 Donnerstag, 18. April 2013 3:20 15
GEFAHR für Kinder
• Verpackungsmaterial ist kein Kinderspielzeug. Kinder dürfen nicht mit den
Kunststoffbeuteln spielen. Es besteht Erstickungsgefahr.
• Bewahren Sie das Gerät außerhalb der
Reichweite von Kindern auf.
GEFAHR von Explosion
• Das Gerät darf niemals in aerosol- oder explosionsgefährdeter Umgebung betrieben
werden.
GEFAHR von Stromschlag
durch Feuchtigkeit
• Das Gerät darf niemals in der Nähe einer
Badewanne, einer Dusche, eines gefüllten
Waschbeckens o. Ä. betrieben werden.
• Das Gerät, die Anschlussleitung und der
Netzstecker dürfen nicht in Wasser oder
andere Flüssigkeiten getaucht werden.
• Schützen Sie das Gerät vor Tropf- und
Spritzwasser.
• Sollte Flüssigkeit in das Gerät (außer in
den Wasserbehälter) gelangen, sofort
den Netzstecker ziehen. Vor einer erneuten Inbetriebnahme das Gerät prüfen lassen.
• Bedienen Sie das Gerät nicht mit feuchten Händen.
• Sollte das Gerät ins Wasser gefallen
sein, sofort den Netzstecker ziehen. Erst
danach das Gerät herausnehmen.
GEFAHR durch Stromschlag
• Achten Sie darauf, dass die Anschlussleitung nicht durch scharfe Kanten oder
heiße Stellen beschädigt werden kann.
Wickeln Sie die Anschlussleitung nicht
um das Gerät.
• Das Gerät ist auch nach Ausschalten
nicht vollständig vom Netz getrennt. Um
dies zu tun, ziehen Sie den Netzstecker.
• Achten Sie beim Gebrauch des Gerätes
darauf, dass die Anschlussleitung nicht
eingeklemmt oder gequetscht wird.
• Um den Netzstecker aus der Schutzkontaktsteckdose zu ziehen, immer am Stecker, nie am Kabel ziehen.
• Ziehen Sie den Schutzkontaktstecker
aus der Schutzkontaktsteckdose, …
… wenn eine Störung auftritt,
… wenn Sie das Gerät nicht benutzen,
… bevor Sie das Gerät reinigen und
… bei Gewitter.
• Benutzen Sie das Gerät nicht, wenn es
sichtbare Beschädigungen am Gerät
oder der Anschlussleitung aufweist.
• Um Gefährdungen zu vermeiden, nehmen Sie keine Veränderungen am Gerät
vor. Auch die Anschlussleitung darf
nicht selbst ausgetauscht werden. Lassen Sie Reparaturen nur von einer Fachwerkstatt bzw. im Service-Center
durchführen.
WARNUNG vor Sachschäden
• Stellen Sie keine mit Flüssigkeit gefüllten
Gegenstände wie z. B. Vasen auf das
Gerät.
• Schwere Gegenstände dürfen nicht auf
das Gerät gestellt werden.
• Schützen Sie das Gerät vor Hitze.
• Das Gerät darf nicht (z. B. mit Zeitungen, Kissen oder Decken) bedeckt werden.
• Es dürfen keine Gegenstände in die Lüftungsschlitze eingefügt werden.
• Offene Feuerquellen wie z. B. brennende Kerzen dürfen nicht auf oder direkt
neben das Gerät gestellt werden.
• Stellen Sie das Gerät so auf, dass kein
direktes Sonnenlicht darauf fällt.
• Stellen Sie das Gerät auf eine feste,
ebene Oberfläche.
• Reinigen Sie den Luftfilter, bevor er stark
verschmutzt ist.
• Achten Sie bei der Schlauchentwässerung darauf, dass der Schlauch nicht
6
DE
Page 9
__RP89301_B1.book Seite 7 Donnerstag, 18. April 2013 3:20 15
blockiert wird und das offene Ende des
Schlauches tiefer als das Gerät liegt.
• Betreiben Sie das Gerät nur mit eingesetztem Wassertank oder installiertem
Schlauch. Das Schlauchende muss über
einem Abfluss liegen.
• Verwenden Sie nur das Originalzubehör.
• Verwenden Sie keine scharfen oder
scheuernden Reinigungsmittel.
• Reinigen Sie das Gerät nur mit einem
leicht feuchten Tuch.
4. Lieferumfang
1 Luftentfeuchtermit Wassertank 5
1Schlauch 22
1 Bedienungsanleitung
5. Inbetriebnahme
• Entfernen Sie sämtliches Verpackungsmaterial.
• Entfernen Sie alle Transportsicherungen.
• Ziehen Sie die Folie vom Bedienfeld ab.
• Überprüfen Sie, ob alle Teile vorhanden
und unbeschädigt sind.
6. Hinweise zum
Betrieb
• Sollten Sie in Wohnräumen dauerhaft
eine zu hohe relative Luftfeuchtigkeit haben, sollte die Ursache gefunden und
beseitigt werden. (Dauerhaftes - jahrelanges - Entlüften ist in der Regel nicht
sinnvoll.)
• Die optimale Umgebungstemperatur, um
der Luft Feuchtigkeit zu entziehen, beträgt 5 bis 35°C. Unter 5°C hat der
Einsatz eines Luftentfeuchters keinen
Sinn, da nur wenig Feuchtigkeit in der
Luft ist.
• Während des Betriebs kann die Raum-
temperatur je nach Raumgröße zwischen 1°C und 4 °C steigen. Dies ist
normal.
Automatische Enteisung
Damit das Gerät im Dauerbetrieb nicht vereist, enteist es sich automatisch. Dabei wird
die Entfeuchtung eingestellt und der Motor
auf höchste Stufe gestellt.
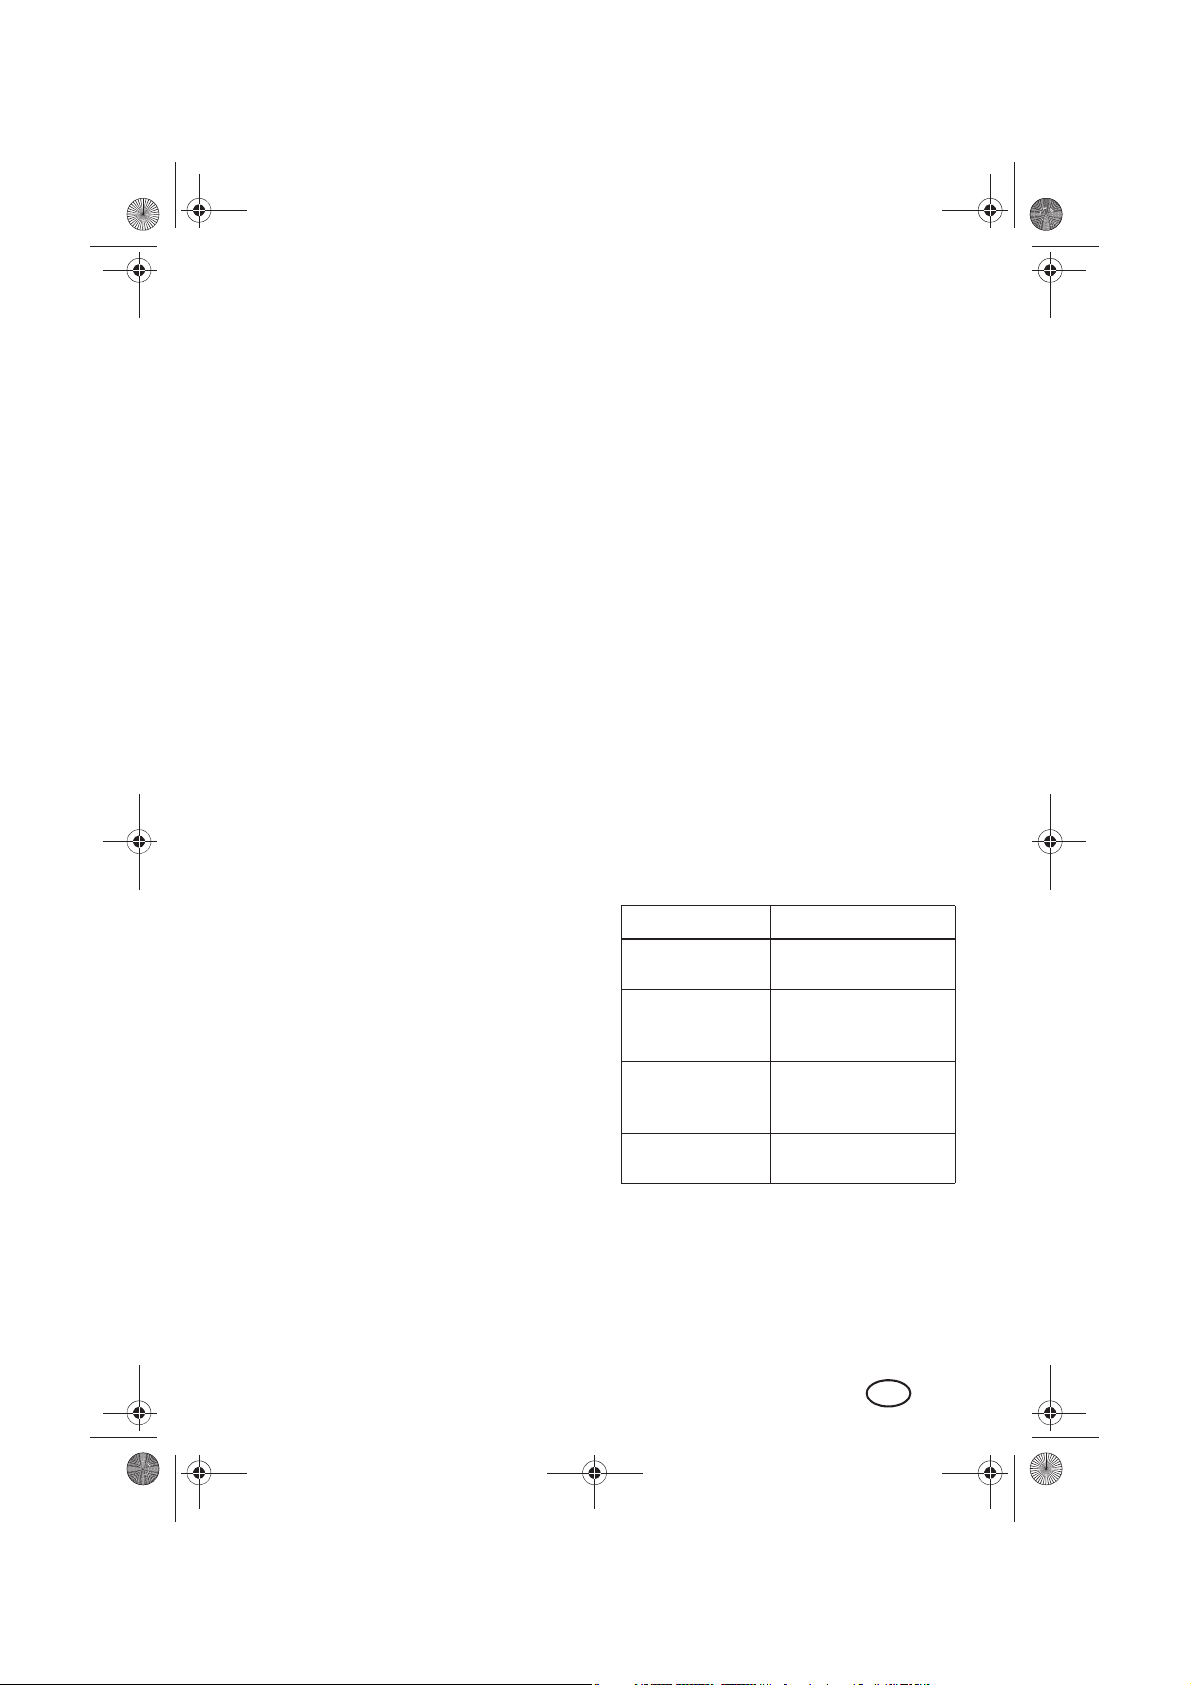
Die Intervalle dafür sind unterschiedlich.
1. Stellen Sie das Gerät auf einen ebenen, trockenen und festen Untergrund.
2. Lassen Sie das Gerät in der Einsatzposition ca. 30 Minuten ruhig stehen, damit sich die Kühlflüssigkeit setzen kann.
3. Prüfen Sie, dass der Schwimmer links
im Wassertank 5 sich frei bewegen
kann.
4. Prüfen Sie, ob der Wassertank 5 korrekt eingesetzt ist. Bei falschem Sitz
oder wenn der Wassertank entfernt
wurde, leuchtet die LED 12 WASSER-
TANK VOLL.
5. Verbinden Sie den Netzstecker 10 mit
einer Schutzkontaktsteckdose.
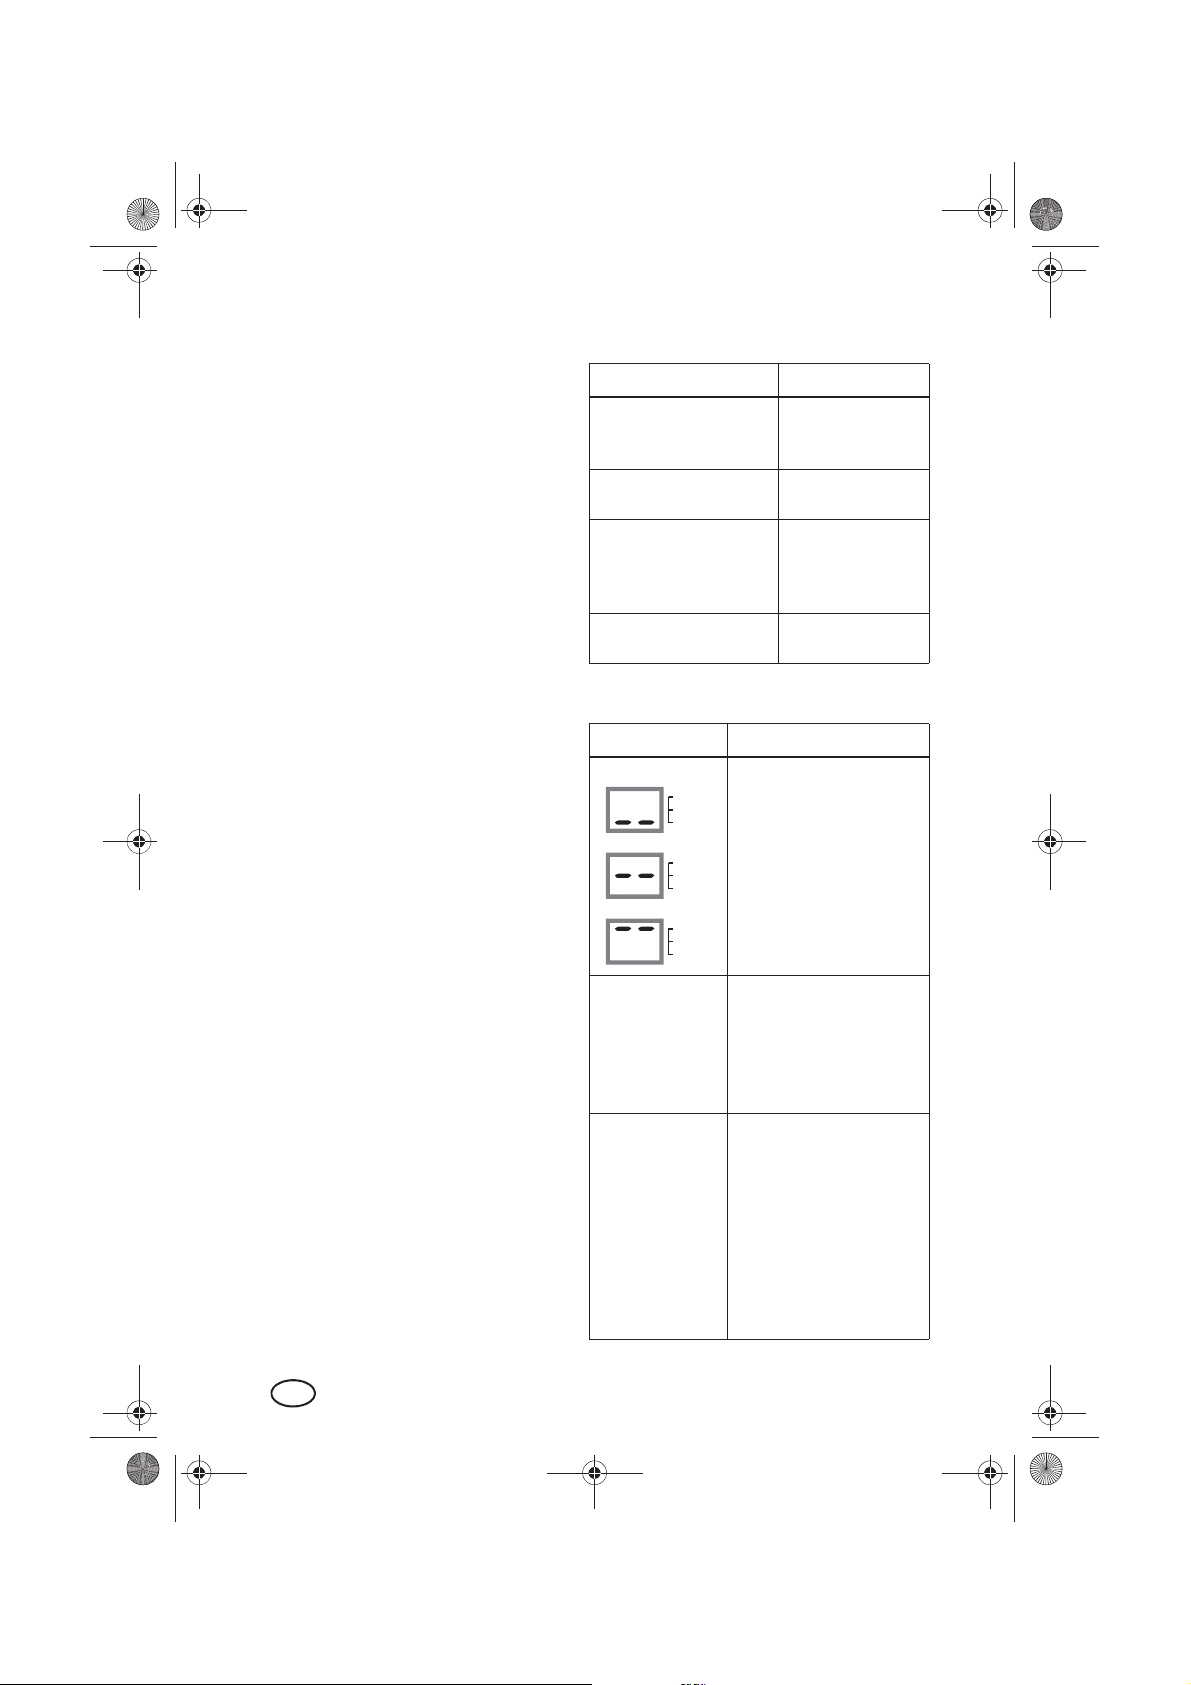
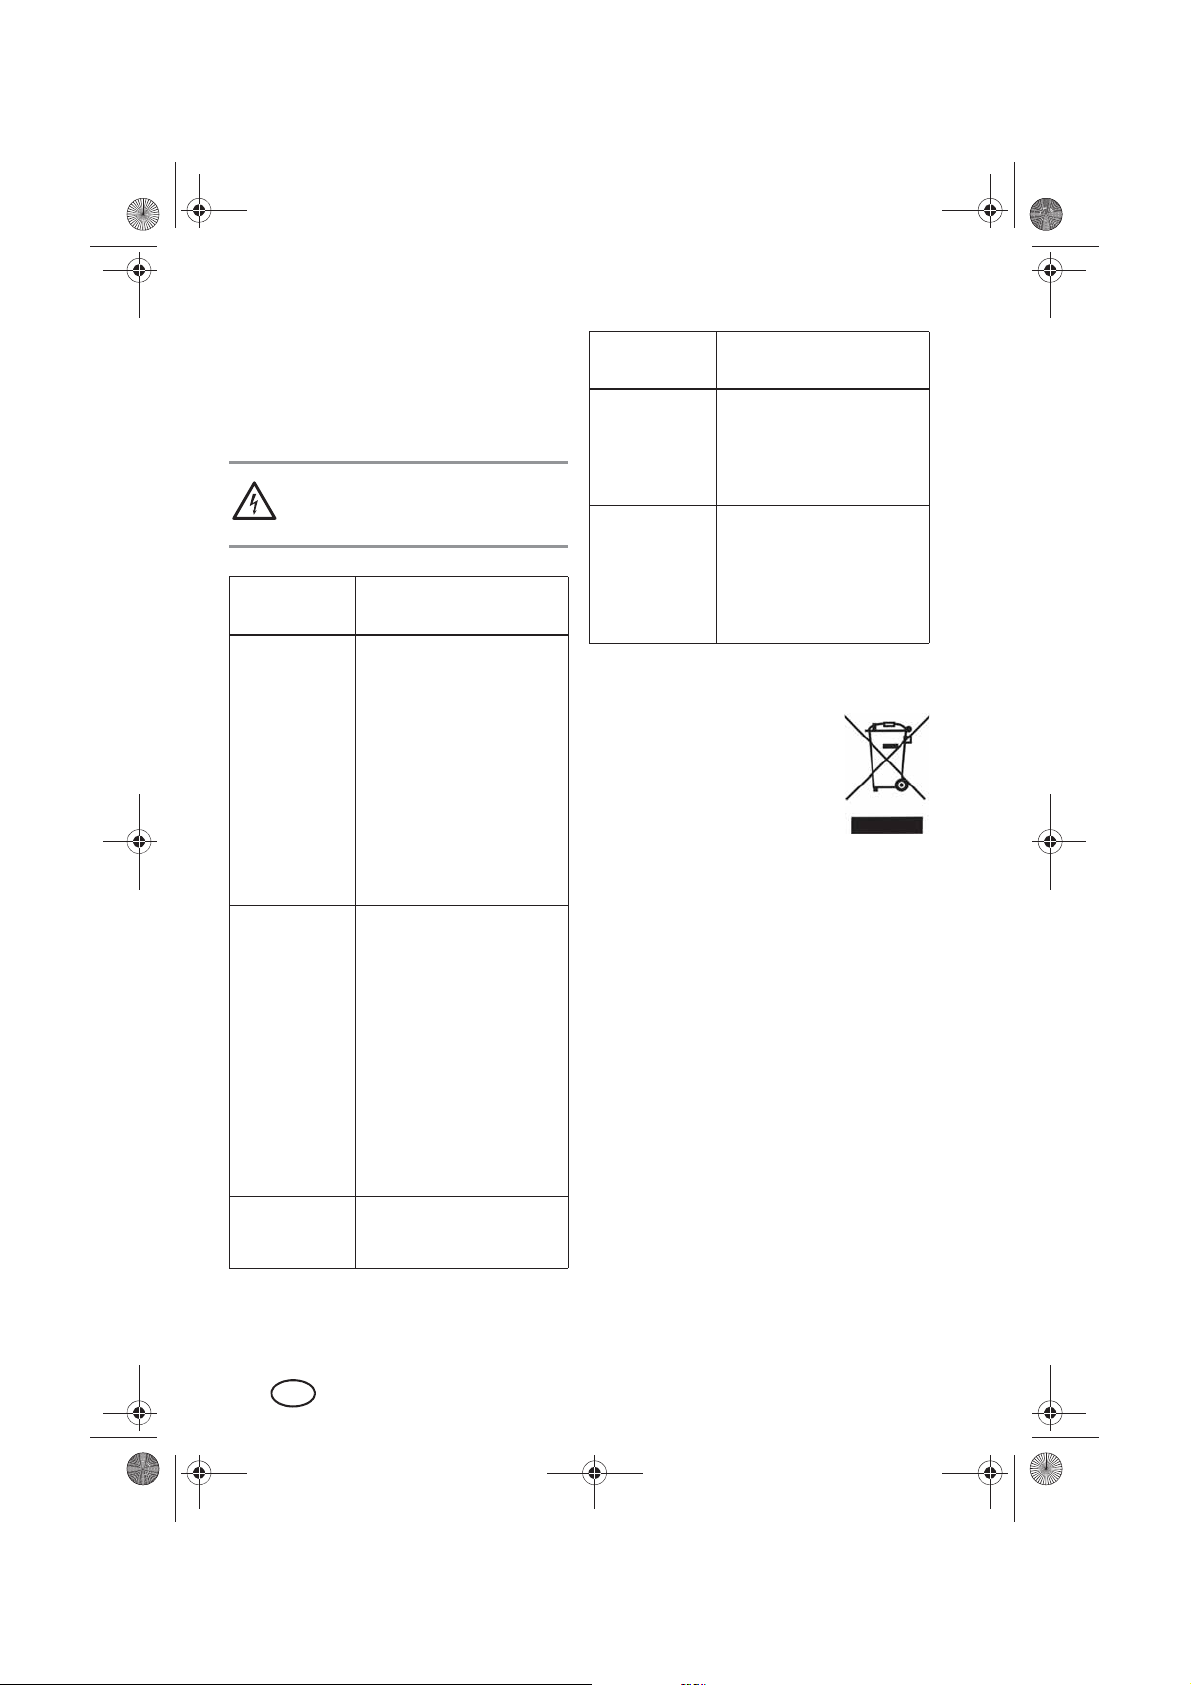
Bedingungen
Temperatur:
über 20°C
Temperatur:
12 bis 20°C
Temperatur:
5 bis 12°C
Temperatur:
unter 5°C
Enteisen
kein enteisen
nach 40 Minuten entfeuchten,
8 Minuten enteisen
nach 25 Minuten entfeuchten,
10 Minuten enteisen
kein Betrieb möglich
DE
7
Page 10
MITTEL
NIEDRIG
HOCH
MITTEL
NIEDRIG
HOCH
MITTEL
NIEDRIG
HOCH
__RP89301_B1.book Seite 8 Donnerstag, 18. April 2013 3:20 15
7. Bedienung
7.1 Ein- und Ausschalten
• Durch Drücken der Taste16 STAND-BY
schalten Sie das Gerät ein und aus. Die
entsprechenden LEDs leuchten oder erlöschen.
- Das Gerät startet mit der zuletzt gewählten Einstellung.
- Nach einem Stromausfall, wenn das
Gerät vom Netz getrennt wurde oder
nach dem Ausschalten durch den
Überhitzungsschutz startet das Gerät
im Programm AUTOMATIK.
• Wurde ein Timer gesetzt, schaltet sich
das Gerät nach Ablauf der Zeit (112Stunden) dauerhaft aus.
• Wurde im Programm DAUERBETRIEB
der Wert für die relative Luftfeuchtigkeit
eingestellt, schaltet das Gerät aus,
wenn der Wert erreicht ist und wieder
ein, wenn der Wert wieder überschritten wird.
• Das Gerät schaltet aus, wenn der Wassertank voll ist oder entfernt wird.
Klappe Luftauslassöffnung
Bild B: Egal, in welchem Programm das
Gerät betrieben wird, öffnen Sie die obere
Klappe 1. Sie rastet in vier Positionen ein.
Wird die Klappe nicht geöffnet, schaltet der
Überhitzungsschutz das Gerät nach einiger
Zeit für ca. 3 Minuten aus.
7.2 Anzeigen
Die Programm LED 14 und das Display 13
zeigen die gewählten Funktionen und den
Luftfeuchtigkeitsbereich an.
Programm LED
LED leuchtet
WASSERTANK VOLL
TIMER AKTIV
LUFTREINIGUNG
WÄ SC HE T RO CK N UN G
DAUERBETRIEB
AUTOMATIK
BETRIEB
Display
Anzeige
1 - 12
blinken 5 Sek.
30 - 80 oder CO
blinken 5 Sek.
Diese Anzeige ist während des Betriebs dauerhaft zu sehen. Sie zeigt
den Bereich der Luftfeuchtigkeit im Raum an:
NIEDRIG: unter 65%
MITTEL: 65% bis 75%
HOCH: über 75%
Timer alle Programme:
Diese Werte (1 - 12 Stunden) blinken für 5 Sekunden, wenn Sie mit den
Pfeiltasten eine Ausschaltzeit festlegen.
Relative Luftfeuchtigkeit
im Dauerbetrieb einstellen.
Werte zwischen 30 und
80 oder CO werden
beim Einstellen für
5 Sekunden blinkend
angezeigt.
CO: Das Gerät entfeuchtet dauerhaft.
Bedeutung
Der Wassertank
ist voll oder nicht
eingesetzt.
Es ist eine Ausschaltzeit aktiviert.
gewähltes Programm
Das Gerät ist eingeschaltet.
Bedeutung
8
DE
Page 11
__RP89301_B1.book Seite 9 Donnerstag, 18. April 2013 3:20 15
7.3 Programme
HINWEIS: Die eingestellten Werte zur relativen Luftfeuchtigkeit (rF%) werden mit einer
Abweichung von ca. 3% nach oben und unten erkannt. Dies ist notwendig, damit sich
das Gerät nicht ständig ein- und ausschaltet.
• Das Gerät verfügt über 4 verschiedene
Programme.
• Durch Drücken der Taste 17 PRO-
GRAMM schalten Sie zwischen den
Programmen um.
• Die Programm LED 14 vor dem aktiven
Programm leuchtet.
AUTOMATIK
Die relative Luftfeuchtigkeit (rF), die erreicht
werden soll, ist fest auf 55% eingestellt. Der
Kompressor entfeuchtet, bis dieser Wert erreicht ist und schaltet sich dann aus. Steigt
die relative Luftfeuchtigkeit wieder an, schaltet sich der Kompressor wieder ein.
In diesem Programm arbeitet das Gerät in
3unterschiedlichen Stufen:
- rF über 70%: Das Gerät entfeuchtet auf
höchster Stufe.
- rF zwischen 55% und 70%: Das Gerät
entfeuchtet mit normaler Stärke.
- rF unter 55%: Keine Entfeuchtung, es
läuft lediglich der Lüfter.
HINWEIS: Die rF Werte der Automatik sind
nicht identisch mit den Werten HOCH/MITTEL/NIEDRIG im Display 13.
Wählen Sie dieses Programm für die dauerhafte Entfeuchtung auf eine relative Luftfeuchtigkeit von angenehmen 55%.
DAUERBETRIEB
Im Programm DAUERBETRIEB können Sie
die relative Luftfeuchtigkeit in 5% Schritten
zwischen 30% und 80% wählen. Das Gerät
entfeuchtet auf kleiner Stufe, bis der eingestellte Wert erreicht ist und schaltet sich
dann aus. Steigt die relative Luftfeuchtigkeit
wieder an, schaltet sich das Gerät wieder
ein.
- 30 - 80%: Einstellung für die gewünschte relative Luftfeuchtigkeit im Raum.
- CO: Das Gerät entfeuchtet dauerhaft.
Wählen Sie dieses Programm für eine dauerhafte Entfeuchtung oder für eine Entfeuchtung auf den von Ihnen festgelegten Wert.
WÄSCHETROCKNUNG
• Dieses Programm nutzen Sie, um feuchte Wäsche oder Schuhe schneller zu
trocknen. Das Gerät entfeuchtet in der
höchsten Stufe. Bewegen Sie die Klappe 1 des Luftauslasses so, dass der Luftstrahl auf die zu trocknenden
Kleidungstücke gerichtet wird.
LUFTREINIGUNG
Bei diesem Programm findet keine Entfeuchtung statt. Die Raumluft wird durch die Filter
vor der Lufteinlassöffnung angesogen und
dort gereinigt.
7.4 Wassertank
• Der Wassertank 5 hat ein Fassungsvermögen von 5 Litern.
• Der Wasserstand kann vorne im Sichtfenster 7 überprüft werden.
• Das Gerät kann nur mit eingesetztem
Wassertank betrieben werden.
• Ist der Wassertank 5 voll, beginnt die
LED 12 WASSERTANK VOLL zu blinken.
Das Gerät schaltet sich nach einigen Sekunden aus. Für ca. 20 Sekunden ertönt
ein Alarmton. Die LED 12 WASS ERTANK VOLL blinkt, bis der Tank geleert
ist.
DE
9
Page 12
__RP89301_B1.book Seite 10 Donnerstag, 18. April 2013 3:20 15
1. Bild A: Um den Wassertank 5 zu ent-
leeren, ziehen Sie ihn links und rechts
etwas heraus und tragen ihn dann am
Griff 3.
2. Gießen Sie das Wasser aus und setzen
den Tank wieder ein.
7.5 Timer
• Der Timer kann mit allen 4 Programmen
kombiniert werden.
• Es können 12 Ausschaltzeiten von 1 bis
12 Stunden gewählt werden.
• Nach Ablauf der eingestellten Zeit wird
das Gerät dauerhaft ausgeschaltet und
der Timer ist beendet.
1. Drücken Sie während des Betriebs die
Tas te TIMER 19. Die LED 20 TIMER
AKTIV blinkt.
2. Wählen Sie mit den Pfeiltasten 18 eine
Ausschaltzeit von 1 bis 12 Stunden.
Die gewählte Zeit blinkt für 5 Sekunden
im Display 13 und ist dann gespeichert.
Um den Timer vorzeitig zu beenden, drü-
•
cken Sie zweimal
ten Sie das Gerät mit
aus.
TIMER 19
oder schal-
STAND-BY16
8. Schlauchentwässerung
Bei sehr feuchten Räumen ist es oft sinnvoller, dass das Wasser nicht im Wassertank
gesammelt wird, sondern direkt über einen
Schlauch ausgegeben wird.
WARNUNG! Bei der Schlauchentwässerung läuft das Gerät im Dauerbetrieb durch.
Das bedeutet, dass das ausgeschiedene
Wasser sicher ablaufen können muss, damit
sich auf dem Boden keine Pfützen bilden.
1. Bild C: Entfernen Sie mit einem
Schraubendreher den Verschluss 21
auf der Rückseite.
2. Entnehmen Sie den Pfropfen 23.
3. Bild C: Setzen Sie den mitgelieferten
Schlauch 22 auf die Öffnung.
4. Stellen Sie das Gerät so auf, dass das
Schlauchende über einem Abfluss endet. Dabei muss das offene Schlauchende unter dem Auslass am Gerät
liegen (Der Schlauch muss also ein Gefälle haben.).
5. Schalten Sie das Gerät wie gewohnt
ein und wählen Sie ein Programm.
6. Wenn Sie wieder in den Wassertank 5
entwässern wollen, schalten Sie das
Gerät aus, ziehen Sie den Schlauch
ab und stecken den Pfropfen 23 wieder fest auf die Öffnung.
22
9. Filter reinigen und
tauschen
Die Leistungsfähigkeit des Gerätes hängt
auch von der Sauberkeit der Filter ab.
•Der Kohlefilter 25 sollte alle 2 Wochen
gereinigt und alle 6 Monate getauscht
werden. Bürsten oder saugen Sie den
Filter ab.
• Der normale Kunststofffilter 24 sollte
alle 2 Wochen gewaschen werden.
1. Schalten Sie das Gerät aus und ziehen
Sie den Netzstecker 10.
2. Bild D: Fassen Sie in die obere Öffnung des Gitters 8 und ziehen es ab.
3. Drehen Sie das Gitter 8 um und drücken Sie ggf. mit beiden Daumen in die
Mitte des Gitters.
4. Der Kunststofffilter 24 und der Kohlefilter 25 lösen sich vom Gitter. Nehmen
Sie sie vom Gitter 8 ab.
5. Waschen Sie beide Filter mit lauwarmem Wasser aus. (Der Kohlefilter 25
sollte nach ca. 6 Monaten getauscht
werden.)
10
DE
Page 13
__RP89301_B1.book Seite 11 Donnerstag, 18. April 2013 3:20 15
6. Lassen Sie beide Filter komplett trocknen.
7. Setzen Sie die Filter in das Gitter 8.
8. Setzen Sie das Gitter auf das Gerät.
HINWEIS: Neue Kohlefilter erhalten Sie in
fast allen Geschäften für Haushaltswaren.
Die Matten müssen nur zugeschnitten werden.
10. Reinigen
Reinigen Sie das Gerät vor der ersten Benutzung!
GEFAHR durch Stromschlag!
• Ziehen Sie den Netzstecker 10
aus der Schutzkontaktsteckdose, bevor Sie das Gerät reinigen.
• Das Gerät, die Anschlussleitung und der
Netzstecker10 dürfen nicht in Wasser
oder andere Flüssigkeiten getaucht werden.
WARNUNG vor Sachschäden! Verwenden Sie keine scharfen oder scheuernden Reinigungsmittel.
• Wischen Sie das Gehäuse und die An-
schlussleitung 10 bei Bedarf mit einem
leicht angefeuchteten Tuch ab.
• Entnehmen Sie den Wassertank 5, gie-
ßen das Wasser weg und trocknen den
Tank vor dem Einsetzen innen und außen gut ab.
11. Schutz vor
Überhitzung
Das Gerät verfügt über einen Überhitzungsschutz.
• Der Überhitzungsschutz schaltet das
Gerät bei Gefahr einer Überhitzung automatisch aus.
• Anschließend kann das Gerät für 3 Mi-
nuten nicht mehr gestartet werden.
• Nach ca. 3 Minuten startet das Gerät
automatisch.
• Prüfen Sie, ob äußere Bedingungen den
Hitzeschutz ausgelöst haben können.
Z. B. Temperaturen über 35°C oder
eine geschlossene Klappe 1 über dem
Luftauslass.
12. Aufbewahrung
GEFAHR für Kinder! Bewahren
Sie das Gerät außerhalb der Reichweite von Kindern auf.
• Lagern Sie das Gerät nur in einer auf-
rechten Position.
• Wählen Sie einen Platz, wo weder star-
ke Hitze noch Feuchtigkeit auf das Gerät einwirken können.
DE
11
Page 14
__RP89301_B1.book Seite 12 Donnerstag, 18. April 2013 3:20 15
13. Problemlösung
Sollte Ihr Gerät einmal nicht wie gewünscht
funktionieren, gehen Sie bitte erst diese
Checkliste durch. Vielleicht ist es nur ein kleines Problem, das Sie selbst beheben können.
GEFAHR durch Stromschlag!
Versuchen Sie auf keinen Fall, das
Gerät selbstständig zu reparieren.
Fehler
Keine Funktion.
Die Entfeuchtung scheint gering zu sein.
Zu laute Geräusche.
Mögliche Ursachen/
Maßnahmen
• Ist die Stromversorgung sichergestellt?
• Überprüfen Sie den
Füllstand des Wassertanks 5.
• Überprüfen Sie die Position des Wassertanks.
• Überhitzungsschutz
hat das Gerät ausgeschaltet. Warten Sie
ca. 3 Minuten.
•Sind die Filter 24, 25
verschmutzt?
• Ist der Lufteinlass 8
blockiert?
• Temperatur ist gering.
• Läuft das Gerät im Programm LUFTREINIGUNG? In diesem Fall
findet keine Entfeuchtung statt.
• Ist ein Fenster auf oder
wird im Raum Dampf
erzeugt?
• Steht das Gerät auf einem ebenen, festen
Untergrund?
Fehler
Funktion stoppt
gelegentlich.
Feuchte Kleidung wird
nicht oder nur
langsam trocken.
Mögliche Ursachen/
Maßnahmen
• Raumtemperatur über
35°C?
• Raumtemperatur unter
5°C?
• Enteisung ist aktiv.
• Ist der Luftstrom des
Gerätes direkt auf die
feuchte Kleidung gerichtet?
• Ist die Raumtemperatur
zu gering?
14. Entsorgen
Das Symbol der durchgestrichenen Abfalltonne auf Rädern bedeutet, dass das
Produkt in der Europäischen
Union einer getrennten Müllsammlung zugeführt werden
muss. Dies gilt für das Produkt
und alle mit diesem Symbol gekennzeichneten Zubehörteile. Gekennzeichnete Produkte
dürfen nicht über den normalen Hausmüll
entsorgt werden, sondern müssen an einer
Annahmestelle für das Recycling von elektrischen und elektronischen Geräten abgegeben werden. Recycling hilft, den Verbrauch
von Rohstoffen zu reduzieren und die Umwelt zu entlasten. Informationen zur Entsorgung und der Lage des nächsten
Recyclinghofes erhalten Sie z.B. bei Ihrer
Stadtreinigung oder in den Gelben Seiten.
Verpackung
Wenn Sie die Verpackung entsorgen möchten, achten Sie auf die entsprechenden Umweltvorschriften in Ihrem Land.
12
DE
Page 15
__RP89301_B1.book Seite 13 Donnerstag, 18. April 2013 3:20 15
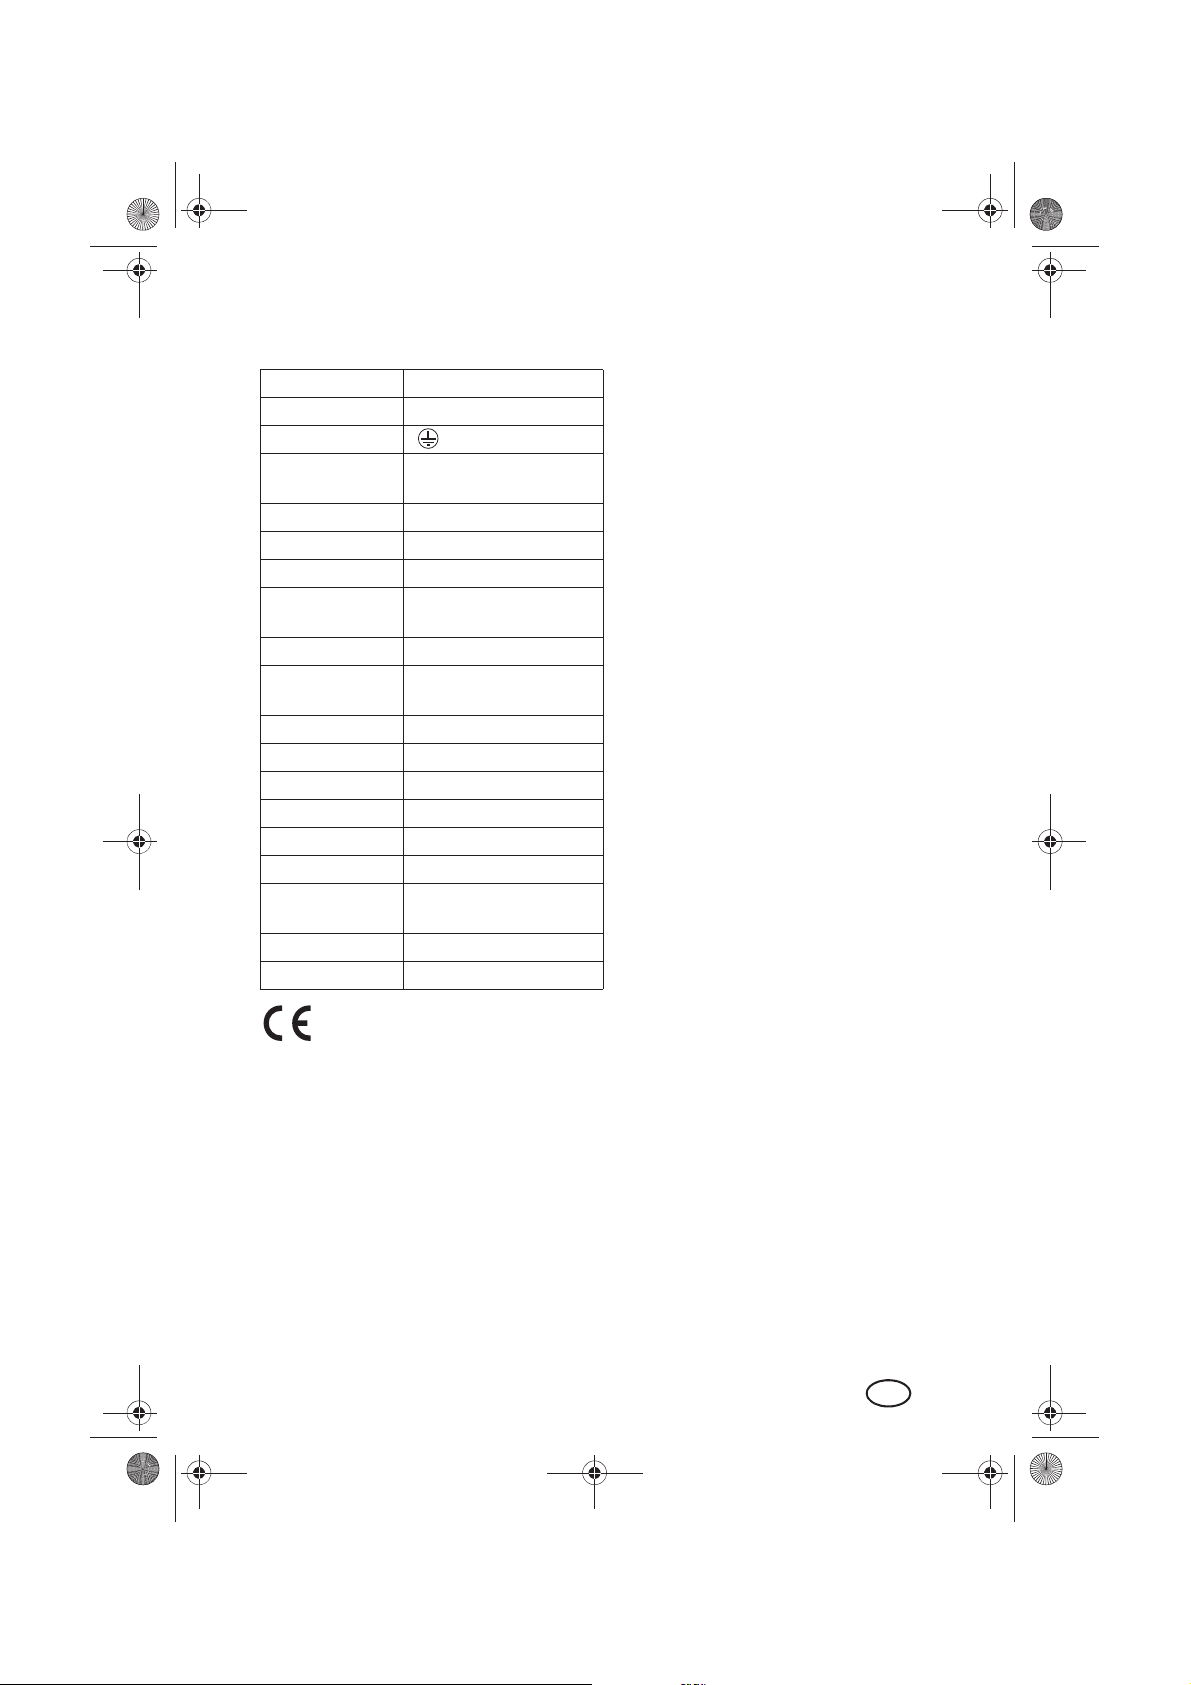
15. Technische Daten
Modell: SLE 420 A1
Netzspannung
Schutzklasse: I
Eingangs-
leistung: 320 W (27°C 60%)
Leistung max.: 420 W (35°C 90%)
Nennstrom: 1,39 A (27°C 60%)
Stromaufnahme:
Entfeuchtungsleis-
tung:
Luftdurchsatz: 195 m
Kühlmittel /
Menge:
Kältemittelgruppe: L1
Wassertank: 5 l
Raumgröße max.: 20m
Raumtemperatur: 5 - 35°C
Gewicht: 12,5 kg
Abmessungen: 360 x 230 x 610 BxTxH
Geräuschent-
wicklung:
Ansaugdruck: 0,5 MPa
Ausblassdruck: 1,5 MPa
Technische Änderungen vorbehalten.
: 220 - 240V~ 50Hz
max.1.82 A (35°C 90%)
20 L /Tag (30°C 80%)
11 L /Tag (27°C 60%)
3
/h
R134a/190g
2
‚ (Rh. 2,3m)
48 dB(A)
16. Garantie der
HOYERHandel GmbH
Sehr geehrte Kundin, sehr geehrter Kunde,
Sie erhalten auf dieses Gerät 3Jahre Garantie ab Kaufdatum. Im Falle von Mängeln
dieses Produkts stehen Ihnen gegen den Verkäufer des Produkts gesetzliche Rechte zu.
Diese gesetzlichen Rechte werden durch unsere im Folgenden dargestellte Garantie
nicht eingeschränkt.
Garantiebedingungen
Die Garantiefrist beginnt mit dem Kaufdatum. Bitte bewahren Sie den Original Kassenbon gut auf. Diese Unterlage wird als
Nachweis für den Kauf benötigt.
Tritt innerhalb von drei Jahren ab dem Kaufdatum dieses Produkts ein Material- oder Fabrikationsfehler auf, wird das Produkt von
uns – nach unserer Wahl – für Sie kostenlos
repariert oder ersetzt. Diese Garantieleistung setzt voraus, dass innerhalb der Dreijahresfrist das defekte Gerät und der
Kaufbeleg (Kassenbon) vorgelegt und
schriftlich kurz beschrieben wird, worin der
Mangel besteht und wann er aufgetreten ist.
Wenn der Defekt von unserer Garantie gedeckt ist, erhalten Sie das reparierte oder
ein neues Produkt zurück. Mit Reparatur
oder Austausch des Produkts beginnt kein
neuer Garantiezeitraum.
Garantiezeit und gesetzliche
Mängelansprüche
Die Garantiezeit wird durch die Gewährleistung nicht verlängert. Dies gilt auch für ersetzte und reparierte Teile. Eventuell schon beim
Kauf vorhandene Schäden und Mängel müssen sofort nach dem Auspacken gemeldet
werden. Nach Ablauf der Garantiezeit anfallende Reparaturen sind kostenpichtig.
Garantieumfang
Das Gerät wurde nach strengen Qualitätsrichtlinien sorgfältig produziert und vor Anlieferung gewissenhaft geprüft.
13
DE
Page 16
DE
AT
CH
D_RP89301_Luftbefeuchter.fm Seite 14 Freitag, 19. April 2013 9:40 09
Die Garantieleistung gilt für Material- oder
Fabrikationsfehler. Diese Garantie erstreckt
sich nicht auf Produktteile, die normaler Abnutzung ausgesetzt sind und daher als Verschleißteile angesehen werden können oder
für Beschädigungen an zerbrechlichen Teilen, z. B. Schalter, Akkus oder Teile, die aus
Glas gefertigt sind.
Diese Garantie verfällt, wenn das Produkt
beschädigt, nicht sachgemäß benutzt oder
gewartet wurde. Für eine sachgemäße Benutzung des Produkts sind alle in der Bedienungsanleitung aufgeführten Anweisungen
genau einzuhalten. Verwendungszwecke
und Handlungen, von denen in der Bedienungsanleitung abgeraten oder vor denen
gewarnt wird, sind unbedingt zu vermeiden.
Das Produkt ist lediglich für den privaten und
nicht für den gewerblichen Gebrauch bestimmt. Bei missbräuchlicher und unsachgemäßer Behandlung, Gewaltanwendung und
bei Eingriffen, die nicht von unserem autorisierten Service-Center vorgenommen wurden, erlischt die Garantie.
Abwicklung im Garantiefall
Um eine schnelle Bearbeitung Ihres Anliegens zu gewährleisten, folgen Sie bitte den
folgenden Hinweisen:
• Bitte halten Sie für alle Anfragen die Ar-
tikelnummer IAN:89301 und den
Kassenbon als Nachweis für den Kauf
bereit.
• Sollten Funktionsfehler oder sonstige Mängel auftreten, kontaktieren Sie zunächst
das nachfolgend benannte Service-Center
telefonisch oder per E-Mail.
• Ein als defekt erfasstes Produkt können
Sie dann unter Beifügung des Kaufbelegs (Kassenbon) und der Angabe, worin der Mangel besteht und wann er
aufgetreten ist, für Sie portofrei an die
Ihnen mitgeteilte Service Anschrift übersenden.
Auf www.lidl-service.com können
Sie diese und viele weitere Handbücher, Produktvideos und Software
herunterladen.
Service-Center
Service Deutschland
Tel.: 0800 5435 111
(kostenfrei)
E-Mail: hoyer@lidl.de
Service Österreich
Tel.: 0820 201 222
(0,15 EUR/Min.)
E-Mail: hoyer@lidl.at
Service Schweiz
Tel.: 0842 665566
(0,08 CHF/Min.,
Mobilfunk max. 0,40 CHF/Min.)
E-Mail: hoyer@lidl.ch
IAN: 89301
Lieferant
Bitte beachten Sie, dass die folgende Anschrift
keine Serviceanschrift
Kontaktieren Sie zunächst das oben benannte
Service-Center.
HOYER Handel GmbH
Kühnehöfe 5
22761 Hamburg
Deutschland
ist.
14
DE
Page 17
__RP89301_B1.book Seite 15 Donnerstag, 18. April 2013 3:20 15
DE
15
Page 18
__RP89301_B1.book Seite 16 Donnerstag, 18. April 2013 3:20 15
Sommaire
1. Aperçu de l'appareil ...................................................................... 17
2. Utilisation conforme ....................................................................... 18
3. Consignes de sécurité ..................................................................... 19
4. Éléments livrés ............................................................................... 21
5. Mise en service .............................................................................. 21
6. Remarques concernant le fonctionnement ...................................... 21
7. Utilisation ...................................................................................... 22
7.1 Mettre en marche et à l'arrêt ................................................................ 22
7.2 Affichages .......................................................................................... 22
7.3 Programmes ....................................................................................... 23
7.4 Réservoir d'eau ................................................................................... 24
7.5 Minuterie ........................................................................................... 24
8. Vidange de flexible ....................................................................... 24
9. Nettoyer et changer le filtre ........................................................... 25
10. Nettoyage ..................................................................................... 25
11. Protection contre la surchauffe ....................................................... 25
12. Rangement .................................................................................... 26
13. Dépannage .................................................................................... 26
14. Mise au rebut ................................................................................ 27
15. Caractéristiques techniques ............................................................ 27
16. Garantie de HOYER Handel GmbH ................................................. 28
16
FR
Page 19

__RP89301_B1.book Seite 17 Donnerstag, 18. April 2013 3:20 15
1. Aperçu de l'appareil
1 Clapet mobile pour l'évacuation de l'air
2 Champ de commande
3 Poignée de transport
4 Poignée encastrée pour le réservoir d'eau
5 Réservoir d'eau (5 L)
6 Roulettes
7 Fenêtre de regard pour le contrôle du niveau de l'eau
8 Grille pour l'admission de l'air (amovible)
9 Crochet pour enrouler le câble de raccordement
10 Câble de raccordement avec fiche de contact de protection
11 Plaque signalétique
12 WASSERTANK VOLL
(RÉSERVOIR PLEIN) La DEL s'allume lorsque le réservoir d'eau est plein
13 HOCH/MITTEL/NIEDRIG
(HAUT/MOYEN/BAS) Ecran destiné à afficher l'humidité de l'air choisie et le
temps d'arrêt
14 Programmes Les DEL affichent le programme actif
15 BETRIEB
(FONCTIONNEMENT) La DEL est allumée pendant le fonctionnement
16 STAND-BY (VEILLE) Met l'appareil en marche et à l'arrêt
17 PROGRAMM (MODE) Commute entre les 4 programmes
18 rF%STD/ EINSTELLUNG
(RÉGLAGE) Régler l'humidité de l'air et la minuterie
19 TIMER (MINUTERIE) Mettre la minuterie en marche et à l'arrêt
20 TIMER AKTIV (MINUTERIE) La DEL est allumée lorsque la minuterie est active
21 Fermeture pour raccordement du flexible (Retirez la fermeture à l'aide d'un tourne-
vis. Retirer le bouchon et raccorder le flexible.)
22 Flexible
23 Bouchon
24 Filtre plastique
25 Filtre carbone
17
FR
Page 20
__RP89301_B1.book Seite 18 Donnerstag, 18. April 2013 3:20 15
Merci beaucoup pour
votre confiance !
Nous vous félicitons pour l'achat de votre
nouveau déshumidificateur d'air.
Pour manipuler le produit en toute sécurité et
vous familiariser avec le volume de
livraison :
• Lisez attentivement ce mode
d’emploi avant la première utilisation.
• Respectez en priorité les
consignes de sécurité !
• L'appareil ne doit être utilisé
qu'aux fins décrites dans ce
mode d'emploi.
• Conservez ce mode d'emploi.
• Si vous transmettez l'appareil à
un tiers, n'oubliez pas d'y joindre
ce mode d'emploi.
Nous vous souhaitons beaucoup de plaisir
avec votre nouveau déshumidificateur d'air !
2. Utilisation conforme
Le déshumidificateur d'air est exclusivement
prévu pour déshumidifier les pièces d’habitation, les caves ou les entrepôt à une température comprise entre 5 °C et 35 °C.
L'appareil doit être utilisé uniquement à l'intérieur.
Cet appareil ne peut pas être utilisé dans un
cadre professionnel.
Utilisation impropre prévisible
DANGER ! Risque de maladies !
G L'eau accumulée n'est pas destinée
à être bue ou à irriguer. Il y a un
risque sanitaire.
DANGER ! Risque
d'électrocution !
Ne mettez pas l'appareil dans
l'eau / ni dans des mares ou des
flaques d'eau.
AVERTISSEMENT : risque de dommages matériels !
• N'utilisez pas l'appareil dans des piscines, salles de bain ou autres lieux
semblables.
• L'appareil n’est pas adapté au séchage
des isolations. Si, après une rupture de
canalisation, l'isolation ou le matériau
d'isolation est devenu humide, faites
obligatoirement appel à un technicien
qualifié.
• N'exposez jamais l'appareil à des températures inférieures ou égales à
0 degré Celsius. L'eau résiduelle dans
les conduites pourrait geler et endommager le système.
• N'utilisez pas l'appareil dans un environnement poussiéreux ou contenant du
chlore.
18
FR
Page 21
__RP89301_B1.book Seite 19 Donnerstag, 18. April 2013 3:20 15
3. Consignes de
sécurité
Avertissements
Les avertissements suivants sont utilisés si nécessaire dans le présent mode d’emploi :
DANGER ! Risque élevé : le nonrespect de l’avertissement peut provoquer des blessures graves, voire
la mort.
AVERTISSEMENT ! Risque moyen : le nonrespect de l’avertissement peut provoquer
des blessures ou des dommages matériels
graves.
ATTENTION : risque faible : le non-respect
de l’avertissement peut provoquer des blessures légères ou entraîner des dommages
matériels.
REMARQUE : remarques et particularités
dont il faut tenir compte en manipulant l’appareil.
Instructions pour une utilisation en toute sécurité
• Cet appareil n'est pas destiné à être utilisé par des personnes (et
par des enfants) présentant des déficiences physiques, sensorielles
ou mentales, ni par des personnes ne possédant aucune expérience et connaissance en la matière, sauf si ces personnes sont surveillées et supervisées par une personne compétente qui leur
expliquera le fonctionnement de l'appareil.
• Les enfants doivent rester sous surveillance pour s'assurer qu'ils ne
jouent pas avec l'appareil.
• N'encastrez pas l'appareil. Sur les côtés et derrière l’appareil, lais-
sez un espace minimal d'env. 20 cm ; devant, laissez 10 cm et audessus, 30 cm.
• L'appareil ne doit fonctionner que dans des locaux dont la tempé-
rature est comprise entre 5 °C et 35 °C.
• N'utilisez l'appareil que dans des pièces de 20 m
2
maximum.
• Ne branchez la fiche secteur qu'à une prise facilement accessible
installée dans les règles, dotée de contacts de protection et dont la
tension correspond aux indications de la plaque signalétique.
Après avoir branché l'appareil, la prise de courant doit rester facilement accessible.
• L'appareil doit être installé conformément aux prescriptions d'instal-
lation nationales en vigueur.
FR
19
Page 22
__RP89301_B1.book Seite 20 Donnerstag, 18. April 2013 3:20 15
DANGER pour les enfants
• Le matériel d'emballage n'est pas un
jouet. Les enfants ne doivent pas jouer
avec les sachets en plastique. Ceux-ci
présentent un risque d'asphyxie.
• Conservez l’appareil hors de portée des
enfants.
RISQUE d'explosion
• L'appareil ne doit jamais fonctionner
dans un environnement d'aérosol ou à
risque d'explosion.
DANGER ! Risque d'électrocution en raison de l’humidité
• Il ne faut jamais faire fonctionner l'appareil à proximité d'une baignoire,
d'une douche, d'un lavabo rempli etc.
• L'appareil, le câble de raccordement et
la fiche secteur ne doivent pas être plongés dans l'eau ou dans un autre liquide.
• Protégez l'appareil contre les gouttes et
les éclaboussures.
• Si du liquide devait pénétrer dans l'appareil (sauf dans le réservoir d'eau), retirer immédiatement la fiche secteur.
Faites contrôler l'appareil avant de le remettre en service.
• N'utilisez pas l'appareil avec les mains
mouillées.
• Si l'appareil tombe dans l'eau, débranchez immédiatement la fiche secteur.
Ne retirer l'appareil qu'après cela.
DANGER ! Risque
d'électrocution
• Évitez toute détérioration du câble de
raccordement par des arêtes vives ou
des surfaces brûlantes. N’enroulez pas
le câble de raccordement autour de
l’appareil.
• L’appareil n’est pas complètement isolé
du secteur même après l’avoir éteint
avec l’interrupteur Marche/Arrêt. Pour
ce faire, débranchez la fiche secteur.
• Lors de l'utilisation de l'appareil, le
câble de raccordement ne doit pas être
coincé ou écrasé.
• Pour débrancher la fiche secteur de la
prise de contact de protection, toujours
tirer sur la fiche secteur, jamais sur le
câble.
• Débranchez la fiche de contact de protection de la prise de contact de protection, …
… lorsqu'une panne survient,
… quand vous n’utilisez pas l'appareil,
… avant de nettoyer l'appareil et
…en cas d'orage.
• N'utilisez pas l'appareil si celui-ci ou le
câble de raccordement présente des dégâts apparents.
• Si le câble d'alimentation est endommagé, il doit être remplacé par le fabricant, son service après vente ou des
personnes de qualification similaire afin
d'éviter un danger.
• Afin d'éviter tout risque d'accident, n'effectuez aucune modification au niveau
de l'appareil. Ne remplacez pas le
câble de raccordement vous-même.
Confiez les réparations uniquement à
un atelier spécialisé ou au service
après-vente.
AVERTISSEMENT : risque de
dommages matériels
• Ne posez aucun objet rempli de liquide, comme par exemple un vase, sur
l'appareil.
• Aucun objet lourd ne doit être posé sur
l'appareil.
• Protégez l'appareil contre la chaleur.
• L'appareil ne doit pas être recouvert
(par exemple avec des journaux, des
coussins ou des couvertures).
• Il ne faut insérer aucun objet dans la
fente de ventilation.
• Des sources de feu comme par exemple
des bougies allumées ne doivent pas
être posées sur ou directement à côté de
l'appareil.
20
FR
Page 23

__RP89301_B1.book Seite 21 Donnerstag, 18. April 2013 3:20 15
• Installez l'appareil à l’abri des rayons
directs du soleil.
• Placez l'appareil sur une surface solide
et plane.
• Nettoyez le filtre à air avant qu'il ne soit
fortement encrassé.
• Lors de la vidange du flexible, veillez à
ce que ce dernier ne soit pas bloqué et
à ce que l'extrémité du flexible soit située plus bas que l'appareil.
• Ne faites fonctionner l'appareil que
lorsque le réservoir d'eau est en place
ou que le flexible est installé. L'extrémité
du flexible doit reposer au-dessus d'une
évacuation.
• Utilisez uniquement les accessoires
d’origine.
• N’utilisez aucun détergent acide ou décapant.
• Ne nettoyez l'appareil qu'avec un chiffon légèrement humide.
4. Éléments livrés
1 Déshumidificateur d'air avec réservoir
d'eau 5
1Flexible 22
1 Mode d’emploi
5. Mise en service
• Ôtez tout le matériau d'emballage.
• Enlevez tous les dispositifs de sécurité
pour le transport.
• Retirez le film de protection du champ
de commande.
• Vérifiez si toutes les pièces sont présentes et en parfait état.
1. Placez l'appareil sur une surface
plane, sèche et solide.
2. Laissez l'appareil reposer pendant env.
30 minutes dans la position d'utilisation, afin que le liquide de refroidissement puisse se déposer.
3. Vérifiez que le flotteur situé à gauche
dans le réservoir d'eau 5 puisse se déplacer librement.
4. Vérifiez que le réservoir d'eau 5 est
correctement inséré. Si le réservoir
d'eau est mal installé ou a été retiré, la
DEL 12 WASSERTANK VOLL (RÉSERVOIR PLEIN) est allumée.
5. Reliez la fiche secteur 10 avec une
prise de contact de protection.
6. Remarques concer-
nant le fonctionnement
• S'il devait y avoir de manière durable
une humidité relative de l'air trop élevée
dans des pièces d’habitation, il faut en
trouver la cause et l'éliminer. (Il n'est en
principe pas judicieux de désaérer en
permanence - pendant des années.)
• La température ambiante optimale pour
déshumidifier l'air est comprise entre
5et 35 °C. En dessous de 5 °C, l'utilisation d'un déshumidificateur d'air n'a
pas de sens car il n'y a que peu d'humidité dans l'air.
• Pendant le fonctionnement, la température ambiante peut, en fonction de la
taille de la pièce, augmenter de 1à
4 °C. Ceci est normal.
FR
21
Page 24

__RP89301_B1.book Seite 22 Donnerstag, 18. April 2013 3:20 15
Dégivrage automatique
Afin que l'appareil ne givre pas en mode
continu, il se dégivre automatiquement. A
cette occasion, la déshumidification est réglée et le moteur est passé au niveau le plus
élevé.
Les intervalles pour cela varient.
Conditions
Température :
au-dessus de
20 °C
Température :
12 à 20 °C
Température :
5 à 12 °C
Température :
en-dessous de
5°C
Dégivrage
pas de dégivrage
après 40 minutes déshumidification,
8 minutes dégivrage
après 25 minutes déshumidification,
10 minutes dégivrage
pas de fonctionnement
possible
7. Utilisation
7.1 Mettre en marche et à
l'arrêt
• Vous mettez l'appareil en marche et l'ar-
rêter en appuyant sur la touche 16
STAND-BY (VEILLE). Les DEL correspondantes s'allument ou s'éteignent.
- L'appareil démarre avec le dernier réglage choisi.
- Après une panne de courant, si l'appareil a été coupé du secteur ou
après un arrêt dû au contacteur de
protection contre la surchauffe, l'appareil démarre en mode AUTOMATIK
(AUTOMATIQUE).
• Si une minuterie a été réglée, l'appareil
s'arrête pour une durée prolongée une
fois le temps écoulé (1-12 heures).
• Si la valeur de l'humidité relative de
l'air est réglée dans le mode DAUERBE-
TRIEB (CONTINU), l'appareil s'arrête
lorsque la valeur est atteinte et se remet
en marche lorsque la valeur est à nouveau dépassée.
• L'appareil s'arrête lorsque le réservoir
d'eau est plein ou est retiré.
Clapet d'ouverture d'évacuation
de l'air
Figure B : Quel que soit le mode dans lequel l'appareil fonctionne, ouvrez le clapet
supérieur 1. Il s'encrante dans quatre positions.
Si le clapet n'est pas ouvert, la protection
contre la surchauffe arrête au bout d’un moment l'appareil pendant env. 3 minutes.
7.2 Affichages
Le programme DEL 14 et l'écran 13 affichent les fonctions choisies et la plage
d'humidité de l'air.
Programme DEL
La DEL s'allume
WASSERTANK VOLL
(RÉSERVOIR PLEIN)
TIMER AKTIV (MINUTERIE)
LUFTREINIGUNG
(AIR PROPRE)
WÄSCHETROCKNUNG (SÉCHAGE
VÊTEMENTS)
DAUERBETRIEB
(CONTINU)
AUTOMATIK (AUTOMATIQUE)
BETRIEB (FONCTIONNEMENT)
Signification
Le réservoir d'eau
est plein ou non utilisé.
Un temps d'arrêt
est activé.
Programme choisi
L’appareil est
allumé.
22
FR
Page 25

MITTEL
NIEDRIG
HOCH
MITTEL
NIEDRIG
HOCH
MITTEL
NIEDRIG
HOCH
__RP89301_B1.book Seite 23 Donnerstag, 18. April 2013 3:20 15
Écran
Affichage
1 - 12
clignotent
5secondes
30 - 80 ou CO
clignotent
5secondes
Signification
On peut voir cet affichage
durablement pendant le
fonctionnement. Il indique
la plage d'humidité de
l'air dans la pièce :
NIEDRIG (BAS) :
moins de 65 %
MITTEL (MOYEN) :
65 % à 75 %
HOCH (HAUT) :
plus de 75 %
Minuterie tous programmes :
Ces valeurs (1 - 12 heures)
clignotent pendant
5secondes si vous fixez
un temps d'arrêt avec les
touches de flèche.
Régler l'humidité relative
de l'air en mode continu.
Les valeurs situées entre
30 et 80 ou CO
clignotent pendant
5secondes.
CO: L'appareil déshumidifie en permanence.
7.3 Programmes
REMARQUE : les valeurs réglées par rapport à l'humidité relative de l'air (rF%) sont
détectées avec une tolérance d'env. 3 %
vers le haut ou vers le bas. Ceci est nécessaire afin que l'appareil ne s'allume et ne
s'éteigne pas en permanence.
• L'appareil dispose de 4 programmes
différents.
• En appuyant sur la touche 17 PRO-
GRAMM (MODE), vous commutez
entre les programmes.
• Le programme DEL 14 située devant le
programme actif s’allume.
AUTOMATIK (AUTOMATIQUE)
L'humidité relative de l'air (rF) qui doit être
atteinte est fixée à 55 %. Le compresseur
déshumidifie jusqu'à ce que cette valeur soit
atteinte puis s'arrête. Si l'humidité relative
de l'air remonte à nouveau, le compresseur
se remet en marche
.
Dans ce programme, l'appareil fonctionne
dans 3 niveaux différents :
- rF supérieure à 70% : l'appareil déshumidifie au niveau le plus élevé.
- rF entre 55% et 70% : l'appareil déshumidifie à une puissance normale.
- rF inférieure à 55% : pas de déshumidification, seul le ventilateur marche.
REMARQUE : les valeurs rF du mode automatique ne sont pas identiques aux valeurs
HOCH/MITTEL/NIEDRIG (HAUT/
MOYEN/BAS) affichées sur l'écran 13.
Choisissez ce programme pour déshumidifier de façon durable à une humidité relative
de l'air agréable de 55 %.
DAUERBETRIEB (CONTINU)
Dans le programme DAUERBETRIEB
(CONTINU), vous pouvez choisir l'humidité
relative de l'air entre 30 % et 80 %, à intervalles de 5 %. L'appareil déshumidifie au niveau le plus bas jusqu'à ce que la valeur
réglée soit atteinte puis s'arrête. Si l'humidité relative de l'air remonte à nouveau, l'appareil se remet en marche.
- 30 - 80 % : réglage pour l'humidité relative de l'air souhaitée dans la pièce.
- CO : l'appareil déshumidifie en permanence.
Choisissez ce programme pour déshumidifier en permanence ou pour déshumidifier à
une valeur que vous aurez fixée.
FR
23
Page 26

__RP89301_B1.book Seite 24 Donnerstag, 18. April 2013 3:20 15
WÄSCHETROCKNUNG
(SÉCHAGE VÊTEMENTS)
Utilisez ce programme pour sécher plus rapidement le linge humide ou les chaussures.
L'appareil déshumidifie au niveau le plus
élevé. Bougez le clapet 1 de l'évacuation
de l'air de façon à ce que l'air soit dirigé
vers les vêtements à sécher.
LUFTREINIGUNG (AIR PROPRE)
Il n'y a aucune déshumidification avec ce
programme. L'air ambiant est aspiré à travers le filtre situé devant l'ouverture d'admission de l'air et y est nettoyé.
7.4 Réservoir d'eau
• Le réservoir d'eau 5 a une contenance
de 5 litres.
• Le niveau d'eau peut être vérifié sur le
devant par la fenêtre de regard 7.
• L'appareil ne peut fonctionner que si le
réservoir d'eau est en place.
• Si le réservoir d'eau 5 est plein, la
DEL12 WASSERTANK VOLL (RÉSERVOIR PLEIN) se met à clignoter. Au bout
de quelques secondes, l'appareil
s'éteint. Une alarme retentit pendant
env. 20 secondes. La DEL 12 WASSER-
TANK VOLL (RÉSERVOIR PLEIN) clignote
jusqu'à ce que le réservoir soit vidé.
1. Figure A : pour vidanger le réservoir
d'eau 5, tirez-le un peu vers la gauche
et vers la droite pour le sortir puis portez-le avec la poignée 3.
2. Videz l'eau et remettez le réservoir.
7.5 Minuterie
• La minuterie peut être combinée aux
4programmes.
• On peut choisir 12 temps d'arrêt de 1 à
12 heures.
• A la fin du temps réglé, l'appareil est arrêté de façon prolongée et la minuterie
est terminée.
1. Appuyez, pendant le fonctionnement,
sur la touche TIMER (MINUTERIE) 19.
La DEL 20 TIMER AKTIV (MINUTERIE)
clignote.
2. Choisissez, avec les touches à
flèche18, un temps d'arrêt de 1 à
12heures. Le temps choisi clignote
pendant 5 secondes à l'écran 13 et est
ensuite mis en mémoire.
• Pour stopper la minuterie avant terme,
appuyez deux fois sur TIMER (MINUTE-
RIE) 19 ou arrêtez l'appareil avec
STAND-BY (VEILLE) 16.
8. Vidange de flexible
Dans les pièces très humides, il est souvent
plus judicieux que l'eau ne soit pas collectée
dans le réservoir d'eau, mais soit directement rejetée par un flexible.
AVERTISSEMENT ! Dans le cas de la vidange par flexible, l'appareil fonctionne en
mode continu. Cela veut dire que l'eau évacuée doit pouvoir s'écouler en toute sécurité
afin qu'aucune flaque ne se forme sur le sol.
1. Figure C : retirez, avec ou un tournevis, la fermeture 21 à l'arrière.
2. Retirez le bouchon 23.
3. Figure C : fixez le flexible fourni 22
sur l'ouverture.
4. Posez l'appareil de façon à ce que l'extrémité du flexible soit située sur une
évacuation. Il faut que l'extrémité ouverte du flexible repose sous l'évacuation de l'appareil (le flexible doit avoir
une dénivellation).
5. Mettez comme d'habitude l'appareil en
marche et choisissez un programme.
6. Si vous voulez à nouveau vidanger
dans le réservoir d'eau 5, arrêtez l'ap-
pareil, débranchez le flexible 22 et
fixez à nouveau le bouchon 23 sur
l'ouverture.
24
FR
Page 27

__RP89301_B1.book Seite 25 Donnerstag, 18. April 2013 3:20 15
9. Nettoyer et changer
le filtre
La performance de l'appareil dépend aussi
de la propreté des filtres.
• Le filtre carbone 25 doit être nettoyé
toutes les 2 semaines et changé tous les
6 mois. Brossez ou aspirez le filtre.
• Le filtre plastique normal 24 doit être
lavé toutes les 2 semaines.
1. Arrêtez l'appareil et débranchez la
fiche secteur 10.
2. Figure D : saisissez l'ouverture supé-
rieure de la grille 8 et extrayez-la.
3. Faites pivoter la grille 8 et, si néces-
saire, appuyez au centre de la grille
avec vos deux pouces.
4. Le filtre plastique 24 et le filtre car-
bone25 se détachent de la grille. Retirez-les de la grille 8.
5. Lavez les deux filtres à l'eau tiède. (Le
filtre carbone 25 doit être changé
après env. 6 mois.)
6. Faites sécher complètement les deux
filtres.
7. Insérez les filtres dans la grille 8.
8. Posez la grille sur l'appareil.
REMARQUE : Vous trouverez des filtres
carbone dans presque tous les magasins
d’articles ménagers. Les nattes filtrantes
doivent seulement être découpées.
10. Nettoyage
Nettoyez l'appareil avant la première utilisation !
DANGER! Risque d'électrocution !
• Débranchez la fiche secteur 10 de la
prise de contact de protection avant de
nettoyer l'appareil.
• L'appareil, le câble de raccordement et
la fiche secteur 10 ne doivent pas être
plongés dans l'eau ou dans un autre liquide.
AVERTISSEMENT : risque de dommages matériels ! N’utilisez aucun dé-
tergent acide ou décapant.
• Essuyez le boîtier et le câble de raccor-
dement 10 si nécessaire avec un chiffon légèrement humide.
• Retirez le réservoir d'eau 5, jetez l'eau
et séchez bien le réservoir à l'intérieur
et à l'extérieur avant de l'insérer.
11. Protection contre la
surchauffe
L'appareil dispose d'une protection contre
la surchauffe.
• La protection contre la surchauffe arrête
automatiquement l’appareil en cas de
risque de surchauffe.
• L'appareil ne peut ensuite plus démarrer
pendant 3 minutes.
• L'appareil démarre automatiquement
après env. 3 minutes.
• Vérifiez si des conditions extérieures
sont susceptibles d’avoir déclenché la
protection contre la surchauffe.
Par exemple des températures supérieures à 35 °C ou un clapet fermé 1
au-dessus de l'évacuation de l'air.
FR
25
Page 28

__RP89301_B1.book Seite 26 Donnerstag, 18. April 2013 3:20 15
12. Rangement
DANGER pour les enfants !
Conservez l’appareil hors de portée des enfants.
• Ne stockez l'appareil qu’en position
verticale.
• Choisissez un endroit à l'abri d'une
forte chaleur ou de l'humidité.
13. Dépannage
Si votre appareil ne fonctionne pas correctement, procédez dans un premier temps aux
tests de cette liste de contrôle. Il s’agit peutêtre seulement d’un problème mineur que
vous pouvez résoudre vous-même.
DANGER ! Risque d'électrocution ! N’essayez en aucun cas de
réparer l'appareil vous-même.
Problème
Aucun fonctionnement.
Cause possible/
solution
• L’alimentation électrique est-elle établie
correctement ?
• Vérifiez le niveau de
remplissage du réservoir d'eau 5.
• Vérifiez la position du
réservoir d'eau.
• La protection contre la
surchauffe a arrêté
l'appareil. Attendez
environ 3 minutes.
Problème
La déshumidification semble
être trop faible.
Bruits trop élevés.
Le fonctionnement s'interrompt de temps
à autre.
Les vêtements
humides ne
sèchent pas ou
ne sèchent que
lentement.
Cause possible/
solution
• Les filtres 24, 25 sont-
ils encrassés ?
• L'admission de l'air 8
est-elle bloquée ?
• La température est
faible.
• L'appareil fonctionne-t-il
en mode LUFTREINIGUNG (AIR PROPRE)?
Aucune déshumidification n'a lieu dans ce
cas.
• Une fenêtre est-elle ouverte ou de la vapeur
est-elle générée dans
la pièce ?
• L'appareil se trouve-t-il
sur un support plan et
solide ?
• Température ambiante supérieure à
35 °C ?
• Température ambiante inférieure à
5°C ?
• Le dégivrage est actif.
• Le flux d'air de l'appareil est-il directement
dirigé vers le vêtement humide ?
• La température ambiante est-elle trop
faible ?
26
FR
Page 29

__RP89301_B1.book Seite 27 Donnerstag, 18. April 2013 3:20 15
14. Mise au rebut
Le symbole de la poubelle sur
roues barrée signifie que,
dans l’Union européenne, le
produit doit faire l’objet d’une
collecte séparée des déchets.
Cela s’applique au produit et
à tous les accessoires portant
ce symbole. Les produits portant ce symbole
ne doivent pas être éliminés avec les déchets ménagers normaux, mais doivent être
déposés dans un point de collecte chargé du
recyclage des appareils électriques et électroniques. Le recyclage contribue à réduire
l’utilisation de matières premières et à protéger l’environnement.
Emballage
Si vous souhaitez mettre l’emballage au rebut, respectez les prescriptions environnementales correspondantes de votre pays.
15. Caractéristiques
techniques
Modèle : SLE 420 A1
Tension secteur
Classe de
protection :
Puissance
d'entrée : 320 W (27°C 60%)
Puissance : max. 420 W (35°C
Courant nominal : 1,39 A (27°C 60%)
Consommation
de courant :
Puissance de dés-
humidification :
Débit d'air : 195 m
Réfrigérant /
quantité :
Groupe de réfrigé-
rant : L1
Réservoir d'eau : 5 l
Taille de la pièce : 20 m
Températ ure am-
biante : 5 - 35°C
Poids : 12,5 kg
Dimensions : 360 x 230 x 610 LxPxH
Développement
de bruit : 48 dB(A)
Pression d'aspira-
tion : 0,5 MPa
Pression de
soufflage : 1,5 MPa
: 220 - 240 V~ 50 Hz
I
90%)
max.1.82 A (35°C
90%)
20 L /jour (30°C 80%)
11 L /jour (27°C 60%)
3
/h
R134a/190g
2
‚ (Rh. 2,3 m)
Sous réserves de modifications techniques.
27
FR
Page 30

__RP89301_B1.book Seite 28 Donnerstag, 18. April 2013 3:20 15
16. Garantie de
HOYER Handel GmbH
Chère cliente, cher client,
Vous obtenez pour cet appareil une garantie
de 3 ans à compter de la date d’achat. En
cas de défauts de ce produit, vous disposez
de droits légaux contre le vendeur de ce produit. Ces droits ne sont pas limités par notre
garantie présentée par la suite.
Conditions de garantie
Le délai de garantie commence à la date
d’achat. Conservez le ticket de caisse d’origine. Ce document sert de justificatif
d’achat.
Si au cours des trois années suivant la date
d’achat, des défauts de matériel ou de fabrication apparaissent sur ce produit, celui-ci
vous est, à notre discrétion, réparé ou remplacé gratuitement. Les conditions pour faire
valoir la garantie sont que l’appareil et la
preuve d’achat (ticket de caisse) soient présentés dans un délai de trois ans et que le
défaut ainsi que le moment où il est survenu
soient brièvement décrits par écrit.
Si le défaut est couvert par notre garantie,
nous vous renvoyons le produit réparé ou
neuf. La réparation ou l’échange du produit
ne constitue pas un nouveau commencement
de période de la garantie.
Durée de garantie et requêtes
légales pour vices de construction
La durée de garantie n’est pas prolongée
par son application. Ceci est également valable sur les pièces réparées et remplacées.
Les dommages et les vices déjà présents au
moment de l’achat doivent être signalés immédiatement après le déballage. Après l’expiration de la garantie, les réparations à
effectuer sont payantes.
Etendue de la garantie
L’appareil a été fabriqué selon des prescriptions de qualité rigoureuses et a été vérifié
minutieusement avant livraison.
La garantie s’applique aux défauts de matériel ou de fabrication. Cette garantie ne
s’applique pas aux pièces du produit subissant l’usure normale et pouvant donc être
considérées comme pièces d’usure ou aux
dommages sur les pièces fragiles comme le
bouton, la batterie ou les éléments en verre.
Cette garantie est perdue si l’appareil n’a
pas été utilisé ou entretenu de manière
conforme. Pour une utilisation conforme du
produit, respecter précisément toutes les
consignes présentées dans le mode d’emploi. Les fins d’utilisation et les actions
contre-indiquées ou déconseillées dans le
mode d’emploi doivent impérativement être
évitées.
Le produit est exclusivement conçu pour un
usage privé non commercial. La manipulation non autorisée et non conforme, l'utilisation de force et les interventions non
effectuées par notre centre de service autorisé entraînent la perte de garantie.
Déroulement en cas de garantie
Pour assurer un traitement rapide de votre
demande, respectez les éléments suivants :
• Pour toute demande, tenez à disposition
le numéro d’article IAN : 89301 et le
ticket de caisse comme preuve d’achat.
• En cas d’erreur de fonctionnement ou
autres pannes, contactez d’abord par
téléphone ou par e-Mail le centre de
service cité ci-dessous.
• Envoyez ensuite gratuitement à l’adresse
de service qu’on vous a donnée le produit considéré comme défectueux en y
joignant la preuve d’achat (ticket de
caisse) et l’indication du défaut ainsi que
du moment où il est survenu.
28
FR
Page 31

FR
CH
__RP89301_B1.book Seite 29 Donnerstag, 18. April 2013 3:20 15
Sur www.lidl-service.com, vous
pouvez télécharger ce mode d’emploi ainsi que ceux d’autres produits, des vidéos sur les produits et
des logiciels.
Centre de service
Service France
Tel.: 0800 919270
E-Mail: hoyer@lidl.fr
Service Suisse
Tel.: 0842 665566 (0,08 CHF/Min.,
mobile max. 0,40 CHF/Min.)
E-Mail: hoyer@lidl.ch
IAN : 89301
Fournisseur
Attention ! L’adresse suivante n’est pas
une adresse de service. Contactez
d’abord le centre de service cité plus haut.
HOYER Handel GmbH
Kühnehöfe 5
22761 Hamburg
Allemagne
FR
29
Page 32

__RP89301_B1.book Seite 30 Donnerstag, 18. April 2013 3:20 15
Indice
1. Panoramica ................................................................................... 31
2. Uso conforme ................................................................................ 32
3. Istruzioni per la sicurezza .............................................................. 33
4. Materiale in dotazione ................................................................... 35
5. Messa in funzione .......................................................................... 35
6. Note sul funzionamento ................................................................. 35
7. Funzionamento .............................................................................. 36
7.1 Accensione e spegnimento ................................................................... 36
7.2 Indicazioni ......................................................................................... 36
7.3 Programmi ......................................................................................... 37
7.4 Serbatoio dell'acqua ........................................................................... 38
7.5 Timer ................................................................................................. 38
8. Scarico dell'acqua mediante il tubo flessibile .................................. 38
9. Pulizia e sostituzione del filtro ........................................................ 39
10. Pulizia ........................................................................................... 39
11. Dispositivo di protezione contro il surriscaldamento ....................... 39
12. Conservazione ............................................................................... 40
13. Risoluzione dei problemi ................................................................ 40
14. Smaltimento .................................................................................. 41
15. Dati tecnici ..................................................................................... 41
16. Garanzia della HOYER Handel GmbH ............................................ 42
30
IT
Page 33

__RP89301_B1.book Seite 31 Donnerstag, 18. April 2013 3:20 15
1. Panoramica
1 Sportello mobile per lo scarico dell'aria
2 Pannello di comando
3 Manico di trasporto
4 Maniglia a gola per il serbatoio dell'acqua
5 Serbatoio dell'acqua (5 L)
6 Rotelle
7 Oblò per il controllo del livello dell'acqua
8 Grata per l'entrata dell'aria (amovibile)
9 Ganci per l'avvolgimento del cavo di collegamento
10 Cavo di collegamento con spina con messa a terra
11 Targhetta di omologazione
12 WASSERTANK VOLL
(SERBATOIO PIENO) Il LED si accende quando il serbatoio
dell'acqua è pieno
13 HOCH/MITTEL/NIEDRIG
(ALTO/MEDIO/BASSO) Display per indicare l'umidità dell'aria
selezionata ed il tempo di arresto
14 Programmi I LED indicano il programma attivo
15 BETRIEB
(FUNZIONAMENTO) Il LED si accende durante il funzionamento
16 STAND-BY Accende e spegne l'apparecchio
17 PROGRAMM (MODO) Commuta tra i 4 programmi
18 rF%STD/ EINSTELLUNG
(IMPOSTAZIONE RH%HR) Impostare l’umidità dell'aria e il timer
19 TIMER Accendere e spegnere il timer
20 TIMER AKTIV Il LED si accende quando il timer è attivato
21 Chiusura per il collegamento del tubo flessibile (togliere la chiusura con un caccia-
vite. Togliere il tappo e collegare il tubo flessibile)
22 Tubo flessibile
23 Tapp o
24 Filtro in plastica
25 Filtro di carbone
IT
31
Page 34

__RP89301_B1.book Seite 32 Donnerstag, 18. April 2013 3:20 15
Vi ringraziamo per la
vostra fiducia.
Congratulazioni per l'acquisto del vostro
nuovo deumidificatore dell'aria.
Per un impiego sicuro del prodotto e per conoscerne tutto il ventaglio di prestazioni:
• Leggere attentamente il presente manuale di istruzioni per l'uso
prima della prima messa in funzione.
• Attenersi soprattutto alle istruzioni per la sicurezza!
• È consentito usare l'apparecchio
solo come descritto nel manuale
di istruzioni.
• Conservare il manuale di istruzioni.
• Se si cede l'apparecchio a terzi,
consegnare anche il manuale di
istruzioni per l'uso.
Ci auguriamo che il deumidificatore
dell'aria possa darvi molte soddisfazioni!
2. Uso conforme
Il deumidificatore dell'aria è stato concepito
esclusivamente per deumidificare locali adibiti ad abitazione, cantina o magazzino
con una temperatura tra i 5°C e i 35°C.
Usare l'apparecchio solo al chiuso.
Questo apparecchio non va utilizzato a scopo commerciale.
Uso indebito prevedibile
PERICOLO di contrarre malattie!
L'acqua raccolta non è potabile e
non va utilizzata per innaffiare le
piante. Si corre il rischio di pregiudicare la propria salute.
PERICOLO di scossa elettrica!
Non collocare l'apparecchio
nell'acqua / nemmeno nelle pozze
d'acqua o nelle pozzanghere.
AVVERTENZA: rischio di danni materiali!
• Non utilizzare l'apparecchio nei locali
adibiti a piscina, lavatoio o simili.
• L'apparecchio non è adatto per l'essiccazione dell'isolamento. Se dopo la rottura di un tubo l'isolamento o la
coibentazione si sono inumiditi, rivolgersi in ogni caso ad uno specialista.
• Non sottoporre mai l'apparecchio a
temperature pari o inferiori a 0°C. I residui di acqua nelle tubature potrebbero
gelare e danneggiare il sistema.
• Non utilizzare l'apparecchio in ambienti polverosi o contenenti cloro.
32
IT
Page 35

__RP89301_B1.book Seite 33 Donnerstag, 18. April 2013 3:20 15
3. Istruzioni per la
sicurezza
Avvertenze di sicurezza
Laddove necessario, nel presente manuale
di istruzioni per l'uso vengono utilizzate le
seguenti avvertenze di sicurezza:
PERICOLO! Rischio elevato: la
mancata osservanza di questa avvertenza può essere causa di danni
a persone.
AVVERTENZA! Rischio medio: la mancata
osservanza di questa avvertenza può essere
causa di lesioni o gravi danni materiali.
ATTENZIONE! Rischio minimo: la mancata osservanza di questa avvertenza può essere causa di lievi lesioni o danni materiali.
NOTA: circostanze e particolarità di cui tener conto durante l'uso dell'apparecchio.
Istruzioni per un impiego sicuro
• Il presente apparecchio non è adatto a persone con ridotte capaci-
tà fisiche, sensoriali, psichiche o senza esperienza e/o competenza (bambini compresi), a eccezione del caso in cui l'utilizzo
avvenga sotto il controllo di una persona responsabile per la sicurezza o nel caso in cui si ricevano indicazioni sull’utilizzo dell’apparecchio.
• I bambini devono essere tenuti sotto controllo per evitare che gio-
chino con l’apparecchio.
• Non incassare l'apparecchio nelle pareti. Lasciare sui lati e sul re-
tro una distanza minima di ca. 20 cm, anteriormente almeno
10cm e sopra almeno 30 cm di spazio.
• L'apparecchio va utilizzato solamente in locali con una temperatu-
ra compresa tra i 5°C ed i 35°C.
• Utilizzare l'apparecchio in locali di non più di 20 m
2
.
• Collegare la spina solo ad una presa correttamente installata, facil-
mente accessibile e dotata di contatto di terra, la cui tensione coincida con quella indicata sulla targhetta di omologazione. La presa
di corrente deve essere facilmente accessibile anche dopo il collegamento.
• L'apparecchio deve essere installato conformemente alle norme di
installazione nazionali.
IT
33
Page 36

__RP89301_B1.book Seite 34 Donnerstag, 18. April 2013 3:20 15
PERICOLO per i bambini
• Il materiale di imballaggio non è un giocattolo per bambini. I bambini non devono giocare con i sacchetti di plastica,
poiché ciò comporta un pericolo di soffocamento.
• Conservare l'apparecchio lontano dalla
portata dei bambini.
PERICOLO di esplosione
• L'apparecchio non deve essere mai utilizzato in ambienti a rischio di aerosol o di
esplosione.
PERICOLO di scossa elettrica a
causa dell'umidità
• Non far funzionare l'apparecchio vicino
ad una vasca da bagno, una doccia, un
lavandino pieno o simili.
• Non immergere l'apparecchio, il cavo
di collegamento e la spina in acqua o
altri liquidi.
• Proteggere l'apparecchio dalle gocce e
dagli spruzzi d'acqua.
• Se dovessero penetrare dei liquidi
nell'apparecchio (eccetto che nel serbatoio di acqua), staccare subito la spina.
Far controllare l'apparecchio prima di
rimetterlo in funzione.
• Non usare l'apparecchio con le mani
bagnate.
• Se l'apparecchio cade in acqua, staccare immediatamente la spina e solo in
seguito tirare fuori l'apparecchio.
PERICOLO di scossa elettrica
• Assicurarsi che il cavo di collegamento
non possa essere danneggiato da bordi
taglienti o punti molto caldi. Non avvolgere il cavo di collegamento intorno
all'apparecchio.
• Anche dopo lo spegnimento, l'apparecchio non è completamente staccato dalla rete. Per farlo, estrarre la spina.
• Durante l'uso dell'apparecchio, assicurarsi che il cavo di collegamento non
sia bloccato né schiacciato.
• Per scollegare la spina dalla presa con
messa a terra, tirare sempre la spina,
mai il cavo.
• Tirare la spina con messa a terra dalla
presa con messa a terra …
… se si verifica un guasto,
… quando non si utilizza l'apparec-
chio,
… prima di pulire l'apparecchio e
… in caso di temporali.
• Non utilizzare l'apparecchio se esso o
il cavo di collegamento presentano danni visibili.
• Per evitare rischi non apportare alcuna
modifica all'apparecchio. Non sostituire
autonomamente il cavo di collegamento. Fare riparare l’apparecchio solo da
un laboratorio specializzato o presso il
nostro centro assistenza.
AVVERTENZA: rischio di danni
materiali
• Non posare mai degli oggetti che contengono liquido, ad esempio dei vasi,
sull'apparecchio.
• Sull’apparecchio non devono essere posti oggetti pesanti.
• Proteggere l'apparecchio dal calore.
• L'apparecchio non deve essere coperto
(ad es. con riviste, cuscini o coperte).
• Non inserire alcun oggetto nelle feritoie
di ventilazione.
• Non collocare fonti di ignizione libere,
come ad es. candele accese, sull'apparecchio o nelle sue immediate vicinanze.
• Collocare l'apparecchio in modo che la
luce solare non vi incida direttamente.
• Collocare l'apparecchio in posizione
verticale su una superficie solida e piana.
• Pulire il filtro dell'aria prima che sia eccessivamente sporco.
34
IT
Page 37

__RP89301_B1.book Seite 35 Donnerstag, 18. April 2013 3:20 15
• Scaricando l’acqua mediante il tubo
flessibile fare attenzione a non schiacciare il tubo e che l'estremità aperta del
tubo sia più in basso rispetto all'apparecchio.
• Azionare l'apparecchio solo con il serbatoio dell'acqua montato o il tubo installato. L'estremità del tubo deve essere
collocata su uno scarico.
• Utilizzare solo gli accessori originali.
• Non utilizzare detergenti corrosivi o
abrasivi.
• Per la pulizia dell'apparecchio utilizzare esclusivamente un panno leggermente umido.
4. Materiale in
dotazione
1 Deumidificatore dell'aria con serbatoio
dell'acqua 5
1 Tubo flessibile 22
1 Manuale di istruzioni per l'uso
5. Messa in funzione
• Togliere tutto il materiale di imballaggio.
• Togliere tutto il materiale di protezione
per il trasporto.
• Staccare la pellicola dal pannello di comando.
• Verificare che tutti i pezzi siano presenti
e integri.
1. Collocare l'apparecchio su di un ripia-
no asciutto, solido e piano.
2. Non muovere l'apparecchio nella posi-
zione in cui verrà utilizzato per ca.
30minuti, in modo che il liquido refrigerante si possa depositare.
3. Controllare che il galleggiante a sini-
stra nel serbatoio dell'acqua 5 si possa
muovere liberamente.
4. Controllare se il serbatoio dell'acqua 5
sia inserito correttamente. Se il serbato-
io dell'acqua è collocato male o se è
stato smontato si accende il LED 12
WASSERTANK VOLL (SERBATOIO PIENO).
5. Collegare la spina 10 con una presa
con messa a terra.
6. Note sul
funzionamento
• Se si dovesse avere nell'abitazione un
livello costantemente troppo alto
dell'umidità relativa dell'aria, si dovrebbe trovare ed eliminare la causa. (La
deumidificazione continua - per anni di norma non ha senso.)
• La temperatura ambiente ottimale per
sottrarre umidità all'aria è compresa tra
i 5°C e i 35°C. Sotto i 5°C l'impiego
del deumidificatore dell'aria non ha
senso, in quanto nell'aria c'è poca umidità.
• Come conseguenza dell'utilizzo dell'ap-
parecchio, a seconda della grandezza
del locale la temperatura può aumentare tra i 1°C e i 4°C. Ciò è normale.
Sbrinamento automatico
Perché l'apparecchio non si ghiacci nel funzionamento continuo, esso si sbrina automaticamente. A questo scopo, la deumidificazione
viene interrotta ed il motore gira al massimo livello.
Gli intervalli in cui ciò accade sono variabili.
Condizioni
Temp er at ur a:
sopra i 20°C
Temp er at ur a:
da 12°C a 20°C
Sbrinamento
nessuno sbrinamento
dopo 40 minuti di deumidificazione,
8 minuti di sbrinamento
IT
35
Page 38

__RP89301_B1.book Seite 36 Donnerstag, 18. April 2013 3:20 15
Condizioni
Temp er at ur a:
da 5°C a 12°C
Temp er at ur a:
sotto i 5°C
Sbrinamento
dopo 25 minuti di deumidificazione,
10 minuti di sbrinamento
il funzionamento non è
possibile
7. Funzionamento
7.1 Accensione e
spegnimento
• Premendo il tasto 16 STAND-BY si ac-
cende e si spegne l'apparecchio. I LED
corrispondenti si accendono o si spengono.
- L'apparecchio si avvia con l'ultima
impostazione selezionata.
- Dopo un black out, se l'apparecchio
è stato staccato dalla corrente o dopo
uno spegnimento tramite il dispositivo
di protezione contro il surriscaldamento, l'apparecchio si avvia con il
programma AUTOMATIK (AUTOMATICO).
• Se un timer è stato attivato, l'apparecchio si spegne dopo il trascorrere del
tempo impostato (1-12 ore) e rimane
spento.
• Se nel programma DAUERBETRIEB
(CONTINUO) è stato impostato un valore per l'umidità relativa dell'aria, l'apparecchio si spegne quando questo
valore viene raggiunto e si riaccende
quando questo valore viene nuovamente superato.
• L'apparecchio si spegne se il serbatoio
è pieno o viene tolto.
Sportello per lo scarico dell'aria
Figura B: qualsiasi sia il programma con
cui si utilizza l'apparecchio, aprire lo sportello 1 superiore. Scatta in quattro posizioni.
Se non si apre lo sportello, dopo un po' di
tempo il dispositivo di protezione contro il
surriscaldamento spegne l'apparecchio per
ca. 3 minuti.
7.2 Indicazioni
Il LED di programma 14 ed il display 13 indicano le funzioni selezionate e l'intervallo
di umidità dell'aria.
LED di programma
LED acceso
WASSERTANK VOLL
(SERBATOIO PIENO)
TIMER AKTIV
LUFTREINIGUNG
(DEPURAZIONE
DELL’ARIA)
WÄSCHETROCKNUNG
(ASCIUGAMENTO DI
VESTITI)
DAUERBETRIEB
(CONTINUO)
AUTOMATIK
(AUTOMATICO)
BETRIEB
(FUNZIONAMENTO)
Significato
Il serbatoio è pieno
o non montato.
È attivato un tempo
di arresto.
Programma selezionato
L'apparecchio è
acceso.
36
IT
Page 39

MITTEL
NIEDRIG
HOCH
MITTEL
NIEDRIG
HOCH
MITTEL
NIEDRIG
HOCH
__RP89301_B1.book Seite 37 Donnerstag, 18. April 2013 3:20 15
Display
Indicazione
1 - 12
lampeggiano
per 5 sec.
30 - 80 o CO
lampeggiano
per 5 sec.
Significato
Questa indicazione è
sempre visibile durante il
funzionamento. Mostra
l'intervallo di umidità
dell'aria nel locale:
NIEDRIG (BASSO):
sotto il 65%
MITTEL (MEDIO):
tra il 65% ed il 75%
HOCH (ALTO):
sopra il 75%
Timer per tutti i programmi: questi valori (1 12 ore) lampeggiano
per 5 secondi quando
con i tasti freccia si fissa
un tempo di arresto.
Impostare l'umidità relativa dell'aria nel funzionamento continuo.
Quando si imposta
valori tra 30 ed 80 o CO
vengono indicati in
modo lampeggiante per
5 secondi.
CO: l'apparecchio deumidifica continuamente.
7.3 Programmi
NOTA: i valori impostati per l'umidità relativa dell'aria (rF%) sono rilevati con uno scostamento di ca. il 3% in più o in meno. Ciò
è necessario per evitare che l'apparecchio
si accenda e si spenga continuamente.
• L'apparecchio è dotato di 4 diversi programmi.
• Premendo il tasto 17 PROGRAMM
(MODO) si passa da un programma
all'altro.
• Il LED di programma 14 davanti al pro-
gramma attivo si accende.
AUTOMATIK (AUTOMATICO)
L'umidità relativa dell'aria (rF) da raggiungere è fissata al 55%. Il compressore deumidifica fino a che non si raggiunge questo
valore, poi si spegne. Se l'umidità relativa
dell'aria aumenta di nuovo, il compressore
si accende di nuovo.
In questo programma l'apparecchio lavora
a 3 diversi livelli:
- rF oltre il 70%: l'apparecchio deumidifica al massimo livello.
- rF tra il 55% e il 70%: l'apparecchio
deumidifica con normale intensità.
- rF sotto il 55%: nessuna deumidificazione, gira solo il ventilatore.
NOTA: i valori rF del modo automatico non
sono identici con i valori nel display 13
HOCH/MITTEL/NIEDRIG (ALTO/MEDIO/
BASSO).
Selezionare questo programma per una
deumidificazione continua per ottenere una
piacevole umidità relativa dell'aria del
55%.
DAUERBETRIEB
(FUNZIONAMENTO CONTINUO)
Nel programma DAUERBETRIEB (CONTINUO) si può selezionare l'umidità relativa
dell'aria tra il 30% ed il 80% a passi del
5%. L'apparecchio deumidifica a livello basso fino a che non si raggiunge il valore impostato, quindi si spegne. Se l'umidità
relativa dell'aria aumenta di nuovo, esso si
accende di nuovo.
- 30 - 80%: impostazione dell'umidità relativa dell'aria desiderata nel locale.
- CO: l'apparecchio deumidifica continuamente.
IT
37
Page 40

__RP89301_B1.book Seite 38 Donnerstag, 18. April 2013 3:20 15
Selezionare questo programma per una
deumidificazione continua o per deumidificare al valore da voi fissato.
WÄSCHETROCKNUNG
(ASCIUGAMENTO DI VESTITI)
Utilizzare questo programma per asciugare
più velocemente il bucato o delle scarpe
umidi. L'apparecchio deumidifica al massimo livello. Muovere lo sportello 1 dello scarico dell'aria in modo che il getto d'aria sia
orientato sui vestiti da asciugare.
LUFTREINIGUNG
(DEPURAZIONE DELL'ARIA)
Con questo programma non si ha una deumidificazione. L'aria del locale viene aspirata attraverso i filtri situati davanti
all’apertura di entrata dell'aria e qui viene
pulita.
7.4 Serbatoio dell'acqua
• Il serbatoio dell'acqua 5 ha una capaci-
tà di 5 litri.
• Il livello d’acqua può essere controllato
mediante l'oblò 7 situato sul lato frontale.
• L'apparecchio può essere azionato solo
con il serbatoio dell'acqua inserito.
• Se il serbatoio dell'acqua 5 è pieno, il
LED 12 WASSERTANK VOLL (SERBATOIO PIENO) inizia a lampeggiare. L'apparecchio si spegne dopo alcuni
secondi. Per ca. 20secondi si sente un
segnale acustico. Il LED 12 WASSER-
TANK VOLL (SERBATOIO PIENO) lampeggia finché il serbatoio non viene
svuotato.
1. Figura A: per svuotare il serbatoio
dell'acqua 5 tirarlo un po' in fuori a sinistra e a destra e prenderlo per la maniglia 3.
2. Svuotare l'acqua e reinserire il serbato-
io.
7.5 Timer
• Il timer può essere combinato con ciascuno dei 4 programmi.
• Si possono selezionare 12 tempi di arresto, da 1 ora a 12 ore.
• Dopo il trascorrere del periodo di tempo impostato, l'apparecchio resta spento e la funzione timer è disattivata.
1. Durante il funzionamento premere il ta-
sto TIMER 19. Il LED 20 TIMER AKTIV
lampeggia.
2. Selezionare con i tasti freccia 18 un
tempo di arresto tra 1 ora e 12 ore. Il
tempo selezionato lampeggia per 5 secondi sul display 13 e viene memorizzato.
• Per disattivare anzi tempo il timer, premere due volte TIMER 19 o spegnere
l'apparecchio con STAND-BY 16.
8. Scarico dell'acqua me-
diante il tubo flessibile
In caso di locali molto umidi spesso è opportuno che l'acqua non venga raccolta nel serbatoio dell'acqua ma che venga
direttamente scaricata con un tubo flessibile.
AVVERTENZA! Scaricando l’acqua mediante il tubo flessibile l'apparecchio opera
con funzionamento continuo. Ciò significa
che l'acqua espulsa deve essere scaricata in
modo sicuro, senza che si formino delle pozzanghere sul pavimento.
1. Figura C: con un cacciavite togliere la
chiusura 21 sul retro.
2. Togliere il tappo 23.
3. Figura C: collegare il tubo flessibi-
le22 in dotazione all'apertura.
4. Collocare l'apparecchio in modo tale
che l'estremità del tubo flessibile finisca
in uno scarico. L'estremità aperta del
tubo flessibile deve essere più in basso
38
IT
Page 41

__RP89301_B1.book Seite 39 Donnerstag, 18. April 2013 3:20 15
dello scarico dell'apparecchio (Il tubo
flessibile deve quindi scendere verso il
basso.).
5. Accendere normalmente l'apparecchio
e selezionare un programma.
6. Se si vuole di nuovo scaricare nel serbatoio dell'acqua 5, spegnere l'apparecchio, togliere il tubo flessibile 22 ed
reinserire il tappo 23 nell'apertura.
9. Pulizia e sostituzione
del filtro
Le prestazioni dell'apparecchio dipendono
anche dalla pulizia dei filtri.
• Il filtro di carbone 25 va pulito ogni
2settimane e sostituito ogni 6 mesi. Pulire il filtro con una spazzola o un aspirapolvere.
• Il normale filtro in plastica 24 va lavato
ogni 2 settimane.
1. Spegnere l'apparecchio e staccare la
spina 10.
2. Figura D: afferrare l'apertura superiore della grata 8 e staccarla.
3. Girare la grata 8 e premere event. con
i due pollici nel centro della grata.
4. Il filtro in plastica 24 e il filtro di carbone 25 si staccano dalla grata. Separarli dalla grata 8.
5. Lavare i due filtri con dell'acqua tiepida. (Il filtro di carbone 25 va cambiato
dopo ca. 6 mesi.)
6. Far asciugare i due filtri completamente.
7. Inserire i filtri nella grata 8.
8. Montare la grata sull'apparecchio.
NOTA: inuovi filtri di carbone sono reperibili in quasi tutti i negozi di casalinghi. Si
devono solo tagliare i feltri su misura.
10. Pulizia
Pulire l'apparecchio prima di utilizzarlo per la prima volta!
PERICOLO di scossa elettrica!
• Prima di pulire l'apparecchio
staccare la spina 10 dalla presa con messa a terra.
• Non immergere l'apparecchio, il cavo
di collegamento e la spina 10 in acqua
o altri liquidi.
AVVERTENZA: rischio di danni materiali! Non utilizzare detergenti corrosivi o
abrasivi.
• Se necessario, pulire l'alloggiamento e
il cavo di collegamento 10 con uno
straccio leggermente inumidito.
• Togliere il serbatoio dell'acqua 5, svuo-
tare l'acqua ed asciugare bene il serbatoio dentro e fuori prima di reinserirlo.
11. Dispositivo di
protezione contro il
surriscaldamento
L'apparecchio dispone di un dispositivo di
protezione contro il surriscaldamento.
• Il dispositivo di protezione contro il sur-
riscaldamento spegne l'apparecchio automaticamente in caso di rischio di
surriscaldamento.
• Per 3 minuti l'apparecchio non può es-
sere riavviato.
• Dopo ca. 3 minuti l'apparecchio si riac-
cende automaticamente.
• Controllare se dei fattori esterni posso-
no aver causato il surriscaldamento.
Ad es. temperature sopra i 35°C o lo
sportello 1 dello scarico dell'aria è
chiuso.
IT
39
Page 42

__RP89301_B1.book Seite 40 Donnerstag, 18. April 2013 3:20 15
12. Conservazione
PERICOLO per i bambini! Conservare l'apparecchio lontano dalla portata dei bambini.
• Conservare l'apparecchio solo in posizione verticale.
• Scegliere un luogo nel quale non possano agire sull'apparecchio né un calore
forte né l'umidità.
13. Risoluzione dei
problemi
Qualora l'apparecchio non funzioni correttamente, scorrere la checklist seguente, poiché
l’anomalia di funzionamento potrebbe essere
dovuta a un piccolo problema che l'utente è
in grado di risolvere autonomamente.
PERICOLO di scossa elettrica!
non tentare mai di riparare autonomamente l'apparecchio.
Guasto
L’apparecchio
non funziona.
Possibili cause/
Rimedi
• L'apparecchio è allacciato alla rete elettrica?
• Controllare il livello
d’acqua nel serbatoio5.
• Controllare la posizione del serbatoio
dell'acqua.
• Il dispositivo di protezione contro il surriscaldamento ha
spento l'apparecchio.
Attendere circa 3 minuti.
Guasto
La deumidificazione sembra
insufficiente.
Eccessiva rumorosità.
Il funzionamento si arresta ogni tanto.
Gli abiti umidi
non si asciugano
o si asciuga-
no lentamente.
Possibili cause/
Rimedi
•I filtri 24, 25 sono
sporchi?
• L'entrata dell'aria 8 è
bloccata?
• Temperatura troppo
bassa.
Il programma impostato
•
è LUFTREINIGUNG (DEPURAZIONE
DELL'ARIA)?
caso non si ha deumidificazione.
• Una finestra è aperta
o si crea del vapore
nel locale?
• L'apparecchio è situato su di una superficie
piana e solida?
• Temperatura nel locale
sopra i 35°C?
• Temperatura nel locale
sotto i 5°C?
• Si è azionato lo sbrinamento.
• Il flusso d'aria dall'apparecchio è orientato
direttamente sugli abiti?
• La temperatura nel locale è troppo bassa?
In questo
40
IT
Page 43

__RP89301_B1.book Seite 41 Donnerstag, 18. April 2013 3:20 15
14. Smaltimento
Il simbolo del bidone della
spazzatura su ruote barrato
significa che all’interno
dell’Unione Europea il prodotto deve essere smaltito separatamente. Questo vale per il
prodotto e tutti i suoi accessori
contrassegnati da questo simbolo. I prodotti
così contrassegnati non possono essere
smaltiti assieme ai normali rifiuti domestici,
bensì devono essere consegnati presso un
centro di raccolta per il riciclaggio degli apparecchi elettrici ed elettronici. Il riciclaggio
contribuisce a ridurre il consumo di materie
prime e l’inquinamento ambientale.
Confezione
Smaltire la confezione nel rispetto delle normative ambientali vigenti nel proprio paese.
15. Dati tecnici
Modello: SLE 420 A1
Tensione di rete
Classe di
protezione:
Potenza in in-
gresso: 320 W (27°C 60%)
Potenza max.: 420 W (35°C 90%)
Tensione
nominale:
Corrente
assorbita:
Capacità di deu-
midificazione:
Portata d'aria: 195 m
Refrigerante /
Quantità:
Classe di
refrigerante:
Serbatoio
dell'acqua:
Max. dimensioni
del locale:
Temperatura nel
locale:
Peso: 12,5 kg
Dimensioni: 360 x 230 x 610 LxPxA
Rumorosità: 48 dB(A)
Pressione di
aspirazione:
Pressione di
scarico:
: 220 - 240 V~ 50 Hz
I
1,39 A (27°C 60%)
max.1.82 A (35°C
90%)
20 l/giorno (30°C
80%)
11 l/giorno (27°C
60%)
3
/h
R134a/190g
L1
5 l
2
‚ (Rh. 2,3m)
20m
5 - 35°C
0,5 MPa
1,5 MPa
Con riserva di modifiche tecniche.
IT
41
Page 44

__RP89301_B1.book Seite 42 Donnerstag, 18. April 2013 3:20 15
16. Garanzia della
HOYER Handel GmbH
Gentile cliente,
questo apparecchio è dotato di una garanzia di 3 anni a decorrere dalla data d'acquisto. In caso di difetti del prodotto dispone di
diritti legali contro il venditore. Questi diritti
legali non sono limitati dalla garanzia da noi
prestata, che viene descritta di seguito.
Condizioni della garanzia
Il termine della garanzia inizia dalla data
d'acquisto. Conservi con cura lo scontrino
originale. Questo documento è necessario
come prova dell'acquisto.
Se entro tre anni dalla data d'acquisto del
prodotto si presenta un difetto di materiale o
di produzione, ripareremo o sostituiremo gratuitamente il prodotto, a nostra scelta. Per avvalersi di questa garanzia occorre presentare
entro il termine di tre anni l'apparecchio difettoso e la prova d'acquisto (scontrino), descrivendo brevemente per iscritto in cosa consiste
il difetto e quando si è presentato.
Se il difetto è coperto dalla nostra garanzia,
vi verrà consegnato il prodotto riparato o un
prodotto nuovo. La riparazione o sostituzione del prodotto non comporta l'inizio di un
nuovo periodo di garanzia.
Periodo di garanzia e diritti per i
difetti
La prestazione della garanzia non prolunga
il periodo di garanzia. Ciò si applica anche
ai pezzi sostituiti o riparati. Danni e difetti
eventualmente presenti già al momento
dell'acquisto devono essere comunicati
dopo aver aperto la confezione. Le riparazioni effettuate dopo lo scadere del periodo
di garanzia sono a pagamento.
Entità della garanzia
L'apparecchio è stato prodotto con cura basandosi su severe direttive di qualità ed è
stato controllato scrupolosamente prima della consegna.
La garanzia si applica agli errori di materiale o produzione. Questa garanzia non si
estende a parti del prodotto esposte a normale usura e dunque assimilabili a pezzi
soggetti a usura, né si estende ai danni a
parti fragili, ad es. interruttori, batterie o elementi di vetro.
La garanzia decade se il prodotto è stato
danneggiato o non è stato correttamente utilizzato o sottoposto a manutenzione. Per un
uso adeguato del prodotto occorre attenersi
strettamente a tutte le indicazioni riportate
nel manuale di istruzioni per l'uso. Occorre
evitare assolutamente usi o azioni sconsigliati o evidenziati negativamente nel manuale di istruzioni per l'uso.
Il prodotto è destinato esclusivamente
all'uso privato e non commerciale. La garanzia decade in caso di maneggio scorretto e
inadeguato, ricorso alla forza e interventi
non autorizzati dal nostro centro assistenza.
Disbrigo nei casi contemplati
dalla garanzia
Per garantire un rapido disbrigo della richiesta, la preghiamo di attenersi alle seguenti
indicazioni:
• Per tutte le richieste mantenga a portata di
mano il numero di articolo.
IAN: 89301
• Qualora si presentassero errori di funzionamento o altri difetti, si rivolga innanzitutto ai centri assistenza indicati di
seguito, telefonicamente o tramite
e-mail.
• Il prodotto registrato come difettoso potrà poi essere inviato a carico del destinatario all'indirizzo del centro
assistenza che Le verrà comunicato, allegando la prova d'acquisto (scontrino)
e indicando in che cosa consiste il difetto e quando si è presentato.
e lo scontrino come prova.
42
IT
Page 45

IT
CH
__RP89301_B1.book Seite 43 Donnerstag, 18. April 2013 3:20 15
All'indirizzo www.lidl-service.com
è possibile scaricare questo manuale, molti altri manuali, filmati sui
prodotti e software.
Centri assistenza
Assistenza Italia
Tel.: 02 36003201
E-Mail: hoyer@lidl.it
Assistenza Svizzera
Tel.: 0842 665566 (0,08 CHF/Min.,
telefonia mobile max. 0,40 CHF/Min.)
E-Mail: hoyer@lidl.ch
IAN: 89301
Fornitore
Si tenga presente che il seguente indirizzo
non è un indirizzo di assistenza.
Rivolgersi innanzitutto ai centri assistenza riportati sopra.
HOYER Handel GmbH
Kühnehöfe 5
22761 Hamburg
Germania
IT
43
Page 46

__RP89301_B1.book Seite 44 Donnerstag, 18. April 2013 3:20 15
Inhoud
1. Overzicht ....................................................................................... 45
2. Correct gebruik .............................................................................. 46
3. Veiligheidsinstructies ..................................................................... 47
4. Levering ........................................................................................ 49
5. Ingebruikname .............................................................................. 49
6. Aanwijzingen voor gebruik ........................................................... 49
7. Bediening ...................................................................................... 50
7.1 In- en uitschakelen............................................................................... 50
7.2 Weergaven........................................................................................ 50
7.3 Programma's...................................................................................... 51
7.4 Waterreservoir ................................................................................... 52
7.5 Timer................................................................................................. 52
8. Waterafvoer met behulp van een slang ......................................... 52
9. Filter reinigen en vervangen .......................................................... 53
10. Reinigen ........................................................................................ 53
11. Beveiliging tegen oververhitting ..................................................... 53
12. Opbergen ...................................................................................... 54
13. Problemen oplossen ...................................................................... 54
14. Weggooien .................................................................................... 55
15. Technische gegevens ...................................................................... 55
16. Garantie van HOYERHandel GmbH ............................................... 56
44
NL
Page 47

__RP89301_B1.book Seite 45 Donnerstag, 18. April 2013 3:20 15
1. Overzicht
1 Beweegbare klep voor de luchtuitlaat
2 Bedieningspaneel
3 Draaggreep
4 Verzonken handgreep voor het waterreservoir
5 Waterreservoir (5 l)
6 Wielen
7 Venster ter controle van het waterpeil
8 Luchtinlaatrooster (verwijderbaar)
9 Haak voor het oprollen van het aansluitsnoer
10 Aansluitsnoer met geaarde stekker
11 Typeplaatje
12 WASSERTANK VOLL
(RESERVOIR VOL) LED brandt wanneer het waterreservoir vol is
13 HOCH/MITTEL/NIEDRIG
(HOOG/MIDDEL/LAAG) Display met weergave van de geselecteerde
luchtvochtigheid en uitschakeltijd
14 Programma's LED's geven het actieve programma weer
15 BETRIEB (WERKING) LED brandt tijdens gebruik
16 STAND-BY Schakelt het apparaat in en uit
17 PROGRAMM (MODUS) Schakelt tussen de 4 programma’s om
18 rF%STD/ EINSTELLUNG
(INSTELLING) Luchtvochtigheid en timer instellen
19 TIMER Tijdschakelklok in- en uitschakelen
20 TIMER AKTIV LED brandt, wanneer de timer actief is
21 Afsluitdop van de aansluiting van de slang (Verwijder de afsluitdop met een
schroevendraaier. Verwijder de stop en sluit de slang aan)
22 Slang
23 Stop
24 Kunststoffilter
25 Koolstoffilter
NL
45
Page 48

__RP89301_B1.book Seite 46 Donnerstag, 18. April 2013 3:20 15
Hartelijk dank voor uw
vertrouwen!
Wij feliciteren u met uw nieuwe luchtontvochtiger.
Om het product veilig te gebruiken en om
alle functies van het apparaat te leren kennen:
• dient u deze handleiding vóór de
eerste ingebruikname grondig
door te lezen.
• Neemt u vooral de veiligheidsinstructies in acht!
• Het apparaat mag alleen worden bediend zoals in deze handleiding wordt beschreven.
• Bewaar deze handleiding goed.
• Wanneer u het apparaat ooit
aan iemand anders geeft, dient
u deze handleiding erbij te geven.
Wij wensen u veel plezier met uw nieuwe
luchtontvochtiger!
2. Correct gebruik
De luchtontvochtiger is uitsluitend bedoeld
voor het ontvochtigen van woonkamers, kelders of opslagruimten met een temperatuur
van 5 °C tot 35 °C.
Het apparaat mag uitsluitend binnenshuis
worden gebruikt.
Dit apparaat mag niet voor commerciële
doeleinden worden gebruikt.
Voorzienbaar misbruik
GEVAAR! Risico op ziektes!
G Het opgevangen water is niet drink-
baar en is niet geschikt voor het begieten van planten. Er bestaat
gevaar voor de gezondheid.
GEVAAR door een elektrische
schok!
Plaats het apparaat niet in water /
ook niet in plasjes of poeltjes.
WAARSCHUWING voor materiële
schade!
• Gebruik het apparaat niet in zwembaden, wasruimten of in soortgelijke ruimten.
• Het apparaat is niet geschikt voor het
drogen van isolatie. Indien isolatie of
isolatiemateriaal na een gescheurde leiding nat geworden is, moet u in elk geval professionele hulp inschakelen.
• Stel het apparaat in geen geval bloot
aan temperaturen van 0 °C of lager.
Restwater in de leidingen kan bevriezen
en kan het systeem beschadigen.
• Gebruik het apparaat niet in een stoffige omgeving of in een omgeving met
chloor.
46
NL
Page 49

__RP89301_B1.book Seite 47 Donnerstag, 18. April 2013 3:20 15
3. Veiligheidsinstructies
Waarschuwingen
Indien nodig vindt u de volgende waarschuwingen in deze handleiding:
GEVAAR! Hoog risico: het negeren van de waarschuwing kan tot
letsel leiden.
WAARSCHUWING! Matig risico: het niet
in acht nemen van de waarschuwing kan
verwondingen of ernstige materiële schade
veroorzaken.
LET OP: gering risico: het niet in acht nemen van de waarschuwing kan lichte verwondingen of materiële schade
veroorzaken.
AANWIJZING: toedrachten en bijzonderheden waarop tijdens het gebruik van het
apparaat moet worden gelet.
Instructies voor een veilig gebruik
• Dit apparaat is niet bestemd om door personen (waaronder kinderen) te worden gebruikt met beperkte fysieke, sensorische of geestelijke capaciteiten of zonder de nodige ervaring en/of kennis, tenzij
ze worden begeleid door een voor hun veiligheid verantwoordelijke persoon of tenzij ze aanwijzingen krijgen hoe het apparaat te
gebruiken.
• Kinderen moet in de gaten gehouden worden om er zeker van te
zijn dat ze niet met het apparaat gaan spelen.
• Bouw het apparaat niet in. Laat aan de zijkanten en achterkant
een minimale afstand van ca. 20 cm over, 10 cm aan de voorkant
en 30 cm aan de bovenkant.
• Het apparaat mag alleen worden gebruikt in ruimten met een temperatuur van 5 °C tot 35 °C.
• Gebruik het apparaat alleen in ruimten tot max. 20 m
2
.
• Sluit de stekker alleen aan op een op de juiste wijze geïnstalleerd,
gemakkelijk toegankelijk stopcontact met aardingscontacten, waarvan de spanning overeenkomt met de gegevens op het typeplaatje.
Het stopcontact moet ook na het aansluiten gemakkelijk toegankelijk blijven.
• Het apparaat moet overeenkomstig de nationale installatievoorschriften worden geïnstalleerd.
NL
47
Page 50

__RP89301_B1.book Seite 48 Donnerstag, 18. April 2013 3:20 15
GEVAAR voor kinderen
• Verpakkingsmateriaal is geen kinderspeelgoed. Kinderen mogen niet met de
plastic zakken spelen. Er bestaat verstikkingsgevaar.
• Bewaar het apparaat buiten bereik van
kinderen.
GEVAAR voor ontploffing
• Het apparaat mag nooit worden gebruikt
in aërosolomgevingen of explosieve omgevingen.
GEVAAR van een elektrische
schok door vocht
• Het apparaat mag nooit worden gebruikt
in de buurt van een badkuip, een douche,
een gevulde wasbak o. i.d.
• Het apparaat, het aansluitsnoer en de
stekker mogen niet in water of andere
vloeistoffen worden gedompeld.
• Bescherm het apparaat tegen druip- en
spatwater.
• Wanneer er vloeistof in het apparaat
(behalve in het waterreservoir) terechtkomt, moet de stekker direct uit het stopcontact worden getrokken. Voor een
volgende ingebruikname het apparaat
laten controleren.
• Bedien het apparaat niet met vochtige
handen.
• Wanneer het apparaat in het water is
gevallen, moet de stekker direct uit het
stopcontact worden getrokken. Pas
daarna mag het apparaat uit het water
worden gehaald.
GEVAAR door een elektrische
schok
• Let erop, dat het aansluitsnoer niet door
scherpe randen of hete plaatsen kan
worden beschadigd. Wikkel het aansluitsnoer niet rond het apparaat.
• De stroomtoevoer naar het apparaat is
ook na het uitschakelen niet volledig on-
derbroken. Om dat te doen, moet u de
stekker uit het stopcontact trekken.
• Let er bij gebruik van het apparaat op,
dat het aansluitsnoer niet vastgeklemd
wordt of bekneld raakt.
• Trek de stekker altijd aan de stekker uit
het stopcontact met aardingscontacten
en nooit aan het snoer.
• Trek de randaardestekker uit het stopcontact met aardingscontacten, ...
… wanneer zich een storing voordoet,
… wanneer u het apparaat niet ge-
bruikt,
… voordat u het apparaat reinigt en
… bij onweer.
• Gebruik het apparaat niet als het apparaat zelf of het aansluitsnoer zichtbaar
beschadigd is.
• Brengt u geen veranderingen aan het
apparaat aan, dit om gevaar te voorkomen. Ook het aansluitsnoer mag niet
zelf worden vervangen. Laat reparaties
alleen door een erkende reparateur c.q.
in het servicecenter uitvoeren.
WAARSCHUWING voor materiële
schade
• Zet geen met vloeistof gevulde voorwerpen, zoals vazen, op het apparaat.
• Zware voorwerpen mogen niet op het
apparaat geplaatst worden.
• Bescherm het apparaat tegen hitte.
• Het apparaat mag niet worden afgedekt (bijv. met kranten, kussens of dekens).
• Er mogen geen objecten in de luchtopeningen worden geplaatst.
• Er mag geen open vuur, zoals brandende kaarsen, op of direct naast het apparaat worden geplaatst.
• Plaats het apparaat dusdanig dat er
geen direct zonlicht op valt.
• Zet het apparaat op een stevig, vlak oppervlak.
• Maak het luchtfilter schoon, voordat dit
vuil is.
48
NL
Page 51

__RP89301_B1.book Seite 49 Donnerstag, 18. April 2013 3:20 15
• Let er bij de waterafvoer d.m.v. een
slang op, dat de slang niet geblokkeerd
wordt en dat het open uiteinde van de
slang lager ligt dan het apparaat.
• Gebruik het apparaat alleen met geplaatst waterreservoir of geïnstalleerde
slang. Het uiteinde van de slang moet boven een afvoer liggen.
• Gebruik uitsluitend de originele accessoires.
• Gebruik geen scherpe of schurende
schoonmaakmiddelen.
• Reinig het apparaat uitsluitend met een
licht vochtige doek.
4. Levering
1 Luchtontvochtiger met waterreservoir 5
1Slang 22
1 Handleiding
5. Ingebruikname
• Verwijder al het verpakkingsmateriaal.
• Verwijder alle beveiligingen voor het
transport.
• Verwijder de folie van het bedieningspaneel.
• Controleer of alle onderdelen aanwezig
en onbeschadigd zijn.
1. Plaats het apparaat op een vlakke, dro-
ge en stevige ondergrond.
2. Laat het apparaat in gebruiksklare po-
sitie ca. 30 minuten staan, zodat de
koelvloeistof op zijn plaats kan zakken.
3. Controleer of de vlotter links in het wa-
terreservoir 5 zich vrij kan bewegen.
4. Controleer of het waterreservoir 5 op
de juiste manier geplaatst is. In geval
van verkeerde plaatsing, of als het waterreservoir werd verwijderd, brandt
de LED 12 WASSERTANK VOLL (RESERVOIR VOL).
5. Stop de stekker 10 in het stopcontact
met aardingscontacten.
6. Aanwijzingen voor
gebruik
• Mocht er voortdurend een te hoge rela-
tieve luchtvochtigheid in uw woonruimten zijn, dan moet de oorzaak
gevonden en geëlimineerd worden.
(Voortdurend - jarenlang - ontluchten is
meestal niet zinvol.)
• De optimale omgevingstemperatuur om
vochtigheid aan de lucht te onttrekken
ligt tussen 5 °C tot 35 °C. Onder 5 °C
heeft het gebruik van een luchtontvochtiger geen zin, omdat er zeer weinig
vocht in de lucht is.
• Tijdens het gebruik kan de temperatuur
in de ruimte, afhankelijk van de oppervlakte van de ruimte, oplopen met 1 °C
tot 4 °C. Dit is normaal.
Automatische ontdooiing
Opdat het apparaat bij permanente inschakeling niet bevriest, wordt dit automatisch
ontdooid. Daarbij wordt de ontvochtiging
ingesteld en de motor op de hoogste stand
gezet.
De intervallen daarvan verschillen.
Omstandighe-
den
Temperatuur:
hoger dan 20 °C
Temperatuur:
12 tot 20 °C
Temperatuur:
5 tot 12 °C
Temperatuur:
lager dan 5 °C.
Ontdooien
geen ontdooien
na 40 minuten ontvochtigen,
8 minuten ontdooien
na 25 minuten ontvochtigen,
10 minuten ontdooien
gebruik niet mogelijk
NL
49
Page 52

MITTEL
NIEDRIG
HOCH
MITTEL
NIEDRIG
HOCH
MITTEL
NIEDRIG
HOCH
__RP89301_B1.book Seite 50 Donnerstag, 18. April 2013 3:20 15
7. Bediening
7.1 In- en uitschakelen
• Door op de knop 16 STAND-BY te
drukken, schakelt het apparaat aan en
uit. De bijbehorende LED’s gaan branden of gaan uit.
- Het apparaat start met de laatst geselecteerde instelling.
- Na een stroomstoring, nadat het apparaat losgekoppeld werd van het
voedingsnet of na het uitschakelen
door de beveiliging tegen oververhitting start het apparaat in het programma AUTOMATIK
(AUTOMATISCH).
• Als er een timer is ingesteld, schakelt
het apparaat na verloop van deze tijd
(1-12 uur) uit.
• Indien in het programma DAUERBETRIEB (PERMANENT) een waarde voor
de relatieve luchtvochtigheid werd ingesteld, schakelt het apparaat uit, wanneer deze waarde bereikt is en schakelt
weer in, wanneer de waarde weer
overschreden wordt.
• Het apparaat wordt uitgeschakeld,
wanneer het waterreservoir vol is of verwijderd werd.
Klep luchtuitlaatopening
Afbeelding B: open de bovenste klep 1,
ongeacht welk programma het apparaat
doorloopt. Het sluit in vier posities.
Als de klep niet wordt geopend, schakelt de
beveiliging tegen oververhitting het apparaat na enige tijd voor ca. 3 minuten uit.
7.2 Weergaven
Het programma-LED 14 en het display 13
geven de geselecteerde functies en het luchtvochtigheidsbereik weer.
Programma LED
LED brandt
WASSERTANK VOLL
(RESERVOIR VOL)
TIMER AKTIV
LUFTREINIGUNG
(LUCHTREINIGING)
WÄSCHETROCKNUNG
(KLEDING DROGEN)
DAUERBETRIEB
(PERMANENT)
AUTOMATIK
(AUTOMATISCH)
BETRIEB
(WERKING)
Display
Weergave
Deze weergave is tijdens
het gebruik doorgaand
zichtbaar. Het geeft het
bereik van de luchtvochtigheid in de ruimte
weer:
NIEDRIG (laag):
lager dan 65%
MITTEL (middel):
65% tot 75%
HOCH (hoog):
hoger dan 75%
Betekenis
Het waterreservoir
is vol of is niet
geplaatst.
Er is een uitschakeltijd geactiveerd.
geselecteerd programma
Het apparaat is
ingeschakeld.
Betekenis
50
NL
Page 53

__RP89301_B1.book Seite 51 Donnerstag, 18. April 2013 3:20 15
Weergave
Betekenis
Alle timerprogramma's:
Deze waarden (1 - 12uur)
1 - 12
knippert 5 sec.
knipperen gedurende
5seconden, wanneer u
de pijltjestoetsen
gebruikt om een uitschakeltijd te selecteren.
Relatieve luchtvochtigheid ingesteld op perma-
nente werking.
30 - 80 of CO
knippert 5 sec.
Waarden tussen 30 en
80 of CO knipperen tij-
dens het instellen gedu-
rende 5 seconden.
CO: Het apparaat ont-
vochtigt permanent.
7.3 Programma's
AANWIJZING: de ingestelde waarden
voor relatieve luchtvochtigheid (RV%) worden met een afwijking van ca. 3% naar boven en beneden gedetecteerd. Dit is nodig,
zodat het apparaat zich niet permanent inen uitschakelt.
• Het apparaat beschikt over 4 verschillende programma's.
• Door op de knop 17 PROGRAMM
(MODUS) te drukken, schakelt u tussen
de programma's om.
• Het programma-LED 14 van het actieve
programma brandt.
In dit programma functioneert het apparaat
in drie verschillende fasen:
- RV hoger dan 70%: het apparaat ontvochtigt op de hoogste stand.
- RV tussen 55% en 70%: het apparaat
ontvochtigt met normale sterkte.
- RV lager dan 55%: geen ontvochtiging,
alleen de ventilator loopt.
AANWIJZING: de RV-waarden van de automatische werking zijn niet identiek aan de
waarden HOCH/MITTEL/NIEDRIG
(HOOG/MIDDEL/LAAG) op het display13.
Selecteer dit programma voor permanente
ontvochtiging bij een aangename relatieve
luchtvochtigheid van 55%.
DAUERBETRIEB (PERMANENT)
In het programma DAUERBETRIEB (PERMANENT) kunt u de relatieve luchtvochtigheid
in stappen van 5% van 30% tot 80% selecteren. Het apparaat ontvochtigt op lage
stand, totdat de ingestelde waarde bereikt is
en schakelt zich vervolgens uit. Als de relatieve luchtvochtigheid weer stijgt, schakelt
het apparaat zich weer in.
- 30 - 80%: instelling voor de gewenste
relatieve luchtvochtigheid in de ruimte.
- CO: het apparaat ontvochtigt permanent.
Kies dit programma voor permanente ontvochtiging of voor een ontvochtiging op de
door u ingestelde waarde.
AUTOMATIK (AUTOMATISCHE WERKING)
De relatieve luchtvochtigheid (RV) die bereikt moet worden, is standaard op 55% ingesteld. De compressor ontvochtigt, totdat
deze waarde bereikt is en wordt dan uitgeschakeld. Als de relatieve luchtvochtigheid
weer stijgt, schakelt de compressor weer in.
WÄSCHETROCKNUNG
(KLEDING DROGEN)
Dit programma wordt gebruikt om natte was
of schoenen sneller te drogen. Het apparaat
ontvochtigt op de hoogste stand. Beweeg
de klep 1 van de luchtuitlaat dusdanig, dat
de luchtstroom op de te drogen kleding gericht wordt.
NL
51
Page 54

__RP89301_B1.book Seite 52 Donnerstag, 18. April 2013 3:20 15
LUFTREINIGUNG (LUCHTREINIGING)
Bij dit programma vindt er geen ontvochtiging plaats. De lucht in de ruimte wordt
door het filter voor de luchtinlaatopening
opgezogen en daar gereinigd.
7.4 Waterreservoir
• Het waterreservoir 5 heeft een inhoud
van 5 liter.
• Het waterpeil kan aan de voorkant door
middel van een venstertje 7 gecontroleerd worden.
• Het apparaat kan uitsluitend met een
geplaatst waterreservoir gebruikt worden.
• Wanneer het waterreservoir 5 vol is,
gaat de LED 12 WASSERTANK VOLL
(RESERVOIR VOL) knipperen. Het apparaat schakelt zich na enkele seconden
uit. Gedurende ca. 20 seconden klinkt
er een alarmsignaal. De LED 12 WASSERTANK VOLL (RESERVOIR VOL) knippert, totdat het reservoir geleegd is.
1. Afbeelding A: om het waterreser-
voir5 te legen, trekt u deze er aan de
linker- en rechterkant iets uit en houdt u
deze aan de draaggreep 3 vast.
2. Giet het water uit en plaats het reser-
voir weer terug.
7.5 Timer
• De timer kan met alle 4 programma’s
gecombineerd worden.
• Er kunnen 12 uitschakeltijden van 1 tot
12 uur geselecteerd worden.
• Nadat de ingestelde tijd afgelopen is,
wordt het apparaat uitgeschakeld en de
timer gestopt.
1. Druk terwijl het apparaat in gebruik is
op de knop TIMER 19. De LED 20 TIMER AKTIV knippert.
2. Kies met behulp van de pijltjestoet-
sen18 een uitschakeltijd van 1 tot
12uur. De geselecteerde tijd zal gedurende 5 seconden knipperen op het
display 13 en wordt vervolgens opgeslagen.
• Om de timer voortijdig te stoppen, drukt
u twee keer TIMER 19 of schakelt u het
apparaat met STAND-BY16 uit.
8. Waterafvoer met behulp van een slang
In zeer vochtige ruimten heeft het vaak meer
zin om het water niet op te vangen in het
waterreservoir, maar direct via een slang af
te voeren.
WAARSCHUWING! Bij de afvoer met behulp van de slang is het apparaat permanent in gebruik. Dit betekent dat het
afgescheiden water veilig moet kunnen worden afgevoerd, zodat er geen plassen op de
grond ontstaan.
1. Afbeelding C: gebruik een schroe-
vendraaier om de afsluitdop 21 op de
achterkant te verwijderen.
2. Verwijder de stop 23.
3. Afbeelding C: sluit de bijgeleverde
slang 22 aan op de opening.
4. Plaats het apparaat dusdanig, dat het
uiteinde van de slang over een afvoer
eindigt. Daarbij dient het open uiteinde
van de slang onder de uitlaat van het
apparaat te liggen (de slang moet dus
een neerwaarts verloop hebben).
5. Schakel het apparaat op de normale
manier in en selecteer een programma.
6. Indien u het water weer in het waterre-
servoir 5 wilt afvoeren, schakelt u het
apparaat uit, koppelt u de slang 22 los
en steekt u de stop 23 weer terug in de
opening.
52
NL
Page 55

__RP89301_B1.book Seite 53 Donnerstag, 18. April 2013 3:20 15
9. Filter reinigen en
vervangen
De werking van het apparaat is ook afhankelijk van de reinheid van het filter.
• Het koolstoffilter 25 moet om de 2 we-
ken worden gereinigd en om de
6maanden vervangen. Borstel of zuig
het filter af.
• Het normale kunststoffilter 24 moet om
de 2 weken worden gewassen.
1. Schakel het apparaat uit en trek de
stekker 10 uit het stopcontact.
2. Afbeelding D: pak het rooster 8 bij
de bovenste opening vast en verwijder
dit.
3. Draai het rooster 8 om en druk indien
nodig met beide duimen in het midden
van het rooster.
4. Het kunststoffilter 24 en het koolstoffil-
ter 25 komen los van het rooster. Verwijder deze van het rooster 8.
5. Was beide filters met lauw water. (Het
koolstoffilter 25 moet na ca. 6 maanden worden vervangen.)
6. Laat beide filters volledig drogen.
7. Plaats de filters in het rooster 8.
8. Plaats het rooster op het apparaat.
AANWIJZING: nieuwe koolstoffilters zijn
in bijna alle winkels voor huishoudelijke apparatuur verkrijgbaar. De matten moeten enkel op maat worden gesneden.
10. Reinigen
Maak het apparaat schoon alvorens
het voor de eerste keer te gebruiken!
GEVAAR door een elektrische schok!
• Trek de stekker 10 uit het stopcontact
met aardingscontacten, voordat u het
apparaat schoonmaakt.
• Het apparaat, het aansluitsnoer en de
stekker 10 mogen niet in water of andere vloeistoffen worden gedompeld.
WAARSCHUWING voor materiële
schade! Gebruik geen scherpe of schuren-
de schoonmaakmiddelen.
• Veeg de behuizing en het aansluit-
snoer10, indien nodig, af met een licht
vochtige doek.
• Verwijder het waterreservoir 5, giet het
water weg en droog het reservoir van
binnen en buiten goed, voordat u het terugplaatst.
11. Beveiliging tegen
oververhitting
Het apparaat beschikt over een beveiliging
tegen oververhitting.
• De beveiliging tegen oververhitting
schakelt het apparaat automatisch uit in
geval van oververhitting.
• Het apparaat kan vervolgens geduren-
de 3 minuten niet meer worden gestart.
• Na ca. 3 minuten start het apparaat au-
tomatisch.
• Controleer of externe omstandigheden
de activering van deze beveiliging tegen oververhitting kunnen hebben veroorzaakt.
Bijvoorbeeld temperaturen boven 35 °C
of een gesloten klep 1 boven de luchtuitlaat.
NL
53
Page 56

__RP89301_B1.book Seite 54 Donnerstag, 18. April 2013 3:20 15
12. Opbergen
GEVAAR voor kinderen! Bewaar het apparaat buiten bereik
van kinderen.
• Bewaar het apparaat in een verticale
positie.
• Kies een plaats waar noch grote hitte
noch vocht invloed hebben op het apparaat.
13. Problemen oplossen
Wanneer uw apparaat een keer niet functioneert zoals gewenst, doorloopt u eerst deze
checklist. Misschien is het een klein probleem
dat u zelf kunt oplossen.
GEVAAR door een elektrische schok! Probeer in geen ge-
val het apparaat zelf te repareren.
Storing
Geen functie.
Mogelijke oorzaken/
maatregelen
• Is de stroomvoorziening gewaarborgd?
• Controleer het waterpeil in het waterreservoir 5.
• Controleer de positie
van het waterreservoir.
• Beveiliging tegen oververhitting heeft het apparaat uitgeschakeld.
Wacht ca. 3 minuten.
Storing
De ontvochtiging lijkt gering te zijn.
Te harde g elu iden.
Functie stopt af
en toe.
Vochtige kleding droogt
niet of droogt
langzaam.
Mogelijke oorzaken/
maatregelen
• Zijn de filters 24, 25
vuil?
• Is de luchtinlaat 8 ge-
blokkeerd?
• Lage temperatuur.
• Loopt het apparaat in
het programma LUFTREINIGUNG (LUCHTREINIGING)? In dit
geval vindt er geen
ontvochtiging plaats.
• Staat er een raam
open of wordt er in de
ruimte stoom geproduceerd?
• Staat het apparaat op
een vlakke, stabiele
ondergrond?
• Kamertemperatuur
meer dan 35 °C?
• Kamertemperatuur lager dan 5 °C?
• Ontdooiing is geactiveerd.
• Is de luchtstroom van
het apparaat rechtstreeks op de vochtige kleding gericht?
• Is de kamertemperatuur te laag?
54
NL
Page 57

__RP89301_B1.book Seite 55 Donnerstag, 18. April 2013 3:20 15
14. Weggooien
Het symbool van de doorgestreepte afvalton op wieltjes
betekent dat het product in de
Europese Unie gescheiden
moet worden weggegooid.
Dat geldt voor het product en
alle met dit symbool aangeduide accessoires. Aldus aangeduide producten mogen niet met het normale huisvuil
worden weggegooid, maar moeten bij een
innamepunt voor recycling van elektrische
en elektronische apparaten worden afgegeven. Recycling help het verbruik van grondstoffen te reduceren en het milieu te
ontlasten.
Verpakking
Als u de verpakking wilt weggooien, houdt
u dan aan de betreffende milieuvoorschriften in uw land.
15. Technische gegevens
Model: SLE 420 A1
Netspanning
Beschermings-
klasse: I
Ingangs-
vermogen: 320 W (27 °C 60%)
Vermogen max.: 420 W (35 °C 90%)
Nominale
stroom:
Stroomverbruik: max. 1.82 A (35 °C
Ontvochtigingscapaciteit:
Luchtdebiet: 195 m
Koelvloeistof /
Hoeveelheid:
Koelvloeistof-
groep: L1
Waterreservoir: 5 l
Oppervlakte van
de ruimte max.: 20 m
Temperatuur in
de ruimte:
Gewicht: 12,5 kg
Afmetingen: 360 x 230 x 610 bxdxh
Ontwikkeling van
geluid: 48 dB(A)
Zuigkracht: 0,5 Mpa
Blaaskracht: 1,5 Mpa
: 220 - 240 V~ 50 Hz
1,39 A (27 °C 60%)
90%)
20 l/dag (30 °C 80%)
11 l/dag (27 °C 60%)
3
/h
R134a/190g
2
‚ (Rh. 2,3 m)
5 - 35 °C
Technische wijzigingen voorbehou-
den.
NL
55
Page 58

__RP89301_B1.book Seite 56 Donnerstag, 18. April 2013 3:20 15
16. Garantie van
HOYERHandel GmbH
Geachte klant,
U heeft op dit apparaat 3 jaar garantie vanaf de koopdatum. Wanneer dit product onvolkomenheden vertoont, heeft u wettelijke
rechten ten opzichte van de verkoper van
het product. Deze wettelijke rechten worden
niet beperkt door onze hiernavolgend beschreven garantie.
Garantievoorwaarden
De garantietermijn begint op de koopdatum.
Bewaar de originele kassabon goed. Deze
bon is nodig als bewijs dat u het apparaat
heeft gekocht.
Wanneer zich binnen drie jaar na de koopdatum van dit product een materiaal- of fabricagefout voordoet, wordt het product door
ons – naar onze keus – gratis voor u gerepareerd of vervangen. Deze garantie stelt als
voorwaarde, dat het defecte apparaat en het
koopbewijs (kassabon) binnen de termijn van
drie jaar wordt overlegd en dat er kort schriftelijk wordt beschreven, waaruit de onvolkomenheid bestaat en wanneer deze zich heeft
voorgedaan.
Wanneer het defect door onze garantie
wordt gedekt, ontvangt u het gerepareerde
product terug of u krijgt een nieuw exemplaar.
Met reparatie of vervanging van het product
begint geen nieuwe garantieperiode.
Garantieperiode en wettelijke
garantieaanspraken wegens
gebreken
De garantieperiode wordt door de vrijwaring niet verlengd. Dat geldt ook voor vervangen en gerepareerde onderdelen.
Schades en onvolkomenheden die eventueel
al bij de koop aanwezig waren, moeten direct na het uitpakken worden gemeld. Aan
reparaties die zich voordoen na het verstrijken van de garantieperiode zijn kosten ver-
bonden.
Omvang van de garantie
Het apparaat werd zorgvuldig geproduceerd
volgens strenge kwaliteitsrichtlijnen en nauwgezet gecontroleerd vóór levering.
De garantie geldt voor materiaal- of fabricagefouten. Deze garantie is niet van toepassing op productonderdelen die onderhevig
zijn aan normale slijtage en daarom kunnen
worden beschouwd als slijtonderdelen of op
beschadigingen van breekbare onderdelen,
bijv. schakelaars, accu's of die van glas zijn
gemaakt.
Deze garantie vervalt, wanneer het product
werd beschadigd of ondeskundig werd gebruikt of onderhouden. Voor een juist gebruik
van het product moeten alle instructies die in
de handleiding staan vermeld, nauwkeurig
worden nageleefd. Gebruiksdoeleinden en
handelingen die in de handleiding worden
afgeraden of waarvoor wordt gewaarschuwd, moeten beslist worden vermeden.
Het product is uitsluitend bedoeld voor particulier gebruik en niet voor commercieel gebruik. Bij een oneigenlijke of ondeskundige
behandeling, bij gebruikmaking van geweld
en bij ingrepen die niet werden uitgevoerd
door ons erkende servicecenter, vervalt de
garantie.
Afhandeling in geval van
garantie
Om een snelle behandeling van uw verzoek
te waarborgen, dient u de volgende aanwijzingen te volgen:
• Houd voor alle aanvragen het artikel-
nummer IAN: 89301 en de kassabon
als bewijs voor de koop bij de hand.
• Wanneer zich functiestoringen of andere onvolkomenheden voordoen, neemt u
eerst telefonisch of per e-mail contact op met het hierna genoemde servicecenter.
• Een product dat geregistreerd staat als
defect, kunt u dan met bijvoeging van
de aankoopnota (kassabon) en de vermelding waaruit de onvolkomenheid be-
56
NL
Page 59

NL
__RP89301_B1.book Seite 57 Donnerstag, 18. April 2013 3:20 15
staat en wanneer deze zich heeft
voorgedaan, franco naar het serviceadres sturen dat u is meegedeeld.
Op www.lidl-service.com kunt u
deze en nog veel meer handleidingen, productvideo's en software
downloaden.
Servicecenters
Service Nederland
Tel.: 0900 0400223 (0,10 EUR/Min.)
E-Mail: hoyer@lidl.nl
IAN: 89301
Leverancier
Let erop, dat het onderstaande adres geen
serviceadres is. Neem eerst contact op
met het bovengenoemde servicecenter.
HOYER Handel GmbH
Kühnehöfe 5
22761 Hamburg
Duitsland
NL
57
Page 60

GB_RP89301_Luftbefeuchter.fm Seite 58 Freitag, 19. April 2013 9:20 09
Contents
1. Overview ...................................................................................... 59
2. Intended purpose .......................................................................... 60
3. Safety information ......................................................................... 61
4. Items supplied ............................................................................... 62
5. How to use .................................................................................... 63
6. Notes on operation ........................................................................ 63
7. Operation ...................................................................................... 63
7.1 Switching on and off ........................................................................... 63
7.2 Displays............................................................................................. 64
7.3 Modes of operation............................................................................. 64
7.4 Water tank......................................................................................... 65
7.5 Timer................................................................................................. 66
8. Hose drainage ............................................................................... 66
9. Cleaning and replacing the filter .................................................... 66
10. Cleaning ........................................................................................ 67
11. Protection against overheating ...................................................... 67
12. Storage ......................................................................................... 67
13. Trouble-shooting ............................................................................ 67
14. Disposal ........................................................................................ 68
15. Technical specifications .................................................................. 68
16. Warranty of the HOYER Handel GmbH ........................................... 69
58
GB
Page 61

__RP89301_B1.book Seite 59 Donnerstag, 18. April 2013 3:20 15
1. Overview
1 Mobile flap valve for air outlet
2 Operating panel
3 Handle
4 Recessed grip for water tank
5 Water tank (5 L)
6 Rollers
7 Inspection window for checking water level
8 Grid for air inlet (removable)
9 Hook for coiling up the power cable
10 Power cable with safety plug
11 Rating plate
12 WASSERTANK VOLL LED illuminates when water tank is full
13 HOCH/MITTEL/NIEDRIG Display for the selected humidity and switch-off time
14 Modes of operation LEDs display the active mode
15 BETRIEB LED illuminates during operation
16 STAND-BY Switch the device on and off
17 PROGRAMM Switch between the 4 modes
18 rF%STD/ EINSTELLUNG Set humidity and timer
19 TIMER Switch the timer on and off
20 TIMER AKTIV LED illuminates when timer is active
21 Fastener for connecting the hose (Remove the fastener with a screwdriver. Remove
plug and connect hose)
22 Hose
23 Plug
24 Plastic filter
25 Carbon filter
59
GB
Page 62

__RP89301_B1.book Seite 60 Donnerstag, 18. April 2013 3:20 15
Thank you for your trust!
Congratulations on your new dehumidifier.
For a safe handling of the product and in order to get to know the entire scope of features:
• Thoroughly read these operating instructions prior to initial
commissioning.
• Above all, observe the safety instructions!
• The device should only be used
as described in these instructions.
• Keep these instructions for reference.
• If you pass the device on to
someone else, please include
these instructions.
We hope you enjoy your new dehumidifier!
2. Intended purpose
The dehumidifier is intended exclusively for
dehumidifying residential, cellar and storage rooms with a temperature of between
5°C and 35°C.
The device must only be used indoors.
This device must not be used for commercial
purposes.
Foreseeable misuse
DANGER! Risk of illness!
G The water collected is not suitable
for drinking or for watering plants.
There is a risk of illness.
DANGER! Risk of electric
shock!
Do not place the device in water /
also do not place in pools or puddles of water.
WARNING! Risk of material damage!
• Do not use the device in swimming
pools, washrooms, or any similar
rooms.
• The device is not intended for drying insulation material. If lagging or insulating material has become damp after a
water pipe has broken, always consult
a specialist.
• Never expose the device to temperatures of 0°C or lower. Residual water in
the piping could freeze and damage
the system.
• Do not use the device in environments
that are dusty or which contain chlorine.
60
GB
Page 63

__RP89301_B1.book Seite 61 Donnerstag, 18. April 2013 3:20 15
3. Safety information
Warnings
If necessary, the following warnings will be
used in these operating instructions:
DANGER! High risk: failure to observe this warning may result in injury to life and limb.
WARNING! Moderate risk: failure to observe this warning may result in injury or serious material damage.
CAUTION: low risk: failure to observe this
warning may result in minor injury or material damage.
NOTE: circumstances and specifics that
must be observed when handling the device.
Instructions for safe operation
• This device is not designed to be used by people (including children) with limited physical, sensory or mental capabilities or people without adequate experience and/or understanding unless they
are supervised by someone responsible for their safety or are instructed by them on how to use the device.
• Children must be supervised to ensure that they do not play with
the device.
• Do not install the device in a narrow space. Leave a minimum
clearance of approx. 20 cm at the rear and sides, 10 cm at the
front, and 30 cm at the top.
• The device must only be operated in rooms with a temperature of
between 5°C to 35°C.
• Only use the device in rooms with a size of max. 20 m
2
.
• Only connect the mains plug to a properly installed and easily accessible grounded wall socket whose voltage corresponds to the
specifications on the rating plate. The wall socket must continue to
be easily accessible after the device is plugged in.
• The appliance shall be installed in accordance with national wiring
regulations.
DANGER for children
DANGER of explosion
• Packing materials are not children's
toys. Children should not be allowed to
play with the plastic bags. There is a
risk of suffocation.
• Keep the device out of the reach of children.
• The device must never be operated in areas with potentially aerosol-forming or explosive atmosphere.
DANGER! Risk of electric
shock due to moisture
• This device must never be operated close
to a bathtub, shower, filled hand basin or
similar.
61
GB
Page 64

__RP89301_B1.book Seite 62 Donnerstag, 18. April 2013 3:20 15
• The device, the power cable and the
mains plug must not be immersed in water or any other liquids.
• Protect the device from water drops and
water spray.
• If liquid gets into the device (except in
the water container), pull out the mains
plug immediately. Have the device
checked before reusing.
• Never touch the device with wet hands.
• If the device falls into water, disconnect
the mains plug immediately. Only then
is it safe to retrieve the device.
DANGER! Risk of electric
shock
• Ensure that the power cable cannot be
damaged by sharp edges or hot points.
Do not wrap the power cable around
the device.
• The device is not fully disconnected from
the power supply, even after it is
switched off. In order to fully disconnect
it, pull out the mains plug.
• When using the device, ensure that the
power cable cannot be trapped or
crushed.
• When removing the mains plug from the
grounded power socket, always pull on
the plug and never the cable.
• Pull the safety plug out of the grounded
power socket, …
… if there is a fault,
… when you are not using the device,
… before you clean the device, and
… during thunderstorms.
• Do not use the device if there is visible
damage to the device or the power cable.
• To avoid any risk, do not make modifications to the device. You also must not
replace the power cable yourself. Repairs must be carried out by a specialist
workshop or the Service Centre.
WARNING! Risk of material damage
• Never place objects filled with liquid on
top of the device, e.g. vases.
• Heavy objects must never be placed on
the device.
• Protect the device from heat.
• The device must not be covered (e.g.
with newspapers, cushions or blankets).
• Never insert objects into the ventilation
slit.
• Open sources of ignition, e.g. burning
candles, must never be placed on or immediately next to the device.
• Place the device somewhere that it will
never be exposed to direct sunlight.
• Place the device on a solid, flat surface.
• Clean the air filter before it becomes
heavily contaminated.
• When draining water through the hose,
ensure that the hose does not become
blocked, and that the open end of the
hose is lower down than the device.
• Only operate the device with the water
tank installed, or the hose attached. The
hose end must be placed over a drain.
• Only use the original accessories.
• Do not use any astringent or abrasive
cleaning agents.
• Only clean the device with a slightly
damp cloth.
4. Items supplied
1 Dehumidifier with water tank 5
1Hose 22
1 Set of operating instructions
62
GB
Page 65

__RP89301_B1.book Seite 63 Donnerstag, 18. April 2013 3:20 15
5. How to use
• Remove all packing material.
• Remove all transport packing material.
• Strip off the foil from the operating panel.
• Check to ensure that all parts are present and undamaged.
1. Place the device on a level, dry and
solid surface.
2. Let the device rest in its working posi-
tion for about 30 minutes, so that the
coolant fluid can settle.
3. Make sure that the float at the left-hand
side of the water tank 5 can move freely.
4. Check that the water tank 5 is inserted
correctly. If it is installed incorrectly, or
if the water tank has been removed, the
LED 12 WASSERTANK VOLL will illuminate.
5. Connect the mains plug 10 to a
grounded power socket.
6. Notes on operation
• If the relative humidity in residential
rooms is continuously excessive, the
cause should be found and rectified.
(Continuous ventilation - i.e. for several
years - is generally not reasonable.)
• The optimum ambient temperature for
removing humidity from the air is 5°C
to 35°C. Below 5°C, the use of a dehumidifier is not helpful, as there is only
relatively little humidity in the air.
• During operation, the room temperature
may rise by between 1°C and 4°C,
depending on room size. This is normal.
Automatic defrosting
In order to prevent the device from freezing
over while in continuous operation, it defrosts itself automatically. To do this, the dehumidification process is interrupted, and
the motor switches to its highest setting.
The intervals at which this happens vary.
Conditions
Temp er at ure :
over 20°C
Temp er at ure :
12°C to 20°C
Temp er at ure :
5°C to 12°C
Temp er at ure :
under 5°C
Defrosting
no defrosting
after 40 minutes dehumidification,
8 minutes defrosting
after 25 minutes dehumidification,
10 minutes defrosting
operation not possible
7. Operation
7.1 Switching on and off
• By pressing the button 16 STAND-BY,
you can switch the device on and off.
The corresponding LEDs illuminate or go
out.
- The device will start with the setting
last selected.
- If the device has failed due to a power outage, has been disconnected
from the mains power or stopped by
the overheating protection system, it
will start in the AUTOMATIK mode.
• If a timer has been set, the device will
shut down after the time has run out (112 hours).
• If a value has been set for relative humidity in the DAUERBETRIEB mode, the
device will stop when the value has
been reached, and re-start when the value is exceeded again.
• The device switches off when the water
tank is full or has been removed.
GB
63
Page 66

MITTEL
NIEDRIG
HOCH
MITTEL
NIEDRIG
HOCH
MITTEL
NIEDRIG
HOCH
GB_RP89301_Luftbefeuchter.fm Seite 64 Freitag, 19. April 2013 9:13 09
Air outlet flap valve
Figure B: irrespective of which mode the
device is being operated in, open the top
flap valve 1. It clicks into place in four positions.
If the flap valve is not opened, the overheating protection will switch the device off after
a while for approx. 3 minutes.
7.2 Displays
The mode of operation LEDs 14 and the display 13 show the selected functions and the
humidity range.
Mode of operation LEDs
LED illuminated
WASSERTANK VOLL
(TANK FULL)
TIMER AKTIV
(TIMER)
LUFTREINIGUNG
(AIR CLEAN)
WÄSCHETROCKNUNG
(DRY CLOTHES)
DAUERBETRIEB
(CONTINUOUS)
AUTOMATIK
BETRIEB
(OPERATION)
Meaning
The water tank is
full or has not been
inserted.
A switch-off time is
activated.
Selected mode
The device is
switched on.
Display
Display
1 - 12
flash for 5 sec.
30 - 80 or CO
flash for 5 sec.
This display can be seen
continuously during operation. It shows the humidity range in the room:
NIEDRIG (LOW):
under 65%
MITTEL (MID):
65% to 75%
HOCH (HIGH):
over 75%
Timer for all modes:
These values (1 - 12 hours)
will flash for 5 seconds
when you use the arrow
keys to select a switch-off
time.
Set relative humidity in
continuous operation.
Values between 30 and
80 or CO will flash for
5seconds when
selected.
CO: The device dehumidifies continuously.
Meaning
7.3 Modes of operation
NOTE: the values selected for relative humidity (RH%) are recognised with an upwards or downwards deviation of approx.
3%. This is necessary so that the device does
not constantly switch on and off.
64
• The device has 4 different modes available.
• By pressing the button 17 PRO-
GRAMM, you can switch between the
modes.
• The mode of operation LED 14 next to
the active mode illuminates.
GB
Page 67

GB_RP89301_Luftbefeuchter.fm Seite 65 Freitag, 19. April 2013 9:13 09
AUTOMATIK
The setting for the target relative humidity
(RH) is fixed at 55%. The compressor dehumidifies until this value has been reached,
and will then switch off. When the relative
humidity rises again, the compressor switches on again.
In this mode, the device operates in 3 different stages:
- RH over 70%: the device dehumidifies
at its highest setting.
- RH between 55% and 70%: the device
dehumidifies at its normal setting.
- RH under 55%: no dehumidification,
only the fan is running.
NOTE: the relative humidity values of the
automatic system are not identical to the values HOCH/MITTEL/NIEDRIG on the display13.
Select this mode for continuous dehumidification to a pleasant relative humidity of 55%.
DAUERBETRIEB (CONTINUOUS)
In the DAUERBETRIEB mode, you can set the
relative humidity in 5% increments to between 30% and 80%. The device dehumidifies at a low level until the set value has been
reached, and then deactivates itself. When
the relative humidity rises again, the device
switches on again.
- 30 - 80%: setting for the desired relative
humidity in the room.
- CO: the device dehumidifies continuously.
WÄSCHETROCKNUNG (DRY CLOTHES)
You can use this mode in order to dry damp
clothes or shoes faster. The device dehumidifies at its highest setting. Shift the flap
valve1 of the air outlet in such a way that
the jet of air is directed towards the items of
clothing to be dried.
LUFTREINIGUNG (AIR CLEAN)
No dehumidification takes place with this
mode. The room air is drawn in through the
filter in front of the air inlet, and is cleaned
there.
7.4 Water tank
• The water tank 5 has a holding capaci-
ty of 5 litres.
• The water level can be checked using
the inspection window 7 in the front.
• The device can only be operated with
the water tank in place.
• When the water tank 5 is full, the WASSERTANK VOLL LED 12 starts flashing.
The device switches off after a few seconds. An alarm sounds for approx.
20seconds. The WASSERTANK VOLL
LED12 flashes until the tank has been
emptied.
1. Figure A: in order to empty the water
tank 5, pull it out slightly on the left and
right-hand sides, and then carry it by
the handle 3.
2. Pour the water out and place the tank
back in the device.
Select this mode for continuous dehumidification, or for dehumidification to a value
that you have set.
GB
65
Page 68

GB_RP89301_Luftbefeuchter.fm Seite 66 Freitag, 19. April 2013 9:13 09
7.5 Timer
• The timer can be combined with all
4modes.
• There are 12 switch-off times that can
be selected, from 1 to 12 hours.
• After the expiry of the time that has
been set, the device is shut down and
the timer function is terminated.
1. During operation, press the TIMER 19
button. The TIMER AKTIV LED 20 will
flash.
2. Use the arrow keys 18 to select a switch-
off time of between 1 to 12hours. The
selected time flashes in the display
for 5seconds and is then saved.
• If you want to end the timer earlier than
the set time, press TIMER 19 twice or
switch the device off by pressing
STAND-BY 16.
13
8. Hose drainage
In the case of very damp rooms, it is often
more reasonable for the water not to be collected in the water tank, but to be discharged directly through a hose.
WARNING! During hose drainage, the device runs in continuous mode. This means
that the water collected must be able to
drain reliably, otherwise puddles will form
on the floor.
1. Figure C: use a screwdriver to remove
the fastener 21 on the rear.
2. Remove the plug 23.
3. Figure C: place the hose 22 included
in the box over the opening.
4. Place the device in a position where
the end of the hose is over a drain. It is
essential here that the open end of the
hose is lower down than the drain out-
let on the device (i.e. the hose must run
at a downward angle).
5. Switch the device on as described
above and select a mode.
6. If you wish to drain into the water
tank5 again, switch the device off, remove the hose 22, and replace the
plug 23 firmly over the opening.
9. Cleaning and
replacing the filter
The performance of the device also depends
on the cleanliness of the filter.
• The carbon filter 25 should be cleaned
every 2 weeks and replaced every
6months. Clean the filter by brushing
or vacuum suction.
• The normal plastic filter 24 should be
washed every 2 weeks.
1. Switch the device off and pull out the
mains plug 10.
2. Figure D: reach into the upper opening of the grid 8 and pull it off.
3. Rotate grid 8 and press, if necessary
with both thumbs, in the middle of the
grid.
4. The plastic filter 24 and the carbon fil-
ter 25 come loose from the grid. Remove them from the grid 8.
5. Rinse out both filters with lukewarm water. (The carbon filter 25 should be replaced after approx. 6 months.)
6. Allow both filters to dry completely.
7. Place the filters into the grid 8.
8. Place the grid onto the device.
NOTE: new carbon filters are available in
almost all household goods shops. The pads
just need to be cut to size.
66
GB
Page 69

GB_RP89301_Luftbefeuchter.fm Seite 67 Freitag, 19. April 2013 9:13 09
10. Cleaning
Clean the device prior to its first use!
DANGER! Risk of electric
shock!
• Pull the mains plug 10 out of the
grounded power socket before you
clean the device.
• The device, the power cable and the
mains plug 10 must not be immersed in
water or any other liquids.
WARNING! Risk of material damage! Do not use any astringent or abrasive
cleaning agents.
• Wipe the housing and the power ca-
ble10 with a damp cloth if necessary.
• Remove the water tank 5, pour out the
water, and dry the tank well inside and
outside before re-inserting it into the device.
11. Protection against
overheating
The device has an overheating protection
system.
• The overheating protection system will
switch the device off automatically if
there is a risk of overheating.
• It is then impossible to switch the device
on again for 3 minutes.
• After approx. 3 minutes, the device
starts automatically.
• Check whether external conditions
could have triggered the overheating
protection system, e.g. temperature
above 35°C or a closed flap valve 1
over the air outlet.
12. Storage
DANGER for children! Keep the
device out of the reach of children.
• Always store the device in an upright
position.
• Select a location where neither high
temperatures nor moisture can affect the
device.
13. Trouble-shooting
If your device fails to function as required,
please try this checklist first. Perhaps there is
only a minor problem, and you can solve it
yourself.
DANGER! Risk of electric
shock! Do not attempt to repair
the device yourself under any circumstances.
Fault Possible causes/Action
• Has the device been
connected to the power
supply?
• Check the water level in
the water tank 5.
No function.
• Check the position of
the water tank.
• The overheating protection system has
switched the device off.
Wait for approx. 3 minutes.
GB
67
Page 70

GB_RP89301_Luftbefeuchter.fm Seite 68 Freitag, 19. April 2013 9:13 09
Fault Possible causes/Action
• Are the filters 24, 25
dirty?
• Is the air inlet 8 blocked?
The dehumidification
does not
seem to be
working very
well.
Excessive
noise.
Occasionally the
device stops
working.
Damp clothing is not
drying, or is
only drying
very slowly.
• The temperature is low.
• Is the device operating
in LUFTREINIGUNG
mode? No dehumidification takes place with
this program.
• Is a window open, or
has steam been generated in the room?
• Is the device standing on
a level, solid surface?
• Room temperature
above 35°C?
• Room temperature be-
low 5°C?
• Defrosting mode is ac-
tive.
• Is the air flow from the
device directly pointed
at the damp clothing?
• Is the room temperature
too low?
14. Disposal
The symbol showing a wheelie bin crossed through indicates that the product requires
separate refuse collection in
the European Union. This applies to the product and all accessories marked with this
symbol. Products identified with this symbol
may not be discarded with normal household waste, but must be taken to a collection
point for recycling electric and electronic appliances. Recycling helps to reduce the consumption of raw materials and protect the
environment.
Packaging
When disposing of the packaging, make
sure you comply with the environmental regulations applicable in your country.
15. Technical
specifications
Model: SLE 420 A1
Mains voltage
Protection class: I
Input power: 320 W (27°C 60%)
Power rating max.:
Nominal current: 1,39 A (27°C 60%)
Power consump-
tion:
Dehumidification
capacity:
Air flow: 195 m3/h
Coolant /
Volume:
Coolant group: L1
Water tank: 5 l
Room size: 20m
Room
temperature: 5 - 35°C
Weight: 12.5 kg
Dimensions: 360 x 230 x 610
Noise level: 48 dB(A)
Intake pressure: 0,5 MPa
Exhaust pressure: 1,5 MPa
: 220 - 240 V~ 50 Hz
420 W
(35°C 90%)
max.1.82 A
(35°C 90%)
20 L /day (30°C 80%)
11 L /day (27°C 60%)
R134a/190g
2
‚ (Rh. 2.3m)
WxDxH
Subject to technical modification.
68
GB
Page 71

__RP89301_B1.book Seite 69 Donnerstag, 18. April 2013 3:20 15
16. Warranty of the
HOYER Handel GmbH
Dear Customer,
your device is provided with a 3 year warranty starting with the purchase date. In the
event of product defects, you are entitled to
statutory rights against the vendor. These
statutory rights are not restricted by our warranty presented in the following.
Warranty conditions
The warranty period starts with the purchase
date. Please keep the original purchase receipt in a safe place. This document is required to verify the purchase.
If within three years from the purchase date
of this product a material or factory defect
occurs, the product will be repaired or replaced by us – at our discretion – free of
charge to you. This warranty implies that
within the period of three years the defective
device and the purchase receipt are presented, including a brief written description of
the defect and the time it occurred.
If the defect is covered by our warranty, the
repaired or a new product will be returned
to you. No new warranty period starts with
a repair or replacement of the product.
Warranty period and statutory
claims for defects
The warranty period is not extended when
the warranty has been claimed. This also applies to replaced and repaired parts. Any
damages and defects already existing at the
time of purchase must be reported immediately upon unpacking. Repairs arising after
the expiration of the warranty period are
subject to a charge.
uct parts that are subject to standard wear
and therefore can be considered wear parts;
the same applies to damages at fragile parts,
e.g. switches, rechargeable batteries or parts
made of glass.
This warranty expires if the product is damaged, not used as intended or not serviced.
For the proper operation of the product, all instructions listed in the operating instructions
must be observed carefully. Any form of use
and handling that is advised against in the
operating instructions or warned against
must always be avoided.
The product is only intended for private and
not for commercial use. In the case of incorrect and improper treatment, use of force and
interventions not performed by our authorised Service Centre, the warranty shall cease.
Handling in case of a warranty
claim
In order to ensure prompt processing of your
matter, please observe the following notes:
• Please keep the article number
IAN: 89301
as a purchase verification for all inquiries.
• If faulty operation or other defects occur,
first contact the Service Centre listed in
the following by telephone or email.
• Then, you are able to send a product reported as defective free of charge to the
service address specified to you, including the purchase receipt and the information on the defect and when it
occurred.
Please visit www.lidl-service.com to
download this and many other
manuals, product videos and software.
and the purchase receipt
Warranty coverage
The device was produced carefully according
to strict quality guidelines and tested diligently prior to delivery.
The warranty applies to material or factory
defects. This warranty does not include prod-
GB
69
Page 72

GB
IE
__RP89301_B1.book Seite 70 Donnerstag, 18. April 2013 3:20 15
Service Centre
Service Great Britain
Tel.: 0871 5000 720 (£ 0.10/Min.)
E-Mail: hoyer@lidl.co.uk
Service Ireland
Tel.: 1890 930 034
(0,08 EUR/Min., (peak))
(0,06 EUR/Min., (off peak))
E-Mail: hoyer@lidl.ie
IAN: 89301
Supplier
Please note that the following address is no
service address. First contact the afore-
mentioned Service Centre.
HOYER Handel GmbH
Kühnehöfe 5
22761 Hamburg
Germany
70
GB
Page 73

__RP89301_B1.book Seite 71 Donnerstag, 18. April 2013 3:20 15
GB
71
Page 74

HOYER HANDEL GMBH
Kühnehöfe 5
D-22761 Hamburg
Stand der Informationen · Version des informations ·
Stato attuale delle conoscenze · Stand van de informatie · Status of information:
04/2013 · Ident.-Nr.: SLE 420 A1 DE AT
IAN 89301
RP89301_Luftentfeuchter_Cover_LB1_DE_AT.indd 1 19.04.13 10:40
1
 Loading...