

Page 1

STEAM IRON SDB 2200 D2
STEAM IRON
Operating instructions
DAMPFBÜGELEISEN
Bedienungsanleitung
IAN 273029
ΑΤΜΟΣΙΔΕΡΟ
Οδηүίες χρήσης
Page 2

Before reading, unfold the page containing the illustrations and familiarise yourself with all functions of
the device.
Πριν ξεκινήσετε την ανάγνωση, ανοίξτε τις δυο σελίδες με τις εικόνες και εξοικειωθείτε με όλες τις
λειτουργίες της συσκευής.
Klappen Sie vor dem Lesen die Seite mit den Abbildungen aus und machen Sie sich anschließend mit allen
Funktionen des Gerätes vertraut.
GB / IE / CY Operating instructions Page 1
GR / CY Οδηүίες χρήσης Σελίδα 11
DE / AT / CH Bedienungsanleitung Seite 21
Page 3

A
B
Page 4

Content Page
Introduction 2
Intended use 2
Scope of delivery 2
Operating elements 2
Technical data 2
Safety instructions 3
Before initial use 5
Filling the water tank 5
Plugging in and ironing 6
Steam ironing 6
Ironing with steam blast 6
Temporarily setting the steam iron aside 6
Turning off the steam iron 7
Drip-stop function 7
Automatic switch-off 7
Cleaning 7
Self-cleaning function .......................................................................................................................7
Housing and sole of the iron...........................................................................................................8
Storage 8
Troubleshooting 8
Disposal 8
Warranty and service 9
Importer 9
- 1 -
Page 5

STEAM IRON
Introduction
Congratulations on the purchase of your new appliance.
You have clearly decided in favour of a quality
product. These operating instructions are a constituent of this product. They contain important information with regard to safety, use and disposal.
Before using the product, familiarise yourself with all
of these operating and safety instructions. Use the
product only as described and only for the specified
areas of application. Please also pass these documents on to any future owner, together with the product.
Intended use
The steam iron is exclusively intended for ironing
textiles. The iron may only be used indoors and in
private households. Any other use is deemed
improper. The apparatus is not intended for commercial use!
Operating elements
Figure A:
1 Water jet
2 Filler opening for the water tank
3 Steam regulator
4 Button for steam blast
5 Button for fine water spray
6 Automatic switch-off indicator lamp
7 Temperature control lamp
8 Thermostat
9 Power cable with anti-kink protection
0 Appliance base
q Ironing sole
w Self-clean button
Figure B:
e Measuring beaker
Technical data
Power supply voltage: 220 - 240 V
50/60 Hz
max. power consumption: 2200 W
~
Scope of delivery
Steam Iron
Measuring beaker
Operating instructions
- 2 -
Page 6

Safety instructions
Risk of Burns!
•Always hold the steam iron by the handle when it is hot.
•Children should be supervised to ensure that they do not play with the
appliance.
•Never hold your hand over the steam spray or touch hot metal parts.
•The filler opening of the water reservoir must not be opened while the iron is in
use. First allow the steam iron to cool down and remove the plug from the power socket.
•The iron and its connecting cable must be kept out of the reach of children
younger than 8 years old when it is switched on or cooling down.
Risk of Injury! Risk of fire!
•Never leave a steam iron that is hot, switched on or connected to the mains power supply unattended.
•Do not put the steam iron into storage until it has cooled down completely.
•This steam iron must be used and placed on a stable surface.
•When ironing, only use the temperatures detailed in the garment care instructions, or those suitable for the material. Otherwise, you could damage the textiles. Should care instructions not be given or known, start with the lowest temperature setting.
•Always put the iron on a level, heat-resistant surface.
The iron must be in a stable position.
•Should you wish to put the steam iron down, always put it on the appliance
base.
Risk of electric shock!
• The rating of the local power supply must correspond with the details given on
the rating plate of the appliance.
•To avoid potential risks, arrange for defective appliances to be checked and
possibly repaired by a qualified specialist workshop, or contact our Customer
Service Department.
•Arrange for defective power plugs and/or cables to be replaced immediately
by qualified technicians or our Customer Service Department.
•To disconnect from the power source, only pull the plug itself, not the cable.
- 3 -
Page 7

•Never bend (kink) or crush the power cable. Arrange it in such a way that it
cannot come into contact with hot surfaces and so that no-one can step on it or
trip over it.
•Remove the plug from the power socket after every use, and before cleaning or
filling with tap water.
•Always unwind the power cable fully before switching on, and do not use an
extension cable.
•Never touch the power cable or the plug with wet hands.
•Never use the steam iron near a bath, shower, wash basin or other vessel containing water. The proximity of moisture presents a danger, even when the appliance is switched off.
•Under no circumstances should you submerge the steam iron in liquid or permit
liquids to penetrate the casing of the steam iron. Do not expose the appliance
to humidity and do not use outdoors. Should liquids enter the casing, unplug the
appliance from the socket immediately and arrange for it to be repaired by a
qualified technician.
•You may not open the casing of the steam iron. Should repairs be necessary,
only allow authorised technicians to repair a defective appliance.
•Under NO circumstance should you use the appliance if it shows visible signs
of damage, has fallen, or is leaking.
Arrange for it to be repaired by qualified specialists.
•Do not use the appliance if the anti-kink protection on the power cable is
damaged!
•This appliance may be used by children aged 8 years or over and by individuals with reduced physical, sensory or mental capabilities, or lack of experience
and/or knowledge if they are supervised or have been instructed in the safe use
of the appliance and have understood the potential risks. Children may not
play with the appliance.
Cleaning and user maintenance should not be carried out by children without
supervision.
- 4 -
Page 8

Attention! Property Damage!
• Should the clothing care instructions forbid iro-
ning, (symbol ), the clothing item may not be
ironed. If you do so, the clothing item could be
permanently damaged.
• The water tank is to be filled exclusively with tap
water or distilled water. Otherwise, you will damage the steam iron.
• Do not clean the steam iron with solvents, alcohol
or abrasive cleaning agents, since these could
cause damage.
Before initial use
• Remove the steam iron from the packaging.
• Remove all stickers and protective film from the
steam iron and the ironing sole q.
Filling the water tank
• Hold the iron at an angle.
• Open the cover of the filler opening for the
water tank 2.
• Using the measuring beaker e, fill the water
tank to the "MAX" marking.
• Slide the cover of the filler opening for the water
tank 2 back to close it.
Note:
Should the tap water in your area be rated as hard,
it is recommended that you mix tap water with some
distilled water. Otherwise, the jets for the steam
blast function could calcify (become blocked) prematurely.
To extend the optimal steam blast function, mix tap
water with distilled water as follows.
Risk of asphyxiation!
Plastic bags can be dangerous. To avoid the risk of
asphyxiation, keep plastic bags out of the reach of
toddlers and small children.
• Pour water into the water tank (see chapter
"Filling the water tank").
• Insert the plug into a wall power socket supplying an electrical current as detailed on the rating
plate.
• Move the thermostat 8 to the "MAX" position.
• Heat the steam iron up for several minutes at the
highest setting.
• Press the button for the steam blast 4 a few
times until steam exits from the ironing sole q.
• Then iron a scrap piece of material to remove
possible contamination from the ironing sole q.
Ratios - distilled
Water hardness
very soft / soft 0
medium 1 : 1
hard 2 : 1
very hard 3 : 1
The water hardness level can be queried at your
local water works.
water to
tap water
- 5 -
Page 9

Plugging in and ironing
Dry ironing is possible at all temperatures, steam ironing is possible by adjusting to on the
thermostat 8.
• Insert the plug into a power socket.
Attention! Property Damage!
Should the clothing care instructions forbid ironing,
(symbol ), the clothing item may not be ironed.
If you do so, the clothing item could be permanently
damaged.
• Check the care instructions on the labels in the
garment to see whether it is suitable for being
ironed, and at which temperature setting.
Symbol thermostat 8
Type of material
Acrylic, rayon
Silk, wool, polyester
blended fabrics
• Wait until the temperature control lamp 7
switches off.
• To moisten the laundry, press the button for fine
water spray 5.
This function is suitable for extremely dry and extremely
crumpled garments.
Steam ironing
• Set the steam regulator 3 to the desired steam
setting.
• The thermostat 8 must be moved to at least
adjustment range . Otherwise it cannot
produce any steam.
Ironing with steam blast
The steam blast is especially suitable for smoothing
parts of a garment that are difficult to reach.
• Slightly raise the steam iron.
• For a steam blast, press the steam blast
button 4.
Cotton, linen, viscose
• Select the best suitable temperature setting with
the thermostat 8.
Note:
While it is heating up, always place the iron on the
base 0.
If you place the iron on the ironing sole q and do
not move it, the automatic switch-off will be activated after 30 seconds (see chapter “Automatic
switch-off”) and the appliance stops heating.
The temperature control lamp 7 glows. When the
set temperature has been reached, the temperature
control lamp 7 goes out.
Temporarily setting the steam
iron aside
Risk of fire!
NEVER leave the hot, mains-connected or switched-on
steam iron unattended.
• Set the thermostat 8 to the "MIN" position.
• Always put the steam iron on the appliance
base 0.
- 6 -
Page 10

Turning off the steam iron
• Remove the plug from the wall socket.
• Empty the water tank and clean the ironing
sole q.
• Put the steam iron on the appliance base 0
after it has cooled down.
Note:
The automatic switch-off is not a substitute for unplugging the apparatus from the power supply! It is
only intended for reducing the risk of fire if the iron
is accidentally left on!
Cleaning
Drip-stop function
With conventional steam irons it can occur that water
drips from the ironing sole q at low temperatures.
However, this iron possesses a new equipment characteristic, the DRIP-STOP function. At low temperatures the iron automatically switches off the steamblast function. When this happens, a "CLICK" is
heard. You must then select a suitable temperature
using the thermostat 8. As soon as this is reached,
steam production continues.
Automatic switch-off
The iron is equipped with an automatic switch-off.
This stops the iron from heating up.
If the iron is standing on its ironing sole q and has
not been moved for approx. 30 seconds, acoustic
warning signals are heard and the automatic switchoff indicator lamp 6 flashes. The iron will no longer
be heated. To deactivate the automatic switch-off,
pick up the iron and move it around a little. The
automatic switch-off indicator lamp 6 will go off
and the iron will heat up again.
Self-cleaning function
• Fill the water tank to the "MAX" marking.
• Insert the plug into a wall socket.
• Move the thermostat 8 to the "MAX" position.
• Adjust the steam regulator 3 to maximum steam
power.
• Allow the steam iron to heat up until the temperature control lamp 7 switches off and once
again glows.
• Hold the steam iron horizontally over a catchment
receptacle.
• Press and hold down the self-clean button w.
Move the steam iron back and forth a little.
Steam and boiling water flows from the steam
exit holes in the ironing sole q.
Impurities that may be present are washed out.
• Release the self-clean button w as soon as all
of the water has exited.
• Thoroughly dry the ironing sole q. For this, slide
the ironing sole q back and forth over a hand
towel or an old piece of material several times.
• Allow the steam iron to cool down before placing
it in storage.
If the iron is standing on its base 0 and has not
been moved for approx. 8 minutes, acoustic warning
signals are heard and the automatic switch-off indicator lamp 6 flashes. The iron is no longer heated.
To deactivate the automatic switch-off, pick up the
iron and move it around a little. The automatic
switch-off indicator lamp 6 will go off and the iron
will heat up again.
- 7 -
Page 11

Housing and sole of the iron
Disposal
Potentially fatal danger!
Remove the plug before cleaning the device.
There is a risk of electric shock!
Risk of physical injury!
Allow the appliance to cool down before cleaning
it. Otherwise, there is a risk of burns!
Attention! Property Damage!
Do not use abrasive, aggressive or chemical cleaning agents.
They can damage the surface and also lead to irreparable damage to the appliance.
• Clean the housing with a soft, dry cloth only.
• Clean the ironing sole q using a damp cloth
and a mild, non-scouring detergent.
Storage
Store the appliance in a clean, dust-free, and dry
location after it has cooled down.
Do not dispose of the appliance in your
normal domestic waste. This appliance
is subject to the provisions of European
Directive 2012/19/EU.
Dispose of the appliance through an approved disposal centre or at your community waste facility.
Observe the currently applicable regulations.
In case of doubt, please contact your waste disposal
centre.
Dispose of all packaging materials in an
environmentally friendly manner.
Troubleshooting
Steam iron producing little or no steam:
The reserves of water in the steam iron are depleted.
Fill the water tank with tap water (See "Filling the
water tank").
The steam iron does not get hot:
• The steam iron is not plugged in or is not switched
on. Insert the plug into a wall power socket and
adjust the thermostat 8 to the desired ironing
temperature.
• The steam iron is defective. Arrange for the steam
iron to be repaired by qualified specialists.
- 8 -
Page 12

Warranty and service
The warranty for this appliance is for 3 years from
the date of purchase. The appliance has been manufactured with care and meticulously examined
before delivery.
Please retain your receipt as proof of purchase. In the
event of a warranty claim, please telephone our
Service Department. This is the only way to ensure
that your goods are dispatched free of charge.
The warranty only covers claims for material and
manufacturing defects, but not for transport damage,
wearing parts or damage to fragile components
such as buttons or batteries. This product is for private
use only and is not intended for commercial use.
The warranty is void in the case of incorrect and improper handling, use of force and internal manipulation that is not carried out by our authorised service
branch. Your statutory rights are not restricted in any
way by this warranty.
The warranty period will not be extended by repairs
made under warranty. This also applies to replaced
and repaired parts. Any damage and defects that
are discovered immediately after purchase must be
reported immediately after unpacking the appliance, no more than two days after the purchase date.
Repairs made after the expiration of the warranty
period are subject to payment.
Service Cyprus
Tel.: 8009 4409
E-Mail: kompernass@lidl.com.cy
IAN 273029
Hotline availability:
Monday to Friday 08:00 - 20:00 (CET)
Importer
KOMPERNASS HANDELS GMBH
BURGSTRASSE 21
44867 BOCHUM
GERMANY
www.kompernass.com
Service Great Britain
Tel.: 0871 5000 720 (£ 0.10/Min.)
E-Mail: kompernass@lidl.co.uk
IAN 273029
Service Ireland
Tel.: 1890 930 034
(0,08 EUR/Min., (peak))
(0,06 EUR/Min., (off peak))
E-Mail: kompernass@lidl.ie
IAN 273029
- 9 -
Page 13

- 10 -
Page 14

Περιεχόμενα Σελίδα
Εισαγωγή 12
Προβλεπόμενη χρήση 12
Παραδοτέος εξοπλισμός 12
Στοιχεία χειρισμού 12
Τεχνικές πληροφορίες 12
Υποδείξεις ασφαλείας 13
Πριν την πρώτη χρήση 15
Πλήρωση δοχείου νερού 15
Σύνδεση και σιδέρωμα 16
Σιδέρωμα με ατμό 16
Σιδέρωμα με εκτόξευση ατμού 16
Προσωρινή απενεργοποίηση του ατμοσίδερου 16
Απενεργοποίηση ατμοσίδερου 17
Λειτουργία αποφυγής σταξίματος (Drip-stop) 17
Αυτόματη απενεργοποίηση 17
Καθαρισμός 17
Σύστημα αυτοκαθαρισμού.............................................................................................................17
Περίβλημα και βάση σίδερου........................................................................................................18
Φύλαξη 18
Διόρθωση δυσλειτουργιών 18
Απόρριψη 18
Εγγύηση και σέρβις 19
Εισαγωγέας 19
- 11 -
Page 15

Ατμοσίδερο
Εισαγωγή
Συγχαρητήρια για την αγορά της νέας σας συσκευής.
Αποφασίσατε έτσι την απόκτηση ενός προϊόντος
υψηλής ποιότητας. Οι οδηγίες χρήσης είναι τμήμα
αυτού του προϊόντος. Περιέχουν σημαντικές υποδείξεις
για την ασφάλεια, τη χρήση και την απόρριψη.
Πριν από τη χρήση του προϊόντος εξοικειωθείτε με
όλες τις υποδείξεις χειρισμού και ασφαλείας.
Χρησιμοποιείτε το προϊόν μόνο όπως περιγράφεται
και για τα αναφερόμενα πεδία χρήσης. Σε περίπτωση
παράδοσης του προϊόντος σε τρίτους, παραδίδετε
και όλα τα έγγραφα.
Στοιχεία χειρισμού
Εικόνα A:
1 Ακροφύσιο νερού
2 Άνοιγμα πλήρωσης για το δοχείο νερού
3 Ρυθμιστής ατμού
4 Πλήκτρο για εκτόξευση ατμού
5 Πλήκτρο για τη λειτουργία ψεκασμού
6 Λυχνία ελέγχου για την αυτόματη
απενεργοποίηση
7 Λυχνία ελέγχου για τη θερμοκρασία
8 Ρυθμιστής θερμοκρασίας
9 Καλώδιο τροφοδοσίας με προστασία κάμψης
0 Υποδοχή
q Πάτος σίδερου
w Πλήκτρο αυτοκαθαρισμού [Selfclean]
Προβλεπόμενη χρήση
Το ατμοσίδερο προορίζεται αποκλειστικά για το
σιδέρωμα ρούχων. Επιτρέπεται να το χρησιμοποιείτε
μόνο εντός κλειστών χώρων και σε ιδιωτικά νοικοκυριά.
Όλες οι άλλες χρήσεις ισχύουν ως μη σύμφωνες
με τους κανονισμούς. Μην το χρησιμοποιείτε για
επαγγελματικό σκοπό!
Παραδοτέος εξοπλισμός
Ατμοσίδερο
Δοχείο μέτρησης
Οδηγίες χρήσης
Εικόνα B:
e Δοχείο μέτρησης
Τεχνικές πληροφορίες
Τάση παροχής : 220 - 240 V
50/60 Hz
Μεγ. κατανάλωση ισχύος: 2200 W
~
- 12 -
Page 16

Υποδείξεις ασφαλείας
Κίνδυνος εγκαύματος!
•Πιάνετε το ατμοσίδερο μόνο από τη χειρολαβή όταν είναι ζεστό.
•Τα παιδιά πρέπει να επιτηρούνται ώστε να εξασφαλίζεται ότι δεν παίζουν με τη
συσκευή.
•Ποτέ μην έχετε τα χέρια σας στο σημείο εξόδου ατμού ή σε καυτά μεταλλικά
μέρη.
•Δεν επιτρέπεται κατά τη λειτουργία να ανοίγετε το άνοιγμα πλήρωσης για το
δοχείο νερού. Αφήστε πρώτα το ατμοσίδερο να κρυώσει και τραβήξτε το φις από
την πρίζα.
•Το σίδερο και το καλώδιο σύνδεσης του πρέπει κατά την ενεργοποίηση ή το
κρύωμα να μην είναι προσβάσιμα σε παιδιά κάτω των 8 ετών.
Κίνδυνος τραυματισμού! Κίνδυνος πυρκαγιάς!
•Ποτέ μην αφήνετε ανεπιτήρητο ένα ατμοσίδερο το οποίο είναι συνδεδεμένο ή
ενεργοποιημένο.
•Αποθηκεύετε το ατμοσίδερο πάντα όταν έχει κρυώσει.
•Το ατμοσίδερο πρέπει να χρησιμοποιείται και να τοποθετείται σε μια σταθερή
επιφάνεια.
•Σιδερώνετε μόνο σύμφωνα με τις κατάλληλες ρυθμίσεις θερμοκρασίας που
αναφέρονται στις υποδείξεις φροντίδας και στο υλικό υφάσματος. Σε διαφορετική
περίπτωση μπορεί να φθείρετε τα ρούχα. Εάν δεν γνωρίζετε κάποιες υποδείξεις
φροντίδας, τότε ξεκινήστε με την ελάχιστη ρύθμιση θερμοκρασίας.
•Τοποθετείτε το ατμοσίδερο μόνο επάνω σε μία επίπεδη και θερμοανθεκτική
επιφάνεια. Το ατμοσίδερο πρέπει να είναι σταθερό.
•Εάν θέλετε να αποθέσετε το ατμοσίδερο, τοποθετείτε το μόνο επάνω στην
υποδοχή.
Κίνδυνος από ηλεκτροπληξία!
•Η τάση της πηγής ρεύματος πρέπει να συμφωνεί με τα στοιχεία που
αναγράφονται στην πινακίδα τύπου της συσκευής.
•Επιτρέπετε την επισκευή μίας ελαττωματικής συσκευής εγκαίρως αποκλειστικά
από ένα εξουσιοδοτημένο συνεργείο ή απευθύνεστε στο τμήμα εξυπηρέτησης
πελατών για να αποφεύγετε κινδύνους.
• Τα βύσματα ή καλώδια τροφοδοσίας με βλάβη πρέπει να αντικαθίστανται
αμέσως από εξουσιοδοτημένο ειδικό προσωπικό ή από το τμήμα εξυπηρέτησης
πελατών, ώστε να αποφεύγονται κίνδυνοι.
- 13 -
Page 17

•Τραβάτε πάντα μόνο από το βύσμα, ποτέ από το καλώδιο.
•Μην κάμπτετε ή συμπιέζετε το καλώδιο τροφοδοσίας και τοποθετείτε το έτσι ώστε
να μην έρχεται σε επαφή με καυτές επιφάνειες και να μην μπορεί κανείς να πατάει
εκεί ή να σκοντάφτει.
•Τραβάτε πριν από τον καθαρισμό, κατά την πλήρωση με νερό δικτύου και μετά από
κάθε χρήση, το φις από την πρίζα.
•Πριν από την ενεργοποίηση ξετυλίγετε πάντα εντελώς το καλώδιο τροφοδοσίας
και μην χρησιμοποιείτε προεκτάσεις καλωδίων.
•Ποτέ μην πιάνετε το καλώδιο ή το βύσμα με βρεγμένα χέρια.
•Σε καμία περίπτωση μην χρησιμοποιείτε το ατμοσίδερο κοντά σε νερό το οποίο
βρίσκεται σε μπανιέρες, ντους, νιπτήρες ή σε άλλα δοχεία. Υπάρχει κίνδυνος από
την ύπαρξη νερού ακόμα και όταν η συσκευή είναι εκτός ρεύματος.
•Σε καμία περίπτωση δεν επιτρέπεται να βυθίζετε το ατμοσίδερο σε υγρά ούτε και να
εισχωρούν υγρά στο περίβλημα της συσκευής. Δεν επιτρέπετε να εκθέτετε τη
συσκευή σε υγρασία και να την χρησιμοποιείτε σε εξωτερικό χώρο. Στην περίπτωση
που εισχωρήσει υγρό στο περίβλημα της συσκευής, τραβήξτε αμέσως το φις της
συσκευής από την πρίζα και παραδώστε τη προς επιδιόρθωση σε εξειδικευμένο
προσωπικό.
•Δεν επιτρέπεται να ανοίγετε το περίβλημα της συσκευής. Το ελαττωματικό
ατμοσίδερο πρέπει να επισκευάζεται μόνο από εξουσιοδοτημένο προσωπικό.
•Μη χρησιμοποιείτε το ατμοσίδερο σε καμία περίπτωση όταν έχει εμφανείς
φθορές, εάν έχει πέσει κάτω ή εάν τρέχει νερό. Θα πρέπει πρώτα να επισκευαστεί
από εξειδικευμένο προσωπικό.
•Μη συνεχίζετε τη χρήση της συσκευής, εάν η προστασία κάμψης στο καλώδιο
τροφοδοσίας έχει φθαρεί!
•Αυτή η συσκευή μπορεί να χρησιμοποιείται από παιδιά άνω των 8 ετών και από
άτομα με μειωμένες φυσικές, αισθητηριακές ή νοητικές δυνατότητες ή με έλλειψη
εμπειρίας και/ή γνώσεων, εφόσον επιτηρούνται ή εάν έχουν εκπαιδευτεί αναφορικά
με την ασφαλή χρήση της συσκευής και έχουν κατανοήσει τους τυχόν
επακόλουθους κινδύνους. Τα παιδιά δεν επιτρέπεται να παίζουν με τη
συσκευή.Ο καθαρισμός και η συντήρηση του χρήστη δεν επιτρέπεται να
διεξάγονται από παιδιά χωρίς επιτήρηση.
- 14 -
Page 18

Προσοχή! Υλικές ζημιές!
• Στην περίπτωση που οι υποδείξεις φροντίδας στο
ρούχο απαγορεύουν το σιδέρωμα (σύμβολο ),
δεν επιτρέπεται να σιδερώσετε το ρούχο. Σε
διαφορετική περίπτωση μπορεί να το καταστρέψετε.
• Επιτρέπεται να γεμίζετε το δοχείο νερού αποκλειστικά με νερό δικτύου/αποσταγμένο νερό. Σε
αντίθετη περίπτωση καταστρέφετε το ατμοσίδερο.
• Δεν επιτρέπεται να καθαρίζετε το ατμοσίδερο με
διαλυτικά μέσα, οινόπνευμα ή τριβικά καθαριστικά
μέσα. Σε διαφορετική περίπτωση μπορεί να φθαρεί.
Πριν την πρώτη χρήση
• Αφαιρέστε το ατμοσίδερο από τη συσκευασία.
• Απομακρύνετε όλα τα αυτοκόλλητα και τις
μεμβράνες από το ατμοσίδερο και από τον πάτο
του σίδερου q.
Πλήρωση δοχείου νερού
• Κρατήστε λοξά το ατμοσίδερο στο χέρι.
• Ανοίξτε το καπάκι στο άνοιγμα πλήρωσης του
δοχείου νερού 2.
• Γεμίστε το δοχείο e με νερό δικτύου μέχρι το
πολύ έως τη σήμανση „MAX“.
• Κλείστε το καπάκι στο άνοιγμα πλήρωσης του
δοχείου νερού 2.
Υπόδειξη:
Εάν το νερό βρύσης της περιοχής σας είναι πολύ
σκληρό, προτείνεται να αναμείξετε το νερό βρύσης
με αποσταγμένο νερό. Αλλιώς μπορεί τα ακροφύσια
για την εκτόξευση ατμού να γεμίσουν με άλατα
πρόωρα.
Για την παράταση της τέλειας λειτουργίας
εκτόξευσης ατμού αναμείξτε το νερό βρύσης με
αποσταγμένο νερό σύμφωνα με τον πίνακα.
Κίνδυνος ασφυξίας!
Οι πλαστικές σακούλες μπορούν να αποτελέσουν
κίνδυνο. Για να αποφύγετε τον κίνδυνο ασφυξίας
φυλάξτε τις πλαστικές σακούλες μακριά από παιδιά
και μωρά.
• Γεμίστε με νερό το δοχείο νερού (βλ. „Πλήρωση
δοχείου νερού“).
• Τοποθετήστε το φις σε μία πρίζα που να αντιστοιχεί
στην αναγραφόμενη τάση στην πινακίδα τύπου.
• Ρυθμίστε τον ρυθμιστή θερμοκρασίας 8 στη
θέση „MAX“.
• Θερμαίνετε το ατμοσίδερο μερικά λεπτά στην
υψηλότερη βαθμίδα.
• Πιέστε το πλήκτρο για την εκτόξευση ατμού 4
μερικές φορές, ώστε να εξέλθει ατμός
από τον πάτο του σίδερου q.
• Σιδερώστε μετά ένα ύφασμα που δεν σας είναι
απαραίτητο για να αφαιρέσετε ενδεχόμενες
ακαθαρσίες από τον πάτο του ατμοσίδερου q.
Αναλογία
Σκληρότητα
νερού
πολύ μαλακό/
μαλακό
μέτριο 1 : 1
σκληρό 2 : 1
πολύ σκληρό 3 : 1
Μπορείτε να μάθετε για τη σκληρότητα νερού στην
τοπική εγκατάσταση ύδρευσης.
αποσταγμένου
νερού σε νερό
δικτύου
0
- 15 -
Page 19

Σύνδεση και σιδέρωμα
Στεγνό σιδέρωμα χωρίς ατμό είναι δυνατό σε
όλες τις θερμοκρασίες, σιδέρωμα με ατμό γίνεται
από τη βαθμίδα ρύθμισης στον ρυθμιστή
θερμοκρασίας 8.
• Εισάγετε το βύσμα σε μια πρίζα δικτύου.
Προσοχή! Υλικές ζημιές!
Εάν η υπόδειξη φροντίδας στο ρούχο απαγορεύει
το σιδέρωμα (σύμβολο ), τότε δεν επιτρέπεται να
το σιδερώσετε. Σε διαφορετική περίπτωση μπορεί να
καταστρέψετε το ρούχο.
• Ελέγξτε την υπόδειξη φροντίδας στην ετικέτα του
ρούχου και για το εάν ενδείκνυται το σιδέρωμα
σε αυτό και σε ποια θερμοκρασία.
Σύμβολο
Ρυθμιστή
θερμοκρασίας 8
Είδος υφάσματος
Ακρυλικό, ραιγιόν
Μετάξι, μαλλί,
πολυεστερικό ανάμικτο
ύφασμα
Βαμβάκι, λινό, βισκόζη
Η λυχνία ελέγχου για τη θερμοκρασία 7 ανάβει.
Όταν σβήσει η λυχνία ελέγχου 7 τότε έχει επιτευχθεί
η ρυθμισμένη θερμοκρασία.
• Περιμένετε έως ότου σβήσει η λυχνία ελέγχου για
τη θερμοκρασία 7.
• Για να υγράνετε τα πλυμένα ρούχα πιέστε στο
πλήκτρο λειτουργίας ψεκασμού 5.
Αυτή η λειτουργία ενδείκνυται για στεγνά, ιδιαίτερα
τσαλακωμένα ρούχα.
Σιδέρωμα με ατμό
• Ρυθμίστε με τον ρυθμιστή ατμού 3 την επιθυμητή
ένταση ατμού.
• Ο ρυθμιστής θερμοκρασίας 8 πρέπει να έχει
στραφεί τουλάχιστο στη βαθμίδα ρύθμισης
Αλλιώς δεν μπορεί να δημιουργηθεί ατμός.
Σιδέρωμα με εκτόξευση ατμού
Η εκτόξευση ατμού ενδείκνυται ειδικά για το ίσιωμα
σε δύσκολα προσβάσιμα μέρη των ρούχων.
• Σηκώστε λίγο το ατμοσίδερο.
• Για την εκτόξευση ατμού, πιέστε το σχετικό
πλήκτρο 4.
• Ρυθμίστε την ενδεδειγμένη θερμοκρασία με τον
ρυθμιστή θερμοκρασίας 8.
Υπόδειξη:
Κατά τη διάρκεια της θέρμανσης, τοποθετείτε το
σίδερο πάντα στην υποδοχή 0.
Όταν τοποθετείτε το σίδερο στην βάση σίδερου q
κατά τη διάρκεια της θέρμανσης και δεν το
μετακινείτε, μετά από 30 δευτερόλεπτα ενεργοποιείται
η αυτόματη απενεργοποίηση (δείτε το Κεφάλαιο
"Αυτόματη απενεργοποίηση") και η συσκευή
σταματάει την θέρμανση.
Προσωρινή απενεργοποίηση
του ατμοσίδερου
Κίνδυνος πυρκαγιάς!
Ποτέ μην αφήνετε το καυτό, συνδεδεμένο στο δίκτυο
ρεύματος ή ενεργοποιημένο ατμοσίδερο, χωρίς
επιτήρηση.
• Θέστε το ρυθμιστή θερμοκρασίας 8 στη θέση
„MIN“.
• Τοποθετείτε το ατμοσίδερο μόνο επάνω στην
υποδοχή 0.
- 16 -
Page 20

Απενεργοποίηση ατμοσίδερου
• Τραβήξτε το φις από την πρίζα.
• Αδειάστε το δοχείο νερού και καθαρίστε τον
πάτο q.
• Τοποθετήστε το κρύο ατμοσίδερο επάνω στην
υποδοχή 0.
Λειτουργία αποφυγής
σταξίματος (Drip-stop)
Στα κοινά ατμοσίδερα υπάρχει η πιθανότητα σε
μικρή θερμοκρασία σιδερώματος να στάξει νερό
από τον πάτο q. Αυτό το ατμοσίδερο φέρει ένα
νέο σύστημα στον εξοπλισμό του, την λειτουργία
DRIP-STOP.
Το ατμοσίδερο απενεργοποιεί αυτόματα την
εκτόξευση ατμού σε χαμηλές θερμοκρασίες. Όταν
αυτό συμβεί ακούγεται ένα „κλικ”. Ρυθμίστε με τον
ρυθμιστή θερμοκρασίας 8 την ενδεδειγμένη
θερμοκρασία. Μόλις αυτή επιτευχθεί, η δημιουργία
ατμού συνεχίζεται.
Αυτόματη απενεργοποίηση
Το ατμοσίδερο είναι εξοπλισμένο με μια αυτόματη
λειτουργία απενεργοποίησης. Αυτή σταματάει τη
θέρμανση του ατμοσίδερου.
Όταν το ατμοσίδερο βρίσκεται επάνω στον
πάτο του σίδερου q και δεν μετακινείται περ. για
30 δευτερόλεπτα, ακούγονται προειδοποιητικά
σήματα και η λυχνία ελέγχου για την αυτόματη
απενεργοποίηση 6 αναβοσβήνει. Η θέρμανση του
ατμοσίδερου σταματάει. Για να απενεργοποιήσετε την
αυτόματη απενεργοποίηση, σηκώστε το ατμοσίδερο
και περιστρέψτε το ελαφρώς πέρα - δώθε. Η λυχνία
ελέγχου για την αυτόματη απενεργοποίηση 6 σβήνει
και το ατμοσίδερο ζεσταίνεται πάλι.
Όταν το ατμοσίδερο βρίσκεται επάνω στην υποδοχή 0
και δεν μετακινείται περ. για 8 λεπτά, ακούγονται
προειδοποιητικά σήματα και η λυχνία ελέγχου για
την αυτόματη απενεργοποίηση 6 αναβοσβήνει.
Η θέρμανση του ατμοσίδερου σταματάει. Για να
απενεργοποιήσετε την αυτόματη απενεργοποίηση,
σηκώστε το ατμοσίδερο και περιστρέψτε το ελαφρώς
πέρα - δώθε. Η λυχνία ελέγχου για την αυτόματη
απενεργοποίηση 6 σβήνει και το ατμοσίδερο
ζεσταίνεται πάλι.
Υπόδειξη:
Η αυτόματη απενεργοποίηση δε σημαίνει ότι η συσκευή
τίθεται εκτός ρεύματος όπως όταν τραβάτε το φις
από την πρίζα! Εξυπηρετεί αποκλειστικά τη μείωση
του κινδύνου πυρκαγιάς, στην περίπτωση που κατά
λάθος το ατμοσίδερο δεν απενεργοποιηθεί!
Καθαρισμός
Σύστημα αυτοκαθαρισμού
• Γεμίστε το δοχείο νερού μέχρι τη σήμανση “MAX”.
• Βάλτε το φις στην πρίζα.
• Θέστε τον ρυθμιστή θερμοκρασίας 8 στη θέση
“MAX”.
• Θέστε τον ρυθμιστή ατμού 3 στη μέγιστη ένταση
ατμού.
• Αφήστε το ατμοσίδερο να ζεσταθεί μέχρι η λυχνία
ελέγχου 7 να σβήσει και να ανάψει εκ νέου.
• Κρατήστε το ατμοσίδερο σε θέση οριζόντια πάνω
από μία λεκάνη.
• Πιέστε το πλήκτρο Selfclean w και κρατήστε το
πατημένο. Μετακινήστε τότε το σίδερο ατμού
ελαφρώς πέρα - δώθε.
Βγαίνει ατμός και βραστό νερό από τις οπές εξόδου
ατμού στη βάση του σίδερου q.
Τυχόν υπάρχουσες ακαθαρσίες αποπλένονται και
εκρέουν προς τα έξω.
• Αφήστε το πλήκτρο Selfclean w ελεύθερο,
μόλις το νερό στο δοχείο έχει καταναλωθεί.
- 17 -
Page 21

• Στεγνώστε τον πάτο q επιμελώς.
Για αυτό περάστε τον πάτο q μερικές φορές
πέρα - δώθε σε ένα πανί ή σε ένα παλαιό κομμάτι
ύφασμα.
• Αφήστε το ατμοσίδερο να κρυώσει πριν να το
αποθηκεύσετε.
Περίβλημα και βάση σίδερου
Κίνδυνος-θάνατος!
Τραβήξτε το βύσμα από την πρίζα πριν τον
καθαρισμό.
Υπάρχει κίνδυνος ηλεκτροπληξίας!
Κίνδυνος τραυματισμού!
Αφήνετε τη συσκευή να κρυώνει πριν από τον
καθαρισμό.
Αλλιώς υπάρχει κίνδυνος εγκαύματος!
Διόρθωση δυσλειτουργιών
Το ατμοσίδερο δεν εκτοξεύει ατμό ή εκτοξεύει
πολύ λίγο ατμό:
Το απόθεμα νερού στο ατμοσίδερο είναι μειωμένο.
Γεμίστε το δοχείο νερού με νερό δικτύου (βλ.
“Πλήρωση δοχείου νερού“).
Το ατμοσίδερο δεν ζεσταίνεται:
• Το ατμοσίδερο δεν είναι συνδεδεμένο ή
ενεργοποιημένο. Τοποθετήστε το φις στην πρίζα
και θέστε με τον ρυθμιστή θερμοκρασίας 8 την
επιθυμητή θερμοκρασία.
• Το ατμοσίδερο είναι ελαττωματικό και θα πρέπει
να επισκευασθεί από εξειδικευμένο προσωπικό.
Απόρριψη
Προσοχή! Υλικές ζημιές!
Μη χρησιμοποιείτε άγρια, εκτριπτικά και χημικά
απορρυπαντικά.
Αυτά μπορεί να προσβάλουν την επιφάνεια και να
οδηγήσουν σε ανεπανόρθωτες ζημιές στη συσκευή.
• Καθαρίζετε το περίβλημα μόνο με ένα μαλακό,
στεγνό πανί.
• Καθαρίστε την βάση σίδερου q με ένα ελαφρώς
νωπό πανί και με ένα απαλό και όχι εκτριπτικό
απορρυπαντικό.
Φύλαξη
Φυλάτε την κρύα συσκευή σε έναν καθαρό και
στεγνό χώρο χωρίς σκόνη.
Σε καμία περίπτωση μην απορρίπτετε τη
συσκευή στα οικιακά απορρίμματα. Αυτό
το προϊόν υπόκειται στην Ευρωπαϊκή
Οδηγία 2012/19/EU.
Απομακρύνετε τη συσκευή μέσω μιας εγκεκριμένης
επιχείρησης απόρριψης ή μέσω της κοινοτικής
επιχείρησης απόρριψης.
Να τηρείτε τους ισχύοντες κανονισμούς. Σε περίπτωση
αμφιβολιών ελάτε σε επαφή με την επιχείρηση απόρριψης.
Απομακρύνετε όλα τα υλικά συσκευασιών
φιλικά προς το περιβάλλον.
- 18 -
Page 22

Εγγύηση και σέρβις
Εισαγωγέας
Η παρούσα συσκευή διαθέτει 3 χρόνια εγγύηση από
την ημερομηνία αγοράς. Η συσκευή κατασκευάστηκε
και ελέγχθηκε προσεκτικά πριν από την αποστολή.
Παρακαλούμε φυλάξτε την απόδειξη ταμείου ως
απόδειξη για την αγορά. Παρακαλούμε επικοινωνήστε
τηλεφωνικά με την υπηρεσία σέρβις σε περίπτωση
εγγύησης. Μόνο έτσι μπορεί να εξασφαλιστεί μια
δωρεάν αποστολή του εμπορεύματός σας.
Η απόδοση εγγύησης ισχύει μόνο για σφάλματα
υλικού ή κατασκευής, όχι όμως για ζημιές από τη
μεταφορά, για φθειρόμενα εξαρτήματα ή για βλάβες
σε εύθραυστα εξαρτήματα, π.χ. διακόπτες ή
συσσωρευτές.
Το προϊόν προορίζεται μόνο για ιδιωτική και όχι για
επαγγελματική χρήση. Σε περίπτωση κακής
μεταχείρισης και ακατάλληλης χρήσης, σε χρήση
βίας και σε παρεμβάσεις οι οποίες δεν διεξήχθησαν
από το εξουσιοδοτημένο μας τμήμα σέρβις, η
εγγύηση παύει να ισχύει. Τα νομικά σας δικαιώματα
δεν περιορίζονται μέσω αυτής της εγγύησης.
Ο χρόνος εγγύησης δεν επεκτείνεται μέσω της
απόδοσης εγγύησης. Αυτό ισχύει και για εξαρτήματα
τα οποία έχουν αντικατασταθεί ή επισκευαστεί.
Ενδεχόμενες ήδη υπάρχουσες κατά την αγορά ζημιές
και ελλείψεις πρέπει να αναφέρονται αμέσως μετά
την αποσυσκευασία, το αργότερο όμως δύο ημέρες
μετά την ημερομηνία αγοράς. Επισκευές που
εμφανίζονται μετά τη λήξη του χρόνου εγγύησης
χρεώνονται.
KOMPERNASS HANDELS GMBH
BURGSTRASSE 21
44867 BOCHUM
GERMANY
www.kompernass.com
Σέρβις Ελλάδα
Tel.: 801 5000 019 (0,03 EUR/Min.)
E-Mail: kompernass@lidl.gr
IAN 273029
Σέρβις Κύπρος
Tel.: 8009 4409
E-Mail: kompernass@lidl.com.cy
IAN 273029
Τηλεφωνικό κέντρο (Hotline):
Δευτέρα έως Παρασκευή, 8:00 – 20:00 (CET)
- 19 -
Page 23

- 20 -
Page 24

Inhaltsverzeichnis Seite
Einleitung 22
Bestimmungsgemäßer Gebrauch 22
Lieferumfang 22
Bedienelemente 22
Technische Daten 22
Sicherheitshinweise 23
Vor dem ersten Gebrauch 25
Wassertank befüllen 25
Anschließen und Bügeln 26
Dampfbügeln 26
Bügeln mit Dampfstoß 26
Dampfbügeleisen vorübergehend abstellen 26
Dampfbügeleisen außer Betrieb nehmen 27
Tropf-Stop-Funktion 27
Automatische Abschaltung 27
Reinigen 27
Selbstreinigungs-Funktion...............................................................................................................27
Gehäuse und Bügelsohle..............................................................................................................28
Aufbewahren 28
Fehlfunktionen beseitigen 28
Entsorgen 28
Garantie und Service 29
Importeur 29
- 21 -
Page 25
DAMPFBÜGELEISEN
Einleitung
Herzlichen Glückwunsch zum Kauf Ihres neuen
Gerätes.
Sie haben sich damit für ein hochwertiges Produkt
entschieden. Die Bedienungsanleitung ist Bestandteil dieses Produkts. Sie enthält wichtige Hinweise
für Sicherheit, Gebrauch und Entsorgung. Machen
Sie sich vor der Benutzung des Produkts mit allen
Bedien- und Sicherheitshinweisen vertraut. Benutzen
Sie das Produkt nur wie beschrieben und für die angegebenen Einsatzbereiche. Händigen Sie alle
Unterlagen bei Weitergabe des Produkts an Dritte
mit aus.
Bestimmungsgemäßer
Gebrauch
Bedienelemente
Abbildung A:
1 Wasserdüse
2 Einfüllöffnung für den Wassertank
3 Dampfregler
4 Taste für den Dampfstoß
5 Taste für Sprühfunktion
6 Kontrollleuchte für die
automatische Abschaltung
7 Kontrollleuchte für die Temperatur
8 Temperaturregler
9 Netzkabel mit Knickschutz
0 Sockel
q Bügelsohle
w Selfclean-Taste
Abbildung B:
e Messbecher
Technische Daten
Das Dampfbügeleisen ist ausschließlich zum Bügeln
von Kleidung bestimmt. Sie dürfen es nur innerhalb
geschlossener Räume und in privaten Haushalten
verwenden. Alle anderen Verwendungen gelten als
nicht bestimmungsgemäß. Benutzen Sie es nicht gewerblich!
Lieferumfang
Dampfbügeleisen
Messbecher
Bedienungsanleitung
Versorgungsspannung: 220 - 240 V
50/60 Hz
max. Leistungsaufnahme: 2200 W
- 22 -
~
Page 26

Sicherheitshinweise
Verbrennungsgefahr!
•Fassen Sie das Dampfbügeleisen nur am Griff an, wenn es heiß ist.
•Kinder sollten beaufsichtigt werden, um sicherzustellen, dass sie nicht mit dem
Gerät spielen.
•Halten Sie niemals Ihre Hände in den Dampfstoß oder an heiße Metallteile.
•Sie dürfen die Einfüllöffnung für den Wassertank während des Gebrauchs nicht
öffnen. Lassen Sie das Dampfbügeleisen zunächst erkalten und ziehen Sie den
Netzstecker aus der Netzsteckdose.
•Das Bügeleisen und dessen Anschlussleitung müssen während des Einschaltens
oder Abkühlens außer Reichweite von Kindern sein, die jünger als 8 Jahre alt
sind.
Verletzungsgefahr! Brandgefahr!
•Lassen Sie das heiße, am Stromnetz angeschlossene oder eingeschaltete
Dampfbügeleisen niemals unbeaufsichtigt.
•Verstauen Sie das Dampfbügeleisen nur im abgekühlten Zustand.
•Das Dampfbügeleisen muss auf einer stabilen Oberfläche benutzt und abge-
stellt werden.
• Bügeln Sie nur mit den auf den Pflegehinweisen angegebenen und für das Material geeigneten Temperatureinstellungen. Sie können die Wäsche andernfalls
beschädigen. Falls Sie keine Pflegehinweise kennen, beginnen Sie mit der niedrigsten Temperatureinstellung.
• Stellen Sie das Bügeleisen nur auf einen ebenen und hitzeunempfindlichen
Untergrund. Das Bügeleisen muss stabil stehen.
• Wenn Sie das Dampfbügeleisen aus der Hand legen wollen, stellen Sie es nur
auf dem Sockel ab.
Gefahr durch elektrischen Schlag!
• Die Spannung der Stromquelle muss mit den Angaben auf dem Typenschild
des Gerätes übereinstimmen.
• Lassen Sie ein defektes Gerät umgehend von einer qualifizierten Fachwerkstatt instandsetzen, oder wenden Sie sich an den Kundenservice, um Gefährdungen zu
vermeiden.
• Lassen Sie beschädigte Netzstecker oder Netzkabel sofort von autorisiertem
Fachpersonal oder dem Kundenservice austauschen, um Gefährdungen zu
vermeiden.
• Ziehen Sie immer nur am Netzstecker, niemals am Kabel.
- 23 -
Page 27

• Knicken oder quetschen Sie das Netzkabel nicht und verlegen Sie es so, dass
es nicht in Kontakt mit heißen Oberflächen kommt und niemand darauf treten
oder darüber stolpern kann.
• Ziehen Sie vor dem Reinigen, beim Auffüllen mit Leitungswasser und nach jedem Gebrauch den Netzstecker.
• Rollen Sie das Netzkabel vor dem Einschalten immer vollständig ab und verwenden Sie keine Verlängerungskabel.
• Fassen Sie das Kabel oder den Netzstecker niemals mit feuchten Händen an.
• Benutzen Sie das Dampfbügeleisen keinesfalls in der Nähe von Wasser, das in
Badewannen, Duschen, Waschbecken oder anderen Gefäßen enthalten ist.
Die Nähe von Wasser stellt eine Gefahr dar, auch wenn das Gerät
ausgeschaltet ist.
• Sie dürfen das Dampfbügeleisen keinesfalls in eine Flüssigkeit tauchen und keine Flüssigkeiten in das Gerätegehäuse des Dampfbügeleisens gelangen lassen. Sie dürfen das Gerät keiner Feuchtigkeit aussetzen und nicht im Freien
benutzen. Falls doch einmal Flüssigkeit in das Gerätegehäuse gelangt, ziehen
Sie sofort den Netzstecker des Geräts aus der Netzsteckdose und lassen Sie
es von qualifiziertem Fachpersonal reparieren.
• Sie dürfen das Gerätegehäuse des Dampfbügeleisens nicht öffnen. Lassen Sie
das defekte Dampfbügeleisen nur von qualifiziertem Fachpersonal reparieren.
• Benutzen Sie das Dampfbügeleisen auf keinen Fall, wenn es sichtbare Beschädigungen aufweist, heruntergefallen ist, oder Wasser ausläuft. Lassen Sie es
erst von qualifiziertem Fachpersonal reparieren.
• Benutzen Sie das Gerät nicht weiter, wenn der Knickschutz am Netzkabel beschädigt ist!
• Dieses Gerät kann von Kindern ab 8 Jahren und älter und von Personen mit reduzierten physischen, sensorischen oder mentalen Fähigkeiten oder Mangel
an Erfahrung und/oder Wissen benutzt werden, wenn sie beaufsichtigt oder
bezüglich des sicheren Gebrauchs des Gerätes unterwiesen wurden und die
daraus resultierenden Gefahren verstanden haben. Kinder dürfen nicht mit
dem Gerät spielen. Reinigung und Benutzer-Wartung dürfen nicht durch Kinder
ohne Beaufsichtigung durchgeführt werden.
- 24 -
Page 28

Achtung! Sachschaden!
• Falls die Pflegehinweise in der Kleidung das
Bügeln untersagen (Symbol ), dürfen Sie das
Kleidungsstück nicht bügeln. Sie könnten das
Kleidungsstück andernfalls beschädigen.
• Sie dürfen ausschließlich Leitungswasser/destilliertes Wasser in den Wassertank einfüllen. Andernfalls beschädigen Sie das Dampfbügeleisen.
• Sie dürfen das Dampfbügeleisen nicht mit Lösungsmitteln, Alkohol oder scheuernden Reinigungsmitteln
säubern. Andernfalls könnten Sie es beschädigen.
Vor dem ersten Gebrauch
• Entnehmen Sie das Dampfbügeleisen aus der
Verpackung.
• Entfernen Sie alle Aufkleber und Folienteile vom
Dampfbügeleisen und der Bügelsohle q.
Erstickungsgefahr!
Plastiktüten können eine Gefahr darstellen. Um Erstickungsgefahr zu vermeiden, bewahren Sie die
Plastiktüten außerhalb der Reichweite von Babies
und Kleinkindern auf.
• Füllen Sie Wasser in den Wassertank (siehe Kapitel „Wassertank befüllen“).
• Stecken Sie den Netzstecker in eine Netzsteckdose, die der auf dem Typenschild
angegebenen Spannung entspricht.
• Stellen Sie den Temperaturregler 8 in die
Position „MAX“.
• Heizen Sie das Dampfbügeleisen einige
Minuten auf der höchsten Stufe auf.
• Betätigen Sie die Taste für den Dampfstoß 4
einige Male, so dass Dampf aus der Bügelsohle q austritt.
• Bügeln Sie dann ein nicht mehr benötigtes Stück
Stoff, um eventuelle Unreinheiten von der
Bügelsohle q zu beseitigen.
Wassertank befüllen
• Halten Sie das Bügeleisen schräg in der Hand.
• Öffnen Sie den Deckel der Einfüllöffnung für den
Wassertank 2.
• Füllen Sie mit dem Messbecher e Leitungswas-
ser bis höchstens zur „MAX“-Markierung in den
Wassertank.
• Schließen Sie den Deckel der Einfüllöffnung für
den Wassertank 2.
Hinweis:
Sollte das Leitungswasser Ihres Wohnortes zu hart
sein, empfiehlt es sich, das Leitungswasser mit destilliertem Wasser zu mischen. Ansonsten können die
Düsen für die Dampfstoß-Funktion vorzeitig verkalken.
Zur Verlängerung der optimalen Dampfstoß-Funktion mischen Sie das Leitungswasser mit destilliertem
Wasser entsprechend der Tabelle.
Anteil destillier-
Wasserhärte
sehr
weich/weich
mittel 1 : 1
hart 2 : 1
sehr hart 3 : 1
Die Wasserhärte können Sie beim örtlichem
Wasserwerk erfragen.
tes Wasser zu
Leitungswasser
0
- 25 -
Page 29

Anschließen und Bügeln
Trockenbügeln ohne Dampf können Sie bei allen
Temperaturen, Dampfbügeln ist erst ab dem Einstellbereich am Temperaturregler 8 möglich.
• Stecken Sie den Netzstecker in eine
Netzsteckdose.
Die Kontrollleuchte für die Temperatur 7 leuchtet.
Wenn die Kontrollleuchte 7 erlischt, ist die
eingestellte Temperatur erreicht.
• Warten Sie, bis die Kontrollleuchte für die
Temperatur 7 erlischt.
• Zum Befeuchten der Wäsche drücken Sie auf
die Taste für die Sprühfunktion 5.
Achtung! Sachschaden!
Falls die Pflegehinweise in der Kleidung das Bügeln
untersagen (Symbol ), dürfen Sie das Kleidungsstück nicht bügeln. Sie könnten das Kleidungsstück
anderenfalls beschädigen.
• Prüfen Sie die Pflegehinweise auf den Schildern
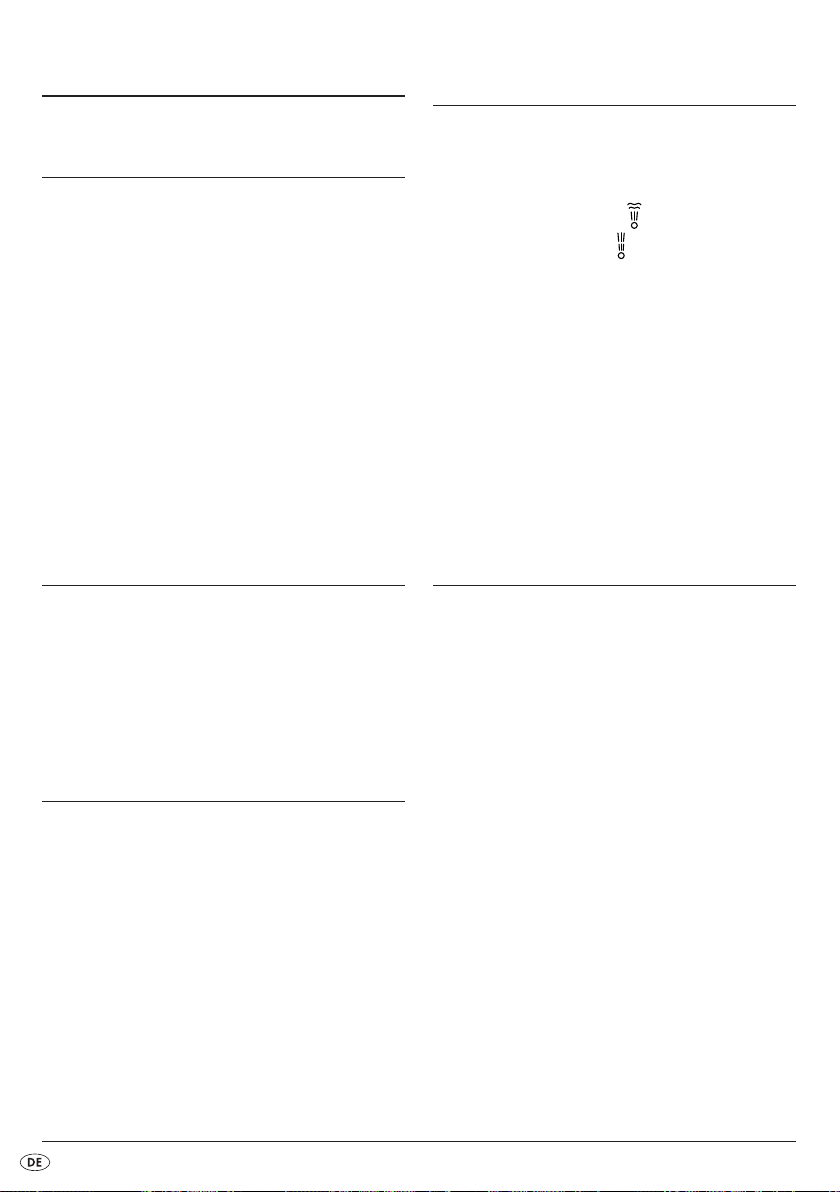
in der Kleidung, ob und bei welcher Temperatureinstellung das Kleidungsstück zum Bügeln geeignet ist.
Symbol
Temperaturregler 8
• Stellen Sie die geeignete Temperatureinstellung
mit dem Temperaturregler 8 ein.
Stoffart
Acryl, Rayon
Seide, Wolle,
Polyestermischgewebe
Baumwolle, Leinen,
Viskose
Diese Funktion ist für sehr trockene, stark knittrige
Wäsche geeignet.
Dampfbügeln
• Stellen Sie mit dem Dampfregler 3 die
gewünschte Dampfstärke ein.
• Der Temperaturregler 8 muss mindestens bis in
den Einstellbereich gedreht sein. Ansonsten kann kein Dampf erzeugt werden.
Bügeln mit Dampfstoß
Der Dampfstoß eignet sich besonders, um schwer
zugängliche Bereiche der Wäsche zu glätten.
• Heben Sie das Dampfbügeleisen leicht an.
• Drücken Sie für einen Dampfstoß die Taste für
den Dampfstoß 4.
Dampfbügeleisen
vorübergehend abstellen
Hinweis:
Stellen Sie das Bügeleisen während des Aufheizens
immer auf den Sockel 0.
Wenn Sie das Bügeleisen während des Aufheizens
auf die Bügelsohle q stellen und nicht bewegen,
wird nach 30 Sekunden die automatische Abschaltung aktiviert (siehe Kapitel “Automatische Abschaltung”) und das Gerät stoppt das Heizen.
Brandgefahr!
Lassen Sie das heiße, am Stromnetz angeschlossene oder eingeschaltete Dampfbügeleisen niemals
unbeaufsichtigt.
• Stellen Sie den Temperaturregler 8 in die
Position „MIN“.
• Stellen Sie das Dampfbügeleisen nur auf dem
Sockel 0 ab.
- 26 -
Page 30

Dampfbügeleisen außer Betrieb
nehmen
• Ziehen Sie den Netzstecker aus der
Netzsteckdose.
• Leeren Sie den Wassertank und reinigen Sie die
Bügelsohle q.
• Stellen Sie das abgekühlte Dampfbügeleisen auf
den Sockel 0.
Wenn das Bügeleisen auf dem Sockel 0 steht und
es für ca. 8 Minuten nicht bewegt wird, erklingen
Warnsignale und die Kontrollleuchte für die automatische Abschaltung 6 blinkt. Das Heizen des Bü-
geleisens wird gestoppt. Um die automatische Abschaltung zu deaktivieren, heben Sie das
Bügeleisen an und schwenken Sie es leicht hin und
her. Die Kontrollleuchte für die automatische Abschaltung 6 erlischt und das Bügeleisen heizt wieder auf.
Tropf-Stop-Funktion
Bei herkömmlichen Dampfbügeleisen kann es vorkommen, dass bei zu geringer Bügeltemperatur
Wasser aus der Bügelsohle q tropft. Dieses Bügeleisen weist jedoch ein neues Ausstattungsmerkmal,
die TROPF-STOP-Funktion auf. Das Bügeleisen
schaltet den Dampfstoß bei niedrigen Temperaturen
automatisch ab. Wenn dies geschieht, ist ein „Klick”
zu hören. Stellen Sie dann mit dem Temperaturregler 8 die geeignete Temperatur ein. Sobald
diese erreicht ist, wird die Dampferzeugung
fortgesetzt.
Automatische Abschaltung
Das Bügeleisen ist mit einer automatischen Abschaltung ausgestattet. Diese stoppt das Heizen des Bügeleisens.
Wenn das Bügeleisen auf der Bügelsohle q steht
und es für ca. 30 Sekunden nicht bewegt wird, erklingen Warnsignale und die Kontrollleuchte für die
automatische Abschaltung 6 blinkt. Das Heizen
des Bügeleisens wird gestoppt. Um die automatische Abschaltung zu deaktivieren, heben Sie das
Bügeleisen an und schwenken Sie es leicht hin und
her. Die Kontrollleuchte für die automatische Abschaltung 6 erlischt und das Bügeleisen heizt wieder auf.
Hinweis:
Die automatische Abschaltung ersetzt nicht das Ziehen des Netzsteckers! Sie dient lediglich der Reduzierung der Brandgefahr, wenn das Bügeleisen versehentlich nicht ausgeschaltet wird!
Reinigen
Selbstreinigungs-Funktion
• Füllen Sie den Wassertank bis zur Markierung
„MAX“.
• Stecken Sie den Netzstecker in die Netzsteckdose.
• Stellen Sie den Temperaturregler 8 auf Position
„MAX“.
• Stellen Sie den Dampfregler 3 auf maximale
Dampfstärke.
• Lassen Sie das Dampfbügeleisen aufheizen, bis
die Kontrollleuchte für die Temperatur 7 erlischt
und erneut aufleuchtet.
• Halten Sie das Dampfbügeleisen waagerecht
über eine Auffangschüssel.
• Drücken Sie die Taste Selfclean w und halten
Sie diese gedrückt. Bewegen Sie das Dampfbügeleisen dabei ein wenig hin und her.
Dampf und kochendes Wasser tritt aus den
Dampfaustrittslöchern in der Bügelsohle q aus.
Eventuell vorhandene Verunreinigungen werden
dabei herausgespült.
• Lassen Sie die Taste Selfclean w los, sobald das
Wasser im Wassertank aufgebraucht ist.
- 27 -
Page 31

• Trocknen Sie die Bügelsohle q gründlich. Führen Sie dazu die Bügelsohle q einige Male
über ein Handtuch oder altes Stück Stoff hin und
her.
• Lassen Sie das Dampfbügeleisen abkühlen,
bevor Sie es zur Seite stellen.
Gehäuse und Bügelsohle
Lebensgefahr!
Ziehen Sie vor der Reinigung den Netzstecker. Es
besteht die Gefahr eines elektrischen Schlages!
Verletzungsgefahr!
Lassen Sie das Gerät vor dem Reinigen abkühlen.
Ansonsten besteht Verbrennungsgefahr!
Achtung! Sachschaden!
Benutzen Sie keine aggressiven, scheuernden oder
chemischen Reinigungsmittel. Diese können die
Oberfläche angreifen und zu irreparablen Schäden
am Gerät führen.
• Reinigen Sie das Gehäuse nur mit einem
weichen, trockenem Tuch.
• Reinigen Sie die Bügelsohle q mit einem leicht
mit Wasser befeuchtetem Tuch und einem milden, nicht scheuerndem Reinigungsmittel.
Aufbewahren
Fehlfunktionen beseitigen
Das Dampfbügeleisen stößt keinen oder sehr
wenig Dampf aus:
Der Vorrat an Leitungswasser im Dampfbügeleisen
ist erschöpft. Füllen Sie den Wassertank mit
Leitungswasser (Siehe „Wassertank befüllen“).
Das Dampfbügeleisen erhitzt sich nicht:
• Das Bügeleisen ist nicht angeschlossen oder
nicht eingeschaltet. Stecken Sie den Netzstecker
in die Netzsteckdose und stellen mit dem Temperaturregler 8 die gewünschte Temperatur ein.
• Das Dampfbügeleisen ist defekt. Lassen Sie das
Dampfbügeleisen von qualifiziertem Fachpersonal reparieren.
Entsorgen
Werfen Sie das Gerät keinesfalls in den
normalen Hausmüll. Dieses Produkt
unterliegt der europäischen Richtlinie
2012/19/EU.
Entsorgen Sie das Gerät über einen zugelassenen
Entsorgungsbetrieb oder über Ihre kommunale
Entsorgungseinrichtung.
Beachten Sie die aktuell geltenden Vorschriften.
Setzen Sie sich im Zweifelsfall mit Ihrer Entsorgungseinrichtung in Verbindung.
Bewahren Sie das abgekühlte Gerät an einem sauberen, staubfreien und trockenem Ort auf.
Führen Sie alle Verpackungsmaterialien
einer umweltgerechten Entsorgung zu.
- 28 -
Page 32

Garantie und Service
Sie erhalten auf dieses Gerät 3 Jahre Garantie ab
Kaufdatum. Das Gerät wurde sorgfältig produziert
und vor Anlieferung gewissenhaft geprüft.
Bitte bewahren Sie den Kassenbon als Nachweis
für den Kauf auf. Bitte setzen Sie sich im Garantiefall mit Ihrer Servicestelle telefonisch in Verbindung.
Nur so kann eine kostenlose Einsendung Ihrer Ware
gewährleistet werden.
Die Garantieleistung gilt nur für Material- oder
Fabrikationsfehler, nicht aber für Transportschäden,
Verschleißteile oder für Beschädigungen an zerbrechlichen Teilen, z. B. Schalter oder Akkus. Das
Produkt ist lediglich für den privaten und nicht für
den gewerblichen Gebrauch bestimmt.
Bei missbräuchlicher und unsachgemäßer Behandlung, Gewaltanwendung und bei Eingriffen, die
nicht von unserer autorisierten Service-Niederlassung vorgenommen wurden, erlischt die Garantie.
Ihre gesetzlichen Rechte werden durch diese
Garantie nicht eingeschränkt.
Die Garantiezeit wird durch die Gewährleistung
nicht verlängert. Dies gilt auch für ersetzte und reparierte Teile. Eventuell schon beim Kauf vorhandene
Schäden und Mängel müssen sofort nach dem
Auspacken gemeldet werden, spätestens aber zwei
Tage nach Kaufdatum. Nach Ablauf der Garantiezeit anfallende Reparaturen sind kostenpflichtig.
Service Deutschland
Tel.: 0800 5435 111
(Kostenfrei aus dem dt. Festnetz/Mobilfunknetz)
E-Mail: kompernass@lidl.de
IAN 273029
Service Österreich
Tel.: 0820 201 222 (0,15 EUR/Min.)
E-Mail: kompernass@lidl.at
IAN 273029
Service Schweiz
Tel.: 0842 665566 (0,08 CHF/Min.,
Mobilfunk max. 0,40 CHF/Min.)
E-Mail: kompernass@lidl.ch
IAN 273029
Erreichbarkeit Hotline:
Montag bis Freitag von 8:00 Uhr - 20:00 Uhr (MEZ)
Importeur
KOMPERNASS HANDELS GMBH
BURGSTRASSE 21
44867 BOCHUM
GERMANY
www.kompernass.com
- 29 -
Page 33

KOMPERNASS HANDELS GMBH
BURGSTRASSE 21
44867 BOCHUM
DEUTSCHLAND / GERMANY
www.kompernass.com
Last Information Update · Έκδοση των πληροφοριών
Stand der Informationen:
08 / 2015 · Ident.-No.: SDB2200D2-072015-1
IAN 273029
 Loading...