


RADIOSVEGLIA CON CD SCUR 3 A1
RADIOSVEGLIA CON CD
Istruzioni per l’uso e indicazioni relative alla sicurezza
CD-UHRENRADIO
Bedienungsanleitung und Sicherheitshinweise
IAN 306411
CD CLOCK RADIO
Operating instructions and safety instructions

Prima di leggere aprire la pagina con le immagini e prendere confidenza con le diverse funzioni
dell’apparecchio.
Before reading, unfold the page containing the illustrations and familiarise yourself with all functions of
the device.
Klappen Sie vor dem Lesen die Seite mit den Abbildungen aus und machen Sie sich anschließend mit allen
Funktionen des Gerätes vertraut.
IT / MT Istruzioni per l’uso e indicazioni relative alla sicurezza Pagina 1
GB / MT Operating instructions and safety instructions Page 29
DE / AT / CH Bedienungsanleitung und Sicherheitshinweise Seite 55


Indice
Introduzione .................................................. 3
Informazioni sul presente manuale di istruzioni ...................................3
Indicazioni sui marchi ......................................................3
Uso conforme ............................................................3
Avvertenze utilizzate e simboli di pericolo ......................................4
Sicurezza ..................................................... 5
Pericolo derivante dalla corrente elettrica .......................................5
Avvertenze riguardanti le pile ................................................6
Indicazioni generali relative alla sicurezza ......................................6
Parti ed elementi di comando .................................... 8
Indicazioni sul display ..........................................9
Messa in funzione ............................................. 10
Dotazione e ispezione dei danni da trasporto ..................................10
Smaltimento dell'imballaggio ................................................10
Requisiti del luogo d'installazione ............................................11
Posizionamento dell'apparecchio ............................................11
Connessione all'alimentazione di corrente .....................................11
Inserimento delle pile ......................................................12
Utilizzo e funzionamento .......................................12
Accensione/spegnimento dell'apparecchio ....................................12
Impostazione dell'ora .....................................................13
Selezione della modalità operativa ...........................................13
Volume/riproduzione dei bassi ..............................................13
Caricamento di dispositivi esterni ............................................14
Collegamento cuffia ......................................................14
Radio .......................................................15
Ricerca automatica delle emittenti (AMS) ......................................15
Salvataggio automatico delle emittenti ........................................15
Impostazione manuale dell'emittente ..........................................15
Salvataggio manuale dell'emittente ...........................................16
Richiamo delle emittenti salvate ..............................................16
Ricezione dell'emittente in mono .............................................16
SCUR 3 A1
IT│MT │ 1 ■

Riproduzione CD ..............................................17
Inserimento CD ..........................................................17
Funzioni standard ........................................................18
Funzioni di ripetizione (REPEAT) .............................................18
Riproduzione casuale (RANDOM) ...........................................19
Programmazione della sequenza brani ........................................19
Funzioni sveglia ..............................................20
Impostazione dell'ora della sveglia ...........................................20
Accensione/spegnimento dell'allarme. . . . . . . . . . . . . . . . . . . . . . . . . . . . . . . . . . . . . . . . .21
Altre funzioni ................................................. 22
Illuminazione del display ...................................................22
Funzione SLEEP ..........................................................22
Timer (NAP) .............................................................23
Collegamento dei dispositivi di riproduzione esterni ..............................23
Pulizia ......................................................24
Pulizia dell'alloggiamento ..................................................24
Conservazione in caso di mancato utilizzo ......................... 24
Smaltimento .................................................24
Smaltimento dell'apparecchio ...............................................24
Smaltimento delle pile .....................................................24
Eliminazione dei guasti .........................................25
Cause ed eliminazione dei guasti ............................................25
Appendice ................................................... 26
Dati tecnici ..............................................................26
Indicazioni sulla dichiarazione di conformità UE ................................26
Garanzia della Kompernass Handels GmbH ...................................27
Assistenza ..............................................................28
Importatore .............................................................28
■ 2 │ IT
│
MT
SCUR 3 A1

Introduzione
Informazioni sul presente manuale di istruzioni
Congratulazioni per l'acquisto del nuovo apparecchio.
È stato scelto un prodotto di alta qualità. Il manuale di istruzioni è parte integrante
del presente prodotto. Esso contiene importanti indicazioni sulla sicurezza, l'uso
e lo smaltimento. Prima di utilizzare il prodotto, acquisire dimestichezza con tutte
le indicazioni relative ai comandi e alla sicurezza. Utilizzare il prodotto solo
come descritto e per i campi d'impiego indicati. Conservare con cura il presente
manuale di istruzioni. In caso di cessione del prodotto a terzi, consegnare anche
tutta la relativa documentazione.
Indicazioni sui marchi
USB® è un marchio registrato di USB Implementers Forum, Inc.
Il marchio SilverCrest e il marchio commerciale sono proprietà del relativo titolare.
Tutti gli altri nomi e prodotti possono essere marchi o marchi registrati dei rispettivi
proprietari.
Uso conforme
Questo è un apparecchio dell'elettronica dell'intrattenimento ed è destinato solo
alla ricezione di trasmissioni radio, alla riproduzione di CD, all'utilizzo come
sveglia ed alla riproduzione di musica di dispositivi esterni. Tramite la funzione di
ricarica integrata si possono caricare dispositivi esterni. L'apparecchio è destinato
all'installazione isolata. Un uso diverso o esulante da quanto sopra è considerato
non conforme. L'apparecchio non è destinato all'uso in ambienti commerciali o
industriali. Si esclude qualsiasi tipo di rivendicazione per danni derivanti da un
uso non conforme, riparazioni inadeguate, esecuzione di modifiche non consentite o uso di parti di ricambio non omologate. Il rischio è esclusivamente a carico
dell'utente.
SCUR 3 A1
IT│MT │ 3 ■

Avvertenze utilizzate e simboli di pericolo
Nel presente manuale di istruzioni vengono utilizzate le seguenti avvertenze:
PERICOLO
Un'avvertenza contrassegnata da questo livello di pericolo
indica una situazione pericolosa.
Qualora non fosse possibile evitarla, tale situazione può causare gravi lesioni
o decesso.
► Seguire le avvertenze contenute in questo elenco per evitare il pericolo di
gravi lesioni personali o di morte.
ATTENZIONE
Un'avvertenza contrassegnata da questo livello di pericolo
indica la possibilità di danni materiali.
Qualora non fosse possibile evitarla, tale situazione può causare danni materiali.
► Seguire le indicazioni di questa avvertenza per evitare danni materiali.
NOTA
► Una nota fornisce ulteriori informazioni volte a facilitare l'uso dell'appa-
recchio.
Simboli di pericolo riportati sull'apparecchio:
Simbolo Significato
■ 4 │ IT
│
MT
Attenersi alle avvertenze di pericolo e di sicurezza!
Rischio di folgorazione!
Tensione elettrica pericolosa – Pericolo di morte!
Laser! Non esporsi al raggio laser.
SCUR 3 A1

Sicurezza
In questo capitolo sono riportate importanti indicazioni relative alla sicurezza
nell'uso dell'apparecchio. L'apparecchio è conforme alle norme di sicurezza
prescritte. L'uso inappropriato può comportare danni a persone e a cose.
Pericolo derivante dalla corrente elettrica
PERICOLO
Pericolo di morte da scossa elettrica!
In caso di contatto con linee o elementi sotto tensione sussiste il
pericolo di morte.
Rispettare le seguenti avvertenze di sicurezza per evitare il rischio di folgorazione elettrica:
► Non utilizzare l'apparecchio in presenza di danni alla spina o al cavo di rete.
► Estrarre il cavo di rete dalla presa tirando sempre dalla spina, mai dal cavo
stesso.
► Non afferrare mai la spina o l'apparecchio con le mani umide.
► Se l'apparecchio viene portato da un ambiente freddo in uno caldo, proce-
dere prima ad un eventuale acclimatamento. Tale processo può durare fino
a due ore.
► Non aprire assolutamente l'alloggiamento dell'apparecchio. In caso di con-
tatto con i collegamenti sotto tensione e di modifica della struttura elettrica
e meccanica, sussiste il pericolo di scossa elettrica e d'incendio.
► Non introdurre oggetti nelle feritoie di ventilazione o in altri fori dell'appa-
recchio.
► L'apparecchio consuma corrente in modalità standby. Per scollegare
completamente l'apparecchio dalla rete elettrica, è necessario staccare la
spina dalla presa. L'apparecchio deve quindi venire collocato in modo tale
da garantire costantemente l'accesso libero alla presa di corrente, al fine di
poter staccare la spina in situazioni di emergenza.
SCUR 3 A1
IT│MT │ 5 ■

Avvertenze riguardanti le pile
PERICOLO
Pericolo di lesioni dovuto all'errato utilizzo delle pile!
► Tenere le pile fuori dalla portata dei bambini. I bambini potrebbero metterle
in bocca e ingerirle. In caso di ingerimento delle pile, ricorrere immediata-
mente al soccorso medico.
► Non gettare le pile nel fuoco. Non sottoporre le pile a elevate temperature.
► Pericolo di esplosione! Solo le pile contrassegnate come "ricaricabili"
possono essere ricaricate.
► Non aprire, deformare né cortocircuitare le pile.
► Non combinare tipi di pile diversi.
► A causa dell'alto rischio di fuoriuscita di liquido, è preferibile rimuovere le
pile scariche. Si consiglia di rimuovere le pile anche quando non si utilizza
l'apparecchio per un periodo prolungato.
► L'acido che fuoriesce dalle pile può provocare irritazioni cutanee. In caso
di contatto con la pelle, lavare abbondantemente con acqua. Qualora il
liquido avesse raggiunto gli occhi, lavarsi abbondantemente con acqua,
non sfregare e consultare subito un medico.
► Il capitolo "Inserimento delle pile" spiega come inserire ed estrarre le pile
dall'apparecchio.
Indicazioni generali relative alla sicurezza
Per l'uso sicuro dell'apparecchio, rispettare le seguenti indicazioni relative alla
sicurezza:
■ Questo apparecchio può essere utilizzato dai bambini di almeno 8anni di
età e da persone con capacità fisiche, sensoriali o mentali ridotte o insufficiente esperienza o conoscenza, solo se sorvegliati o istruiti sull'uso sicuro
dell'apparecchio e qualora ne abbiano compreso i pericoli associati. I bambini non devono giocare con l'apparecchio. La pulizia e la manutenzione a
cura dell'utente non devono essere eseguite da bambini, a meno che non
siano sorvegliati.
■
PERICOLO! I materiali d'imballaggio non sono un giocattolo! Tenere
tutti i materiali d'imballaggio fuori dalla portata dei bambini.
Pericolo di soffocamento!
■ Prima dell'uso, controllare l'apparecchio per rilevare eventuali danni esterni
visibili. Non mettere in funzione l'apparecchio se danneggiato o caduto.
■ In caso di danni al cavo o ai collegamenti, fare eseguire le riparazioni a
personale specializzato autorizzato o al servizio clienti.
■ Proteggere il cavo di rete da superfici surriscaldate e bordi taglienti. Assicu-
rarsi che il cavo di rete non venga teso o piegato. Non fare pendere il cavo
di rete sugli angoli (effetto di inciampo).
■ Fare eseguire le riparazioni solo da aziende specializzate o dall'assistenza
ai clienti. Riparazioni non conformi possono causare gravi pericoli per
l'utente e comportano il decadere della garanzia.
■ 6 │ IT
│
MT
SCUR 3 A1

■ I componenti difettosi devono essere sostituiti esclusivamente da pezzi di
ricambio originali. Solo con questi pezzi di ricambio è garantita la conformità ai requisiti di sicurezza.
■ Evitare modifiche o cambiamenti arbitrari dell'apparecchio.
■ Appoggiare l'apparecchio su una superficie piana e stabile. Esso può
danneggiarsi in caso di caduta.
■ Non esporre l'apparecchio alla luce solare diretta o a temperature elevate.
Altrimenti il dispositivo potrebbe surriscaldarsi e subire danni irreparabili.
■ Verificare che il ricircolo dell'aria sia sufficiente ad evitare un accumulo di
calore. Non coprire mai l'apparecchio. Pericolo di incendio!
■ Non collocare il prodotto in prossimità di fonti di calore come corpi riscal-
danti o altri apparecchi che generano calore.
■ Tenere sempre le fiamme libere (ades. candele) lontane dall'apparecchio.
■ L'apparecchio è indicato solo per l'uso in ambienti interni asciutti.
■ L'apparecchio non è predisposto per l'uso in locali esposti a temperature e
umidità elevate (ades. bagni) o a polvere eccessiva.
■ Proteggere l'apparecchio da spruzzi e gocce d'acqua. Non immergere
mai l'apparecchio in acqua, non collocare l'apparecchio nelle vicinanze
dell'acqua e non collocare oggetti pieni di liquidi (ad es.es. vasi) sull'apparecchio.
■ Se si riscontra sull'apparecchio odore di bruciato o sviluppo di fumo, stac-
care immediatamente la spina dalla presa di rete e rimuovere le pile.
■ In caso di guasti e in presenza di temporali, scollegare sempre la spina
dalla presa di rete.
■ Non utilizzare supporti difettosi o danneggiati per la modalità CD del-
l'appa recchio.
■ Non guardare il raggio laser o l'apertura da cui esce in caso di modalità
CD.
■ Non dirigere mai il raggio laser su superfici riflettenti, persone o animali.
Già solo il breve contatto visivo con il raggio laser può danneggiare gli
occhi.
■ L'apparecchio è dotato di un dispositivo di sicurezza che previene il con-
tatto dell'utente con il raggio laser al momento dell'apertura del vano CD.
Non danneggiare né manomettere questo dispositivo di sicurezza.
■ Le caratteristiche tecniche dell'apparecchio permettono un campo di fre-
quenze regolabile di 87,5–108 MHz. A seconda del Paese potrebbero
esistere regolamenti differenti in relazione ai campi di frequenza radiofonici
assegnati. Si ricorda che è vietato utilizzare, inoltrare a terzi o abusare
delle informazioni ricevute al di fuori della gamma di frequenza attribuita.
SCUR 3 A1
IT│MT │ 7 ■

Parti ed elementi di comando
Lato superiore ed anteriore
SNOOZE/DIMMER
Display
І◄◄ VOL TUNE ►►І
REPEAT/RANDOM
►/IISCAN/AMS
■ST/MONO
AUX IN
XBASS
- SLEEP/NAP
3 USB 5V 1A
!
. ALARM
0 /SOURCE
6 CLOCK/MEMORY
Lato posterior
1
% AC 100 – 240 V ∼
50/60 Hz
+ OPEN
, FM ANT.
Vano CD
Tasto Snooze Interrompere l'allarme per 9 minuti, impostare
la luminosità del display
Incavo per l'apertura del coperchio del vano CD
Visualizzazione di informazioni, ad es. frequenza, ora, ora
di allarme ecc.
Impostazione del volume
CD: premere brevemente, quindi ruotare per selezionare il brano
Radio: premere brevemente, quindi ruotare per selezionare
la frequenza
Impostazione ora/sveglia: impostare ore e minuti
CD: attivare/disattivare le funzioni di ripetizione/casuale
Avvio/arresto della riproduzione
Radio: ricerca automatica delle emittenti
Termine della riproduzione
Radio: commutare tra Stereo/Mono
Collegamento per un dispositivo esterno, ad es. lettore MP3
(presa jack da Ø 3,5 mm)
Riproduzione dei bassi amplificata/normale
Impostazione della funzione Sleep
Impostazione del timer (NAP)
Collegamento USB: per la ricarica dei dispositivi esterni
Collegamento cuffie (presa jack da Ø 3,5 mm)
Impostazione degli orari di allarme, attivazione e disattiva-
zione dell'allarme
Accensione dell'apparecchio dalla modalità standby:
premere brevemente
Passaggio alla modalità standby: premere per oltre 2
secondi
In funzione: premere brevemente per cambiare la modalità
operativa
Ora: impostare l'ora nella modalità standby
Radio: premere brevemente per richiamare la posizione
successiva memorizzata / premere a lungo per memorizzare
l'emittente attuale nella posizione attuale
CD: Programmazione della sequenza brani
Altoparlante sinistro
Cavo di rete con spina
Vano per pile di supporto
Antenna lineare per la ricezione FM
Altoparlante destro
■ 8 │ IT
│
MT
SCUR 3 A1

Indicazioni sul display
/
PM
"
XBASS
#
((ST.))
$
RAND
&
MP3
'
NAP
(
5
ZZZ
4
SNOOZE
AL 2
2
AL 1
*
)
FM
REPEAT ALL
REPEAT 1
MEMORY
XBASS
MEMORY
REP 1 ALL
RAND MP3 NAP
FM
MHz
Indicazione 12 ore attivata (PM viene visualizzato solo con
indicazione 12 ore attivata tra ore 12 e 00) commutabile a
indicazione 24 ore
Visualizzazione dell'ora
Riproduzione dei bassi amplificata
Un'emittente radio viene ricevuta con suono stereo.
I brani del CD vengono riprodotti nella sequenza casuale.
File MP3 in riproduzione.
Timer attivo
Cartella di un CD MP3
Funzione SLEEP attivato
Funzione Snooze (NAP) attivato
Allarme 2 attivo
Allarme 1 attivo
Sveglia con riproduttore CD
Sveglia con segnale acustico
Sveglia con radio
Con CD: riproduzione in corso
Indicazione della frequenza in Mhz / Funzione / Ora timer
/ Memoria / Volume
Emittente UHF in ricezione
Ripetizione CD intero attivata
Ripetizione brani attivata
Lampeggia durante la programmazione di una sequenza
di brani o il salvataggio di emittenti / accesa se è attivo un
programma o un'emittente programmata
SNOOZE
AL 1 AL2
SCUR 3 A1
IT│MT │ 9 ■

Messa in funzione
Dotazione e ispezione dei danni da trasporto
(per le illustrazioni vedere la pagina pieghevole)
PERICOLO
► Il materiale di imballaggio non deve essere utilizzato dai bambini come
giocattolo. Pericolo di soffocamento.
♦ Rimuovere dalla scatola tutte le parti dell'apparecchio e il manuale di istru-
zioni.
♦ Rimuovere tutto il materiale di imballaggio dall'apparecchio.
La dotazione comprende i seguenti componenti:
▯ Radiosveglia con CD SCUR 3 A1
▯ Il presente manuale di istruzioni
NOTA
► Controllare se la fornitura è integra e se presenta danni visibili.
► In caso di fornitura incompleta o in presenza di danni da trasporto o
da imballaggio inadeguato, rivolgersi all'assistenza (vedere capitolo
"Assistenza").
Smaltimento dell'imballaggio
L'imballaggio protegge l'apparecchio contro i danni da trasporto. I materiali di
imballaggio sono stati selezionati in relazione alla loro ecocompatibilità e alle
caratteristiche di smaltimento e pertanto sono riciclabili.
Il riciclo dell'imballaggio consente di risparmiare materie prime e riduce la generazione di rifiuti. Smaltire il materiale di imballaggio inutilizzato in conformità
alle vigenti norme locali.
Smaltire l'imballaggio conformemente alle norme di tutela ambientale.
Tenere conto dei codici presenti sui vari materiali di imballaggio ed eventual-
mente separare i materiali effettuando una raccolta differenziata. I materiali di
imballaggio presentano codici costituiti da abbreviazioni (a) e numeri (b) con il
seguente significato:
1–7: materie plastiche
20–22: carta e cartone
80–98: materiali compositi
■ 10 │ IT
NOTA
► Durante il periodo di validità della garanzia, se possibile, conservare
l'imballaggio originale per poter imballare adeguatamente l'apparecchio
in caso di intervento in garanzia.
│
MT
SCUR 3 A1

Requisiti del luogo d'installazione
Per l'uso sicuro e privo di guasti dell'apparecchio, il luogo d'installazione deve
soddisfare i seguenti requisiti:
■ Collocare l'apparecchio su una superficie salda, piana e orizzontale.
■ Collocare l'apparecchio in modo tale da non coprire le aperture di ventila-
zione e gli altoparlanti sinistro
■ Non azionare l'apparecchio in un ambiente surriscaldato, molto umido o
bagnato o nelle vicinanze di materiale infiammabile.
■ La presa di rete dev'essere facilmente accessibile per poter staccare il cavo
di rete
%agevolmente in caso di emergenza.
1e destro .
Posizionamento dell'apparecchio
♦ Trovare un luogo di installazione idoneo per l'apparecchio (v. anche capitolo
"Requisiti del luogo di installazione").
♦ Rimuovere completamente tutti i componenti di imballaggio.
♦ Sollevare il coperchio del vano CD
vano CD
♦ Sfilare la pellicola protettiva del display
♦ Posizionare l'apparecchio su una superficie piana e stabile.
♦ Non esporre l'apparecchio al calore estremo o all'umidità.
♦ Provvedere a una ventilazione idonea su tutti i lati dell'apparecchio.
♦ Svolgere completamente l'antenna lineare
.
e rimuovere la sicura di trasporto dal
.
,.
Connessione all'alimentazione di corrente
ATTENZIONE
► Prima di collegare l'apparecchio alla rete elettrica, confrontare i dati di
collegamento dell'apparecchio (tensione e frequenza) riportati sulla targhetta
affissa sul retro dell'apparecchio con quelli della propria rete elettrica.
Questi dati devono coincidere per evitare di arrecare danni all'apparecchio.
♦ Inserire il cavo di rete
SCUR 3 A1
% dell'apparecchio in una presa di corrente.
IT│MT │ 11 ■

Inserimento delle pile
Inserendo 2 pile da 1,5V (tipo AAA/Micro/LR3) si evita che l'ora programmata,
le emittenti radio e gli orari di allarme memorizzati vadano persi in caso di
un'eventuale mancanza di corrente. Le pile consentono all'orologio interno di
continuare a funzionare anche in caso di mancanza di corrente.
NOTA
► L'apparecchio può funzionare anche senza pile. Tuttavia, in caso di man-
canza di corrente, occorre impostare e memorizzare nuovamente l'ora, gli
orari di allarme e le emittenti radio.
► In caso di mancanza di corrente, il display
inserite. La modalità radio/CD e le funzioni di allarme ritornano disponibili
solo se l'alimentazione di corrente è ripristinata tramite il cavo di rete
si spegne anche con le pile
%.
♦ Aprire il coperchio del vano pile
♦ Collocare 2 pile da 1,5V del tipo AAA/Micro/LR3 (non in dotazione) nel
vano pile
♦ Chiudere il vano pile
+. Rispettare l'indicazione della polarità riportata nel vano pile +.
+ inserendo il coperchiofino all'arresto.
+ alloggiato sul retro dell'apparecchio.
Utilizzo e funzionamento
Accensione/spegnimento dell'apparecchio
Non appena l'alimentazione di corrente è stabilita con il cavo di rete %, l'apparecchio si trova nella modalità standby e il display
♦ Premere il tasto
L'apparecchio si avvia dopo la prima accensione nella modalità CD.
♦ Premere il tasto
recchio nella modalità standby.
NOTA
► Dopo lo spegnimento, l'apparecchio rimane nella modalità standby.
► Staccare il cavo di rete
periodo di tempo, poiché l'apparecchio ha ancora un consumo di corrente
ridotto anche in modalità standby.
► Scollegando completamente l'apparecchio dalla rete elettrica e non essen-
doci pile nell'apposito vano
nuova impostazione dell'ora e degli orari di allarme e alla nuova memorizzazione delle emittenti radio.
/SOURCE 0 per accendere l'apparecchio.
/SOURCE 0 per più di 2 secondi per riportare l'appa-
% se l'apparecchio non viene usato per un lungo
+, si dovrà procedere successivamente alla
indica "0:00".
■ 12 │ IT
│
MT
SCUR 3 A1

Impostazione dell'ora
♦ Premere eventualmente il tasto /SOURCE 0 per portare l'apparecchio
nella modalità standby. L'ora può essere impostata solo se l'apparecchio si
trova in modalità standby.
♦ Premere il tasto CLOCK/MEMORY
gia l'indicazione "24H" (visualizzazione 24 ore).
♦ Ruotare la manopola −VOL+/ І◄◄ TUNE ►►І
sualizzazione 24 ore o 12 ore (in quest'ultima l'ora viene indicata con un
intervallo 12 - 00 prima dell'indicazione "pm").
♦ Premere il tasto CLOCK/MEMORY
zione delle ore.
♦ Per impostare le ore ruotare la manopola −VOL+/ І◄◄ TUNE ►►І
♦ Premere il tasto CLOCK/MEMORY 6. Sul display lampeggia l'indica-
zione dei minuti.
♦ Per impostare i minuti ruotare la manopola −VOL+/ І◄◄ TUNE ►►І
♦ Premere il tasto CLOCK/MEMORY 6 per salvare l'ora impostata.
NOTA
► Se in modalità di impostazione non si eseguono impostazioni per oltre
10 secondi, viene effettuata l'uscita dal relativo menu. Vengono salvate le
impostazioni al momento configurate e il display
stata.
6finché sul display non lampeg-
6. Sul display lampeggia l'indica-
Selezione della modalità operativa
per selezionare la vi-
mostra l'ora preimpo-
♦ Una volta acceso l'apparecchio, premere brevemente il tasto /SOURCE 0
fino a visualizzare la modalità operativa desiderata sul display
– "Cd" per la riproduzione CD
– "FM" e l'indicazione della frequenza per la riproduzione radio
– "AUX" per la riproduzione di un apparecchio esterno nell'ingresso
AUX IN
Volume/riproduzione dei bassi
♦ Ruotare la manopola −VOL+/ І◄◄ TUNE ►►І verso destra per aumen-
tare il volume o verso sinistra per ridurlo. Sul display
viene indicato con un valore compreso tra "L00" (spento) e "L25" (massimo).
♦ Per amplificare la riproduzione dei bassi, premere il tasto XBASS
Se la funzione è attivata, sul display
SCUR 3 A1
:
il volume impostato
.
compare "XBASS".
IT│MT │ 13 ■

NOTA
► Nella modalità AUX è possibile impostare il volume anche nel dispositivo
esterno se quest'ultimo è collegato alla radiosveglia CD tramite l'uscita
AUX IN
.
► Qualora la riproduzione fosse disturbata, ridurre il volume sul dispositivo
esterno.
Caricamento di dispositivi esterni
La radiosveglia CD è dotata di una funzione di ricarica con cui poter ricaricare
le pile dei dispositivi che normalmente vengono ricaricati con una presa USB.
La corrente di ricarica massima corrisponde a 1,0 A.
NOTA
► La presa USB
► La radiosveglia CD deve essere collegata alla rete elettrica per consentire
la ricarica dei dispositivi esterni.
► Si può acquistare un cavo di carica USB idoneo (non compreso nella
dotazione) presso un negozio specializzato.
3 consente di ricaricare esclusivamente dispositivi esterni.
♦ Inserire lo spinotto USB A del cavo nella presa USB
CD.
♦ Inserire l'altro spinotto del cavo nella presa USB del dispositivo esterno.
♦ Dopo alcuni secondi inizia la ricarica dell'apparecchio esterno. La radiosve-
glia CD può essere accesa o trovarsi nella modalità standby.
♦ Al termine della ricarica del dispositivo esterno, scollegare il cavo dalla
presa USB
3 per scollegare i dispositivi.
Collegamento cuffia
♦ Ruotare la manopola −VOL+/ І◄◄ TUNE ►►І verso sinistra per ridurre
il volume al minimo.
♦ Inserire lo spinotto jack della cuffia nell'apposito ingresso
del dispositivo. La trasmissione avviene esclusivamente tramite la cuffia
collegata.
♦ Impostare il volume desiderato con la manopola −VOL+/ І◄◄ TUNE ►►І
3 della radiosveglia
! sul lato anteriore
.
■ 14 │ IT
│
MT
SCUR 3 A1

Radio
Ricerca automatica delle emittenti (AMS)
NOTA
► L'apparecchio deve essere acceso. Premere eventualmente il tasto
SOURCE
► L'antenna lineare
0 per accendere l'apparecchio.
,deve essere estesa.
/
♦ Premere brevemente il tasto
l'indicazione della frequenza sul display
♦ Per avviare una ricerca automatica delle emittenti, premere brevemente il
tasto ►/II/SCAN/AMS
direzioni. Tale condizione dipende dall'ultima direzione di ricerca manuale
utilizzata. La ricerca si ferma una volta trovata l'emittente successiva con un
segnale sufficientemente forte.
/SOURCE 0 fino a visualizzare "FM" e
.
. La ricerca delle emittenti è possibile in diverse
Salvataggio automatico delle emittenti
La ricerca automatica delle emittenti con relativo salvataggio effettua una ricerca
nell'intera banda di frequenza e memorizza automaticamente le prime 20 emittenti con un segnale sufficientemente forte nelle posizioni 1 - 20.
♦ Per avviare una ricerca automatica delle emittenti con relativo salvataggio,
premere il tasto ►/II/SCAN/AMS
emittenti trovate vengono automaticamente salvate nelle posizioni 1 - 20
con frequenza crescente. Al termine della ricerca, l'emittente viene automaticamente trasmessa sulla prima posizione.
NOTA
► La ricerca automatica con relativo salvataggio sovrascrive le posizioni già
salvate.
per più di due secondi. Le prime 20
Impostazione manuale dell'emittente
♦ Premere una volta la manopola −VOL+/ І◄◄ TUNE ►►І e ruotarla
successivamente verso sinistra o destra per modificare la frequenza in passi
da 0,05 MHz. La frequenza attuale viene segnalata sul display
♦ Ruotare nuovamente la manopola −VOL+/ І◄◄ TUNE ►►І
almeno 10 secondi per impostare nuovamente il volume con la manopola
−VOL+/ І◄◄ TUNE ►►І
.
.
o attendere
SCUR 3 A1
IT│MT │ 15 ■

Salvataggio manuale dell'emittente
♦ Impostare l'emittente desiderata con la manopola −VOL+/ І◄◄ TUNE ►►І .
♦ Premere il tasto CLOCK/MEMORY
peggia il messaggio
del programma (es. P01).
♦ Ruotare la manopola −VOL+/ І◄◄ TUNE ►►І
per selezionare la posizione desiderata (P01 - P20).
♦ Premere il tasto CLOCK/MEMORY
desiderata.
♦ Ripetere queste procedure per salvare fino a 20 emittenti. La stessa emittente
può essere memorizzata ripetutamente in diverse posizioni.
"MEMORY" e non viene visualizzata una posizione
6finché sul display non lam-
6 per salvare l'emittente nella posizione
Richiamo delle emittenti salvate
♦ Per richiamare un'emittente già salvata, premere una volta il tasto
CLOCK/MEMORY
manopola −VOL+/ І◄◄ TUNE ►►І
nare un'emittente.
♦ In alternativa, premere ripetutamente il tasto CLOCK/MEMORY
te la trasmissione radio fino a visualizzare l'emittente desiderata.
6 durante la trasmissione radio e ruotare quindi la
verso sinistra o destra per selezio-
Ricezione dell'emittente in mono
In caso di emittenti con intensità di segnale debole oppure oscillante, è possibile
migliorare la qualità di trasmissione commutando da trasmissione stereo a mono.
verso sinistra o destra
6 duran-
■ 16 │ IT
♦ Commutare con il tasto ■ ST/MONO
Attivando la trasmissione stereo, alla ricezione di un'emittente stereo appare
l'indicazione "((ST.))" sul display
NOTA
► Per migliorare la qualità di ricezione UHF, è possibile provare anche diverse
posizioni dell'antenna lineare , e dell'apparecchio.
│
MT
tra trasmissione mono e stereo.
.
SCUR 3 A1

Riproduzione CD
Inserimento CD
NOTA
► Non è possibile garantire la riproduzione di CD-R e CD-RW masterizzati.
Non si tratta di difetto dell'apparecchio se quest'ultimo non riproduce
CD-R o CD-RW masterizzati.
♦ Premere eventualmente il tasto
L'apparecchio si avvia automaticamente alla prima accensione nella modalità CD.
♦ Se l'apparecchio è già acceso e si trova ancora nella modalità CD, preme-
re brevemente il tasto
messaggio "Cd".
♦ Aprire il vano pile
Nella parte anteriore destra del vano CD
Sul display
vano CD
♦ Inserire il CD con il lato stampato rivolto verso l'alto e farlo scattare sull'asse
esercitando una leggera pressione.
♦ Chiudere il vano pile
Sul display
automatica del CD con il primo brano del CD.
NOTA
► Se dopo l'inserimento di un CD il display
"Err", è probabile che sia stato inserito un CD dati e non audio. Il messaggio
"NO" appare anche sul display
al contrario.
è aperto.
, sollevando con cautela il coperchio con le dita.
compare il messaggio "OPEN" non appena il coperchio del
spingendo leggermente il coperchio verso il basso.
compare dapprima "----" e poco dopo inizia la riproduzione
/SOURCE 0 per accendere l'apparecchio.
/SOURCE 0 finché il display non mostra il
si trova un piccolo incavo .
mostra il messaggio "NO" o
se il vano CD è vuoto o il CD è inserito
SCUR 3 A1
IT│MT │ 17 ■

Funzioni standard
Funzione nella modalità CD
Avvio
Premere il tasto ►/II/SCAN/AMS
Pausa
Stop
Brano successivo
Brano precedente
Premere il tasto ►/II/SCAN/AMS
zione (il brano riprodotto lampeggia sul display
Premere il tasto ■ ST/MONO
Premere prima la manopola −VOL+/ І◄◄ TUNE ►►І
quindi ruotarla verso destra fino a riprodurre il brano
desiderato.
Premere prima la manopola −VOL+/ І◄◄ TUNE ►►І
quindi ruotarla verso sinistra fino a riprodurre il brano
desiderato.
durante la riproduzione
Funzioni di ripetizione (REPEAT)
La funzione Repeat consente di ripetere a piacere un brano, l'intero CD o una
sequenza programmata.
Ripetizione del brano attualmente riprodotto
♦ Premere una volta il tasto REPEAT/RANDOM durante la riproduzione
CD. Sul display
riprodotto viene ripetuto.
Ripetizione dell'intero CD
♦ Premere due volte il tasto REPEAT/RANDOM durante la riproduzione
CD. Sul display
sequenza programmata viene ripetuta.
compare il messaggio "REP1" e il brano attualmente
compare il messaggio "REP ALL" e l'intero CD o la
durante la riprodu-
)
,
,
Disinserimento della funzione ripetizione (REPEAT)
♦ Premere ripetutamente il tasto REPEAT/RANDOM durante la riprodu-
■ 18 │ IT
zione CD finché il display
né "RAND".
│
MT
non mostra il messaggio "REP1"/"REP ALL"
SCUR 3 A1

Riproduzione casuale (RANDOM)
In questa riproduzione, i brani di un CD vengono riprodotti in una sequenza
casuale.
♦ Premere tre volte il tasto REPEAT/RANDOM
CD. Il display
è attivata.
♦ Per terminarla, premere nuovamente il tasto REPEAT/RANDOM
Il display
brani ritorna alla sequenza normale.
mostra il messaggio "RAND" e la riproduzione casuale
non mostra più il messaggio "RAND" e la riproduzione dei
durante la riproduzione
Programmazione della sequenza brani
È possibile programmare una sequenza di massimo 20 brani con il CD in pausa.
Non appena programmati i 20 brani, il display
♦ Premere il tasto CLOCK/MEMORY
saggio "MEMORY". La prima posizione del programma "P01" lampeggia
brevemente seguita dall'indicazione "00".
♦ Ruotare la manopola −VOL+/ І◄◄ TUNE ►►І
per selezionare il brano desiderato.
♦ Premere il tasto CLOCK/MEMORY
nella prima posizione "P01". La posizione successiva "P02" lampeggia
brevemente sul display
♦ Ruotare la manopola −VOL+/ І◄◄ TUNE ►►І
per selezionare il brano successivo desiderato. Premere nuovamente il tasto
CLOCK/MEMORY
dura finché non si sono programmati tutti i brani desiderati. Lo stesso brano
può essere memorizzato ripetutamente in diverse posizioni.
♦ Per avviare la riproduzione della sequenza programmata, premere il tasto
►/II/SCAN/AMS
"MEMORY".
♦ Se la sequenza programmata è stata riprodotta completamente, la riprodu-
zione CD si interrompe e sul display
Premere nuovamente il tasto ►/II/SCAN/AMS
zione dei brani programmati.
seguita dall'ultimo brano selezionato.
6 per effettuare il salvataggio. Ripetere questa proce-
finché sul display non lampeggia il messaggio
indica "FU".
6. Sul display lampeggia il mes-
6 per salvare il brano selezionato
compare il messaggio "MEMORY".
.
verso sinistra o destra
verso sinistra o destra
per ripetere la riprodu-
SCUR 3 A1
NOTA
► Per cancellare nuovamente una sequenza programmata, premere due
volte il tasto ■ ST/MONO o commutare l'apparecchio nella modalità
standby con il tasto
► Durante la riproduzione CD o in pausa è possibile selezionare gli altri
brani programmati precedenti o successivi premendo brevemente una
volta la manopola −VOL+/ І◄◄ TUNE ►►І
verso sinistra o destra.
/SOURCE 0.
e quindi ruotandola
IT│MT │ 19 ■

Funzioni sveglia
L'apparecchio dispone di due funzioni di allarme, "AL 1" e "AL 2". Per entrambe
le funzioni è possibile programmare a un determinato orario un segnale di allarme o la riproduzione dell'ultima emittente ascoltata o di un CD.
NOTA
► Se in modalità di impostazione non vengono eseguite impostazioni per
oltre 10 secondi, la procedura di impostazione si interrompe e si esce dal
relativo menu.
Impostazione dell'ora della sveglia
♦ L'apparecchio deve trovarsi in modalità stand-by. Premere eventualmente il
tasto
/SOURCE 0 per più di 2 secondi per spegnere l'apparecchio.
♦ Premere il tasto ALARM
lampeggia il messaggio "AL 1" o "AL 2".
♦ Impostare le funzioni di allarme "AL 1" o "AL 2" con la manopola −VOL+/
І◄◄ TUNE ►►І
♦ Per confermare la selezione premere il tasto ALARM
cazione delle ore "0:".
♦ Per impostare le ore ruotare la manopola −VOL+/ І◄◄ TUNE ►►І
so sinistra o destra. Per salvare l'impostazione premere il tasto ALARM
Lampeggia l'indicazione dei minuti ":00".
♦ Per impostare i minuti ruotare la manopola −VOL+/ І◄◄ TUNE ►►І
so sinistra o destra. Per salvare l'impostazione premere il tasto ALARM
Sul display
quello della modalità attiva.
♦ Ruotare la manopola −VOL+/ І◄◄ TUNE ►►І
per selezionare la modalità sveglia desiderata:
–
– Sveglia con riproduttore CD
– Sveglia con radio
♦ Per salvare la selezione premere il tasto ALARM
il segnale acustico , l'impostazione è terminata.
♦ Se per la sveglia si seleziona la riproduzione radio o CD, occorre impostare il
volume (L15 - L25) con la manopola −VOL+/ І◄◄ TUNE ►►І
♦ Per salvare l'impostazione premere il tasto ALARM
.
compaiono i simboli della modalità sveglia e lampeggia
Sveglia con segnale acustico
. per più di 2 secondi, finché sul display non
.. Lampeggia l'indi-
ver-
..
ver-
..
verso sinistra o destra
.. Una volta selezionato
.
..
■ 20 │ IT
│
MT
SCUR 3 A1

Accensione/spegnimento dell'allarme
Accensione dell'allarme
♦ Premere ripetutamente il tasto ALARM . nella modalità standby fino a
visualizzare la funzione di allarme desiderata sul display
AL1
–
Allarme 1 attivato
AL2
Allarme 2 attivato
–
AL1
AL2
–
– Se non vengono visualizzati simboli, gli allarmi 1 e 2 sono disattivati.
Interruzione dell'allarme
♦ È possibile interrompere l'allarme (segnale acustico, radio o CD) per
9 minuti, premendo il tasto SNOOZE/DIMMER
SNOOZE è attiva, il display
NOTA
► Se l'allarme non viene spento, si arresta automaticamente dopo 60 minuti.
► Se la modalità sveglia corrisponde alla riproduzione CD ma il vano CD
è vuoto, viene attivata la sveglia con segnale acustico.
Termine dell'allarme
♦ Premere il tasto /SOURCE 0 oppure ALARM . per disattivare l'allarme.
L'ora impostata dell'allarme rimane invariata.
NOTA
► L'allarme è disattivato per 24 ore e si riattiva all'ora impostata.
Allarme 1 e 2 attivati
indica il messaggio "NOOZE".
:
. Se la funzione
Disattivazione completa dell'allarme
♦ Per disattivare completamente l'allarme, premere ripetutamente il tasto
ALARM
AL1
SCUR 3 A1
. nella modalità standby fino a non visualizzare più il simbolo
AL2
o
oppure "AL 1" o "AL 2" sul display .
IT│MT │ 21 ■

Altre funzioni
Illuminazione del display
♦ La luminosità dell'indicazione LED sul display può essere impostata su
tre livelli. Premere il tasto SNOOZE/DIMMER
gradualmente la luminosità del display
– L'illuminazione rimane sul livello attualmente selezionato ad eccezione
dell'intervallo tra le 23:00 e le 5:00 (modalità notte).
– All'accensione dell'apparecchio viene sempre utilizzato il livello più chiaro.
– Dopo 10 secondi dallo spegnimento dell'apparecchio viene impostato
automaticamente il livello di luminosità minore. Premendo ogni volta il
tasto, il display
NOTA
► Nella modalità standby, il display
nell'intervallo tra le 23:00 e le 5:00 (modalità notte). In questo intervallo
non è possibile un'illuminazione permanente nella modalità standby.
Funzione SLEEP
Questa funzione consente di spegnere l'apparecchio automaticamente dopo
15 - 90 minuti.
per aumentare o ridurre
.
si accende per 10 secondi al livello più chiaro.
viene automaticamente oscurato
■ 22 │ IT
♦ Premere brevemente il tasto SLEEP/NAP
Sul display
♦ Premere ripetutamente il tasto SLEEP/NAP
SLEEP (15, 30, 45, 60, 90, OFF).
La funzione SLEEP viene attivata dopo circa 5 secondi se non viene premuto
nessun altro tasto. Con la funzione SLEEP attivata, il display
♦ Premere una volta il tasto SLEEP/NAP
allo spegnimento dell'apparecchio con funzione SLEEP attivata.
♦ Per disattivare la funzione SLEEP, premere ripetutamente il tasto SLEEP/
NAP
NOTA
► Se il tempo della riproduzione CD è inferiore al tempo SLEEP impostato, al
termine del CD la riproduzione si arresta.
│
MT
appare il messaggio "ZZZ" e "15" (minuti).
- finché sul display non compare "OFF" o spegnere l'apparecchio.
- durante la riproduzione CD.
- per impostare il tempo
mostra "ZZZ".
-, per visualizzare il tempo residuo
SCUR 3 A1

Timer (NAP)
Questa funzione consente di impostare un timer (NAP) che si attiva dopo 1 120 minuti con un segnale acustico.
♦ Premere il tasto SLEEP/NAP
appare il messaggio "NAP" e "10" (minuti).
♦ Selezionare con la manopola −VOL+/ І◄◄ TUNE ►►І il tempo in minuti
(tra 1 e 120) dopo il quale si desidera essere svegliati.
La funzione NAP viene attivata dopo circa 5 secondi se non vengono eseguite
altre impostazioni. Con la funzione NAP attivata, il display mostra "NAP".
♦ Premere una volta il tasto SLEEP/NAP
al segnale acustico con funzione NAP attivata.
♦ Premere il tasto SLEEP/NAP - per disattivare il segnale acustico.
♦ Per disattivare la funzione NAP, premere il tasto SLEEP/NAP - e ruotare
la manopola −VOL+/ І◄◄ TUNE ►►І verso sinistra finché il messaggio
"NAP" non compare più sul display .
- nella modalità standby. Sul display
-, per visualizzare il tempo residuo
Collegamento dei dispositivi di riproduzione esterni
L'ingresso AUX IN è compatibile con il collegamento di dispositivi di riprodu-
zione esterni quali un lettore MP3 o uno smartphone per utilizzarli come strumenti
di riproduzione per la radiosveglia CD.
NOTA
► Spegnere la radiosveglia CD e il dispositivo esterno prima di collegarli.
Osservare anche le istruzioni per l'uso del dispositivo da collegare alla
radiosveglia CD.
Per il collegamento di dispositivi esterni è necessario un cavo audio (non in dotazione) con uno spinotto jack da Ø 3,5 mm per l'ingresso AUX IN
sveglia CD. Lo spinotto da collegare all'altra estremità del cavo audio dipende
dall'uscita audio del dispositivo esterno.
♦ Collegare gli spinotti del cavo audio all'uscita audio del dispositivo esterno
e all'ingresso AUX IN
♦ Premere il tasto
♦ Premere brevemente il tasto
display
.
♦ Avviare la riproduzione sul dispositivo esterno. La riproduzione è gestibile
solo dal dispositivo esterno. Il volume e le impostazioni sonore possono
essere impostati anche dalla radiosveglia CD.
♦ Spegnere entrambi gli apparecchi prima di scollegarli.
♦ Staccare lo spinotto del cavo audio dall'ingresso AUX IN
della radiosveglia CD.
/SOURCE 0 per accendere la radiosveglia CD.
/SOURCE 0 fino a visualizzare "AUX" sul
della radio-
.
SCUR 3 A1
IT│MT │ 23 ■

Pulizia
PERICOLO
Pericolo di morte da scossa elettrica!
► Prima di cominciare con la pulizia, staccare sempre il cavo di rete
presa.
ATTENZIONE
Danneggiamento dell'apparecchio!
► Per evitarne il danneggiamento irreparabile dell'apparecchio, assicurarsi
che durante la pulizia non vi penetri umidità.
► Non utilizzare detergenti corrosivi, abrasivi o contenenti solventi, che
possono danneggiare le superfici dell'apparecchio.
► Non è necessario pulire l'unità laser. Si sconsiglia l'utilizzo di detergenti.
Pulizia dell'alloggiamento
♦ Pulire le superfici dell'apparecchio solo con un panno morbido e asciutto.
♦ In caso di sporco ostinato, utilizzare un panno leggermente umido e un
detergente delicato.
Conservazione in caso di mancato utilizzo
♦ Qualora non si intenda utilizzare l'apparecchio per un lungo periodo di
tempo, disconnetterlo dall'alimentazione elettrica. Rimuovere le pile dal-
l'apparecchio e riporlo in un luogo pulito e asciutto non esposto all'irradia-
zione solare diretta.
% dalla
Smaltimento
Smaltimento dell'apparecchio
Il simbolo a lato di un bidone della spazzatura con ruote barrato indica che
questo apparecchio è soggetto alla direttiva 2012/19/EU. La direttiva prevede
che, al termine della sua vita utile, l’apparecchio non venga smaltito assieme
ai normali rifiuti domestici, bensì venga conferito ad appositi punti di raccolta,
centri di riciclaggio o aziende di smaltimento.
Lo smaltimento è gratuito per l’utente. Rispettare l’ambiente e
smaltire l’apparecchio in modo conforme alle direttive pertinenti.
Per lo smaltimento del prodotto una volta che ha terminato la sua funzione,
informarsi presso l'amministrazione comunale.
Smaltimento delle pile
È vietato gettare le pile nei contenitori per i rifiuti domestici. Le pile difettose o
esauste devono essere riciclate in base alla direttiva 2006/66/CE. Ogni consumatore è obbligato per legge a conferire le pile ad un centro di raccolta comunale o di quartiere, ovvero a restituirle al commerciante. L'obbligo è finalizzato
allo smaltimento ecologico delle pile. Smaltire le pile solo se scariche.
■ 24 │ IT
│
MT
SCUR 3 A1

Eliminazione dei guasti
In questo capitolo sono riportate importanti informazioni per l'individuazione e
l'eliminazione dei guasti. Rispettare le indicazioni per evitare pericoli e danneggiamenti.
Cause ed eliminazione dei guasti
La seguente tabella è di ausilio nell'individuazione ed eliminazione di guasti
minori. Se non si riuscisse a risolvere il problema seguendo i passaggi qui di
seguito indicati, rivolgersi al servizio clienti (v. capitolo "Assistenza").
Guasto Possibile causa Risoluzione
Il display
mostra niente.
Suono assente.
Interferenze nella ricezione del segnale
radio.
Il CD non viene
riprodotto.
Dopo una mancanza di corrente, l'ora
e la memoria delle
emittenti sono state
azzerate.
non
Il cavo di rete
inserita nella presa.
La presa di rete non fornisce alcuna tensione.
Il volume è al minimo. Ruotare la manopola −VOL+/
L'apparecchio è in modalità
stand-by.
La ricezione è troppo
debole.
Si tratta di CD-R o CD-RW
non compatibile.
Il CD è posizionato al
contrario all'interno del
vano
Nel vano pile
ci sono pile o sono state
inserite pile scariche.
Le pile sono state inserite in
modo errato all'interno del
vano
% non è
.
+non
+.
Inserire il cavo di rete % nella
presa.
Controllare i fusibili.
І◄◄ TUNE ►►І
per aumentare il volume.
Premere il tasto
per accendere l'apparecchio.
Tentare di migliorare la ricezione
spostando l'antenna lineare
Commutare con il tasto ■ ST/
MONO
Sostituire il CD con un altro CD
(audio).
Inserire il CD nel vano
stampato rivolto verso l'alto.
Verificare se le pile hanno ancora
sufficiente tensione e all'occorrenza
sostituirle.
Verificare se le pile sono inserite in
modo corretto all'interno del vano
verso destra
/SOURCE 0
,.
alla trasmissione mono.
con il lato
+. Rispettare l'indicazione della
polarità riportata nel vano pile
+.
SCUR 3 A1
IT│MT │ 25 ■

Appendice
Dati tecnici
Tensione d'ingresso
Classe di protezione
Pile di backup
Assorbimento di potenza in esercizio 10,5W
Assorbimento di potenza in standby max 1 W
Potenza di uscita altoparlanti
Campo di frequenze radio (FM) 87,5 - 108 MHz
Posizioni di memoria emittenti 20
Sistema di scansione CD Laser classe 1
Formati supporto leggibili CD audio, CD-R, CD-RW
Collegamento cuffie Presa jack da Ø 3,5 mm
Collegamento dispositivi esterni
(AUX IN)
Porta USB
(per la ricarica dei dispositivi esterni)
Temperatura di esercizio da +15 °C a +35 °C
100 ‒ 240 V ∼ (corrente alternata),
50/60 Hz
II /
2 x 1,5 V tipo AAA/Micro/LR3
(non in dotazione)
circa 2 x 1,5 W RMS
(con 10% di fattore di distorsione
armonica)
Presa jack da Ø 3,5 mm
USB tipo A, 5V
continua), max 1,0 A
(corrente
Temperatura di conservazione da 0° C a 40 °C
Umidità (senza condensa) ≤ 75%
Dimensioni (L x P x A) circa 15,0 x 12,5 x 19,3 cm
Peso circa 1100 g
Indicazioni sulla dichiarazione di conformità UE
Questo apparecchio è conforme ai requisiti fondamentali e alle altre norme
rilevanti della Direttiva RE 2014/53/EU, Ecodesign 2009/125/CE nonché
RoHS 2011/65/EU.
La dichiarazione di conformità UE completa può essere scaricata tramite il link
www.kompernass.com/support/306411_DOC.pdf.
■ 26 │ IT
│
MT
SCUR 3 A1

Garanzia della Kompernass Handels GmbH
Egregio Cliente,
Questo apparecchio ha una garanzia di 3 anni dalla data di acquisto. Qualora
questo prodotto presentasse vizi, Le spettano diritti legali nei confronti del venditore
del prodotto. La garanzia qui di seguito descritta non costituisce alcun limite a
tali diritti legali.
Condizioni di garanzia
Il periodo di garanzia decorre dalla data dell’acquisto. Si prega di conservare lo
scontrino di cassa originale. Tale documento è necessario come prova di acquisto.
Qualora entro tre anni a partire dalla data dell’acquisto di questo prodotto si
presentasse un vizio del materiale o di fabbricazione, provvederemo, a nostra
discrezione, a riparare o a sostituire gratuitamente il prodotto. Questa prestazione
di garanzia ha come presupposto che l’apparecchio difettoso e la prova di acquisto
(scontrino di cassa) vengano presentati entro il termine di tre anni e che si descriva
per iscritto in cosa consiste il vizio e quando si è presentato.
Se il vizio rientra nell’ambito della nostra garanzia, il Suo prodotto verrà riparato
o sostituito da uno nuovo. Con la riparazione o la sostituzione del prodotto non
decorre un nuovo periodo di garanzia.
Periodo di garanzia e diritti legali di rivendicazione di vizi
Il periodo di garanzia non viene prolungato da interventi in garanzia. Ciò vale
anche per le parti sostituite e riparate. Danni e vizi eventualmente già presenti
al momento dell’acquisto devono venire segnalati immediatamente dopo che
l’apparecchio è stato disimballato. Le riparazioni eseguite dopo la scadenza del
periodo di garanzia sono a pagamento.
Ambito della garanzia
L’apparecchio è stato prodotto con cura secondo severe direttive qualitative e
debitamente collaudato prima della consegna.
La garanzia viene prestata in caso di vizi del materiale o di fabbricazione.
Questa garanzia non si estende a componenti del prodotto che sono esposti al
normale logorio e possono pertanto essere considerati come componenti soggetti
a usura o a danni che si verificano su componenti delicati, per es. interruttori, batterie,
stampi da forno o parti realizzate in vetro.
Questa garanzia decade se il prodotto è stato danneggiato oppure utilizzato o
sottoposto a interventi di manutenzione in modo non conforme. Per un utilizzo
adeguato del prodotto si devono rigorosamente rispettare tutte le istruzioni esposte
nel manuale di istruzioni per l’uso. Si devono assolutamente evitare modalità di
utilizzo e azioni che il manuale di istruzioni per l’uso sconsiglia o da cui esso mette
in guardia.
Il prodotto è destinato esclusivamente all’uso domestico e non a quello commerciale. La garanzia decade in caso di impiego improprio o manomissione, uso
della forza e interventi non eseguiti dalla nostra filiale di assistenza autorizzata.
SCUR 3 A1
IT│MT │ 27 ■

Trattamento dei casi di garanzia
Per garantire una rapida evasione della Sua richiesta, La preghiamo di seguire le
seguenti istruzioni:
■ Tenga a portata di mano per qualsiasi richiesta lo scontrino di cassa e il
codice dell’articolo (per es. IAN 12345) come prova di acquisto.
■ Il codice dell’articolo è indicato sulla targhetta di modello, su un’incisione,
sul frontespizio del manuale di istruzioni per l’uso (in basso a sinistro) o
come adesivo sul lato posteriore o inferiore.
■ Qualora si presentassero malfunzionamenti o altri tipi di vizi, contatti
innanzitutto il reparto assistenza clienti qui di seguito indicato telefonica-
mente o via e-mail.
■ Una volta che il prodotto è stato registrato come difettoso, lo può poi
spedire a nostro carico, provvedendo ad allegare la prova di acquisto
(scontrino di cassa), una descrizione del vizio e l’indicazione della data
in cui si è presentato, all’indirizzo del servizio di assistenza clienti che Le è
stato comunicato.
Al sito www.lidl-service.com si possono scaricare questo e molti altri manuali
di istruzioni per l’uso, filmati sui prodotti e software.
Assistenza
Assistenza Italia
Tel.: 02 36003201
E-Mail: kompernass@lidl.it
Service Malta
Tel.: 80062230
E-Mail: kompernass@lidl.com.mt
IAN 306411
Importatore
Badi che il seguente indirizzo non è quello del servizio di assistenza clienti.
Contatti innanzitutto il servizio di assistenza clienti indicato.
KOMPERNASS HANDELS GMBH
BURGSTRASSE 21
DE - 44867 BOCHUM
GERMANIA
www.kompernass.com
■ 28 │ IT
│
MT
SCUR 3 A1

Contents
Introduction ..................................................31
Information about these operating instructions ..................................31
Notes on trademarks ......................................................31
Proper use ..............................................................31
Warnings and warning symbols used .........................................32
Safety. . . . . . . . . . . . . . . . . . . . . . . . . . . . . . . . . . . . . . . . . . . . . . . . . . . . . . . 33
Risk of electrocution .......................................................33
Battery information .......................................................34
Basic safety instructions ....................................................34
Parts and operating components ................................36
Indicators on the display .......................................37
Use .........................................................38
Package contents and transport inspection .....................................38
Disposal of packaging .....................................................38
Requirements for the set-up location ..........................................39
Setting up the device ......................................................39
Connecting the power supply ...............................................39
Inserting batteries. . . . . . . . . . . . . . . . . . . . . . . . . . . . . . . . . . . . . . . . . . . . . . . . . . . . . . . . .39
Handling and use .............................................40
Switching the device on/off .................................................40
Setting the time ..........................................................40
Selecting the operating mode ...............................................41
Volume/bass ............................................................41
Charging external devices ..................................................41
Connecting headphones ...................................................42
Radio .......................................................42
Automatic station search (AMS) .............................................42
Storing stations automatically ...............................................42
Manual station selection ...................................................42
Saving stations manually ...................................................43
Calling up the stored station ................................................43
Receiving stations in mono ..................................................43
SCUR 3 A1
GB│MT │ 29 ■

Playing CDs .................................................. 44
Inserting a CD ...........................................................44
Standard functions ........................................................44
Repeat function ..........................................................45
Random playback ........................................................45
Programming a sequence of tracks ...........................................45
Alarm function ................................................ 46
Setting the alarm time .....................................................46
Switch the alarm on/off ....................................................47
Other functions ...............................................48
Display lighting ..........................................................48
Sleep function ...........................................................48
Nap alarm ..............................................................49
Connecting external playback devices ........................................49
Cleaning ..................................................... 50
Cleaning the housing ......................................................50
Storage when not in use ....................................... 50
Disposal .....................................................50
Disposal of the device .....................................................50
Disposing of the batteries ..................................................50
Troubleshooting ..............................................51
Fault causes and remedies ..................................................51
Appendix .................................................... 52
Technical details. . . . . . . . . . . . . . . . . . . . . . . . . . . . . . . . . . . . . . . . . . . . . . . . . . . . . . . . . .52
Notes on the EU Declaration of Conformity ....................................52
Kompernass Handels GmbH warranty ........................................53
Service .................................................................54
Importer ................................................................54
■ 30 │ GB
│
MT
SCUR 3 A1

Introduction
Information about these operating instructions
Congratulations on the purchase of your new device.
You have selected a high-quality product. The operating instructions are part
of this product. They contain important information about safety, usage and
disposal. Before using the product, please familiarise yourself with all operating
and safety instructions. Use the product only as described and for the range of
applications specified. Retain these instructions for future reference. Please also
pass these operating instructions on to any future owner.
Notes on trademarks
USB® is a registered trademark of USB Implementers Forum, Inc.
The SilverCrest trademark and the retail name are the property of their respective
owner.
All other names and products may be trademarks or registered trademarks of
their respective owner.
Proper use
This device is a consumer electronics device designed for the reception of
radio programmes, for playing CDs, as an alarm and for playing back music
from external devices. The integrated charging function can be used to charge
external devices. The device is intended for freestanding installation. The device
is not intended for any other purpose, nor for use beyond the scope described.
The device is not intended for use in commercial or industrial environments. The
manufacturer accepts no responsibility for damage caused by failure to observe
these instructions, improper use or repairs, unauthorised modifications or the use
of unapproved replacement parts. The risk is borne solely by the user.
SCUR 3 A1
GB│MT │ 31 ■

Warnings and warning symbols used
The following warnings are used in these operating instructions:
DANGER
A warning notice at this hazard level indicates an imminently
hazardous situation.
Failure to avoid this hazardous situation could result in serious injuries or even
death.
► Follow the instructions in this warning notice to avoid the risk of serious
injuries or death.
CAUTION
A warning notice at this hazard level indicates a risk of property
damage.
Failure to avoid this situation could result in property damage.
► Follow the instructions in this warning to prevent property damage.
NOTE
► A note provides additional information that makes handling the device
easier for you.
The following warning symbols are used on the device.
Symbol Meaning
■ 32 │ GB
│
MT
Pay attention to warning and safety notices!
Risk of electric shock!
Dangerous electric voltage – risk to life!
Laser! Do not expose yourself to the laser beam.
SCUR 3 A1

Safety
This section contains important safety instructions for handling the device. This
device complies with statutory safety regulations. Improper use may result in
personal injury and property damage.
Risk of electrocution
DANGER
Risk of fatal injury from electrocution!
Contact with live cables or components can result in a fatal injury!
Comply with the following safety information in order to avoid the hazard from
electrical current:
► Do not use the device if the mains power plug or the mains cable is damaged.
► When disconnecting the device from the mains supply, always pull on the
plug and never on the cable.
► Never touch the mains plug or the device with wet hands.
► If you move the device from a cold to a warm environment, allow the
device to acclimatise before using it. This can take up to two hours.
► Never open the device housing. Touching live connections or making
modifications to the electrical or mechanical assembly can lead to a risk of
electrocution and fire.
► Do not insert any objects into the ventilation slots or other openings on the
device.
► The device consumes power in standby mode. To completely disconnect
the device from the mains power, the power plug must be removed from
the mains power socket. The device must be positioned so that you have
unrestricted access to the mains socket at all times and can pull out the plug
immediately in an emergency.
SCUR 3 A1
GB│MT │ 33 ■

Battery information
DANGER
Risk of injury if batteries are handled incorrectly
► Keep batteries out of the reach of children. Children might put batteries
into their mouths and swallow them. If a battery has been swallowed, seek
medical assistance immediately.
► Do not throw batteries into a fire. Never expose batteries to high temperatures.
► Explosion hazard! Do not charge batteries unless they are explicitly
labelled as "rechargeable".
► Do not open, deform or short-circuit the batteries.
► Do not mix different types of batteries.
► Empty batteries should be removed because of the increased risk of leak-
age. The batteries should also be removed from the device if it is not being
used for long periods.
► Battery acid leaking from a battery can cause skin irritation. If it contacts
your skin, rinse off with plenty of water. If the liquid comes into contact with
your eyes, rinse thoroughly with plenty of water, do not rub and consult a
doctor immediately.
► The section entitled "Inserting batteries" describes how to insert and remove
batteries correctly.
Basic safety instructions
To ensure safe operation of the device, follow the safety guidelines set out below:
■ This device may be used by children aged 8 years and above and by
persons with limited physical, sensory or mental capabilities, or lack of experience and knowledge, provided that they are under supervision or have
been told how to use the device safely and are aware of the potential risks.
Do not allow children to play with the device. Cleaning and user maintenance tasks may not be carried out by children unless they are supervised.
DANGER! Do not allow children to play with the packaging material!
■
Keep all packaging materials away from children.
There is a risk of suffocation!
■ Check the device for visible external damage before use. Do not operate a
device that has been damaged or dropped.
■ If the cables or connections are damaged, have them replaced by an
authorised specialist or the Customer Service department.
■ Keep the power cable away from hot surfaces and sharp edges. Ensure that
the power cable is not stretched tightly or kinked. Do not allow the cable to
dangle over edges (tripwire effect).
■ All repairs must be carried out by authorised specialist companies or
Customer Service. Improper repairs may put the user at risk. It will also
invalidate any warranty claims.
■ 34 │ GB
│
MT
SCUR 3 A1

■ Defective components must always be replaced with original replacement
parts. It is ensured only for these parts that they fulfil the safety requirements.
■ Do not make any unauthorised modifications or alterations to the device.
■ Always place the device on a stable and level surface. It can be damaged
if dropped.
■ Do not expose the device to direct sunlight or high temperatures.
Otherwise it may overheat and be irreparably damaged.
■ Be sure to provide sufficient air circulation to avoid a heat build-up.
Never cover the device. There is a fire hazard!
■ Do not place the product near heat sources such as radiators or other
heat-generating devices.
■ Keep the device away from open flames (e.g. candles) at all times.
■ This device is intended for use only in dry indoor rooms.
■ The device is not designed for use in rooms with high temperatures or
humidity (e.g. bathrooms) or where there is excessive dust.
■ Protect the device from spray or dripping water. Never submerge the
device in water, do not place the device near water and do not place any
object filled with liquid (e.g. vases) on top of the device.
■ If you notice a burning smell or smoke, pull out the plug from the mains
socket immediately and remove the batteries.
■ In the event of malfunctions, and in bad weather, disconnect the plug from
the mains power socket.
■ Do not use any defective or damaged media during CD operation.
■ During CD operation, do not look directly into the laser beam or into the
opening from which it emerges.
■ Never aim the laser beam at reflective surfaces, people or animals.
Even brief visual contact with a laser beam can result in eye injuries.
■ The device has a safety device that prevents users from coming into contact
with the laser beam when opening the CD compartment. Do not damage or
tamper with this safety device.
■ The technical features of this device enable an adjustable frequency range
of 87.5–108 MHz. In some countries, different national regulations may
apply to the assigned radio frequency ranges. Please note that information
received outside of the assigned radio frequency ranges may not be exploited, passed on to third parties or otherwise misused.
SCUR 3 A1
GB│MT │ 35 ■

Parts and operating components
Top and front
SNOOZE/DIMMER
Display
І◄◄ VOL TUNE ►►І
REPEAT/RANDOM
►/IISCAN/AMS
■ST/MONO
AUX IN
XBASS
- SLEEP/NAP
3 USB 5V 1A
!
. ALARM
0 /SOURCE
6 CLOCK/MEMORY
CD compartment
Snooze button: Pause the alarm for 9 minutes; set the display
brightness
Indentation for opening the CD compartment lid
Display of information, such as frequency, time, alarm time, etc.
Adjusting the volume
CD: press briefly – then turn for track selection
Radio: press briefly – then turn for frequency selection
Set time/alarm: Setting the hours and minutes
CD: Switching repeat/random playback function on/off
Starting/stopping playback
Radio: automatic station search
Stop playback
Radio: switch between stereo/mono
Connection for external device, e.g. MP3 player
(3.5 mm Ø jack socket)
Bass boost/normal
Setting the sleep function
Setting the NAP alarm
USB connection: for charging external devices
Headphone socket (3.5 mm Ø jack)
Setting the alarm time, switching alarm on/off
Waking device from standby mode: press briefly
Putting device into standby mode: press for longer than
2 seconds
During operation: press briefly to change mode
Clock: set the time in standby mode
Radio: press briefly to call up the next stored programmes
space / press longer to save the current station in the
current programme space
CD: Programming a sequence of tracks
Rear
1
% AC 100 – 240 V ∼
50/60 Hz
+ OPEN
, FM ANT.
■ 36 │ GB
│
MT
Left speaker
Mains cable with mains plug
Battery compartment for reserve power batteries
Wire aerial for FM reception
Right speaker
SCUR 3 A1

Indicators on the display
/
"
#
$
&
'
(
5
4
2
*
)
XBASS
MEMORY
REP 1 ALL
PM
XBASS
((ST.))
RAND
MP3
NAP
ZZZ
SNOOZE
AL 2
AL 1
FM
REPEAT ALL
REPEAT 1
MEMORY
RAND MP3 NAP
FM
MHz
12-hour display is activated (PM is only shown between
12 noon and 12 midnight when 12-hour display is activated),
can be switched to 24-hour display
Display time
Boost bass
Radio station is received in stereo.
CD tracks are played in a random order.
An MP3 file is being played.
Nap alarm active
Folder on an MP3-CD
Sleep function is activated
Snooze function (NAP) is activated
Alarm 2 active
Alarm 1 active
Alarm with CD player
Alarm with alarm tone
Alarm with radio
In CD mode: Playback active
Display of frequency in MHz / function / timer time /
memory space / volume
FM station is being received
Repeat entire CD is activated
Repeat track is activated
flashes while programming a sequence of tracks or saving
stations / lights up when a programme or programmed
station is active
SNOOZE
AL 1 AL2
SCUR 3 A1
GB│MT │ 37 ■

Use
Package contents and transport inspection
(See fold-out page for illustrations)
DANGER
► Do not allow children to play with packaging materials.
There is a risk of suffocation.
♦ Remove all parts of the device and the operating instructions from the box.
♦ Remove all packaging materials from the device.
The product includes the following components:
▯ CD clock radio SCUR 3 A1
▯ These operating instructions
NOTE
► Check the package for completeness and signs of visible damage.
► If any items are missing or damaged as a result of defective packaging or
transportation, please contact the Service Hotline (see section "Service").
Disposal of packaging
The packaging protects the device from damage during transport. The packaging
materials have been selected for their environmental friendliness and ease of
disposal, and are therefore recyclable.
Returning the packaging to the material cycle conserves raw materials and
reduces the amount of waste that is generated. Dispose of packaging materials
that are no longer needed in accordance with applicable local regulations.
Dispose of the packaging in an environmentally friendly manner.
Note the labelling on the packaging and separate the packaging material
components for disposal if necessary. The packaging material is labelled with
abbreviations (a) and numbers (b) with the following meanings:
1–7: plastics
20–22: paper and cardboard
80–98: composites
■ 38 │ GB
NOTE
► If possible, keep the original packaging for the complete warranty period
of the device so that the device can be packaged properly for return shipment in the event of a warranty claim.
│
MT
SCUR 3 A1

Requirements for the set-up location
For safe and trouble-free operation of the device, the set-up location must fulfil
the following requirements:
■ Place the device on a firm, flat and level surface.
■ Set up the device so that the ventilation openings and the left
speakers are not covered.
■ Do not operate the device in a hot, wet or extremely damp environment or
in the vicinity of flammable materials.
■ The mains power socket must be easily accessible so that the mains cable
can be easily pulled out in an emergency.
Setting up the device
♦ Select a suitable location for the device (see also the section "Requirements
for the set-up location").
♦ Completely remove all packaging material.
♦ Lift the CD compartment lid
CD compartment
♦ Remove the protective film from the display
♦ Place the device on a firm, level surface.
♦ Do not subject the device to extreme heat or humidity.
♦ Ensure the device is sufficiently ventilated from all sides.
♦ Completely unwind the wire aerial
.
and remove the transport lock from the
,.
Connecting the power supply
CAUTION
► Before connecting the device, compare the connection data (voltage and
frequency) on the rating plate on the rear of the device with that of your
electric supply. This data must agree so that the device is not damaged.
♦ Insert the plug of the mains cable
% into a mains power socket.
1 and right
%
.
Inserting batteries
By inserting 2 x 1.5V batteries (type AAA/Micro/LR3), you can prevent the
programmed time, saved radio stations and alarm times from being lost in the
event of a power failure. The batteries make sure that the internal clock continues
to run even during a power failure.
NOTE
► The device can also be operated without batteries. In this case, however, you
must reset the time, alarms and resave the radio stations after a power failure.
► During a power failure, the display
installed. Radio/CD operation and the alarm functions will not be available
again, however, until the power supply via the mains cable
SCUR 3 A1
switches off even if batteries are
% is restored.
GB│MT │ 39 ■

♦ Open the battery compartment cover + on the rear of the device.
♦ Insert 2 x 1.5V batteries (type AAA/Micro/LR3) (not supplied) into the battery
compartment
♦ Then close the battery compartment + by replacing the coverand snap-
ping it into place.
+. Note the polarity diagram in the battery compartment +.
Handling and use
Switching the device on/off
As soon as the power supply via the mains cable % is restored, the device will
be in standby mode and the display
♦ Press the
on for the first time, the device starts in CD mode.
♦ Press the
device back into standby mode.
NOTE
► After switching off, the device remains in standby mode.
► Pull out the mains cable
periods, as the device consumes power even when in standby mode.
► If you disconnect the device completely from the mains power and there
are no batteries in the battery compartment
time and the alarms and resave the radio stations later.
Setting the time
♦ Press the /SOURCE button 0 if required to switch the device into stand-
by mode. The time can only be set while the device is in standby mode.
♦ Press the CLOCK/MEMORY button
flashes on the display
♦ Turn the −VOL+/ І◄◄ TUNE ►►І dial
12-hour display (in 12-hour display "PM" will be shown in front of the time
between 12 noon and midnight).
♦ Press the CLOCK/MEMORY button
♦ Turn the −VOL+/ І◄◄ TUNE ►►І dial
♦ Press the CLOCK/MEMORY button
♦ Turn the −VOL+/ І◄◄ TUNE ►►І dial
♦ Press the CLOCK/MEMORY button
NOTE
► If no setting is made within 10 seconds while in setting mode, the device
exits the settings menu. All settings made thus far will be saved and the
display
/SOURCE button 0 to switch on the device. When switched
/SOURCE button 0 for longer than 2 seconds to put the
.
shows the set time.
shows "0:00".
% if you do not intend to use the device for long
+, you will have to reset the
6until "24H" (24-hour display)
to select the 24-hour display or
6. The hour flashes on the display .
to set the hours.
6. The minutes flash on the display .
to set the minutes.
6 once to save the set time.
■ 40 │ GB
│
MT
SCUR 3 A1

Selecting the operating mode
♦ While the device is switched on, press the /SOURCE button 0 until the
desired mode is shown on the display
– "Cd" for CD playback
– "FM" and the frequency for radio playback
– "AUX" for playback from an external device connected to the AUX IN
input
Volume/bass
♦ Turn the −VOL+/ І◄◄ TUNE ►►І dial to the right to increase the volume
or to the left to decrease the volume. The set volume will be shown on the
display
as a value between "L00" (mute) and "L25" (maximum volume).
♦ Press the XBASS button
activated, "XBASS" is shown on the display
NOTE
► In AUX mode you can also set the volume on the external device if this is
connected to the CD clock radio via the AUX IN input .
► Reduce the volume on the external device if the playback sounds distorted.
button to turn up the bass. If this function is
Charging external devices
The CD clock radio has a charging function which you can use to charge the batteries of devices that are usually charged via a USB connection. The maximum
charging current is 1.0 A.
NOTE
► The USB connection
► The CD clock radio must be connected to the mains in order to charge
external devices.
► You can purchase a suitable USB charging cable (not supplied) in any
consumer electronics shop.
♦ Insert the USB-A connector on the USB charging cable into the USB connec-
3 on the CD clock radio.
tion
♦ Insert the other USB connector on the USB charging cable into the USB
connection on the external device.
♦ The external device will start charging after a few seconds. During this, the
CD clock radio can be switched on or in standby mode.
♦ After charging the external device, pull the USB charging cable out of the
USB connection
3 is exclusively for charging external devices.
3 to disconnect the devices from each other.
:
.
SCUR 3 A1
GB│MT │ 41 ■

Connecting headphones
♦ Turn the −VOL+/ І◄◄ TUNE ►►І dial to the left to the lowest volume.
♦ Insert the jack plug on the headphones into the headphone socket
on the front of the device. Sound playback now takes place only via the
connected headphones.
♦ Set the desired volume with the −VOL+/ І◄◄ TUNE ►►І dial
Radio
Automatic station search (AMS)
NOTE
► This device must be switched on. Press the
if necessary, to switch on the device.
► The wire aerial
, must be unwound.
!
.
/SOURCE button 0,
♦ Press the
display is shown on the display
♦ Press the ►/II/SCAN/AMS button
The station search works in both directions. This is dependent on the lastused manual search direction. The station search stops at the next station
with a sufficiently strong signal.
/SOURCE button 0 briefly until "FM" and the frequency
.
Storing stations automatically
The automatic station search with station saving scans once through the entire
frequency band and automatically saves the first 20 stations with a sufficiently
strong signal in the programme spaces 1–20.
♦ Press the ►/II/SCAN/AMS button
the automatic station search with station saving. The first 20 stations will
be saved in the programme spaces 1–20 in order of increasing frequency.
After the station search is complete, the station stored in the first programme
space is played automatically.
NOTE
► The automatic station search replaces the stations already stored in the
programme spaces.
Manual station selection
♦ Press −VOL+/ І◄◄ TUNE ►►І dial once and turn it to the left or right to
change the frequency in steps of 0.05 MHz. The current frequency is shown
on the display
♦ Press the −VOL+/ І◄◄ TUNE ►►І dial
.
to start the automatic station search.
for longer than 2 seconds to start
again or wait at least 10 sec-
■ 42 │ GB
│
MT
SCUR 3 A1

onds to set the volume with the −VOL+/ І◄◄ TUNE ►►І dial again.
Saving stations manually
♦ Use the −VOL+/ І◄◄ TUNE ►►І dial to set the desired station.
♦ Press the CLOCK/MEMORY button
gramme space (e.g. P01) flash on the display
♦ Turn the −VOL+/ І◄◄ TUNE ►►І dial
desired programme space (P01 to P20).
♦ Press the CLOCK/MEMORY button
desired programme space.
♦ Repeat these steps to save up to 20 stations. The same station can be saved
in more than one programme space.
Calling up the stored station
♦ To call up a stored station, press the CLOCK/MEMORY button 6 while in
radio mode and then turn the −VOL+/ І◄◄ TUNE ►►І dial
or left to select a station.
♦ Alternatively, press the CLOCK/MEMORY button
radio mode until the desired station is shown.
Receiving stations in mono
It is sometimes possible to improve the playback quality of stations with a poor or
unstable signal strength by switching from stereo to mono playback.
6until "MEMORY" and the pro-
.
to the left or right to select the
6 again to save the station in the
to the right
6 several times while in
SCUR 3 A1
♦ Use the ■ ST/MONO button
back. If stereo playback is activated, "((ST.))" appears on the display
when a stereo radio station is received.
NOTE
► To improve FM reception quality, you can also try repositioning the wire
aerial , and/or the device.
to switch between mono and stereo play-
GB│MT │ 43 ■

Playing CDs
Inserting a CD
NOTE
► It is not possible to guarantee playback for every self-burned CD-R or CD-
RW. If the burned CD-R or CD-RW does not play, this does not indicate that
the device is faulty.
♦ Press the
When switched on for the first time, the device automatically starts in CD
mode.
♦ If the device is already switched on, but is not yet in CD mode, press the
/SOURCE button 0 briefly until "Cd" appears on the display .
♦ Open the CD compartment
To help you, there is a small indentation
compartment
CD compartment lid
♦ Place the CD, with the printed side facing up, onto the tray spindle and
press it on gently until it clicks into place.
♦ Close the CD compartment
/SOURCE button 0, if necessary, to switch on the device.
. "OPEN" now appears on the display as soon as the
first shows "----" and then shortly afterwards CD playback starts with the
first track on the CD.
NOTE
► If "NO" or "Err" appears on the display
possible that you have inserted a data CD rather than a music CD. "NO"
also appears on the display
if the CD is inserted the wrong way round.
Standard functions
Function in CD mode
Start
Pause
Stop
Next track
Previous track
by lifting the lid carefully with your fingers.
at the front right side of the CD
is opened.
by pressing the lid gently down. The display
after inserting the CD, then it is
if there is no CD in the CD compartment or
Press the ►/II/SCAN/AMS button
Press the ►/II/SCAN/AMS button
(the number of the track currently playing flashes on the
display
)
Press the ■ ST/MONO button
First press the −VOL+/ І◄◄ TUNE ►►І dial
turn it to the right until the required track is played.
First press the −VOL+/ І◄◄ TUNE ►►І dial
turn it to the left until the required track is played.
during playback
during playback
and then
and then
■ 44 │ GB
│
MT
SCUR 3 A1

Repeat function
You can use the repeat function to repeat a single track or the whole CD or the
programmed track sequence.
Repeat current track
♦ During CD playback press the REPEAT/RANDOM button once. "REP1"
appears on the display
Repeat entire CD
♦ During CD playback press the REPEAT/RANDOM button twice. "REP
ALL" appears on the display
sequence is repeated.
Switching off repeat
♦ During CD playback press the REPEAT/RANDOM button twice until
"REP1"/"REP ALL" and "RAND" all disappear from the display
Random playback
During random play, all the tracks on a CD are played in a random order.
and the current track will then be repeated.
and the entire CD or the programmed track
.
♦ During CD playback press the REPEAT/RANDOM button
"RAND" appears on the display
♦ Press the REPEAT/RANDOM button
"RAND" disappears from the display
the normal order.
and random playback is activated.
Programming a sequence of tracks
You can programme a playback sequence of up to 20 tracks while CD playback is
stopped. As soon as 20 tracks are programmed, "FU" appears on the display
♦ Press the CLOCK/MEMORY button
. The first programme position "P01" flashes briefly, followed by "00".
♦ Turn the −VOL+/ І◄◄ TUNE ►►І dial
desired track.
♦ Press the CLOCK/MEMORY button
first programme position "P01". The next programme position, "P02", flashes
SCUR 3 A1
briefly on the display
♦ Turn the −VOL+/ І◄◄ TUNE ►►І dial
next track. To store this track, press the CLOCK/MEMORY button
Repeat this process until all the desired tracks have been programmed. The
same track can be saved in more than one programme space.
♦ Press the ►/II/SCAN/AMS button
display
to start playback of the programmed sequence.
, followed by the last selected track.
three times.
again to stop random play.
and the tracks are now played in
.
6. "MEMORY" flashes on the display
to the left or right to select the
6 to store the selected track in the
to the left or right to select the
6 again.
as long as "MEMORY" is still on the
GB│MT │ 45 ■

♦ Once the programmed sequence has played completely through, CD play-
back stops and "MEMORY" appears again on the display
II/SCAN/AMS button
again.
NOTE
► To delete a programmed sequence of tracks, press the ■ ST/MONO
button twice during CD playback or use the /SOURCE button 0to
switch the device into standby mode.
► During CD playback, or while playback is paused, you can jump to another
programmed track by pressing the −VOL+/ І◄◄ TUNE ►►І dial
briefly and then turning it to the left or right.
Alarm function
The device has two alarms: "AL 1" and "AL 2". You can programme an alarm
sound or playback of the last selected radio station or a CD at a certain time.
NOTE
► If no setting is made within 10 seconds while in setting mode, the setting
process is cancelled and the device exits the settings menu.
Setting the alarm time
♦ The device must be standby mode. Press the /SOURCE button 0 for
longer than 2 seconds to switch off the device, if necessary.
♦ Press the ALARM button
flashes on the display
♦ Use the −VOL+/ І◄◄ TUNE ►►І dial
functions "AL 1" and "AL 2".
♦ Press the ALARM button
on the display.
♦ Turn the −VOL+/ І◄◄ TUNE ►►І dial
Then press the ALARM button
flash.
♦ Turn the −VOL+/ І◄◄ TUNE ►►І dial
minutes. Then press the ALARM button
for the alarm mode appear on the display
alarm mode flashes.
♦ Turn the −VOL+/ І◄◄ TUNE ►►І dial
desired alarm mode:
–
Alarm with alarm tone
– Alarm with CD player
Alarm with radio
–
. Press the ►/
again to play back the programmed sequence
once
. for longer than 2 seconds until "AL 1" or "AL 2"
.
to choose between the alarm
. to confirm the selection. The hour "0" flashes
to the left or right to set the hours.
. to save the setting. The minutes ":00"
to the left or right to set the
. to save the setting. The symbols
and the symbol for the active
to the left or right to select the
■ 46 │ GB
│
MT
SCUR 3 A1

♦ Press the ALARM button . to save the selection. If you have selected the
alarm tone , the setting process is now complete.
♦ If you have selected radio or CD playback, you must use the −VOL+/
І◄◄ TUNE ►►І dial
to set the volume (L15–L25).
♦ Press the ALARM button
Switch the alarm on/off
Switching the alarm on
♦ While the device is in standby mode, press the ALARM button . until the
desired alarm function is shown on the display
AL1
–
Alarm 1 is activated
AL2
Alarm 2 is activated
–
AL1
AL2
–
– If no symbol is displayed, both Alarm 1 and 2 are deactivated.
Pausing the alarm
♦ You can pause the alarm (alarm, radio or CD) for 9 minutes by pressing
the SNOOZE/DIMMER button
"SNOOZE" appears on the display
NOTE
► If the alarm is not switched off, it stops automatically after 60 minutes.
► If CD playback is activated as the alarm mode and there is no CD in the
CD compartment
Alarm 1 and 2 are activated
, the alarm tone will play instead.
. to save the setting.
:
. While the SNOOZE function is active,
.
Switching off the alarm
♦ Press the /SOURCE button 0 or the ALARM button . to switch off the
alarm. The set alarm time remains programmed.
NOTE
► The alarm is finished for 24 hours and will reactivate at the set alarm time.
Switching the alarm off completely
♦ To switch off the alarm completely, press the ALARM button . while in
standby mode until the symbol
shown on the display
SCUR 3 A1
.
AL1
AL2
or
or "AL 1" or "AL 2" is no longer
GB│MT │ 47 ■

Other functions
Display lighting
♦ You can set the brightness of the LED display in three stages. Press the
SNOOZE/DIMMER button
the display
– The brightness remains at the currently selected level except for between
the hours of 11 pm and 5 am (night mode).
– When the device is switched on, the brightest mode is always used.
– After switching off the device, the display is automatically set to the
lowest brightness after 10 seconds. The display
brightest level for 10 seconds every time a button is pressed.
NOTE
► In standby mode the display
from 11 pm to 5 am (night mode). Permanent illumination is not possible in
standby mode during this time.
Sleep function
You can use this function to automatically switch the device off after 15–
90 minutes.
to increase or decrease the brightness of
in stages.
is restored to the
is automatically dimmed during the period
■ 48 │ GB
♦ During radio or CD playback, press the SLEEP/NAP button
"ZZZ" and "15" (minutes) appear on the display
♦ Press the SLEEP/NAP button
45, 60, 90, OFF).
The sleep function is activated after around 5 seconds if no other button is
pressed. As long as the sleep function is activated, "ZZZ" appears on the
display
.
♦ Press the SLEEP/NAP button
show the remaining time until the device is switched off.
♦ To deactivate the function, press the SLEEP/NAP button
appears on the display
NOTE
► If, during CD playback, the CD playback time is less than the set SLEEP
time, the playback is stopped at the end of the CD.
│
MT
- repeatedly to set the SLEEP time (15, 30,
- once while the function is activated to
or switch off the device.
.
- briefly.
- until "OFF"
SCUR 3 A1

Nap alarm
You can use this function to set a nap alarm that will wake you after 1–120 minutes
with an alarm.
♦ In standby mode, press the SLEEP/NAP button
"NAP" and "10" (minutes) appear on the display
♦ Use the −VOL+/ І◄◄ TUNE ►►І dial
1 and 120) after which you would like to be woken.
The NAP function is activated after around 5 seconds if no other button is
pressed. As long as the NAP function is activated, "NAP" is shown on the
display
.
♦ Press the SLEEP/NAP button
to show the remaining time until the alarm.
♦ Press the SLEEP/NAP button
♦ To deactivate the NAP function, press the SLEEP/NAP button
turn the −VOL+/ І◄◄ TUNE ►►І dial
appears on the display
.
to set a time in minutes (between
- once while the NAP function is activated
- to switch off the alarm.
to the left until "NAP" no longer
Connecting external playback devices
You can connect external playback devices, such as an MP3 player or a smartphone, to the AUX IN input
radio.
NOTE
► Switch the CD clock radio and the external device off before you connect
them with each other. Note also the operating instructions for the device
that you want to connect to the CD clock radio.
To connect external playback devices, you will need an audio cable (not
supplied) with a 3.5 mm Ø jack plug for the AUX IN input
radio. The plug on the other end of the audio cable will depend on the audio
output of the external device.
♦ Connect the plug on the audio cable to the audio output on the external
device and the AUX IN input
♦ Press the
♦ Press the
♦ Start playback on the external device. The playback is now controlled
via the external device only. You can also change the volume and sound
settings on the CD clock radio.
♦ Turn off both devices before you disconnect them from each other.
♦ Pull the plug on the audio cable out of the AUX IN input
/SOURCE button 0 to switch on the CD clock radio.
/SOURCE button 0 briefly until "AUX" appears on the display .
to use this as a playback source for the CD clock
on the CD clock radio.
-.
.
- and
on the CD clock
.
SCUR 3 A1
GB│MT │ 49 ■

Cleaning
DANGER
Risk of fatal injury from electrocution!
► Remove the mains cable
clean the device.
CAUTION
Damage to the device!
► To avoid irreparable damage to the device, ensure that no moisture can
penetrate the device during cleaning.
► Do not use caustic, abrasive or solvent-based cleaning materials. These can
damage the surfaces of the device.
► The laser unit does not require cleaning. We do not recommend the use of
cleaning media.
% from the mains power socket before starting to
Cleaning the housing
♦ Clean the surfaces of the device with a soft, dry cloth.
♦ Use a lightly moistened cloth and a mild detergent to remove stubborn dirt
residues.
Storage when not in use
♦ If you do not intend to use the device for a long period, disconnect the plug
from the mains power supply. Remove the batteries from the device and
store it in a clean, dry location away from direct sunlight.
Disposal
Disposal of the device
The adjacent symbol of a crossed-out wheelie bin means that this device is
subject to Directive 2012/19/EU. This directive states that this device must not
be disposed of in normal household waste at the end of its useful life but must be
brought to a specially set-up collection point, recycling depot or disposal company.
This disposal is free of charge for the user. Protect the environment and dispose of this device properly.
Your local community or municipal authorities can provide information on how to
dispose of the worn-out product.
Disposing of the batteries
Do not dispose of the batteries in the domestic waste. Defective or dead batteries must
be recycled according to Directive 2006/66/EC. Consumers are legally obliged to
dispose of used batteries at a collection point in their town/district or at a retail store.
This obligation is intended to ensure that batteries are disposed of in an environmentally responsible manner. Dispose of batteries only when they are fully discharged.
■ 50 │ GB
│
MT
SCUR 3 A1

Troubleshooting
This section contains important information about fault identification and rectification. Follow the instructions to avoid hazards and damage.
Fault causes and remedies
The following table will help you to identify and rectify minor malfunctions. If the
solutions presented below do not resolve the problem, please contact Customer
Service (see section "Service").
Fault Possible cause Remedy
There is nothing on
the display
No sound.
Interference with the
radio reception.
The CD is not
played.
The time and station
presets are lost after
a power failure.
.
The mains cable % is not
plugged in.
The power socket is not
supplying power.
The volume is set to minimum.
The device is in standby
mode.
The reception is weak.
It is an incompatible CD-R
or CD-RW.
The CD is the wrong way
up in the CD compartment
.
No batteries in the battery
compartment
ies are dead.
The batteries are inserted
incorrectly in the battery
compartment
+ or batter-
+.
Insert the plug of the mains cable %
in the mains socket.
Check the house fuses.
Turn the −VOL+/ І◄◄ TUNE ►►І
dial
to the right to increase the
volume.
Press the
switch on the device.
Try to improve reception by moving
the wire aerial
Use the ■ ST/MONO button
switch to mono playback.
Swap the CD for another (audio)
CD.
Place the CD, with the printed side
facing up, into the CD compartment
/SOURCE button 0 to
,.
to
.
Check that the batteries are sufficiently charged and replace them if
necessary.
Check whether the batteries are
inserted the right way round in the
battery compartment +. Note
the polarity diagram in the battery
compartment
+.
SCUR 3 A1
GB│MT │ 51 ■
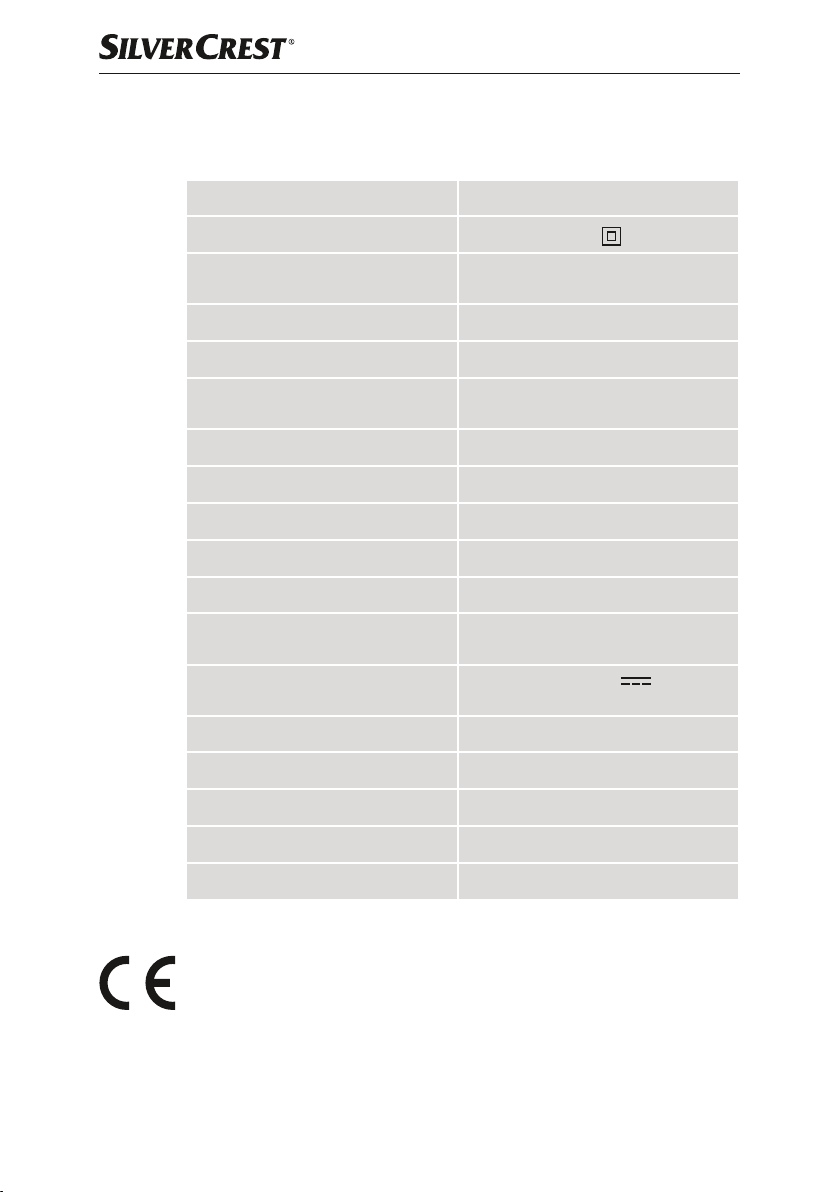
Appendix
Technical details
Input voltage 100 ‒ 240 V ∼ (AC), 50/60 Hz
Protection class
Batteries for data retention
Power consumption (in operation) 10,5W
Power consumption (standby) max. 1 W
Speaker output
Frequency range of radio (FM) 87.5–108 MHz
Station presets 20
CD scanning system Class 1 laser
Supported media formats Audio CD, CD-R, CD-RW
Headphone connection 3.5 mm Ø jack socket
Connection for external devices
(AUX IN)
USB port
(for charging external devices)
Operating temperature 15°C to 35°C
Storage temperature 0°C to 40°C
Humidity (no condensation) ≤ 75%
2 x 1.5 V type AAA/Micro/LR3
approx. 2 x 1.5 W RMS
(with 10% distortion factor)
USB type A, 5V
II /
(not supplied)
3.5 mm Ø jack socket
(DC),
max. 1.0 A
Dimensions (W x H x D) approx. 15.0 x 12.5 x 19.3 cm
Weight approx. 1100 g
Notes on the EU Declaration of Conformity
This device complies with the essential requirements and other relevant provisions
of the RE Directive 2014/53/EU, the Ecodesign Directive 2009/125/EC and
the RoHS Directive 2011/65/EU.
You can download the complete EU conformity declaration from:
www.kompernass.com/support/306411_DOC.pdf.
■ 52 │ GB
│
MT
SCUR 3 A1

Kompernass Handels GmbH warranty
Dear Customer,
This appliance has a 3-year warranty valid from the date of purchase. If this product
has any faults, you, the buyer, have certain statutory rights. Your statutory rights
are not restricted in any way by the warranty described below.
Warranty conditions
The validity period of the warranty starts from the date of purchase. Please keep
your original receipt in a safe place. This document will be required as proof of
purchase.
If any material or production fault occurs within three years of the date of purchase
of the product, we will either repair or replace the product for you at our discretion.
This warranty service is dependent on you presenting the defective appliance
and the proof of purchase (receipt) and a short written description of the fault
and its time of occurrence.
If the defect is covered by the warranty, your product will either be repaired or
replaced by us. The repair or replacement of a product does not signify the beginning of a new warranty period.
Warranty period and statutory claims for defects
The warranty period is not prolonged by repairs effected under the warranty.
This also applies to replaced and repaired components. Any damage and defects
present at the time of purchase must be reported immediately after unpacking.
Repairs carried out after expiry of the warranty period shall be subject to a fee.
Scope of the warranty
This appliance has been manufactured in accordance with strict quality guidelines
and inspected meticulously prior to delivery.
The warranty covers material faults or production faults. The warranty does not
extend to product parts subject to normal wear and tear or fragile parts such as
switches, batteries, baking moulds or parts made of glass.
The warranty does not apply if the product has been damaged, improperly used
or improperly maintained. The directions in the operating instructions for the product
regarding proper use of the product are to be strictly followed. Uses and actions
that are discouraged in the operating instructions or which are warned against
must be avoided.
This product is intended solely for private use and not for commercial purposes.
The warranty shall be deemed void in cases of misuse or improper handling, use
of force and modifications / repairs which have not been carried out by one of
our authorised Service centres.
SCUR 3 A1
GB│MT │ 53 ■

Warranty claim procedure
To ensure quick processing of your case, please observe the following instructions:
■ Please have the till receipt and the item number (e.g. IAN 12345) available
as proof of purchase.
■ You will find the item number on the type plate, an engraving on the front
page of the instructions (bottom left), or as a sticker on the rear or bottom of
the appliance.
■ If functional or other defects occur, please contact the service department
listed either by telephone or by e-mail.
■ You can return a defective product to us free of charge to the service ad-
dress that will be provided to you. Ensure that you enclose the proof of
purchase (till receipt) and information about what the defect is and when it
occurred.
You can download these instructions along with many other manuals,
product videos and software on www.lidl-service.com.
Service
Service Great Britain
Tel.: 0871 5000 720 (£ 0.10/Min.)
E-Mail: kompernass@lidl.co.uk
Service Malta
Tel.: 80062230
E-Mail: kompernass@lidl.com.mt
IAN 306411
Importer
Please note that the following address is not the service address. Please use the
service address provided in the operating instructions.
KOMPERNASS HANDELS GMBH
BURGSTRASSE 21
DE - 44867 BOCHUM
GERMANY
www.kompernass.com
■ 54 │ GB
│
MT
SCUR 3 A1

Inhaltsverzeichnis
Einleitung .................................................... 57
Informationen zu dieser Bedienungsanleitung ...................................57
Hinweise zu Warenzeichen .................................................57
Bestimmungsgemäße Verwendung ...........................................57
Verwendete Warnhinweise und Warnsymbole ..................................58
Sicherheit ....................................................59
Gefahr durch elektrischen Strom .............................................59
Batteriehinweise ..........................................................59
Grundlegende Sicherheitshinweise ...........................................60
Teile und Bedienelemente ......................................62
Anzeigen im Display ...........................................63
Inbetriebnahme ..............................................64
Lieferumfang und Transportinspektion .........................................64
Verpackung entsorgen .....................................................64
Anforderungen an den Aufstellort ............................................65
Aufstellen des Gerätes .....................................................65
Stromversorgung herstellen .................................................65
Batterien einlegen ........................................................66
Bedienung und Betrieb .........................................66
Gerät ein-/ausschalten ....................................................66
Uhr stellen ..............................................................67
Betriebsart wählen ........................................................67
Lautstärke/Basswiedergabe ................................................68
Externe Geräte laden .....................................................68
Kopfhörer anschließen .....................................................68
Radio .......................................................69
Automatische Sendersuche (AMS) ...........................................69
Sender automatisch speichern ...............................................69
Sender manuell einrichten ..................................................69
Sender manuell speichern ..................................................70
Gespeicherten Sender aufrufen ..............................................70
Sender in Monoqualität empfangen ..........................................70
SCUR 3 A1
DE│AT│CH
│
55 ■

CDs abspielen ................................................ 71
CDs einlegen ............................................................71
Standardfunktionen .......................................................72
Wiederholfunktionen (REPEAT) ..............................................72
Zufallswiedergabe (RANDOM) .............................................72
Titelfolge programmieren ...................................................73
Weckfunktionen .............................................. 74
Weckzeit einstellen .......................................................74
Alarm ein-/ausschalten ....................................................75
Sonstige Funktionen ...........................................75
Display-Beleuchtung ......................................................75
Einschlaf-Funktion (SLEEP) ..................................................76
Kurzzeitwecker (NAP) .....................................................76
Externe Wiedergabegeräte anschließen .......................................77
Reinigung ....................................................77
Gehäuse reinigen ........................................................78
Lagerung bei Nichtbenutzung ...................................78
Entsorgung. . . . . . . . . . . . . . . . . . . . . . . . . . . . . . . . . . . . . . . . . . . . . . . . . . . 78
Gerät entsorgen ..........................................................78
Batterien entsorgen .......................................................78
Fehlerbehebung .............................................. 79
Fehlerursachen und -behebung ..............................................79
Anhang .....................................................80
Technische Daten .........................................................80
Hinweise zur EU-Konformitätserklärung ........................................80
Garantie der Kompernaß Handels GmbH .....................................81
Service .................................................................82
Importeur ...............................................................82
■ 56 │ DE
│AT│
CH
SCUR 3 A1

Einleitung
Informationen zu dieser Bedienungsanleitung
Herzlichen Glückwunsch zum Kauf Ihres neuen Gerätes.
Sie haben sich damit für ein hochwertiges Produkt entschieden. Die Bedienungs-
anleitung ist Bestandteil dieses Produkts. Sie enthält wichtige Hinweise für Sicherheit,
Gebrauch und Entsorgung. Machen Sie sich vor der Benutzung des Produkts mit
allen Bedien- und Sicherheitshinweisen vertraut. Benutzen Sie das Produkt nur
wie beschrieben und für die angegebenen Einsatzbereiche. Bewahren Sie diese
Bedienungsanleitung gut auf. Händigen Sie alle Unterlagen bei Weitergabe des
Produkts an Dritte mit aus.
Hinweise zu Warenzeichen
USB® ist ein eingetragenes Warenzeichen von USB Implementers Forum, Inc..
Das SilverCrest Warenzeichen und der Handelsname sind Eigentum des jeweili-
gen Inhabers.
Alle weiteren Namen und Produkte können die Warenzeichen oder eingetragene
Warenzeichen ihrer jeweiligen Eigentümer sein.
Bestimmungsgemäße Verwendung
Dieses Gerät ist ein Gerät der Unterhaltungselektronik und ist nur zum Empfang
von Hörfunksendungen, für das Abspielen von CDs, als Wecker und für die
Wiedergabe von Musik von externen Geräten bestimmt. Über die integrierte Ladefunktion können externe Geräte geladen werden. Das Gerät ist zur freien Aufstellung bestimmt. Eine andere oder darüber hinausgehende Benutzung gilt als nicht
bestimmungsgemäß. Das Gerät ist nicht zur Verwendung in gewerblichen oder
industriellen Bereichen vorgesehen. Ansprüche jeglicher Art wegen Schäden
aus nicht bestimmungsgemäßer Verwendung, unsachgemäßen Reparaturen,
unerlaubt vorgenommener Veränderungen oder Verwendung nicht zugelassener
Ersatzteile sind ausgeschlossen. Das Risiko trägt allein der Benutzer.
SCUR 3 A1
DE│AT│CH
│
57 ■
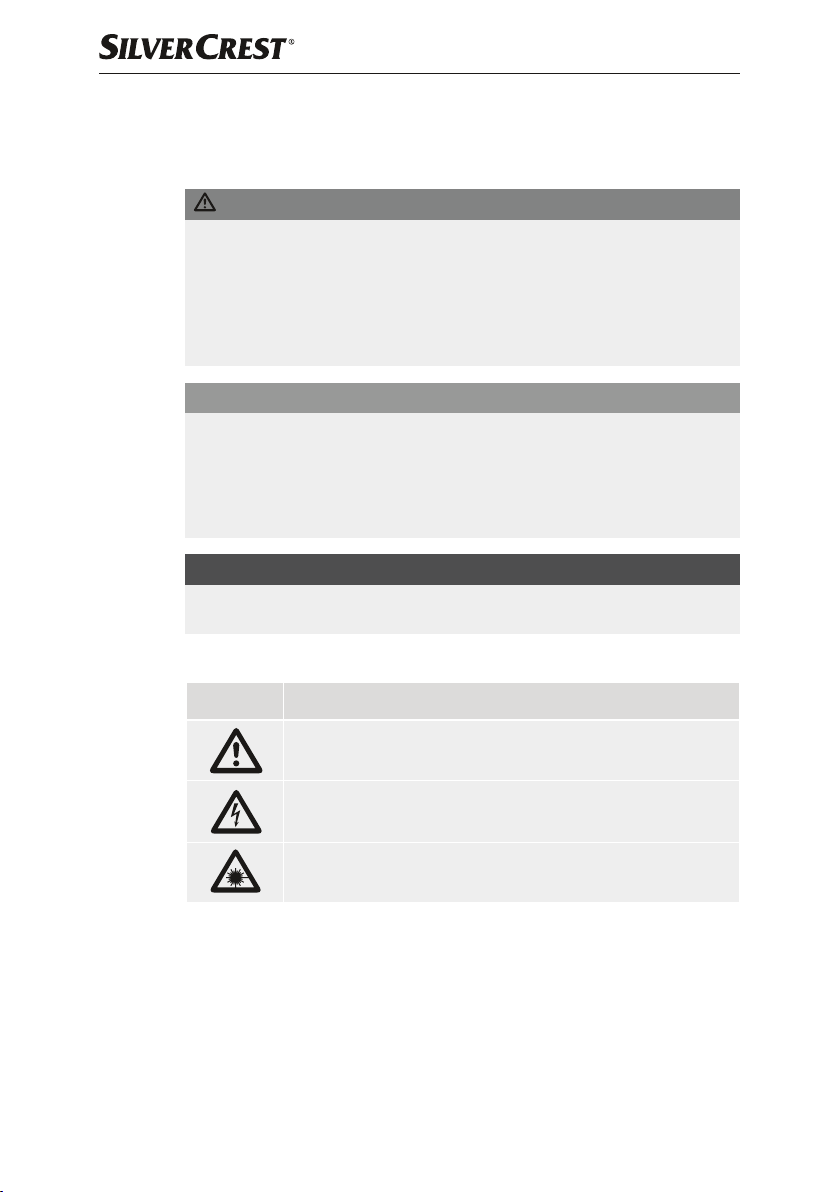
Verwendete Warnhinweise und Warnsymbole
In der vorliegenden Bedienungsanleitung werden folgende Warnhinweise
verwendet:
GEFAHR
Ein Warnhinweis dieser Gefahrenstufe kennzeichnet eine
drohende gefährliche Situation.
Falls die gefährliche Situation nicht vermieden wird, kann dies zu schweren
Verletzungen oder zum Tod führen.
► Die Anweisungen in diesem Warnhinweis befolgen, um die Gefahr von
schweren Verletzungen oder des Todes zu vermeiden.
ACHTUNG
Ein Warnhinweis dieser Gefahrenstufe kennzeichnet einen
möglichen Sachschaden.
Falls die Situation nicht vermieden wird, kann dies zu Sachschäden führen.
► Die Anweisungen in diesem Warnhinweis befolgen, um Sachschäden zu
vermeiden.
HINWEIS
► Ein Hinweis kennzeichnet zusätzliche Informationen, die den Umgang mit
dem Gerät erleichtern.
Auf dem Gerät werden folgende Warnsymbole verwendet:
■ 58 │ DE
Symbol Bedeutung
Warn- und Sicherheitshinweise beachten!
Vorsicht vor elektrischem Schlag!
Gefährliche elektrische Spannung – Lebensgefahr!
Laser! Setzen Sie sich nicht dem Laserstrahl aus.
│AT│
CH
SCUR 3 A1

Sicherheit
In diesem Kapitel erhalten Sie wichtige Sicherheitshinweise im Umgang mit dem
Gerät. Dieses Gerät entspricht den vorgeschriebenen Sicherheitsbestimmungen.
Ein unsachgemäßer Gebrauch kann zu Personen- und Sachschäden führen.
Gefahr durch elektrischen Strom
GEFAHR
Lebensgefahr durch elektrischen Strom!
Beim Kontakt mit unter Spannung stehenden Leitungen oder
Bauteilen besteht Lebensgefahr!
Beachten Sie die folgenden Sicherheitshinweise um eine Gefährdung durch
elektrischen Strom zu vermeiden:
► Benutzen Sie das Gerät nicht, wenn der Netzstecker oder das Netzkabel
beschädigt sind.
► Ziehen Sie das Netzkabel immer am Netzstecker aus der Steckdose,
niemals am Kabel.
► Fassen Sie den Netzstecker oder das Gerät niemals mit nassen Händen an.
► Lassen Sie das Gerät ggf. erst akklimatisieren, wenn Sie es von einer kalten
in eine warme Umgebung bringen. Dies kann bis zu zwei Stunden dauern.
► Öffnen Sie auf keinen Fall das Gehäuse des Gerätes. Werden spannungs-
führende Anschlüsse berührt und der elektrische und mechanische Aufbau
verändert, besteht Stromschlag- und Brandgefahr.
► Führen Sie keine Gegenstände in die Lüftungsschlitze oder andere Öffnun-
gen des Gerätes ein.
► Das Gerät nimmt im Standby-Betrieb Strom auf. Um das Gerät vollständig
vom Netz zu trennen, muss der Netzstecker aus der Netzsteckdose
gezogen werden. Daher muss das Gerät so aufgestellt werden, dass stets
ein unbehinderter Zugang zur Netzsteckdose gewährleistet ist, damit in
Notsituationen der Netzstecker sofort abgezogen werden kann.
Batteriehinweise
GEFAHR
Verletzungsgefahr durch falschen Umgang mit Batterien!
► Batterien dürfen nicht in die Hände von Kindern gelangen. Kinder könnten
Batterien in den Mund nehmen und verschlucken. Wurde eine Batterie
verschluckt, muss sofort medizinische Hilfe in Anspruch genommen werden.
► Batterien nicht ins Feuer werfen. Batterien keinen hohen Temperaturen
aussetzen.
► Explosionsgefahr! Nur als „aufladbar“ gekennzeichnete Batterien dürfen
wieder aufgeladen werden.
► Batterien nicht öffnen, verformen oder kurzschließen.
► Unterschiedliche Batterietypen dürfen nicht gemischt eingesetzt werden.
SCUR 3 A1
DE│AT│CH
│
59 ■

GEFAHR
Leere Batterien sollten wegen des erhöhten Auslaufrisikos entnommen
►
werden. Auch bei Nichtgebrauch des Gerätes sollten die Batterien aus
dem Gerät entnommen werden.
► Batteriesäure, die aus einer Batterie austritt, kann zu Hautreizungen führen.
Bei Hautkontakt mit viel Wasser abspülen. Wenn die Flüssigkeit in die Au-
gen gelangt ist, gründlich mit viel Wasser ausspülen, nicht reiben und sofort
einen Arzt aufsuchen.
► Wie Sie die Batterien in das Gerät einsetzen und wieder herausnehmen
erfahren Sie im Kapitel „Batterien einlegen“.
Grundlegende Sicherheitshinweise
Beachten Sie für einen sicheren Umgang mit dem Gerät die folgenden Sicherheitshinweise:
■ Dieses Gerät kann von Kindern ab 8 Jahren und darüber sowie von Personen
mit verringerten physischen, sensorischen oder mentalen Fähigkeiten oder
Mangel an Erfahrung und Wissen benutzt werden, wenn Sie beaufsichtigt
oder bezüglich des sicheren Gebrauchs des Gerätes unterwiesen wurden
und die daraus resultierenden Gefahren verstehen. Kinder dürfen nicht
mit dem Gerät spielen. Reinigung und Benutzer-Wartung dürfen nicht von
Kindern ohne Beaufsichtigung durchgeführt werden.
GEFAHR! Verpackungsmaterialien sind kein Kinderspielzeug! Halten Sie
■
alle Verpackungsmaterialien von Kindern fern.
Es besteht Erstickungsgefahr!
■ Kontrollieren Sie das Gerät vor der Verwendung auf äußere sichtbare Schä-
den. Nehmen Sie ein beschädigtes oder heruntergefallenes Gerät nicht in
Betrieb.
■ Bei Beschädigung der Kabel oder Anschlüsse lassen Sie diese von autori-
siertem Fachpersonal oder dem Kundenservice austauschen.
■ Schützen Sie das Anschlusskabel vor heißen Oberflächen und scharfen
Kanten. Achten Sie darauf, dass das Anschlusskabel nicht straff gespannt
oder geknickt wird. Lassen Sie das Anschlusskabel nicht über Ecken hängen
(Stolperdrahteffekt).
■ Lassen Sie Reparaturen am Gerät nur von autorisierten Fachbetrieben oder
dem Kundenservice durchführen. Durch unsachgemäße Reparaturen können
Gefahren für den Benutzer entstehen. Zudem erlischt der Garantieanspruch.
■ Defekte Bauteile dürfen nur gegen Original-Ersatzteile ausgetauscht wer-
den. Nur bei diesen Teilen ist gewährleistet, dass sie die Sicherheitsanforderungen erfüllen.
■ Nehmen Sie keine eigenmächtigen Umbauten oder Veränderungen an dem
Gerät vor.
■ 60 │ DE
│AT│
CH
SCUR 3 A1

■ Stellen Sie das Gerät immer auf eine stabile und gerade Fläche. Bei Stürzen
kann es beschädigt werden.
■ Setzen Sie das Gerät nicht direktem Sonnenlicht oder hohen Temperaturen
aus. Anderenfalls kann es überhitzen und irreparabel beschädigt werden.
■ Achten Sie auf eine ausreichende Luftzirkulation, um einen Hitzestau zu
vermeiden. Decken Sie das Gerät niemals ab. Es besteht Brandgefahr!
■ Stellen Sie das Produkt nicht in der Nähe von Wärmequellen wie Heizkör-
pern oder anderen Wärme erzeugenden Geräten auf.
■ Halten Sie offene Flammen (z.B. Kerzen) zu jeder Zeit von dem Gerät fern.
■ Das Gerät ist nur für die Verwendung in trockenen Innenräumen vorgese-
hen.
■ Das Gerät ist nicht für den Betrieb in Räumen mit hoher Temperatur oder
Luftfeuchtigkeit (z.B. Badezimmer) oder übermäßigen Staubaufkommen
ausgelegt.
■ Schützen Sie das Gerät vor Spritz- und Tropfwasser. Tauchen Sie das Gerät
niemals unter Wasser, stellen Sie das Gerät nicht in der Nähe von Wasser
auf und stellen Sie keine mit Flüssigkeit gefüllten Gegenstände (z.B. Vasen)
auf das Gerät.
■ Wenn Sie am Gerät Brandgeruch oder Rauchentwicklung feststellen, ziehen
Sie sofort den Netzstecker aus der Netzsteckdose und entnehmen Sie die
Batterien.
■ Ziehen Sie bei auftretenden Störungen und bei Gewitter den Netzstecker
aus der Netzsteckdose.
■ Verwenden Sie keine defekten oder beschädigten Medien für den CD-
Betrieb des Gerätes.
■ Schauen Sie bei CD-Betrieb des Gerätes nicht in den Laserstrahl bzw. in die
Öffnung aus der er austritt.
■ Richten Sie den Laserstrahl niemals auf reflektierende Flächen, Personen
oder Tiere. Bereits ein kurzer Sichtkontakt mit dem Laserstrahl kann zu Schäden an den Augen führen.
■ Das Gerät verfügt über eine Sicherheitsvorrichtung, die verhindert, dass der
Benutzer beim Öffnen des CD-Fachs mit dem Laserstrahl in Kontakt kommt.
Beschädigen oder manipulieren Sie diese Sicherheitsvorrichtung nicht.
■ Die technischen Gegebenheiten des Gerätes ermöglichen einen einstell-
baren Frequenzbereich von 87,5–108 MHz. In verschiedenen Ländern
können abweichende nationale Regelungen zu den zugewiesenen Rundfunkfrequenzbereichen bestehen. Beachten Sie, dass Sie die außerhalb des
zugewiesenen Rundfunkfrequenzbereiches empfangenen Informationen
nicht verwerten, an Dritte weiterleiten oder zweckentfremdet missbräuchlich
verwenden dürfen.
SCUR 3 A1
DE│AT│CH
│
61 ■

Teile und Bedienelemente
Ober- und Vorderseite
SNOOZE/DIMMER
Display
І◄◄ VOL TUNE ►►І
REPEAT/RANDOM
►/IISCAN/AMS
■ST/MONO
AUX IN
XBASS
- SLEEP/NAP
3 USB 5V 1A
!
. ALARM
0 /SOURCE
6 CLOCK/MEMORY
Rückseite
1
% AC 100 – 240 V ∼
50/60 Hz
+ OPEN
, FM ANT.
CD-Fach
Schlummertaste: Alarm für 9 Minuten unterbrechen,
Helligkeit des Displays einstellen
Ausbuchtung zum Öffnen des CD-Fachdeckels
Anzeige von Informationen, z. B. Frequenz, Uhrzeit,
Alarmzeit etc.
Lautstärke einstellen
CD: kurz drücken - dann drehen für Titelwahl
Radio: kurz drücken - dann drehen für Frequenzwahl
Uhr/Weckzeit stellen: Stunden und Minuten einstellen
CD: Wiederhol-/Zufallsfunktionen ein-/ausschalten
Wiedergabe starten/anhalten
Radio: automatische Sendersuche
Wiedergabe beenden
Radio: wechseln zwischen Stereo/Mono
Anschluss für ein externes Gerät, z. B. MP3-Player
(3,5 mm Ø Klinkenbuchse)
Basswiedergabe verstärkt/normal
Einschlaf-Funktion einstellen
Kurzzeitwecker (NAP) einstellen
USB-Anschluss: zum Laden von externen Geräten
Kopfhöreranschluss (3,5 mm Ø Klinkenbuchse)
Alarmzeiten einstellen, Alarm ein- und ausschalten
Gerät aus Standby-Modus einschalten: kurz drücken
in Standby-Modus schalten: länger als 2 Sekunden drücken
im Betrieb: kurz drücken, um die Betriebsart zu wechseln
Uhr: im Standby-Modus Uhrzeit einstellen
Radio: kurz drücken, um nächsten gespeicherten
Programmplatz aufzurufen / lang drücken, um aktuellen
Sender auf dem aktuellen Programmplatz zu speichern
CD: Titelfolge programmieren
Lautsprecher links
Netzkabel mit Stecker
Batteriefach für Stützbatterien
Wurfantenne für UKW-Empfang
Lautsprecher rechts
■ 62 │ DE
│AT│
CH
SCUR 3 A1

Anzeigen im Display
/
"
#
$
&
'
(
5
4
2
*
)
XBASS
MEMORY
REP 1 ALL
PM
XBASS
((ST.))
RAND
MP3
NAP
ZZZ
SNOOZE
AL 2
AL 1
FM
REPEAT ALL
REPEAT 1
MEMORY
RAND MP3 NAP
FM
MHz
12-Stunden-Anzeige ist aktiviert (PM wird nur bei aktivierter
12-Stunden-Anzeige zwischen 12 und 00 Uhr angezeigt),
umstellbar auf 24-Stunden-Anzeige
Anzeige der Uhrzeit
Basswiedergabe wird verstärkt
Ein Radiosender wird in Stereoton empfangen.
Titel der CD werden in zufälliger Reihenfolge abgespielt.
Eine MP3-Datei wird abgespielt.
Kurzzeitwecker aktiv
Ordner bei einer MP3-CD
Einschlaf-Funktion (SLEEP) ist aktiviert
Schlummerfunktion (NAP) ist aktiviert
Alarm 2 aktiv
Alarm 1 aktiv
Wecken mit CD-Player
Wecken mit Alarmton
Wecken mit Radio
bei CD: Wiedergabe läuft
Anzeige von Frequenz in MHz / Funktion / Timerzeit /
Speicherplatz / Lautstärke
UKW-Sender wird empfangen
ganze CD wiederholen ist aktiviert
Titel wiederholen ist aktiviert
blinkt während der Programmierung einer Titelfolge oder
Speichern von Sendern / leuchtet, wenn ein Programm
oder ein programmierter Sender aktiv ist
SNOOZE
AL 1 AL2
SCUR 3 A1
DE│AT│CH
│
63 ■

Inbetriebnahme
Lieferumfang und Transportinspektion
(Abbildungen siehe Ausklappseite)
GEFAHR
► Verpackungsmaterialien dürfen nicht von Kindern zum Spielen verwendet
werden. Es besteht Erstickungsgefahr.
♦ Entnehmen Sie alle Teile des Gerätes und die Bedienungsanleitung aus dem
Karton.
♦ Entfernen Sie sämtliches Verpackungsmaterial vom Gerät.
Der Lieferumfang besteht aus folgenden Komponenten:
▯ CD-Uhrenradio SCUR 3 A1
▯ Diese Bedienungsanleitung
HINWEIS
► Prüfen Sie die Lieferung auf Vollständigkeit und auf sichtbare Schäden.
► Bei einer unvollständigen Lieferung oder Schäden infolge mangelhafter
Verpackung oder durch Transport wenden Sie sich an die Service-Hotline
(siehe Kapitel „Service“).
Verpackung entsorgen
Die Verpackung schützt das Gerät vor Transportschäden. Die Verpackungsmaterialien sind nach umweltverträglichen und entsorgungstechnischen
Gesichtspunkten ausgewählt und deshalb recyclebar.
Die Rückführung der Verpackung in den Materialkreislauf spart Rohstoffe und
verringert das Abfallaufkommen. Entsorgen Sie nicht mehr benötigte Verpackungsmaterialien gemäß den örtlich geltenden Vorschriften.
Entsorgen Sie die Verpackung umweltgerecht.
Beachten Sie die Kennzeichnung auf den verschiedenen Verpackungsmaterialien
und trennen Sie diese gegebenenfalls gesondert. Die Verpackungsmaterialien sind
gekennzeichnet mit Abkürzungen (a) und Ziffern (b) mit folgender Bedeutung:
1–7: Kunststoffe
20–22: Papier und Pappe
80–98: Verbundstoffe
■ 64 │ DE
HINWEIS
► Heben Sie wenn möglich die Originalverpackung während der Garan-
tiezeit des Gerätes auf, um das Gerät im Garantiefall ordnungsgemäß
verpacken zu können.
│AT│
CH
SCUR 3 A1

Anforderungen an den Aufstellort
Für einen sicheren und fehlerfreien Betrieb des Gerätes muss der Aufstellort
folgende Voraussetzungen erfüllen:
■ Stellen Sie das Gerät auf eine feste, flache und waagerechte Unterlage.
■ Stellen Sie das Gerät so auf, dass vorhandene Lüftungsöffnungen und die
Lautsprecher links
■ Betreiben Sie das Gerät nicht in einer heißen, nassen oder sehr feuchten
Umgebung oder in der Nähe von brennbarem Material.
■ Die Netzsteckdose muss leicht zugänglich sein, so dass der Netzstecker
notfalls leicht abgezogen werden kann.
1und rechts nicht verdeckt werden.
Aufstellen des Gerätes
♦ Suchen Sie einen geeigneten Aufstellort für das Gerät aus (s. auch Kapitel
„Anforderungen an den Aufstellort“).
♦ Entfernen Sie alle Verpackungsteile vollständig.
♦ Heben Sie den Deckel des CD-Fachs
sicherung aus dem CD-Fach .
♦ Entfernen Sie die Schutzfolie des Displays .
♦ Stellen Sie das Gerät auf eine stabile, ebene Oberfläche.
♦ Setzen Sie das Gerät keiner extremen Hitze oder Feuchtigkeit aus.
♦ Achten Sie auf eine ausreichende Belüftung des Gerätes von allen Seiten.
♦ Wickeln Sie die Wurfantenne
an und entfernen Sie die Transport-
,ab.
%
Stromversorgung herstellen
ACHTUNG
► Vergleichen Sie vor dem Anschließen des Gerätes die Anschlussdaten des
Gerätes (Spannung und Frequenz) auf dem Typenschild an der Geräterückseite mit denen Ihres Stromnetzes. Diese Daten müssen übereinstimmen,
damit keine Schäden am Gerät auftreten.
♦ Stecken Sie den Netzstecker
SCUR 3 A1
% des Gerätes in eine Netzsteckdose.
DE│AT│CH
│
65 ■

Batterien einlegen
Durch Einlegen von 2 x 1,5V Batterien (Typ AAA/Micro/LR3) vermeiden Sie,
dass bei einem möglichen Stromausfall die programmierte Uhrzeit, gespeicherte
Radiosender und Alarmzeiten verloren gehen. Die Batterien sorgen dafür, dass
die interne Uhr auch während des Stromausfalls weiterläuft.
HINWEIS
► Das Gerät kann auch ohne Batterien betrieben werden. Nach einem
Stromausfall müssen dann allerdings die Uhrzeit, die Alarmzeiten sowie die
Radiosender neu eingestellt und gespeichert werden.
► Bei einem Stromausfall wird das Display
ausgeschaltet. Der Radio-/CD-Betrieb und die Alarm-Funktionen sind erst
wieder verfügbar, wenn die Stromversorgung über das Netzkabel
wiederhergestellt ist.
♦ Öffnen Sie den Deckel des Batteriefachs + auf der Geräterückseite.
♦ Legen Sie 2 x 1,5V Batterien vom Typ AAA/Micro/LR3 (nicht im Liefer-
umfang enthalten) in das Batteriefach
Kennzeichnung der Polarität im Batteriefach
♦ Schließen Sie das Batteriefach
einrasten lassen.
Bedienung und Betrieb
Gerät ein-/ausschalten
Sobald die Stromversorgung über das Netzkabel %hergestellt ist, befindet sich
das Gerät im Standby-Modus und im Display wird „0:00“ angezeigt.
♦ Drücken Sie die /SOURCE-Taste 0, um das Gerät einzuschalten. Das
Gerät startet nach dem ersten Einschalten im CD-Modus.
♦ Drücken Sie die
Gerät wieder in den Standby-Modus zu schalten.
HINWEIS
► Nach dem Ausschalten bleibt das Gerät im Standby-Modus.
► Ziehen Sie den Netzstecker
benutzen, da das Gerät auch im Standby-Modus noch einen geringen
Stromverbrauch hat.
► Wenn Sie das Gerät komplett vom Stromnetz trennen und sich im Batterie-
+keine Batterien befinden, müssen später die Uhrzeit und die Alarm-
fach
zeiten neu eingestellt und die Radiosender neu gespeichert werden.
/SOURCE-Taste 0 länger als 2 Sekunden, um das
auch bei eingelegten Batterien
%
+ein. Beachten Sie dabei die
+.
+, indem Sie den Deckelaufsetzen und
%, wenn Sie das Gerät längere Zeit nicht
■ 66 │ DE
│AT│
CH
SCUR 3 A1

Uhr stellen
♦ Drücken Sie gegebenenfalls die /SOURCE-Taste 0, um das Gerät in
den Standby-Modus zu schalten Die Uhrzeit kann nur eingestellt werden,
wenn sich das Gerät im Standby-Modus befindet.
♦ Drücken Sie die CLOCK/MEMORY-Taste
(24-Stunden-Anzeige) im Display
♦ Drehen Sie den −VOL+/ І◄◄ TUNE ►►І-Drehregler
24-Stunden-Anzeige oder die 12-Stunden-Anzeige auszuwählen (bei der
12-Stunden-Anzeige wird zwischen 12 und 00 Uhr vor der Uhrzeit „pm“
angezeigt).
♦ Drücken Sie die CLOCK/MEMORY-Taste 6. Im Display blinkt die
Stundenanzeige.
♦ Drehen Sie den −VOL+/ І◄◄ TUNE ►►І-Drehregler
einzustelllen.
♦ Drücken Sie die CLOCK/MEMORY-Taste 6. Im Display blinkt die
Minutenanzeige.
♦ Drehen Sie den −VOL+/ І◄◄ TUNE ►►І-Drehregler , um die Minuten
einzustellen.
♦ Drücken Sie einmal die CLOCK/MEMORY-Taste
Uhrzeit zu speichern.
HINWEIS
►
Wenn im Einstellmodus für mehr als 10 Sekunden keine Einstellung erfolgt,
wird das Einstellmenü verlassen. Bis dahin erfolgte Einstellungen werden
gespeichert und das Display
6bis die Anzeige „24H“
blinkt.
, um die
, um die Stunden
6, um die eingestellte
zeigt die eingestellte Uhrzeit an.
Betriebsart wählen
♦ Drücken Sie im eingeschalteten Zustand kurz die /SOURCE-Taste 0 bis
die gewünschte Betriebsart im Display angezeigt wird:
– „Cd“ für die CD-Wiedergabe
– „FM“ und die Frequenzanzeige für die Radio-Wiedergabe
– „AUX“ für die Wiedergabe eines externen Gerätes am AUX IN-Eingang
SCUR 3 A1
DE│AT│CH
│
67 ■

Lautstärke/Basswiedergabe
♦ Drehen Sie den −VOL+/ І◄◄ TUNE ►►І-Drehregler nach rechts, um die
Lautstärke zu erhöhen oder nach links, um die Lautstärke zu verringern. Im
Display wird die eingestellte Lautstärke mit einem Wert zwischen „L00“
(Ton aus) und „L25“ (maximale Lautstärke) angezeigt.
♦ Drücken Sie die XBASS-Taste
Wenn diese Funktion aktiviert ist, wird im Display „XBASS“ angezeigt.
HINWEIS
► Im AUX-Modus können Sie die Lautstärke auch am externen Gerät einstel-
len, wenn dieses über den AUX IN-Eingang mit dem CD-Uhrenradio
verbunden ist.
► Reduzieren Sie die Lautstärke am externen Gerät, falls die Wiedergabe
verzerrt klingen sollte.
Externe Geräte laden
Das CD-Uhrenradio verfügt über eine Ladefunktion, mit der Sie die Akkus von
Geräten aufladen können, die üblicherweise an einem USB-Anschluss aufgeladen werden. Der maximale Ladestrom beträgt 1,0 A.
HINWEIS
► Über den USB-Anschluss 3 ist ausschließlich das Aufladen externer
Geräte möglich.
► Das CD-Uhrenradio muss zum Aufladen externer Geräte an das Stromnetz
angeschlossen sein.
► Ein passendes USB-Ladekabel (nicht im Lieferumfang enthalten) erhalten
Sie im Fachhandel.
♦ Stecken Sie den USB-A-Stecker des USB-Ladekabels in den USB-Anschluss
des CD-Uhrenradios.
♦ Stecken Sie den anderen Stecker des USB-Ladekabels in den USB-Anschluss
des externen Gerätes.
♦ Nach wenigen Sekunden beginnt das Laden des externen Gerätes. Dabei
kann das CD-Uhrenradio entweder eingeschaltet sein oder sich im StandbyModus befinden.
♦ Ziehen Sie nach dem Laden des externen Gerätes das USB-Ladekabel aus
dem USB-Anschluss
3, um die Geräte voneinander zu trennen.
, um die Basswiedergabe zu verstärken.
3
Kopfhörer anschließen
♦ Drehen Sie den −VOL+/ І◄◄ TUNE ►►І-Drehregler nach links auf die
niedrigste Lautstärke.
♦ Stecken Sie den Klinkenstecker des Kopfhörers in den Kopfhörer-Anschluss
auf der Vorderseite des Gerätes. Die Tonausgabe erfolgt nun ausschließlich
über den angeschlossenen Kopfhörer.
♦ Stellen Sie die gewünschte Lautstärke mit dem −VOL+/ І◄◄ TUNE ►►І-
■ 68 │ DE
Drehregler
│AT│
ein.
CH
!
SCUR 3 A1

Radio
Automatische Sendersuche (AMS)
HINWEIS
► Das Gerät muss eingeschaltet sein. Drücken Sie gegebenenfalls die
/SOURCE-Taste 0, um das Gerät einzuschalten.
► Die Wurfantenne
♦ Drücken Sie kurz die
zeige im Display
♦ Drücken Sie kurz die ►/II/SCAN/AMS-Taste
Sendersuchlauf zu starten. Der Sendersuchlauf ist in unterschiedlichen
Richtungen möglich. Dies ist von der zuletzt verwendeten manuellen Suchrichtung abhängig. Der Sendersuchlauf stoppt bei dem nächsten Sender mit
ausreichend starkem Signal.
Sender automatisch speichern
Die automatische Sendersuche mit Senderspeicherung durchsucht einmal das
gesamte Frequenzband und speichert automatisch die ersten 20 Sender mit
ausreichend starkem Signal auf die Programmplätze 1 bis 20.
♦ Drücken Sie die ►/II/SCAN/AMS-Taste länger als 2 Sekunden, um
die automatische Sendersuche mit Senderspeicherung zu starten. Die ersten
20 gefundenen Sender werden automatisch mit aufsteigender Frequenz auf
den Programmplätzen 1 bis 20 gespeichert. Nach Beenden des Suchlaufs
wird der Sender auf dem ersten Programmplatz automatisch wiedergegeben.
,muss abgewickelt sein.
/SOURCE-Taste 0 bis „FM“ und die Frequenzan-
angezeigt werden.
, um einen automatischen
HINWEIS
► Durch einen automatischen Suchlauf mit Senderspeicherung werden bereits
gespeicherte Programmplätze überschrieben.
Sender manuell einrichten
♦ Drücken Sie einmal den −VOL+/ І◄◄ TUNE ►►І-Drehregler und drehen
Sie ihn anschließend nach links oder rechts, um die Frequenz in Schritten
von 0,05 MHz zu ändern. Die aktuelle Frequenz wird im Display
angezeigt.
♦ Drücken Sie den −VOL+/ І◄◄ TUNE ►►І-Drehregler
oder warten Sie mindestens 10 Sekunden, um mit dem −VOL+/
І◄◄ TUNE ►►І-Drehregler wieder die Lautstärke einzustellen.
SCUR 3 A1
erneut
DE│AT│CH
│
69 ■

Sender manuell speichern
♦ Stellen Sie mit dem −VOL+/ І◄◄ TUNE ►►І-Drehregler den gewünschten
Sender ein.
♦ Drücken Sie die CLOCK/MEMORY-Taste 6 bis im Display die Anzeige
„MEMORY“ blinkt und ein Programmplatz (z. B. P01) angezeigt wird.
♦ Drehen Sie den −VOL+/ І◄◄ TUNE ►►І-Drehregler
rechts, um den gewünschten Programmplatz zu wählen (P01 bis P20).
♦ Drücken Sie die CLOCK/MEMORY-Taste
dem gewünschten Programmplatz zu speichern.
♦ Wiederholen Sie diese Schritte, um bis zu 20 Sender zu speichern. Der-
selbe Sender kann auch mehrfach auf verschiedenen Programmplätzen
gespeichert werden.
Gespeicherten Sender aufrufen
♦ Um einen bereits gespeicherten Sender aufzurufen, drücken Sie während der
Radio-Wiedergabe einmal die CLOCK/MEMORY-Taste
dann den −VOL+/ І◄◄ TUNE ►►І-Drehregler
einen Sender auszuwählen.
♦ Alternativ drücken Sie während der Radio-Wiedergabe mehrmals die
CLOCK/MEMORY-Taste
6bis der gewünschte Sender angezeigt wird.
Sender in Monoqualität empfangen
Bei Sendern mit schwacher oder schwankender Signalstärke kann mit der Umstellung von Stereo- auf Monowiedergabe die Wiedergabequalität verbessert werden.
♦ Schalten Sie mit der ■ ST/MONO-Taste zwischen Mono- und Stereo-
wiedergabe um. Wenn die Stereowiedergabe eingeschaltet ist, erscheint
beim Empfang eines Stereosenders die Anzeige „((ST.))“ im Display
nach links oder
6 erneut, um den Sender auf
6 und drehen Sie
nach links oder rechts, um
.
■ 70 │ DE
HINWEIS
► Um die UKW-Empfangsqualität zu verbessern, können Sie auch verschiedene
Positionen der Wurfantenne , und des Gerätes ausprobieren.
│AT│
CH
SCUR 3 A1

CDs abspielen
CDs einlegen
HINWEIS
► Das Abspielen von gebrannten CD-R und CD-RW kann nicht garantiert
werden. Falls das Gerät gebrannte CD-R oder CD-RW nicht abspielt, ist
dies kein Gerätefehler.
♦ Drücken Sie gegebenenfalls die
einzuschalten. Das Gerät startet beim ersten Einschalten automatisch im
CD-Modus.
♦ Falls das Gerät bereits eingeschaltet ist und sich noch nicht im CD-Modus
befindet, drücken Sie kurz die
Anzeige „Cd“ erscheint.
♦ Öffnen Sie das CD-Fach
Fingern anheben. Dafür finden Sie vorne rechts am CD-Fach
Ausbuchtung
Deckel des CD-Fachs
♦ Legen Sie die CD mit der bedruckten Seite nach oben ein und lassen Sie
diese mit leichtem Druck auf der Achse einrasten.
♦ Schließen Sie das CD-Fach
drücken. Im Display
automatisch die CD-Wiedergabe mit dem ersten Titel der CD.
HINWEIS
► Erscheint nach dem Einlegen einer CD im Display
oder „Err“, ist möglicherweise keine Audio-CD, sondern eine Daten-CD eingelegt. Die Anzeige „NO“ erscheint auch im Display
CD im CD-Fach befindet oder die CD verkehrt herum eingelegt ist.
/SOURCE-Taste 0, um das Gerät
/SOURCE-Taste 0 bis im Display die
, indem Sie den Deckel vorsichtig mit den
eine kleine
. Im Display erscheint die Anzeige „OPEN“, sobald der
geöffnet ist.
, indem Sie den Deckel leicht nach unten
wird zuerst „----“ angezeigt und kurz darauf startet
die Anzeige „NO“
, wenn sich keine
SCUR 3 A1
DE│AT│CH
│
71 ■

Standardfunktionen
Funktion im CD-Modus
Start
Pause
Stop
Nächster Titel
Vorheriger Titel
►/II/SCAN/AMS-Taste
►/II/SCAN/AMS-Taste
drücken (der gespielte Titel wird blinkend im Display
angezeigt)
■ ST/MONO-Taste
Erst den −VOL+/ І◄◄ TUNE ►►І-Drehregler
dann nach rechts drehen bis der gewünschte Titel wiedergeben wird.
Erst den −VOL+/ І◄◄ TUNE ►►І-Drehregler
dann nach links drehen bis der gewünschte Titel wiedergegeben wird.
Wiederholfunktionen (REPEAT)
Mit der Repeat-Funktion können Sie einen Titel oder die komplette CD bzw. eine
programmierte Titelfolge beliebig oft wiederholen.
Aktuellen Titel wiederholen
♦ Drücken Sie während der CD-Wiedergabe einmal die REPEAT/RANDOM-
Taste
. Im Display erscheint die Anzeige „REP1“ und der aktuelle Titel
wird wiederholt.
Komplette CD wiederholen
♦ Drücken Sie während der CD-Wiedergabe zweimal die REPEAT/RANDOM-
Taste
. Im Display erscheint die Anzeige„REP ALL“ und die komplette
CD bzw. die programmierte Titelfolge wird wiederholt.
Wiederholen (REPEAT) ausschalten
♦ Drücken Sie während der CD-Wiedergabe die REPEAT/RANDOM-Taste
so oft, bis weder „REP1“/„REP ALL“ noch „RAND“ im Display
angezeigt werden.
drücken
während der Wiedergabe
während der Wiedergabe drücken
drücken,
drücken,
Zufallswiedergabe (RANDOM)
Bei der Zufallswiedergabe werden die Titel einer CD in zufälliger Reihenfolge
abgespielt.
♦ Drücken Sie während der CD-Wiedergabe dreimal die REPEAT/RANDOM-
. Im Display wird „RAND“ angezeigt und die Zufallswiedergabe
Taste
ist aktiviert.
♦ Drücken Sie die REPEAT/RANDOM-Taste erneut, um die Zufallswieder-
gabe zu beenden. Im Display wird „RAND“ nicht mehr angezeigt und
die Titel werden wieder in der normalen Reihenfolge abgespielt.
■ 72 │ DE
│AT│
CH
SCUR 3 A1

Titelfolge programmieren
Sie können eine Folge von bis zu 20 Titeln bei gestoppter CD programmieren.
Sobald 20 Titel programmiert sind, wird im Display „FU“ angezeigt.
♦ Drücken Sie die CLOCK/MEMORY-Taste
Anzeige „MEMORY“. Der erste Programmplatz „P01“ blinkt kurz auf,
gefolgt von der Anzeige„00“.
♦ Drehen Sie den −VOL+/ І◄◄ TUNE ►►І nach links oder rechts, um den
gewünschten Titel zu wählen.
♦ Drücken Sie die CLOCK/MEMORY-Taste
den ersten Programmplatz „P01“ zu speichern. Der nächste Programmplatz
„P02“ blinkt kurz im Display auf, gefolgt vom zuletzt gewählten Titel.
♦ Drehen Sie den −VOL+/ І◄◄ TUNE ►►І nach links oder rechts, um den
nächsten gewünschten Titel zu wählen. Zum Speichern drücken Sie wieder
die CLOCK/MEMORY-Taste 6. Wiederholen Sie diesen Vorgang bis
Sie alle gewünschten Titel programmiert haben. Derselbe Titel kann auch
mehrfach auf verschiedenen Programmplätzen gespeichert werden.
♦ Drücken Sie die ►/II/SCAN/AMS-Taste
MORY“ noch im Display blinkt, um die Wiedergabe der programmierten Titelfolge zu starten.
♦ Wenn die programmierte Titelfolge komplett abgespielt wurde, stoppt die
CD-Wiedergabe und „MEMORY“ wird noch im Display angezeigt.
Drücken Sie die ►/II/SCAN/AMS-Taste erneut, um die Wiedergabe
der programmierten Titel zu wiederholen.
HINWEIS
► Um eine programmierte Titelfolge wieder zu löschen, drücken Sie während
der CD-Wiedergabe zweimal die ■ ST/MONO-Taste
Sie mit der
► Während der CD-Wiedergabe oder in Pause können Sie zu anderen
programmierten Titeln vor- oder zurückspringen, indem Sie den −VOL+/
І◄◄ TUNE ►►І-Drehregler
oder rechts drehen.
/SOURCE-Taste 0das Gerät in den Standby-Modus.
6. Im Display blinkt die
6, um den gewählten Titel auf
, solange die Anzeige „ME-
oder schalten
einmal kurz drücken und dann nach links
SCUR 3 A1
DE│AT│CH
│
73 ■

Weckfunktionen
Das Gerät verfügt über zwei Alarmfunktionen „AL 1“ und „AL 2“. Für beide Funktionen können Sie jeweils einen Alarmton oder die Wiedergabe des zuletzt gehörten Radiosenders oder einer CD zu einer bestimmten Uhrzeit programmieren.
HINWEIS
► Wenn im Einstellmodus für mehr als 10 Sekunden keine Einstellung erfolgt,
wird der Einstellvorgang abgebrochen und das Einstellmenü verlassen.
Weckzeit einstellen
♦ Das Gerät muss sich im Standby-Modus befinden. Drücken Sie gegebe-
nenfalls die /SOURCE-Taste 0 länger als 2 Sekunden, um das Gerät
auszuschalten.
♦ Drücken Sie die ALARM-Taste
„AL 1“ oder „AL 2“ im Display blinkt.
♦ Wählen Sie mit dem −VOL+/ І◄◄ TUNE ►►І-Drehregler zwischen den
Alarmfunktionen „AL 1“ und „AL 2“.
♦ Drücken Sie die ALARM-Taste ., um die Auswahl zu bestätigen. Die
Stundenanzeige „0:“ blinkt.
♦ Drehen Sie den −VOL+/ І◄◄ TUNE ►►І-Drehregler
rechts, um die Stunden einzustellen. Drücken Sie dann die ALARM-Taste .,
um die Einstellung zu speichern. Die Minutenanzeige „:00“ blinkt.
♦ Drehen Sie den −VOL+/ І◄◄ TUNE ►►І-Drehregler nach links oder
rechts, um die Minuten einzustellen. Drücken Sie dann die ALARM-Taste .,
um die Einstellung zu speichern. Im Display werden die Symbole für den
Weckmodus angezeigt und das Symbol für den aktiven Weckmodus blinkt.
♦ Drehen Sie den −VOL+/ І◄◄ TUNE ►►І-Drehregler
rechts, um den gewünschten Weckmodus auszuwählen:
– Wecken mit Alarmton
– Wecken mit CD-Player
Wecken mit Radio
–
♦ Drücken Sie die ALARM-Taste ., um die Auswahl zu speichern. Wenn Sie
den Alarmton gewählt haben, ist die Einstellung nun beendet.
♦ Wenn Sie zum Wecken die Radio- oder CD-Wiedergabe gewählt haben,
müssen Sie nun noch mit dem −VOL+/ І◄◄ TUNE ►►І-Drehregler die
Lautstärke (L15 - L25) einstellen.
♦ Drücken Sie die ALARM-Taste
. länger als 2 Sekunden, bis die Anzeige
nach links oder
nach links oder
., um die Einstellung zu speichern.
■ 74 │ DE
│AT│
CH
SCUR 3 A1

Alarm ein-/ausschalten
Alarm einschalten
♦ Drücken Sie im Standby-Modus mehrmals die ALARM-Taste . bis die
gewünschte Alarmfunkion im Display
AL1
–
Alarm 1 ist aktiviert
AL2
–
Alarm 2 ist aktiviert
AL1
–
– Wird kein Symbol angezeigt, sind Alarm 1 und 2 deaktiviert.
Alarm unterbrechen
♦ Sie können den Alarm (Alarmton, Radio oder CD) für 9 Minuten unterbre-
chen, indem Sie die SNOOZE/DIMMER-Taste
SNOOZE-Funktion aktiv ist, erscheint im Display die Anzeige „SNOOZE“.
HINWEIS
► Wenn der Alarm nicht ausgeschaltet wird, endet er automatisch nach
60 Minuten.
► Wenn als Weckmodus die CD-Wiedergabe aktiviert ist und sich keine CD
im CD-Fach
Alarm beenden
♦ Drücken Sie die /SOURCE-Taste 0 oder die ALARM-Taste ., um den
Alarm auszuschalten. Die eingestellte Alarmzeit bleibt dabei erhalten.
HINWEIS
► Der Alarm ist für 24 Stunden beendet und wird wieder zur eingestellten
Weckzeit aktiviert.
AL2
Alarm 1 und 2 sind aktiviert
befindet, wird stattdessen mit dem Alarmton geweckt.
angezeigt wird:
drücken. Während die
Alarm ganz ausschalten
♦ Um den Alarm ganz auszuschalten, drücken Sie im Standby-Modus mehr-
mals die ALARM-Taste
oder „AL 2“ nicht mehr im Display
Sonstige Funktionen
Display-Beleuchtung
♦ Die Helligkeit der LED-Anzeige im Display können Sie in drei Stufen
einstellen. Drücken Sie die SNOOZE/DIMMER-Taste
des Displays
– Die Beleuchtung bleibt auf der aktuell gewählten Stufe mit Ausnahme
der Zeitspanne zwischen 23:00 und 5:00 Uhr (Nachtmodus).
– Beim Einschalten des Gerätes wird immer die hellste Stufe verwendet.
– Nach dem Ausschalten des Gerätes wird nach 10 Sekunden automa-
tisch die geringste Helligkeitsstufe eingestellt. Bei jedem Tastendruck
leuchtet das Display
SCUR 3 A1
stufenweise zu erhöhen oder zu verringern.
. bis das Symbol
AL1
oder
AL2
bzw. „AL 1“
angezeigt wird.
, um die Helligkeit
für 10 Sekunden auf der hellsten Stufe.
DE│AT│CH
│
75 ■

HINWEIS
► Im Standby-Modus wird das Display
23:00 und 5:00 Uhr abgedunkelt (Nachtmodus). In dieser Zeit ist eine
dauerhafte Beleuchtung im Standby-Modus nicht möglich.
Einschlaf-Funktion (SLEEP)
Mit dieser Funktion können Sie das Gerät automatisch nach 15 - 90 Minuten
ausschalten.
♦ Drücken Sie während der Radio- oder CD-Wiedergabe kurz die SLEEP/NAP-
-. Im Display leuchtet die Anzeige „ZZZ“ und „15“ (Minuten).
Taste
♦ Drücken Sie mehrmals die SLEEP/NAP-Taste
30, 45, 60, 90, OFF) einzustellen.
Die SLEEP-Funktion wird nach ca. 5 Sekunden aktiviert, wenn keine weitere
Taste gedrückt wird. Bei aktivierter SLEEP-Funktion wird im Display
„ZZZ“ angezeigt.
♦ Drücken Sie einmal die SLEEP/NAP-Taste
Funktion die Restlaufzeit bis zum Ausschalten des Gerätes anzuzeigen.
♦ Um die SLEEP-Funktion zu deaktivieren, drücken Sie mehrmals die SLEEP/
NAP-Taste
das Gerät aus.
HINWEIS
► Wenn bei CD-Wiedergabe die Spielzeit der CD weniger als die eingestell-
te SLEEP-Zeit beträgt, wird am Ende der CD die Wiedergabe gestoppt.
- bis im Display „OFF“ angezeigt wird oder schalten Sie
automatisch in der Zeit zwischen
-, um die SLEEP-Zeit (15,
-, um bei aktivierter SLEEP-
Kurzzeitwecker (NAP)
Mit dieser Funktion können Sie einen Kurzzeitwecker (NAP) einstellen, der nach 1 120 Minuten mit einem Alarmton weckt.
♦ Drücken Sie im Standby-Modus die SLEEP/NAP-Taste
leuchtet die Anzeige „NAP“ und „10“ (Minuten).
♦ Wählen Sie mit dem −VOL+/ І◄◄ TUNE ►►І-Drehregler die gewünsch-
te Zeit in Minuten (zwischen 1 und 120), nach der Sie geweckt werden
möchten.
Die NAP-Funktion wird nach ca. 5 Sekunden aktiviert, wenn keine weitere
Einstellung erfolgt. Bei aktivierter NAP-Funktion wird im Display
angezeigt.
♦ Drücken Sie einmal die SLEEP/NAP-Taste
Funktion die Restlaufzeit bis zum Alarmton anzuzeigen.
♦ Drücken Sie die SLEEP/NAP-Taste
♦ Um die NAP-Funktion zu deaktivieren, drücken Sie die SLEEP/NAP-Taste
- und drehen Sie den −VOL+/ І◄◄ TUNE ►►І-Drehregler so lange
nach links, bis die Anzeige „NAP“ nicht mehr im Display
■ 76 │ DE
│AT│
CH
-. Im Display
„NAP“
-, um bei aktivierter NAP-
-, um den Alarmton auszuschalten.
erscheint.
SCUR 3 A1

Externe Wiedergabegeräte anschließen
Am AUX IN-Eingang können Sie externe Wiedergabegeräte wie z. B. einen
MP3-Player oder ein Smartphone anschließen, um diese als Wiedergabequelle
für das CD-Uhrenradio zu verwenden.
HINWEIS
► Schalten Sie das CD-Uhrenradio und das externe Gerät aus, bevor Sie
diese miteinander verbinden. Beachten Sie auch die Bedienungsanleitung
des Gerätes, das Sie an das CD-Uhrenradio anschließen möchten.
Für den Anschluss externer Geräte benötigen Sie ein Audiokabel (nicht im Lieferumfang enthalten) mit einem 3,5 mm Ø Klinkenstecker für den AUX IN-Eingang
des CD-Uhrenradios. Welcher Stecker sich am anderen Ende des Audioka-
bels befinden muss, ist vom Audio-Ausgang des externen Gerätes abhängig.
♦ Schließen Sie die Stecker des Audiokabel an den Audio-Ausgang des exter-
nen Gerätes und an den AUX IN-Eingang des CD-Uhrenradios an.
♦ Drücken Sie die /SOURCE-Taste 0, um das CD-Uhrenradio einzuschalten.
♦ Drücken Sie kurz die /SOURCE-Taste 0, bis im Display „AUX“
angezeigt wird.
♦ Starten Sie die Wiedergabe am externen Gerät. Die Wiedergabe wird
nur über das externe Gerät. gesteuert. Lautstärke und Klangeinstellungen
können Sie auch am CD-Uhrenradio einstellen.
♦ Schalten Sie beide Geräte aus, bevor Sie diese wieder voneinander trennen.
♦ Ziehen Sie den Stecker des Audiokabels aus dem AUX IN-Eingang
.
Reinigung
GEFAHR
Lebensgefahr durch elektrischen Strom!
► Ziehen Sie den Netzstecker
Reinigung beginnen.
ACHTUNG
Beschädigung des Gerätes!
► Stellen Sie sicher, dass bei der Reinigung keine Feuchtigkeit in das Gerät
eindringt, um eine irreparable Beschädigung des Gerätes zu vermeiden.
► Verwenden Sie keine ätzenden, scheuernden oder lösungsmittelhaltigen
Reinigungsmittel. Diese können die Oberflächen des Gerätes angreifen.
► Eine Reinigung der Lasereinheit ist nicht notwendig. Von der Verwendung
von Reinigungsmedien wird abgeraten.
SCUR 3 A1
% aus der Netzsteckdose, bevor Sie mit der
DE│AT│CH
│
77 ■

Gehäuse reinigen
♦ Reinigen Sie die Oberflächen des Gerätes mit einem weichen, trockenen
Tuch.
♦ Verwenden Sie bei hartnäckigen Verschmutzungen ein leicht feuchtes Tuch
mit einem milden Spülmittel.
Lagerung bei Nichtbenutzung
♦ Sollten Sie das Gerät längere Zeit nicht benutzen, trennen Sie es von der
Stromversorgung. Entnehmen Sie die Batterien und lagern Sie es an einem
sauberen, trockenen Ort ohne direkte Sonneneinstrahlung.
Entsorgung
Gerät entsorgen
Das nebenstehende Symbol einer durchgestrichenen Mülltonne auf Rädern zeigt
an, dass dieses Gerät der Richtlinie 2012/19/EU unterliegt. Diese Richtlinie besagt, dass Sie dieses Gerät am Ende seiner Nutzungszeit nicht mit dem normalen
Hausmüll entsorgen dürfen, sondern in speziell eingerichteten Sammelstellen,
Wertstoffhöfen oder Entsorgungsbetrieben abgeben müssen.
Diese Entsorgung ist für Sie kostenfrei. Schonen Sie die Umwelt
und entsorgen Sie fachgerecht.
Möglichkeiten zur Entsorgung des ausgedienten Produkts erfahren Sie bei Ihrer
Gemeinde- oder Stadtverwaltung
Batterien entsorgen
Batterien dürfen nicht im Hausmüll entsorgt werden. Defekte oder verbrauchte
Batterien müssen gemäß Richtlinie 2006/66/EG recycelt werden. Jeder
Verbraucher ist gesetzlich verpflichtet, Batterien bei einer Sammelstelle seiner
Gemeinde / seines Stadtteils oder im Handel abzugeben. Diese Verpflichtung
dient dazu, dass Batterien einer umweltschonenden Entsorgung zugeführt
werden können. Geben Sie Batterien nur im entladenen Zustand zurück.
■ 78 │ DE
│AT│
CH
SCUR 3 A1

Fehlerbehebung
In diesem Kapitel erhalten Sie wichtige Hinweise zur Störungslokalisierung und
Störungsbehebung. Beachten Sie die Hinweise um Gefahren und Beschädigungen
zu vermeiden.
Fehlerursachen und -behebung
Die nachfolgende Tabelle hilft bei der Lokalisierung und Behebung kleinerer
Störungen. Wenn Sie mit den nachfolgend genannten Schritten das Problem nicht
lösen können, wenden Sie sich bitte an den Kundendienst (s. Kapitel „Service“).
Fehler Mögliche Ursache Behebung
Das Display
nichts an.
Kein Ton.
Störgeräusche beim
Radioempfang.
CD wird nicht abgespielt.
Die Uhrzeit und
der Senderspeicher
wurden nach einen
Stromausfall zurückgesetzt.
zeigt
Der Netzstecker
eingesteckt.
Steckdose liefert keine
Spannung.
Die Lautstärke steht auf
Minimum.
Das Gerät befindet sich im
Standby-Modus.
Der Empfang ist zu
schwach.
Es handelt sich um eine
nicht kompatible CD-R oder
CD-RW.
Die CD liegt verkehrt herum
im CD-Fach
Im Batteriefach
keine oder leere Batterien
eingelegt.
Die Batterien sind falsch
herum im Batteriefach
eingelegt.
% ist nicht
.
+sind
+
Stecken Sie den Netzstecker % in
die Steckdose.
Überprüfen Sie die Haussicherungen.
Drehen Sie den −VOL+/
І◄◄ TUNE ►►І-Drehregler
rechts, um die Lautstärke zu erhöhen.
Drücken Sie die
nach
/SOURCE-Taste
0, um das Gerät einzuschalten.
Versuchen Sie durch Bewegen der
Wurfantenne
verbessern.
Schalten Sie mit der ■ ST/MONO-
Taste
Tauschen Sie die CD gegen eine
andere (Audio-)CD aus.
Legen Sie die CD mit der bedruckten
Seite nach oben ins CD-Fach .
Überprüfen Sie, ob die Batterien
noch ausreichend Spannung haben
und ersetzen Sie diese gegebenenfalls.
Überprüfen Sie, ob die Batterien
richtig herum im Batteriefach +
eingelegt sind. Beachten Sie dabei
die Kennzeichnung der Polarität im
Batteriefach +.
,den Empfang zu
auf Monoempfang um.
SCUR 3 A1
DE│AT│CH
│
79 ■

Anhang
Technische Daten
Eingangsspannung
Schutzklasse
Batterien für Datensicherung
Leistungsaufnahme Betrieb 10,5 W
Leistungsaufnahme Standby max. 1 W
Ausgangsleistung Lautsprecher
Frequenzbereich Radio (UKW) 87,5 - 108 MHz
Senderspeicherplätze 20
CD-Abtastsystem Laser Klasse 1
Lesbare Medienformate Audio-CD, CD-R, CD-RW
Kopfhörer-Anschluss 3,5 mm Ø Klinkenbuchse
Anschluss externe Geräte (AUX IN) 3,5 mm Ø Klinkenbuchse
USB-Anschluss
(zum Laden externer Geräte)
Betriebstemperatur 15 °C bis 35 °C
Lagertemperatur 0°C bis 40 °C
100 ‒ 240 V ∼ (Wechselstrom),
50/60 Hz
II /
2 x 1,5 V Typ AAA/Micro/LR3
(nicht im Lieferumfang enthalten)
ca. 2 x 1,5 W RMS
(bei 10 % Klirrfaktor)
USB Typ A, 5V
(Gleichstrom),
max. 1,0 A
Feuchtigkeit (keine Kondensation) ≤ 75 %
Abmessungen (B x H x T) ca. 15,0 x 12,5 x 19,3 cm
Gewicht ca. 1100 g
Hinweise zur EU-Konformitätserklärung
Dieses Gerät entspricht hinsichtlich Übereinstimmung mit den grundlegenden
Anforderungen und den anderen relevanten Vorschriften der RE-Richtlinie
2014/53/EU, der Ökodesign-Richtlinie 2009/125/EG und der RoHS-Richtlinie
2011/65/EU.
Die vollständige EU-Konformitätserklärung können Sie unter
www.kompernass.com/support/306411_DOC.pdf herunterladen.
■ 80 │ DE
│AT│
CH
SCUR 3 A1

Garantie der Kompernaß Handels GmbH
Sehr geehrte Kundin, sehr geehrter Kunde,
Sie erhalten auf dieses Gerät 3 Jahre Garantie ab Kaufdatum. Im Falle von
Mängeln dieses Produkts stehen Ihnen gegen den Verkäufer des Produkts gesetzliche Rechte zu. Diese gesetzlichen Rechte werden durch unsere im Folgenden
dargestellte Garantie nicht eingeschränkt.
Garantiebedingungen
Die Garantiefrist beginnt mit dem Kaufdatum. Bitte bewahren Sie den Original–
Kassenbon gut auf. Diese Unterlage wird als Nachweis für den Kauf benötigt.
Tritt innerhalb von drei Jahren ab dem Kaufdatum dieses Produkts ein Materialoder Fabrikationsfehler auf, wird das Produkt von uns – nach unserer Wahl – für
Sie kostenlos repariert oder ersetzt. Diese Garantieleistung setzt voraus, dass
innerhalb der Drei-Jahres-Frist das defekte Gerät und der Kaufbeleg (Kassenbon)
vorgelegt und schriftlich kurz beschrieben wird, worin der Mangel besteht und
wann er aufgetreten ist.
Wenn der Defekt von unserer Garantie gedeckt ist, erhalten Sie das reparierte
oder ein neues Produkt zurück. Mit Reparatur oder Austausch des Produkts
beginnt kein neuer Garantiezeitraum.
Garantiezeit und gesetzliche Mängelansprüche
Die Garantiezeit wird durch die Gewährleistung nicht verlängert. Dies gilt auch
für ersetzte und reparierte Teile. Eventuell schon beim Kauf vorhandene Schäden
und Mängel müssen sofort nach dem Auspacken gemeldet werden. Nach Ablauf der Garantiezeit anfallende Reparaturen sind kostenpflichtig.
Garantieumfang
Das Gerät wurde nach strengen Qualitätsrichtlinien sorgfältig produziert und vor
Auslieferung gewissenhaft geprüft.
Die Garantieleistung gilt für Material- oder Fabrikationsfehler. Diese Garantie
erstreckt sich nicht auf Produktteile, die normaler Abnutzung ausgesetzt sind und
daher als Verschleißteile angesehen werden können oder für Beschädigungen
an zerbrechlichen Teilen, z. B. Schalter, Akkus, Backformen oder Teile, die aus
Glas gefertigt sind.
Diese Garantie verfällt, wenn das Produkt beschädigt, nicht sachgemäß benutzt
oder gewartet wurde. Für eine sachgemäße Benutzung des Produkts sind alle
in der Bedienungsanleitung aufgeführten Anweisungen genau einzuhalten.
Verwendungszwecke und Handlungen, von denen in der Bedienungsanleitung
abgeraten oder vor denen gewarnt wird, sind unbedingt zu vermeiden.
Das Produkt ist nur für den privaten und nicht für den gewerblichen Gebrauch
bestimmt. Bei missbräuchlicher und unsachgemäßer Behandlung, Gewaltanwendung und bei Eingriffen, die nicht von unserer autorisierten Service-Niederlassung vorgenommen wurden, erlischt die Garantie.
SCUR 3 A1
DE│AT│CH
│
81 ■

Abwicklung im Garantiefall
Um eine schnelle Bearbeitung Ihres Anliegens zu gewährleisten, folgen Sie bitte
den folgenden Hinweisen:
■ Bitte halten Sie für alle Anfragen den Kassenbon und die Artikelnummer
(z. B. IAN 12345) als Nachweis für den Kauf bereit.
■ Die Artikelnummer entnehmen Sie bitte dem Typenschild, einer Gravur, auf
dem Titelblatt Ihrer Anleitung (unten links) oder als Aufkleber auf der Rück-
oder Unterseite.
■ Sollten Funktionsfehler oder sonstige Mängel auftreten, kontaktieren Sie
zunächst die nachfolgend benannte Serviceabteilung telefonisch oder per
E-Mail.
■ Ein als defekt erfasstes Produkt können Sie dann unter Beifügung des Kauf-
belegs (Kassenbon) und der Angabe, worin der Mangel besteht und wann
er aufgetreten ist, für Sie portofrei an die Ihnen mitgeteilte Serviceanschrift
übersenden.
Auf www.lidl-service.com können Sie diese und viele weitere Handbücher,
Produktvideos und Software herunterladen.
Service
Service Deutschland
Tel.: 0800 5435 111 (Kostenfrei aus dem dt. Festnetz/Mobilfunknetz)
E-Mail: kompernass@lidl.de
Service Österreich
Tel.: 0820 201 222 (0,15 EUR/Min.)
E-Mail: kompernass@lidl.at
Service Schweiz
Tel.: 0842 665566 (0,08 CHF/Min., Mobilfunk max. 0,40 CHF/Min.)
E-Mail: kompernass@lidl.ch
IAN 306411
Importeur
■ 82 │ DE
Bitte beachten Sie, dass die folgende Anschrift keine Serviceanschrift ist.
Kontaktieren Sie zunächst die benannte Servicestelle.
KOMPERNASS HANDELS GMBH
BURGSTRASSE 21
DE - 44867 BOCHUM
DEUTSCHLAND
www.kompernass.com
│AT│
CH
SCUR 3 A1

KOMPERNASS HANDELS GMBH
BURGSTRASSE 21
DE - 44867 BOCHUM
GERMANY
www.kompernass.com
Versione delle informazioni · Last Information Update · Stand der Informationen:
05 / 2018 · Ident.-No.: SCUR3A1-012018-3
IAN 306411
5
 Loading...