


Samsung LE37D580, LE40D550, LE37D550, D550, D580 Manual
...LCD TV
User Manual
E-MANUAL
imagine the possibilities
Thank you for purchasing this Samsung product. To receive more complete service, please register your product at
www.samsung.com/register
Model______________ Serial No.______________
For more information on how to use e-Manual (P.12)
Figures and illustrations in this User Manual are provided for reference only and may differ from actual product appearance. Product design and specifications may be changed without notice.
Important Warranty Information Regarding Television Format Viewing
1.Functionalities related to Digital TV (DVB) are only available in countries/areas where DVB-T (MPEG2 and MPEG4 AVC) digital terrestrial signals are broadcasted or where you are able to access to a compatible DVB-C (MPEG2 and MPEG4 AAC) cable-TV service. Please check with your local dealer the possibility to receive DVB-T or DVB-C signal.
2.DVB-T is the DVB European consortium standard for the broadcast transmission of digital terrestrial television and DVB-C is that for the broadcast transmission of digital TV over cable. However, some differentiated features like EPG (Electric Programme Guide), VOD (Video On Demand) and so on, are not included in this specification. So, they cannot be workable at this moment.
3.Although this TV set meets the latest DVB-T and DVB-C standards, as of [August, 2008], the compatibility with future DVB-T digital terrestrial and DVB-C digital cable broadcasts cannot be guaranteed.
4.Depending on the countries/areas where this TV set is used some cable-TV providers may charge an additional fee for such a service and you may be required to agree to terms and conditions of their business.
5.Some Digital TV functions might be unavailable in some countries or regions and DVB-C might not work correctly with some cable service providers.
6.For more information, please contact your local Samsung customer care centre.
The reception quality of TV may be affected due to differences in broadcasting method between the countries. Please check the TV performance in the local SAMSUNG Authorized Dealer, or the Samsung Call Centre whether it can be improved by reconfiguring TV setting or not.
Still image warning
Avoid displaying still images (like jpeg picture files) or still image element (like TV programme logo, panorama or 4:3 image format, stock or news bar at screen bottom etc.) on the screen. Constant displaying of still picture can cause ghosting of LCD screen, which will affect image quality. To reduce risk of this effect, please follow below recommendations:
•Avoid displaying the same TV channel for long periods.
•Always try do display any image on full screen, use TV set picture format menu for best possible match.
•Reduce brightness and contrast values to minimum required to achieve desired picture quality, exceeded values may speed up the burnout process.
•Frequently use all TV features designed to reduce image retention and screen burnout, refer to proper user manual section for details.
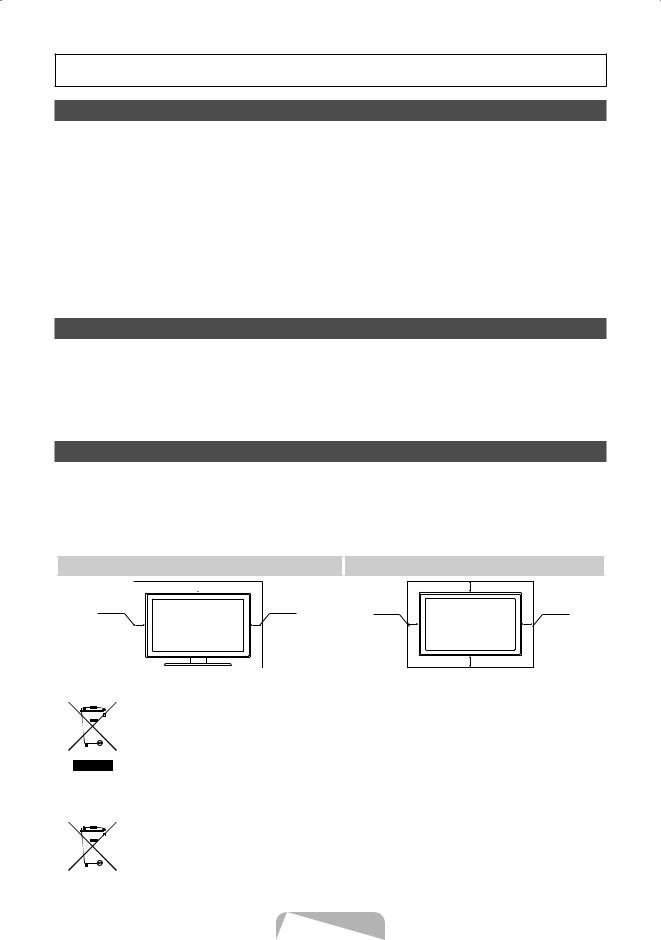
Securing the Installation Space
Keep the required distances between the product and other objects (e.g. walls) to ensure proper ventilation.
Failing to do so may result in fire or a problem with the product due to an increase in the internal temperature of the product.
When using a stand or wall-mount, use parts provided by Samsung Electronics only.
• If you use parts provided by another manufacturer, it may result in a problem with the product or an injury due to the product falling.
The appearance may differ depending on the product. |
|
|
|
Be careful when you contact the TV because some parts can be somewhat hot. |
|
|
|
Installation with a stand. |
Installation with a wall-mount. |
 10 cm
10 cm
10 cm |
10 cm |
|
10 cm |
10 cm |
10 cm |
|
10 cm |
Correct Disposal of This Product (Waste Electrical & Electronic Equipment)
(Applicable in the European Union and other European countries with separate collection systems)
This marking on the product, accessories or literature indicates that the product and its electronic accessories (e.g. charger, headset, USB cable) should not be disposed of with other household waste at the end of their working life. To prevent possible harm to the environment or human health from uncontrolled waste disposal, please separate these items from other types of waste and recycle them responsibly to promote the sustainable reuse of material resources. Household users should contact either the retailer where they purchased this product, or their local government office, for details of where and how they can take these items for environmentally safe recycling. Business users should contact their supplier and check the terms and conditions of the purchase contract. This product and its electronic accessories should not be mixed with other commercial wastes for disposal.
Correct disposal of batteries in this product
(Applicable in the European Union and other European countries with separate battery return systems)
This marking on the battery, manual or packaging indicates that the batteries in this product should not be disposed of with other household waste at the end of their working life. Where marked, the chemical symbols Hg, Cd or Pb indicate that the battery contains mercury, cadmium or lead above the reference levels in EC Directive 2006/66. If batteries are not properly disposed of, these substances can cause harm to human health or the environment. To protect natural resources and
to promote material reuse, please separate batteries from other types of waste and recycle them through your local, free battery return system.
English - 2

Accessories
Please make sure the following items are included with your TV. If any items are missing, contact your dealer.The items’ colours and shapes may vary depending on the models.
Cables not included in the package contents can be purchased separately.
Check that there is no accessory hidden behind packing materials when you open the box.
yy |
Remote Control & Batteries (AAA x 2) |
yy |
Power Cord |
yy |
Owner’s Instructions |
yy |
Cleaning Cloth |
An administration fee may be charged if either
(a)an engineer is called out at your request and there is no defect in the product (i.e. where you have failed to read this user manual)
(b)you bring the unit to a repair centre and there is no defect in the product
(i.e. where you have failed to read this user manual).
The amount of such administration charge will be advised to you before any work or home visit is carried out.
Viewing the Control Panel
The product colour and shape may vary depending on the model.

 Control Panel
Speakers
Remote control sensor |
Aim the remote control towards this spot on the TV. |
Power Indicator |
Blinks and turns off when the power is on and lights up in standby mode. |
SOURCEE |
Toggles between all the available input sources. In the on-screen menu, use this |
|
button as you would use the ENTERE button on the remote control. |
MENU |
Displays an on-screen menu, the OSD (on screen display) of your TV’s features. |
Y |
Adjusts the volume. In the OSD, use the Y buttons as you would use the ◄ |
|
and ► buttons on the remote control. |
z |
Changes the channels. In the OSD, use the z buttons as you would use the |
|
▼ and ▲ buttons on the remote control. |
P (Power) |
Turns the TV on or off. |
Standby mode
Do not leave your TV in standby mode for long periods of time (when you are away on a holiday, for example). A small amount of electric power is still consumed even when the power button is turned off. It is best to unplug the power cord.
English - 3

Viewing the Remote Control
Turns the TV on and off.
Press to directly access to channels
Displays and selects the available video sources.
Alternately select Teletext ON, Double, Mix or OFF.
(Not MHEG text)
Adjusts the volume.
Opens the main menu.
Displays the My Downloads, Watch TV,
AllShare™ and Source.
Quickly select frequently used functions.
Selects the on-screen menu items and changes the values seen on the menu.
Returns to the previous menu.
Buttons used in the Channel List,
Channel Manager, My Downloads, Network, AllShare™ menu and interactive TV(MHEG) features etc.
Use these buttons in My Downloads and Anynet+ modes.
CONTENT |
Returns to the previous channel.
 Cuts off the sound temporarily.
Changes channels.
 Displays channel lists on the screen.
Displays the EPG (Electronic Programme Guide).
Displays information on the TV screen.
Use as the selection button.
Exits the menu.
A B C
SRS |
DUAL I-II |
E-MANUAL  AD/SUBT.
P.MODE: Selects picture mode. SRS: Selects the SRS TruSurround HD mode.
DUAL I-II: Select Dual sound mode. E-MANUAL: Displays the e-Manual guide.
P.SIZE: Selects the picture size. AD: Audio Description selection. (Not available in some locations) SUBT.: Displays digital subtitles.
Installing batteries (Battery size: AAA)
Remove the battery cover located on the back of the handset by gently pulling downwards from the indicated part.
|
|
|
|
|
|
|
|
|
|
|
|
Insert two AAA/R6 or equivalent type |
Replace the battery cover. |
||||
batteries inside. Place the batteries in the |
|
|
|
||
right directions. |
|
|
|
||
Remove the batteries from remote control handset when it is not to be used for a long period. Otherwise it can be damaged due to any leakage of batteries.
English - 4
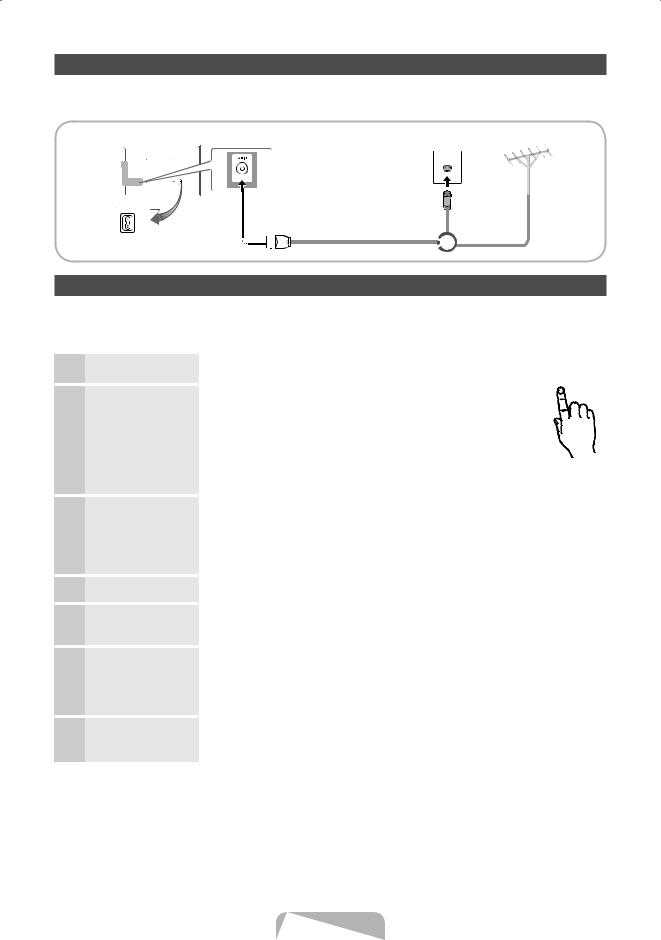
Connecting to an Antenna
When the TV is initially powered on, basic settings proceed automatically.Preset: Connecting the mains and antenna.
TV Rear Panel |
Cable |
VHF/UHF Antenna |
Power Input |
or |
|
Plug & Play (Initial Setup)
When the TV is initially powered on, a sequence of on-screen prompts will assist in configuring basic settings. Press the POWERP button. Plug & Play is available only when the Input source is set to TV.
To return to the previous step, press the Red button.
1 |
Selecting a language |
2 |
Selecting Store Demo |
|
or Home Use |
3 |
Selecting a country |
4 |
Setting the Clock |
|
Mode |
5 |
Selecting an antenna |
6 |
Selecting a channel |
7 |
Enjoy your TV. |
Press the ▲ or ▼ button, then press the ENTERE button. |
POWER |
Select the desired OSD (On Screen Display) language. |
P |
Press the ◄ or ► button, then press the ENTERE button. |
|
Select the Home Use mode. Store Demo mode is for retail |
|
environments. |
|
To return the unit’s settings from Store Demo to Home Use (standard): |
|
Press the volume button on the TV. When the OSD volume is displayed, |
|
press and hold MENU for 5 sec. |
|
Store Demo is only for shop display. If you select it, several functions |
|
are not able to use. Please select Home Use when you watch at home. |
|
Press the ▲ or ▼ button, then press the ENTERE button. |
|
Select the appropriate country.
After selecting the country in the Country menu, some models may proceed with an additional option to setup the pin number.
When you input the PIN number, 0-0-0-0 is not available. Set the Clock Mode automatically or manually.
Press the ▲ or ▼ button, then press the ENTERE button.
Select Air (Digital & Analogue/Digital/Analogue) or Cable (Digital & Analogue/Digital/ Analogue).
Press the ▲ or ▼ button, then press the ENTERE button.
Select the channel source to memorise. When setting the antenna source to Cable, a step appears allowing you to assign numerical values (channel frequencies) to the channels. For more information, refer to Channel → Auto Tuning.
Press the ENTERE button at any time to interrupt the memorisation process. Select the Watch TV. Press the ENTERE button.
If you select the Network Settings, set the network. For more information, refer to “Network menu” in the e-Manual.
If You Want to Reset This Feature...
Select System - Plug & Play (Initial Setup). Enter your 4 digit PIN number. The default PIN number is “0-0-0-0.” If you want to change the PIN number, use the Change PIN function.
You should do Plug & Play (MENU → System) again at home although you did in shop.
If you forget the PIN code, press the remote control buttons in the following sequence in Standby mode, which resets the PIN to “0-0-0-0” : MUTE → 8 → 2 → 4 → POWER (on)
English - 5

Connecting to an AV devices
¦¦ Available devices: DVD, Blu-ray player, HD cable box, HD STB (Set-Top-Box) satellite receiver, VCR, Digital Audio System, Amplifier, DVD Home Theatre, PC
HDMI connection
HDMI OUT
DVI OUT
AUDIO OUT
R-AUDIO-L
Using an HDMI cable or HDMI to DVI Cable (up to 1080p)
HDMI IN 1(DVI), 2, 3, 4, PC/DVI AUDIO IN
xx For better picture and audio quality, connect to a digital device using an HDMI cable.
xx An HDMI cable supports digital video and audio signals, and does not require an audio cable.
–– To connect the TV to a digital device that does not support HDMI output, use an HDMI/DVI and audio cables.
xx The picture may not display normally (if at all) or the audio may not work if an external device that uses an older version of HDMI mode is connected to the TV. If such a problem occurs, ask the manufacturer of the external device about the HDMI version and, if out of date, request an upgrade.
xx Be sure to purchase a certified HDMI cable. Otherwise, the picture may not display or a connection error may occur.
xx A basic high-speed HDMI cable or one with ethernet is recommended. This product does not support the ethernet function via HDMI.
English - 6
 Loading...