


USER’S MANUAL
AS09N |
Series |
AS12N |
Series |
AS18N |
Series |
AS24N |
Series |
Split - type Air Conditioner
(Cooling)
E DB98-29654A


|
Contents |
|
PREPARATION |
|
|
■ Safety Precautions ......................................................................................................... |
|
2 |
■ Name of Each Part ......................................................................................................... |
|
4 |
■ Remote Control – Buttons and Display ............................................................... |
6 |
|
■ Inserting the Remote Control Batteries ............................................................... |
6 |
|
■ Getting Started ............................................................................................................... |
|
7 |
OPERATION |
|
|
■ Selecting Auto Mode ................................................................................................... |
8 |
|
■ Selecting Cool Mode .................................................................................................... |
9 |
|
■ Selecting Dry Mode |
...................................................................................................... |
10 |
■ Selecting Fan Mode |
...................................................................................................... |
11 |
■ Selecting the Turbo Function ................................................................................... |
12 |
|
■ Selecting |
Mode ...................................................................................... |
13 |
■ Adjusting the Airflow Direction .............................................................................. |
15 |
|
■ Setting the On Timer .................................................................................................... |
16 |
|
■ Setting the Off Timer ................................................................................................... |
17 |
|
■ Operating Your Air Conditioner Without the Remote Control .................. |
18 |
|
■ Selecting |
Mode ........................................................................................ |
18 |
RECOMMENDATIONS FOR USE |
|
|
■ Cleaning Air Filter on Your Air Conditioner ....................................................... |
19 |
|
■ Cleaning Deodorizing and Bio filter(Option).................................................... |
20 |
|
■ Temperature and Humidity Ranges ...................................................................... |
21 |
|
■ Operating Recommendations ................................................................................. |
21 |
|
■ Solving Common Problems ...................................................................................... |
22 |
|
E-3

Name of Each Part
The design and shape can be changed according to the model.
Indoor Unit
Air Inlet
Room
Temperature sensor
Airflow blade (outlet)
Air filter (under the panel)
Operation indicator(Green)
Timer indicator(Green)


 mode indicator(Green)
Power(On/Off) button
Outdoor Unit |
AS09N |
E-4

|
|
|
|
|
|
|
|
|
Outdoor Unit |
AS12N |
|
Air Inlet (Rear)
Air Outlet
Connection Valve (Inside)
Outdoor Unit |
AS18N |
Air Inlet (Rear)
Air Outlet
Connection Valve |
(Inside) |
Outdoor Unit |
AS24N |
Air Inlet (Rear)
Air Outlet 
 Connection Valve
(Inside)
E-5
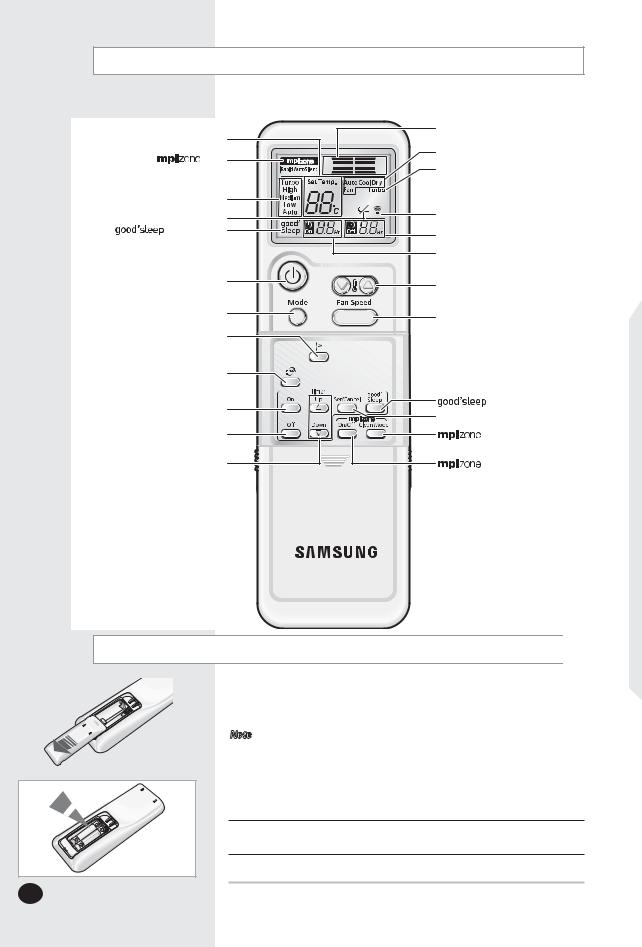
Remote Control-Buttons and Display
Temperature setting |
Airflow direction indicator |
|
Operating mode indicator |
||
|
||
mode |
(Auto, Cool, Dry, Fan) |
|
Turbo function indicator |
||
indicator |
||
Fan speed indicator |
|
|
Battery life indicator |
Remote Control |
|
transmission indicator |
||
mode indicator |
Off Timer indicator |
|
|
||
|
On Timer indicator |
|
Power (On/Off) button |
Temperature adjustment |
|
|
||
|
buttons |
|
Mode selection button |
Fan speed adjustment button |
|
(Auto, Cool, Dry, Fan) |
||
|
||
Swing button |
|
|
Turbo button |
|
|
On Timer button |
button |
|
Timer Set/Cancle button |
||
|
||
Off Timer button |
mode |
|
|
adjustment button |
|
Time adjustment button |
On/Off button |
Inserting the Remote Control Batteries
|
|
You must insert or replace the remote control batteries when : |
||
|
|
You purchase the air conditioner |
||
|
|
The remote control does not work correctly |
||
|
|
0QVG |
Use two AAA, LR03 1.5V batteries. |
|
|
|
Do not use old and new batteries or different kinds of batteries |
||
|
|
|
together. |
|
|
|
Insert" |
two batteries correctly as indicated by the + and - symbols. |
|
|
||||
|
|
|
|
|
1 Remove the battery cover in the rear of the remote control by pushing it with your thumb.
2 Insert two batteries, respecting the polarities as indicated by the + and - symbols.
3Close the cover by sliding it back in place.
'
(FUUJOH4UBSUFE
5IF6TFST.BOVBMQSPWJEFTZPVXJUIWBMVBCMFJOGPSNBUJPOBCPVUZPVSBJSDPOEJUJPOFS *OPSEFSUPUBLFGVMMBEWBOUBHFPGUIFBJSDPOEJUJPOFSTGFBUVSFT QMFBTFSFBEUIJTNBOVBM DBSFGVMMZCFGPSFVTJOH
:PVIBWFBMSFBEZTFFOUIFCBTJDEFTDSJQUJPOPGUIFVOJUPOQBHFTGSPN UP 4UBSUJOHXJUIUIFOFYUQBHF ZPVXJMMGJOEBTFSJFTPGTUFQ CZ TUFQQSPDFEVSFT GPSFBDIGVODUJPOBWBJMBCMF
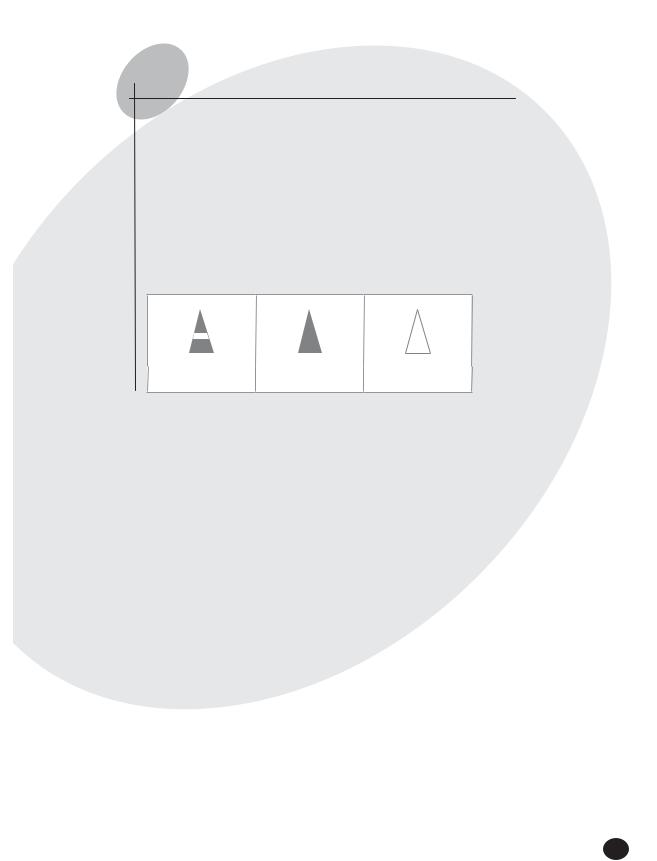
5IFJMMVTUSBUJPOTJOUIFTUFQ CZ TUFQQSPDFEVSFTVTFUISFFEJGGFSFOUTZNCPMT
13&44 |
164) |
)0-%%08/ |
E-7

4FMFDUJOH"VUP.PEF
You can select Auto mode if you want to cool your room automatically. You can adjust the temperature in this mode.
1Press the  (On/Off) button.
Result: The operation indicator on the indoor unit lights up.
The air conditioner starts up in the mode selected when the unit was last used.
|
The indoor unit beeps. |
|
|
2 1SFTT UIF CVUUPO PO UIF SFNPUF DPOUSPM VOUJM "VUPJT EJTQMBZFE |
|
3FTVMU |
5IF JOEPPS VOJU CFFQT FBDI UJNF ZPV QSFTT UIF CVUUPO |
|
5IF BJS DPOEJUJPOFS SVOT JO "VUP NPEF |
|
"VUP NPEF DPPMT UIF SPPN EFQFOEJOH PO UIF TFU UFNQFSBUVSF |
|
5IF BJS DPOEJUJPOFS DIBOHFT GSPN $PPM NPEF BVUPNBUJDBMMZ |
|
EFQFOEJOH PO UIF DVSSFOU UFNQFSBUVSF |
/PUF:PV DBO DIBOHF NPEFT BU BOZ UJNF
1SFTT UIF  CVUUPO UP BEKVTU UIF UFNQFSBUVSF VOUJM UIF SFRVJSFE UFNQFSBUVSF JT EJTQMBZFE :PV DBO TFU UIF UFNQFSBUVSF CFUXFFO ¡$ BOE ¡$
3FTVMU &BDI UJNF ZPV QSFTT UIF  CVUUPO5IF UFNQFSBUVSF BEKVTUT CZ ¡$5IF JOEPPS VOJU CFFQT
5IF GBO TQFFE BEKVTUT BVUPNBUJDBMMZ
E-8
 Loading...