


LAMINATE/PARQUET REPAIR SET
PLPRS A1
LAMINATE/PARQUET REPAIR SET
Operating instructions
SET ZA POPRAVAK LAMINATA/PARKETA
Upute za upotrebu
ΣΕΤ ΕΠΙΔΙΟΡΘΩΣΗΣ ΛΑΜΙΝΕÏΤ/ΠΑΡΚΕ
Οδηүίες χρήσης
LAMINAT-/PARKETT-REPARATURSET
Bedienungsanleitung
IAN 270273
Before reading, unfold the page containing the illustrations
and familiarise yourself with all functions of the device.
Prije nego što pročitate tekst, otvorite stranicu sa slikama i
upoznajte se na osnovu toga sa svim funkcijama uređaja.
Πριν ξεκινήσετε την ανάγνωση, ανοίξτε τη σελίδα με τις εικόνες και εξοικειωθείτε με όλες τις λειτουργίες της συσκευής.
Klappen Sie vor dem Lesen die Seite mit den Abbildungen aus
und machen Sie sich anschließend mit allen Funktionen des
Gerätes vertraut.
GB / CY Operating instructions Page 1
HR Upute za upotrebu Stranica 13
GR / CY Οδηүίες χρήσης Σελίδα 25
DE / AT / CH Bedienungsanleitung Seite 37

A B
C D
E F
G H
I

Table of contents
Introduction .....................2
Limited liability ........................2
Intended use .......................... 2
Warnings used ........................3
Safety . . . . . . . . . . . . . . . . . . . . . . . . . .3
Handling batteries .....................4
Basic safety instructions .................5
First use.........................6
Items supplied and transport inspection . . . . . 6
Disposal of the packaging ............... 6
Battery insertion/ exchange .............. 7
Operating elements ..............7
Handling and operation ...........7
Switching the appliance on/off ...........7
Application example....................7
Troubleshooting..................9
Malfunction causes and remedies .........9
Cleaning ........................9
Storage.........................9
Disposal .......................10
Disposal of the appliance...............10
Disposing of the batteries ...............10
Appendix ......................10
Technical data........................10
Warranty ...........................10
Service .............................11
Importer ............................11
GB
CY
PLPRS A1
1

GB
CY
Introduction
Congratulations on the purchase of your new
appliance.
You have clearly decided in favour of a highquality product. These operating instructions are
a part of this product. They contain important
information in regard to safety, use and disposal.
Before using the product, familiarise yourself
with all operating and safety instructions. Use
this appliance only as described and only for
the specified areas of application. Retain these
instructions for future reference. In addition, pass
these operating instructions on to whoever might
acquire the appliance at a future date.
Limited liability
All technical information, data and information for
installation, connection and operation contained
in these operating instructions correspond to the
latest at time of printing and, to the best of our
knowledge, take into account our previous experience and know-how. No claims can be derived
from the details, illustrations and descriptions in
these instructions. The manufacturer assumes no
responsibility for damage caused by failure to
observe these instructions, improper use, incompetent repairs, making unauthorised modifications or
for using unapproved replacement parts.
Intended use
This laminate/parquet repair kit is intended for
the repair of laminate, parquet, cork and wood
or plastic surfaces. The supplied wax melter is
intended exclusively for the melting of hard wax
suitable for these applications. The appliance is
intended exclusively for domestic use. Do not
use the appliance for commercial or industrial
applications. Use the appliance only in a dry
environment resp. in indoor areas. This appliance
is not intended for any other use or for uses
beyond those detailed. Claims of any kind for
damage resulting from unintended use will not
be accepted. The user alone bears the risk.
2
PLPRS A1
Warnings used
In these extant operating instructions the following
warnings are used:
DANGER
A warning at this risk level indicates
a threateningly dangerous situation.
If the dangerous situation is not avoided, it could
lead to death or serious physical injury.
► Follow the instructions in this warning to avoid
the death of or serious physical injury to people.
WARNING
A warning at this risk level indicates
a potentially dangerous situation.
If the dangerous situation is not avoided, it could
lead to physical injuries.
► Follow the instructions in this warning to avoid
personal injuries.
CAUTION
A warning at this risk level indicates
potential property damage.
If the situation is not avoided it could lead to
property damage.
► Follow the directives in this warning to avoid
property damage.
GB
CY
NOTICE
► A notice indicates additional information
that could assist you in the handling of the
appliance.
Safety
In this chapter you will receive important safety
information regarding the handling of the appliance. This appliance complies with the statutory
safety regulations. Incorrect usage can lead to
personal injury and property damage.
DANGER
► Do not use the appliance in loca-
tions where there is a risk of fire
or explosion, e.g. in the vicinity of
inflammable liquids or gases.
PLPRS A1
3

GB
CY
Handling batteries
WARNING
Risks from uses other than
those intended! There is a risk
of explosions and leakage!
For the safe handling of batteries,
take note of the following safety
instructions:
► Do not throw batteries into a fire.
► Never short-circuit batteries.
► Do not attempt to recharge bat-
teries.
► Regularly check the condition of
the batteries. Leaking battery acid
can cause permanent damage to
the appliance. Special caution
should be exercised when handling
damaged or leaking batteries.
There is a risk of receiving acid
burns! Wear protective gloves.
► Store batteries in a place inac-
cessible to children. If a battery
should be swallowed, seek medical
attention IMMEDIATELY.
► If you do not intend to use the
appliance for an extended period,
remove the batteries.
4
PLPRS A1

Basic safety instructions
For safe handling of the appliance,
follow the safety information below:
■ Before use, check the appliance for
visible external damage. Do not take
into use a damaged appliance or one
that has been dropped.
■ Do not make any unauthorised modifi-
cations or alterations to the appliance.
■ This appliance may be used by chil-
dren aged 8 over and by persons with
reduced physical, sensory or mental
capabilities or lack of experience and
knowledge, provided that they are
under supervision or have been told
how to use of the appliance safely
and are aware of the potential risks.
Children must not play with the appliance. Cleaning and user maintenance
tasks must not be carried out by children unless they are supervised.
GB
CY
■ Protect the appliance against moisture
and liquid penetration.
■ Do not operate the appliance close to
open flames (e.g. candles).
■ Avoid direct sunlight.
■ Avoid unintentional operation of the
wax melter. Ensure that the wax melter
is switched off before lifting or carrying it.
■ On ceasing work, always switch the
wax melter off with the slide switch
(position OFF) when you put it down.
■ Avoid skin contact with the wax melter
tip and protect yourself against dripping wax. There is a risk of burns!
PLPRS A1
5

GB
CY
First use
DANGER
During the commissioning of the appliance
personal injury and property damage
could occur!
► Packaging material should not be used as
a play thing. There is a risk of suffocation.
Items supplied and transport
inspection
This Laminate/Parquet Repair Set is supplied with
the following components as standard:
▯ Wax melter
▯ Cleaning scraper
▯ Scraper with planer function
▯ Scraper with curvature
▯ 11 x Hard wax sticks
▯ Sanding sponge
▯ Cleaning cloth
▯ 2 x Batteries 1.5 V Type AA/LR6/Mignon
▯ Storage case
▯ This operating manual
NOTICE
► Check the contents to ensure that everything
is available and for signs of visible damage.
► If the contents are not complete, or are dam-
aged due to defective packaging or through
transportation, contact the Service Hotline
(see chapter Service).
Disposal of the packaging
The packaging protects the appliance against
transport damage. The packaging materials are
selected from the point of view of their environmental friendliness and disposal technology and
are therefore recyclable. The recirculation of
packaging into the material circuit saves on raw
material and reduces the amount of waste generated. Dispose of packaging material that is no
longer needed as per the regionally established
regulations.
6
PLPRS A1
Battery insertion/ exchange
This wax melter requires 2 x 1.5 V batteries, type
AA/LR6/Mignon, for operation.
♦ Open the battery compartment
underside of the wax melter
♦ Place the batteries into the battery compart-
, following the polarity details as
ment
depicted in it.
♦ Close and secure the battery compartment.
on the
.
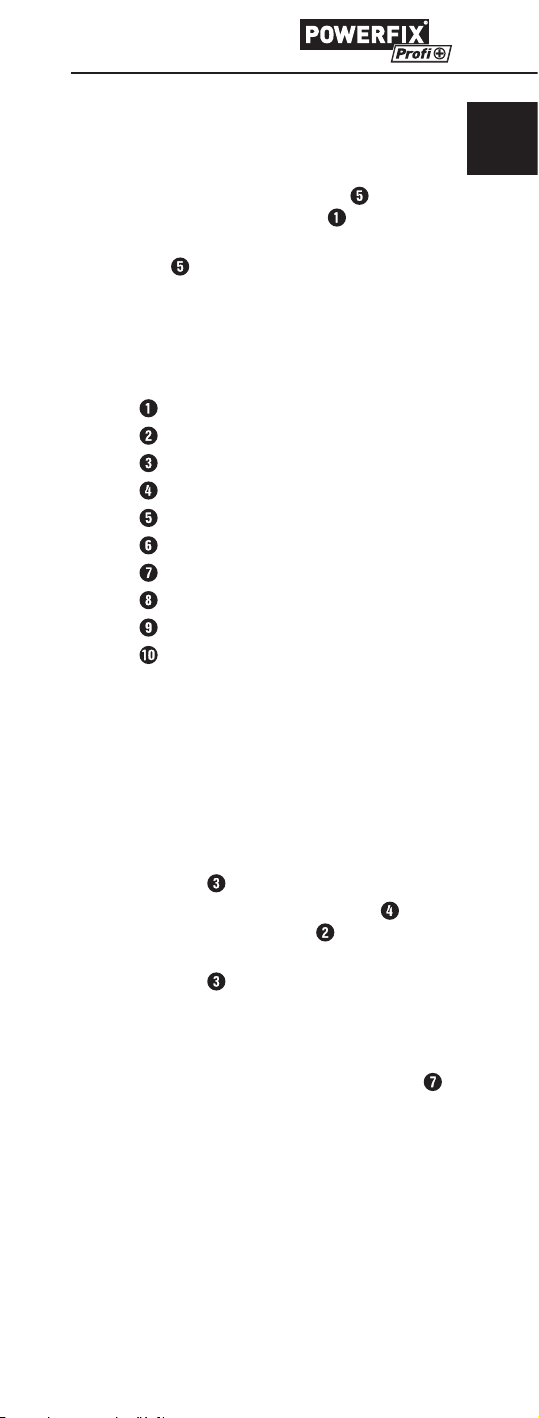
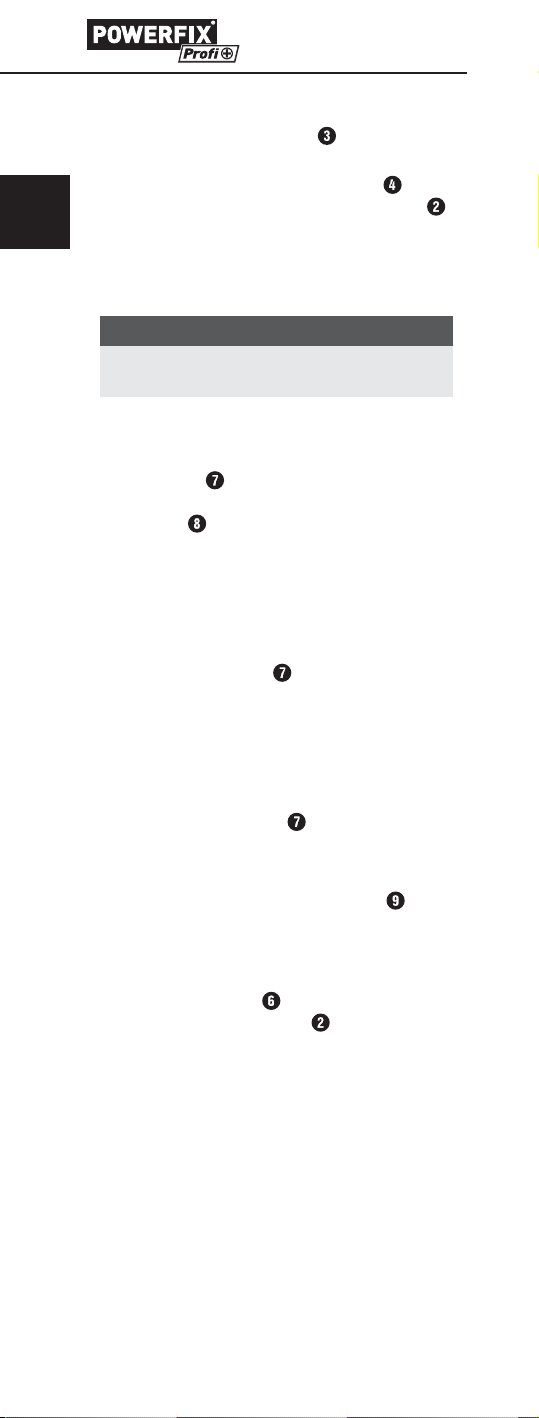
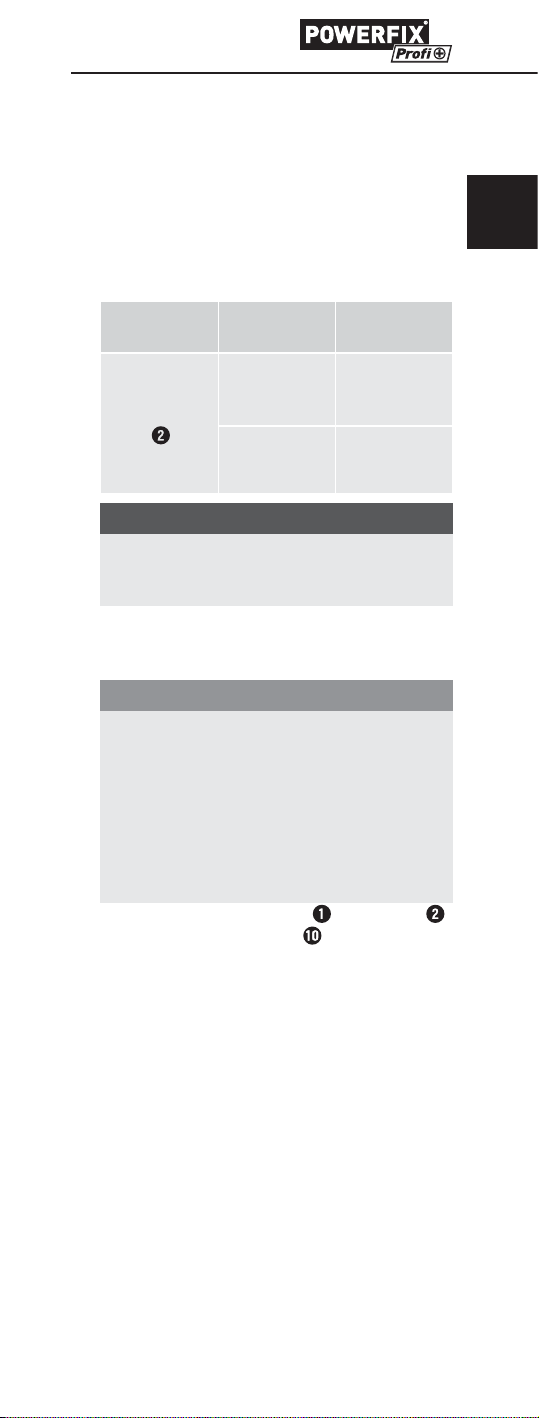
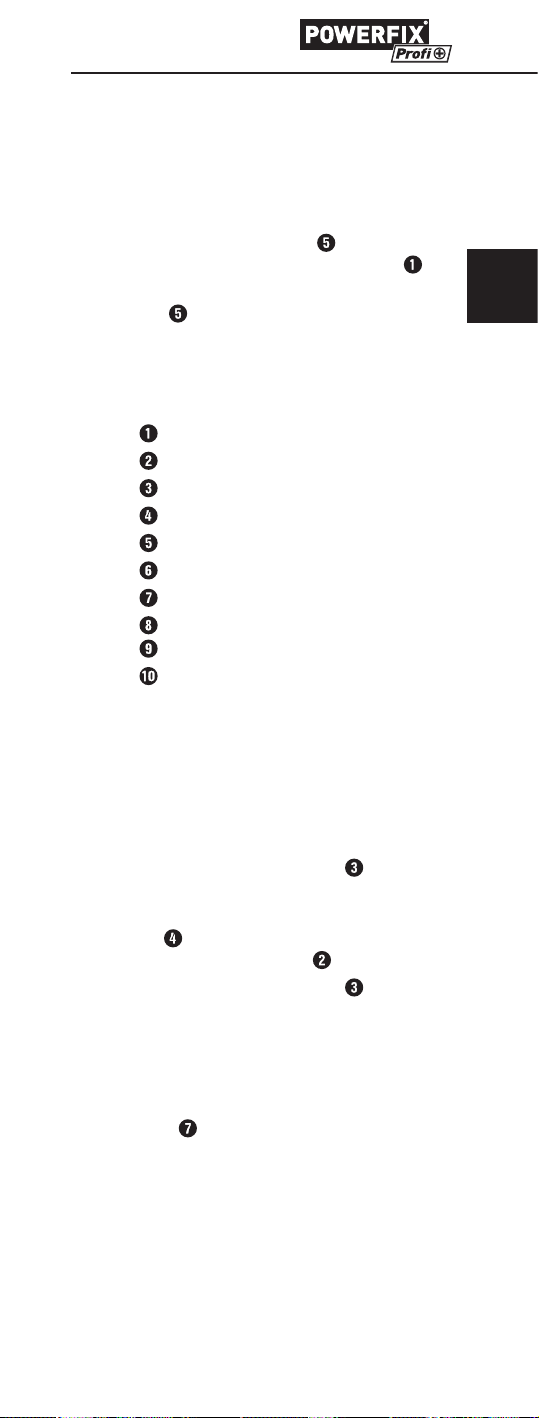
Operating elements
Wax melter
Wax melter tip
On/Off switch
Activation button
Battery compartment
Cleaning scraper
Scraper with planer function
Scraper with curvature
Sanding sponge
Cleaning cloth
GB
CY
Handling and operation
In this chapter you will receive important information for the handling and operation of the
appliance.
Switching the appliance on/off
♦ To switch the appliance on, place the On/
Off switch
♦ Press and hold the activation button
heat up the wax melter tip
♦ To switch the appliance off, place the On/
Off switch
Application example
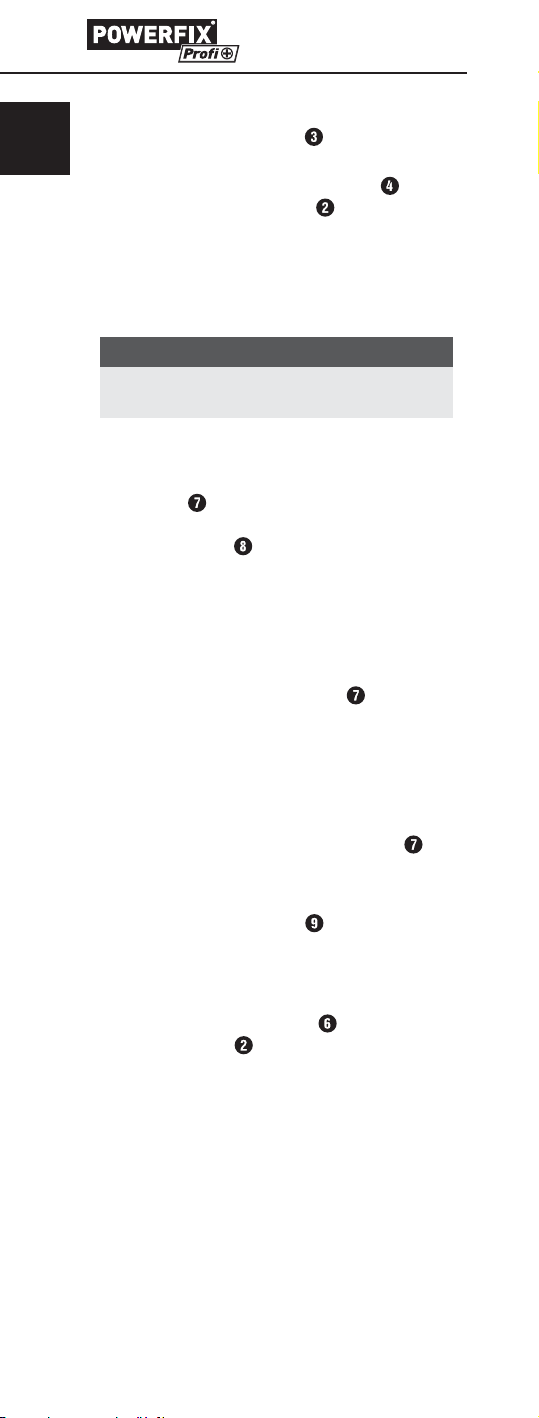
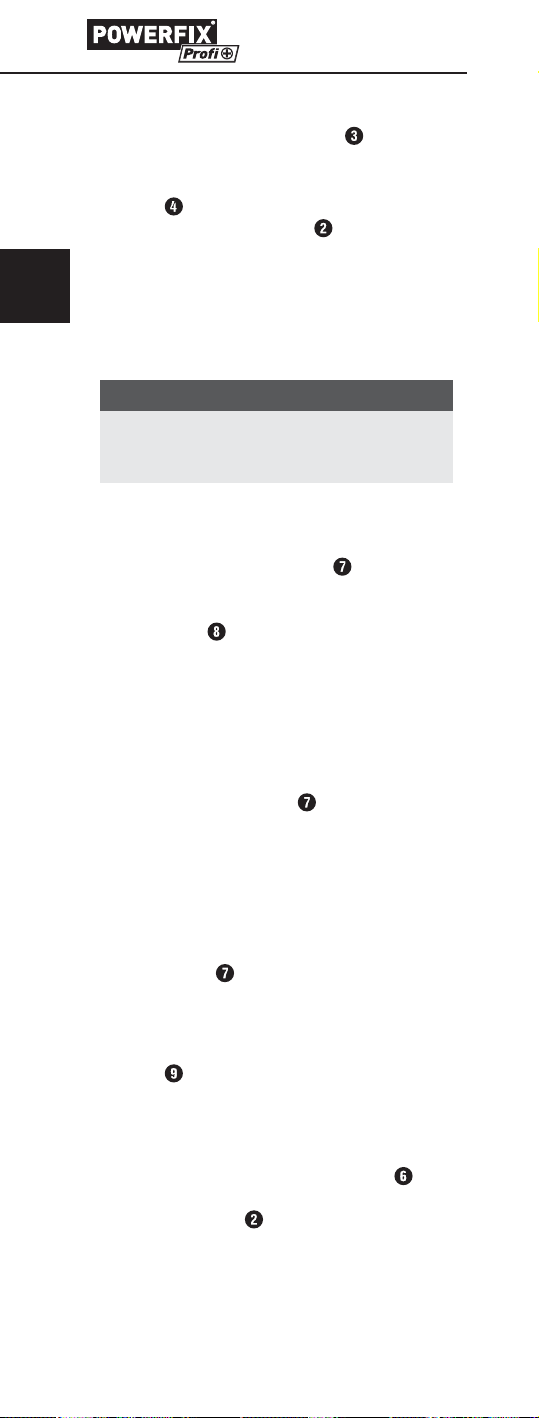
Preparation (Fig. A)
♦ Clean the damaged area with the spatula
and remove all loose parts. Press the edges
of the damaged area round.
Colour selection (Fig. B)
♦ Select the matching colour tone.
Ensure that several colour tones, from light to
dark, are always used. With real wood, it is
recommended to additionally work with transparent (K), so as to achieve a sense of depth.
at the position "ON".
.
at the position "OFF".
to
PLPRS A1
7
GB
CY
Melting and filling (Figs. C + D)
♦ Place the On/Off switch at the position
"ON" to switch the appliance on.
♦ Press and hold the activation button
heat up the wax melter tip
♦ Now melt small portions of the hard wax and
place them into the damaged area, until it is
slightly overfilled. Start with the light colour
tones and progress step by step to the dark
colour tones.
NOTICE
► At pressure points it is often sufficient if you
use only the transparent hard wax (K).
.
to
Filling (Fig. E)
♦ For vertical surfaces it is recommended to mix
the colour tone beforehand, collect it on the
spatula
When working on curved areas the scraper
with curvature
wax into the damaged area.
and then fill the damaged area.
should be used to fill hard
Smoothing (Fig. F)
♦ Allow the hard wax to cool for a few seconds
(about 10 seconds).
♦ After cooling, smooth any protrusion with the
planing grooves of the scraper
light pressure to smooth the protrusion.
. Use only
Fine matching (Fig. G)
♦ For fine matching, now imitate the grain struc-
ture with a darker colour tone.
♦ Subsequently, again smooth any protrusion
with the planing grooves of the scraper
Degreasing (Fig. H)
♦ To finish, remove the last hard wax residues
with the sanding sponge
gloss level of the surface will also be simultaneously matched. Job done!
. Thereby the
Cleaning the planer grooves (Fig. I)
♦ Place the cleaning scraper on the cooled
wax melter tip
dues from the plane grooves.
and scrape the wax resi-
.
8
PLPRS A1

Troubleshooting
In this chapter you will receive important information for malfunction localisation and malfunction
remedies.
Malfunction causes and remedies
The following table will help with localising and
remedying minor malfunctions:
Defect
The wax melter
does not
tip
get hot.
NOTICE
► If you cannot solve the problem with the
aforementioned solutions, please contact the
Service Hotline (see chapter Service) .
Possible
cause
The batteries
have been
inserted incorrectly.
The batteries
are discharged.
Solution
Insert the batteries as per
the depiction
in the battery
compartment .
Insert two
new batteries.
Cleaning
GB
CY
CAUTION
Damage to the appliance!
► Ensure that, when cleaning it, no moisture can
penetrate into the appliance, so as to avoid
irreparable damage to it.
► Do not use chemical or abrasive cleaning
agents. These could damage the housing.
♦ Clean the wax melter
with the cleaning cloth only when
tip
they have cooled down.
and the wax melter
Storage
If you do not intend to use the appliance for an
extended period of time, remove the batteries.
Store all parts of the Laminate/Parquet Repair Kit
in the storage case and at a clean, dry location
out of direct sunlight.
PLPRS A1
9

GB
CY
Disposal
Disposal of the appliance
Do not dispose of the appliance in your
normal domestic waste. This product
is subject to the provisions of European Directive 2012/19/EU WEEE
(Waste Electrical and Electronic
Equipment).
Dispose of the appliance through an approved
disposal centre or at your community waste facility. Please pay heed to the currently applicable
regulations. In case of doubt, please contact your
waste disposal centre.
Disposing of the batteries
Do not dispose of the batteries with domestic
waste. Every consumer is statutorily obliged to
dispose of batteries/rechargeable batteries
at a collection point in their community/district
or to a dealer.
This obligation is intended to ensure that batteries
are disposed of in an environmentally responsible
manner. Dispose of batteries only when they are
fully discharged.
Appendix
Technical data
Voltage supply
batteries
Dimensions approx. 14.7 x 3.5 x 2.5 cm
Weight
(including batteries)
Warranty
The warranty for this appliance is for 3 years
from the date of purchase.
The appliance has been manufactured with care
and meticulously examined before delivery.
Please retain your receipt as proof of purchase.
In the case of a warranty claim, please make
contact by telephone with our Customer Service
Department.
Only in this way can a post-free despatch for
your goods be assured.
NOTICE
► The warranty covers only claims for mate-
rial and manufacturing defects, but not for
transport damage, wearing parts or for
damage to fragile components, e.g. buttons or batteries.
2 x 1.5 V
type AA/LR6/Mignon
approx. 80 g
10
PLPRS A1

This product is for domestic use only and is not
intended for commercial use.
The warranty is void in the case of abusive and
improper handling, use of force and internal
tampering not carried out by our authorised
service branch.
Your statutory rights are not restricted in any way
by this warranty. The warranty period is not
extended by repairs made under the warranty.
This applies also to replaced and repaired parts.
Damages and defects extant at the time of purchase
must be reported immediately after unpacking,
resp. no later than two days after the date of
purchase.
Repairs made after the lapse of the warranty
period are subject to charge.
Service
Service Great Britain
Tel.: 0871 5000 720 (£ 0.10/Min.)
E-Mail: kompernass@lidl.co.uk
IAN 270273
CY
Service Cyprus
Tel.: 8009 4409
E-Mail: kompernass@lidl.com.cy
IAN 270273
Hotline availability:
Monday to Friday 08:00 - 20:00 (CET)
GB
CY
Importer
KOMPERNASS HANDELS GMBH
BURGSTRASSE 21
44867 BOCHUM
GERMANY
www.kompernass.com
PLPRS A1
11

12
PLPRS A1

Sadržaj
Uvod ..........................14
Ograničenje odgovornosti ..............14
Namjenska uporaba...................14
Korištena upozorenja ..................15
Sigurnost ......................15
Rukovanje baterijama ..................16
Opće sigurnosne napomene ............16
Puštanje u pogon................18
Opseg isporuke i provjera transporta......18
Zbrinjavanje ambalaže.................18
Umetanje/zamjena baterija .............19
Upravljački elementi .............19
Rukovanje i rad .................19
Uključivanje/isključivanje uređaja ........19
Primjer za primjenu ....................19
Otklanjanje smetnji ..............21
Uzroci pogrešaka i njihovo otklanjanje.....21
Čišćenje ........................21
Skladištenje ....................21
Zbrinjavanje....................22
Zbrinjavanje uređaja ..................22
Zbrinjavanje baterija...................22
Prilog..........................22
Tehnički podaci.......................22
Jamstvo .............................22
Servis ..............................23
Uvoznik.............................23
HR
PLPRS A1
13

HR
Uvod
Srdačno čestitamo na kupnji Vašeg novog uređaja.
Time ste se odlučili za visokovrijedan proizvod.
Upute za rukovanje predstavljaju sastavni dio
ovog proizvoda. One sadrže važne napomene
za sigurnost, rukovanje i zbrinjavanje. Prije uporabe uređaja upoznajte se sa svim pripadajućim
uputama za uporabu i svim sigurnosnim napomenama. Proizvod koristite isključivo na opisani
način i u navedenim područjima uporabe. Sačuvajte ove upute za rukovanje. U slučaju predaje
proizvoda trećim osobama priložite i predajte i
svu dokumentaciju.
Ograničenje odgovornosti
Sve tehničke informacije, svi podaci i sve napomene za priključivanje i posluživanje uređaja
sadržani u ovim uputama za rukovanje odgovaraju najnovijem stanju tehnike u trenutku pripreme
za tisak i navedeni su uz uvažavanje naših dosadašnjih iskustava i saznanja. Na osnovu navoda,
slika i opisa sadržanih u ovim uputama za rukovanje ne mogu se izvoditi nikakva potraživanja.
Proizvođač ne preuzima odgovornost za štete
nastale uslijed nepridržavanja uputa za rukovanje, nenamjenske uporabe, nestručno izvedenih
popravaka, neovlašteno izvršenih izmjena ili
uporabe nedozvoljenih zamjenskih dijelova.
Namjenska uporaba
Set za popravak laminata/parketa predviđen je
za popravak laminata, parketa, plutenih, drvenih
i plastičnih površina. Uređaj za topljenje voska
sadržan u opsegu isporuke namijenjen je isključivo
za topljenje prikladnog tvrdog voska. Uređaj je
namijenjen isključivo za privatnu uporabu.
Uređaj ne koristite u gospodarske ili industrijske
svrhe. Uređaj koristite isključivo u suhom okruženju,
odn. u zatvorenim prostorima. Svaki drugi način
uporabe i svaka uporaba koja prelazi navedene
okvire smatra se nenamjenskom. Isključena su
sva potraživanja bilo koje vrste na temelju štete
nastale uslijed nenamjenske uporabe. Rizik snosi
isključivo sam korisnik.
14
PLPRS A1

Korištena upozorenja
U ovim uputama za rukovanje korištena su sljedeća
upozorenja:
OPASNOST
Upozorenje ovog stupnja opasnosti
označava prijeteću opasnu situaciju.
Ukoliko ne izbjegnete opasnu situaciju, to može
dovesti do smrti ili do teških ozljeda.
► Slijedite naputke navedene u ovom upozorenju
kako biste izbjegli opasnost od smrtnog slučaja
ili teških ozljeda osoba.
UPOZORENJE
Upozorenje ovog stupnja opasnosti
označava moguću opasnu situaciju.
Ukoliko ne izbjegnete opasnu situaciju, to može
dovesti do ozljeda.
► Slijedite naputke navedene u ovom upozorenju,
kako biste izbjegli ozljede osoba.
POZOR
Upozorenje ovog stupnja opasnosti
označava mogućnost oštećenja imovine.
Ukoliko ne izbjegnete dotičnu situaciju, to može
dovesti do oštećenja predmeta.
► Slijedite naputke navedene u ovom upozorenju
kako biste izbjegli oštećenje predmeta.
HR
NAPOMENA
► Napomena označava dodatne informacije
za jednostavnije rukovanje uređajem.
Sigurnost
U ovom poglavlju možete pronaći važne sigurnosne napomene za rukovanje uređajem. Ovaj
uređaj zadovoljava propisane sigurnosne odredbe. Nestručna uporaba može uzrokovati ozljede
i oštećenja imovine.
OPASNOST
►
Uređaj ne koristite na mjestima,
na kojima postoji opasnost od eksplozije ili od požara, npr. u blizini
zapaljivih tekućina ili plinova.
PLPRS A1
15

HR
Rukovanje baterijama
UPOZORENJE
Opasnost uslijed nenamjenske
uporabe!
Postoji opasnost od eksplozije
i istjecanja!
Za sigurno ophođenje baterijama
obratite pažnju na slijedeće sigurnosne napomene:
► Baterije ne bacajte u vatru.
► Ne prespojite baterije kratkim
spojem.
► Ne pokušajte baterije ponovo
napuniti.
► U redovnim vremenskim razmaci-
ma kontrolirajte baterije. Iscurjela
baterijska kiselina može uzrokovati
trajna oštećenja uređaja.
Prilikom rukovanja s oštećenim ili
iscurjelim baterijama budite posebno oprezni. Postoji opasnost
od nagrizanja! Nosite zaštitne
rukavice.
► Baterije čuvajte izvan dohvata dje-
ce. U slučaju gutanja neizostavno
zatražite liječničku pomoć.
► Izvadite baterije, ako uređaj duže
vrijeme ne koristite.
Opće sigurnosne napomene
Za sigurno rukovanje uređajem pridržavajte se sljedećih sigurnosnih
napomena:
■ Uređaj prije uporabe provjerite kako
biste ustanovili eventualna vidljiva
vanjska oštećenja. Ne koristite oštećen uređaj ili uređaj koji je pao.
■ Ne vršite preinake uređaja na vlastitu
ruku niti promjene uređaja.
16
PLPRS A1

■ Ovaj uređaj smiju koristiti djeca stara
8 godina ili više, kao i osobe sa smanjenim fizičkim, senzornim ili mentalnim sposobnostima ili pomanjkanjem
iskustva i/ili znanja, ukoliko su pod
nadzorom ili su primile poduku o
sigurnom rukovanju uređajem te su
razumjele opasnosti koje proizlaze iz
uporabe uređaja. Djeca se ne smiju
igrati uređajem. Čišćenje i servisiranje
ne smiju obavljati djeca bez odgovarajućeg nadzora.
■ Uređaj zaštitite od vlage i prodiranja
tekućina.
■ Uređaj ne koristite u blizini otvorenog
plamena (npr. svijeće).
■ Izbjegavajte neposredno izlaganje
sunčevoj svjetlosti.
■ Izbjegavajte nehotično uključivanje
uređaja za topljenje voska. Provjerite
da je uređaj za topljenje voska isključen
prije nego ga podignete ili premjestite.
HR
■ Uređaj za topljenje voska uvijek is-
ključite pomoću kliznog prekidača (u
položaj OFF) prije nego ga odložite.
■ Izbjegavajte kontakt vrha uređaja za
topljenje voska s kožom i zaštitite se
od kapanja voska.
Postoji opasnost od opeklina!
PLPRS A1
17

HR
Puštanje u pogon
OPASNOST
Prilikom puštanja uređaja u rad može
doći do ugrožavanja zdravlja i do nastanka predmetne štete!
► Ambalaža se ne smije koristiti za igranje.
Postoji opasnost od gušenja.
Opseg isporuke i provjera
transporta
Set za popravak laminata/parketa se standardno
isporučuje sa sljedećim komponentama:
▯ Uređaj za topljenje voska
▯ Strugalica za čišćenje
▯ Lopatica s funkcijom glodanja
▯ Lopatica sa zaobljenim dijelom
▯ 11 štapića tvrdog voska
▯ Spužva za brušenje
▯ Krpa za čišćenje
▯ 2 x 1.5 V baterije tipa AA/LR6/Mignon
▯ Kofer za čuvanje
▯ Ove upute za uporabu
NAPOMENA
► Provjerite cjelovitost opsega isporuke i provjerite
postoje li na uređaju vidljiva oštećenja.
► U slučaju nepotpune isporuke ili štete uzro-
kovane nedostatnim pakiranjem, kao i štete
nastale prilikom transporta, nazovite telefon
servisne službe (vidi poglavlje Servis).
Zbrinjavanje ambalaže
Ambalaža štiti uređaj od transportnih oštećenja.
Materijali pakiranja su izabrani prema ekološkim
aspektima i aspektima zbrinjavanja i stoga mogu
biti reciklirani. Povrat ambalaže u kružni tok
materijala štedi sirovine te smanjuje nakupljanje
otpada. Ambalažu koja Vam više nije potrebna
zbrinite u skladu s važećim lokalnim propisima.
18
PLPRS A1

Umetanje/zamjena baterija
Za rad uređaja za topljenje voska potrebne su
2 baterije 1,5 V tipa AA/LR6/Mignon.
♦ Otvorite pretinac za baterije
strani uređaja za topljenje voska
♦ Umetnite baterije u pretinac
polaritet naznačen na uređaju.
♦ Zatvorite poklopac pretinca za baterije.
na donjoj
pazeći na
Upravljački elementi
Uređaj za topljenje voska
Vrh uređaja za topljenje voska
Prekidač za uključivanje/isključivanje
Gumb za aktivaciju
Pretinac za baterije
Strugalica za čišćenje
Lopatica s funkcijom glodanja
Lopatica sa zaobljenim dijelom
Spužva za brušenje
Krpa za čišćenje
Rukovanje i rad
.
HR
U ovom poglavlju možete pronaći važne napomene za posluživanje i rad uređaja.
Uključivanje/isključivanje uređaja
♦ Gurnite prekidač Uklj/Isklj u položaj ON,
kako biste uključili uređaj.
♦ Pritisnite i držite gumb za aktiviranje
biste zagrijali vrh uređaja za topljenje voska
♦ Gurnite prekidač Uklj/Isklj
kako biste isključili uređaj.
u položaj OFF,
, kako
Primjer za primjenu
Priprema (slika A)
♦ Očistite oštećeno mjesto lopaticom i uklonite
sve odvojene dijelove. Uokolo pritisnite rub
oštećenja.
Odabir boje (slika B)
♦ Odaberite odgovarajuće tonove boja.
Pazite da uvijek koristite više tonova boje od
svijetlih prema tamnima. Kod punog drveta
preporučuje se dodatno raditi s transparen-
tnim voskom (K) kako bi se postigao efekt
dubine.
.
PLPRS A1
19
HR
Topljenje i punjenje (slika C + D)
♦ Gurnite prekidač Uklj/Isklj u položaj ON,
kako biste uključili uređaj.
♦ Pritisnite i držite gumb za aktiviranje
biste zagrijali vrh uređaja za topljenje voska
♦ Rastopite malene porcije tvrdog voska i nane-
site na oštećeno mjesto sve dok se lagano ne
prelije. Započnite sa svijetlim tonovima boja
i korak po korak birajte sve tamnije tonove.
NAPOMENA
► Kod mjesta pritiska uglavnom je dovoljno ako
koristite samo transparentni tvrdi vosak (K).
, kako
Punjenje lopaticom (slika E)
♦ Kod okomitih površina preporučuje se pret-
hodno izmiješati ton boje, te nanijeti i ispuniti
lopaticom
dijelovima koristite lopaticu sa zaobljenim
dijelom
oštećeno mjesto.
. Prilikom radova na zaobljenim
, kako biste tvrdi vosak nanijeli na
Skidanje (slika F)
♦ Ostavite tvrdi vosak nekoliko sekundi (oko 10 s)
da se ohladi.
♦ Nakon hlađenja višak uklonite lopaticom s
utorima za glodanje
samo laganim pritiskom.
. Višak uvijek uklanjajte
Fino usklađivanje (slika G)
♦ Za fino usklađivanje sada imitirajte eventualno
postojeće šare pomoću tamnije nijanse boje.
♦ Na kraju ponovno višak uklonite lopaticom
s utorima za glodanje
.
Odmašćivanje (slika H)
♦ Na kraju posljednje ostatke tvrdog voska
uklonite pomoću spužve za brušenje
taj način se istovremeno prilagođava i stupanj
sjaja površine. Gotovo!
. Na
Čišćenje utora na lopatici (slika I)
♦ Lopaticu s utorima stavite na ohlađeni vrh
uređaja za topljenje voska
voska s utora glodalice.
i ostružite ostatke
.
20
PLPRS A1
Otklanjanje smetnji
U ovom poglavlju možete pronaći važne napomene
za pronalaženje smetnji i njihovo otklanjanje.
Uzroci pogrešaka i njihovo
otklanjanje
Sljedeća tablica pomoći će Vam u pronalaženju
i otklanjanju manjih smetnji:
se
Mogući
uzrok
Baterije su
pogrešno
umetnute.
Baterije su
prazne.
Otklanjanje
Umetnite baterije prema slici
na uređaju.
Umetnite dvije
nove baterije.
Greška
Vrh uređaja
za topljenje
voska
ne zagrijava.
NAPOMENA
► Ako navedenim koracima ne uspijete riješiti
problem, molimo Vas obratite se službi za
korisnike (vidi poglavlje Servis)
Čišćenje
POZOR
Oštećenje uređaja!
► Osigurajte da prilikom čišćenja ne dođe do
prodiranja tekućine u unutrašnjost uređaja,
kako biste izbjegli nepopravljiva oštećenja
uređaja.
► Ne koristite kemijska sredstva ili abrazivna
sredstva za čišćenje. Ova sredstva mogu
oštetiti kućište.
♦ Uređaj za topljenje voska
čistite krpom za čišćenje
hladni.
i vrh uređaja
samo kada su
HR
Skladištenje
Ukoliko se uređaj neće koristiti duže vrijeme,
izvadite baterije. Čuvajte sve dijelove seta za
popravak laminata/parketa u koferu za čuvanje
na čistom i suhom mjestu koje nije izloženo izravnom sunčevom zračenju.
PLPRS A1
21

HR
Zbrinjavanje
Zbrinjavanje uređaja
Uređaj nikako ne smijete bacati s
običnim kućnim otpadom. Ovaj proi-
zvod podliježe europskoj direktivi
2012/19/EU WEEE (Waste Electrical
and Electronic Equipment).
Uređaj zbrinite preko autoriziranog poduzeća za
zbrinjavanje ili preko Vaše komunalne ustanove
za zbrinjavanje otpada. Poštujte aktualno važeće
propise. U slučaju dvojbe obratite se mjesnom
poduzeću za zbrinjavanje otpada.
Zbrinjavanje baterija
Baterije se ne smiju bacati zajedno s kućnim
smećem. Svaki potrošač zakonski je obavezan
baterije predati na sabirnom mjestu svoje
mjesne zajednice/svog dijela grada ili kod
trgovca.
Svrha ove obaveze je ta, da baterije mogu biti
zbrinute na način neškodljiv za okoliš. Baterije
predajte samo ako su ispražnjene.
Prilog
Tehnički podaci
Napajanje
Baterije
Dimenzije
Težina (uklj. baterije) oko 80 g
Izjava o sukladnosti za ovaj proizvod dostupna
je na internet stranici www.lidl.hr.
2 x 1,5 V
tip AA/LR6/Mignon
oko 14,7 x 3,5 x 2,5 cm
Jamstvo
Za ovaj uređaj odobrava se jamstvo u trajanju od
3 godine od datuma kupnje. Uređaj je pažljivo
proizveden i prije isporuke brižljivo provjeren.
Molimo sačuvajte račun kao dokaz o kupnji.
Molimo vas da u slučaju jamstvenog zahtjeva
nazovete telefonski broj nadležnog servisa.
Samo na taj način možemo osigurati besplatno
slanje robe.
NAPOMENA
► Jamstvo vrijedi samo za greške materijala
i greške u izradi, a ne za transportne štete,
potrošne dijelove ili oštećenja lomljivih
dijelova, npr. prekidača ili baterija.
Proizvod je namijenjen isključivo za privatnu,
nekomercijalnu uporabu.
22
PLPRS A1

Jamstvo prestaje vrijediti u slučaju zlouporabe,
nepravilnog korištenja, primjene sile i zahvata na
uređaju koje nije obavila za to ovlaštena podružnica servisa.
Ovo jamstvo ne ograničava Vaša zakonska prava.
Korištenje prava na jamstvo ne produžuje jamstveni
rok. To vrijedi i za zamijenjene i popravljene
dijelove.
Štete i nedostatke koji eventualno postoje već
prilikom kupovine treba javiti neposredno nakon
raspakiranja, a najkasnije u roku od dva dana
nakon datuma kupnje.
Nakon isteka jamstvenog roka izvršeni popravci
se naplaćuju.
Servis
Servis Hrvatska
Tel.: 0800 777 999
E-Mail: kompernass@lidl.hr
IAN 270273
Dostupnost dežurne telefonske linije:
Ponedjeljak do petak od 8:00 - 20:00 sati (SEV)
Uvoznik
Lidl Hrvatska d.o.o. k.d.,
p.p. 61
10020 Novi Zagreb
HR
Proizvođač:
KOMPERNASS HANDELS GMBH
BURGSTRASSE 21
44867 BOCHUM
GERMANY
www.kompernass.com
PLPRS A1
23

24
PLPRS A1

Περιεχόμενα
Εισαγωγή ......................26
Περιορισμός ευθύνης..................26
Προβλεπόμενη χρήση .................26
Χρησιμοποιούμενες υποδείξεις
προειδοποίησης......................27
Ασφάλεια ......................27
Χειρισμός των μπαταριών ...............28
Βασικές υποδείξεις ασφαλείας...........28
Θέση σε λειτουργία ..............30
Παραδοτέος εξοπλισμός και
έλεγχος μεταφοράς ...................30
Απόρριψη της συσκευασίας.............30
Τοποθέτηση / Αλλαγή της μπαταρίας .....31
Στοιχεία χειρισμού ...............31
Χειρισμός και λειτουργία..........31
Ενεργοποίηση / απενεργοποίηση συσκευής 31
Παράδειγμα χρήσης...................31
Διόρθωση σφαλμάτων............33
Αιτίες σφαλμάτων και διόρθωση..........33
Καθαρισμός ....................33
Αποθήκευση....................33
Απόρριψη ......................34
Απόρριψη συσκευής ..................34
Απόρριψη των μπαταριών ..............34
Παράρτημα.....................34
Τεχνικά χαρακτηριστικά ................34
Εγγύηση ............................34
Σέρβις..............................35
Εισαγωγέας..........................35
GR
CY
PLPRS A1
25

GR
CY
Εισαγωγή
Συγχαρητήρια για την αγορά της νέας σας
συσκευής.
Αποφασίσατε έτσι για την απόκτηση ενός προϊόντος υψηλής ποιότητας. Οι οδηγίες χρήσης είναι
τμήμα αυτού του προϊόντος. Περιέχουν σημαντικές
υποδείξεις για την ασφάλεια, τη χρήση και την
απόρριψη. Πριν από τη χρήση του προϊόντος,
εξοικειωθείτε με όλες τις υποδείξεις χειρισμού και
ασφάλειας. Χρησιμοποιείτε το προϊόν μόνο όπως
περιγράφεται και για τα αναφερόμενα πεδία χρήσης. Φυλάξτε αυτές τις οδηγίες χρήσης καλά.
Παραδώστε όλα τα έγγραφα σε περίπτωση
παράδοσης του προϊόντος σε τρίτους.
Περιορισμός ευθύνης
Όλες οι περιεχόμενες στις παρούσες οδηγίες
χρήσης τεχνικές πληροφορίες, τα δεδομένα και
οι υποδείξεις σύνδεσης και χειρισμού αντιστοιχούν στην τελευταία λέξη της τεχνολογίας κατά
τη στιγμή της εκτύπωσης και πραγματοποιούνται
λαμβάνοντας υπόψη τις μέχρι τώρα εμπειρίες
και γνώσεις μας στο ανώτερο επίπεδο. Από τα
στοιχεία, τις εικόνες και τις περιγραφές σε αυτές
τις οδηγίες χρήσης δεν μπορούν να εγερθούν
απαιτήσεις. Ο κατασκευαστής δεν αναλαμβάνει
καμία ευθύνη για βλάβες λόγω μη τήρησης των
οδηγιών χρήσης, μη προβλεπόμενης χρήσης,
εσφαλμένων επισκευών, μη εγκεκριμένων τροποποιήσεων ή χρήσης μη επιτρεπόμενων εξαρτημάτων.
Προβλεπόμενη χρήση
Το σετ επιδιόρθωσης λαμινέϊτ/παρκέ προορίζεται για την επιδιόρθωση λαμινέϊτ, παρκέ, φελού,
ξύλινων και συνθετικών επιφανειών. Η περιεχόμενη
στον παραδοτέο εξοπλισμό συσκευή ρευστοποίησης κεριού προβλέπεται αποκλειστικά για το
λιώσιμο του κατάλληλου για τη διαδικασία σκληρού κεριού. Η συσκευή προορίζεται αποκλειστικά για ιδιωτική χρήση. Μη χρησιμοποιείτε τη
συσκευή για επαγγελματικούς ή βιομηχανικούς
σκοπούς. Χρησιμοποιείτε τη συσκευή μόνο σε
στεγνό περιβάλλον ή σε εσωτερικούς χώρους.
Μία άλλη ή διαφορετική χρήση από τα ανωτέρω
αναφερόμενα ισχύει ως μη σύμφωνη με τους
κανονισμούς. Απαιτήσεις οποιουδήποτε είδους
λόγω φθορών από μη προβλεπόμενη χρήση
αποκλείονται. Την ευθύνη φέρει αποκλειστικά ο
χρήστης.
26
PLPRS A1

Χρησιμοποιούμενες υποδείξεις
προειδοποίησης
Στις παρούσες οδηγίες χρήσης χρησιμοποιούνται
οι εξής υποδείξεις προειδοποίησης:
ΚΙΝΔΥΝΟΣ
Μία υπόδειξη προειδοποίησης αυτού
του βαθμού κινδύνου χαρακτηρίζει μία
επικείμενη επικίνδυνη κατάσταση.
Στην περίπτωση που δεν μπορεί να αποφευχθεί
αυτή η επικίνδυνη κατάσταση, μπορεί να προκληθεί θάνατος ή βαριοί τραυματισμοί.
► Τηρείτε τις οδηγίες σε αυτή την υπόδειξη προ-
ειδοποίησης ώστε να αποφευχθεί ο κίνδυνος
θανάτου ή βαριών σωματικών τραυματισμών.
ΠΡΟΕΙΔΟΠΟΙΗΣΗ
Μία υπόδειξη προειδοποίησης αυτού
του βαθμού κινδύνου χαρακτηρίζει μία
πιθανή επικίνδυνη κατάσταση.
Στην περίπτωση που δεν μπορεί να αποφευχθεί
αυτή η επικίνδυνη κατάσταση, μπορεί να προκληθούν τραυματισμοί.
► Οι οδηγίες σε αυτή την υπόδειξη προειδο-
ποίησης γίνονται ώστε να αποφεύγονται
σωματικοί τραυματισμοί.
GR
CY
ΠΡΟΣΟΧΗ
Μία υπόδειξη προειδοποίησης αυτού
του βαθμού κινδύνου χαρακτηρίζει μία
πιθανή υλική ζημιά.
Στην περίπτωση που δεν μπορεί να αποφευχθεί
αυτή η κατάσταση, μπορεί να προκληθούν
υλικές ζημιές.
► Τηρείτε τις οδηγίες σε αυτή την υπόδειξη
προειδοποίησης ώστε να αποφεύγονται
υλικές ζημιές.
ΥΠΟΔΕΙΞΗ
► Μία υπόδειξη χαρακτηρίζει επιπλέον πληρο-
φορίες που διευκολύνουν το χειρισμό της
συσκευής.
Ασφάλεια
Σε αυτό το κεφάλαιο λαμβάνετε σημαντικές υποδείξεις ασφαλείας για το χειρισμό της συσκευής.
Αυτή η συσκευή ανταποκρίνεται στους προδιαγεγραμμένους κανόνες ασφαλείας. Μία μη
σύμφωνη με τους κανονισμούς χρήση μπορεί να
οδηγήσει σε σωματικές βλάβες και υλικές ζημιές.
PLPRS A1
27

ΚΙΝΔΥΝΟΣ
► Μη χρησιμοποιείτε τη συσκευή σε
σημεία όπου υπάρχει κίνδυνος
πυρκαγιάς ή έκρηξης, π.χ. κοντά
σε εύφλεκτα υγρά ή αέρια.
GR
CY
Χειρισμός των μπαταριών
ΠΡΟΕΙΔΟΠΟΙΗΣΗ
Κίνδυνος από εσφαλμένη
χρήση! Υπάρχει κίνδυνος
έκρηξης και διαρροής!
Για την ασφαλή χρήση των μπαταριών, τηρείτε τις ακόλουθες υποδείξεις ασφαλείας:
► Μην πετάτε τις μπαταρίες στη φωτιά.
► Μη γειώνετε τις μπαταρίες.
► Μη δοκιμάζετε να επαναφορτίζετε
τις μπαταρίες.
► Ελέγχετε τακτικά τις μπαταρίες. Το
εκρέον οξύ των μπαταριών μπορεί
να προκαλέσει μόνιμες βλάβες
στη συσκευή. Κατά το χειρισμό
φθαρμένων μπαταριών ή μπαταριών με διαρροή δίνετε ιδιαίτερη
προσοχή. Υπάρχει κίνδυνος χημικού εγκαύματος! Φοράτε γάντια
προστασίας.
► Φυλάτε τις μπαταρίες σε μη προ-
σβάσιμο μέρος για τα παιδιά. Σε
περίπτωση κατάποσης αναζητήστε
άμεσα ιατρική βοήθεια.
► Όταν δε χρησιμοποιείτε τη συ-
σκευή για μεγάλο χρονικό διάστημα, αφαιρείτε τις μπαταρίες.
Βασικές υποδείξεις ασφαλείας
Τηρείτε τις κάτωθι υποδείξεις ασφαλείας για έναν ασφαλή χειρισμό της
συσκευής:
■ Πριν από τη χρήση ελέγχετε τη συ-
σκευή ως προς εξωτερικές εμφανείς
φθορές. Μη θέτετε σε λειτουργία μία
28
PLPRS A1

συσκευή που έχει υποστεί φθορές ή
έχει πέσει κάτω.
■ Μην κάνετε αυθαίρετες μετατροπές ή
τροποποιήσεις στη συσκευή.
■ Αυτή η συσκευή επιτρέπεται να χρησι-
μοποιείται από παιδιά άνω των 8 ετών
καθώς και από άτομα με περιορισμένες φυσικές, αισθητηριακές ή νοητικές
ικανότητες ή ελλείψεις από άποψη
εμπειρίας και γνώσεων, εφόσον επιτηρούνται ή έχουν ενημερωθεί αναφορικά με την ασφαλή χρήση της συσκευής και κατανοούν τους προκύπτοντες
κινδύνους. Τα παιδιά δεν επιτρέπεται
να παίζουν με τη συσκευή. Ο καθαρισμός και η συντήρηση του χρήστη
δεν επιτρέπεται να διεξάγονται από
παιδιά, χωρίς επιτήρηση.
■ Προστατεύετε τη συσκευή από την
υγρασία και την εισχώρηση υγρών.
GR
CY
■ Μη χρησιμοποιείτε τη συσκευή κοντά
σε εμφανείς φλόγες (π.χ. κεριά).
■ Αποφεύγετε την απευθείας ηλιακή
ακτινοβολία.
■ Αποφεύγετε μια μη ηθελημένη θέση
σε λειτουργία της συσκευής ρευστοποίησης κεριού. Βεβαιώνεστε ότι η
συσκευή ρευστοποίησης κεριού είναι
απενεργοποιημένη, προτού τη σηκώσετε ή τη μεταφέρετε.
■ Απενεργοποιείτε πάντα τη συσκευή
ρευστοποίησης κεριού από το συρόμενο διακόπτη (Θέση OFF), όταν την
αποθέτετε κάπου.
■ Αποφεύγετε επαφή του δέρματος με
τη μύτη της συσκευής ρευστοποίησης
κεριού και προστατεύεστε από το κερί
που στάζει. Υπάρχει κίνδυνος εγκαύματος!
PLPRS A1
29

GR
CY
Θέση σε λειτουργία
ΚΙΝΔΥΝΟΣ
Κατά τη θέση σε λειτουργία της συσκευής
μπορεί να προκληθούν σωματικοί τραυματισμοί και υλικές ζημιές!
► Τα υλικά συσκευασίας δεν επιτρέπεται να
χρησιμοποιούνται για παιχνίδι. Υπάρχει
κίνδυνος ασφυξίας.
Παραδοτέος εξοπλισμός και
έλεγχος μεταφοράς
Το σετ επιδιόρθωσης λαμινέϊτ/παρκέ παραδίδεται
κανονικά με τα εξής στοιχεία:
▯ Συσκευή ρευστοποίησης κεριού
▯ Ξύστρα καθαρισμού
▯ Σπάτουλα με λειτουργία κοπής
▯ Στρογγυλεμένη σπάτουλα
▯ 11 Ράβδοι σκληρού κεριού
▯ Σφουγγάρι λείανσης
▯ Πανί καθαρισμού
▯ 2 μπαταρίες 1,5 V τύπου AA/LR6/Mignon
▯ Βαλιτσάκι αποθήκευσης
▯ Οι παρούσες οδηγίες χρήσης
ΥΠΟΔΕΙΞΗ
► Ελέγχετε τον παραδοτέο εξοπλισμό ως προς
την πληρότητα και για εμφανείς φθορές.
► Σε περίπτωση ελλιπούς παραδοτέου εξοπλι-
σμού ή ζημιών λόγω ελλιπούς συσκευασίας ή
λόγω μεταφοράς, απευθυνθείτε στην ανοικτή
τηλεφωνική γραμμή εξυπηρέτησης (βλ. κεφάλαιο Σέρβις).
Απόρριψη της συσκευασίας
Η συσκευασία προστατεύει τη συσκευή από
φθορές κατά τη μεταφορά. Τα υλικά συσκευασίας έχουν επιλεγεί σύμφωνα με τους οικολογικούς
παράγοντες και τους παράγοντες της τεχνικής
απόρριψης και για το λόγο αυτό είναι ανακυκλώσιμα. Η επιστροφή της συσκευασίας στο κύκλωμα υλικών εξοικονομεί πρώτες ύλες και μειώνει
την ποσότητα των απορριμμάτων. Απορρίπτετε
τα υλικά συσκευασίας που δεν χρησιμοποιούνται πλέον σύμφωνα με τις τοπικές ισχύουσες
προδιαγραφές.
30
PLPRS A1
Τοποθέτηση / Αλλαγή της
μπαταρίας
Για τη λειτουργία της συσκευής ρευστοποίησης
κεριού απαιτούνται 2 μπαταρίες 1,5 V τύπου
AA/LR6/Mignon.
♦ Ανοίξτε τη θήκη μπαταριών
ρά της συσκευής ρευστοποίησης κεριού
♦ Τοποθετήστε τις μπαταρίες στη θήκη μπατα-
λαμβάνοντας υπόψη την απεικονιζό-
ριών
μενη επάνω στη συσκευή πολικότητα.
♦ Κλείστε πάλι το καπάκι της θήκης μπαταριών.
στην κάτω πλευ-
Στοιχεία χειρισμού
Συσκευή ρευστοποίησης κεριού
Μύτη συσκευής ρευστοποίησης κεριού
Διακόπτης On / Off
Κουμπί ενεργοποίησης
Θήκη μπαταριών
Ξύστρα καθαρισμού
Σπάτουλα με λειτουργία κοπής
Στρογγυλεμένη σπάτουλα
Σφουγγάρι λείανσης
Πανί καθαρισμού
.
GR
CY
Χειρισμός και λειτουργία
Σε αυτό το κεφάλαιο λαμβάνετε σημαντικές υποδείξεις για το χειρισμό και τη λειτουργία της συσκευής.
Ενεργοποίηση / απενεργοποίηση
συσκευής
♦ Ωθήστε το διακόπτη On / Off στη θέση
ON, για να ενεργοποιήσετε τη συσκευή
♦ Πιέστε και κρατήστε το κουμπί ενεργοποίη-
, για να θερμάνετε τη μύτη της συσκευ-
σης
ής ρευστοποίησης κεριού
♦ Ωθήστε το διακόπτη On / Off
OFF, για να απενεργοποιήσετε τη συσκευή.
Παράδειγμα χρήσης
Προετοιμασία (Εικ. A)
♦ Καθαρίστε το ελαττωματικό σημείο με τη σπά-
τουλα
τμήματα. Πιέστε τα άκρα του ελαττωματικού
σημείου ώστε να στρογγυλέψουν.
Επιλογή χρώματος (Εικ. B)
♦ Επιλέξτε τους κατάλληλους χρωματικούς τό-
νους. Θα χρησιμοποιούνται πάντα περισσότε-
ροι χρωματικοί τόνοι, από ανοιχτόχρωμοι έως
σκουρόχρωμοι. Στο πραγματικό ξύλο συστή-
νεται να χρησιμοποιείτε επιπρόσθετα διαφανές
(Κ), ώστε να επιτυγχάνεται διείσδυση εις βάθος.
και απομακρύνετε όλα τα χαλαρά
.
στη θέση
PLPRS A1
31
GR
CY
Τήξη και πλήρωση (Εικ. C + D)
♦ Ωθήστε το διακόπτη On / Off στη θέση
ON, για να ενεργοποιήσετε τη συσκευή.
♦ Πιέστε και κρατήστε το κουμπί ενεργοποίη-
, για να θερμάνετε τη μύτη της συσκευ-
σης
ής ρευστοποίησης κεριού
♦ Τώρα λιώστε μικρές δόσεις του σκληρού κε-
ριού και εφαρμόστε τις στο ελαττωματικό ση-
μείο, έως ότου αυτό υπερπληρωθεί. Ξεκινήστε
πρώτα με τους ανοιχτόχρωμους χρωματικούς
τόνους και προχωρήστε σταδιακά προς τους
σκουρόχρωμους χρωματικούς τόνους.
ΥΠΟΔΕΙΞΗ
► Στα βαθουλώματα αρκεί τις περισσότερες
φορές να χρησιμοποιείτε μόνο το διαφανές
σκληρό κερί (Κ).
.
Σπατουλάρισμα (Εικ. E)
♦ Σε κάθετες επιφάνειες συστήνεται να αναμι-
γνύετε προηγουμένως το χρωματικό τόνο, να
τον παίρνετε με τη σπάτουλα
γετε την πλήρωση. Σε εργασίες σε καμπύλες
πρέπει να χρησιμοποιείται η στρογγυλεμένη
σπάτουλα
σημείο με σκληρό κερί.
, ώστε να γεμίσει το ελαττωματικό
και να διεξά-
Λείανση και απομάκρυνση (Εικ. F)
♦ Αφήστε το σκληρό κερί να κρυώσει για μερικά
δευτερόλεπτα (περ. 10 δευτ.).
♦ Μόλις κρυώσει λειάνετε και απομακρύνετε το
υλικό που περισσεύει με τις ραβδώσεις πλανί-
σματος της σπάτουλας
υλικό που περισσεύει μόνο με ελαφριά πίεση.
. Απομακρύνετε το
Φινίρισμα (Εικ. G)
♦ Για το φινίρισμα αντιγράψτε τα νερά με έναν
πιο σκούρο χρωματικό τόνο.
♦ Στη συνέχεια απομακρύνετε πάλι το υλικό που
περισσεύει με τις ραβδώσεις πλανίσματος της
σπάτουλας
.
Καθαρισμός και γυάλισμα (Εικ. Η)
♦ Τέλος απομακρύνετε και τα τελευταία υπολείμ-
ματα σκληρού κεριού με το σφουγγάρι λείαν-
. Έτσι προσαρμόζεται ταυτόχρονα ο
σης
βαθμός γυαλάδας της επιφάνειας. Έτοιμο!
Καθαρισμός των ραβδώσεων
πλανίσματος (Εικ. Ι)
♦ Τοποθετήστε την ξύστρα καθαρισμού
επάνω στην κρύα μύτη της συσκευής ρευστο-
ποίησης κεριού
κεριού για να τα απομακρύνετε από τις
ραβδώσεις.
και ξύστε τα υπολείμματα
32
PLPRS A1
Διόρθωση σφαλμάτων
Σε αυτό το κεφάλαιο λαμβάνετε σημαντικές
υποδείξεις για τον εντοπισμό και τη διόρθωση
βλαβών.
Αιτίες σφαλμάτων και διόρθωση
Ο επόμενος πίνακας βοηθά στον εντοπισμό και
στη διόρθωση μικρότερων βλαβών:
δε
Πιθανή
αιτία
Οι μπαταρίες
έχουν τοποθετηθεί λάθος.
Οι μπαταρίες
είναι άδειες.
Διόρθωση
Τοποθετήστε
τις μπαταρίες
σύμφωνα με
την εικόνα
επάνω στη
συσκευή.
Τοποθετήστε
δύο νέες
μπαταρίες.
Σφάλμα
Η μύτη της
συσκευής ρευστοποίησης
κεριού
ζεσταίνεται.
ΥΠΟΔΕΙΞΗ
► Εάν δε μπορείτε να λύσετε το πρόβλημα με τα
ανωτέρω αναφερόμενα βήματα, τότε επικοινωνήστε με την ανοικτή τηλεφωνική γραμμή
εξυπηρέτησης (βλ. κεφάλαιο Σέρβις).
GR
CY
Καθαρισμός
ΠΡΟΣΟΧΗ
Ζημιά στη συσκευή!
► Βεβαιωθείτε ότι κατά τον καθαρισμό δεν
εισέρχεται υγρασία μέσα στη συσκευή, ώστε
να αποφύγετε ανεπανόρθωτη ζημιά της.
► Μη χρησιμοποιείτε χημικά ή τριβικά καθα-
ριστικά μέσα. Μπορεί να καταστρέψετε το
περίβλημα.
♦ Καθαρίζετε τη συσκευή ρευστοποίησης κε-
ριού
και τη μύτη της συσκευής ρευστοποίησης κεριού
το πανί καθαρισμού
μόνο σε κρύα κατάσταση με
.
Αποθήκευση
Εάν δε χρησιμοποιήσετε τη συσκευή για μεγάλο
χρονικό διάστημα, απομακρύνετε τις μπαταρίες.
Αποθηκεύετε όλα τα εξαρτήματα του σετ επιδιόρθωσης λαμινέϊτ/παρκέ στο βαλιτσάκι αποθήκευσης και σε έναν καθαρό, στεγνό χώρο χωρίς
απευθείας ηλιακή ακτινοβολία.
PLPRS A1
33

GR
CY
Απόρριψη
Απόρριψη συσκευής
Σε καμία περίπτωση μην απορρίπτετε
τη συσκευή στα οικιακά απορρίμματα.
Αυτό το προϊόν υπόκειται στην
Ευρωπαϊκή Οδηγία 2012/19/ΕU ΑΗΗΕ
(Απόβλητα ηλεκτρικού και ηλεκτρονικού εξοπλισμού).
Απορρίπτετε τη συσκευή μέσω μιας εγκεκριμένης
επιχείρησης απόρριψης ή μέσω της κοινοτικής
επιχείρησης απόρριψης. Τηρείτε τους ισχύοντες
κανονισμούς. Σε περίπτωση αμφιβολιών επικοινωνείτε με την αρμόδια επιχείρηση απόρριψης.
Απόρριψη των μπαταριών
Οι μπαταρίες δεν επιτρέπεται να απορρίπτονται στα οικιακά απορρίμματα. Κάθε καταναλωτής είναι νομικά υποχρεωμένος να παραδίδει
τις μπαταρίες σε ένα σημείο συλλογής της
κοινότητας / του δήμου του ή στο εμπορικό
κατάστημα.
Αυτή η υποχρέωση εξυπηρετεί στο να απομακρύνονται οι μπαταρίες με έναν φιλικό προς το
περιβάλλον τρόπο. Επιστρέφετε τις μπαταρίες
μόνο σε αποφορτισμένη κατάσταση.
Παράρτημα
Τεχνικά χαρακτηριστικά
Τροφοδοσία τάσης
μπαταρίες
Διαστάσεις περ. 14,7 x 3,5 x 2,5 εκ.
Βάρος (συμπεριλ.
μπαταριών)
2 x1,5 V
τύπου AA/LR6/
Mignon
περ. 80 γρ.
Εγγύηση
Έχετε για αυτή τη συσκευή 3 χρόνια εγγύηση
από την ημερομηνία αγοράς. Η συσκευή κατασκευάστηκε και ελέγχθηκε προσεκτικά πριν από
την αποστολή.
Παρακαλούμε φυλάξτε την απόδειξη ταμείου
ως απόδειξη για την αγορά. Σε περίπτωση εγγύησης ελάτε σε επικοινωνία με το τμήμα του σέρβις
τηλεφωνικά. Μόνο έτσι μπορεί να εξασφαλιστεί
μια δωρεάν αποστολή του εμπορεύματός σας.
ΥΠΟΔΕΙΞΗ
► Η απόδοση εγγύησης ισχύει μόνο για
σφάλματα υλικού ή κατασκευής, όχι ωστόσο για ζημιές από τη μεταφορά, για εξαρτήματα φθοράς ή για ζημιές σε εύθραυστά
εξαρτήματα, π.χ. διακόπτες.
34
PLPRS A1

Το προϊόν προορίζεται μόνο για την ιδιωτική και
όχι για την επαγγελματική χρήση. Σε περίπτωση
κακής μεταχείρισης και ακατάλληλης χρήσης,
σε χρήση βίας και σε παρεμβάσεις οι οποίες
δεν διεξήχθησαν από το εξουσιοδοτημένο μας
τμήμα σέρβις, η εγγύηση παύει να ισχύει.
Τα νομικά σας δικαιώματα δεν περιορίζονται μέσω
αυτής της εγγύησης. Ο χρόνος εγγύησης δεν
επεκτείνεται μέσω της εγγύησης. Αυτό ισχύει και
για εξαρτήματα τα οποία έχουν αντικατασταθεί
και επισκευαστεί.
Ενδεχόμενες ήδη υπάρχουσες κατά την αγορά
ζημιές και ελλείψεις πρέπει να ανακοινώνονται
αμέσως μετά την αποσυσκευασία, το αργότερο
όμως δύο ημέρες μετά την ημερομηνία αγοράς.
Μετά τη λήξη του χρόνου εγγύησης χρεώνονται
οι εμφανιζόμενες επισκευές.
Σέρβις
Σέρβις Ελλάδα
Tel.: 801 5000 019 (0,03 EUR/Min.)
E-Mail: kompernass@lidl.gr
IAN 270273
CY
Σέρβις Κύπρος
Tel.: 8009 4409
E-Mail: kompernass@lidl.com.cy
IAN 270273
Τηλεφωνικό κέντρο (Hotline): Δευτέρα έως
Παρασκευή, 8:00 – 20:00 (CET)
GR
CY
Εισαγωγέας
KOMPERNASS HANDELS GMBH
BURGSTRASSE 21
44867 BOCHUM
GERMANY
www.kompernass.com
PLPRS A1
35

36
PLPRS A1

Inhaltsverzeichnis
Einleitung ......................38
Haftungsbeschränkung.................38
Bestimmungsgemäße Verwendung........38
Verwendete Warnhinweise..............39
Sicherheit ......................39
Umgang mit Batterien..................40
Grundlegende Sicherheitshinweise........40
Inbetriebnahme .................42
Lieferumfang und Transportinspektion......42
Entsorgung der Verpackung .............42
Batterie einlegen / wechseln .............43
Bedienelemente .................43
Bedienung und Betrieb ...........43
Gerät ein- /ausschalten.................43
Anwendungsbeispiel...................43
Fehlerbehebung.................45
Fehlerursachen und Behebung ...........45
Reinigung ......................45
Lagerung ......................45
Entsorgung . . . . . . . . . . . . . . . . . . . . .46
Gerät entsorgen ......................46
Batterien entsorgen....................46
Anhang ........................46
Technische Daten .....................46
Garantie ............................46
Service .............................47
Importeur ...........................47
DE
AT
CH
PLPRS A1
37

DE
AT
CH
Einleitung
Herzlichen Glückwunsch zum Kauf Ihres neuen
Gerätes.
Sie haben sich damit für ein hochwertiges Produkt
entschieden. Die Bedienungsanleitung ist Bestandteil dieses Produkts. Sie enthält wichtige Hinweise
für Sicherheit, Gebrauch und Entsorgung. Machen
Sie sich vor der Benutzung des Produkts mit allen
Bedien- und Sicherheitshinweisen vertraut. Benutzen Sie das Produkt nur wie beschrieben und für
die angegebenen Einsatzbereiche. Bewahren Sie
diese Bedienungsanleitung gut auf. Händigen Sie
alle Unterlagen bei Weitergabe des Produkts an
Dritte mit aus.
Haftungsbeschränkung
Alle in dieser Bedienungsanleitung enthaltenen
technischen Informationen, Daten und Hinweise
für den Anschluss und die Bedienung entsprechen
dem letzten Stand bei Drucklegung und erfolgen
unter Berücksichtigung unserer bisherigen Erfahrungen und Erkenntnisse nach bestem Wissen. Aus
den Angaben, Abbildungen und Beschreibungen
in dieser Bedienungsanleitung können keine
Ansprüche hergeleitet werden. Der Hersteller
übernimmt keine Haftung für Schäden aufgrund
von Nichtbeachtung der Bedienungsanleitung,
nicht bestimmungsgemäßer Verwendung, unsachgemäßen Reparaturen, unerlaubt vorgenommener
Veränderungen oder Verwendung nicht zugelassener Ersatzteile.
Bestimmungsgemäße Verwendung
Das Laminat- /Parkett-Reparatur-Set ist zur Reparatur
von Laminat, Parkett, Kork, Holzoberflächen und
Kunststoffoberflächen bestimmt. Der im Lieferumfang enthaltene Wachsschmelzer ist ausschließlich
zum Schmelzen von hierfür geeignetem Hartwachs
vorgesehen. Das Gerät ist ausschließlich für den
privaten Gebrauch bestimmt. Verwenden Sie das
Gerät nicht für gewerbliche oder industrielle
Zwecke. Setzen Sie das Gerät nur in trockener
Umgebung bzw. in Innenräumen ein. Eine andere
oder darüber hinausgehende Benutzung gilt als
nicht bestimmungsgemäß. Ansprüche jeglicher
Art wegen Schäden aus nicht bestimmungsgemäßer
Verwendung sind ausgeschlossen. Das Risiko
trägt allein der Benutzer.
38
PLPRS A1

Verwendete Warnhinweise
In der vorliegenden Bedienungsanleitung werden
folgende Warnhinweise verwendet:
GEFAHR
Ein Warnhinweis dieser Gefahrenstufe
kennzeichnet eine drohende gefährliche
Situation.
Falls die gefährliche Situation nicht vermieden
wird, kann dies zum Tod oder zu schweren
Verletzungen führen.
► Die Anweisungen in diesem Warnhinweis
befolgen, um die Gefahr des Todes oder
schwerer Verletzungen von Personen zu
vermeiden.
WARNUNG
Ein Warnhinweis dieser Gefahrenstufe
kennzeichnet eine mögliche gefährliche
Situation.
Falls die gefährliche Situation nicht vermieden
wird, kann dies zu Verletzungen führen.
► Die Anweisungen in diesem Warnhinweis
befolgen, um Verletzungen von Personen zu
vermeiden.
DE
AT
CH
ACHTUNG
Ein Warnhinweis dieser Gefahrenstufe
kennzeichnet einen möglichen Sachschaden.
Falls die Situation nicht vermieden wird, kann
dies zu Sachschäden führen.
► Die Anweisungen in diesem Warnhinweis
befolgen, um Sachschäden zu vermeiden.
HINWEIS
► Ein Hinweis kennzeichnet zusätzliche
Informationen, die den Umgang mit dem
Gerät erleichtern.
Sicherheit
In diesem Kapitel erhalten Sie wichtige Sicherheitshinweise im Umgang mit dem Gerät. Dieses Gerät
entspricht den vorgeschriebenen Sicherheitsbestimmungen. Ein unsachgemäßer Gebrauch kann
zu Personen- und Sachschäden führen.
GEFAHR
► Benutzen Sie das Gerät nicht
an Orten, wo Feuergefahr oder
Explosionsgefahr besteht, z. B. in
der Nähe von brennbaren Flüssigkeiten oder Gasen.
PLPRS A1
39

DE
AT
CH
Umgang mit Batterien
WARNUNG
Gefahr durch nicht ordnungsgemäße Verwendung!
Es besteht Explosions- und
Auslaufgefahr!
Für den sicheren Umgang mit Batterien beachten Sie folgende Sicherheitshinweise:
► Werfen Sie Batterien nicht ins Feuer.
► Schließen Sie Batterien nicht kurz.
► Versuchen Sie nicht, Batterien
wieder aufzuladen.
► Überprüfen Sie regelmäßig die
Batterien. Ausgetretene Batteriesäure kann dauerhafte Schäden
am Gerät verursachen. Im Umgang
mit beschädigten oder ausgelaufenen Batterien besondere Vorsicht
walten lassen. Es besteht Verätzungsgefahr! Schutzhandschuhe tragen.
► Batterien für Kinder unzugänglich
aufbewahren. Bei Verschlucken
umgehend einen Arzt aufsuchen.
► Entnehmen Sie die Batterien, wenn
Sie das Gerät längere Zeit nicht
benutzen.
Grundlegende
Sicherheitshinweise
Beachten Sie für einen sicheren
Umgang mit dem Gerät die folgenden
Sicherheitshinweise:
■ Kontrollieren Sie das Gerät vor der
Verwendung auf äußere, sichtbare
Schäden. Nehmen Sie ein beschädigtes
oder heruntergefallenes Gerät nicht in
Betrieb.
■ Nehmen Sie keine eigenmächtigen
Umbauten oder Veränderungen an
dem Gerät vor.
40
PLPRS A1

■ Dieses Gerät kann von Kindern ab 8
Jahren und darüber sowie von Personen
mit verringerten physischen, sensorischen
oder mentalen Fähigkeiten oder Mangel an Erfahrung und Wissen benutzt
werden, wenn sie beaufsichtigt oder
bezüglich des sicheren Gebrauchs
des Gerätes unterwiesen wurden und
die daraus resultierenden Gefahren
verstehen. Kinder dürfen nicht mit dem
Gerät spielen. Reinigung und BenutzerWartung dürfen nicht von Kindern
ohne Beaufsichtigung durchgeführt
werden.
■ Schützen Sie das Gerät vor Feuchtigkeit
und dem Eindringen von Flüssigkeiten.
■ Betreiben Sie das Gerät nicht in der
Nähe von offenen Flammen
(z. B. Kerzen).
■ Vermeiden Sie direkte Sonnenein-
strahlung.
DE
AT
CH
■ Vermeiden Sie eine unbeabsichtigte
Inbetriebnahme des Wachsschmelzers.
Vergewissern Sie sich, dass der Wachsschmelzer ausgeschaltet ist, bevor Sie
diesen aufnehmen oder tragen.
■ Schalten Sie den Wachsschmelzer
immer am Schiebeschalter aus
(Position OFF), wenn Sie diesen aus
der Hand legen.
■ Vermeiden Sie Hautkontakt mit der
Wachsschmelzerspitze und schützen
Sie sich vor tropfendem Wachs.
Es besteht Verbrennungsgefahr!
PLPRS A1
41

Inbetriebnahme
GEFAHR
Bei der Inbetriebnahme des Gerätes
können Personen- und Sachschäden
auftreten!
► Verpackungsmaterialien dürfen nicht zum
Spielen verwendet werden. Es besteht
Erstickungsgefahr.
DE
AT
CH
Lieferumfang und Transportinspektion
Das Laminat- /Parkett-Reparatur-Set wird standardmäßig mit folgenden Komponenten geliefert:
▯ Wachsschmelzer
▯ Reinigungsschaber
▯ Spachtel mit Hobelfunktion
▯ Spachtel mit Rundung
▯ 11 x Hartwachsstangen
▯ Schleifschwamm
▯ Reinigungstuch
▯ 2 x 1.5 V-Batterien Typ AA/LR6/Mignon
▯ Aufbewahrungskoffer
▯ Diese Bedienungsanleitung
HINWEIS
► Prüfen Sie die Lieferung auf Vollständigkeit
und auf sichtbare Schäden.
► Bei einer unvollständigen Lieferung oder
Schäden infolge mangelhafter Verpackung
oder durch Transport wenden Sie sich an die
Service-Hotline (siehe Kapitel Service).
Entsorgung der Verpackung
Die Verpackung schützt das Gerät vor Transportschäden. Die Verpackungsmaterialien sind nach
umweltverträglichen und entsorgungstechnischen
Gesichtspunkten ausgewählt und deshalb recyclebar. Die Rückführung der Verpackung in den
Materialkreislauf spart Rohstoffe und verringert
das Abfallaufkommen. Entsorgen Sie nicht mehr
benötigte Verpackungsmaterialien gemäß den
örtlich geltenden Vorschriften.
42
PLPRS A1

Batterie einlegen / wechseln
Der Wachsschmelzer benötigt zum Betrieb
2 x 1,5 V-Batterien Typ AA/LR6/Mignon.
♦ Öffnen Sie das Batteriefach
seite des Wachsschmelzers
♦ Legen Sie die Batterien, unter Berücksich-
tigung der auf dem Gerät angegebenen
Polarität, in das Batteriefach
♦ Schließen Sie den Batteriefachdeckel wieder.
an der Unter-
.
ein.
Bedienelemente
Wachsschmelzer
Wachsschmelzerspitze
Ein-/Ausschalter
Aktivierungsknopf
Batteriefach
Reinigungsschaber
Spachtel mit Hobelfunktion
Spachtel mit Rundung
Schleifschwamm
Reinigungstuch
DE
AT
CH
Bedienung und Betrieb
In diesem Kapitel erhalten Sie wichtige Hinweise
zur Bedienung und Betrieb des Gerätes.
Gerät ein- /ausschalten
♦ Schieben Sie den Ein-/Ausschalter in die
Position ON, um das Gerät einzuschalten
♦ Drücken und halten Sie den Aktivierungsknopf
um die Wachsschmelzerspitze
♦ Schieben Sie den Ein-/Ausschalter
Position OFF, um das Gerät auszuschalten.
Anwendungsbeispiel
Vorbereiten (Abb. A)
♦ Reinigen Sie die Schadstelle mit dem Spachtel
und entfernen Sie alle losen Teile. Drücken Sie
den Schadensrand rund.
Farbauswahl (Abb. B)
♦ Wählen Sie die passenden Farbtöne aus.
Achten Sie darauf, dass immer mehrere Farbtöne von hell bis dunkel eingesetzt werden.
Bei Echtholz empfiehlt es sich zusätzlich mit
Transparent (K) zu arbeiten, um eine Tiefenwirkung zu erzielen.
aufzuheizen.
,
in die
PLPRS A1
43

DE
AT
CH
Schmelzen und Füllen (Abb. C + D)
♦ Schieben Sie den Ein-/Ausschalter in die
Position ON, um das Gerät einzuschalten.
♦ Drücken und halten Sie den Aktivierungs-
knopf
aufzuheizen.
♦ Schmelzen Sie nun kleine Portionen des
Hartwachses ab und bringen Sie sie in die
Schadstelle ein, bis diese leicht überfüllt ist.
Beginnen Sie zuerst mit den hellen Farbtönen
und arbeiten Sie sich Schritt für Schritt zu den
dunklen Farbtönen vor.
HINWEIS
► Bei Druckstellen reicht es meistens aus, wenn
Sie nur das transparente Hartwachs (K)
verwenden.
, um die Wachsschmelzerspitze
Spachteln (Abb. E)
♦ Bei senkrechten Flächen empfiehlt es sich, den
Farbton vorher anzumischen, mit dem Spach-
aufzunehmen und einzufüllen. Bei
tel
Arbeiten an Rundungen sollte der Spachtel
mit Rundung
Hartwachs in die Schadstelle einzufüllen.
verwendet werden, um das
Abtragen (Abb. F)
♦ Lassen Sie den Hartwachs einige Sekunden
(ca. 10 s) abkühlen.
♦ Nach dem Erkalten tragen Sie die Überstände
mit den Hobelrillen des Spachtels
Sie die Überstände nur mit leichten Druck ab.
ab. Tragen
Feinabstimmung (Abb. G)
♦ Zur Feinabstimmung ahmen Sie nun die Ma-
serung mit einem dunkleren Farbton nach.
♦ Tragen Sie anschließend die Überstände wie-
der mit den Hobelrillen des Spachtels
Entfetten (Abb. H)
♦ Entfernen Sie zum Schluss noch die letzten
Hartwachsreste mit dem Schleifschwamm
Dadurch wird auch gleichzeitig der Glanzgrad der Oberfläche angepasst. Fertig!
Reinigung der Hobelrillen (Abb. I)
♦ Setzen Sie den Reinigungsschaber auf die
abgekühlte Wachsschmelzerspitze
schaben Sie die Wachsrückstände von den
Hobelrillen ab.
und
ab.
.
44
PLPRS A1

Fehlerbehebung
In diesem Kapitel erhalten Sie wichtige Hinweise
zur Störungslokalisierung und Störungsbehebung.
Fehlerursachen und Behebung
Die nachfolgende Tabelle hilft bei der Lokalisierung und Behebung kleinerer Störungen:
Fehler
Die Wachsschmelzerspitze
wird nicht
heiß.
HINWEIS
► Wenn Sie mit den vorstehend genannten
Schritten das Problem nicht lösen können,
wenden Sie sich bitte an die Service-Hotline
(siehe Kapitel Service)
Mögliche
Ursache
Die Batterien
sind falsch
eingelegt.
Die Batterien
sind entladen.
Behebung
Legen Sie die
Batterien, entsprechend der
Abbildung auf
dem Gerät,
ein.
Legen Sie
zwei neue
Batterien ein.
DE
AT
CH
Reinigung
ACHTUNG
Beschädigung des Gerätes!
► Stellen Sie sicher, dass bei der Reinigung keine
Feuchtigkeit in das Gerät eindringt, um eine
irreparable Beschädigung des Gerätes zu
vermeiden.
► Benutzen Sie keine chemischen oder scheu-
ernden Putzmittel. Sie können das Gehäuse
beschädigen.
♦ Reinigen Sie den Wachsschmelzer
Wachsschmelzerspitze
Zustand mit dem Reinigungstuch
nur im abgekühlten
.
Lagerung
Sollten Sie das Gerät längere Zeit nicht benutzen, entnehmen Sie die Batterien. Lagern Sie alle
Teile des Laminat- /Parkett-Reparatur-Sets in dem
Aufbewahrungskoffer und an einem sauberen,
trockenen Ort ohne direkte Sonneneinstrahlung.
und die
PLPRS A1
45

DE
AT
CH
Entsorgung
Gerät entsorgen
Werfen Sie das Gerät keinesfalls in
den normalen Hausmüll. Dieses
Produkt unterliegt der europäischen
Richtlinie 2012/19/EU WEEE (Waste
Electrical and Electronic Equipment).
Entsorgen Sie das Gerät über einen zugelassenen Entsorgungsbetrieb oder über Ihre kommunale Entsorgungseinrichtung. Beachten Sie die
aktuell geltenden Vorschriften. Setzen Sie sich im
Zweifelsfall mit Ihrer Entsorgungseinrichtung in
Verbindung.
Batterien entsorgen
Batterien dürfen nicht im Hausmüll entsorgt
werden. Jeder Verbraucher ist gesetzlich
verpflichtet, Batterien bei einer Sammelstelle
seiner Gemeinde / seines Stadtteils oder im
Handel abzugeben.
Diese Verpflichtung dient dazu, dass Batterien einer
umweltschonenden Entsorgung zugeführt werden
können. Geben Sie Batterien nur im entladenen
Zustand zurück.
Anhang
Technische Daten
Spannungsversorgung
Batterien
Abmessungen ca. 14,7 x 3,5 x 2,5 cm
Gewicht (inkl. Batterien) ca. 80 g
Garantie
Sie erhalten auf dieses Gerät 3 Jahre Garantie
ab Kaufdatum. Das Gerät wurde sorgfältig produziert und vor Auslieferung gewissenhaft geprüft.
Bitte bewahren Sie den Kassenbon als Nachweis
für den Kauf auf. Bitte setzen Sie sich im Garantiefall mit Ihrer Servicestelle telefonisch in Verbindung.
Nur so kann eine kostenlose Einsendung Ihrer
Ware gewährleistet werden.
HINWEIS
►
Die Garantieleistung gilt nur für Materialoder Fabrikationsfehler, nicht aber für
Transportschäden, Verschleißteile oder für
Beschädigungen an zerbrechlichen Teilen,
z. B. Schalter oder Akkus.
Das Produkt ist nur für den privaten und nicht für
den gewerblichen Gebrauch bestimmt.
2 x 1,5 V
Typ AA/LR6/Mignon
46
PLPRS A1

Bei missbräuchlicher und unsachgemäßer Behandlung, Gewaltanwendung und bei Eingriffen, die
nicht von unserer autorisierten Service-Niederlassung vorgenommen wurden, erlischt die Garantie.
Ihre gesetzlichen Rechte werden durch diese
Garantie nicht eingeschränkt.
Die Garantiezeit wird durch die Gewährleistung
nicht verlängert. Dies gilt auch für ersetzte und
reparierte Teile.
Eventuell schon beim Kauf vorhandene Schäden
und Mängel müssen sofort nach dem Auspacken
gemeldet werden, spätestens aber zwei Tage
nach Kaufdatum.
Nach Ablauf der Garantiezeit anfallende Reparaturen sind kostenpflichtig.
Service
Service Deutschland
Tel.: 0800 5435 111 (Kostenfrei aus dem
dt. Festnetz/Mobilfunknetz)
E-Mail: kompernass@lidl.de
IAN 270273
Service Österreich
Tel.: 0820 201 222 (0,15 EUR/Min.)
E-Mail: kompernass@lidl.at
IAN 270273
DE
AT
CH
Service Schweiz
Tel.: 0842 665566 (0,08 CHF/Min.,
Mobilfunk max. 0,40 CHF/Min.)
E-Mail: kompernass@lidl.ch
IAN 270273
Erreichbarkeit Hotline:
Montag bis Freitag von 8:00 Uhr – 20:00 Uhr (MEZ)
Importeur
KOMPERNASS HANDELS GMBH
BURGSTRASSE 21
44867 BOCHUM
GERMANY
www.kompernass.com
PLPRS A1
47

48
PLPRS A1

KOMPERNASS HANDELS GMBH
BURGSTRASSE 21
44867 BOCHUM
DEUTSCHLAND / GERMANY
www.kompernass.com
Last Information Update · Stanje informacija
Έκδοση των πληροφοριών · Stand der Informationen:
05 / 2015 · Ident.-No.: PLPRSA1-052015-2
IAN 270273
7
 Loading...