

Page 1
SET DE RÉPARATION POUR
PARQUET PLPRS A1
SET DE RÉPARATION POUR PARQUET
Mode d’emploi
LAMINAT-/PARKETT-REPARATURSET
Bedienungsanleitung
LAMINATE/PARQUET REPAIR SET
Operating instructions
IAN 78554
Page 2
Avant de lire le mode d‘emploi, ouvrez la page contenant
les illustrations et familiarisez-vous ensuite avec toutes les
fonctions de l‘appareil.
Klappen Sie vor dem Lesen die Seite mit den Abbildungen aus
und machen Sie sich anschließend mit allen Funktionen des
Gerätes vertraut.
Before reading, unfold the page containing the illustrations
and familiarise yourself with all functions of the device.
FR / BE Mode d’emploi Page 1
DE / AT / CH Bedienungsanleitung Seite 11
GB Operating instructions Page 21
Page 3
A B
C D
E F
G H
I
Page 4

Sommaire
Introduction . . . . . . . . . . . . . . . . . . . . .2
Limitation de responsabilité. . . . . . . . . . . . . . . 2
Utilisation conforme . . . . . . . . . . . . . . . . . . . . 2
Avertissements utilisés . . . . . . . . . . . . . . . . . . . 3
Sécurité. . . . . . . . . . . . . . . . . . . . . . . . .3
Maniement des piles. . . . . . . . . . . . . . . . . . . . 4
Consignes de sécurité fondamentales . . . . . . 4
Mise en service. . . . . . . . . . . . . . . . . . .5
Accessoires fournis et inspection de transport 5
Élimination de l'emballage . . . . . . . . . . . . . . . 5
Mise en place / remplacement des piles . . . . 6
Éléments d'utilisation. . . . . . . . . . . . . .6
Fonctionnement et opération . . . . . . .6
Mise en marche/arrêt de l'appareil . . . . . . . . 6
Exemple d'application . . . . . . . . . . . . . . . . . . 6
Dépannage. . . . . . . . . . . . . . . . . . . . . .8
Causes des pannes et remèdes . . . . . . . . . . . 8
Nettoyage . . . . . . . . . . . . . . . . . . . . . .8
Entreposage . . . . . . . . . . . . . . . . . . . . .8
Mise au rebut . . . . . . . . . . . . . . . . . . . .9
Mise au rebut de l'appareil . . . . . . . . . . . . . . 9
Mise au rebut des piles. . . . . . . . . . . . . . . . . . 9
Annexe . . . . . . . . . . . . . . . . . . . . . . . . .9
Caractéristiques techniques . . . . . . . . . . . . . . 9
Service après-vente. . . . . . . . . . . . . . . . . . . . . 9
Importateur . . . . . . . . . . . . . . . . . . . . . . . . . . . 9
FR
BE
PLPRS A1
1
Page 5

FR
BE
Introduction
Toutes nos félicitations pour l'achat de votre nouvel
appareil.
Vous avez choisi un produit de grande qualité.
Le mode d'emploi fait partie de ce produit. Il
contient des remarques importantes concernant
la sécurité, l'usage et la mise au rebut. Avant
l'usage, veuillez vous familiariser avec toutes les
consignes d'opération et de sécurité. N'utilisez
le produit que conformément aux consignes et
pour les domaines d'utilisation prévus. Veuillez
conserver soigneusement le mode d'emploi. Si
vous cédez le produit à un tiers, remettez-lui
également ces instructions d'utilisation.
Limitation de responsabilité
L'ensemble des informations, données et remarques
techniques se rapportant au raccordement et
à l'opération contenues dans le présent mode
d'emploi sont conformes au dernier état lors du
passage en presse en tenant compte de nos
expériences passées et de nos connaissances en
toute bonne foi. Aucune prétention ne peut être
dérivée des indications, photos et descriptions
contenues dans les présentes instructions d'utilisation. Le fabricant n'endosse aucune responsabilité
pour les dommages résultant du non-respect du
mode d'emploi, d'un usage non conforme, de
réparations non agréées, de modifi cations non
autorisées ou de l'emploi de pièces de rechange
non agréées.
Utilisation conforme
Ce kit sert à réparer les sols stratifi és, les parquets,
sols en liège, surfaces en bois et en matière
synthétique. Le dispositif fondeur de cire livré d'origine sert exclusivement à faire fondre la cire dure
adaptée à ce domaine d'application. Cet appareil
est exclusivement destiné à un usage privé.
N'utilisez pas l'appareil à des fi ns commerciales
ou industrielles. Ne mettez l'appareil en œuvre
que dans un environnement sec ou à l'intérieur de
locaux. Tout usage divergent ou toute utilisation
ne respectant pas les recommandations d'emploi
seront considérés comme non conformes. Aucune
réclamation pour dommages résultant d'un usage
non conforme ne sera prise en considération.
L'utilisateur assume seul le risque.
2
PLPRS A1
Page 6
Avertissements utilisés
Les avertissements suivants sont utilisés dans ce
mode d'emploi :
DANGER
Un avertissement de ce niveau de
danger caractérise une situation qui
menace de devenir dangereuse.
Si la situation dangereuse n'est pas évitée, cela
peut entraîner la mort ou des accidents dangereux.
► Il faut impérativement suivre les instructions de
cet avertissement, pour éviter le danger de
mort ou d'accidents graves.
AVERTISSEMENT
Un avertissement de ce niveau de danger
signale une situation potentiellement
dangereuse.
Des accidents peuvent résulter de l'incapacité à
éviter la situation dangereuse.
► Voilà pourquoi il est important de suivre les
instructions fi gurant dans cet avertissement,
pour éviter que des personnes ne soient
blessées.
ATTENTION
Un avertissement de ce niveau danger
signale un risque de dégâts matériels.
Si vous ne pouvez éviter la situation dangereuse,
cela peut entraîner des dommages matériels.
► Suivre les instructions dans cet avertissement,
pour éviter tous dommages matériels.
FR
BE
REMARQUE
Une remarque signale des informations
►
supplémentaires qui facilitent la manipulation
de l'appareil.
Sécurité
Ce chapitre contient des consignes de sécurité
importantes se rapportant à la manipulation
de l'appareil. Cet appareil est conforme aux
consignes de sécurité prescrites. Tout usage non
conforme peut entraîner des dommages personnels et matériels.
DANGER
►
N'utilisez pas l'appareil dans des endroits
exposés à un risque d'incendie ou d'explosion, par ex. à proximité de liquides ou de
gaz infl ammables.
PLPRS A1
3
Page 7

FR
BE
Maniement des piles
AVERTISSEMENT
Risque suite à une utilisation inadéquate !
Risque d'explosion et de fuite !
Veuillez respecter les consignes de sécurité
suivantes pour assurer la manipulation des piles
en toute sécurité :
► Ne jetez pas les piles au feu.
► Ne court-circuitez pas les piles.
► N'essayez pas de recharger les piles.
► Vérifi ez régulièrement les piles. Des fuites
d'acide de pile peuvent sérieusement endommager l'appareil. Opérez avec une prudence
particulière des piles endommagées ou
usagées. Risque de vous brûler au contact de
l'acide ! Porter des gants de protection.
► Conserver les piles hors de portée des
enfants. Consulter immédiatement un médecin
en cas d'incident (avalement).
► Si vous n'utilisez pas l'appareil pendant une
durée prolongée, retirez les piles.
Consignes de sécurité
fondamentales
Veuillez vous conformer aux consignes de sécurité ci-après afi n de garantir la sécurité d'utilisation de l'appareil :
■ Vérifi ez la présence de dommages visibles
extérieurs avant l'usage de l'appareil. Ne mettez pas en service un appareil endommagé
ou ayant subi une chute.
■ Ne procédez pas à des transformations
ou des modifi cations sur l'appareil de votre
propre initiative.
■ Cet appareil n'est pas prévu pour être utilisé
par des personnes (y compris des enfants)
dont les capacités physiques, sensorielles ou
mentales présentent des défi ciences ou dont
le manque d'expérience ou de connaissances
les empêche d'opérer l'appareil en toute
sécurité, les empêche d'assurer un usage sûr
du produit, à moins qu'ils ne soient surveillés
ou qu'ils aient été initiés au préalable par les
personnes responsables de leur sécurité.
■ Les enfants doivent être surveillés afi n d'éviter
qu'ils ne jouent avec l'appareil.
■ Protégez l'appareil de l'humidité et de la
pénétration de liquides.
■ N'utilisez pas l'appareil à proximité de
fl ammes nues (de bougies par exemple).
■ Évitez l'exposition directe au soleil.
4
PLPRS A1
Page 8

■ Évitez toute mise en service involontaire
du dispositif fondeur de cire. Veillez bien à
éteindre le dispositif fondeur de cire avant de
le saisir ou de le transporter.
■ Éteignez toujours le dispositif fondeur de cire
par l'interrupteur à curseur (position OFF)
lorsque vous le déposez.
■ Évitez tout contact cutané avec la pointe faisant
fondre la cire, et protégez-vous de la cire en
train de goutter. Vous risquez de vous brûler !
Mise en service
DANGER
Toute mise en service de l'appareil peut
entraîner des dommages corporels et
des dégâts matériels !
► Les matériaux d'emballage ne sont pas des
jouets et ne doivent donc pas être considérés
comme tels. Il y a un risque d'étouff ement.
Accessoires fournis et inspection
de transport
Le kit de réparation pour sols stratifi és et parquets
est livré standard avec les composants suivants :
▯ Dispositif fondeur de cire
▯ Raclette de nettoyage
▯ Spatule à fonction rabot
▯ Spatule à arrondi
▯ 11 bâtonnets de cire dure
▯ Éponge de ponçage
▯ Tissu de nettoyage
▯ 2 x piles 1.5 V de type AA/LR6/Mignon
▯ Coff ret de rangement
▯ Ce mode d'emploi
REMARQUE
Vérifi ez que la livraison est au complet et
►
qu'elle ne présente pas de dégâts apparents.
► En cas de livraison incomplète ou de dégâts
résultant d'un emballage défectueux ou du
transport, veuillez vous adresser à la hotline
du service après-vente (cf. le chapitre Service
après-vente).
FR
BE
Élimination de l'emballage
L'emballage protège l'appareil de tous dommages
éventuels au cours du transport. Les matériaux
d'emballage ont été sélectionnés selon des critères
de respect de l'environnement et de recyclage,
de sorte qu'ils peuvent être recyclés. Le retour de
l'emballage dans les fi lières de revalorisation permet d'économiser les matières premières et réduit
le volume de déchets. Rapportez les matériaux
d'emballage qui ne sont plus utilisés aux points
de collecte prévus par la réglementation.
PLPRS A1
5
Page 9
FR
BE
Mise en place / remplacement
des piles
Pour fonctionner, le dispositif fondeur de cire a
besoin de deux piles de 1,5 V du type AA/LR6/
Mignon.
♦ Ouvrez le compartiment à piles situé sous
le dispositif fondeur de cire
♦ Insérez les piles dans le compartiment à
en respectant la polarité indiquée
piles
sur l'appareil.
♦ Fermez le couvercle du compartiment à piles.
.
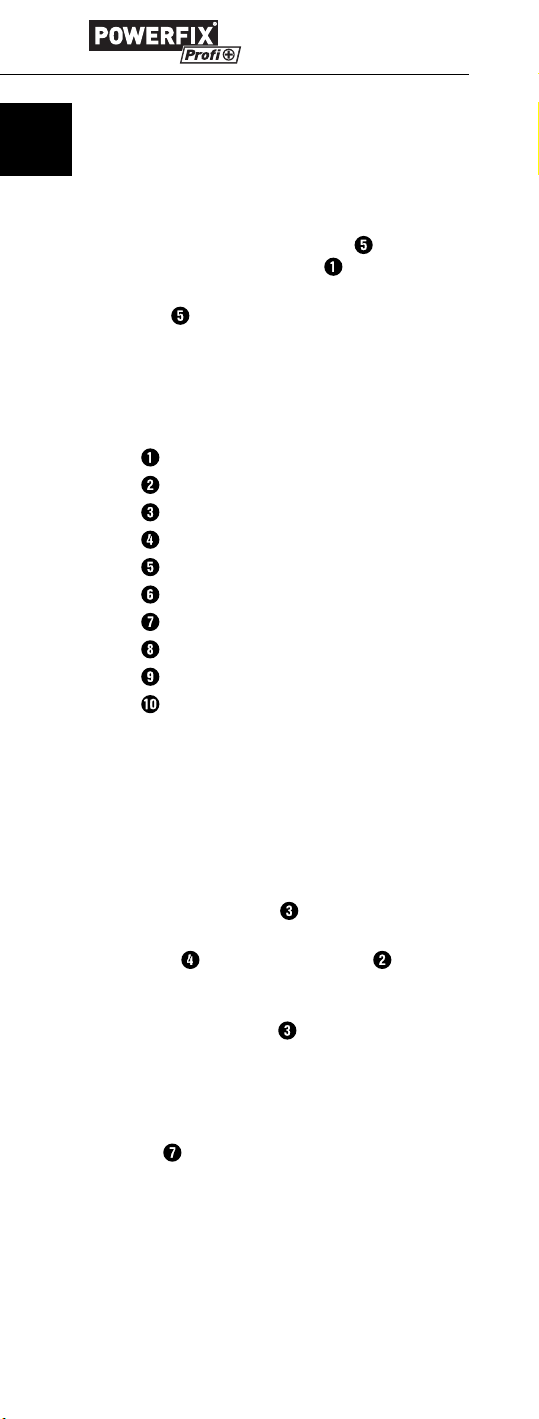
Éléments d'utilisation
Dispositif fondeur de cire
Pointe du dispositif
Interrupteur Marche/Arrêt
Bouton d'activation
Compartiment à piles
Raclette de nettoyage
Spatule à fonction rabot
Spatule à arrondi
Éponge de ponçage
Chiff on de nettoyage
Fonctionnement et opération
Ce chapitre contient des remarques importantes
sur le fonctionnement et l'utilisation de l'appareil.
Mise en marche/arrêt de l'appareil
♦ Pour mettre en marche l'appareil, réglez l'inter-
rupteur marche/arrêt
♦ Appuyez constamment sur le bouton d'acti-
vation
dispositif fondeur de cire.
♦ Pour mettre en marche l'appareil, amenez l'inter-
rupteur marche/arrêt
pour échauff er la pointe du
Exemple d'application
Préparation (Fig. A)
♦ Nettoyez la zone endommagée avec la spa-
puis retirez tous les déchets. Appuyez sur
tule
le bord de la zone endommagée pour l'arrondir.
Choix de la teinte (Fig. B)
♦ Choisissez les teintes adéquates.
Souvenez-vous de toujours utiliser plusieurs
teintes, des teintes claires aux foncées. Avec
le vrai bois, il est recommandé de travailler
en plus avec le produit Transparent (K) pour
obtenir un eff et de profondeur.
sur la position "ON".
sur la position "OFF".
6
PLPRS A1
Page 10
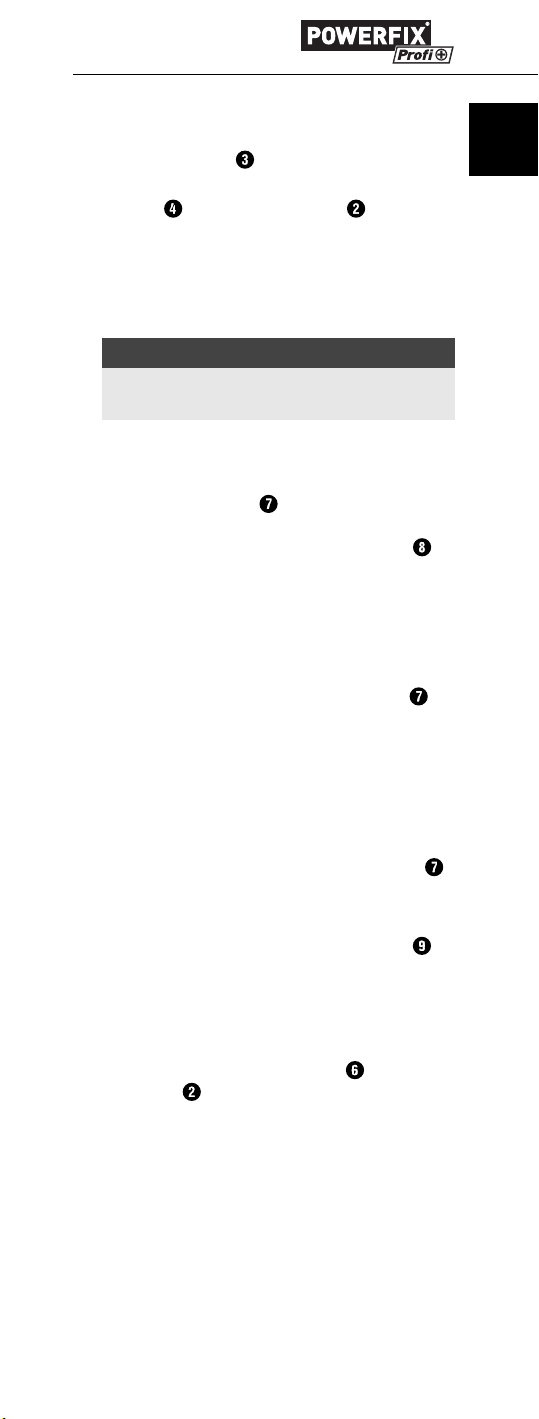
Fusion et comblement (Fig. C + D)
♦ Pour allumer l'appareil, amenez l'interrupteur
Marche/Arrêt
♦ Appuyez constamment sur le bouton d'activa-
pour échauff er la pointe du dispositif.
tion
♦ Maintenant, faites fondre de petites quantités
de cire dure puis introduisez-les dans la zone
abîmée jusqu'à l'avoir remplie avec un léger excédent. Commencez par les teintes claires puis
progressez pas à pas vers les teintes foncées.
REMARQUE
Dans les zones enfoncées, il vous suffi ra géné-
►
ralement d'utiliser la cire dure transparente (K).
sur la position "ON".
Travail à la spatule (Fig. E)
♦ Sur les surfaces verticales, il est recommandé
de préparer d'abord la teinte, d'appliquer la
cire sur la spatule
zone abîmée. Lors des travaux sur les arrondis,
il faudrait utiliser la spatule avec arrondi
pour combler la zone abîmée avec la cire dure.
et de combler ensuite la
Racler (Fig. F)
♦ Laissez la cire dure refroidir pendant quelques
secondes (10 s env.)
♦ Après qu'elle a refroidi, retirez les débordements
avec les rainures raboteuses de la spatule
N'exercez qu'une légère pression pour racler les
débordements.
.
Harmonisation fi ne (Fig. G)
♦ Pour harmoniser avec précision, imitez mainte-
nant les madrures avec une teinte plus foncée.
♦ Ensuite, raclez à nouveau les débordements
avec les rainures raboteuses de la spatule
Dégraissage (Fig. H)
♦ À la fi n, retirez les derniers résidus de cire
dure à l'aide d'une éponge de ponçage
Cette opération permet également d'adapter
le degré de brillant de la surface. Terminé!
Nettoyage des rainures raboteuses
(Fig. I)
♦ Posez la raclette de nettoyage sur la
pointe
cire puis raclez les résidus de cire présents
dans les rainures raboteuses.
refroidie du dispositif fondeur de
FR
BE
.
.
PLPRS A1
7
Page 11

FR
BE
Dépannage
Ce chapitre vous donne des remarques importantes relatives à la localisation des pannes et au
dépannage.
Causes des pannes et remèdes
Le tableau ci-dessous est destiné à vous aider
à localiser de petits dysfonctionnements et à y
remédier :
Panne
La pointe
du dispositif
fondeur de cire
ne chauff e pas.
REMARQUE
► Si vous ne pouvez pas résoudre le problème
en prenant les mesures susmentionnées,
veuillez vous adresser à notre hotline de
service après-vente (voir le chapitre Service
après-vente).
Cause
possible
Les piles sont
mal insérées.
Les piles sont
vides.
Suppression
Introduisez
les piles
conformément
à l'illustration
fi gurant sur
l'appareil.
Mettez des
piles neuves
en place.
Nettoyage
ATTENTION
Risque d'endommager l'appareil !
► Assurez-vous lors du nettoyage qu'aucune
humidité ne pénètre dans l'appareil pour
éviter de l'endommager irréparablement.
► N'utilisez pas de produits de nettoyage
chimiques ou abrasifs. Vous risqueriez
d'endommager le boîtier.
♦ Avec le chiff on de nettoyage , nettoyez le
dispositif fondeur de cire
du dispositif uniquement après le refroidissement.
et la pointe
Entreposage
Si n'allez pas utiliser l'appareil pendant une période prolongée, retirez les piles. Rangez toutes
les pièces du kit de réparation pour sols stratifi és
et parquet dans son coff ret de rangement, puis
placez-le dans un endroit propre, sec et à l'abri
d'un ensoleillement direct.
8
PLPRS A1
Page 12

Mise au rebut
Mise au rebut de l'appareil
L'appareil ne doit en aucun cas être
jeté à la poubelle domestique normale.
Ce produit est assujetti à la directive
européenne 2002/96/EC-WEEE (Waste
Electrical and Electronic Equipment).
Éliminez l'appareil par l'intermédiaire d'une
entreprise de traitement des déchets agréée ou
via le service de recyclage de votre commune.
Respectez la réglementation en vigueur. En cas
de doute, prenez contact avec votre centre de
recyclage.
Mise au rebut des piles
Il est interdit de jeter les piles aux ordures
ménagères. La législation impose à chaque
consommateur de remettre les piles/batteries
à un centre de collecte de sa commune / son
quartier ou à un commerce.
Cette obligation a pour objectif d'assurer l'élimination écologique des piles. Veuillez remettre les piles
uniquement après qu'elles se sont déchargées.
Annexe
FR
BE
Caractéristiques techniques
Alimentation en tension
Dimensions env. 14,7 x 3,5 x 2,5 cm
Poids (piles incluses) env. 80 g
2 x piles 1,5 V du type
AA/LR6/Mignon
Service après-vente
Service France
Tel.: 0800 919270
E-Mail: kompernass@lidl.fr
IAN 78554
Service Belgique
Tel.: 070 270 171 (0,15 EUR/Min.)
E-Mail: kompernass@lidl.be
IAN 78554
Importateur
KOMPERNASS GMBH
BURGSTRASSE 21
44867 BOCHUM, GERMANY
www.kompernass.com
PLPRS A1
9
Page 13

10
PLPRS A1
Page 14

Inhaltsverzeichnis
Einleitung . . . . . . . . . . . . . . . . . . . . . .12
Haftungsbeschränkung. . . . . . . . . . . . . . . . . 12
Bestimmungsgemäße Verwendung. . . . . . . . 12
Verwendete Warnhinweise. . . . . . . . . . . . . . 13
Sicherheit . . . . . . . . . . . . . . . . . . . . . .13
Umgang mit Batterien. . . . . . . . . . . . . . . . . . 14
Grundlegende Sicherheitshinweise. . . . . . . . 14
Inbetriebnahme . . . . . . . . . . . . . . . . .15
Lieferumfang und Transportinspektion. . . . . . 15
Entsorgung der Verpackung . . . . . . . . . . . . . 15
Batterie einlegen / wechseln. . . . . . . . . . . . . 16
Bedienelemente . . . . . . . . . . . . . . . . .16
Bedienung und Betrieb . . . . . . . . . . .16
Gerät ein- /ausschalten. . . . . . . . . . . . . . . . . 16
Anwendungsbeispiel. . . . . . . . . . . . . . . . . . . 16
Fehlerbehebung. . . . . . . . . . . . . . . . .18
Fehlerursachen und Behebung . . . . . . . . . . . 18
Reinigung . . . . . . . . . . . . . . . . . . . . . .18
Lagerung . . . . . . . . . . . . . . . . . . . . . .18
Entsorgung . . . . . . . . . . . . . . . . . . . . .19
Gerät entsorgen . . . . . . . . . . . . . . . . . . . . . . 19
Batterien entsorgen. . . . . . . . . . . . . . . . . . . . 19
Anhang . . . . . . . . . . . . . . . . . . . . . . . .19
Technische Daten . . . . . . . . . . . . . . . . . . . . . 19
Service . . . . . . . . . . . . . . . . . . . . . . . . . . . . . 19
Importeur . . . . . . . . . . . . . . . . . . . . . . . . . . . 20
DE
AT
CH
PLPRS A1
11
Page 15

DE
AT
CH
Einleitung
Herzlichen Glückwunsch zum Kauf Ihres neuen
Gerätes.
Sie haben sich damit für ein hochwertiges Produkt
entschieden. Die Bedienungsanleitung ist Bestandteil dieses Produkts. Sie enthält wichtige Hinweise
für Sicherheit, Gebrauch und Entsorgung. Machen
Sie sich vor der Benutzung des Produkts mit allen
Bedien- und Sicherheitshinweisen vertraut. Benutzen Sie das Produkt nur wie beschrieben und für
die angegebenen Einsatzbereiche. Bewahren Sie
diese Bedienungsanleitung gut auf. Händigen Sie
alle Unterlagen bei Weitergabe des Produkts an
Dritte mit aus.
Haftungsbeschränkung
Alle in dieser Bedienungsanleitung enthaltenen
technischen Informationen, Daten und Hinweise
für den Anschluss und die Bedienung entsprechen
dem letzten Stand bei Drucklegung und erfolgen
unter Berücksichtigung unserer bisherigen Erfahrungen und Erkenntnisse nach bestem Wissen. Aus
den Angaben, Abbildungen und Beschreibungen
in dieser Bedienungsanleitung können keine
Ansprüche hergeleitet werden. Der Hersteller
übernimmt keine Haftung für Schäden aufgrund
von Nichtbeachtung der Bedienungsanleitung,
nicht bestimmungsgemäßer Verwendung, unsachgemäßen Reparaturen, unerlaubt vorgenommener
Veränderungen oder Verwendung nicht zugelassener Ersatzteile.
Bestimmungsgemäße Verwendung
Das Laminat- /Parkett-Reparatur-Set ist zur Reparatur
von Laminat, Parkett, Kork, Holzoberfl ächen und
Kunststoff oberfl ächen bestimmt. Der im Lieferumfang enthaltene Wachsschmelzer ist ausschließlich
zum Schmelzen von hierfür geeignetem Hartwachs
vorgesehen. Das Gerät ist ausschließlich für den
privaten Gebrauch bestimmt. Verwenden Sie das
Gerät nicht für gewerbliche oder industrielle
Zwecke. Setzen Sie das Gerät nur in trockener
Umgebung bzw. in Innenräumen ein. Eine andere
oder darüber hinausgehende Benutzung gilt als
nicht bestimmungsgemäß. Ansprüche jeglicher
Art wegen Schäden aus nicht bestimmungsgemäßer
Verwendung sind ausgeschlossen. Das Risiko
trägt allein der Benutzer.
12
PLPRS A1
Page 16

Verwendete Warnhinweise
In der vorliegenden Bedienungsanleitung werden
folgende Warnhinweise verwendet:
GEFAHR
Ein Warnhinweis dieser Gefahrenstufe
kennzeichnet eine drohende gefährliche
Situation.
Falls die gefährliche Situation nicht vermieden
wird, kann dies zum Tod oder zu schweren
Verletzungen führen.
► Die Anweisungen in diesem Warnhinweis
befolgen, um die Gefahr des Todes oder
schwerer Verletzungen von Personen zu
vermeiden.
WARNUNG
Ein Warnhinweis dieser Gefahrenstufe
kennzeichnet eine mögliche gefährliche
Situation.
Falls die gefährliche Situation nicht vermieden
wird, kann dies zu Verletzungen führen.
► Die Anweisungen in diesem Warnhinweis
befolgen, um Verletzungen von Personen zu
vermeiden.
DE
AT
CH
ACHTUNG
Ein Warnhinweis dieser Gefahrenstufe
kennzeichnet einen möglichen Sachschaden.
Falls die Situation nicht vermieden wird, kann
dies zu Sachschäden führen.
► Die Anweisungen in diesem Warnhinweis
befolgen, um Sachschäden zu vermeiden.
HINWEIS
Ein Hinweis kennzeichnet zusätzliche
►
Informationen, die den Umgang mit dem
Gerät erleichtern.
Sicherheit
In diesem Kapitel erhalten Sie wichtige Sicherheitshinweise im Umgang mit dem Gerät. Dieses Gerät
entspricht den vorgeschriebenen Sicherheitsbestimmungen. Ein unsachgemäßer Gebrauch kann
zu Personen- und Sachschäden führen.
GEFAHR
►
Benutzen Sie das Gerät nicht an Orten, wo
Feuergefahr oder Explosionsgefahr besteht,
z.B. in der Nähe von brennbaren Flüssigkeiten oder Gasen.
PLPRS A1
13
Page 17

DE
AT
CH
Umgang mit Batterien
WARNUNG
Gefahr durch nicht ordnungsgemäße
Verwendung! Es besteht Explosionsund Auslaufgefahr!
Für den sicheren Umgang mit Batterien beachten
Sie folgende Sicherheitshinweise:
► Werfen Sie Batterien nicht ins Feuer.
► Schließen Sie Batterien nicht kurz.
► Versuchen Sie nicht, Batterien wieder aufzu-
laden.
► Überprüfen Sie regelmäßig die Batterien.
Ausgetretene Batteriesäure kann dauerhafte
Schäden am Gerät verursachen. Im Umgang mit beschädigten oder ausgelaufenen
Batterien besondere Vorsicht walten lassen. Es
besteht Verätzungsgefahr! Schutzhandschuhe
tragen.
► Batterien für Kinder unzugänglich aufbewah-
ren. Bei Verschlucken umgehend einen Arzt
aufsuchen.
► Entnehmen Sie die Batterien, wenn Sie das
Gerät längere Zeit nicht benutzen.
Grundlegende Sicherheitshinweise
Beachten Sie für einen sicheren Umgang mit dem
Gerät die folgenden Sicherheitshinweise:
■ Kontrollieren Sie das Gerät vor der Verwen-
dung auf äußere sichtbare Schäden. Nehmen
Sie ein beschädigtes oder heruntergefallenes
Gerät nicht in Betrieb.
■ Nehmen Sie keine eigenmächtigen Umbauten
oder Veränderungen an dem Gerät vor.
■ Dieses Gerät ist nicht dafür bestimmt, durch
Personen (einschließlich Kinder) mit eingeschränkten physischen, sensorischen oder
geistigen Fähigkeiten oder mangels Erfahrung
und/oder mangels Wissen benutzt zu werden, es sei denn, sie werden durch eine für
ihre Sicherheit zuständige Person beaufsichtigt
oder erhielten von ihr Anweisungen, wie das
Gerät zu benutzen ist.
■ Kinder sollten beaufsichtigt werden, um
sicherzustellen, dass sie nicht mit dem Gerät
spielen.
■ Schützen Sie das Gerät vor Feuchtigkeit und
dem Eindringen von Flüssigkeiten.
■ Betreiben Sie das Gerät nicht in der Nähe
von off enen Flammen (z.B. Kerzen).
■ Vermeiden Sie direkte Sonneneinstrahlung.
14
PLPRS A1
Page 18

■ Vermeiden Sie eine unbeabsichtigte Inbetrieb-
nahme des Wachsschmelzers. Vergewissern
Sie sich, dass der Wachsschmelzer ausgeschaltet ist, bevor Sie diesen aufnehmen oder
tragen.
■ Schalten Sie den Wachsschmelzer immer am
Schiebeschalter aus (Position OFF), wenn sie
diesen aus der Hand legen.
■ Vermeiden Sie Hautkontakt mit der Wachs-
schmelzerspitze und schützen Sie sich vor
tropfendem Wachs. Es besteht Verbrennungsgefahr!
Inbetriebnahme
GEFAHR
Bei der Inbetriebnahme des Gerätes
können Personen- und Sachschäden
auftreten!
► Verpackungsmaterialien dürfen nicht zum
Spielen verwendet werden. Es besteht
Erstickungsgefahr.
Lieferumfang und Transportinspektion
Das Laminat- /Parkett-Reparatur-Set wird standardmäßig mit folgenden Komponenten geliefert:
▯ Wachsschmelzer
▯ Reinigungsschaber
▯ Spachtel mit Hobelfunktion
▯ Spachtel mit Rundung
▯ 11 x Hartwachsstangen
▯ Schleifschwamm
▯ Reinigungstuch
▯ 2 x 1.5 V Batterien Typ AA/LR6/Mignon
▯ Aufbewahrungskoff er
▯ Diese Bedienungsanleitung
HINWEIS
Prüfen Sie die Lieferung auf Vollständigkeit
►
und auf sichtbare Schäden.
► Bei einer unvollständigen Lieferung oder
Schäden infolge mangelhafter Verpackung
oder durch Transport wenden Sie sich an die
Service-Hotline (siehe Kapitel Service).
DE
AT
CH
Entsorgung der Verpackung
Die Verpackung schützt das Gerät vor Transportschäden. Die Verpackungsmaterialien sind nach
umweltverträglichen und entsorgungstechnischen
Gesichtspunkten ausgewählt und deshalb recyclebar. Die Rückführung der Verpackung in den
Materialkreislauf spart Rohstoff e und verringert
das Abfallaufkommen. Entsorgen Sie nicht mehr
benötigte Verpackungsmaterialien gemäß den
örtlich geltenden Vorschriften.
PLPRS A1
15
Page 19

DE
AT
CH
Batterie einlegen / wechseln
Der Wachsschmelzer benötigt zum Betrieb
2 x 1,5 V Batterien Typ AA/LR6/Mignon.
♦ Öff nen Sie das Batteriefach an der Unter-
seite des Wachsschmelzers
♦ Legen Sie die Batterien, unter Berücksich-
tigung der auf dem Gerät angegebenen
Polarität, in das Batteriefach
♦ Schließen Sie den Batteriefachdeckel wieder.
.
ein.
Bedienelemente
Wachsschmelzer
Wachsschmelzerspitze
Ein-/Ausschalter
Aktivierungsknopf
Batteriefach
Reinigungsschaber
Spachtel mit Hobelfunktion
Spachtel mit Rundung
Schleifschwamm
Reinigungstuch
Bedienung und Betrieb
In diesem Kapitel erhalten Sie wichtige Hinweise
zur Bedienung und Betrieb des Gerätes.
Gerät ein- /ausschalten
♦ Schieben Sie den Ein-/Ausschalter in die
Position ON, um das Gerät einzuschalten
♦ Drücken und halten Sie den Aktivierungsknopf ,
um die Wachsschmelzerspitze
♦ Schieben Sie den Ein-/Ausschalter in die
Position OFF, um das Gerät auszuschalten.
Anwendungsbeispiel
Vorbereiten (Abb. A)
♦ Reinigen Sie die Schadstelle mit dem Spachtel
und entfernen Sie alle losen Teile. Drücken Sie
den Schadensrand rund.
Farbauswahl (Abb. B)
♦ Wählen Sie die passenden Farbtöne aus.
Achten Sie darauf, dass immer mehrere Farbtöne von hell bis dunkel eingesetzt werden.
Bei Echtholz empfi ehlt es sich zusätzlich mit
Transparent (K) zu arbeiten, um eine Tiefenwirkung zu erzielen.
aufzuheizen.
16
PLPRS A1
Page 20

Schmelzen und Füllen (Abb. C + D)
♦ Schieben Sie den Ein-/Ausschalter in die
Position ON, um das Gerät einzuschalten.
♦ Drücken und halten Sie den Aktivierungs-
, um die Wachsschmelzerspitze
knopf
aufzuheizen.
♦ Schmelzen Sie nun kleine Portionen des
Hartwachses ab und bringen Sie sie in die
Schadstelle ein, bis diese leicht überfüllt ist.
Beginnen Sie zuerst mit den hellen Farbtönen
und arbeiten Sie sich Schritt für Schritt zu den
dunklen Farbtönen vor.
HINWEIS
Bei Druckstellen reicht es meistens aus, wenn
►
Sie nur das transparente Hartwachs (K)
verwenden.
Spachteln (Abb. E)
♦ Bei senkrechten Flächen empfi ehlt es sich, den
Farbton vorher anzumischen, mit dem Spach-
aufzunehmen und einzufüllen. Bei
tel
Arbeiten an Rundungen sollte der Spachtel
mit Rundung
Hartwachs in die Schadstelle einzufüllen.
verwendet werden, um das
Abtragen (Abb. F)
♦ Lassen Sie den Hartwachs einige Sekunden
(ca. 10 s) abkühlen.
♦ Nach dem Erkalten tragen Sie die Überstände
mit den Hobelrillen des Spachtels
Sie die Überstände nur mit leichten Druck ab.
ab. Tragen
Feinabstimmung (Abb. G)
♦ Zur Feinabstimmung ahmen Sie nun die Ma-
serung mit einem dunkleren Farbton nach.
♦ Tragen Sie anschließend die Überstände wie-
der mit den Hobelrillen des Spachtels
Entfetten (Abb. H)
♦ Entfernen Sie zum Schluss noch die letzten
Hartwachsreste mit dem Schleifschwamm
Dadurch wird auch gleichzeitig der Glanzgrad der Oberfl äche angepasst. Fertig!
Reinigung der Hobelrillen (Abb. I)
♦ Setzen Sie den Reinigungsschaber auf die
abgekühlte Wachsschmelzerspitze
schaben Sie die Wachsrückstände von den
Hobelrillen ab.
und
DE
AT
CH
ab.
.
PLPRS A1
17
Page 21

DE
AT
CH
Fehlerbehebung
In diesem Kapitel erhalten Sie wichtige Hinweise
zur Störungslokalisierung und Störungsbehebung.
Fehlerursachen und Behebung
Die nachfolgende Tabelle hilft bei der Lokalisierung und Behebung kleinerer Störungen:
Fehler
Die Wachsschmelzerspit-
wird
ze
nicht heiß.
HINWEIS
Wenn Sie mit den vorstehend genannten
►
Schritten das Problem nicht lösen können,
wenden Sie sich bitte an die Service-Hotline
(siehe Kapitel Service)
Mögliche
Ursache
Die Batterien
sind falsch
eingelegt.
Die Batterien
sind entladen.
Behebung
Legen Sie die
Batterien, entsprechend der
Abbildung auf
dem Gerät,
ein.
Legen Sie
zwei neue
Batterien ein.
Reinigung
ACHTUNG
Beschädigung des Gerätes!
► Stellen Sie sicher, dass bei der Reinigung keine
Feuchtigkeit in das Gerät eindringt, um eine
irreparable Beschädigung des Gerätes zu
vermeiden.
► Benutzen Sie keine chemischen oder scheu-
ernden Putzmittel. Sie können das Gehäuse
beschädigen.
♦ Reinigen Sie den Wachsschmelzer und die
Wachsschmelzerspitze
Zustand mit dem Reinigungstuch
nur im abgekühlten
.
Lagerung
Sollten Sie das Gerät längere Zeit nicht benutzen, entnehmen Sie die Batterien. Lagern Sie alle
Teile des Laminat- /Parkett-Reparatur-Sets in dem
Aufbewahrungskoff er und an einem sauberen,
trockenen Ort ohne direkte Sonneneinstrahlung.
18
PLPRS A1
Page 22

Entsorgung
Gerät entsorgen
Werfen Sie das Gerät keinesfalls in
den normalen Hausmüll. Dieses
Produkt unterliegt der europäischen
Richtlinie 2002/96/EC WEEE (Waste
Electrical and Electronic Equipment).
Entsorgen Sie das Gerät über einen zugelassenen Entsorgungsbetrieb oder über Ihre kommunale Entsorgungseinrichtung. Beachten Sie die
aktuell geltenden Vorschriften. Setzen Sie sich im
Zweifelsfall mit Ihrer Entsorgungseinrichtung in
Verbindung.
Batterien entsorgen
Batterien dürfen nicht im Hausmüll entsorgt
werden. Jeder Verbraucher ist gesetzlich verpfl ichtet, Batterien bei einer Sammelstelle
seiner Gemeinde / seines Stadtteils oder im
Handel abzugeben.
Diese Verpfl ichtung dient dazu, dass Batterien einer
umweltschonenden Entsorgung zugeführt werden
können. Geben Sie Batterien nur im entladenen
Zustand zurück.
DE
AT
CH
Anhang
Technische Daten
Spannungsversorgung
Abmessungen ca. 14,7 x 3,5 x 2,5 cm
Gewicht (inkl. Batterien) ca. 80 g
Service
Service Deutschland
Tel.: 0180 5772033
(0,14 EUR/Min. aus dem dt. Festnetz,
Mobilfunk max. 0,42 EUR/Min.)
E-Mail: kompernass@lidl.de
IAN 78554
Service Österreich
Tel.: 0820 201 222 (0,15 EUR/Min.)
E-Mail: kompernass@lidl.at
IAN 78554
Service Schweiz
Tel.: 0842 665566 (0,08 CHF/Min.,
Mobilfunk max. 0,40 CHF/Min.)
E-Mail: kompernass@lidl.ch
IAN 78554
2 x 1,5 V Batterie
Typ AA/LR6/Mignon
PLPRS A1
19
Page 23

DE
AT
CH
Importeur
KOMPERNASS GMBH
BURGSTRASSE 21
D-44867 BOCHUM
www.kompernass.com
20
PLPRS A1
Page 24

Table of contents
Introduction . . . . . . . . . . . . . . . . . . . .22
Limited liability . . . . . . . . . . . . . . . . . . . . . . . 22
Intended use . . . . . . . . . . . . . . . . . . . . . . . . . 22
Warnings used . . . . . . . . . . . . . . . . . . . . . . . 23
Safety . . . . . . . . . . . . . . . . . . . . . . . . .23
Handling batteries . . . . . . . . . . . . . . . . . . . . 24
Basic safety instructions . . . . . . . . . . . . . . . . 24
First use. . . . . . . . . . . . . . . . . . . . . . . .25
Items supplied and transport inspection . . . . 25
Disposal of the packaging . . . . . . . . . . . . . . 25
Battery insertion/ exchange . . . . . . . . . . . . . 26
Operating elements . . . . . . . . . . . . .26
Handling and operation . . . . . . . . . .26
Switching the appliance on/off . . . . . . . . . . 26
Application example. . . . . . . . . . . . . . . . . . . 26
Troubleshooting. . . . . . . . . . . . . . . . .28
Malfunction causes and remedies . . . . . . . . 28
Cleaning . . . . . . . . . . . . . . . . . . . . . . .28
Storage . . . . . . . . . . . . . . . . . . . . . . . .28
Disposal . . . . . . . . . . . . . . . . . . . . . . .29
Disposal of the appliance. . . . . . . . . . . . . . . 29
Disposing of the batteries . . . . . . . . . . . . . . . 29
Appendix . . . . . . . . . . . . . . . . . . . . . .29
Technical data. . . . . . . . . . . . . . . . . . . . . . . . 29
Service . . . . . . . . . . . . . . . . . . . . . . . . . . . . . 29
Importer . . . . . . . . . . . . . . . . . . . . . . . . . . . . 29
GB
PLPRS A1
21
Page 25

GB
Introduction
Congratulations on the purchase of your new
appliance.
You have clearly decided in favour of a highquality product. These operating instructions are
a part of this product. They contain important
information in regard to safety, use and disposal.
Before using the product, familiarise yourself
with all operating and safety instructions. Use
this appliance only as described and only for
the specifi ed areas of application. Retain these
instructions for future reference. In addition, pass
these operating instructions on to whoever might
acquire the appliance at a future date.
Limited liability
All technical information, data and information for
installation, connection and operation contained
in these operating instructions correspond to the
latest at time of printing and, to the best of our
knowledge, take into account our previous experience and know-how. No claims can be derived
from the details, illustrations and descriptions in
these instructions. The manufacturer assumes no
responsibility for damage caused by failure to
observe these instructions, improper use, incompetent repairs, making unauthorised modifi cations or
for using unapproved replacement parts.
Intended use
This laminate/parquet repair kit is intended for
the repair of laminate, parquet, cork and wood
or plastic surfaces. The supplied wax melter is
intended exclusively for the melting of hard wax
suitable for these applications. The appliance is
intended exclusively for domestic use. Do not
use the appliance for commercial or industrial
applications. Use the appliance only in a dry
environment resp. in indoor areas. This appliance
is not intended for any other use or for uses
beyond those detailed. Claims of any kind for
damage resulting from unintended use will not
be accepted. The user alone bears the risk.
22
PLPRS A1
Page 26

Warnings used
In these extant operating instructions the following
warnings are used:
DANGER
A warning at this risk level indicates
a threateningly dangerous situation.
If the dangerous situation is not avoided, it could
lead to death or serious physical injury.
► Follow the instructions in this warning to avoid
the death of or serious physical injury to people.
WARNING
A warning at this risk level indicates
a potentially dangerous situation.
If the dangerous situation is not avoided, it could
lead to physical injuries.
► Follow the instructions in this warning to avoid
personal injuries.
CAUTION
A warning at this risk level indicates
potential property damage.
If the situation is not avoided it could lead to
property damage.
► Follow the directives in this warning to avoid
property damage.
GB
NOTICE
A notice indicates additional information
►
that could assist you in the handling of the
appliance.
Safety
In this chapter you will receive important safety
information regarding the handling of the appliance. This appliance complies with the statutory
safety regulations. Incorrect usage can lead to
personal injury and property damage.
DANGER
►
Do not use the appliance in locations where
there is a risk of fi re or explosion, e.g. in the
vicinity of infl ammable liquids or gases.
PLPRS A1
23
Page 27

GB
Handling batteries
WARNING
Risks from uses other than those
intended! There is a risk of explosions
and leakage!
For the safe handling of batteries, take note of
the following safety instructions:
► Do not throw batteries into a fi re.
► Never short-circuit batteries.
► Do not attempt to recharge batteries.
► Regularly check the condition of the batteries.
Leaking battery acid can cause permanent
damage to the appliance. Special caution
should be exercised when handling damaged
or leaking batteries. There is a risk of receiving acid burns! Wear protective gloves.
► Store batteries in a place inaccessible to
children. If a battery should be swallowed,
seek medical attention IMMEDIATELY.
► If you do not intend to use the appliance for
an extended period, remove the batteries.
Basic safety instructions
For safe handling of the appliance, follow the
safety information below:
■ Before use, check the appliance for visible
external damage. Do not take into use a
damaged appliance or one that has been
dropped.
■ Do not make any unauthorised modifi cations
or alterations to the appliance.
■ This appliance is not intended for use by
individuals (including children) with restricted
physical, physiological or intellectual abilities
or defi ciencies in experience and/or knowledge unless they are supervised by a person
responsible for their safety or receive instructions from this person on how the appliance
is to be used.
■ Children should be supervised to ensure that
they do not play with the appliance.
■ Protect the appliance against moisture and
liquid penetration.
■ Do not operate the appliance close to open
fl ames (e.g. candles).
■ Avoid direct sunlight.
24
PLPRS A1
Page 28

■ Avoid unintentional operation of the wax
melter. Ensure that the wax melter is switched
off before lifting or carrying it.
■ On ceasing work, always switch the wax
melter off with the slide switch (position OFF)
when you put it down.
■ Avoid skin contact with the wax melter tip and
protect yourself against dripping wax. There is
a risk of burns!
First use
DANGER
During the commissioning of the appliance
personal injury and property damage
could occur!
► Packaging material should not be used as
a play thing. There is a risk of suff ocation.
Items supplied and transport
inspection
This Laminate/Parquet Repair Set is supplied with
the following components as standard:
▯ Wax melter
▯ Cleaning scraper
▯ Scraper with planer function
▯ Scraper with curvature
▯ 11 x Hard wax sticks
▯ Sanding sponge
▯ Cleaning cloth
▯ 2 x Batteries 1.5 V Type AA/LR6/Mignon
▯ Storage case
▯ This operating manual
NOTICE
Check the contents to ensure that everything
►
is available and for signs of visible damage.
► If the contents are not complete, or are dam-
aged due to defective packaging or through
transportation, contact the Service Hotline
(see chapter Service).
GB
Disposal of the packaging
The packaging protects the appliance against
transport damage. The packaging materials are
selected from the point of view of their environmental friendliness and disposal technology and
are therefore recyclable. The recirculation of
packaging into the material circuit saves on raw
material and reduces the amount of waste generated. Dispose of packaging material that is no
longer needed as per the regionally established
regulations.
PLPRS A1
25
Page 29

GB
Battery insertion/ exchange
This wax melter requires 2 x 1.5 V batteries, type
AA/LR6/Mignon, for operation.
♦ Open the battery compartment on the
underside of the wax melter
♦ Place the batteries into the battery compart-
, following the polarity details as
ment
depicted in it.
♦ Close and secure the battery compartment.
.
Operating elements
Wax melter
Wax melter tip
On/Off switch
Activation button
Battery compartment
Cleaning scraper
Scraper with planer function
Scraper with curvature
Sanding sponge
Cleaning cloth
Handling and operation
In this chapter you will receive important information for the handling and operation of the
appliance.
Switching the appliance on/off
♦ To switch the appliance on, place the On/
Off switch
♦ Press and hold the activation button to
heat up the wax melter tip
♦ To switch the appliance off , place the On/
Off switch
Application example
Preparation (Fig. A)
♦ Clean the damaged area with the spatula
and remove all loose parts. Press the edges
of the damaged area round.
Colour selection (Fig. B)
♦ Select the matching colour tone.
Ensure that several colour tones, from light to
dark, are always used. With real wood, it is
recommended to additionally work with transparent (K), so as to achieve a sense of depth.
at the position "ON".
.
at the position "OFF".
26
PLPRS A1
Page 30

Melting and fi lling (Figs. C + D)
♦ Place the On/Off switch at the position
"ON" to switch the appliance on.
♦ Press and hold the activation button to
heat up the wax melter tip
♦ Now melt small portions of the hard wax and
place them into the damaged area, until it is
slightly overfi lled. Start with the light colour
tones and progress step by step to the dark
colour tones.
NOTICE
At pressure points it is often suffi cient if you
►
use only the transparent hard wax (K).
.
Filling (Fig. E)
♦ For vertical surfaces it is recommended to mix
the colour tone beforehand, collect it on the
spatula
When working on curved areas the scraper
with curvature
wax into the damaged area.
and then fi ll the damaged area.
should be used to fi ll hard
Smoothing (Fig. F)
♦ Allow the hard wax to cool for a few seconds
(about 10 seconds).
♦ After cooling, smooth any protrusion with the
planing grooves of the scraper
light pressure to smooth the protrusion.
. Use only
Fine matching (Fig. G)
♦ For fi ne matching, now imitate the grain struc-
ture with a darker colour tone.
♦ Subsequently, again smooth any protrusion
with the planing grooves of the scraper
Degreasing (Fig. H)
♦ To fi nish, remove the last hard wax residues
with the sanding sponge
gloss level of the surface will also be simultaneously matched. Job done!
. Thereby the
Cleaning the planer grooves (Fig. I)
♦ Place the cleaning scraper on the cooled
wax melter tip
dues from the plane grooves.
and scrape the wax resi-
GB
.
PLPRS A1
27
Page 31

GB
Troubleshooting
In this chapter you will receive important information for malfunction localisation and malfunction
remedies.
Malfunction causes and remedies
The following table will help with localising and
remedying minor malfunctions:
Defect
The wax melter
does not
tip
get hot.
NOTICE
If you cannot solve the problem with the
►
aforementioned solutions, please contact the
Service Hotline (see chapter Service) .
Possible
cause
The batteries
have been
inserted incorrectly.
The batteries
are discharged.
Solution
Insert the batteries as per
the depiction
in the battery
compartment .
Insert two
new batteries.
Cleaning
CAUTION
Damage to the appliance!
► Ensure that, when cleaning it, no moisture can
penetrate into the appliance, so as to avoid
irreparable damage to it.
► Do not use chemical or abrasive cleaning
agents. These could damage the housing.
♦ Clean the wax melter and the wax melter
with the cleaning cloth only when
tip
they have cooled down.
Storage
If you do not intend to use the appliance for an
extended period of time, remove the batteries.
Store all parts of the Laminate/Parquet Repair Kit
in the storage case and at a clean, dry location
out of direct sunlight.
28
PLPRS A1
Page 32

Disposal
Disposal of the appliance
Do not dispose of the appliance in your
normal domestic waste. This product
is subject to the provisions of European Directive 2002/96/EC-WEEE
(Waste Electrical and Electronic
Equipment).
Dispose of the appliance through an approved
disposal centre or at your community waste facility. Please pay heed to the currently applicable
regulations. In case of doubt, please contact your
waste disposal centre.
Disposing of the batteries
Do not dispose of the batteries with domestic
waste. Every consumer is statutorily obliged to
dispose of batteries/rechargeable batteries
at a collection point in their community/district
or to a dealer.
This obligation is intended to ensure that batteries
are disposed of in an environmentally responsible
manner. Dispose of batteries only when they are
fully discharged.
GB
Appendix
Technical data
Voltage supply
Dimensions
Weight
(including batteries)
Service
Service Great Britain
Tel.: 0871 5000 720 (£ 0.10/Min.)
E-Mail: kompernass@lidl.co.uk
IAN 78554
Importer
KOMPERNASS GMBH
BURGSTRASSE 21
44867 BOCHUM, GERMANY
www.kompernass.com
2 x 1.5 V batteries,
type AA/LR6/Mignon
approx. 14.7 x 3.5 x
2.5 cm
approx. 80 g
PLPRS A1
29
Page 33

KOMPERNASS GMBH
Burgstraße 21
D-44867 Bochum
www.kompernass.com
Version des informations · Stand der Informationen
Last Information Update: 10 / 2012
Ident.-No.: PLPRSA1-092012-2
IAN 78554
2
 Loading...