

Pioneer AVIC 900 DVD, AVIC 800 DVD Hardware Manual
CRB1887A_English.book Page 1 Thursday, April 24, 2003 12:29 PM
Introduction
How To Read This Manual
This manual mainly describes hardware-related
information such as the part names of the Navigation System or precautions for use. Please
read this manual before using your Navigation
System. The following issues are described in
each chapter:
How to use this manual
Introduction
This chapter describes precautions for
the use of the Navigation System.
How to Use Remote Control
1
2
and Names of Parts
This section describes the functions of
the Steering Remote Control used to
operate the Navigation System. In addition, this chapter describes matters that
are important to know before using the
Navigation System, such as the names of
each part, inserting/ejecting discs, or
how to set a PC card.
Using Built-in DVD Player
(AVIC-900DVD only)
This chapter describes how to set DVD
Video or CD and play with this Navigation
System. (This function is for AVIC900DVD only. This is not available for
AVIC-800DVD.)
Terminology
Before moving on, take a few minutes to read the
following information about the conventions
used in this manual. Familiarity with these conventions will help you greatly as you learn how to
use your new equipment.
• Buttons on your Remote Control or display are
referred to as:
Ex.) NAVI button, NAVI MENU button.
• Items in various menus or touch keys displayed on the screen are referred to like this:
Ex.) “ Destination ”, “ Settings ”.
• Extra information, alternative use and other
notes are presented like this:
Ex.)
PC card can be set or removed regardless
❒
of the power ON/OFF of the main unit (ON/
OFF of the engine).
• The references are indicated like this:
Ex.)
“Resetting the System” ➞ Page 28
➲
Appendix
In this chapter, how to handle the Navigation System or discs, specifications of the
Navigation System and how to reset the
system are described.
1
CRB1887A_English.book Page 2 Thursday, April 24, 2003 12:29 PM
Table of Contents
Introduction 1
How To Read This Manual 1
How to use this manual 1
Terminology 1
Table of Contents 2
Important Safety Information 3
Notes Before Using the System 3
Precaution 3
About the main unit battery 4
Chapter 1
How to Use Remote Control and
Names of Parts 5
Preparing the Remote Control 5
Inserting the battery for the Remote Control 5
Getting to Know the Components and What They
Do 6
The Steering Remote Control 6
Microphone 7
Main unit 7
Chapter 2
Using Built-in DVD Player (AVIC900DVD only) 9
To Ensure Safe Driving 9
Before Using Built-in DVD Player 9
Playable discs 9
DVD video disc region numbers 10
Set the DVD Remote Control 10
How to Listen to a CD with Built-in DVD Player
(AVIC-900DVD only) 11
How to use the DVD Remote Control 11
Basic method of listening to CD 12
Specifying a track (Direct search) 12
Set to Repeat Playback, Random Playback,
Scan Playback 12
How to Watch a DVD with Built-in DVD Player
(AVIC-900DVD only) 13
How to use the DVD Remote Control 13
Basic method of watching DVD 14
Operation of menu 16
Specifying a title or a chapter 16
Selecting a sound track type, subtitles or
camera angles 16
To Operate While Checking on the Screen 18
Adjusting Settings 20
Basic Operation of the default setting
screen 20
Items User can Change 20
Setting the subtitle 20
Setting the audio language 21
Setting the menu language 21
Setting viewing restriction 22
Setting aspect ratio of the screen 22
Setting the display of the angle selection
mark 23
Language code list 24
TV Tuner/Display Operation 25
Function Compatibility Charts 25
Appendix 27
Handling and Care of the Disc 27
Resetting the System 28
Specifications 28
2
CRB1887A_English.book Page 3 Thursday, April 24, 2003 12:29 PM
Important Safety Information
Before using your Navigation System, be sure to
read and fully understand the following safety
information:
• Read the manual before operating this Navigation System.
• This Navigation System is intended solely as
an aid to you in the operation of your vehicle. It
is not a substitute for your attentiveness,
judgement, and care when driving.
• Do not operate this Navigation System if doing
so in any way will divert your attention from the
safe operation of your vehicle. Always observe
safe driving rules and follow all existing traffic
regulations.
• Never allow others to use the system unless
they have read and understood the operating
instructions.
• Never use this Navigation System to route to
hospitals, police stations, or similar facilities in
an emergency. The map data may not include
a comprehensive list of emergency service
facilities.
• Route and guidance information displayed by
this equipment is for reference purposes only.
It may not accurately reflect the latest permissible routes, road conditions, or traffic restrictions.
• Traffic restrictions and advisories currently in
force should always take precedence over
guidance given by this product. Always obey
current traffic restrictions, even if this product
provides contrary advice.
• Failure to input correct information about the
local time may result in the product providing
improper routing and guidance instructions.
• Never set the volume of your Navigation System so high that you cannot hear outside traffic and emergency vehicles.
• To promote safety, certain functions are disabled unless the handbrake is on.
• The data encoded in the disc for this product is
the intellectual property of the provider, and
the provider is responsible for such content.
• As with any accessory in your vehicle’s interior, you should not allow this Navigation System to divert your attention from the safe
operation of your vehicle. If you experience difficulty in operating the system or reading the
display, please make adjustments while safely
parked.
Notes Before Using the System
Precaution
• This product complies with the EMC Directives (89/336/EEC, 92/31/EEC) and CE Marking Directive (93/68/EEC).
• This product does not work correctly in the
areas other than Europe.
• Pay close attention to all warnings in this manual and keep this manual handy for future reference.
• Should this product fail to operate properly,
contact your dealer or the nearest authorised
Pioneer service facility.
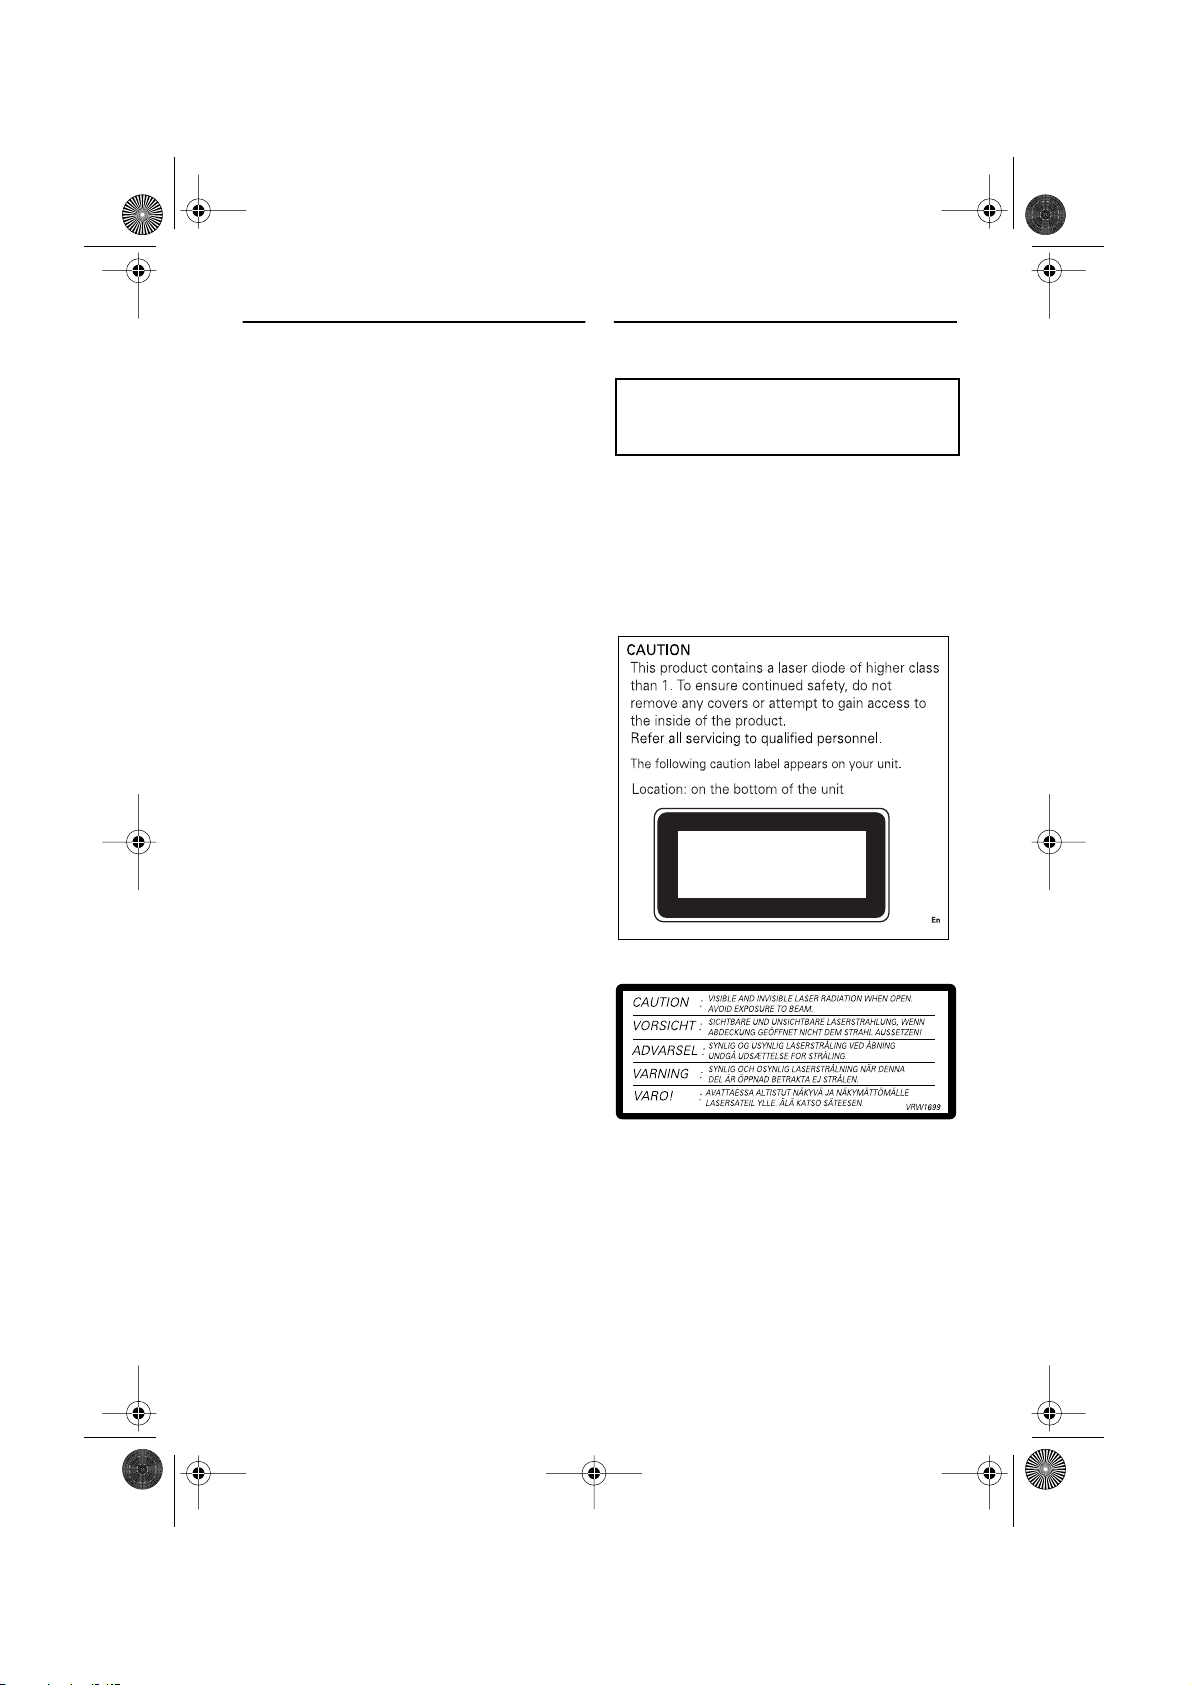
CLASS 1
LASER PRODUCT
On the top of the unit.
• The Pioneer CarStereo-Pass is for use only in
Germany.
• Protect this product from moisture.
3
CRB1887A_English.book Page 4 Thursday, April 24, 2003 12:29 PM
Handbrake interlock
Certain functions offered by this Navigation System
could be dangerous if used while driving. To prevent
them being used while in motion, there is an interlock with your vehicle’s handbrake. If you attempt to
use these functions during driving, it may be inoperable. If so, stop in a safe place, apply the handbrake,
then operate.
Colour difference of the map display
between day and night
Night display (Ex. touch panel display)
The examples in this manual are illustrated using
the daytime display. When driving at night, the
colours you see may differ from those shown.
To use this function, the Orange/white lead to
this unit must be connected correctly.
Day/Night Display ➞ Operation Manual
➲
Avoiding low battery
When using this unit, make sure to start your
engine first. Using this unit without starting the
engine will run down the battery.
About voice guidance (AVH-P7500DVD,
AVH-P6500DVD)
There may be no voice guidance depending on a
combined display unit. In that case, an external
speaker (commercially available) must be connected to the SP-OUT jack (3.5 ø MINI JACK, 1 W
max [8 Ω ]) on this unit’s back.
About the main unit battery
The main unit of your Navigation System has a
lithium battery for memory backup. Please dispose of the battery properly by following the
instructions below.
WARNING
• Keep the lithium battery out of the reach
of children. Should the battery be swallowed, immediately consult a doctor.
Caution
• Do not recharge, disassemble, heat or dispose of the battery in fire.
• Use a CR2450 (3V) lithium battery only.
Never use other types of battery with this
unit.
• Do not handle the battery with metallic
tools.
• Do not store the lithium battery with
metallic materials.
• When disposing of used batteries, please
comply with governmental regulations or
environmental public institution’s rules
that apply in your country/area.
• Always check carefully that you are loading the battery with its (+) and (-) poles
facing in the proper directions.
How to remove the battery
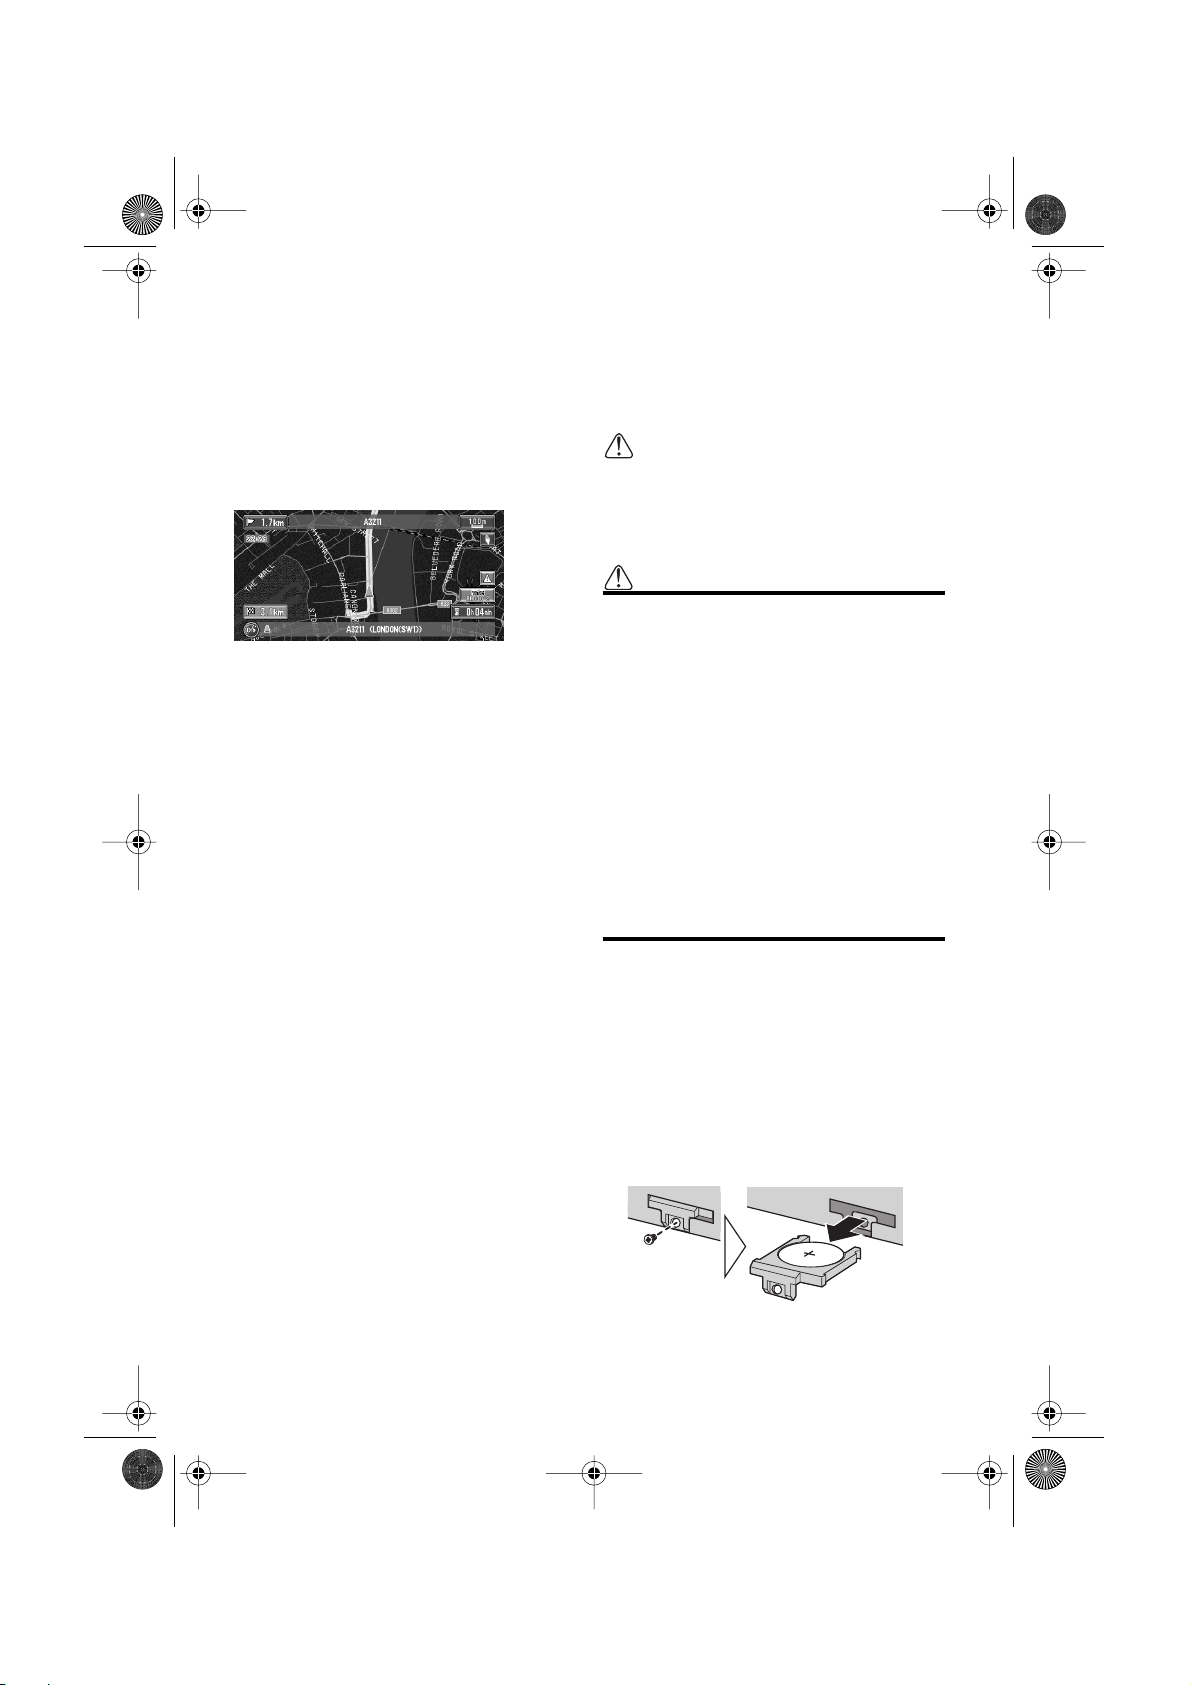
PRECAUTION:
• Remove the battery from the main unit using a
non-metallic tapered instrument.
1
Using a screwdriver, remove the screw at
the side of the main unit.
Using a pointed tool, pull out the tray on
2
which the battery is set, and remove the
battery.
4
CRB1887A_English.book Page 5 Thursday, April 24, 2003 12:29 PM
Chapter
1
How to Use Remote Control and Names of Parts
Preparing the Remote Control
Some navigation operations can be performed
with the Steering Remote Control provided.
In the case of the AVIC-900DVD, the supplied
DVD remote control can be used to watch DVD
videos and listen to CDs.
For instructions on using the DVD remote
➲
control ➞ Page 10
Prior to using the remote control, refer to the following to install the battery.
If you are not combining with a touch panel display, you will need a separately sold remote control (CD-R11) to perform all navigation
operations.
For information on operating with the CD-
➲
R11 ➞ “Operation Manual (For remote control-
led types)” and the CD-R11 “Owner’s manual”.
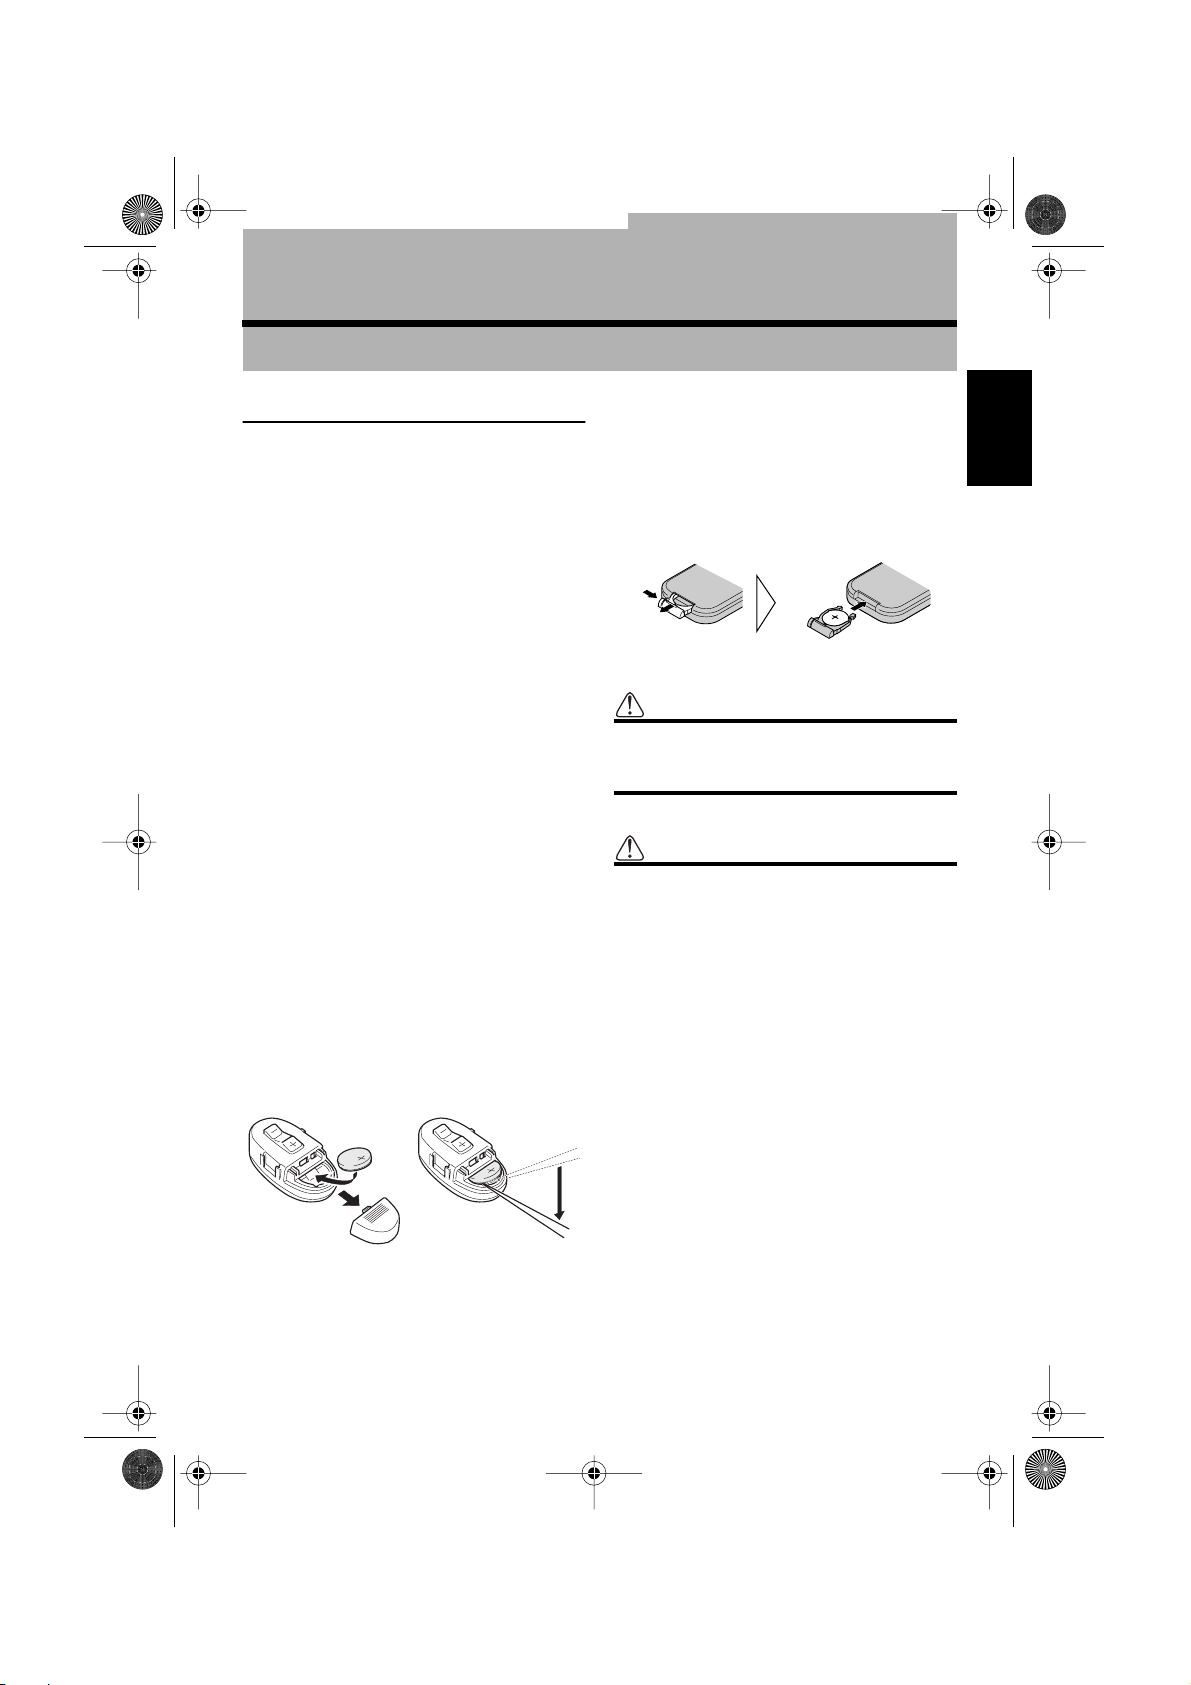
Inserting the battery for the
Remote Control
The following batteries are used with the various
remote controls.
Steering Remote : CR2032 (3V)
DVD Remote : CR2025 (3V)
Steering Remote
Remove the cover on the back of the remote control and insert the lithium battery with the positive side (+) up. When changing the battery, use
a probe with a fine non-metallic tip to remove the
lithium battery.
DVD Remote
Slide out the battery holder on the back of the
DVD remote control and insert the battery with
the (+) and (–) poles pointing in the proper directions.
When using for the first time, pull out the film
protruding from the battery holder.
Warning
• Keep the lithium battery out of reach of
children. Should the battery be swallowed,
immediately consult a doctor.
Caution
• Do not recharge, disassemble, heat or dispose of the battery in fire.
• For Steering Remote:
Use a CR2032 (3V) lithium battery only.
Never use other types of battery with this
unit.
• For DVD Remote:
Use a CR2025 (3V) lithium battery only.
Never use other types of battery with this
unit.
• Do not handle the battery with metallic
tools.
• Do not store the lithium battery with
metallic materials.
• When disposing of used batteries, please
comply with governmental regulations or
environmental public institution’s rules
that apply in your country/area.
• Always check carefully that you are loading the battery with its (+) and (–) poles
facing in the proper directions.
• Remove the battery if remote control is not
to be used for a month or longer.
Chapter 1
How to Use Remote Control and Names of Parts
5
CRB1887A_English.book Page 6 Thursday, April 24, 2003 12:29 PM
• In the event of battery leakage, wipe the
remote control completely clean and
install a new battery.
Getting to Know the Components and What They Do
Before using this unit, get to know the name of
Chapter 1
each component and how it is used.
The Steering Remote Control
Operation mode
By switching the Operation mode (Main mode,
DIN mode, Navigation mode) you can use one
remote control to operate different equipment.
Main mode :
Operates Pioneer AV Head Unit (e.g. AVHP7500DVD, AVH-P6500DVD, AVH-P6400CD,
AVH-P6400R)
DIN mode :
Other Pioneer Head Unit operation
Navigation mode :
How to Use Remote Control and Names of Parts
Navigation operation
First of all, set the Operation mode switching
method. The Operation mode switching changes
in accordance with the settings as below.
Setting A
Setting B
Setting C
Switching
method
Main mode
J
Navigation
mode
DIN mode
J
Navigation
mode
Navigation
mode only
Setting method
Press the
VOICE button
while pressing
the A.MENU
button.
Press the BACK
button while
pressing the
A.MENU button.
Press the SRC
(SOURCE) button while pressing the A.MENU
button.
❒
When using with the Pioneer AV Head Unit,
set to Setting A. If you wish to operate another
Pioneer Head Unit, set to Setting B. If you
wish to use Navigation operation only, set to
Setting C. (“Setting A” is default or factory setting.)
Main mode and DIN mode operation
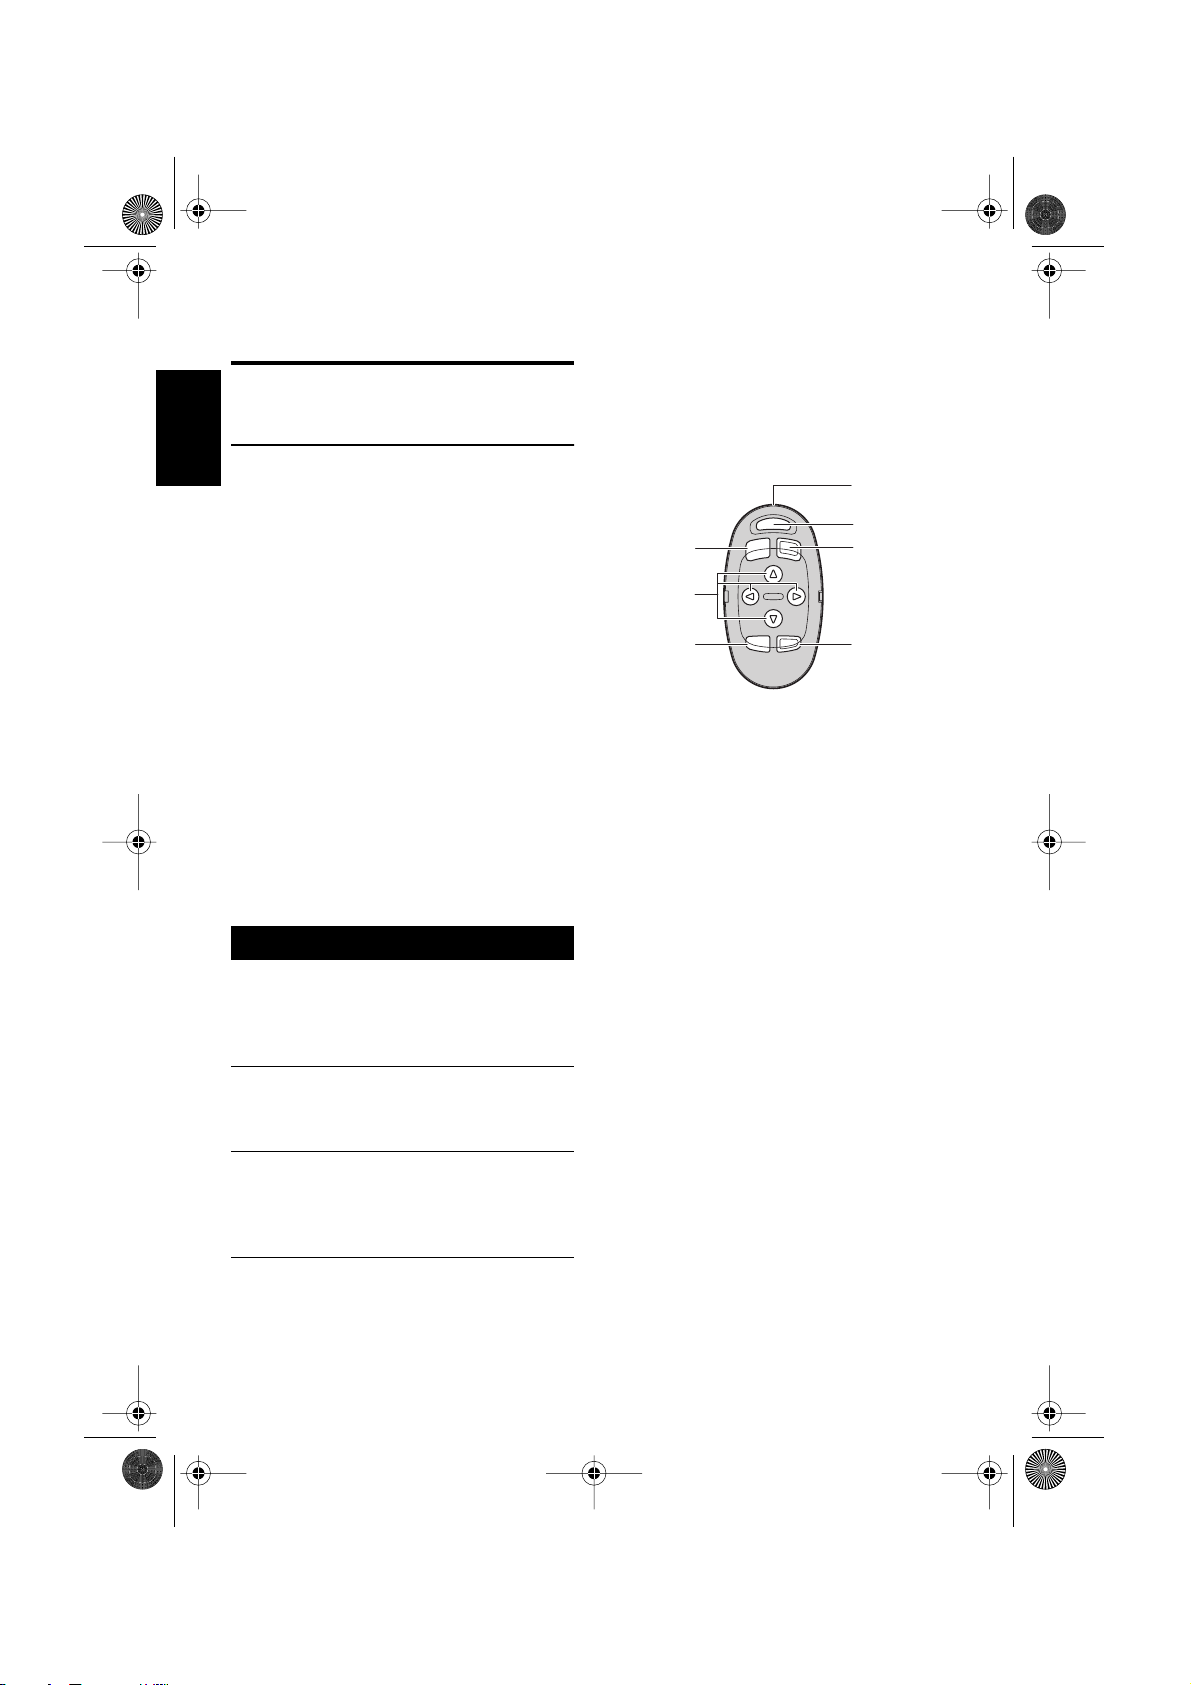
q
w
e
t
y
(1) Transmitter
This transmits the remote contol signals.
(2) NAVI/AUDIO button
Pressing this button switches the Operation
mode.
(3) VOICE button
You can use the VOICE button to start voice recognition, allowing you to operate the Navigation
System by speech.
(4) SRC (SOURCE) button
Switches between sources and switches power
ON/OFF. (Depending on the connected units,
operation may differ slightly. Refer to “Switching
the Sources” in the connected unit’s instructions.)
55
∞∞
22
, ∞∞
33
, 22
, 33
button
Return to the previous screen.
FUNCTION menu is displayed.
Display the menu.
AUDIO menu is displayed.
(5) 55
Operates the same as the Head Unit’s 55
33
33
button or the Joystick.
(6) BACK button
Main mode : BACK button
DIN mode : FUNCTION button
(7) A.MENU button
Main mode : AUDIO MENU button
DIN mode : AUDIO button
r
u
55
∞∞
22
, ∞∞
, 22
,
6
CRB1887A_English.book Page 7 Thursday, April 24, 2003 12:29 PM
i
(8) +/– button
The Pioneer Head Unit’s sound volume can be
adjusted.
Navigation mode (navigation operation)
The main way of operating the built-in DVD
➲
player is by the DVD remote control supplied.
➞ Chapter 2
❒ The SRC (SOURCE) button, and 2 / 3 but-
tons are not used in Navigation mode.
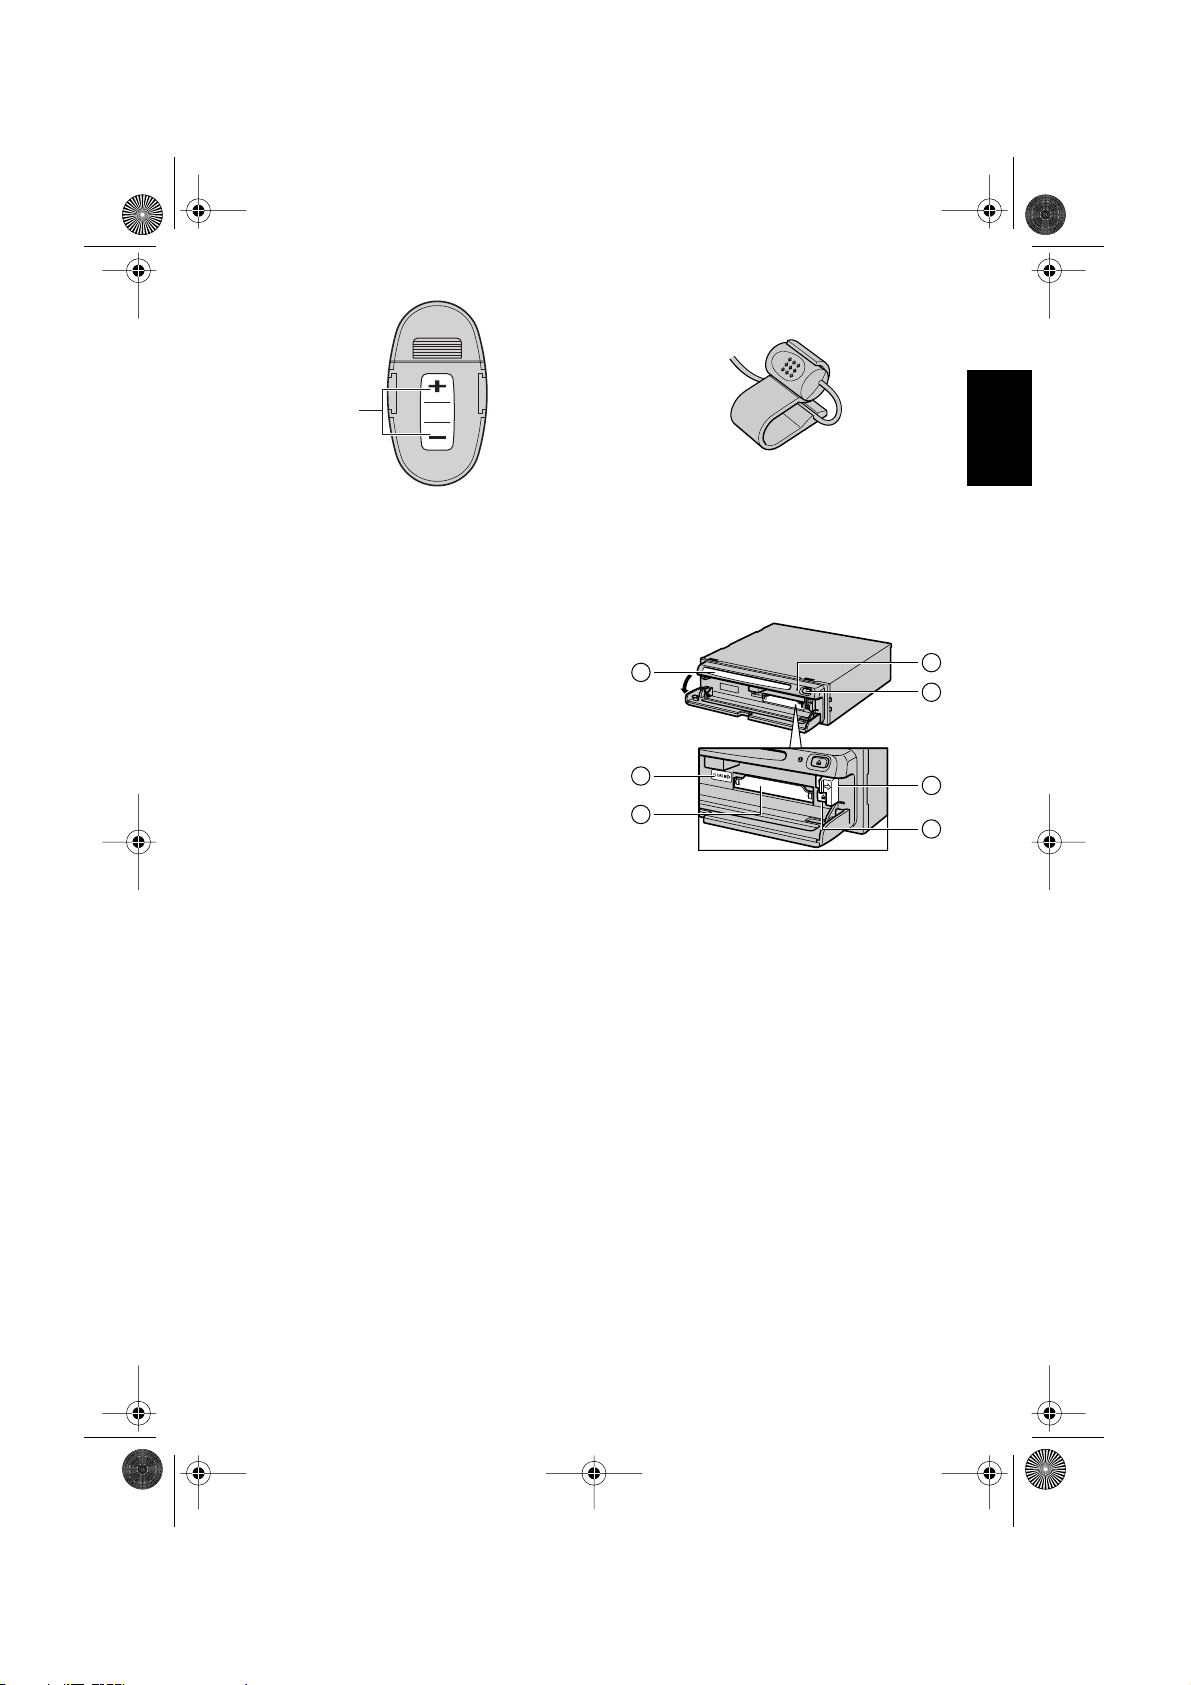
(1) Transmitter
See Main/DIN mode.
(2) NAVI/AUDIO button
See Main/DIN mode.
(Setting C does not need this button.)
(3) VOICE button
See Main/DIN mode.
(5) 5555/∞∞∞∞ button
The map can be enlarged or reduced. If a menu
list extends over several pages, switch to the previous page or the next page.
(6) NAVI button
Press this button to view the map or return to
guidance. Also, when the map is scrolling, pressing this button returns you to the display of the
map of your surroundings.
(7) GUIDE/TRAFFIC button
Press this button if you want to hear the voice
guidance again. If this button is pressed for more
than two seconds, you can listen to traffic information on your route (where available).
(8) +/– button
The volume of the navigation guide voice can be
adjusted.
Microphone
(1) Microphone
After pressing the VOICE button to start voice
operation, this microphone hears your commands.
Main unit
1
7
4
(1) Disc loading slot
(2) Reset button
If the system malfunctions, reset it by pressing
this recessed button with a ballpoint pen or similar pointed object.
➲ “Resetting the System” ➞ Page 28
(3) Disc eject button
(4) PC card slot
(5) PC card eject button
Remove the PC card by pressing this button.
(6) PC card lock lever
This lever is used to remove the PC card.
(7) PC card lock lamp
The red light goes on when the PC card is
inserted and a proper connection is made.
2
3
6
5
Chapter 1 How to Use Remote Control and Names of Parts
7
1
2
3
CRB1887A_English.book Page 8 Thursday, April 24, 2003 12:29 PM
Setting and removing the disc
Insert the disc in the Disc loading slot with the
label-side up. To remove the disc, press the Disc
eject button on the right-hand side of the Disc
loading slot.
❒ Do not try to use discs other than a disc
designed for this system. Please use only the
disc specified by Pioneer.
Chapter 1
➲ For information on playing DVD videos or
music CDs, and on storing and handling
discs ➞ Page 9
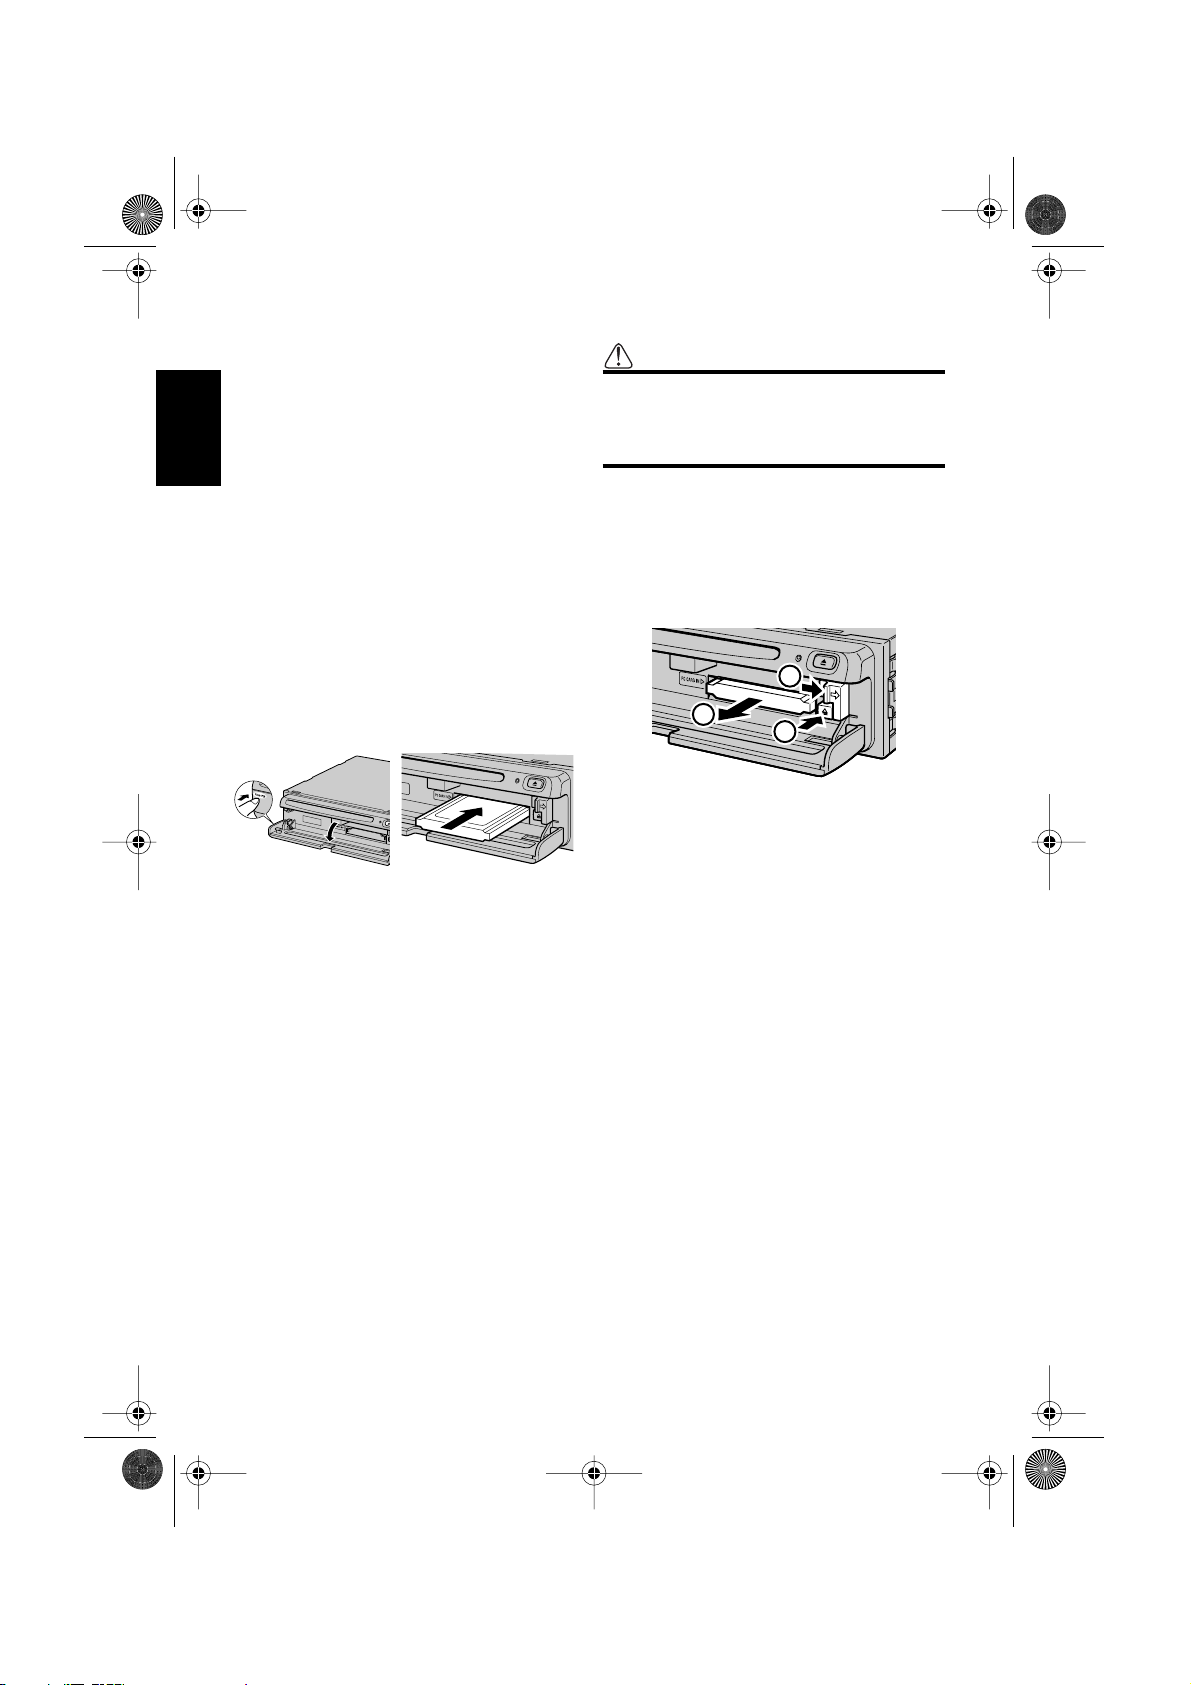
Setting the PC card
Open the cover at the front of the main unit. Hold
the PC card label-side up: the arrow shows the
direction of insertion. Insert the card firmly until
the PC card eject button pops out. If the main
unit power is on, the PC card lock lamp changes
from green to red, showing that the PC card is
inserted correctly and ready for use.
How to Use Remote Control and Names of Parts
Removing the PC Card
Caution
• Do not remove the PC card while the PC
card lock lamp is red. It may damage the
main unit of the Navigation System or the
PC card.
Open the cover on the front of the main unit.
Slide the PC card lock lever to the right (1), and
hold it there. Check that the PC card lock lamp
has changed to green, and then press the PC
card eject button (2). (Keep holding the PC card
lock lever to the right until the PC card is
removed completely.)
❒ PC card can be set or removed regardless of
the power ON/OFF of the main unit (ON/OFF
of the engine).
❒ You can only use a card that conforms to the
PCMCIA Type II (5V) standard. If you attempt
to use a card complying with a different standard, the card slot may be damaged, or a malfunction may occur.
❒ Do not remove the card while editing the data
on the PC card. The data stored on the Navigation unit and data on the PC card could be
corrupted.
8
 Loading...