


Elance GC3110
Philips Elance GC3110, Elance GC3115, Elance GC3111, Elance GC3112, GC3115/25 User Manual
...
Elance
GC3135, GC3130, GC3128, GC3126, GC3125, GC3120, GC3117,
GC3116, GC3115, GC3112, GC3111, GC3110, GC3106

2

ENGLISH 4
DEUTSCH 11
FRANÇAIS 19
NEDERLANDS 27
ITALIANO 35
GC3135, GC3130, GC3128, GC3126, GC3125, GC3120, GC3117,
GC3116, GC3115, GC3112, GC3111, GC3110, GC3106
Important
Read these instructions for use carefully before using the appliance and
save them for future reference.
◗ Check if the voltage indicated on the type plate corresponds to
the local mains voltage before you connect the appliance.
◗ Only connect the appliance to an earthed wall socket.
◗ Do not use the appliance if the plug, the cord or the appliance
itself shows visible damage, or if the appliance has been dropped
or is leaking.
◗ Check the cord regularly for possible damage.
◗ If the mains cord is damaged, it must be replaced by Philips, a
service centre authorised by Philips or similarly qualified persons
in order to avoid a hazard.
◗ Never leave the appliance unattended when it is connected to the
mains.
◗ Never immerse the iron and the stand, if provided, in water.
◗ Keep the appliance out of the reach of children.
◗ The soleplate of the iron can become extremely hot and may
cause burns if touched.
◗ Do not allow the cord to come into contact with the soleplate
when it is hot.
◗ When you have finished ironing, when you clean the appliance,
when you fill or empty the water tank and also when you leave
the iron even for a short while: set the steam control to position
O, put the iron on its heel and remove the mains plug from the
wall socket.
◗ Always place and use the iron and the stand, if provided, on a
stable, level and horizontal surface.
◗ Do not put perfume, vinegar,starch,descaling agents, ironing aids
or other chemicals in the water tank.
◗ This appliance is intended for household use only.
Before first use
1 Check if the voltage rating on the typeplate corresponds to the
supply in your home.
C
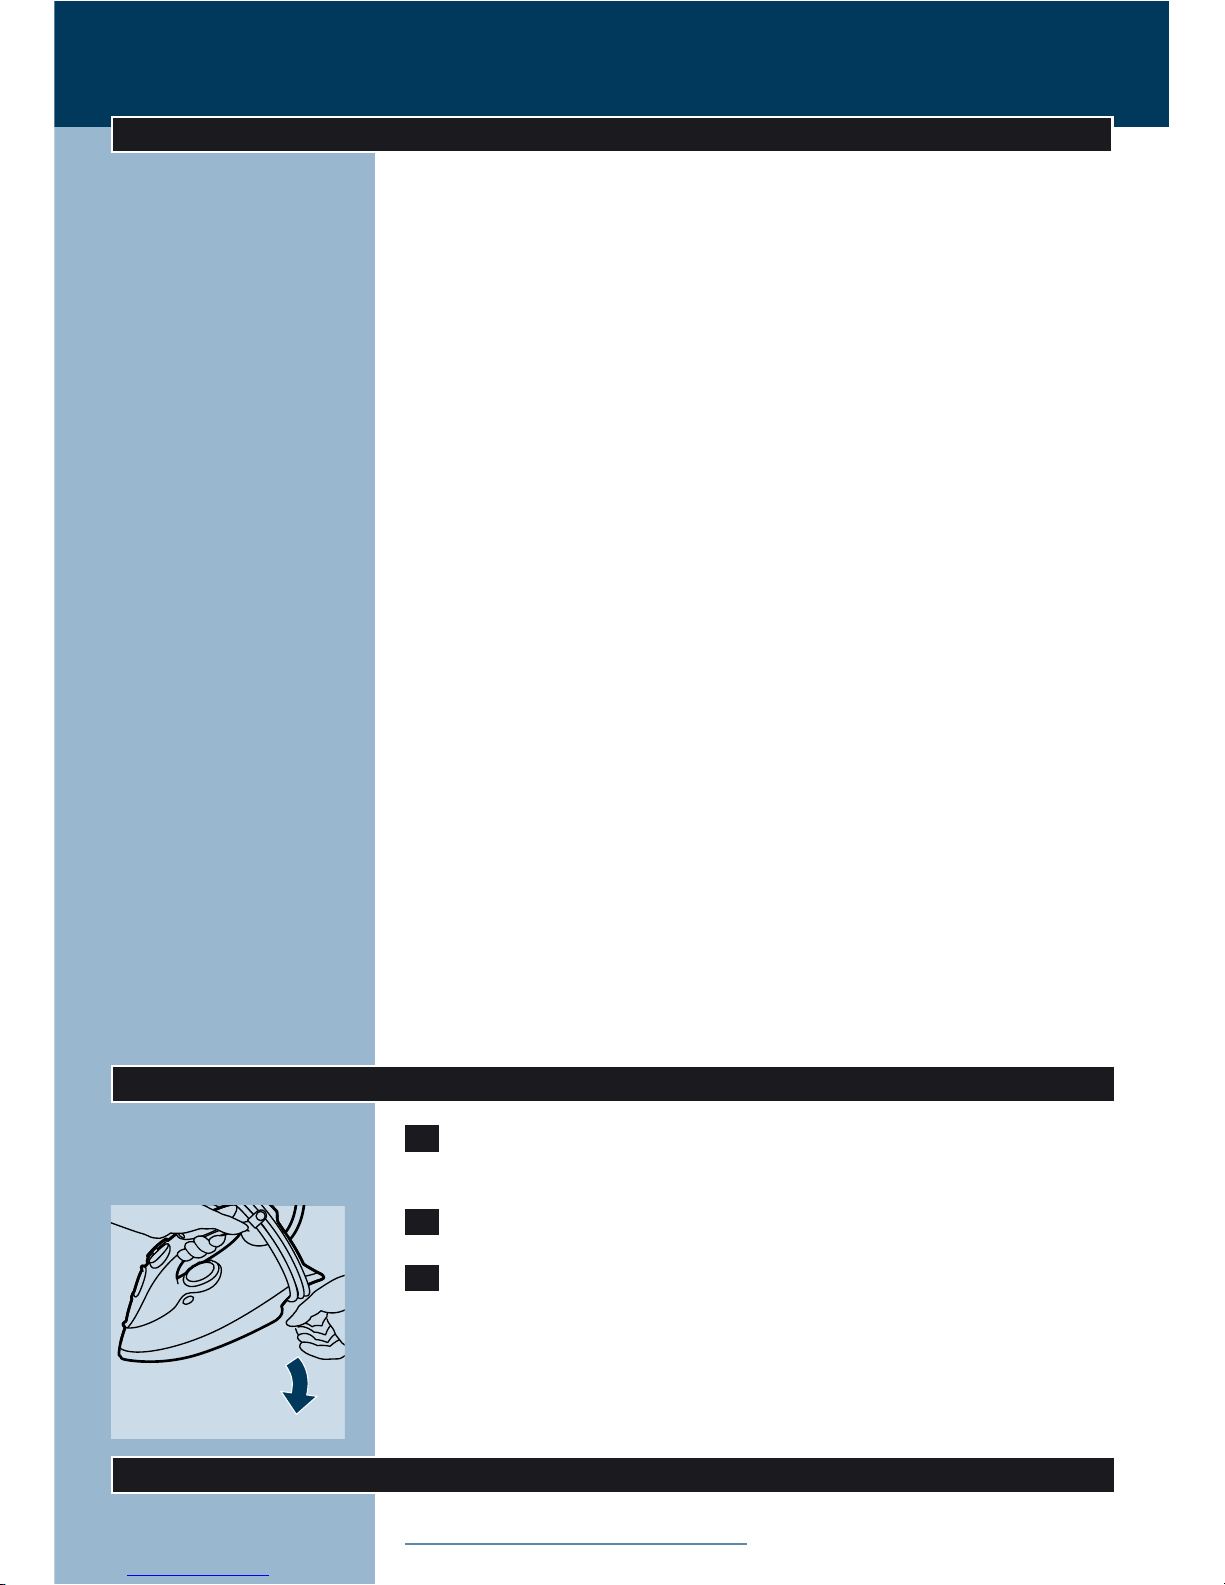
2 Remove any sticker or protective foil from the soleplate.
3 Heat up the iron to maximum temperature and iron over a
piece of damp cloth for several minutes to remove any residue
on the soleplate.
The iron may give out some smoke when using it for the first time.
After a short while this will cease.
Filling the water tank
Do not immerse the iron in water.
ENGLISH4
1 Remove the plug from the wall socket.
C
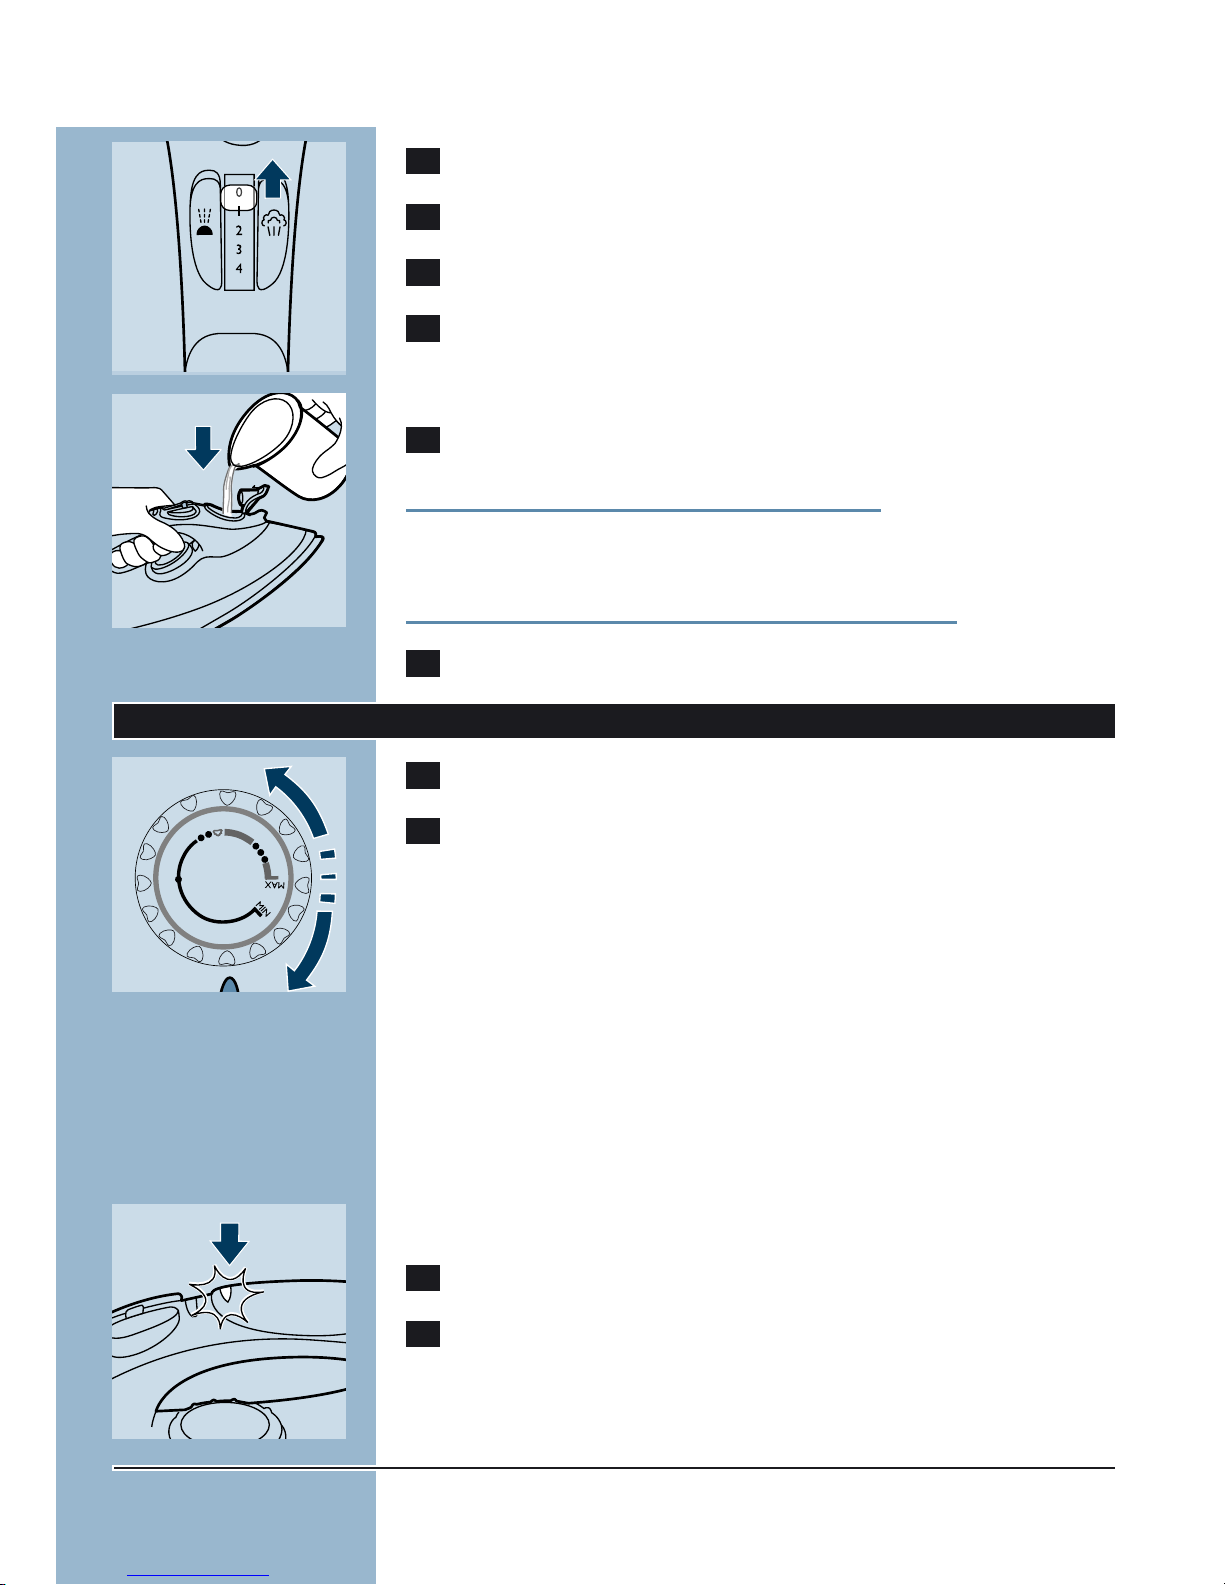
2 Set the steam control to position O (= no steam).
3 Open the filling cap.
4 Hold the iron in a tilted position.
C
5 Pour tap water from the filling jug into the water tank up to
the maximum level.
Do not fill the tank beyond the MAX indication.
If the tap water in your area is very hard, we advise you to mix it with
an equal portion of distilled water, or to use distilled water only.
Do not use vinegar, starch or chemically descaled water.
6 Press to close the filling cap (click!).
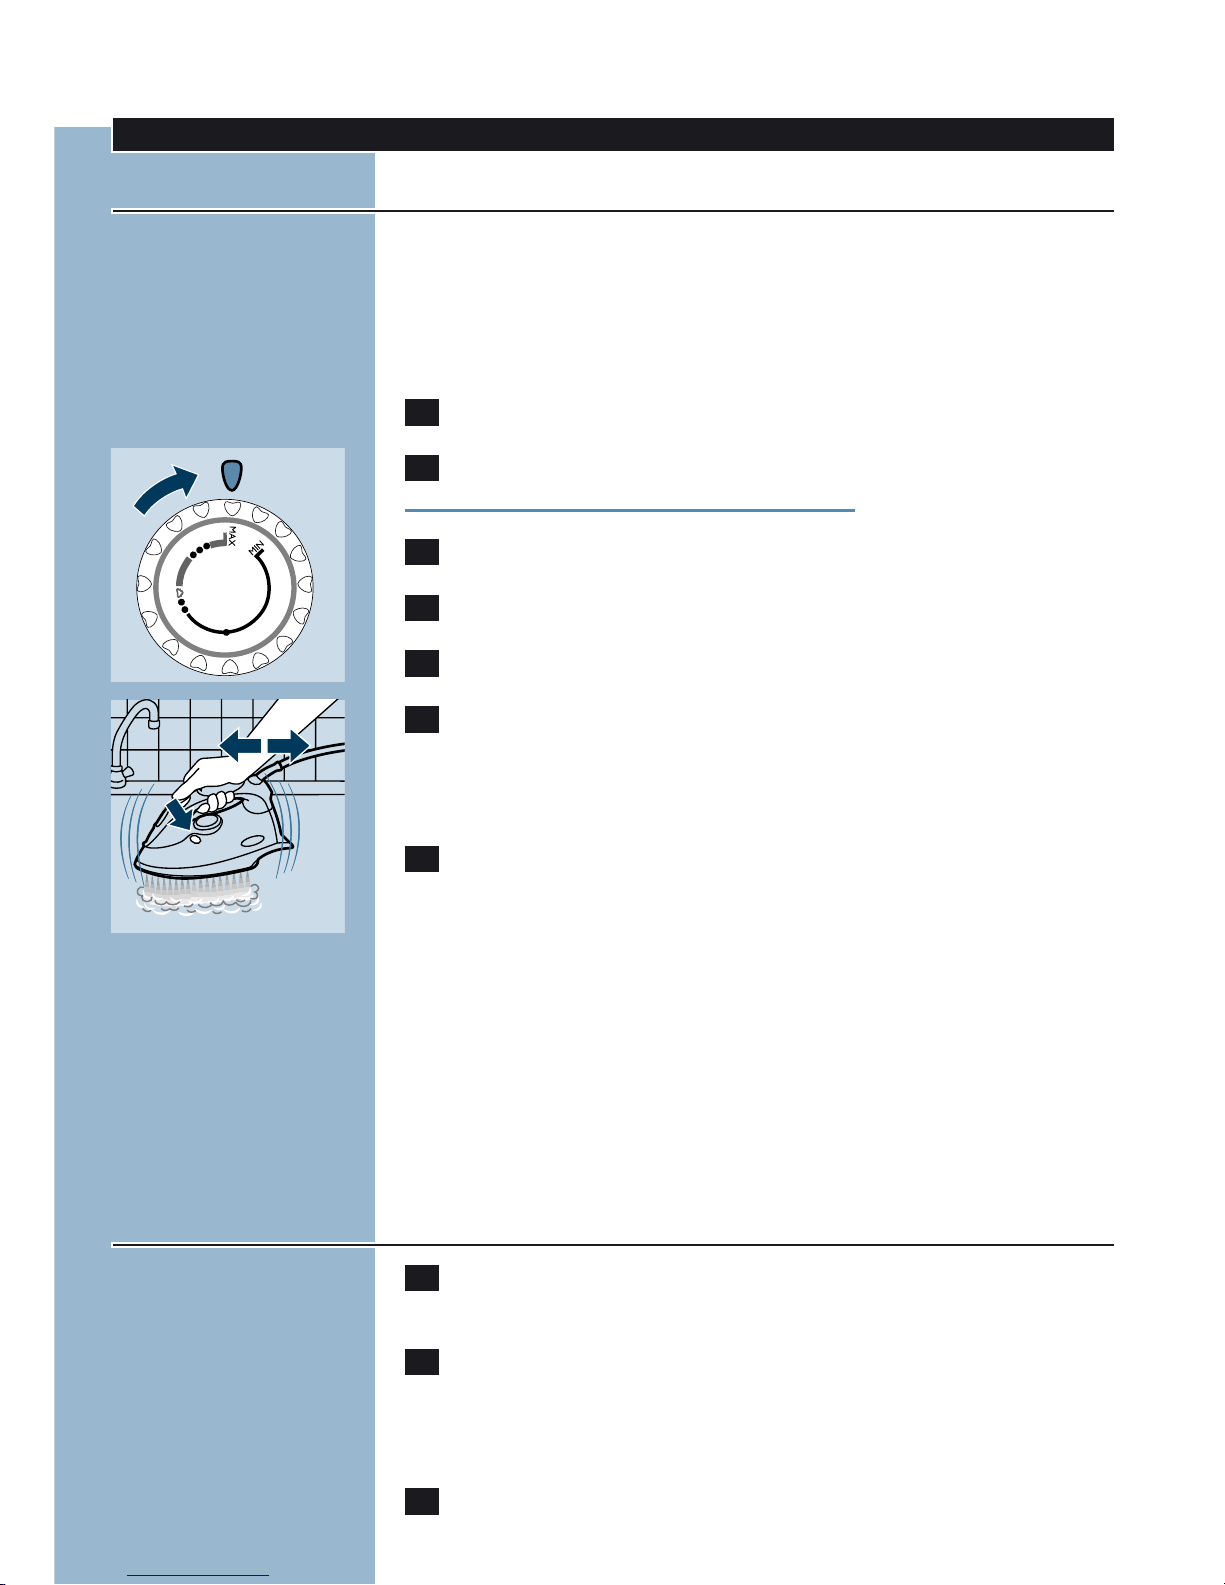
Setting the temperature
1 Put the iron on its heel.
C
2 Set the temperature control to the required ironing
temperature by turning it to the position of the temperature
indicator.
- Check the garment label for the required ironing temperature.
- 1 Synthetic fabrics (e.g. acrylic, viscose, polyamide, polyester)
- 1 Silk
- 2 Wool
- 3 Cotton, linen
- When you do not know what kind of fabric(s) the article is made of,
try to iron on a spot which will be invisible when you wear it.
- Silk, woolen and synthetic materials: iron the reverse side of the
fabric to prevent shiny spots.To prevent stains, avoid using the spray
function.
- Start ironing the articles that require the lowest ironing temperature,
such as those made of synthetic fibers.
3 Put the plug in a grounded wall socket.
C
4 When the amber temperature pilot light has first gone out,
wait for a while before start ironing.
B
The amber pilot light will come on from time to time during ironing.
For Auto-shut-off versions (type GC3135 only)
If the Auto-shut-off is activated (red pilot light blinks), move the iron
slightly to deactivate it (blinking stops).
ENGLISH 5
L
I
N
E
N
C
O
T
T
O
N
W
O
O
L
S
I
L
K
N
Y
L
O
N
L
I
N
O
A
L
G
O
D
O
N
L
A
N
A
S
E
D
A
N
I
L
O
N

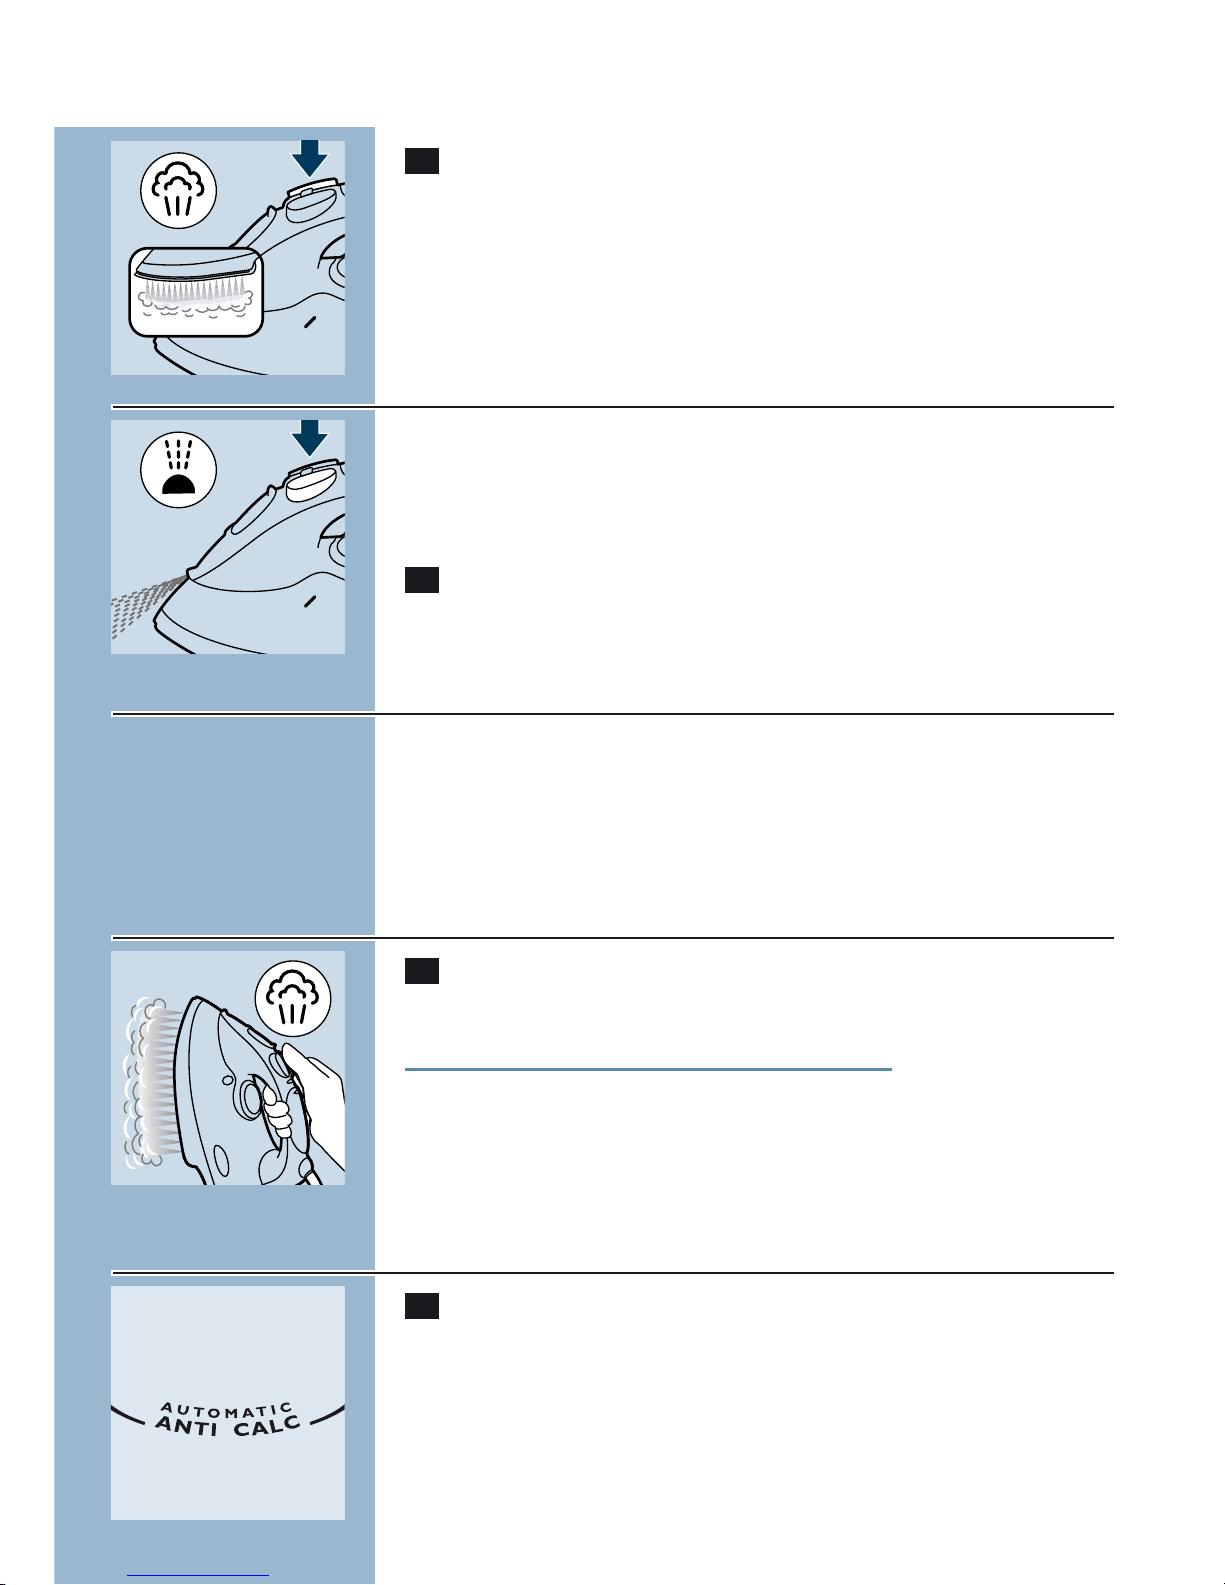
Steam-ironing
Make sure that there is enough water in the water tank.
1 Set the temperature control to the recommended position.
See section 'Setting the temperature'.
C
2 Set the steam control to the appropriate steam position.
- 1 - 2 for moderate steam (temperature settings 2 to 3)
- 3 - 4 for maximum steam (temperature settings 3 to MAX)
B
Steaming will start as soon as the set temperature has been reached.
◗ If the selected ironing temperature is too low,water may drip from
the soleplate.Types GC3135, GC3130, GC3128, GC3126, GC3125,
GC3120, GC3115 are equipped with a drip stop system (refer to
'Drip stop' further on).
Ironing without steam
1 Set the steam control to position O (= no steam).
2 Set the temperature control to the recommended position.
See section 'Setting the temperature'.
Other features
Spraying
To remove stubborn creases at any temperature.
Make sure that there is enough water in the water tank.
C
1 Press the spray button a couple of times to moisten the
laundry.
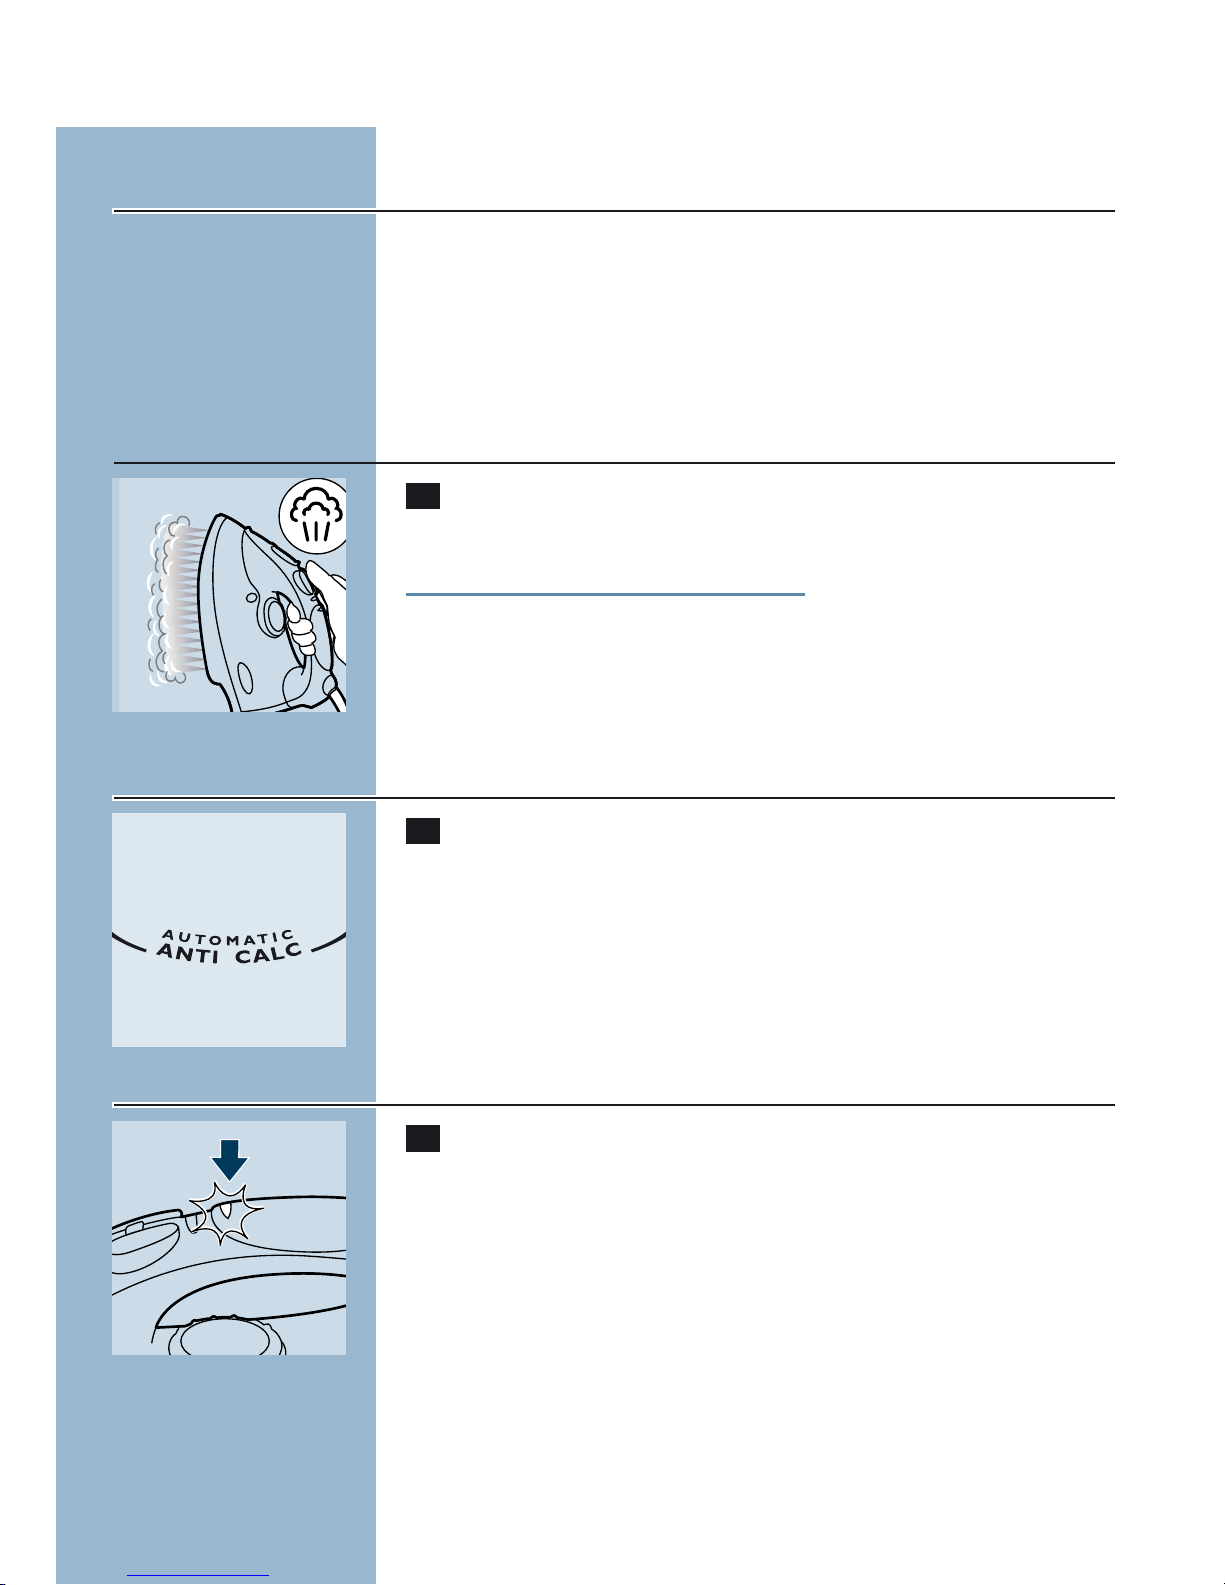
Shot of Steam
A powerful "shot" of steam helps remove stubborn creases.
The Shot-of-Steam function can only be used at temperature settings
between 2 and MAX.
C
1 Press and release the Shot-of-Steam button.
ENGLISH6
Drip Stop (types GC3135, GC3130, GC3128, GC3126,
GC3125, GC3120, GC3115 only)
This iron features a "Drip Stop" steam shut-off facility: the iron
automatically stops steaming at too low temperatures to prevent water
from dripping out of the soleplate.When this happens you may hear a
sound.
Vertical Shot of Steam (types GC3135, GC3130, GC3128,
GC3126, GC3125, GC3120, GC3117, GC3116, GC3115,
GC3112, GC3111, GC3110 only).
C
1 The Shot of Steam function can also be used when you hold
the iron in vertical position.
Never direct the steam towards people.
Automatic Anti-Calc (types GC3135, GC3130, GC3128,
GC3126, GC3125, GC3120, GC3117, GC3116, only).
C
1 The built-in Automatic Anti-Calc system reduces deposit of
scale and ensures a longer life of the iron.
Auto-shut-off (type GC3135, only)
C
1 An electronic safety device will automatically switch off the
iron if it has not been moved for a while.
◗ To indicate that the iron has been switched off, the red auto-off
pilot light will start blinking.
To heat up the iron again:
- Pick up the iron or move it slightly.
- The red auto-off pilot light will go out.The amber temperature pilot
lightmay come on, depending on the soleplate temperature.
- If the amber pilot light comes on after the iron is moved, wait for it to
go out before start ironing.
- If the amber pilot light does not come on after the irom is moved, the
iron is ready for use.
ENGLISH 7
Cleaning and maintenance
Calc-Clean
This is a Calc-Cleaning function which removes scale and impurities.
Use the Calc-Clean function once every two weeks. If the water in
your area is very hard (when flakes coming out from the soleplate
during ironing), the Calc-Clean function should be used more
frequently.
1 Set the steam control to position O.
2 Fill the water tank to the maximum level.
Do not use vinegar or other descaling agents.
C
3 Set the temperature control to MAX.
4 Put the plug in the wall socket.
5 Unplug the iron when the amber pilot light has gone out.
C
6 Hold the iron over the sink, press and hold the calc-clean
button and gently shake the iron.
B
Steam and boiling water will come out of the soleplate. Impurities and
flakes (if any) will be flushed out.
7 Release the Calc-Clean button as soon as all the water in the
tank has been used up.
Repeat the calc-cleaning process if the iron still contains a lot of
impurities.
After calc-cleaning
- Plug in the iron to let the soleplate dry up.
- Unplug the iron when the amber pilot light has gone out.
- Move the hot iron gently over a piece of used cloth to remove any
water stains that may have formed on the soleplate.
- Let the iron cool down before you store it.
After ironing
1 Remove the plug from the wall socket and let the iron cool
down.
2 Wipe flakes and any other deposits off the soleplate with a
damp cloth and a non-abrasive (liquid) cleaner.
Keep the soleplate smooth: avoid hard contact with metal objects.
3 Clean the upper part of the iron with a damp cloth.
ENGLISH8
L
I
N
E
N
C
O
T
T
O
N
W
O
O
L
S
I
L
K
N
Y
L
O
N
L
I
N
O
A
L
G
O
D
O
N
L
A
N
A
S
E
D
A
N
I
L
O
N

C
4 Regularly rinse the water tank with water. Empty the water
tank after cleaning.
Storage
1 Remove the plug from the wall socket and set the steam
control to position 0.
2 Empty the water tank.
C
3 Let the iron cool down.Wind the cord around the cord
storage facility and fix it with the cord clip.
4 Store the iron standing on its heel in a safe and dry place.
Environment
C
◗ Do not throw the appliance away with the normal household
waste at the end of its life, but hand it in at an official collection
point for recycling. By doing this you will help to preserve the
environment.
Guarantee & service
If you need information or if you have a problem, please visit the Philips
Web site at www.philips.com or contact the Philips Customer Care
Centre in your country (you will find its phone number in the
worldwide guarantee leaflet). If there is no Customer Care Centre in
your country, turn to your local Philips dealer or contact the Service
Department of Philips Domestic Appliances and Personal Care BV.
Troubleshooting
This chapter summarises the most common problems you could
encounter with your iron. Please read the different sections for more
details. If you are unable to solve the problem, please contact the
Philips Customer Care Centre in your country.
ENGLISH 9

Solution
Check the cord, the plug and the wall
socket.
Set the iron to the appropriate
temperature (see Setting the
temperature).
Fill the water tank (see Filling the
water tank).
Set to steam position between 1-4
(see Steam ironing).
Set the temperature control to the
steam area (2 to MAX). Put the
iron on its heel and wait until the
amber pilot light has gone out before
you start ironing.
Put the iron in horizontal position and
wait for a while before using the
(Vertical) Shot of Steam function
again.
Set the temperature control to the
steam area (2 to MAX). Put the
iron on its heel and wait until the
amber pilot light has gone out before
you start ironing.
Press to close the filling cap tightly
until you hear a click.
Set the iron to the appropriate
temperature (see Steam ironing).
Types GC3117, GC3116, GC3112,
GC3111, GC3110, GC3106 do not
use steam when using temperature
lower than 2 dots (2).
Empty the water tank before you
store the iron. Set the steam control
to position O and store the iron
upright on its heel.
Apply Calc-Clean a few times (see
Calc-Clean).
Shake the iron slightly to deactivate
the Auto-shut-off,the lamp will stop
blinking.
Possible cause(s)
Connection problem.
Temperature control set at MIN.
Not enough water in the water tank.
The steam control has been set to
position O.
The iron is not hot enough and/or
Drip Stop is activated.
The (Vertical) Shot of Steam function
has been used too often within a very
short period.
The iron is not hot enough.
The filling cap is not closed properly.
The iron is not hot enough.
The iron is put in horizontal position
with water still left in the water tank.
Hard water forms flakes inside the
soleplate.
Auto-shut-off is activated.
See "Auto-shut-off" section.
Problem
The iron is plugged in but the soleplate
is cold.
No steam
No Shot of Steam or No Vertical Shot
of Steam (GC3135, GC3130, GC3128,
GC3126, GC3125, GC3120,GC3117,
GC3116, GC3115, GC3112,GC3111,
GC3110 only)
Water droplets on fabric
Water drips from the soleplate after
the iron has been stored or cooled
down.
Flakes and impurities coming out from
soleplate during ironing.
Red pilot light blinks
(type GC3135 only).
ENGLISH10

Wichtig
Lesen Sie diese Bedienungsanleitung vor dem ersten Gebrauch des
Geräts sorgfältig durch und bewahren Sie sie zur späteren
Einsichtnahme auf.
◗ Überprüfen Sie, ob die auf dem Typenschild angegebene
Betriebsspannung mit der örtlichen Netzspannung übereinstimmt,
bevor Sie das Gerät anschließen.
◗ Verwenden Sie das Gerät ausschließlich an einer Schukosteckdose.
◗ Benutzen Sie das Gerät nicht, wenn Schäden am Stecker, am Kabel
oder am Gerät selbst erkennbar sind, oder wenn das Gerät
herunter gefallen oder undicht ist.
◗ Überprüfen Sie das Netzkabel regelmäßig auf Unversehrtheit.
◗ Wenn das Netzkabel defekt oder beschädigt ist, darf es nur von
einem Philips Service-Center oder einer von Philips autorisierten
Werkstatt durch ein Original-Ersatzkabel ausgetauscht werden, um
Gefährdungen zu vermeiden.
◗ Lassen Sie das Gerät nicht unbeaufsichtigt, solange es am
Stromnetz angeschlossen ist.
◗ Tauchen Sie das Bügeleisen und die Ladestation (sofern vorhanden)
nicht in Wasser.
◗ Halten Sie das Gerät außer Reichweite von Kindern.
◗ Die Bügelsohle wird sehr heiß. Berühren Sie sie nicht, um
Verbrennungen zu vermeiden.
◗ Achten Sie darauf, dass das Netzkabel nicht mit der heißen
Bügelsohle in Kontakt kommt.
◗ Wenn Sie das Bügeln beenden, das Gerät reinigen, den
Wasserbehälter füllen oder leeren oder den Raum nur kurz
verlassen, stellen Sie stets den Dampfregler auf Position 0,stellen
Sie das Bügeleisen aufrecht und ziehen Sie den Netzstecker aus
der Steckdose.
◗ Platzieren und benutzen Sie das Bügeleisen und die Ladestation
(sofern vorhanden) stets auf einer stabilen, ebenen und
waagerechten Unterlage.
◗ Geben Sie niemals Parfüm, Essig, Stärke, Entkalker, Bügelhilfen oder
andere Chemikalien in den Wasserbehälter.
◗ Dieses Gerät ist nur für den Gebrauch im Haushalt bestimmt.
Vor dem ersten Gebrauch
1 Prüfen Sie, ob die örtliche Netzspannung mit der
Spannungsangabe auf dem Typenschild übereinstimmt.
C
2 Entfernen Sie vor dem ersten Gebrauch alle Aufkleber und die
Schutzfolie von der Bügelsohle.
3 Heizen Sie die Bügelsohle auf die maximale Temperatur auf, und
führen Sie das Bügeleisen einige Minuten über ein feuchtes
Tuch, damit sich alle Verunreinigungen von der Bügelsohle
DEUTSCH 11

Einige Teile des Bügeleisens sind leicht eingefettet und können beim
ersten Gebrauch etwas Rauch abgeben. Das geht nach kurzer Zeit
vorüber.
Den Wasserbehälter füllen
Tauchen Sie das Bügeleisen niemals in Wasser.
1 Ziehen Sie vor dem Füllen den Netzstecker aus der Steckdose.
C
2 Stellen Sie den Dampfregler auf Position O (= kein Dampf).
3 Öffnen Sie den Verschluß des Wasserbehälters.
4 Halten Sie das Eisen schräg.
C
5 Füllen Sie den Wasserbehälter mit Hilfe des Bechers bis zur
Markierung mit Leitungswasser.
Füllen Sie niemals mehr Wasser ein als bis zur Markierung MAX.
Sie können Leistungswasser verwenden. Ist das Wasser in Ihrer Gegend
hart (Härtegrad 3 oder 4), so ist allerdings zu empfehlen, es zur Hälfte
mit destilliertem Wasser zu mischen oder mit reinem destilliertem
Wasser zu füllen. - Ihre Wasserwerke geben Ihnen Auskunft über die
Härte Ihres Wassers.
Verwenden Sie keinen Essig, keine Wäschestärke bzw. -steife und kein
chemisch enthärtetes Wasser.
6 Drücken Sie den Deckel des Wasserbehälters fest auf ("Klick").
Einstellen der Bügeltemperatur
1 Stellen Sie das Bügeleisen auf den Rücken.
C
2 Stellen Sie den Temperaturregler auf die zum Bügeln
erforderliche Temperatur. Sie ist auf der Skala des Reglers
ablesbar.
- Prüfen Sie die Bügelvorschrift auf dem Etikett des Wäschestücks.
- 1 Sythetics, z. B.Akryl,Viskose, Polyamid, Polyester
- 1 Seide
- 2 Wolle
- 3 Baumwolle, Leinen
- Wenn Ihnen die Art des Materials nicht bekannt ist, so prüfen Sie
die Bügeltemperatur an einer Stelle, die bei normaler Verwendung
nicht sichtbar ist.
- Bügeln Sie Wolle, Seide und Sythetics stets von links, um glänzende
Stellen zu vermeiden.Verwenden Sie kein Bügelspray; es könnte
Flecken verursachen.
- Beginnen Sie stets mit den Textilien, die nur eine niedrige Temperatur
vertragen, also gfs. mit Synthetics.
DEUTSCH12
L
I
N
E
N
C
O
T
T
O
N
W
O
O
L
S
I
L
K
N
Y
L
O
N
L
I
N
O
A
L
G
O
D
O
N
L
A
N
A
S
E
D
A
N
I
L
O
N

3 Stecken Sie den Netzstecker in eine Schuko-Steckdose.
C
4 Wenn die gelbe Kontroll-Lampe ausgegangen ist,so warten Sie
bitte noch eine Weile, bevor Sie mit dem Bügeln beginnen.
B
Die gelbe Kontrollampe schaltet sich von Zeit zu Zeit an und wieder
aus.
(Nur Typen GC3135,) Die automatische Ausschaltung
Hat die Automatik das Gerät ausgeschaltet, so blinkt die rote KontrollLampe.Wenn Sie das Bügeleisen leicht hin und her bewegen, schaltet
es sich wieder ein und die rote Kontroll-Lampe blinkt nicht mehr.
Dampfbügeln
Achten Sie darauf, daß genügend Wasser im Wasserbehälter ist.
1 Stellen Sie den Temperaturregler auf die erforderliche
Temperatur.
Vgl. den Abschnitt "Die Temperatur einstellen".
C
2 Stellen Sie dann den Dampfregler auf die erforderliche Position.
- 1 bis 2: mäßiger Dampf, bei Temperatureinstellung 2 bis 3.
- 3 bis 4: starker Dampf, bei Temperatureinstellung 3 bis MAX .
B
Sobald die eingestellte Temperatur erreicht ist, können Sie mit dem
Dampfbügeln beginnen.
◗ Wenn die eingestellte Temperatur zu niedrig ist, kann Wasser aus
der Bügelsohle tropfen. (Typen GC3135, GC3130, GC3128,
GC3126, GC3125, GC3120, GC3115:) Diese Modelle sind mit
einem Tropf-Stop versehen.- Vgl. den Abschnitt "Tropf-Stop".
Trockenbügeln
1 Stellen Sie den Dampfregler auf Position 0 (= kein Dampf).
2 Stellen Sie den Temperaturregler auf die erforderliche
Temperatur.
Vgl. den Abschnitt "Die Temperatur einstellen".
Andere Anwendungen
Bügelgut einsprühen
Hiermit lassen sich bei jeder Temperatur hartnäckige Falten ausbügeln.
Achten Sie darauf, daß genügend Wasser im Wasserbehälter ist.
DEUTSCH 13
DEUTSCH14
C
1 Drücken Sie einige Male die Sprühtaste, um die Wäsche
anzufeuchten.
Dampfstoß
Ein kräftiger Dampfstoß beseitigt selbst hartnäckige Falten aus den
Textilien.
Der Dampfstoß kann nur bei Temperatureinstellungen zwischen 2
und MAX angewandt werden.
C
1 Drücken Sie die Dampfstoßtaste, und lassen Sie sie wieder los.
(Nur Typen GC3135, GC3130, GC3128, GC3126, GC3125,
GC3120, GC3115:) Tropf-Stop
Ihr Bügeleisen ist mit einem "Tropf-Stop" ausgerüstet, der verhindert, dass
bei zu geringer Temperatur der Bügelsohle Wasser aus dem Bügeleisen
tropft.Wenn er sich einschaltet, wird ein Geräusch hörbar ("Klick").
(Nur Typen GC3135, GC3130, GC3128, GC3126, GC3125,
GC3120, GC3117, GC3116, GC3115, GC3112, GC3111,
GC3110:) Vertikal-Dampfstoß
C
1 Der Dampfstoß kann auch bei senkrecht gehaltenem
Bügeleisen angewandt werden.
Richten Sie den Dampstoß niemals auf Personen!
(Nur Typen GC3135, GC3130, GC3128, GC3126, GC3125,
GC3120, GC3117, GC3116:) Automatische Entkalkung
C
1 Das integrierte Anti-Kalk-System reduziert die
Kalkablagerungen und verlängert die Nutzungsdauer Ihres
Bügeleisens.
 Loading...