

Page 1
Installation and Assembly - Universal Adapter
Bracket for 22" - 46" LCD Screens
IMPORTANT! Read instruction sheet before you st art installation and assembly .
Before you begin, make sure all parts shown are included with your product.
Models: PLP-UNM, PLP-UNM-S,
PLP-UNMP , PLP-UNMP-S
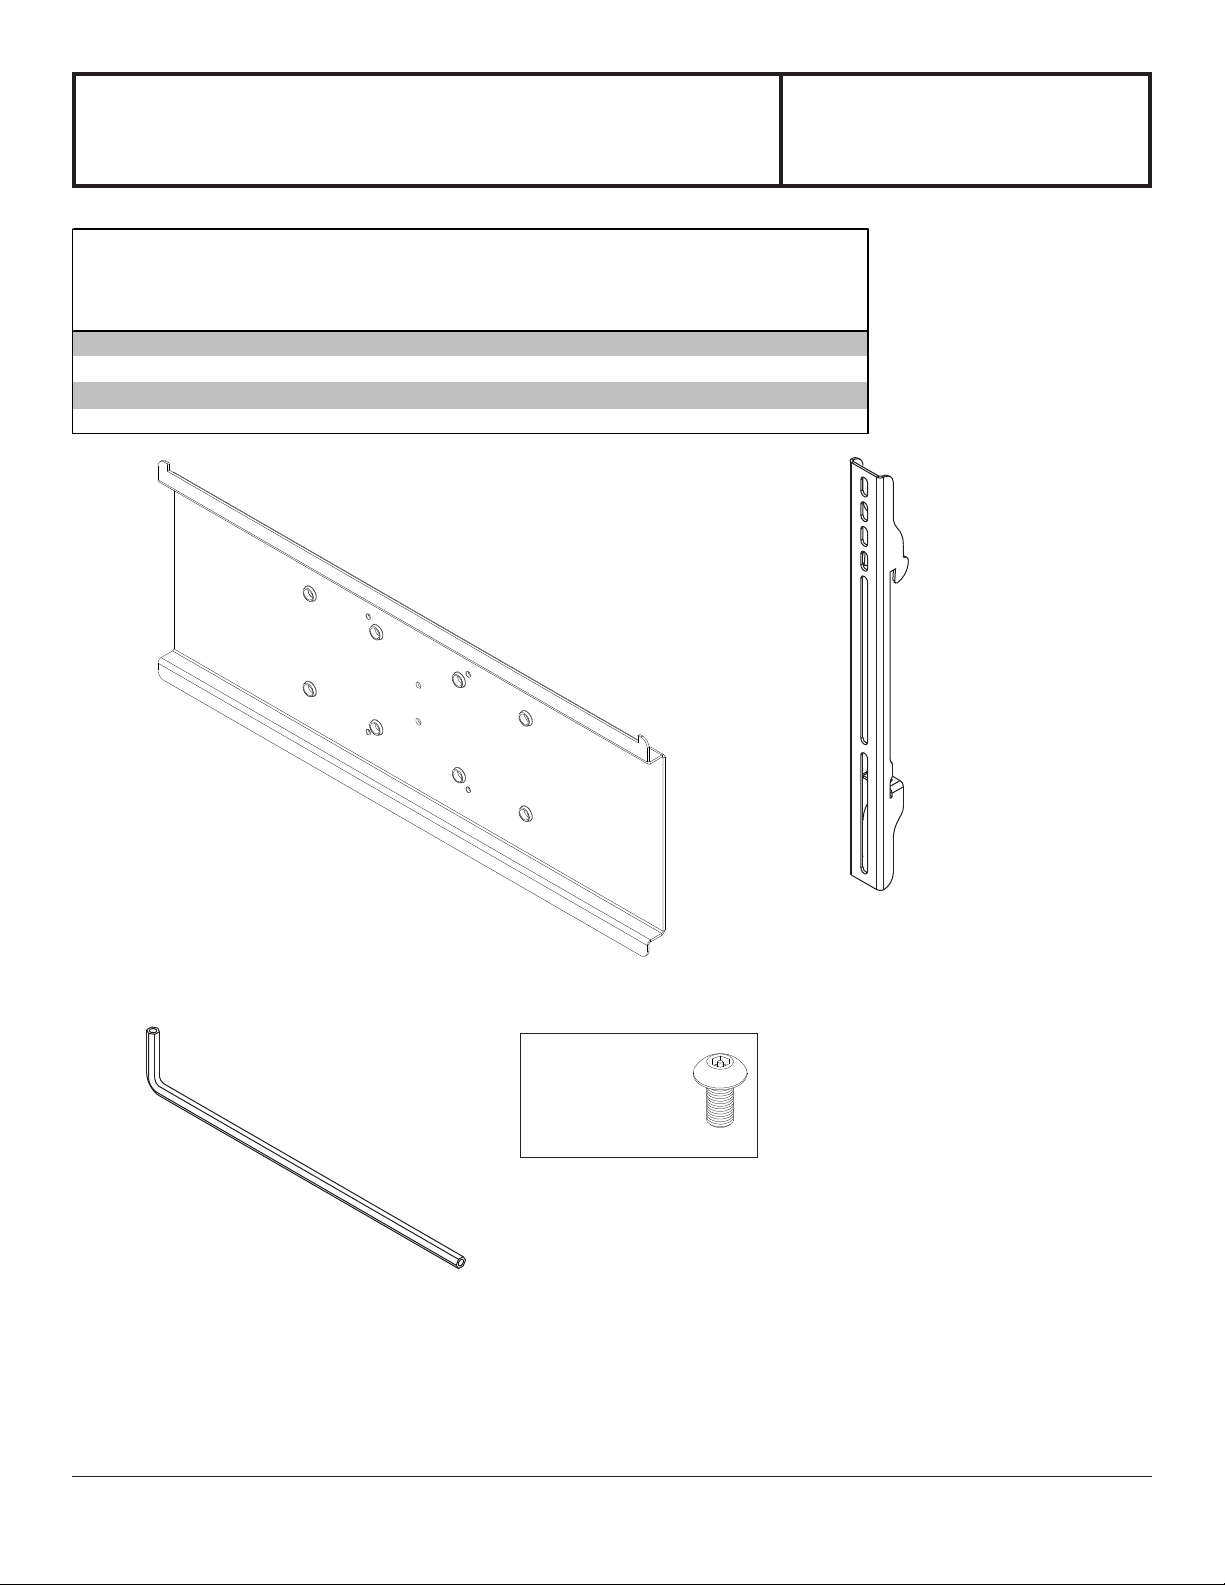
Parts List
De scrip tion Qty Part # Par t # Part # Par t #
adapter plat e 1 201-1016 201-4016 201-1016 201-4016
AA
adapter bracket 2 201-1512 201-4512 201-1515 201-4515
BB
allen wrench 1 560-9646 560-9646 560-0072 560-0072
CC
M5 x 10mm sc rew 4 520-1063 520-1063 520-9250 520-9250
DD
PLP-UNM PLP-UNM-S PLP-UNMP PLP-UNMP-S
AA
BB
CC
Used with specific
mounts only
1 of 5
DD
ISSUED: 06-01-06 SHEET #: 202-9145-4 08-08-12
Page 2
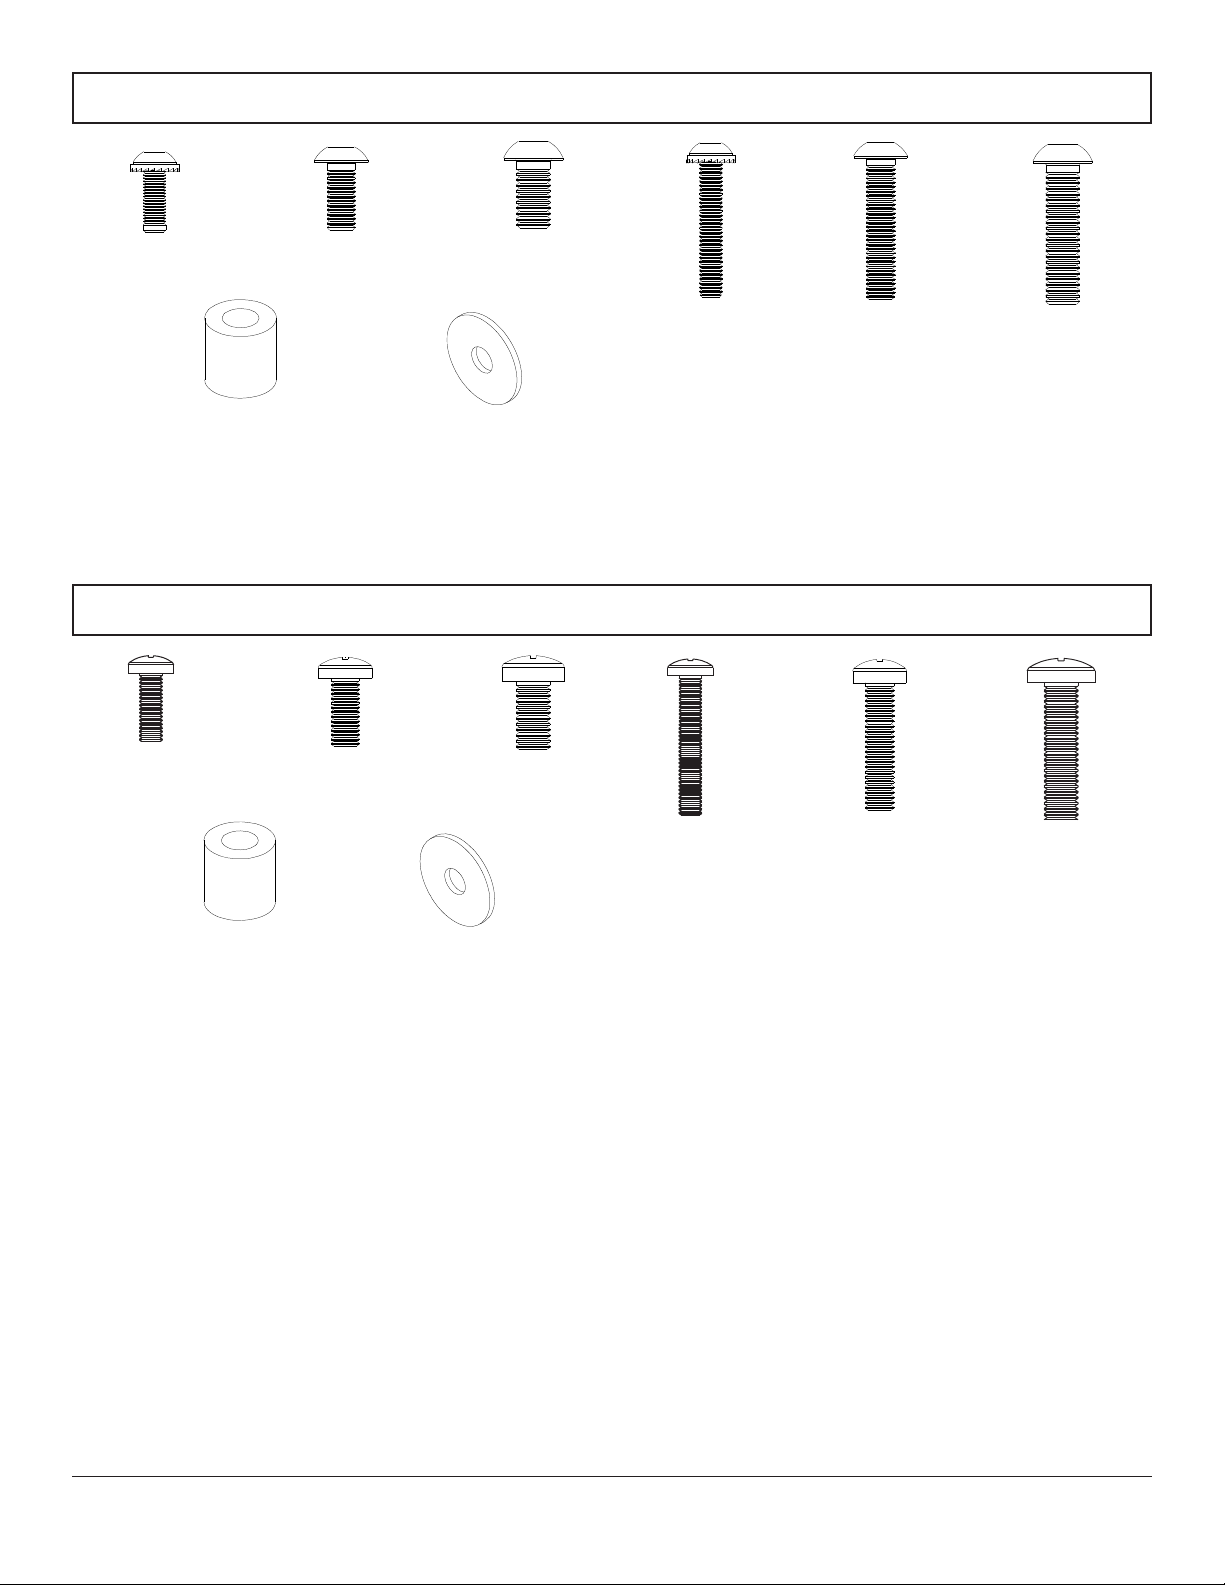
Security Adapter Bracket Fasteners
M4 x 12 mm (4)
510-1079
I.D. .26" (6.6 mm) (4)
540-1058
M4 x 12 mm (4)
504-9013
M5 x 12 mm (4)
520-1064
I.D. .203" (5.16 mm) (4)
M6 x 12 mm (4)
520-1050
M4 x 25 mm (4)
510-1082
540-1040
Phillips Adapter Bracket Fasteners
M5 x 12 mm (4)
520-1027
M6 x 12 mm (4)
520-1 128
M5 x 25 mm (4)
520-1 122
M6 x 25 mm (4)
520-121 1
I.D. .26" (6.6 mm) (4)
540-1058
I.D. .203" (5.16 mm) (4)
540-1040
M4 x 25 mm (4)
504-1015
M5 x 25 mm (4)
520-9543
M6 x 25 mm (4)
520-1208
2 of 5
ISSUED: 06-01-06 SHEET #: 202-9145-4 08-08-12
Page 3

Installing Adapter Brackets
WARNING
• Tighten screws so adapter brackets are firmly attached. Do not tighten with excessive force. Overtightening can cause
stress damage to screws, greatly reducing their holding power and possibly causing screw heads to become
detached. Tighten to 40 in. • lb (4.5 N.M.) maximum torque.
• If screws don't get three complete turns in the screen inserts or if screws bottom out and bracket is still not tightly
secured, damage may occur to screen or product may fail.
• This product is intended for indoor use only . Use of this product outdoors could lead to product failure and personal
injury.
To prevent scratching the screen, set a cloth on a flat, level surface that will support the weight of the screen. Place
1
screen face side down. If screen has knobs on the back, remove them to allow the adapter brackets to be attached.
Place adapter brackets (BB) on back of screen, align to holes, and center on back of screen as shown below . Att ach
the adapter brackets to the back of the screen using the appropriate combination of screws, washers and spacers as
shown in figure 1.1 and figure 1.2.
NOTE: Top and bottom holes must always be used.
Verify that all holes are properly aligned, and then tighten screws using a phillip s screwdriver.
NOTE: If using security screws, tighten using security allen wrench (CC).
X
CENTER BRACKETS VERTICALLY
BB
ON BACK OF SCREEN
X
NOTE: "X" dimensions should be equal.
Notes:
• The number of fasteners used will vary , depending upon the type of screen.
• Washers and spacers may not be used, depending upon the type of screen.
NOTE: For flat back screens proceed to step 1-1. For bump-out or recessed back screen skip to step 1-2.
3 of 5
ISSUED: 06-01-06 SHEET #: 202-9145-4 08-08-12
Page 4

For Flat Back Screen
Begin with the shortest length screw, hand thread through washer and adapter bracket into screen as shown below .
1- 1
Screw must make at least three full turns into the mounting hole and fit snug into place. Do not over tighten. If
screw cannot make three full turns into the screen, select a longer length screw from the baffled fastener pack.
Repeat for remaining mounting holes, level brackets and tighten screws.
NOTE: Spacers may not be used, depending upon the type of screen.
If you have any questions, please call Peerless customer care at 1-800-865-2112.
fig. 1.1
SCREEN
WASHER
SCREW
ADAPTER
BRACKET (BB)
For Bump-out or Recessed Back Screen
Begin with longer length screw, hand thread through washer , adapter bracket and spacer in that order into screen as
1- 2
shown below. Screw must make at least three full turns into the mounting hole and fit snug into place. Do not over
tighten. If screw cannot make three full turns into the screen, select a longer length screw from the baffled fastener
pack. Repeat for remaining mounting holes, level brackets and tighten screws.
SCREEN
SP ACER
If you have any questions, please call Peerless customer care at 1-800-865-2112.
fig. 1.2
WASHER
SCREW
ADAPTER
BRACKET (BB)
4 of 5
ISSUED: 06-01-06 SHEET #: 202-9145-4 08-08-12
Page 5

Mounting and Removing Flat Panel Screen
WARNING
• Always use an assistant or mechanical lifting equipment to safely lift and position the plasma television.
Refer to mount instruction sheet for attachment of adapter plate to mount.
Hook adapter brackets (BB) onto adapter plate (AA), then slowly swing screen in as shown. Turn screws clockwise at
2
least six times to prevent screen from being removed as shown in detail 1.
NOTE: Tighten screws using allen wrench (CC).
Screen can be adjusted horizontally if desired.
NOTE: T o lock the screen down, tighten screws to adapter bracket as shown in det ail 1.
T o remove screen from mount, loosen screws, swing screen away from mount, and lift screen off of mount.
BB
AA
SCREWS
BB
DETAIL 1
AA
5 of 5
ISSUED: 06-01-06 SHEET #: 202-9145-4 08-08-12
All other brand and product names are trademarks or registered trademarks of their respective owners.
© 2012, Peerless Industries, Inc. All rights reserved.
 Loading...