

Parkside PDST 10 A2 Translation Of The Original Instructions
AIR HOSE REEL PDST 10 A2
GB HU
AIR HOSE REEL
Operation and Safety Notes
Translation of the original instructions
SI CZ
NAVIJALNI BOBEN S CEVJO
ZA STISNJEN ZRAK
Navodila za montažo, uporabo in varnostna navodila
Prevod originalnega navodila za uporabo
SK DE AT CH
NAVÍJACÍ BUBON S TLAKOVOM
HADICOU
Návod na obsluhu a bezpečnostné upozornenia
Preklad originálneho návodu na obsluhu
SŰRÍTETT LEVEGŐS
TÖMLŐDOB
Kezelési és biztonsági hivatkozások
Az eredeti használati utasítás fordítása
NAVÍJECÍ BUBEN S TLAKOVOU
HADICÍ
Návod k obsluze a bezpečnostní pokyny
Překlad originálního provozního návodu
DRUCKLUFT -
SCHLAUCHTROMMEL
Bedienungs- und Sicherheitshinweise
Originalbetriebsanleitung
IAN 304723
HU
SI
CZ SK

GB
Before reading, unfold the page containing the illustrations and familiarise yourself with all
functions of the device.
HU
Olvasás előtt hajtsa ki az ábrát tartalmazó oldalt, és ezután ismerje meg a készülék mindegyik funkcióját.
SI
Pred branjem odprite stran s slikami in se nato seznanite z vsemi funkcijami naprave.
CZ
Než začnete číst tento návod k obsluze, rozložte stránku s obrázky a seznamte se se všemi
funkcemi zařízení.
SK
Prv než začnete čítať tento návod, rozložte si stranu s obrázkami a potom sa oboznámte so
všetkými funkciami zariadenia.
DE AT CH
Klappen Sie vor dem Lesen die Seite mit den Abbildungen aus und machen Sie sich
anschließend mit allen Funktionen des Gerätes vertraut.
GB Operation and Safety Notes Page 5
HU Kezelési és biztonsági hivatkozások Oldal 15
SI Navodila za upravljanje in varnostna opozorila Stran 27
CZ Návod k obsluze a bezpečnostní pokyny Strana 39
SK Návod na obsluhu a bezpečnostné upozornenia Strana 49
DE / AT / CH Montage-, Bedienungs- und Sicherheitshinweise Seite 59
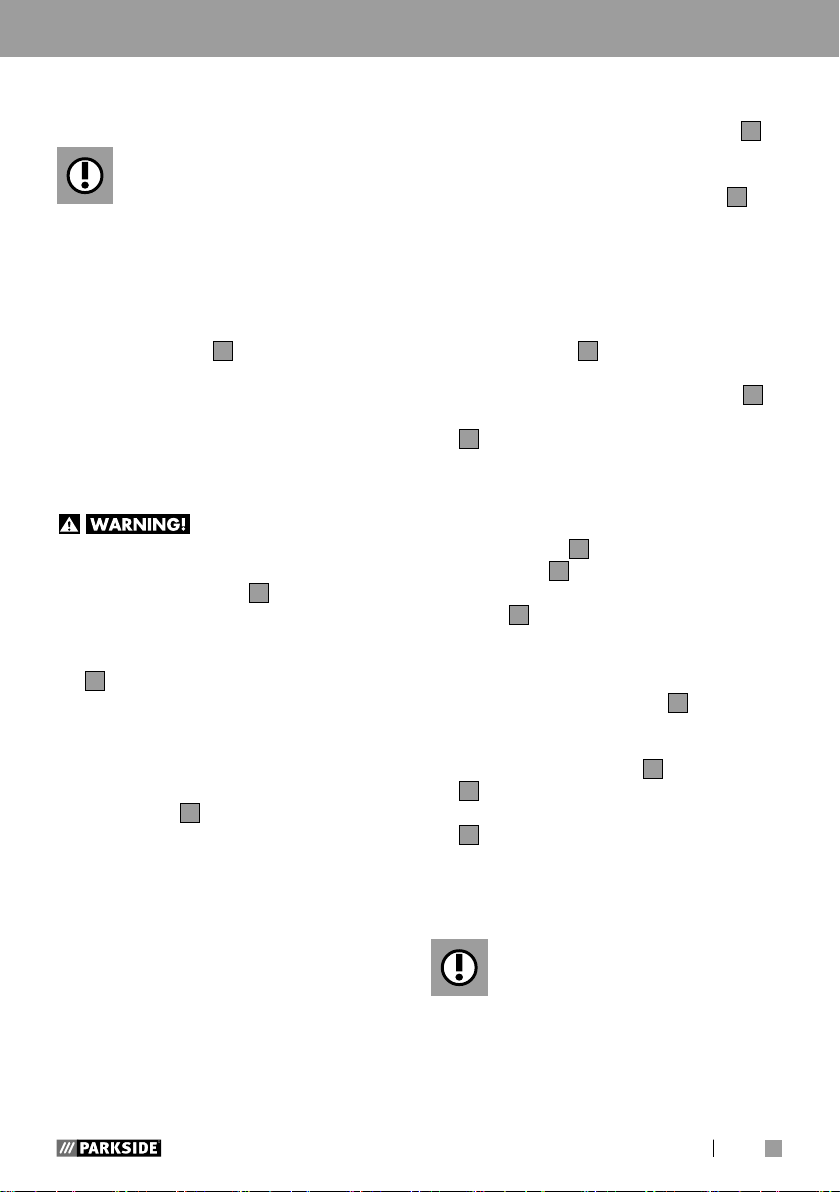
A
3
2
1
4
5
6
DB
4
7
8
9
EC
1110
8


Table of contents
List of pictograms used ................................................................................... Page 6
Introduction .......................................................................................................... Page 6
Intended use ............................................................................................................ Page 6
Features ................................................................................................................... Page 6
Technical specifications ........................................................................................... Page 7
Package contents ..................................................................................................... Page 7
Safety instructions for pneumatic tools .................................................. Page 7
Residual risk ............................................................................................................ Page 9
Operation .............................................................................................................. Page 9
Before starting up .................................................................................................... Page 9
Mounting ................................................................................................................. Page 9
Starting up ............................................................................................................... Page 10
Maintenance and cleaning ...................................................................................... Page 11
Warranty and service information ........................................................... Page 11
Warranty conditions ................................................................................................ Page 11
Extent of warranty ................................................................................................... Page 12
Processing of warranty claims ................................................................................. Page 12
Environmental notes and disposal information ................................. Page 13
Declaration of Conformity ............................................................................. Page 13
5GB
List of pictograms used / Introduction
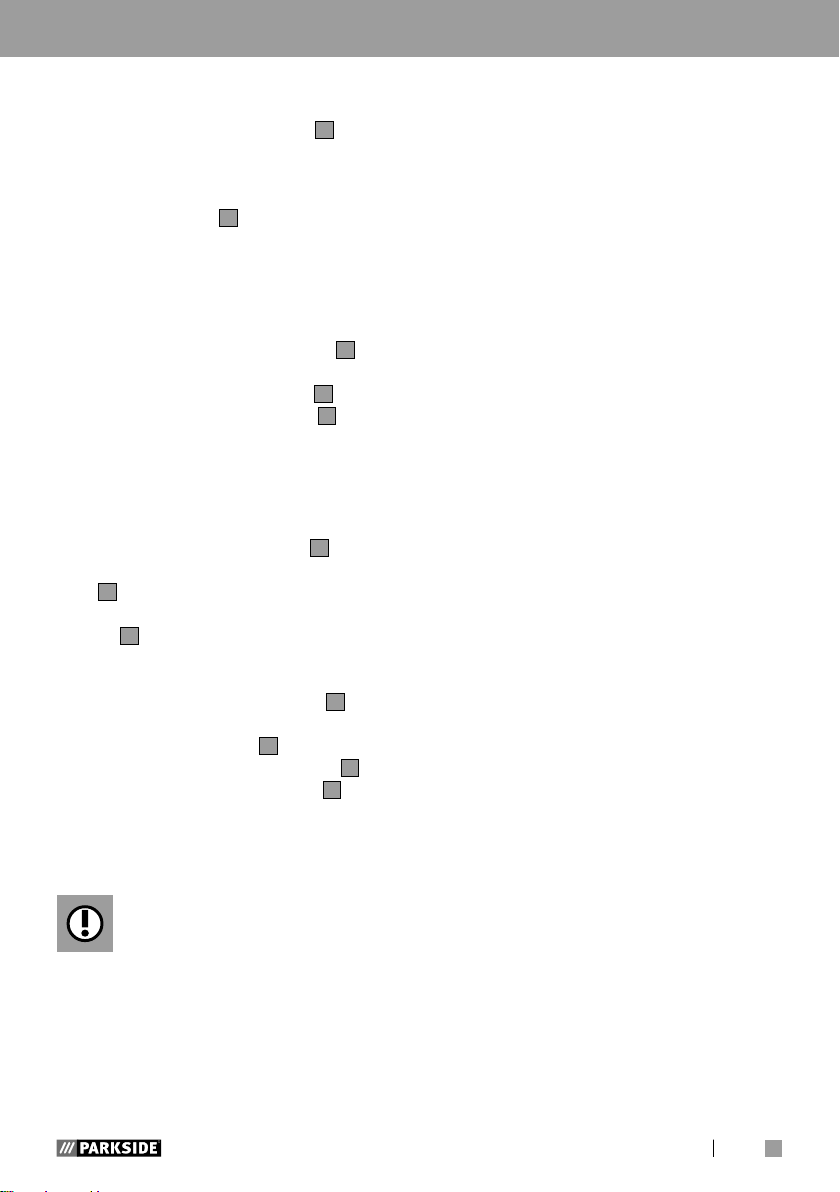
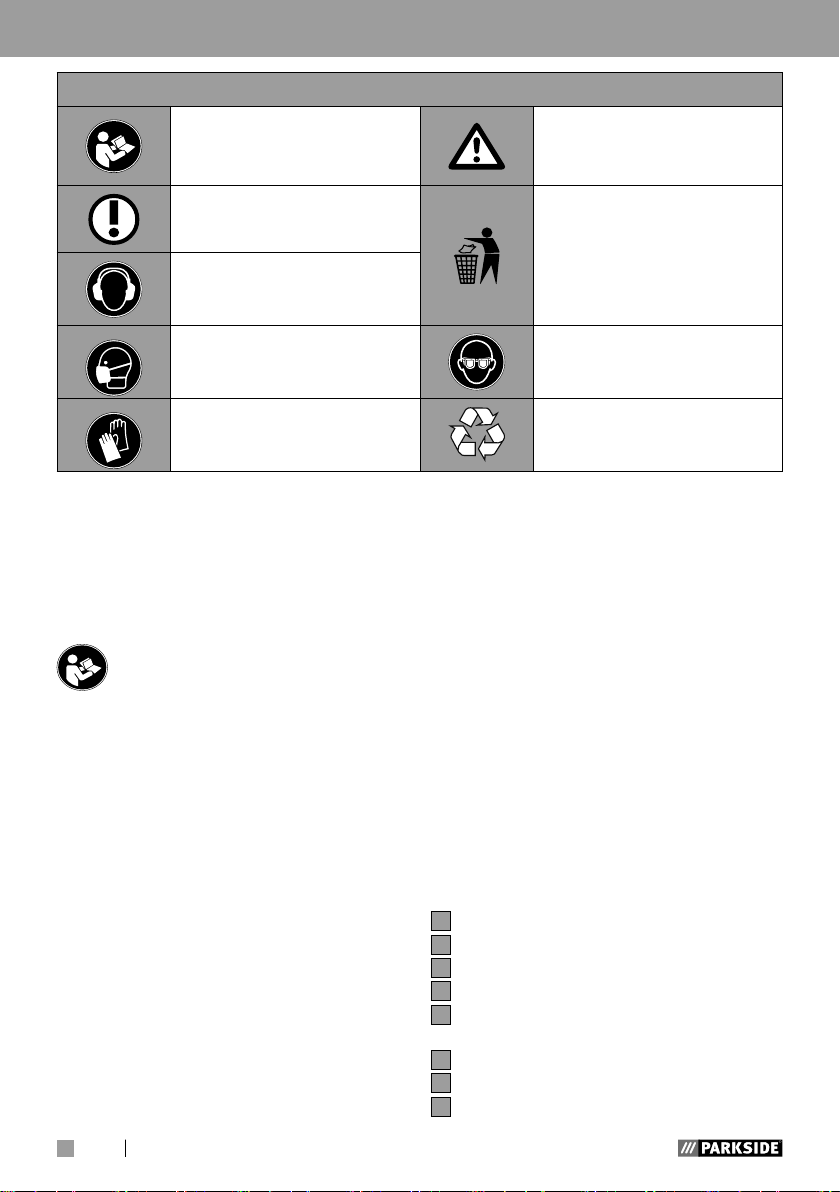
List of pictograms used
Read the operating
instructions.
Note!
Use hearing protection!
Use a dust mask! Use a goggles.
Use protective gloves!
Air hose reel
PDST 10 A2
z Introduction
Congratulations! You have purchased a high-quality product.
Please read the operating instructions with care and observe the
notes described. Familiarise yourself with the
device, its proper use and the safety notes
based on these operating instructions. The
rating plate container all technical data of
this air hose reel; please learn about the
technical features of this device.
KEEP OUT OF THE REACH OF
CHILDREN!
z Intended use
The air hose reel serves power supply
of pneumatic tools in connection with a
compressor. The hose drum serves only to
transport compressed air. It is not suitable for
transporting liquids. Use the products only as
Observe and obey the safety
notes!
Dispose of the pneumatic
devices and packaging environmentally compatibly.
Made from recycling material.
described and only for the specific applications as stated. Keep these instructions
in a safe place. Ensure you hand over all
documentation when passing the product on
to anyone else. Any use that differs to the intended use as stated above is prohibited and
potentially dangerous. Damage or injury
caused by misuse or disregarding the above
warning is not covered by the warranty or
any liability on the part of the manufacturer.
The device was designed for household
use and must not be used commercially or
industrially.
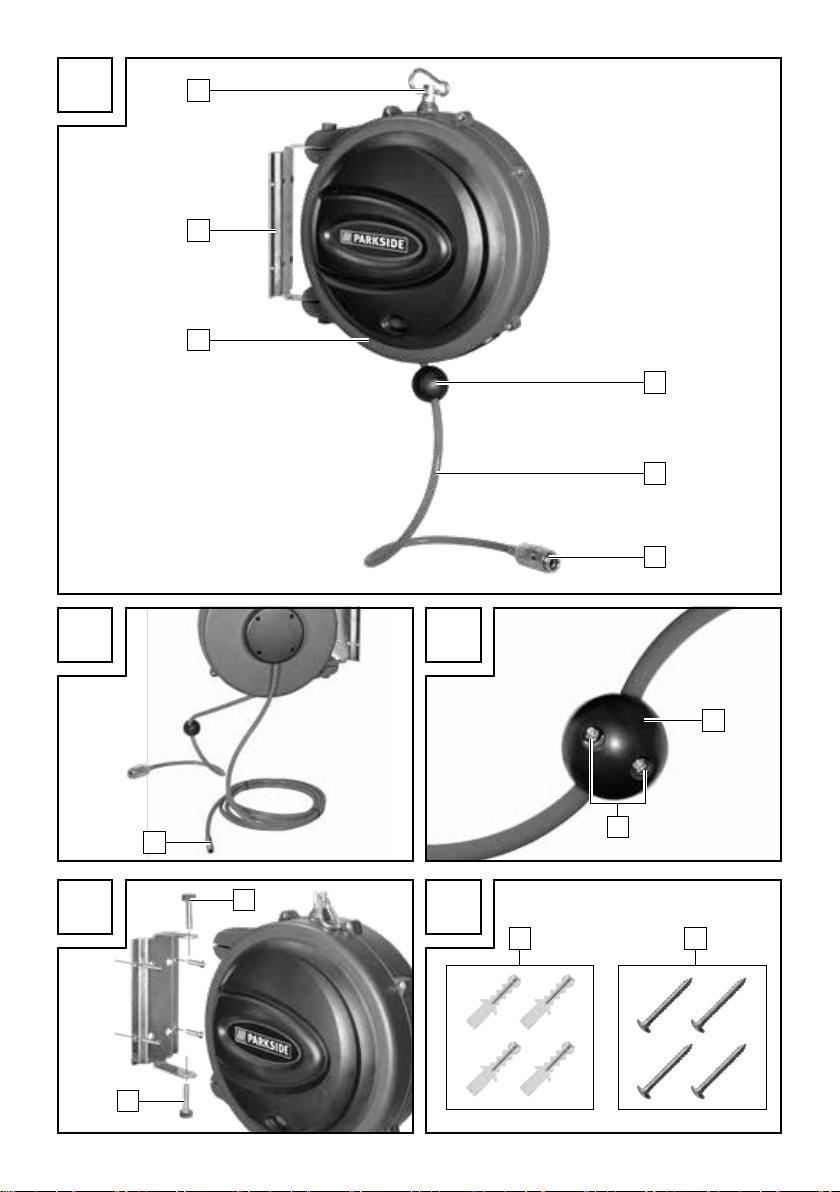
z Features
1
Drum housing
2
Swivelling attachment bracket
3
Hook for hanging
4
Hose stopper
5
Compressed air - hose for pneumatic
tools
6
Quick coupling
7
Compressed air connection
8
Screws
9
Fastening screws
6 GB

Introduction / Safety instructions for pneumatic tools
Mounting accessories:
10
Mounting screws
11
Dowel
z Technical specifications
Rolling system Automatic
Length of working
hose
Maximum work
pressure
Compressed air
connection size
Weight 1.85 kg
Hose material Polyurethane
10 m + 3 m
10 bar
¼“= 6.35 mm
z Package contents
1 air hose reel
1 set of operating instructions
1 mounting accessories
(4 × mounting screws , 4 x dowel)
z Safety instructions for
pneumatic tools
BEFORE USE, PLEASE
READ FIRST THE OPERATING INSTRUCTIONS
CAREFULLY. THESE FORM
PART OF THE DEVICE AND
MUST BE AVAILABLE AT ALL
TIMES!
This device can be used by
children 16 years and older and also by persons with
reduced physical, sensory or
mental capacities or a lack of
experience and knowledge
if they are supervised or they
have been instructed with
regard to the safe use of the
device and they understand
the dangers it presents. Do
not allow children to play with
the product. Cleaning and
user maintenance must not be
performed by children without
supervision.
In connection with a compres-
sor, the hose drum provides a
power supply for pneumatic
tools. The hose drum serves
only to transport compressed
air. It is not suitable for transporting liquids.
The hose drum is intended for
installation to a suitable wall
or ceiling based on its design;
use without mounting is not
permitted.
The hose drum has not been
developed for commercial,
industrial or crafts use. This
product is only intended for
private use. The hose drum
must only be used as intended.
Any further, deviating use is
forbidden!
Consideration of the safety
note sin the operating instruction and the assembly instruc-
7GB

Safety instructions for pneumatic tools
tions are also part of intended
use. The manufacturer or
dealer assumes no liability for
any damage caused by non-intended or wrong use.
Only accessories suitable for
this product must be used. Persons who use the hose drum
and who may perform maintenance work are obligated
to familiarise themselves with
it. They also must be informed
about potential dangers. The
applicable accident prevention
provisions must be correctly
and conscientiously observed.
Any changes to the hose drum
exclude liability of the manufacturer and any connected
damage.
Mount the hose drum before
using it in order to reduce the
risk of injury to a minimum.
Use the hose drum only with
compressed air. You must not
use the air hose reel with any
liquids.
Always let the hose roll up in
a controlled manner; the hose
drum has a tension spring for
the rolling mechanism. A hose
rolling up may cause injury if
used incorrectly. If the rolling
mechanism is damaged, you
must stop use of the hose drum
at once and have it repaired
by a specialist. Never open
the housing of the air hose reel
yourself.
Use only accessories in proper
condition that are intended for
use with the hose drum.
Never exceed the maximum
working pressure of the hose
drum or the pneumatic tool
used.
Connect the hose drum only to
compressed air lines when it is
ensured that exceeding of the
maximum permitted working
pressure by more than 10 % is
prevented (e.g. by a pressure
reducer).
Always keep the compressed
air hose away from sharp edg-
es, heat and oil.
Always check the compressed
air hose before using the hose
drum.
Use the hose drum only in
connection with a compressor.
Operation with compressed
air cylinders is forbidden.
Use of pneumatic tools with
flammable gases is forbidden.
There is a danger of explosion!
The hose drum must not be
used for any other purposes.
Do not store the hose drum in
reach of children.
Never point the hose drum
8 GB

Safety instructions for pneumatic tools / Operation
or its hoses at any persons or
animals.
Only use genuine spare parts
for repairs. Any non-genuine
spare parts may cause severe
damage.
When conducting any main-
tenance, setting and repair
work, always disconnect the
hose drum from the compressed air supply first.
Changes to the hose drum are
forbidden.
Use the hose drum only when
it is in an impeccable condition. In doubt, use a specialist's advice.
Have repairs only conducted
by qualified specialists.
Never transport the hose drum
by taking it by the hoses.
Always hold the hose firmly
when you disconnect it from
the compressed air source or a
pneumatic tool.
z Residual risk
Even if you operate the device as
intended, there will be residual
risks. The following dangers may
occur in connection with the build
and design of this air hose reel:
Danger of falling from com-
pressed air hoses lying
around.
Reduce the residual risk by
carefully using the device as
intended.
z Operation
z Before starting up
Take all parts from the packaging and
check whether the air hose reel or parts
show any damage. If this is the case,
do not use the air hose reel. Contact the
manufacturer via the indicated service
address.
Remove all protective films and other
transport packaging.
Check that the delivery is complete.
z Mounting
Finding a mounting spot
Mount the hose drum on a suitable ceil-
ing or wall; use of the unmounted hose
drum is not permitted.
Choose a place for mounting the hose
drum so that it does not pose any obstacle.
Ensure a mounting height of at least 2.5
metres for ceiling installation.
You need the following tools for mount-
ing: a power drill, a suitable drill bit and
a screwdriver.
Danger from beating com-
pressed air hoses.
9GB

Operation
Mounting the air hose reel
DANGER OF INJURY!
Improper mounting of the hose drum may
cause injury.
Ensure that there are no lines or tubes at
the mounting site. Use a detector for this
if necessary or contact a specialist.
Observe the safety notes for the drill
used.
NOTE! Danger of damage!
Improper mounting may cause
damage.
Ensure that the carrier material at the
mounting site bears the weight of the
hose drum. Contact a specialist if you
have any questions.
1. Use the swivelling attachment bracket
as a template. You can disconnect the
swivelling attachment bracket
2
from
the compressed air hose reel, once you
have removed both screws
8
by turning
anti-clockwise (see Fig. C). For this, mark
the position of the bores on the carrier
material with a pen.
2. Drill the holes required for installation
into the carrier material.
3. Mount the swivelling attachment bracket
2
using the appropriate fastening mate-
rial (see mounting accessories
10 11
).
4. Reconnect the compressed air hose reel
8
, which
2
.
to the swivelling attachment bracket
To do so, tighten the screws
were removed in step 1, by turning them
clockwise. (see Fig. C)
z Starting up
Connecting the air hose reel to a
compressed air source
of the compressed air - hose reel in the
quick coupling of the compressed air
source.
Connecting the air hose reel to a
pneumatic tool
Note: Danger of damage!
Improper handling of the air hose
reel may cause damage.
Always observe the maximum working
pressure of the air hose reel and that the
connection pieces used match. The quick
coupling
6
of the working hose permits
immediate connection between it and a
pneumatic tool via its air inlet.
Using the air hose reel
2
DANGER OF INJURY!
The hose drum is equipped with a return
mechanism. It is operated by a strong
spring. If the compressed air hose
rolled up improperly there may be injuries.
Never let the compressed air hose
whip back uncontrolled.
If the return mechanism is damaged,
take the air hose reel out of operation
at once. Have the resulting damage
repaired by a specialist.
The air hose reel has a latching and
return mechanism. This permits easy
extension and return of the working hose
5
.
This latching mechanism produces a
grinding sound at winding and unwinding. This is not a fault. If the sound
changes after multiple uses and/or if
there are any problems with the mecha-
nism, get professional help or contact the
customer service.
5
is
5
Insert the compressed air connection
10 GB
7
Operation / Warranty and service informationty
Unwinding the hose
Carefully extend the air hose
5
from
the drum housing to the desired working
length for the pneumatic tool. The latch
will engage if you release the compressed air hose
5
after you have heard
a click.
Winding up the hose
1. Briefly pulling the working hose
5
will
release the latch.
2. Ensure that the working hose
wound into the drum housing
5
1
is re-
in a
controlled manner.
Setting the hose stopped
The position of the hose stopper
4
can be
set; it interrupts winding up of the working
5
hose
at the desired length. You need a
Phillips-head screwdriver to adjust the hose
stopper
4
(not included in the scope of
delivery).
Make sure that no water can enter inside
the hose drum. Ensure that the housing
and the compressed air hose remains
dust- and dirt-free. For this, regularly rub
the hose drum with a clean cloth.
Before you return the compressed
air hose into the housing, clean the
compressed air hose for further use if
possible.
Clean the hose drum and hose at regular
intervals using a moist cloth and a little
liquid soap.
z Warranty and service
information
Warranty from Creative Marketing &
Consulting GmbH
Dear Customer,
The warranty for this device is 3 years from
the date of purchase. In the event of product
defects, you have legal rights against the
retailer of this product. Your statutory rights
are not affected in any way by our warranty
conditions, which are described below.
1. Release the attachment screws
9
with
the Phillips-head screwdriver (see fig. D).
2. Push the hose stopper
position along the working hose
3. Tighten the attachment screws
4
into the desired
5
.
9
again.
z Maintenance and cleaning
Note: The air hose reel must be
regularly serviced and overhauled
for proper function and for
compliance with the safety requirements.
Improper and wrong operation may cause
failures and damage to the device.
Never use any sharp and/or scraping
cleaning agents or solvents. They may
damage the plastic parts of the air hose
reel.
z Warranty conditions
The warranty period begins on the date of
purchase. Please retain the original sales
receipt. This document is required as your
proof of purchase.
Should this product show any defect in materials or manufacture within 3 years from the
date of purchase, we will repair or replace it
– at our discretion – free of charge. To claim
against this warranty, you must present the
defective device and your purchase receipt
within the 3-year period, and include a brief
written description of the nature of the defect
and the date it occurred.
If the defect is covered by our warranty, we
will repair and return your product or send
11GB
Warranty and service informationty
you a replacement. The original warranty
period is not extended when a device is
repair or replaced.
z Extent of warranty
The device has been manufactured according to strict quality guidelines and meticulously examined before delivery.
The warranty applies to defects in material
or manufacture. This warranty does not
extend to product parts which are subject to
normal wear and tear and can thus be re-
garded as consumable parts, or for damages to fragile parts, e.g. switches, rechargeable batteries, or parts made from glass.
This warranty is voided if the product
becomes damaged or is improperly used or
maintained. For proper use of the product,
all of the instructions given in the operating
instructions must be followed precisely. If the
operating instructions advise you or warn
you against certain uses or actions, these
must be avoided in all circumstances.
tions (bottom left), or the sticker on the back
or bottom. In the event of malfunctions or
other defects, please first contact our service
department below by phone or email. If
your product is found to be defective, you
can then send your product with proof
of purchase (till receipt) and a statement
describing what the fault involves and when
it occurred free of charge to the service
address given.
Note:
You can download this handbook
and many more, as well as product
videos and software at
www.lidl-service.com.
How to contact us:
GB, IE, NI
Name: C. M. C. GmbH
Website: www.cmc-creative.de
E-mail: service.gb@cmc-creative.de
Phone: 0-808-189-0652
Standard rate for calls to
German fixed-line network
Registered office: Germany
The product is for consumer use only and is
not intended for commercial or trade use.
The warranty becomes void in the event
of misuse and improper use, use of force,
and any work on the device that has not
been carried out by our authorised service
branch.
z Processing of warranty
claims
To ensure prompt processing of your claim,
please follow the instructions given below:
Please retain your proof of purchase and
quote the product number (e.g. the EAN
code) in all correspondence. The product
number can be found on the type plate, an
engraving, the cover page of your instruc-
12 GB
IAN 304723
Please note that the following address is not
a service address.
Please first contact the service point given
above.
Address:
C. M. C. GmbH
Katharina-Loth-Str. 15
D-66386 St. Ingbert
GERMANY
Environmental notes and disposal information / Declaration of Conformity
z Environmental notes and
disposal information
Please return this device, accessories
and packaging to your local recycling depot.
Do not dispose of pneumatic devices in
household waste! Devices that are no longer
functional should be recycled wherever possible. Ask your local stockist for advice.
z Declaration of Conformity
We,
C. M. C. GmbH
Responsible for documentation:
Alexander Hoffmann
Katharina-Loth-Str. 15
66386 St. Ingbert
Germany
hereby take sole responsibility for declaring
that the product
St. Ingbert, 19/10/2018
pp M. Sc. Alexander Hoffmann
– Quality assurance –
Air hose reel
IAN: 304723
Article no.: 2164
Year of manufacture: 2019/04
Model: PDST 10 A2
meets the essential protection requirements
that are specified in the European directives
and their changes.
Machinery Directive:
2006/42/EC
and their amendments.
This conformity assessment is based on the
following harmonised standards:
EN 12100:2010
13GB

14 GB

Tartalomjegyzék
A használt piktogramok magyarázata ...................................................... Oldal 16
Bevezetés ........................................................................................................................ Oldal 16
Rendeltetésszerű használat ............................................................................................ Oldal 16
Felszerelés .........................................................................................................................Oldal 16
Műszaki adatok .................................................................................................................. Oldal 17
Szállítási terjedelem .........................................................................................................Oldal 17
Biztonsági utasítások sűrített levegős szerszámokhoz ............. Oldal 17
Fennmaradó kockázat ...................................................................................................... Oldal 19
Kezelés .............................................................................................................................. Oldal 20
Üzembe helyezés előtt ..................................................................................................... Oldal 20
Szerelés ..............................................................................................................................Oldal 20
Üzembe helyezés..............................................................................................................Oldal 20
Karbantartás és tisztítás ..................................................................................................Oldal 21
Garanciával és szervizszolgáltatással
kapcsolatos tudnivalók ........................................................................................Oldal 22
Garanciális feltételek ........................................................................................................ Oldal 22
A garancia terjedelme ....................................................................................................... Oldal 22
Garanciális eset kezelése ................................................................................................ Oldal 23
Környezetvédelemmel kapcsolatos tudnivalók
és az ártalmatlanítás adatai ............................................................................ Oldal 23
EU megfelelőségi nyilatkozat .......................................................................... Oldal 23
Jótállási tájékoztató ............................................................................................... Oldal 25
15HU
A használt piktogramok magyarázata / Bevezetés
A használt piktogramok magyarázata
Olvassa el a használati
útmutatót!
Tudnivaló.
Használjon hallásvédő
eszközt.
Használjon porvédő maszkot.
Használjon védőkesztyűt.
SŰRÍTETT LEVEGŐS
TÖMLŐDOB PDST 10 A2
z Bevezetés
Gratulálunk! Kiváló minőségű
termék mellett döntött. Kérjük,
alaposan olvassa át a használati
útmutatót, és tartsa be a benne
található utasításokat. A használati útmutató
segítségével ismerje meg a készüléket,
annak megfelelő használatát, valamint
a biztonsági utasításokat. A típustáblán
látható a tömlődob összes műszaki adata,
kérjük, tájékozódjon a készülék műszaki
jellemzői felől.
A BERENDEZÉS NE KERÜLJÖN
GYEREKEK KEZÉBE!
z Rendeltetésszerű használat
A sűrített levegős tömlődob kompresszorral
összekötve a sűrített levegő szerszámok
tápellátására szolgál. A tömlődob kizárólag
sűrített levegő szállítására használható. Fo-
Olvassa el és tartsa be
a biztonsági előírásokat.
Környezetbarát módon
ártalmatlanítsa a csomagolást és a sűrített levegős
készüléket.
Használjon védőszemüveget
Újrahasznosított anyagból
készült.
lyadékok szállítására nem alkalmas. Csak
a leírtak szerint, a rendeltetésszerű használatnak megfelelően használja a terméket.
Őrizze meg ezt az útmutatót.
Ha átadja a terméket egy harmadik fél
számára, mellékelje az összes dokumentumot. Minden rendeltetésszerű használattól
eltérő alkalmazás tilos, és adott esetben
veszélyes lehet. A garancia nem vonatkozik
az útmutató be nem tartásából vagy a nem
rendeltetésszerű használatból eredő károkra, és a gyártott nem terheli felelősség ilyen
esetben. A készüléket otthoni használatra
tervezték, kereskedelmi vagy ipari célra
nem használható.
z Felszerelés
1
Dobház
2
Billenthető rögzítőkengyel
3
Kampók felakasztáshoz
4
Tömlőmegállító
5
Sűrített levegős tömlő sűrített levegős
szerszámhoz
6
Gyorscsatlakozó
7
Sűrített levegő csatlakozás
8
Csavarok
16 HU
Bevezetés / Biztonsági utasítások sűrített levegős szerszámokhoz
9
Rögzítőcsavarok
Szerelőtartozékok:
10
Szerelőcsavarok
11
Tiplik
z Műszaki adatok
Felcsévélő rendszer
A munkatömlő
hossza
Maximális
munkanyomás
Sűrített levegő
csatlakozás mérete
Súly 1,85 kg
A tömlő anyaga poliuretán
Automatika
10 m + 3 m
10 bar
¼“ = 6,35 mm
z Szállítási terjedelem
1 Tömlődob
1 Használati útmutató
1 szerelőtartozék
(4 x szerelőcsavar, 4 x tipli)
z Biztonsági utasítások
sűrített levegős szerszámokhoz
KÉRJÜK, a HASZNÁ-
LAT ELŐTT ALAPOSAN OLVASSA EL a HASZNÁLATI ÚTMUTATÓT. AZ
ÚTMUTATÓ a KÉSZÜLÉK
RÉSZE ÉS MINDIG KÉZNÉL KELL LENNIE!
Ezt a készüléket 16 évnél
idősebb gyermek valamint
csökkent zikai, érzékszervi
vagy mentális képességekkel
bíró vagy tapasztalat vagy
tudás hiányában szenvedő
személyek csak akkor
használhatják, ha felügyelet
alatt állnak vagy a készülék
biztonságos használatáról ki
lettek oktatva, és a készülék használatából adódó
veszélyeket megértették.
Gyermekek nem játszhatnak
a készülékkel. A tisztítást és
a felhasználói karbantartást
gyermekek felügyelet nélkül
nem végezhetik.
Kompresszorral összekötve
a tömlődob a sűrített levegős
szerszámok tápellátására
szolgál. A tömlődob kizárólag
sűrített levegő szállítására
használható. Folyadékok szállítására nem alkalmas.
A tömlődobot a berendezés
alapján egy arra alkalmas
falra vagy tetőre szerelésre
tervezték, felszerelés nélküli
használata nem engedélyezett.
A tömlődobot nem ipari,
kereskedelmi vagy kézműipari
használatra fejlesztették ki.
Ezt a terméket csupán sze
-
mélyes használatra szánták.
A tömlődobot kizárólag rendeltetésének megfelelően szabad
17HU

Biztonsági utasítások sűrített levegős szerszámokhoz
használni. Minden egyéb, ettől
eltérő használat tilos!
A rendeltetésszerű haszná-
lathoz tartozik a használati
útmutató biztonsági utasításainak, valamint a szerelési
útmutatóban foglaltak gyelembe vétele. A nem
rendeltetésszerű vagy hibás
használatból eredő károkért
a gyártó vagy a kereskedő
nem vállal felelősséget.
Csak az ehhez a termék-
hez megfelelő kiegészítőket
használhat. A sűrített levegős
tömlődobot használó, és
szükség esetén karbantartási
munkákat végző személyek
kötelesek megismerkedni
a berendezéssel. Továbbá
a lehetséges veszélyeket
illetően tájékozottnak kell
lenniük. A hatályos balesetmegelőzési előírásokat
pontosan és lelkiismeretesen
be kell tartani.
A sűrített levegős tömlődobon
végzett bármely módosítás
kizárja a gyártó felelősségét,
és az ezzel összefüggő kártérítést.
Használat előtt szerelje fel
a tömlődobot, hogy a sérülés kockázatát a minimumra
csökkentse.
Kizárólag sűrített levegő-
vel használja a tömlődobot.
A sűrített levegős tömlődob
folyadékkal való használata
nem megengedett.
A tömlőt mindig kontrollál-
tan csévéltesse fel, mivel
a tömlődob felcsévélő mechanizmusát feszítőrugóval látták
el. A magától felcsévélődő
tömlő nem megfelelő használat esetén sérüléseket
okozhat. A felcsévélő mechanizmus sérülése esetén
a tömlődobot közvetlenül
üzemen kívül kell helyezni, és
specialistával kell megjavíttatni. Semmi esetre se nyissa
fel önkezűleg sűrített levegős
tömlődob készülékházát.
Csak olyan kifogástalan
állapotban lévő kiegészítőt
használjon, amelyet a tömlődobhoz való használatra
szántak.
Soha ne lépje túl a tömlődob
vagy az alkalmazott sűrített
levegős szerszám maximális
munkanyomását.
Csak akkor csatlakoztassa
a tömlődobot sűrített levegős
vezetékekre, amennyiben biztosítva van, hogy
a maximálisan megengedett
munkanyomás 10%-ot meghaladó mértékű
túllépését megakadályozzák
18 HU

Biztonsági utasítások sűrített levegős szerszámokhoz
(pl. nyomáscsökkentő segítségével).
A sűrített levegős tömlőt min-
dig tartsa távol éles szélektől,
hőtől és olajoktól.
A tömlődob használat előtt
mindig ellenőrizze a sűrített
levegős tömlőt.
A tömlődobot csak kompresz-
szorral összekötve használja.
Sűrített levegős palackkal
használni tilos.
A sűrített levegős szerszámo-
kat éghető gázokkal használni
tilos. Robbanásveszély áll
fenn!
A tömlődobot egyéb célokra
nem szabad használni.
A tömlődobot olyan helyen
tárolja, ahol gyermekek nem
férhetnek hozzá.
A tömlődobot ill. annak tömlőit
soha ne irányítsa emberekre
vagy állatokra.
A javítások során kizáró-
lag eredeti pótalkatrészeket
használjon. A nem eredeti
pótalkatrészek súlyos károkat
okozhatnak.
A karbantartási, beállítási és
javítási munkálatok elvégzéséhez először válassza le
a tömlődobot a sűrített levegő
ellátásról.
A tömlődobon módosításokat
eszközölni tilos.
A tömlődobot csak kifogás-
talan állapotban használja.
Kérdéses esetben használat
előtt kérjen tanácsot egy specialistától.
A javításokat csak képzett
szakemberekkel végeztesse el.
A tömlődobot soha ne
a tömlőknél fogva szállítsa.
Mindig tartsa a tömlőt sta-
bilan, ha a sűrített levegő
ellátásról vagy a sűrített
levegős szerszámról leválasztja.
z Fennmaradó kockázat
Fennmaradó kockázatok mindig
vannak, még akkor is, ha a készüléket az előírásoknak megfelelően kezeli. A sűrített levegős
tömlődob felépítésével és kivitelezésével összefüggésben az
alábbi veszélyek merülhetnek
fel:
A csapkodó sűrített levegős
tömlők miatti veszély
A szanaszét heverő sűrített
levegős tömlők miatti elesésveszély.
Csökkentse a fennmaradó kockázatokat azzal, hogy a készüléket gondosan, és az előírásoknak megfelelően használja
19HU

Kezelés
z Kezelés
z Üzembe helyezés előtt
Vegyen ki minden alkatrészt a cso-
magolásból, és ellenőrizze, hogy nem
láthatók-e sérülések a sűrített levegős
tömlődobon vagy az egyes alkatrészeken. Ebben az esetben ne használja
a sűrített levegős tömlődobot. Vegye fel
a kapcsolatot a gyártóval a megadott
szervizcímen.
Távolítson el minden védőfóliát, vala-
mint az egyéb szállítási csomagolásokat.
Ellenőrizze a szállítmány teljességét.
z Szerelés
Szerelési hely megtalálása
Szerelje a tömlődobot egy arra alkalmas
falra vagy mennyezetre, a tömlődob
felszerelés nélküli használata nem
megengedett.
Úgy válassza ki a szerelési helyet
a tömlődob számára, hogy az ne képezzen akadályt.
Mennyezetre szerelés esetén ügyelje-
nek a legalább 2,5 méteres szerelési
magasságra.
A szereléshez az alábbi segédeszkö-
zökre lesz szüksége: egy fúrógép, egy
megfelelő fúró, valamint egy csavarhúzó.
A tömlődob szerelése
SÉRÜLÉSVESZÉLY!
A tömlődob helytelen szerelése sérülésekhez vezethet.
detektort, vagy lépjen kapcsolatba egy
szakemberrel.
Tartsa be a használandó fúrógép bizton-
sági utasításait.
TUDNIVALÓ! Rongálódásveszély!
A tömlődob helytelen szerelése
rongálódáshoz vezethet.
Győződjön meg róla, hogy a szerelési
helyen lévő tartóeszköz elbírja a tömlődob súlyát. Ha kérdése van, forduljon
specialistához.
1. Sablonként használjon billenthető
rögzítőkengyelt
2
leválaszthatja a sűrített levegős
2
. A rögzítőkengyelt
tömlődobról, miután mindkét csavart
, az óramutató járásával ellentétesen
forgatva, eltávolította (lásd C ábra).
Ehhez a furatok helyét a tartóeszközön
ceruzával jelölje be.
2. Fúrja bele a szereléshez szükséges
lyukakat a tartóeszközbe.
3. Szerelje fel a rögzítőkengyelt
alkalmas rögzítőeszközzel (lásd
11
és
-es szerelőtartozékok).
2
arra
10
-es
4. Rögzítse ismét a sűrített levegős tömlődobot és a rögzítőkengyelt
2
. Húzza
meg az 1. lépésben eltávolított csava-
8
rokat
most az óramutató járásával
megegyezően, szorosan. (Lásd C ábra.)
z Üzembe helyezés
A tömlődob csatlakoztatása a sűrített levegő ellátásra
Illessze a sűrített levegős tömlődob sű-
rítettlevegő-csatlakozóját
vegő-forrás gyorscsatlakozójába.
7
a sűrítettle-
8
Gondoskodjon róla, hogy a szerelési
helyen ne legyenek vezetékek vagy csövek. Ehhez szükség esetén használjon
20 HU
Kezelés
A tömlődob csatlakoztatása sűrített levegős szerszámhoz
Tudnivaló: Rongálódásveszély!
A sűrített levegős tömlődob
helytelen kezelése rongálódáshoz
vezethet.
Mindig vegye gyelembe a sűrített
levegős tömlődob maximális munkanyomását, valamint a felhasznált csatlakozóidomok összeegyeztethetőségét.
A gyorskuplung
6
segítségével a munkatömlő közvetlenül a levegőbevezetésnél köthető össze a sűrített levegős
szerszámmal.
A tömlődob használata
SÉRÜLÉSVESZÉLY!
A tömlődobot visszajárati mechanizmussal látták el. Ezt egy erős rugó működteti.
A sűrített levegős tömlő
5
nem megfelelő
felcsévélése sérülésekhez vezethet.
Soha ne hagyja a sűrített levegős tömlőt
5
kontrollálatlanul visszacsapni.
Amennyiben a visszajárati mechaniz-
mus megsérült, haladéktalanul helyezze
üzemen kívül a sűrített levegős tömlődobot. A keletkezett károkat specialistával
javíttassa ki.
A tömlődob
5
rendelkezik egy reteszelő és visszajárati mechanizmussal. Ez
megkönnyíti a munkatömlő kihúzását és
visszavezetését.
Ez a reteszelés a fel- és lecsévélés
során csikorgó hangot ad. Ez nem jelent
meghibásodást. Amennyiben a hang
számos alkalmazást követően, vagy
a mechanizmussal kapcsolatban felmerült problémák esetén megváltozik, kérje
szakember segítségét, vagy forduljon az
ügyfélszolgálathoz.
A tömlő lecsévélése
Gondosan húzza ki a munkatömlőt
5
a dobházból a sűrített levegős szerszámhoz a tetszés szerinti munkahoszszra. Ha a sűrített levegős tömlőt
5
egy kattanó hangot követően elengedi,
a reteszelés ennél a helyzetnél fog
bekattanni.
A tömlő felcsévélése
1. A munkatömlő
5
rövid meghúzásával
tudja oldani a reteszelést.
2. Ügyeljen arra, hogy a munkatömlőt
5
kontrolláltan csévélje vissza a dobházba
1
.
Tömlőmegállító beállítása
A tömlőmegállító
a munkatömlő
4
pozíciója beállítható,
5
felcsévélését a tetszés
szerinti hossznál szakítja meg. A tömlőmegállító
4
beállításához kereszthornyos
csavarhúzóra van szükség. (A szállítási
terjedelem nem tartalmazza.)
1. Oldja a rögzítőcsavarokat
9
a ke-
reszthornyos csavarhúzóval (lásd az D
ábrát).
2. Tolja a tömlőmegállítót
5
mentén a kívánt pozícióba.
4
a munkatömlő
3. Húzza meg ismét a rögzítőcsavarokat
9
.
z Karbantartás és tisztítás
Tudnivaló: a sűrített levegős
tömlődobot a kifogástalan műkö-
dés, valamint a biztonsági
utasítások betartása érdekében rendszeresen karban kell tartani, és helyre kell
állítani. A szakszerűtlen és helytelen
üzemeltetés a készülék meghibásodásához
és megrongálódásához vezethet.
21HU

Kezelés / Garanciával és szervizszolgáltatással kapcsolatos tudnivalók
Soha ne használjon éles és/vagy karco-
ló hatású tisztító- vagy oldószert. Ezek
károsíthatják a sűrített levegős tömlődob
műanyagból készült alkotóelemeit.
Ügyeljen rá, hogy soha ne kerüljön víz
a tömlődob belsejébe. Ügyeljen rá, hogy
a ház és a sűrített levegős tömlő por-és
piszokmentes maradjon. Ennek érdekében rendszeresen dörzsölje át a tömlődobot egy tiszta ronggyal.
Mielőtt a sűrített levegős tömlőt a házba
visszavezetné, lehetőség szerint
tisztítsa meg a sűrített levegős tömlőt
a további használathoz.
A tömlődobot, valamint a tömlőt szabá-
lyos időközönként, nedves ronggyal és
egy kevés kenőszappannal tisztítsa.
z Garanciával és szer-
vizszolgáltatással kapcsolatos tudnivalók
A Creative Marketing & Consulting
GmbH garanciája
Tisztelt vásárlónk, a vásárlás dátumától
számított 3 éves garancia vonatkozik a termékre. Amennyiben a megvásárolt termék
hibás, a termék értékesítőjével szemben
törvényes jogai vannak. Ezeket a törvényi
jogokat a következőkben leírt garancia sem
korlátozza.
z Garanciális feltételek
A garanciaidő a megvásárlás dátumával
kezdődik. Ezért kérjük, gondosan őrizze
meg az eredeti pénztári blokkot. Ez a dokumentum szükséges a vásárlás igazolásához.
Amennyiben három évvel a vásárlás
dátumától számítva anyag vagy gyártási
hiba lép fel, a terméket – saját döntésünk
alapján – díjmentesen megjavítjuk vagy
kicseréljük. Ez a garanciális szolgáltatás
akkor vehető igénybe, ha a meghibásodott
terméket és a vásárlást igazoló nyugtát
(blokkot) három éven belül bemutatja, és
röviden leírja, mi a termék hibája, és mikor
jelentkezett a hiba.
Amennyiben a hibára kiterjed a garancia,
visszakapja a megjavított terméket vagy
küldünk önnek egy új terméket. A termék
javításával vagy cseréjével nem kezdődik
újra a garanciaidő.
z A garancia terjedelme
A terméket szigorú minőségügyi irányelvek
alapján gondosan gyártottuk és a kiszállítás
előtt alaposan ellenőriztük.
A garancia anyag- és gyártási hibákra vonatkozik. Ez a garancia nem terjed ki olyan
termékelemekre, melyek normál elhasználódásnak vannak kitéve, és ezáltal kopó
alkatrésznek számítanak vagy a károsodások olyan törékeny alkatrészeken történtek,
pl. kapcsoló, akkumulátor vagy hasonló,
melyek üvegből készültek.
Ez a garancia nem érvényes, ha a termék
megsérült, nem szakszerűen használták vagy javították. A termék szakszerű
használata érdekében minden használati
útmutatóban felsorolt utasítást pontosan
be kell tartani. Feltétlenül kerülendők az
olyan felhasználási célok és intézkedések,
melyek a használati útmutatóban foglaltaktól eltérnek, illetve amelyekkel kapcsolatban
gyelmeztetés hangzik el.
A terméket csak magáncélú és nem ipari
felhasználásra terveztük. Rendeltetésellenes vagy szakszerűtlen kezelés, erőszak
alkalmazása vagy nem az általunk feljogosított szerviz-képviselet által végzett
beavatkozás esetén a garancia megszűnik.
22 HU
 Loading...