

Panasonic SC-PMX3 Operating Instructions

Operating Instructions
SUPPLIED ACCESSORIES
DOD
VAN
SLU
ENSTV
Instrucciones de funcionamiento
Instrukcja obs∏ugi
Návod k obsluze
CD Stereo System
Before connecting, operating or adjusting this product, please read
the instructions completely.
Please keep this manual for future reference.
Antes de conectar, operar o ajustar este producto, sírvase leer
estas instrucciones completamente.
Guarde este manual para su consulta en el futuro.
Przed pod∏àczeniem, obs∏ugà lub regulacjà sprz´tu prosimy o
dok∏adne zapoznanie si´ z treÊcià niniejszej instrukcji.
Prosimy o zachowanie niniejszej instrukcji obs∏ugi.
Niniejsza instrukcja zosta∏a opracowana na podstawie
oryginalnej publikacji f irmy MATSUSHITA ELECTRIC
INDUSTRIAL CO., LTD.
Dfiíve neÏ zaãnete jakékoli zapojování, provoz nebo nastavování
tohoto v˘robku, prostudujte si prosím cel˘ tento návod.
Uschovejte si prosím tento návod k obsluze.
SUPPLIED ACCESSORIES
ACCESORIOS SUMINISTRADOS
DOSTARCZONE WYPOSA˚ENIE
DODÁÁ
Please check and identify the supplied accessories.
Por favor, verifi que e identifi que los accesorios suministrados.
Zidentyfi kuj poszczególne jego elementy wyposazenia
standard-owego.
Zkontrolujte si prosím a identifi kujte dodávané pfiislušenství.
1 x Remote control
1 x Mando a distancia
1 x Pilot zdalnego sterowania
1 x Dálkové ovládání
(N2QAYB000257)
1 x AC mains lead
1 x Cable de alimentación
de CA
1 x Przewód sieciowy
1 x Kabel pfiívodu
stfiídavého proudu
VANÉÉ P P¤¤ÍÍ
SLUŠŠ
2 x Remote control batteries
2 x Pilas del mando a
2 x Baterie do pilota
2 x Baterie dálkového
1 x AM loop antenna
1 x Antena de cuadro de AM
1 x Antena p´tlowa AM
1 x AM rámová anténa
ENSTVÍÍ
distancia
zdalnego sterowania
ovládání
Sistema estéreo
con reproductor de
discos compactos
Zestaw stereo z CD
Stereosystém s CD
Model No. SC-PMX3
Operations in these instructions are described using
remote control, but you can do the operations with the
main unit if the controls are the same.
Your unit may not look exactly as illustrated.
Las operaciones de estas instrucciones se describen
principalmente usando el mando a distancia, pero
puede realizar las mismas operaciones en el aparato
principal.
Es posible que su unidad no se parezca exactamente a
la que se muestra.
W niniejszej instrukcji opisano przede wszystkim
sposoby wykonywania operacji przy u˝yciu pilota,
mo˝na je jednak wykonywaç tak˝e na urzàdzeniu
g∏ównym, jeÊli sà na nim dost´pne identyczne elementy
sterujàce.
Urzàdzenie mo˝e si´ nieznacznie ró˝niç od
przedstawionego na ilustracji.
Operace v tûchto instrukcích jsou popsány vût‰inou pro
pouÏití dálkového ovládání, ale mÛÏete je vykonat i na
hlavní jednotce, pokud jsou ovládací prvky totoÏné.
Vzhled v˘robku nemusí pfiesnû odpovídat uveden˘m
obrázkÛm.
1 x FM indoor antenna
1 x Antena interior de FM
1 x Antena wewn´trzna FM
1 x FM pokojová anténa
E
PMX3_E_EN.indd 1PMX3_E_EN.indd 1 6/17/08 10:14:33 AM6/17/08 10:14:33 AM
2 x Speaker cables
2 x Cables de altavoz
2 x Kable głoÊnikowe
2 x Reproduktorové kabely
RQTV0271-4E
Dear customer
Thank you for purchasing this product.
For optimum performance and safety, please read these instructions
carefully.
These operating instructions are applicable to the following system.
ENGLISH
System SC-PMX3
Main unit SA-PMX3
Speakers SB-PMX3
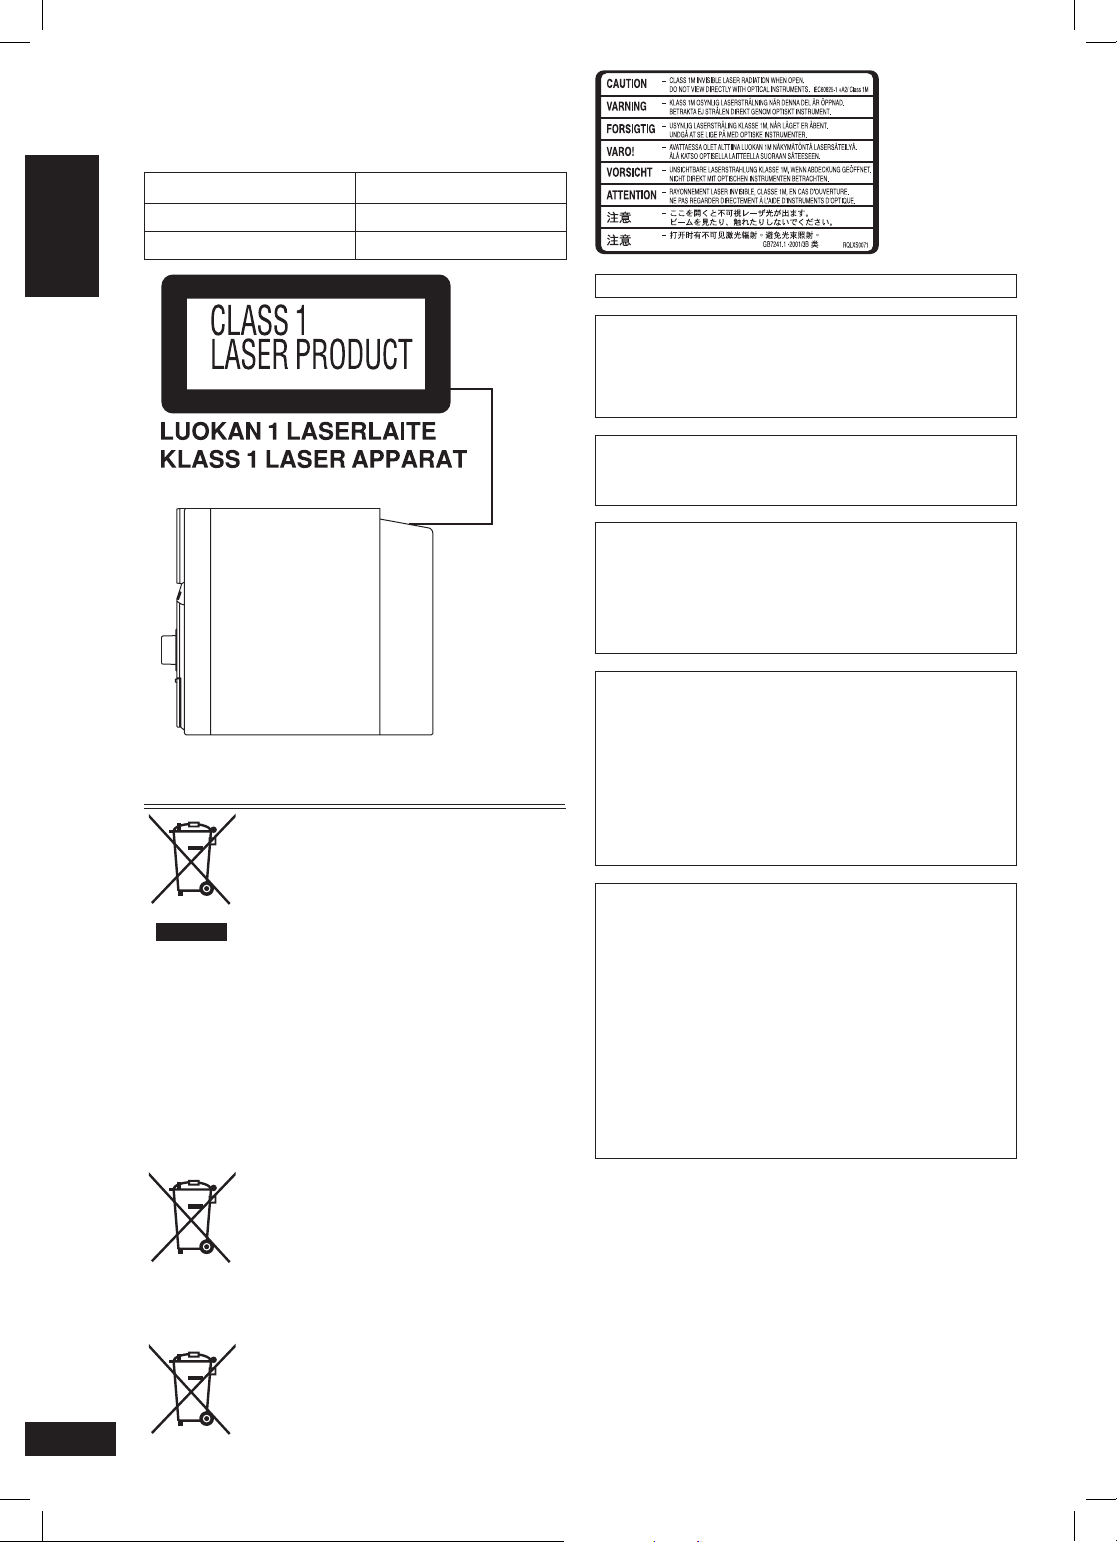
(Back of product)
Inside of product
Tuotteen sisällä
Produktets innside
THIS UNIT IS INTENDED FOR USE IN MODERATE CLIMATES.
The socket outlet shall be installed near the equipment and easily
accessible.
The mains plug of the power supply cord shall remain readily
operable.
To completely disconnect this apparatus from the AC Mains,
disconnect the power supply cord plug from AC receptacle.
This product may receive radio interference caused by mobile
telephones during use. If such interference is apparent, please
increase separation between the product and the mobile
telephone.
CAUTION!
THIS PRODUCT UTILIZES A LASER.
USE OF CONTROLS OR ADJUSTMENTS OR PERFORMANCE
OF PROCEDURES OTHER THAN THOSE SPECIFIED HEREIN
MAY RESULT IN HAZARDOUS RADIATION EXPOSURE.
DO NOT OPEN COVERS AND DO NOT REPAIR YOURSELF.
REFER SERVICING TO QUALIFIED PERSONNEL.
– If you see this symbol –
Information for Users on Collection and Disposal of Old
Equipment and used Batteries
These symbols on the products, packaging,
and/or accompanying documents mean that used
electrical and electronic products and batteries
should not be mixed with general household
waste. For proper treatment, recovery and
recycling of old products and used batteries,
please take them to applicable collection points, in
accordance with your national legislation and the
Directives 2002/96/EC and 2006/66/EC.
By disposing of these products and batteries
correctly, you will help to save valuable resources
and prevent any potential negative effects on
human health and the environment which could
otherwise arise from inappropriate waste handling.
For more information about collection and
recycling of old products and batteries, please
contact your local municipality, your waste disposal
service or the point of sale where you purchased
the items.
Penalties may be applicable for incorrect disposal
of this waste, in accordance with national
legislation.
For business users in the European Union
If you wish to discard electrical and electronic
equipment, please contact your dealer or supplier
for further information.
[Information on Disposal in other Countries
outside the European Union]
These symbols are only valid in the European
Union. If you wish to discard these items, please
contact your local authorities or dealer and ask for
the correct method of disposal.
Note for the battery symbol (bottom two
symbol examples):
This symbol might be used in combination with a
RQTV0271
2
2
Cd
chemical symbol. In this case it complies with the
requirement set by the Directive for the chemical
involved.
WARNING:
TO REDUCE THE RISK OF FIRE, ELECTRIC SHOCK OR
PRODUCT DAMAGE,
• DO NOT EXPOSE THIS APPARATUS TO RAIN, MOISTURE,
DRIPPING OR SPLASHING AND THAT NO OBJECTS
FILLED WITH LIQUIDS, SUCH AS VASES, SHALL BE
PLACED ON THE APPARATUS.
• USE ONLY THE RECOMMENDED ACCESSORIES.
• DO NOT REMOVE THE COVER (OR BACK); THERE
ARE NO USER SERVICEABLE PARTS INSIDE. REFER
SERVICING TO QUALIFIED SERVICE PERSONNEL.
CAUTION!
• DO NOT INSTALL OR PLACE THIS UNIT IN A
BOOK CASE, BUILT-IN CABINET OR IN ANOTHER
CONFINED SPACE. ENSURE THE UNIT IS WELL
VENTILATED. TO PREVENT RISK OF ELECTRIC SHOCK
OR FIRE HAZARD DUE TO OVERHEATING, ENSURE
THAT CURTAINS AND ANY OTHER MATERIALS DO NOT
OBSTRUCT
THE VENTILATION VENTS.
• DO NOT OBSTRUCT THE UNIT’S VENTILATION OPENINGS
WITH NEWSPAPERS, TABLECLOTHS, CURTAINS, AND
SIMILAR ITEMS.
• DO NOT PLACE SOURCES OF NAKED FLAMES, SUCH AS
LIGHTED CANDLES, ON THE UNIT.
• DISPOSE OF BATTERIES IN AN ENVIRONMENTALLY
FRIENDLY MANNER.
PMX3_E_EN.indd 2PMX3_E_EN.indd 2 6/17/08 10:14:38 AM6/17/08 10:14:38 AM
Safety precautions
Placement
Set the unit up on an even surface away from direct sunlight,
high temperatures, high humidity, and excessive vibration. These
conditions can damage the cabinet and other components, thereby
shortening the unit’s service life.
Place it at least 15 cm away from wall surfaces to avoid distortion
and unwanted acoustical effects.
Do not place heavy items on the unit.
Voltage
Do not use high voltage power sources. This can overload the unit
and cause a fi re.
Do not use a DC power source. Check the source carefully when
setting the unit up on a ship or other place where DC is used.
AC mains lead protection
Ensure the AC mains lead is connected correctly and not
damaged. Poor connection and lead damage can cause fi re or
electric shock. Do not pull, bend, or place heavy items on the lead.
Grasp the plug fi rmly when unplugging the lead. Pulling the AC
mains lead can cause electric shock.
Do not handle the plug with wet hands. This can cause electric
shock.
Foreign matter
Do not let metal objects fall inside the unit. This can cause electric
shock or malfunction.
Do not let liquids get into the unit. This can cause electric shock or
malfunction. If this occurs, immediately disconnect the unit from the
power supply and contact your dealer.
Do not spray insecticides onto or into the unit. They contain
fl ammable gases which can ignite if sprayed into the unit.
Table of contents
Safety precautions ...................................... 3
Placement of speakers ................................ 3
Simple setup ................................................ 4
Preparing the remote control ..................... 5
DEMO function ............................................. 5
Overview of controls ................................... 6
Discs ............................................................. 7
Using the FM/AM radio ................................ 8
Using the timers .......................................... 9
Using sound effects .................................... 10
USB ............................................................... 11
Using other equipment ............................... 14
Troubleshooting guide ................................ 16
Specifi cations .............................................. 17
Maintenance ................................................. 17
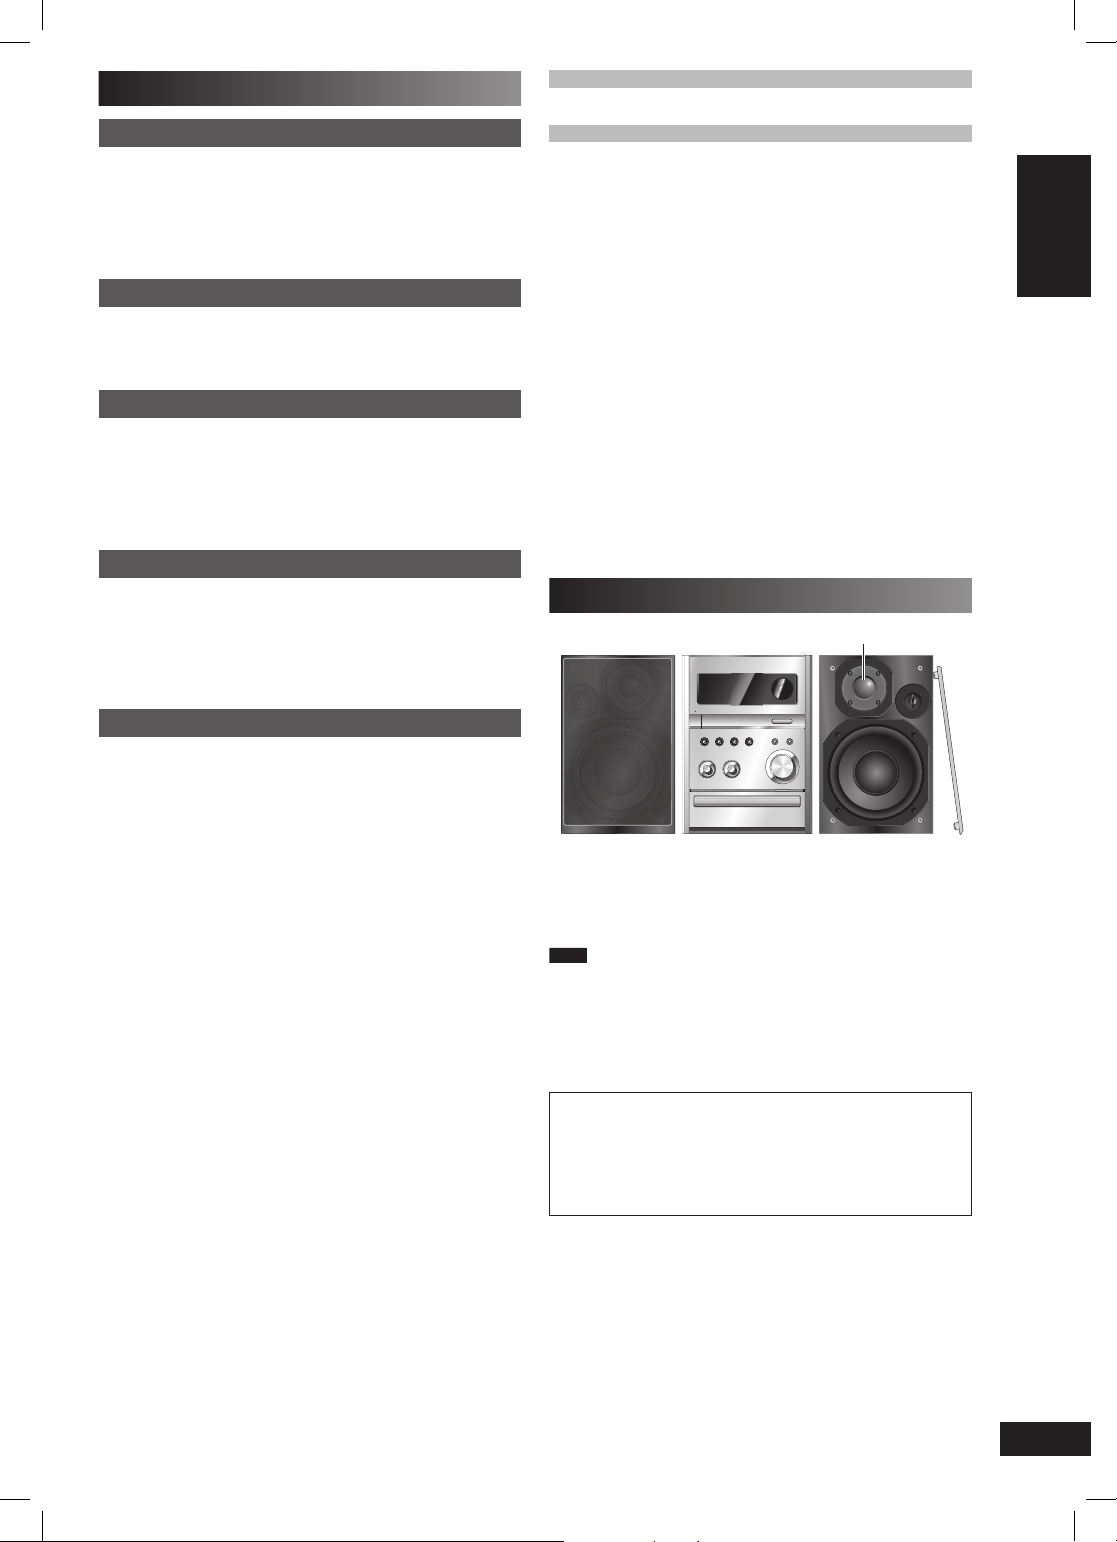
Placement of speakers
Tweeter
ENGLISH
Service
Do not attempt to repair this unit by yourself. If sound is
interrupted, indicators fail to light, smoke appears, or any other
problem that is not covered in these instructions occurs, disconnect
the AC mains lead and contact your dealer or an authorized service
center. Electric shock or damage to the unit can occur if the unit is
repaired, disassembled or reconstructed by unqualifi ed persons.
Extend operating life by disconnecting the unit from the power
source if it is not to be used for a long time.
Place the speakers so that the tweeter is on the inside.
Use only the supplied speakers.
The combination of the main unit and speakers provide the best
sound. Using other speakers can damage the unit and sound quality
will be negatively affected.
Note
• Keep your speakers at least 10 mm away from the system for
proper ventilation.
• These speakers do not have magnetic shielding. Do not place
them near televisions, personal computers or other devices easily
infl uenced by magnetism.
• To avoid damage to the speakers, do not touch the speaker cones
if you have taken the nets off.
CAUTION
• Use the speakers only with the recommended system.
Failure to do so can damage the amplifi er and speakers,
and can cause fi re. Consult a qualifi ed service person if
damage occurs or if a sudden change in performance is
apparent.
• Do not attach these speakers to walls or ceilings.
RQTV0271
3
3
PMX3_E_EN.indd 3PMX3_E_EN.indd 3 6/17/08 10:14:40 AM6/17/08 10:14:40 AM
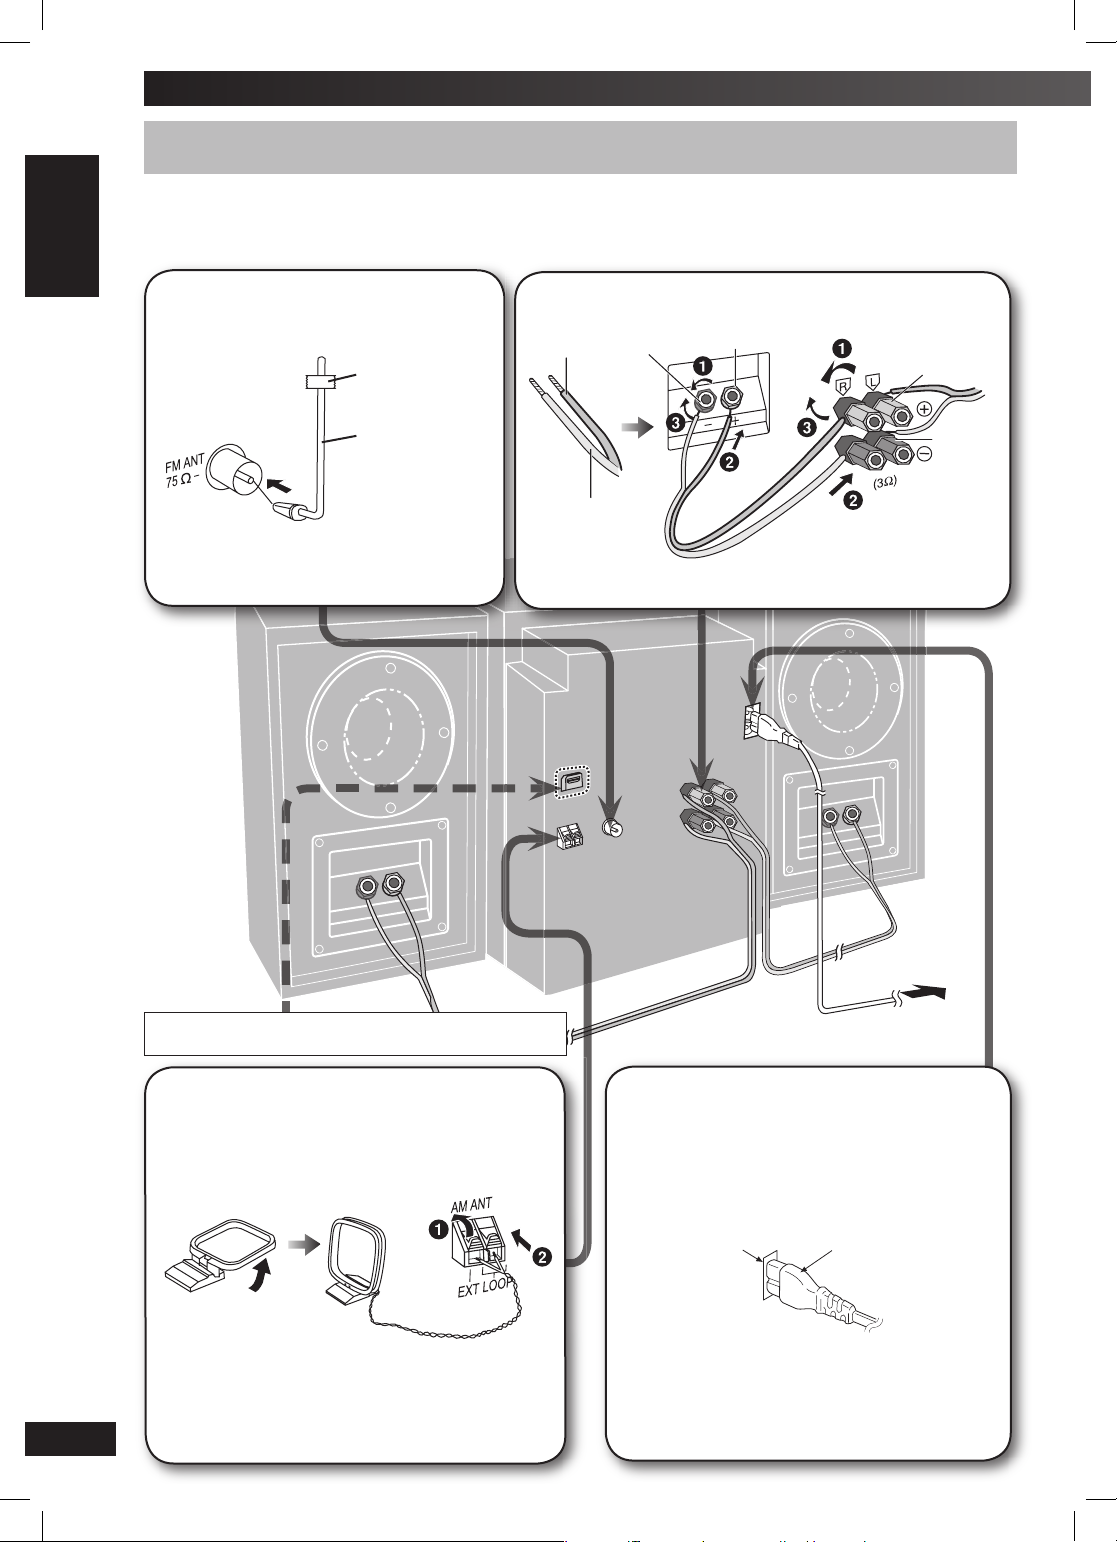
Simple setup
Making the connections
Making the connections
Connect the AC mains lead only after all the other connections have been made.
Conserving power
The main unit consumes a small amount of power, even when it is in standby mode (approx. 0.7 W). To save power when the unit is not to be
ENGLISH
used for a long time, unplug it from the household mains socket. You will need to reset some memory items after plugging in the unit.
Connect the FM indoor antenna.
Adhesive
tape
FM indoor
antenna
Tape the antenna to a wall or column, in a position
with least amount of interference.
Connect the speaker cables.
Copper (ª)
Silver (·)
Incorrect connection can damage the unit.
Black (·)
Red (ª)
Red (ª)
Black (·)
To household
mains socket
Please refer to “Connecting the Universal Dock for iPod” and
“Connecting and playing a Bluetooth device” on page 14.
Connect the AM loop antenna.
AM loop antenna
RQTV0271
Stand the antenna up on its base. Keep the loose antenna
cord away from other wires and cords.
Connect the AC mains lead.
The included AC mains lead is for use with this unit only. Do
not use it with other equipment. Also, do not use cords for
other equipment with the main unit.
Insertion of connector
Appliance inlet
Even when the connector is perfectly inserted, depending
on the type of inlet used, the front part of the connector
may jut out as shown in the drawing. However there is no
problem using the unit.
Connector
4
4
PMX3_E_EN.indd 4PMX3_E_EN.indd 4 6/17/08 10:14:44 AM6/17/08 10:14:44 AM
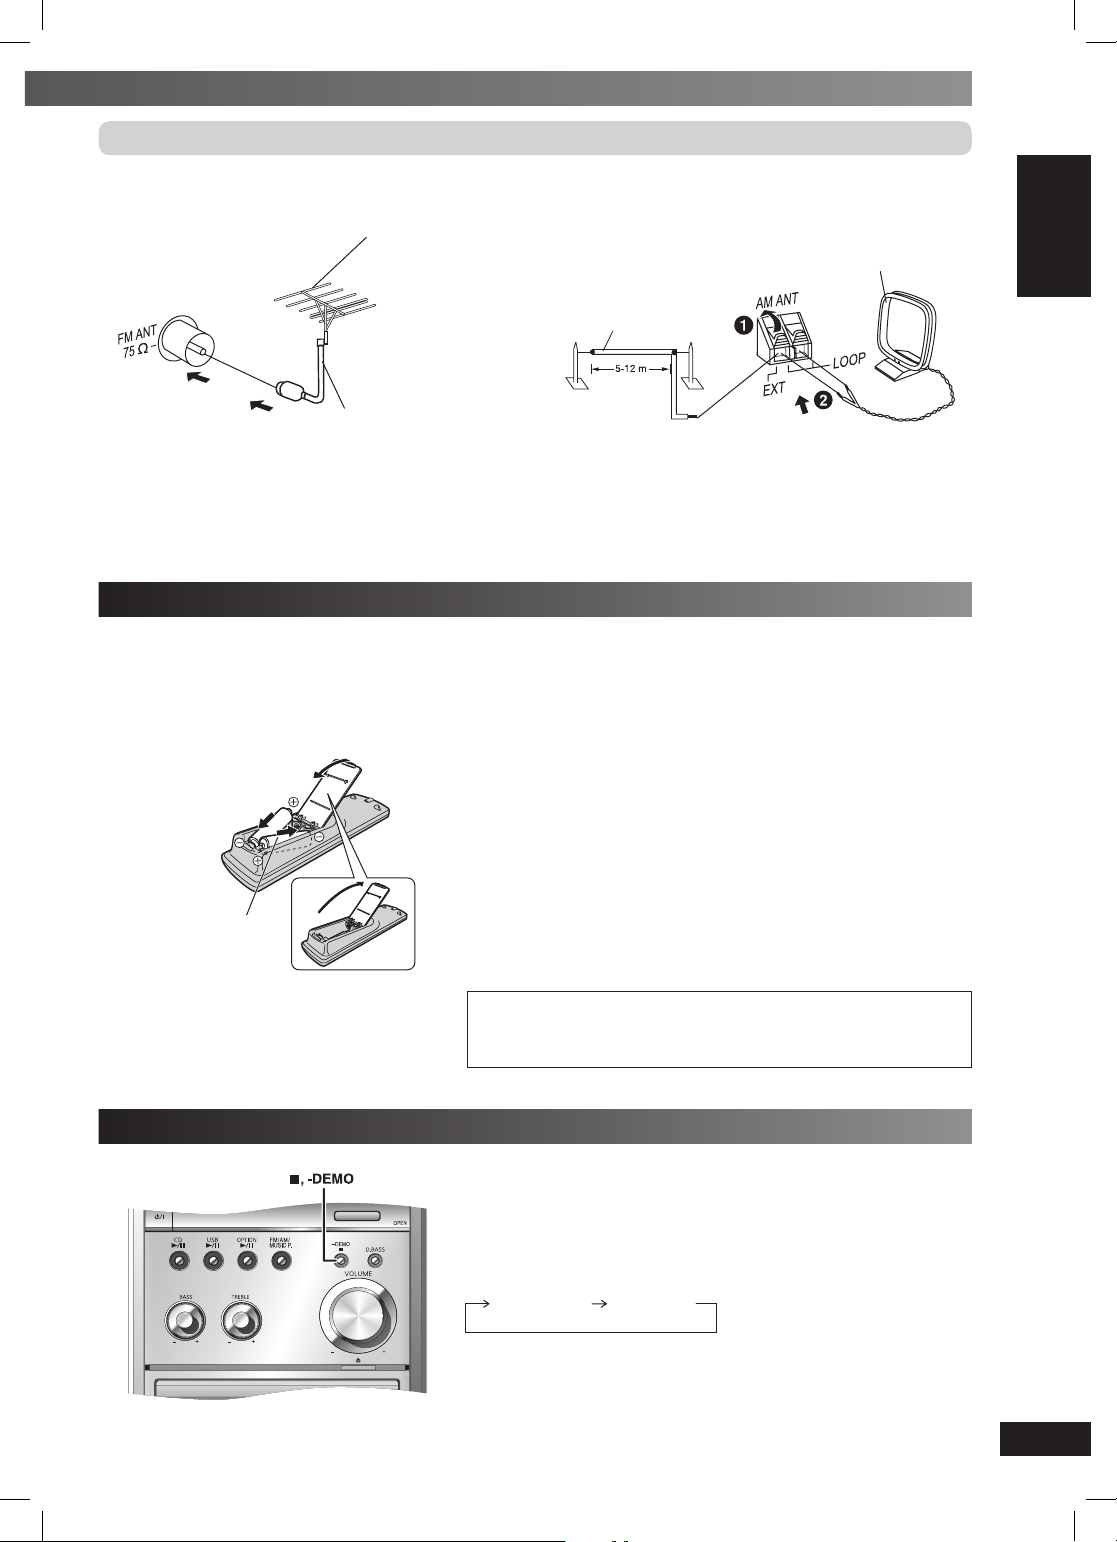
Optional antenna connections
FM outdoor antenna AM outdoor antenna
FM outdoor antenna
(not included)
Rear panel of
this main unit
75
Ω coaxial cable
(not included)
• Never use an outdoor antenna during a lightning storm.
• You can connect the FM outdoor antenna for better reception. Please consult your dealer for installation.
• Disconnect the FM indoor antenna if an FM outdoor antenna is installed.
• Connect the AM outdoor antenna without removing the AM loop antenna. Run 5 to 12 m of vinyl-covered wire horizontally along a window
or other convenient location.
AM outdoor antenna
(not included)
Rear panel of
this main unit
AM loop antenna
(included)
Preparing the remote control
Batteries:
• Remove the batteries if the remote control is not going to be used for a long
period of time. Store in a cool, dark place.
• Mishandling of batteries can cause electrolyte leakage, which can severely
damage the remote control.
2 Insert so the
poles (+ and –)
match those in the
remote control.
2,2!!
1
3
• Do not use rechargeable type batteries.
• Do not heat or expose to fl ame.
• Do not leave the battery(ies) in an automobile exposed to direct sunlight for a
long period of time with doors and windows closed.
Do not:
• mix old and new batteries.
• use different types of batteries at the same time.
• take apart or short-circuit the batteries.
• attempt to recharge alkaline or manganese batteries.
• use batteries if the covering has been peeled off.
■ Use
Aim at the remote control signal sensor (➡ page 6), avoiding obstacles, at a
maximum range of 7 m directly in front of the unit.
CAUTION
Danger of explosion if battery is incorrectly replaced. Replace only with
the same or equivalent type recommended by the manufacturer. Dispose
of used batteries according to the manufacturer’s instructions.
ENGLISH
DEMO function
When the unit is fi rst plugged in, a demonstration of its functions may be shown
on the display.
If the demo setting is off, you can show a demonstration by selecting “DEMO
ON”.
Press and hold [7, –DEMO].
The display changes each time the button is held down.
$%-//&& $%-//.
While in standby mode, select “DEMO OFF” to reduce power consumption.
RQTV0271
5
5
PMX3_E_EN.indd 5PMX3_E_EN.indd 5 6/17/08 10:14:47 AM6/17/08 10:14:47 AM
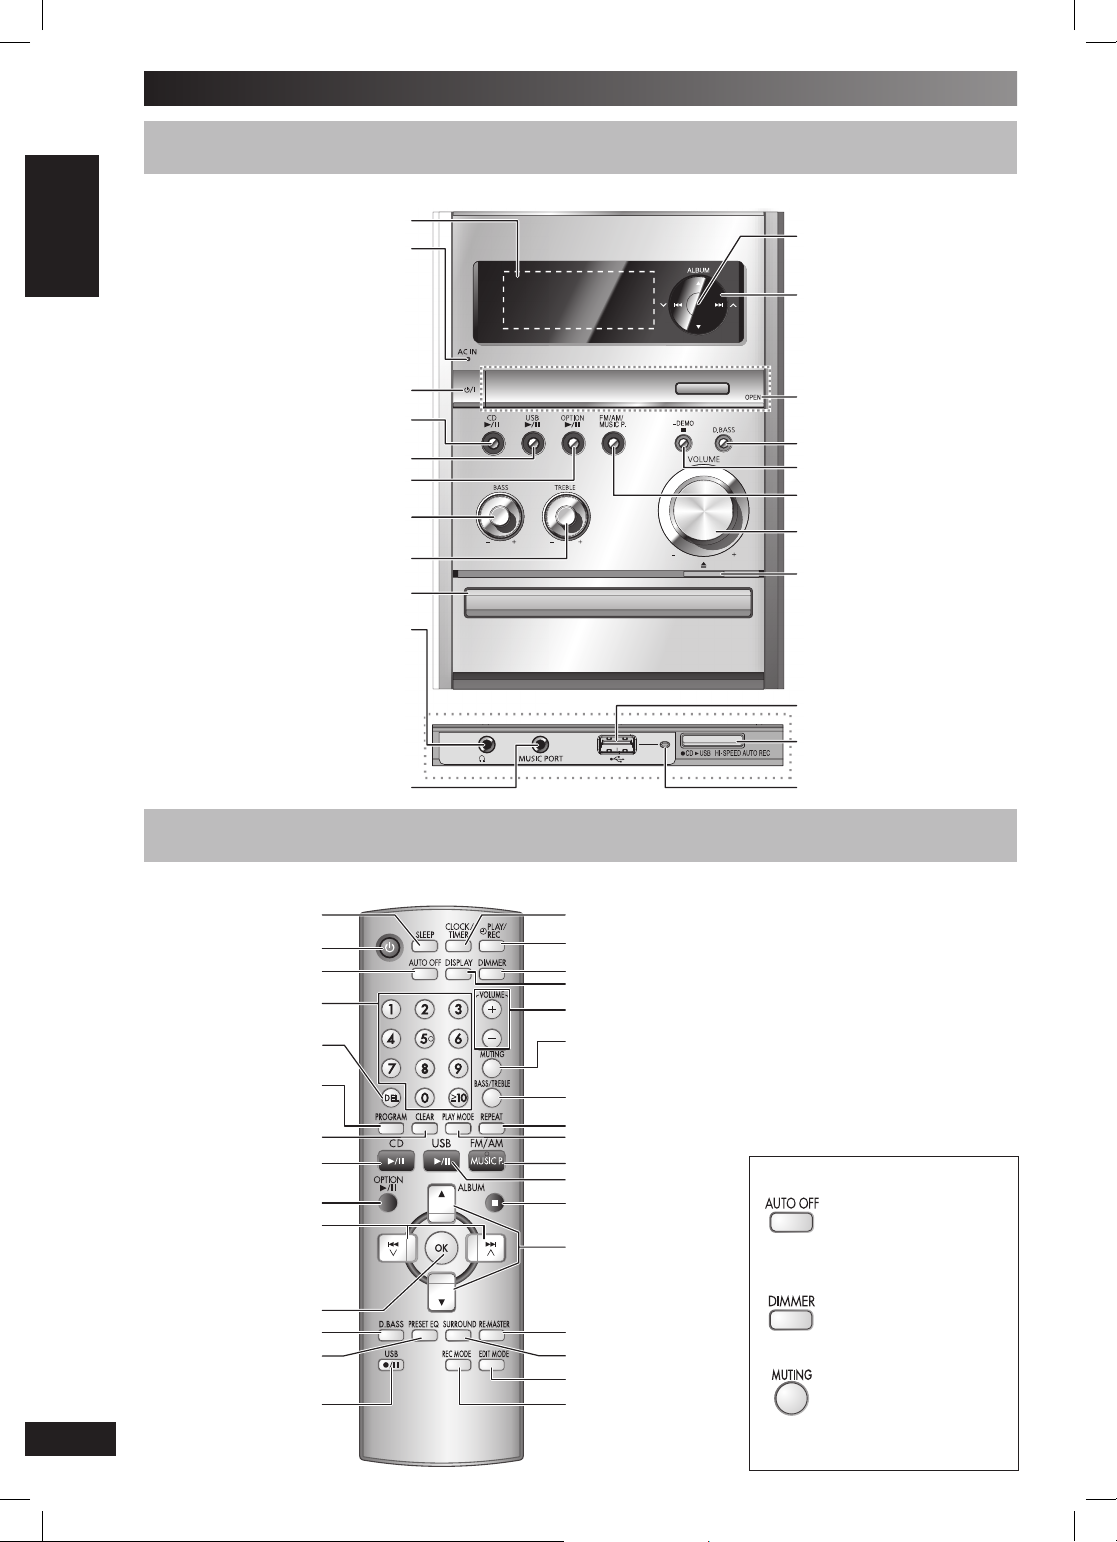
Main unit
Remote control
Refer to the numbers in parentheses for page reference.
ENGLISH
Overview of controls
Main unit
Display panel
AC supply indicator (AC IN)
This indicator lights when the
unit is connected to the AC
1 Standby/on switch (y/l) (7)
Press to switch the unit from on
to standby mode or vice versa.
In standby mode, the unit is still
consuming a small
2 Disc play/pause (7, 8, 11, 12)
3 USB play/pause (11, 13)
4 Option play/pause (14)
Treble adjustment (10)
Avoid listening for prolonged periods
of time to prevent hearing damage.
Excessive sound pressure from
earphones and headphones can
Plug type: Ø3.5 mm stereo
mains supply.
amount of power.
Bass adjustment (10)
Disc tray (7)
Headphone jack (
cause hearing loss.
(not included)
Music Port jack (15)
Remote control sensor
Track skip/search, album
selection, tune/preset
channel selections, time
adjustment (7 to 11, 13, 14)
USB lid (11)
5 D.BASS selection (10)
Stop/Demo (5, 7, 11 to 14)
6 FM/AM radio, music
port selection (8, 9, 15)
7 Volume control
Disc tray open/close (7)
)
l
USB port (11)
CD to USB high speed
auto recording (12)
Recording indicator (11)
Remote control
Buttons such as 1 function the same as the controls on the main unit.
Sleep timer (9)
1
Auto off
Numeric
(7, 9, 11, 15)
Delete (8)
Program (7 to 9)
Clear (8)
2
4
Track skip/search, tune/
preset channel selections,
time adjustment, program
play, program check
(7 to 11, 13, 14)
OK (7, 9, 13 to 15)
5
Preset EQ (10)
RQTV0271
USB recording
start/pause (11, 12)
6
6
Clock/Timer (9, 10)
Play timer/Record timer (9, 10)
Dimmer
Display (7, 9, 12 to 14)
7
Muting
Bass/Treble (10)
Repeat (7)
Play mode (7 to 9, 11)
6
3
Stop (7, 11 to 14)
Album selection,
bass/treble
adjustment
(7, 10, 11, 14)
Re-Master (10)
Surround (10)
USB edit mode (12, 13)
USB recording mode (13)
• Press the button to activate.
• Press again to cancel.
This function allows you to
turn off the unit in disc or
USB mode only after left
unused for 10 minutes.
The setting is maintained
even if the unit is turned off.
Dims the display panel.
Mutes the sound.
PMX3_E_EN.indd 6PMX3_E_EN.indd 6 6/17/08 10:14:51 AM6/17/08 10:14:51 AM
 Loading...