


ORIGINAL INSTRUCTIONS
USER’S MANUAL
AIR-CONDITIONER
ENGLISH
SRK63ZM-S SRK71ZM-S SRK80ZM-S
MANUEL DE L’UTILISATEUR |
FRANÇAIS |
CLIMATISEUR |
|
ANWENDERHANDBUCH |
DEUTSCH |
¨ |
|
KLIMAGERAT |
|
ISTRUZIONI PER L’USO |
ITALIANO |
CONDIZIONATORE D’ARIA |
|
MANUAL DEL PROPIETARIO |
˜ |
ESPANOL |
|
ACONDICIONADOR DE AIRE |
|
GEBRUIKERSHANDLEIDING |
NEDERLANDS |
AIRCONDITIONING |
|
MANUAL DO UTILIZADOR |
PORTUGUÊS |
APARELHO DE AR CONDICIONADO |
|
ΟΔΗΓΙΕΣ ΧΡΗΣΗΣ |
ΕΛΛΗΝΙΚΑ |
ΚΛΙΜΑΤΙΣΤΙΚΟ |
|
РУКОВОДСТВО ПО ЭКСПЛУАТАЦИИ |
РУССКИЙ |
КОНДИЦИОНЕР ВОЗДУХА |
|
KULLANIM KILAVUZU |
TÜRKÇE |
This air conditioner complies with EMC Directive 2004/108/EC, LV Directive 2006/95/EC.
Ce climatiseur est conforme à la Directive EMC: 2004/108/EC, LV Directive 2006/95/EC.
Dieses Kimagerät erfüllt die EMC Direktiven 2004/108/EC, LV Direktiven 2006/95/EC.
Questo condizionatore d’aria è conforme alla Direttiva EMC: 2004/ 108/EC, LV Direttiva 2006/95/EC.
Este acondicionador de aire cumple con la directiva EMC: 2004/ 108/EC, LV Directiva 2006/95/EC.
Deze airconditioner voldoet aan EMC Directive 2004/108/EC, LV Directive 2006/95/EC.
Este aparelho de ar condicionado está em conformidade com a Directiva EMC 2004/108/EC e a Directiva LV 2006/95/EC.
∞˘Щfi ЩФ ОПИМ·ЩИЫЩИОfi В›У·И Ы‡МКˆУФ МВ ЩИ˜ ЪФ‰И·БЪ·К¤˜ ЩЛ˜ √‰ЛБ›·˜ EMC 2004/108/EK Î·È Ù˘ √‰ËÁ›·˜ LV 2006/95/EK.
RKW012A412D
Thank you for purchasing a MITSUBISHI HEAVY INDUSTRIES, LTD. Air-Conditioner. To get the best long-lasting performance, please read and follow this User’s Manual carefully before using your air-conditioner. After reading, please store the Manual in a safe place and refer to it for operational questions or in the event of any irregularities.
This air-conditioner is intended for domestic use.
Do not vent R410A into the atmosphere: R410A is a fluorinated greenhouse gas, covered by the Kyoto Protocol with a Global Warming Potential (GWP) = 1975.
ENGLISH

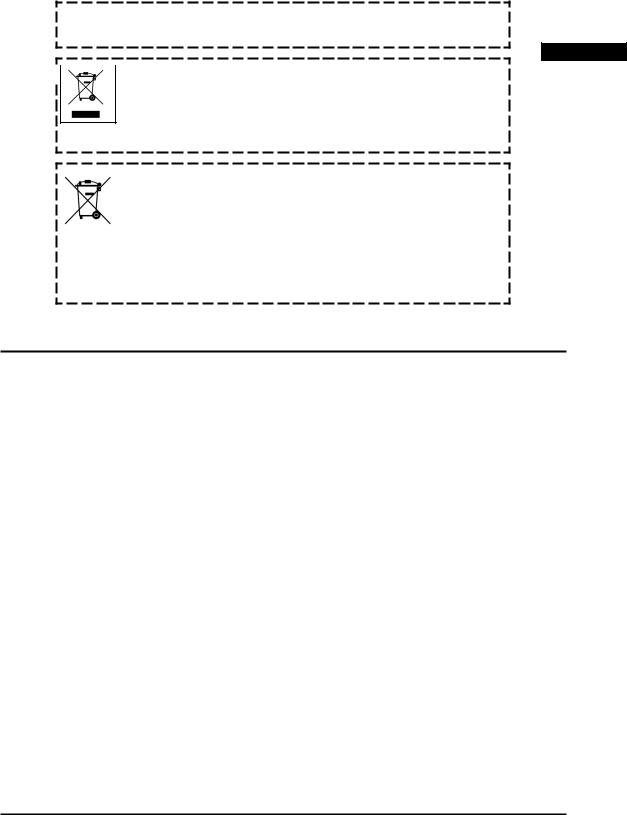
 Your Air Conditioning product may be marked with this symbol. It means that waste electrical and electronic equipment (WEEE as in directive 2012/ 19/EU) should not be mixed with general household waste. Air conditioners should be treated at an authorized treatment facility for re-use, recycling and recovery and not be disposed of in the municipal waste stream. Please contact the installer or local authority for more information.
This symbol printed in the batteries attached to your Air Conditioning product is information for end-users according to the EU directive 2013/56/ EU article 20 annex II.
Batteries, at their end-of-life, should be disposed of separately from general household waste. If a chemical symbol is printed beneath the symbol shown above, this chemical symbol means that the batteries contain a heavy metal at a certain concentration. This will be indicated as follows: Hg:mercury(0.0005%) , Cd:cadmium(0.002%) , Pb:lead(0.004%)
Please, dispose of batteries correctly at your local community waste collection or the recycling center.
The emission sound pressure level from each Indoor and Outdoor unit is under 70 dB(A).
contents
Safety precautions ........................................ |
2 |
Name of each part and its function ............... |
6 |
Remote control handling ............................... |
8 |
Operation failure with the remote control ...... |
8 |
Temporary run operation .............................. |
8 |
Installing two air conditioners in the same |
|
room .............................................................. |
9 |
Child Lock ..................................................... |
9 |
Operation and display section for |
|
remote control ............................................. |
10 |
Current time setting..................................... |
11 |
AUTO mode operation ................................ |
11 |
Temperature adjustment during AUTO ....... |
12 |
FAN SPEED ................................................ |
12 |
COOL/HEAT/DRY/FAN mode operation .... |
13 |
Air-conditioner operable |
|
temperature setting ..................................... |
13 |
Characteristics of HEAT mode operation ... |
13 |
Airflow direction adjustment ........................ |
14 |
3D AUTO operation .................................... |
14 |
SLEEP TIMER operation ............................ |
15 |
OFF-TIMER operation ................................ |
15 |
ON-TIMER operation .................................. |
16 |
SLEEP TIMER + ON-TIMER operation ...... |
16 |
ON-TIMER + OFF-TIMER operation .......... |
17 |
ALLERGEN CLEAR operation .................... |
17 |
WEEKLY TIMER operation ......................... |
18 |
HIGH POWER/ECONOMY operation ......... |
22 |
NIGHT SETBACK operation ....................... |
23 |
SILENT operation ....................................... |
23 |
SELF CLEAN operation .............................. |
24 |
Auto restart function .................................... |
24 |
Tips for effective operation ......................... |
24 |
Installation location setting .......................... |
25 |
Maintenance ............................................... |
26 |
Proper installation ....................................... |
28 |
Troubleshooting .......................................... |
28 |
Notice .......................................................... |
29 |
Contact your dealer..................................... |
30 |
About the Multiple Air-conditioner ............... |
30 |
Self diagnosis function ................................ |
31 |
– 1 –
Safety precautions
•Before starting to use the system, please read these “Safety precautions” carefully to ensure proper operation of the system.
•When you have read this instruction manual, please keep it without missing. If someone else takes over as operator, make certain that the manual is also passed on to the new operator.
WARNING |
Improper handling could lead to drastic result like death, se- |
|
rious injury, etc. |
||
|
||
CAUTION |
Might pose a serious problem, depending on the circum- |
|
stances. |
||
|
Please observe these precautions with great care, since they are essential to your safety.
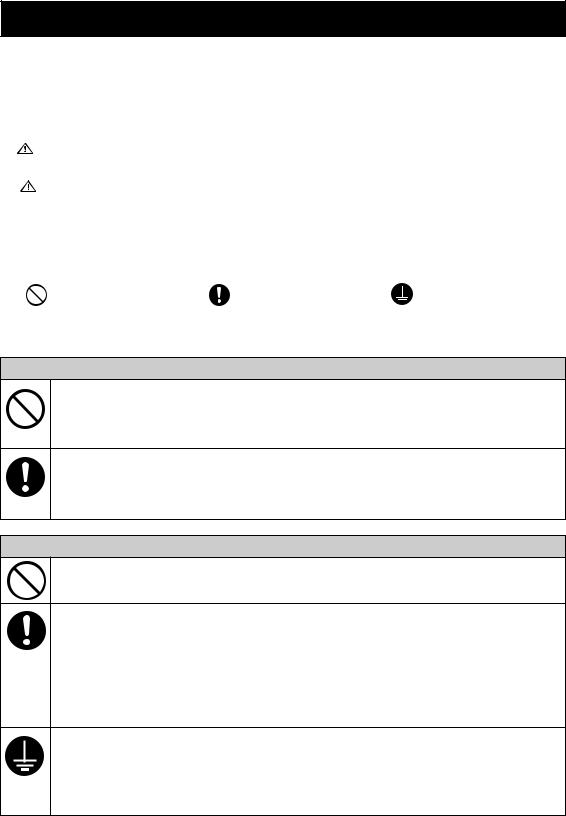
• Symbols which appear frequently in the text have the following meaning:
|
Strictly prohibited |
|
Observe instructions |
|
|
|
Provide proper earth- |
|
|
with great care |
|
|
|
ing |
|
|
|
|
|
||||
|
|
|
|
||||
|
|
|
|
|
|
||
|
|
|
|
|
|
|
|
INSTALLATION PRECAUTIONS
 WARNING
•The system is for domestic, residential etc. use.
If used in severer environments, such as an engineering workplace, the equipment may function poorly.
•The system must be installed by your dealer or a qualified professional.
It is not advisable to install the system by yourself, as faulty handling may cause leakage of water, electric shock or fire.
 CAUTION
•Do not install it where flammable gas may leak.
Gas leaks may cause fire.
• Depending on the place of installa- |
• Make sure to install the drain hose |
tion, an earth leakage breaker may be |
properly so that all the water is |
necessary. |
drained out. |
If you do not install an earth leakage |
Improper installation may lead to water |
breaker, you may get an electric shock. |
drop in the room resulting in wet furni- |
|
ture. |
• Make sure that the system has been properly earthed.
Earth cables should never be connected to a gas pipe, water pipe, lightning conductor or telephone earth cable. Incorrect installation of the earth cable may produce an electric shock.
– 2 –
Safety precautions
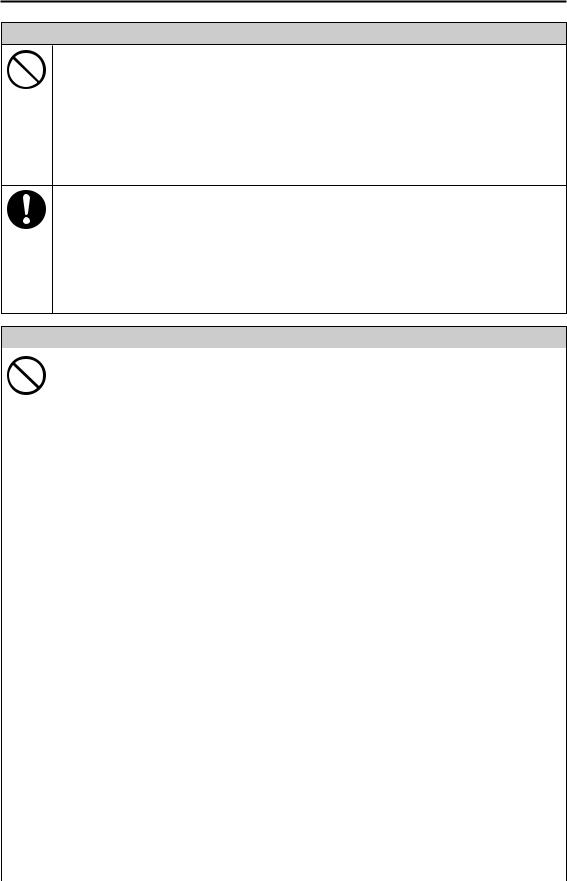
OPERATION PRECAUTIONS
 WARNING
•Children shall not play with the appliance.
•Do not expose yourself to the cooling air for a long period.
This could affect your physical condition and cause health problems.
•Cleaning and user maintenance shall not be made by children without supervision.
•Do not insert anything into the air inlet.
This may cause injury, as the internal fan rotates at high speed.
•This appliance can be used by children aged from 8 years and above and persons with reduced physical, sensory or mental capabilities or lack of experience and knowledge if they have been given supervision or instruction concerning use of the appliance in a safe way and understand the hazards involved.
•Store the remote control out of reach of infants.
Failure to observe this may result in the batteries being swallowed or other accidents.
 CAUTION
|
• Only use approved fuses. |
• The system should only be used for |
|
Use of steel or copper wire instead of an |
its original purpose and not for any- |
|
approved fuse is strictly prohibited, as it |
thing else like, for instance, preserva- |
|
may cause a breakdown or fire. |
tion of food, plants or animals, preci- |
|
• Do not handle the switches with wet |
sion devices or works of art. |
|
hands. |
The system is only intended for use in |
|
This may cause an electric shock. |
ordinary domestic rooms. Any other use |
|
• Do not swing from the indoor unit. |
of the system may damage the quality |
|
If the indoor unit falls down,you may get |
of food, etc. |
|
• Do not place anything containing wa- |
|
|
injured. |
ter, like vases, on top of the unit. |
|
• Do not place a flammable insecticide |
|
|
Water entering the unit could damage |
|
|
or paint spray near the blower, nor |
|
|
the insulation and therefore cause an |
|
|
spray it directly on the system. |
|
|
electric shock. |
|
|
This may result in a fire. |
|
|
• Do not install the system where the |
|
|
• You should not expose any combus- |
|
|
airflow direction is aimed directly at |
|
|
tion appliance directly to the air |
|
|
plants or animals. |
|
|
stream of the air-conditioner. |
|
|
This will damage their health. |
|
|
The appliance may then work inad- |
|
|
• Do not sit on the outdoor unit nor put |
|
|
equately. |
anything on it. |
|
• Do not wash the air-conditioner with |
|
|
If the unit falls down or things drop off it, |
|
|
water. |
|
|
people could get hurt. |
|
|
This could cause an electric shock. |
|
|
• After a long period of use, check the |
|
|
|
|
|
|
unit's support structure from time to |
|
|
time. |
|
|
If you do not repair any damage right |
|
|
away, the unit may fall down and cause |
|
|
personal injury. |
|
|
|
– 3 –
Safety precautions
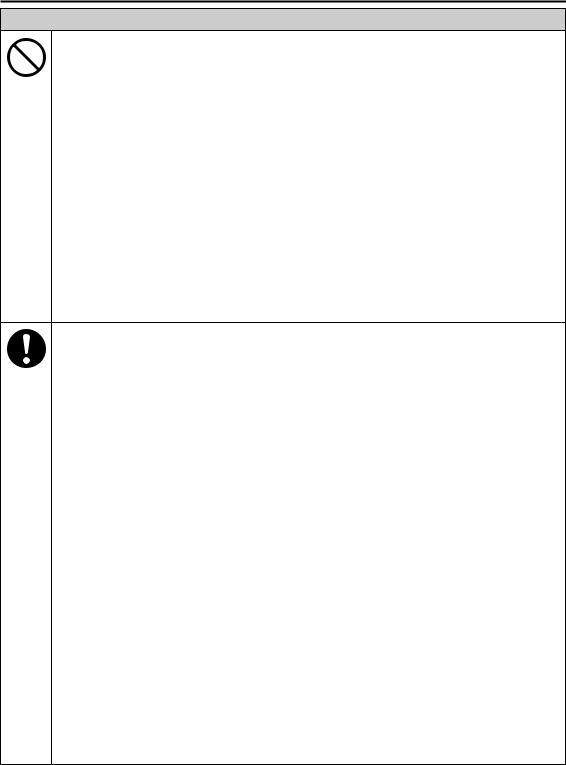
 CAUTION
•Do not touch the aluminum fins on the air heat exchanger.
It may result in injury.
•Do not place household electrical appliances or household items under neath the indoor or outdoor units.
Condensation falling from the unit may stain objects and cause accidents or electrical shock.
•Do not operate the system without the air filter.
It can cause malfunction of the system due to clogging of the heat exchanger.
•Do not shut off the power supply immediately after stopping the operation.
Wait at least 5 minutes, otherwise there is a risk of water leakage or breakdown.
•Do not control the system with main power switch.
It can cause fire or water leakage. In addition, the fan can start unexpectedly, which can cause personal injury.
•Do not pour liquid into this unit and do not put water container on this unit.
Water entering the unit could damage the insulation and therefore cause an electric shock.
•If you operate the system together with a combustion appliance, you must regularly ventilate the indoor air.
Insufficient ventilation may cause accidents due to oxygen deficiency.
•Stand firmly on a stepladder or other stable object when removing the inlet panel and filters.
Failure to observe this may result in injury through insecure objects toppling over.
•When you clean the system, stop the unit and turn off the power supply.
Never open the panel while the internal fan is rotating.
•Do not place objects near the outdoor unit or allow leaves to gather around the unit.
If there are objects or leaves around the outdoor unit, small animals may enter unit and contact electrical parts and may cause a break-down, smoke or fire.
•Contact your dealer to clean inside the indoor unit, do not attempt to do by yourself.
The use of a non-approved detergent or improper washing method may damage the unit’s plastic components and cause leaks. Damage, smoke, or fire may also happen if the detergent comes in contact with electrical parts or the unit’s motor.
•Stop the unit and turn off the power if you hear thunder or there is a danger of lightning.
It may damage the unit.
•Do not let the foreign matters enter the indoor unit through the air outlets.
This may cause the dumper inoperable.
•If the power cord becomes damaged, contact your dealer or a qualified engineer.
If it is not replaced, it may cause a breakdown or fire.
– 4 –
Safety precautions
PRECAUTIONS FOR RELOCATION OR REPAIRS
 WARNING
•Do not perform any repairs or modifications by yourself. Consult the dealer if the unit requires repair.
If you repair or modify the unit, it can cause water leaks, electric shocks or fire.
•Consult your dealer for repairs.
Wrong repairs could cause an electric shock, fire, etc.
•In case the air-conditioner is relocated elsewhere, contact your dealer or a professional fitter.
Faulty installation may cause water leakage, electric shock, fire, etc.
•If you notice anything abnormal (smell of burning, etc.), stop the system, turn off the power supply and consult your dealer.
Continued use of the system in abnormal circumstances may result in malfunctioning, electric shock, fire, etc.
•If the air-conditioner fails to cool or warm the room, it may have a refrigerant leakage. Contact your dealer. If refrigerant needs to be added, check with your dealer for proper instructions.
If the refrigerant comes in contact with the bare skin, it may cause cold injury. If the refrigerant gas is inhaled excessively, it may cause deterioration of nerve function like dizziness and headache, or deterioration of heart function like irregular heartbeat and heart palpitation temporarily. If refrigerant unexpectedly leaks from the unit onto a fan heater, stove, hotplate or other heat source, harmful gases could be generated.
– 5 –

Name of each part and its function
INDOOR UNIT
|
Air inlet panel |
Draws in the indoor air. |
Page 26 |
Indoor unit fan
Unit display section
 Page 7
Wireless remote control
Air filter
Removes dust or dirt from the inlet air.  Page 26
Heat exchanger
Air-cleaning filter
Room temperature sensor
Unit operation switch
Air outlet
Air blows out of here.
Left/right air flow direction adjustment louver
 Page 14
Up/down air flow direction adjustment flap
 Page 14
Drain hose
Drains water from the indoor unit.
Refrigerant piping connection and electric wire
OUTDOOR UNIT
Air inlet
(On side & rear surface)
Air outlet
Outdoor unit fan
Heat exchanger
– 6 –
Name of each part and its function
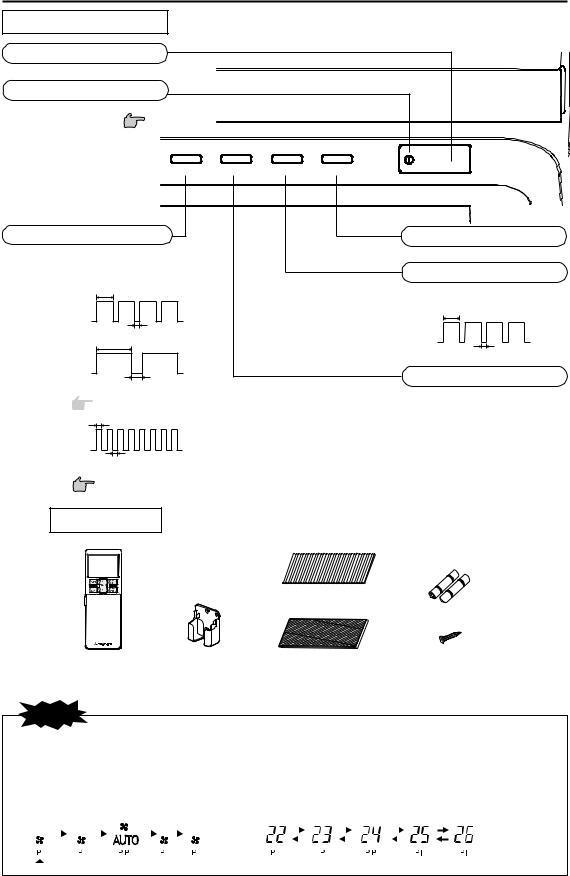
Unit display section
Remote control signal receiver
Unit ON/OFF button
This button can be used for turning on/off the unit when
remote control is not available.
Page 8
RUN |
TIMER |
HI POWER |
ECONO |
RUN (HOT KEEP) light (green)
•Illuminates during operation.
•Blinks when airflow stops due to the ‘HOT KEEP’, ‘CLEAN operation’and ‘operation mode invalid’.
1.5sec.
ON
HOT KEEP
OFF
0.5 sec.
3 sec.
ON
CLEAN operation
OFF
1 sec.
 Page 24
0.5 sec.
ON
Operation mode invalid OFF
0.5 sec.
ON/OFF
ECONO light (orange)
Illuminates during ECONOMY operation.
HI POWER light (green)
Illuminates during HIGH POWER operation. Blinks during heating preparation.
1.5 sec.
ON
OFF
0.5 sec.
TIMER light (yellow)
Illuminates during TIMER operation.
Page 30
Accessories
Allergen clear filter
(Light orange)  Battery
(R03 (AAA, Micro) ×2)
Wireless remote control |
Wireless remote |
Photocatalytic washable |
Wood screw (Quantity:2) |
|
control holder |
deodorizing filter (Orange) |
(for remote control holder mounting) |
NOTE
• Buzzer sound for remote control
When preset temperature 24°C, automatic operation and automatic airflow are selected, the buzzer sound (PiPi) is produced. When turning off the air conditioner by pressing ON/OFF button (except CLEAN mode), the buzzer sound (Pi) is produced. This function is useful for operating the air conditioner in the darkness.
|
Air flow setting |
|
|
|
|
|
|
|
|
|
|
|
Preset temperature |
|||||||||||||||||||||||||||||||
|
|
|
|
|
|
|
|
|
|
|
|
|
|
|
|
|
|
|
|
|
|
|
|
|
|
|
|
|
|
|
|
|
|
|
|
|
|
|
|
|
|
|
|
|
|
|
|
|
|
|
|
|
|
|
|
|
|
|
|
|
|
|
|
|
|
|
|
|
|
|
|
|
|
|
|
|
|
|
|
|
|
|
|
|
|
|
|
|
|
|
|
|
|
|
|
|
|
|
|
|
|
|
|
|
|
|
|
|
|
|
|
|
|
|
|
|
|
|
|
|
|
|
|
|
|
|
|
|
|
|
|
|
|
|
|
|
|
|
|
|
|
|
|
|
|
|
|
|
|
|
|
|
|
|
|
|
|
|
|
|
|
|
|
|
|
|
|
|
|
|
|
|
|
|
|
|
|
|
|
|
|
|
|
|
|
|
|
|
|
|
|
|
|
|
|
|
|
|
|
|
|
|
|
|
|
|
|
|
|
|
|
|
|
|
|
|
|
|
|
|
|
|
|
|
|
|
|
|
|
|
|
|
|
|
|
|
|
|
|
|
|
|
|
|
|
|
|
|
|
|
|
|
|
|
|
|
|
|
|
|
|
|
|
|
|
|
|
|
|
|
|
|
|
|
|
|
|
|
|
|
|
|
|
|
|
|
|
|
|
|
|
|
|
|
|
|
|
|
|
|
|
|
|
|
|
|
|
|
|
|
|
|
|
|
– 7 –
Remote control handling
Replacing the batteries
The following cases signify exhausted batteries. Replace old batteries with new ones.
•Receiving beep is not emitted when a signal is transmitted.
•Display fades away.
1 Pull out the cover and take out old batteries.
2 Insert new batteries. R03 (AAA, Micro) x2
Pay attention to the ª and · marks
NOTE
•Do not use old and new batteries together.
•Remove the batteries when the remote control is not used for a long period.
•The recommended effective period of a battery conforming to JIS or IEC should be 6 to 12 months with normal use. If used longer, or when an unspecified battery is used, liquid may leak from the battery, causing the remote control to malfunction.
•The recommendable effective period is printed on the battery. This may be shorter due to manufacturering time to the unit. However, the battery may still be in working order after expiry of its nominal life.
■When the display shows any abnormal condition, Press the ACL switch with the tip of a ballpoint pen.
Using the remote control holder
3 Close the cover.
4 Press the ACL switch with the tip of a ballpoint pen.
Page 11
The remote control can be attached to a wall or pillar by using a remote control holder. Before installing the remote control, check that the air-conditioner receives the signals properly.
For installing or removing the remote control, move it up or down in the holder.
Warning note for remote control handling
 Strictly prohibited
• Do not go near high temperature |
• Do not leave the remote control ex- |
• Do not drop the remote control. |
places, such as an electric carpet |
posed to direct sunlight or other |
Handle with care. |
or stove. |
strong lighting. |
|
|
|
|
• Do not put any obstructing obsta- |
• Do not spill any liquid on the |
• Do not place heavy objects on the |
cles between the remote control |
remote control. |
remote control, or step on it. |
and the unit. |
|
|
|
|
|
Operation failure with the remote control
• Are the batteries running down?
“Replacing the batteries” above.
Replace the batteries with new ones and retry the operation.
• If the operation fails, operate the unit |
Below |
with temporary operation function. |
|
Contact your dealer to have the remote con- |
|
trol checked. |
|
Temporary run operation
• The unit ON/OFF button on the unit operates ON/OFF temporarily when the remote control is not used.
Operation program
• OPERATION MODE : AUTO
• |
FAN SPEED |
: |
AUTO |
• |
AIR FLOW |
: |
AUTO |
•Operation starts by pressing the unit ON/OFF button; it stops if you press the button again.
Unit ON/OFF button
NOTE
•Do not hold the Unit ON/OFF button down for more than 5 seconds.
(Holding it down longer than 5 seconds sets the automatic cooling used during servicing or when relocating the air-conditioner.)
–8 –
Installing two air conditioners in the same room
■When two air conditioners are installed in the same room, use this setting when the two air conditioners are not operated with one remote control. Set the remote control and indoor unit.
Setting the remote control
1 Pullies. out the cover and take out batter-
2 Disconnect the switching line next to the battery with wire cutters.
Disconnect
3 Insert batteries. Close the cover.
Setting an indoor unit
1 Turn off the power supply, and turn it on after 1 minute.
2 Point the remote control that was set according to the procedure described on the left side at the indoor unit and send a signal by pressing the ACL switch on the remote control.
Since the signal is sent in |
Reception |
about 6 seconds after the |
pip |
ACL switch is pressed, |
|
point the remote control |
|
at the indoor unit for |
|
some time. |
|
3 Check that the reception buzzer sound "pip" is emitted from the indoor unit.
At completion of the setting, the indoor unit emits a buzzer sound "pip". (If no reception tone is emitted, start the setting from the beginning again.)
Child Lock
■ This function locks the remote control operation to prevent an operation error.
Point the remote control toward the air-conditioner, and
1 Press the SET button for 3 seconds or longer.
 is displayed. While Child Lock is set, only the ON/OFF button can be operated.
Releasing procedure
Turn off the light by pressing the SET button for 3 seconds or longer.
NOTE
• While Child Lock is set, the settings of temperature, fan speed and airflow direction cannot be changed. To change the settings, reset Child Lock.
• Child lock will not function during ALLERGEN CLEAR operation.
– 9 –
Operation and display section for remote control
Operation section
OPERATION MODE select button
Each time the button is pressed, the mode changes.
 Page 11,13
TEMPERATURE button
This button sets the room temperature.
HI/ECO button
This button changes the HIGH POWER/
ECONOMY operation.
Page 22
AIR FLOW (LEFT/RIGHT) button
This button changes the air flow (left/ right) direction.
 Page 14
SILENT button
This buttion changes the SILENT operation.
 Page 23
ALLERGEN CLEAR button
This button selects ALLERGEN CLEAR operation.
 Page 17
ON TIMER button
This button selects ON TIMER operation.
 Page 16
OFF TIMER button
This button selects OFF TIMER operation.
 Page 15
WEEKLY button
This button switches the WEEKLY
TIMER to ON/OFF.
 Page 18
CLEAN switch
This switch selects the CLEAN operation.
 Page 24
SLEEP button
This button selects SLEEP operation. |
• The above illustration shows all controls, but in |
Page 15 |
practice only the relevant parts are shown. |
|
Transmission section
ON/OFF (luminous) button
Press to start operation, press again to stop.
FAN SPEED button
Each time the button is pressed, the fan speed changes.
 Page 12
AIR FLOW (UP/DOWN) button
This button changes the air flow (up/ down) direction.
 Page 14
3D AUTO button
This button sets 3D AUTO operation.  Page 14
NIGHT SETBACK button
This button sets NIGHT SETBACK operation.
 Page 23
SET/Child Lock button
Use this button to set the timer and Child Lock.
 Page 9
CANCEL button
This button cancels the ON timer, OFF timer, and SLEEP operation.
TIMER button
This buttions is used for setting the current time and timer function.
PROGRAM button
This button sets WEEKLY TIMER.  Page 18
ACL switch
Switch for resetting microcomputer.  Page 8
TIME SET UP switch
This switch is for setting the time.  Page 11
Transmission procedure
When each button on the remote control is pressed – with the remote control pointing towards the air-conditioner unit, a signal is transmitted. When the air-conditioner receives the signal correctly, it will beep.
– 10 –
 Loading...