

Page 1
Operating instructions
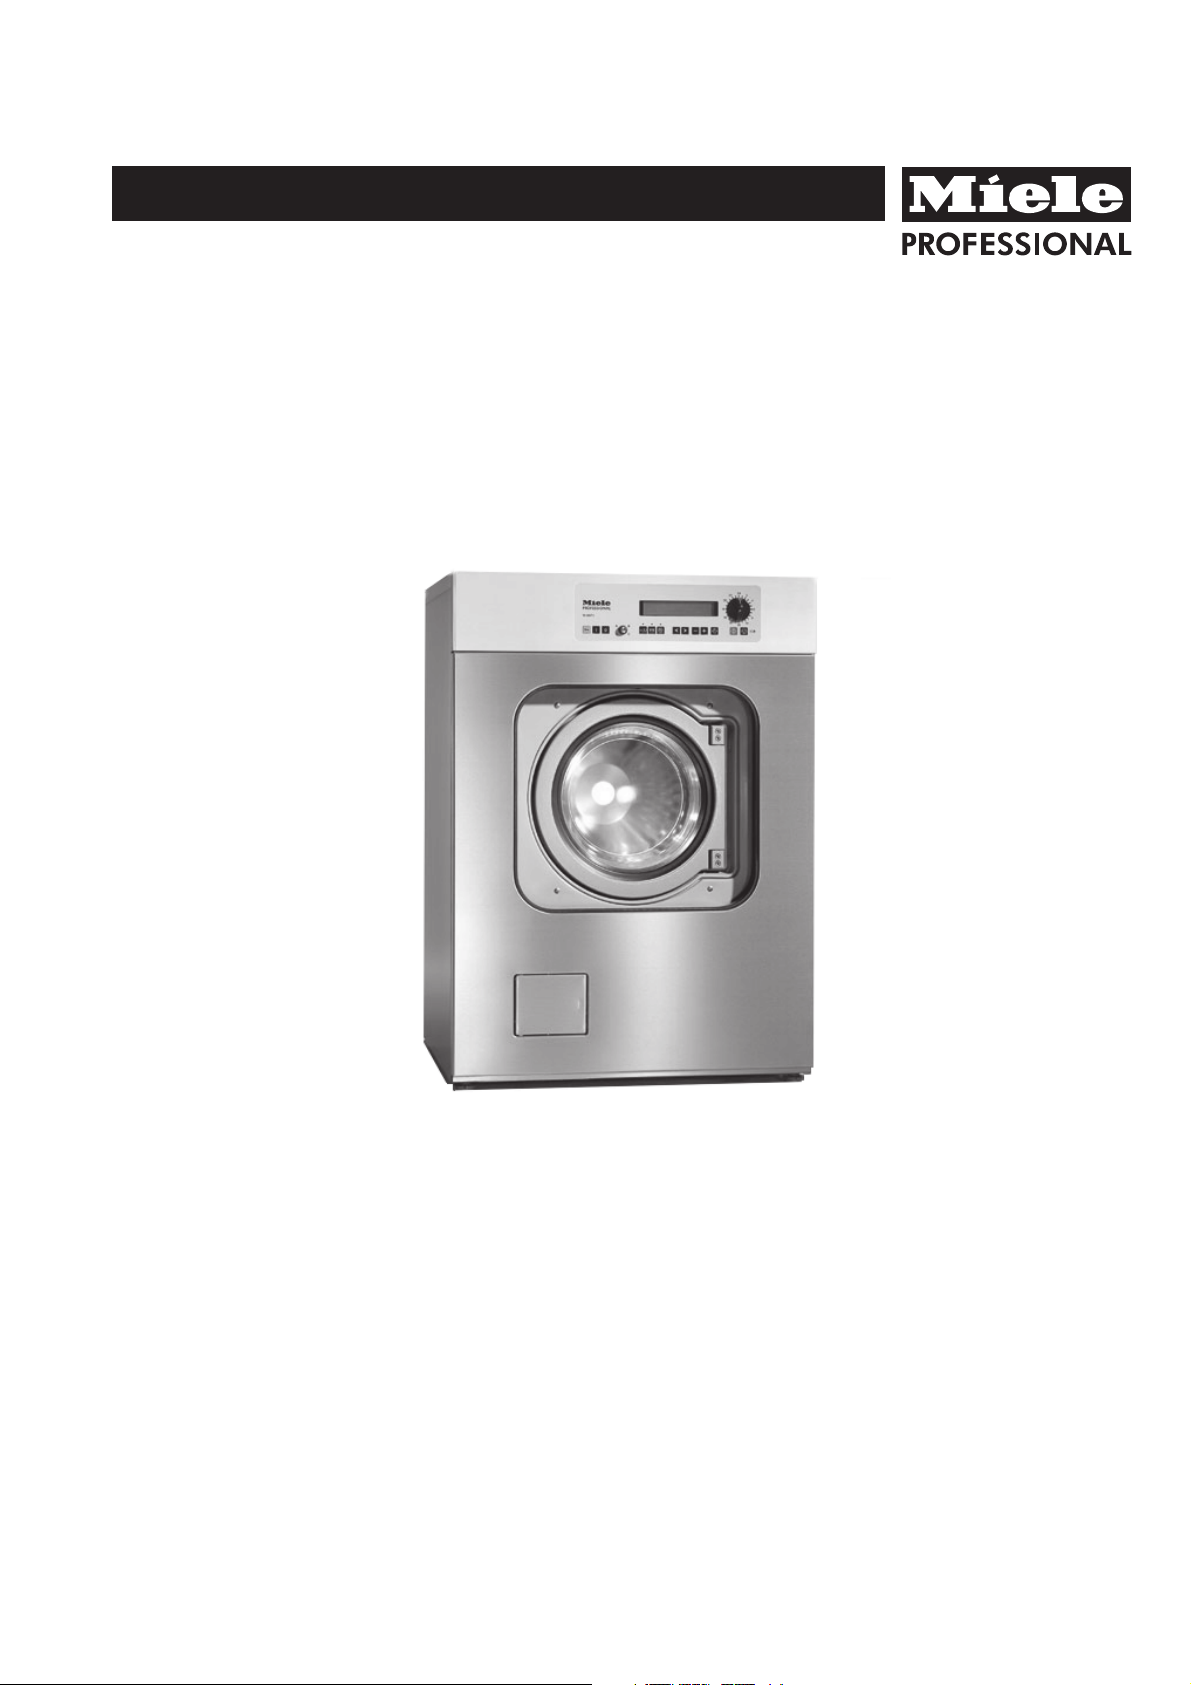
Washer-Extractor
WS 5071 MOP-PROFI
To avoid the risk of accidents or damage to the machine it is
essential to read these instructions before installing,
commissioning and using it for the first time.
en - GB
M.-Nr. 07 076 772
Page 2

2 M.-Nr. 07 076 772
Page 3

Contents
Warning and Safety Instructions . . . . . . . . . . . . . . . . . . . . . . . . . . . . . . . . . . . . . . . . . . . . . . . 4
Caring for the environment . . . . . . . . . . . . . . . . . . . . . . . . . . . . . . . . . . . . . . . . . . . . . . . . . . . . 7
Guide to the machine. . . . . . . . . . . . . . . . . . . . . . . . . . . . . . . . . . . . . . . . . . . . . . . . . . . . . . . . . 8
Operation . . . . . . . . . . . . . . . . . . . . . . . . . . . . . . . . . . . . . . . . . . . . . . . . . . . . . . . . . . . . . . . . .13
Setting the local language (if necessary). . . . . . . . . . . . . . . . . . . . . . . . . . . . . . . . . . . . . . . . . . 13
Setting current time and date. . . . . . . . . . . . . . . . . . . . . . . . . . . . . . . . . . . . . . . . . . . . . . . . . . . 13
Washing. . . . . . . . . . . . . . . . . . . . . . . . . . . . . . . . . . . . . . . . . . . . . . . . . . . . . . . . . . . . . . . . . . . 14
Before using for the first time . . . . . . . . . . . . . . . . . . . . . . . . . . . . . . . . . . . . . . . . . . . . . . . . . . . 14
Preparing the wash load . . . . . . . . . . . . . . . . . . . . . . . . . . . . . . . . . . . . . . . . . . . . . . . . . . . . . . 14
Programme end - to open the drum door . . . . . . . . . . . . . . . . . . . . . . . . . . . . . . . . . . . . . . . . . 17
Maximum load / Detergent. . . . . . . . . . . . . . . . . . . . . . . . . . . . . . . . . . . . . . . . . . . . . . . . . . . . 18
Bleaching agents . . . . . . . . . . . . . . . . . . . . . . . . . . . . . . . . . . . . . . . . . . . . . . . . . . . . . . . . . . . . 18
Detergent dispensing . . . . . . . . . . . . . . . . . . . . . . . . . . . . . . . . . . . . . . . . . . . . . . . . . . . . . . . . 18
Additional functions. . . . . . . . . . . . . . . . . . . . . . . . . . . . . . . . . . . . . . . . . . . . . . . . . . . . . . . . . 19
With Pre-wash. . . . . . . . . . . . . . . . . . . . . . . . . . . . . . . . . . . . . . . . . . . . . . . . . . . . . . . . . . . . . . . 19
Starch . . . . . . . . . . . . . . . . . . . . . . . . . . . . . . . . . . . . . . . . . . . . . . . . . . . . . . . . . . . . . . . . . . . . . 19
Without spin . . . . . . . . . . . . . . . . . . . . . . . . . . . . . . . . . . . . . . . . . . . . . . . . . . . . . . . . . . . . . . . . 19
Skipping programme stages . . . . . . . . . . . . . . . . . . . . . . . . . . . . . . . . . . . . . . . . . . . . . . . . . . . 20
Programme interruption . . . . . . . . . . . . . . . . . . . . . . . . . . . . . . . . . . . . . . . . . . . . . . . . . . . . . . . 20
Programme cancellation . . . . . . . . . . . . . . . . . . . . . . . . . . . . . . . . . . . . . . . . . . . . . . . . . . . . . .20
Delayed Start . . . . . . . . . . . . . . . . . . . . . . . . . . . . . . . . . . . . . . . . . . . . . . . . . . . . . . . . . . . . . . . 21
PC- Printer. . . . . . . . . . . . . . . . . . . . . . . . . . . . . . . . . . . . . . . . . . . . . . . . . . . . . . . . . . . . . . . . .22
PC- Printer connection: . . . . . . . . . . . . . . . . . . . . . . . . . . . . . . . . . . . . . . . . . . . . . . . . . . . . . . . 22
Liquid dispensing. . . . . . . . . . . . . . . . . . . . . . . . . . . . . . . . . . . . . . . . . . . . . . . . . . . . . . . . . . . 23
Amount to be dispensed . . . . . . . . . . . . . . . . . . . . . . . . . . . . . . . . . . . . . . . . . . . . . . . . . . . . . .23
Commissioning the dispensing pumps . . . . . . . . . . . . . . . . . . . . . . . . . . . . . . . . . . . . . . . . . . . 24
Cleaning and Care . . . . . . . . . . . . . . . . . . . . . . . . . . . . . . . . . . . . . . . . . . . . . . . . . . . . . . . . . . 25
Problem solving guide. . . . . . . . . . . . . . . . . . . . . . . . . . . . . . . . . . . . . . . . . . . . . . . . . . . . . . . 27
Power cut during a wash programme - Emergency door release . . . . . . . . . . . . . . . . . . . . . . . 27
Fault messages . . . . . . . . . . . . . . . . . . . . . . . . . . . . . . . . . . . . . . . . . . . . . . . . . . . . . . . . . . . . . 28
Possible reasons for increased levels of foaming . . . . . . . . . . . . . . . . . . . . . . . . . . . . . . . . . . . 30
After sales service . . . . . . . . . . . . . . . . . . . . . . . . . . . . . . . . . . . . . . . . . . . . . . . . . . . . . . . . . . . 30
Explanation of symbols on the data plate . . . . . . . . . . . . . . . . . . . . . . . . . . . . . . . . . . . . . . . 31
Notes for the installer. . . . . . . . . . . . . . . . . . . . . . . . . . . . . . . . . . . . . . . . . . . . . . . . . . . . . . . . 32
Transit fittings . . . . . . . . . . . . . . . . . . . . . . . . . . . . . . . . . . . . . . . . . . . . . . . . . . . . . . . . . . . . . . . 32
Connection to water supply . . . . . . . . . . . . . . . . . . . . . . . . . . . . . . . . . . . . . . . . . . . . . . . . . . . .33
Electrical connection . . . . . . . . . . . . . . . . . . . . . . . . . . . . . . . . . . . . . . . . . . . . . . . . . . . . . . . . . 34
EU Declaration of Conformity . . . . . . . . . . . . . . . . . . . . . . . . . . . . . . . . . . . . . . . . . . . . . . . . . 35
Guarantee . . . . . . . . . . . . . . . . . . . . . . . . . . . . . . . . . . . . . . . . . . . . . . . . . . . . . . . . . . . . . . . . .37
The washer-extractor must be installed and commissioned by
an approved Service technician or authorised Service Dealer.
M.-Nr. 07 076 772 3
Page 4

Warning and Safety Instructions
Please read the operating instructions
before using this machine for the first
time. They contain important information
about the safety, use and maintenance of
the machine. This will avoid the risk of
accidents and damage to the machine.
Appropriate use of the machine
This washer extractor is only intended for
items of laundry which have not been
impregnated with dangerous or inflammable
substances.
Only machine wash articles which
possess a care label stating they are
suitable for machine washing.
It is the operator’s responsibility to
ensure that the standard of disinfection
in thermal as well as chemo thermal
procedures is maintained (in accordance
with § 18 IFSG) by carrying out suitable
validation tests. These procedures should
be checked on a regular basis, either
thermo-electrically using loggers, or
bacteriologically with bio indicators. The
operator must pay particular attention to
maintaining the correct parameters in the
procedure, including temperature and with
chemo thermal programmes the chemical
concentration used. Disinfection
programmes must not be interrupted, as this
can have a limiting effect on the disinfection
result.
On no account must solvents of the kind
used for dry cleaning be used in this
machine. There may be the danger of fire or
explosion.
Never use or store petrol or petroleum
based substances or any easily
inflammable substances near the machine.
Do not use the machine lid as a resting
place.
Danger of fire or explosion
Technical and electrical safety
The electrical safety of this machine can
only be guaranteed when continuity is
complete between it and an effective
earthing system which complies with local
and national safety regulations.
It is most important that this basic safety
requirement is regularly tested by a qualified
electrician. The manufacturer cannot be held
liable for the consequences of an
inadequate earthing system.
Do not damage, remove or bypass the
safety features and controls on the
machine.
Where there is any damage to the
machine or to the cable insulation the
machine must not be used until it has been
repaired.
Any removable outer panels must be in
place, and all moving or electrical parts
shielded before the machine is operated.
The machine is only completely isolated
from the electricity supply either when
switched off at the wall isolator, or the mains
fuse is withdrawn from the socket.
Repairs should only be undertaken by a
suitably qualified service engineer to
ensure safety. Unauthorised repairs could be
dangerous.
Faulty components should only be
exchanged for Miele original spare parts.
Only when these parts are fitted can the
safety standards of the machine be
guaranteed.
The very best materials are used in the
manufacture of this machine, and every
care is taken in its manufacture. However,
with time, deterioration of parts can occur,
especially with rubber components such as
hoses. Check the inlet hoses regularly for
signs of deterioration and replace in good
time, to avoid leaks and subsequent
damage.
4 M.-Nr. 07 076 772
Page 5

Warning and Safety Instructions
Use of the machine
This washer extractor is not intended for
use by persons (including children) with
reduced physical, sensory or mental
capabilities, or lack of experience or
knowledge, unless they have been given
supervision or instruction concerning its use
by a person responsible for their safety.
Never allow children to play in, on or
near the washer extractor, or to operate it
themselves. Please supervise its use by the
elderly or infirm.
Remember that the door porthole glass
can become hot during the operation of
the machine. Do not let children touch it.
When washing with high temperatures
steam can be emitted from the venting
slot behind the machine.
Do not grip between the suspended
drum unit and the seal of the front panel
cut-out during spin.
Disinfecting and cleaning agents often
have compounds containing chlorides in
them. If these agents dry on to stainless
steel surfaces, the residual chlorides will
attack the steel and can cause rusting.
To protect your machine from rust damage,
we recommend only using chloride free
disinfecting and cleaning agents for washing
and disinfecting programmes and for
cleaning stainless steel surfaces of the
machine itself.
If you are not sure about a particular agent,
contact the manufacturer of that agent for
advice.
If you accidentally spill an agent containing
chlorides on the machine it should be rinsed
off with water and dried using a soft cloth.
Proprietary dyes, dye removers and
descaling agents may only be used in
this machine if the manufacturer expressly
states that they are suitable for use in a
washing machine. Follow the instructions on
the packaging.
Always make sure the drum is stationary
before reaching in to remove washing.
Reaching into a moving drum is extremely
dangerous.
Water used for washing and rinsing must
not be used as drinking water. It must be
discharged into a proper drainage system.
The machine should only be operated
unsupervised when there is a floor drain
(gully) in the direct vicinity of the machine.
To avoid flooding:
If hooking the hose into a sink make sure
that the water can flow away freely to avoid
flooding.
Secure the hose against slipping. The
pressure of the water flowing out can push
an unsecured hose out of the sink.
Laundry that was soiled with biological
oils or fat should be washed using a
suitable detergent and/or wash programme.
It must also be inspected after washing. If
oils or fat are not sufficiently removed they
could cause the laundry to self ignite during
the drying process.
Always follow the instructions of the
chemical manufacturer when using a
combination of cleaning agents and special
application chemicals. Only use such
chemicals for the purpose and in the
situation specified by the manufacturer in
order to avoid the danger of adverse
chemical reactions and material damage.
If in doubt check the suitability of the
product for use in this machine with the
manufacturer before using it.
M.-Nr. 07 076 772 5
Page 6

Warning and Safety Instructions
Where a chemical cleaning agent is
recommended on technical application
grounds, this does not imply that the
manufacturer of the machine takes
responsibility for the effect of the chemical
on the material of the items being cleaned or
on the machine.
Please be aware that changes in
formulation, storage conditions etc., which
may not be publicised by the chemical
producer, can have a negative effect on the
cleaning result.
On no account use pressure washers or
hose down the machine to clean it.
Use of accessories
Accessory parts may only be fitted when
expressly approved by Miele. If other
parts are used, guarantee, performance and
product liability claims may be invalidated.
Chlorine and component damage
Anti-chlorine treatment
Anti-chlorine treatment has to be carried out
immediately after chlorine bleach has been
used. Hydrogen peroxide and oxygen based
cleaning and bleaching agents must only be
used in programmes specified for their use.
Any wash performance problems should be
discussed with the manufacturer of the
cleaning / bleaching product in the first
instance.
With thiosulfate, especially when used with
hard water, gypsum can form, which can
lead to incrustations on laundry or deposits
in the machine.
The exact quantity of additives and the
treatment temperatures required must be set
and tested on site in accordance with the
dosage recommendations of the detergent
and additive manufacturers. The laundry
must also be tested to make sure it contains
no active chlorine residues after processing.
Notes on using chlorine bleach and
perchlorethylene
Frequent use of chlorine increases the
risk of component damage.
The use of agents containing chlorine, such
as sodium hypochlorite and chlorine bleach
in powder form, can damage the protective
surface of stainless steel and cause
corrosion. Factors affecting this are chlorine
concentration levels, contact time and
temperature. It is therefore advisable to
avoid the use of such agents. Oxygen based
bleaching agents should be used instead.
If, however, chlorine based bleaching
agents have to be used for particular types
of soiling, then anti-chlorine measures must
also be carried out. If this is not done
irreparable damage can occur to
components in the machine and to laundry.
Disposal of old machines
When disposing of an old washer-
extractor first make it unusable.
Disconnect from all services.
Make the door lock inoperative, so that
children cannot accidentally shut
themselves in. Make appropriate
arrangements for the safe disposal of the
machine.
All personnel working with this machine
must be fully trained in all aspects of its
use and safety.
Keep these instructions in a safe place
6 M.-Nr. 07 076 772
Page 7

Disposal of the packing material
The transport and protective packing has
been selected from materials which are
environmentally friendly for disposal and can
normally be recycled. Packaging e.g. cling
film, polystyrene and plastic wrappings must
be kept out of the reach of babies and
young children. Danger of suffocation.
Rather than just throwing these materials
away, please ensure that they are recycled.
Disposal of your old machine
Electrical and electronic machines often
contain materials which, if handled or
disposed of incorrectly, could be potentially
hazardous to human health and to the
environment. They are, however, essential
for the correct functioning of your machine.
Please do not therefore dispose of it with
your household waste.
Caring for the environment
Please dispose of it at your local community
waste collection/recycling centre, and
ensure that it presents no danger to children
while being stored for disposal.
It should be unplugged or disconnected
from the mains electricity supply by a
competent person.
M.-Nr. 07 076 772 7
Page 8
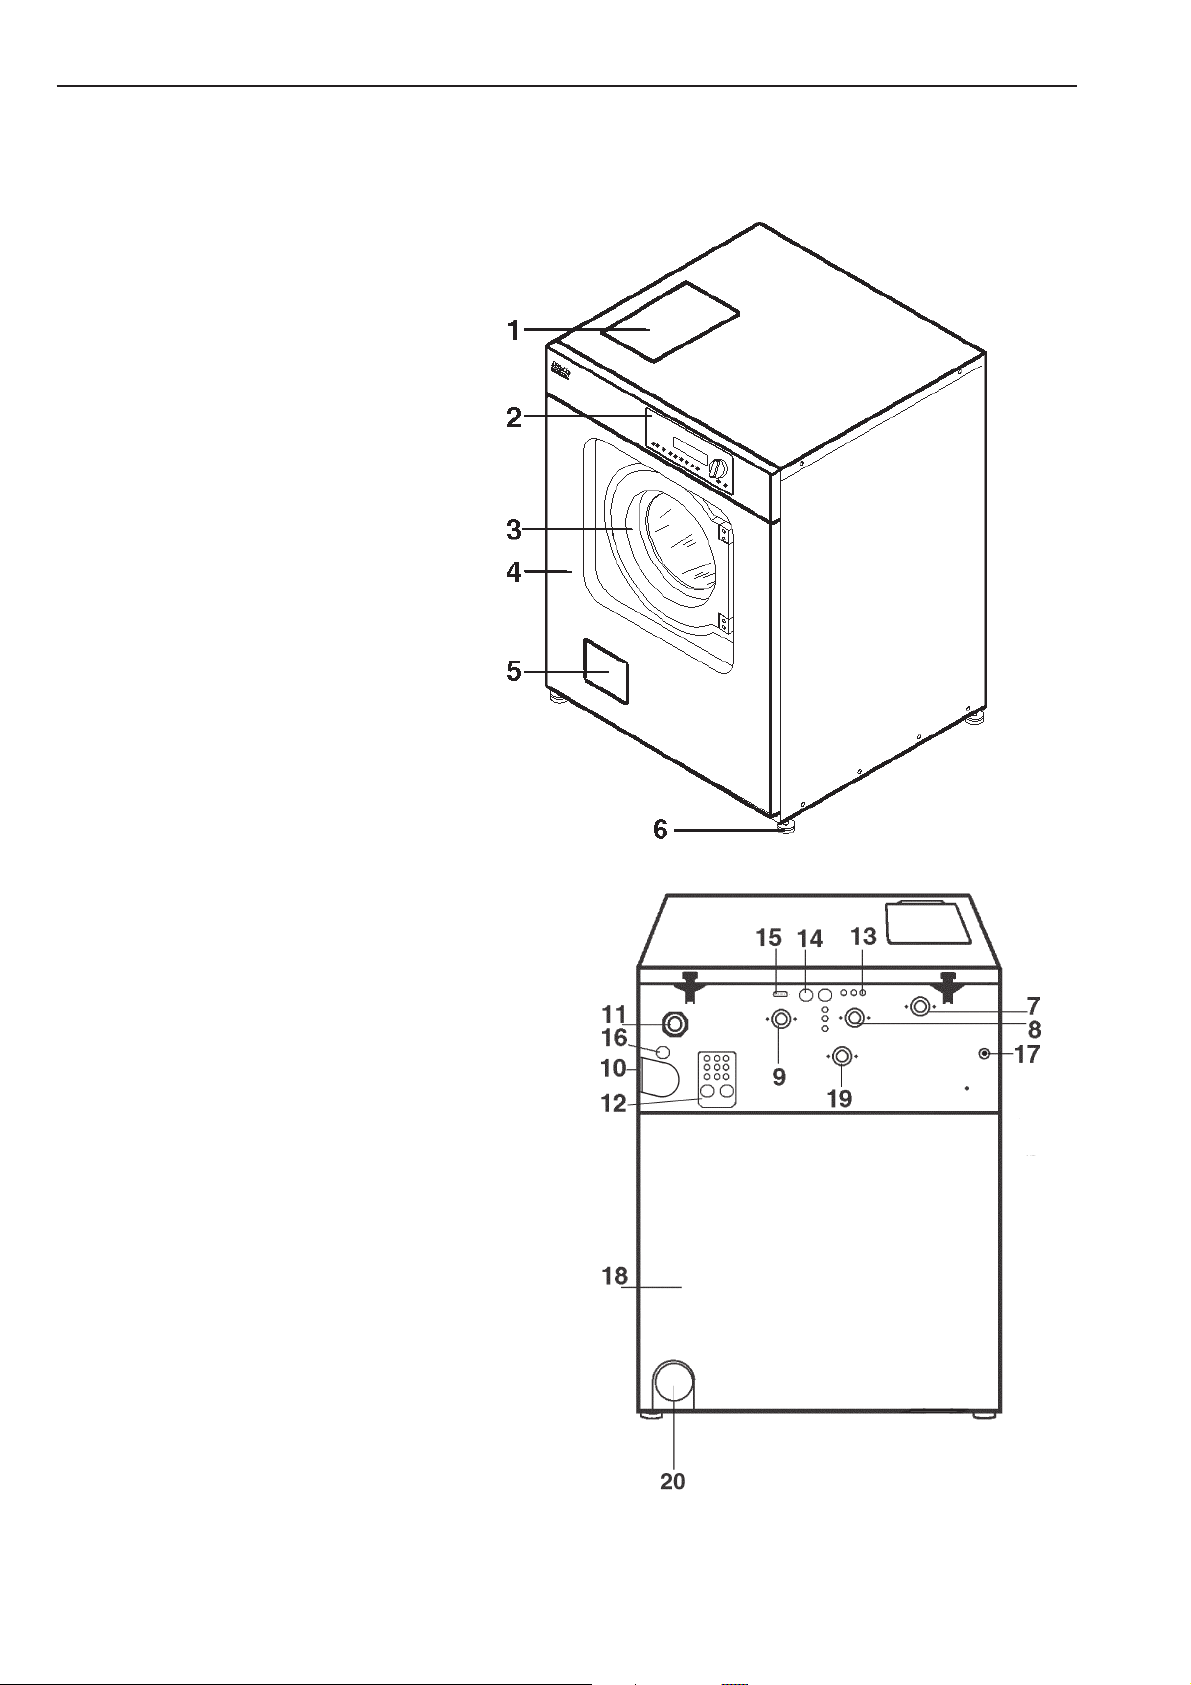
Guide to the machine
WS 5071 MOP-PROFI
This machine is constructed in accordance with IEC 60204-1:2005
a Detergent dispenser box
b Control panel
c Drum door
d Front wall panel
e Access panel to suds
filter/drainage system and
emergency door release
f Four adjustable screw feet
g Cold water connection
h Hot water connection
i Cold water connection for liquid
dispensing
j Venting socket
k Cable entry for power supply
l Liquid dispenser box
m Cable entry for dispenser pumps
n Cable entry for 3 dispenser pumps
o Serial interface for printer
p Cable entry for add-on appliances
q Vent screw for drain valve
r Back wall
s Cold water connection for drain valve
t Drainage
8 M.-Nr. 07 076 772
Page 9
Control panel
Guide to the machine
ab c
a Key switch
b Display
c Programme selector
9 Optical interface
Switches
Y Mains on
Z Mains off
Buttons
5 Door
T Block + / (pre-wash)
U Starch hold
V Without spin
1 2 Cursor
3 Minus
4 Plus
W Delay start
X Start
7 End
PROGRAMME 1 COTTONS
>90° C< Main wash 1
Rinses 3 1200 RPM ->
Display
The Display content shows after the machine
is switched on. It has up to four lines, each
40 digits long, showing which programme
has been selected.
After the Programme start:
a PROGRAMME 1 COTTONS
b 60 °C Pre-wash 25 °C
c 95 °C Main wash
d -->
a Programme number / Prog.name
b Required temperature of the current
prog.block. / Name of the current prog.
block. / Current temperature / Time line
for the current Prog. block
c Required temperature of the following
prog. block. / Name of the following
Programme block
d Indicates more lines in the display
M.-Nr. 07 076 772 9
Page 10

Guide to the machine
Mains on Y Switch
Mains off Z Switch
Door 5 button
Key switch
Position A - Free access
At this operating level only those
programmes can be started which have
been allocated free access.
See Programming Instructions for allocation
of free access.
Position B - Operation
All programmes can be started at this
operating level. The display will show the
programme the selector has been turned to.
Position C - Programming
In this position programming can be carried
out, e.g. copying, deleting, printing out,
altering, giving or barring free access and
creating new programme sequences. See
Programming Instructions.
Keys for the key switch
Key 1 (2 supplied) for operating levels
A and B.
Key 2 for operating levels
A, B, C.
Key 3 for operating levels
A, B, C, D.
Position D - Unlocking
At this operating level barred programmes
can be unlocked. Locked Programmes (e.g.
Disinfection programmes) can not be
cancelled 1 minute after they have been
started. If the key switch is turned to position
D in such a programme, the programme
running is unlocked and can be cancelled.
See Programming Instructions.
10 M.-Nr. 07 076 772
Page 11
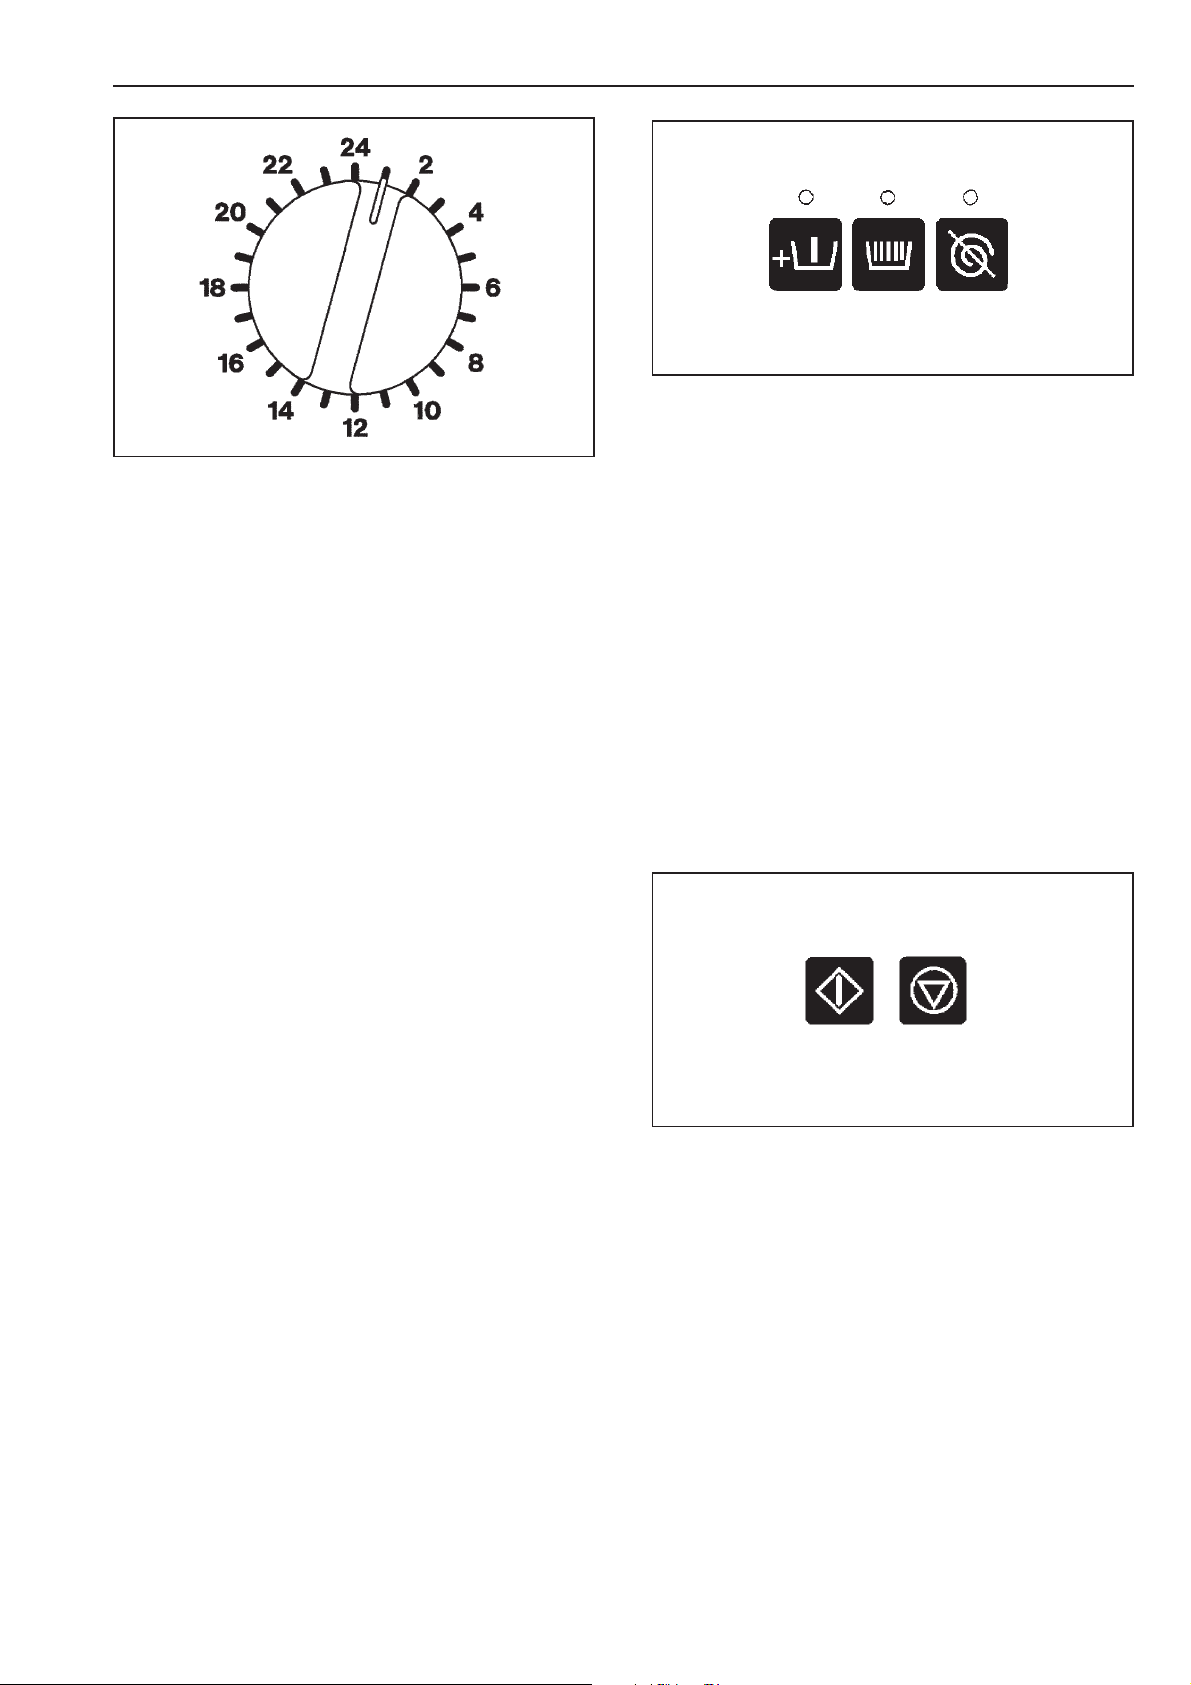
Programme selector switch
Programme numbers 1 - 24 can be selected
directly.
Programme numbers 25 - 99 can be
selected using selector position 24 together
with the 4 Plus button.
The name of the selected programme and
its corresponding number appear in the
display. Programme positions 1 - 10 are
filled with standard programmes.
The subsequent programme positions vary
according to the model, and are listed in the
Programme Survey. If the programme
selector switch is turned to another position
after the start of a programme, the first line
of the display flashes. The programme does
not however change.
Guide to the machine
Block + button T with indicator light
When the button is pressed the light above it
comes on. The corresponding programme
block (e.g. Pre-wash) is added to the
programme. Pressing the button a second
time de-selects the function.
Starch hold button U with indicator light
Press this button if the washing is to be
starched. The light comes on.
Spin-stop button V with indicator light
Press this button if a final spin is not required
after the final rinse. The light comes on.
Standard programmes:
1 Cottons 90°C
2 Cottons 60°C
3 Cottons 40°C
4 Short programme
5 Minimum iron
6 Delicates / Synthetics
7 Woollens
8 Separate rinse and spin
9 Separate spin
10 Separate drain
Start button X
Press to start the selected programme.
End button 7
Pressing this button halts a programme
(Stop mode). Pressing the button again
immediately terminates a programme. A
halted programme can be continued in the
relevant programme stage by pressing the
Start button.
M.-Nr. 07 076 772 11
Page 12

Guide to the machine
Cursor buttons 1 2
The cursor buttons are used to navigate
backwards or forwards into the input fields
or into the next display, (this appears as > <
flashing in the display). After the start of the
programme it is possible in Stop mode to
scroll block by block backwards or forwards
in the programme. Pressing continuously on
the button scrolls quickly through the blocks.
Plus-/-Minus buttons 4 3
Once an input field has been selected it is
possible to make a modification. Pressing
continuously on the button scrolls quickly
through the options.
Delay start button W
If this button is pressed before the start of a
programme, the display indicates that a start
time can be selected. If the button is
pressed again the Delay start option is
cancelled.
If the button is pressed after the start of a
programme the current time of day and date
are shown.
Optical interface
Data transfer to and from the machine’s
controls and a PC can take place using the
relevant software. The optical interface on
the machine’s control panel provides the
connection point.
12 M.-Nr. 07 076 772
Page 13

Pauses between programming steps must
not last longer than 25 seconds, otherwise
the display returns to the basic stage,
(such as On) and the changes are not
stored in memory
Setting the local language (if
necessary)
To set the local language the programming
mode must be accessed by pressing
simultaneously on the Mains on switch Y
and the Start button X. Normally German
and one other language are available.
Switch on the on-site mains switch.
^
Turn the key switch to position "B"
^
(Operation).
Press the OFF button Z to switch off the
^
machine.
^ Press the Start button X and the ON
button Y at the same time and hold
pressed in, until the Display shows the
following:
Operation
Setting current time and date
Switch the machine off with the Mains off
^
switch Z .
Turn the key switch to position "B".
^
Press the Delay start button W and the ON
^
button Y at the same time, and hold
pressed in, until the Display shows the
following:
SETTING TIME AND DATE
Time of day >14< : 30 hrs
Date 23. 03. 2000
After selection press Start button.
Use the Cursor button 2 to position the
^
cursor on the input field for hours and set the
hours with the Plus or Minus button 43.
Use the Cursor button 2 to position the
^
cursor on the input field for minutes and
set the minutes with the Plus or Minus
button 4 3.
^ Position the Cursor on Day and set the day
with the Plus or Minus button 4 3.
SETTING LOCAL LANGUAGE
DEUTSCH >ENGLISH<
After selection press Start button.
^
Select the required language with the
Cursor buttons 1 2 .
The display content being shown is
immediately converted into the language
selected .
^
Confirm with the Start button X .
^ Position the Cursor on Month and set the
month.
^ Position the Cursor on Year and set the
year.
^
Store in memory with the Start button X .
If the Delay start button W is pressed
during a running programme the current
time of day and date are shown.
M.-Nr. 07 076 772 13
Page 14

Washing
Before using for the first time
The machine should be commissioned by
a Miele service technician or an
authorised Miele Service Dealer only.
It is essential that the machine is installed
and connected to power, water and
drainage correctly.
Flushing out the machine
Any residual lubricants and water from
testing still in the machine should be flushed
out as follows:
Open the on-site stopcock.
^
^ Switch on the on-site mains switch.
^ Turn the key switch to position "B"
(Operation).
^ Do not load any laundry in the machine.
Preparing the wash load
Empty all pockets
^
Foreign objects, (eg nails, coins, paper
clips etc) can cause damage to textiles
and components in the machine.
^ Add a little detergent to compartment j .
^ Turn the programme selector switch to the
2 COTTONS 60°C programme.
^ Press the Start button X .
Sort the laundry
Most garments have a textile care label in
the collar or side seam. Sort the laundry by
care label symbols.
Only wash items in this machine which are
stated by the manufacturer to be machine
washable on the textile care label.
Dark textiles often contain excess dye, and
should be washed separately several times
before being included in a mixed load.
Delicate textiles should be washed
separately in a delicates programme.
Loading the drum
Unfold laundry and load loosely in the drum.
For best results make up mixed loads of
large and small items. This improves the
washing effect and distributes the load
better for spinning.
Overloading reduces the wash result and
causes more creasing.
14 M.-Nr. 07 076 772
Page 15

Shut the drum door
^
Washing
Select a programme (e.g. Programme 1
^
COTTONS).
The display shows the following (example):
PROGRAMME 1 COTTONS
Grasp the door in the open position and
^
slam it shut, (mind your fingers).
At first the door may shut with difficulty. This
eases in due course.
Make sure no items of washing are caught
when the door is closed, or they could be
damaged.
?
>90° C< Main wash 1
Rinses 3 1200 RPM
?
^
Use the Block + button T to select a
"Pre-wash" if required. The light above the
button lights up.
When the Block + button T has been
pressed the following shows in the display:
^
Turn the key switch to position " B"
(Operation).
^
Press the Mains on switch Y .
M.-Nr. 07 076 772 15
PROGRAMME 1 COTTONS
>40° C< Pre-wash 1
90° C Main wash 1
Rinses 3 1200 RPM
^
Add detergent for the main wash to
compartment j - and if required
detergent for the pre-wash to compartment
i , fabric conditioner to compartment p
and liquid bleaching agent to
compartment x .
Page 16

Washing
The following parameters can be changed
before the start of a programme if
required:
The temperature in 1 °C steps from cold, 15
to max. 95 °C.
The spin speed in steps of 100 rpm from 0,
300 to max. 1200 rpm.
PROGRAMME 1 COTTONS
>40° C< Pre-wash 1
90° C Main wash 1
Rinses 3 1200 rpm
Use the Cursor button 2 to position the
^
cursor on the input field for the Pre-wash
temperature, and set the temperature
required (here 40 °C) with the Plus or
Minus button 4 3 .
Position the Cursor on the input field for
^
the Main wash temperature, and set the
temperature required with the Plus or
Minus button 4 3 .
^ Position the Cursor on the input field for
the Spin speed, and set the spin speed
required with the Plus or Minus button 4
3 .
The programme sequence is shown in the
display after the start of the programme.
PROGRAMME 1 COTTONS
40° C Pre-wash 20 °C
90° C Main wash
->
In the 2nd Display line, here Pre-wash, the
actual suds temperature is shown, together
with the time line extending off to the right.
Underneath is the following programme
block here Main wash.
PROGRAMME 1 COTTONS
90 °C Main wash 20 °C
Rinse 1
->
When the Pre-wash programme block has
finished, the Main wash programme block
appears in the 2nd line of the display, with
the actual suds temperature, and the time
line extending off to the right.
The following programme block is shown
underneath, here Rinse 1.
An arrow at the right of the last line ( -> )
indicates that there is another line in the
display.
Press the Cursor button 2 , and further
information on the programme appears in
the lower lines.
?
Programme end display
After water from the last heating phase has
^
Press the Start button X .
- The wash programme proceeds -.
16 M.-Nr. 07 076 772
drained away, or after the last "Cool Down"
the programme end time is shown in hours
and minutes.
PROGRAMME 1 COTTONS
Rinse 1
Rinse 2
Programme end 11 : 25 hrs ->
Page 17

Programme end - to open the drum
door
At the end of the Programme, with a
stationary drum and no more water in the
machine the following display is shown (for
example):
PROGRAMME 1 COTTONS
PROGRAMME END
DOOR IS UNLOCKED
Press the door button 5 to open the door.
^
Remove the laundry.
^
If the programme is interrupted when there is
water in the machine, or during the spin, the
following display messages might appear:
Washing
PROGRAMME 1 COTTONS
PROGRAMME END
DOOR IS LOCKED
THERE IS WATER IN THE MACHINE
or:
PROGRAMME 1 COTTONS
PROGRAMME END
DOOR IS LOCKED
DRUM NOT YET STATIONARY
The door is locked. Never try to force open
the door.
^
Select the SEPARATE DRAIN or SEPARATE
SPIN programme and start it. At the end of
the programme open the door.
If this was the last wash load of the day, or
for a longer period:
^
Leave the drum door open.
^
Switch off the machine.
^
Switch off the electricity mains supply (at
the wall switch).
^
Turn off the stopcocks on site for water.
M.-Nr. 07 076 772 17
Page 18

Maximum load / Detergent
Load weight (dry laundry) max. 7.5 kg
Load weights for individual programmes
are quoted in the Programme Survey.
Adding detergent
through the siphon and into the detergent
dispenser drawer before it is needed.
Detergent dispensing
Avoid dispensing more than the required
amount as this can cause excessive
foaming.
Only use low foaming detergents.
–
Dispense according to the detergent
–
manufacturer’s recommendations.
The amount to dispense will depend on:
the amount of laundry
–
the water hardness level in your area
–
the type and amount of soiling
–
Add detergent for the:
– Main wash to compartment j
– Pre-wash to compartment i
– Fabric conditioner to compartment p
–
Liquid bleach to compartment x
Bleaching agents
Only use bleaching agents on textiles which
have the symbol x on the care label. Liquid
bleaching agents must only be dispensed
through designated dispenser compartment
(4). The agent will then be dispensed
nd
automatically during the 2
bleaching). Liquid bleaching agents should
only be used on coloured textiles which
have a care label stating that they are colour
fast and suitable for bleaching.
rinse (cold
Water hardness levels
Hardness
range
I soft 0 – 1.3 0 - 7
II medium 1.3 – 2.5 7 - 14
III hard 2.5 – 3.8 14 - 21
IV very hard over 3.8 over 21
If you do not know the hardness level of the
water in your area you should contact your
local water authority for information.
Water
quality
Hardness
level in
mmol/l
German
hardness
level °d
For cold bleaching the 4thrinse must be
programmed into the machine (see the
Profitronic programming manual for
further details on how to do this).
Liquid detergent must not be filled higher
than the level marker, as otherwise it will get
18 M.-Nr. 07 076 772
Page 19

Additional functions
With Pre-wash
?
A Pre-wash can be selected when the load
is heavily soiled.
The Pre-wash programme block can be
selected before the start by pressing the
Block + button T .The indicator light above
the button lights up.
Starch
Without spin
?
Without spin can be selected in all
programmes by pressing the Without spin
button V (except "Separate spin"). The
indicator light above the button lights up.
PROGRAMME 2 COTTONS
Rinse 3
WITHOUT SPIN
Press the without spin or End button.
?
Starching can be selected with all
programmes by pressing button U. The
indicator light above the button lights up.
PROGRAMME 1 COTTONS
Rinse 3
STARCH HOLD
Press the Starch and Starch hold button.
When the "Starch" point has been reached in
the programme sequence, "Starch hold"
flashes in the Display.
When the "Spin" programme point is
reached, "Without spin" flashes in the
Display. Either press the Without spin button
V again to continue the programme with a
spin, or press the End button 7, for the
programme to finish with water in the
machine.
When you are ready to remove the laundry
select the SEPARATE DRAIN programme
and press the Start button X. The door can
be opened once the water has been drained
away.
Rinsing with hot water
Rinsing with hot water is a benefit for
machines connected to a hot water supply.
Standard programmes
1 Cottons 95°C and
2 Cottons 60°C
are programmed to rinse with hot water.
The programme is continued by pressing the
Starch hold button U , (the display light
goes out). Add starch prepared according to
manufacturer’s instructions into
compartment (I). The wash time is
automatically extended by 4 minutes.
M.-Nr. 07 076 772 19
If a hot water supply is available it is an
advantage to run the final rinse with hot
water. This reduces the residual moisture
content of the laundry after spinning and the
laundry retains heat.
If the laundry is then tumble dried or ironed
straight after the wash programme savings
Page 20

Additional functions
will be made in the time it takes to process it
and in the amount of energy required.
Skipping programme stages
?
Stages in the programme in progress can be
skipped or blocks repeated.
Press the End button 7 to stop the
programme.
PROGRAMME 2 COTTONS
Main wash
PROGRAMME STOP
Programme cancellation
?
Should you wish to cancel a programme,
press the End button 7 twice in succession.
If the programme was cancelled while there
was water in the machine, or during a spin,
the following shows in the display (example):
PROGRAMME 2 COTTONS
PROGRAMME END
DOOR IS LOCKED
WATER IS IN THE MACHINE
Programme stop flashes in the Display.
Use the Cursor button 2 to skip the
programme by blocks to the end.
Use the Cursor button 1 to move the
programme back by blocks to the
beginning.
At the position required press the Start
button X to continue the programme.
?
or:
PROGRAMME 2 COTTONS
PROGRAMME END
DOOR IS LOCKED
DRUM NOT YET STATIONARY
^
Select and start the SEPARATE DRAIN or
SEPARATE SPIN programme. On
completion the door can be opened.
Programme interruption
To interrupt a programme press the End
button 7 (stop-mode).
Press the Start button X to continue.
20 M.-Nr. 07 076 772
Page 21

Additional functions
Delayed Start
If a later start to a programme is required,
this can be selected using the "Delay start"
button.
To select a delayed start time
Switch on the machine and select the
^
required programme with the programme
selector switch.
The Display shows the following (example):
PROGRAMME 1 COTTONS
>90 °C< Main wash 1
Rinses 3 1200 RPM
Press the Delay start button W .
^
Here the Display shows the following:
PROGRAMME 1 COTTONS
Start time 14 < : 30 hrs
After the start time has been set
Note:
Before pressing the Start button the Start
time can be deleted by pressing again on
the Delay start button, or by switching the
machine off and then on again.
Otherwise, when the Start button X is
^
pressed in, Delay start is confirmed, and
the following shows in the display:
PROGRAMME 1 COTTONS
90 °C Main wash 1
Start time 18 : 30 hrs
When the start time is reached the
programme proceeds and the Display
shows the programme sequence. If the
Delay start button W is pressed during the
programme, the actual time of day and date
are shown.
^ To cancel the Delay Start function after
having pressed the Start button you will
have to press the 7 End button.
press the Start button.
The current time of day is always displayed
first.
The cursor points to the input field for
‘hours’.
^
Select the Start hour with the Plus or Minus
button 4 3 .
^
Position the Cursor on the input field for
minutes and select the minutes with the
Plus or Minus button 4 3 .
M.-Nr. 07 076 772 21
Page 22

PC- Printer
PC- Printer connection:
The machine can be connected to a PC
(Personal Computer) or printer using fitting
kit SD.
PC-Operation:
Programme changes can be carried out via
a PC, or new programmes can be
downloaded. This requires a special Editor
programme which is available from the Miele
Professional Department.
Printer-Operation:
It is possible to print out whole programmes
or parts of programmes. See programming
instructions.
22 M.-Nr. 07 076 772
Page 23

Liquid dispensing
Dispenser pump Suction pipe
acb
d e
a Hose connection socket (suction side)
Amount to be dispensed
Follow the detergent manufacturer’s
guidelines.
Always follow the instructions of the
chemical manufacturer when using cleaning
agents and special application chemicals.
Only use such chemicals for the purpose
and in the situation specified by the
manufacturer in order to avoid the danger of
adverse chemical reactions and material
damage.
If in doubt check the suitability of the
product for use in this machine with the
manufacturer before using it.
Correct dosage also depends on the
viscosity of the liquid detergent. It should be
allowed to settle to room temperature before
being used.
b Hose connection socket (pressure side)
c Leakage outlet
d Suction inlet opening
e Level checker for empty indicator
When the dispenser container is empty
the pump and the machine switch
themselves off.
PROGRAMME - - - - - - - - - - -
PROGRAMME STOP
DISPENSING SYSTEM FAULT
Dispensing container 1 empty.
At the same time the machine indicates a
lack of liquid detergent.
The programme will continue automatically
once the container has been refilled.
Dispensing system maintenance
Rinse the dispensing system through with
hot water every 2 weeks, or before shutting
the dispenser pumps down for any length of
time, to avoid the system getting clogged
up.
^
Rinse out the suction pipes as well with
water.
^
Put the suction pipes in a container with
warm water, (40 - 50 °C) .
^
In the Service programme switch in each
pump, until the dispensing system is
rinsed through.
^
Check the connection points, hoses and
washers for leaks.
M.-Nr. 07 076 772 23
Page 24

Liquid dispensing
Commissioning the dispensing
pumps
Before the liquid dispensing pumps can be
used the liquid detergent must be drawn into
the system and the amount to be dispensed
set. The Service Programme is used for this.
Drawing in the liquid detergent
Insert the suction pipes into the liquid
^
detergent containers.
Service operation:
Switch off the washer extractor.
^
Operating mode B, set the programme
^
selector switch to 24.
Switch on the washer-extractor, and within
^
4 seconds, press the Block plus button T
4 times in quick succession. This brings
you into Service operation. The cursor is
already at the Service programmes.
SERVICE - OPERATION
SERVICE - OPERATION SERVICE PROGS
SERVICE PROGRAMME 2
Dispenser valve >D1< Disp. time 20 Secs.
Cancel with the End button.
Cancel with the End button 7.
^
Repeat the whole process with pumps D2
and D3.
SERVICE - OPERATION
>SERVICE PROGRAMMES< MACHINE DATA
After selection press Start button. ->
Press the Start button, select SERVICE
^
PROGRAMME 2, and press the Start
button X .
To exit from Service operation:
^ Cancel with the End button 7 and switch
off the machine.
>SERVICE PROGRAMMES< MACHINE DATA
After selection press Start button. ->
^ Press the Start button X .
SERVICE - OPERATION SERVICE PROGS
SERVICE PROGRAMME >1<
After selection press Start button. ->
^
Select SERVICE PROGRAMME 2 with the
Plus button 4 and press the Start button X.
SERVICE - OPERATION SERVICE PROGS
SERVICE PROGRAMME 2
Dispenser valve >D1< Disp. time 0 Secs
After selection press Start button.
^
With the Plus button 4 select D1, with the
Cursor button 2 move to the input field for
dispensing time and with the Plus button
4 set a dispensing time of approx. 20
seconds. Press the Start button X, and the
hoses of pump 1 will be filled.
^ Switch the machine on and select
Programme 8 , SEPARATE RINSE and
SPIN, to flush the liquid media out of the
machine.
To correct the amount dispensed by the
pumps (should the dispensing times set not
be enough)
The amount to be dispensed is measured
out in litres in the Service programme. The
procedure is similar to the one for drawing in
liquid detergent. The dispensing time is then
set in the operating mode C Programming in
the step programming.
The maximum pump throughput is
approx.168 ml/min. for all pumps.
These figures are only intended as a guide,
and will vary according to the medium.
^
Put the suction pipe into a deep measuring
container with sufficient liquid detergent
and keep it at the full level.
Continue as for Drawing in liquid detergent
24 M.-Nr. 07 076 772
Page 25

Cleaning and Care
Cleaning the machine
Clean the casing with a mild non-abrasive
detergent or soap and water. Wipe dry with
a soft cloth.
Clean the fascia panel with a damp cloth
and dry with a soft cloth.
The drum and any other stainless steel parts
can be cleaned using a proprietary stainless
steel cleaner according to the
manufacturer’s instructions.
Do not use any scouring agent or solvent
cleaner.
If you are unsure about a particular product
or need further advice please contact your
nearest Miele Sales office. See back page
for address.
Remove any deposits from the door seal
with a damp cloth.
To clean the filter in the inlet hose:
Close the stopcock.
^
Build-up of rust
The drum and suds container are
manufactured from rust-free stainless steel.
It is, however, possible that water with a high
iron content or foreign bodies in the wash,
(e.g. paper clips or metal buttons), may lead
to the formation of superficial rust spots in
the drum and/or suds container, especially if
the machine is not used for a long time.
Stainless steel components should be
cleaned regularly with a proprietary cleaning
agent for stainless steel. This must be done
if rust appears!
Door seals should also be regularly checked
to make sure that nothing has got trapped in
them. Clean them regularly.
Cleaning the filters in the water inlet
The washing machine has the following
filters to protect the inlet valves:
^ Carefully unscrew the knurled coupling
connecting the inlet hose to the stopcock.
^ Remove the rubber seal from the recess.
^ Using pointed pliers, take hold of the
plastic filter bar, remove the filter and
clean.
^ Put the filter and seal back in the reverse
order.
The filters in the inlet hose should be
checked and cleaned approx. every 6
months.
Inspect the inlet hose which is subjected to
high pressure while the machine is in
operation. The hose should be replaced if
there are small cracks in the surface, or if it
has been otherwise damaged.
If replacing the inlet hose only use a hose
tested to withstand pressure of at least 70
bar.
Miele’s own hoses meet this requirement.
–
in the free end of any water inlet hose,
–
in the water inlet valve(s) for connection
hose to machine.
M.-Nr. 07 076 772 25
Page 26

Cleaning and Care
To clean the filter in the water inlet valve:
Using pliers, carefully loosen the ribbed
^
plastic nut on the inlet valve, and unscrew.
After use the detergent box should be
^
cleaned with warm water to remove any
detergent residues.
The siphons in compartments § and x
^
should also be cleaned.
Unscrew the screws next to the siphons.
^
^ Use water pump pliers to withdraw the
plastic filter by the bar (see illustration).
^ Clean and put back in the reverse order.
The machine must not be used without
the two dirt filters being put back in place.
^ Pull the siphons upwards to remove for
cleaning in warm water. Replace in the
reverse order (the siphons must be hooked
in correctly).
If the machine is not going to be used for
a longer period of time (4 weeks or more)
the drum should be rotated several times
after the last use. The drum should be
rotated every 4 weeks to prevent damage
to the bearings.
26 M.-Nr. 07 076 772
Page 27

Any work on the electrical components of
this machine should only be carried out
by a suitably qualified and competent
person. Unauthorised repairs could be
dangerous.
There are, however, minor faults which can
be corrected without contacting the Service
Department.
Power cut during a wash
programme - Emergency door
release
With a short power cut:
The programme remains in the last position,
and when power is restored the following
message appears in the Display:
Problem solving guide
After draining the machine tighten the vent
^
screw back up and make sure that it is
securely in position.
Open the drain valve access flap.
^
PROGRAMME 1 COTTONS
PROGRAMME STOP
THROUGH POWER CUT
Please press the Start button.
Press the Start button X , the programme
continues.
With an extended power cut:
^ Switch off the machine.
^
Switch off the mains supply at the mains
switch (isolator).
^
Turn off the water stopcocks.
To remove laundry the drain valve needs to
be manually opened and then the drum door
manually unlocked.
^
To open the drain valve loosen the vent
screw using a number 17 spanner. The
vent screw is located at the rear of the
machine. It must not be taken right out.
The water will then drain out of the
machine.
Warning. Some water will seep out of the
vent (approx.100 cc), use a suitable
container to catch it.
^
Press against the drum door and pull on
the emergency door opening mechanism.
^
Close the flap.
^
Remove the laundry.
Always make sure the drum is stationary
before reaching in to remove washing.
Reaching into a moving drum is extremely
dangerous.
M.-Nr. 07 076 772 27
Page 28

Problem solving guide
Fault messages
Repairs to machines operating with
electricity, gas or steam should only be
undertaken by a suitably qualified service
engineer to ensure safety. Unauthorised
repairs could be dangerous.
Faults that occur before or after the start of a
programme are displayed in a flashing display.
PROGRAMME 1 COTTONS
PROGRAMME STOP
HEATING SYSTEM FAULT
Short circuit on heater sensor 1
Call the Service department.
^
PROGRAMME 1 COTTONS
PROGRAMME STOP
THROUGH POWER CUT
Please press the Start button.
When power is restored press the Start
^
button X . This fault message can also
indicate that the winding protection of the
drive motor has overheated.
-Allow the motor to cool down.-
PROGRAMME 1 COTTONS
PROGRAMME STOP
WATER INLET FAULT
Open water stopcock and press Start button.
^ Open water stopcock and press Start
button X.
PROGRAMME 1 COTTONS
PROGRAMME STOP
HEATING SYSTEM FAULT
Cut-out of heating sensor 1.
Call the Service department.
^
PROGRAMME 1 COTTONS
PROGRAMME STOP
HEATING SYSTEM FAULT
^ Call the Service department.
PROGRAMME 1 COTTONS
PROGRAMME STOP
PROGRAMME 1 COTTONS
PROGRAMME STOP
DRAIN FAULT
Clean drain system and press Start button.
^
Check the drainage system on site and
press the Start button X . A defective
drain valve should only be repaired by the
service department or their authorised
agent.
DRIVE SYSTEM FAULT
Multiplug drive variants lacking.
^
Call the Service department.
PROGRAMME 1 COTTONS
90 °C Main wash 20 °C
Rinses 1
DRIVE SYSTEM FAULT
^
Call the Service department if there is no
drum movement after this message.
28 M.-Nr. 07 076 772
Page 29

PROGRAMME 1 COTTONS
PROGRAMME STOP
IMBALANCE SWITCH FAULT
Call the Service Dept.
^
PROGRAMME 1 COTTONS
PROGRAMME STOP
IMBALANCE SWITCH
Press the On-Off switch.
Press the Mains off Z and the Mains on Y
^
switches.
PROGRAMME 1 COTTONS
PROGRAMME STOP
Problem solving guide
DISPENSING SYSTEM FAULT
Dispensing container 1 empty
^ Refill or replenish the container.
M.-Nr. 07 076 772 29
Page 30

Problem solving guide
Possible reasons for increased
levels of foaming
detergent type
–
Only use detergent formulated for use in
^
commercial washer extractors. Domestic
laundry detergent is not suitable.
overdosing of detergent
–
Dispense detergent following the
^
detergent manufacturer’s instructions on
the packaging and in accordance with
local water hardness levels.
detergent creates too much foam
–
Use a lower foaming detergent or contact
^
your detergent application specialist.
very soft water
–
In areas with hardness level 1 dispense
^
less detergent in accordance with the
detergent manufacturer’s instructions.
After sales service
Should a fault occur please contact your
nearest Miele Service Dept.
When contacting the Service Dept, please
quote the model type and machine number,
(Fabr.-Nr.) and material no. (M.-Nr.). These
can be found on the data plate:
with the door open, or:
– soiling level of the laundry
^ For lightly soiled laundry dispense less
detergent in accordance with the
detergent manufacturer’s instructions.
– residues, e.g. detergent are left on
laundry
^ Run an additional pre-wash without
detergent and without selecting a
temperature. Laundry which has been
soaked before washing must be
thoroughly rinsed before running a wash
programme.
–
small loads
^
Reduce the amount of detergent
dispensed according to the size of the
load.
–
drum speed too high during the wash
^
Reduce the drum speed and wash rhythm.
at the rear of the machine towards the top.
Only use genuine spare parts. When
ordering spare parts the Spare Parts Dept
will also need to know the model type and
machine number (Fabr.-Nr.) and material
number. (M.-Nr.).
30 M.-Nr. 07 076 772
Page 31

Explanation of symbols on the data plate
1 Machine type
2 Machine number/year of manufacture*
3 Voltage/Frequency
4 Control fusing
5 Drive motor
6 Plate diameter*/Plate quantity*
7 Drum data
8 Drum diameter/drum depth
9 Spin speed
10 Drum volume/Laundry dry weight
11 Kinetic energy
12 Ex. time to top speed
13 Braking time
14 Heating
15 Electric heating
16 Fusing (on site)
17 Steam heating indirect*
18 Steam heating direct*
19 Gas heating*
20 Commissioning date
21 Water registration DVGW-test cert
(Water)*
22 Field for CE test symbol....
(Product-ID-No./Gas)*
*)not applicable to WS 5071
Noise emission
During wash During spin
58.5 dB 74.3 dB
(measured in Germany in accordance with
DIN (IEC) 45 635, machine noise regulations
3. GSGV p1. 1.a)
M.-Nr. 07 076 772 31
Page 32

Notes for the installer
The washer-extractor must be installed
and commissioned by an approved
Customer Service technician or
authorised Service Dealer.
Installation
A concrete floor is the most suitable
installation surface. Please note:
The machine must be level and securely
^
positioned.
Do not install the machine on a ‘soft’ base
^
such as floorboards as this could result in
more vibration during the spin cycles.
If the machine is installed on a raised
^
plinth it should be secured using the butt
straps supplied with the machine.
If there is not already a concrete plinth
on-site, Miele offers a steel plinth. The steel
plinth must be secured to the floor, (see the
enclosed installation plan).
To avoid the possibility of frost damage on
no account install the machine in a room
which is exposed to frost.
Front transit fitting
“A” (1 piece)
The front panel must be taken off, (2 internal
torx T20 screws at the bottom) in order to
remove the front transit fitting (3 SW-13
screws).
Rear transit fitting
Transit fittings
When the machine has been installed in its
final position, remove the red transit fittings
marked "A", "B". and "C".
The transit fittings should be stored in a safe
place for future use. They must be re-fitted if
the machine is moved again.
The machine must not be moved without
all the outer panels in place.
“B” (1 piece) “C” (1 piece)
The rear panel must be taken off, (just
loosen 15 internal torx T20 screws at the
bottom) in order to remove the rear transit
fitting (3 SW13 screws each).
,
The machine must not be moved
without the transit fittings in place.
32 M.-Nr. 07 076 772
Page 33

Notes for the installer
Levelling
The machine must stand level to ensure
smooth operation.
Do not install the machine on carpeted
flooring if the carpet pile blocks the
ventilation gap at the base of the machine.
Connection to water supply
Connection must be made to the water
supply via a stopcock which conforms with
local and national regulations. This work
must be carried out by a suitably qualified
and competent person.
To ensure the machine is correctly
connected please observe the installation
plan and the installation instructions
supplied with the machine.
See the installation diagram supplied for
instructions on connection to the water
supply and for drainage.
The inlet pressure hoses supplied with the
machine must be used for connection to the
water supply.
To ensure the hot water inlet hose (marked
90°C) lasts for many years it is advised not
to use it on a hot water connection supplying
water hotter than 70°C.
The adjustable feet can compensate for an
uneven base.
^ Screw the foot or feet out until the machine
stands level.
^ Hold the foot tight using a pipe wrench.
^ Tighten the counternut using a screwdriver
as indicated.
If replacing an inlet hose only use a hose
able to withstand a burst pressure of at least
70 bar and a temperature of 90°C. This also
applies to all connection parts.
Miele "Original" spare parts are tested to this
standard.
A water pressure flow rate of at least 1 bar,
maximum 10 bar is essential to ensure the
smooth operation of this machine.
Water taken into the machine must not
exceed a temperature of 70°C.
Connection to cold water only
Drainage
A DN 70 angle connector can be used to
make connection to an on-site drainage
system, (sink box with odour trap).
M.-Nr. 07 076 772 33
Page 34

Notes for the installer
Electrical connection
All electrical work must be carried out by a
suitably competent person in compliance
with national and local regulations.
Please take note of the Installation diagram
and the Wiring diagram. They are important
for electrical connection.
The electrical safety of this machine is in
accordance with IEC 335.
The minimum suds level required for
activating the heating is 45 mm column of
water.
The voltage and frequency are given on the
data plate. The machine must only be
connected if these match the mains supply.
Versions: 3N AC 380-415 V 50 Hz
AC 220-240 V 50 Hz
The motor is fitted with an overload
protection switch.
For extra safety it is advisable to install a
residual current device with a trip current of
30 mA (in accordance with DIN VDE 0664,
VDE 0100, Section 739).
When switched off there must be an all-pole
contact gap in the isolator switch (including
switch, fuses and relays according to VDE
0660).
Nominal rated load and fuse rating are given
on the data plate. Ensure that these are
compatible with the electricity supply.
WARNING
THIS APPLIANCE MUST BE EARTHED
Connection should be made via a suitable
isolator with an on-off switch located near
the machine which can be used as an
emergency off switch. It should be coloured
red and yellow for easy identification.
When installation and connection have
been completed all removable outer
panels must be re-fitted before the
machine is operated.
34 M.-Nr. 07 076 772
Page 35

EU Declaration of Conformity
Document No.: 071387200
Month, year: 07.2007
Manufacturer: Miele Company Ltd., KG
Address: Industriestrasse 3
D - 31275 Lehrte
Product designation: Washer-extractor
Model no.: WS 5071
Brand: Miele
The product listed above complies with the conditions of the following European
Directives:
EU Directive 2006/42/EG: Machinery directive
89/336/EC: EMC directive
European Standard: EN ISO 10472-1 :1997
EN ISO 10472-2 :1997
EN 60204-1 :2006
EN 61770 :1999 + Corrigendum December 2005 + A1 :2004 + A2 :2006
EN 55014–1 :2006
EN 55014–2 :1997 + A1:2001
EN 61000–3–2 :2006
EN 61000–3–3 :2006
Introduction of the CE mark: 2007
Place, date: Lehrte, 10.07.2007
Signed:
Construction & Development Management Appliance Production Management
Hr. Dr. Köckerling Hr. Krimpmann
M.-Nr. 07 076 772 35
Page 36

36 M.-Nr. 07 076 772
Page 37

Guarantee
Please contact your Miele Sales Office for
details concerning guarantee terms and
conditions. See the back cover for contact
details.
M.-Nr. 07 076 772 37
Page 38

Alteration rights reserved/2008
M.-Nr. 07 076 772 / 00
 Loading...