

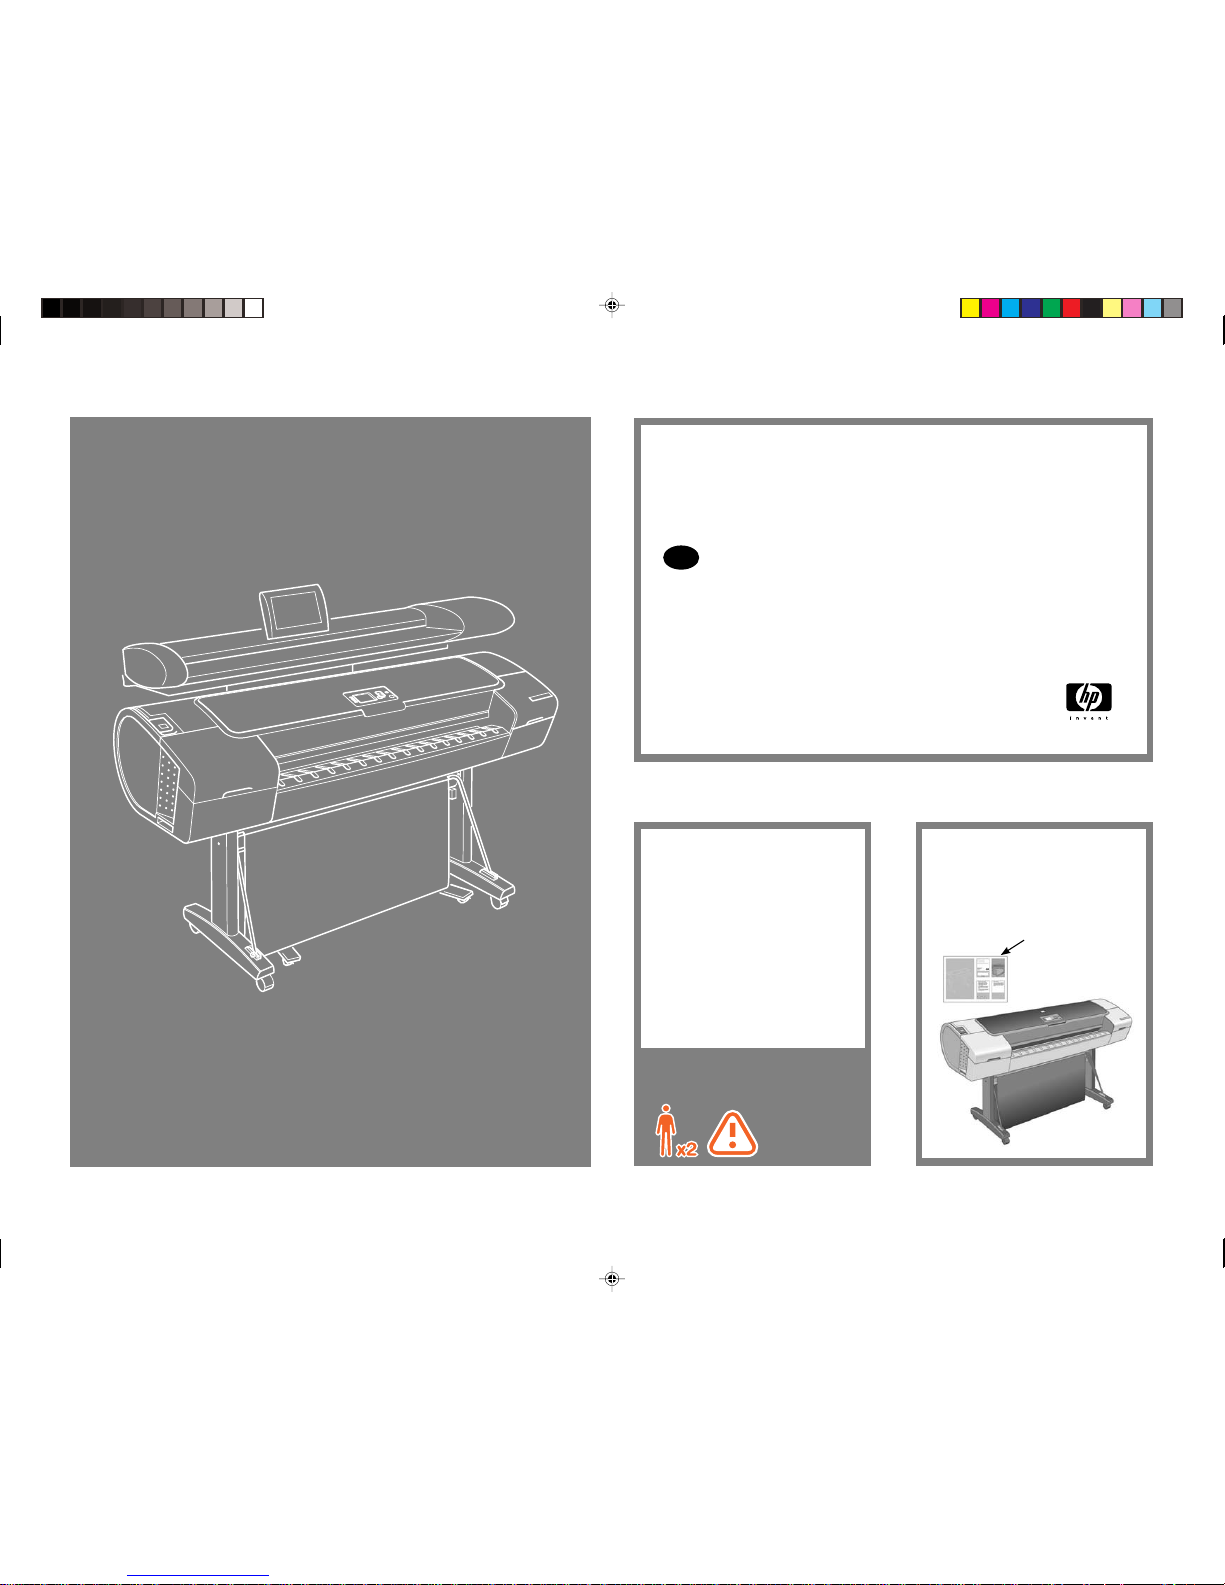
Page 1
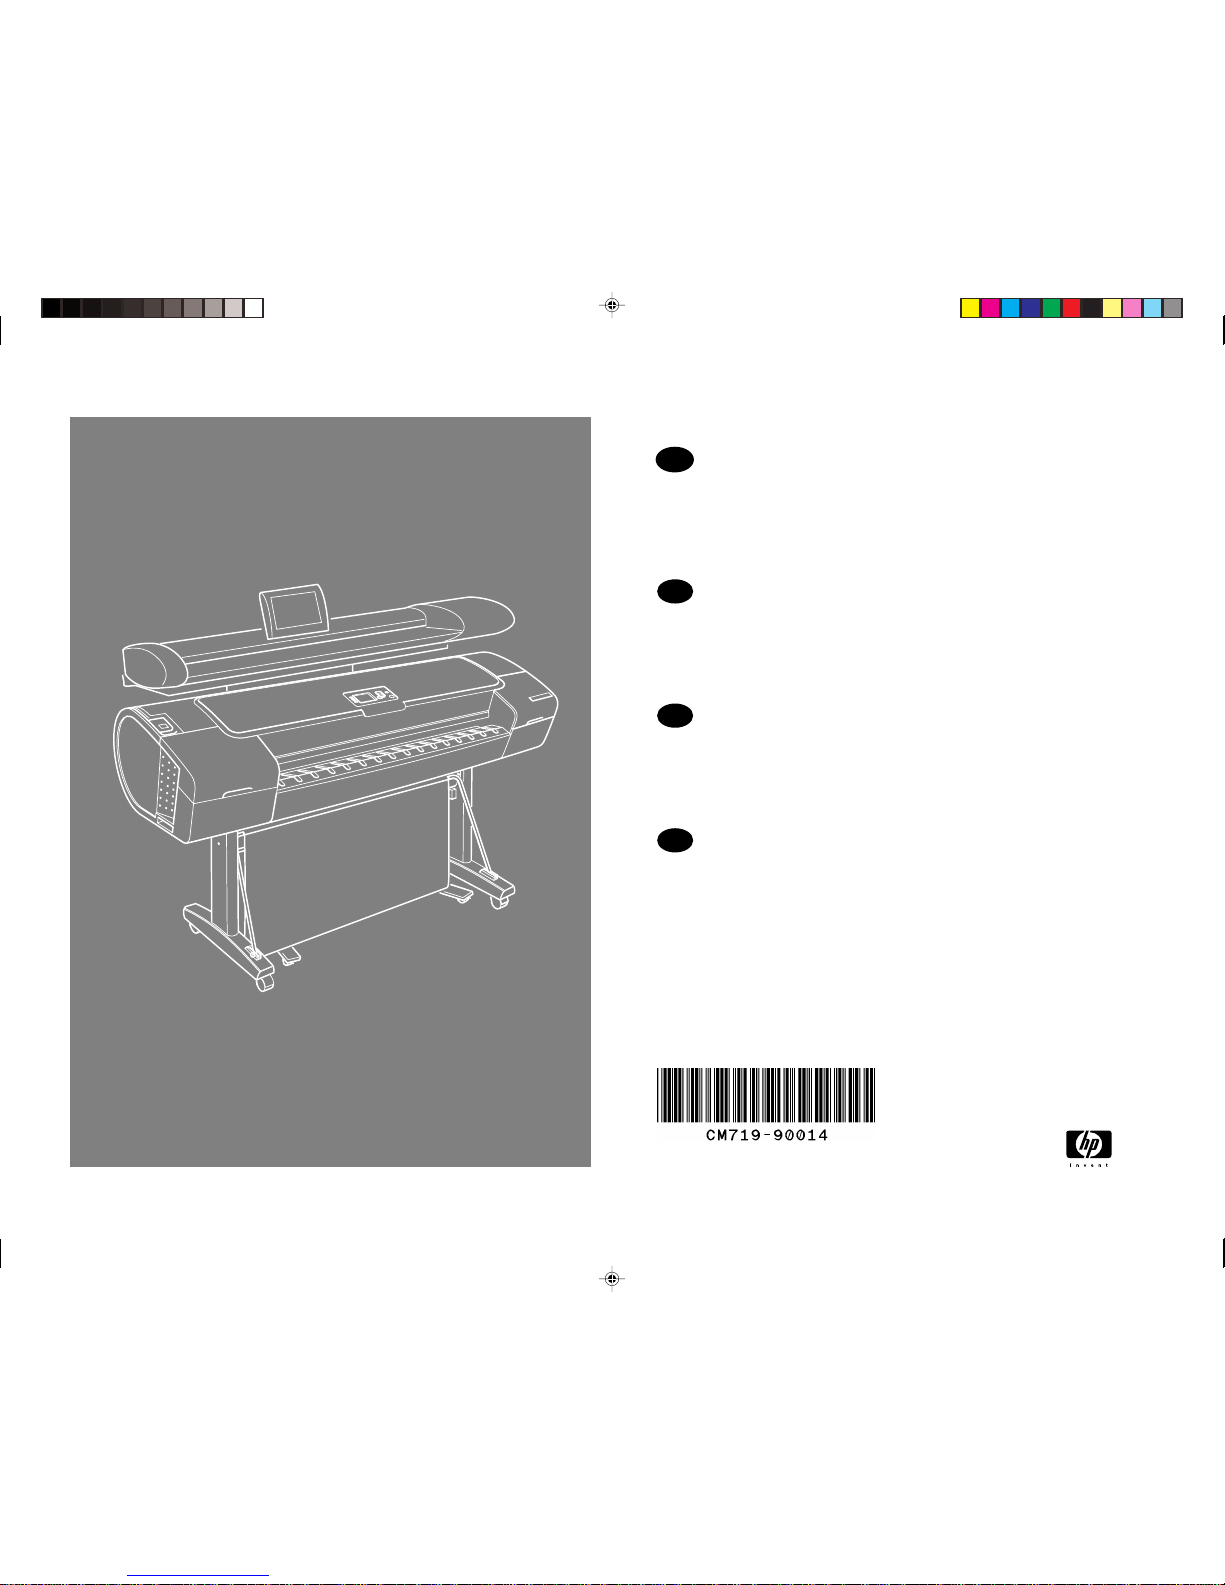
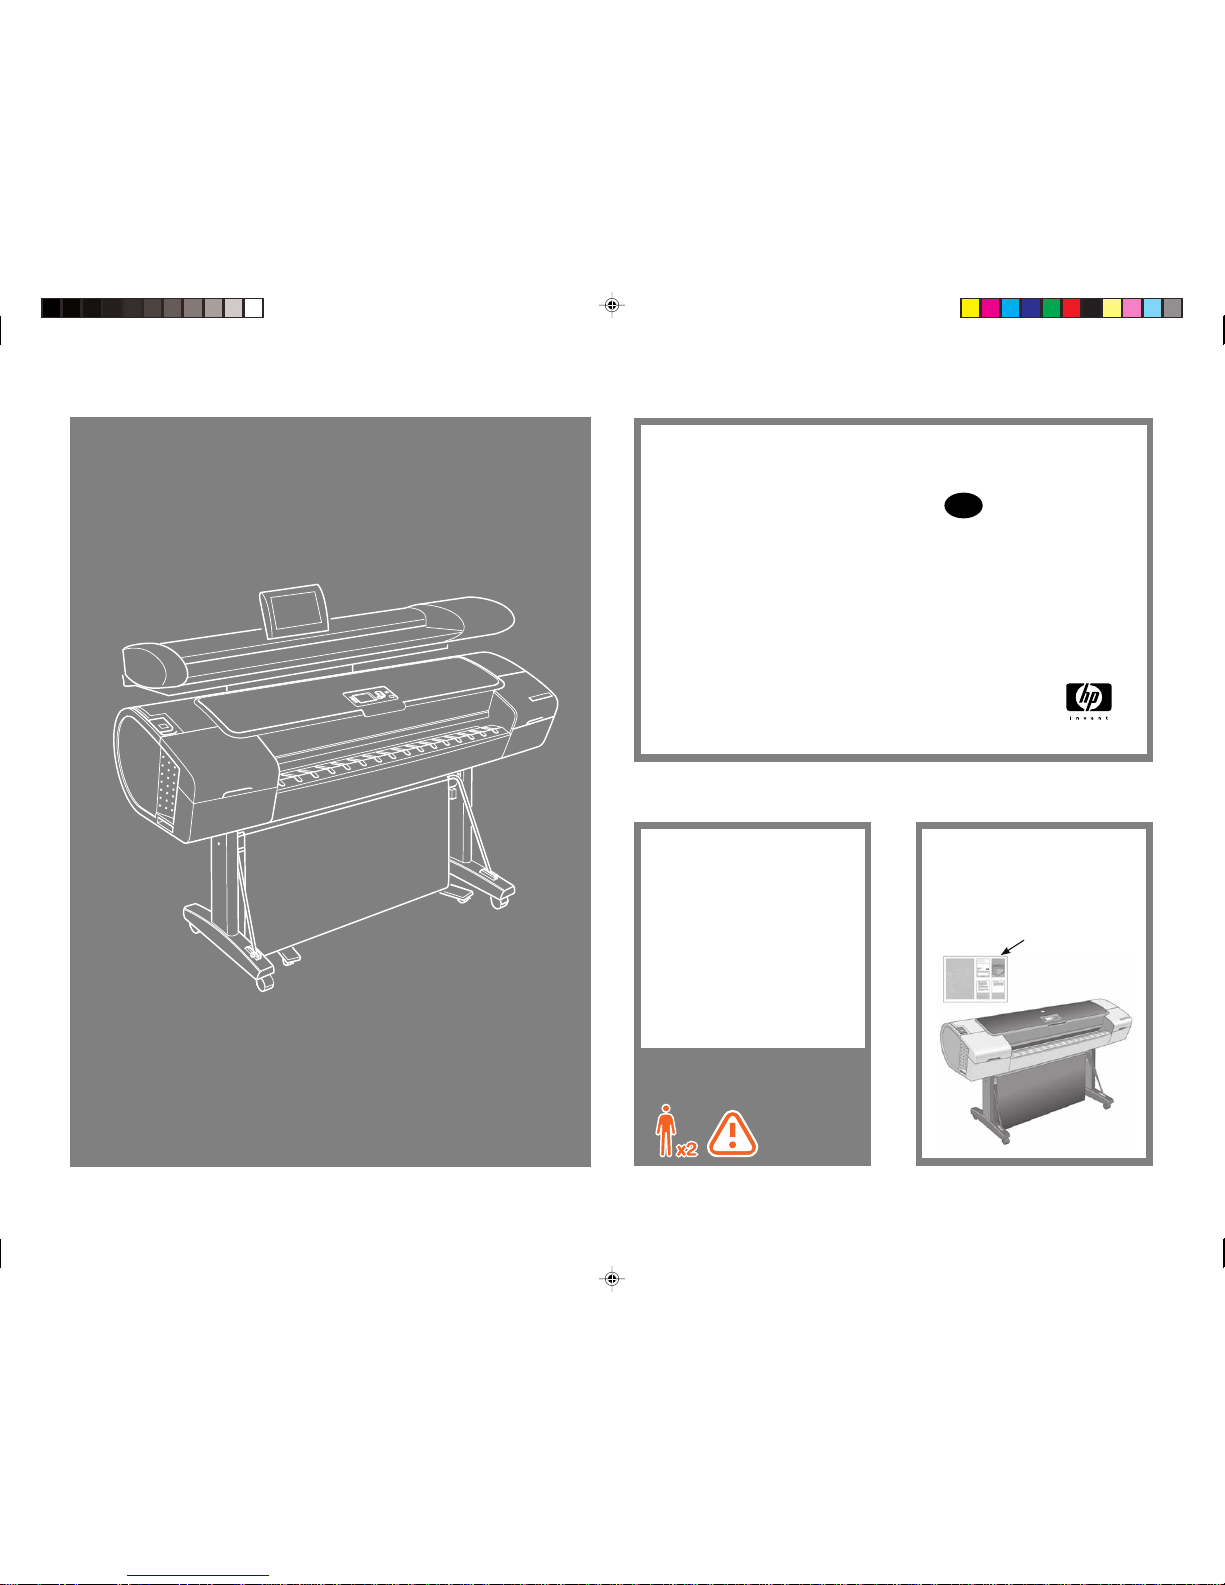
HP Designjet T1120 SD-MFP
Assembly Instructions
Printed in Germany Imprimé en Allemagne Stampato in Germania
EN
HP Designjet T1120 SD-MFP
Montaj Yönergeleri
TR
HP Designjet T1120 SD-MFP
Pokyny pro sestavení
CS
HP Designjet T1120 SD-MFP
Összeszerelési útmutató
HU
Learning Products Barcelona - Hewlett-Packard Company
Page 2

Learning Products Barcelona - Hewlett-Packard Company
Page 3
Read these instructions carefully...
What you will need for this procedure:
Because the scanner is heavy, you will
need two people to unpack and set it up.
When two people are needed, the symbol
at the foot of this box is displayed.
You are required to clean the scan area
glass plate during the assembly procedure:
To do so you will need clean lint free
cloths and a mild, streak-free glass cleaner.
These are not provided with the scanner.
HP Designjet T1120 SD-MFP
Assembly Instructions
© 2009 Hewlett-Packard Company
Inkjet Commercial Division
Avenida Graells 501 · 08174
Sant Cugat del Vallès
Barcelona · Spain
All rights reserved
Your printer should already be assembled
and working before starting this procedure. For instructions on how to assemble
the printer, please refer to the assembly
poster included with the printer.
Assembly poster
EN
Learning Products Barcelona - Hewlett-Packard Company
Page 4
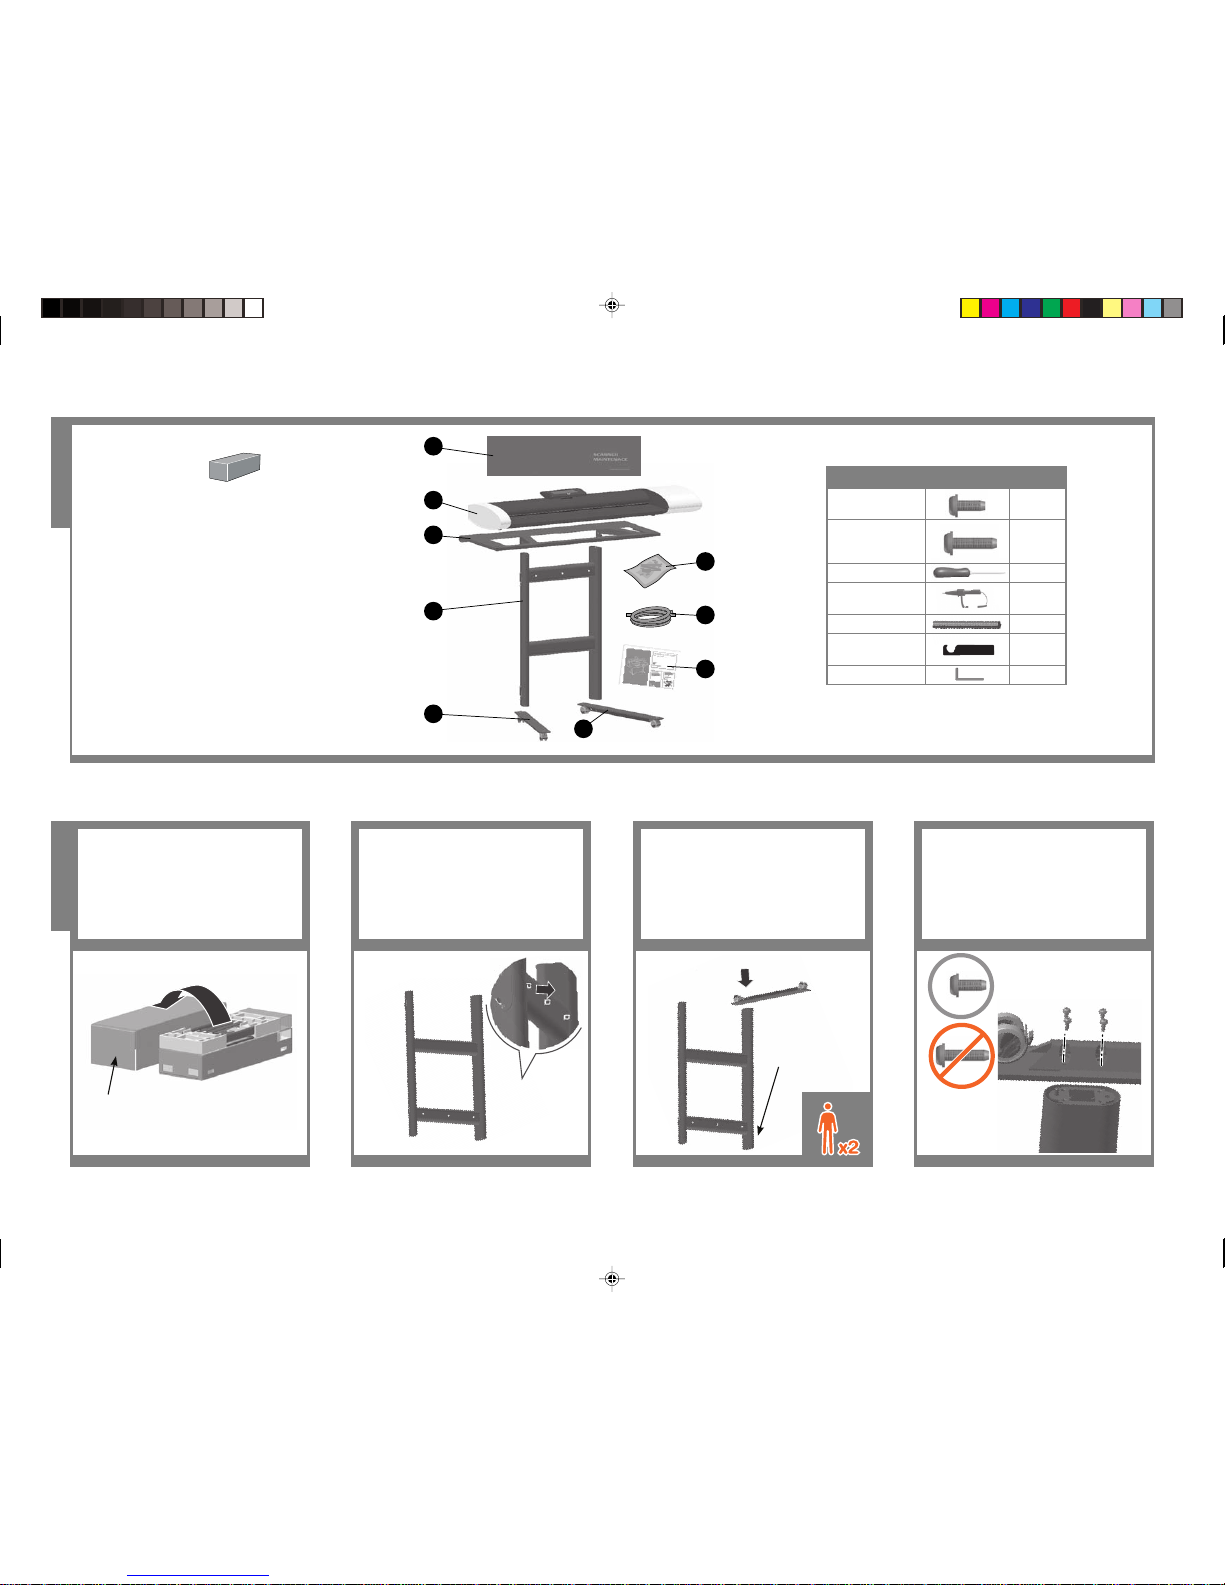
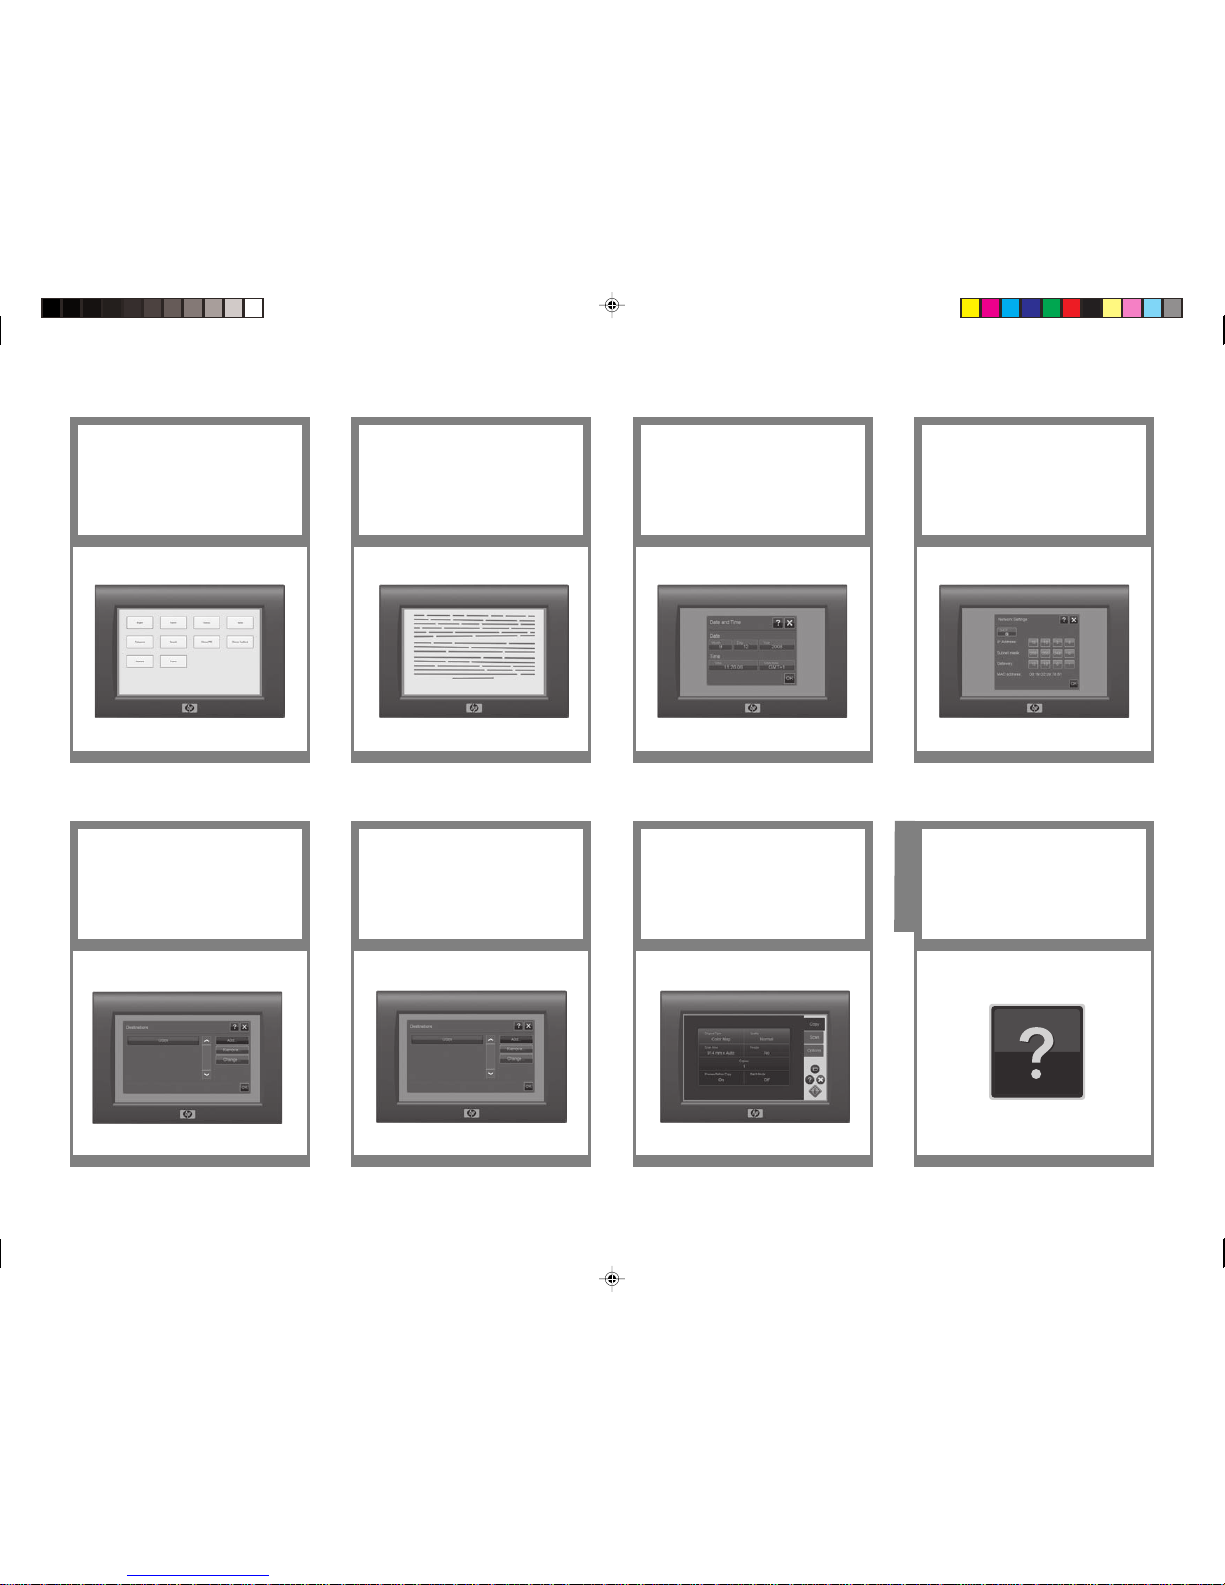
Raise the ap,
and lift the
lid off
Unpacking stand
Take the 2 feet out of the box. Take the leg
structure from the box and place it, with the
clips forward up, on the oor.
Clips facing
forward
Take one of the feet from the box. Align
the foot with the leg on the leg structure,
making sure it is in its correct position and
angle. Insert the leg structure’s guiding-peg
into the middle hole on the foot.
21 43
Fasten the foot using 4 M5x14 screws.
Insert all 4 screws loosely and then tighten
using the Torx screwdriver.
Stand assembly
Open the box: to do so, you need to raise
the ap on the end, and then lift the lid off.
Assemby kit contents:
Description Quantity
18 Torx M5x14
screws
18
4 Torx M5x25
scanner xing
screws
4
Torx screwdriver 1
Stylus (Pointing
device)
1
Stoppers 2
Maintenance sheet
hang-hooks
2
Allen key 1
X4
Box contents:
1. Maintenance sheet
2. Scanner
3. Top Tray
4. Leg Stucture
5. Foot
6. Foot
7. Assembly Kit
8. Cables – USB, LAN, Power
extension, Power
9. Assembly instructions
2
3
4
5
6
7
8
9
1
Support on
the oor
Learning Products Barcelona - Hewlett-Packard Company
Page 5
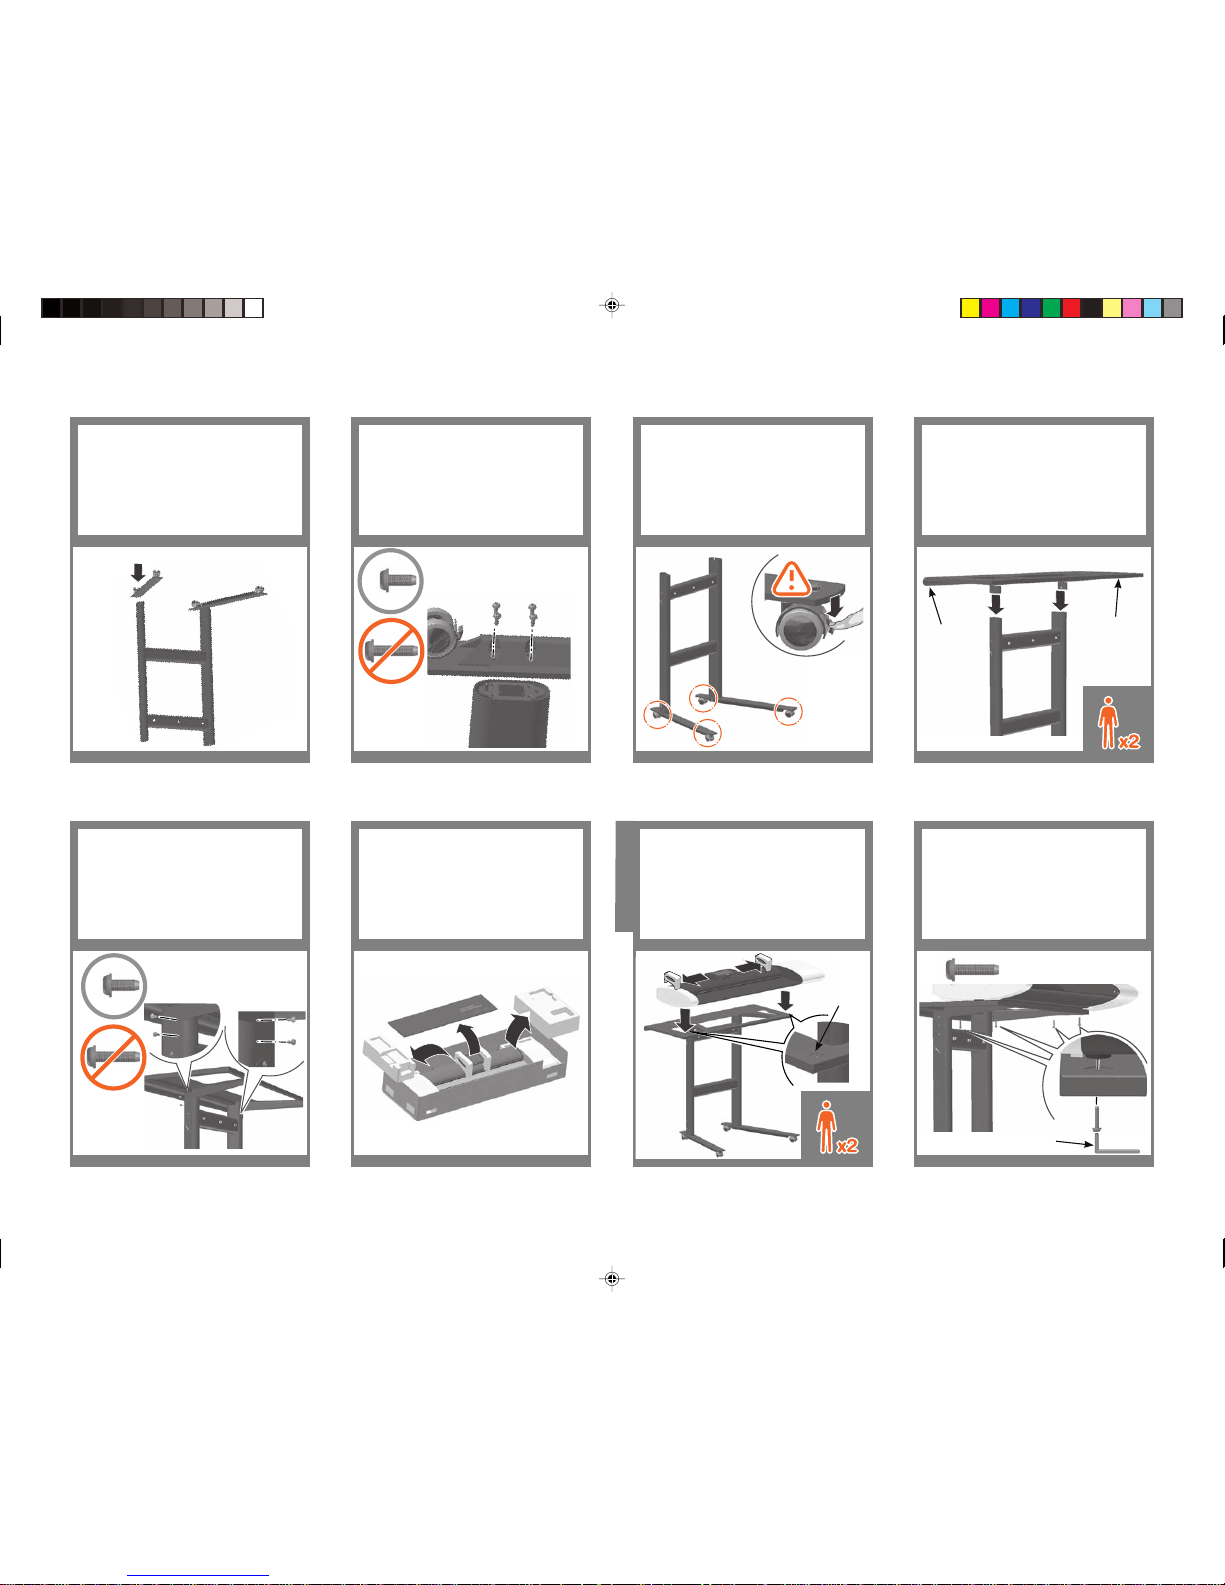
Turn the legs upside down, and attach the
two feet to the left and right legs using four
M6×30 screws (two for each foot). Tighten
the screws with the T-handle Torx driver
T30 found in the assembly kit.
9
Using 2 people; lift the scanner from the
box and place it on the Top Tray. Align
the scanner’s 4 rubber feet so they rest
in the Top Tray’s sink holes (a). Remove
the 2 protective foam pieces from the
touch-screen (b).
Make sure you have fully removed the
top of the box. Remove the Maintenance
sheet (required later), and packing
pieces.
Fix the scanner to the Top Tray with the 4
Torx M5x25 scanner xing screws. Insert
the screws through the holes in the bottom of the tray and screw them into the
scanner’s rubber feet using the Allen key.
10 11 12
5
Fasten the foot using 4 M5x14 screws.
Insert all 4 screws loosely and then tighten
using the Torx screwdriver.
6 87
Fasten the Top Tray using 4 M5x14
screws: insert 2 screws loosely on each
leg, when all 4 screws are in place,
tighten with the Torx screwdriver.
Attach scanner
to stand
Place the leg structure upright. Be sure
that all four wheels are locked.
Using 2 people; take the Top Tray from
the box. Position the Top Tray on the leg
structure with the rounded edge facing
the back and its at edge facing the
front. Insert the tray’s bottom mounts into
the 2 leg tops.
X4
Rounded edge
facing the
back
Flat edge
facing the
front
Sink hole
X4
Take the other foot from the box. Align
the foot with the other leg on the leg
structure, making sure it is in its correct
position and angle. Insert the leg
structure’s guiding-peg into the middle
hole.
a
a
b
b
X4
Allen key
Learning Products Barcelona - Hewlett-Packard Company
Page 6
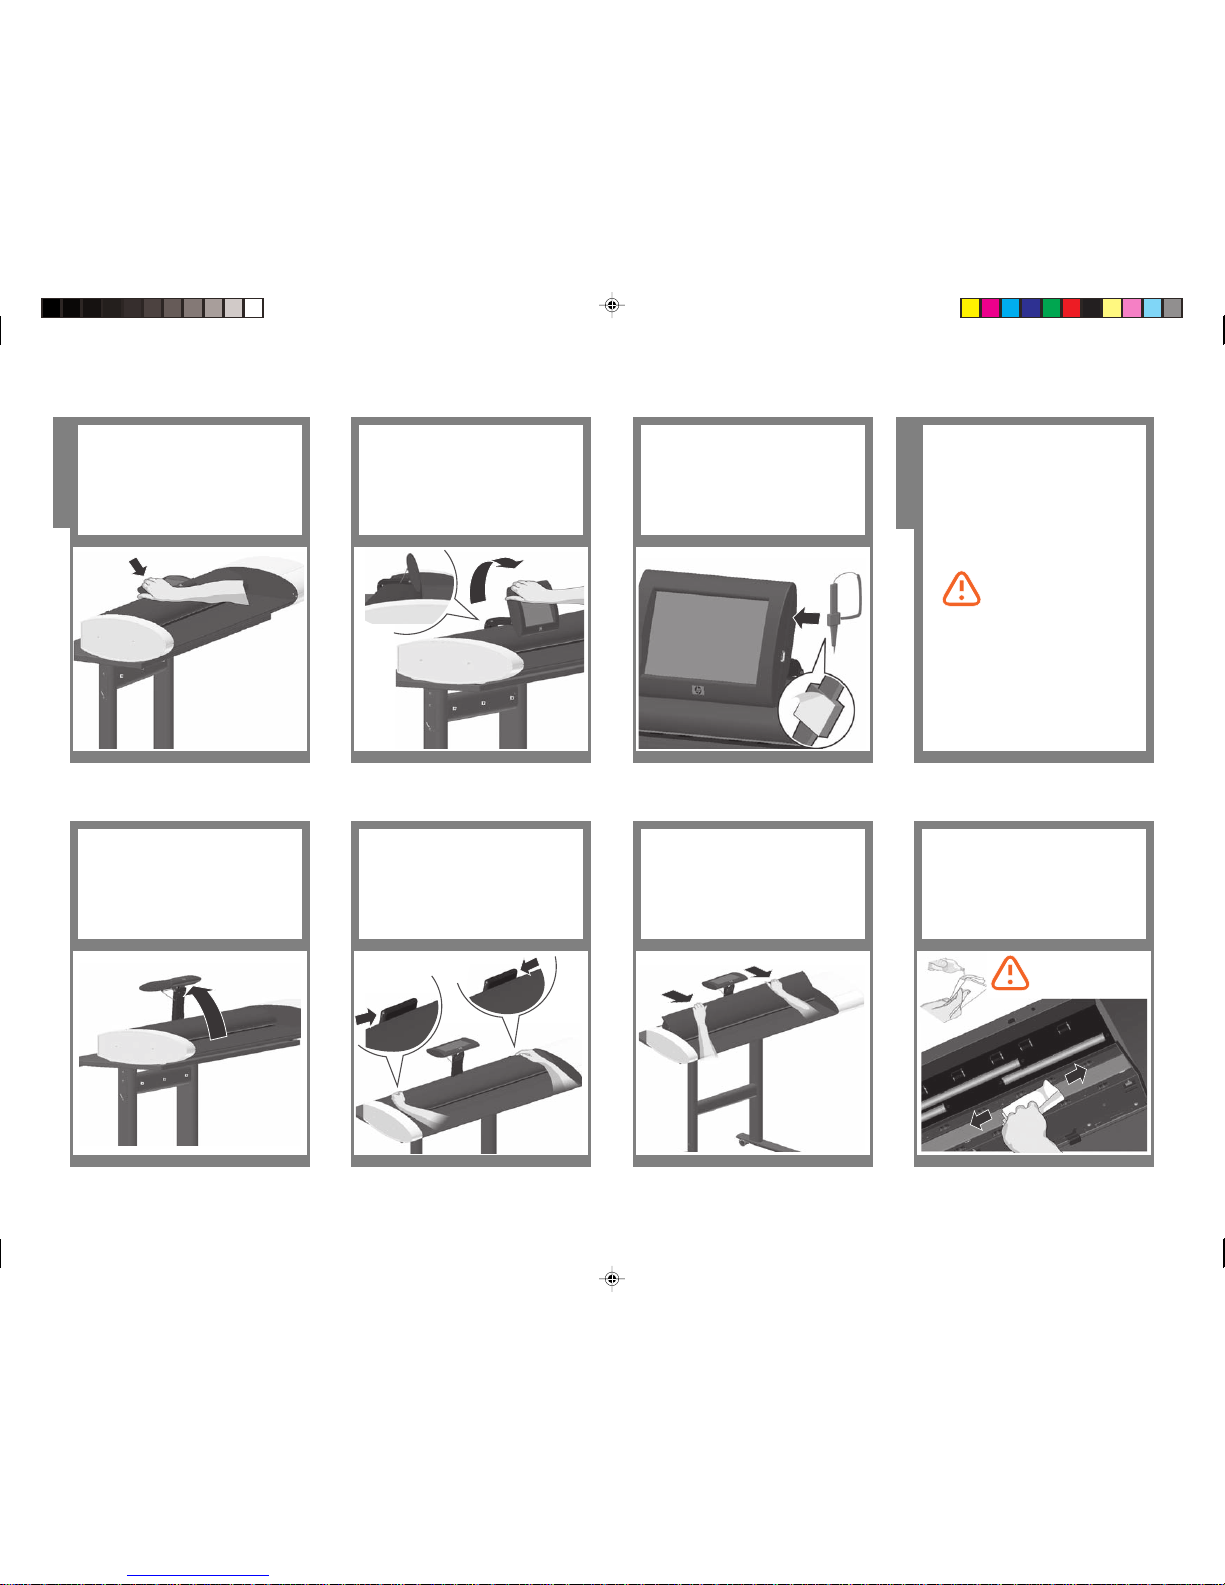
Cleaning the scan area...
You are now required to clean the scan
area - glass plate. To do so you will
need clean lint free cloths and a mild,
streak-free glass cleaner. These are not
provided with the scanner.
Caution: do not use abrasives, acetone,
benzene, or uids that contain these
chemicals. Do not spray liquids directly
onto the scanner glass plate or anywhere
else in the scanner.
16
To access the scan area, you need to
open the scanner lid. Push the touch
screen so it twists backwards on its arm
until it rests in its “service” position.
13
There are 2 lid release buttons at the
back of the scanner. Simultaneously
press the buttons inwards with your
ngers until you feel them unlock.
14 15
Retain pressure on the lid release buttons
and your grip on the lid edge, and pull
the lid backwards towards your body.
Open the scanner lid all the way back.
Apply a mild, streak-free glass cleaner to
a lint-free cloth, such as the one supplied
with your scanner, and gently clean the
glass surface. The surface must be very
clean; any dirt will appear on a print.
17 18 19 20
Cleaning the scan area
Surface must be very
clean; any dirt will appear on a print!
Pull the touch-screen back towards you
until you hear the click that indicates it
is locked in its upright “ready“ position.
Attach the stylus to the touch-screen.For its protection, the scanner’s touchscreen is shipped folded down in its
“transportation” position, and needs to
be lifted up and locked in its “ready”
position. Grasp the top edge of the
screen with one hand.
Touch screen
assembly
Learning Products Barcelona - Hewlett-Packard Company
Page 7
Cabling and
connecting
21
Insert the clips under the Top Tray to
mount the USB cable where shown
below. Mount the cable and let the end
hang from the last clip. The cable will be
connected to the printer in a later step.
Let the end hang from the last clip
Attach the USB cable to the scanner.
22
Screw the stoppers into the holes on the
stand leg structure.
23
Attach the maintenance sheet hang
hooks on the stoppers. Note: This is
where the maintenance sheet is stored
when not in use. It is connected to the
hang hooks with velcro.
24
Slide the assembled printer under the
scanner. The printer’s feet will be positioned outside the scanner’s feet.
25 26 27 28
X2
Dry the glass fully using a separate
clean, dry lint-free cloth.
Close the scanner lid and gently push it
down to lock it into place.
Pull the touch-screen back down to the
“ready” position.
Learning Products Barcelona - Hewlett-Packard Company
Page 8
a
b
a
b
c
c
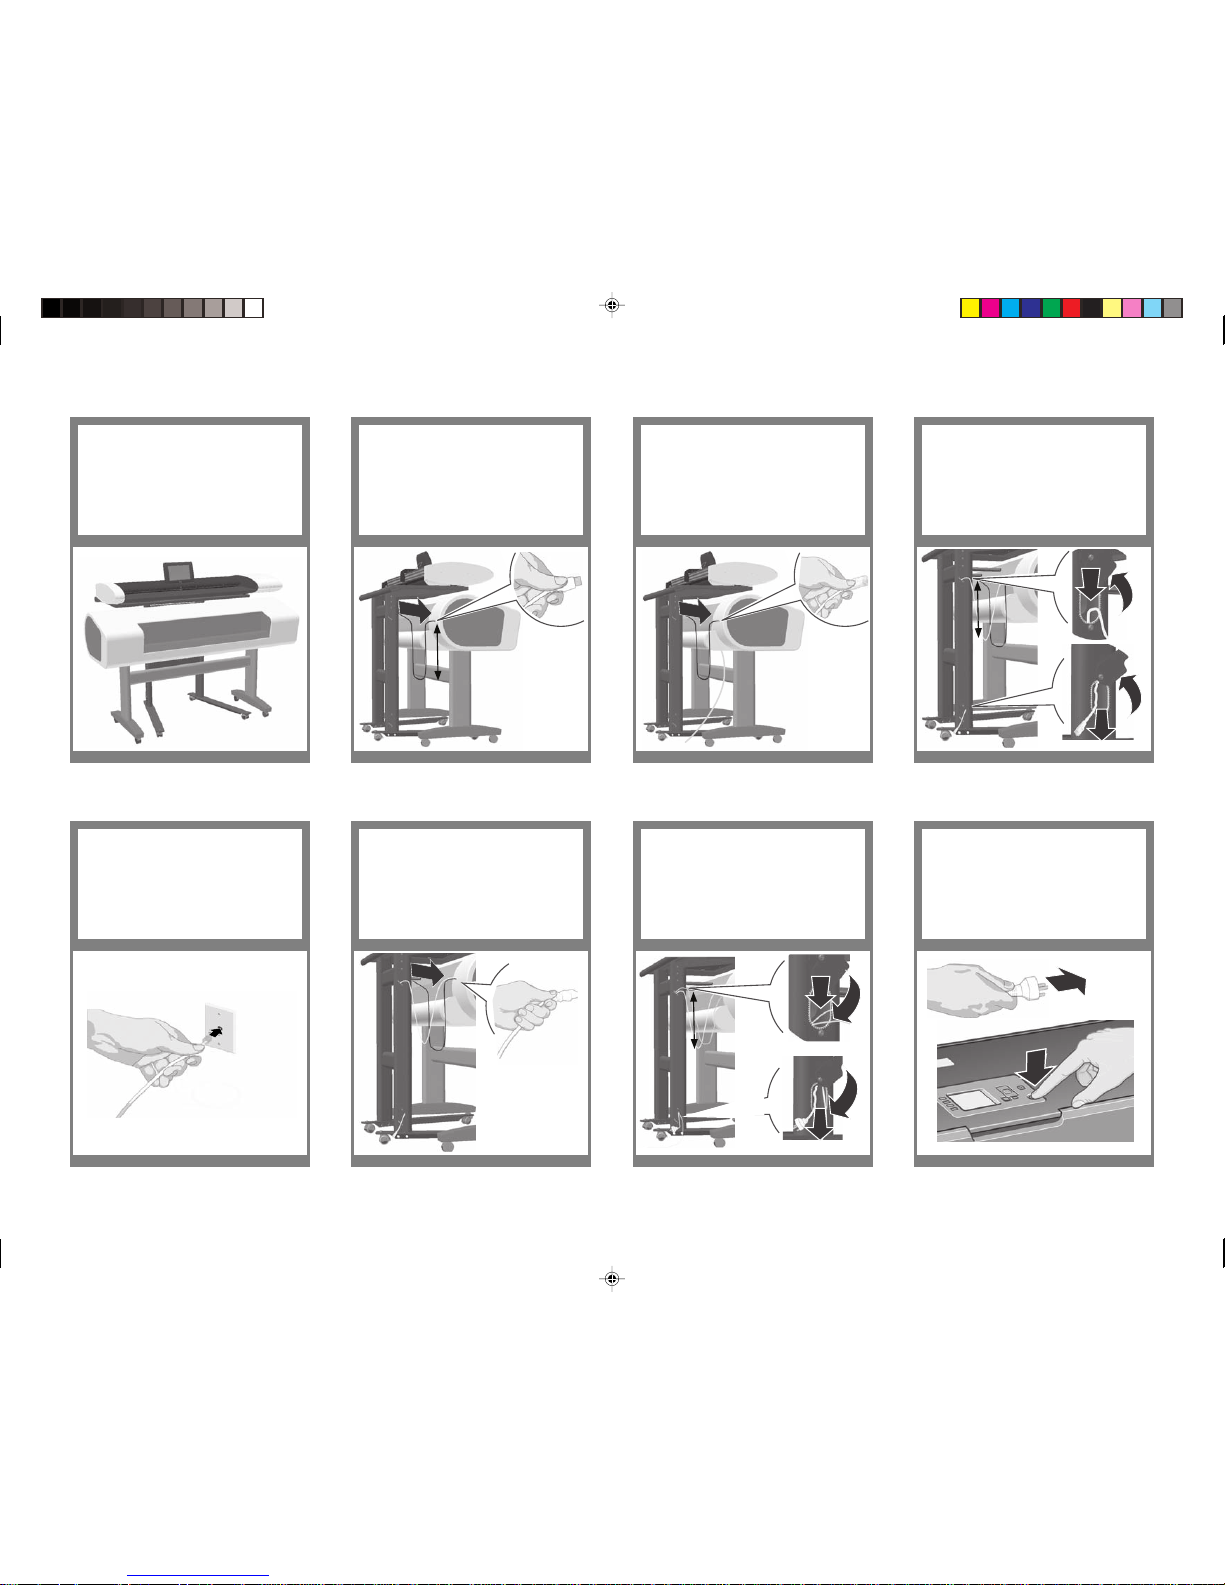
Slack
29
Plug the LAN cable into a connection
socket.
Feed the LAN cable through the leg:
loosen the bottom screw on each hole’s
cover, rotate the cover open to expose
the hole (a). Insert the free end of the
LAN cable in the top hole (b) and pull it
out of the bottom hole (c). Leave enough
slack in the cable to be able to pull out
the printer when changing paper.
30
Connect the printer’s power cable to the
printer.
31
Feed the power cable through the leg:
Insert the end of the cable into the top
hole (a) and pull it out of the bottom
hole (b). Leave enough slack in the cable
to be able to pull out the printer when
changing paper. Push the hole covers
back down and tighten the screws (c).
32
Connect the printer’s power cable to a
power outlet (a) and switch the printer
on (b).
33 34 35 36
a
a
b
c
Slack
Slack
Slack for pulling
out when changing
paper
Your HP Designjet T1120 scanner is now
assembled, and should appear as in the
below illustration.
Connect the printer to the scanner with
the USB cable. Adjust the cable to leave
enough slack to be able to pull out the
printer when changing paper.
Connect the printer’s LAN cable to the
printer. Note: only 1 L AN cable is sup-
plied with the scanner; you will need a
separate one for the printer.
Learning Products Barcelona - Hewlett-Packard Company
Page 9
b
b
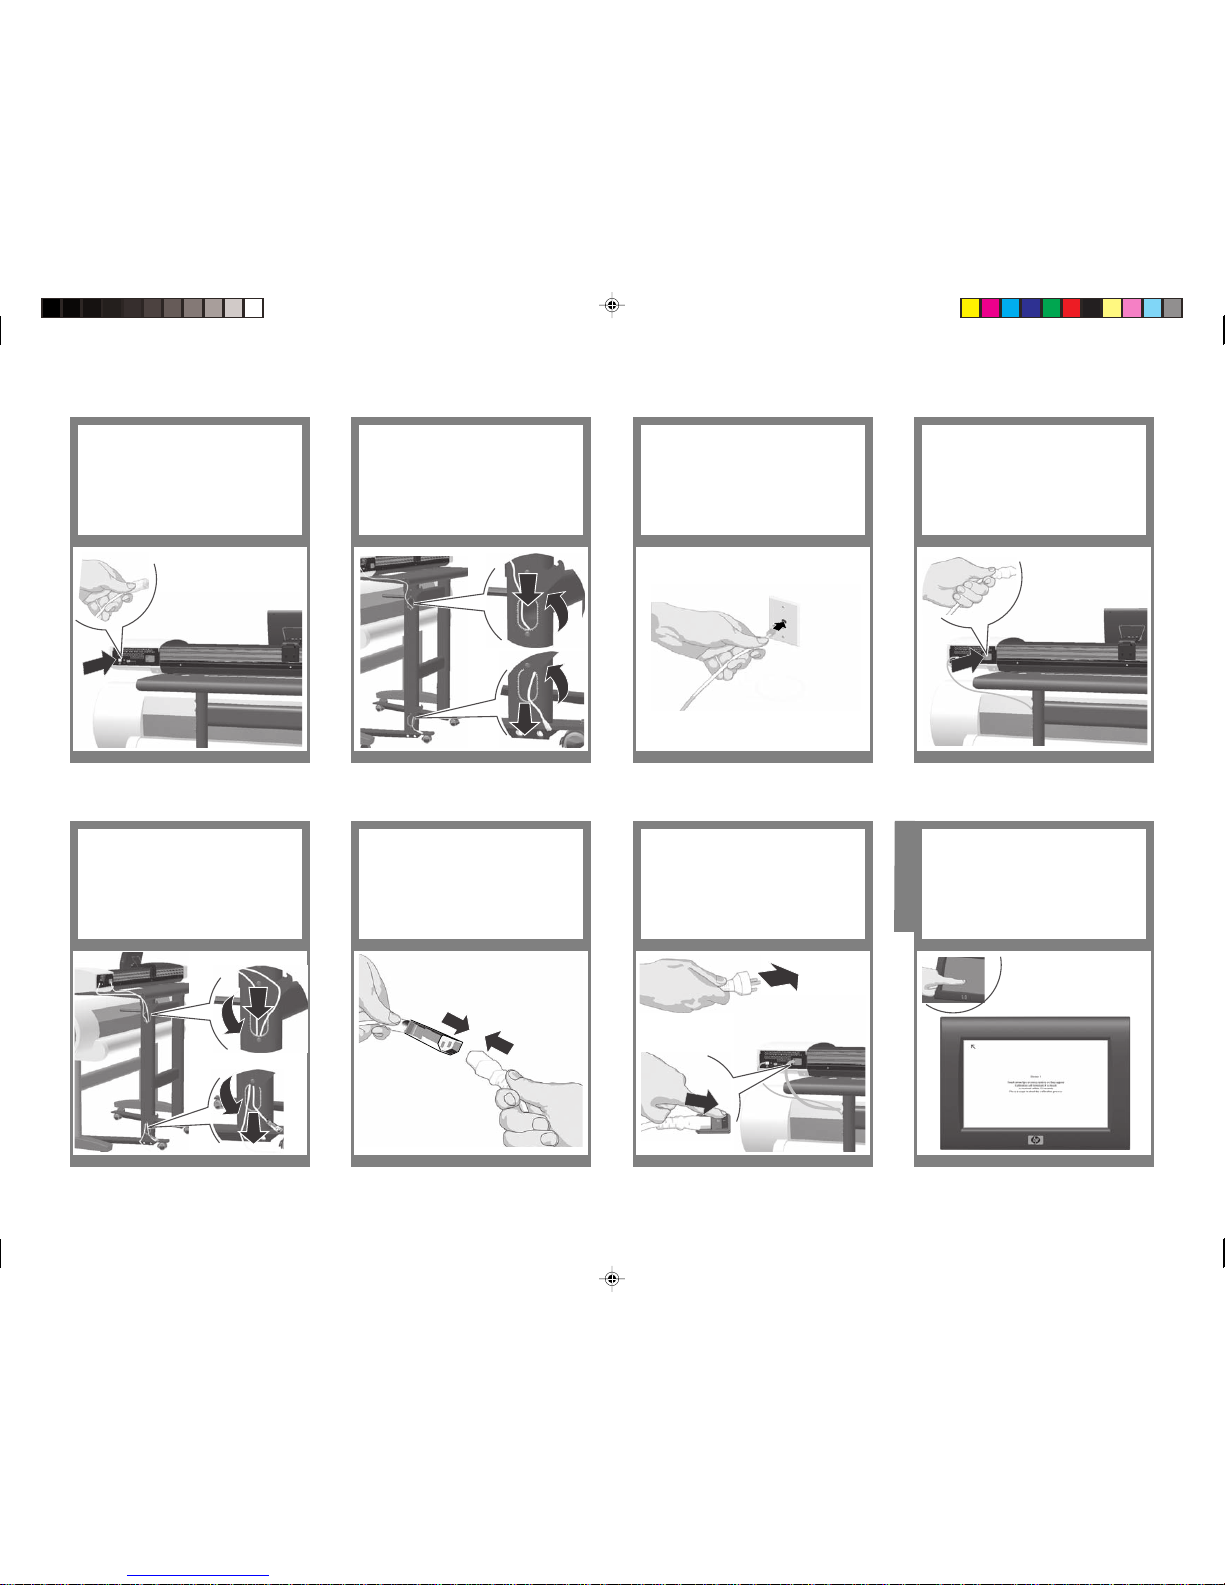
37
Feed the power extension cable through
the leg: Insert the end of the cable in the
top hole (a) and pull it out of the bottom
hole (b). Push the hole covers back down
and tighten the screws (c).
Connect the power extension cable’s
plug end to the scanner.
38
Connect the scanner power cable to the
scanner power extension cable.
39
Connect the scanner power cable to a
power outlet (a) and switch the scanner
on (b).
40
Your scanner screen will ash on and
take you through your system’s installation steps. You start by calibrating the
screen. Touch the arrows at each corner
as they appear. Touch the middle dialog
to control and end the screen calibration.
41 42 43 44
System installation
Connect the scanner’s LAN cable to the
scanner.
Feed the LAN cable through the leg:
loosen the bottom screw on each hole’s
cover, and rotate the cover open to
expose the hole (a). Insert the free end
of the LAN cable in the top hole (b) and
pull it out of the bottom hole (c).
Plug the LAN cable into a connection
socket.
a
c
c
a
b
a
a
b
c
Learning Products Barcelona - Hewlett-Packard Company
Page 10
PROVISIONAL
NOT FINAL IMAGE
PROVISIONAL
NOT FINAL IMAGE
PROVISIONAL
NOT FINAL IMAGE
45
49
Your system now has all the information
it needs and will start up in the Copy
screen.
Dene one or more initial destinations
for scanned les (accessible folders on
the network): Press the Add button to
dene a destination. Enter a label, the
full network path to the folder and login
information. Check ‘Remember’ if the
password should be stored after power
down.
Press the Test Connection button to
verify your entries. Press OK when done.
Repeat the steps 49 and 50 if you want
to enter additional destinations.
NOTE: If you will only scan to USB,
press the cancel button to skip this step.
You can create additional destinations
later on.
46
50
For any further information on how to use
your scanner, see the online help
available from your touch screen.
47
51
48
52
Notes and advice
Set your local date and time. The time
zone for your area and daylight period
is set in relation to GMT.
Accept the licence agreement. Enter your network settings to join your
system with your local network. Select
the DHCP option for automatic setup
(on DHCP server networks) or enter the
correct IP data manually.
Select the language for the software
interface.
Learning Products Barcelona - Hewlett-Packard Company
Page 11
53
You will nd these instructions useful
again if you setup and install the system
at another location.
Keep these instructions
Learning Products Barcelona - Hewlett-Packard Company
Page 12

Learning Products Barcelona - Hewlett-Packard Company
Page 13
Bu yönergeleri dikkatlice okuyun...
Bu yordam için ne gerekecek:
Tarayıcı ağır olduğu için, tarayıcıyı
ambalajından çıkarmak ve kurmak
için iki kişi gerekir. İki kişinin gerektiği
durumlarda, bu kutunun altında
gördüğünüz sembol görüntülenir.
Montaj işlemi sırasında tarama alanı cam
plakasını temizlemeniz gerekir: Bunun için
temiz, tüy bırakmayan bir bez ve yumuşak,
leke bırakmayan bir cam temizleyici gerekir.
Bunlar, tarayıcıyla birlikte sağlanmaz.
HP Designjet T1120 SD-MFP
Montaj Yönergeleri
© 2009 Hewlett-Packard Company
Inkjet Commercial Division
Avenida Graells 501 · 08174
Sant Cugat del Vallès
Barcelona · İspanya
Tüm hakları saklıdır
Bu yordamı uygulamaya başlamadan
önce yazıcınızın monte edilmiş ve çalışır
durumda olması gerekir. Yazıcının montaj
yönergeleri için, lütfen yazıcıyla birlikte
verilen montaj posterine bakın.
Montaj posteri
TR
Learning Products Barcelona - Hewlett-Packard Company
Page 14

Kanadı kaldırın
ve kapağı çıkarın
Sehpayı ambalajından
çıkarma
2 ayağı kutudan çıkarın. Sehpanın
bacaklarını kutudan çıkarıp klipsler öne
ve yukarı bakacak şekilde yere koyun.
Klipsler öne
bakacak
Ayaklardan birini kutudan alın. Ayağı,
doğru konumda ve açıda olduğundan
emin olmak için bacaklardan birine göre
hizalayın. Bacakların üzerindeki kılavuzu,
ayağın ortasındaki çukura yerleştirin.
21 43
Dört adet M5x14 vida kullanarak ayağı
sabitleyin. Vidaların dördünü de önce
gevşek bir şekilde yerleştirin ve ardından
Torx tornavidayı kullanarak sıkıştırın.
Sehpa montajı
Kutuyu açın: bunun için, uçtaki kanadı ve
ardından kapağı kaldırmanız gerekir.
Montaj kitinin içindekiler:
Açıklama Miktar
18 Torx M5x14
vidalar
18
4 Torx M5x25
tarayıcıyı sabitleme
vidaları
4
Torx tornavida 1
Stylus (İşaret aygıtı) 1
Sabitleyiciler 2
Bakım sayfası
askıları
2
Alyan anahtarı 1
X4
Kutunun içeriği:
1. Bakım sayfası
2. Tarayıcı
3. Üst Tepsi
4. Bacaklar
5. Ayak
6. Ayak
7. Montaj Kiti
8. Kablolar – USB, LAN, Güç
uzatma, Güç
9. Montaj yönergeleri
2
3
4
5
6
7
8
9
1
Zemin desteği
Learning Products Barcelona - Hewlett-Packard Company
Page 15

Bacakları baş aşağı çevirin ve iki ayağı
dört adet M6×30 vida (her ayak için
iki adet) kullanarak sehpanın sol ve sağ
bacağına takın. Vidaları montaj kitinde
bulunan T şeklindeki Torx T30 tornavida
ile sıkın.
9
İki kişi birlikte tarayıcıyı kutudan çıkarıp
Üst Tepsiye yerleştirin. Tarayıcının 4
lastik ayağını, Üst Tepsinin üzerindeki
giriş yuvalarına (a) oturacak şekilde
hizalayın. Dokunmatik ekranın üzerindeki
2 koruyucu köpüğü (b) çıkarın.
Kutunun üstünü tamamen açtığınızdan
emin olun. Bakım sayfasını (daha sonra
gerekecek) ve paket parçalarını çıkarın.
4 Torx M5x25 tarayıcı sabitleme
vidasıyla tarayıcıyı Üst Tepsiye sabitleyin.
Vidaları, tepsinin altındaki deliklerden
geçirin ve Alyan anahtarını kullanarak
tarayıcının lastik ayağına vidalayın.
10 11 12
5
Dört adet M5x14 vida kullanarak ayağı
sabitleyin. Vidaların dördünü de önce
gevşek bir şekilde yerleştirin ve ardından
Torx tornavidayı kullanarak sıkıştırın.
6 87
Dört adet M5x14 vida kullanarak Üst
Tepsiyi sabitleyin: her bacağa 2 vidayı
gevşek bir şekilde yerleştirin ve 4 vida
da yerine oturunca Torx tornavidayı
kullanarak vidaları sıkıştırın.
Tarayıcıyı sehpaya
yerleştirme
Bacakları dik konuma getirin. Dört
tekerin de kilitlendiğinden emin olun.
İki kişi birlikte, Üst Tepsiyi kutudan
çıkarın. Üst Tepsiyi, yuvarlak ucu arkaya,
düz ucuysa öne bakacak şekilde
bacakların üzerine yerleştirin. Tepsinin
altındaki çıkıntıları, bacakların tepesine
yerleştirin.
X4
Yuvarlak uç
arkaya
bakacak
Düz uç
öne
bakacak
Giriş yuvası
X4
Kutudan diğer ayağı alın. Ayağı, doğru
konumda ve açıda olduğundan emin
olmak için diğer bacağa göre hizalayın.
Bacaklardaki kılavuzu ortadaki çukura
yerleştirin.
a
a
b
b
X4
Alyan anahtarı
Learning Products Barcelona - Hewlett-Packard Company
Page 16

Tarama alanını temizleme...
Şimdi tarama alanını – cam plakayı
temizlemeniz gerekir. Bunun için temiz,
tüy bırakmayan bir bez ve yumuşak, leke
bırakmayan bir cam temizleyici gerekir.
Bunlar, tarayıcıyla birlikte verilmez.
Uyarı: Aşındırıcı, aseton, benzen veya bu
kimyasalları içeren sıvılar kullanmayın.
Tarayıcının cam plakasına veya başka bir
yerine doğrudan sıvı püskürtmeyin.
16
Tarama alanına ulaşmak için tarayıcının
kapağını açmanız gerekir. Dokunmatik
ekranı, kolunun üzerinde ters dönecek
şekilde iterek “servis” konumuna getirin.
13
Tarayıcının arka yüzünde, kapağı
çıkarmak için iki düğme bulunur.
Kilitlerinin açıldığını hissedene kadar,
düğmeleri aynı anda parmaklarınızla
içeri doğru itin.
14 15
Kapağı çıkarma düğmelerini bastırmaya
devam ederek ve ucunu bırakmadan
kapağı, arkaya, kendinize doğru
çekin. Tarayıcı kapağını geriye doğru
tamamen açın.
Tarayıcınızla birlikte verilen bez gibi
tüy bırakmayan bir beze yumuşak, leke
bırakmayan cam temizleyici uygulayın ve
cam yüzeyi nazikçe temizleyin. En küçük
tozlar bile baskıda görüneceğinden
yüzeyin çok temiz olması gerekir.
17 18 19 20
Tarama alanını
temizleme
En küçük tozlar bile baskıda
görüneceğinden yüzeyin çok
temiz olması gerekir!
Dik, “hazır” konumuna kilitlendiğini
gösteren sesi duyuncaya dek
dokunmatik ekranı arkaya, kendinize
doğru çekin.
Stylus'u dokunmatik ekrana iliştirin.Tarayıcının dokunmatik ekranı, koruma
amacıyla “taşıma” konumunda
katlanmış olarak gönderilir ve kaldırılıp
“hazır” konumuna kilitlenmesi gerekir.
Ekranın üst kenarını bir elinizle tutun.
Dokunmatik ekran
montajı
Learning Products Barcelona - Hewlett-Packard Company
Page 17

Kablolama ve
bağlama
21
USB kablosunu aşağıda gösterilen
konuma takmak için klipsleri Üst Tepsinin
altına yerleştirin. Kabloyu takın ve ucunu
son klipsten sarkacak şekilde bırakın.
Sonraki adımlarda kabloyu yazıcıya
bağlamanız istenecek.
Kablonun ucunu son klipsten
sarkacak şekilde bırakın.
USB kablosunu tarayıcıya takın.
HP birimle birlikte verilen 2,9 metrelik
kablonun kullanılmasını önermektedir.
Bu kablo (çift bükümlü) sistem
performansını optimum hale getirmek
için gerekli teknik şartları karşılayan
tam onaylı bir kablodur.
22
Sabitleyicileri, standın bacağındaki
deliklere vidalayın.
23
Bakım sayfasının askılarını sabitleyicilere
takın. Not: Kullanılmadığında bakım
sayfası burada muhafaza edilir. Askılara
cırt cırtla tutturulur.
24
Monte edilmiş yazıcıyı tarayıcının altına
yerleştirin. Yazıcının ayağı tarayıcı
ayağının dışında kalacaktır.
25 26 27 28
X2
Başka bir temiz, kuru ve tüy bırakmayan
bez kullanarak camı tamamen kurulayın.
Tarayıcı kapağını kapatın ve yerine
oturması için aşağı doğru nazikçe
bastırın.
Dokunmatik ekranı aşağı, “hazır”
konumuna çekin.
Learning Products Barcelona - Hewlett-Packard Company
Page 18

a
b
a
b
c
c
Uzunluk
29
LAN kablosunu bağlantı yuvasına takın.
LAN kablosunu bacağın içinden geçirin:
deliklerin kapağındaki alt vidaları gevşetin;
kapağı, deliği (a) açıkta bırakacak
şekilde döndürün. LAN kablosunun boşta
kalan ucunu, üstteki delikten (b) geçirip
alttaki delikten (c) çıkarın. Kabloyu, kağıt
değiştirirken yazıcıyı çekmenize yetecek
kadar uzun bırakın.
30
Yazıcının güç kablosunu yazıcıya
bağlayın.
31
Güç kablosunu bacağın içinden yürütün:
Kablonun ucunu, üstteki delikten
(a) geçirip alttaki delikten (b) çıkarın.
Kabloyu, kağıt değiştirirken yazıcıyı
çekmenize yetecek kadar uzun bırakın.
Deliklerin kapaklarını tekrar yerine itip
vidaları (c) sıkıştırın.
32
Yazıcının güç kablosunu bir elektrik
prizine (a) takın ve yazıcıyı açın (b).
33 34 35 36
a
a
b
c
Uzunluk
Uzunluk
Kağıt değiştirirken
çekebilmek için
yeterli uzunluk
HP Designjet T1120 tarayıcınız artık
monte edilmiştir ve aşağıdaki şekildeki
gibi görünmesi gerekir.
Tarayıcıyı yazıcıya USB kablosu ile
bağlayın. Kağıt değiştirirken yazıcıyı
çekebilmek için kabloyu yeterli oranda
gevşek bırakacak şekilde ayarlayın.
Yazıcının LAN kablosunu yazıcıya
bağlayın. Not: tarayıcıyla yalnızca
1 LAN kablosu verilir; yazıcı için ayrı
bir kablo gerekir.
Learning Products Barcelona - Hewlett-Packard Company
Page 19

b
b
37
Güç uzatma kablosunu bacağın içinden
yürütün: Kablonun ucunu, üstteki delikten
(a) geçirip alttaki delikten (b) çıkarın.
Deliklerin kapaklarını tekrar yerine itip
vidaları (c) sıkıştırın.
Güç uzatma kablosunun priz ucunu
tarayıcıya takın.
38
Tarayıcının güç kablosunu, tarayıcının
güç uzatma kablosuna takın.
39
Tarayıcının güç kablosunu bir elektrik
prizine (a) takın ve tarayıcıyı açın (b).
40
Tarayıcınızın ekranı yanar ve
sistemin kurulum adımları boyunca
size yol gösterir. İlk iş olarak ekranı
ayarlarsınız. Köşelerde görünen oklara
dokunun. Ekran ayarını denetlemek
ve sonlandırmak için ortadaki iletişim
kutusuna dokunun.
41 42 43 44
Sistem kurulumu
Tarayıcının LAN kablosunu tarayıcıya
takın.
LAN kablosunu bacağın içinden geçirin:
deliklerin kapağındaki alt vidaları
gevşetin ve kapağı, deliği (a) açıkta
bırakacak şekilde döndürün. LAN
kablosunun boşta kalan ucunu, üstteki
delikten (b) geçirip alttaki delikten
(c) çıkarın.
LAN kablosunu bağlantı yuvasına takın.
a
c
c
a
b
a
a
b
c
Learning Products Barcelona - Hewlett-Packard Company
Page 20

GEÇİCİ
SON GÖRÜNTÜ
GEÇİCİ
SON GÖRÜNTÜ
GEÇİCİ
SON GÖRÜNTÜ
45
49
Sisteminiz, artık gereken bilgilerin
tümünü içeriyor ve Copy (Kopyalama)
ekranında başlayacak.
Taranan dosyalar için bir veya daha fazla
ilk hedef belirtin (bu hedeer, ağ üzerinde
erişilebilir klasörler olmalıdır): Bir hedef
tanımlamak için Add (Ekle) düğmesine
basın. Bir etiket, klasörün tam ağ yolunu
ve giriş bilgilerini girin. Güç kesildiğinde
parolanın saklanmasını istiyorsanız
‘Remember’ (Hatırla) seçeneğini işaretleyin.
Girdiğiniz bilgileri doğrulamak için Test
Connection (Bağlantıyı Test Et) düğmesine
basın. İşiniz bittiğinde OK (Tamam)
düğmesine basın. Daha fazla hedef
girmek istiyorsanız 49 – 50 arası adımları
tekrarlayın.
NOT: Yalnızca USB’ye tarayacaksanız, bu
adımı atlamak için iptal düğmesine basın.
Daha sonra yeni hedeer oluşturabilirsiniz.
46
50
Tarayıcınızın kullanımına ilişkin daha
fazla bilgi için dokunmatik ekranınızdan
ulaşabileceğiniz çevrimiçi yardıma
bakın.
47
51
48
52
Notlar ve öneriler
Yerel tarihinizi ve saatinizi ayarlayın.
Bulunduğunuz saat dilimi ve gün ışığı
süresi, Greenwich Ortalama Zamanı’na
göre ayarlanır.
Lisans sözleşmesini kabul edin. Yerel ağınızla sisteminize katılmak
için ağ ayarlarınızı girin. Otomatik
kurulum için DHCP seçeneğini işaretleyin
(DHCP sunucu ağlarında) veya el ile
doğru IP verilerini girin.
Yazılım arabiriminin dilini seçin.
Learning Products Barcelona - Hewlett-Packard Company
Page 21

53
Sistemi başka bir konuma kurar ve
yüklerseniz bu yönergeler tekrar işinize
yarayacaktır.
Bu yönergeleri saklayın
Learning Products Barcelona - Hewlett-Packard Company
Page 22

Learning Products Barcelona - Hewlett-Packard Company
Page 23

Přečtěte si pozorně následující pokyny…
Co k tomuto procesu potřebujete:
Skener je těžký, proto jsou k jeho
rozbalení a nastavení zapotřebí dva lidé.
U činností, které vyžadují dva lidi, je
uveden symbol zobrazený v dolní části
tohoto rámečku.
Během procesu sestavení je třeba vyčistit
skleněnou desku snímací plochy. K tomu
potřebujete textilní hadřík, který nepouští
vlákna, a neagresivní čistící prostředek na
sklo. Toto příslušenství není dodáváno se
skenerem.
HP Designjet T1120 SD-MFP
Pokyny pro sestavení
© 2009 Hewlett-Packard Company
Inkjet Commercial Division
Avenida Graells 501 · 08174
Sant Cugat del Vallés
Barcelona · Spain
Všechna práva vyhrazena.
Před zahájením tohoto postupu je třeba
tiskárnu sestavit a uvést do provozu.
Návod k sestavení tiskárny naleznete
v příručce pro sestavení, která byla
dodána s tiskárnou.
Příručka pro sestavení
CS
Learning Products Barcelona - Hewlett-Packard Company
Page 24

Zvedněte
chlopeň a
zdvihněte víko
Vybalení podstavce
Vyjměte z krabice 2 nožky. Vyjměte
z krabice podstavec a umístěte jej
na podlahu se svorkami směrem
dopředu a nahoru.
Svorky směrem
dopředu
Vyjměte z krabice jednu z nožek.
Zarovnejte nožku s nohou podstavce
a ujistěte se, že je ve správné pozici
a úhlu. Vložte vodící kolík podstavce
do prostředního otvoru v nožce.
21 43
Přišroubujte nožku pomocí 4 šroubů
M5x14. Volně vložte všechny
4 šrouby a potom je utáhněte
pomocí šroubováku Torx.
Sestavení podstavce
Otevřete krabici. K tomu je třeba zvednout
chlopeň na konci a potom zdvihnout víko.
Obsah montážní sady:
Popis Množství
18 šroubů Torx
M5x14
18
4 šrouby Torx
M5x25
pro upevnění
skeneru
4
Šroubovák Torx 1
Stylus (polohovací
zařízení)
1
Zarážky 2
Háky pro zavěšení
listu pro údržbu
2
Imbusový klíč 1
X4
Obsah krabice:
1. List pro údržbu
2. Skener
3. Horní zásobník
4. Podstavec
5. Nožka
6. Nožka
7. Montážní sada
8. Kabely – USB, síťový, napájecí
prodlužovací, napájecí
9. Pokyny pro sestavení
2
3
4
5
6
7
8
9
1
Podpora na
podlaze
Learning Products Barcelona - Hewlett-Packard Company
Page 25

Otočte stojny spodními konci vzhůru a
na každou stojnu upevněte nohu pomocí
šroubů M6×30 (každou nohu dvěma
šrouby). Šrouby utáhněte pomocí momen-
tového klíče T30 s rukojetí ve tvaru T, který
je součástí montážní sady.
9
Ve 2 lidech zdvihněte skener z krabice a
umístěte jej na horní zásobník. Zarovnejte
4 gumové nožky skeneru tak, aby ležely
v prohlubních horního zásobníku (a).
Odstraňte 2 ochranné pěnové části
z dotykové obrazovky (b).
Přesvědčte se, že jste zcela odstranili
horní část krabice. Odstraňte list pro
údržbu (bude třeba později) a kusy
obalového materiálu.
Připevněte skener k hornímu zásobníku
pomocí 4 upevňovacích šroubů Torx
M5x25. Vložte šrouby skrz otvory v
dolní části zásobníku a zašroubujte je
do gumových nožek skeneru pomocí
imbusového klíče.
10 11 12
5
Přišroubujte nožku pomocí 4 šroubů
M5x14. Volně vložte všechny
4 šrouby a potom je utáhněte
pomocí šroubováku Torx.
6 87
Upevněte horní zásobník pomocí
4 šroubů M5x14. Do každé nožky
volně vložte 2 šrouby a po umístění
všech 4 šroubů je utáhněte pomocí
šroubováku Torx.
Připevnění skeneru
k podstavci
Umístěte podstavec do svislé polohy.
Přesvědčte se, že jsou všechna
4 kolečka uzamčena.
Ve 2 lidech vyjměte horní zásobník
z krabice. Umístěte horní zásobník na
podstavec se zaoblenou hranou směrem
dozadu a plochou hranou směrem
dopředu. Shora vložte spodní opěry
zásobníku do 2 stojen.
X4
Zaoblená hrana
směrem
dozadu
Plochá
hrana
směrem
dopředu
Prohlubeň
X4
Vyjměte z krabice další nožku.
Zarovnejte nožku s další nohou
podstavce a ujistěte se, že je ve
správné pozici a úhlu. Vložte vodící
kolík podstavce do prostředního otvoru.
a
a
b
b
X4
Imbusový klíč
Learning Products Barcelona - Hewlett-Packard Company
Page 26

Čištění snímací plochy...
Nyní je třeba vyčistit snímací plochu
– skleněnou desku. K tomu potřebujete
textilní hadřík, který nepouští vlákna,
a neagresivní čistící prostředek na
sklo. Toto příslušenství není dodáváno
se skenerem.
Upozorn
ění: Nepoužívejte drsné
čisticí materiály, aceton, benzen ani
tekutiny, které by mohly tyto látky
obsahovat. Nerozprašujte tekutiny
přímo na sklo skeneru ani na žádné
jiné části skeneru.
16
Pro přístup ke snímací ploše je
třeba otevřít víko skeneru. Zatlačte
na dotykovou obrazovku tak, aby
se na svém rameni otočila dozadu
a zůstala v poloze pro údržbu.
13
Na zadní straně skeneru jsou 2 tlačítka
pro uvolnění víka. Současně prsty
stiskněte tlačítka dovnitř, dokud neucítíte
odemknutí víka.
14 15
Stále tlačte na tlačítka pro uvolnění víka
a držte hranu víka a potom vytáhněte
víko dozadu směrem k sobě. Otevřete
víko skeneru až úplně dozadu.
Pomocí textilního hadříku, který nepouští
vlákna (např. hadřík dodaný se
skenerem), navlhčeného neagresivním
čistícím prostředkem na sklo opatrně
vyčistěte skleněný povrch. Povrch musí
být úplně čistý. Na výtisku budou
viditelné veškeré nečistoty.
17 18 19 20
Čištění snímací plochy
Povrch musí být úplně čistý.
Na výtisku budou viditelné
veškeré nečistoty!
Zatáhněte dotykovou obrazovku zpět
směrem k sobě, dokud neuslyšíte
zaklapnutí označující, že je
obrazovka uzamčena ve své svislé
provozní pozici.
Připojte k dotykové obrazovce stylus.Z důvodu ochrany je dotyková
obrazovka skeneru přepravována
ohnutá v přepravní pozici a je třeba
ji zdvihnout a uzamknout v provozní
pozici. Jednou rukou uchopte horní
hranu obrazovky.
Dotyková obrazovka
Learning Products Barcelona - Hewlett-Packard Company
Page 27

Kabely
a zapojení
21
Vložte svorky pod horní zásobník
a připevněte kabel USB, jak je
znázorněno níže. Připevněte kabel
a nechte jeho konec viset za poslední
svorkou. V pozdějším kroku bude
kabel připojen k tiskárně.
Nechte konec kabelu viset
za poslední svorkou
Připojte kabel USB ke skeneru.
Poznámka: Společnost HP doporučuje
používat 2,9 m dlouhý kabel
dodaný s jednotkou. Tento
kabel je vysokorychlostní kabel
(kroucená dvoulinka), který splňuje
potřebné specikace pro optimální
výkon systému.
22
Zašroubujte zarážky do děr v podstavci.
23
Připojte k zarážkám háky pro zavěšení
listu pro údržbu. Poznámka: Sem se
umísťuje list pro údržbu, pokud se
nepoužívá. K hákům pro zavěšení
se připojuje suchým zipem.
24
Zasuňte sestavenou tiskárnu pod
skener. Nožky tiskárny budou vně
nohou skeneru.
25 26 27 28
X2
Sklo zcela vysušte jiným, čistým textilním
hadříkem, který nepouští vlákna.
Zavřete kryt skeneru a jemně na něj
zatlačte, až zapadne do správné polohy.
Zatáhněte dotykovou obrazovku zpět
dolů do provozní pozice.
Learning Products Barcelona - Hewlett-Packard Company
Page 28

a
b
a
b
c
c
Rezerva
29
Zapojte síťový kabel do zásuvky
pro připojení.
Veďte síťový kabel skrz nohu: Uvolněte
spodní šroub na krytu každého otvoru a
otočením krytu otvor odkryjte (a). Vložte
volný konec síťového kabelu do horního
otvoru (b) a vytáhněte jej spodním
otvorem ven (c). Délku kabelu upravte
tak, aby bylo možné při výměně papíru
tiskárnu vysunout.
30
K tiskárně připojte napájecí
kabel tiskárny.
31
Veďte napájecí kabel skrz nohu: Vložte
konec kabelu do horního otvoru (b)
a vytáhněte jej spodním otvorem ven
(c). Délku kabelu upravte tak, aby bylo
možné při výměně papíru tiskárnu
vysunout. Otočte kryty otvorů zpět
a zašroubujte šrouby (c).
32
Napájecí kabel tiskárny připojte
do elektrické zásuvky (a) a zapněte
tiskárnu (b).
33 34 35 36
a
a
b
c
Průvěs
Průvěs
Rezerva kabelu pro
vytažení při výměně
papíru
Skener HP Designjet T1120 je nyní
sestavený a měl by vypadat tak, jak je
zobrazeno na následujícím obrázku.
Připojte tiskárnu ke skeneru pomocí
kabelu USB. Délku kabelu upravte tak,
aby bylo možné při výměně papíru
tiskárnu vysunout.
K tiskárně připojte síťový kabel tiskárny.
Poznámka: Se skenerem je dodáván
pouze 1 síťový kabel, pro tiskárnu
budete potřebovat další.
Learning Products Barcelona - Hewlett-Packard Company
Page 29

b
b
37
Veďte napájecí prodlužovací kabel skrz
nohu: Vložte konec kabelu do horního
otvoru (b) a vytáhněte jej spodním
otvorem ven (c). Otočte kryty otvorů
zpět a zašroubujte šrouby (c).
Konec napájecího prodlužovacího
kabelu připojte ke skeneru.
38
Napájecí kabel skeneru připojte
k napájecímu prodlužovacímu
kabelu skeneru.
39
Napájecí kabel skeneru připojte
do elektrické zásuvky (a) a zapněte
skener (b).
40
Obrazovka skeneru se rozsvítí a provede
vás jednotlivými kroky instalace systému.
Prvním krokem je kalibrace obrazovky.
Dotkněte se šipek zobrazených v rozích.
Dotykem prostředního dialogového okna
můžete kalibraci ovládat a ukončit.
41 42 43 44
Instalace systému
Ke skeneru připojte síťový kabel skeneru. Veďte síťový kabel skrz nohu: Uvolněte
spodní šroub na krytu každého otvoru a
otočením krytu otvor odkryjte (a). Vložte
volný konec síťového kabelu do horního
otvoru (b) a vytáhněte jej spodním
otvorem ven (c).
Zapojte síťový kabel do zásuvky
pro připojení.
a
c
c
a
b
a
a
b
c
Learning Products Barcelona - Hewlett-Packard Company
Page 30

PROZATÍMNÍ
OBRÁZEK NENÍ
PROZATÍMNÍ
OBRÁZEK NENÍ
PROZATÍMNÍ
OBRÁZEK NENÍ
45
49
Systém nyní získal všechny potřebné
informace a bude spuštěn na obrazovce
Copy (Kopírování) .
Určete jedno nebo několik počátečnách
cílových umístění pro skenované soubory
(přístupné složky v síti): Stisknutím tlačítka
Add (Přidat) určíte cílové umístění. Zadejte
název, úplnou cestu v síti ke složce
a přihlašovací informace. Zaškrtněte
možnost Remember (Zapamatovat),
pokud chcete heslo uložit i po vypnutí.
Stisknutím tlačítka Test Connection (Odzkoušet
připojení) ověříte zadané údaje. Po dokončení
stiskněte tlačítko OK. Pokud chcete přidat
další cílová umístění, opakujte kroky 49 a 50.
POZNÁMKA: Pokud budete skenovat pouze
prostřednictvím rozhraní USB, stisknutím
tlačítka Cancel (Zrušit) tento krok přeskočíte.
Další cílová umístění můžete vytvořit později.
46
50
Další informace o použití skeneru
naleznete v nápovědě online,
která je k dispozici prostřednictvím
dotykové obrazovky.
47
51
48
52
Poznámky a rady
Nastavte místní datum a čas. Časové
pásmo a doba denního světla ve vaší
oblast jsou nastavovány vzhledem
k času GMT.
Potvrďte souhlas s licenční smlouvou. Zadejte nastavení sítě a tak systém
připojte k vaší místní síti. Vyberte
automatické nastavení podle serveru
DHCP (v sítích se serverem DHCP)
nebo ručně zadejte správné adresy IP.
Vyberte jazyk softwarového rozhraní.
Learning Products Barcelona - Hewlett-Packard Company
Page 31

53
Tyto pokyny se vám mohou znovu hodit
při nastavení a instalaci systému
v jiném umístění.
Tyto pokyny uschovejte
Learning Products Barcelona - Hewlett-Packard Company
Page 32

Learning Products Barcelona - Hewlett-Packard Company
Page 33

Kérjük, tanulmányozza át az itt található
utasításokat...
Amire szüksége lesz a készülék üzembe
helyezéséhez:
Mivel a lapolvasó nehéz, kicsomagolásához
és üzembe helyezéséhez két ember
szükséges. Ha az adott művelet
elvégzéséhez két emberre van szükség,
akkor a leírásánál a szövegdoboz alsó
részében látható szimbólum jelenik meg.
A beolvasási terület üveglapját az üzembe
helyezéskor meg kell tisztítania: Ehhez
egy nem bolyhosodó és enyhe, nem
karcoló üvegtisztítóval megnedvesített
törlőkendő szükséges. Ezek nem tartozékai
a lapolvasónak.
© 2009 Hewlett-Packard Company
Inkjet Commercial Division
Avenida Graells 501 · 08174
Sant Cugat del Vallčs
Barcelona · Spanyolország
Minden jog fenntartva.
A művelet megkezdése előtt a nyomtatónak
már összeszerelt, üzemképes állapotban
kell lennie. A nyomtató összeszerelésével
kapcsolatos tudnivalókat a nyomtatóhoz
mellékelt összeszerelési útmutató tartalmazza.
Összeszerelési útmutató
HP Designjet T1120 SD-MFP
Összeszerelési útmutató
HU
Learning Products Barcelona - Hewlett-Packard Company
Page 34

Emelje fel
a szárnyat,
majd emelje
le a fedelet
Az állvány kicsomagolása
Vegye ki a két talpat a dobozból. Vegye ki
az állványzatot a dobozból, majd helyezze
azt úgy a padlóra, hogy a kapcsok előre
és felfelé nézzenek.
A kapcsok
előre néznek
Vegye ki az egyik talpat a dobozból.
Igazítsa a talpat az állványzat lábához,
és győződjön meg arról, hogy helyzete
és dőlésszöge megfelelő. Helyezze
az állványzat rögzítőtüskéjét a talpon
található lyuk közepébe.
21 43
Rögzítse a talpat négy M5x14 csavarral.
A négy csavart illessze be lazán, majd
húzza meg azokat a Torx csavarhúzóval.
Az állvány összeszerelése
Nyissa ki a dobozt: ehhez emelje fel
a doboz végén található szárnyat,
majd emelje le a fedelet.
Az összeszerelési csomag tartalma:
Leírás Mennyiség
18 db Torx M5x14
csavar
18
4 db Torx M5x25
csavar a lapolvasó
rögzítéséhez
4
Torx csavarhúzó 1
Ceruza (mutató-
eszköz)
1
Dugaszok 2
A karbantartási
lap akasztói
2
Imbuszkulcs 1
X4
A doboz tartalma:
1. Karbantartási lap
2. Lapolvasó
3. Felső tartólemez
4. Állványzat
5. Talp
6. Talp
7. Összeszerelési csomag
8. Kábelek – USB, LAN,
táphosszabbító, táp
9. Összeszerelési útmutató
2
3
4
5
6
7
8
9
1
Alátámasztás
a padlón
Learning Products Barcelona - Hewlett-Packard Company
Page 35

Fordítsa fejjel lefelé a lábakat, majd négy
darab M6x30-as csavarral erősítse a
két talpat a bal és a jobb oldali lábhoz
(két csavar talpanként). Húzza meg a
csavarokat az összeszerelési csomagban
található T-nyelű T30-as csillagcsavar-
húzóval.
9
2 személy emelje ki a lapolvasót a
dobozból, majd helyezze azt a felső
tartólemezre. Igazítsa úgy a lapolvasót,
hogy annak négy gumilába a felső
tartólemez tartóvájataiba (a) illeszkedjen.
Távolítsa el a két habszivacs védőelemet
az érintőképernyőről (b).
Győződjön meg arról, hogy teljesen
eltávolította a doboz tetejét. Vegye ki
a karbantartási lapot (erre később még
szükség lesz) és a csomagolóelemeket.
Rögzítse a lapolvasót a felső
tartólemezhez a négy Torx M5x25
lapolvasó-rögzítő csavar segítségével.
A csavarokat a tartólemez alján
található lyukakon keresztül
csavarozza a lapolvasó gumilábaiba
az imbuszkulcs segítségével.
10 11 12
5
Rögzítse a talpat 4 M5x14 csavarral.
A 4 csavart illessze be lazán, majd
húzza meg azokat a Torx csavarhúzóval.
6 87
Rögzítse a felső tartólemezt négy
M5x14 csavarral: helyezzen a lábakba
két-két csavart lazán, majd ha a mind
a négy csavar a helyére került, húzza
azokat szorosra a Torx csavarhúzóval.
A lapolvasó csatlakoztatása
az állványhoz
Állítsa fel az állványzatot. Győződjön
meg arról, hogy mind a négy kereket
befékezte.
Két személy emelje ki a felső tartólemezt
a dobozból. Helyezze a felső tartólemezt
az állványzatra úgy, hogy a tartólemez
lekerekített széle hátra, egyenes széle
pedig előre nézzen. Helyezze a tálca
alsó rögzítőelemeit a két állványláb
tetejébe.
X4
Hátrafelé néző
lekerekített szél
Előre néző
egyenes
szél
Tartóvájat
X4
Vegye ki a másik talpat a dobozból.
Igazítsa a talpat az állványzat
másik lábához, és győződjön meg
arról, hogy helyzete és dőlésszöge
megfelelő. Helyezze be az állványzat
rögzítőtüskéjét a középső lyukba.
a
a
b
b
X4
Imbuszkulcs
Learning Products Barcelona - Hewlett-Packard Company
Page 36

A beolvasási terület tisztítása...
A következő lépésben meg kell tisztítani
a beolvasási terület üveglapját. Ehhez
egy nem bolyhosodó és enyhe, nem
karcoló üvegtisztítóval megnedvesített
törlőkendő szükséges. Ezek nem
tartozékai a lapolvasónak.
Figyelmeztetés: ne használjon súrolóport,
acetont, benzint vagy bármely olyan
vegyszert, amely ezeket az anyagokat
tartalmazza. Ne juttasson folyadékot
közvetlenül a lapolvasó üveglapjára
vagy a lapolvasó egyéb részeibe.
16
A beolvasási terület eléréséhez fel kell
nyitnia a lapolvasó fedelét. Tolja az
érintőképernyőt, amíg hátra nem fordul
a tartókaron „szervizpozícióba”.
13
Két fedélnyitó gomb található a
lapolvasó hátulján. Nyomja befelé
egyszerre a két gombot, amíg nem
érzi, hogy kioldanak.
14 15
Tartsa nyomva a fedél kioldógombjait
és ne engedje el a fedelet. Húzza a
fedelet maga felé. Nyissa fel teljesen
a lapolvasó fedelét.
Használjon nem bolyhosodó és
enyhe, nem karcoló üvegtisztítóval
megnedvesített törlőkendőt, és
noman tisztítsa meg az üvegfelületet.
Ha a felület nem tökéletesen
tiszta, a szennyeződés megjelenik
a nyomatokon.
17 18 19 20
A beolvasási terület
tisztítása
Ha a felület nem tökéletesen
tiszta, a szennyeződés
megjelenik a nyomatokon!
Húzza vissza kattanásig az
érintőképernyőt; ekkor az
érintőképernyő újból „kész”
helyzetbe kerül.
Rögzítse az érintőceruzát az
érintőképernyőhöz.
A károsodás elkerülése érdekében
a lapolvasó érintőképernyője szállítás
közben lehajtva, „szállítás” helyzetben
áll, és a használathoz fel kell emelni,
majd rögzíteni „kész” helyzetben.
Egy kézzel fogja meg a képernyő
felső szélét.
Érintőképernyő
összeszerelése
Learning Products Barcelona - Hewlett-Packard Company
Page 37

Vezetékek és
csatlakoztatás
21
Helyezze a kapcsokat a felső tartólemez
alá, majd az alábbi ábrán látható
módon rögzítse az USB-kábelt. Úgy
rögzítse a kábelt, hogy a vége lelógjon
az utolsó kapocsról. A kábelt egy
későbbi lépés során kell a nyomtatóhoz
csatlakoztatni.
A kábel vége lógjon le az
utolsó kapocsról
Csatlakoztassa az USB-kábelt
a lapolvasóhoz. Megjegyzés: A HP
javasolja, hogy a készülékkel együtt
kapott 2,9 m hosszú kábelt használja. Ez
a kábel egy teljesen szabványos csavart
érpáras kábel, amely megfelel a szükséges
műszaki követelményeknek, és így képes
biztosítani a rendszer optimális működését.
22
Csavarozza a dugaszokat az
állványzaton látható lyukakba.
23
Csatlakoztassa a dugaszokhoz
a karbantartási lap akasztóit.
Megjegyzés: Itt kell tárolni a
karbantartási lapot, ha az éppen
nincs használatban. A lap tépőzárral
rögzíthető az akasztókhoz.
24
Csúsztassa az összeszerelt nyomtatót
a lapolvasó alá. A nyomtató talpai
a lapolvasó talpain kívülre kerülnek.
25 26 27 28
X2
Törölje teljesen szárazra az üveget egy
tiszta, száraz és nem bolyhosodó ruha
használatával.
Csukja be a lapolvasó fedelét,
és óvatosan lefelé nyomva rögzítse
azt a helyén.
Húzza vissza az érintőképernyőt „kész”
helyzetbe.
Learning Products Barcelona - Hewlett-Packard Company
Page 38

a
b
a
b
c
c
Lógás
29
Csatlakoztassa a hálózati kábelt
egy aljzatba.
Vezesse át a hálózati kábelt a lábon
keresztül: a lyukak fedelén lazítsa meg az
alsó csavart, majd forgassa el a fedeleket
a lyukakról (a). Helyezze a hálózati kábel
nem csatlakoztatott végét a felső lyukba
(b), majd húzza ki azt az alsó lyukon
(c) keresztül. A kábelt hagyja lazán,
hogy az elég hosszú legyen a nyomtató
kihúzásához papírbetöltés esetén.
30
Csatlakoztassa a nyomtató tápkábelét
a nyomtatóhoz.
31
Vezesse a tápkábelt a lábon keresztül:
Helyezze a kábel végét a felső lyukba
(a), majd húzza ki azt az alsó lyukon
(b) keresztül. A kábelt hagyja lazán,
hogy az elég hosszú legyen a nyomtató
kihúzásához papírbetöltés esetén.
Forgassa vissza a lyukak fedelét, majd
húzza újra szorosra a csavarokat (c).
32
Csatlakoztassa a nyomtató tápkábelét
egy elektromos aljzathoz (a), majd
kapcsolja be a nyomtatót (b).
33 34 35 36
a
a
b
c
Lelógó
rész
Lógás
Hagyja lazán a kábelt,
hogy papírcseréhez
ki lehessen húzni
a készüléket
A HP DesignJet T1120 lapolvasó
összeszerelése ezzel befejeződött.
A készüléknek az ábrán látható
módon kell kinéznie.
Csatlakoztassa a nyomtatót
a lapolvasóhoz az USB-kábel
segítségével. A kábelt hagyja lazán,
hogy elég hely legyen a nyomtató
kihúzására papírbetöltés esetén.
Csatlakoztassa a nyomtató hálózati
kábelét a nyomtatóhoz. Megjegyzés:
a lapolvasónak csak egy hálózati kábel
tartozéka; a nyomtatóhoz egy másik
hálózati kábelre lesz szükség.
Learning Products Barcelona - Hewlett-Packard Company
Page 39

b
b
37
Vezesse át a táphosszabbító kábelt a
lábon keresztül: Helyezze a kábel végét
a felső lyukba (a), majd húzza ki azt
az alsó lyukon (b) keresztül. Forgassa
vissza a lyukak fedelét, majd húzza újra
szorosra a csavarokat (c).
Csatlakoztassa a táphosszabbító kábel
csatlakozós végét a lapolvasóhoz.
38
Csatlakoztassa a lapolvasó tápkábelét
a lapolvasó táphosszabbító kábeléhez.
39
Csatlakoztassa a lapolvasó tápkábelét
egy elektromos aljzathoz (a), majd
kapcsolja be a lapolvasót (b).
40
A lapolvasó képernyője bekapcsol,
és végigvezeti a rendszertelepítési
eljáráson. Először a képernyőt kell
kalibrálni. Érintse meg a sarkokban
megjelenő nyilakat. A képernyő
kalibrálásának befejezéséhez érintse
meg a középső párbeszédpanelt.
41 42 43 44
Rendszertelepítés
Csatlakoztassa a lapolvasó hálózati
kábelét a lapolvasóhoz.
Vezesse át a hálózati kábelt a lábon
keresztül: a lyukak fedelén lazítsa
meg az alsó csavart, majd forgassa
el a fedeleket a lyukakról (a). Helyezze
a hálózati kábel nem csatlakoztatott
végét a felső lyukba (b), majd húzza
ki azt az alsó lyukon (c) keresztül.
Csatlakoztassa a hálózati kábelt
egy aljzatba.
a
c
c
a
b
a
a
b
c
Learning Products Barcelona - Hewlett-Packard Company
Page 40

IDEIGLENES
NEM A VÉGSŐ KÉP
IDEIGLENES
NEM A VÉGSŐ KÉP
IDEIGLENES
NEM A VÉGSŐ KÉP
45
49
A rendszer most már az összes szükséges
információval rendelkezik, és megjeleníti
a Copy (Másolás) képernyőt.
Adjon meg egy vagy több kezdeti célt (elérhető
hálózati mappát) a beolvasott fájloknak: Cél
beállításához nyomja meg az Add (Hozzáadás)
gombot. Adjon meg egy címkét, adja meg a
mappa teljes hálózati elérési útját, majd adja
meg a bejelentkezési adatokat. Jelölje meg
a „Remember” (Jegyezze meg) négyzetet, ha
azt szeretné, hogy a készülék a kikapcsolás
után is megjegyezze a jelszót.
A megadott adatok ellenőrzéséhez
nyomja meg a Test Connection (Kapcsolat
ellenőrzése) gombot. A kívánt beállítások
megadása után nyomja meg az OK gombot.
További célok megadásához ismételje meg a
49–50. lépést. MEGJEGYZÉS: Ha csak USBkapcsolatra végez lapolvasást, a Megszakítás
gomb lenyomásával ugorja át ezt a lépést.
Később is megadhat további célhelyeket.
46
50
A lapolvasó további használatával
kapcsolatban lásd az online súgót.
Ez az érintőképernyőről érhető el.
47
51
48
52
Megjegyzések és tanácsok
Állítsa be a helyi dátumot és időt.
A helyi időzóna és nappali időszak
a GMT időzónához képest kerül
beállításra.
Fogadja el a licencszerződést. A helyi hálózathoz történő
csatlakozáshoz adja meg a hálózati
beállításokat. Automatikus beállításhoz
válassza ki a DHCP lehetőséget (DHCP-
szerverrel ellátott hálózat esetén), vagy
adja meg kézzel a megfelelő IP-címet.
Válassza ki a szoftveres kezelőfelület
nyelvét.
Learning Products Barcelona - Hewlett-Packard Company
Page 41

53
A rendszer újbóli beállításakor és
telepítésekor ezek az utasítások ismét
hasznosak lehetnek.
Õrizze meg ezt a dokumentumot
Learning Products Barcelona - Hewlett-Packard Company
Page 42

Learning Products Barcelona - Hewlett-Packard Company
 Loading...