


Hobart HRO101 Installation Manual

HRO SERIES
ROTISSERIE OVENS &
I
N
S
T
R
U
C
T
I
O
N
S
HRW SERIES
ROTISSERIE OVENS WITH WARMERS
MODELS
HRO101 ML-43775
HRO330 ML-43869
HRO550 ML-43871
HRW101 ML-43777
HRW330 ML-43870
HRO330P ML-43888
HRO550P ML-43889
HRW330P ML-43890
HRO220 ML-114635
HRW220 ML-114641
HRO220P ML-114903
HRW220P ML-114904
701 S. RIDGE AVENUE
TROY, OHIO 45374-0001
937 332-3000
www.hobartcorp.com
– 1 –
FORM 33669 Rev. A (June 2000)

Models HRO101 and HRO220 Oven
Model HRO330 Oven
Models HRW101 and
HRW220 Oven/Warmer
© HOBART CORPORATION, 1992
Model HRO550 Double Oven
Model HRW330 Oven/Warmer
– 2 –

Installation, Operation and Care of
HRO & HRW SERIES ROTISSERIE OVENS
SAVE THESE INSTRUCTIONS
GENERAL
The HRO and HRW Series Rotisserie Ovens and Warmers feature stainless steel interior and
exterior for ease of cleaning. Rotating, self-basting spits or flat baking racks and combination
convection and radiant heat provide thorough cooking and even browning yet eliminate hot spots.
The grease drawer has a drain plug for elimination of excess fat and can be completely removed
for cleaning. Oven controls provide “Manual” or “Automatic” (timer controlled) operation where the
END TIME or PROCESS TIME can be preset. Models HRO220P, HRW220P, HRO330P, HRW330P and
HRO550P provide programmable controls. Tempered glass doors, both front and back, and quartz
lighting promote visual appeal and stimulate customer interest. Doors can be rehinged — contact
your local Hobart service office.
HRW Series have a single compartment upper oven and a lower warming cabinet. The warming
cabinet features low velocity, high humidity air circulation which keeps foods moist. The warming
cabinet has three shelves.
Ovens come in two sizes, with or without warming cabinet below.
HRO101 — oven capacity: four spits (16 chickens).
HRO220 — oven capacity: five spits (20 chickens).
HRO330 — large oven capacity: seven spits (35 chickens).
HRW101— HRO101 oven with W101 warming cabinet below.
HRW220— HRO220 oven with W220 warming cabinet below.
HRW330— HRO330 oven with W330 warming cabinet below.
HRO550 — two HRO330 ovens, stacked.
Features and Options
Quantity Required per Oven*
Spit Basket Turkey Spit Baking Plate Chicken Rack Warmer Shelves
HRO101 4 opt. 4 opt. 1 opt. 4 opt. NA NA
HRO220 5 opt. 5 opt. 1 opt. 5 opt. NA NA
HRO330 7 opt. 7 opt. 1 opt. NA 7 opt. NA
HRO550 14 opt. 14 opt. 2 opt. NA 14 opt. NA
HRW101 4 opt. 4 opt. 1 opt. 4 opt. NA 3 std.
HRW220 5 opt. 5 opt. 1 opt. 5 opt. NA 3 std.
HRW330 7 opt. 7 opt. 1 opt. NA 7 opt. 3 std.
* Rotisserie inserts can be intermixed requiring less than the maximum shown in the chart.
– 3 –
INSTALLATION
Immediately after unpacking the oven, check for possible shipping damage. If the oven is found
to be damaged after unpacking, save the packaging material and contact the carrier within 15 days
of delivery.
Prior to installation, test the electrical service to assure that it agrees with the specifications on the
machine data plate located on the right side panel near the controls.
HRO550 and HRW330 are secured to the skid with four screws which must be removed.
LOCATION
WARNING: THE OVEN SHOULD NOT BE ACCESSIBLE TO THE CUSTOMER. HOT GLASS AND
PARTS CAN CAUSE BURNS.
The oven may be placed where cooking may be observed to enhance customer awareness. The
oven must be installed on a level surface. A minimum clearance of 10" from the rear, 10" from any
glass, and 4" from each side panel must be maintained. The installation location must allow
adequate clearances for servicing and for proper operation of the front and rear doors.
LEGS / CASTERS
1
Counter models, HRO101, HRO220 and HRO330, are furnished with 1
/2" legs. HRO550,
HRW101, HRW220 and HRW330 are furnished with 2 swivel and 2 locking swivel casters.
ASSEMBLY
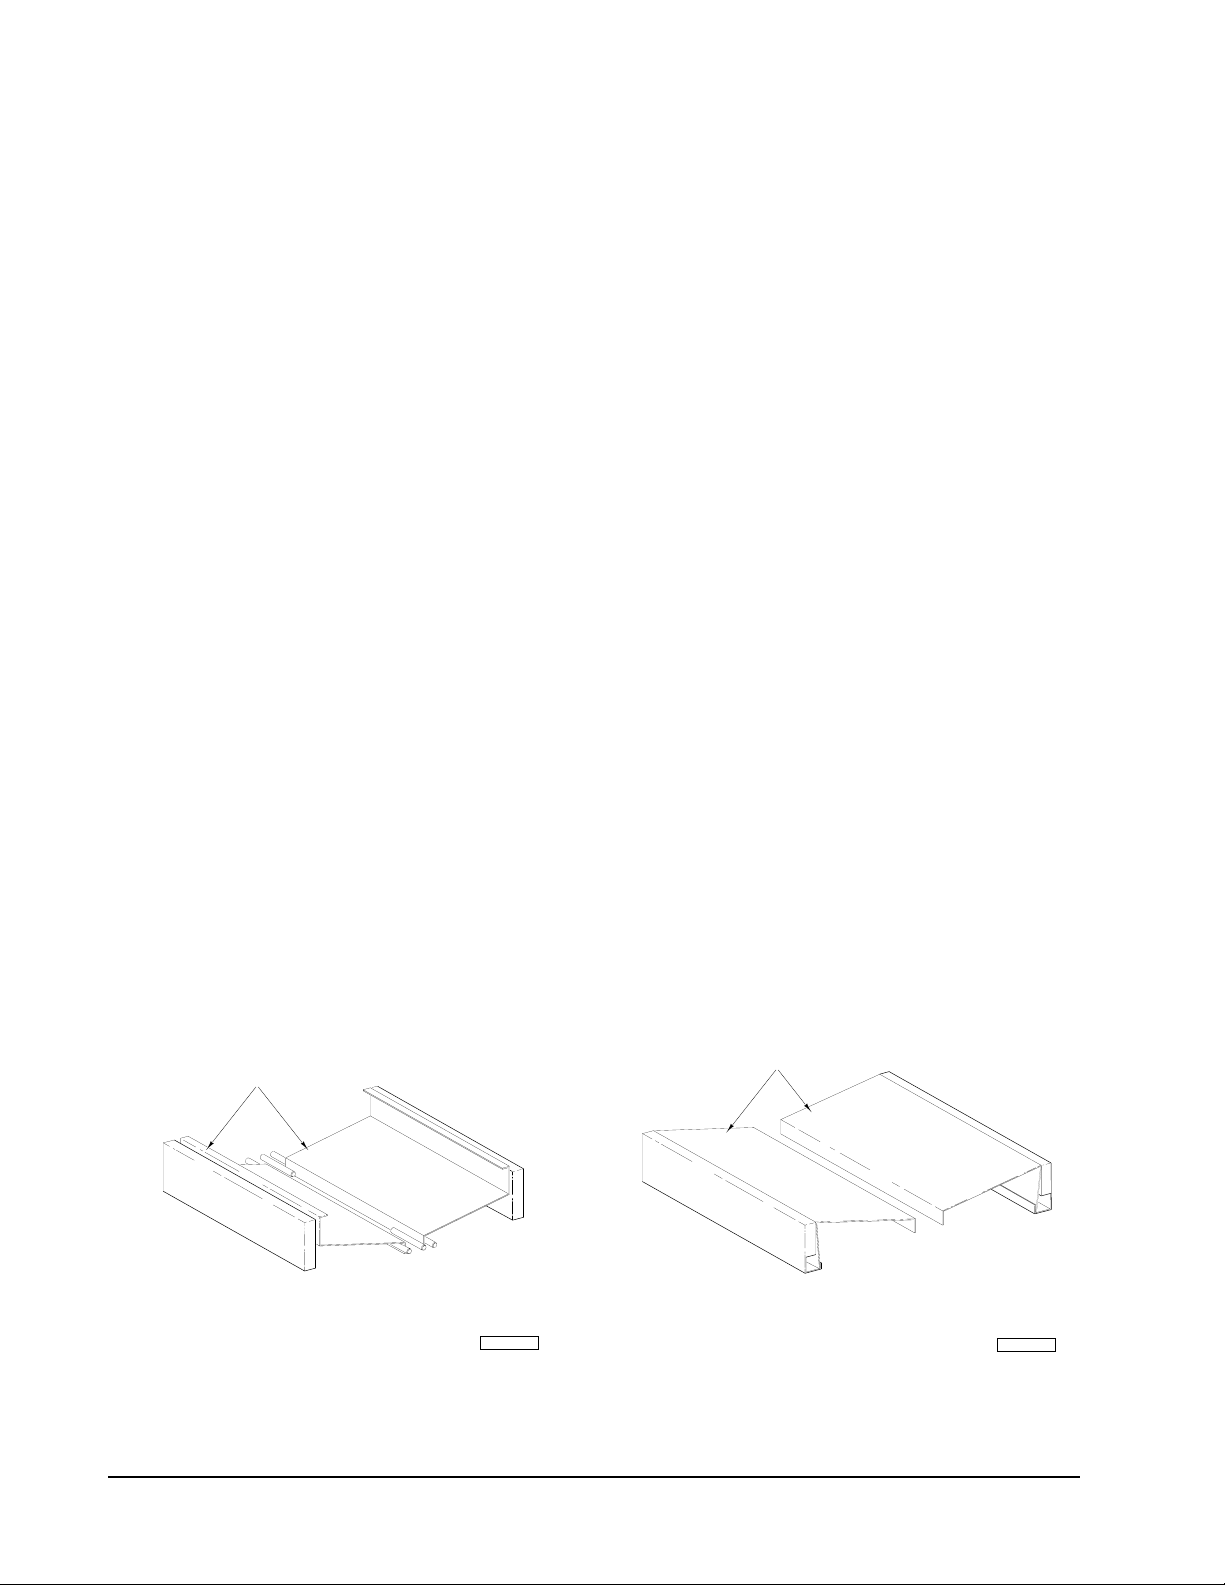
Place the two bottom plates in the oven. The two plates slant to the middle to allow fat to drip into
the grease drawer (Figs.1, 2).
Bottom Plates
Bottom Plates
Model HRO101/HRO220 Model HRO303
Model HRO101
Fig. 1
PL-50803
– 4 –
Model HRO303
Fig. 2
PL-50804

ELECTRICAL CONNECTIONS
WARNING: ELECTRICAL AND GROUNDING CONNECTIONS MUST COMPLY WITH THE
APPLICABLE PORTIONS OF THE NATIONAL ELECTRICAL CODE AND/OR OTHER LOCAL
ELECTRICAL CODES.
WARNING: DISCONNECT ELECTRICAL POWER SUPPLY AND PLACE A TAG AT THE
DISCONNECT SWITCH INDICATING THAT YOU ARE WORKING ON THE CIRCUIT.
Access the electrical connection point by removing the right side panel. Comply with the
appropriate wiring diagram attached to the oven. Electrical supply cord and plug should be
supplied by installer. Replace right side panel.
ELECTRICAL DATA
MODEL VOLTS HERTZ PHASE CIRCUIT SIZE*
(AMPS)
HRO101 208 60 1 35
& 208 60 3 20
HRO220 240 60 1 35
240 60 3 20
HRO330 208 60 1 60
208 60 3 35
240 60 1 60
240 60 3 35
HRO550 208 60 3 70
240 60 3 70
HRW101 208 60 1 50
& 208 60 3 30
HRW220 240 60 1 50
240 60 3 30
HRW330 208 60 3 50
240 60 3 45
* Maximum Circuit Breaker Size / Minimum Circuit Amperage compiled in accordance with the
National Electrical Code, 1990 edition.
BEFORE FIRST USE
WARNING: UNPLUG BEFORE CLEANING.
Before using the oven for the first time, it must be “burned in” to release any odors that might result
from heating the new surfaces in the oven.
Clean the oven, accessories and warmer (if present), both inside and outside, with warm soapy
water. Rinse thoroughly and wipe dry with a soft clean cloth. Avoid water contact with the quartz
lamps.
Operate the oven at the maximum temperature setting of 450°F for four hours. Smoke with an
unpleasant odor will normally be given off during this burn-in period.
– 5 –
 Loading...