


PFG-600
Table of contents
 Loading...
44--HHeeaadd GGaass
PPrreessssuurree FFrryyeerrss
SERVICE
MANUAL
MODEL 600
FM06-009D


Table of Contents
Safety and Compliance................................................................................................ ix
Chapter 1 Troubleshooting..............................................................................................1
1.1 Introduction ...........................................................................................................1
1.2 Diagnostics............................................................................................................1
Chapter 2 Maintenance ................................................................................................13
2.1 Introduction .........................................................................................................13
2.2 Maintenance Hints ...............................................................................................13
2.3 Preventative Maintenance Schedule......................................................................13
2.4 Lower the Control.................................................................................................14
2.4.1 Raise the Control ........................................................................................... 14
2.4.2 Replace the Control ....................................................................................... 14
2.4.3 Configure the Serial Number...........................................................................15
2.4.3.1 Verify the Serial Number ............................................................................. 15
2.4.3.2 Adding or Correcting a 9 Character Serial Number........................................ 16
2.4.3.3 Adding or Correcting a 7 Character Serial Number........................................ 17
2.5 Transformer Replacement ....................................................................................17
2.6 Temperature Probe Replacement ..........................................................................18
2.7 Temperature Regulation (Single Stage) .................................................................20
2.7.1 Front Panel Thermostat..................................................................................20
2.7.2 Internal Operation ..........................................................................................20
2.7.3 Drain Microswitch ..........................................................................................21
2.7.4 High Limit Temperature Control .......................................................................21
2.8 Calibrating The Standard Single Stage Thermostat.................................................21
2.9 Testing The Thermostat ........................................................................................ 21
2.9.1 Procedure .....................................................................................................21
2.10 Thermostat Replacement....................................................................................22
2.11 High Temperature Limit Control ...........................................................................25
2.11.1 Description ..................................................................................................25
2.11.2 Checkout ..................................................................................................... 26
2.11.3 Replacement ...............................................................................................26
2.12 Gas Burner Assembly.........................................................................................28
2.12.1 Description ..................................................................................................28
2.12.2 Safety Precautions ....................................................................................... 29
2.12.3 Replacement ...............................................................................................29
2.13 Thermocouple.................................................................................................... 31
2.13.1 Description ..................................................................................................31
2.13.2 Safety Precautions ....................................................................................... 32
2.13.3 Replacement ...............................................................................................32
2.14 Gas Control Valve .............................................................................................. 33
2.14.1 Description ..................................................................................................33
2.14.2 Safety Precautions ....................................................................................... 33
2.14.3 Operator Replacement .................................................................................33
2.14.4 Regulator Spring Replacement ..................................................................... 35
2.14.5 Adjusting Pilot Burner ................................................................................... 35
2.14.6 Adjusting Regulator......................................................................................36
Contents
i

2.15 Electrical Components........................................................................................37
2.16 Timing Control ...................................................................................................42
2.17 Pressure Regulation/Exhaust..............................................................................45
2.18 Filtering System ................................................................................................. 68
Contents
2.15.1 Fan .............................................................................................................38
2.15.2 Drain Switch ................................................................................................ 38
2.15.2.1 Gas Models..............................................................................................38
2.15.3 Main Power Switch....................................................................................... 39
2.15.4 Continuity Check Procedure..........................................................................40
2.15.5 Replacement ...............................................................................................40
2.15.6 Indicator Lights ............................................................................................41
2.15.7 Fuse Holder.................................................................................................41
2.15.8 Checking Procedure For Fuses ..................................................................... 41
2.15.9 Cord & Plug Check.......................................................................................41
2.15.10 Wall Receptacle (Voltage Check)................................................................. 41
2.15.10.1 Gas Models............................................................................................41
2.16.1 Description ..................................................................................................42
2.16.2 Checking Procedure..................................................................................... 42
2.16.3 Replacement ...............................................................................................43
2.16.4 Timer Light ..................................................................................................44
2.16.5 Buzzer Coil..................................................................................................44
2.16.6 Timer Switch ................................................................................................ 45
2.17.1 Solenoid Valve .............................................................................................45
2.17.2 Coil Check Procedure................................................................................... 45
2.17.3 Replacement ...............................................................................................46
2.17.4 Deadweight Valve ........................................................................................51
2.17.5 Cleaning Steps ............................................................................................51
2.17.6 Removal & Cleaning of Safety Relief Valve ....................................................52
2.17.7 Pressure Gauge........................................................................................... 52
2.17.7.1 Calibration Steps ......................................................................................52
2.17.7.2 Cleaning Steps.........................................................................................53
2.17.8 Condensation Box Assembly ........................................................................53
2.17.9 Condensation Box Bottom Removal .............................................................. 54
2.17.10 Lid Cover Assembly.................................................................................... 55
2.17.10.1 Description.............................................................................................55
2.17.10.2 Lid Cover Removal .................................................................................55
2.17.10.3 Lid Cover Installation .............................................................................. 56
2.17.11 Lid Hinge Spring......................................................................................... 56
2.17.12 Latch Spring Installation.............................................................................. 57
2.17.13 Lid Liner .................................................................................................... 60
2.17.14 Reversing The Lid Gasket...........................................................................60
2.17.14.1 Purpose .................................................................................................60
2.17.14.2 Process .................................................................................................61
2.17.15 Lid Limit Stop Adjustment ...........................................................................62
2.17.16 Spindle Screw Assembly ............................................................................63
2.18.1 Filter Rinse Hose .........................................................................................68
2.18.2 Removal......................................................................................................69
2.18.3 Installation ...................................................................................................69
2.18.4 Filter Valve Description .................................................................................69
2.18.5 Removal......................................................................................................70
2.18.6 Filter Pump Repair ....................................................................................... 70
2.18.7 Cover Removal ............................................................................................ 70
ii

2.18.8 Pump Removal ............................................................................................ 71
2.18.9 Filter Pump Motor Protector - Manual Reset ................................................... 73
2.19 Gas Conversion ................................................................................................. 73
2.19.1 Service Hints ............................................................................................... 73
2.19.2 Maintenance................................................................................................74
2.20 Wiring Diagrams ................................................................................................ 75
2.21 Caster Replacement Procedure.......................................................................... 75
2.22 Solenoid Valve ................................................................................................... 75
2.22.1 Replace Solenoid Valve Assembly................................................................. 76
Chapter 3 Parts Information ..........................................................................................79
3.1 Introduction .........................................................................................................79
3.2 Genuine Parts...................................................................................................... 79
3.3 How To Find Parts ................................................................................................ 79
3.4 Sub-Assemblies................................................................................................... 80
3.5 How To Order Parts ..............................................................................................81
3.6 Prices..................................................................................................................81
3.7 Delivery...............................................................................................................82
3.8 Warranty ............................................................................................................. 82
3.9 Recommended Spare Parts For Distributors ..........................................................82
3.10 Parts and Illustrations ......................................................................................... 83
Chapter 4 C8000 Replacement Parts ........................................................................... 175
4.1 Controls and Decals ........................................................................................... 175
4.2 600 Series Gas Control Valve ............................................................................. 177
4.3 600 Series Gas Components ..............................................................................178
4.4 Rear Panel Wiring Connection Decal ................................................................... 180
4.5 600 230v 50/60Hz. 1PH...................................................................................... 181
4.6 600 208-240v 50/60Hz. 1PH ............................................................................... 182
4.7 600 120v 50/60Hz. 1PH...................................................................................... 183
4.8 600 120v 50/60Hz. 1PH...................................................................................... 184
4.9 600 208-240v 50/60Hz. 1PH ............................................................................... 185
Chapter 5 Pressure Assist Features and Function ......................................................... 187
5.1 Software............................................................................................................ 187
5.1.1 C8000 Controller.......................................................................................... 187
Chapter 6 Programming ............................................................................................. 189
Chapter 7 Wiring Diagrams.......................................................................................... 197
7.1 600 GF, 120v, 60Hz, 1P, STD IGN (63240H) ........................................................197
7.2 600 GF, 240v, 50Hz, 1P, SI (55318A) ................................................................... 198
7.3 600 GF, 120v, 60Hz, 1P, EI (34389C)................................................................... 199
7.4 600 GF, 120-240v, 50/60Hz, 1P, STD IGN (63694L) (Before AN0702112)............... 200
7.5 600 GF, 120-240v, 50/60Hz, 1P, ESI (75555B) (AN0703021-11029-Shaw) ............. 201
7.6 600 GF, 120-240v, 50/60Hz, 1P, ESI (75555E) (After AN0703021-Fenwal) ............. 202
7.7 600 GF, 120v, 50/60Hz, 1P, ESI (67152C) (After AN0703021 use 75555) ............... 203
7.8 600 GF, 208-240v, 50/60Hz, 1P, ESI (69076C) (After AN0703021 use
75555) ..............................................................................................................204
7.9 600 GF, 230v, 50Hz, 1P (34807K) (Before AN0702112) ........................................ 205
7.10 600 GF, 230v, 50Hz, 1P, SSI (75556B) (AN0703021-711029-Shaw)..................... 206
7.11 600 GF, 230v, 50Hz, 1P, SSI (75556D) (After AN0711030-Fenwal).......................207
7.12 600 GF, C1000 & 2000, 100/120v, 50/60Hz, 1P, 24v, SSI (78558D)...................... 208
7.13 600 GF, C1000 & 2000, 230v, 50Hz, 1P, 24v, 24v SSI (80221B) ........................... 209
7.14 600 EF, LVC, 120v, 50/60Hz, 1P (68598B) ......................................................... 210
Contents
iii

7.16 600 C/C EF, 120v, 50/60Hz, 1P, ESI (67199J) (After AN0711030-Fenwal) ............212
7.17 600 C/C EF, 208-240v, 50/60Hz, 1P (32759G) .................................................... 213
7.18 600 C/C EF, 208-240v, 50/60Hz, 1P, ESI (67204E) .............................................214
7.19 600 C/C EF, LVC, 208-240v, 50/60Hz, 1P (68614B) ............................................ 215
7.20 600 C/C EF, LVC, 230v, 50/60Hz, 1P (68615B) ................................................... 216
7.21 600 GF, 100-240v 50/60 Hz, 1P (63357N) (Before AN0702112)...........................217
7.23 600 GF, 100-240v, 50/60Hz, 1P, SSI (75510) (After AN0711030-Fenwal).............. 219
7.24 600 EF, 230v, 50/60Hz, 1P (63358N) (Before AN0702112) .................................. 220
7.25 600 EF, 230v, 50/60Hz, 1P, SSI (75511C) (AN0703021-0711029-Shaw)...............221
7.26 600 EF, 230v, 50/60Hz, 1P, SSI (75511F) (After AN0711030-Fenwal)................... 222
7.27 600 EF, 120v, 50/60Hz, 1P (23457F) (After AN0703021 use 75510)..................... 223
7.28 600 SC GF, 120v, 60Hz, 1P, Dual Thermostat (17353F) ...................................... 224
7.29 600 SMS EF, 100-240v, 50/60Hz, 1P, SMS, SSI (75190D)................................... 225
Chapter 8 Annual Inspection........................................................................................ 229
8.1 Henny Penny Start-Up Provider Information......................................................... 229
8.2 Store Information ...............................................................................................229
8.3 Equipment Information ....................................................................................... 229
8.4 Signatures......................................................................................................... 229
8.5 Checklist ........................................................................................................... 229
8.6 Inspect the Fry Pot ............................................................................................. 234
8.7 Inspect the Casters and Frame ........................................................................... 235
8.8 Inspect the Power Cord ...................................................................................... 235
8.9 Inspect the Gas Hose and Connection ................................................................. 236
8.10 Inspect the Flue ............................................................................................... 236
8.11 Inspect the Condensation Box ........................................................................... 237
8.12 Inspect the Solenoid and Deadweight Plumbing .................................................238
8.13 Inspect the Drain Switch ...................................................................................240
8.14 Test the Filtration System .................................................................................. 240
8.15 Inspect the Drain Pan ....................................................................................... 241
8.16 Inspect the High Limit ....................................................................................... 241
8.17 Inspect the Temperature Probe ......................................................................... 242
8.18 Inspect the Burner............................................................................................ 243
8.19 Inspect for Oil Leaks......................................................................................... 245
8.20 Test Pressure Regulator ...................................................................................246
8.21 Inspect Deadweight.......................................................................................... 247
8.22 Inspect Latch, Catch and Spring........................................................................ 248
Contents
8.23 Inspect Cross Arm Component.......................................................................... 250
8.24 Lubricate Cross Arm Components ..................................................................... 253
7.15 600 C/C EF, 120v, 50/60Hz, 1P, Wendy’s FPS, ESI (67199G) (AN0703021-
711029-Shaw) ................................................................................................... 211
7.22 600 GF, 100-240v 50/60 Hz, 1P, SSI (75510C) (AN0703021-0711029-
Shaw) ...............................................................................................................218
7.30 600 SMS EF, 230v, 50Hz, 1P, SMS, SSI (75512B) (AN0703021-711029-
Shaw) ...............................................................................................................226
7.31 600 SMS EF, 230v, 50Hz, 1P, SMS, SSI (75512F) (After AN0711030-
Fenwal)............................................................................................................. 227
8.12.1 Clean the Dead Weight Plumbing ................................................................ 238
8.12.2 Clean the Solenoid Plumbing ...................................................................... 239
8.18.1 Clean the Burner Jets................................................................................. 243
8.18.2 Clean the Pilot Assembly ............................................................................ 244
8.19.1 Plumbing Leaks in Filtration ........................................................................ 245
8.19.2 Plumbing Leaks During Cooking .................................................................246
iv

8.25 Pressure Regulation and Exhaust System.......................................................... 254
8.25.1 Clean the Lid Liner .....................................................................................254
8.25.2 Reverse the Lid Gasket ..............................................................................255
8.25.3 Adjust the Lid Limit Stop ............................................................................. 255
8.25.4 Removal and Cleaning of Safety Relief Valve ............................................... 256
8.25.5 Pressure Gauge Calibration ........................................................................ 257
8.25.6 Coil Check Procedure................................................................................. 258
8.25.7 Locking Pin Test Procedure ........................................................................ 258
Contents
v

List of Tables
Table 1-1 Troubleshooting..................................................................................................1
Table 2-1 Preventative Maintenance Schedule .................................................................. 13
Table 2-2 Gas Control Valve Check Procedures .................................................................34
Table 2-3 Continuity Check Procedure - Off Position .......................................................... 40
Table 2-4 Continuity Check Procedure - Power Position ..................................................... 40
Table 2-5 Continuity Check Procedure - Pump Position ......................................................40
Table 2-6 Checking Procedure - ON/OFF Switch ...............................................................42
Table 2-7 Checking Procedure - Buzzer Coil ......................................................................43
Table 2-8 Checking Procedure - Microswitch ..................................................................... 43
Table 2-9 Checking Procedure - Motor ..............................................................................43
Table 2-10 Checking Procedure - Reset Coil......................................................................43
Table 2-11 Coil Check Procedure ......................................................................................46
Table 3-1 KFC SMS-20 Controls & Spare Parts .................................................................87
Table 3-2 Fast Control Panel ............................................................................................ 95
Table 3-3 Hybrid Control Panel .........................................................................................96
Table 3-4 Filter Screen Kits ............................................................................................ 144
Table 3-5 Table 1 ........................................................................................................... 167
Table 3-6 Table 2 ........................................................................................................... 167
Table 6-1 Programming.................................................................................................. 189
Figure 2-1 Thermostat Test Points .................................................................................... 22
Figure 2-2 Thermostat Sensing Bulb - Gas ........................................................................ 22
Figure 2-3 Thermostat & Control Panel Diagram ................................................................23
Figure 2-4 Screw Nut Assembly........................................................................................ 24
Figure 2-5 High Limit Reset Button - Gas........................................................................... 25
Figure 2-6 High Limit Capillary Tube - Gas ........................................................................27
Figure 2-7 Gas Burner Assembly ......................................................................................28
Figure 2-8 Gas Supply Connection ...................................................................................30
Figure 2-9 Heat Shield Deflector Assembly........................................................................30
Figure 2-10 Pilot & Thermocouple Assembly .....................................................................32
Figure 2-11 Gas Control Valve ..........................................................................................33
Figure 2-12 Regulator Spring Replacement .......................................................................35
Figure 2-13 Pilot Burner ...................................................................................................35
Figure 2-14 Pressure Tap ................................................................................................. 36
Figure 2-15 Adjusting Regulator .......................................................................................37
Figure 2-16 Continuity Check Test Points ..........................................................................40
Figure 2-17 Solenoid Valve Assembly ............................................................................... 46
Figure 2-18 Exhaust Fitting ..............................................................................................49
Figure 2-19 Conduit Fitting ...............................................................................................50
Contents
Figure 2-20 Solenoid Valve Diagram .................................................................................50
List of Figures
vi

Figure 2-21 Latch Spring Assembly ..................................................................................58
Figure 2-22 Lid Cover Screws ..........................................................................................61
Figure 3-1 Computron C1000 Control ............................................................................... 83
Figure 3-2 Wendy’s Computron C2000 Control .................................................................. 85
Figure 3-3 KFC SMS-20 Control .......................................................................................87
Figure 3-4 Fast Control Panel...........................................................................................89
Figure 3-5 Standard Control Panel....................................................................................92
Figure 3-6 Automatic Reset Timer Assembly ..................................................................... 97
Figure 3-7 CFA Original Panel .......................................................................................... 98
Figure 3-8 Electric Conduit Assembly.............................................................................. 100
Figure 3-9 Frame & Cabinet Assembly............................................................................103
Figure 3-10 Lid Components .......................................................................................... 107
Figure 3-11 Complete Lid w/ Crossbar Assembly (with Language Specific Labels) ............. 110
Figure 3-12 Fry Basket .................................................................................................. 112
Figure 3-13 3 Tier Wire Basket ....................................................................................... 114
Figure 3-14 CFA Half-Quarter Size Funnels..................................................................... 116
Figure 3-15 CFA Double Hinged Basket .......................................................................... 117
Figure 3-16 Exhaust Stack Assembly.............................................................................. 118
Figure 3-17 Deadweight Valve Assembly ........................................................................ 122
Figure 3-18 Solenoid Valve Assembly ............................................................................. 124
Figure 3-19 Drain Valve Assembly .................................................................................. 127
Figure 3-20 Lower Filter Plumbing Components............................................................... 129
Figure 3-21 Upper Filter Plumbing Components............................................................... 133
Figure 3-22 Rinse Hose ................................................................................................. 136
Figure 3-23 Filter Motor & Pump ..................................................................................... 137
Figure 3-24 Direct-Connect Assembly - Model 600........................................................... 139
Figure 3-25 Filter Drain Pan & Filter Screen Assembly .....................................................141
Figure 3-26 Supersorb Filter Assembly (Before 3–1–02)................................................... 145
Figure 3-27 Supersorb Filter Assembly (3–1–02 & After) ..................................................148
Figure 3-28 Contactor & Frame Assembly (Single Phase Electric Model)...........................150
Figure 3-29 Contactor & Frame Assembly (Three Phase Electric Model) ........................... 152
Figure 3-30 Fan & High Temperature Limit Control ........................................................... 154
Figure 3-31 Electronic Ignition Assembly......................................................................... 156
Figure 3-32 Vat (frypot) & Gas Burner Assy - Non-CE, Domestic, & Electric Ignition............ 158
Figure 3-33 Gas Line & Burner Assembly - CE, International, & Electronic Ignition .............161
Figure 3-34 Gas Control Valve........................................................................................ 165
Figure 3-35 Countertop Insulation Assembly (Gas Model) ................................................ 168
Figure 3-36 Firebox & Flue Assembly (Gas Model) .......................................................... 170
Figure 3-37 Firebox Insulation Assembly (Gas Model)...................................................... 172
Figure 8-1 PFG 600 Weld Locations ............................................................................... 234
Contents
vii

Contents
viii
SSaaffeettyy aanndd CCoommpplliiaannccee
Henny Penny fryers have many safety features incorporated. However, the only way
to ensure safe operation is to fully understand the proper installation, operation, and
maintenance procedures. The instructions in this manual have been prepared to aid
you in learning the proper procedures. Where information is of particular importance
or is safety related, the words DANGER, WARNING, CAUTION, or NOTICE are used.
Their usage is described as follows:
DDAANNGGEERR!! indicates hazardous situation which, if not
avoided, will result in death or serious injury.
DDAANNGGEERR!!
WWAARRNNIINNGG!!
CCAAUUTTIIOONN!!
NOTICE
WWAARRNNIINNGG!! indicates hazardous situation which, if not
avoided, could result in death or serious injury.
CCAAUUTTIIOONN!! indicates hazardous situation which, if not
avoided, could result in moderate or minor injury.
NOTICE
regarding property damage.
is used for information considered important
Preface
ix

These are the original version controlled Henny Penny instructions for Pressure Fryer
Gas (PFG) model 600 (PFG 600).
This manual is available on the Henny Penny Public website (www.hennypenny.com).
Read these instructions completely prior to installation and operation of this appliance
to ensure compliance to all required installation, operation and safety standards. Read
and obey all safety messages to avoid damage to the appliance and personal injury.
• TThhiiss ffrryyeerr mmuusstt bbee iinnssttaalllleedd aanndd uusseedd iinn aa wwaayy tthhaatt
wwaatteerr ddooeess nnoott ccoonnttaacctt tthhee ooiill wwhhiicchh ccaann ccaauussee
ssppllaasshhiinngg aanndd bbooiilliinngg oovveerr ooff ooiill aanndd sstteeaamm lleeaaddiinngg
ttoo ppeerrssoonnaall iinnjjuurryy;; eexxcclluuddeess nnoorrmmaall pprroodduucctt
mmooiissttuurree..
• BBuurrnn rriisskk!! DDoo nnoott mmoovvee tthhee ffrryyeerr oorr ffiilltteerr ddrraaiinn ppaann
wwhhiillee ccoonnttaaiinniinngg hhoott ooiill.. PPeerrssoonnaall iinnjjuurryy oorr sseerriioouuss
bbuurrnnss ccaann rreessuulltt ffrroomm ssppllaasshhiinngg hhoott ooiill..
This appliance is intended for commercial use in kitchens of restaurants, bakeries,
hospitals, etc. but not for the continuous mass production of food such as in a factory
setting. During use the units airborne A-weighted emission sound pressure is below
70 db(A). All repairs must be performed by the manufacturer, its service agent or
similarly qualified persons in order to avoid a hazard.
Always use strain relief. The provided power cord must be installed with a strain relief
in a way that if the strain relief fails, wires L1, L2, L3 and N must draw taunt and fail
first. If the supplied power cord or an existing one becomes damaged, do not use it;
rather, replace it with a known good power cord. The power cord must be replaced by
the manufacturer, its service agent or similarly qualified persons in order to avoid a
hazard.
Proper daily, weekly, monthly, quarterly and yearly maintenance must be performed
on this appliance to ensure safe and continuous operation. This appliance must never
be cleaned with a water jet or steam cleaning tool. Cleaning brushes are shipped with
the appliance and proper cleaning instructions are included in this manual.
Proper maintenance also increases the usable life of the appliance and oil, which
reduces lifetime operating costs. Additionally, old oil increases the possibility of surge
boiling and fire due to the reduced flash point of the oil. The oil temperature must
never exceed 450⁰ F (230⁰ C).
This appliance is not intended for use by persons (including children) with reduced
physical, sensory or mental capabilities, or lack of experience and knowledge, unless
they have been given supervision or instruction concerning use of the appliance by a
Preface
x

person responsible for their safety. Children should be supervised to ensure that they
do not play with the appliance.
This appliance is not intended to be operated by means of an external timer or a
separate remote control system.
This appliance must be installed in accordance with the manufacturer’s instructions
and the regulations in force and only used in suitably ventilated location. Read the
instructions fully before installing or using the appliance.
This appliance must be installed with suitable ventilation in accordance with the
manufacturer’s instructions and the regulations in force to prevent the occurrence of
unacceptable concentrations of substances harmful to health. Proper air flow is
essential to permit efficient removal of the steam exhaust and frying odors. Air flow for
this model is 33.3 cfm (56.6 m3/h) of air flow.
For gas appliance installations in South Africa, the installation shall be carried out by a
registered installer, and the installation shall comply with requirements of SANS
10087-1 or SANS827 as applicable.
WWAASSTTEE EELLEECCTTRRIICCAALL AANNDD EELLEECCTTRROONNIICC EEQQUUIIPPMMEENNTT ((WWEEEEEE)) As of August
16, 2005, the Waste Electrical and Electronic Equipment directive went into effect for
the European Union. Our products have been evaluated to the WEEE directive. We
have also reviewed our products to determine if they comply with the Restriction of
Hazardous Substances directive (RoHS) and have redesigned our products as
needed in order to comply. To continue compliance with these directives, this unit
must not be disposed as unsorted municipal waste. For proper disposal, please
contact your nearest Henny Penny distributor.
Technical Data For CE Marker Products
Nominal Heat Input (Net): Natural (I
Natural (I
Natural (I
Natural (I
Natural (I
(72,000 Btu/h)
Liquid Propane (I
h)
) = 21.1 kW (72,000 Btu/h)
2H
) = 21.1 kW (72,000 Btu/h)
2E
) = 21.1 kW (72,000 Btu/h)
2E+
) = 21.1 kW (85,000 Btu/h)
2L
2(43.46-45.3 MJ/m3(0°C))
) = 21.1 kW (72,000 Btu/
3P
) = 21.1 kW
Preface
xi

Technical Data For CE Marker Products
Nominal Heat Input (Gross): Natural (I
Natural (I
Natural (I
Natural (I
Liquid Propane (I
h)
Supply Pressure: Natural (I
Natural (I
Natural (I
Natural (I
Liquid Propane (I
Liquid Propane (I
Liquid Propane (I
) = 23.4 kW (80,000 Btu/h)
2H
) = 23.4 kW (80,000 Btu/h)
2E
) = 23.4 kW (80,000 Btu/h)
2E+
) = 23.4 kW (80,000 Btu/h)
2L
) = 22.9 kW (78,000 Btu/
3P
) = 20 mbar (2.0 kPa)
2H
) = 20 mbar
2E
) = 20/25 mbar
2E+
) = 25 mbar
2L
) = 30 mbar
3P
) = 37 mbar
3P
) = 50 mbar
3P
Preface
Test Point Pressure: Natural (I
Natural (I
Natural (I
Natural (I
Liquid Propane (I
Injector Size: Natural (I
Natural (I
Natural (I
Natural (I
Liquid Propane (I
Restrictor Size: Natural (I
) = 8.7 mbar (0.87 kPa)
2H
) = 8.7 mbar
2E
) = 8.7/10 mbar
2E+
) = 10 mbar
2L
) = 25 mbar
3P
) = 1.04 mm
2H
) = 1.04 mm
2E
) = 1.04 mm
2E+
) = 1.04 mm
2L
) = 0.66 mm
3P
) = 4.1 mm
2E+
xii

CChhaapptteerr 11 TTrroouubblleesshhoooottiinngg
11..11 IInnttrroodduuccttiioonn
This section provides troubleshooting information in the form of an easy to read table.
If a problem occurs during the first operation of a new fryer, recheck the installation
per Section 2 Unpacking/Installation of the Operator’s Manual. Before
troubleshooting, always recheck the operating procedure per Section 3 Operating
Instructions of the Operator’s Manual.
11..22 DDiiaaggnnoossttiiccss
To isolate a malfunction, proceed as follows:
11.. Clearly define the problem (or symptom) and when it occurs.
22.. Locate the problem in the troubleshooting table.
33.. Review all possible causes. Then, one-at-a-time, work through the list of
corrections until the problem is solved.
RReeffeerr ttoo tthhee mmaaiinntteennaannccee pprroocceedduurreess iinn CChhaapptteerr 22
WWAARRNNIINNGG!!
MMaaiinntteennaannccee
aarree nnoott ffoolllloowweedd ccoorrrreeccttllyy iinnjjuurriieess aanndd//oorr pprrooppeerrttyy
ddaammaaggee ccaann rreessuulltt..
,, ppaaggee 1133.. IIff mmaaiinntteennaannccee pprroocceedduurreess
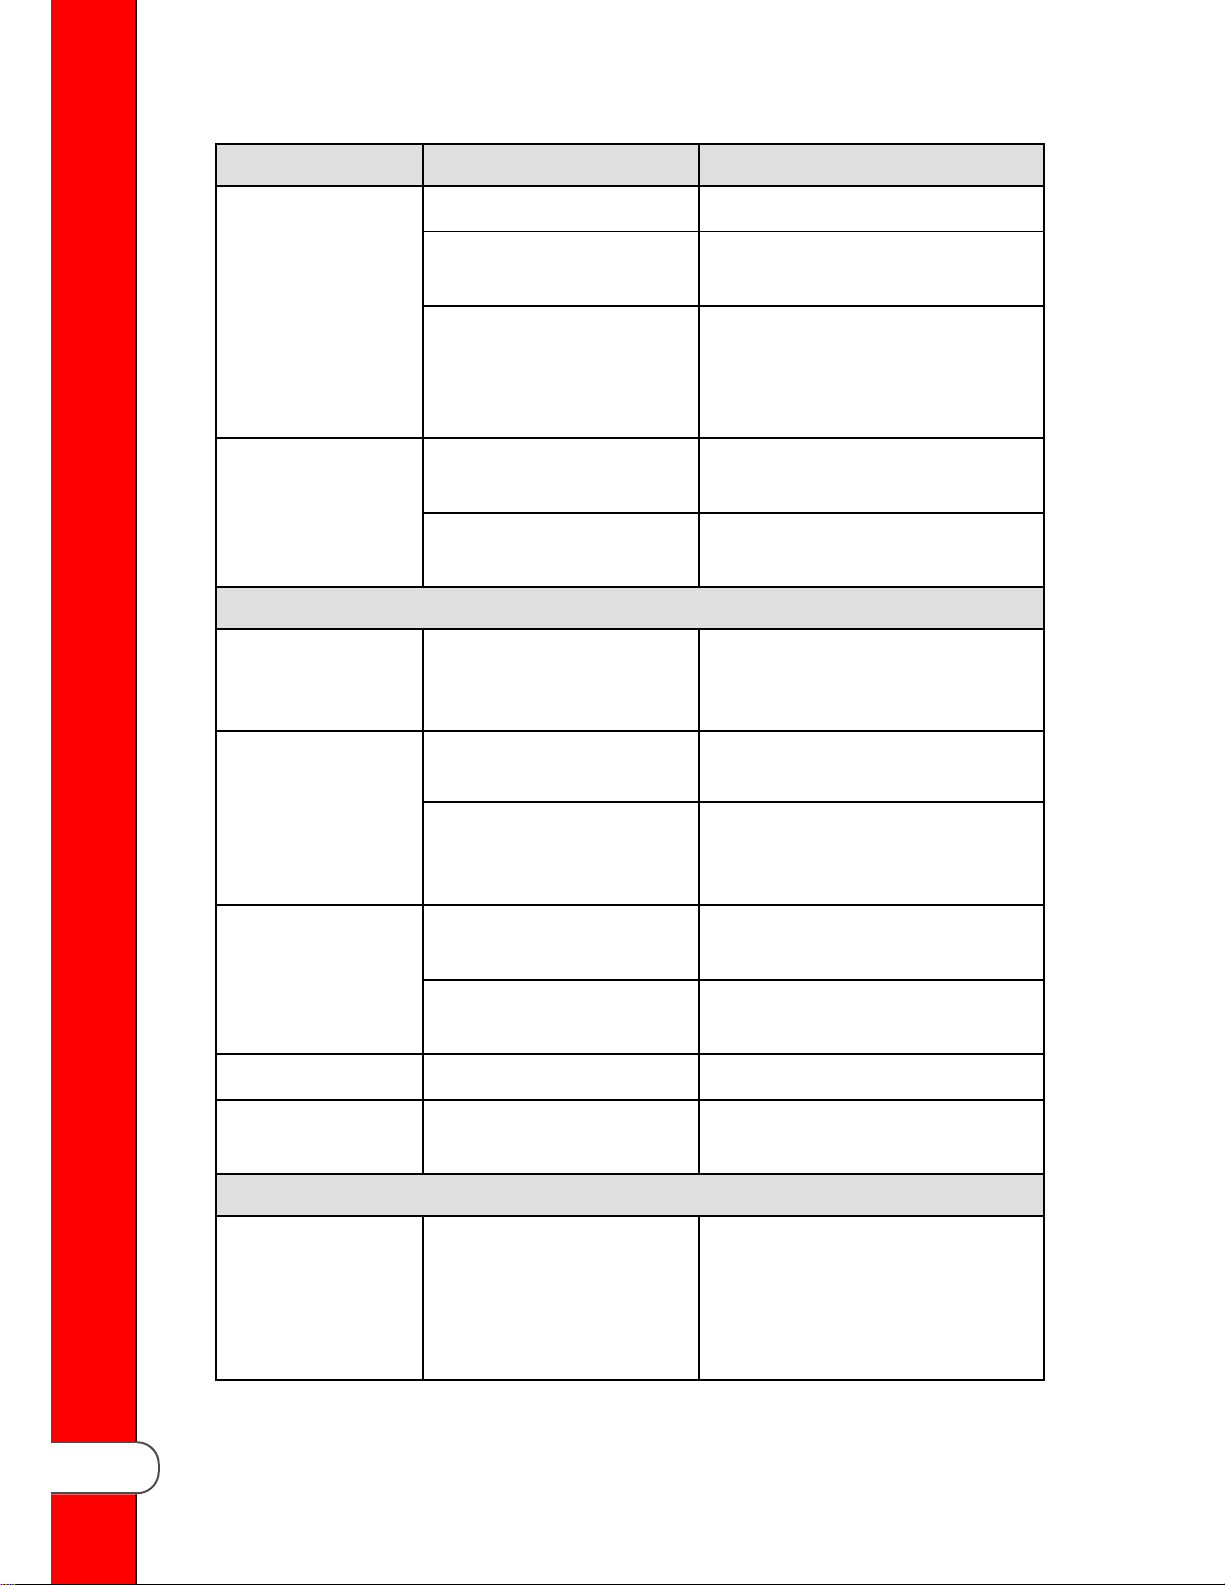
TTaabbllee 11--11 TTrroouubblleesshhoooottiinngg
Problem Cause Correction
CCooookkiinngg SSeeccttiioonn
Product Color Not Correct:
A. Too dark. Temperature too high.
• Reduce thermostat setting.
• Remove and replace defective
thermostat per 2.10
Replacement
Shortening too old. Change shortening.
Shortening too dark.
• Filter shortening.
• Shortening taste test, see the
Operator’s Manual.
• Change Shortening.
Thermostat
, page 22.
Troubleshooting
1
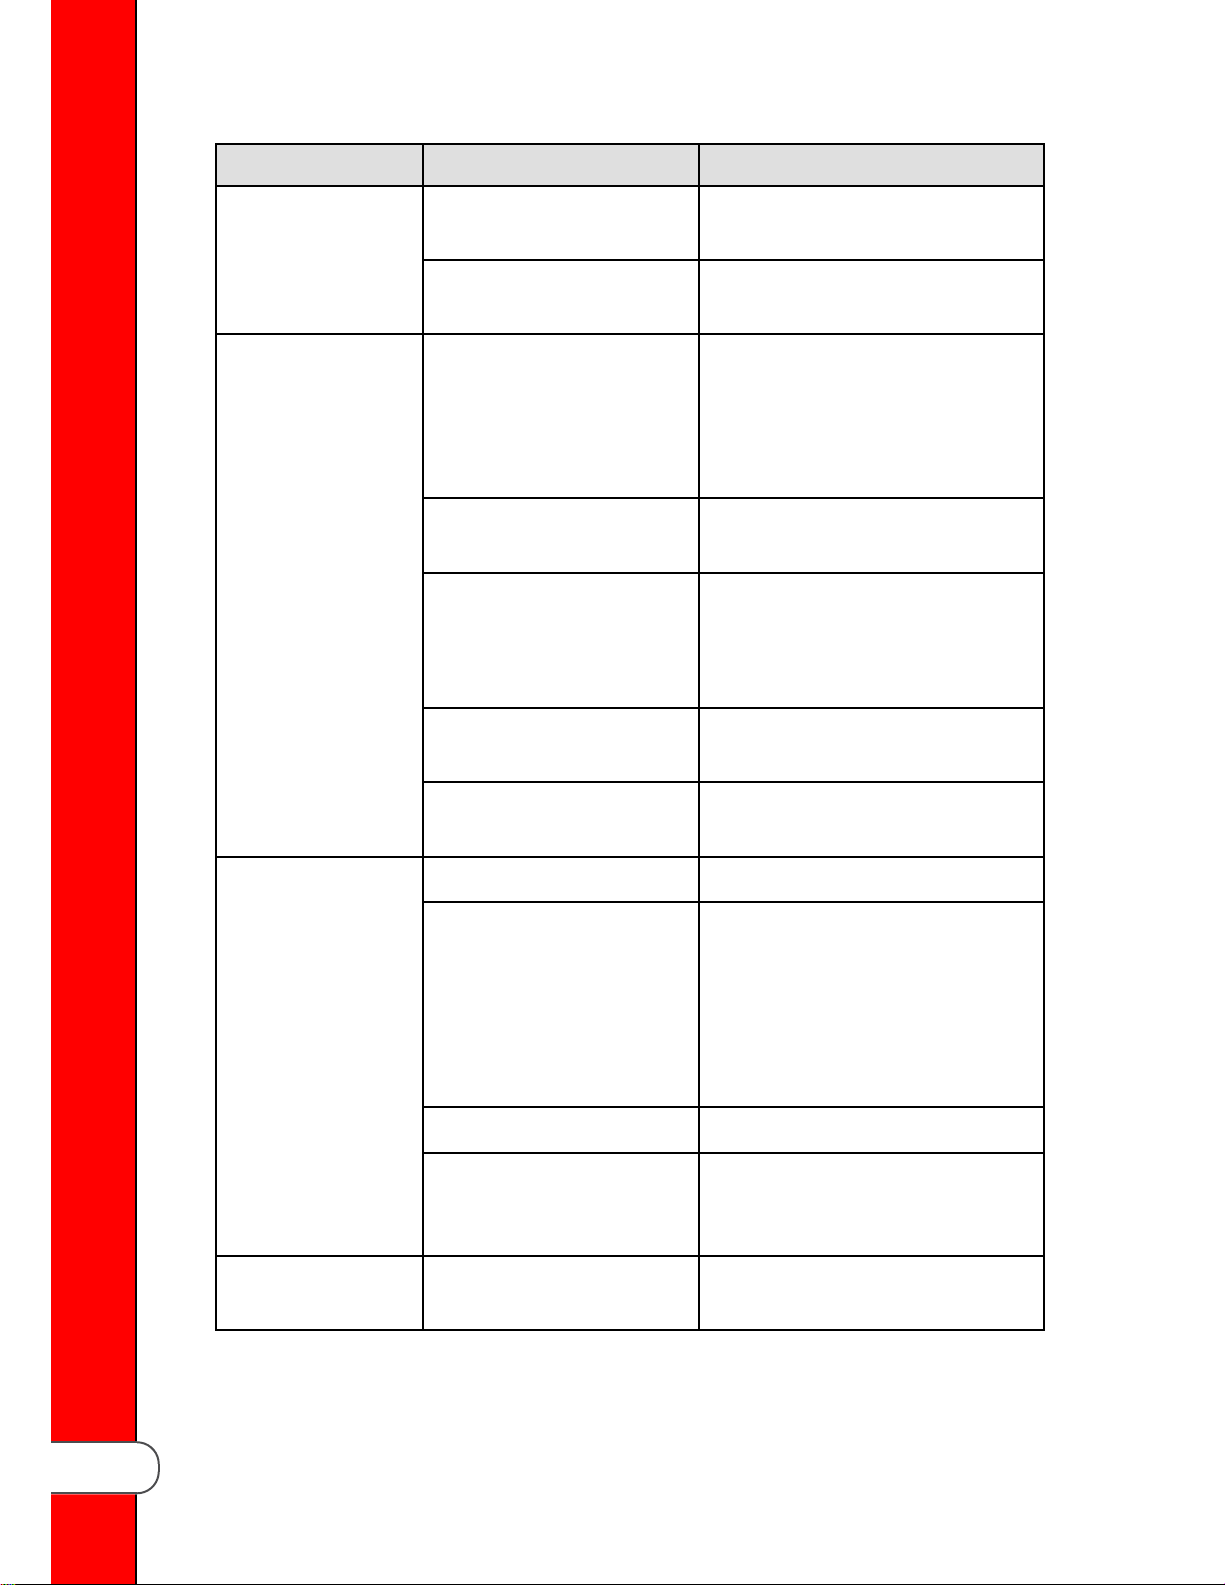
Problem Cause Correction
Dip solution too strong for
product.
Breading product too far in
advance.
B. Too light. Temperature too low.
Dip solution too weak for
product.
Incorrect preheat
procedures.
Vat (frypot) overloaded with
product.
Use correct dip solution or shorten
product immersion time.
Bread product closer to actual frying
period.
• Increase temperature.
• Remove and replace defective
thermostat per 2.10
Replacement
Correct dip solution.
• Allow proper preheat time.
• Stir shortening prior to dropping
product into vat (frypot).
Reduce cooking load.
Thermostat
, page 22.
C. Product greasy. Shortening old. Replace shortening.
D. Spotted product. Improper separation of the
Troubleshooting
Slow fryer heat-up/recovery. Refer to burner or heating elements
in Chapter 2
Temperature too low.
Vat (frypot) overloaded. Reduce cooking load.
Product not removed from
vat (frypot) immediately after
depressurization.
product.
• Increase thermostat settings.
• Temperature not recovered when
product was dropped in vat
(frypot) basket.
• Replace thermostat if needed.
Remove product immediately after
depressurization of the vat (frypot).
Refer to Operator’s Manual.
Maintenance
, page 13.
2
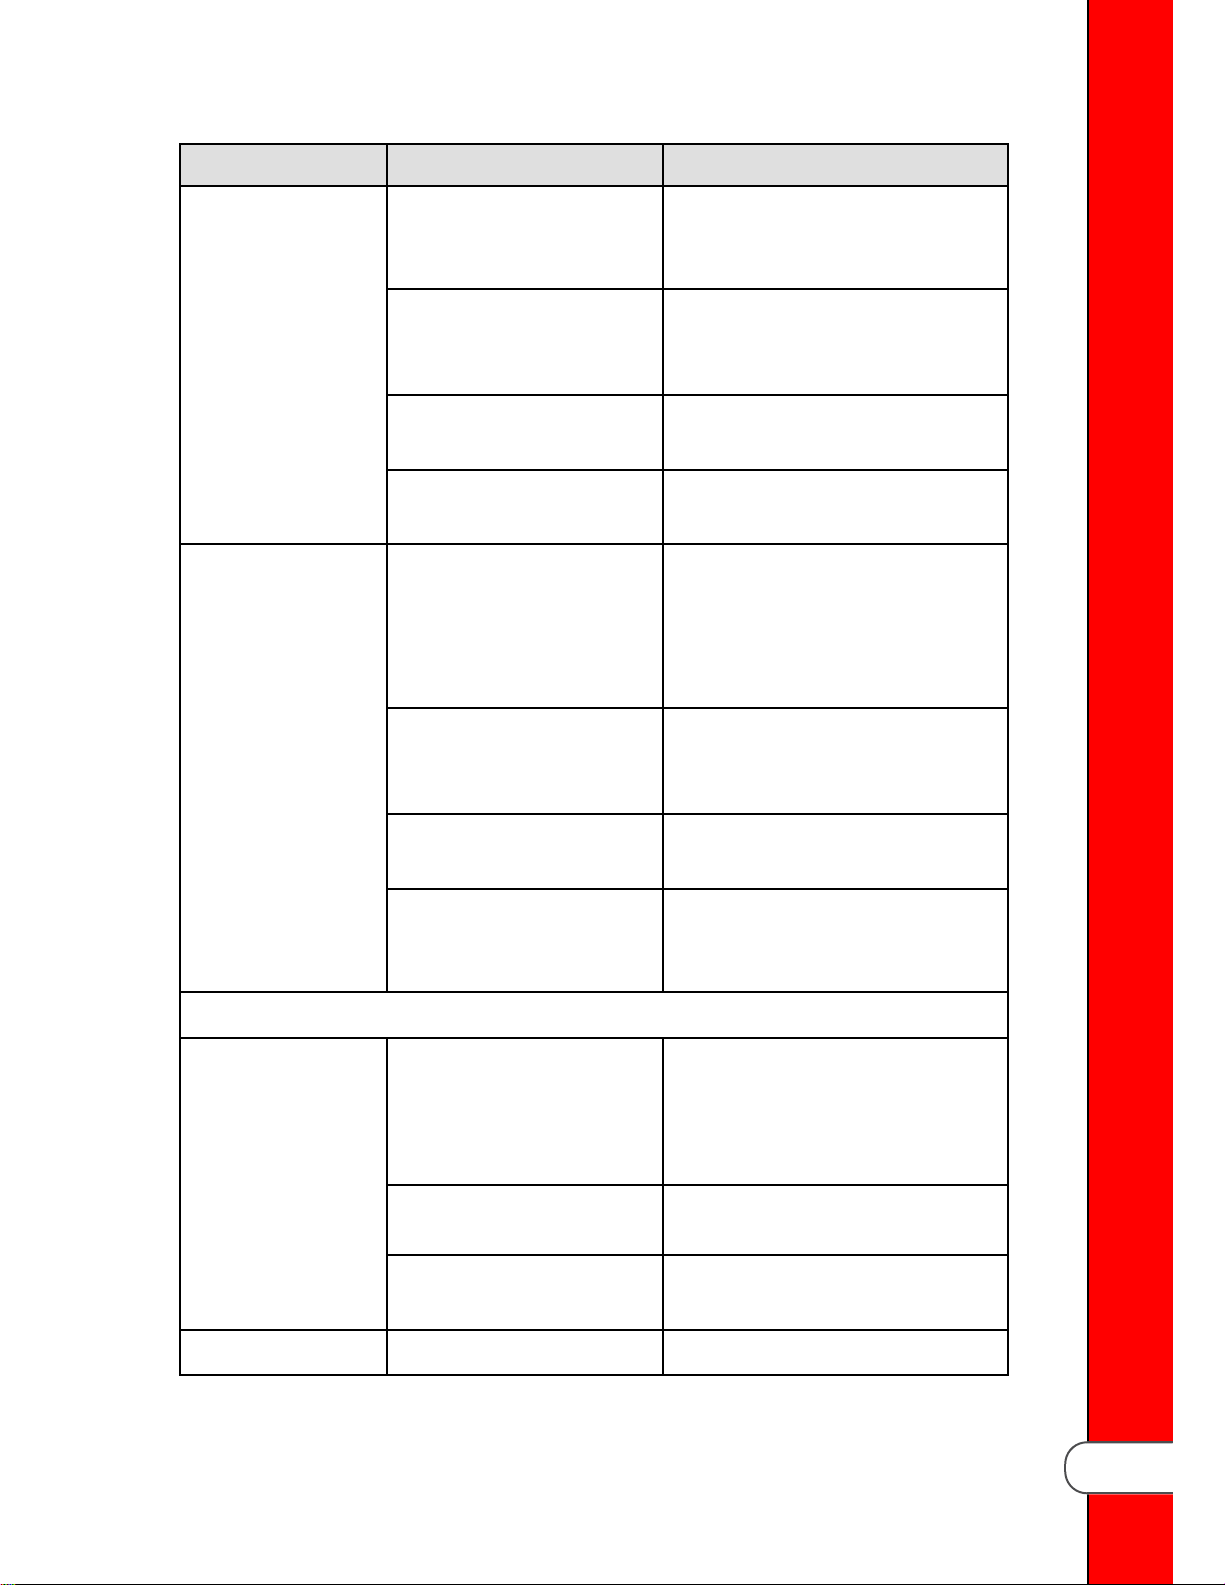
Problem Cause Correction
E. Dryness of
product.
Product was incorrectly
dipped in water before
breading.
Breading not uniform on
product.
Burned breading particles on
product.
Product sticking together. Separate product prior to pressure
Moisture loss prior to
cooking.
Over cooking the product.
Agitate product during the dipping
procedure.
• Sift breading during breading.
• Refer to Operator’s Manual.
Filter the shortening more frequently.
cooking, see the Operator’s Manual.
• Use fresh products.
• Keep product covered with a
moist cloth to reduce
evaporation.
• Reduce cooking time.
• Reduce cooking temperature.
Low operating pressure. Check pressure gauge reading;
check for pressure leaks.
Product load too small. Increase quantity to obtain correct
operating pressure and product
quality.
Product Flavor (Taste):
A. Salty taste. Breading mixture is too salty.
Marination mixture too
concentrated.
Incorrect choice of breading. Use breading designed for the de-
B. Burned taste. Burned shortening flavor. Replace shortening.
• Sift breading after each use.
• Incorrect breading mixture.
• Discard old breading.
Reduce the concentration of the
marination mixture.
sired product.
Troubleshooting
3
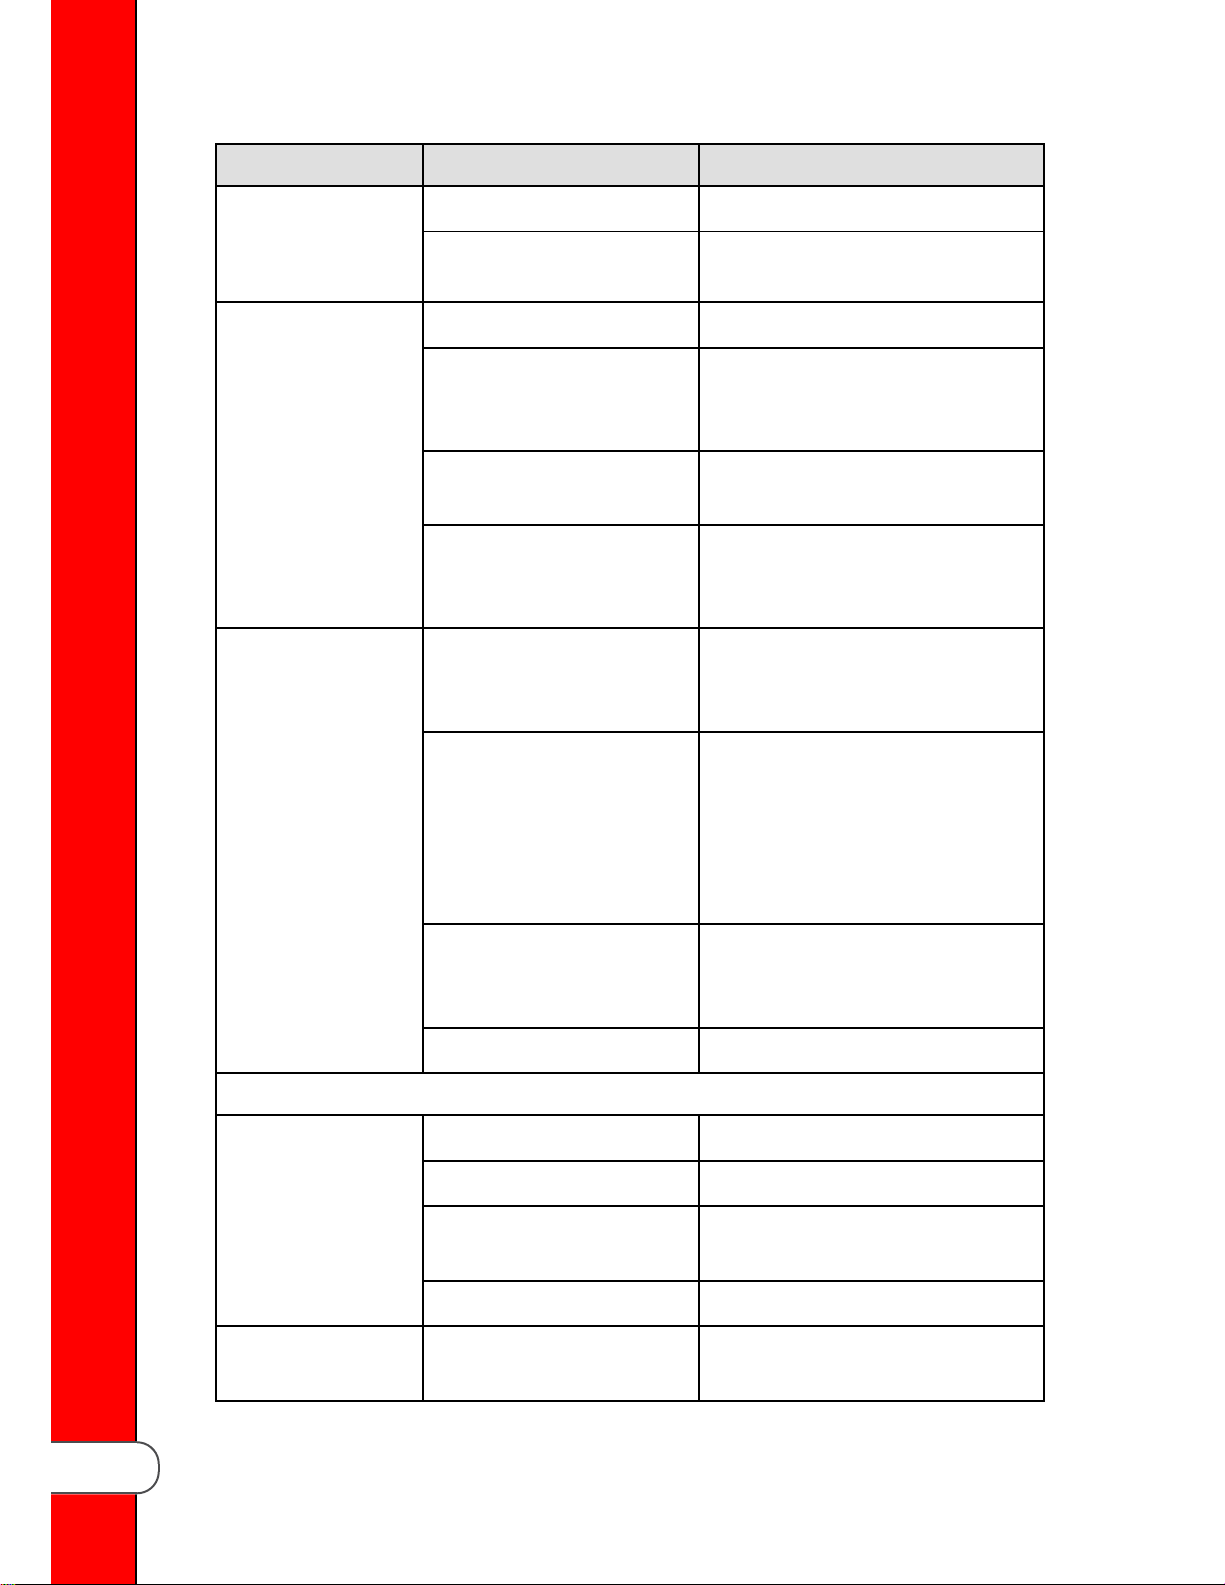
Problem Cause Correction
Shortening needs filtering. Filter shortening more frequently.
Vat (frypot) not properly
cleaned.
C. Bland taste. Raw product not fresh. Use fresh raw products.
Breading mixture incorrect
for product (spice content too
low).
Cooking temperature too
high (spice flavor lost).
Breading does not adhere to
product.
D. Rancid taste. Shortening too old. Replace shortening, and follow rec-
Non-compatible products
cooked within the same
shortening.
Drain and clean vat (frypot).
Use breading designed for desired
product.
Use correct temperature for breading
used.
Use correct dip and breading, and
use correct procedure for the
product.
ommended care and use of shortening, see the Operator’s Manual.
• Replace shortening.
• Use compatible products, and
follow recommended care and
use of shortening; refer to
Operator’s Manual.
General:
A. Meat separation
from bone.
B. Bone color not
Troubleshooting
proper.
4
Infrequent filtering. Replace shortening and follow rec-
ommended care and use of shortening; refer to Operator’s Manual.
Raw product not fresh. Use fresh product.
Incorrect meat cut. Use correct meat cutting procedures.
Overcooking. Reduce cooking time.
Raw product contains too
much water.
Product not fresh. Use fresh product.
Using frozen product (black
bone).
Allow product to drain after
marinating.
Use fresh product.
Problem Cause Correction
Improper handling of product
(black bone).
Product not thoroughly
cooked (red bone).
C. Breading falls off. Incorrect breading
procedures.
Product partially frozen during breading.
Improper handling of cooked
product.
Excessive stirring of product
prior to closing the lid.
D. Product sticking
together.
Product breaded too long prior to cooking.
Improper separation procedures prior to closing the lid.
Use proper handling procedures for
product.
Increase cooking time.
Use correct breading procedure, see
the Operator’s Manual.
Thoroughly thaw the product before
breading.
Handle cooked product carefully.
Separate the product, see the Operator’s Manual.
Refer to breading & frying
instructions.
Separate the product, see the Operator’s Manual.
With switch in
POWER position,
the fryer is completely inoperative
(NO POWER).
Vat (frypot)) overloaded with
product.
Improper loading procedure. Load product properly into vat (fry-
PPoowweerr SSeeccttiioonn
Open circuit.
Reduce the cooking load.
pot), see the Operator’s Manual.
• Check to see that unit is plugged
in.
• Check breaker or fuse at supply
box.
• Check control panel fuses per
2.15
Electrical Components
page 37 section (electric module
only).
• Check voltage at wall receptacle.
• Check MAIN POWER switch per
2.15
Electrical Components
page 37; replace if defective.
,
,
Troubleshooting
5
Problem Cause Correction
• Check cord and plug per 2.15
Electrical Components
• Check circuit breaker on single
phase fryers.
PPrreessssuurree SSeeccttiioonn
, page 37.
Pressure will not exhaust at end of cook
cycle.
Operating pressure
too high.
Pressure does not
build.
Exhaust line from solenoid
valve to expansion tank
clogged.
Solenoid valve clogged. Check and clean solenoid valve per
Deadweight clogged. Place proper quantity of moist prod-
Exhaust line to stack
clogged.
Not enough product in fryer
or product not moist.
Metal shipping spacer not removed from deadweight.
Lid open or not latched. Close and latch lid.
Release pressure from vat (frypot);
clean all pressure lines, exhaust
stacks, and expansion tank on gas
model.
2.17
Pressure Regulation/Exhaust
page 45.
uct within vat (frypot) to generate
steam.
Clean exhaust line to stack.
Place proper quantity of moist product within vat (frypot) to generate
steam.
Remove shipping spacer per Operator’s Manual.
,
Troubleshooting
6
Solenoid valve leaking or not
closing.
Deadweight valve leaking. Repair per 2.17
Main timer not closing
solenoid.
Lid gasket leaking. Adjust lid limit stop; if this does not
Check and clean solenoid valve per
2.17
Pressure Regulation/Exhaust
page 45.
Pressure Regula-
tion/Exhaust
Check main timer per 2.16
Control
correct the problem, reverse the lid
gasket; if this fails to correct the
problem, replace the lid gasket.
, page 45.
Timing
, page 42.
,

Problem Cause Correction
Safety relief valve leaking. Check and replace, if necessary, per
2.17
Pressure Regulation/Exhaust
page 45.
FFiilltteerr SSyysstteemm SSeeccttiioonn
,
Filter motor runs but
pumps shortening
slowly.
Pump switch ON,
motor does not run.
Filter valve not open. Open filter valve.
Pump clogged. Remove and clean pump per 2.18
Filtering System
Filter frame not properly
assembled.
Filter line connections loose. Tighten all filter line connections.
Solidified shortening in lines. Clear all filter lines of solidified
Charcoal filter clogged (if
applicable).
Defective switch. Check/replace switch per 2.15
Defective motor. Check/replace motor per 2.18
Motor thermal protector
tripped.
Handles must put pressure on filter.
shortening.
Change charcoal filter (if applicable).
trical Components
ing System
Reset thermal switch per 2.18
ing System
, page 68.
Elec-
, page 37.
Filter-
, page 68.
Filter-
, page 68.
Motor hums but will
not pump.
Shortening will not
heat.
Clogged lines or pump.
HHeeaattiinngg ooff SShhoorrtteenniinngg SSeeccttiioonn
Blown fuse or tripped circuit
breaker at supply box or control panel.
Blown fuse at control panel. Check fuse per 2.15
• Remove and clean pump and
lines per 2.18
page 68.
• Replace pump seal, rotor and
rollers per 2.18
page 68.
Reset breaker or replace fuse.
ponents
, page 37.
Filtering System
Filtering System
Electrical Com-
,
,
Troubleshooting
7
Problem Cause Correction
Heating of shortening too slow.
Faulty main switch. Check main switch per 2.15
cal Components
No power. Check cord and plug and power at
wall receptacle per 2.15
Components
High limit control switch
open.
Faulty thermostat. Check thermostat per 2.10
Faulty high limit control
switch.
Low or improper voltage. Use a meter and check the recep-
Wire(s) loose. Tighten.
Burnt or charred wire
connection.
Press red high limit reset per 2.11
High Temperature Limit Control
page 25.
stat Replacement
Check high limit control switch per
2.11
High Temperature Limit Control
page 25.
tacle against data plate.
Replace wire and clean connectors.
, page 37.
, page 37.
, page 22.
Electri-
Electrical
,
Thermo-
,
Shortening
overheating.
Pilot will not light. Pilot not lit. Light pilot per Section 2-10 Gas Pilot
Pilot will not stay lit. Faulty thermocouple. Replace thermocouple per 2.13
Troubleshooting
Check thermostat. Check faulty thermostat per 2.10
Thermostat Replacement
Lightning & Burner Lighting and
Shutdown Procedure of Operator’s
manual.
Plugged pilot orifice, and/or
pilot supply tube.
Gas supply off. Turn ON gas supply.
Faulty gas control valve. Replace gas control valve.
Air in gas supply line. Bleed air from supply line.
Pilot magnetic plug. Replace gas control valve per 2.14
Unplug pilot orifice and/or pilot supply tube.
Thermocouple
Gas Control Valve
, page 31.
, page 33.
, page 22.
8
Problem Cause Correction
Burner will not light,
pilot lit (gas model)
Drain valve open. Close drain valve.
High limit control switch. Press red high limit reset per 2.11
High Temperature Limit Control
page 25.
Faulty high limit control
switch.
Possible faulty gas control
valve.
Possible faulty thermostat. Check thermostat per 2.10
With power removed from fryer,
check across high limit switch terminals with ohmmeter; replace if no
reading is indicated on meter.
With power removed from fryer,
check across electrical leads of gas
control valve with ohmmeter, and
gas control valve in ON position;
Ohm reading should be 350 ohms
resistance; replace the control valve
if not within 10%.
stat Replacement
thermostat if found to be faulty.
, page 22; replace
,
Thermo-
Heating of Shortening Too Slow (gas
model).
Shortening overheating (gas model).
Foaming or boiling
over of shortening
(gas/electric
models).
Supply line too small - low
gas volume.
Incorrect jet size. Replace with proper size jet for type
Improper ventilation system. Refer to Section 2-5 Ventilation of
Possible faulty thermostat. Check thermostat per 2.10
SShhoorrtteenniinngg FFooaammiinngg//DDrraaiinniinngg
Water in shortening. At end of cook cycle, drain shorten-
Condensation line stopped
up.
Increase supply line size, see Section 2 Unpacking/Installation of Operator’s manual.
of gas, and altitude (contact factory).
Fryer in Operator’s Manual.
Thermo-
stat Replacement
thermostat if found to be faulty.
ing and clean vat (frypot), add fresh
shortening, and check procedure for
raising lid.
Condensation line stopped up.
, page 22; replace
Troubleshooting
9
Problem Cause Correction
Improper or bad shortening. Use recommended shortening.
Improper filtering. Refer to the procedure covering fil-
tering the shortening.
Improper rinsing after cleaning the fryer.
Shortening will not
drain from vat
(frypot).
Timer fails to run. No power input.
Buzzer continues to
buzz.
Drain valve clogged with
crumbs.
Drain valve will not open by
turning handle.
MMaaiinn TTiimmeerr SSeeccttiioonn
Timer set at zero. Set timer indicator to a setting other
Faulty microswitch. Check and replace faulty micro-
Clean and neutralize the vat (frypot);
rinse with vinegar to remove alkaline
then rinse with hot water, and dry vat
(frypot).
Open valve - force cleaning brush
through drain opening.
Replace cotter pins in valve
coupling.
• Check timer switch.
• Check timer motor.
than zero.
switch per 2.15
nents
, page 37.
Electrical Compo-
Buzzer will not buzz. Possible faulty buzzer. Check buzzer per 2.16
Timer will not reset. Faulty timer. Replace timer.
Timer light out. Faulty lamp. Replace lamp per 2.16
Gasket coming out of
lid liner.
Troubleshooting
10
Timer indicator not returning
to zero.
LLiidd SSeeccttiioonn
Crumbs under gasket.
Timing Con-
trol
, page 42.
Replace timer per 2.16
trol
, page 42.
trol
, page 42.
• Remove gasket and clean per
2.17
Pressure Regulation/
Exhaust
• Clean top rim of vat (frypot).
, page 45.
Timing Con-
Timing Con-
Problem Cause Correction
• Replace worn or damaged
gasket per 2.17
Regulation/Exhaust
Pressure
, page 45.
Lid spindle will not
turn or turns hard
with lid open.
Lid will not unlatch
from closed position.
Spindle dry. Lubricate spindle per 2.17
Regulation/Exhaust
Worn acme nut. Replace acme nut per 2.17
Regulation/Exhaust
Lid gasket not seated properly or idle nut not adjusted.
To check the problem, perform
the following procedures:
11.. Remove pressure from vat
(frypot).
22.. Turn main switch to off position.
33.. Drain shortening from vat
(frypot).WWAARRNNIINNGG!! TThhee nneexxtt
pprroocceedduurree mmuusstt bbee ppeerrffoorrmmeedd
wwhhiillee hhoollddiinngg tthhee lliidd cclloosseedd
uunnttiill tthhee lliidd llaattcchh iiss ffrreeee ffrroomm
tthhee ccrroossss--aarrmm.. ffaaiilluurree ttoo hhoolldd
ddoowwnn tthhee lliidd wwiillll rreessuulltt iinn tthhee lliidd
sspprriinnggiinngg bbaacckk ttoo aa ffuullll ooppeenn
ppoossiittiioonn.. ppeerrssoonnaall iinnjjuurryy,, oorr
ddaammaaggee ttoo tthhee hhiinnggee mmaayy
rreessuulltt..
, page 45.
, page 45.
Pressure
Pressure
44.. Remove Tru-Arc ring. Drive latch
pin out. Lid will open.
55.. Raise lid slowly.
66.. Reinstall latch.
77.. Adjust limit stop, per 2.17
Pressure Regulation/Exhaust
page 45.
88.. Lid gasket should be properly
seated in lid liner.
,
Troubleshooting
11

Troubleshooting
12
CChhaapptteerr 22 MMaaiinntteennaannccee
22..11 IInnttrroodduuccttiioonn
This section provides procedures for the checkout and replacement of the various
parts used within the fryer. Before replacing any parts, see Chapter 1
Troubleshooting
22..22 MMaaiinntteennaannccee HHiinnttss
• You may use two test instruments to check electric components:
– A continuity light
– An ohmmeter
• When the manual refers to the circuit being closed, the continuity light will be illuminated or
the ohmmeter should read zero unless otherwise noted.
• When the manual refers to the circuit being open, the continuity light will not be illuminated
or the ohmmeter will read 1 (one).
, page 1. It will aid you in determining the cause of the malfunction.
NOTICE:
A continuity tester cannot be used to check coils or motors.
22..33 PPrreevveennttaattiivvee MMaaiinntteennaannccee SScchheedduullee
To ensure a long life of the fryers and their components, regular maintenance should
be performed, see the chart below.
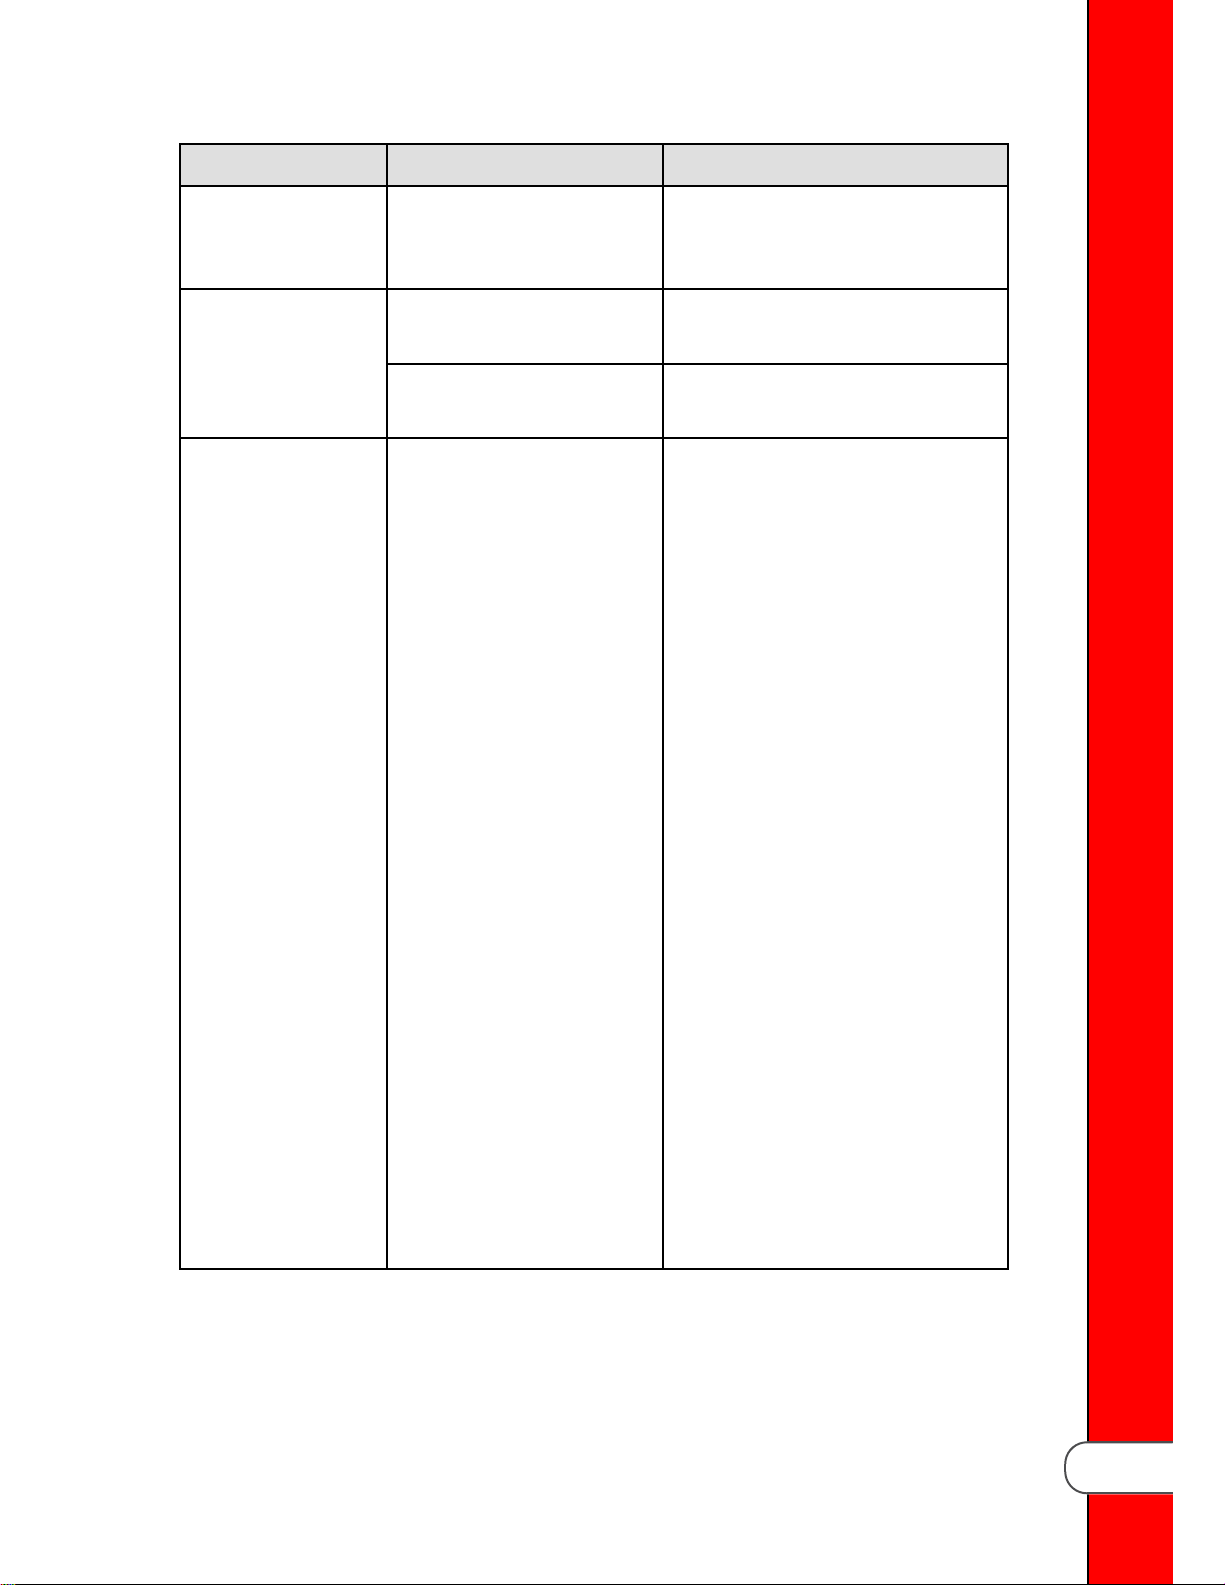
TTaabbllee 22--11 PPrreevveennttaattiivvee MMaaiinntteennaannccee SScchheedduullee
Frequency Action
Daily (3-4 loads) Filter shortening.
Daily Clean deadweight valve cap, weight, and
orifice.
30 Days Lubricate spindle threads and ball seat.
90 Days Reverse lid gasket.
90 Days Check limit stop adjustment.
90 Days Check and tighten element spreader bars.
Once A Year Annual preventative maintenance, see Ap-
pendix A.
Maintenance
13

22..44 LLoowweerr tthhee CCoonnttrrooll
TToo aavvooiidd eelleeccttrriiccaall sshhoocckk oorr pprrooppeerrttyy ddaammaaggee,, mmoovvee tthhee
ppoowweerr sswwiittcchh ttoo ooffff aanndd ddiissccoonnnneecctt mmaaiinn cciirrccuuiitt bbrreeaakkeerr,, oorr
uunnpplluugg ccoorrdd aatt wwaallll rreecceeppttaaccllee..
To replace parts inside the fryer, lower the control by doing the following:
11)) Place the main power switch to the off position. The switch is labeled POWER/
OFF/PUMP.
22)) Remove the two screws from the bottom of the control.
33)) Carefully slide the control upward until it lifts off the metal hangers.
44)) With the fryer door closed, place the lower edge of the control in the slot
between the door and the frame of the fryer.
22..44..11 RRaaiissee tthhee CCoonnttrrooll
11)) Raise the control, and then hook it on the metal hangers that hold the top of the
control in place.
22)) Install the two screws in the bottom of the control.
33)) Reconnect power to the fryer.
22..44..22 RReeppllaaccee tthhee CCoonnttrrooll
Follow the steps outlined in 2.4
Control
, page 14.
Lower the Control
, page 14 and 2.4.1
Raise the
11)) Note the locations of the connectors on the back of the control
Maintenance
22)) Remove the connectors, and then swap out the old control for the new.
14

33)) Reconnect the connectors on the back of the control.
22..44..33 CCoonnffiigguurree tthhee SSeerriiaall NNuummbbeerr
NOTICE
module cannot receive or transmit data, including automated software updates.
22..44..33..11 VVeerriiffyy tthhee SSeerriiaall NNuummbbeerr
: The serial number must be added correctly in to the control or the WiFi
11)) Set the power switch to the OFF position.
22)) Locate the machine data plate on the inside of the filter pan door, and then
record the serial number displayed on it.
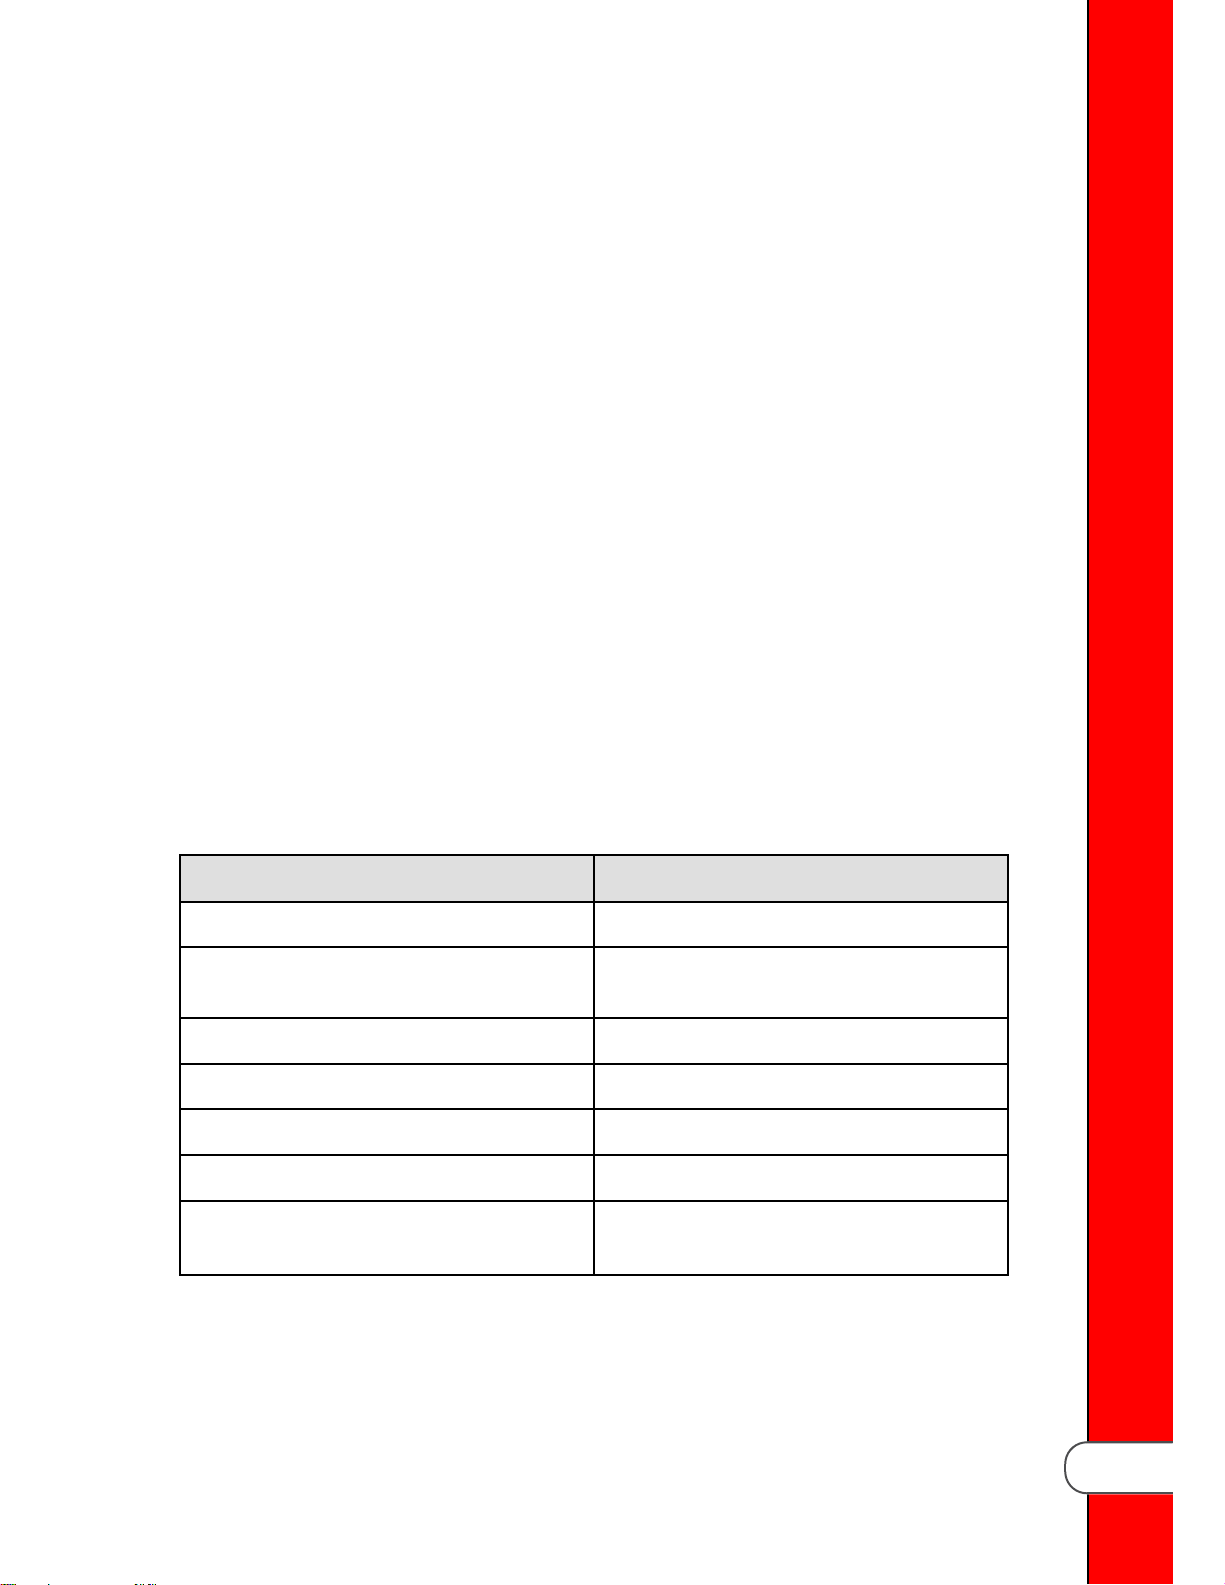
NNOOTTEE: Serial numbers may be one of two formats:
• AAXXXXXXX (AA followed by seven digits)
• BCXXXDE (Two letters followed by three digits followed by two more letters)
The serial number may also be etched in to the rear top left corner of the pot
(see image below).
33)) Press and hold for 7-8 seconds until L-2 LEVEL 2 displays. CFA PROG /
ENTER CODE displays.
44)) Press twice. SETUP / ENTER CODE displays.
55)) Using the left product buttons, press 1,2,3. - SETUP MODE - briefly displays.
66)) Compare the serial number displayed in SM-1 with the number you recorded.
77)) Perform one of the two actions:
•
If the serial number matches, press and hold
control resumes normal operation.
•
If the serial number is missing or does not match, follow either the 9 or 7
character serial number correction procedure.
until - OFF - displays. The
Maintenance
15

22..44..33..22 AAddddiinngg oorr CCoorrrreeccttiinngg aa 99 CChhaarraacctteerr SSeerriiaall NNuummbbeerr
NNOOTTEE: You only need to enter the first four and last three digits; the “AA” is already
populated.
11)) Press the left-side button.
22)) Press the right-side for standard (STD).
33)) Press the product keys to enter the first four digits of the serial number you
recorded.
NNOOTTEE: The value of each product key is represented by the number below the
product key (see above image).
44)) Press to continue.
55)) Press the product keys to enter the last three digits of the serial number
recorded in 2.4.3.1
66)) Press . SAVE ? YES NO displays.
77)) Do one of the following:
- If the serial number is correct, press the right-side
- If the serial number is incorrect, press the right-side
repeat steps 2-6 of this procedure.
Verify the Serial Number
, page 15.
for YES.
for NO, and then
88)) Press and hold until - OFF - displays. The control resumes normal
Maintenance
16
operation.
Loading...