


JBS03BH2WH
GE JBS03BH2WH, JBS03BH2CT, JBP21WH4WW, JBP21WH3WW, JBP21BH4WH Owner’s Manual
...
ge.com
Safety Information .......... 2-6
Operating ImlrucCions
Adjust the Oven
Thermostat ................... 91
(;lock and Timer . .......... 15, 16
()yen ..................... 12-14
Oven Controls ............. 10, 11
Sabbath Feature ............ 19, 90
Selecting Types of Cookware ..... 9
Self-Cleaning .............. 94, 95
Special Feaunes ............... 18
Surface Units ................ 7, 8
Timed Baking and Roas6ng ..... 17
Wanning Drawer ........... 99, 93
Care and Cleaning ........ 24-33
(;lass Cooktop ............. 32, 33
Self-Cleaning Oxen ......... 24, 25
Coil 7@ and
Radiant ToDModds
Standard Se_:Clean
Clear_Modds Modds
#gso3 }g6oo
jeso7 j,9,oz5
JBS l 5 JBP21
JBS2 7 JBP22
j s56 j p6o
RB525 RB740
RB526 RB 75 7
RB536 RB787
RB540 RB790
RB800
Imlallation Instructions
Anti-Tip Device ............ 34, 40
getbre You Begin ............. 34
Electrical Connections ....... 36-39
Leveling .................. 40, 41
Troubleshooting Tips ...... 42-46
Accessories .................. 47
Consumer Support
Consumer Support ..... Back Coxer
Product Registration ........ 49, 50
V(anantv .................... 51
Write the model and serial
numbershere:
Model #
Serial #
You can find them on a label,
behind the storage drawer or
warming drawer on the oven
li'aIIle.
183D6379P034 49-88028 03-06 JR
iMPORTANTSAFETYiNFORMAtiON.
READALLiNSTRUCTiONSBEFOREUSING.
For your safety, the information in this manual must be followed to minimize the risk of fire or explosion,
electric shock, or to prevent property damage, personal injury, or loss of life.
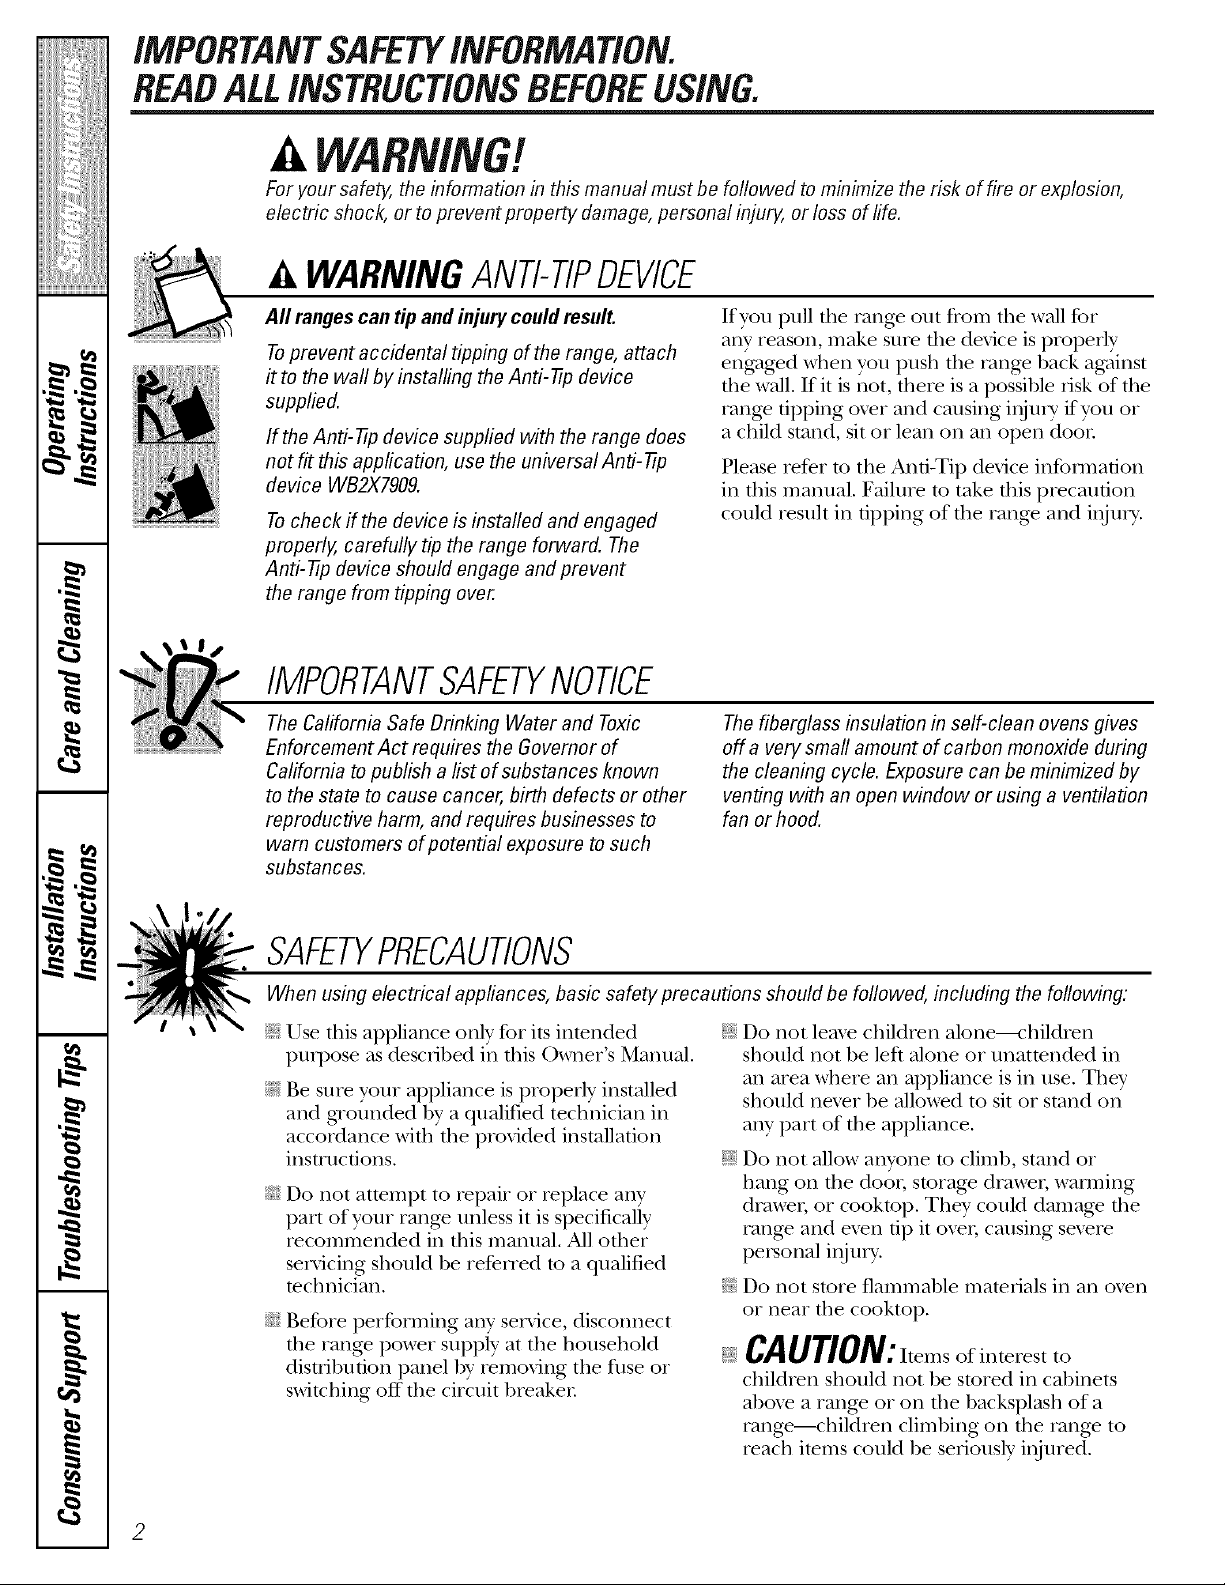
WARNINGANTI-TIPDEVICE
All ranges can tip andinjury could result.
Toprevent accidental tipping of the range, attach
it to the waft by installing the Anti--tip device
supplied.
If the Anti--tip device supplied with the range does
not fit this application, use the universal Anti--tip
device WB2X7909.
Tocheck if the device is installed and engaged
properly, carefully tip the range forward. The
Anti--tip device should engage and pravent
the range from tipping over.
IMPORTANTSAFETYNOtiCE
The Californb Safe Drinking Water and Toxic
Enforcement Act requires the Governor of
California to publish a list of substances known
to the state to cause cancer, birth defects or other
reproductive harm, and requires businesses to
warn customers of potential exposure to such
substances.
If you pull file rang_ out flom file wall %r
any reason, make snre the device is properly
eng_ged when you push the tange back ag:_inst
the wall. If it is not, there is a pos0ble risk of the
range tipping over and causing inju U if yon or
a child stand, sit or lean on an open door
Please refer to the Anti-Tip device information
in this manual. Failure to take this precaution
could resuh in tipping of the range and inju U.
The fiberglass insulation in self-clean ovens gives
off a very small amount of carbon monoxide during
the cleaning cycle. Exposure can be minimized by
venting with an open window or using a ventilation
fan or hood.
SAFETYPRECAUtiONS
When using electrical appliances, basic safety precautions should be followed, including the following:
Use this appliance only for its intended
pm])ose as described in this )wne_ s Manual.
Be sure your appliance is properly installed
and gaounded by a qualified technician in
accordance with the provided installation
instructions.
Do not attempt to repair or replace any
part of your range unless it is specifically
recommended in this manual. All other
servicing should be refe_xed to a qualified
tech nician.
Before performing any service, disconnect
the range power supply at the household
disuibufion panel by _emoving the fllse or
switching off the circuit breaker
(
2
Do not leme children alone----r'hildren
should not be left alone or unattended in
an area where an appliance is in use. They
should nexer be allowed to sit or stand on
any part of the appliance.
Do not allow anyone to climb, stand or
hang on fl_e doo,; storage drawel, wamfing
drawel; or cooktop. They could damage the
rang_ and even tip it ovel; causing se_re
personal injm T.
Do not store flammable materials in an o'_en
or near the cooktop.
CAUtiON-Items of interestto
children should not be stored in cabinets
aboxe a range or on the backsplash of a
range--children climbing on the range to
reach items could be seriously injured.
ge.com
COOKMEATANDPOULTRYTHOROUGHLY...
Cookmeat andpoultrythoroughly--meat to atleast an INTERNALtemperatureof 160°Fandpoultry to at leastan
INTERNALtemperatureof 180°ECookingto thesetemperaturesusuallyprotectsagainst foodbomeillness.
A WARNING!
SAFETYPRECAUTIONS
Nex.er wear loose-fitting or hanging garments
while using tile appliance. Be carefld when
reaching for imms stored over tile rang.e.
Flammable mamrial could be ignimd if
brought in contact wifll hot surface units
or heating elements and may cause sex.ere
b/lrlls.
Use only dU pot holders--moist or damp
pot holders on hot surfaces may result in
bun_s flom steam. Do not let pot holders
touch hot surfitce units or heating elements.
Do not use a towel or oilier bulky cloth.
For your safety, nexer use your appliance
for wam_ing or heating the room.
N
Do not let cooking grease or other flammable
materials accumulate ill or near the range.
Do not use wamr on grease fires. Nex.er pick
up a flaming pan. Turn tile controls off.
Smother a flaming pan on a surfi_ce unit by
covering the pan completely with a well-
fitting lid, cookie sheet or fiat trW. Use a
mulfiq)urpose di T chemical or foam-type
fi_e extinguisher
Flaming grease outside a pan call be put
OUt by cox.ering it with baking soda o_,
if available, by using a multi-propose di T
chemical or foam-type fire extinguishen
Flame ill tile oven or wanning drawer
can be smothered complemly by closing tile
door and mining tile oven offor by using a
nmhi-purpose dU chemical or foam-type fire
extinguisher
;f; Do not touch the snrtZace units, the heating
elements or the inmrior surtZace of the oxen.
These surfaces m W be hot enough to bnrll
ex.en thouOi they are dark in color During
and 'after use, do not much, or let clothing
or other flammable mamrials contact, file
surfitce units, areas nearby the surtZace units
or ally' inmrior a_.ea of tile ox.en; allow
sufficient time for cooling first.
Potenually hot surtZaces include tile cooktop,
areas fhcing tile cooktop, ox.en x.ent opening,
surtZaces near tile opening, crevices around
the ox.en door and metal trim parts above
the door
REMEMBER: The inside surl_ace of the oven
may be hot when the door is opened.
_7{;:Do not store or use combustible mamrials,
gv_soline or other flammable vapors and
liquids in the vicinity of this or ally' other
appliance.
;f; Kee I) tile hood and grease filters clean
to maintain good xenting and to axoid
gxease fires.
_f;Nex.er block dm vents (air openings) of die
rang_. They provide tile air inlet and oudet
that are necessa W for the range to operam
properly with conect combustion. Air
openings are located at file rear of the
cooktop, at the top and bottom of file oven
door, and at rite bottom of tile rang.e under
the warming drawer or storag.e drawee
IMPORTANTSAFETYINFORMATION.
READALLINSTRUCTIONSBEFOREUSING.
OVEN
Stand away from the range when opening
the oxen doo_: Hot air or steam which
escapes call cause bnTlls to hands, face
and/or eyes.
;_;Do not heat unopened food containers.
Pressure could build up and die container
could burst, causing an i_jury.
Kee I) file oxen xent unobstructed.
Kee I) file oxen flee from gxease buildup.
;_;Place the oxen shelf in the desired position
while the oven is cool. If shelxes must be
handled when hot, do not let pot holder
contact the heating elements.
SELF-CLEANINGOVEN
_!:_!'_Do not clean tile door gasket. Tile door
gasket is essential %r a good seal. Care
should be taken not to rub, damage or
moxe the gasket.
i_;!_Clean only parts listed m tins _xsner s
Manual.
;fi:,iDo not use oven cleaners on self-clean
models. No commercial oxen cleaner or
oxen liner protective coating of any kind
should be used in or around any part of
tile oxen. Residue from oxen cleaners will
damage the inside of tile oxen when the
self-clean cycle is used.
_7_;:Pulling out the shelf to tile stop-lock is a
comenience in lifting heax T foods. It is also
a precaution against burns from touching
hot sur£tces of the door or oxen walls.
_;:When using cooking or roasting bags in tile
oxen, follow the manufacturer's directions.
;_i:,:Do not use the oxen to dU newspapers.
If oxerheamd, they can catch on fire.
N Do not use the oxen for a storage area.
Imms stored in an oven can ignite.
N Do not leave paper products, cooking
utensils or food in the oxen when not in use.
;f; Be%re self-cleaning the oven, remoxe the
broiler pan, grid and other cookware.
_i:,iBe sure to wipe up excess spillage be%re
starting the self-cleaning operation.
;f; If the self-cleaning mode malflmctions,
turn the oxen off and disconnect the power
supply. Haxe it serviced by a qualified
technician.
q_{_;Take tile shelxes out of the oxen before
you begin the self-clean cycle or they
may discolor
i
4
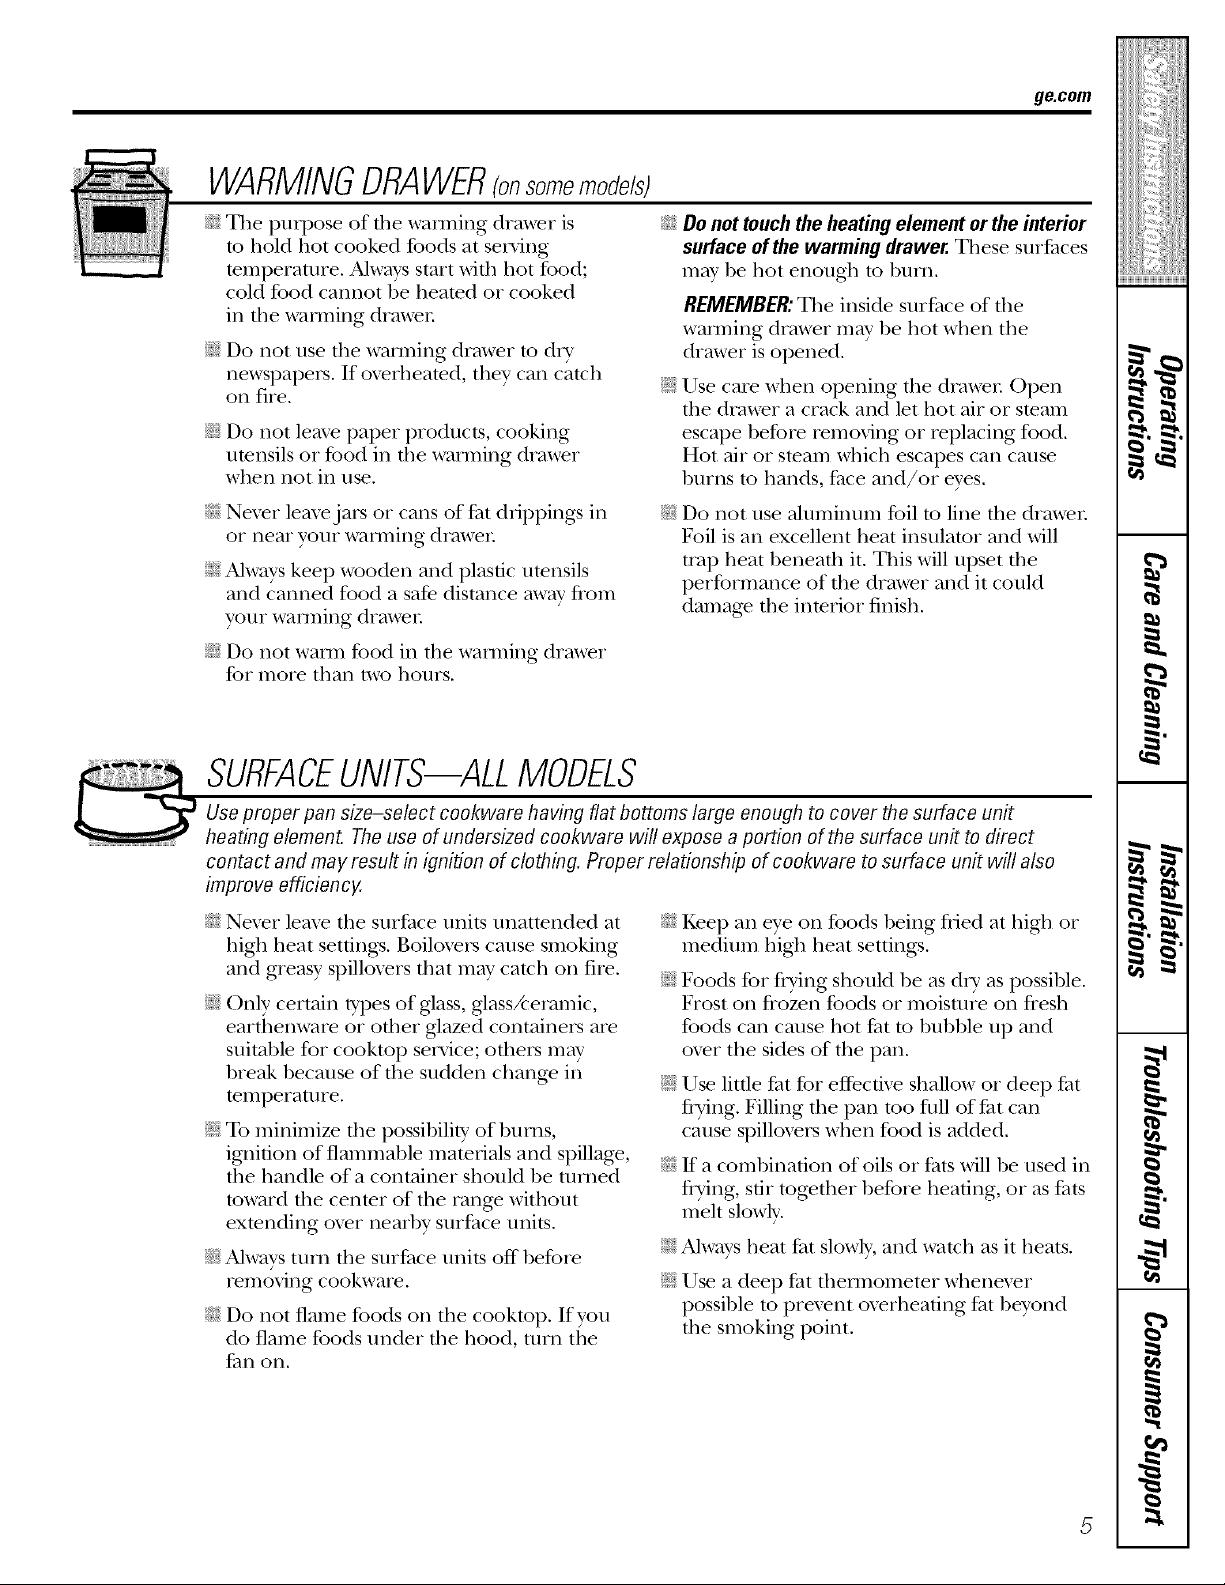
WARMINGDRAWERronsomemode/s)
g_com
_?{:;Tile pml)ose of d_e wam_ing drawer is
to hold hot cooked foods at serving
mmperature. Always start with hot fbod;
cold food cannot be heamd or cooked
in tile wanning drawer
E:,:Do not use die wam_ing drawer to di T
newspapers. If oxerheated, they can catch
on fire.
_{:_Do not leme paper products, cooking
umnsils or food in tile warming drawer
when not in use.
_{:_Never leax>jars or cans of fat dfipping_ in
or near your warming drawer
E:,:Always kee I) wooden and plastic utensils
and canned food a safe distance away flora
your wanning drawer
_{::Do not warm food in the wanning drawer
for more than two hours.
SURFACEUNITS--ALLMODELS
_:_Do not touchthe heating element or the interior
surface ofthe warming drawer. Tilese sur£_ces
may be hot enougt_ to bnHl.
REMEMBER:Tile inside surPace of d_e
wanning drawer may be hot when tile
drawer is opened.
E:,:Use care when opening die drawel: Open
the drawer a crack and let hot air or steam
escape before removing or replacing food.
Hot air or steam which escapes can cause
burns to hands, fl_ce and/or eyes.
_{::Do not use ahlminun_ fbil to line the drawer
Foil is an excellent heat insulator and will
uap heat beneath it. Tills will upset tile
performance of tile drawer and it could
damag> tile inmrior finish.
Use proper pan size-select cookware having fiat bottoms large enough to cover the surface unit
heating element. The use of undersized cookware will expose a portion of the surface unit to direct
contact and may result in ignition of clothing. Proper relationship of cookware to surface unit will also
improve efficiency.
q_{::Never leax> the suli_ace units unattended at
higil heat setfing:s. Boilo_ers cause smoking
and greasy spillox_rs that may catch on file.
E:,:Only certain types of glass, gtassAeramic,
earthenware or other glazed containers are
suitable for cookmp service; oflmrs m W
break because of tile sudden chang_ in
ten_perature.
E:,:To minimize dm possibili U of bums,
ignition of flammable mamfials and spillage,
the handle of a container should be turned
toward fire center of the rang_ without
exmnding ox_I nearby surPace units.
_?{::Always tnill tile surl_ace units off before
removing cookware.
_?{::Do not flame foods on d_e cooktop. If you
do flame foods under file hood, turn tile
_tn on.
_?{:_Kee I) an eye on foods being flied at higil or
medium higil heat setdng:s.
E:,:Foods for fl?ing should be as d U as possible.
Frost on fiozen foods or moisulre on flesh
foods can cause hot l_atto bubble up and
o_eI tile sides of tile pan.
_fi:,:Use little fat for eflOcfive shallow or deep fi_t
flTing. Filling tile pan too fllll of Pat can
cause spillovers when food is added.
_{:_It"a combination of oils or f:ats will be used in
flying, stir together before heating, or as fats
melt slowly.
_fi:,:Always heat l_at slowly, and watch as it heats.
_fi:,:Use a deep l_at flmnnometer whenever
possible to prexent oxerheafing fi_tbeyond
tile smoking point.
iMPORTANTSAFETYiNFORMATiON.
READALLiNSTRUCTiONSBEFOREUSING
WARNING!
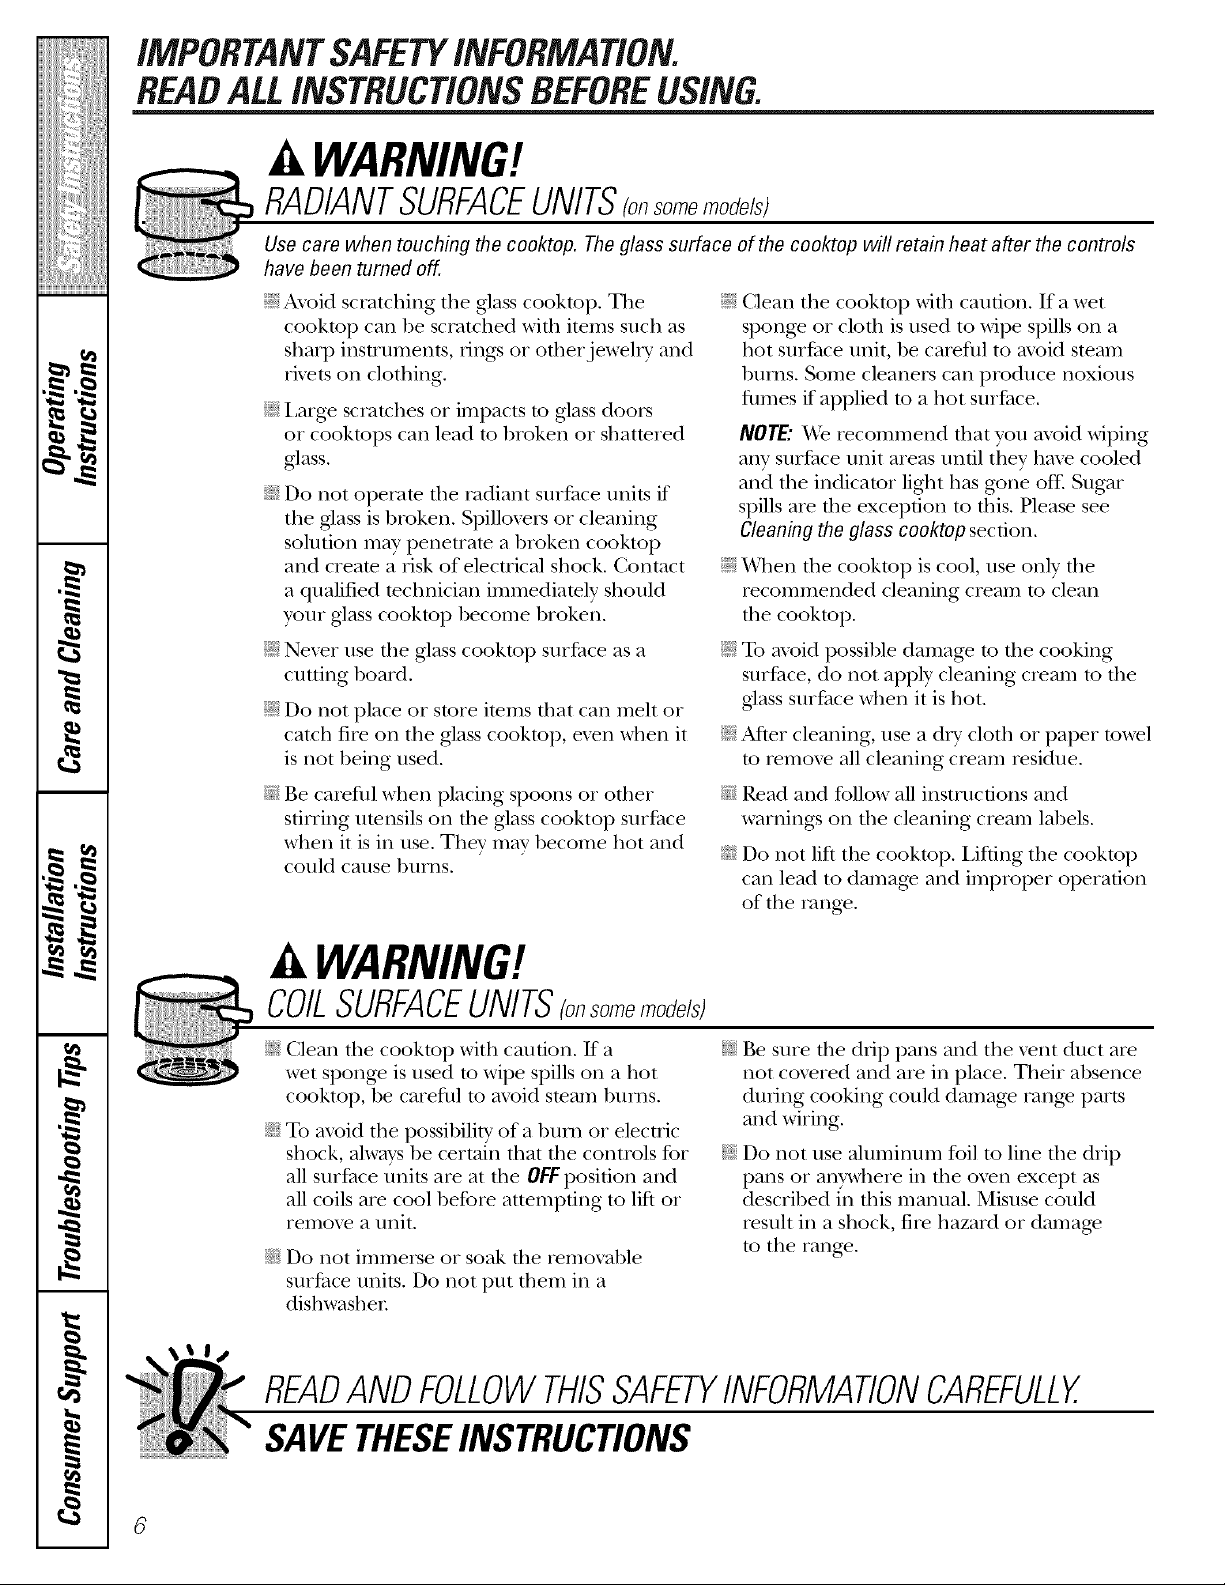
RADIANTSURFACEUNITS_onsomemodefsJ
Use care when touching the cooktop. Theglass surface of the cooktop will retain heat after the controls
have been turned off.
E:,:Avoid scratching the glass cooktop. The
cooktop can be scratched wifl_ imms such as
sharp instruments, lings oi otherjeweh T and
rivets on clothing.
E:,:Large scratches oi impacts to glass doors
or cooktops can lead to broken or shattered
glass.
_7{_:Do not operate fl_e radiant smlaace units if
the glass is broken. Spillovei_ or cleaning
solution may penetram a broken cooktop
and cream a risk of electrical shock. Contact
a qualified mchnician immediamly should
your glass cooktop hecome broken.
E:,:Nmer nse the glass cooktop snilaace as a
cutting hoard.
E:,:Do not place or store items that can meh or
catch fire on the glass cooktop, exen when it
is not being used.
_7_Be careflfl when placing spoons oi other
stilting utensils on the glass cooktop surPace
when it is in use. They may hecome hot and
could cause hums.
E:,:Clean the cooktop Mill cauuon. If a wet
spong_ oi clofl_ is used to Mpe spills on a
hot surt_ace unit, be ca_eflfl to mold steam
l)nills. Sonle cleaners can produce noxious
flm/es if applied m a hot snifitce.
NOTE."_Ajerecommend that you mold wiping
any surt_ace unit areas until they haw cooled
and the indicator ligilt has g_ne oft: Sugar
spills are the exception to this. Please see
Cleaning the glass cooktop sect.ion.
_fi:,:When the cooktop is cool, use only the
recommended cleaning cream to clean
the cooktop.
E:,:To axoid possible damage to d_e cooking
surPace, do not apply cleaning cream to the
glass surt_ace when it is hot.
E:,:Alter cleaning, use a d U cloth or paper towel
to remoxe all cleaning cream residue.
_7_Read and follow all instructions and
warnings on d_e cleaning cream labels.
_7{_:Do not lift the cooktop. Lifting the cooktop
can lead to damage and improper operation
of the range.
A WARNING/
COILSURFACEUNITS_o__om_mod_/_I
;fi:,:Clean the cooktop with caution. If a
wet sponge is used to wipe spills on a hot
cooktop, be careflfl to mold steam btnils.
To avoid the possibility of a bni_ oi elecuic
shock, alwws be certain that the controls for
all snrlaace units are at the OFFposit.ion and
all coils are cool 1)efore attempting to lift or
remo\_ a nnit.
_7_:Do not immerse or soak the remoxable
surface units. Do not put them in a
dishwashei:
READANDFOLLOWTHISSAFETYINFORMATIONCAREFULLY.
SAVETHESEINSTRUCTIONS
Be sure the drip pans and the x_nt duct are
not coxered and are in place. Their absence
during cooking could damag_ range parts
and wiring.
Do not use aluminum %il to line fl_e drip
pans or anywhere in the oven except as
descrihed in this manual. Misuse could
result in a shock, fire hazard or damage
to the rang_.
Usingthe surface units, ge.co,,
Throughout this manual, features and appearance may vary from your model.
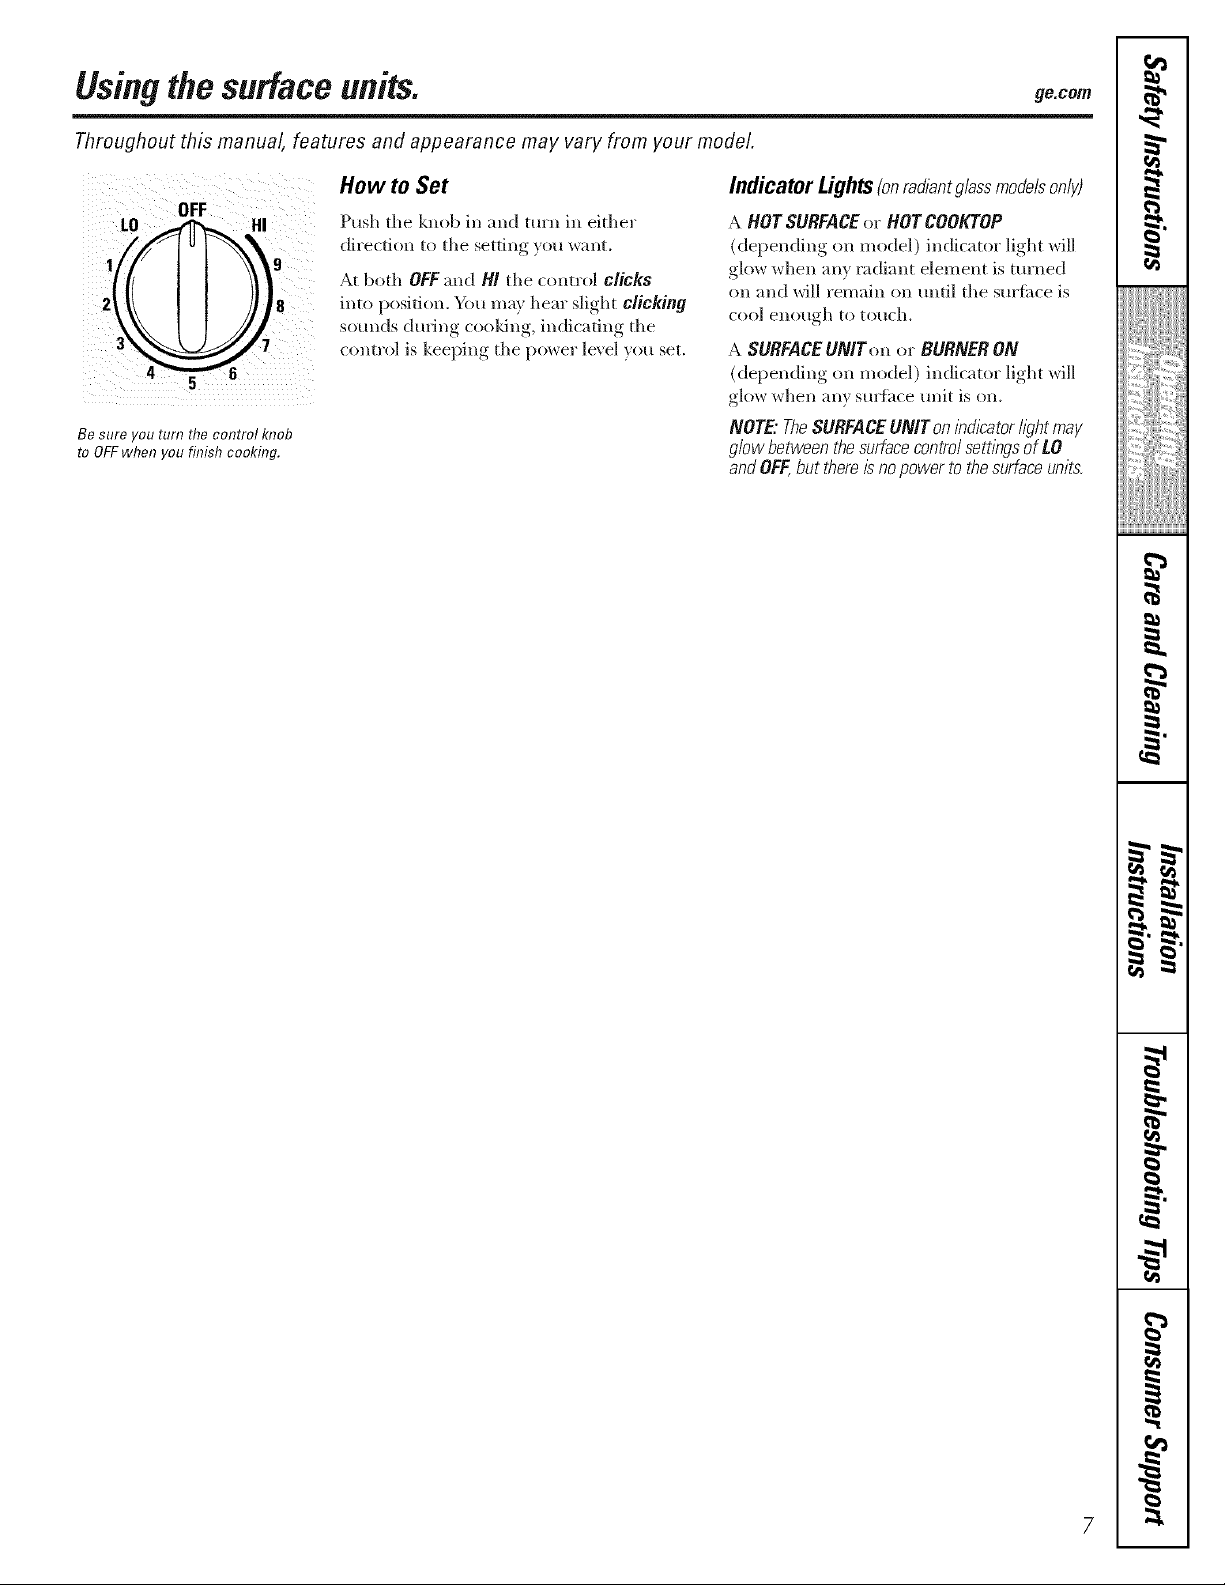
OFF
2
4
Be sure you turn the control knob
to OFFwhen you finish cookflTg.
How to Set
Push the knob in and turn ill either
direction to tile setting you want.
At both OFFand HI the control clicks
into position. Ym may hear slight clicking
sounds during cooldng, indicating the
control is keeping tile power ]e', el you set.
IndicatorLights(onradbntg/assmodelsonly)
A HOT SURFACEor HOT COOKTOP
(depending on model) indicat(w light will
glow when ally radiant element is turned
on and will remain on until tile Stll'titce is
COOlenotlgh to tOtlch.
A SURFACEUNlron or BURNER ON
(depending on model) indicator light will
glow when any smfime unit is on.
NOTE">e SURFACEUNITon/bd/2ator//_?htmay
glow between the surfacecontrol sett/bgsof I.O
andOFF,but there/_ no power tothe surface units.
7
I
w
Usingthe radiantsurface units, some odefsl
About the radiant surface units...
Tile nldiant cooktop lbatm'es heating units _:
beneath a smooth glass sm'fime.
Waterstains(mineraldeposits)areremovable
usingthecleaningcreamorfull-strengthwhite
wnegar
m
Never cook directly on the glass.
Always use cookware.
NOTE:Ash_?htodorIsnormalwhenanewcooktop
/susedforthefksttffne./t/scausedbytheheating ;;Ji:_
ofnewpartsandinsulatingmatena/sandwill
disappearinashortt/kne.
The sm]i_ce unit will cxcle on and off to !i_:
Illailltaill _o111" selected con[l'ol settill r
It is safo to place hot cook_<u'e from tile
oven o1" S[ll'fitce Oil tile glass S[ll'iilce xdlen
Useof window cleanermay leavean indescent
film onthecooktop. Thecleaningcream wff/
removethis discoloration.
Don'tstore heavyitemsabove thecooktop. If they
droponto the cooktop,theycan causedamage.
Donot usethesurfaceas a cuttingboarcL
tile smthce is cool.
Even alter tile surfime units a*'e turned off;
the glass cooktop retains enough heat to
continue cooldng, To avoid ove>cooldng,
m
_'emove pans flora tile sm'time units when
tile fi_od is cooked. A\oid pladng an)q:hing
on tile sm'time unit until it has cooled
completel>
Always place thepan in the center of
the surface unit you are cooking on.
Do not sfide cookware across the cooktop
because it can scratch the glass--the glass
is scratch resistant, not scratch proof.
h
.,im
m
m
#_.
1=
m
oa
h
Temperature Limiter
E\'e_' radiant smti_ce trait has a
temperatm'e limited:
Tile temperature limiter protects tile glass
cooktop fl'om getting too hot.
Tile temperature limiter may cycle tile
milts off fi)r a time if':
::_?The pan boils dr)z
!:_:Thepanbottomis notf/aL
!_;:Thepanisoffcenter
_; Thereisnopanontheunit.
I
8
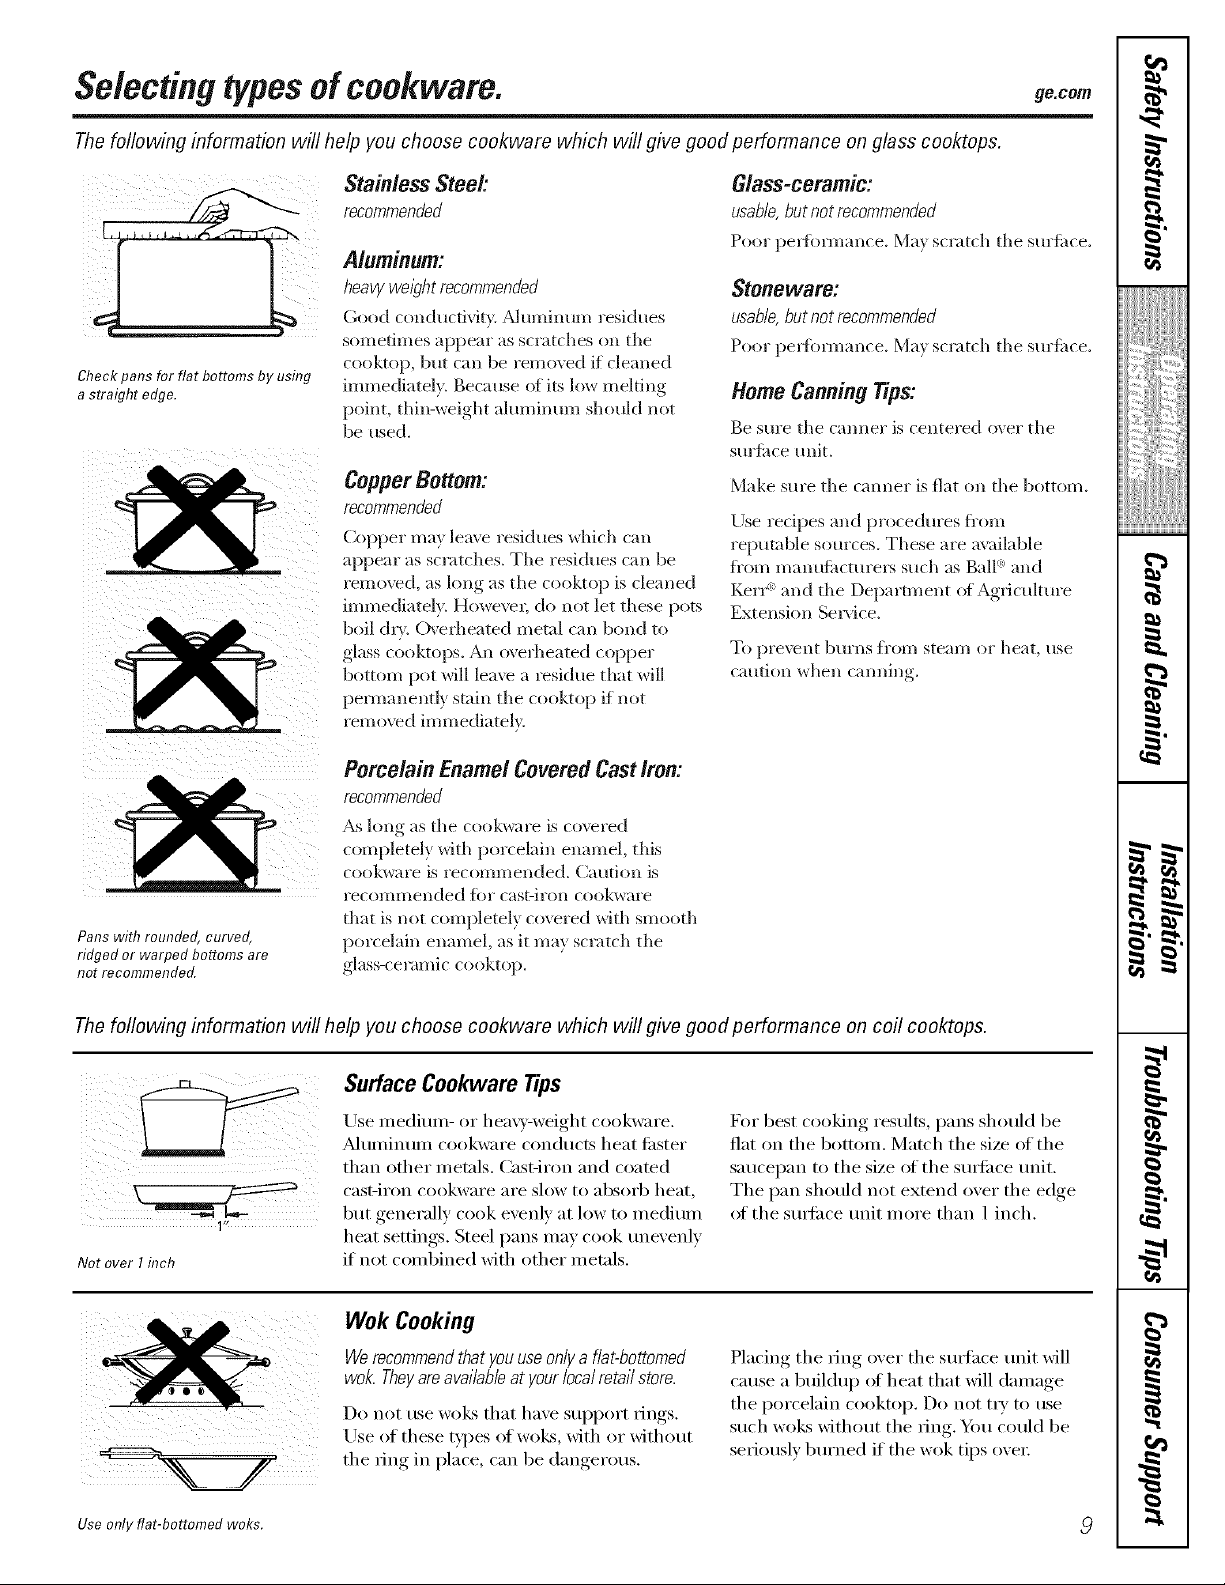
Selectingtypesofcookware, ge.co,,
The following information will help you choose cookware which will give good performance on glass cooktops.
Check pans for flat bottoms by using
a straight edge.
Pans with rounded, curved,
ridged or warped bottoms are
not recommended.
Stainless Steel:
recommended
Aluminum:
heavywe/_?htrecommended
Good conductivity. _Muminum residues
sometimes appear as scratches on tile
cooktop, but can be remo\ ed if cleaned
immediatel> Because of its low melting
point, thin-weight ahm/inum shoukl not
be used.
Copper Bottom:
recommended
Copper may leave residues whkh can
appear as scratches. The residues call be
iemoved, as king as tile cooktop is cleaned
immediately. Howevel; do not let these pots
boil d_'. Overheated metal can bond to
glass cooktops. All overheated copper
bottom pot will leave a residue that will
permanently stain tlle cooktop if not
rein oved imm ediatel>
Porcelain Enamel Covered CastIron:
recommended
_s long as tile cookware is (oveled
completely with porcelain enamel, this
COOkWai'e is i'ecolllI/lended. Catltion is
I'eCOlllI/lended tk)l"casViFo/l cookware
that is not completely covered with smooth
porcelain enamel, as it may scratch the
glass-ceramic cooktop.
Glass-ceramic:
usable,but not recommended
Poor pe_fm'mance, l\/la_ scratch tile sm'fi_(e.
Stoneware:
usable,but not recommended
Poor pe_fimnance. J\/la,_scratch tile sm'iilce.
Home Canning Tips:
Be Stll'e tile (;lllllel" is Celltel'ed ()*,;'el"tile
sm'titce unit.
Make sure tile caroler is fiat on tile bottom.
Ijse recipes and procedures fl'om
repntable somces. These are available
Kom manufilcturers such as Ball <_and
/(.erF _and the Department ofAgriculture
Extension Sel_ice.
To pi'exent btll'llS fl'olll stean/of heat, use
c;ttlti()ii vvhell Callllillg.
w
[..--
! ta
The foflowing information will help you choose cookware which will give good performance on coil cooktops.
Surface Cookware Tips
Notover I inch
Use mediun/- or hea',_v-weight cookware.
Ahllninunl cookware conducts heat fi_ster
than other inetals. Cast-iron and coated
cast-ii'on cookware are slow to absorb heat,
but generally cook evenh' at low to inediuln
heat settings. Steel pans Inay cook tmevenlv
if not confl)ined with other metals.
For best cooking results, pans should be
fiat on tile bottom. Match tile size of tile
saucel)an to tile size of the s/mfi_ce unit.
The pan should not extend over the edge
ot the s/mfi_ce trait inore than 1 inch.
Wok Cooking
We recommendthat youuse onlya flat-bottomed
wok. Theyareavailable at your localretail store.
Do not rise woks that have supl)ort tings.
Use of these types of woes, with or without
the ring in place, can be dangerous.
Useonlyflat-bottomedwoks.
Placing tile ring over tile suI_fhce unit will
cause a buildup of heat that will dalnage
tile porcelain cooktop. Do not tla' m use
such woes without the I_ing. _4m could be
seriously burned if the wok tips ()vex-
g
m
q

Usingthe ovencontrols,ronsomemodefsl
Throughout this manual, features and appearance may vary from your model.
OVEN CONTROLS
.-%
OvenControl,ClockandTimerFeaturesandSettings
o BAKE/TEMPRECALLPad 0
O Display
If "F- and a numberor letter" flash in the displayand the
ovencontrolsl)na& this indicatesa function errorcode.
/f yourovenwas set fora timedoven operationand
apower outageoccurred the clockand aftprogrammed
functionsmustbereseL
ThetlYneof daywi// flash inthe display whentherehas been
apower outage.Resetthe clock.
If the functionerrorcode appearsdunbg theself-cleaning
cycle,checkthe ovendoor latch. Thelatch handlemay have
beenmoved even if onlyslightly,from the/atchedposition.
Make sure the latch ismovedto the nght as far as it wi// go.
Touch the CLEAR/OFFpad. Allow the oven tocool for
onehour Put theoven backinto operation, ff thefunction
errorcode repeats,disconnectthepower to the range and
ca//for service.
Touch tiffs pad to select tile bake function.
BAKE Light
[qashes _hile in edit n-lode--} ou can change
tile oven temperature at this point. (;lo_:s _tlen
the oven is in bake mode.
START/ON Pad
Must be touched to start an) cooking or
cleaning function,
Shows tile time of da}; oxen temperattH'e,
whether the oven is in the bake, broil or
self:cleaning mode and the times set for
tile tiiller or atltoillatic ()veil opei'ations.
Tile display will show PBEwhile preheating.
_._q/en tile oxen reaches tile selected
temperature, the oxen control will beep and
the display will show the oven temperature.
ONTROLS
KITCHEN TIMERON/OFF
or TIMER ON/OFFPad
Totuh this pad to select tile timer tbature.
Then touch tile + and -pads to a(!iust tile
[ilI/el:
TIMER Light
[:lashes _]lile in edit mode--y()u can change
the set time at this point. Glows when tile timer
has been activated, [qashes again _hen the time
has run out until tile control is reset.
CLOCK Pad
To set tile clock, press this pad twice and then
press tile +and -pads. Tile time of day will
flash in tile display when tile oven is fi_t
tllrned on.
STARTTIME Pad (on some models)
Use along with tile COOKINGTIMEor
SELFCLEANpadsto set tile oven to start
and stop automatically at a time you set.
STARTTIME Light
[:lashes _hile in edit mode--y()u can change
the start time at this point, Glows when the
flmcfion has been activated,
COOKING TIME Pad (on some models)
V
Touch this pad and then touch tile + or -
pads to set tile aillO/lnt oJ[ tiI/le v(}/1%;lilt VO/lI"
toed to cook. Tile oven will shut off when tile
cooking time has run out.
COOKINGTIME Light
[:lashes _hile in edit mode--y()u can change
the set time at this point. Gkm:s _hen the
flmcfion has been activated. Flashes again _tlen
tile time has mn out tmtil tile control is reset.
10
OvenControlClockand TimerFeaturesandSettings
ge.com
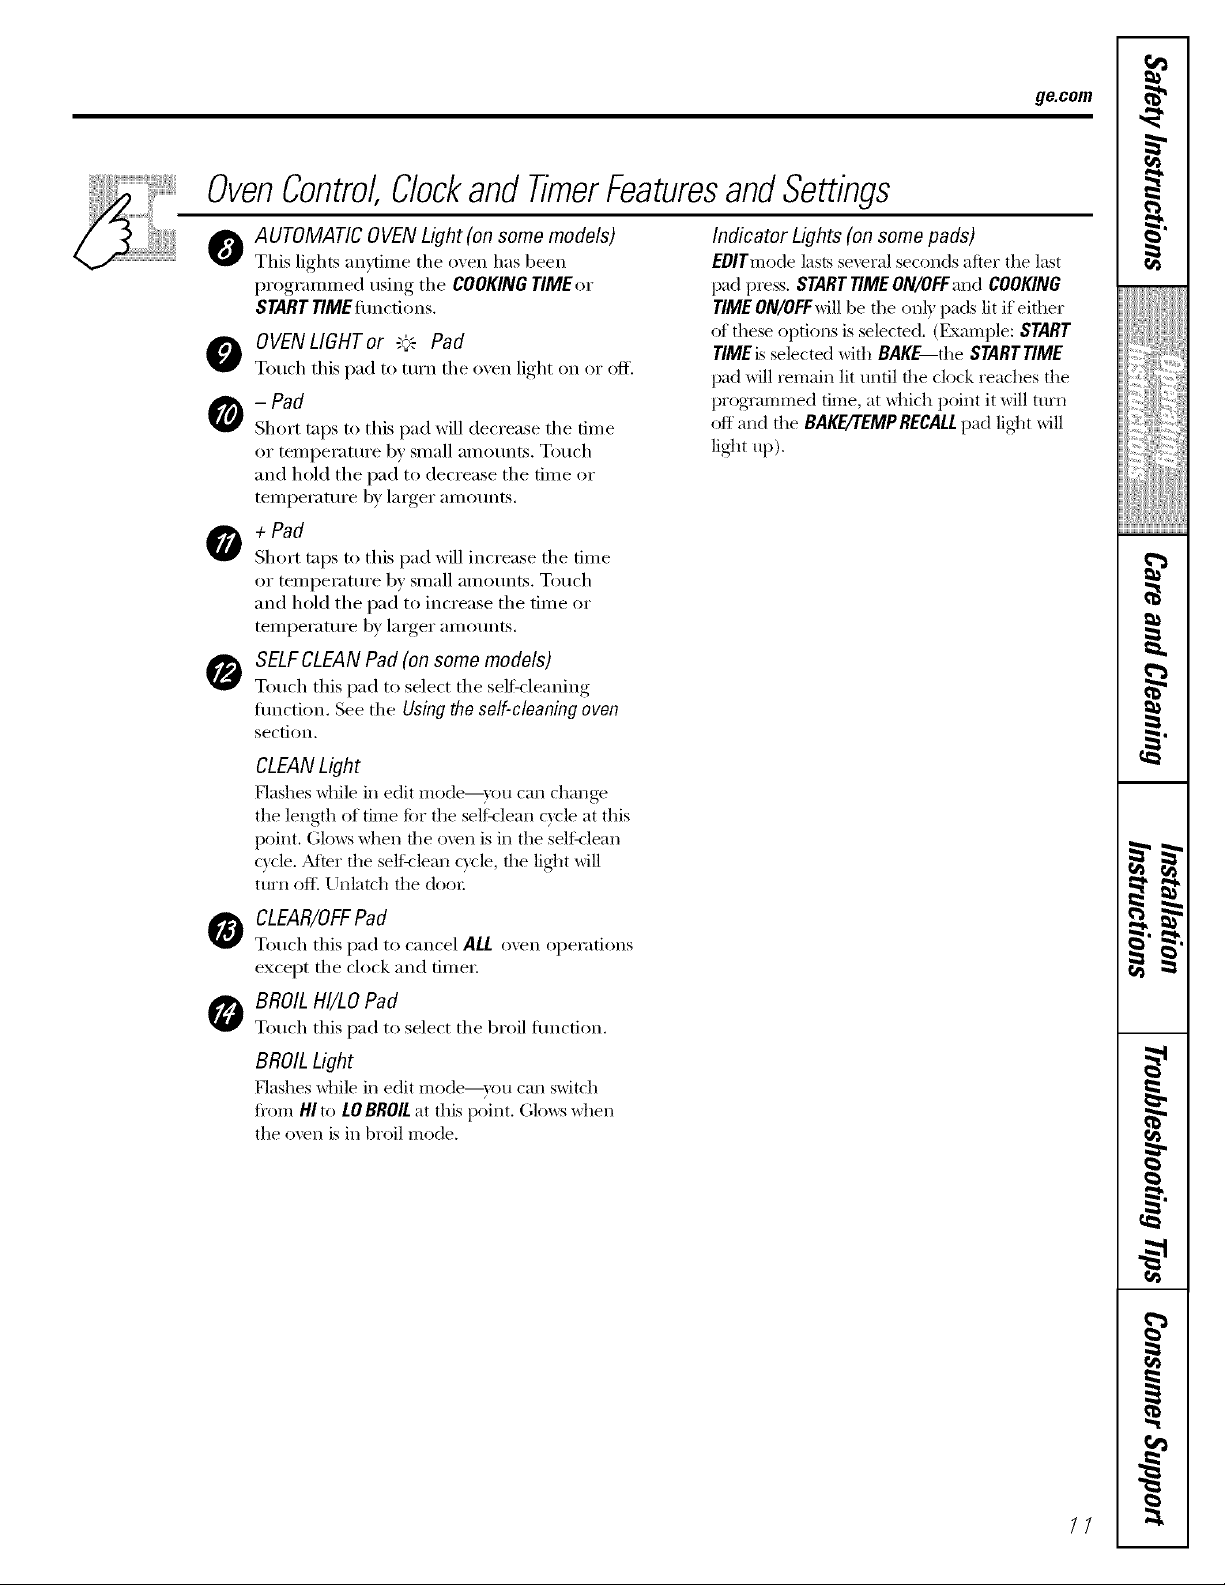
AUTOMATIC OVEN Light (on some models)
0
This lights anytin_e the oven has been
progranm_ed using the COOKINGTIMEor
START riME timctions.
O OVENLIGHTor "_'= Pad
Touch this pad to turn the oven light on or off.
-Pad
Short taps to this pad will decrease the time
or temperature by small amounts. Touch
and hold the pad to decrease the time or
temperature by larger amounts.
O +POd
Short taps to this pad will increase the time
or temperature by small amounts. Touch
and hold the pad to increase the time or
temperature by larger amounts.
SELF CLEAN Pad (on some models)
Touch this pad to select the self'cleaning
flmction. See the Using the self-cleaning oven
section.
CLEANLight
Flashes while in edit mode--you can change
the length of time ti)r the selt:vlean c)cle at this
point. Glows when the oven is in the selt:vlean
c}cle. Adter the seltklean cycle, the lig]_t will
ttli'n oiI_ Unlatch the door
CLEAR/OFFPad
Touch this pad to cancel ALL oven operations
except the clock and timer;
BROIL HI/LO Pad
Touch this pad to select the broil flmction.
BROIL Light
Flashes _dfile in edit mode--you can switch
fi'om HI to LOBROILat this point. Glcm:swhen
the oven is in broil mode,
Indicator Lights (on some pads)
EOlTmode lasts several seconds after the last
pad press. START TIMEON/OFFand COOK/NG
TIMEON/OFFwill be the on b pads lit if either
of these options is selected. (Example: START
TIMEis selected with BAKE the SraRT TIME
pad will remain lit until the clock reaches the
programmed time, at _hich point it will turn
off and the BAKE/TEMPRECALLpad lig_t will
lig]_t up),
w
m
g
N"
m
_B
r_
q
//
I
w
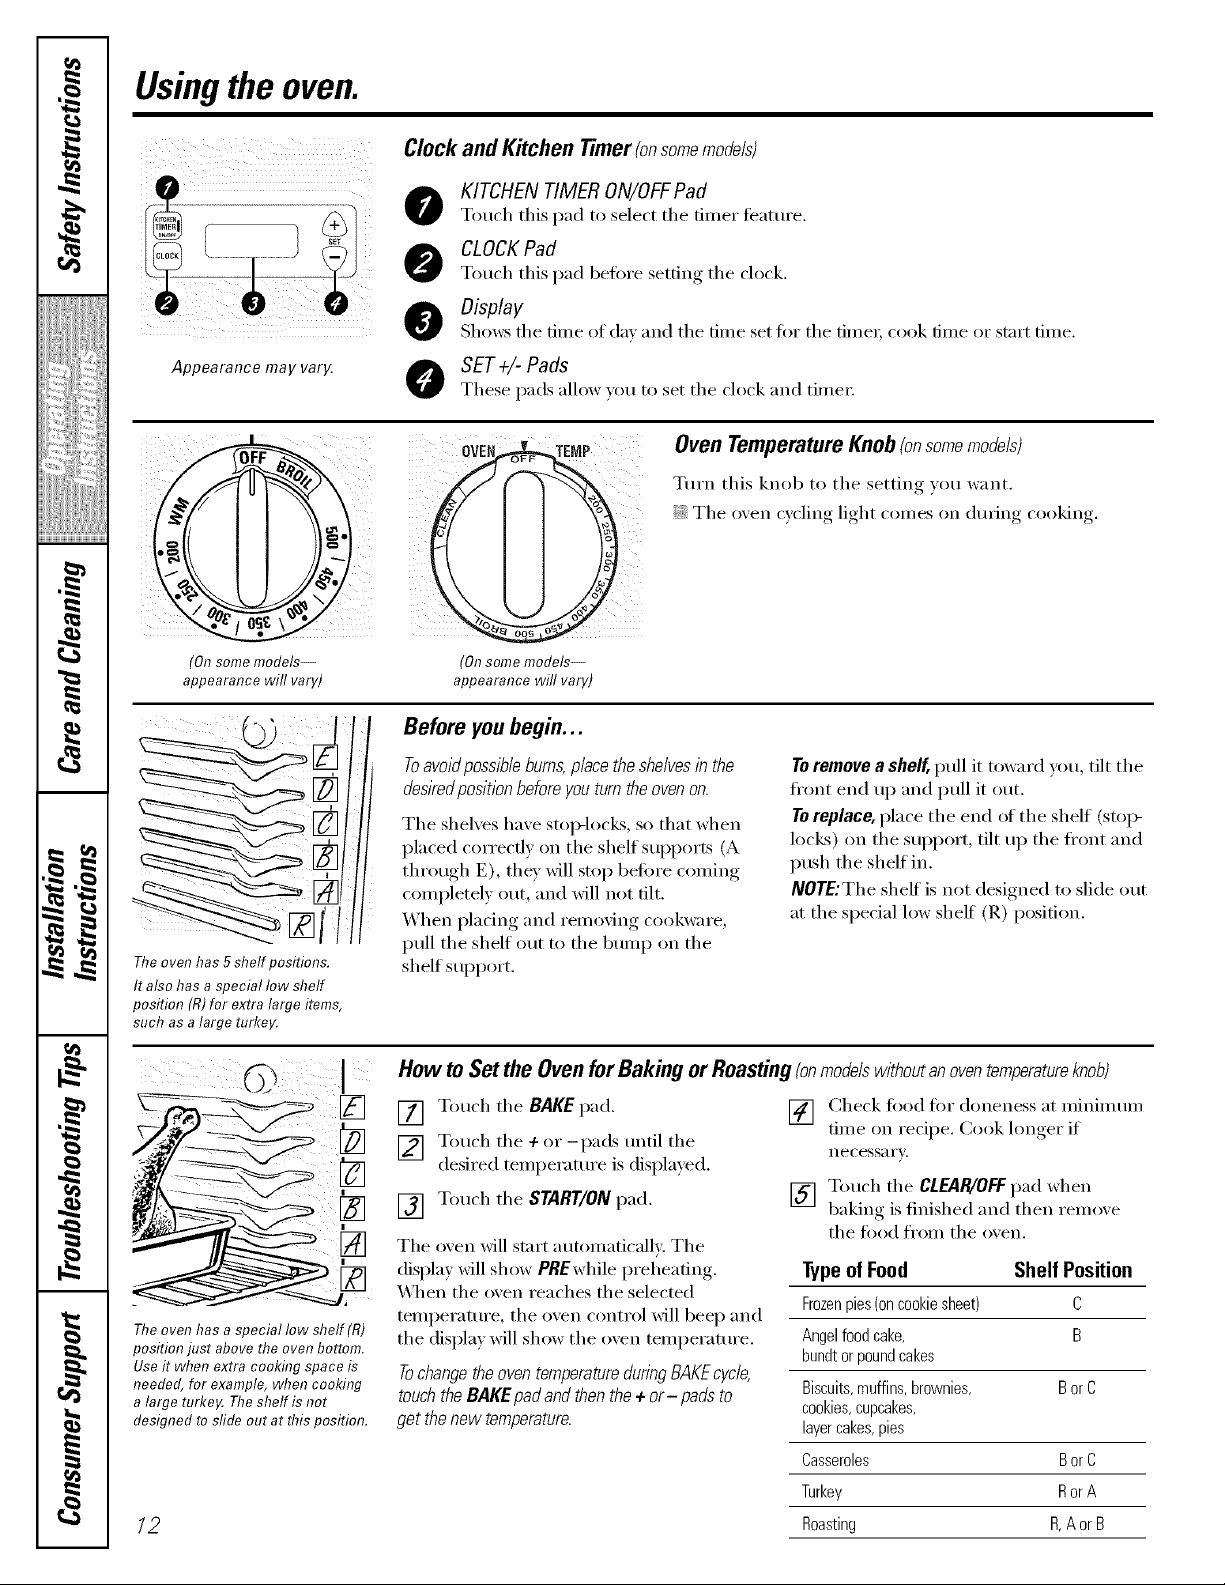
Usingthe oven.
Clockand Kitchen Timer(onsomemodels)
KITCHEN TIMERON/OFFPad
Touch this pad to select the timer feature.
m
CLOCKPad
Touch this pad beiore setting the clock.
Display
Shows the time of dm and the time set for the fime_, cook time or start time.
Appearance may vary
O SET+l-Pads
These pads allow _ou to set the clock and time_:
OVEN
Oven TemperatureKnob(onsomemodels)
Turn this knob to the setting you want.
i_i_The oxen cycling light comes on dining cooking.
m
(Onsome models--
appearance will vary)
(On some models--
appearance will vary)
Before youbegin...
Toavoidpossible burns,place the shelvesin the
desiredposition before you turn theovenon.
The shelves have stop-locks, so that when
h
h
placed correctly on the shelf sui)ports (A
through E), they will stop before coming
completely out, and will not tilt.
When plating and removing cookware,
dr_
m
Theoven has 5shelf positions.
It also has a special low shelf
position (R)for extra large items,
such as a large turkey.
pull the shelf Otlt to the bump on the
shelf SUl)port.
To remove a shell, pull it toward you, tilt the
ti'ont end up and pull it out.
To replace, place the end (ff the shelf (stoi>
h)cEs) on the sui)port, tilt up the ti'ont and
push the shelf in.
NOTE:The shelf is not designed to slide out
at the special low shelf (R) position.
How to Set the Oven for Baking or Roasting (onmodelswithoutanoventemperatureknob)
m
[] Touch the BAKE pad.
[] Touch the ÷or-pads until the
desired temperature is displayed.
[] Touch the START/ON pad.
The oven will start automatically. The
display will show PREwhile preheating.
_._l_en the oven reaches the selected
tz
m
I
Theoven has a special low sheff (R)
position just above the oven bottom.
Useit when extra cooking space is
needed, for example, when cool<ing
a large turl<eHThe shelf is not
designed to sfide out at this position.
temperature, the oven control will beep and
the display will show the oven temperature.
Tochangetheoven temperatureduring BAKEcycle,
touchthe BAKE pad and thenthe + or-pads to
get thenew temperature.
/2
[] Check fi_od fi)r doneness at minim um
time on recipe. Cook hmger if
necessary.
[] Touch the CLEAR/OFFpad when
baking is finished and then remoxe
the food from the oven.
Typeof Food Shelf Position
Frozenpies(oncookiesheet) C
Angelfoodcake, B
bundtorpoundcakes
Biscuits,muffins,brownies, BorC
cookies,cupcakes,
layercakes,pies
Casseroles BorC
Turkey Ror A
Roasting R,A orB
Typeof Margarine Will Affect Baking Performanc!!
ge.com
Most recipes for baking have been
developed using high fat products such
as butter or margarine (80% fat). If you
decrease the fat, the recipe may not
give the same results as with a higher
fat product.
Recipefailurecanresultffcakes,pies,pastries,
cookiesorcandlesaremadewithlowfatspreads.
Thelowerthefatcontentofa spreadproduct,the
morenoticeablethesedifferencesbecome.
Preheatingand Pan Placement
Preheat the oven if tile redpe calls fin" it.
To preheat, set the oven at tile correct
temperature. Preheating is necessaiw fin.
good results when baldng cakes, cookies,
past U and b*'eads.
Forovenswithout a preheat ihdleatorlight or tone,
preheat 10m/butes.
Onsome models,the d/spley w/71show "PilE"
while preheat/bg.When theovenreachesthe
selected temperature,the ovencontrol will beep
and thed/spleywill show the oven temperature.
Federal standards require products labeled
"marga_-h_e" to contain at least 80% tilt by
weight, ix)\_qilt spreads, on the other hand,
contain less tilt and more water. The high
moisture content of these spreads affects
the texture and flavor of baked goods. For
best results with your old til\'ofite redpes,
rise margarine, butter or stick spreads
containing at least 70% vegetable oil.
Baking results will be better if baking pans
are centered in tile o_ ell as Ill[/ch as
possible. Pans should not touch each ()tiles"
or tile walls of tile oven. If vou need to use
two shelves, stagger tile pans so one is not
directly abo\v tile other; and leave
appro_mately 1½" Kern tile fl'ont ot tile
pan to tile fl'ont ot tile shell
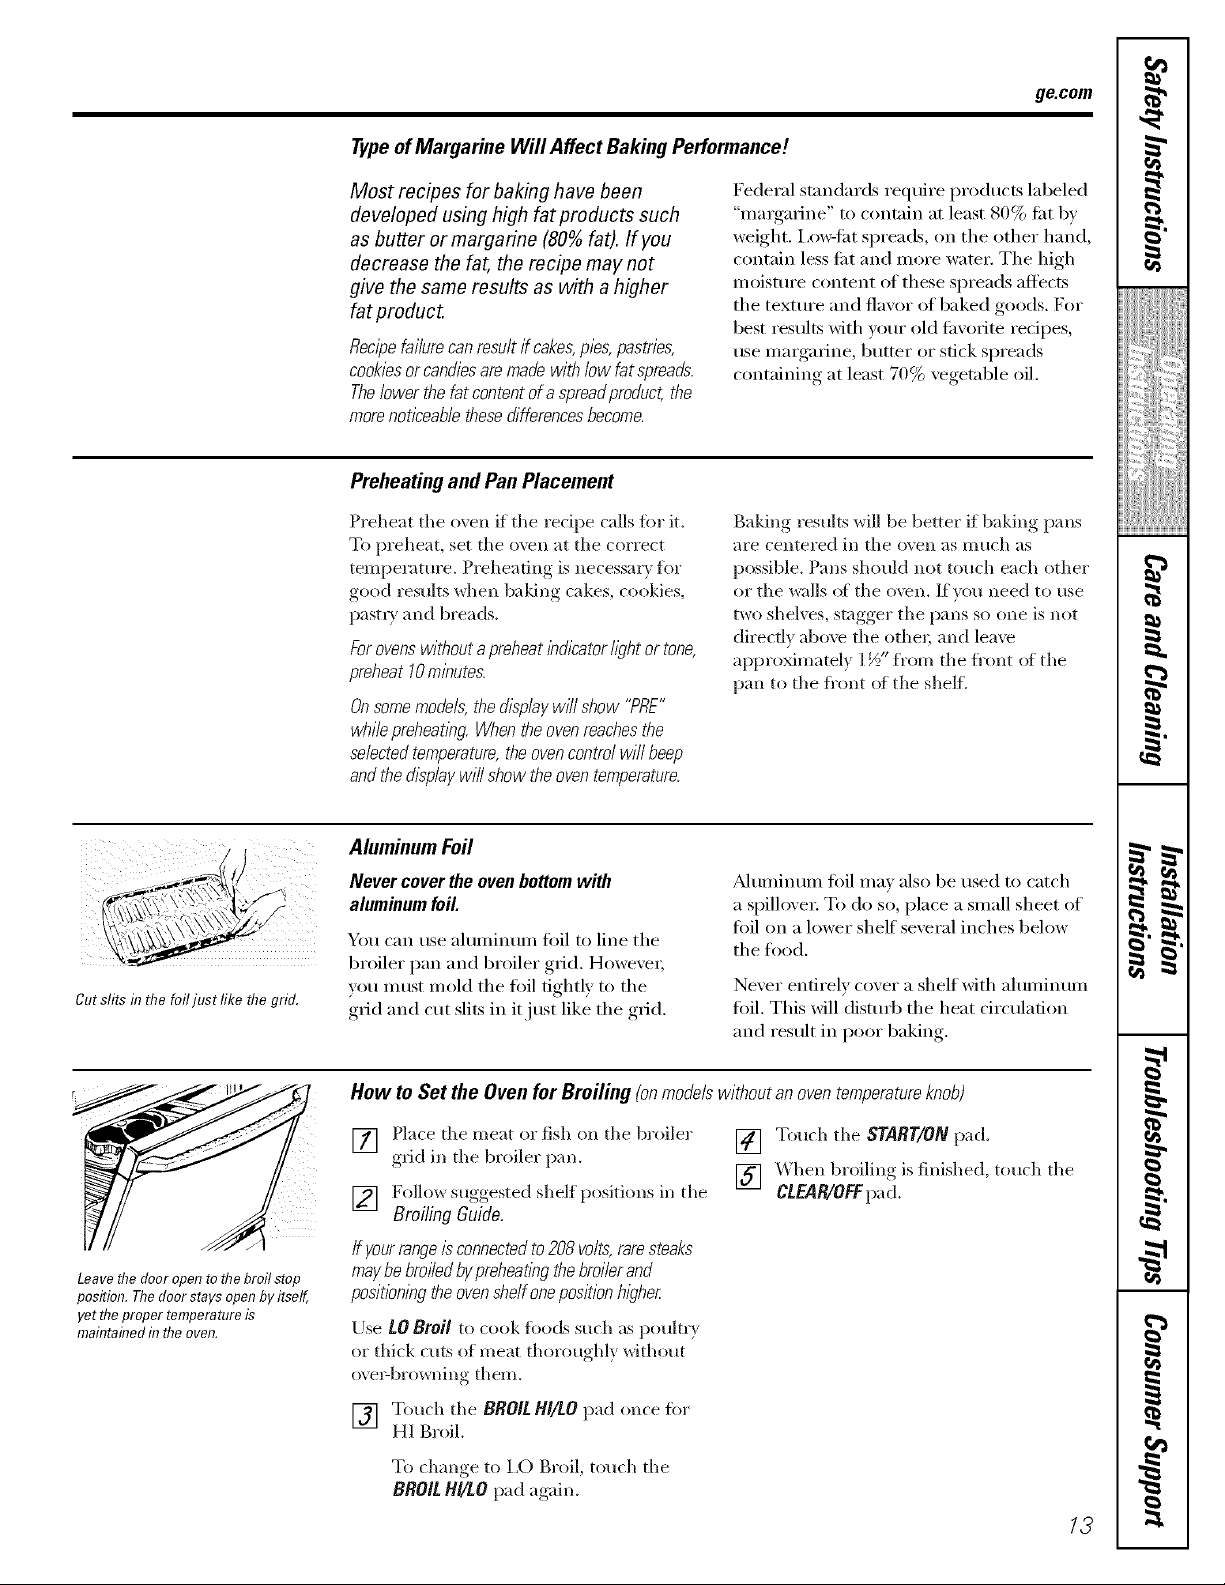
Cutslits inthefoiljust likeflTegrid.
l
Leavethe door open tothe broil stop
position. Thedoorstays open by itself,
yet the proper temperatereis
rnaflTtainedf17the oven.
Aluminum Foil
Never cover the oven bottom with
aluminum foil.
You can use ahmfinum fi)il to line the
broiler pan and broiler g_id. Howexe_;
you must mold the fifil tightly to the
gt'id and cut slits in it just like the grid.
_Muminum fi)il may also be used m catch
a spilloveL To do so, place a small sheet of
fifil on a lower shelf several inches below
the tood.
Never entirely cover a shelf with aluminum
toil. This will disturb the heat circulation
and result in poor baking.
How to Set the Oven forBroiling (onmodels without anoven temperatureknob)
[] Place tile meat or fish on tile broiler
grid in tile b_'oiler pan,
Follo*_ stwoested s
[] _ '._ _g ._ .dlelfpositions in the
Broiling Guide.
ff yourrangeis connectedto208 volts,rare steaks
maybe bro/Tedbypreheatlegthe broilerand
podtbn/bg the ovenshelfone positionh/_?her.
Use LO Broil to cook fi>ods such as poultry
or thick cuts of meat thoroughly without
(wer-b,'owning them.
[] Touch tile BBOIL HI/LO pad once fiw
HI Broil.
[] Touch tile START/ON pad.
[] _hen broiling is finished, touch tile
CLEAR/OFFpad.
To change to 1,0 Broil, touch tile
BROIl. HI/tO I)ad "__,"_in
13
Usingtheoven.
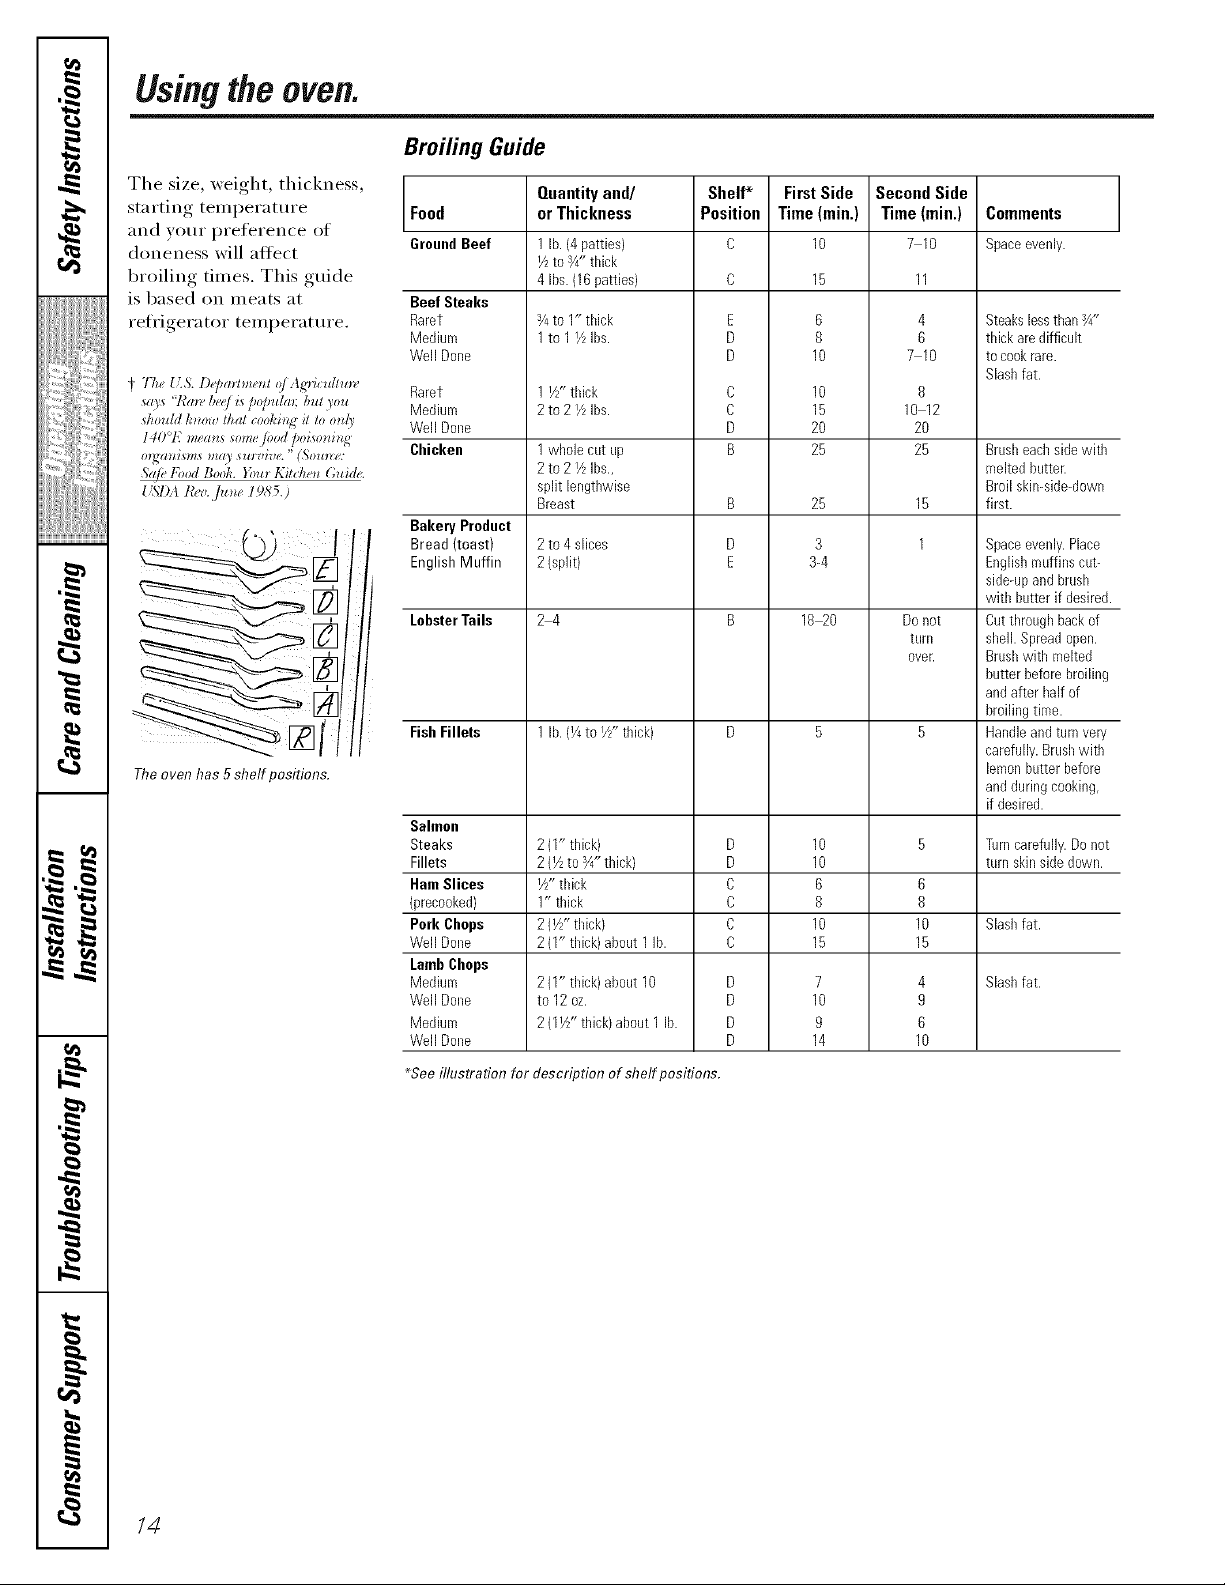
Bruiting Guide
The size, weight, thickness,
starting temperature
and your preference of
doneness will atii_ct
broiling times. This guide
is based on meats at
retiigerator temperatm'e.
Theoven has 5shelf positions.
Food
GroundBeef
Beef Steaks
Raret
Medium
WellDone
Raret
Medium
WellDone
Chicken
Bakery Product
Bread (toast)
English Muffin
LobsterTails
FishFillets
Sahnon
Steaks
Fillets
HamSlices
")recooked)
Pork Chops
WellDone
LambCbops
Medium
WellDone
Mediuro
WellDone
Quantityand/
or Thickness
1 lb. (4patties)
I/zto _/4"thick
4 Ibs.(16patties)
3/4to 1"thick
1to 1I/LIhs.
1 i/_-thick
2to2 YLIbs.
1whole cut up
2to 2 I/zIbs.,
split lengthwise
Breast
2to 4 slices
2(split)
24
1 lb. (¼to I/z"thick)
2(1" thick)
2(Yzto Y4"thick)
I/z"thick
1" thick
2(Yz"thick)
2(I" thick) about 1 lb.
2(1" thick) about 10
to 12 oz.
2(Y/z" thick)about 1 lb.
Shelf* First Side
Position Time (rain.)
C 10
E
D
D
C
C
D
B
B
D
E
D
D
C
C
C
C
D
D
D
D
6
8
10
10
15
20
25
25
3
3-4
18_0
10
10
6
8
10
15
7
10
9
14
Second Side
Time (rain.)
710
4
6
710
8
10 12
20
25
15
1
Donot
tarll
oveE
6
8
10
15
4
9
6
10
Commeots
Spaceevenly.
Steakslessthan_Y'
thick aredifficult
toc00k rare.
Slashfat.
Brasheachsidewith
meltedbatter.
Broil skin-side-down
first.
Spaceevenly.Place
Englishmuffins cut-
side-upandbrash
with hatter if desired.
Cutthroughback of
shell. Spreadopen.
Brashwith malted
butter beforebroiling
andafter half of
broilingtime.
Handleandturnyen/
carefully.Brashwith
lemonhatterbefore
andduringcooking,
if desired.
Tarncarefully.Do not
turn skinsidedown.
Slashfat.
Slashfat.
_Seeillustration for description of shelf positions.
/4
Usingthe clock andtimer.(onsomemode/sl ge.com
Not all features are on all models.
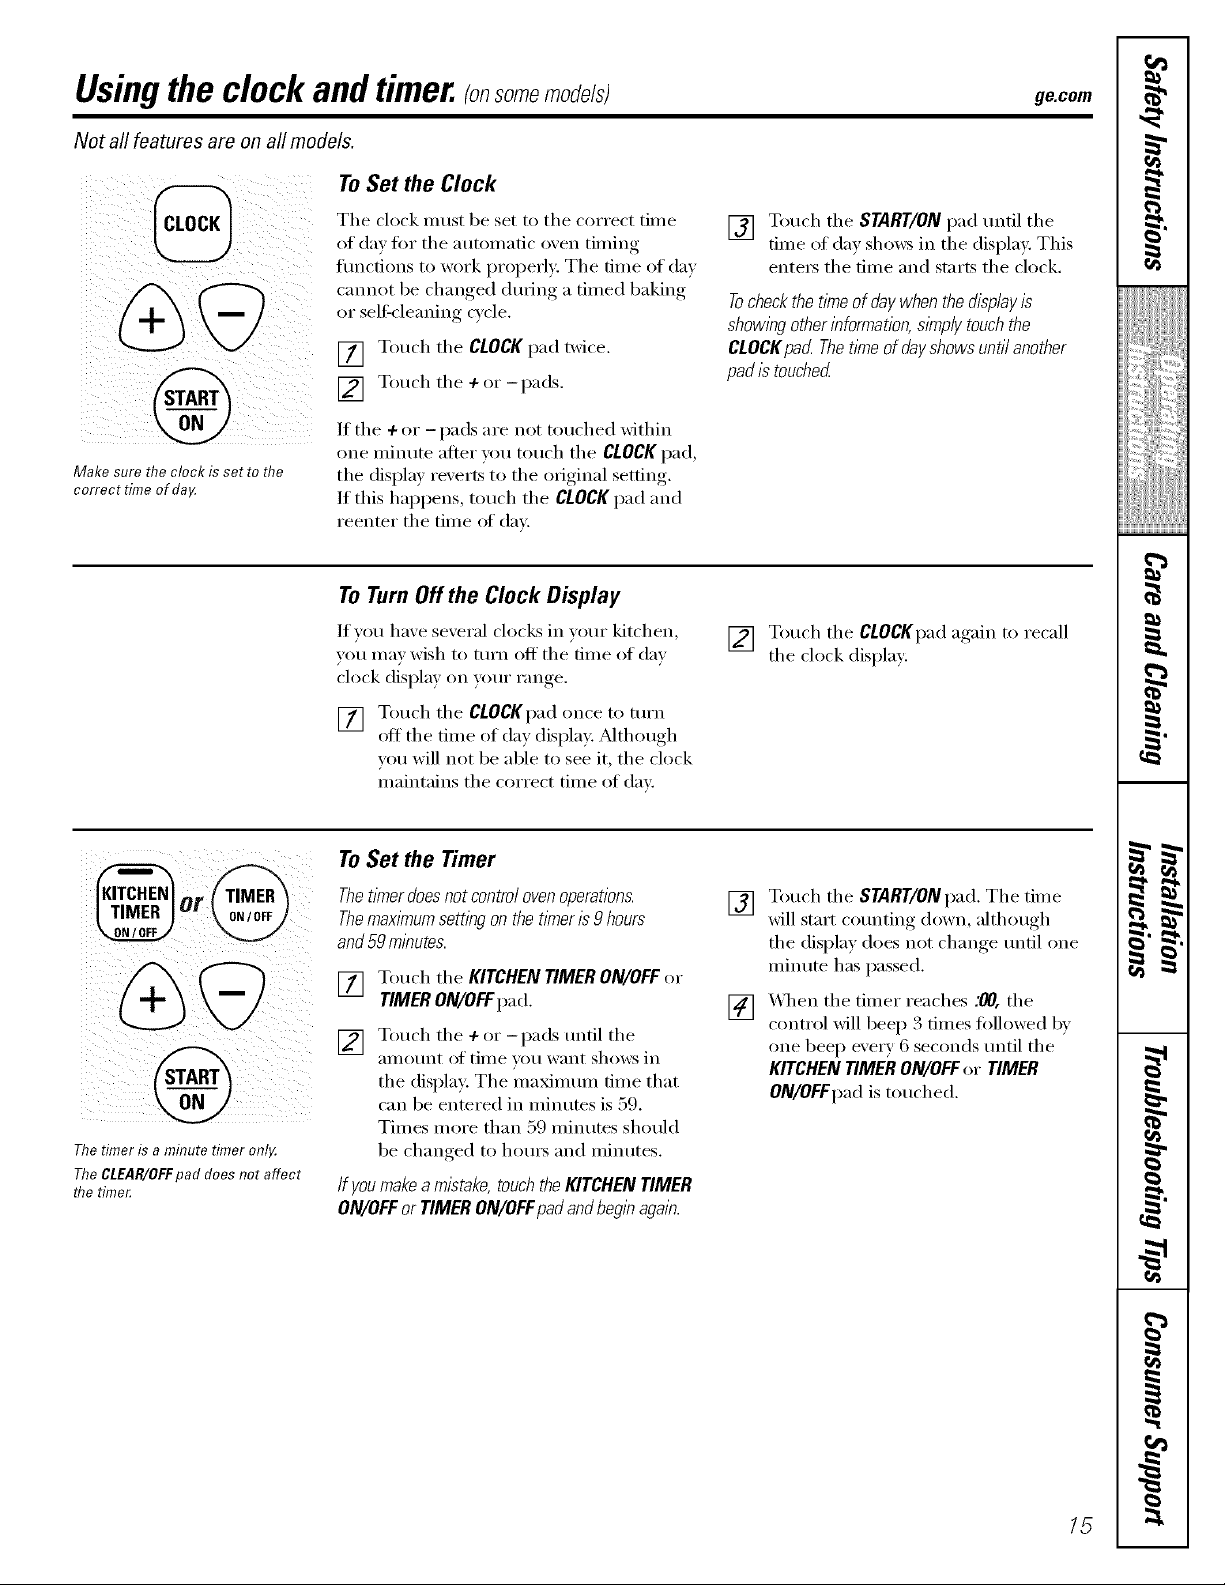
ToSet the Clock
46I?
@
Make sure the clock is set reme
correct time of da_
The clock Inust be set to tile correct time
of day fin" tile automatic ox'erl timing
flmctions to work properly: Tire time of day
cmmot be chan_ed dufin_ a timed baking
or seltk'leaninff cycle.
[] Touch tire CLOCKpad twice.
] Touch tire + or-pads.
If tire + or - pads are not touched withill
(me Inlnute alter you touch tire CLOCKpad,
the display reverts to tire r)fiuinal setting.
/f this happens, touch tile CLOCKpad and
reenter tire time of din:
ToTurnOffthe Clock Display
If you have several clocks in your kitchen,
you may wish to mrn off tile fiIne of day
clock display on yam" range.
[] Tr)uch tile CLOCKpad once to turn
off tile time of day display: _Mthough
you will not be able to see it, tile clock
maintains tile correct time of day.
[] Touch tile START/ONpad until tile
time of day shows in tile displa); This
entex_ the time and starts the clock,
Tocheckthetitheof daywhenthedisplayis
showingotherinformation,s/_nplytouchthe
CLOCKpa_ Thetimeofdayshowsuntilanother
padistouched
[] Touch tile CLOCKpad again to recall
tile clock display:
==
w
Thetimer is a minute timer only.
TheCLEAR/OFFpad does not affect
flTetime_
To Set the Timer
Thet/Ynerdoesnot contro/ ovenoperations.
Themax/Ynumsetting onthe timer/s 9 hours
and59 minutes.
1_ Touch tile KITCHENTIMERON/OFFor
TIMER ON/OFF pa d.
[] Touch tile +or-pads mltil tile
_lIIlOtlnt ()_ [lille _()tl w_lIlt shows in
tile display: Tile maximum time that
can be entered in minutes is 59.
Times more than 59 minutes should
be changed to hom_ and nlinutes.
If youmakeamistake,touchtheKITCHENTIMER
ON/OFFor TIMERON/OFFpadandbeginagain,
[] Touch the START/ONpad. The time
will start counting down, although
tile display does not change tmtil one
minute has passed.
[] _4_/en tile timer reaches :00, tile
control will beep 3 times followed lJ',
one beep e\'et T 6 seconds tmti] the
KITCHEN TIMER ON/OFF or TIMER
ON/OFFpad is touched.
g
€=
m
15
q
Usingthe clock and timer, somemode/sl
Not all features are on all models.
To Reset the Timer
Or
@
or
If tile display is still showing tile time
remaining, you may change it 1)ytouching
the KITCHEN TIMER ON/OFFor TIMER
ON/OFFpad, then touch the + or-pads
until tile time wm want appears in tile
displa,v.
ToCancel the Timer
Touch tile KITCHEN TIMER ON/OFF
or TIMER ON/OFFpad Twice.
Endof Cycle Tones(onsomemode/s)
Clear tile tones by pressing tile pad of tile
J[ilnction Veil _lI'e rising.
If tile remaining time is not in tile display
(clock, delay start or cooking time are in
the display), recall the remaining time by
touching the KITCHEN TIMERON/OFF or
TIMERON/Offp'ad and then touching the
÷ or --pads to enter tile new tiIlle veil W}lIlt.
@
Power Outage
Ifa flashlhgtitheisin thedisplay,youhave
experiencedapowerfailure,flesettheclod<
To reset tile clock, touch tile CLOCKp'ad
twice. Enter tile correct time of day by
touching tile + or -pads. Touch tile
START/ON p'a d.
16
 Loading...