

Page 1

Table Of ContentsTable Of Contents
Table Of Contents
Table Of ContentsTable Of Contents
INSTALLATION .................................. 2
SYSTEM REQUIREMENTS ..................... 2
STORYLINE ................................................... 3
MISSION STATEMENT ............................. 3
GAME PLAY ................................................. 3
Main Menu................................................ 4
Mission ....................................................... 4
Career ......................................................... 4
Multi-Player .............................................. 5
Over & Out................................................. 5
Options - SWAT Eagle ........................... 5
Mission Mode ............................................ 10
Standard Mission Mode ..................... 10
Custom Mission Mode........................ 15
Career Mode .............................................. 22
Creating A New Career ...................... 22
Restoring A Career .............................. 26
Metropolitan Division .......................... 26
IN-GAME FEATURES .............................. 37
Performance ........................................... 37
Movement................................................ 37
Weapons / Tactics ................................ 38
Communications ................................... 43
View Ports ................................................ 52
Weapon Status....................................... 53
Briefing Summary ................................. 54
Debrief ...................................................... 54
MULTI-PLAYER MODE .......................... 59
Multi-Player Menu Options .................. 59
Officer Screen ............................................ 62
Call Up .......................................................... 62
Multi-Player Game Types .................. 63
Main / HQ ................................................64
Career ....................................................... 64
Join ............................................................. 65
Create ........................................................ 65
Officer ....................................................... 65
Info ............................................................. 65
Operations ...................................................66
Ops Screen ..............................................67
Mission Screen ...................................... 69
Gear Screen ............................................ 70
Chat Screen ............................................ 72
Go! Go! Go! .............................................. 73
Multi-Player Gameplay Features ........ 73
General Multi-Player Features .........73
Co-Operative Play Features .............. 75
Deathmatch Player Features ............ 83
SINGLE-PLAYER MISSION
WALKTHROUGH ...................................... 85
GAME CREDITS ........................................ 89
CONTACTING SIERRA ........................... 92
Customer Service,
Support, and Sales ............................... 92
On-Line Sales ........................................ 93
Disk and or Manual Replacement: 93
Technical Support ................................. 94
SIERRA WARRANTY & LEGAL
INFORMATION .......................................... 95
1
Page 2

INSTALLATION
Insert the game CD into your CD-ROM drive. If your CD-ROM drive has AutoPlay
enabled, click the “Install” tab and follow the on screen instructions.
If AutoPlay is not enabled, double-click on the “My Computer” icon located on your
desktop. Double-click on the CD-ROM drive icon. Follow the on screen instructions.
SYSTEM REQUIREMENTS
Minimum System Requirements
Windows 95, Windows 98, Windows ME, Windows 2000
Pentium II 266 MHz
64 MB RAM
550 MB HD space
CD ROM: 4X or better
Mouse and Keyboard
800 x 600 SVGA high color display (16 bit)
8MB Video Card
DirectX8a (included on CD)
Windows compatible sound device
Mouse and Keyboard
Recommended System Requirements
Pentium II 300+ MHz
64 MB RAM
3D accelerator card (DirectX Compatible)
Internet/Multi-Player System
Requirements
32-bit Internet Service Provider with
28.8+ Modem or (LAN) Local Area Network
2
Page 3

STORYLINE
Los Angeles, 2005.
In the next seven days, representatives from every nation around the world will
converge on Los Angeles to witness the signing of the United Nations Nuclear
Abolishment Treaty (resolution S-112/8). The protection of these dignitaries falls on
the shoulders of LAPD SWAT.
As a tactical leader within SWAT, your assignment for the next 24 / 7 will be to lead
your team against the global forces that would prevent the City from hosting the
treaty ceremony and joining the world in celebrating Global Peace Day 2005.
MISSION STATEMENT
As an officer of D Platoon SWAT you must have a deep and abiding reverence for
human life and a firm resolve that all possible tactical alternatives be exhausted
before employing deadly force.
You must be committed to the concept of team work, and recognize that the overall
success of each mission is a direct result of individual team members acting in
concert with one another.
It is important that you have a conviction that intensive training is paramount to
continued success in all operational aspects of the team.
You must recognize that we, the members of SWAT, are part of a larger organization,
the Department. Our level of success is dependent, in large measure, on the support
of the Department.
As an LAPD SWAT officer, know that your fundamental mission is to make Los
Angeles a safe haven for all law abiding citizens, while keeping the men under your
command free from harm.
GAME PLAY
SWAT3: Tactical Game Of The Year Edition is a first-person tactical simulation
where you play either the element leader of a five-man entry team, or a team
assaulter. SWAT3 can be played in mission mode, career mode, or multi-player
mode.
In mission mode, each mission is a stand-alone experience. Mission results are not
tallied and do not effect an overall score.
In career mode your up-front decisions have long lasting effects, as the squad you
choose will last your entire career. The sequence of missions within a career is
predicated on outcomes from previous missions. In career mode your leadership
score and the medals awarded you are tracked.
Multi-player mode allows you to play SWAT
LAN or the Internet. Selection of mission, career, or multi-player mode occurs at the
game’s main menu.
3 missions or careers on-line, over a
3
Page 4
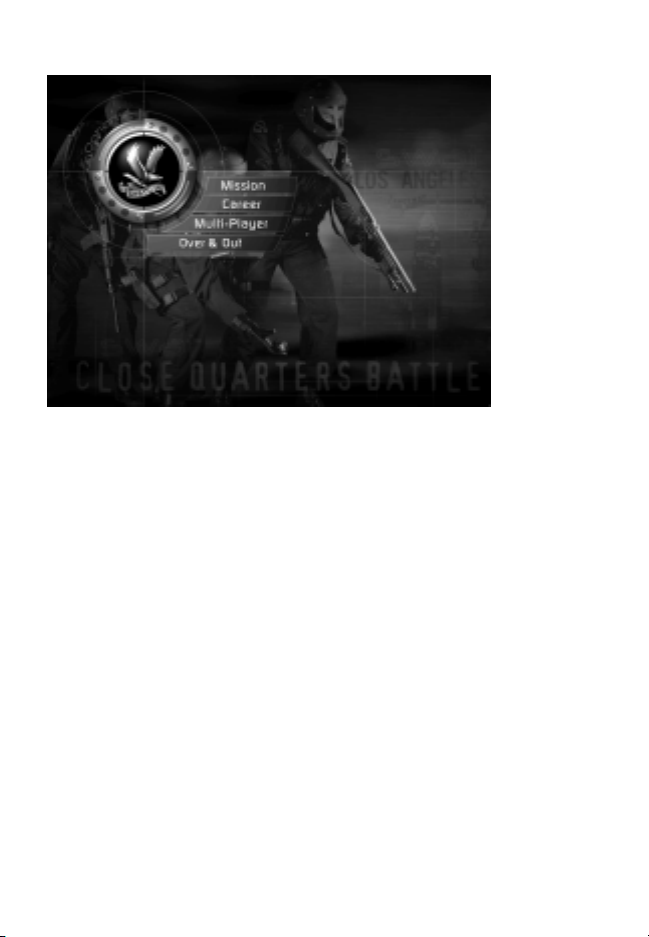
Main Menu
The main menu appears after the opening sequence. From the main menu you can
play a mission, begin or restore a career, play a multi-player game of SWAT
your options, or quit out to Windows. Passing your cursor over any of the main menu
option tabs causes them to highlight. Click on a highlighted option tab to select.
3, set
Mission
Clicking on the Mission tab exposes two mission modes: Standard and Custom.
Passing your cursor over either of these tabs will cause them to highlight. Click on a
highlighted tab to select.
Standard
Clicking on the Standard tab will bring you directly to the mission mode game
environment, where you play as the element leader of a five-man entry team in any
of the SWAT
3 missions.
Custom
Clicking the Custom tab will take you to the custom mission mode game environment and allow you to select a mission and gameplay type.
Career
Clicking on the Career tab exposes two career options: New and Restore. Passing
your cursor over either of these tabs will cause them to highlight. Click on a
highlighted tab to select.
4
Page 5
New
Clicking the New tab will bring you to the career selection screen and allow you to
select the career you wish to begin.
Restore
Clicking the Restore tab will bring you to the restore career screen and allow you to
select a saved career that you wish to restore.
Multi-Player
Clicking on the Multi-Player tab will allow you to access multi-player mode. For more
information, see the Multi-Player Mode section of this manual.
Over & Out
Clicking on the Over & Out tab quits the game and returns you to Windows.
Options - SWAT eagle
Clicking on the SWAT eagle will take you to the Main Options Screen and, subsequently, to the Keyboard Mapping Screen and Custom Chat Screen. From these
screens you can customize your keyboard and mouse configurations, set your audio
and music levels, select video card support or software, adjust your screen modes
and settings, and perform a host of other options described below. The Main Options
Screen can be accessed anywhere within the Metropolitan environment by clicking
on the SWAT eagle.
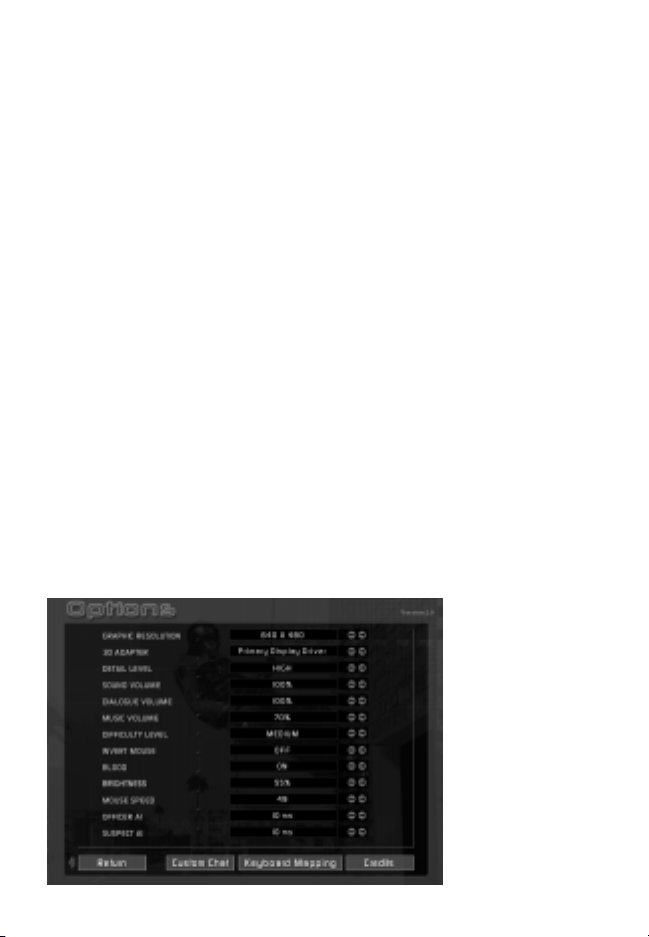
Main Options Screen
5
Page 6

Here you can change various settings to improve game performance or enjoyment.
Each of the categories mentioned below has a default setting. To change the default
setting click on the arrows to the right of the category.
Additional options are located on two separate screens, accessible by clicking on
either the Custom Chat tab or the Keyboard Mapping tab, both located at the
bottom of the screen. Additionally, you may view the game credits by clicking on the
Credits tab located at the bottom of the screen.
To return to the previous screen, you may click the Return tab at the lower left
corner of the screen.
Graphics Resolution
The default setting is 640 x 480. The available resolutions will vary depending on the
capabilities of your system.
3D Adapter
If you have a 3D adapter it will be listed here. If not, the word “Software” will appear.
If you are running the game under Software you will not experience the game to it’s
fullest. You will be missing many of the game’s lighting effects, such as the
flashlight, shadows, and lightsticks.
Detail Level
If you notice that the game is running sluggishly, lower your detail level. Lowering
your detail level will speed up the game; however, you will notice a slight reduction
in art quality. There are three detail settings: low, medium and high. The higher the
detail setting, the more processing power your computer should have.
Sound Volume
Increase or decrease the volume of your sound effects.
Dialogue Volume
Increase or decrease the volume of the game dialogue.
Music Volume
Increase or decrease the volume of the game music.
Difficulty Level
If you find that the AI characters are just too darn hard to beat, lower this setting. As
you become better trained and better versed in tactics, go ahead and increase the
difficulty level. After all, they’re just AI characters...
Invert Mouse
It’s like flying a plane! Move your mouse forward and your cursor points down.
Move your mouse back and your cursor moves up.
6
Page 7
Blood
On or off; nothing in between. Not even a drop.
Brightness
Increase this setting to enhance the brightness in the game, if your surroundings
seem too dark. Decrease this setting if things seem washed-out.
Mouse Speed
You can adjust your mouse sensitivity using this control. The higher the number, the
more sensitive the mouse.
Officer AI
Increase this setting to make your officers more “intelligent”. Note that increasing
your officer’s intelligence is at the cost of computing power. Consequently,
depending on your system, the smarter your officers the more sluggish the game
may play.
Suspect AI
Increase this setting to make the suspects more “intelligent”. Note that increasing
the suspect’s intelligence is at the cost of computing power. Consequently,
depending on your system, the smarter the suspects the more sluggish the game
may play.
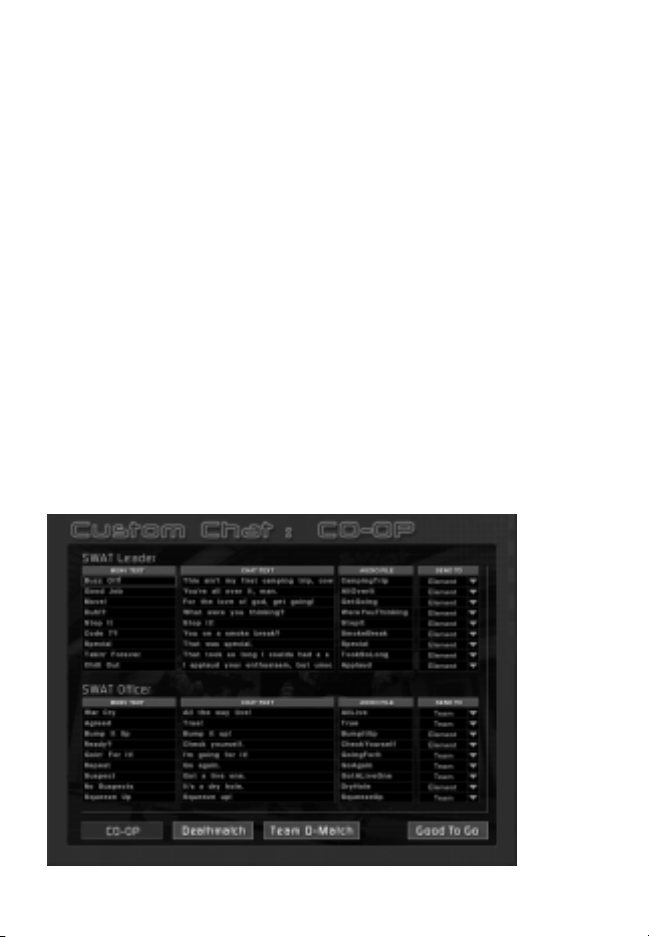
Custom Chat
7
Page 8

Selecting the Custom Chat tab causes the Options screen to be replaced by the
Custom Chat screen. The Custom Chat screen allows you to create personal custom
chat messages and specify their recipients for multi-player game play.
There are three separate Custom Chat screens: Co-Operative, Deathmatch, and
Team Deathmatch. To move between these three screens, highlight and click on one
of the three tabs (Co-Op, Deathmatch, or Team D-Match) located at the bottom of
the screen.
The Co-Operative screen, Co-Op, is broken into two sections: one for SWAT leader
messages and the other for SWAT officer messages. Creating custom messages for
both team positions prepares you for the potential of assuming the position of SWAT
leader in the event the original SWAT leader is neutralized in cooperative play.
The Deathmatch custom chat screen contains a single section with nine
configurable messages.
The Team Deathmatch custom chat screen is arranged similarly to the Co-Operative
screen; there is a section for team Leader, and a section for team Assaulter. As in
Co-Op play, you may end up assuming the role of leader in the event that the
original leader is neutralized, so prepare your custom messages accordingly.
The Custom Chat sections have four configurable fields of information, they are:
Menu Text, Chat Text, Audio File and Send To.
Menu Text
The nine lines of text that appear in this column are displayed for your reference on
screen as message headings in the Messaging Menu, under Custom Chat. As with
all message headings in the Messaging Menu, these nine messages are bound to
number keys; the topmost heading is bound to the “1” key, the next lowest bound
to the “2” key, and so on.
To edit any of the headings, pass your cursor over the text to highlight and click to
select. Once selected, use the keyboard to type in a new text heading.
Chat Text
This is the on screen text that is displayed to other players when you send a custom
message.
To edit any of the text messages, pass your cursor over the text to highlight and click
to select. Once selected, use the keyboard to type in a new text message.
Audio File
Every custom chat message can have an accompanying audio file. To edit, pass your
cursor over the current audio file name to highlight and click to select. Once
selected, use the keyboard to type in a new audio file name (without extension). The
audio file must be a 16 bit, 22KHz, mono .wav file.
Note: Place the actual audio file in your SWAT
8
3 root directory.
Page 9
Send To
This column contains a drop down menu with optional recipients. To select a
recipient, click on the arrow to reveal the drop down menu. Scroll to highlight a
recipient. Click on the highlighted recipient to select.
Recipients vary depending on game type and position. For Co-Op / SWAT Leader
and Team Deathmatch / Leader, the recipients include: Element, Red and Blue.
Designating Element as a recipient results in the message being heard by everyone
in the element. Designating Red or Blue as the recipient results in the message
being heard by the specified team only.
For Co-Op / SWAT Officer and Team Deathmatch / Assaulter, the recipients include:
Element, Leader and Team. Designating Element as a recipient results in the
message being heard by everyone in the element. Designating Leader as the
recipient results in the message being heard only by the leader. Designating Team
as the recipient results in the message being heard only by your teammate.
In Deathmatch there are two available recipients: All and Side. Designating All as
the recipient results in the message being heard by anyone in the game. Designating Side as the recipient results in the message being heard only by people on your
team, or side.
Click the Good to Go tab located at the bottom of the screen to save your changes.
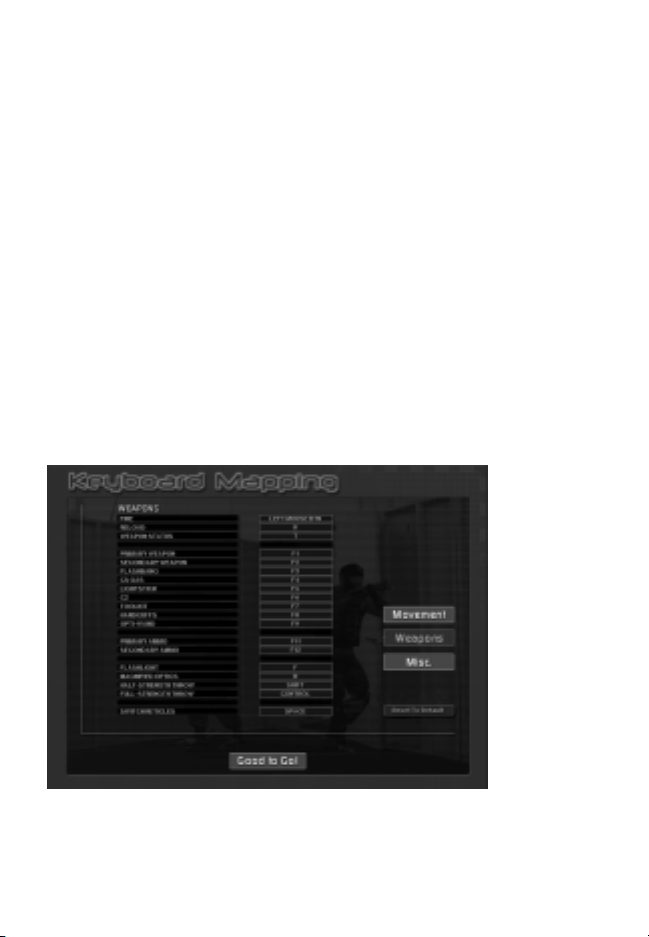
Keyboard Mapping
Selecting the Keyboard Mapping tab replaces the Options Screen with the Keyboard
Mapping Screen.
The Keyboard Mapping screen allows you to customize your in-game controls. To do
so, pass your cursor over the list of controls on the right side of the screen to
9
Page 10
highlight. Click to select. There are three separate keyboard mapping screens,
divided by the category in which they are used. They are: Movement, Weapons, and
Misc. (Miscellaneous). Highlight and click these tabs to change screens.
To bind a control to a specific key, highlight and click the control, and then press the
key you want mapped to that control. If the key you request is already in use, your
new key will be bound, and you will be notified which command had previously been
bound to that key.
To accept your changes, highlight and click on the Good To Go tab located at the
bottom of the screen. To return the controls to their default settings, highlight and
click the Reset to Default tab.
Credits
OK, so we’re proud of what we do. Pass your cursor over to highlight, and click to
select. And then do it again, and again, and again...
Mission Mode
Standard Mission Mode
Standard mission mode has been designed to get you into a mission as quickly and
seamlessly as possible. Consequently, entering the game in standard mission mode
takes you directly to Metro.
10
Page 11

Metro
In Metro, the selections of your character, team, weapons, and mission are handled
by four tabs along the bottom of the screen. From left to right the tabs are Mission,
Element, Gear, and Active Duty. Pass your cursor over the tabs to highlight. Click on
a highlighted tab to select. The highlighted tab will change from blue to gold and the
screen will change to your selection.
Located on the bottom right of the screen is the SWAT eagle surrounded by three
options: Education, Metro and Main. Pass your cursor over the SWAT eagle and the
tabs to highlight. Click on the highlighted SWAT eagle or a highlighted tab to select.
Clicking on the SWAT eagle switches the game to the Main Options Menu. Clicking
on the Education tab accesses tactics information. Clicking on the Metro tab
accesses mission information. Clicking on the Main tab switches to the Main Menu.
Mission
Clicking on the Mission tab at the bottom of the screen accesses the Mission Map.
Located on the map are blue pin dots representing all of the different game
missions. Pass your cursor over the pin dots to highlight and learn the nature of
each mission. Click on a highlighted pin dot to select. The pin dot will change color
from blue to red and the selected mission information will appear to the right of the
map. To deselect a particular mission, merely click on a different blue pin dot.
Also located on the mission map is one green pin dot representing SWAT’s Shooting
House. The Shooting House is a training environment where you can hone your
individual skills or your team tactics. Pass your cursor over the green pin dot to
highlight. Click on the highlighted pin dot to select. The pin dot will change color
11
Page 12
from green to red and the shooting house information will appear to the right of the
map. To deselect, merely click on a different pin dot.
As a default in standard mission mode, the Mission Map is selected when entering
the game.
Entry Point – Mode Of Entry
Located to the right of the map, above the mission information, are two arrows.
Clicking on the highlighted arrow pointing to the right will allow you to choose your
entry point and tactical mode of entry. Clicking the highlighted arrow pointing to the
left will bring you back to the mission information. If you do not choose an entry
point or a tactical mode of entry, defaults will be provided for you.
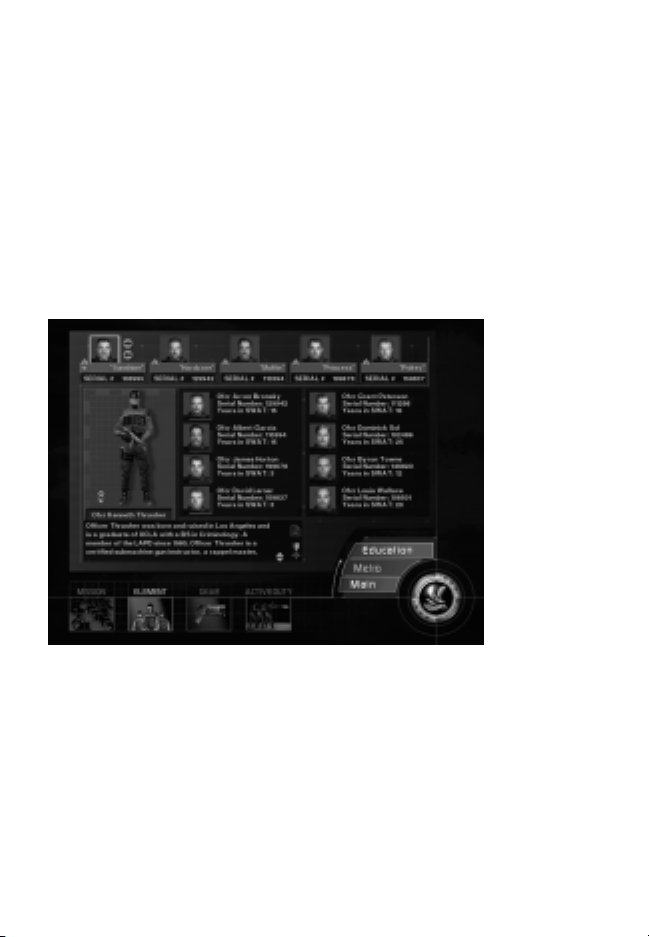
Element
Clicking on the Element tab on the bottom of the screen accesses the Element
Selection Screen. The Element Selection Screen is where you choose the Element
Leader you wish to play and the team you want to command.
There are twelve Element Leaders and forty-eight officers to choose from. The fortyeight officers are broken into six groups of eight. Each group of eight officers are
associated with two specific Element Leaders.
As a default, an Element Leader and four officers within his element are assigned to
team positions when the Element Selection Screen appears.
Located across the top of the Element Selection Screen are five specific team
positions, each filled with an officer. From left to right the positions are: Element
Leader, Red “1”, Red “2”, Blue “1”, Blue “2”.
12
Page 13
To change the officer in the Element Leader position click on the arrow to the right
of the Element Leader’s image. As you do so, notice the information contained in the
box at the bottom of the screen changes: this is the Element Leader’s biography.
Also notice that every second click the eight officers in the center of the screen
change.
Once you have determined which Element Leader you want to play, leave his image
in the Element Leader slot on the top row. The eight officers who appear in the
center of the screen can now be assigned to specific team positions.
Assigning officers to specific team positions is easy. Pass your cursor over the top
row of team positions. As your cursor passes over the different team positions, the
images of the pre-assigned officers highlight.
Click on a highlighted image to select. A red or blue border now outlines your
selection, indicating that the team position is ready for re-assignment. Notice that
the officer assigned to that particular team position is highlighted with a red or blue
border in the center of the screen, and that his biography appears in the box at the
bottom of the screen.
To re-assign the selected team position, pass your cursor over the eight officers
located in the center of the screen. As your cursor passes over the officers they
highlight. Click to select. Continue re-assigning team positions until you’re satisfied
with your line up.
Remember, you are creating a four-man team that can be split into two groups. It’s
important that the officer’s assigned to a particular team compliment one another
and that both teams work in tandem. This will become even more important when
you are assigning them weapons.
If you skip through this selection process prior to entering a mission, not to worry;
random defaults are set.
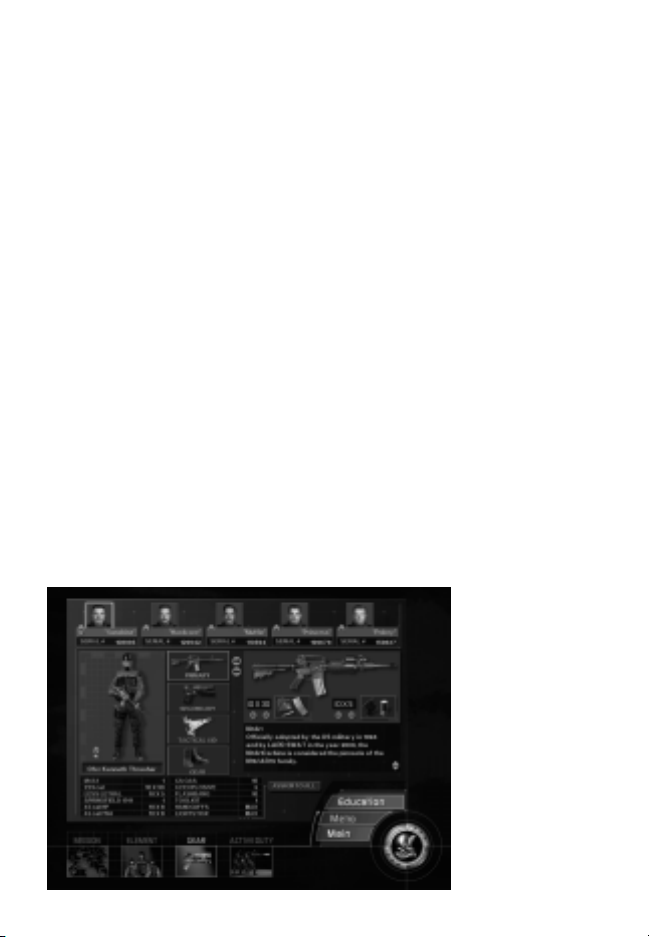
Gear
13
Page 14

Clicking on the Gear tab on the bottom of the screen accesses the Gear Selection
Screen. Notice that when switching between Element Selection and Gear Selection
screens the officers located along the top of the screen do not change or disappear.
Located vertically in the center of the screen are four tabs representing categories
of weapons and gear, they are: Primary, Secondary, Tactical Aid, and Gear. Passing
your cursor over these tabs causes them to highlight. Click on a highlighted tab to
select. Once a category is selected arrows appear to the right of the tab. Click on
the arrows to browse through the category.
Primary and secondary refers to the weapons an officer will carry. To select a
specific weapon for a mission, leave it displayed on screen.
All weapons require ammunition. Next to the onscreen ammunition information
there are arrows. Click on the arrows to increase or decrease the number of
magazines you wish an officer to carry. There is a maximum number of magazines
assigned to each weapon, so increasing one type of ammunition will decrease the
other.
Tactical Aid and Gear refer to everything an officer needs beyond his weapons.
Some items in these categories can be assigned; others are standard issue. Arrows
appear next to items which can be assigned a quantity, such as CS Gas, flashbangs
2.
and C
Click on the arrows to increase or decrease the amount assigned to an officer. Note
that an officer can carry a set number of canisters. Consequently, increasing the
number of CS Gas canisters will decrease the number of flashbangs, (and visa
versa).
It is important to note that when assigning weapons and gear, you are assigning it to
a particular team position, not to a specific officer. Consequently, if you change
officers after you’ve assigned weapons you do not need to re-assign weapons. All
clear? Good.
You may click the Assign to All tab to assign the configuration of weaponry,
ammunition, and tactical aids shown on-screen to all assaulters, including the
Element Leader.
If you do not configure your team prior to entering a mission, don’t sweat it. Each
position has a default weapons setting for each mission. It might not be the
configuration you wanted, but hey, you had your chance.
Active Duty
Clicking on the Active tab on the bottom of the screen takes you to Active Duty... it’s
mission time! There’s no turning back.
Remember, you can choose Active Duty without selecting an Element Leader, or
choosing your assaulters, or configuring your team’s weapons. Defaults are set, and
you’ll arrive on scene with the team, the weapons and tactical aids the Department
deems appropriate.
14
Page 15

Custom Mission Mode
In addition to the original SWAT3 mission mode, accessible through the main menu
by clicking on the Mission tab, and then the Standard tab, you may play any of the
3 missions, including those created by mod builders, with an extended set of
SWAT
options and up to ten assaulters split between up to two entry teams, by selecting
Custom from the Mission tab in the main menu.
Custom missions give you access to additional weapons, assaulter types, camos,
and an extra entry team for the mission if you so choose. Any MODs you have
activated with the MOD Selector will be active here.
If this is your first time playing SWAT
create a SWAT officer persona to represent you in the game. You may specify the
names and traits for your new officer or leave them set to defaults. To create your
own persona name, click on the supplied name, and then type using the keyboard.
You’ll want to enter a last name, first name, and nickname. After that’s finished, you
can use the arrows to the sides of the Years in Swat and Race selection to scroll
through those fields to pick the traits that you’d like. If you are satisfied with your
changes, click the Accept tab. If you do not wish to save your changes, click the
Cancel tab.
If you are returning to custom mission mode, you will not be asked to create another
persona.
Mission Selection
Once you have clicked the Mission tab and then the Custom tab on the Main menu
and have a persona, you will be taken to the Mission Selection menu. The selection
is defaulted to a randomly chosen mission. Click on the arrows at the bottom-right
hand side of the menu to change the currently selected mission. A graphic of the
mission appears to the left of the arrows for your reference, and the name of the
mission will appear at the upper-left.
Game Type
When you have selected the mission that you would like to play, you may also select
the game type you would like. You may choose to play Co-Operative (as in the
original SWAT
Team Deathmatch, or Last Man Standing. Click on the arrow to the right of the box
marked Game Type and select from the list. See the Multi-player section of this
manual for information on the multi-player game types.
Once you have your mission choices the way you want them, move your cursor over
the tab marked O.K. and click. You will be taken to Operations where you can
configure your team, your gear, and your entry points for the upcoming mission.
3 missions), or any of the new competitive game types: Deathmatch,
3 in custom mission mode, you will be asked to
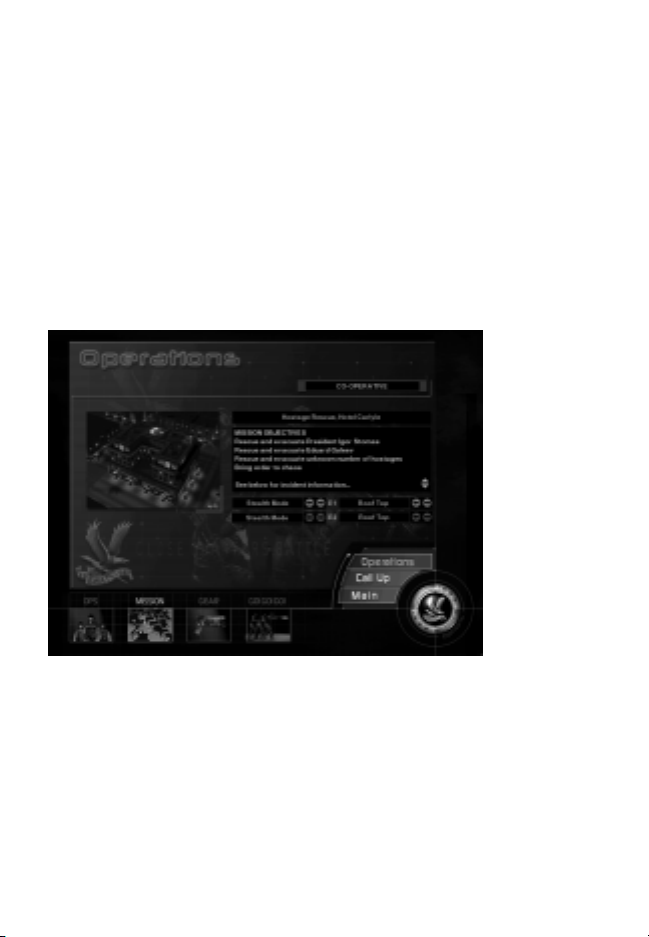
Operations
To ready yourself and your team for a custom mission, or a mission in a custom
career, you will be taken to Operations. This set of menus allows you to make
15
Page 16
choices about how you want your team to be structured, equipped, and outfitted,
and where you want your team to insert into the mission area. You may also choose
gameplay augmentations and custom scenarios from these screens.
Operations is divided into three screens: Ops, Mission, and Gear. In single-player
mode, the screen defaults to the Ops menu.
Located at the bottom right of the Operations screen is the SWAT eagle surrounded
by three option tabs; Operations, Call Up, and Main. Pass your cursor over the SWAT
eagle and the tabs to highlight. Click on the highlighted SWAT eagle or a highlighted
tab to select. Clicking on the SWAT eagle brings up the Options Menu. Clicking on
the Call Up tab returns you to the mission selection screen. Clicking on the Main tab
takes you back to SWAT
The SWAT eagle and associated options are persistent between Ops, Mission and
Gear.
3’s Main Menu.
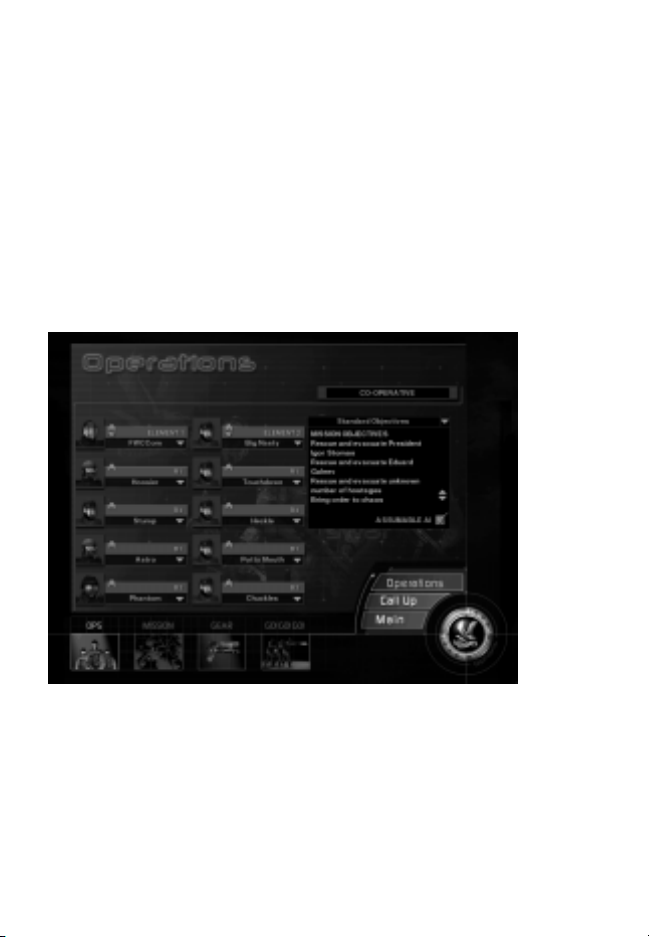
Ops
In Ops, you configure the structure of the teams and choose what positions you
want filled by AI, and what position you yourself wish to have on the team. You may
choose to be element leader, or a team assaulter. Augmentations and scenarios are
also chosen here, and the mission briefing is displayed.
Co-Operative
In Co-Operative mode, the first step is to determine if you wish to play the mission’s
standard scenario, or a custom MOD scenario. This option is only available in
mission mode, as the missions are pre-set in career mode. At the top-right hand
16
Page 17

corner of the Ops screen is a box that contains the current mission briefing and
objectives list. You may scroll through the briefing by clicking the arrows to the right
of the briefing box.
Above the box is the name of the current scenario and an arrow. Click this arrow to
open a list of available scenarios; click to select the scenario of your choice. If the
“Random Objectives” scenario is chosen, fields will appear that represent the
number of hostages, suspects, and civilians that will be placed in the mission area
when the game begins. Use the arrows located to the right of each field to increase
or decrease the number in the field, or click the Random button to the far right of
the field to set the field to a random value.
Deathmatch
In any of the Deathmatch variations, the scenario briefing is replaced by several
fields that represent the game parameters: Max Score, Suspects, Civilians, Timer,
and Lives. Each field has two arrows directly to the right which are used to change
the value in the field, and, depending on the field, a Random button which will set
the value randomly at game start.
Max Score can be set to a value or can be left blank. If blank, there is no maximum
score, and thus, the game cannot end based on score. If it is set to a value, the
game will end when one player reaches the maximum score.
The Suspects and Civilians fields can be set to a value, including zero or a random
value. These fields designate how many suspects and civilians will be placed in the
mission area when the game begins.
The Timer can be set to designate a certain amount of game duration. If the timer is
left blank, the game cannot end based on time elapsed. If the timer is set to a value,
that value represents the number of minutes that will pass during the game before
the game ends.
The Lives field indicates the number of times that each player will be able to reenter the mission area after being neutralized. You may leave it blank or click the
None button to the right of the field to give each player indefinite lives, or set it to a
value to limit their number of lives.
Augmentations
Below the briefing box is a space for check boxes that toggle gameplay augmentations. These vary from game mode to game mode.
Co-Operative Mode Augmentations
Co-operative mode contains the Assumable AI augmentation. If you choose to turn
this feature on, you may assume control of the next AI officer on your team should
you be neutralized. During the game, if you are neutralized, press the ESCAPE key
to bring up the in-game menu. Click the Assum. AI tab to immediately assume
control of the next AI officer on your team.
17
Page 18

Deathmatch Mode Augmentations
Deathmatch mode contains several augmentations, including Paintball mode which
can be activated in any deathmatch game type and is explained on the following
page, as well as augmentations that are unique to the game type that you have
selected.
For Standard and Team Deathmatch modes, the Respawn AI augmentation is
available. Activating the Respawn AI augmentation box will cause all AI characters
removed from the map, by neutralization or evacuation, to return to the game in a
random location.
For Team Deathmatch, the Base Camp augmentation is available, selectable from the
Mission screen. This augmentation is located in the Mission screen, explained
below. If activated, this augmentation will designate the starting locations of each
team in the game to be their “Base Camp”. Once a player has been neutralized, they
will respawn at their team’s base camp. If this option is deactivated, players will
respawn in random locations on the map if they are neutralized.
For Last Man Standing, the Life Support augmentation is available. This augmentation, if active, will give each player a “life meter” that will slowly drain away as the
game progresses. If it falls to zero, the player is neutralized. To recharge these
meters, players must wound or neutralize suspects or other players. This discourages the practice of “camping”.
Paintball Mode
Paintball Mode is a unique way to play SWAT3 deathmatch. The color of the boxes
that contain the names of the players in the current game represent the color of
paint each player has for their weapon.
Paintball has its own set of rules and changes:
All players now shoot paintballs, rather than bullets, from their weapons. Each
player’s paintball color is determined automatically before the mission begins.
Suspects, however, will always fire orange paintballs.
If you are hit with a paintball, your screen will flash the color of the paintball you
were hit with.
The effects of body armor are negated; every player, suspect, and hostage is equally
vulnerable to a paintball hit. However, damage is relative; a direct hit to the head
with a paintball does not deal as much “damage” as a hit to the hand.
Paintballs are fired at much lower velocities than bullets; in paintball mode, your
shots will not penetrate any surfaces, nor will they pass through any other
characters. Paintballs will leave a visible “splat” of paint on any surface or character
they hit.
Team Setup
The next step is to determine the structure of the teams you want in the mission. In
the center of the screen, you will see two columns of five boxes each. Each column
represents a five-man entry team. The left column is team one, in which four AI
assaulters have been assigned, and to which you are assigned the role of element
leader, and the right column is team two, which is initially empty. To assign an AI
18
Page 19
assaulter to any one of these slots, click on the arrow to the right of the slot name,
and choose from the available options in the drop-down list. You may select “AI” to
fill the slot with a new AI assaulter. You may also select the name of a previously
placed AI assaulter to move him to the new slot, you may select your own name to
move yourself to that spot, and you may select “Boot” to empty the slot of any
assaulter currently placed in it.
In Co-Operative mode, these two teams work in tandem to accomplish mission
objectives. In Team Deathmatch, they compete head-to-head for points. In Last
Man Standing and Deathmatch play, each player fights against all of the others for
supremacy.
Note that in Co-Operative and Team Deathmatch, the game cannot start if either
team has assaulters but no leader. If a team has assaulters, it must have a leader for
the game to begin.
Mission
The Mission tab, available in Co-Operative and Team Deathmatch modes provides
you with information about the mission area you will be entering and allows you to
set entry points for your team(s). On the right hand side of the screen is the current
briefing for the upcoming mission. You can scroll through the briefing by clicking
the arrows to the right of the briefing text.
To the left of the briefing box is a shot of the current mission location, for your
reference. Below the briefing box are your entry point / mode of entry selectors.
Two sets of boxes, one for each team, identify the team’s entry point and tactical
mode of entry: stealth or dynamic, for the mission. Click the arrows to the left and
right of each box to change the entry point and tactical mode of entry for your
team(s). When you are satisfied with your choices, simply leave them displayed onscreen, and they will be applied when the mission begins.
19
Page 20
In Team Deathmatch, the option for activating the “Base Camp” augmentation will
appear. For more information on gameplay augmentations, see above.
In Standard Deathmatch and Last Man Standing modes, the Mission screen is
unavailable.
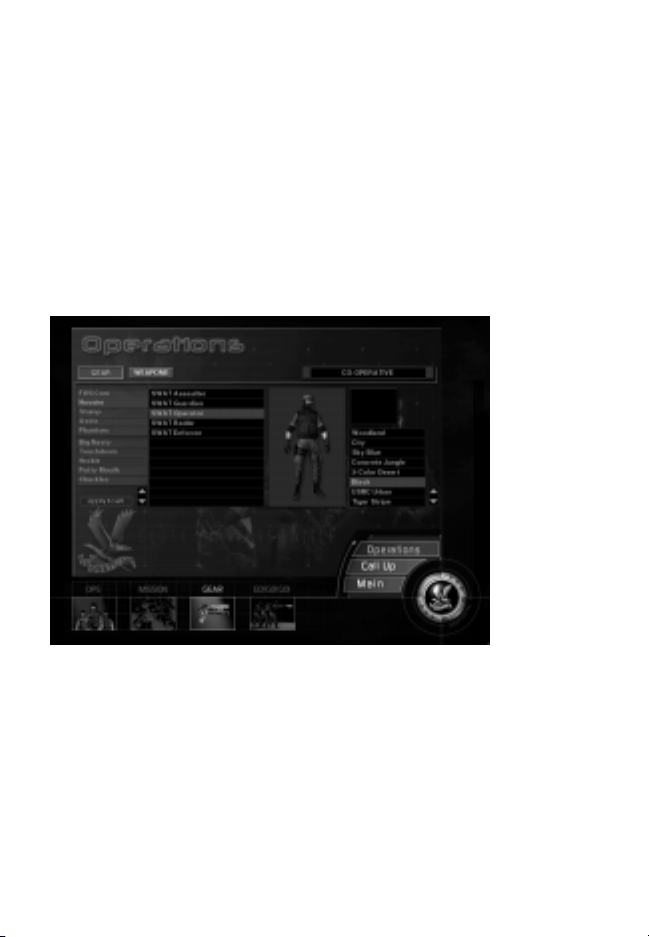
Gear
The Gear tab allows you to access weapons and equipment for yourself and the
other assaulters. The Gear screen is separated into two menus, the Gear menu and
the Weapons menu. By default, the Gear menu is shown. To move between the two
menus, click either the Gear or the Weapons tabs located at the top-left hand
corner of the screen.
Gear
In the Gear menu, you can configure the character types for each assaulter and
choose a team camouflage configuration. On the left hand side of the screen is a
list of the assaulters that are assigned to the mission. To select an assaulter to
equip, click on their name. Directly to the right of the assaulter list is a list of
character types. You may scroll through this list by clicking on the arrows to the
lower left of the list. To choose a character type for the selected assaulter, click the
name of the character type you want to assign from the list. If you are satisfied with
the character type, leave it selected on-screen.
Character types have certain attributes that affect their mobility and protection. A
heavy assaulter may have more protection from bullets than a light assaulter, but
cannot move as quickly.
If you find that a particular character type is appropriate for the entire squad of
20
Page 21

assaulters, you may click the Assign To All button located at the lower-left hand side
of the menu to apply the currently selected character attributes to all assaulters.
You may also choose a camouflage style for your team. On the right side of the
screen is a list of available camo styles, with a swatch of the currently selected camo
above the list for your reference. Scroll through the list by clicking on the arrows to
the right of the box, and select a camo by clicking on its name. When you are
satisfied with your choice, leave the camo selected on-screen.
Weapons
In the Weapons screen, you may choose the primary and secondary weapon
configurations for yourself and your assaulters, as well as your tactical aids.
Weapons and tactical aids are chosen from three separate lists, accessible by the
named tabs above the center list: Primary, Secondary, and Tactical Aid. Clicking on
one of the tabs will switch the list contents to that category and display the currently
selected assaulter’s weapon if Primary or Secondary is selected.
The list of assaulters is shown on the left hand side of the screen. Select the
assaulter you wish to outfit by clicking on their name. If you are currently in Primary
or Secondary weapon selection mode, the current assaulter’s weapon selection will
be highlighted in the weapon list, shown to the right of the assaulter list. This list is
scrollable; you may click the arrows to the left of the list to scroll the contents. To
choose a weapon for the currently selected officer, click the name of the weapon. A
graphic of the currently selected weapon will be shown to the right of the weapon
list, along with two fields below the graphic representing the amounts of primary
and secondary ammo that are currently assigned to the current assaulter for the
selected weapon. If you would like to change the amounts of a specific ammunition
type carried, you may click the arrow to the left of the field to decrease the amount,
and click the arrow to the right of the field to increase the amount. Note that the
21
Page 22

assaulter only has a limited amount of space available; increasing the amount of one
ammunition type may decrease the amount of the other type.
In choosing tactical aids, you may select the quantities of each type of tactical aid for
the current assaulter. To do so, enter tactical aid selection mode by clicking the
“Tactical Aid” button above the central list, and then select a tactical aid from the list
by clicking on its name. Below the graphic of the tactical aid is a field in which is
displayed the quantity of the selected tactical aid carried by the current assaulter. To
increase or decrease the amount, click the arrows on either side of the field. Note
that the assaulter has limited space, and so increasing the amount of one tactical aid
may decrease the amount of the others.
Finally, should you find that a certain combination of weapons, ammunition, and
tactical aids is suitable for all assaulters on your team, you may click the “Assign to
All” button located to the lower left of the central list, after selecting the weapons,
ammunition, and tactical aids for the current assaulter that you wish each assaulter
to carry. The selection will be immediately applied.
Go! Go! Go!
When you have made your team, gear, and mission selections, click the “Go! Go! Go!”
button to begin the mission.
Career Mode
Welcome to D Platoon, officer. As an Element Leader, every decision you make from
here on out, from the largest to the smallest, will affect the outcome of your career,
and consequently, the lives of the citizens you’re charged to protect.
Creating A New Career
To begin your career, the Department needs to know what career path you’ll be
entering, and an update on your vitals: name, race, a brief personality description, a
confirmation on your years in SWAT, and oh yeah... your nickname. Next you’ll need
to accept a squad assignment. Who you choose to team up with is important; you’ll
be working with the same eight officers for the duration of your career. Once you’re
in, you can report to active duty or spend some time honing up on tactics and the
current political climate in LA. Either way, you’re an LAPD SWAT officer and that
means something...Like get to work!
Career Selection
Upon entering the Career Selection screen, you will be presented with a list of
available SWAT careers. You may choose to play the original SWAT
(Standard Career), shown at the top of the list, or you may choose from the available
careers made by MOD builders (Custom Career). You may pass your cursor over the
name of the career you wish to start and click to highlight it. You may click on the
arrows next to the list to scroll through the contents should the number of careers
22
3 Career
Page 23
available exceed the space allotted. When you are satisfied with your choice, you
may click the Select button to start your new career. If you wish to return to the
Main Menu, you may click the Cancel button.
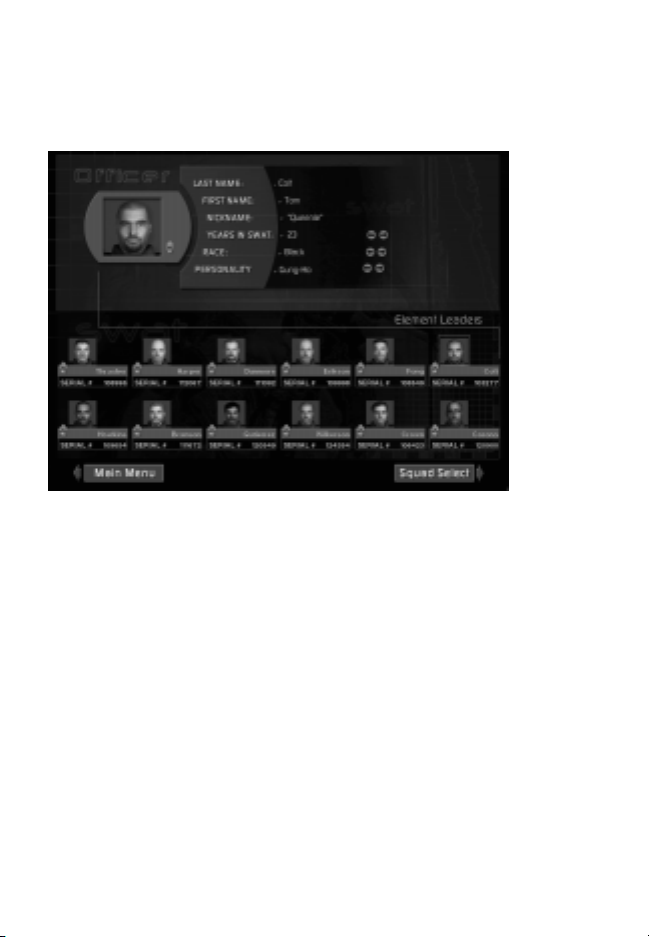
Officer Information
Please sign in. At the top of the screen there is a space for your last name, first
name, and yes, nickname. Using your keyboard, type the information in the space
provided. If you choose not to provide the information, the Department will provide it
for you based on its records.
Also required is a confirmation of your years in SWAT, your race and a brief
personality description. Use the arrows to the right of these categories to scroll
through your options. Once again, if you fail to provide the information, the
Department will fill in the blanks.
Below the information section of the screen are pictures of your fellow Element
Leaders. As you can see, there are only twelve of you in D Platoon. It’s a coveted
position. But you’re in a more advantageous position than that; you get to choose
your squad, a rare occurrence. So once you’re done updating your vitals move on to
squad selection. To do so, click on the Squad Select tab at the bottom of the screen.
23
Page 24
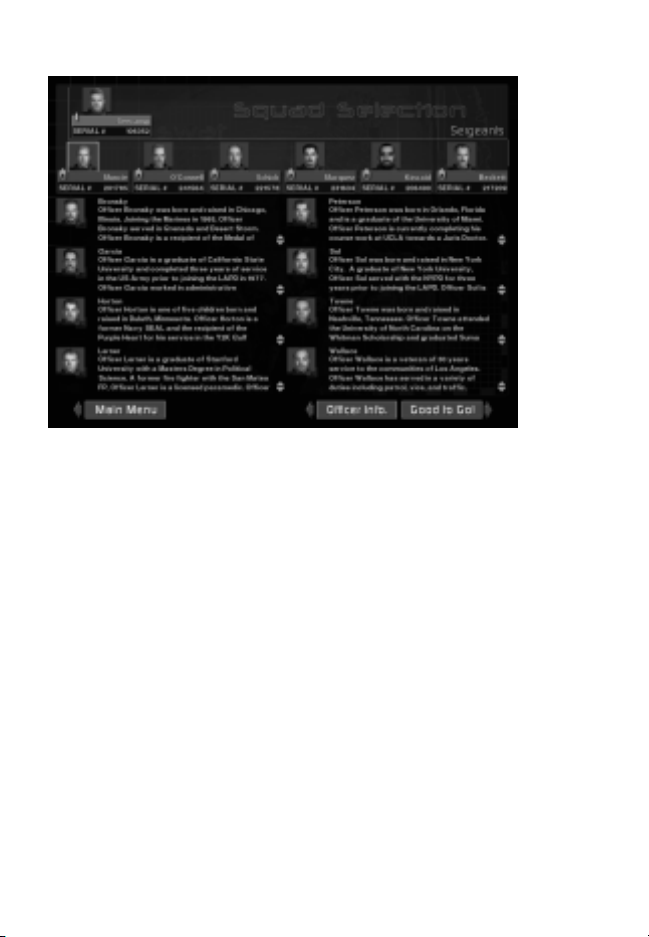
Squad Selection
The org chart of LAPD SWAT. At the top is Lieutenant Seecamp, the commander of
SWAT and referred to as 10-David. Reporting to the Lieutenant are six sergeants, 20David through 70-David. Each sergeant has a squad of ten officers: two element
leaders and eight crossed-trained assaulters. As mentioned earlier, you’re in the rare
position to choose your squad - and doing so is easy. The challenge is making the
right choice.
Pass your cursor over the row of sergeants to highlight. Click on a highlighted
sergeant to select. Selecting a sergeant causes the assaulters in his squad to appear
in the center of the screen. Read each assaulter’s biography carefully, you’re about
to spend your entire career with these guys.
To make your squad selection known, just leave your choice displayed on screen and
click on the Good to Go! tab at the bottom of the screen.
If for some reason you feel it necessary to return to the officer information screen
you can do so by clicking on the Officer Info tab at the bottom of the screen.
24
Page 25

Confirmation
It’s the last chance to change your mind. If you’re sure about your squad selection
click on the Confirm tab located underneath your squad. But before you do, think
about this: for each mission, your team will be randomly comprised of four out of the
eight assaulters in your squad. The exact make-up of your team will be predicated
on rotation and current health status for each officer, (Injured Reserve or Active
Duty). The decision is the Department’s, not yours.
So, if there’s an assaulter in the squad you’ve selected that you wouldn’t trust with
your life, it’s best to make that call now. To change your squad selection, click on the
Decline tab. You will return to the Squad Selection Screen.
Confirmed
OK, you’ve selected your squad and clicked on the Confirm tab. Now you have just
one more decision to make. Do you immediately respond to a call-up or do you head
to Metro and brush up on tactics? It’s up to you.
Pass your cursor over the Metro and Call Up tabs to highlight. Click on a highlighted
tab to select.
25
Page 26
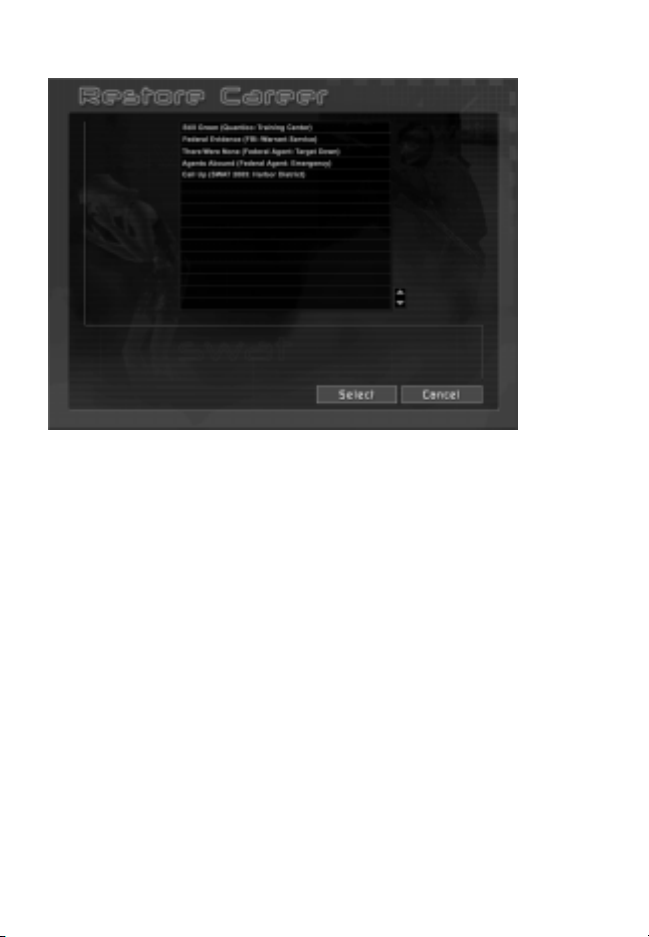
Restoring A Career
From the Restore Career screen you may select any saved career and re-enter the
game from the last mission played.
To select a saved career, pass your cursor over the list of saved careers. As you do
so they will highlight. To select, click on the saved game you wish to restore, and
click the Restore tab. The game will load and return you to the point in which your
career was saved. All of your stats will be reinstated, from your leadership score to
the medals awarded you.
Metropolitan Division
Welcome to Metropolitan Division. When you’re not on a call up, you’re here. There
are two sections within the Division, Metro and Education. The Metro section deals
with everything relating to missions, from the status of your squad, to the incident
map of LA. The Education section deals with everything else, from the history of D
Platoon to tactical considerations.
Located at the bottom right of the screen is the SWAT eagle surrounded by four
option tabs: Education, Metro, Main, and Save. Pass your cursor over the SWAT
eagle and the tabs to highlight. Click on the highlighted SWAT eagle or a highlighted tab to select. The SWAT eagle and associated options are persistent between
Metro and Education.
Clicking on the SWAT eagle brings up the Options Menu. Clicking on the Education
tab accesses the education section of Metro. Clicking on the Metro tab accesses
mission information. Clicking Main switches to the Main Menu. Clicking on the Save
tab allows you to save your career in progress.
26
Page 27
Save
Clicking this tab switches to the Save Career screen. Type in a name for your career,
and click the Save tab. Your career path and all related information, such as medals
and mission outcomes, will be saved. You may restore this saved career through the
Career Restore screen, accessible through the Career tab in the Main Menu. If you
do not wish to save, click the Cancel tab.
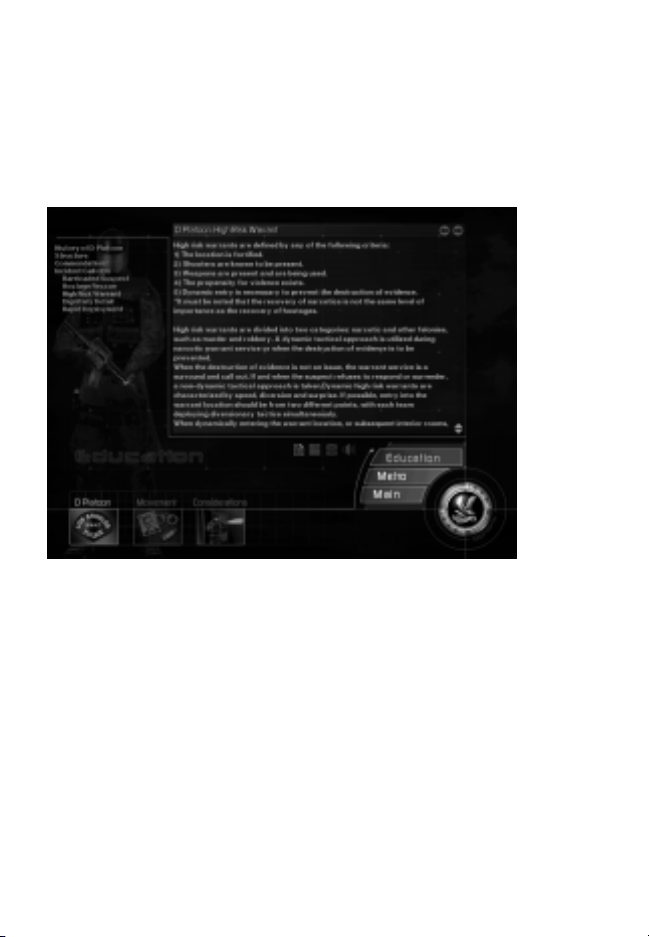
Education
Located on the bottom of the Education Screen are three tabs: D Platoon, Movement, and Considerations. Pass your cursor over the tabs to highlight. Click on the
highlighted tab to select.
Each education tab controls a set of menus located on the left hand side of the
screen. Pass your cursor over the menus to highlight. Click on a highlighted menu
topic to access. Clicking on a menu topic changes the information contained in the
center of the screen.
Located underneath the education information section are four icons. These icons
represent the presence of Text, Sound, Movies, and Slides. Anytime a menu topic
has accompanying media, such as a movie, the icon will be highlighted. Click on the
highlighted icon to select.
Metro
As mentioned above, Metro deals with everything mission related. To that end, there
are three tabs along the bottom of the screen that access mission specific
information. The tabs are Mission, Element, and Pre-Assault.
27
Page 28
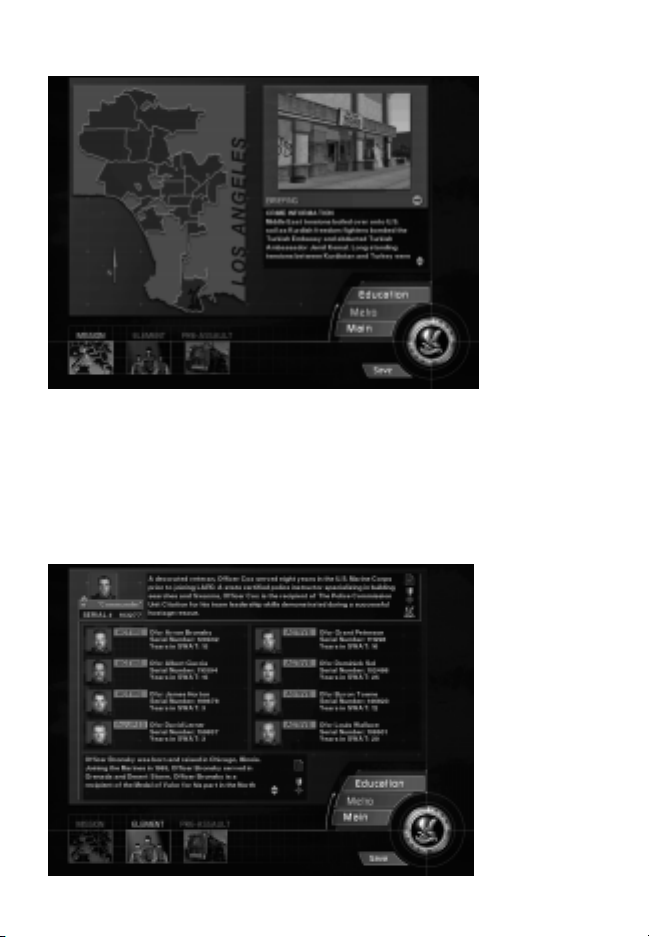
Mission
The mission map of Los Angeles shows crime incidents broken down by division. As
incidents occur and are resolved, they appear on the map. Checking the map
periodically is a good way to refresh your memory on the resolution of an incident.
Crime incidents are represented by a blue pin dot. Pass your cursor over the pin dots
to highlight a brief incident description. Click on a highlighted pin dot to select and
get the full roundup on the incident. The incident information will appear to the right
of the map. To deselect an incident, merely click on a different blue pin dot.
Element
28
Page 29
Clicking on the Element tab on the bottom of the screen accesses the Element
Screen. The Element Screen is divided into two sections. The top section is devoted
to your career. The bottom section is devoted to the careers of your eight assaulters.
Your Career
To review your career progress, use the three icons located to the far right of the top
section of the screen. These icons represent your biography, awarded medals and
your leadership score. Click on an icon to select.
Biography
Your biography was written for you based on your brief personality description,
compliments of the Department. Betcha didn’t know you looked so good on paper.
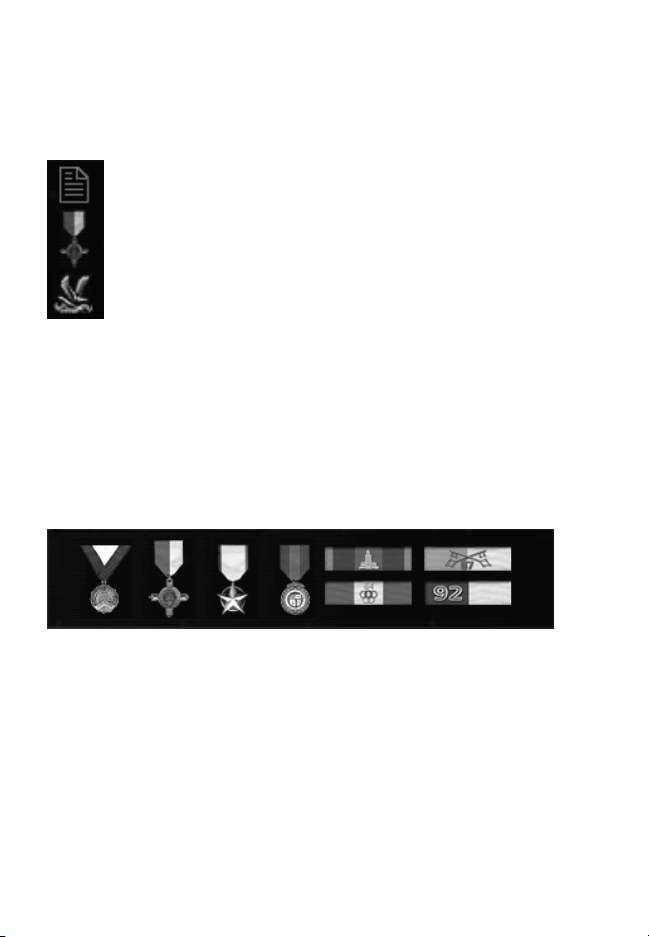
Medals
Medals are hard to come by in LAPD. Sure, your life is on the line everyday, but
that’s the job. It’s the lives you save, and the way in which you save them that earns
the respect of the Department and the conferral of a medal.
Leadership Score
Your leadership score says a lot about you. The higher your score, the more respect
your team has for you. The more respect your team has for you, the more they’re
willing to follow you into battle and do as commanded. The lower the score...well,
think about it. Would you follow the commands of a leader you didn’t respect? Well,
your team won’t either.
The leadership score is broken into five categories: Officer survival, proper use of
deadly force, respect level, rescue rate and mission success rate.
29
Page 30

Officer Survival
The player’s career begins with an officer survival rating of 100% (you start with one
success point). This rating can change drastically and quickly per mission as
individual officers are “downed.”
Officer survival is calculated at the conclusion of each mission using the following
computation: If no officers are “downed“ during the mission the player is awarded
one success point. For every officer that is downed during a mission the player is
penalized with one failure point. Divide the number of success points by the sum of
the success and failure points. This is the displayed percentage.
% = number of successes / (number of successes + number of failures)
This equation leans toward the severe, as the player can accumulate only one
success point per mission, but can receive from one to four failure points per
mission, based on how many officers are “downed.“
Proper Use of Deadly Force
The player’s career begins with a proper use of deadly force rating of 100% (1
success point). This rating can change drastically and quickly per mission if any
non-threatening individuals are shot. Non-threatening individuals include civilians,
hostages, and any armed suspect who is not pointing a gun at the player or another
officer / hostage / civilian. The player is penalized for the shot taken regardless if the
non-threatening individual is neutralized or merely wounded.
Proper use of deadly force is calculated at the conclusion of each mission using the
following computation: If no non-threatening individuals are shot during the mission
the player is awarded one success point. For every non-threatening individual shot
during a mission the player is penalized with one failure point. Divide the number of
success points by the sum of the success and failure points.
% = number of successes / (number of successes + number of failures)
This equation leans toward the severe; as the player can accumulate only one
success point per mission, but can receive numerous failure points per mission
based on how many non-threatening individuals were shot.
Respect
The player’s career begins with a respect rating of 50% (after all, he is new on the
job!). Just as it’s hard to earn respect in real life, it’s a challenge to increase the
game’s respect rating.
Respect is calculated at the conclusion of each mission using two criteria: medals
won by the player and his team and the issuance of “dumb” orders/ reports. “Dumb”
orders and reports include the following: Ordering an officer to handcuff a noncompliant civilian, hostage or suspect; ordering the evacuation of unsecured
civilians, hostages and suspects; reporting a non-wounded officer, civilian, hostage
or suspect as “down” or “neutralized;” reporting a downed officer, civilian, hostage
or suspect as “neutralized”; reporting a neutralized civilian, hostage or suspect as
“down.”
If the player issues no “dumb” orders or reports during a mission he is awarded one
30
Page 31

success point. For every “dumb” order or report issued during a mission the player
is penalized one failure point. Divide the number of successes in half, and then
divide that by the sum of the success and failure points.
% = 0.5 * number of successes / (number of successes + number of failures)
Medals awarded can greatly increase a player’s respect rating. For each medal won
by an officer other than the player, the player’s respect rating is increased 2%. For
each medal won by the team, the player’s respect rating is increased 5%. And for
each medal won by the player the respect rating goes up 10%. Regardless of the
number of medals, the maximum respect that can be earned is 100%.
Rescue Rate
The player’s career begins with a rescue rating of 0%. To successfully complete a
“rescue” the player must evacuate the character (civilian, hostage, suspect) from the
game.
Healthy, non-wounded characters must be “secured” or handcuffed prior to their
evacuation. The character can be handcuffed by the player or by one of his officers.
Characters who are wounded or neutralized do not need to be secured prior to their
evacuation.
A player’s rescue rate is calculated at the conclusion of each mission using the
following computation: For each character (civilian / hostage / suspect) “rescued”
the player is awarded one success point. For each character (civilian / hostage /
suspect) not “rescued” the player is penalized with one failure point. Divide the
number of successes by the sum of the number of successes and failures.
% = number of successes / (number of successes + number of failures)
Mission Success
The player’s career begins with a success rating of 0%. To successfully complete a
specific mission the player must meet all in-game objectives of that particular
mission. Mission objectives appear in two separate areas of the game: in the Preassault Briefing screen (both mission and career mode), and in the game by
accessing the Briefing Summary screen. The Briefing Summary screen is accessed
in the game by pressing the “B” key. (This is the default setting for the Briefing
Summary screen.)
The player’s mission success rating is calculated at the conclusion of each mission
using the following computation: For each mission deemed successful (all in-game
objectives met) the player is awarded one success point. For each mission deemed
unsuccessful (not all in-game objectives met) the player is penalized with one
failure point. Divide the number of successes by the sum of the number of
successes and failures.
% = number of successes / (number of successes + number of failures)
Overall Leadership Score
The overall leadership score is calculated by combining a percentage of each
category’s score. The percentages used from each category is as follows:
31
Page 32

30% of Officer Survival total percentage
20% of Proper Use of Deadly Force total percentage
15% of Respect total percentage
20% of Rescue Rating’s total percentage
15% of Mission Success total percentage
Using this formula, the player begins each career with an initial leadership score of
57% (30% of 100 + 20% of 100 + 15% of 50 + 20% of 0 + 15% of 0 = 57%).
A player’s leadership score is used by the game’s Artificial Intelligence system to
determine various actions and messages generated by the game’s Assaulters. A low
leadership score causes the Assaulters to be less tolerant of shooting errors on the
part of the player. A high leadership score has just the opposite effect: the game’s
Assaulters are more tolerant of the player’s shooting errors.
A low score is defined as belonging in the 0% to 30% range. A high score is defined
as belonging to the 70% - 100% range. Shooting errors are defined as any shot
taken by the player that strikes another officer. The player is allowed only 3 shooting
errors when his leadership score is low. When the player’s leadership score is high
he is allowed 8 or more shooting errors. Low tolerance results in swift justice on the
part of the Assaulters: the player will be neutralized immediately. High tolerance
results in leniency on the part of the Assaulters: the player is given the benefit of the
doubt and is not neutralized immediately.
Assaulter’s Career
As mentioned above, the bottom section of the screen is devoted to the careers of
your eight assaulters. Next to each assaulter’s image are his personal stats and his
duty status: Injured or Active. If an assaulter is on the injured reserve list he will not
be eligible for call-ups. However, as time passes and his injuries heal, he’ll be
rotated back onto active duty.
Obviously, more assaulters on the injured reserve list means less assaulters
available for call-ups. Fewer available assaulters means fewer team configurations.
All this translates to: if your assaulters spend a lot of time on the injured reserve list
you had better hope you chose a squad where everyone is as equally good as the
next guy. If not, you might find yourself at a real disadvantage in a clutch.
There is another disadvantage to a lot of injured assaulters; the squad starts to lose
confidence in your leadership ability. Once their confidence in you falters, they start
losing respect. The less respect, the lower your leadership score... it’s a vicious
cycle. A bit of advice... keep your men healthy; maintain command.
To review an assaulter’s biography or his medal conferral, pass your cursor over the
32
Page 33

assaulter’s image. It will highlight. Click on the highlighted image to select. The
selected assaulters biography will appear near the bottom of the screen. To the right
of the biography are two icons. One represents the biography, the other medals.
Highlight and click on the medal icon to view an assaulter’s medals. Click and
highlight the text to review an assaulter’s biography.
Pre-Assault
Ready to test your mettle? Lead your team? Save the world? Cool. But first, get the
facts. Click on the Pre-Assault tab to enter the pre-assault briefing for the upcoming
mission. Depending on whether you chose the Standard Career or a Custom Career,
your options will vary slightly.
Standard Career Pre-Assault
Pre-Assault Briefing
First stop on any mission is the pre-assault briefing. In the pre-assault you’ll receive
the latest updates on the current crisis, configure your team’s arsenal, determine
entry points and your tactical approach to the target location.
Neglect your responsibilities and the Department makes all the decisions for you. Do
you really want that?
Located on the bottom of the Pre-Assault Screen are three tabs: Briefing, Gear and
Active Duty. Pass your cursor over the tabs to highlight. Click on the highlighted tab
to select.
33
Page 34

Briefing
The Briefing Screen contains up to eleven categories of information to help you
succeed in your mission. The categories are located on the left hand side of the
briefing screen. Pass your cursor over the categories to highlight. Click on a
highlighted category to access. Clicking on a category changes the information
contained in the center of the screen.
The eleven categories of information are: crime information, event description,
demand deadlines, witnesses, weapons, suspects, hostages, location target, floor
plans, tactical advantages, objectives.
Though all categories of information are important, three have special importance.
They are: Hostages, Tactical Advantages, and Objectives.
Hostages
It’s always a good idea to know what the persons you’re charged with saving look
like... Remember, looks can be deceiving.
Tactical Advantages
Once you have all the mission facts clear in your mind, it’s time to start devising
your plan of attack.
Two crucial elements of that plan are your entry point into the structure and the
tactical mode of entry. In the Tactical Advantages screen you have the opportunity
to choose your entry point, (if there’s more than one), and your initial tactical mode:
stealth or dynamic.
If you fail to make these decisions, the Department will make them for you. Keep in
mind that all the decisions you make, or lack there of, affects your men’s opinion of
you. And you do know what that means to your leadership score, right? Make
informed decisions; earn the respect of your team.
Entry Point
Some structures have more than one entrance. This is a good thing. Choose your
entry point wisely, and do so with your tactical mode of entry in mind.
Tactical Mode
Stealth or dynamic. Which is it going to be? As an example, entering a structure in
stealth mode and clearing to a breach point within the structure is one tactic.
Another is to announce your entrance with a bang. It’s up to you.
Objectives
Objectives refer to your mission objectives: who to save and who to arrest.
Remember, there is no “one way” to meet your objectives in a tactical environment.
However, there is one guideline to follow: there are no acceptable losses.
34
Page 35

Gear
You know the particulars of the mission, and you have a bead on the suspects. It’s
time to match firepower. Click on the Gear tab to access your arsenal and configure
your team.
Located along the top of the Gear Screen is your team for the pending mission.
Each officer has been equipped with a default primary and secondary weapon,
along with a default set of tactical aids. However, you’re the one responsible for the
mission’s outcome, so how your team is ultimately configured is up to you. So get to
it.
To configure an officer’s arsenal, first select the officer by passing your cursor over
the top row. As the image of the officer highlights, click on the highlighted officer to
select.
Located vertically in the center of the screen are four tabs representing various
categories of weapons and gear available for distribution, they are: Primary,
Secondary, Tactical Aid, and Gear. Pass your cursor over these tabs to highlight.
Click on a highlighted tab to select. Once a category is selected, arrows appear to
the right of the tab. Click on the arrows to browse through the category.
Weapons
Primary and secondary refers to the two different types of weapons an officer
carries.
As a primary weapon, assaulters can be assigned the MP5, the MP5SD, a M4, or a
Benelli 12 gauge shotgun. As an Element Leader, the same weapons are available to
you, but with a twist. The M4 is less-lethal capable. Depending on the situation, you
might want the option of knocking down, not knocking dead, your opponent.
To select a specific weapon leave it displayed on screen.
35
Page 36

Ammunition
The Department issues two types of ammunition, referred to as primary and
secondary. Both types have their place in a CQB environment.
Primary ammunition is jacketed hollow point for long rifles and pistols. For shotguns,
it’s 12 gauge 00 buckshot.
Secondary ammunition is full metal jacket for long rifles and pistols (excluding the
M4), and breaching rounds for shotguns.
Give yourself a tactical advantage: as you assign the amount and type of ammunition per officer, including yourself, give thought to the environment you’re about to
enter, the number of hostages, and whether or not the suspects are wearing body
armor.
Next to the on-screen ammunition information are arrows. Click on the arrows to
increase or decrease the number of magazines you wish an officer to carry. There is
a maximum number of magazines assigned to each weapon, so increasing one type
of ammunition will decrease the other.
Tactical Aids
Tactical Aids and Gear refer to everything an officer needs beyond his weapons.
Some items in these categories are optional; others are standard issue. Arrows
appear next to items that can be assigned a quantity, such as CS Gas, flashbangs
2.
and C
Click on the arrows to increase or decrease the amount assigned to an officer. Note
that an officer can carry a set number of canisters. Consequently, increasing the
number of CS Gas canisters will decrease the number of flashbangs, (and visa
versa).
Assign To All
If a particular configuration of weapons, ammunition, and tactical aids seems
appropriate for every member of the entry team, click the tab marked Assign to All.
This will assign the displayed configuration of weapons, ammunition, and tactical
aids to all assaulters.
Active Duty
This is it. What every SWAT officer lives for. The action, the heroism, the guts and the
glory. You good to go? Click on the Active Duty tab, you’re going to war.
Custom Career Pre-Assault
To outfit you and your team for your upcoming mission, you will be taken to the
Operations screen. The interface in Career Operations behaves in exactly the same
way as the Mission Operations interface with the addition of a Save tab that persists
throughout all of the pre-assault screens at the bottom of the screen to the left of
the SWAT eagle. Click this tab to enter the Save Career screen. For more information about loading up at Operations, see the Mission Mode – Operations section of
this manual, found above.
36
Page 37

IN-GAME FEATURES
Performance
Screen Size
If you find the game is sluggish you can speed things up by decreasing your screen
size. To do so, click on the “-” key. Press the “+” key to increase your screen size.
Escape Key
Pressing the ESCAPE key in-game displays a menu of options. The options
available to you vary, depending on your current game style and status. The options
that may be available to you are:
Restart: Restarts the mission.
Debrief: Returns you immediately to the Debrief window. If you are the host, this
will end the mission.
Resume: Closes the options menu and returns to the game in progress.
Call Up: Returns you immediately to the Call-Up screen.
Quit: This will quit the game and return to Windows.
Assum. AI: If the Assumable AI augmentation is activated in a Co-Op game and
you are not currently alive, you may click this tab to take over the next available AI
officer and continue the game.
Observe: If you happen to be neutralized, you may click this tab to enter Observer
Mode, where you can watch the game from the viewpoints of the remaining players.
More information about Observer Mode can be found below.
In-Game Options
The in-game Options Screen allows you to adjust nearly all of the game’s options,
with the exception of Resolution and Rendering Device.
If you need to change Resolution or Rendering Device, you’ll need to exit your
current mission and access the Main Options Screen from Metro or the Main Menu.
For more information on the options available, see the Main Menu, Options section
of this manual.
Movement
Forward / Backward / Left / Right
Use the four arrow keys to move.
Turbo Movement
To accelerate movement, click and hold the right mouse button while holding down
an arrow key. Note that you will move faster in dynamic mode than you will in stealth
mode.
37
Page 38

Crouch / Stand
To crouch, click on the “C” key. To return to a standing position, click on the “S” key.
You can also toggle between crouching and standing by pressing the “A” key.
Leaning
To lean right click the Keypad “-” key. To lean to the left, press the keypad “/” key.
To return to an upright position, click the Keypad “*” key. You can also momentarily
lean left by pressing the “Z” key, and right by pressing the “X” key. Release to
return to an upright position.
Use / Open / Operate
When a door can be opened, an item picked up, or a switch flipped, four “tick”
marks will appear on the outside of your reticule. Click on the “U” key to interact
with the item.
Weapons / Tactics
Primary
Primary weapon refers to your long rifle. When your primary weapon is accessed a
reticule will appear in the center of your screen. Each primary weapon has its own,
distinct reticule.
To access your primary weapon, press the [F1] key.
Secondary
Secondary weapon refers to your pistol. When your secondary weapon is accessed,
a reticule will appear in the center of your screen. To access your secondary weapon
press the [F2] key.
Aim
Aiming is controlled by mouse movement, regardless if you’re aiming a weapon or
deploying a tactical aid device, such as a flashbang.
Note that some weapons do not aim as quickly as others. Heavy weapons such as
the Benelli or M4 shoot inaccurately after quickly moving the aim point. To acquire
an accurate sight picture, take a moment or two to steady the weapon before taking
the shot. Light weapons such as the 1911 or MP5 shoot very accurately even after
rapidly changing aim.
Your movement speed will also affect your accuracy. The faster you are moving, the
less accurate the shot, regardless of weapon type.
Fire
To fire either your primary or secondary weapon, click the left mouse button. Holding
down the left mouse button will produce rapid fire for only those weapons capable of
rapid fire. Holding the left mouse button down on single fire weapons will result in
the normal delay associated with a single fire weapon.
38
Page 39

Ammo
At the start of every mission, all weapons are loaded to full capacity with their
primary ammunition, (jacketed hollow point for long rifles and pistols, and buck shot
for shotguns.)
To switch from primary ammo to secondary ammo, press the [F12] key. Doing so
causes a magazine change. The next time you press “R” for reload, your weapon
will be reloaded with secondary ammunition.
To return to your primary ammunition, press the [F11] key. Once again, a magazine
change will occur, and the next time you reload, you’ll be reloading primary ammunition.
During the loading sequence your reticule will change from blue to gray. The gray
represents the “real time” it takes to perform the desired reload. When your firearm
is fully loaded, and capable of being fired, your reticule will turn blue.
As element leader, transitioning between primary and secondary ammo will cause
the officers on your team to transition their ammo as well. Exceptions include the
following cases: when transitioning to less then lethal ammo; when carrying a
shotgun and transition to a breaching round; and finally, when an officer is out of
the desired round.
Reload
To reload, press the “R” key.
Weapon Flashlight
If you are using a weapon equipped with a flashlight, you may toggle it on and off by
pressing the “F” key. Note that when you have tactical aids such as CS, flashbangs,
or your Opti-Wand active, you have no flashlight capability, as your primary weapon
is slung to your side and your pistol is holstered.
Magnified Optics
The HK G36 and M4 ACOG variants come equipped with magnified optics that you
can use to magnify distant objects and aid in aiming. If you are using one of these
weapons, you can change your sighting focal length by pressing the “N” key. You
may move and shoot normally in this mode. To return to your weapons standard
sight, press the “N” key a second time.
Reticules
Default weapon reticules are shaped to resemble the sight picture of the weapon
you’re carrying. Additional weapon reticules have been included that you might find
less distracting, or add to your shooting enjoyment. Pressing the “V” key allows you
to cycle through the available alternate reticules.
Flashbangs
To access a flashbang, press the [F3] key. Doing so causes a flashbang icon to
appear in the center of your screen.
Accessing a flashbang happens in “real time”, so prepare yourself for a small delay
39
Page 40

from the time you access the bang to the time it is ready to be deployed. When the
flashbang icon first appears on screen it’s gray in color. When it turns blue you know
it is deployable.
When you access a flashbang, your primary weapon is slung to the side and your
pistol is holstered. In other words, you’re without firing capability.
Aim your flashbang by moving your mouse. Click and hold the left mouse button to
“charge” your throw. The distance of your throw is represented at the bottom of the
screen by a small distance meter. The longer the left mouse button is held down, the
further the throw. When you are ready to deploy the flashbang, release the left
mouse button.
There is also a quick release option available in either half-strength or full strength.
With a flashbang selected, hold down the left mouse button and the SHIFT key
simultaneously to prepare to deploy at half-strength. To prepare to quick release at
full strength, hold down the left mouse button and the CTRL key simultaneously. To
deploy, release the mouse button.
Remember, when you access a flashbang, you are without firing capability.
CS Gas
To access a CS Gas canister press the [F4] key. Doing so causes a CS Gas icon to
appear in the center of your screen. Accessing CS Gas happens in “real time”, so
prepare yourself for a small delay from the time you access the CS to the time it is
ready to be deployed. (When deployable, the CS Gas icon will change from gray to
blue.)
Aim your gas canister by moving your mouse. Click and hold the left mouse button
to “charge” your throw. The distance of your throw is represented at the bottom of
the screen by a small distance meter. The longer the left mouse button is held down,
the further the throw. When you are ready to deploy the gas canister, release the left
mouse button.
There is also a quick release option available in either half-strength or full strength.
With CS Gas selected, hold down the left mouse button and the SHIFT key
simultaneously to prepare to deploy at half-strength. To prepare to quick release at
full strength, hold down the left mouse button and the CTRL key simultaneously. To
deploy, release the mouse button.
Remember, when you access a CS gas canister, you are without firing capability.
Lightsticks
Press the [F5] key to access a lightstick. Doing so causes a lightstick icon to appear
in the center of the screen. Click, hold and release the left mouse button to deploy
the lightstick. A small distance meter appears on screen to help you gauge the
distance of your throw when you click your left mouse button. The longer you hold
down the left mouse button, the further the lightstick is thrown. A lightstick glows
only after it makes contact with a hard surface.
There is also a quick release option available in either half-strength or full strength.
With a lightstick selected, hold down the left mouse button and the SHIFT key
40
Page 41

simultaneously to prepare to deploy at half-strength. To prepare to quick release at
full strength, hold down the left mouse button and the CTRL key simultaneously. To
deploy, release the mouse button.
Once again, when you access a lightstick, you are without firing capability.
C2
Press the [F6] key to access a C2 charge. Doing so causes a C2 icon to appear in
the center of your screen. Accessing a C
yourself for a delay as you transition from your weapon to a C
is ready to be placed, the icon will turn from gray to blue.
Use your mouse to move the C
“tick” marks will highlight around the C
click to begin setting the charge. It is not necessary to hold down the left mouse
button while placing the charge. Once the charge is set, left click again to detonate.
If you turn your view away from the door before the charge is fully set, the placement of the charge will be cancelled. During the time you are setting a C
you are unarmed, as your primary weapon is slung to your side and your pistol is
holstered.
2 charge into place. When in range of a closed door
2 charge happens in “real time”, so prepare
2 charge. Once the C2
2 icon. With the tick marks highlighted, left
2 charge
Tool Kit
Press the [F7] key to access the tool kit. Doing so causes a tool kit icon to appear in
the center of your screen. When within range of an item the tool kit can breach,
deactivate or defuse, “tick” marks highlight around tool kit icon. With the tick marks
highlighted, left click the tool kit on the object causing the highlights.
Manipulating the tool kit means you are without firing capability.
Handcuffs
Press the [F8] key to access your handcuffs. Doing so causes a handcuffs icon to
appear in the center of your screen. Note that you are without firepower, so be alert.
Your handcuffs are accessed in real-time, so there will be a slight delay from the
time you access them to the time they are useable. When the handcuffs are ready to
be placed, the icon will turn from gray to blue.
Moving your handcuff reticule over a compliant individual (kneeling with hands
raised) will highlight the reticule if you are within range. To handcuff a highlighted
individual, click the left mouse button.
After securing the individual, you will automatically transition back to the weapon
you were carrying. You may then call for evacuation on the secured individual. If,
however, an individual needing evacuation is wounded and laying on the ground, it
is not necessary to handcuff them before calling for evacuation.
Opti-Wand
The Opti-Wand allows you to “see” a radius of 180 degrees, approximately 48 inches
in front of you. This allows you to see into a room before entering, not a bad idea if
you’re worried about potential threats.
41
Page 42

To access the Opti-Wand, press the [F9] key. The Opti-Wand’s image screen will
appear in the top right hand corner of the screen. To manipulate and change the
Opti-Wand’s image, click and hold the left mouse button as you rotate the mouse.
To re-center the Opti-Wand image, press the [F9] key again. To clear the Opti-Wand
from the screen, replace it with another item by pressing any [FUNCTION] key.
As element leader, you are able to issue commands directly through the Opti-Wand. With
the Opti-Wand accessed, hold the CAPS LOCK key, and a cursor will appear in the
Opti-Wand image screen. Use the mouse to move the cursor as a reticule to give
commands. This command method can be used in both single-player and multi-player
play.
When manipulating the Opti-Wand you are without firing capability, as your primary
weapon is slung to your side, and your pistol is holstered.
Tactical Mode
Located in the lower right hand corner of your screen is a small icon of a SWAT
officer. The icon is either yellow or red.
The yellow icon is a reminder that you’re in stealth mode.
The red icon is a reminder that you’re in dynamic mode.
Manually changing from one tactical mode to another is easily done. When in
Stealth mode press the PAGE U P key to change to Dynamic mode. When in
Dynamic mode press the PAGE DOWN key to change to Stealth mode.
Injury Meter
Each time you’re struck by a bullet your injury is registered and your health is
negatively affected. When your health is less then optimal, a small meter appears on
the right hand side of the screen. The meter graphically depicts your loss of health and
registers each successive injury. When the meter bar is full, you’re dead. Roger that?
42
Page 43

Noxious Gas
When explosive, noxious fumes are present a small icon will appear in the lower
right hand portion of your screen. When the noxious fumes icon is present, it’s wise
not to shoot your weapon or deploy a flashbang, CS gas, or C
find yourself eating the big donut in the sky. Copy?
2. If you do, you might
Communications
Good communication is an essential ingredient of a successful mission. Whether
issuing commands to your team, or reporting to the Tactical Operations Center,
concise accurate information is the goal.
To that end, SWAT
structure, with communiquès accessed by number keys.
Command Menu
SWAT3’s command menu provides the player the means by which to communicate
with teammates, the Command Post, civilians, hostages and suspects.
The command menu is built on a three level, branching tree structure with messages
accessed by number keys. Beyond the root directory level, message options change
according to the tactical mode of play: stealth or dynamic.
Root Directory
The root directory allows the player to begin a command message, report mission
status, alert team members of a compromise and issue compliance.
1-3: Command Messages
Command messages can be directed at the entire team [ELEMENT],
or at the individual two-man teams [RED & BLUE].
Press the corresponding number [1-3], located to the left of the team name, to
designate the command recipient. Designating a command recipient expands the
message menu by one level.
3’s communication system is a command menu built on a tree
4: Report Mission Status
SWAT is a life saving organization. The ultimate goal of every mission is to defuse
any given situation with the least amount of force and evacuate all persons to safety.
As an element leader the player is responsible for the coordination of this process.
43
Page 44

Reporting officer, civilian, hostage and suspect status to the Command Post keeps
the Brass abreast of your tactical situation and allows them to provide evacuation
support.
Pressing the number [4] key from the root directory begins a report message and
expands the message menu by one level. The expanded menu allows the player to
report the status of an individual character or report that the mission is complete.
To access the various character status options the game cursor must be pointed at
that individual. When the game cursor is pointed at an in-game character, the
cursor will display small flashing tick marks, and the extended menu options will
highlight. Choosing the corresponding number to a status option results in the
player to reporting a character’s status, or requesting evacuation [1 - 4].
Reporting that the mission is complete does not require special placement of the
game cursor.
the Command Post verifies the message and calls the team back to the Command Post.
5: Area Cleared
Pressing the [5] key from the root directory results in the player notifying his
teammates that an area is clear of threat. The player can follow-up this announcement by dropping a lightstick at the entrance to the cleared area.
Once an area is pronounced clear of threat the player’s team will behave as though
the area is a safe zone. Consequently, it is imperative that the area be cleared of
threat; otherwise the player is jeopardizing his team’s safety.
6: Compromised
Pressing the [6] key from the root directory results in the player notifying his
teammates that their situation has been compromised. If the game was in stealth
mode this notification causes the game to switch to dynamic mode.
A compromised situation is one in which a suspect is unexpectedly encountered.
Once the corresponding number [5] for “mission complete” is pressed
1: Down - Reports highlighted individual as wounded.
2: Evacuate - Requests evacuation of individual highlighted by cursor.
3: Neutralized - Reports highlighted individual as dead.
4: Contact - Reports contact has been made with individual highlighted by cursor.
5: Mission Complete
7: Compliance
Compliance is the use of verbal commands to subdue non-threatening individuals,
and is issued in non life-threatening situations. Non life-threatening situations are
defined as those in which officers, or other innocents, are not in immediate danger
of dying. A non life-threatening situation refers to encounters with unarmed civilians
and hostages, or armed suspects who are not pointing their weapon at an innocent.
General compliance commands are issued when the game cursor is not pointing at
a specific individual and the player presses the [7] key from the root directory.
To issue compliance to a specific individual point the game cursor at the individual
and press the [7] key from the root directory. Compliance can also be issued
quickly by pressing your middle mouse button.
44
Page 45

Dynamic Commands
Dynamic commands reflect the nature of dynamic tactics: fast and loud.
To issue dynamic commands, the player must first be in dynamic mode (press the
PAGE UP key).
Once in dynamic mode the player must choose a command recipient from the root
directory [1:Element, 2:Red, 3:Blue]. Choosing a recipient expands the message
menu by one level.
The dynamic commands available on the second level of the message tree highlight
as the game cursor is passed over game characters and various environmental
elements. There are a total of eight dynamic commands. Some of the commands
change based on whether the player is inside or outside an environment, and some
have a third level of options. Press the corresponding number [1-8], located to the
left of the command, to issue an order.
1: Breach, Bang & Clear
Breach, bang and clear appears as a dynamic command option when the game
cursor is pointed at a closed interior door.
Defined, breach, bang & clear commands the recipient to breach (open) the closed
door, throw in a flashbang and clear what lays beyond the door.
When commanded to “breach, bang & clear’, the game assaulters know what
equipment they have in their arsenal that will allow them to dynamically breach the
door. If their primary weapon is a shotgun and they are carrying breaching rounds
they will execute the breach with the shotgun. If they are carrying C
will blow the door open. If they were not assigned dynamic breaching material, or
have run out, they will notify the player that they cannot execute the breach.
1: Bang & Clear
Bang and clear appears as a dynamic command option when the game cursor is
pointed at an open interior door.
Defined, bang & clear commands the recipient to flashbang the doorway and clear
what lays beyond the door. If the commanded assaulter was not assigned
flashbangs, or has run out, he will notify the player that he cannot execute the order.
2 explosives they
1: Breach, Bang & Make Entry
Breach, bang and make entry appears as a dynamic command option when the
game cursor is pointed at a closed exterior door.
Defined, breach, bang & make entry commands the recipient to breach (open) the
closed door, throw in a flashbang, make entry and clear the area just beyond the
interior of the doorway.
The game assaulters know what equipment they have in their arsenal that will allow
them to dynamically breach the door. If their primary weapon is a shotgun and they
are carrying breaching rounds they will execute the breach with the shotgun. If they
are carrying C
dynamic breaching material, or have run out, they will notify the player that they
cannot execute the breach.
2 explosives they will blow the door open. If they were not assigned
45
Page 46

2: Move & Clear
Move & clear appears as a dynamic command option when the game cursor is
pointed at any open doorway.
Defined, move and clear commands the recipient to enter the open door and clear
the area beyond for threat. Once an area is cleared of threat, the recipient will notify
the player of the situation.
When the move & clear command is selected, the menu tree expands and provides
the player with a tactical modifier: CS Gas.
1: No CS Gas – Modifies the command to “move and clear without CS gas.”
2: Use CS Gas – Modifies the command to “move and clear with CS gas.”
2: Breach & Clear
Breach & Clear appears as a dynamic command option when the game cursor is
pointed at a closed door.
Defined, breach and clear commands the recipient to breach (open) the closed door
and clear the room beyond the doorway for threat. Once an area is cleared of
threats, the recipient will notify the player the area is clear and will drop a lightstick
in the room’s doorway upon exiting.
When the breach & clear command is selected, the menu tree expands and provides
the player with a tactical modifier: CS Gas.
1: No CS Gas – Modifies the command to “breach and clear without CS gas.”
2: Use CS Gas – Modifies the command to “breach and clear with CS gas.”
3: Search
Search appears as a dynamic command option when the game cursor is pointing
anywhere within a room or hallway. It is not available if the game cursor is pointing
at a door. If the game cursor is pointing at an opening within a room or hallway then
the Search command applies to the area on the other side of the opening.
Direction of Search
When the search command is selected the menu tree expands and provides the
player with directional modifiers. When searching a location the modifiers, Left and
Right, refer to the direction of the command recipient. In other words, the player
commands the recipient to search to their left or right, not the player’s left or right.
1: Left – Modifies the command to “search to the left.”
2: Right – Modifies the command to “search to the right.”
3: Continue – Commands the recipient to continue searching.
4: Cover
Cover appears as a dynamic command option when the game cursor is pointed at a
particular location or at a specific hostage, civilian or suspect.
When commanded to cover a particular location, the assaulters will move into a
position where they can safely cover against a threat from that general direction.
When ordered to cover a suspect, hostage, or civilian, the assaulters will set up aim
on that individual and follow their movement.
46
Page 47

5: Fall In
Fall in as a dynamic command is available at all times. Commanding a recipient to
fall in does not require special placement of the game cursor.
Defined, fall in commands the recipient to follow behind the player until commanded to do otherwise.
It should be noted that the fall in command can be used as a “hold’ command as
well. If the player wants to stop an assaulter from engaging a civilian, hostage or
suspect, the fall in command will cause the assaulter to abort the engagement and
fall in behind the player.
6: Deploy
The player can command a recipient to deploy any one of five tactical aids in
dynamic mode. Two of the tactical aids require that the game cursor be
pointed at a closed door. The other three require that the game cursor be
pointed at a specific area.
1: Lightstick– Lightsticks are used to light otherwise dark areas and to mark
areas which have been cleared of threat as “cleared.’
To issue the command, ‘Deploy Lightstick’, the game cursor should be pointed
at the area in which the player wants the lightstick dropped.
2 – C2 is used to blow open closed / locked doors.
2: C
To issue the command, ‘Deploy C
the closed door which the player wants blown open.
If the commanded (AI) assaulter has run out of C
that he cannot execute the breach.
3: Flashbang – Flashbangs are used to temporarily distract or disorient a
suspect, hostage or civilian. When entering a room, the flashbang should be
dropped just inside the doorway. This allows the police officers to use the
smoke generated by the flashbang as concealment as they enter the room.
To issue the command, ‘Deploy Flashbang’, the game cursor should be pointed
at the area in which the player wants the flashbang to detonate.
If the commanded assaulter was not assigned flashbangs, or has run out, he
will inform the player that he cannot execute the ‘bang’.
4: CS Gas – CS Gas is used as a non-lethal alternative when dealing with
non-compliant suspects, civilians and hostages. When deployed, CS gas
causes the unprotected recipient to cough violently. The physical response to
CS gas, combined with compliance commands, often causes enough stress to
make a non-compliant individual compliant. Once the individual is compliant,
they can be secured and evacuated to safety.
To issue the command, ‘Deploy CS Gas’, the game cursor should be pointed at
the area in which the player wants the CS gas to discharge.
If the commanded assaulter was not assigned CS Gas, or has run out, he will
inform the player that he cannot execute the command.
2’, the game cursor needs to be pointed at
2 he will inform the player
47
Page 48

5: Shotgun – When loaded with breaching rounds, a shotgun can be used to
breach closed / locked doors. Commanding an assaulter to breach a door with
a shotgun requires the assaulter to have been assigned a shotgun and
breaching rounds in the pre-assault briefing.
To issue the command, ‘Deploy Shotgun’, the game cursor needs to be pointed
at the closed door which the player wants blown open.
If the commanded assaulter does not have a shotgun, or has run out of
breaching rounds, he will inform the player that he cannot execute the breach.
7: Disable
The player can issue a disable command on a variety of devices, ranging from
security systems to missile launchers to atomic demolition munitions.
The game cursor will highlight when passed over active objects that can be disabled
or defused.
To issue the command, “Disable’, the game cursor needs to be highlighted and
pointed at the object which the player wants disabled or defused.
8: Restrain
The player can command a recipient to restrain (handcuff) any hostage, civilian or
suspect. In order for the command to be carried out, the hostage, civilian or suspect
must be compliant. Compliant is defined as having surrendered. Compliant
individuals are unarmed and “assume the pose” – they drop to their knees with their
hands in the air.
If the player commands that a non-compliant person be restrained, they will lose
respect from their team, as this is considered a “dumb” command. (For more
information on “dumb” commands, please see FAQ section titled Leadership Score /
Respect.)
To issue the command, ‘Restrain’, the game cursor should be pointed at a compliant
individual.
Stealth Commands
Stealth commands reflect the nature of stealth tactics: slow and quiet.
To issue stealth commands, the player must first be in stealth mode (press the PA GE
DOWN key).
Once in stealth mode the player must choose a command recipient from the root
directory [1:Element, 2:Red, 3:Blue]. Choosing a recipient expands the message
menu by one level.
The stealth commands available on the second level of the message tree highlight
as the game cursor is passed over game characters and various environmental
elements. There are a total of eight stealth commands. Some of the commands
change based on whether the player is attempting to enter a door, or is inside or
outside an environment, and some have a third level of options.
Press the corresponding number [1-8], located to the left of the command, to issue
an order.
48
Page 49

1: Stack
Stack appears as a stealth command option when the game cursor is pointed at any
interior or exterior door, regardless if open or closed.
Defined, stack commands the recipients to stack up on the door and ready
themselves to make entry.
When commanded to ‘stack’, the game assaulters position themselves to the side of
the door in a “stack” formation and ready themselves to either open a closed door
or mirror an open door.
1: Try Door
Try door appears as a stealth command option when the game cursor is pointing at
a closed door with assaulters in a stack formation.
Defined, try door commands the recipient to try and open the closed door. If the
door is unlocked the assaulter will open the door. If the door is locked, the assaulter
will inform the player and the door will stay closed.
1: Pick Lock
Pick lock appears as a stealth command option when the game cursor is pointing at
a locked door with assaulters in a stack formation.
Defined, pick lock commands the recipient to breach (open) the locked / closed
door using the standard issued tool kit. Once the lock is picked, the door will open.
1: Mirror
Mirror door appears as a stealth command option when the game cursor is pointing
at an open door that assaulters are stacked on.
Defined, mirror commands the recipient to transition from his primary weapon to his
Opti-Wand. Using the Opti-Wand along the doorframe, the assaulter looks for signs
of threats beyond the doorway. The assaulter reports his findings to the player. Once
the player is aware of the possible dangers awaiting him, he can determine a
tactical plan of attack.
2: Clear
Clear appears as a stealth command option when the game cursor is pointed at any
open interior doorway or room.
Defined, clear commands the recipient to clear the room beyond the doorway for
threat. Once an area is cleared of threat, the recipient will notify the player the area
is clear and will drop a lightstick in the room’s doorway upon exiting.
When the clear command is selected, the menu tree expands and provides the
player with a tactical modifier: CS Gas.
1: No CS Gas – Modifies the command to “clear without CS gas.”
2: Use CS Gas – Modifies the command to “clear with CS gas.”
2: Move & Clear
Move & Clear appears as a stealth command option when the game cursor is
pointed at any open exterior doorway or room.
49
Page 50

Defined, move and clear commands the recipient to clear the room beyond the
doorway for threat. Once an area is cleared of threat, the recipient will notify the
player the area is clear and will drop a lightstick in the room’s doorway upon exiting.
When the move & clear command is selected, the menu tree expands and provides
the player with a tactical modifier: CS Gas.
1: No CS Gas – Modifies the command to “move and clear without CS gas.”
2: Use CS Gas – Modifies the command to “move and clear with CS gas.”
3: Search
Search appears as a stealth command option when the game cursor is pointing
anywhere within a room or hallway. It is not available if the game cursor is pointing
at a door. If the game cursor is pointing at an opening within a room or hallway then
the Search command applies to the area on the other side of the opening.
Direction of Search
When the search command is selected the menu tree expands and provides the
player with directional modifiers. When searching a location the modifiers, Left and
Right, refer to the direction of the command recipient. In other words, the player
commands the recipient to search to their left or right, not the player’s left or right.
1: Left – Modifies the command to “search to the left.”
2: Right – Modifies the command to “search to the right.”
3: Continue – Commands the recipient to continue searching.
4: Cover
Cover appears as a stealth command option when the game cursor is pointed at a
particular location or at a specific hostage, civilian or suspect.
When commanded to cover a particular location, the assaulters will move into a
position where they can safely cover against a threat from that general direction.
When ordered to cover a suspect, hostage, or civilian, the assaulters will set up aim
on that individual and follow their movement.
5: Fall In
Fall in as a stealth command is available at all times. Commanding a recipient to fall
in does not require special placement of the game cursor.
Defined, fall in commands the recipient to follow behind the player until commanded to do otherwise.
It should be noted that the fall in command can be used as a ‘hold’ command as
well. If the player wants to stop an assaulter from engaging a civilian, hostage or
suspect, the fall in command will cause the assaulter to abort the engagement and
fall in behind the player.
50
Page 51

6: Deploy
The player can command a recipient to deploy one of two tactical aids in stealth
mode: Lightsticks and CS Gas.
1: Lightstick– Lightsticks are used to light otherwise dark areas and to mark
areas which have been cleared of threat as ‘cleared.’ To issue the command,
‘Deploy Lightstick’, the game cursor should be pointed at the area in which the
player wants the lightstick dropped.
2: CS Gas – CS Gas is used as a non-lethal alternative when dealing with noncompliant suspects, civilians and hostages. When deployed, CS gas causes the
unprotected recipient to cough violently. The physical response to CS gas,
combined with compliance commands, often causes enough stress to make a
non-compliant individual compliant. Once the individual is compliant, they can
be secured and evacuated to safety.
To issue the command, ‘Deploy CS Gas’, the game cursor should be pointed at
the area in which the player wants the CS gas to discharge.
If the commanded assaulter was not assigned CS Gas, or has run out, he will
inform the player that he cannot execute the command.
7: Disable
The player can issue a disable command on a variety of devices, ranging from
security systems to missile launchers to atomic demolition munitions.
The game cursor will highlight when passed over active objects that can be disabled
or defused.
To issue the command, ‘Disable’, the game cursor needs to be highlighted and pointed
at the object which the player wants disabled or defused.
8: Restrain
The player can command a recipient to restrain (handcuff) any hostage, civilian or
suspect. In order for the command to be carried out, the hostage, civilian or suspect
must be compliant. Compliant is defined as having surrendered. Compliant
individuals are unarmed and “assume the pose” – they drop to their knees with their
hands in the air. If the player commands that a non-compliant person be restrained,
they will lose respect from their team, as this is considered a “dumb” command. (For
more information on “dumb” commands, please see FAQ section titled Leadership
Score / Respect.)
To issue the command, ‘Restrain’, the game cursor must be pointed at a compliant
individual.
Multi-player mode allows extra communications between the team, including
responses to the element leader and teammates; see the Multi-player section for
more details.
51
Page 52

View Ports
Each assaulter has a small camera mounted onto his helmet whose image can be
accessed with the press of a key. Remote access of an assaulter’s view port lets you
“see” what the assaulter is seeing, without being in the same location. This can be
very helpful when planning your team’s next move.
Default keys are assigned to each team position:
INSERT: Red1
HOME: Red2
DELETE: Blue1
END: Blue2
View port keys function two ways. First as an on-off toggle switch, and second as a
sequential switch.
View port Key as a toggle: Press a view port key once and the view port of choice
appears. Press the key a second time and the view port disappears.
View port key as a sequential switch: Press a view port key once and the view
port of choice appears. Press a second view port key and the view port replaces the
first.
To clear the view port from the screen, press the second key again. Should a second
team be operating in the mission with you, you can switch to the view from that
team by pressing the “]” key.
Press the key again to return to your team’s view.
To change the view port’s default key mapping go to the Keyboard Mapping Screen.
For instructions on how to change the key mapping, see above Main Menu, Options.
52
Page 53

View Port Commands
As element leader, you are able to issue commands directly through a view port.
With a view port accessed, hold the CAP S LOCK key, and a cursor will appear in
the view port. Use the mouse to move the cursor as a reticule to give commands.
This command method can be used in both single-player and multi-player play.
Please note that the view port feature is disabled when the Opti-Wand is in use.
However, commands can be issued though the Opti-Wand. For detailed information, see Opti-Wand, Weapons / Tactics.
Weapon Status
The Weapons Status screen is a translucent overlay which can be accessed any
time during a mission. The information includes the amount of ammunition
available to both your primary and secondary weapons, and the number of tactical
aids you have at your disposal.
Accessing the Weapons Status screen does not stop the game. It does however
obstruct your visibility, so it should be used sparingly.
To access the Weapons Status screen press the SPACE BAR. To clear the display,
press the SPACE BAR a second time.
53
Page 54

Briefing Summary
The Briefing Summary can be accessed any time during a mission. The information is a summary of your mission objectives. This is a dynamic summary, so as
objectives are met, (or not), the summary is updated, keeping you abreast of your
progress.
Accessing the Briefing Summary in single-player mode stops the game. There is
no danger of being caught off guard as you review your objectives and your
progress.
To access the Briefing Summary, click on the “B” key. To clear the display, press
the “B” key a second time.
In Multi-Player mode, accessing the briefing summary does not stop the game, so
be alert.
Debrief
Standard Mission
A recap appears at the end of each mission, regardless if you’re in mission or
career mode, in the form of the Briefing Screen.
The Briefing Screen is broken into two sections. The first section is devoted to
your activities within the mission: the number of hostages rescued, and suspects
arrested or neutralized. If your actions within the mission qualify you as the
recipient of a medal, you’ll be awarded it here and now.
54
Page 55

The second section of the Briefing Screen is devoted to the actions of your team
as a whole: the total number of bullets shot, the total number of hostages rescued
or suspects arrested. If any of your team members qualify for a medal, it will
appear here.
If you are not satisfied with the mission results, you have the option to restart the
mission at this time. To do so, pass your cursor over the restart tab and click. If
you’re satisfied with your mission results and want to move on, click on the Metro
tab.
Custom Mission
Co-Operative
After a Co-Operative mission ends, you will be presented with a debriefing screen,
which will recap the mission objectives and their status, statistics relating to the
mission’s civilians, hostages, suspects, and your officers, as well as your leadership score.
There are three sections to the debriefing itself: Mission, Element 1 and Element 2.
Move your cursor over any of the tabs to highlight them, and click the highlighted
tab to select.
The Mission tab gives you a breakdown of the mission objectives, their status, the
mission’s elapsed time, and mission statistics relating to hostages, civilians,
suspects, and your fellow officers. If there is more information about the mission
than can be shown in the mission debrief box, you may click the arrows at the
bottom-right of the box to scroll the contents of the box.
55
Page 56

The Element 1 and 2 tabs display information about each of the officers in the
first and second entry teams, respectively. You will see a picture of the officer, the
officer’s name, and statistics relating to the number of rounds fired, tactical aids
deployed, and weapons seized. If the officer has received a medal for their part in
the mission, the medal will be displayed to the right of their statistics. Additionally, the element leader’s leadership score will be shown below his name.
You have additional options pertaining to the next mission you would like to take
on with your team(s). If you wish to try the same mission again, with the same
team and gear configuration, click the Replay tab at the bottom of the screen.
Additionally, in the lower-right hand quadrant of the screen is a picture
representing the mission you and your team just finished. Above this picture are
two arrows, click these arrows to change the mission shown in the box, and click
Ops to enter the Operations screen for the selected mission. You will have a
chance to reconfigure your team(s), read up on the mission briefing and set up
your gear configurations before deploying for the mission.
If you wish to select a new mission and/or game mode, you may click the Call Up
tab. If you wish to return directly to the main menu, click the Main tab.
Deathmatch/Last Man Standing
The debrief screen for Standard Deathmatch and Last Man Standing is a
breakdown of each player’s kills, executions, respawns, evacs, and total score.
Each player is listed (along with a cumulative total for all AI suspects in the
game) in a descending order ranked by score.
56
Page 57

Kills: The number of armed enemies that the player neutralized.
Executions: The number of unarmed characters that the player neutralized.
Respawns: The number of times the player returned to the game after being
neutralized.
Evacs: The number of hostages that the player successfully evacuated.
Score: The total score for the player.
Also displayed is the game’s winner, based on total score. The winner is also
shown at the top of the score breakdown list.
Team Deathmatch
The Team Deathmatch debrief screen is separated into three sections to provide
information about each team’s score, and the scores of individual officers on each
team. The debriefing is separated into three screens: Mission, Good Guys, and Bad
Guys. To access these screens, click the tabs located below the mission statistics
box.
In the Mission screen, all of the players in the game and their corresponding
mission statistics are shown in descending order sorted by score. Below the player
list, the teams are shown along with their cumulative game statistics.
The Good Guy and Bad Guy boxes show missions statistics for each player in the
corresponding team, in descending order sorted by score. The highest-scoring
player will be shown at the top of the list.
57
Page 58

Medals
Medals are awarded for bravery, preservation of life and minimum use of force.
Criteria for the presentation of a medal is as follows:
Medal of Valor
No civilian is hurt or neutralized
No hostage is hurt or neutralized
No non-threatening suspect is neutralized
All downed officers are evacuated to safety
All downed hostages are evacuated to safety
All downed civilians are evacuated to safety
The officer is shot at 50 times or more
The officer returns less fire then received
Police Medal
No non-threatening suspect is neutralized
All downed officers are evacuated to safety
All downed hostages are evacuated to safety
All downed civilians are evacuated to safety
Officer is shot at 25 times or more
Officer returns less fire then received
Police Star
No non-threatening suspect is neutralized
All downed officers are evacuated to safety
All downed hostages are evacuated to safety
All downed civilians are evacuated to safety
Officer is shot at 25 times or more
Officer returns less fire then received
Police Commission Unit Citation
No non-threatening suspect is neutralized
No officer is wounded
All downed hostages are evacuated to safety
All downed civilians are evacuated to safety
Officer is shot at 7 times or more
Officer returns less fire then received
58
Page 59

MULTI-PLAYER MODE
SWAT3 gives you the option of playing online, either over a LAN (Local Area
Network), or the Internet. To start a multi-player game from the main menu, click
the tab marked Multi-Player. The multi-player menu will appear. There are three
tabs: LAN, Internet, and SWAT3.com. Moving your cursor over these tabs will
cause them to highlight. Click on the highlighted tab to select.
Multi-Player Menu Options
LAN
This option will allow you to join up to or create SWAT3 missions or careers on
your Local Area Network. Clicking this tab will bring you to the LAN Login screen.
LAN Login
Upon choosing LAN mode, you will be prompted to choose or create a game
persona. If this is the first time you’ve entered a multi-player game, you will need
to create a game persona. If you have personas available, click on the persona
name box to reveal a drop down menu. Highlight and click on any available
persona name you choose to use.
From the LAN Login, you have five available options:
New Officer
This will lead you to the Officer screen where you can create a new multi-player
character.
Edit Officer
This will lead you to the Officer screen, where you can edit a saved multi-player
character.
Delete Officer
This will remove the saved multi-player character that you currently have selected.
Cancel
This will return you to the main SWAT3 menu.
59
Page 60

Go!
This will send you to the Call Up screen with your selected multi-player character.
Internet
If you’d like to find an Internet SWAT3 mission or career that suits your taste, or
perhaps create one yourself, choose this option. You will be taken to the Login
prompt.
Internet Login
At the Login screen, you will be asked for a username that will identify you in the
SWAT3 Lobby, and a password. If you do not yet have a username and password,
you can create one by highlighting the New Account tab and clicking. You may
also set up the officer persona you wish to represent you in the game by
highlighting the Officer Setup tab and clicking. This will take you to the Officer
screen.
To log in, enter your username and password in the spaces provided, then
highlight and click the Go! tab. Highlight and click the Cancel tab to return to the
Main Menu.
60
Page 61

Headquarters
Upon logging in, you will be taken to Headquarters. Headquarters is separated
into lobbies, unique rooms where participants chat and create/join games. A list
of all of the players in your current lobby is shown on the right side of the screen,
along with arrows that you may click to scroll the list. The left hand side of the
screen is dedicated to a chat box. To send a message, click the smaller box
below the chat dialogue; type your message, and press ENTER to send the
message.
At the bottom of the screen, there are four tabs: Log Out, Call Up, Officer Setup,
and Communication. Move your mouse over the tabs to highlight them; click the
highlighted tab to select. Clicking Log Out will close your Internet SWAT3 session
and return you to the main menu. Clicking Call Up will allow you to search for or
create a game. Clicking Officer Setup will allow you to make changes to your
player persona for Internet play. Clicking Communication will allow you to choose
a new lobby to chat in. By default, you will be taken to the SWAT3 Lobby
corresponding to your geographic location.
SWAT3.com
Clicking on the SWAT3.com tab will open up your web browser and take you to
the SWAT3.com website. With updates, MODs, and interaction from all parts of
the tactical community, SWAT3.com is your one-stop source for everything
tactical.
61
Page 62

Officer Screen
The Officer screen, accessed by selecting New Officer or Edit Officer from the
LAN Login menu, or Officer Setup from the Internet Login menu, allows you to
specify traits and names for your game persona. Use the provided names for your
game persona or create your own. To create your own persona name, click on a
supplied name, and then type using the keyboard. You’ll want to enter a last name,
first name, and nickname. After that’s finished, you can use the arrows to the
sides of the Years in Swat and Race selection to scroll through those fields to pick
the traits that you’d like. If you are satisfied with your changes, click the Accept
tab. If you do not wish to save your changes, click the Cancel tab.
Call Up
The Call Up screen is where you can search for active LAN or Internet games, or
create your own multi-player game.
62
Page 63

The Call Up screen is comprised of information columns regarding the various
multi-player games waiting to begin or in progress. Information per game
includes game status, game name, mission map in play, current number of
players, game ping, and game type.
Games that are waiting to start, and that can be entered, have the status ‘Open’,
and are displayed in blue. Games that are in play and cannot be entered have a
‘Closed’ status, and are displayed in gray. Password-locked games have a small
lock icon displayed in their status box.
Game names are anything the host wishes to name them. Mission maps can be
familiar single player maps, or new maps created by MOD builders. The ping of a
game reflects the speed of data transfer to and from the host computer. The
lower the ping number, the faster the transmission of game information from the
host’s computer to a client’s computer. Use the ping number to determine if a
game is “fast” enough for your taste.
Games that contain game data different from yours are displayed in red, and
cannot be joined. Selecting a game of this type and clicking on the Info button
will give information on how that particular game’s files differ from yours.
Multi-Player Game Types
There are two types of multiplayer games in SWAT3, Cooperative and
Deathmatch. Both types of games support up to ten players. In Cooperative,
players are part of up to two five-man SWAT entry teams. Each team is comprised
of an element leader and up to four assaulters. Assaulters can be live players or
AI characters. Objectives for the missions range from hostage rescue to VIP
protection to warrant service. Cooperative games can be played in either standalone mission mode, or in career mode.
Cooperative games can be augmented with an Assumable AI feature. To learn
more about this feature, see below.
In Deathmatch games, players can to battle in free for alls, or choose sides: the
“good” guys or the “bad guys”. Deathmatch objectives include last man standing,
team play, and most neutralized. Each objective type has special augmentations
that can be added. For detailed information on these additional features, see
below.
Located below the game information columns is a chat window. Type into the
chat window and hit the ENTER key to send messages to other players in the Call
Up screen. A list of the other players in the Call Up screen appears to the right of
the chat window. Both the chat window and the players list have arrows which
allow you to scroll through the contents.
Located at the bottom of the screen are six tabs: Main/HQ, Career, Join, Create,
Officer and Info. Pass your cursor over to highlight, click to select a tab.
63
Page 64

Main / HQ
This tab will return you to the Main Menu if you are searching for LAN games,
and back to Headquarters if you are searching for Internet games.
Career
Clicking the Career tab will allow you to either create a new Internet/LAN career
or restore a saved Internet/LAN career.
Career Selection
Upon clicking the Career tab, two lists will be displayed.
The leftmost list contains new careers that you may choose to begin. You may
scroll this list of careers by clicking on the arrows located to the lower right of the
list. To select a new career, click on one of these careers and then click the select
tab.
The rightmost list contains careers that have been saved and are available for you
to restore. You may scroll this list of careers by clicking on the arrows located to
the lower right of the list. To restore a career, click on one of the careers shown in
the list and click the select tab.
Upon selecting and confirming a career, you will be taken to Operations to ready
yourself and your team for the upcoming mission.
64
Page 65

Join
Clicking this tab will allow you to join the game you have highlighted in the list. To
highlight a game to join, move your cursor over the name of the game and click. If
the game is password-protected, you will be prompted to enter the password.
Once you have joined the game, you will be taken to the Operations screen.
Create
Clicking on the Create tab allows you to create and host your own SWAT3
mission. Once the Create tab is selected, a window will appear. In the space
provided, enter the name you wish the game to have, a password (optional), and
choose your mission location using the arrows. You can also choose your game
type from the list: Deathmatch, Team Deathmatch, Last Man Standing, or CoOperative. In an Internet game, you will be asked to choose a server to host the
game on. The most appropriate server is automatically displayed for you as the
default. If you wish to choose another server, click the arrow to the right of the
server name to display a list of servers. Click the name of the server that you wish
to host the game on. After you click O.K., you will be taken to your game’s
Operations screen.
Officer
Clicking the Officer tab allows you to edit your active multi-player character,
through the Officer screen.
Info
To access detailed information regarding any of the multiplayer games in the Call
Up screen, first click on an active game, and then click the Info tab. Available
information per game will include the name of the players, and a list of which
MODs, if any, are in use.
65
Page 66

Operations
First stop in any multiplayer game is Operations. From here you’ll choose team
positions, access mission information including mission objectives, chat with your
fellow players, determine a mission entry point and tactical mode of approach
and access the weapons and gear screens from which you and your team will
outfit yourselves.
There are four sections within Operations: Ops, Mission, Gear, and Chat. Ops is
selected as the default when first accessing Operations, and it is here that your
team position will be determined. The Mission section deals with the mission
particulars, such as objectives, tactical mode of approach, and entry point. The
Gear section is where each player chooses a character body type, and gears up
with weapons and tactical aids. Chat provides Internet players the ability to toggle
between the Operations screen and the Lobby screen. This allows players to chat
with those not within their game.
Located below the mission specific information in each screen is a chat window.
Type into the chat window and hit the ENTER key to send messages. All
incoming messages from the other players will appear in this window, preceded
by their name.
Located at the bottom right of the Operations screen is the SWAT eagle surrounded by three option tabs; Operations, Call Up, and Main. Pass your cursor
over the SWAT eagle and the tabs to highlight. Click on the highlighted SWAT
eagle or a highlighted tab to select. Clicking on the SWAT eagle brings up the
Options Menu. Clicking on the Call Up tab accesses the Call Up screen. Clicking
on the Main tab takes you back to SWAT3’s Main Menu.
The chat window and the SWAT eagle and associated options are persistent
between Ops, Mission, Gear, and Chat.
Note that the host is responsible for setting global game play features, including
assigning team positions, camo type, game type, entry point, initial tactical mode
and possible options such as number of suspects or hostages per mission.
However, this is not to say that the client-side players don’t have a say in the
matter. After all, that’s what the chat window is for... express yourself.
66
Page 67

Ops Screen
Co-Operative Mode
As mentioned above, Ops is the default section when entering Operations. In the
Ops section each player is assigned a team position on either of two entry teams
by the host: Element Leader, Red1, Red2, Blue1 and Blue2. If you’re not the host,
use the chat window to express your preference for a particular team position.
To fill a particular team position, click the small arrow located next to the position
to be filled. A box will drop down allowing you to choose from several options.
Options include choosing one of the players to fill the position, choosing a
computer-controlled teammate to fill the position by selecting AI, or choosing not
to fill the position by selecting Closed. Selecting Open leaves the position open
for potential players who may enter Operations before the game is in progress.
Each team, if it contains any team assaulters, must also contain an element
leader. If one or both of the teams contain assaulters but no element leader, the
game will not start. Nor will the game start if the position is merely marked as
Open. It must be filled, either by a live player or an AI officer. If and when the
starting element leader is neutralized and out of the game, the position of element
leader will be filled by an assaulter on the leader’s team. The succession for
replacement begins with Red1, then Red2, Blue1 and finally Blue2. When
succession occurs, the chosen assaulter’s communication menu will automatically change from the Response Menu to the Command Menu.
Located to the right of the screen is a drop-down list of game play scenarios from
which the host can choose. Scenario options will always include the default
SWAT3 scenario and a “Random Objectives” scenario.
67
Page 68

If the “Random Objectives” scenario is chosen, you may choose the number of
suspects and civilians that appear in the scenario. When this option is available,
use the arrows provided to change the number values and create the scenario you
want, or click the Random tab next to the arrows to set the field to a random
value.
Below the scenario box are gameplay augmentation options. These augmentations
vary based on the game type, and as the host, you may choose to activate them or
deactivate them based on your personal preference.
The gameplay augmentations function in multi-player mode in the same fashion
as single-player mode. For information on each of the available game augmentation options, see the Custom Mission – Gameplay Augmentations section of this
manual.
Deathmatch Mode
In Team Deathmatch, both the “good guy” and “bad guy” teams have a command
structure, and are organized like the entry teams in co-op.
As a “bad guy”, the player will benefit from any AI suspects in the game, as they
will go after the “good guys”. In Standard Deathmatch, or Last Man Standing
Deathmatch, the AI suspects will always treat the player as the enemy.
Clicking the small arrow located next to each player’s name will cause a drop
down options list to appear. Deathmatch options include the choice of “booting”
or removing a player, choosing not to fill the position by selecting Closed, or
selecting Open. Selecting Open leaves the position open for potential players who
may enter Operations before the game is in progress.
In any of the Deathmatch variations, the scenario briefing is replaced by several
fields that represent the game parameters: Max Score, Suspects, Civilians, Timer,
and Lives. Each field has two arrows directly to the right which are used to change
the value in the field, and, depending on the field, a Random button which will set
the value randomly at game start.
Max Score can be set to a value or can be left blank. If blank, there is no
maximum score, and thus, the game cannot end based on score. If it is set to a
value, the game will end when one player reaches the maximum score.
The Suspects and Civilians fields can be set to a value, including zero or a random
value. These fields designate how many suspects and civilians will be placed in
the mission area when the game begins.
The Timer can be set to designate a certain amount of game duration. If the timer
is left blank, the game cannot end based on time elapsed. If the timer is set to a
value, that value represents the number of minutes that will pass during the game
before the game ends.
The Lives field indicates the number of times that each player will be able to reenter the mission area after being neutralized. You may leave it blank or click the
None button to the right of the field to give each player indefinite lives, or set it to
a value to limit their number of lives.
68
Page 69

Below the scenario box are gameplay augmentation options. These augmentations vary based on the game type, and as the host, you may choose to activate
them or deactivate them based on your personal preference.
The gameplay augmentations function in multi-player mode in the same fashion
as single-player mode. For information on each of the available game augmentation options, see the Custom Mission – Gameplay Augmentations section of this
manual.
Mission Screen
Co-Operative Mode
The Mission tab provides you with information about the mission area you will be
entering, and, if you are the host, allows you to set entry points for the team(s). On
the right hand side of the screen is the current briefing for the upcoming mission.
You can scroll through the briefing by clicking the arrows to the right of the
briefing text.
To the left of the briefing box is a shot of the current mission location, for your
reference. Below the briefing box are your entry point / mode of entry selectors.
Two sets of boxes, one for each team, identify the team’s entry point and tactical
mode of entry: stealth or dynamic, for the mission. Click the arrows to the left and
right of each box to change the entry point and tactical mode of entry for your
team(s). When you are satisfied with your choices, simply leave them displayed
on-screen, and they will be applied when the mission begins.
69
Page 70

Deathmatch Mode
In Team Deathmatch mode, the Mission Screen provides the mission’s name and
establishing shot. Each team’s element leader is allowed to set their entry point,
hidden from the opposing team. Also available for the host is the option of turning
on the “Base Camp” augmentation, explained in the Single-Player Custom Mission
section of this manual.
In Standard Deathmatch and Last Man Standing modes, the Mission screen is
unavailable.
Gear Screen
The Gear tab allows you to access weapons and equipment for yourself and, if you
are the host, set camouflage colors for your team. The Gear screen is separated
into two menus, the Gear menu and the Weapons menu. By default, the Gear
menu is shown. To move between the two menus, click either the Gear or the
Weapons tabs located at the top-left hand corner of the screen.
Co-Operative/Team Deathmatch Mode
Gear
The Gear section is where you will set the camo and choose a character type to
represent you in the game. To help you do so, the Gear Screen provides a list of
character types and several camos to choose from.
To begin, select your name from the player list located to the left of the screen. If
you are the host, you’re responsible for selecting and outfitting yourself and all AI
70
Page 71

officers chosen for the mission. Consequently, you are able to select yourself and
all AI characters from the list. If you are not the host, your name is selected as the
default.
Once a player’s name is selected, browse through the list of character types by
clicking on any of the character type names. Use the arrows provided if the list of
character types exceeds the space allotted.
Once a character type is clicked on, a picture of the character will appear to the
right of the character list.
The camouflage of the character types can be changed by selecting any of the
various camo patterns provided to the right of the screen. If you are the element
leader, you are responsible for choosing your team’s camo type. If you are a team
assaulter, your camo type is locked to the leader’s selection.
To select your character type and team camo leave them selected and displayed
on screen.
Weapons
Click on the Weapons tab to switch to the weapons and tactical aids screen.
Located vertically to the left of the screen are three tabs representing categories of
weapons and tactical aids available for carry, they are: Primary, Secondary, and
Tactical Aid. Primary and secondary refers to the two different types of weapons
you can carry. Tactical refers to tactical aids, such as flashbangs and CS Gas.
Pass your cursor over these tabs to highlight. Click on a highlighted tab to select.
Once a category is selected, a list of available items will appear to the right of the
tab. Click on the name of each item to view a picture and a brief description of the
item.
71
Page 72

Each weapon available for carry has primary and secondary ammunition. You can
increase or decrease the number of magazines, per ammo type; you wish to carry
by clicking on the arrows provided. There is a maximum number of magazines
assigned to each weapon, so increasing one type of ammunition will decrease the
other. To select your primary and secondary weapons leave them displayed on
screen.
To increase or decrease the amount of a particular tactical aid you wish to carry
click on the arrows provided. Note that there is a set number of canisters you can
carry. Consequently, increasing the number of CS Gas canisters will decrease the
number of flashbangs, (and visa versa).
Note that the host is responsible for configuring all AI officer’s weapons and tactical
aids.
Deathmatch/Last Man Standing Mode
The Deathmatch/Last Man Standing Gear Screen functions in the same manner
as in Co-Op mode, with an exception: each player is allowed to independently
choose their camo type.
To learn how to choose a character-type and configure your character’s weapons
and tactical aids in Deathmatch, see above, Co-Operative/Team Deathmatch
Mode.
Chat Screen
The Chat screen, accessible in Internet mode, allows you to talk with the players
that are in the lobby. When the Chat tab is selected, two chat boxes will appear.
The topmost box is your chat connection with those that are in your current game.
72
Page 73

The bottom box is your chat connection with the lobby. Click on either window
and type your message into it; press ENTER to send your message.
Go! Go! Go!
Located along the bottom of the screen, to the right of the Gear tab, is the Go! Go!
Go! tab. Click this tab to signal to the other players that you’re ready to begin
battle. A tag next to your team position in the Ops screen will illuminate, signaling
that you are ready. If you wish to cancel your ready order, you may click the Go!
Go! Go! tab again, and the tag next to your team position will turn off.
When all players, including the host, have signaled that they’re “good to go”, the
game will launch.
Note that if you fail to choose a character type, or configure your character’s
weapons and gear, defaults will be set for you.
Multi-Player Gameplay Features
General Multi-Player Features
Escape Key
Pressing the ESCAPE key while in a multi-player game displays a menu of
options. The options available to you vary, depending on your current game style
and status. The options that may be available to you are:
Debrief: Returns you immediately to the Debrief window. If you are the host, this
will end the mission.
Resume: Closes the options menu and returns to the game in progress.
Call Up: Returns you immediately to the Multiplayer Call-Up screen. If you are the
host, this will end the mission.
Quit: This will quit the game and return to Windows.
Assum. AI: If the Assumable AI feature is activated in a Co-Op game and you are
not currently alive, you may click this tab to take over the next available AI officer
and continue the game.
Observe: If you happen to be neutralized, you may click this tab to enter Observer
Mode, where you can watch the game from the viewpoints of the remaining
players, and talk to other observers. More information about Observer Mode can
be found below.
In single-player mode, accessing the Options Screen and the Briefing Screen
pauses the game. However, accessing these screens in multi-player mode does
not stop the game. Consider finding cover before activating either the Options or
the Briefing screen.
73
Page 74

Custom Chat
The Custom Chat feature is an extension of SWAT3’s communication system.
Messages created for Custom Chat can be accessed off of both the Command
and Response Menus in Co-op mode and Team Deathmatch mode by pressing
the “9” key. In Standard Deathmatch mode or Last Man Standing mode, press the
“2” key to access Custom Chat messages.
For detailed information on creating custom messages, refer to the documentation
above, under Main Options Screen, Custom Chat.
Chat Box
To chat with other players during a game, press the ENTER key to activate the
chat box. Use your keyboard to type in a message. With the Chat box active, press
the TAB key to access and cycle through a list of recipients for your message.
Press ENTER a second time to send your message.
Opti-Wand
In both Co-Operative and Team Deathmatch multiplayer modes, when the OptiWand is active, players can use both the Command and the Response Menus to
notify their team of potential threats, or the presence of hostages, as seen in the
Opti-Wand image screen.
For detailed information on interfacing with the menus in conjunction with the
Opti-Wand, refer to the documentation below, under Co-Operative Play Features Communications, Multi-Player Command Menu and Response Menu.
Observer Mode
If you expire during a non-respawn multi-player game, or have run out of
respawns, you will receive a prompt allowing you access to Observer Mode.
Selecting the option allows you to rejoin the game as an observer and use the
view port keys to access your fellow officers point of view, and observe their
actions. To access the view ports of the first team, you may use the standard view
port keys. To access the view ports of the second team, press the “]” key, and
then the key corresponding to the view port of the position you wish to view. To
return to the first team, press the “]” key a second time.
While in observer mode, you may chat with other observers using both the chat
box and custom chat on the messaging menu. Note that players that are still
“living” will not see your text in the chat box or your custom chat messages.
Not selecting the option returns you to the Operations Screen.
74
Page 75

Co-Operative Play Features
Co-Operative Mode emphasizes teamwork, and allows players the chance to
work together as one or two five-man SWAT teams. With support for up to ten
players, up to two teams of five can work in tandem to accomplish the mission
objectives. One person on the team is assigned the position of element leader,
while the rest of the players on the team occupy the assaulter positions: Red1,
Red2, Blue1, and Blue2.
If and when the starting element leader expires, the player in the Red1 position
becomes the element leader. Succession is repeated, followed by Red2, Blue1,
and eventually Blue2.
Co-Operative missions are scored like the single-player missions, with a
debriefing screen at the end of the mission summarizing each team’s overall
success at completing the mission’s objectives.
Visual Aids
As an assaulter, your primary job is to follow the commands of your element
leader. However, receiving commands in a multi-player game can be confusing.
To help you make sense of the commands you receive (the what & where of the
command) four visual aids have been incorporated into your interface:
Navigational Lines
Direction / Distance Assist
Command Box
Command Tags
Navigation Lines
Navigation lines graphically display the most direct path from the command
recipient’s position to the command point or object. Nav lines are red and can be
toggled “On” and “Off” using the (default) “P” key.
Nav lines are removed from the screen two ways; first, they can be toggled “Off”
and second, they automatically disappear when the commanded player is in line
of sight of the command point or object.
The “P” key is the default setting and can be changed in the Options, Key
Mapping screen.
Direction/Distance Assist
75
Page 76

Incorporated into each weapon’s reticule interface is a distance meter and a twopart direction arrow.
The two-part arrow and the distance meter appear upon receipt of a command.
The distance meter displays the distance between the command recipient’s
position and the command point or object. As the command recipient moves
closer or further away from the command point the number dynamically changes.
Moving around the reticule in a 360-degree pattern, the two-part arrow points in
the direction of the command point (arrow outline) and the direction of the best
path (solid arrow). Both arrows dynamically adjust as the command recipient
changes his position in relationship to the command point or object. The two-part
arrow disappears when the command is completed.
The Direction / Distance Assist feature cannot be toggled on or off.
Command Box
The Command Box displays commands issued by the element leader, and is
located above the assaulter’s Response Menu.
Active commands are displayed in green text upon receipt. The active command
persists until another command is issued or the recipient responds to the element
leader using the Response Menu.
The Command Box feature is active only if the Response Menu is toggled “On”.
Press the “M” key to toggle the Response Menu “On” and “Off”.
Command Tags
Command Tags exist on the 2-D plane of the player’s “face shield”. This means
that command tags will move or float across, and possibly off, the screen as the
player moves his “head” (mouse direction).
There are two types of command tags available to help the assaulter: a tic box and
a target icon. The tic box and target command tags are the same color as the
Command Box text and appear upon command.
76
Page 77

Target icons are used when directional commands (Clear to the right, Breach
door) and general commands (Clear room) are issued.
The tic box is used when the issued command relates to or targets a character,
such as “Fall In” or “Restrain”.
The tic box or command tag disappears when a new command is issued, or if a
dynamic event occurs (such as shots fired).
The target command tag is shown at the location that the element leader is
requesting an action. When you either enter the area designated by the command
tag, or are less than fifty (50) feet from the target area and are facing in its
direction, the target command tag will “snap” to your reticule to let you know that
you are currently within or are aiming at the location designated by your element
leader. The target command tag disappears permanently once the command has
been completed.
A tic box appears around a character (element leader) that issues the command
“Fall In”. As the character moves away, the tic box scales smaller. The tic box
persists until a different order is issued.
Element Leader View Port
Just like assaulters, the element leader has a small camera mounted onto his
helmet that can be accessed with the press of a key.
View port keys function two ways. First as an on-off toggle switch, and second as
a sequential switch.
View port Key as a toggle: Press a view port key once and the view port of choice
appears. Press the key a second time and the view port disappears. Should a
second team be operating in the mission with you, you can switch to the view
from that team by pressing the “]” key. Press the key again to return to your team’s
view.
77
Page 78

View port key as a sequential switch: Press a view port key once and the view port
of choice appears. Press a second view port key and the view port replaces the
first.
To clear the view port from the screen, press the second key a second time.
Default keys are assigned to each team position:
INSERT: Red1
HOME: Red2
DELETE: Blue1
END: Blue2
BACKSLASH: Element Leader
To change the view port’s default key mapping go to the Keyboard Mapping
Screen. For instructions on how to change the key mapping, see above Main
Menu, Options.
Communications
The Element Leader’s Command Menu was introduced in the single player portion
of SWAT3, and is incorporated into both Co-Operative and Team Deathmatch
multiplayer gameplay. The functionality of the Command Menu is consistent
between single player and multi-player; it is a menu system built on a tree
structure, with communiquès accessed by number keys.
Multi-Player Command Menu
In multi-player mode, the Command Menu has been expanded to enhance
communication between the element leader and his team. To that end, the
Command Menu has new options, including an expanded root directory and the
addition of branching Opti-Wand messages.
Expanded Root Directory
Two additional command headings are added to the Element Leader’s command
menu in multi-player: Copy and Custom Chat.
8: Copy
Pressing the [8] key from the root directory results in the element leader
transmitting the phrase “Copy” to his team. “Copy” is a phrase used to acknowledge a comment, and is used in any situation in which the element leader wants
to let his team know that a comment has been received and understood.
9: Custom Chat
Pressing the number [9] key from the root directory expands the message menu
by one level. The expanded menu allows the element leader to send customized
messages to the individual teams or to the element.
Custom Chat messages are configured through the Main Menu Options screen.
78
Page 79

Opti-Wand Messages
1 - 3: [Element, Red, Blue]
Pressing the [1-3] keys from the root directory defines a recipient and expands
the message menu by one level. When the Opti-Wand is active, the message
options on the second level include the number [9] key, the Opti-Wand.
Pressing the number [9] key expands the message menu by one level. The
message options on the third level relate to potential threats, or the presence of
hostages, as seen in the Opti-Wand image screen.
1: All Clear – Reports no sign of threats, as seen through the Opti-Wand.
2: Civilian – Pressing the number [2] key allows the player to report on the
status of civilian(s), as seen through the Opti-Wand, and expands the menu
to provide various modifiers:
1: Lone Civilian
2: Multiple Civilians
3: Plus Lone Threat
4: Plus Multiple Threats
3: Hostage – Pressing the number [3] key allows the player to report on the
status of hostage(s), as seen through the Opti-Wand, and expands the menu
to provide various modifiers:
1: Lone Hostage
2: Multiple Hostages
3: Plus Lone Threat
4: Plus Multiple Threats
4: Suspect – Pressing the number [4] key allows the player to report on the
status of suspect(s), as seen through the Opti-Wand, and expands the menu
to provide various modifiers:
1: Lone Suspect
2: Multiple Suspects
5: Multiple Persons Down – Reports multiple persons are wounded or
neutralized.
For further details on the Command Menu, refer to the Command Menu section in
Single-Player In Game Features.
79
Page 80

Response Menu
The Response Menu, found in both Co-Operative and Team Deathmatch
multiplayer, is the counterpart to the Command Menu. It too is a menu system
built on a tree structure, with communiquès accessed by number keys. The
Response Menu gives assaulters the means by which to communicate with the
element leader, teammates, the Command Post, civilians, hostages, and suspects.
The Response Menu is built on a three level, branching tree structure with
messages accessed by number keys.
Beyond the root directory level, message options change according to the
command received from the element leader. The assaulter always has at least two
responses to any given command, and can respond to the Element Leader or to
his partner.
Root Directory
The root directory allows the player to begin a response message, communicate
between teammates, report mission status, and issue compliance.
1: Leader
Pressing the [1] key from the root directory expands the message menu by one
level. The response options on the second level are directly related to the element
leader’s last command, and vary from confirmations to refusals.
The response is directed at the element leader, and heard by the element leader
and the all other assaulters.
When the Element Leader has not issued a command, pressing the [1] key from
the root directory allows the assaulter to notify the element leader he is awaiting
orders, or to query the element leader on holding or continuing.
When the Opti-Wand is active, pressing the [1] key from the root directory
expands the menu by one level. The report options on the second level allows the
assaulter to notify the element leader of potential threats, or the presence of
hostages, as seen in the Opti-Wand image screen.
80
Page 81

2: Team
Pressing the [2] key from the root directory expands the message menu by one
level. The response options on the second level refer to the execution of the
pending command. As an example, if the pending command is “Try the Door”, the
possible responses are: Trying the Door, Standing By, Door Locked, and Door
Open.
Sending any one of these responses to your partner(s) informs them of your
action, or the status of the situation. Only your partner(s) will receive these
response messages.
Your partner(s) is defined as your other teammate (Blue / Red), or in the case
where the order was issued to the element, all the other assaulters.
When there is no pending command, pressing the [2] key from the root directory
expands the message menu by one level. The message options on the second
level relate to you and your partner’s next move, such as Follow Me and Hold.
When the Opti-Wand is active, pressing the [2] key from the root directory
expands the menu by one level. The report options on the second level allows the
assaulter to notify the team of potential threats, or the presence of hostages, as
seen in the Opti-Wand image screen.
3: Cover
Pressing the [3] key from the root directory expands the message menu by one
level. The message options on the second level request support and are sent to
the element leader and all other assaulters.
1: Back Up – Requests that your team provide cover for you.
2: Under Fire – Alerts your team that you are taking fire.
3: No Ammo – Alerts your team that you have run out of ammunition.
4: Report Mission Status
In co-operative multiplayer, each team member is responsible for the evacuation
of secured suspects and rescued hostages. Reporting civilian, hostage and
suspect status to the Command Post keeps the Brass abreast of your tactical
situation and allows them to provide evacuation support.
Pressing the number [4] key from the root directory begins a report message and
expands the message menu by one level. The expanded menu allows the assaulter
to report the status of an individual character.
To access the various status options, the game cursor must be pointed at an
individual. When the game cursor is pointed at an in-game character the extended
menu options highlight. Choosing the corresponding number to a status option
results in the player to reporting a character’s status, or requesting evacuation [1 5].
1: Down - Reports highlighted individual is wounded.
2: Evacuate - Requests evacuation of highlighted individual.
3: Neutralized - Reports highlighted individual is DOA.
4: Contact - Reports contact has been made with highlighted individual.
5: Secured – Reports highlighted individual is secured with handcuffs.
81
Page 82

5: Area Cleared
Pressing the [5] key from the root directory results in the assaulter notifying his
teammates that an area is clear of threat. The assaulter can follow-up this
announcement by dropping a lightstick at the entrance to the cleared area.
6: Compromised
Pressing the [6] key from the root directory results in the assaulter notifying his
teammates that their situation has been compromised. If the game was in stealth
mode this notification causes the game to switch to dynamic mode.
A compromised situation is one in which a suspect is unexpectedly encountered.
7: Compliance
Compliance is the use of verbal commands to subdue non-threatening individuals,
and are issued in non life-threatening situations. Non life-threatening situations
are defined as those in which officers, or other innocents, are not in immediate
danger of dying. A non life-threatening situation refers to encounters with
unarmed civilians and hostages, or armed suspects who are not pointing their
weapon at an innocent.
General compliance commands are issued when the game cursor is not pointing
at a specific individual. To issue compliance to a specific individual point the game
cursor at the individual and press the [7] key from the root directory. Compliance
can also be issued quickly by pressing your middle mouse button.
8: Copy
Pressing the [8] key from the root directory results in the assaulter transmitting
the phrase “Copy” to his teammates. “Copy” is a phrase used to acknowledge a
command or comment, and is used in any situation in which the assaulter wants
to let his teammates know that a command or comment has been received and
understood.
9: Custom Chat
Pressing the number [9] key from the root directory expands the message menu
by one level. The expanded menu allows the assaulter to send customized
messages to the element leader, teammate or element.
Custom Chat messages are configured through the Main Menu Options screen.
Team-To-Team Communication
If you are playing the current mission with two teams of assaulters, you may
converse with the other team using both the chat box and custom chat features.
Note that only the chat box and custom chat messages which are directed to “All”
will be heard by the other team.
82
Page 83

Deathmatch Player Features
Deathmatch is a competitive, force-on-force version of SWAT3, where individual
players or teams strive for survival or a high score. Battles can be timed, and can
be played in a variety of ways. Specific rules and scoring are documented below.
Deathmatch
Standard deathmatch is a battle for points; players compete to gain the highest
score by the end of the game. All players, and any armed suspects, are fair game.
If you are neutralized during game play, you will automatically return to the game
in a new location with your weapons fully capable. If the host has designated a
set number of respawns, one will be subtracted from the total left you. If no more
remain, you may enter observer mode.
Deathmatch Scoring
Points are scored by neutralizing other players and armed suspects, and by
handcuffing suspects and civilians, and protecting them until their evacuation.
More points are scored for handcuffing suspects than for neutralizing them.
However, all handcuffed individuals must be protected until evacuation occurs to
receive the points! Note that the evacuation of a handcuffed suspect/civilian
occurs twenty seconds after evacuation is requested.
If another player moves within a few feet of your handcuffed suspect/civilian
during the twenty-second evacuation timer, and you are not nearby, the timer
resets and you are no longer eligible for the handcuffing/evacuation points.
If no other player causes the timer to reset, the player who “stole” your bounty
receives the points for evacuation.
Points are lost by neutralizing unarmed suspects, neutralizing civilians, and by
dying yourself.
Points
+1: Neutralizing Another Player or an Armed Suspect
+2: Handcuffing and Evacuating a Suspect or Civilian
-1: Neutralizing an Unarmed Suspect or Civilian
-1: Player Neutralized
Team Deathmatch
Team Deathmatch is a force-on-force battle for points; players choose either good
guy or bad guy sides, and fight each other for dominance.
Watch your handcuffed suspects awaiting evacuation! If an enemy player gets too
close to them before they are evacuated, they will be freed.
During the game, each player has access to the communications menu; the leader
of each side has access to the command menu, and the assaulters on that team
have access to the response menu and the visual aids. For more information on
83
Page 84

the available commands, responses, and visual aids, see the section above: CoOperative Play Features – Communications, and Co-Operative Play Features –
Visual Aids.
Team Deathmatch Scoring
The good guy players score points for neutralizing bad guy players and armed
suspects. They can score more points, however, by handcuffing civilians and
suspects, and protecting them until evacuation; these points are applied to the
entire team. The good guy players lose points for neutralizing unarmed suspects
or other good guy players. Points are lost for dying, as well. Should you be
neutralized, you will return to the game with your weapons fully capable in either
the “base camp”, if the Base Camp augmentation is active, or in a random location
in the map, if the Base Camp augmentation is not active. If the host has designated a set number of respawns, one will be subtracted from the total left you. If
no more remain, you may enter observer mode.
Good Guy Points
+1: Neutralizing an Armed Suspect or Bad Guy Player
+2: Handcuffing and Evacuating a Suspect or Civilian (Awarded to Entire Team)
-1: Neutralizing an Unarmed Suspect or Civilian
-1: Neutralizing a Good Guy Player
-1: Player Neutralized
The bad guy players score points for neutralizing good guy players. They also
score team points for handcuffing civilians (taking them hostage) and protecting
them until evacuation. Points are lost if a bad guy player, suspect, or civilian is
neutralized. Points are lost for dying, as well.
Bad Guy Points
+1: Neutralizing a Good Guy Player
+2: Handcuffing and Taking Hostage a Civilian (Awarded to Entire Team)
-1: Neutralizing a Suspect or Bad Guy Player
-1: Player Neutralized
Last Man Standing
Last man standing is a fight for survival; all players fight each other until only one
player is left. If you happen to be neutralized, you will not respawn. The host may
change this setting in Operations to allow more than one respawn. In this case,
you may only respawn a number of times equivalent to the host’s selection.
When the “Life Support” option is activated in a Last Man Standing game, each
player slowly loses health. Health can only be regenerated by inflicting damage on
other players and armed suspects, or handcuffing civilians and suspects.
At the conclusion of the game, each player will be given a ranking equivalent to
the amount of time they stayed in the game. The last man standing takes first
place.
84
Page 85

Last Man Standing Scoring
When “Life Support” is activated, you receive health points for damage inflicted
on other players and armed suspects.
If you are able to handcuff and protect a civilian or suspect until evacuation, you
will be restored to full health, whether or not “Life Support” is on.
If you shoot an unarmed suspect or civilian, you will be penalized by a drop in
health, whether or not “Life Support” is on.
The winner is the player who survives the longest. The game will automatically
end when there is only one character (player or AI suspect) left alive.
SINGLE-PLAYER MISSION
WALKTHROUGH
This is a walkthrough of the River Tigris Import store in single-player mode. This is
a hostage rescue mission in which Ambassador Jemil Kemal is being held by
Lokman Damar and an unknown number of others.
Your mission objectives are to rescue Ambassador Jemil Kemal, gain control of
the suspect Lokman Damar and bring order to chaos. To check your progress
throughout the game, press the “B” key. An in game briefing screen will appear
with objective update. To clear the briefing screen press the “B” key.
The mission begins outside the River Tigris Import store. There is only one
entrance into the store, the front door, and it’s very dangerous due to the glass
door and windows. Approach the front door cautiously, as it’s possible that the
storefront contains armed suspects. If suspects are present they can and will
shoot at you and your team through the front windows!
As the element leader you can command your team to enter and clear the
storefront or you can take the lead and have them follow you - it’s up to your own
personal tactical style. If one tactic doesn’t work, try another. This also applies to
the mode under which you enter the store, Dynamic or Stealth. Remember,
Dynamic commands and tactical aids are used to intimidate your adversaries,
whereas Stealth commands and tactical aids are used to mask your presence.
Commands are issued using a combination of the number keys and your reticule.
Consequently, to command your Element to enter the store in Stealth mode, point
your reticule at the door and press the “1” key, followed by the “1” key. This will
command your Element to stack up on the door. Once the Element is in position,
continue to point your reticule at the door and command them to try opening the
door using your number keys. Once the door is open, command your team to
enter and clear the store.
As long as your presence is not compromised while outside the store, your team
will follow your orders precisely. If your presence is compromised by a suspect
85
Page 86

seeing you, your team will automatically go into Dynamic mode and engage all
found suspects.
If you chose to begin the mission in Dynamic mode, you will have two command
options for entering the store: 1) Breach, bang and clear, 2) Breach and clear.
The first option includes the use of a flashbang upon entering. This can be an
effective method of disorienting possible suspects, but it is also a bit slower to
execute, and you may want to save your flashbangs for later. If speed is of the
essence, you might want to command your Element to ‘breach and clear’ and
throw a flashbang into the store yourself.
Once again, commanding your Element in Dynamic mode is a combination of
your reticule and the number keys.
To command your Element to ‘Breach, bang and clear’, you will need to point your
reticule at the door, press the “1” key, followed by the “1” key.
To command your Element to ‘Breach and clear’ you will need to point your
reticule at the door, press the “1” key, followed by the “2” key.
If you want to deploy a flashbang upon your Element’s entry, first press the [F3]
key. Your gun reticule will change to a flashbang reticule. Next, point the
flashbang reticule at the door. Now click and hold your left mouse button. You will
see a power up bar. The more full the bar, the farther the subsequent throw.
Now, while continuing to hold down the left mouse button, point your flashbang
reticule at the door and press the “1” key, followed by the “2” key. Once your
team opens the front door release the left mouse key. The flashbang will be
deployed into the store. (Make sure you’re pointing at the door!)
This maneuver can be tricky to master, but once perfected can be very effective.
This maneuver can also be done with CS gas. To deploy gas upon entry, press the
[F4] key and repeat the command sequence.
Once in the store, clear it of all threats. Threats can be suspects and any
unknown person encountered. A lone firearm can also be a threat. If you see a
gun, secure it by pointing your reticule at it and press the “U” key. If you don’t
secure the firearm, it can be picked up by a non-friendly and used against you!
As a police officer, you must abide by the law, and the rules of engagement are
clear: If you are under fire, engage immediately. If an armed suspect points a
weapon at you, engage immediately. If an armed suspect is not threatening you,
(his gun is not pointed at you or he is running away), or you encounter an
unarmed person, issue compliance by pressing the “7” key. Sometimes it will
take several orders of compliance to get an individual to cooperate.
Compliance, or the issuance of verbal commands, does not always work. This is
when the use of non-lethal tactics, such as the deployment of CS gas, your less
than lethal option on your M4 Carbine, or flashbangs, can be used.
Compliant individuals kneel on the ground with their hands above their head.
Once an individual is compliant, they need to be secured and evac’ed from the
building. To do this, either handcuff the individual (by using the [F8] command
86
Page 87

key), or command your Element to do so. Once the individual is handcuffed, point
your reticule at the secured individual and use the command structure (4- Report,
and then 2-Evac) to report to the Command Post that the individual is safe for
evacuation.
If an individual is wounded there is no need to handcuff them, but to preserve life,
they need to be evacuated. If an individual is neutralized, they need not be
evacuated from the scene.
Once the front of the store is cleared of all threats, and any and all suspects
secured and evacuated, continue moving through the store. Along the back wall
there is a door leading to a storage room. If this door is closed, you will want to
open it and clear the room beyond. As with the front door, you can choose many
ways in which to open this door: you can order your Element, Red or Blue to open
in a Dynamic or Stealth manner. Or, you can open the door and order your
Element to follow or cover you. Remember, the situation dictates the tactics there is no one way to approach a room entry.
Once in the storage room, clear it of all threats. At the far end of the storage room
there is a door. Beyond this door is a small room, which leads to a hidden room,
which in turn leads to a basement. The two rooms leading to the basement are
small and can contain armed suspects, and possibly a hostage. You can give
yourself an advantage by deploying CS gas into the first room prior to entering.
You can also command your Element to deploy CS, or you can command Red to
deploy CS gas, while Blue covers... or...the possibilities are endless. Just note, that
these rooms are small, divided and make for dangerous maneuvering.
Once you have made it through these small rooms, you will find a door leading to
the basement. The tactical mode you enter the stairwell under (Dynamic or
Stealth) should depend on the amount of noise generated thus far in the mission gunfire and flashbangs generate a lot of noise and will alert suspects to your
presence.
Once your tactical mode is selected, open the door and enter the stairwell. Who
goes first is up to you...
Once in the basement you will notice a lack of light. You can enhance your vision
by turning on your weapon’s flashlight by pressing the “F” key. You can approach
the basement in many ways: deploy massive amounts of CS gas to disable the
suspects, (but you could harm the hostage), you could call the suspects out by
issuing compliance, or you could use your Opti-Wand to look around every corner
for suspects or the hostage. However you tactically approach the mission, and the
basement specifically, is correct as long as you rescue the hostage and your team
comes out alive.
The basement is comprised of two hallways, a couple of open areas and a small
room with a door. Due to the character’s artificial intelligence, they can be
anywhere in the basement. There is no guarantee they will be in a specific
location, (as you’ll see each time you play the mission). So keep your eyes open,
and shoot only those threatening you. If you’re too quick on the trigger you might
shoot one of your own coming around a corner, or you might shoot the hostage.
87
Page 88

When you find the hostage, make sure you secure and evacuate him. Yes, even
hostages are secured with handcuffs. That is, of course, if they aren’t wounded. If
the Ambassador is wounded, he need only be evac’ed out of the building. If the
Ambassador expires during your mission, the mission will be considered a failure.
However, failing the mission does not end the mission. You can continue to
salvage what you can.
GOOD LUCK.
88
Page 89

GAME
CREDITS
Producer
Rod Fung
Associate Producer
Cade Myers
Game Designer / Writer / Director
Tammy Dargan
Art Director
Cyrus Kanga
Lead Programming
John D. Anderson
Jim Napier
Artificial Intelligence Programmer
John D. Anderson
Music / SFX
Evan Buehler
Gary Spinrad
Lead 3D Character Modeler
Mark Sigel
Animator
John P. Anderson
3D Environment Artists
Mark Nicolino
Matthew Lucas
Travis Steiner
William Todd Bryan
Jeff Lane
Robert Munsil
3D Modeling Artists
Jason Kim
Travis Brady
Max Braun
2D / 3D Artist
Michael Chavez
Programmers
Brian Johnston
David Sanderman
Jason Olander
Boon Chew
Michael Stahl
Jim Edwards
Tim Gentry
AI Support
Cade Myers
Graphics Engine & System
Architect
Jim Napier
User Interface Design
Cyrus Kanga
Character Design
Jimmy Kowalski
LAPD SWAT Advisor
Kenneth A. Thatcher, LAPD
Consultant
Daryl F. Gates, LAPD Ret.
Technical Documentation
Charles Cox
Quality Assurance Director
Gary Stevens
Quality Assurance Supervisor
Ken Eaton
Quality Assurance Lead
Craig Bradford
Cade Myers
Ken Eaton
Quality Assurance Element
Erinn Hamilton
Tharlie Richardson
Doug Quackenbush
Chris Bourdon
Jared Guthrie
Rick Gusa
Stephen Musch
Craig Marshall
Jim Gentle
Quality Assurance Compatibility
Lab
Sean Meichle
Sue Ung
Joe Easter
Corporate Product Certification
Manager
Chris Mahnken
89
Page 90

Corporate Product Certification
Andrea Stone
Dave Johnson
Chris Slack
Senior Vice-President/Sierra
Studios
Mark Hood
VP of Marketing/Sierra Studios
Jim Veevaert
Director of Marketing/Sierra
Studios
Koren Buckner
Marketing Product Management
Lee Rossini
Dan Amdur
Public Relations Senior Manager
Genevieve Ostergard
Public Relations Manager
Hillary Crowley
Sierra Studios Web Producer
Guy Welch
Documentation Layout
Mary Houghton –
Cheryl Sweeney
Package Design
Orlena Yeung
Shane DeBoer
Motion Capture
House of Moves
Los Angeles, CA
www.moves.com
Executive in Charge of Production,
Motion Capture
Tom Tolles
Executive Producer, Motion
Capture
Jarrod Phillips
Taylor Wilson
Rita Mines
Brett Gassaway
Chris Bellaci
Line’ Spencer
Right Direction Design
James Scanlon
Scott Carroll
Diego Torroija
Jay Juneau
Johnny Ravena
Voice Recording
Hollywood Recording Services
Hollywood, CA.
Voice Casting
Voicecasters
Burbank, CA.
Talent Paymaster
The Talent Fund
Half-Moon Bay, CA.
Firearms Provided by
Weapons Safety, Inc., Bellevue, WA.
www.weaponssafety.com
Special Thanks
The members of D Platoon,
LAPD SWAT:
Andy Lamprey, LAPD Ret.
Ron McCarthy, LAPD Ret.
Lt. Tom Runyon, LAPD
Officer Jim Veenstra, LAPD
Officer Louis Reyes, LAPD
Officer Joseph McWilliams, LAPD
Officer Bob Kain, LAPD
Officer Kenneth Thatcher Jr., LAPD
Officer Don Anderson, LAPD
Officer Andy Reyes, LAPD
Officer Glenn Grossman, LAPD
Officer Randy Walker, LAPD
Colen Garoutte-Carson
Erik De Bonte
Darren Robinson
Bill Dewey
Ross Perez
Mike Nicolino
90
Page 91

LAPD SWAT Eagle Logo
Copyright 1998 LAPD SWAT used with
permission
Gemini Technologies, Inc.
Kel Whelan, Gemtech
www.gem-tech.com
LAPD Mounted Unit, E Platoon
Heckler & Koch, Inc.
John Meyers, HK International Training
Division www.hecklerkoch-usa.com
Safariland LTD, Inc.
www.safariland.com
OmniGlow Corporation
www.omniglow.com
Leatherman Tool Group, Inc.
www.leatherman.com
Trijicon, Inc.
www.trijicon-inc.com
Benelli-USA
www.benelli-usa.com
LaserProducts
www.surefire.com
Aimpoint USA
Springfield Armory, Inc.
www.springfield-armory.com
LA SWAT Gear
www.laswatgear.com
Ernest Herrera, Inspector, City of Los
Angeles
KOMO Television, Seattle WA
Dick Warsinske
Pat Scott
Khym Ripke
TRISTAN
Frank M. Sweeney, FAA
Joe Mobley
Mike Grossman
Justin Kirby
Keith Heitmann
Adam Fossa
Glenn Oliver
Sangeeta Balani
Bill Crow
Ken Ford
Tim Sigel
Melissa Thatcher
Ben Houge
Paul Balon
Robert Serda
Mark Seibert
Torsten Reinl
Craig Utterback
Dave Lee
Dane Burns
www.burnscustom.com
Firearms Academy of Seattle
The Mattman Company
Specialty Vehicles Division
91
Page 92

CONTACTING SIERRA
Customer Service, Support, and Sales
United States
U.S.A. Sales Phone: (800) 757-7707
Hours: 24 hours a day, 7 days a week
International Sales: (310) 649-8008
Hours: Monday-Friday 8 AM to 4 PM PST
FAX: (310) 258-0744
Sierra Entertainment, Inc
6060 Center Drive, 6th Floor
Los Angeles, CA 90045
http://www.sierra.com
United Kingdom
Vivendi Universal Interactive Publishing UK Ltd.
Main: (0118) 920-9111
Monday-Friday, 9:00 a.m. - 5:00 p.m.
Fax: (0118) 987-5603
Disk/CD replacements in the U.K. are £6.00, or £7.00 outside the UK. Add “ATTN.:
Returns.”
2 Beacontree Plaza,
Gillette Way,
Reading, Berkshire
RG2 0BS United Kingdom
France
Vivendi Universal Interactive Publishing France
32, Av de l’Europe
Bât Energy 1 (2e ètage)
78 140 VELIZY-Villacoubaly
France
Tèlèphone: 01-30-67-90-50
Lundi au Jeudi de 10h à 19h
Vendredi de 10h à 18h
Fax: 01-30-67-90-65
92
Page 93

Germany
Vivendi Universal Interactive Publishing Deutschland Gmbh.
Tel: (0) 6103-99-40-40
Montag bis Freitag von 10h - 19Uhr
Fax: (0) 6103-99-40-35
Paul-Ehrlich-Straße la
63225 Langen
Deutschland
On-Line Sales
CompuServe United Kingdom:GO UKSIERRA
CompuServe France: GO FRSIERRA
Internet USA:
http://www.sierra.com
Internet United Kingdom:
http://www.sierra-online.co.uk
Internet France:
http://www.sierra.fr
Internet Germany:
http://www.sierra.de
Disk and or Manual Replacement:
Product Returns*:
Vivendi Universal Interactive Publishing International
Sierra On-Line Returns
4247 S. Minnewawa Ave.
Fresno, CA 93725
Vivendi Universal Interactive Publishing International
Sierra On-Line CD/Doco Replacement
4247 S. Minnewawa Ave.
Fresno, CA 93725
NOTE: To replace your cd(s) please send only the damaged cd and copy of your
dated Receipt, if less then 90 days. After 90 days please include a $10.00 handling
fee along with the cd(s). For Documentation replacement, please include a $5.00
handling fee and a photocopy ONLY of either your disk or cd. Payment should be
made at the time of your request. Sorry, no credit cards.
* Returns to this address valid in North America only.
93
Page 94

Technical Support
North America
Sierra On-Line offers a 24-hour automated technical support line with recorded
answers to the most frequently asked technical questions. To access this service,
call (310) 649-8033, and follow the recorded instructions to find your specific topic
and resolve the issue. If this fails to solve your problem, you may still write, or fax
us with your questions, or contact us via our Web site.
Sierra On-Line
Technical Support
4247 South Minnewawa Avenue
Fresno, CA 93725
Main: (310) 649-8033
Monday-Friday 8:00 a.m. - 4:45 p.m. PST
Fax: (310) 258-0755
http://support.vugames.com
United Kingdom
Vivendi Universal Interactive Publishing UK Ltd. offers a 24-hour Automated
Technical Support line with recorded answers to the most frequently asked
technical questions. To access this service, call (0118) 920-9111, and follow the
recorded instructions to find your specific topic and resolve the issue. If this fails
to solve your problem, you may still write, or fax us with your questions or contact
us via our Internet or CompuServe sites.
Vivendi Universal Interactive Publishing UK Ltd.
2 Beacontree Plaza,
Gillette Way,
Reading, Berkshire
RG2 0BS United Kingdom
Main: (0118) 920-9111
Monday-Friday, 9:00 a.m. - 5:00 p.m.
Fax: (0118) 987-5603
http://www.sierra-online.co.uk
France
Vivendi Universal Interactive Publishing France
32, Av de l’Europe
Bât Energy 1 (2e ètage)
78 140 VELIZY-Villacoublay
France
Tèlèphone: 01-30-67-90-50
94
 Loading...