


TABLE OF CONTENTS |
1 |
|
1 PREFACE |
9 |
|
2 INSTALLATION AND STARTING A GAME |
9 |
|
2.1 |
INSTALLING THE GAME |
9 |
2.2 |
STARTING A GAME |
10 |
3 SUPPORT |
10 |
|
3.1 |
IF YOU ARE EXPERIENCING PROBLEMS |
10 |
3.2 |
CONTACTING US |
10 |
|
3.2.1 Website |
10 |
|
3.2.2 Forum |
10 |
|
3.2.3 E-mail |
10 |
|
3.2.4 Post |
10 |
4 QUICK START |
10 |
|
4.1 |
TUTORIAL |
11 |
4.2 |
QUICK START AND GAME CONTROLS |
11 |
|
4.2.1 Playing Speed |
11 |
|
4.2.2 Game Controls |
11 |
|
4.2.3 Screen Layout |
12 |
|
4.2.3.1 Sections of the Screen |
12 |
|
4.2.3.2 Town View |
12 |
|
4.2.3.3 Sea Map |
12 |
|
4.2.3.4 Sea Battle View |
12 |
4.3 |
TRADE |
12 |
|
4.3.1 How to Trade |
12 |
|
4.3.2 What to Trade |
13 |
|
4.3.3 What Next? |
13 |
5 THE GAME WORLD |
13 |
|
5.1 |
TOWNS |
13 |
|
5.1.1 Hanseatic Towns |
14 |
|
5.1.2 Hanseatic Trading Offices |
14 |
|
5.1.3 Hanseatic Trading Stations |
14 |
|
5.1.4 Founding Towns |
14 |
5.2 |
INSIDE A TOWN |
14 |
|
5.2.1 The Town’s Citizens |
14 |
|
5.2.2 Goods Supply |
14 |
|
5.2.3 Infrastructure |
15 |
|
5.2.4 Events |
15 |
5.3 |
WEATHER |
15 |
6 MAIN MENU |
15 |
|
6.1 |
TUTORIAL |
15 |
1

6.2 |
CAMPAIGNS |
15 |
6.3 |
SINGLE-PLAYER GAME |
15 |
|
6.3.1 Player Settings |
15 |
|
6.3.2 Difficulty Level |
16 |
|
6.3.3 Define your Goal |
16 |
6.4 |
MULTI-PLAYER GAME |
16 |
6.5 |
LOADING |
16 |
6.6 |
OPTIONS |
17 |
6.7 |
CREDITS |
17 |
6.8 |
EXIT |
17 |
7 CONTROLS |
17 |
|
7.1 |
MOUSE CONTROL |
17 |
7.2 |
MORE CONTROLS |
18 |
7.3 |
SEA MAP |
18 |
7.4 |
MINI-MAP AND TITLE BAR |
19 |
|
7.4.1 Mini-map |
19 |
|
7.4.2 Title Bar |
19 |
|
7.4.2.1 Town View Title Bar |
20 |
|
7.4.2.1 Sea View Title Bar |
20 |
7.5 |
BUTTON BAR |
20 |
7.5.1 News Menu |
20 |
|
8 TRADE AND GOODS PRODUCTION |
21 |
|
8.1 |
BASIC CONCEPT |
21 |
|
8.1.1 Towns and Supply Needs |
21 |
|
8.1.2 Production and Prices |
21 |
|
8.1.3 Information |
21 |
|
8.1.4 Trading |
22 |
|
8.1.5 Ships and Transport |
22 |
8.2 |
YOUR TRADING OFFICE |
22 |
|
8.2.1 The Trading Office Menu |
22 |
|
8.2.1.1 Total |
22 |
|
8.2.1.2 Stock of Goods |
23 |
|
8.2.1.3 Stock of Weapons |
23 |
|
8.2.1.4 Warehouse |
23 |
|
8.2.1.5 Trading Office |
23 |
|
8.2.1.6 Personal |
23 |
|
8.2.1.7 Move |
23 |
|
8.2.2 Limitations to building trading offices |
23 |
|
8.2.3 Warehouse |
23 |
8.3 |
GOODS PRODUCTION |
24 |
2

8.4 |
TRADE ROUTES: AUTOMATIC TRADING |
24 |
|
8.4.1 Selecting Towns |
24 |
|
8.4.2 Choosing Goods and Trading Methods |
24 |
|
8.4.3 Price Limits |
24 |
|
8.4.4 Goods Quantities |
24 |
|
8.4.5 Goods Priorities |
24 |
|
8.4.6 Activating Trade |
25 |
|
8.4.7 Loading and Saving |
25 |
|
8.4.8 Blocking Towns and Repairs |
25 |
|
8.4.9 Goods Menu |
25 |
|
8.4.10 Prices |
26 |
|
8.4.11 Town and Action Order |
26 |
8.5 |
OTHER TRADES |
26 |
|
8.5.1 Loans |
26 |
|
8.5.2 Trade with the Hinterland |
26 |
|
8.5.3 Imports |
26 |
9 SHIPS |
26 |
|
9.1 |
SHIP TYPES |
26 |
9.2 |
SHIPBUILDING AND REPAIRS |
27 |
|
9.2.1 Repairing Ships |
28 |
|
9.2.2 Building a Ship |
28 |
|
9.2.3 Order List |
28 |
|
9.2.4 Repair List |
28 |
|
9.2.5 Upgrading your Ship |
28 |
|
9.2.6 Changing a Ship’s Name |
28 |
9.3 |
HIRING A CREW |
28 |
|
9.3.1 Hiring Sailors |
28 |
|
9.3.1.1 Crew’s Morale |
28 |
|
9.3.1.2 Mutiny |
29 |
|
9.3.2 Recruiting Captains |
29 |
|
9.3.2.1 Special Skills of all Captains |
29 |
|
9.3.2.2 A Captain’s Attributes |
29 |
9.4 |
ARMING SHIPS |
29 |
9.5 |
SHIP MENU |
29 |
9.6 |
SPECIAL CASES |
30 |
|
9.6.1 Transfer between two Ships |
30 |
|
9.6.2 Blocked Ships |
30 |
|
9.6.3 Wear and Tear |
30 |
9.7 |
CONVOYS |
30 |
|
9.7.1 Putting a Convoy Together |
30 |
3

|
9.7.2 Public and Private Convoys |
31 |
|
9.7.3 Dissolving a Convoy |
31 |
|
9.7.4 Joining a Convoy |
31 |
|
9.7.5 Leaving a Convoy |
31 |
|
9.7.6 Blocked Convoys |
31 |
10 ACTION BUILDINGS |
31 |
|
10.1 |
YOUR TRADING OFFICE |
31 |
10.2 |
DOCK CRANES |
32 |
10.3 |
MARKET HALL |
32 |
|
10.3.1 Stock |
32 |
|
10.3.2 Production |
32 |
|
10.3.3 Consumption |
32 |
10.4 |
TOWN GATE |
32 |
|
10.4.1 Presents |
32 |
|
10.4.2 Selling Goods |
32 |
|
10.4.3 Delivery Agreements |
32 |
|
10.4.4 Loans |
32 |
|
10.4.5 Overland Route |
32 |
|
10.4.6 War |
32 |
10.5 |
BARN |
32 |
10.6 |
TAVERN |
33 |
|
10.6.1 Contract Brokers |
33 |
|
10.6.2 Ordinary Trader |
33 |
|
10.6.3 Sailors and Captains |
33 |
|
10.6.4 Weapons’ Dealers |
33 |
|
10.6.5 Pirates |
33 |
|
10.6.6 Thieves |
33 |
|
10.6.7 Informers |
33 |
|
10.6.8 Travellers |
33 |
|
10.6.9 The Side Room |
33 |
10.7 |
SHIPYARDS AND REPAIR DOCKS |
34 |
10.8 |
WEAPON SMITH |
34 |
10.9 |
MONEY LENDER |
34 |
|
10.9.1 Take out a Loan |
34 |
|
10.9.2 Repay a Loan |
34 |
|
10.9.3 Grant a Loan |
34 |
|
10.9.4 Granted Loans |
34 |
|
10.9.5 Buy Shares |
34 |
|
10.9.6 Sell Shares |
34 |
10.10 THE GUILD |
34 |
|
4

10.10.1 Joining |
34 |
10.10.2 Auctions |
34 |
10.10.3 Auction Room |
35 |
10.10.4 Convoys |
35 |
10.10.5 Members |
35 |
10.10.6 Goods Trading Centres |
35 |
10.11 TOWN HALL |
35 |
10.11.1 Public Notices |
35 |
10.11.2 Outrigger |
35 |
10.11.3 Town Info |
35 |
10.11.4 Hanseatic Info |
36 |
10.11.5 Council Chamber |
36 |
10.11.6 Town Hall Cellar |
36 |
10.11.7 Town Coffers |
36 |
10.11.8 Alderman’s Office |
36 |
10.12 BATH HOUSE |
36 |
10.13 CHURCH |
36 |
10.13.1 Pray |
36 |
10.13.2 Feeding the Poor |
36 |
10.13.3 Donation for Church Interior |
36 |
10.13.4 Extending the Church |
36 |
10.14 MARKET SQUARE |
37 |
10.15 COMPETITION’S TRADING OFFICES |
37 |
10.16 HARBOUR MASTER |
37 |
10.17 ARSENAL |
37 |
11 BUILDING |
37 |
11.1 BASICS OF BUILDING |
37 |
11.1.1 Building Contracts |
37 |
11.1.2 Construction |
38 |
11.2 TRADING OFFICE BUILDINGS |
38 |
11.2.1 Warehouses |
38 |
11.2.2 Town Houses |
38 |
11.3 CITY BUILDINGS |
38 |
11.3.1 Wells |
38 |
11.3.2 Roads |
38 |
11.3.3 Hospitals |
39 |
11.3.4 Chapel |
39 |
11.3.5 School |
39 |
11.3.6 Mint |
39 |
11.3.7 Monument |
39 |
5

11.4 |
PRODUCTION FACILITIES |
40 |
|
11.4.1 Businesses Producing Raw Materials |
40 |
|
11.4.2 Finishing Businesses |
41 |
11.5 |
TOWN FORTIFICATIONS |
43 |
|
11.5.1 Bombards (port and gate) |
43 |
|
11.5.2 Cannons (port and gate) |
43 |
11.5.3 TOWN WALL |
43 |
|
11.5.4 PITCH SHOOTS |
43 |
|
12 CAREER AND POLITICS |
43 |
|
12.1 |
RISE AND REPUTATION |
43 |
|
12.1.1 Career Development |
43 |
|
12.1.2 Types of Reputation |
44 |
|
12.1.3 Checking and Raising your Reputation |
44 |
|
12.1.4 Your Reputation |
45 |
|
12.1.5 A Family |
45 |
12.2 |
COUNCILLOR |
45 |
|
12.2.1 Member of the Town Council |
45 |
|
12.2.2 Contacts with the Region’s Prince |
45 |
12.3 |
PATRICIAN |
46 |
12.4 |
LORD MAYOR |
46 |
|
12.4.1 Town Council Decisions |
46 |
|
12.4.2 Vote |
46 |
|
12.4.3 The Town Coffers |
46 |
|
12.4.4 Troops |
47 |
12.5 |
CANDIDATE FOR ALDERMAN |
47 |
12.6 |
ALDERMAN |
48 |
|
12.6.1 Hanseatic League Day |
48 |
|
12.6.2 Events |
48 |
|
12.6.3 Calling a Hanseatic League Day |
48 |
12.7 |
BRIBING |
49 |
|
12.7.1 Influencing Elections |
49 |
|
12.7.2 Trials |
49 |
13 FIGHTS AND BATTLES |
49 |
|
13.1 |
PREVENTATIVE MEASURES |
49 |
|
13.1.1 Town Defences |
49 |
13.2 |
SEA BATTLE |
49 |
|
13.2.1 Identifying the Enemy |
50 |
|
13.2.1.1 View Radius |
50 |
|
13.2.1.2 Attack Radius |
50 |
|
13.2.2 Sea Battle Commences |
50 |
6

13.2.2.1 Automatic Battles |
50 |
13.2.2.2 Manual Battles |
50 |
13.2.2.3 Captain and Crew |
50 |
13.2.3 Controlling your Ship Manually During Battle |
50 |
13.2.3.1 Sail Automatically |
51 |
13.2.3.2 Sail Manually |
51 |
13.2.3.3 Weapons and Tactics |
51 |
13.2.4 Damages sustained during Sea Battles |
51 |
13.2.4.1 Ship Damage |
51 |
13.2.4.2 Weapon Damage |
51 |
13.2.4.3 Loss of Crew |
51 |
13.2.5 Battles to Board another Ship |
51 |
13.2.6 Taking a Ship over after a Sea battle |
52 |
13.2.7 Attacking Convoys |
52 |
13.3 PIRATES |
52 |
13.3.1 Hiring Pirates |
52 |
13.3.2 Turn Pirate Yourself! |
52 |
13.3.3 Pirate Hunt |
53 |
13.4 ATTACKS ON TOWN (LAND SIEGE) |
53 |
13.4.1 First Skirmishes |
53 |
13.4.1.1 The Besiegers Set Up Camp |
53 |
13.4.1.2 The Town Reacts |
53 |
13.4.2 The Town Gate Functions during a Siege |
53 |
13.4.2.1 Attack |
53 |
13.4.2.2 Surrender |
53 |
13.4.2.3 Buy Freedom |
53 |
13.4.3 The Attack Starts |
53 |
13.4.3.1 Behaviour of the Attackers |
53 |
13.4.3.2 Behaviour of the Defenders |
54 |
13.4.4 Final Decision |
54 |
13.4.4.1 Victory goes to the Besiegers |
54 |
13.4.4.2 Victory goes to the Town |
54 |
13.4.5 The Citizens’ Behaviour |
54 |
13.5 ATTACKS ON TOWN FROM THE SEA |
54 |
13.5.1 Opponents |
54 |
13.5.2 Defenders |
54 |
13.5.3 The Attack from Sea |
55 |
14 EXPEDITIONS |
55 |
14.1 DESTINATIONS |
55 |
14.2 GOODS AND GOLD |
55 |
7

14.3 |
ORDERS |
56 |
|
14.3.1 Explore |
56 |
|
14.3.2 Trade |
56 |
|
14.3.3 Contracts |
56 |
14.4 |
RISKS |
56 |
14.5 |
THE EXPEDITION RETURNS |
56 |
15 MULTI-PLAYER MODE |
56 |
|
15.1 |
HOT SEAT |
56 |
15.2 |
NETWORK GAME (LAN) |
56 |
|
15.2.1 Setting up a Network Game |
57 |
|
15.2.1.1 Game Description |
57 |
|
15.2.1.2 Personal Settings |
57 |
|
15.2.1.3 Players |
57 |
|
15.2.1.4 Chat Area |
57 |
|
15.2.2 Joining a Network Game |
57 |
|
15.2.3 Loading a Game |
57 |
|
15.2.4 Special Features of Network Games |
58 |
|
15.2.4.1 Saving a Game |
58 |
|
15.2.4.2 Removing or Adding Players |
58 |
|
15.2.4.3 Chatting during Game |
58 |
|
15.2.4.4 Fast Forward |
58 |
15.3 |
PLAYING OVER THE INTERNET |
58 |
|
15.3.1 Connecting through the Main Program |
58 |
|
15.3.2 Connect through Ascman |
58 |
|
15.3.2.1 Ascman Interface |
58 |
|
15.3.2.2 Starting a Game |
59 |
16 CREDITS |
60 |
|
17 APPENDIX |
62 |
|
17.1 |
GAME HOTKEYS |
62 |
17.2 |
PRICE OF BUILDINGS IN GOODS |
63 |
17.3 |
PRICE OF SHIPS IN GOODS |
63 |
17.4 |
TYPES OF GOODS |
64 |
8
1 Preface
The Hanseatic League was founded in the middle of the 13th century to protect its members trading interests. Initially it was a loose organisation of a few daring traders. Over time, however, it developed into a very powerful trading concern. North Sea and Baltic traders had to be a part of the Hanseatic League if they wanted to have any chance of succeeding. In its heyday, the Hanseatic League was much more than a community of merchants or towns. It held strong political sway and was something of a predecessor of the European Union. In other words, it was one of the first global players in the history of economics - even if only Europe and parts of Africa and Asia were known at that time, and America and Australia had not been discovered yet.
Of course, not everyone could join the Hanseatic League. This was usually restricted to the patricians. This class of wealthy and proud merchants ruled most towns in the Holy Roman Empire and even pushed the jealous nobility into the background.
Patrician III let’s you join this exciting world of discovery and new beginnings. Protected by the Hanseatic League, traders travel between Luebeck and London, Cologne and Bergen, Riga and Novgorod. You are a small, but ambitious trader, bent on succeeding and shaping your own empire. To this end you gather information, set up trading offices in other Hanseatic towns, take on various assignments for which you are not always best qualified, and indulge in as much bribery as your purse will withstand. However, it is not just base self-interest driving you in this. You also desire wealth for your home town and toil for recognition and prestige, dabble in local and national politics, ensure your competition is left standing and confront evil pirates and unreasonable princes. In a word, you are busy.
This is why Patrician III has really developed beyond being just a trading simulation. Apart from offering the various elements of construction, you also get to take part in some real action and battles. Fight real-time sea battles or lay siege to a town - not a particularly genteel way of maintaining your interests, but highly effective and quite common for the times. Please take a look through this manual to learn what you need to do to become a successful and respected member of the Hanseatic League. We hope you have fun!
The Patrician III team wishes to thank all who have participated in the Patrician III forum on the ASCARON web site, shared their ideas with us and discussed them with us and others. They have made this game what it is now.
This manual represents the current state of play. All additions and rule changes are incorporated.
2 Installation and Starting a Game
2.1 Installing the Game
Minimum system requirements
Pentium II - 233MHz, 32MB RAM, 4-speed CD-ROM, 4MB graphics card compatible with DirectX 8.1, OS Windows98/98se/ME/2000/XP.
Recommended system requirements (for all graphics options to be available)
Pentium II - 450MHz, 128MB RAM, high-speed 32MB 3D accelerated graphics card compatible with DirectX 8.1
To install Patrician III insert the CD into your disk drive. The set-up program should start automatically. If you have deactivated the autorun option, you can start the program manually by double-clicking on Setup.exe on the CD. Follow the on-screen instructions.
Patrician III has been optimised for DirectX 8 or higher. If you already have this installed, skip this part of the installation.
The Patrician Setup program is launched after installation and tests possible graphics card resolutions for Patrician III. You can also run this program separately (e.g. after installing a new graphics card).
9
2.2 Starting a Game
Please ensure your Patrician III CD is in the CD drive. Start the program from Programs > Autorun or dou- ble-click the Patrician III icon on the desktop.
You can skip the intro by pressing ESC.
3 Support
Due to the large number of hardware and software components on the market and different system configurations, installation and software problems can never be completely eliminated.
We would like to help you solve any difficulties you may encounter with our software.
Ascaron offers you help via the website, forum or by e-mail (see below) if you need hints, tips or solutions for one of our games or if you have difficulties with our software.
3.1 If You are Experiencing Problems
Please refer to the Readme.txt file if you hit on any problems. It is installed along with the game and you will find solutions for any known configuration and networking issues in it.
3.2 Contacting Us
If the Readme does not contain the answer you need, you can contact us in one of the following ways.
3.2.1 Website
You will find product information, current updates, patches and solutions for all Ascaron games at: http://www.ascaron.com
English fan sites are available at: http://www.patricianworld.com and http://www.thecrayer.com. These sites contain hints, tips, help with getting started and charts on the Hanseatic League’s world.
3.2.2 Forum
The Forum contains more hints & tips and technical assistance. Access it via: http://www.ascaron-forum.com
Or from the website by following the “Forum” link.
3.2.3 E-mail
You can email us via: service_p3@ascaron.com
Please send us a full description of your problem and we will reply with assistance as soon as we can.
To assist us in providing you with technical support, please include the following information with any technical query:
title and, if known, version of your Ascaron product your system (processor, RAM, operating system)
your computer hardware (make and model of sound card, graphics card, CD-ROM drive, etc.) software versions (DirectX, graphics driver, etc)
3.2.4 Post
If you wish to contact us by post, please do so using the following address details: Ascaron Entertainment UK Limited
Chantry House High Street Coleshill
Birmingham B46 3BP
4 Quick Start
The five-part tutorial explains the main aspects of operating the game. We recommend that you use this tutorial for all relevant topics. If you want to start a campaign or normal game straight away, the following pages will give you the most important information. For further details see the following chapters of this manual:
6 |
Main Menu |
different ways of playing, setting options and difficulty level |
7 |
Controls |
buttons and operating the interface |
8 |
Trade and Goods Production |
purchasing and selling goods, the trade interface |
9 |
Ships |
ship types, equipment and crew |
Appendix |
all hotkeys |
|
10
4.1 Tutorial
Click on Tutorial in the Main menu to select from one of the five sections: Game Interface
Describes the interface and different views, shows you how to switch views and demonstrates the main operating elements.
Ships
Explains how to interpret the information provided on the ships, how to control, repair or build a ship and how to hire your crew.
Trade
Provides a lot of general information on how the game works and shows you how to trade goods and obtain information.
Towns
Explains what the function of trade buildings, town houses and production facilities are, how to build and produce goods, and how these elements affect a town’s population.
Sea Battles
How to manoeuvre at sea, shoot and board ships.
A commentator provides step by step instructions on playing the game. Each tutorial can be stopped at any time.
Note:
The tutorial is best viewed at a resolution of 1024x768.
4.2 Quick Start and Game Controls
Click on Campaign in the Main menu and select the first campaign, “Rise”. Your task is to rise and become a patrician. You will receive regular hints on trading and information on your reputation.
If you prefer to play independently select Single-player game from the Main menu. In the following screen, enter your playing name and click on Start. The other settings are not required yet (they are explained in Chapter 6).
4.2.1 Playing Speed
The game clock can be stopped or resumed by pressing Pause. When the clock is stopped, orders can be entered. A click on the Fast forward button forces time to jump forward to the next event.
4.2.2 Game Controls
More details are available in Chapter 7: Controls.
The game starts in town view. You move and perform simple trade through the sea map. The town view allows you to trade, build, get more information and carry out many other actions. Simple commands can also be given via the mini-map.
Hovering the cursor or mouse pointer over an object or button will display its tool tip.
Mouse Control
Left-click on |
Resulting Action |
Your own ship, convoy or building |
Selects it, shows commands available |
Action building |
Enter building, shows commands available |
Foreign objects (ships, buildings, citizens) |
Shows information |
Mini-map |
Main view jumps to map area selected |
Right-click on |
Resulting Action |
Sea, river or town (with ship selected) |
Moves to destination |
Town on the mini-sea map or sea map |
Trade window opens |
(with ship/trading office activated) |
|
Enemy ship (in ship view) |
Enemy ship is attacked |
Foreign convoy/ship (in ship view) |
Transfer window is opened |
(with info window open) |
Closes window |
To scroll the main view, move the mouse pointer to the edge of the screen or press the arrow keys.
11

4.2.3 Screen Layout
4.2.3.1 Sections of the Screen
Icon menu/Title bar
Toggle
Mini-map
Upper and lower toolbar
Selection screen
Main view
4.2.3.2 Town View
The game starts in this view and in town you can make use of all the town’s amenities, as well as trade and build. Clicking Own buildings allows you to view your own houses and trade buildings in the town, by temporarily hiding the rest.
Clicking Leave town on the toolbar or the mini-sea map switches you over to the sea map.
4.2.3.3 Sea Map
Leaving town automatically switches you onto the sea map, showing the whole Hanseatic League region. This shows pirates, storms and all your ships, enabling you to continually monitor their routes and change them as required.
4.2.3.4 Sea Battle View
You will automatically be switched to sea battle view whenever you engage in a sea battle. At the end of the battle, unsurprisingly, you will be automatically returned to the sea map!
4.3 Trade
And now to the central questions: how to trade and more importantly, how to make a healthy profit. Firstly: don’t start building production facilities straightaway. To begin with trade will offer you much higher margins than production.
4.3.1 How to Trade
The trading interface is described in much more detail in Chapter 8.
In order to trade you need to select a ship, a convoy or a trading office. Initially, the main differences between ships lies in their storage capacity. Patrician III has two units of measurement: load and barrel. One load equals 10 barrels. So a 15-load snaikka will hold 15 loads or 150 barrels.
When you are in town view you can open the trading window by clicking (left mouse button) on the dock crane or if you are on the sea map or mini-map you just right-click on a town.
When starting to trade with a ship from a town with a trading office, the selection window (right) allows you to select whether to trade with the town or move goods between trading office and ship.
The trade window (see page XX) displays the trading parties, goods in stock and the current purchase and
12

selling prices. You can adjust the number of items per transaction at the bottom of the screen. After this has been adjusted, each click on the price button will be purchasing or selling the set number of items.
The average purchase price for your goods is displayed in the right margin. This allows you quickly verify whether you are still making a profit or whether the price is too high.
The fewer goods a town has in stock, the more it will pay for them. In the same way, if you purchase scarce goods you have to pay more.
The effects:
Selling goods lowers their price, as every sold unit contributes to satisfying demand.
When purchasing goods, on the other hand, their price rises, as every unit purchased makes the goods more difficult to obtain in town.
Frequent problems:
You are trying to buy, but nothing is happening.
-Do you still have enough storage space on board (see top right in the trading window) and enough money for the transaction?
The ship sets sail but the goods you have purchased have disappeared.
-Maybe you forgot to select the ship and you purchased the goods with the trading office?
The prices displayed in the trading window aren’t right.
-When you set a large number of items per transaction the average price sinks.
4.3.2What to Trade
Buy cheap and sell high! You may well be thinking to yourself “well that’s easier said than done, right now I wouldn’t know a bargain if it came up and bit me.” So here are a few hints while you are familiarising yourself with trading the high seas:
On route planning:
Look at the sea map and you will notice demand icons next to town names. These indicate which goods are in high demand and are therefore likely sell at a good price.
Towns generally have some stocks of the goods they produce locally, but there will be demand for all other goods. To find out what is produced locally, simply left-click on the town button in the sea map or on the statue in the town centre.
Purchasing and selling:
The difference between the buying and selling price can tell you lots. A small differential (< 10%) indicates the goods are readily available. It is also seldom wise to buy goods with a high differential, as it is often difficult to sell these goods at a profit.
Check out what goods are in stock at the town’s market hall. If there are sufficient supplies for several weeks you can purchase at a low price. If there are only enough supplies to last a few days, prices will be high. The average price of your own goods can serve as a fast reference point. It shows your own purchase price. Sell your goods at a higher price than this and you will have at least made a profit.
4.3.3 What Next?
Now you know enough to start trading. Your wealth and fleet will grow, and soon you will start building workshops and houses and send expeditions to far-away lands. And then?
In order to gain the reputation you need to attain political power; you need to invest your hard-earned money for the benefit of the people. You may also choose to live a double-life as a pirate. Because if you want to be known and respected in your hometown and all over the Hanseatic League region, being a clever trader alone will not suffice.
5 The Game World
Patrician III is set in all twenty-four of the big towns in the Hanseatic League era. The town’s surrounding countryside only plays a minor role. If the town is doing well, people will migrate from the countryside to the town. If the town is low on supplies, citizens will migrate to the countryside.
Wars and greedy princes often pose challenges to the Hanseatic League, but on the whole hold little sway on the game engine.
The Mediterranean holds more towns just waiting to be discovered and enter trade with you. These towns differ from game to game.
5.1 Towns
Not all the towns of the Hanseatic League have the same importance. Although you can set up trading offices
13

and buildings on all twenty-four sites, a career is only possible in the larger towns. You need to make one of these your hometown to get anywhere.
Inland towns such as Cologne, Novgorod and Torun play a special role, as they can only be reached via a long river journey with small snaikkas and crayers.
5.1.1 Hanseatic Towns
Choose your home from amongst the twelve Hanseatic towns. This is where you will be able to trade and build, strive to improve your reputation or seek to be elected lord mayor. The Hanseatic towns include the North German cities of Hamburg, Bremen, Rostock and Luebeck as well as Cologne, Stettin, Gdansk, Visby, Riga, Reval, Torun and Stockholm.
5.1.2 Hanseatic Trading Offices
Bergen, London, Bruges and Novgorod basically offer you the same opportunities as the Hanseatic towns, but you cannot become lord mayor there.
5.1.3 Hanseatic Trading Stations
The eight trading stations of Malmö, Edinburgh, Scarborough, Groningen, Ripen, Oslo, Aalborg and Ladoga only play a minor role. They have neither guilds nor shipyards, and only offer small docks for repairs.
5.1.4 Founding Towns
If you become an experienced lord mayor at a later stage of the game you will be offered the opportunity to establish production sites for the Hanseatic League (see Chapter 12.5, Candidate for Alderman).
These are historical places where you can set up further production facilities. However you will have to start from scratch, erecting the entire town’s key buildings, as well as houses and businesses so that the town attracts new residents.
The town will automatically be passed over to the Hanseatic League once it has reached a certain size. This means you have fulfilled your mission. Your reputation will be greatly enhanced, but the downside is that you have to finance all the building work yourself. The new town will however earn you a tidy profit. Bear in mind that the Hanseatic Council has selected the site according to which goods are most in demand.
In contrast to other towns, founding towns offer fewer production possibilities and therefore have more or less the status of a Hanseatic League Branch. The one difference is that is no lord mayor in these towns and the builder remains the town manager and thus has privileges resembling those of a mayor. (You can also be a mayor in another town at the same time.)
5.2 Inside a Town
5.2.1 The Town’s Citizens
Every town has poor, well-off and rich people, and each of the three strata of society has its own interests and needs. Even a very wealthy town still has poor elements of society, who typically do the hard work.
A growing town will attract migrant beggars from the surrounding countryside. In order to rise from beggar to citizen the migrant needs work and a home, otherwise he will move on. New workers may only be recruited from this group.
Clicking on the Inhabitants button in the icon menu shows information about each social group’s size and level of satisfaction. The citizen’s level of satisfaction will change very slowly, as a prolonged period of need tends to stick in people’s minds.
If you want to expand you need to focus on satisfying the needs of the poor, as they are the foundation the town’s population is built upon.
The number of workers in the town indicates the degree of economic activity. Click on individual citizens to find out any needs they might have and your reputation with this group.
The roads that lead in and out of town can also provide you with helpful information. Watch who is arriving and who is leaving the town. The people will tell you their reasons for travelling if you click on them.
5.2.2 Goods Supply
Whether or not a town does well depends essentially on whether it receives the required amount of goods. People will leave if there aren’t enough goods in the town, even if plenty of work and housing are available. Different groups have different requirements for basic food items and consumer goods:
Poor citizens need plenty of grain, beer, fish and wood. Once that is covered, they are interested in pottery, oil, leather and wool.
Well-off citizens are more interested in beer, fish and wool, and then meat, grain, wood, oil and cloth.
The rich want meat, wine and cloth as their main priority, and then quite like to have wood, furs, pottery and oil.
The good citizens are very keen to see several days’ worth of supplies in stock; after all, deliveries don’t come
14
every day.
Clicking on the market hall will show you the quantities the citizens and businesses consume per week. This will enable you to judge how long supplies will last.
5.2.3 Infrastructure
As long as supplies are abundant, the population’s satisfaction level is dependent on development and enlargement of the town.
Chapter 11 on Building covers the various building options in more detail. If you want the town to grow, you need to provide enough housing for all sections of society to thrive.
The larger the town, the greater its need for good, paved roads, wells to provide for better hygiene and to help fight fires, as well as hospitals and chapels for preventing epidemics.
The citizens also like the church to reflect their wealth. The costs for these things are usually covered through voluntary donations and donors are always highly respected for their generosity.
Finally, a town also needs enough guards and soldiers to protect the population and a town wall to shield the majority of businesses and houses from outside enemies. Which is also part of the lord mayor’s task...
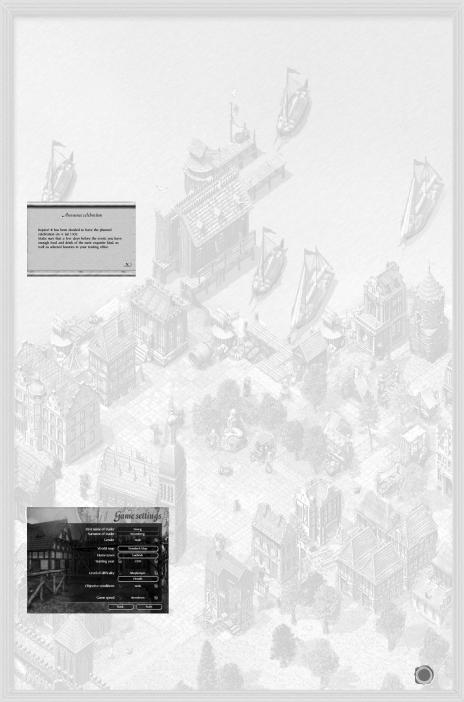
5.2.4 Events
A celebration can often raise a town’s spirits. The people will honour you highly for this, especially after the successful survival of a famine, an epidemic or a siege. You may prepare for such a celebration in the Market Square.
War and famine will make everyone within the town walls very depressed. It may also come to pass that you are held personally responsible. The citizens have a special dislike for sieges, be they from land or sea. However, if the town manages to survive a siege unscathed, the general mood rises very quickly.
5.3 Weather
The town view now shows several different weather effects (rain, frost, frozen port, snowfall and snow on the ground), each of which affect game play in their own particular way:
Rain in town indicates that there is a storm not very far out at sea.
Frost: The ground in all towns is prone to freezing from December through to February. Agricultural production is reduced over this period.
Frozen port: During particularly hard winters it is known for ports freeze up, especially in towns lying further east. No ships will be able to dock in or sail from the port. During this time you will see small icebergs floating in the harbour.
6 Main Menu
6.1 Tutorial
The Tutorial gives step-by-step introductions for playing Patrician III. For more detailed instructions see Chapter 4, Quick Start.
6.2 Campaigns
There are seven scenarios to choose from. When you have clicked on a campaign you will see a short task description appear in the window below. Select the difficulty level under Details (see next section) and begin the game by clicking Start.
6.3 Single-player Game
Patrician III is usually played in Single-player mode. Enter your character’s information, select the game type and then click on Start. The data entered here will be used for the entire game. The only parameter you can adjust later is game speed. Further settings can be made via the menu options as follows.
6.3.1 Player Settings
You entries under first and last name will determine how you are addressed in the game.
Your gender will determine the gender of prospective spouses. World map: Choose from the standard map or a map created by you or somebody else.
Under Hometown you can choose from all Hanseatic towns in the map. This option provides a rough overview of what goods are produced where.
Your start year influences the town size and the number of facilities already built by other traders. From 1350
15

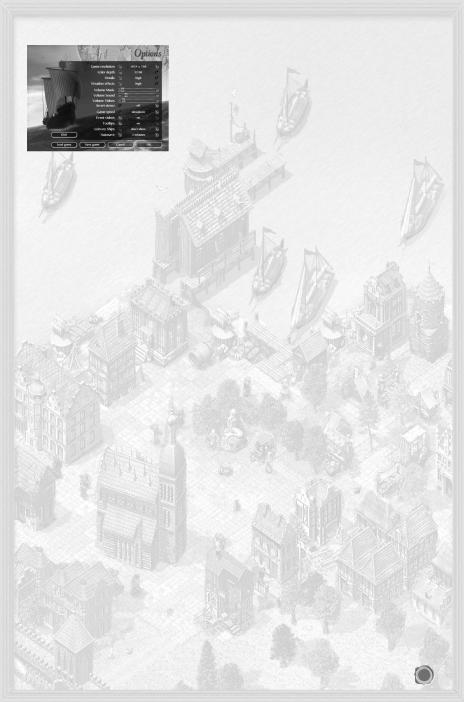
6.6 Options
You can choose between many different display options:
Resolution Choose between 800 x 600, 1024 x 768 and 1280 x 1024 pixels.
Choose between 16-bit and 32-bit.
Adjusts the level of detail. The options are Off, Low, Normal and High. The higher the detail the more system resources will be required.
You will see rain, snow falling and frozen ports during game play. Please note that this option requires a high power computer. If the game display is jerky on your com puter, please try deactivating this option.
Adjust the volume by moving the sliders!
Normal makes a day last 60 seconds, on Very fast it will be over in approx. 20 seconds.
The game has a movie for every special event. Activate this option to watch them.
Activate this to have tips displayed, when you hover the mouse pointer over an object.
Choose whether all a convoy’s ships are displayed when docked in town or just the lead ship. The latter setting enables you to maintain an overview in town view if you have lots of ships or large convoys.
Set how often the game is saved automatically. Choose between ‘Off’ to every 30 minutes.
Clicking on Cancel deletes your changes and OK confirms them. Whatever you select you will be returned to the Main Menu.
6.7 Credits
Find out the team behind Patrician III.
6.8 Exit
Quits the game.
7 Controls
Controls and an overview of the game screens are also contained in Chapter 4, Quick Start. All hotkeys are listed in the appendix.
7.1 Mouse Control
Select objects on the main screen by clicking on them. Usually a menu or information will appear. Clicking
on an empty spot on the map deselects the object. |
|
|
Left-button click on |
Resulting Action |
|
Own ship or convoy |
|
selects the ship. |
Route of own ship or convoys in the sea map |
denote the route by click and dragging the mouse, e.g. to |
|
|
|
pass around a storm. |
Foreign ship |
|
displays information on the foreign ship (this information |
|
|
may not always be reliable). |
17
Own convoy in town view |
selects whole convoy (clicking on one ship in the convoy |
|
selects it and displays its goods). |
Own ship while pressing Ctrl |
allows you to select several of your own ships |
Pull square around several ships |
selects several ships |
Action building |
enter building |
Business or town house |
displays information |
Citizen |
find out their opinion |
Mini-map |
main view jumps to selected map area |
Use the right mouse button to perform certain actions. A summary of the most common ones is provided here:
Right-click on With ship selected
any position on sea or navigable river (with Ctrl pressed) any point on sea or navigable river
town in the mini-map or on the sea map
enemy ship during a sea battle own ship in town view convoy in town view
Without ship selected
town with trading office in mini-sea map or sea map
In contrast to normal windows, movies cannot be closed by right clicking.
Moving the mouse pointer to the edge of the screen scrolls the main view in this direction.
7.2 More Controls
Almost all icons are buttons: you can recognise them, because when you move the mouse pointer over them they have a white frame and a tool tip will appear. Clicking on an icon will do something. For instance if you click on the ship icons in the icon menu, you can toggle through all the ships/convoys. Several clicks on the news icon retrieves all news.
Clicking on labelled buttons in the game will also have an effect. By clicking on the arrow buttons in the ship list (in front of the ship names) you jump directly to the ship. Names appearing on lists (usually ship names) also allow you to select the object. To select several ships press Ctrl and left-click on the names in the list.
7.3 Sea Map
Even experienced sailors need good maps. The main map shows the whole North European sea and land area and includes all towns of importance to the Hanseatic League. This map provides an overview of the towns you can travel to and trade with. To scroll through the whole map touch the edge of the screen with the mouse pointer. You can also use the arrow buttons on your keyboard or click on the desired area in the overview map. Apart from your hometown you can also select and enter any other town by left clicking on it. This only works if you have at least one trading office or a ship docked there. If this is the case, both maps switch to the town view and you can carry out your business or got to your meetings in peace.
Every town has a red button, which you have to press to enter the town. However you may only enter if you have at least one trading office or ship docked there. If this is not the case, clicking will just display general information on the town.
You can obtain a lot of information without needing to click the mouse once – just use your eyes! You will see various icons displayed next to the town names on the main map. These provide you with information on the town’s current situation. Move the mouse pointer over the icons to see a short message (such as “Beer required”).
The following icons are available:
If this icon is displayed, the town is suffering a famine and will be more than happy about your food delivery.
 This icon indicates that an epidemic is raging in the town. To be avoided at all costs.
18
 There is a fire in this town.
This town is suffering from a lack of beer. For a complete list of the goods icons and their meaning look in the appendix.
 This town is being besieged, and the port may be closed. Peaceful trading will be impossible.
A convoy is waiting for permission to leave from this town’s port. The colour of the icon shows you who it belongs to. Blue indicates your own convoy, red the convoy of another player, and any white ones are controlled by the computer.
Beware! A pirate ship is patrolling the waters outside this town’s port. Seek refuge or start polishing your cannons and get ready for battle. If you see a pirate ship docked at port, you might like to consider delaying your little promenade along the front. Pirates are invading the town!
 One glance at the mini-map shows whether you have a ship or ships at anchor in this town.
 Red dots in the sea map indicate towns.
 Your hometown is marked by a contrasting blue dot.
You will see a blue dot appearing in the middle of the red, in towns in which you have opened a trading office.
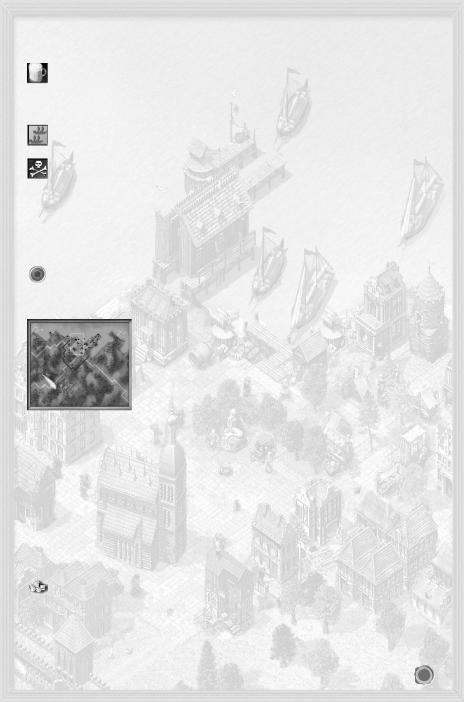
7.4 Mini-map and Title Bar 7.4.1 Mini-map
The mini-map displays a small version of the current town or the Hanseatic League trading area. The rectangle on the map indicates the section currently displayed in the main view. The mini-map has the following functions:
Clicking on any point in the mini-map changes the area shown on the main view. By right clicking you can send any selected ship to somewhere else and trade in towns. This map essentially offers the same functions as the main sea map.
The Toggle map arrow next to the mini-map switches between town view and sea map, so that you can carry out trade in the town, whilst being able to see how your ships are progressing on the mini-map. The mini-map’s icons allow
you to keep a check on where your ships are and in which towns you are trading. Slow blinking icons indicate your selected ships.
Fast blinking squares indicate something happening, e.g. one of your ships docking or been caught in a storm. Mini-map Icons
Icon |
Symbolises |
Squares (blue, white, red, black) |
Ships or convoys (own, computer-controlled, other players, pirates) |
Red diamond |
Town without trading office |
Blue diamond |
Town with your own trading office |
Diamond with blue dot |
Town with one of your ships at port |
Diamond with white frame |
Town currently in view |
Blinking black diamond |
Storm |
7.4.2 Title Bar
The title bar above the mini-map always displays the following:
Your current cash quantity is displayed next to the pile of gold. Clicking on the pile will give you various statistics on your enterprise. For details on these see Chapter 8, Trade and Goods Production.
 The chronicle contains official news on towns, events and traders.
The variable part of the icon menu above the main view is toggled along with the mini-map.
19
7.4.2.1 Town View Title Bar
This displays the population of the town you are currently in. Clicking on the icon displays further information on how many of the three social groups and beggars are present. The satisfaction level of
each group is also shown.
The town name tells you where you are.
Displays the number of buildings in the town. Clicking here hides all buildings that are not yours from the main map (only shown as outlines).
7.4.2.2 Sea View Title Bar
The icon menu has four additional buttons in the mini-map’s sea view:
“Ships in port” shows the number of your ships currently docked in port. Clicking on this button will “jump’ to the first of these ships. Clicking again jumps through all ships at anchor.
Note:
Ships in convoys are not shown.
Ships at sea shows how many of your ships are currently sailing on their own. Selecting these ships works the same as with the Ships in port command.
 ‘Convoys in port’ gives information about your docked convoys. Select by clicking.
 ‘Convoys at sea’ displays your convoys currently at sea. Select by clicking.
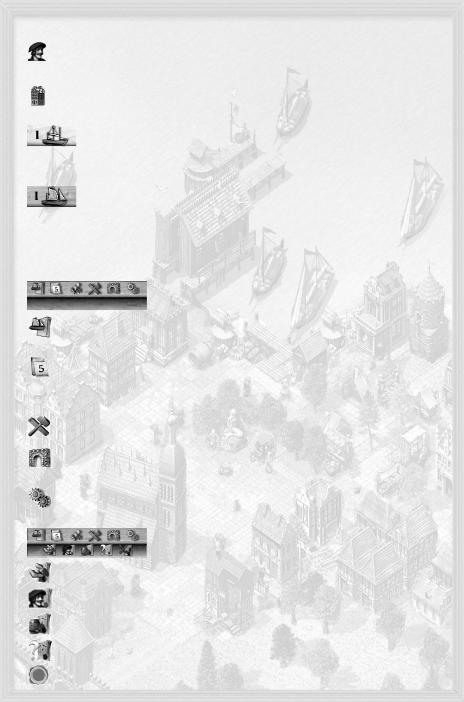
7.5 Button Bar
This toolbar is situated between the mini-map and the selection window. The following are available (other icons are explained in the respective sections):
Ship overview displays information on all your ships. The icon bottom right allows toggling between weapons and trade information. Clicking the arrow icon takes you directly to the ship, clicking on the name selects it.
Fast forward. The map is displayed, while time elapses. The fast forward mode ends automatically, when an event occurs. Left clicking at any time stops the clock immediately.
 News menu - these options are explained in the News Menu section below.
Build Menu is explained in Chapter 11, Building. This icon is not available in the sea map and will appear greyed out.
Clicking on the town gate transports you away from the town view and switches you to the sea map. This icon is not available in the sea map and will appear greyed out.
During the game the options only differ slightly from those of the Main menu. Apart from the options for Resolution, Colour Depth and Volume already covered, you will also have Save Game, Load Game and Exit Game available.
7.5.1 News Menu
These icons give access to the following information:
Displays official documents such as tax statements, fees, charges, court decisions as well as elections and letters.
Displays your personal news, including data about your business and family.
The trade icon shows special information and any offers you have received.
There are also filter options for you to determine how the news items are saved.
20
 Loading...