


Windows ® 95 CD-ROM Data Card
READ ME FIRST!
We know you're anxious to begin PANZER GENERAL II, but before you do, please be sure that your system meets the following minimum system requirements:
•Pentium 90 MHz IBM PC or compatible
•16 MB of RAM
•Windows® 95 - NOTE: This is a Windows 95 game and should not be played on Windows® NT systems. Multitasking is not recommended when playing PANZER GENERAL II
•An Uncompressed hard drive with at least 25 MB free
•A 4X CD-ROM drive or faster
•A SVGA video adapter with 1MB of memory and a Color SVGA Monitor
•A 100% Microsoft (or Logitech) compatible mouse
•Microsoft mouse driver version 9.00 or higher or Logitech mouse driver version 6.24 or higher
In addition to the basic system requirements, the game requires that DirectX5 be installed to your hard drive. The option to install DirectX5 appears during the game installation. At the end of installation, you will be prompted to register PANZER GENERAL II electronically, to receive a free scenario.
INSTALLING THE GAME
You must install PANZER GENERAL II game files to your hard drive and have the PANZER GENERAL II CD in your CD-ROM drive to play this game.
To install the game, insert the CD into the CD-ROM drive. When the pop-up window appears, click on the Install option. If you have disabled the Windows 95 Autorun, or if it does not function, Explore the CD and double click on the Setup icon.
If you experience problems during installation, please refer to the "Troubleshooting" section of this data card. Additional information regarding sound and video setup can be found there.
STARTING THE GAME
Insert the PANZER GENERAL II CD into your CD-ROM drive, and select Play from the pop-up window. For users that have disabled the Windows 95 Autorun feature, or if it does not function, open the PG2 program folder from your Windows 95 Start button and click on the PG2 icon.
For complete and specific “how to play” information, please refer to the User Manual. Any notes regarding changes made to the game made after the User Manual was printed, and any rules errata can be found after the “Troubleshooting” section. Some changes were made too late to include in this data card. Please read the README.TXT file in your game directory for more information.
NOTICE
Several changes were made to the game after the User Manual was printed. Refer to the README.TXT file for complete listings of up to date information.

UNINSTALLING THE GAME
To uninstall the game, choose Settings from the Windows 95 Start button and select Control Panel. In the Control Panel, select Add/Remove Programs, left-click on PG2, and click on the Add/Remove button. The game and all of its components are then removed from your hard drive, except for your saved games or edited scenarios.
SAVING GAMES
PANZER GENERAL II requires space on your hard drive for saved games and temporary files. Each saved game can take up to 1 MB of hard drive space.
ELECTRONIC REGISTRATION
If you did not register your copy of PANZER GENERAL II after installation and wish to do so later:
1.From your desktop select the Start button, click on Programs, click on PG2 and click on
Register for Free Stuff.
2.Follow all on screen prompts.
Note: If you register electronically, or via the registration card, you will be provided with a code to unlock the scenario Caging The Bear, a hypothetical scenario in which the Americans and theBritish, along with the remnants of the German Army, attempt to push the Soviets out of Eastern Germany.
TROUBLESHOOTING
This section provides you with several easy steps to solve some common problems.
SOUND AND VIDEO CARDS
Some sound and video cards are not supported by Windows 95 and DirectX. If you do not have the following sound or video cards, the game may not work.
DirectX Supported Sound Cards: Aztech, Creative Labs, ESS, Media Vision, Microsoft
DirectX Supported Video Cards: ATI, Chips @ Technologies, Cirrus Logic, Matrox, S3,
Tseng Labs, Western Digital, 3Dlabs, ATI, Creative Labs, Rendition
DirectX 5 Setup
This game requires DirectX 5. If you do not have DirectX 5, then it can be installed from the
CD. Explore the game CD and open the REDIST folder. Double click on Setup to start the DirectX 5 install.
DirectX DISCLAIMER
PANZER GENERAL II utilizes Microsoft’s DirectX sound and video drivers. DirectX is a programming tool created by Microsoft, and the installation of DirectX may cause video problems and system anomalies with computers using video drivers that aren’t DirectX compliant. DirectX is a Microsoft product, and as such, SSI cannot be responsible for changes that might occur to your computer system due to its installation. For DirectX related problems that cannot be fixed by updating to your video card’s latest Windows 95 driver set, you must contact either
Microsoft or the manufacturer of your video card for further technical support or service.
Microsoft retains all intellectual property rights to DirectX. The user has been granted a limited license to use DirectX with Microsoft operating system products.
Verifying DirectX Video / Sound Card Drivers
To verify that your sound and video drivers are DirectX 5 certified, follow the steps below.
1.Click on the windows Start button (usually found in the lower left corner of your screen).
2.Click on Run.
3.In the open field, type the command: C:\progra~1\directx\setup\dxsetup.exe then click on OK.
4.Make sure all drivers say “Certified” next to them.
If any of your drivers are not DirectX certified, you should contact the hardware manufacturer and see if they have certified DirectX 5 drivers.
Reinstating Windows 95 Video Drivers
If you find that there is a problem with your display after you have installed DirectX 5, you can reinstate your old video drivers by following the instructions below:
1.Click on the windows Start button (usually found in the lower left corner of your screen).
2.Click on Run.
3.In the open field type the command: C:\progra~1\directx\setup\dxsetup.exe then click on OK.
4.Click on the Restore Display Drivers button.
This may require that you have the disk containing your original drivers.
PANZER GENERAL II WEB SITE
In addition to the SSI web page, there is a web site exclusively for PANZER GENERAL II which provides background information for the game. You can reach the web site at http://www.panzergeneral.com.
CAMPAIGN PLAY TIPS
As you progress through a Campaign, you will receive Prestige for winning battles and capturing Supply Points, Cities and Airfields. Prestige is used to Requisition units, take
Replacements, Upgrade units, and make Experienced units stronger. Understanding how and when you use prestige is a key ingredient to a successful career as a Panzer General.
Key Concepts
Core Units
When you begin a campaign, pay particular attention to units with black numbers inside their strength tags. These are your Core units. Core units accompany you to all your battles, gaining experience as you progress through a campaign. When a battle ends, all your core units are brought up to full strength automatically, at no prestige cost to you.
Core Army Size
Your army makeup is limited by the amount of prestige awarded you as you progress through a campaign. When you win a battle, you are awarded prestige points. You may use those prestige points any way you wish between battles, but if you use most of your prestige to buy new units, you won’t have much left to upgrade or overstrength your core units.
Prestige Use
When you are fighting a battle, you can use prestige to take replacements or to requisition (buy) new core units. Between battles you are sent to the field headquarters where, in addition to requisitioning new units, you can use prestige to upgrade units, overstrength units, and reassign units. (Note again that the only time you can upgrade, overstrength, or reassign units is between battles).
Prestige Decision Points
continued on next panel

When you are fighting a battle, you accrue prestige by capturing objectives. This prestige can be used to take replacements and requisition new units. If you wish to maximize your prestige award for winning a battle, limit the amount of prestige you use requisitioning new units during the battle. PANZER GENERAL II allows you the choice of requisitioning new units to turn the tide of a tough battle, at the cost of having less prestige available between battles. Note that taking replacements during a battle to bring your units up to strength does not count against the prestige award given for winning a battle.
MULTIPLAYER GAMES
PANZER GENERAL II can be played with up to four players over a network or via the internet.
Detailed instructions for creating or joining a multiplayer game are given below. The game creator is given the exclusive ability to set some game options. He or she can change the difficulty level of each player side by clicking on the up and down arrows. This increases or decreases the amount of prestige points available to the player during the game. Also, the game creator can set a time limit (in minutes) for each turn by clicking on the clock icon and then clicking on the up and down arrows.
Network Play
Creating a Network Game
1. Make sure your PANZER GENERAL II CD is in your CD ROM drive. 2 Make sure you have a network connection established.
3.Start the PANZER GENERAL II game.
4.Click on the Multiplayer button from the Start screen.
5.Click on the Network selection in the Multiplayer screen.
6.Click on Create.
7.Enter a name for the game.
8.Enter your player name.
9.Choose the number of players (2-4).
10.Select a scenario and start the game when all players have logged in.
Joining a Network Game
1.Make sure your PANZER GENERAL II CD is in your CD ROM drive.
2.Make sure you have a network connection established.
3.Start the PANZER GENERAL II game.
4.Click on the Multiplayer button from the Start screen.
5.Click on the Network selection in the Multiplayer screen.
6.Click on Join.
7.Enter your player name.
8.Click on a game name to join.
9.Your game will start when the creator determines that all players are ready.
Internet Play
Many Internet Service Provider's (ISP's) use dynamically assigned IP addresses. This means that a user's IP address changes each time they log onto their ISP. If your ISP uses dynamically assigned IP addresses, you need two telephone lines to play PANZER GENERAL II over the Internet (one to log into your ISP, the other to call your opponent and tell him or her what your IP address is). Your other option is to play PANZER GENERAL II on Club SSI.
Creating an Internet Game
1.Make sure your PANZER GENERAL II CD is in your CD ROM drive.
2.Log onto the Internet using your Internet Service Provider (ISP).
3.Determine your IP address by double-clicking on the WINIPCFG.EXE file (located in your C:\WINDOWS directory). Note the IP address numbers and the location of the decimal points. Inform your players of your IP address, if they do not already have it.
4.Start the PANZER GENERAL II game.
5.Click on the Multiplayer button from the Start screen.
6.Click on the Internet selection in the Multiplayer screen.
7.Click on Create.
8.Enter a name for the game.
9.Enter your player name.
10.Choose the number of players (2-4).
11.Select a scenario and start the game when all players have logged in.
Joining an Internet Game
1.Make sure your PANZER GENERAL II CD is in your CD ROM drive.
2.Log onto the Internet using your Internet Service Provider (ISP).
3.Start the PANZER GENERAL II game.
4.Click on the Multiplayer button from the Start screen.
5.Click on the Internet selection in the Multiplayer screen.
6.Click on Join.
7.Enter your player name.
8.Enter the IP address of the game host.
9.Click on a game name to join.
CLUB SSITM
Welcome to a New World of Conflict
Club SSITM is a FREE, easy to use, online gaming service provided by SSI and Headland Digital MediaTM which allows you to find PANZER GENERAL II players on the Internet. Using the Club SSI interface, you can easily chat and create multiplayer games with opponents from around the world. To check it out, visit: www.clubssi.com
To use Club SSI the first time:
1.Make sure your PANZER GENERAL II CD is in your CD
ROM drive.
2.Log onto the Internet using your Internet Service
Provider (ISP).
3.Open your web browser (eg. Netscape NavigatorTM, Microsoft Internet ExplorerTM).
4.Go to http://www.clubssi.com/panzer/reg.htm and follow the instructions to register an account.
5.Club SSI will send you an email with your username and password.
6.Start the PANZER GENERAL II game.
7.Click on the Multiplayer button from the Start screen.
8.Click on the Club SSI internet play selection in the Multiplayer screen.
9.Enter your username and password.
10.Use the Club SSI screen to find your opponent(s).
If you have already received your username and password:
1.Make sure your PANZER GENERAL II CD is in your CD ROM drive.
2.Log onto the Internet using your Internet Service Provider (ISP).
3.Start the PANZER GENERAL II game.
4.Click on the Multiplayer button from the Start screen
5.Click on the Club SSI internet play selection in the Multiplayer screen
6.Enter your username and password.
7.Use the Club SSI screen to find your opponent(s).
SPECIAL THANKS
Wolfgang Blum, Ford Ellis, Mark Evans, Michael Kroon, Bruce Mickelson, Keith Morton, Ix Nichols, Kurt Pernice, Dave Sullivan
2218410-250001

TABLE OF CONTENTS
INTRODUCTION . . . . . . . . . . . . . . . . . . 1
Getting Started . . . . . . . . . . . . . 2
What Comes with this Game? . . . . 2
Copy Protection . . . . . . . . . . . . . 2
Using the Mouse . . . . . . . . . . . . 2
New to PANZER GENERAL II . . . . . . . 2
TUTORIAL . . . . . . . . . . . . . . . . . . . 3
Starting the Tutorial . . . . . . . . . . 3
Playing the Tutorial . . . . . . . . . . 5
THE BASIC SCREENS, MENUS, AND BUTTONS . . 14
The Start Screen . . . . . . . . . . . 14
The Scenario Selection Screen . . . 16
The Campaign Selection Screen . . 18
Cinematics . . . . . . . . . . . . . . . 19
The Main Game Screen . . . . . . . 19
Pop-Up Panels . . . . . . . . . . . . . 23
Secondary Screens . . . . . . . . . . 29
PLAYING A MULTIPLAYER GAME . . . |
. . . . 36 |
Multiplayer Options Screen . . . . . 36 |
|
Creating a Multiplayer Game |
. . . . 36 |
Joining a Multiplayer Game |
. . . . 37 |
Multiplayer Game Options . . |
. . . . 38 |
PLAY BY E-MAIL . . . . . . . . . . . . . . . 39
Starting a Play By E-Mail Game . . 39
Loading a Turn . . . . . . . . . . . . 39
GAME CONCEPTS . . . . . . . . . . . . . . . 40
Beginning a Battle . . . . . . . . . . 40
Combat . . . . . . . . . . . . . . . . . 41
Core and Auxiliary Units . . . . . . 41
Entrenchment . . . . . . . . . . . . . 42
Experience . . . . . . . . . . . . . . . 43
Game Turns . . . . . . . . . . . . . . 44
Initiative . . . . . . . . . . . . . . . . 44
Leaders . . . . . . . . . . . . . . . . . 45
Movement . . . . . . . . . . . . . . . 46
Multiple Attacks . . . . . . . . . . . . 49
Prestige Points . . . . . . . . . . . . 49
Ranged Fire . . . . . . . . . . . . . . 49
Replacements . . . . . . . . . . . . . 50
Rugged Defense . . . . . . . . . . . . 50
Spotting Units . . . . . . . . . . . . . 50
Strength . . . . . . . . . . . . . . . . 51
Supply Rules . . . . . . . . . . . . . . 52
Support Fire . . . . . . . . . . . . . . 53
Suppression . . . . . . . . . . . . . . 54
Terrain . . . . . . . . . . . . . . . . . . 54
Using Artillery and Air Defense . . 55
Victory Conditions . . . . . . . . . . 56
Weather . . . . . . . . . . . . . . . . . 56
Zone of Control . . . . . . . . . . . . 56
CAMPAIGN DESIGN NOTES . . . . . . . . . . . 57
Blitzkrieg . . . . . . . . . . . . . . . . 57
Onward To Berlin . . . . . . . . . . . 68
Crusade in Europe . . . . . . . . . . 72
Defending the Reich . . . . . . . . . 75
SCENARIO BUILDER . . . . . . . . . . . . . . 78
The Scenario Parameters Screen . . 78
The Scenario Builder Screen . . . . 80
UNIT STATISTICS DESCRIPTIONS . . . . . . . |
83 |
UNIT CLASS DESCRIPTIONS . . . . . . . . . . 87
Ground Classes . . . . . . . . . . . . 88
Air Classes . . . . . . . . . . . . . . . 94
Naval Classes . . . . . . . . . . . . . 96
UNIT CLASS AND EQUIPMENT
TYPE SPECIAL ABILITIES . . . . . . . . . . . 98
UNIT CLASS AND EQUIPMENT TABLES . . . . 100
INTRODUCTION
Do you have what it takes to win?
Will you fight as a Wehrmacht Officer, or perhaps lead your comrades in the Soviet Army? You may want to hit the beaches at Salerno and Normandy as an American or British General. No matter what path you choose, you will need all your skills to triumph. The successful “Panzer General” devises sound strategic plans and carries them out with unswerving commitment. Generals who are indecisive inevitably fail. Can you forge a battle-winning command and conquer your foes? Isn’t it time to find out?
Getting Started
If you want to get a quick start, refer to the “Tutorial” section of the manual, which begins on page 3. It provides a step-by-step battle plan to familiarize you with the screens and basic features of a PANZER GENERAL® II scenario, and should help you win part of the first battle of the Blitzkrieg campaign. If, however, you prefer to familiarize yourself with the game as a whole, turn to the “Basic Screens, Menus, and Buttons” and “Game Concepts” sections on pages 14 and 40, respectively.
What Comes with this Game?
Your box should contain this user manual, a datacard, and a PANZER GENERAL II CD. This user manual explains how to play and contains important information on menus, scenarios, and unit classes and equipment. To get the game running on your computer, follow the installation instructions on the datacard.
Copy Protection
In order to play PANZER GENERAL II, the game CD must be in the CD-ROM drive.
Using the Mouse
In PANZER GENERAL II, whenever the mouse passes over a button or hex, smart text, describing the area under the cursor, appears in information bars at the top and bottom of the screen, or beside the unit or button in question. This makes identifying buttons and units easy during game play. In this book, the term “click” means moving the mouse pointer to the desired area on the screen and pressing the left mouse button.
“Right-click” means moving the mouse pointer to the desired area and pressing the right mouse button.
w New to PANZER GENERAL II
For those who played the original PANZER GENERAL, the sections or paragraphs headed by a right-pointing triangle highlight changes and new features in PANZER GENERAL II. This symbol is only used for changes and features that may not be immediately obvious, unlike Multiplayer Play and the Scenario Builder.
1 |
INTRODUCTION |
INTRODUCTION: Getting Started |
2 |

TUTORIAL
This tutorial is intended to explain basic menus and button functions, and to guide you through a small introductory battle. For detailed information about the menus and options in PANZER GENERAL II, see the “Basic Screens, Menus, and Buttons” section starting on page 14; for explanations of various aspects of play, see the “Game Concepts” section starting on page 40; and for detailed strategy notes and game play hints, see the README.TXT file located in your PANZER2 directory.
Starting the Tutorial
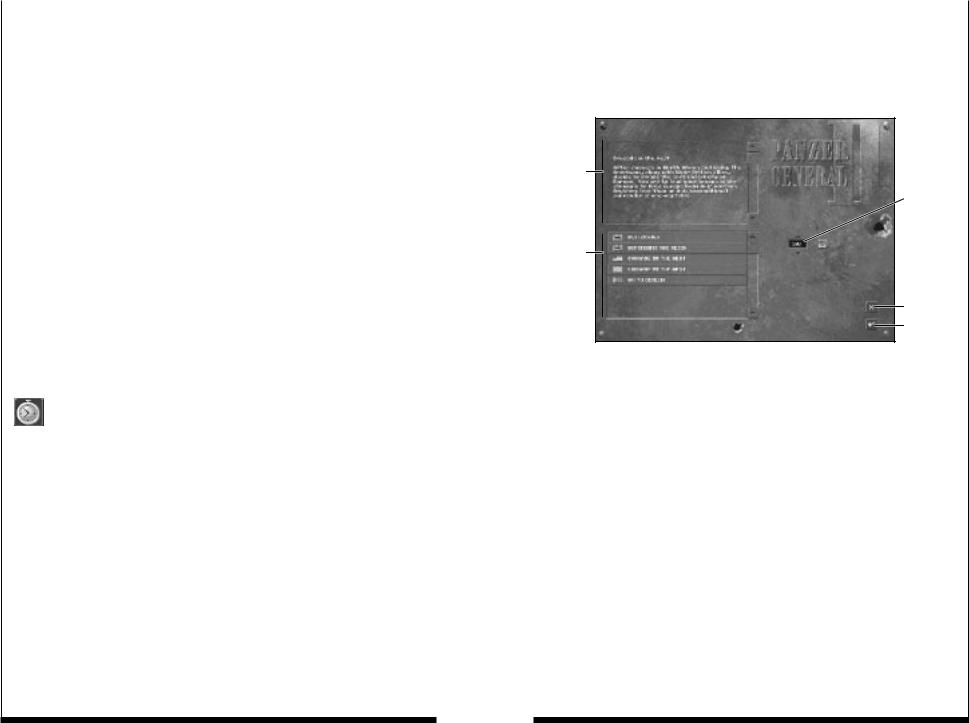
From the PANZER GENERAL II Start screen, click on the Play a Scenario button, the left-most button in the row. This brings up the Scenario Selection screen. On the left side of the screen are two windows; the upper window should be blank, and the lower contains an alphabetical listing of the scenarios. Click repeatedly on the down arrow button, or click on the scroll bar slider, and hold down your mouse button as you drag the slider down. Near the end of the list you should see the Tutorial scenario listed. Click on Tutorial, and a description of the scenario appears in the upper window, along with the number of players the
scenario was designed for, and the number of turns it lasts.
Scenario
Description
Player
Control
Buttons
Scenario
Listing Prestige
Adjustment
Windows
Return to
Start Screen
Play
Scenario
On the right side of the screen, flags indicating the Axis and the Spanish Republican forces have appeared next to the Player Control buttons. Right now the Axis is selected for the human player, indicated by the depressed gold-tone button. The Spanish Republican forces are controlled by the AI, since the computer icon is depressed and highlighted in gold. You can switch the settings if you like, but return them to the default before beginning the scenario.
Next to the flags are windows giving the prestige percentages for each side. Prestige is a measure of how you are viewed as a commander by your superiors; the more prestige you have, the more resources are at your disposal. Essentially, in PANZER GENERAL II it functions as money; prestige points allow you to buy additional units and equipment, as well as restore damaged units. Arrow buttons on the top and bottom of each Prestige Adjustment window allow you to adjust the percentage up and down. If you lower your opponent’s prestige setting to 50%, the Spanish Republican army receives half of the discretionary funds they would ordinarily receive. You do not need such an advantage in this scenario, so leave the percentages at the default.
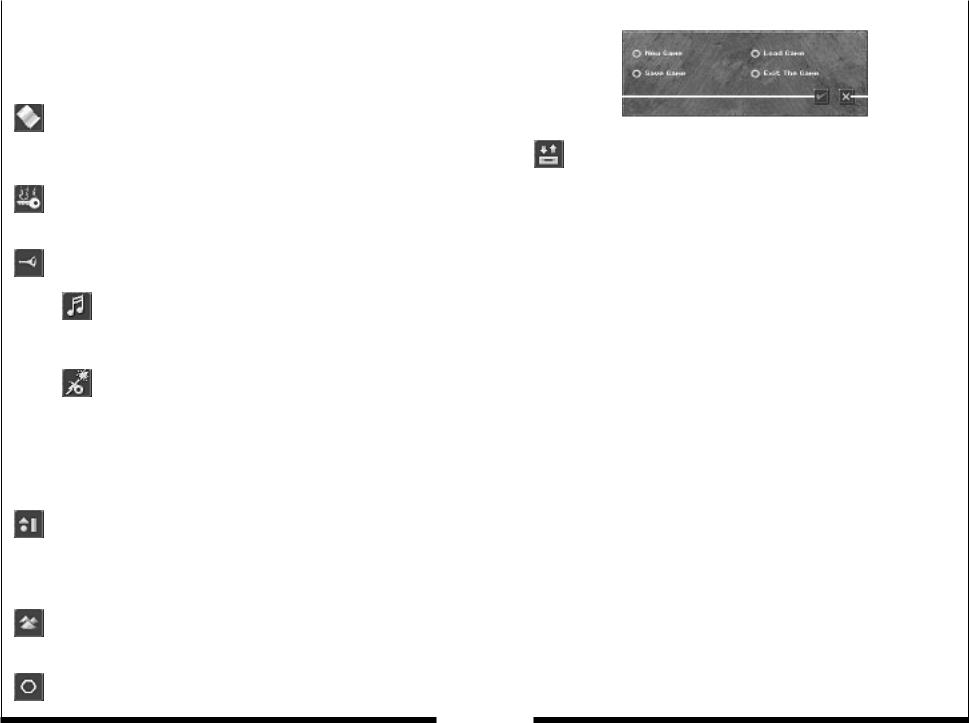
When you are finished exploring the Scenario Selection screen, be sure that the Tutorial scenario has been selected, and that the Prestige Adjustment and Player Control settings are back where they started, then click on the check mark button at the bottom right of the Scenario Selection screen to start the Tutorial.
If you change your mind, click on the Exit button, right above the check mark button, to return to the PANZER GENERAL II Start screen.
3 |
TUTORIAL: Starting The Tutorial |
TUTORIAL: Starting The Tutorial |
4 |

Playing the Tutorial
TURN 1
When you start a scenario, the Main Game screen appears, with the Turn panel overlaying the lower half of the screen. The following information is displayed:
♦ Axis Turn 1
Friday, December 23, 1938
Weather: Cloudy
Brilliant Victory: 2 Turns Remaining
Victory: 3 Turns Remaining
Tactical Victory: 4 Turns Remaining
In order to obtain a victory, all objectives must be held by your forces, which means that you have moved your forces into every hex that is a victory objective. In this scenario, your victory objective is the city of Almadrones at hex (18,5). If you capture Almadrones before the end of Axis turn two, you achieve a brilliant victory. So long as you capture the city by the end of your fourth turn, you still achieve at least a tactical victory. Brilliant victories provide more prestige than regular victories or tactical victories, which is especially important in campaign play.
Click on the check mark button to remove the Turn panel.
City Name |
|
Hex Coordinates |
|
|
|
|
|
|
|
|
Battlefield |
|
|
|
Requisition |
|
|
|||
|
|
|
|
Deploy Unit |
|
|
|
|
|
|
|
|
|
|
End Turn
Game
Function
Unit Designation |
|
Equipment Type |
|
Entrenchment |
|
|
|
|
|
The Main Game screen is dominated by the Battlefield, the map of the contested area. At the top and bottom of the screen are text bars which provide information during play, and at the right is the Options menu, a vertical row of buttons which control various functions in the game. When you move your cursor over a button, smart text appears describing the button’s function. For detailed information about the Options menu, see the “Option Buttons” section on page 21.
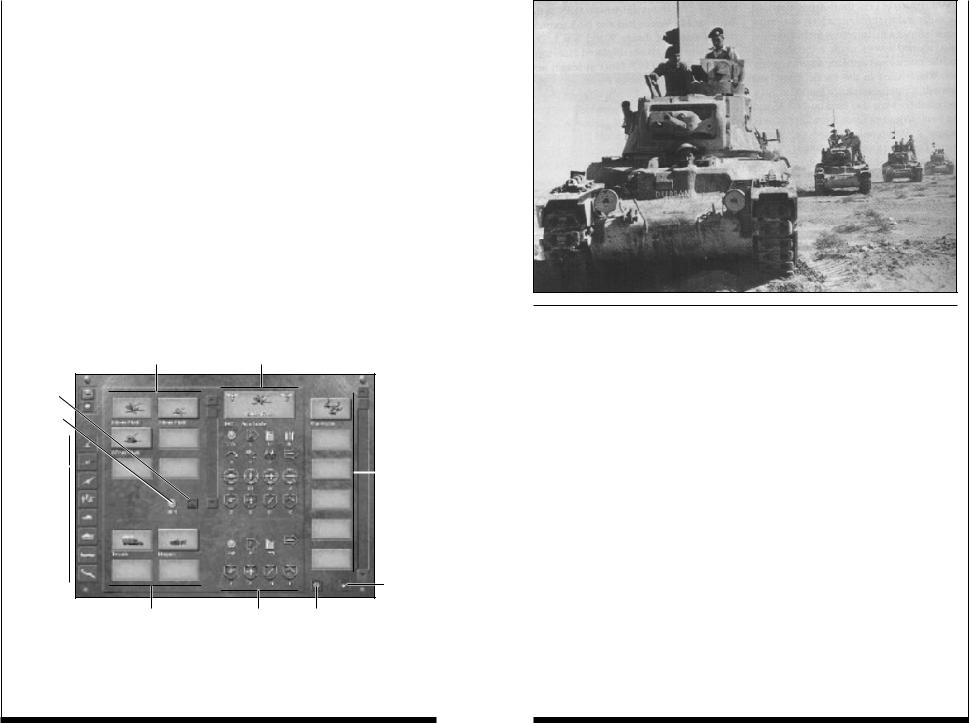
Currently the Battlefield is centered on your selected unit, an infantry unit in hex (20,3). As you pass the cursor over the screen, smart text appears at the top of the screen displaying terrain types and hex coordinates. If you pass the cursor over a unit, its designating number appears at the lower left of the screen, the unit’s equipment type appears in the center of the bar, and the unit’s entrenchment value is given at the lower right. Move your cursor over to your unit, the 4th Motorized Infantry Regiment of the 6th Panzer Division, designated 4/6. Its equipment type, Regular, is given, and it is entrenched at level zero.
Right-click on this unit, and the View Unit panel appears. This displays quick statistics for a unit, such as its attack range, its soft and hard attack values, and its current ammunition and fuel levels. Various unit functions, such as mounting and supply, are also controlled from this panel. For detailed information, see the “View Unit Panel” section starting on page 27. Left-click on the Exit button on the lower right side to remove the View Unit panel.
Move the cursor over your victory objective, the city of Almadrones in hex (18,5). It is defended by the Divisional Artillery of the 12th Loyalist Division, a 75mm artillery unit with an entrenchment level of eight. Entrenchment gives a defending unit bonuses in combat, making it unwise to attack a unit that is deeply entrenched. Being attacked reduces a unit’s entrenchment, therefore the prudent tactic is to attack with artillery from a distance before moving in with your other troops. Also protecting Almadrones are three Loyalist infantry units, which need to be eliminated or driven off before you can assault the city directly.
Softening up the defense.
The first step is to drive a gap in the Spanish defenses. Move the cursor over to your unit 116/6 in hex (21,2), the 10.5 leFH 18 artillery unit, and left-click to select that unit. Now pass the cursor across the screen until it rests over an enemy unit. If that enemy unit is within the currently selected unit’s attack range, an attack reticule appears. On this reticule are given the expected reductions in strength points for both sides; your projected casualties are listed below the German flag, and your enemy’s losses are listed under the Spanish Republican flag. The numbers displayed are not guaranteed, but are an estimation of the
5 |
TUTORIAL: Playing The Tutorial |
TUTORIAL: Playing The Tutorial |
6 |
strength losses that may be incurred in an attack. Left-clicking on an enemy unit with the attack reticule over it initiates an attack. Normally, if that enemy unit’s range is sufficient, it may return fire simultaneously. In this case it cannot, because no unit is ever entitled to return fire upon attacking artillery units.
In this case, the enemy infantry unit 2/12 in hex (19,4) is the best choice, since eliminating it opens up the widest avenue of attack upon the objective city of Almadrones. Left-click on this unit. Gunfire sounds, explosions occur, and hopefully, the enemy takes damage. Now left-click on your unit 117/6 in hex (22,3), a 75mm artillery unit, and again attack enemy unit 2/12.
Evaluating enemy artillery support.
To widen the area of attack, it is important to knock back or eliminate either enemy unit 1/12 or 3/12. Both the 1st in hex (18,4), and the 3/12 in hex (21,5) can receive artillery support from the 12th Artillery in Almadrones. This means that any non-artillery unit which attacks these units comes under fire from the 12th Artillery before it can engage in an attack. Artillery units provide support when your unit is attacked by an enemy unit within the range of the artillery unit. If you right-click on the 12th Artillery, the View Unit panel appears. On the top left side of the panel, the display shows that the 12th Artillery has a range of three. Click on the Exit button to remove the View Unit Panel.
Looking at the map, you should see that both positions from which you can attack the 1/12 are within range of the artillery in Almadrones, as is an attack on the 3/12 from hex (21,4). However, if you attack the 3/12 from hex (22,5), to the upper right of the enemy unit, you are out of the 12th Artillery’s range. This is the best choice for your next move.
|
|
|
|
|
|
|
|
|
|
|
|
|
|
|
Supported |
|
|
|
|
|
|
|
|
Close |
|
|
↓ |
|
|
|
(Attacking unit |
|
|
|
|
|
is within |
||
Supported |
|
|
|
|
|
||
|
|
|
↓ |
|
|
|
artillery range) |
(Defending unit |
|
|
↓ |
|
|
|
|
is adjacent to |
|
|
↓ |
|
|
|
|
|
|
|
|
|
|||
artillery) |
|
|
↓ |
|
Unsupported |
||
|
|
|
↓ |
|
|||
|
|
|
|
|
|
||
|
|
|
|
|
|
|
(Attacking unit |
|
|
|
|
|
|
|
is outside |
|
|
|
|
|
|
|
|
|
|
|
|
|
|
|
artillery range) |
|
|
|
|
|
|
|
|
|
|
|
|
|
|
|
|
Select unit 114/6 in hex (22,4). When a unit is selected and has not yet moved, an area of hexes darkens around that unit’s hex. The unit is able to move into any of these hexes by left-clicking on the destination hex. In this case, move the cursor down to hex (22,5) and left-click. This places your unit above and to the right of the enemy. Now that the 114/6 has moved, it can attack the enemy infantry. Move the attack reticule over 3/12 and left-click.
Sometimes an attack goes very well, and you force the unit to retreat; other times, the enemy can put up a rugged defense, doing a considerable amount of damage to the attacker while sustaining little strength loss itself. If enemy unit 3/12 retreated, you need to take advantage of the opening and move unit 57//6 to hex (20,4). However, time is on your side, and it is better to wait, and try to tempt the enemy infantry into attacking; allow your pionieres to entrench instead of attacking. If enemy 3/12 did not retreat, move unit 57//6 to hex (21,4). The next turn, you may choose to attack with one or both of these infantry units if the enemy has not already retreated.
Move the rest of your units closer to the front, such as unit 4/6 to hex (19,3) and unit 11/6 to (20,4) or (20,5). Again, it is more prudent to refrain from attack, and allow your units to entrench. Left-click again on a unit to deselect it.
7 |
TUTORIAL: Playing The Tutorial |
TUTORIAL: Playing The Tutorial |
8 |

Moving your artillery.
Although artillery units 116/6 and 117/6 have already fired, they can still be reselected as they have not yet moved. Reselect unit 116/6. When you place the cursor over any of the darkened hexes surrounding the unit, it turns into a truck icon. This means that the artillery must be mounted to move. If you left-click on any of the darkened hexes, the unit turns into a truck, and moves to the hex you left-clicked on. Alternately, bring up the View Unit panel by right-clicking on the unit. Move the cursor over the Mount - Dismount button and left-click on it. Your artillery is now mounted and can be moved to hex (20,3).
Vehicle has Organic Transport
Range
Mount-Dismount |
|
|
|
Remove View Unit Panel |
|
|
|||
|
|
|
|
|
|
|
|
|
|
Note: Once a unit has moved, it cannot be dismounted until your next turn, and mounted artillery units cannot give support fire for their allies!
Mount up unit 117/6 as well, and move it to hex (21,3). Left-click to deselect.
Notice that the Next Unit button at the top of the Options bar is no longer highlighted. This signifies that all your units have moved. Now is a good time to requisition new units before continuing on to the next turn.
Calling for reinforcements.
Left-click on the Requisition button, the third from the top of the Options bar. This brings you to the Requisition screen.
On the left side of the screen are the Unit Class Selection buttons. An arrow button at the top left of the screen allows you to toggle between different Axis countries’ forces. Left-click on the Select Air Defense button at the top of the screen. Several icons appear in the Available Equipment boxes to the right of the Class Selection buttons. Click on one of them and two things occur: that unit’s statistics appear in the Equipment Statistics area of the screen, and icons appear in the Available Transport boxes underneath the Available Equipment boxes. When purchasing units that cannot move on their own, Trucks are assigned to them by default. To change to a different type of organic transport, click on your choice; the cost of the transport is added to the total cost of the unit. However, since there are no aircraft threatening your forces at this time, air defense guns are unnecessary. It is a good idea, though, since your enemy does not have an air force, or massive air defense armaments, to launch an aerial attack of your own.
9 |
TUTORIAL: Playing The Tutorial |
TUTORIAL: Playing The Tutorial |
10 |
Available |
|
|
|
Equipment |
|
|
|
||
Equipment |
|
|
|
Statistics |
Boxes |
|
|
|
|
|
|
|
|
|
Air Defense
Requisition Unit
Total Unit Cost
Cancel Last
Requisition
Tactical Bomber
Exit Requisition
Screen
Move the cursor down to the Select Tactical Bomber button at the bottom of the screen and left-click on it. In the center of the screen, an icon of the JU87B bomber unit appears in one of the Available Equipment boxes. Left-click on the JU87B to bring up the bomber’s statistics. The prestige cost of the unit is given below the Available Equipment boxes, and your available prestige is given at the top of the Equipment Statistics area. The JU87B bomber is going to cost you 432 of your 500 prestige points, easily affordable. Click on the Requisition button next to the Total Cost of Unit indicator at the bottom of the Available Equipment area. A bomber icon appears in the Units Available for Deployment boxes on the right side of the Requisitions screen. You have just added a new bomber to your attack force. Leftclick on the Exit button at the bottom right on the screen. If you have made a mistake, click on the Cancel button to the left of the Exit button and begin again.
When you click on the Exit button, the game returns to the Main Game screen with the Deployment panel extended. Use the cursor to scroll the screen to the right on the map by holding the cursor along the right edge of the screen. Since the bomber unit is the only unit available for deployment, the icon box is depressed and darkened hexes have appeared around the airfield at hex (21,1). Left-click on any of these darkened hexes to place the JU87B unit in that hex. Then click on the Exit Deployment button at the bottom right of the screen.
Attacking from above.
Continue your assault around Almadrones with your new bomber unit. When you select that unit, available movement hexes include hexes already occupied by ground units. Air units can occupy the same hex as a ground unit, unlike other ground units. Move your bomber to hex (19,4) over the enemy artillery unit 12. The targeting reticule appears when you move your cursor over hex (19,4). Left-click to attack.
After your attack is finished, click on the Air Mode button in the Options bar to view the damaged enemy below.
The Allies retaliate.
Left-click on the End Turn button. Now the Allied Turn 1 panel appears. Click on the check mark button to continue play. The Spanish Republican forces should counterattack on their turn, peppering one of your infantry with artillery fire, then possibly attacking with their own infantry.
Keep a close eye on the amount of damage your units take.
TURN 2
When the computer player has finished its turn, the turn panel appears again, displaying the following information:
♦ Axis Turn 2
Saturday, December 24, 1936
Weather: Cloudy
Brilliant Victory: 1 Turn Remaining
Victory: 2 Turns Remaining
Tactical Victory: 3 Turns Remaining
Click on the check mark button to continue.
Returning your units to full strength.
The infantry unit 4/6 at hex (19,3) most likely has sustained losses, and may now be in hex (19,2) after retreating. Select unit 4/6 and right-click on it. Inside the View Unit panel on the lower right is the Replacements button. Leftclicking on this button adds strength points back to your unit; if no enemy is adjacent, your unit returns to full strength. Receiving replacements does cost you prestige points. If another unit has sustained more damage than 4/6, call for replacements for that unit instead, so long as it is not adjacent to an enemy unit. If you attempt to get replacements for a unit adjacent to the enemy, fewer strength points are added to your unit, reflecting the difficulty of getting men and supplies so close to the front lines.
Digging in for the assault.
Dismount your artillery units with the Mount - Dismount button in the View Unit panel, and use them next to destroy enemy opposition around the city. Move your infantry and tanks on to the city, finishing off any other defenders in your path. Once you secure your positions around the city, you do not have to advance your artillery up as you did last turn – Almadrones is within their striking range. Don’t forget to shell Almadrones again with your bomber unit. When all of your units have moved or attacked, click on the End Turn button.
11 |
TUTORIAL: Playing The Tutorial |
TUTORIAL: Playing The Tutorial |
12 |

During the enemy’s second turn, the Allies’ remaining units may be in retreat, may attempt to get replacements, or may entrench for a final defense. Some units may try to counterattack, but they are unlikely to do much damage. It’s time for the kill.
TURN 3
When the enemy has finished its second turn, use the same strategy of attacking with air and artillery units to soften up your remaining targets, this time in the city itself, and finish off weakened enemy units with your ground forces. As soon as one of your tank or infantry units occupies the city, the scenario is over, and the victory panel appears. You are given a chance to review the battlefield. Click on the check mark button to return to the PANZER GENERAL II Start screen.
If you have followed the tutorial instructions, you should have received a normal victory. You can replay the scenario, with a more aggressive approach, to achieve a brilliant victory, taking the city of Almadrones in just two turns.
THE BASIC SCREENS, MENUS, AND BUTTONS
This section provides step-by-step suggestions to familiarize you quickly and easily with the basic screens, menus, and buttons in PANZER GENERAL II.
|
|
|
|
|
|
|
Game |
|
|
|
|
|
Exit |
Options |
|
|
|
|
|
Game |
|
|
|
|
|
|
|
|
|
|
|
|
|
|
The Start Screen
When you first begin PANZER GENERAL II, the Start screen appears. At the bottom right of the screen are nine game option buttons. As you run the mouse cursor over a button, smart text appears above it, describing what that button does.
Play a Scenario
Brings up the Scenario Selection screen, from which you can select and start a single player scenario. For more information, see the “Scenario
Selection Screen” section, beginning on page 16.
Play a Campaign
Brings up the Campaign Selection screen, from which you can select and start a single player campaign. For more information, see the “Campaign
Selection Screen” section, beginning on page 18.
Start a Multiplayer Scenario
Brings up the Multiplayer Game Selection screen, from which you can create or join a multiplayer game, either over a Local Area Network (LAN), or via the Internet. For more information about starting and playing multiplayer games, see the “Playing a Multiplayer Game” section, starting on
page 36.
13 |
TUTORIAL: Playing The Tutorial |
THE BASIC SCREENS, MENUS, AND BUTTONS: The Start Screen |
14 |
Play By E-mail
Brings up a dialog box, from which you can choose either to start a new play by e-mail game, or load a turn from a previously saved play by e- mail game. For more information on playing by e-mail, see the “Play By E-Mail”
section starting on page 39.
Start the Scenario Builder
Brings up the Scenario Parameters screen, from which you can begin constructing your own scenario. See the “Scenario Builder” section
starting on page 78 for more information on creating scenarios.
Best Careers
Brings up the Best Careers screen, in which the performance of the best generals is ranked. Clicking on a name brings up the Dossier screen. See
the “Dossier Screen” section beginning on page 34 for more information.
Load a Saved Game
Brings up the Game Functions dialog box, from which you can load a saved game. See the section “Game Functions Panel” on page 26 for
more information on resuming a previously saved campaign or scenario.
Show the Introduction
This brings up the opening cinematic for PANZER GENERAL II. You can exit the cinematic at any time, and return to the Start screen, by pressing
any key, or clicking a mouse button.
Show the Credits
Runs the credits for the research and development team responsible for bringing you PANZER GENERAL II. Click on the screen or press any key to
exit the credits and return to the Start screen.
Exit the Game
Clicking on this button exits the game and returns you to your Windows® 95 desktop.
The Scenario Selection Screen
There are over thirty scenarios in PANZER GENERAL II, depicting historical and theoretical battles from throughout World War II.
Scenario
Description
|
|
|
|
|
|
|
@@@@@@@@e?@@@@@@@@e?@@@@@@@@e? |
|
|
|
|
||||
|
|
|
|
|
|
|
@@h?@@h?@@h?@@@@@@@@e?@@@@@@@@@@@@@@@@@@@@@@@@@@@@ |
|
|
|
|
||||
|
|
|
|
|
|
@@@@ |
@@h?@@h?@@h? |
|
@@@@ |
|
|
|
|
|
|
|
|
|
|
|
|
|
|
|
|
|
|||||
|
|
|
@@@@@@ |
|
|
|
@@@@@@ |
|
|
|
|
|
|||
|
|
|
@@@@@@ |
|
|
|
@@@@@@ |
|
|
|
|
|
|||
|
|
|
@@@@ |
|
|
|
@@@@ |
|
|
|
|
|
|||
|
|
|
@@@@@@ |
|
|
|
@@@@@@ |
|
|
|
|
Player |
|||
|
|
|
@@@@@@ |
|
|
|
@@@@@@ |
|
|
|
|
||||
|
|
|
@@@@ |
|
|
|
@@@@ |
|
|
|
|
||||
|
|
|
@@@@ |
|
|
|
@@@@ |
|
|
|
|
|
|||
|
|
|
@@@@@@ |
|
|
|
@@@@@@ |
|
|
|
|
|
|||
|
|
|
@@@@@@ |
|
|
|
@@@@@@ |
|
|
|
|
|
|||
|
|
|
@@@@@@ |
|
|
|
@@@@@@ |
|
|
|
|
Controls |
|||
|
|
|
@@@@@@ |
|
|
|
@@@@@@ |
|
|
|
|
||||
Scenario |
|
|
@@@@@@ |
|
|
|
@@@@@@ |
|
|
|
|
|
|||
|
|
@@@@@@@@@@ |
|
|
|
@@@@@@@@@@ |
|
|
|
|
|
||||
|
|
|
@@@@ |
|
|
|
@@@@ |
|
|
|
|
|
|||
|
|
|
@@@@@@ |
|
|
|
@@@@@@ |
|
|
|
|
|
|||
Listing |
|
|
|
|
@@@@@@ |
|
|
|
@@@@@@ |
|
|
|
|
|
|
|
|
@@@@@@ |
|
|
|
@@@@@@ |
|
|
|
|
|
||||
|
|
|
@@ |
|
|
|
@@ |
|
|
|
|
|
|||
|
|
|
@@@@@@ |
|
|
|
@@@@@@ |
|
|
|
|
|
|||
|
|
|
@@@@@@ |
|
|
|
@@@@@@ |
|
|
|
|
|
|||
|
|
|
@@@@@@ |
|
|
|
@@@@@@ |
|
|
|
|
|
|||
|
|
|
@@@@@@ |
|
|
|
@@@@@@ |
|
|
|
|
|
|||
|
|
|
|
|
|
@@g@@g |
|
?@@?@@ |
|
|
|
|
|
||
|
|
|
|
|
|
@@g@@g@@g |
|
?@@?@@?@@ |
|
|
|
|
|
||
|
|
|
|
|
|
@@@@@@@@?@@@@@@@@?@@@@@@@@?@@@@@@@@?@@@@@@@@@@@@@@@@@@g |
?@@ |
|
|
|
|
|
|||
|
|
|
|
|
|
|
|
|
|
|
|
|
|
|
|
|
|
|
|
|
|
|
|
|
|
|
|
|
|
|
Return to |
|
|
|
|
|
|
|
|
|
|
|
|
|
|
|
Start Screen |
|
|
|
|
|
|
|
|
|
|
|
|
|
|
|
Play a |
|
|
|
|
|
|
|
|
|
|
|
|
|
|
|
|
|
|
|
|
|
|
|
|
|
|
|
|
|
|
|
Scenario |
|
|
|
|
|
|
|
|
|
|
|
|
|
|
|
|
|
|
|
|
|
|
|
|
|
|
|
|
|
|
||
|
|
|
|
Nationality Flags |
|
|
|
|
Prestige Adjustment Windows |
|
|
|
|||
|
|
|
|
|
|
|
|
|
|
|
|
|
|
|
|
The Scenario Selection screen is divided into several parts. On the left side of the screen are two windows; the upper window is the scenario description area, the lower window contains an alphabetical listing of the currently available scenarios. At the right in the center are the Player Control buttons and the Prestige Adjustment windows, and at the lower right are the Exit and Start A Scenario buttons.
To select a scenario, click on the down arrow button and keep it depressed, or click on the scroll bar slider, and hold down your mouse button as you drag the slider down. When you see the name of the scenario you wish to play, click on it, and a description of the scenario appears in the upper window, along with the number of players the scenario was designed for, and the number of turns it lasts.
Note: All scenarios are not always available. When you start a single player game, only two player scenarios, with the computer controlling one side, are displayed in the scenario listing. In multiplayer games, the selection depends on the number of players, and only scenarios designed for that number of players are shown.
15 |
THE BASIC SCREENS, MENUS, AND BUTTONS: The Start Screen |
THE BASIC SCREENS, MENUS, AND BUTTONS: The Scenario Screen |
16 |
Also, nationality flags, indicating the primary Axis and Allied forces involved in the conflict, appear next to the Prestige Adjustment Windows when a scenario is selected. In a single player game, you can switch which side you wish to play by clicking on the head and computer icons. The current controller of an army is indicated by a depressed gold-tone button. In a multiplayer game, clicking on the flag causes it to switch to a new nationality for that player.
Another way of altering the challenge of a given scenario is by changing the prestige allotment. Next to the nationality flags are the Prestige Adjustment windows, giving a percentage for each side. Prestige is a measure of how you are viewed as a commander by your superiors; the more prestige you have, the more resources are at your disposal. Essentially, in PANZER GENERAL II, it functions as money; prestige points allow you to buy additional units and equipment, and to resupply, upgrade, and reinforce your existing units. During a scenario, prestige is often awarded during certain turns, or for capturing Victory hexes. Arrow buttons on the top and bottom of each Prestige Adjustment window allow you to adjust the percentage up and down. If you lower your opponent’s prestige setting to 50%, the enemy army receives half of the discretionary funds they would ordinarily receive. If you raise it to 150%, the enemy receives half again over what they are normally allotted. This is a powerful tool for adjusting the odds in a scenario; a weak force can suddenly acquire more powerful reinforcements; conversely, a powerful army can find itself short on men and equipment late in a drawn out battle.
When playing a multiplayer game, the Time Per Turn button appears, on the right side of the screen. Click on it to set a time limit on each player’s turn. Simply click on the arrows that appear to increase or decrease the time by five minutes. Turns can last between five and thirty minutes. If a time limit is set however, play automatically continues to the next player at
the end of the allotted period.
When you have selected your scenario, chosen your side, and adjusted the prestige percentages if desired, then click on the Play A Scenario button, the check mark button at the bottom right of the Scenario Selection screen to start the game. If you change your mind about playing a scenario, click on the Exit button, right above the check mark button, to return to the PANZER GENERAL II Start screen.
The Campaign Selection Screen
There are five campaigns in PANZER GENERAL II: Blitzkrieg, Defending the Reich, Crusade in the West as either the United States or Great Britain, and Onward to Berlin. Each campaign is made up of several scenarios based on historic and conjectural battles from World War II.
Campaign
Description
Prestige
Adjustment
Window
Campaign
List
Return to
Start Menu
Start
Campaign
When the Campaign Selection screen appears, the five campaigns are listed on the left hand side. Click on a campaign title and a brief description is given. For detailed design notes on the campaigns, which include the historical outcomes of these battles, see the “Campaign Design Notes” section starting on page 57.
Some campaigns are more difficult than others. For a greater or lesser challenge, you can adjust the AI’s prestige allotment. The Prestige Adjustment window is located on the right hand side of the screen, and is bracketed top and bottom by arrows. Click on these arrows to adjust the percentage. Reducing the computer’s percentage reduces the prestige points available to the AI, making the game easier for you, while increasing the AI’s prestige percentage gives the computer greater resources, making the campaigns more difficult. When you are satisfied with the campaign you have selected, and the AI’s prestige percentage, click on the Play A Campaign button, the check mark button at the bottom right of the screen, to begin the first battle in the campaign. If you decide not to play a campaign, click on the Exit button to return to the PANZER GENERAL II Start screen.
17 |
THE BASIC SCREENS, MENUS, AND BUTTONS: The Scenario Screen |
THE BASIC SCREENS, MENUS, AND BUTTONS: The Campaign Selection Screen |
18 |
Cinematics
Throughout the game, various cinematics may be played to introduce scenarios, celebrate victories, and mourn losses. You can exit any cinematic by pressing any key, or clicking a mouse button.
The Main Game Screen
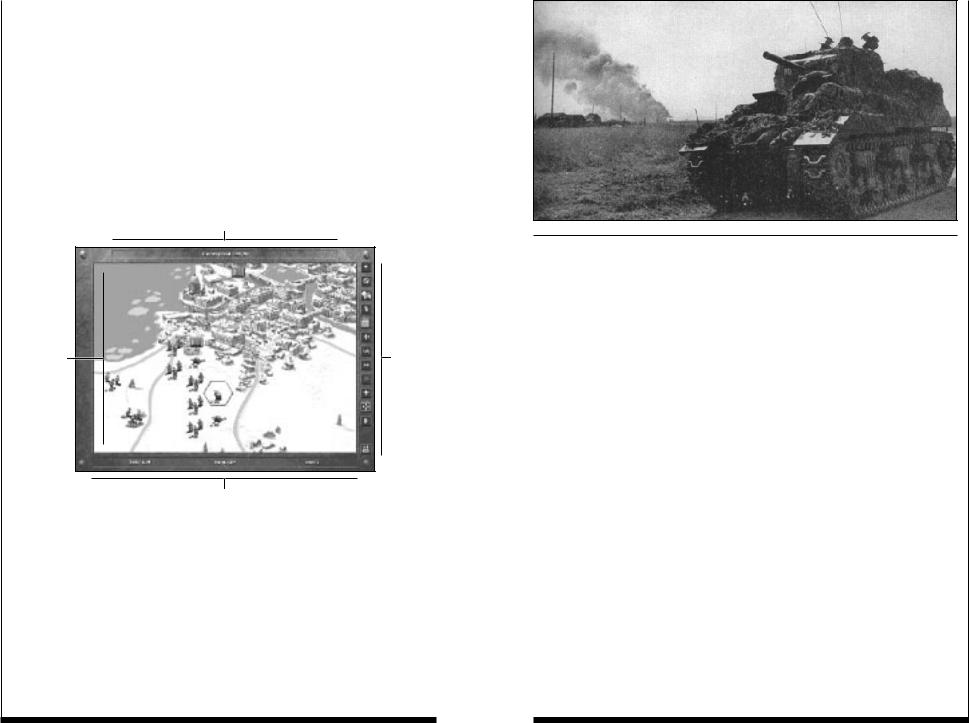
The Main Game screen is where the action of PANZER GENERAL II takes place. There are several parts to this screen: the Information bars are at the top and bottom of the screen, the Battlefield is in the center, and the Options menu buttons are on the right side of the screen.
Information Bar
Battlefield
Options
Menu
Information Bar
The Information Bars
At the top and bottom of the Main Game screen are Information bars. When you pass your mouse cursor over a hex, the top bar displays hex coordinates, and either a description of the terrain in that hex, the name of a city, or the type of structure that occupies that hex. If the hex contains a unit, that unit’s numerical designation appears at the bottom left side of the screen, the equipment type is stated in the center, and the unit’s entrenchment level is given on the far right.
The Battlefield
The Battlefield is the area where all movement and combat take place. In twoplayer games, one player controls all of the Axis forces, and the other controls all of the Allied forces. In multiplayer scenarios, players can control different Axis and Allied countries, some working together, others against each other. The campaign games are designed for a single player.
The map scale is approximately two kilometers per hex, and the unit size varies, depending on strength, from divisions and regiments down to battalions and individual companies. There can be only one unit per hex, except that an air unit can occupy the same hex as a ground or naval unit. Naval units must keep at least one hex between each other at all times, representing the huge size and turning radius of these flotillas. The following features appear on the map:
♦Twelve different types of terrain.
♦Nationality flags indicating city, port, and airfield ownership.
♦Victory Objective hexes denoted by a nationality flag with a gold hex border.
♦Supply points denoted by a nationality flag with a green hex border.
♦Victory Objectives that also act as Supply points denoted by a nationality flag with a border half gold and half green.
♦Unit icons with strength tags indicating current strength, movement status, and leader status.
To view different parts of the Battlefield, move your mouse cursor to the edge of the screen in the direction you wish to scroll the map.
19 |
THE BASIC SCREENS, MENUS, AND BUTTONS: Cinematics |
THE BASIC SCREENS, MENUS, AND BUTTONS: The Main Game Screen |
20 |
Option Buttons
The right-hand side of the Main Game screen is a vertical row of buttons offer game options. Options that are unavailable appear darkened. If you pass the mouse cursor over a button, smart text appears to the left of the button, describing its function.
Next Unit
Selects the next unit that has not moved. If all units have already moved, the icon becomes shaded. Note: Units that have not fired can
still be manually selected to receive orders.
Cancel Move
This button is available when you have selected a destination hex for the unit’s move. When a unit has moved (but before it has attacked), it can return to its point of departure without any adverse effects (like fuel con-
sumption). Cancel Move does not permit you to take back attacks, nor does it allow you to undo moves if the unit has sighted previously hidden enemy units. If the unit did not attack before moving, canceling the move permits you to take any action with the unit: attack, movement, resupply, and so on.
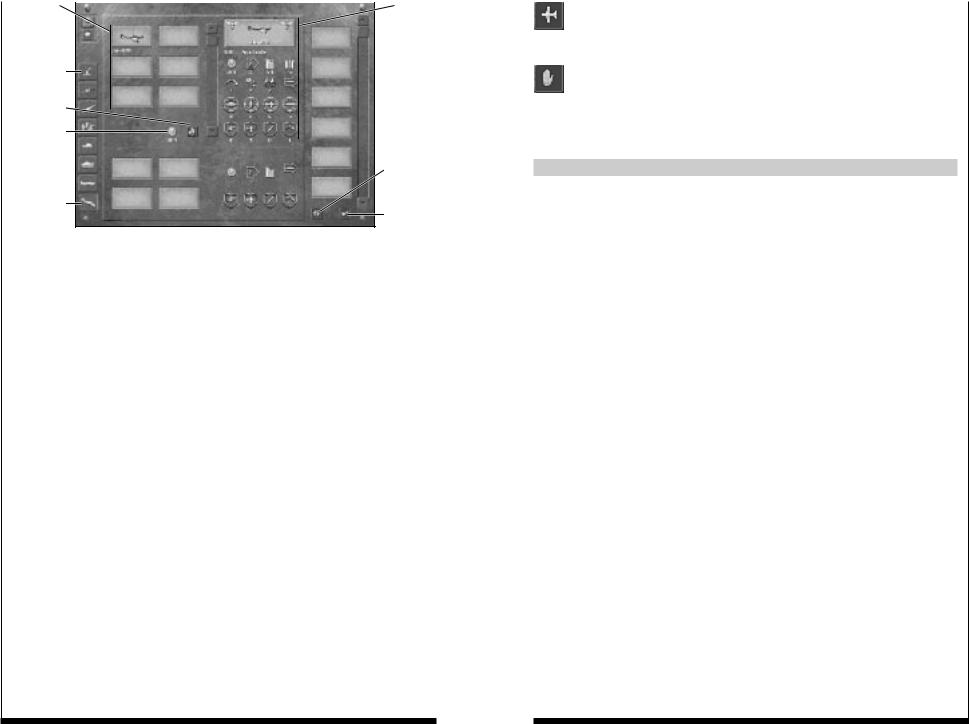
Requisition
Brings up the Requisition screen, from which you can requisition units with prestige points. Requisitioned units are deployed in or adjacent to supply points (if land units) or friendly airfields (if air units). You cannot requisition ships, fortifications, or strongholds. See the “Requisition Screen”
section of this manual on page 29 for more information.
Deploy Forces
Brings up a side panel from which you can deploy units that you have requisitioned during play. You may also deploy your core units at the start of each campaign battle and some scenarios. To place a unit on the
Battlefield click on it, then click on a shaded Battlefield hex. Click on the Exit Deployment button in the lower right corner to remove the Deployment panel. For more information on deployment, see the “Deployment Panel” section on page 23.
Field Headquarters
Brings up the Field Headquarters screen, from which you can view all the units currently under your command, requisition additional units, and evaluate your own performance. For detailed information, see the “Field
Headquarters Screen” section, starting on page 31.
Air Mode
Toggles Air Mode on and off. When both a surface and an air unit occupy the same hex, the surface unit is automatically selected. When Air Mode
is on, the air unit is selected when the hex is clicked on.
Strategic Map
The Strategic Map shows the entire Battlefield on a small scale. The Strategic Map replaces the Battlefield map, with your victory objectives, supply points, and visible units all appearing in miniature. The Options menu remains to the right of the Strategic Map, allowing you to toggle the Air Mode on and off to view air units, and to access other game options. To view a portion of the map up close, click on the section of the map you wish to see. The Strategic Map disappears, and the Battlefield map replaces it, now centered on the point you selected. You can also exit the Strategic Map at any time by
clicking on the Strategic Map button again.
Replay Turn
Rewinds to the beginning of the previous turn, or to an e-mail turn from an opponent. You can review an opponent’s e-mail move this way.
Chat
In multiplayer games, this brings up the Chat panel. See the “Playing a Multiplayer Game” section on page 36 for more information.
Additional Options
Provides access to other game controls. See the “Additional Options Menu” section on page 25 for further information.
Full Screen
Removes the Information bars and Options menu from the screen to provide a larger view of the Battlefield. Click on the Full Screen button again, now located in the lower right corner of the screen, to return the Main
Game screen to its original state.
End Turn
Ends your turn and proceeds to your opponent’s turn.
Game Functions
Brings up the Game Functions panel, from which you can save your game, load a previously saved game, start a new game, or quit the game you are currently playing. Note that you cannot save during a multiplayer game. For more
information, see the “Game Functions Panel” section, beginning on page 26.
21 |
THE BASIC SCREENS, MENUS, AND BUTTONS: The Main Game Screen |
THE BASIC SCREENS, MENUS, AND BUTTONS: The Main Game Screen |
22 |
Pop-Up Panels
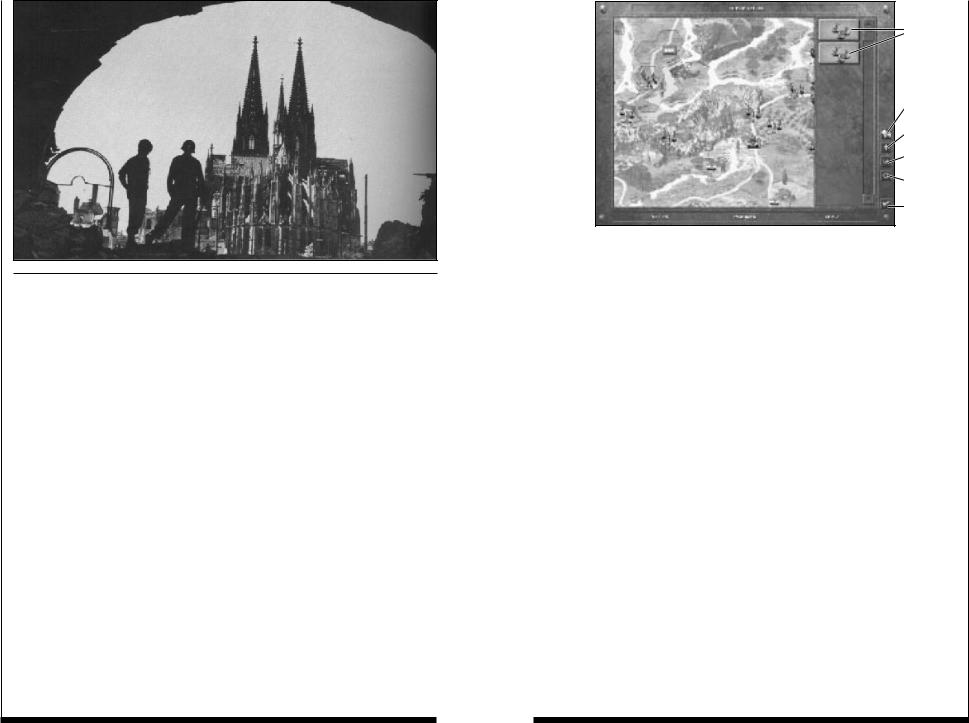
These menus or panels are primarily accessed from the Main Game screen, although some, such as the Game Functions panel, can be reached from several different screens.
Deployment Panel
Clicking on the Deploy Forces button brings up the Deployment panel. You may also see the Deployment panel at the start of a campaign game, when you are allowed to deploy your core units, and at the beginning of certain scenarios in which you also have the option of placing some of your units in their starting positions. You primarily use this panel to deploy units that you requisition during play.
If, however, you are given the chance to deploy your troops at the beginning of a battle, it is best to start by viewing the Strategic map, in order to see the entirety of the contested terrain and evaluate its tactical possibilities.
w Note: If you do not deploy all your forces during your first turn, thereafter you are only allowed to deploy units from their normal deployment zones. Ground units can only be deployed on or adjacent to supply points, and air units are only able to be placed on airfield hexes. In certain battles there are deliberately fewer deployment hexes than needed to reflect certain historic situations.
Available
Units
Requisition
Screen
Air Mode
Strategic
Map
Show Hex
Sides
Exit
Deployment
The Deployment panel is very simple. There is a vertical panel where your units appear, controlled by a scrollbar to their right, and several buttons in the lower right corner of the panel. If you have more than eight units available for deployment, click and hold on the scrollbar slider, and drag the slider down, or click on the up or down arrow of the scroll bar and hold down the mouse button. To place a unit on the Battlefield, click on it and available deployment hexes should darken. You may need to scroll the Battlefield, or transfer to the Strategic map to see these deployment hexes. Ground units can only deploy on or adjacent to supply points you control, while air units can only deploy on airfields or aircraft carriers that you control. In campaign play, special deployment “jump off” hexes are available on your first turn only; otherwise, the same rules apply. Click on a shaded Battlefield hex to deploy the unit.
Click on the Requisitions button to purchase additional units for deployment. See the “Requisitions Screen” section on page 29 for more information.
Use Air Mode to show only air units.
Note: One air unit and one land unit can occupy the same hex.
The Strategic Map button replaces the Battlefield map with the Strategic map. Click on an area of the Strategic map to return to the Battlefield map, centered on the area you selected.
The Show Hexsides button lays a grid on the Battlefield map, which may prove useful in making distance judgments during deployment.
Click on the Exit Deployment button in the lower right corner to remove the Deployment panel.
23 |
THE BASIC SCREENS, MENUS, AND BUTTONS: Pop-Up Panels |
THE BASIC SCREENS, MENUS, AND BUTTONS: Pop-Up Panels |
24 |
Additional Options Menu
When you press the Additional Options button, located on the Options menu bar, a panel slides out to the left of the Options menu, giving access to other game controls.
Status Report
Brings up the Turn panel at the bottom of the Battlefield, on which you can view the turn number, date, weather conditions, and victory objec-
tives. Click on the check mark button to remove the Turn panel.
Hot Keys
Brings up a window listing the hot keys for PANZER GENERAL II. Click on the check mark button to remove the Hot Keys panel.
Audio Settings
Brings up another menu, which slides over the Additional Options menu, from which you can adjust your audio settings.
Clicking this button toggles the music on and off; a depressed gold-tone button indicate the music is on, while a raised button indicates it is off. If the music is on, use the slider bar underneath
the Music button to adjust its volume.
Clicking this button toggles the sound effects on and off; a depressed gold-tone button indicates sound effects are on, while raised indicates that they are off. If the sound effects are on, use the
slider bar underneath the Sound Effects button to adjust their volume.
Click on the check mark button at the bottom of the menu to save the changes and return to the Additional Options menu.
VCR
Brings up the VCR menu, from which you can review previous turns of any saved battle. Four buttons, Play, Stop, Fast Forward and Rewind, control the function. Play plays the current turn. Stop stops the replay of a turn.
Fast Forward advances to the next turn. Rewind returns to the previous turn.
Show Terrain
Removes hexes, ownership flags, and units from the Battlefield map to reveal the terrain. Click on Show Terrain again to exit this mode.
Show Hexsides
This overlays a hex grid on the Battlefield map. Click on Show Hexsides again to exit this mode.
Game Functions Panel
|
|
|
|
|
|
|
Perform |
|
|
|
|
|
Exit Game |
Selected |
|
|
|
|
|
Functions |
|
|
|
|
|
||
Function |
|
|
|
|
|
Panel |
|
|
|
|
|
|
|
|
|
|
|
|
|
|
The Game Functions panel has four main options: New Game, Load Game, Save Game, and Quit Game. Click on an option and then click on the check mark button to select that option. Not all of these options are available from
every screen, for example, you cannot save a game from the Start screen. Options that are unavailable are grayed out. If you change your mind about using any of these options, click on the Exit button on the lower right to return to the previous screen.
New Game
Selecting New Game returns you to the PANZER GENERAL II Start screen, from which you can choose to start a new game.
Load Game
Selecting Load Game brings up a second panel, on which are listed the file names for your previously saved games. If no names are listed, then no games which PANZER GENERAL II recognizes as saved games are located in the PANZER2 directory.
Click on a saved game file to bring up a description of that saved game. If this is the game you wish to load, click on the check mark button at the bottom of the Load Game panel, and click on the check mark again to confirm your choice. If you decide not to load a game, click on the Exit button on the lower right to return to your original game screen.
Save Game
Selecting Save Game brings up a second panel, on which are listed the file names for your previously saved games. Click on a slot that says New Saved Game and type in a file name. Then click in the text box at the bottom of the Save Game panel, and enter a description of the saved game, for later reference.
Note: You cannot save a multiplayer game. Click on the Done button to save the game. The appropriate extension is added to your filename. Your games are saved into the PANZER2 directory. If you decide not to save a game, click on the Exit button on the lower right to return to the previous screen.
25 |
THE BASIC SCREENS, MENUS, AND BUTTONS: Pop-Up Panels |
THE BASIC SCREENS, MENUS, AND BUTTONS: Pop-Up Panels |
26 |
Quit Game
If you choose Quit Game, you are asked to confirm your decision. Click on the check mark to quit your game and return to the PANZER GENERAL II Start screen. If you decide to continue your current game, click on the Cancel button to return to your originating screen.
View Unit Panel
The View Unit panel appears when you right-click on a unit during play.
|
|
|
|
|
|
Unit Plaque |
|
|
Unit Has Experience |
|
|
|
|
|
|
|
|
|
|
|
|||
|
|
|
|
|
|
|
|
|
|
|
|
|
|
|
|
|
Unit Has Leader |
|
|
|
|
Unit Has Organic Transport |
|
|
|
|
|
|
|||
|
|
|
|
||||
|
|
|
|||||
|
|
|
|
|
|
|
|
|
|
|
|
|
|
|
|
Equipment Statistics
Embark-Disembark
Rename Unit
Mount-Dismount
Remove View Unit Panel
Replacements |
Supply |
At the top of the panel, a box states the unit’s experience level and equipment type, and displays an icon of the unit. Below that is the unit’s nationality flag, centered in the first of four rows of icons. The icons give the unit’s current fuel and ammunition supplies, its strength rating, and its attack statistics. If a unit is mounted, the transport’s statistics are shown. Pass the mouse cursor over a statistic icon, and smart text appears, labeling that statistic. For detailed explanations of the statistics, see the “Unit Statistics Descriptions” section, starting on page 83. At the bottom of the View Unit panel are five buttons, which control various unit functions, and the Exit button on the far right.
Mount - Dismount
When using organic transport, units can move more quickly but are more vulnerable to attacks. After you mount or dismount, and move your unit, you may elect to cancel that move. The move you just made cannot be
taken back unless selected immediately after the unit’s movement. A mounted unit uses its transport’s statistics if it is engaged in battle while mounted.
Embark - Disembark
Embarking and disembarking units onto or from air or naval units can only be done at the beginning of a unit’s turn, in other words, a unit may not move or fight before embarking or disembarking. Disembarking ends
the unit’s turn; a unit may not move or attack after disembarking. Embarking and disembarking are not equivalent to mounting and dismounting. For the differences between Air and Sea Embarkation, refer to the “Embarking and Disembarking Air and Naval Units” sections on page 47.
Replacements
Replaces lost strength points and automatically resupplies the unit as described in the “Supply Rules” section, starting on page 52. This action ends the unit’s turn. Ground units can get replacements anywhere; air units can receive replacements only when in a friendly airfield or carrier hex. Naval units cannot take replacements; ship repairs take far longer than the duration of a battle. A unit receives fewer replacements if an enemy unit is adjacent. If more than two enemy units are adjacent, the unit cannot receive
any replacements. Bad weather and desert terrain also reduce replacements.
Click on the Exit button to remove the View Unit panel.
Supply
Supplies the selected unit with up to half its maximum capacity; this is the only action that the unit can take during its turn. Units receiving replacements automatically resupply. Adjacent enemy units prevent resupply except as part of receiving replacements. Weather and terrain can also affect resupply, but a unit is always guaranteed to receive a minimum resupply of one ammo point and one fuel point, regardless of conditions. For more details, see
the “Supply Rules” section, starting on page 52.
Rename
Click here to rename your unit. A text box appears; simply click inside and type to rename the unit.
27 |
THE BASIC SCREENS, MENUS, AND BUTTONS: Pop-Up Panels |
THE BASIC SCREENS, MENUS, AND BUTTONS: Pop-Up Panels |
28 |
Secondary Screens
The Requisition, Field Headquarters, and Dossier screens are all accessed from several points in the game. Exiting from them in most cases returns you to the screen or panel from which you accessed them.
Requisition Screen
The Requisition screen is broken into several parts. An arrow button at the top left of the screen allows you to toggle between different countries’ forces. Beneath that is the vertical row of Unit Class Selection buttons. Clicking on a Unit Class Selection button makes icons appear in the Available Equipment boxes to the right of the Class Selection buttons. These icons represent the various types of equipment in that class that are currently available. Click on one of the Available Equipment boxes; that unit’s statistics appear in the Equipment Statistics area of the screen. Passing the mouse cursor over the statistic icons causes smart text to appear, labeling the icon, but for a detailed explanation of these statistics, see the “Unit Statistics Descriptions” section, starting on page 83. Your Available prestige is given above the Equipment Statistics area.
Available Equipment Boxes |
|
Equipment Statistics |
|
|
|
Requisition
Button
Total Unit Cost
Unit |
|
|
Units |
|
Selection |
|
|
|
Available for |
|
|
|||
Buttons |
|
|
Deployment |
|
|
||||
|
|
|
|
|
Exit
Requisition
Screen
Available Transport Boxes |
|
Transport Statistics |
|
Cancel Last Requisition/Reassign Unit |
|
|
|
|
|
If the selected unit is able to use transport to move, icons also appear in the Available Transport boxes below the Available Equipment boxes. When purchasing units that cannot move on their own, the Truck transport is already depressed. If you wish to choose another type of transport, click on another Available Transport box to select that transport type for the unit, and the cost of the transport is added to the Total Cost of Unit indicator at the bottom of the Available Equipment area. Next to that indicator is the Requisition button; click on it to add the unit to your forces. The unit’s icon appears in one of the Units Available for Deployment boxes on the right side of the Requisitions screen.
If you change your mind, click on the Cancel button to cancel your last requisition. Repeatedly clicking on Cancel continues to cancel your requisitions in reverse order. You can also click on a unit in the Units Available for Deployment area, and click on Cancel to cancel just that requisition. Click on the Exit button at the bottom right on the screen to return to your original screen. If you have made a requisition during a game, the Deployment panel appears. See the “Deployment Panel” section on page 23 for information on deploying your recently requisitioned units.
29 |
THE BASIC SCREENS, MENUS, AND BUTTONS: Secondary Screens |
THE BASIC SCREENS, MENUS, AND BUTTONS: Secondary Screens |
30 |

Requisition Considerations
The prestige cost of units only roughly correlates with their effectiveness, so examine combat values closely before purchasing or upgrading equipment. Remember that an expensive purchase or upgrade has to be balanced against the need for enough prestige to afford replacements for your core units during a tough battle.
Maximum fuel capacity and especially maximum ammo capacity need to be carefully examined. Supply is more of a constraint if the unit is intended to carry an attack to the enemy, than if it is requisitioned to provide stationary defense for a victory objective far behind the front lines. Keep in mind that a unit can easily use up several rounds of ammo in a turn if repeatedly attacked, or if providing defensive fire for nearby friendly units that are being attacked.
Close defense is another statistic that you can regret having overlooked if the unit runs into infantry in the difficult terrain common to most battlefields. A unit defends using its close defense versus infantry, rather than its ground defense value when the battle is in a forest or city, or when a rugged defense occurs.
An evaluation of the statistics of enemy units can be useful in planning which units to requisition. Start by comparing your attack values and defense values against each other to see who has more destructive potential in a fair fight. Then compare initiative values to see who is more likely to initiate combat first, bearing in mind that experienced units receive a bonus to their initiative.
Experience tends to be very important in aerial combat, where initiative values don’t differ much and attack values are high relative to defense values. It is less important in early-war tank combat, where attack values tend to be lower compared with defense values.
Field Headquarters Screen
The Field Headquarters screen allows you to examine all of your forces in detail. On the left side of the screen is a Unit Statistics area, in the center are rows of Unit boxes, and on the right side of the screen are the Field Headquarters menu buttons. You can rotate through the forces of the countries under your control by clicking on the arrow button below the nationality flag at the upper right corner of the Field Headquarters screen. If you have more units of a particular army than can fit in the Unit boxes, use the scroll bar to move up and down through the roster. Clicking on a unit brings up that unit’s statistics, and activates several of the menu buttons.
|
|
|
|
|
|
|
@@h?@@h?@@h?@@@@@@@@e?@@@@@@@@e?@@@@@@@@e?@@@@@@@@?e@@@@@@@@e?@@@@@@@@?e@@@@@@@@e?@@@@@@@@?e@@@@@@@@e?@@@@@@@@?e@@@@@@@@e?@@@@@@@@?e@@@@@@@@e?@@@@@@@@?e@@@@@@@@e?@@@@@@@@?e@@@@@@@@e?@@@@@@@@?e@@@@@@@@e?@@@@@@@@?e@@@@@@@@e?@@@@@@@@?e@@@@@@@@e?@@@@@@@@@@@@@@ |
|
Available |
|
|||||||
|
|
|
|
|
|
|
|
|
|
@@@@@@@@e?@@@@@@@@?e@@@@@@@@e?@@@@@@@@?e@@@@@@@@e?@@@@@@@@?e@@@@@@@@e?@@@@@@@@?e@@@@@@@@e?@@@@@@@@?e@@@@@@@@e?@@@@@@@@?e@@@@@@@@e?@@@@@@@@?e@@@@@@@@e?@@@@@@@@?e@@@@@@@@e?@@@@@@@@?e@@@@@@@@e?@@@@@@@@?e@@@@@@@@e?@@@@@@@@ |
|
|
|
|
|||
|
|
|
@@h?@@h?@@h? |
@@@@@@ |
|
@@@@ |
@@h?@@h?@@h? |
@@@@@@ |
|
|
|
|
Unit Boxes |
|
|||
|
|
|
|
|
|
@@@@ |
|
|
|
|
|
||||||
|
|
|
|
|
@@@@@@@@e?@@@@@@@@?e@@@@@@@@e?@@@@@@@@?e@@@@@@@@e?@@@@@@@@?e@@@@@@@@e?@@@@@@@@?e@@@@@@@@e?@@@@@@@@?e@@@@@@@@e?@@@@@@@@?e@@@@@@@@e?@@@@@@@@?e@@@@@@@@e?@@@@@@@@?e@@@@@@@@ |
|
@@ |
|
|
@@ |
|
|
|
|
|
|
|
|
|
|
|
@@@@@@@@e?@@@@@@@@e?@@@@@@@@e?@@@@@@@@?e@@@@@@@@e?@@@@@@@@?e@@@@@@@@e?@@@@@@@@?e@@@@@@@@e?@@@@@@@@?e@@@@@@@@e?@@@@@@@@?e@@@@@@@@e?@@@@@@@@?e@@@@@@@@e?@@@@@@@@?e@@@@@@@@e?@@@@@@@@?e@@@@@@@@ |
|
@@@@ |
|
|
@@@@ |
|
|
|
|
|
|
||
|
|
|
|
@@h?@@h?@@h? |
@@@@@@ |
|
@@@@@@ |
|
|
@@@@@@ |
|
|
|
|
|
|
|
|
|
|
@@@@ |
|
|
@@@@ |
|
@@@@@@ |
|
|
@@@@@@ |
|
|
|
|
|
|
|
|
|
@@@@@@ |
|
|
@@@@@@ |
|
@@@@@@ |
|
|
@@@@@@ |
|
|
|
|
|
|
|
|
|
@@@@@@ |
|
|
@@@@@@ |
|
@@@@ |
|
|
@@@@ |
|
|
|
|
|
|
|
|
|
@@@@ |
|
|
@@@@ |
|
@@@@@@ |
|
|
@@@@@@ |
|
|
|
|
|
|
|
|
|
@@@@@@ |
|
|
@@@@@@ |
|
@@@@@@ |
|
|
@@@@@@ |
|
|
|
|
|
|
|
|
|
@@@@@@ |
|
|
@@@@@@ |
|
@@@@ |
|
|
@@@@ |
|
|
|
|
Nation |
|
|
|
|
@@@@@@ |
|
|
@@@@@@ |
|
@@@@@@@@ |
|
|
@@@@@@@@ |
|
|
|
|
|
|
|
|
|
@@@@ |
|
|
@@@@ |
|
@@@@@@ |
|
|
@@@@@@ |
|
|
|
|
|
|
|
|
|
@@@@@@ |
|
|
@@@@@@ |
|
@@@@@@ |
|
|
@@@@@@ |
|
|
|
|
|
|
|
|
|
@@@@@@ |
|
|
@@@@@@ |
|
@@@@ |
|
|
@@@@ |
|
|
|
|
|
|
|
|
|
@@@@@@@@ |
|
|
@@@@@@@@ |
|
@@@@@@@@ |
|
|
@@@@@@@@ |
|
|
|
|
Indicator |
|
|
|
|
@@@@@@@@@@@@@@@@@@ |
|
|
@@@@@@@@@@@@@@@@@@ |
|
@@@@@@@@@@@@@@@@@@@@ |
|
|
@@@@@@@@@@@@@@@@@@@@ |
|
|
|
|
|
|
|
|
|
@@ |
|
|
@@ |
|
@@ |
|
|
@@ |
|
|
|
|
|
|
|
|
|
@@@@@@ |
|
|
@@@@@@ |
|
@@@@@@ |
|
|
@@@@@@ |
|
|
|
|
|
|
|
|
|
@@@@@@ |
|
|
@@@@@@ |
|
@@@@ |
|
|
@@@@ |
|
|
|
|
|
|
|
|
|
@@ |
|
|
@@ |
|
|
|
|
|
|
|
|
|
|
|
|
|
|
|
|
|
|
|
@@ |
|
|
@@ |
|
|
|
|
|
|
|
|
|
@@@@ |
|
|
@@@@ |
|
@@@@@@ |
|
|
@@@@@@ |
|
|
|
|
|
|
|
|
|
@@@@@@ |
|
|
@@@@@@ |
|
@@@@@@ |
|
|
@@@@@@ |
|
|
|
|
|
|
|
|
|
@@@@@@ |
|
|
@@@@@@ |
|
@@ |
|
|
@@ |
|
|
|
|
|
|
|
|
|
@@ |
|
|
@@ |
|
@@@@@@ |
|
|
@@@@@@ |
|
|
|
|
|
|
|
|
|
@@@@@@ |
|
|
@@@@@@ |
|
@@@@@@ |
|
|
@@@@@@ |
|
|
|
|
|
|
|
|
|
@@@@@@ |
|
|
@@@@@@ |
|
@@@@ |
|
|
@@@@ |
|
|
|
|
|
|
|
|
|
@@ |
|
|
@@ |
|
@@ |
|
|
@@ |
|
|
|
|
|
|
|
|
|
@@@@ |
|
|
@@@@ |
|
@@@@@@ |
|
|
@@@@@@ |
|
|
|
|
|
|
|
|
|
@@@@@@ |
|
|
@@@@@@ |
|
@@@@@@ |
|
|
@@@@@@ |
|
|
|
|
|
|
|
|
|
@@@@@@ |
|
|
@@@@@@ |
|
@@ |
|
|
@@ |
|
|
|
|
|
|
|
|
|
@@ |
|
|
@@ |
|
@@@@@@ |
|
|
@@@@@@ |
|
|
|
|
|
|
|
|
|
@@@@@@@@@@@@@@ |
|
|
@@@@@@@@@@@@@@ |
|
@@@@@@@@@@ |
|
|
@@@@@@@@@@ |
|
|
|
|
|
|
Unit |
|
|
|
|
|
|
|
@@@@@@ |
|
|
@@@@@@ |
|
|
|
|
|
|
|
|
@@@@ |
|
|
@@@@ |
|
@@ |
|
|
@@ |
|
|
|
|
|
|
|
|
|
@@@@@@@@@@@@@@@@@@@@ |
|
|
@@@@@@@@@@@@@@@@@@@@@@@@@@@@ |
|
@@@@@@@@@@@@@@@@@@@@@@@@ |
|
|
@@@@@@@@@@@@@@@@@@@@@@@@ |
|
|
|
|
|
|
|
|
|
@@@@@@@@ |
|
|
|
|
|
|
|
|
|
|
|
|
|
||
Statistics |
|
|
@@@@@@ |
|
|
@@@@@@ |
|
@@@@@@ |
|
|
@@@@@@ |
|
|
|
|
Field HQ |
|
|
|
|
|
|
@@@@@@@@@@ |
|
|
@@@@@@@@@@ |
|
|
|
|
|
||||
|
|
|
@@@@@@ |
|
|
@@@@@@ |
|
@@@@@@ |
|
|
@@@@@@ |
|
|
|
|
|
|
|
|
|
@@@@@@ |
|
|
@@@@@@ |
|
@@@@ |
|
|
@@@@ |
|
|
|
|
|
|
|
|
|
@@@@@@@@@@ |
|
|
@@@@@@@@@@ |
|
@@@@@@@@ |
|
|
@@@@@@@@ |
|
|
|
|
|
|
|
|
|
@@@@ |
|
|
@@@@ |
|
@@ |
|
|
@@ |
|
|
|
|
|
|
|
|
|
@@@@ |
|
|
@@@@ |
|
@@@@@@ |
|
|
@@@@@@ |
|
|
|
|
Options |
|
|
|
|
@@@@@@@@@@@@@@ |
|
|
@@@@@@@@@@@@@@ |
|
@@@@@@@@@@ |
|
|
@@@@@@@@@@ |
|
|
|
|
|
|
|
|
|
@@@@@@@@@@ |
|
|
@@@@@@@@@@ |
|
@@@@@@ |
|
|
@@@@@@ |
|
|
|
|
|
|
|
|
|
@@ |
|
|
@@ |
|
@@@@@@ |
|
|
@@@@@@ |
|
|
|
|
Menu |
|
|
|
|
@@@@@@@@ |
|
|
@@@@@@@@ |
|
@@@@@@@@@@@@@@ |
|
|
@@@@@@@@@@@@@@ |
|
|
|
|
|
|
|
|
|
@@ |
|
|
@@ |
|
@@@@@@ |
|
|
@@@@@@ |
|
|
|
|
|
|
|
|
|
@@@@@@@@ |
|
|
@@@@@@@@ |
|
@@@@@@@@@@ |
|
|
@@@@@@@@@@ |
|
|
|
|
|
|
|
|
|
@@@@@@ |
|
|
@@@@@@ |
|
|
|
|
|
|
|
|
|
|
|
|
|
|
@@@@@@ |
|
|
@@@@@@ |
|
@@ |
|
|
@@ |
|
|
|
|
|
|
|
|
|
@@@@ |
|
|
@@@@ |
|
@@@@ |
|
|
@@@@ |
|
|
|
|
|
|
|
|
|
@@ |
|
|
@@ |
|
@@@@@@ |
|
|
@@@@@@ |
|
|
|
|
|
|
|
|
|
@@@@@@ |
|
|
@@@@@@ |
|
@@@@@@ |
|
|
@@@@@@ |
|
|
|
|
|
|
|
|
|
@@@@@@ |
|
|
@@@@@@ |
|
@@@@@@ |
|
|
@@@@@@ |
|
|
|
|
|
|
|
|
|
@@ |
|
|
@@ |
|
|
|
|
|
|
|
|
|
||
|
|
|
@@@@ |
|
|
@@@@ |
|
@@@@@@ |
|
|
@@@@@@ |
|
|
|
|
|
|
|
|
|
@@@@@@ |
|
|
@@@@@@ |
|
@@@@ |
|
|
@@@@ |
|
|
|
|
|
|
|
|
|
@@@@@@ |
|
|
@@@@@@ |
|
@@ |
|
|
@@ |
|
|
|
|
|
|
|
|
|
|
|
|
|
|
@@@@@@ |
|
|
@@@@@@ |
|
|
|
|
|
|
|
|
|
@@@@@@@@@@@@ |
|
|
@@@@@@@@@@@@ |
|
@@@@@@@@ |
|
|
@@@@@@@@ |
|
|
|
|
|
|
|
|
|
@@@@ |
|
|
@@@@ |
|
@@@@@@@@ |
|
|
@@@@@@@@ |
|
|
|
|
|
|
|
|
|
@@@@@@@@ |
|
|
@@@@@@@@ |
|
@@@@@@@@ |
|
|
@@@@@@@@ |
|
|
|
|
|
|
|
|
|
@@@@@@ |
|
|
@@@@@@ |
|
@@ |
|
|
@@ |
|
|
|
|
|
|
|
|
|
@@ |
|
|
@@ |
|
@@@@@@ |
|
|
@@@@@@ |
|
|
|
|
|
|
|
|
|
@@@@ |
|
|
@@@@ |
|
@@@@@@ |
|
|
@@@@@@ |
|
|
|
|
|
|
|
|
|
@@@@@@ |
|
|
@@@@@@ |
|
@@ |
|
|
@@ |
|
|
|
|
|
|
|
|
|
@@@@@@ |
|
|
@@@@@@ |
|
@@@@ |
|
|
@@@@ |
|
|
|
|
|
|
|
|
|
@@@@@@ |
|
|
@@@@@@ |
|
@@@@@@ |
|
|
@@@@@@ |
|
|
|
|
|
|
|
|
|
|
|
|
@@@@@@ |
|
|
@@@@@@ |
|
|
|
|
|
|
||
|
|
|
@@@@@@ |
|
|
@@@@@@ |
|
|
|
|
|
|
|
|
|
|
|
|
|
|
@@@@ |
|
|
@@@@ |
|
@@@@@@ |
|
|
@@@@@@ |
|
|
|
|
|
|
|
|
|
@@ |
|
|
@@ |
|
@@@@@@ |
|
|
@@@@@@ |
|
|
|
|
|
|
|
|
|
@@@@@@ |
|
|
@@@@@@ |
|
@@@@ |
|
|
@@@@ |
|
|
|
|
|
|
|
|
|
@@@@@@ |
|
|
@@@@@@ |
|
@@ |
|
|
@@ |
|
|
|
|
|
|
|
|
|
@@ |
|
|
@@ |
|
@@@@@@ |
|
|
@@@@@@ |
|
|
|
|
|
|
|
|
|
@@@@ |
|
|
@@@@ |
|
@@@@@@ |
|
|
@@@@@@ |
|
|
|
|
|
|
|
|
|
@@@@@@ |
|
|
@@@@@@ |
|
@@ |
|
|
@@ |
|
|
|
|
|
|
|
|
|
@@@@@@ |
|
|
@@@@@@ |
|
@@@@@@@@@@ |
|
|
@@@@@@@@@@ |
|
|
|
|
|
|
|
|
|
@@@@@@@@@@ |
|
|
@@@@@@@@@@ |
|
@@@@@@ |
|
|
@@@@@@ |
|
|
|
|
|
|
|
|
|
@@@@@@ |
|
|
@@@@@@ |
|
@@@@@@@@@@ |
|
|
@@@@@@@@@@ |
|
|
|
|
|
|
|
|
|
@@@@@@@@ |
|
|
@@@@@@@@ |
|
@@@@@@ |
|
|
@@@@@@ |
|
|
|
|
|
|
|
|
|
@@@@@@ |
|
|
@@@@@@ |
|
@@@@ |
|
|
@@@@ |
|
|
|
|
|
|
|
|
|
@@ |
|
|
@@ |
|
@@@@@@ |
|
|
@@@@@@ |
|
|
|
|
|
|
|
|
|
@@g@@g@@g@@g |
|
?@@?@@?@@?@@ |
|
@@@@@@ |
|
|
@@@@@@ |
|
|
|
|
|
|
|
|
|
|
@@g@@g |
?@@@@@@@@?e@@@@@@@@e?@@@@@@@@?e@@@@@@@@e?@@@@@@@@?e@@@@@@@@e?@@@@@@@@?e@@@@@@@@e?@@@@@@@@?e@@@@@@@@e?@@@@@@@@?e@@@@@@@@e?@@@@@@@@?e@@@@@@@@e?@@@@@@@@?e@@@@@@@@ |
?@@@@@@@@?@@?@@ |
|
@@ |
|
|
@@ |
|
|
|
|
|
|
|
|
|
|
@@@@@@@@@@@@@@@@ |
?@@@@@@@@?e@@@@@@@@e?@@@@@@@@?e@@@@@@@@e?@@@@@@@@?e@@@@@@@@e?@@@@@@@@?e@@@@@@@@e?@@@@@@@@?e@@@@@@@@e?@@@@@@@@?e@@@@@@@@e?@@@@@@@@?e@@@@@@@@e?@@@@@@@@?e@@@@@@@@ |
?@@@@@@@@ |
|
@@@@ |
|
|
@@@@ |
|
|
|
|
|
|
|
|
|
|
|
|
|
|
|
@@@@ |
|
|
@@@@ |
|
|
|
|
|
|
|
|
|
|
|
|
|
|
@@@@@@ |
|
|
@@@@@@ |
|
|
|
|
|
|
|
|
|
|
|
|
|
|
@@g |
|
?@@ |
|
|
|
|
|
|
|
|
|
|
|
|
|
|
|
@@g@@g@@g |
|
?@@?@@?@@ |
|
|
|
|
|
|
|
|
|
|
|
|
|
|
|
@@g@@g |
?@@@@@@@@?e@@@@@@@@e?@@@@@@@@?e@@@@@@@@e?@@@@@@@@?e@@@@@@@@e?@@@@@@@@?e@@@@@@@@e?@@@@@@@@?e@@@@@@@@e?@@@@@@@@?e@@@@@@@@e?@@@@@@@@?e@@@@@@@@e?@@@@@@@@?e@@@@@@@@e?@@@@@@@@?e@@@@@@@@e?@@@@@@@@?e@@@@@@@@e?@@@@@@@@ |
?@@@@@@@@?@@?@@ |
|
|
|
|
|
|
|
|
|
|
|
|
|
|
|
@@@@@@@@@@@@@@@@ |
?@@@@@@@@?e@@@@@@@@e?@@@@@@@@?e@@@@@@@@e?@@@@@@@@?e@@@@@@@@e?@@@@@@@@?e@@@@@@@@e?@@@@@@@@?e@@@@@@@@e?@@@@@@@@?e@@@@@@@@e?@@@@@@@@?e@@@@@@@@e?@@@@@@@@?e@@@@@@@@e?@@@@@@@@?e@@@@@@@@e?@@@@@@@@?e@@@@@@@@e?@@@@@@@@ |
?@@@@@@@@ |
|
|
|
|
|
|
|
|
|
|
|
|
|
|
|
|
|
|
|
|
|
|
|
Exit Field HQ |
|
|
|
|
|
|
|
|
|
|
|
|
|
|
|
|
|
|
|
|
|
|
|
|
|
|
|
|
|
|
|
|
|
|
|
|
|
|
|
|
|
|
|
|
|
|
|
|
|
|
|
|
|
|
|
Dossier
Brings up the Dossier screen, from which you can review your performance as a general, either in the current scenario, or over the course of the campaign. For more information, see the “Dossier Screen” section, starting
on page 34.
Inspect Unit
Brings up the Inspect Unit screen, from which you can evaluate a unit’s performance in the scenario, or over the course of a campaign. For more
information, see the “Inspect Unit Screen” section, starting on page 35.
Go To Unit
Only usable during a battle, this exits the Field Headquarters screen and centers the Battlefield on the selected unit.
Requisition
Brings up the Requisition screen, where you can purchase new units to add to your forces. For more information, see the “Requisition Screen”
section, beginning on page 29.
w Overstrength Unit
During campaign play, a unit with an experience level of one or greater may be made overstrength using this button. You may only do this between battles, and each time it adds one to the strength of the unit, up to the unit’s experience level. For example, a unit with ten base strength, and two experience levels, may have a maximum strength of twelve. Using overstrength costs prestige points, and each unit may only receive overstrength once after
every battle.
31 |
THE BASIC SCREENS, MENUS, AND BUTTONS: Secondary Screens |
THE BASIC SCREENS, MENUS, AND BUTTONS: Secondary Screens |
32 |
If an overstrength unit is damaged during a battle, replacements only restore the unit to normal strength. However, after the battle, the unit can be made overstrength again, and restored to its previous level. If the unit has not reached its maximum, or achieves a new experience level, it may be made even stronger.
For example, a unit with three bars of experience has been raised to twelve strength. During the next battle they are reduced to nine strength, and take replacements, raising the unit to ten strength. After the battle, from the Field Headquarters screen, you click on Overstrength and the unit is raised to one strength point each time you click, to a maximum of thirteen.
Improving units to overstrength status is a slow process, but provides a combination of numbers and quality that can smash some enemy units with a single attack.
w Upgrade
Activates the Upgrade Unit screen and enables you to change the type of unit within its class and add or change organic transport if available.
You can only upgrade units from the Field Headquarters screen between battles. Upgrading costs prestige points.
Reassign Unit
In campaign play, this command removes the unit from your forces, reassigning it to another general’s command. This frees prestige points for use on a different unit, or new equipment for existing units. This command
can only be used between battles.
Game
Brings up the Game Functions panel from which you can load, save, quit, or start a new game. For more information, see the “Game
Functions Panel” section starting on page 26.
Exit
Exits the Field Headquarters screen, and returns you to the previous screen, or begins a new battle, if you are between battles in campaign play.
w Dossier Screen
The Dossier screen records your performance as a commander, either over the course of a scenario, or a campaign.
On the left are tallied the outcomes of your battles, during campaign play: Brilliant Victories, Victories, Tactical Victories, and
Losses. In the center are the number of enemy units destroyed or forced to surrender because of your leadership, organized by unit class; and on the right are the number of casualties your own forces have suffered under your command.
At the top of the screen are listed the awards, if any, you have been given because of exceptional performance during campaign play, and a snapshot.
Below the snapshot of your general is a name. Click on the name to change it.
On the far lower right of the screen is the Exit button, which returns you to the previous screen.
33 |
THE BASIC SCREENS, MENUS, AND BUTTONS: Secondary Screens |
THE BASIC SCREENS, MENUS, AND BUTTONS: Secondary Screens |
34 |
 Loading...