

THE WORLD OF MISTMARE P 2
MISTMARE ON THE INTERNET P 5
CHARACTER SHEET P 6
GAME WORLD AND TIME P 8
ADVENTURING P 10
ACTION WITH CHARACTERS P 11
USING THE MAP P 12
COMBAT P 16
GAME SETTINGS P 24
VIEW CONTROL P 25
KEYBOARD SHORTCUTS P 26
APPENDIX P 28
WORLD HISTORY AND WORLD ORDER
POLITICS AND CURRENT WORLD ORDER
P 31
1
2
It is near the end of the second millennium. The
old continent has been ravaged by 600 years of
menace: a horrible fog, destroying the minds of
anyone who dares to enter it, is covering most of
what was once called Europe. The Fog has
claimed the lives of millions and pushed the
civilization to the southern lands of the
continent. The Holy Roman Republic, the only
surviving state in the southern part of the
continent, has been unable to fight the Fog,
although it has been practicing powerful and
useful liturgical magic for hundreds of years. In
the 13th century, the Church has been able to
eliminate the plague epidemic using its
then-powerful Link towers, a spell-casting
mechanism connecting all major European
cathedrals, but has been since able only to create a
volatile northern border, preventing the Fog to
spread to its southern lands.
Today the Holy Roman Republic is isolated
:
to the north, the Fog prohibits all passage. Anyone
wandering into the Fog has never returned, their
minds destroyed by the Fog.
Towns that border the Fog are protected with
harmonic tolling, a magical spell cast using
magically crafted church bells. To the south and
east, warring nations of Northern Africa and
Middle East make trade and communication
extremely difficult.
To the west, the Fog has spread to the seas and
prevents sea travel. No ships that have sailed
through the Straits of Gibraltar to the west have
ever returned. The self-contained Holy Roman
Republic, ruled by the Church, enjoys relative
prosperity, although significantly underdeveloped
compared to the rest of the world. The state lives
in feudalism; the Church, using its armed forces
and the Inquisition, a special branch of sorcerer
monks, controls the lives of people. Simple folk
endure and assure each other that one day, The
Prophecy, foretold of old, shall come to pass and
the continent will be saved. Periodically,
peasant revolt to try and shake the iron
rule, but all are crushed.
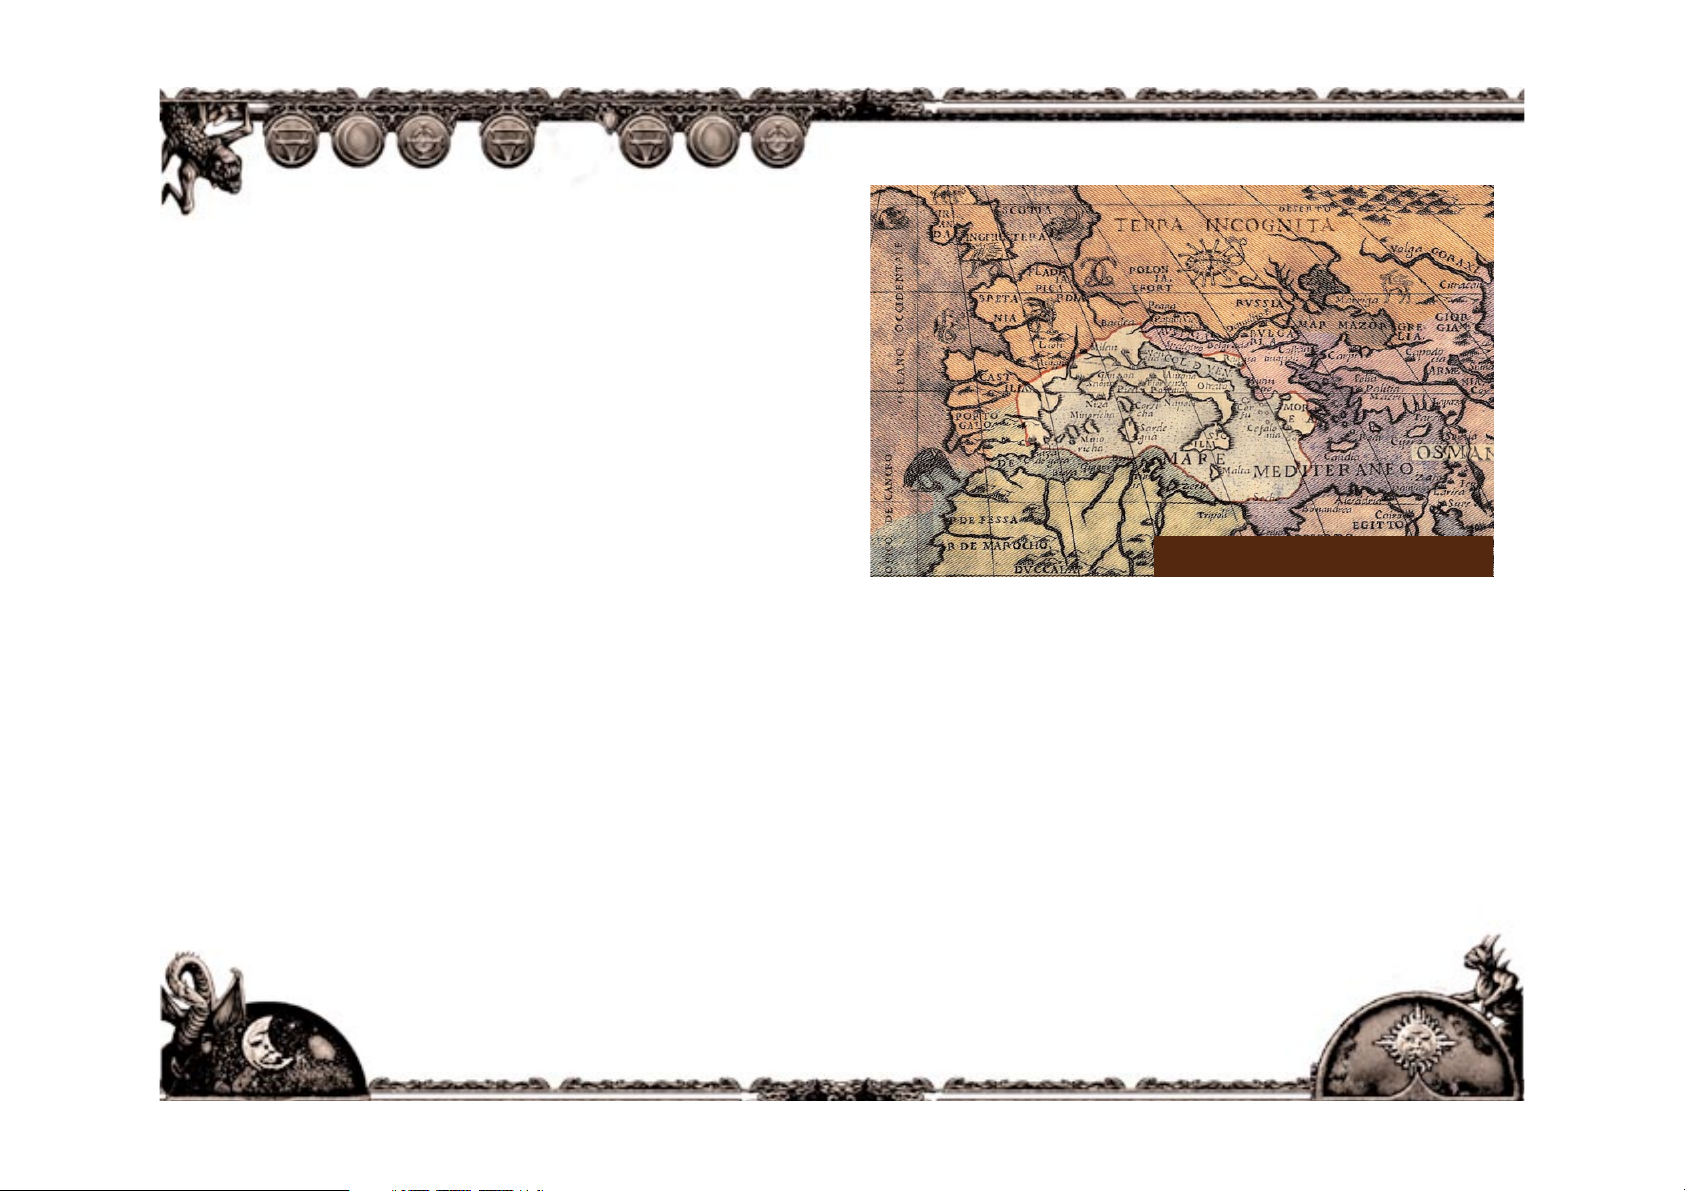
THE WORLD OF MISTMARE
THE HOLY ROMAN REPUBLIC IN 1996 AD
3
MISTMARE ON THE INTERNET
THE OFFICIAL MISTMARE SITE IS
http://mistmare.arxeltribe.com
Make sure you visit it to check for game updates
(problem-fixing patches and new options)
forums, and additional background information
on the game and its world.
USER INTERFACE BASICS
When the game loads, the user interface shows a
three-dimensional view of the world, which is
presented in the main part of the screen. The
game can be controlled solely by mouse, or with
the help of keyboard shortcuts.
T
HE BASIC USER INTERFACE
1. Adventuring interaction/combat school
selection slots
2. Offensive spellcasting
3. Enhancement spellcasting
4. Calendar
5. Time of day
6. Utility belt slot
7. Character sheet
8. Inventory
9. Questlog
10. Map
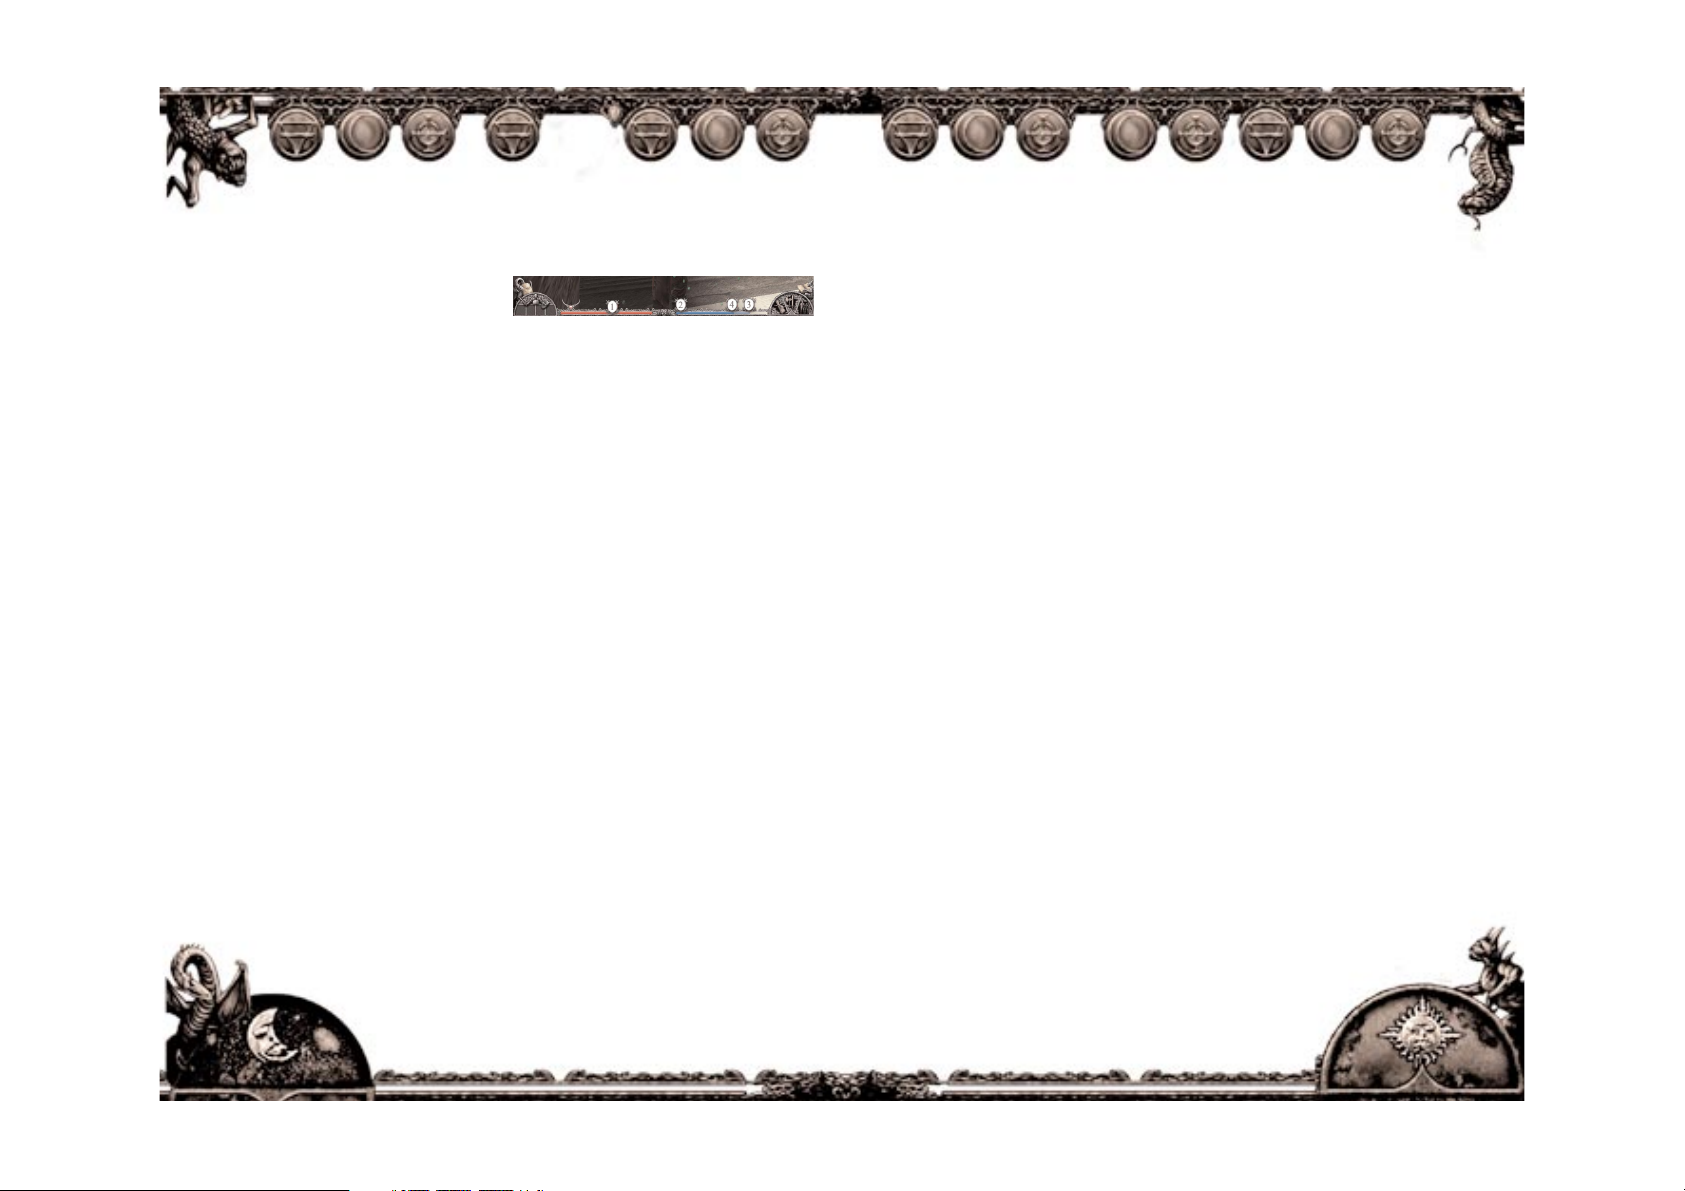
11. Health bar
12. Stamina bar
13. Cursor
Basic character movement and
selection
Character movement and selection of interactive
spots is done using the mouse or the keyboard. If
using the mouse, the following two rules apply:
•
Left-clicking
the mouse button
SELECTS
the object (item, exit, character) under the
current cursor position, enabling you to perform
actions with it
•
Right-clicking
the mouse button directs the
character to
WAL K
(or
RUN
, if the spot is far
away) to the desired spot.
You can also move the character using the
keyboard. Refer to the key mappings section for
more detail.
Interactive objects
You can interact with any active objects in the
environment (exits, props, characters). When you
move the mouse cursor (arrow) over an interactive object, the cursor will change to indicate a
possible action. If notthe cursor does not change,
that object is not interactive at the moment (but
might be at a later time).
Interface functionality
The control part of the interface is divided into
two sections. The upper part provides tools
(icons) for adventuring (search, dig, pick locks,
etc.), combat control, and spellcasting, while the
lower part provides the utility belt (which
contains items and harvesting gems), as well as
indications of health, stamina, and game lengh.
The four gargoyles in the corners of the screen are
quick shortcuts to the
character sheet, map,
inventory, and the quest log/journal
.
You select any function of the main user interface
by left clicking on the required icon. When the
character sheet, inventory, or quest log options
are selected, their respective windows appear
over the screen.
The last peasant revolt against the Church
occurred in the northeastern realms of Carniola in
1978. After the clash between the peasant force
and the Church army, the peasant leaders retreated to the edge of the Fog. When the scouts
reached their camp, they found no survivors except for a raving old man and a crying baby. The
Church soldiers delivered the baby boy to a local
orphanage. The nuns of the orphanage named the
baby Isador - after a local saint, renowned for his
good deeds. At the age of 18, Isador leaves the
orphanage.
Driven by a strong desire to serve God, which had
saved him from the horrors of the Fog, he enrolls
in the Church army corps. During his training in
the south of Spain, Isador comes into mortal
danger, but saves himself by using magical powers,
hidden until this point. He is transferred to the
magic academy of Athens, where he is trained by
the Church liturgical sorcerers, and attains the
rank of brother Inquisitor - a kind of sorcerer
monk order that serves as a special force for
solving the more delicate problems of the church.
YOUR CHARACTER - ISADOR
54
• The middle three circles represent the affinity of the
character towards the three spheres of life. These,
together with the aspect of the character, are used to
produce the secondary statistics (agility, health,
strength, intelligence, concentration, willpower),
which are displayed in the right pane.
•
The three circles on the right represent the resistance
of the character towards the three spheres. Sphere resistance decreases the effects of aggressive spells of that
sphere cast on the character.
On the right pane, all secondary statistics (derived
from the spheres and aspects), combat attributes, and
adventuring skills are represented in a quantitative or
symbolic (bars and symbols) form. Each attribute
(such as health or concentration) is shown with its
level (the numeric value or alternatively, the number
of symbols shown in the upper part of the rectangle)
and the proficiency within that level (the second
numeric value or, alternatively, the growing bar
underneath).
SHOWING YOUR ASPECTS
You can “drill down” to determine how spiritual
and corporeal aspects of your character combine
with your sphere attributes by clicking on the
TREE (corporeal aspect) or the TOWER (spiritual
aspect).
The spiritual aspect defines your mental abilities,
which are
• The concentration, intelligence, and willpower
attributes
• The observation, lore, harvesting, and manipulation skills
• The schools of magic spells (shrieks and harmonies in liturgical magic) your character has
learned)
You can return to the main character sheet screen
or to the corporeal aspect view by left clicking on
the BODY or TREE pictures respectively.
S
PIRITUAL VIEW OF THE CHARACTER SHEET
1. Back to character sheet window
2. Corporeal aspect view
3. Derived spiritual attributes
4. Spiritual skills
5. Enhancement schools of magic
6. Offensive schools of magic
The corporeal aspect defines your corporeal abilities, which are:
• The
health, agility
, and
strength
attributes
• The
ranger, acrobatics, defense
, and
stealth
skills
• The
schools of combat
your character has
learned
You can return to the main character sheet screen
or to the spiritual aspect view by left clicking on
the BODY or TOWER pictures respectively.
C
ORPOREAL VIEW OF THE CHARACTER SHEET
1. Back to character sheet window
2. Spiritual aspect view
3. Derived corporeal attributes
4. Corporeal skills
5. combat schools
CHARACTER SHEET
The character sheet provides insight into the
current attributes (properties) of the player
character, such as health or strength, as well as
the skills the character possesses.
The character sheet is invoked by pressing the
“CHARACTER SHEET” key (by default, “S”) or
left clicking on the top left gargoyle in the main
user interface screen.
The main character sheet illustrates a quick look at
the most important character attributes, which
are created by the three Spheres of Life: the Solar,
Lunar, and Terran Sphere. The left pane shows the
spherical chart of your character (the primary statistics), and the right pane shows the derived (secondary) statistics.
T
HE CHARACTER SHEET WINDOW
1. Character alignment
2. Character spheric affinity
3. Character spheric focus
4. Character spheric resistance
5. Corporeal aspect view
6. Spiritual aspect view
7. Basic attributes
8. Combat attributes
9. Adventuring skills
The size of the nine circles in the left pane
indicates the quantity of an attribute it
represents – the larger the circle, the more the attribute is present with the character.
The nine circles are sorted horizontally in
three groups
• The three circles on the far left (icons of sun, moon,
and earth) represent the ability that the character has
with solar, lunar, and terran sphere. The focus gives
you a bonus to liturgical spells of the appropriate
magic school. A character with a high lunar focus will
use lunar spells with stronger effect.
76
LOCATIONS
Locations are separate parts of Mistmare world
(such as city streets, barber shops,
blacksmith huts, and the like), which are entered
and exited through entrances and exits.
FOG ARENAS
Whenever you venture into the Fog, you face the
danger of its mind-destroying powers: nightmare
creatures appear all around you, and only a warrior of proper skill and abilities can defend himself from such adversaries. Passage through the
Fog is represented with Fog arenas in the world of
Mistmare.
Fog arenas are special locations, which appear as
you enter the Fog, either as a part of a side quest,
or when traveling between cities. A Fog arena is a
world turned dead, full of unknown traps and
creatures. You are required to safely exit the arena
and proceed on your journey, only if you manage
to survive it, of course. Fog arenas are exited via
visible arena exits.
Time passage and time management
In Mistmare, time passes only when certain timeconsuming actions occur between the character
and the world. This means that no time passes
when you simply stand in the street, or perform
less demanding actions, such as talking to
characters, or when fighting enemies. On the
other hand, picking a lock, meditating at a shrine,
or using the sleeping bag will time.
Time passage is indicated on the date and time
corners in the lower bar of the main screen. The
left corner displays the current date, and the right
corner represents the time of day, and is animated
to indicate time passage accordingly.
Each episode in the game has a fixed maximum
number of days (in gametime terms) available to
complete it. The storyline goals can usually be met
well before this time limit expires, so you are able
to use any extra time available to venture on side
quests and enhance your character abilities
through building points.
Bonus time
If you finish a game episode’s storyline earlier
than the episode time limit dictates, you will have
additional time available to enhance your abilities
with side quests or building points, before you
proceed to the next episode. This is
called bonus time, and you might
choose to spend it immediately, or carry it
through to the next episode, where it will be
added to that episode’s time limit.
When playing the game, you will be asked
whether you want to proceed to the next episode.
Use this time wisely to prepare for the challenges
ahead.
Note: Each extra episode will automatically add
some reward bonus days to your bonus time pool.
Time locking
Some of the events in the game are
time-dependent,
when the game can lock its time, not allowing it to
pass beyond a certain limit until the task is met. This
forces you to proceed with playing the main storyline,
and temporarily prevents non-storyline actions (such
as side-quest actions or building point actions until the
current storyline goals are met.
Note: When the game locks its time, a message
“Time locked” will appear in the main interface.
The journal will usually indicate the reason for
locking, and instruct you on how to proceed
playing the main storyline.
For example, an important character in the game
will instruct you to meet him in exactly two days.
You might use those two days to read books or
pray in the nearby monastery. If you go to the
monastery and use the pray action on its altar, a
defined time period will pass (say, six hours).
If you repeatedly pray eight times – two days – the
game will lock its time and force you to proceed
with the storyline the pray option will no longer
be available on the monastery altar. After you meet
the character, the time will unlock and enable you
to proceed freely.
Resting
You can rest by using the standard
Inquisitor issue sleeping bag in your
inventory. Through resting, you can
increase your stamina limit on
demand, at the cost of
spending time.
IMPORTANT PLAYER COMBAT PROPERTIES
The two most important player properties in
combat are health and stamina, which are always
shown in the main user interface as the red
(health) and blue (stamina) bars at the bottom of
the screen respectively.
Health
The
health (red) bar
is diminished when you
are hit by enemy strikes or spells, and
automatically grows when you rest. When the
health bar is exhausted, you will fall unconscious
and wake up in the home location of the current
episode.
Stamina
The stamina (blue) bar defines your current
ability to strike an opponent, or cast a spell.
You will spend stamina with combat actions, and
different schools of combat, and different spells
have different levels of stamina burn (usage).
If your current level is too low for a particular
strike or spell, you have to wait for your stamina
level to grow, or choose a less demanding offensive or defensive move.
Current stamina and stamina limit
The stamina bar indicates two important
aspects: the current stamina (deep blue color),
and the current stamina limit (pale blue color).
The stamina limit indicates the maximum
stamina your character can have at any given time.
Stamina
is used to determine the capability to
strike in combat.
Stamina is decreased when
using combat strikes
. The stamina grows auto-
matically, when the character is not attacking.
The stamina limit is used to determine the capability to cast spells and perform adventuring
actions. Therefore, the current
stamina limit is
decreased when using spells or
adventuring action
s. The stamina
limit grows automatically when
the character is not perform-
ing an activity, and can
be increased on-
demand through
resting (described
in the “Time Passage and Time Management” section of this manual).
H
EALTH AND STAMINA INDIC ATORS
1. Health bar
2. Stamina bar
3. Current stamina limit indication
4. Current stamina indication
Reference Chart
The reference chart gives you an overview and
explanation of the three Spheres of Life and the
connections between all derived statistics and
character properties. You can examine the reference chart by pressing the REFERENCE (BACKSPACE) key.
PLAYER DEATH
The good news is that you cannot die in the
Mistmare world. When your health drops to a
minimum level, you will fall unconscious and
wake up in the starting point of the current
episode.
If you lose a fight, you are able to regain your
health while visiting certain areas to improve your
combat and magic skills. You can then, try combat
again using your newly acquired powers.
Hint: If you win a fight, the defeated opponent
will usually leave some items behind for you to
pick up as a reward (explore the defeated enemy
by clicking on interaction on the corpse).
GAME WORLD
AND TIME
EPISODES
The game is divided into episodes, each of which
represent independent parts of the game
storyline. Each episode is usually set into a city, but
you can not proceed to the next episode until the
goals of the current storyline are met.
98

ADVENTURING
ACTIONS WITH THE WORLD
SELECTING ACTIONS
All actions within the world are selected from the
adventuring actions bar (the four icons in the
upper left hand bar of the user interface). When a
prop, item, hotspot, or character is selected (by
left-clicking on an active object), these icons will
show four possible actions, which can be
performed on that object. Typical actions include
talking to a character, going through a door to
another location, picking a lock, shattering a door,
tolling a bell, praying at a shrine, and so on.
By pressing on the action icon, or pressing on the
keyboard shortcut key (“ACTION 1” through
“ACTION 4” keys, by default mapped on the F1-F4
keys), you will perform the action.
I
NTERACTION INTERFACE
1. Interaction icons
2. Active object indication (cursor)
3. Active object description
4. Action description
Adventuring action icons may become grayed out.
This indicates that there is not enough
time left to perform that Action. This is
a result of a necessary storyline
event, which has to occur for
the game to continue.
Check the quest log or
journal to determine
what to do next.
Prop actions
The most common actions those applied to game
props, such as anvils, closets, chests, doors, etc.
When a prop is selected, all available actions will
appear on the actions icon bar.
Most actions will require some time to accomplish.
This might interfere with the game’s main storyline, which can lock the gametime if an important
event has to occur. In this case, actions involving
props will be grayed out until the storyline current
goals are met. Consult the quest log or the journal
to find out how to satisfy the current game goals.
Location actions
Even a location can have actions related to it.
Examples include a shop (where the idea is to trade
with the shopkeeper) and special actions, such as
helping in a pharmacy, or helping the blacksmith.
When you enter a location, it is the choice of
available action will appear in the actions icon bar.
Shopping
There are different kinds of shops in every episode
of Mistmare offering different items. It would be
wise to check them all. Usually it also pays to return
to the shops, because they might stock different
items. You are not the only person shopping there,
and prices might change overnight.
When you enter a location, which has a trader
inside it (a tavern, a pharmacy, a blacksmith, a
brick-a-brac shop, etc.), the shopping icon appears
automatically in the adventure skills bar.
You do not need to focus anything for this icon to
appear.
SHOPPING USER INTERFACE ACTIVATION
1. Shopping action
2. Other optional location actions
Press the shopping icon to trade in any of these
locations. A double paned window will open.
Your inventory will be shown inside the left pane,
and the purchases available will be shown in the
right pane.
S
HOP INTERFACE
1. Your inventory
2. Shop’s offerings
3. Item action/description button
4. Item price
5. Item description view
Every item shown in the panes has a price
attached to it. Prices of items in your inventory are
the prices the trader is willing to pay you for the
item. Prices of items in the shop’s offerings are the
prices you have to pay the trader to buy that item.
The following actions are available inside a shop
• When you left click on an unequipped item in
your inventory (left pane) you sell that item to the
trader.
•
When you left click on an item in the shop’s offer-
ings (right pane) you buy that item from the trader
• When you left click on the small circle under any
item, you will see the description of the item in
question.
Note: clicking an equipped item in your inventory
will unequip it, making it ready to be sold.
You can exit a shop by clicking on the shopping
icon again, or press the “CANCEL” key (by default,
“ESC”).
ACTION WITH
CHARACTERS
When you select a character, a “talk” option may
appear on the actions bar. Selecting it will start an
interactive dialogue with that character.
D
IALOGUE INTERFACE
1. Dialogue text
2. Interactive answer options
3. Skip dialog node button
When in dialogue, the spoken text will appear in
the main area of the interface. Multiple answer
choices might appear, enabling you to choose different paths through the game.
Hint: Many important facts learned in a dialogue
will be jotted down in your journal.
10
11

Building points
One of the ways to spend time is to use building
points, which are objects, which enable you to
boost your character’s attributes.
Examples of building points include altars and
shrines, where you can meditate to enhance your
spiritual abilities, or the blacksmith’s anvil, where
you can increase your corporeal abilities.
Note: that if an action icon is grayed out on a
building point, time is locked by the game to allow
the main storyline to proceed. When you satisfy
the current storyline goals, you can return to the
building point and continue using it.
Using the inventory, items and weapons
All items you carry around will be stored in your
inventory, from where you can equip them (weapons,
armor, wearable trinkets), put them in your utility belt
(potions, trinkets, etc.), or interact with them.
Using the inventory
You can access the inventory by pressing the
“INVENTORY” key (by default, the “I” key), or by clicking on the left-bottom gargoyle in the main interface.
INVENTORY INTERFACE
1. Item type tabs
2. Inventory scroll left/right
3. Equipped item indicator
4. Item description view
5. Item action/description button
6. Paperdoll (equipped item slots)
The left pane displays the contents of
your inventory. You can use the arrow
keys to scroll through the inventory or use the top
tabs to display only a single class of items
(weapons, armors, key, etc.) present in your inventory. The inventory can hold an unlimited number
of items.
Each item has a small circle underneath it. By clicking on the circle, the description of the item will be
revealed, along with a description of its magical
effects and the spherical chart. The color of the circle indicates the uniqueness of the item: red for
unique items, green for rare items, and no color for
common items.
ITEM DETAILED DESCRIPTION VIEW
1. Item actions
2. Item stats
3. Item spheric chart
4. Item magical effects
5. Item description
Equipping weapons, armour, and trinkets
All weapons, armours, and wearable magic trinkets
are equipped by simply left-clicking them. A small
human figure will appear beside the item, indicating it has been equipped on the character. The right
pane shows the character and his available
equipment slots, together with the equipped items.
You can unequip an item by clicking on it again.
Remember that some weapons are two-handed
and will prevent you from using a shield at the
same time.
In outdoor environments, a map is available (“M”
key). On the map, click on one of the landmarks
and you will run to that spot in the environment.
Quests
The game storyline proceeds in the form of quests,
and you can spend additional time by accepting
side quests (quests not directly related to the main
storyline) and enhance your abilities using
building points (interactive objects or locations,
designed to boost certain ability, at a certain cost).
You will usually accept a quest through a dialogue
with an in-game character. The active quests will
appear in the quest window, accessible through
the “QUEST WINDOW” key (by default, the “Q”
key), or by clicking on the bottom-right gargoyle
in the main interface.
Q
UEST WINDOW
1. Quest log tab
2. Journal tab
3. Game options tab
Quest log
You can see the active quest list and their descriptions
by selecting the quest log tab in the quest window.
By clicking the quest name, its description will
appear in the right pane.
Journal
Your journal will contain all important information you will learn from interacting with the
world and its characters. An on-screen message
will inform you of any updates to the journal,
and you can access journal entries by selecting
the journal tab in the quest window. Journals
are sorted by days, and you can access a day’s
journal by clicking on it.
1312
USING THE MAP

The shield will be equipped, but will
be worn on the character’s back and will not be
used in combat to block strikes. However, its
armour class and any magical effects still apply.
Note: Always equip yourself with weapons and
armour BEFORE entering a fight, as you will not
be able to do so in combat. It is best to stay
equipped throughout the game and only change
certain items if required.
Alternate weapon
At any time, you can equip two weapons, but you
can only use one at the time. You can switch
between weapons with the “SWITCH WEAPONS”
key (by default, “Z”) during combat. The same key
is used to switch between slots in INVENTORY
mode to equip different weapons.
MAGICAL EFFECTS
Items and weapons may have magical effects and
side effects. Those effects are indicated with the
description of the item or weapon. For example,
armor might project an aura, which modifies the
character’s properties; a necklace might prevent all
liturgical magic in the wearer’s surroundings, etc.
If many magical items are equipped, the magical
effects indicators might clutter the user interface.
Use the “EFFECTS TOGGLE” (by default, “E”) key
to show/hide the indicated effects of equipped
items. The effects will still work, and will only be
hidden from the user interface.
Item actions
Many items have actions bound to them. For
example, a set of weights can be used to work out
and boost one’s strength. You can use items in
your inventory and interact with them to spend
time and boost your attributes.
To interact with an item, click on the small circle
under its icon. A description of the item will
appear, and the action icon bar will show any
possible actions possible with this item.
Note: Some items (such as the
Sharpness of Scythe) may
not be sold in the game,
if the storyline
requires it to be
kept.
Note: You can rest by using the sleeping bag
(standard Inquisitor issue) in your inventory.
Through resting, you can increase your stamina
limit on demand, at the cost of spending time.
Using the utility belt
Items which are not equipped directly on the body
of the character, are found in the utility belt. Such
items include health potions and magic trinkets,
and are available for immediate use by pressing the
utility belt activation keys (the “BELT 1” - “BELT 8”
keys, by default mapped on keys “1” – “8”).
By default, these keys are used to immediately activate an item in the utility belt, the number corresponding to the slot in the belt, counting from left.
For example, if the third item in the utility belt is a
large health potion, pressing the “BELT 3” key will
make the character immediately drink that potion.
Such an immediate action is obviously very useful
in combat situations.
Switching between the primary and
secondary utility belts
Switching between the primary and secondary
utility belts
To accommodate for more than eight items on the
utility belt, another secondary belt is available to
hold eight more instant-use items.
You can toggle between the two belts using the
“UTILITY BELT TOGGLE” key (by default, the “B”
key), or clicking the face between the health and
stamina bars.
15
14

• The medium stamina burn, high damage school
of combat (activated by the “ACTION 3” key, by
default, “F3”)
• The high stamina burn, long range school of
combat (activated by the “ACTION 4” key, by
default, “F4”)
After selecting an enemy, press one of the
“ACTION” keys to select the school of combat to
use. An example of a school of combat is the
“Military” school, which is a low-stamina burn,
short-range school.
C
OMBAT INTERFACE
1. Combat school selection
2. Offensive spells
3. Enhancement spells
4. Enemy name, level and health bar
5. Action indicator (change combat school, trap
monster, release monster, cast spell)
6. Buttons/indicators (one/two-handed weapon,
switch weapon, cycle enemies)
If you do not select a school of combat after
selecting an enemy, the first available school of
combat will be selected by default.
COMBAT MODES
With the enemy and a school of combat selected,
you can influence combat in real time by choosing
your character’s behavior in a fight. There are four
basic modes, which you can continuously switch
while in combat:
• GUARD MODE, where the character stays in
place, and strikes the enemy only if the enemy
comes in weapon range. THIS IS THE DEFAULT
COMBAT MODE AND IS AUTOMATICALLY ACTIVATED IF NO OTHER COMBAT CONTROL KEYS
ARE PRESSED.
USER INTERFACE IN COMBAT MODE
Normal vs. combat mode
The user interface switches between normal (or
adventuring) mode, and combat mode, depending on the situation. In normal the “ACTION 1” to
“ACTION 4” keys are mapped to adventuring
actions, while in combat mode, those keys are
mapped to activate different schools of combat.
By default, the user interface is in normal
(adventuring) mode.
Combat Mode
You will enter combat mode when an enemy
moves into your vicinity, and you have either
selected it (focusing it with a left-click), or it has
come inside a certain combat range.
Note:
While in combat mode, you cannot equip yourself with weapons from your inventory. Therefore, it is
extremely important that you enter the combat
equipped, or alternatively, escape the combat by moving away from your enemy (move away and right-click
away from the current enemy), which will revert the
interface back to normal mode.
CONTROLLING COMBAT IN REAL-TIME
Selecting an enemy to fight
When you see an enemy, you can left-click it to
select it and enter combat mode. Double-clicking
the enemy will select it and immediately engage
the “ATTACK” mode explained in the “Combat
modes” section later in this manual.
Note: When more than one enemy is present and
within combat range, you can switch between
enemies using the “SWITCH ENEMIES” key,
explained in the “Switching between enemies”
section later in this manual.
Selecting a school of combat
During the game, you will learn different schools
of combat from other game characters, and you
can then enhance those schools by using them in
combat. Although those schools will have different names, they all belong to one of four classes:
• The low stamina burn, short range school of
combat (activated by the “ACTION 1” key, by
default, “F1”)
• The medium stamina burn, high hit probability
school of combat (activated by the “ACTION 2”
key, by default, “F2”)
1716
COMBAT

USING SPELLS IN COMBAT
Two magic realms are known to the human race in
the game: the Realm of Liturgy and the Realm of
Alchemy.
S
PELL INTERFACE
1. Select offensive school of magic
2. Cast terran offensive spell
3. Cast lunar offensive spell
4. Cast solar offensive spell
5. Select enhancement school of magic
6. Cast terran enhancement spell
7. Cast lunar enhancement spell
8. Cast solar enhancement spell
9. Active magical effects on character
REALM OF LITURGY
Liturgical magic, discovered by the Roman
Church, influences living matter, and is directed
by sound. The knowledge of this realm has spread
throughout the southern territories.
The subject of liturgical study are chords, each of
them consisting of three spherical harmonies or
spherical shrieks, one for each sphere. The
harmonies and shrieks are considered liturgical
spells. The spells of the same chord share certain
similarities, but only affect one of the spheres.
Enhancement spells.
You can cast enhancement spells (or harmonies,
in the realm of Liturgy) on your character to
improve your character’s abilities, such as
increased stamina rate, or faster striking speed. In
combat, they are cast as defensive, fortification or
restoration spells.
The harmonies are more efficiently vocalized by
lawfully aligned characters.You can select and cast
enhancement spells using the following keys:
• “CYCLE ENHANCEMENT MAGIC” key (by
default, the “F5” key) selects the school of
enhancement magic you want to use
• “CAST ENHANCEMENT TERRAN” key (by
default, the “F6” key) casts a terran sphere spell in
the selected school
• “CAST ENHANCEMENT LUNAR” key (by default,
the “F7” key) casts a lunar sphere spell in the
selected school
• “CAST ENHANCEMENT SOLAR” key (by default,
the “F8” key) casts a solar sphere spell in the
selected school
The effect of the spell depends on the school of
magic from which it derives, and the sphere the
spell is cast in.
For example, you can improve your heal rate by
casting a solar sphere spell of the “purification”
school of magic, your proficiency in the spell
school will increase through the use of its spells.
At a certain level of proficiency, additional spell
effects may result. In the mentioned case, you
might be instantly healed.
When a spell is cast empty handed, only the basic
effect is caused. The spell may either be cast at
melee, medium or long range, although the power
may decrease with range.
The power of the effect depends on the
character’s proficiency for the spell and her
natural focusing ability for the sphere. If the spell
is an offensive spell, aimed at another living
creature, that creature’s resistance in the
matching sphere is subtracted from the power.
When a spell is cast using a wielded weapon in
hands, it is considered to be focused, unless the
particular weapon prohibits liturgical focusing.
The character’s natural focus for the sphere is
combined with the weapon’s focus for that
sphere, and with the matching focuses of all focusing items used by the character (talismans, rings,
necklaces...). If the spell is an offensive spell,
aimed at another living creature, that creature’s
resistance in the matching sphere is subtracted
from the combined focusing value.
• ATTACK MODE, where the character attacks the
selected enemy, moving automatically to the best
combat range for the equipped weapon.
You must press the “COMBAT ATTACK” key (by
default, the “8” key on the numeric keypad to
move within the range and strike the enemy. You
must HOLD the “COMBAT ATTACK” key to keep
within the range and continuously strike the
enemy at the first possibility.
• DEFEND MODE, where the character only
defends from enemy strikes and gains stamina by
resting. You must HOLD the “COMBAT DEFEND”
key (by default, the “5” key on the numeric
keypad) to stay in the DEFEND mode.
• RETREAT MODE, where the character retreats
from combat (i.e. walks backwards from the
selected enemy). You must press the “COMBAT
RETREAT” key (by default, the “2” key on the
numeric keypad) to retreat from the enemy.
Some important things to note when using
specific combat modes:
• While in ATTACK MODE, you cannot block an
enemy strike
• While in RETREAT MODE, the character will not
appear to be hit by a blow, but will lose health
nevertheless, if the enemy strike was successful
(i.e. the character cannot play a “hit recovery”
move)
Hint: If you left-click (select) an enemy twice in
succession, the character will enter the ATTACK
MODE and stay in it, therefore continuously
attacking the enemy without player intervention.
Hint: By default, all combat mode selections are
conveniently and intuitively mapped on the keys
of the numeric keypad.
Note: The more actions you perform during
combat, the slower your stamina will grow.
ESCAPING THE ENEMY
While in DEFEND or RETREAT modes, you may
right-click on a spot in the environment to break
out of combat and try to escape the current enemy.
STRAFING IN COMBAT
When engaging the enemy in combat mode, you can
always use the “STRAFE LEFT” and “STRAFE RIGHT”
keys (by default, the “4” and “6” keys on the numeric
keypad) to strafe around the selected enemy.
SWITCHING WEAPONS, HANDS, AND
ENEMIES DURING COMBAT
Primary and secondary weapon.
As mentioned before, weapons are equipped from
your inventory. At any time, you can equip two
weapons, but you can only use one at the time.
You can switch between weapons with the
“SWITCH WEAPONS” key (by default, “Z”) during
combat. The same key is used to switch between
slots in INVENTORY mode to equip different
weapons. The character has to stand still for
weapon switching.
One and two-handed strikes.
Some weapons, such as specific types of axes or
swords, can be used in one or two-handed fashion.
Two-handed strikes are faster, but will burn more
of your stamina. You can switch between
one-handed and two-handed usage of a weapon
with the “SWITCH ONE/TWO HANDED” key (by
default, “X”) during combat.
Switching between enemies.
When multiple enemies are present and within
weapon range, you can use the “SWITCH
ENEMIES” key (by default, “C”) to spread your
focus among them.
Pressing the “SWITCH ENEMIES” key once will
select the nearest enemy, if no enemy is currently
selected. Repeatedly pressing the “SWITCH
ENEMIES” key will cycle through all enemies in
your weapon range, selecting them one at a time.
If you HOLD the “SWITCH ENEMIES” key, you will
enter the multi-attack mode, where your character
will fight multiple enemies automatically,
delivering strikes to all enemies in range one at a
time automatically.
Hint: all three switching options (“SWITCH
WEAPONS”, “SWITCH ONE/TWO HANDED”,
and “SWITCH ENEMIES”) are available as icon
shortcuts, which are revealed if you left-click
on the time (clock) corner (the lower right corner
of the screen).
You might prefer to have these options available
instead of the default indication of time in order to
simplify your combat interface.
ENEMY STATISTICS
When an enemy is selected, its name appears on
the screen along with its health bar and level.
1918

“F9” key) selects the school of offensive magic you
want to use.
• “CAST OFFENSIVE TERRAN” key (by default, the
“F10” key) casts a terran sphere spell in the selected school.
• “CAST OFFENSIVE LUNAR” key (by default, the
“F11” key) casts a lunar sphere spell in the selected
school.
• “CAST OFFENSIVE SOLAR” key (by default, the
“F12” key) casts a solar sphere spell in the selected
school.
If an enemy is selected, you can always cast an
offensive spell on the enemy instead of
performing a classic combat strike, provided you
have enough stamina available.
The following offensive schools of magic and their
associated spells will become available to you, as
you progress through the game:
Disruption
The purpose of this very common chord of
shrieks is to enfeeble an opponent in combat. The
effect is achieved by disrupting the opponent's
balance in a certain sphere, when the high level
effect also influences the basis of the spiritual.
• Terran shriek: Disrupts the opponent's terran
sphere, enfeebling their strength. At a higher level
of proficiency, the stamina growth rate is also
diminished.
• Lunar shriek: Disrupts the opponent's lunar
sphere, decreasing their agility. At a higher level of
proficiency, the attack speed of the opponent is
decreased as well.
• Solar shriek: Disrupts the opponent's solar
sphere, forcing their health to leak. At a higher levels of proficiency, the solar basis of the spirit will
also be disrupted, causing additional leaking
whenever the opponent acts in a hostile manner.
Corruption
This chord has been derived from the Disruption
chord by a late medieval liturgical scholar, who
raised it partially from the corporeal towards the
spiritual aspect. It is not used as regularly, though,
since it may permanently damage the subject's
spiritual aspect.
•
Terran shriek: Corrupts the opponent's terran
sphere, shattering their willpower into a state of
absolute panic. Used by a more skillful sorcerer, it may
cause the panic to spread among other opponents.
• Lunar shriek: Corrupts the opponent's lunar sphere, decreasing their
speed of movement.
The higher proficiency effect is a much more powerful one, inflicting an illusion of agony upon the
subject, paralyzing them almost completely.
• Solar shriek: Corrupts the opponent's solar
sphere, forcing them to attack the shrieker's enemies. At a higher level of proficiency, the opponent will also enter a berserk-like state, increasing
their speed of movement.
Celestial
This chord is an advanced study in Liturgical
weather control, modified to be used in battle. It
controls the elements of the storm, snow, and
wind, being thus a very selective branch of the
celestial school.
• Terran shriek: Causes a lightning strike at the
opponent. At a higher level, the lightning is
chained at other enemies in the vicinity.
• Lunar shriek: Creates a local blizzard to induce
damage. A high proficiency shrieker may also
cause flesh to temporarily freeze, causing the
subject additional damage when striking.
• Solar shriek: Creates a local desert storm, full of
piercing hot sand. The opponent may also choke
from the sand, causing their spending their stamina limit to decrease.
Disintegration
One of the darkest chords in known existence and
officially banned by the Church. Each shriek is an
attempt of shattering the opponent's sphere, causing almost imminent death. Usually, however, it
fails, causing just minor disruption or corruption
effects in the affected sphere.
REALM OF ALCHEMY
Alchemical magic, which you will discover later in
the game, influences dead matter, and is
directed by touch.
The subjects of alchemical study are
elements, each of them manipulated by six elemental
formulae: three
fusion formulae and
three dissolution
formulae.
The magical effects of enhancement
spells currently active on the player are visible as
icons in the bottom right part of the screen, above
the time corner. You can move the mouse cursor
above the icon to see the effect description.
Enhancement spells you cast on your character
will wear off in a certain time period, but the magical effects you gain by equipping certain magical
items will stay for as long as the item is equipped.
Note: you can always cast an enhancement spell
on yourself, regardless of combat or adventuring
mode, if you have enough stamina available.
The following enhancement schools of magic and
their associated spells will become available to
you, as you progress through the game:
Purification
This harmonical chord is the essence of liturgical
magic. Its sounds induce the spheres to vibrate at
higher frequency, making the corporeal aspect of
oneselfone more efficient.
• Terran harmony: Purify the terran sphere,
increasing
one's strength. When used by a skillful
chanter, their body may actually grow for a while,
causing to inspire terror in those present.
•
Lunar harmony: Purifies the lunar sphere,
increasing one's agility. At a higher level, the lunar
resonance is also increased, one of the side-effects
being that each time the chanter strikes an opponent, their attack speed will gain a temporary
boost.
• Solar harmony: Purifies the solar sphere,
increasing the healing rate of the body. A higher
level harmony could cause the subject to be
healed immediately.
Transcendency
The harmonies of the Purification chord have been
refined over the centuries. One of the many variants,
but a very successful one, became known as the
Chord of Transcendency. It goes beyond the purification of spheres, making them glow in an unseen
light. The body affected by the
Transcendency harmonies will be able
to conduct deeds that are other-
wise out of reach for a mere
human.
• “Terran harmony”:
Transcendence
within the terran
sphere. The efficiency of one's strength is multiplied, causing, between other things, higher damage when striking an opponent. At a higher level,
the opponent's terran sphere is also sapped whenever struck, then converted into a health boost for
the chanter.
• “Lunar harmony”: Transcendence within the
lunar sphere. At the lower skill level, this harmony
will increase one's speed of movement, and at the
higher, the speed of actions, like striking, will also
be greatly increased.
•
“
Solar harmony”: Transcendence within the solar
sphere. At the lower skill level, this harmony will
increase one's toughness against the attacks, and
the higher will cause one's stamina to develop
faster.
Twilight
Tales are told that the Twilight chord was
designed by a scholar who had intricate connections with Otherworld beings, most probably the
twilight faeries. Their knowledge of the more mystical properties of the spheres has been combined
with the orthodox diagrams, making it one of the
most peculiar liturgical chords in existence.
• Terran harmony: Twilight of the earth. The invisible darkness surrounding the chanter will cause
anyone attacking them suffer pain and damage.
Chanted at higher level of proficiency, the darkness may spread, it's side-effect forcing the bones
of the dead to rise and fight at the chanter's side.
• Lunar harmony: Twilight of the moon. The
chanter gains an ability to travel in the lunar,
instead of the terran, sphere of the material world.
The movement becomes instantaneous. When the
chanter is a very skillful one, an invisible inhabitant is summoned from that sphere as well, wielding its sword to fight for their cause.
• Solar harmony: Twilight of the sun. The chanter
is surrounded by a soft glow, illuminating their
way. At a higher level, the glow may cause blindness in the enemies.
Offensive spells
You can cast offensive spells (or shrieks, in the
realm of Liturgy) on your enemies in order to
inflict damage or cripple them in various ways.
The shrieks are more efficiently vocalized by
chaotically aligned characters. You can select and
cast offensive spells using the following keys
• “CYCLE OFFENSIVE MAGIC” key (by default, the
2120

HARVESTING INTERFACE
1. Harvesting gem (full)
2. Harvesting gem (empty)
Note: It is recommended to use the primary/secondary utility belt function when using the
Sharpness of Scythe to ensure enough utility belt
slots are available for potions and
magical focuses, as the primary belt is mostly
occupied by harvesting gems (crystals).
Trapping (harvesting) nightmare
creatures
To trap (or harvest) a nightmare creature into a
crystal, you need to have a harvesting weapon (the
Sharpness of Scythe) equipped, and an empty harvesting gem (crystal) installed inside one of its slots.
Then, select a creature to harvest, and press the
button corresponding to the harvesting gem’s
location on the utility belt (the “BELT 1” - “BELT 6”
keys, by default mapped on keys “1” – “6”).
The character will cast a harvesting spell and the
monster will be trapped inside the gem.
Summoning trapped nightmare creatures
To use trapped nightmare creatures in combat,
simply move the cursor on the spot or enemy
where you want the creature to appear, and select
the crystal containing the creature from your belt
(the “BELT 1” - “BELT 6 ”keys).
You can cast a harvesting spell to summon the
creature from the crystal. DO NOT LEFT-CLICK on
the desired summoning spot, as this might select
something from the scenery. It is enough to
simply hover the mouse cursor over the spot over
where you wish to summon the monster.
Note: Your summoned nightmare creatures always
fight on your side against your enemies. After they
are summoned, a circular glow surrounds them,
enabling you to distinguish them from enemy
nightmare creatures or humans.
The glow is colored in the same color as the crystal the creature came from.
Directing the summoned
nightmare creatures around.
To move your nightmare creature around, move
the mouse cursor to the desired location and again
press the number of the crystal the monster came
from (the “BELT 1” - “BELT 6 ”keys). As noted earlier, DO NOT LEFT-CLICK on the desired location,
as this might select something from the scenery.
It is enough to simply hover the mouse cursor over
the spot to which you wish to make the
monster go.
Note: after summoning your creatures and directing them to your enemies, you can merely watch
the fight instead of actively participating in it.
The formula pairs (fusion vs. dissolution) affect three kinds of properties of the material world: substance (chemist: blend vs. extract),
form (blacksmith: forge vs. shatter) and motion
(locksmith: craft vs. disable). The properties
roughly correspond to the spheres of the living
world.
The fusion and extraction formulae are considered alchemical spells. The formulae of the same
element share certain similarities, but only affect
one of the properties.
The alchemical formulae are most efficiently used
by neutrally aligned characters.
Only the elements used by the Warlord alchemists
are modelled in the game.
Reagents are used to cast alchemical spells. There
are six classes of reagents, each of them a
combination of one big and one small spherical
influence:
LARGE SMALL ELEMENTAL REAGENT
INFLUENCE INFLUENCE EFFECT
Solar Terran Fire Sulphur
Solar Lunar Wind Gold
Lunar Solar Water Quicksilver
Lunar Terran Cold
Diamond dust
Terran Lunar Poison Arsenic
Terran Solar Electricity Copper
Reagents come in three standard cartridge sizes:
small, medium and large. The power of reagents
varies and is in general related to the cartridge
size: large cartridges are the strongest. There are
rare exceptions, though, when even a small
cartridge may contain a huge amount of power.
Fusion
The fusion formulae are enhancement spells. They
are used to create magical items or enhance item
properties in a magical way. In combat, they may
be used to enhance the character’s weapons or
armour.
The three fusion formulae of each element are
based on three basic alchemical professions:
chemist, blacksmith and locksmith.
Dissolution
The dissolution formulae are offensive spells.
They are used to extract energies and forces from
reagents or items. In combat, they may be used to
cast magical energies at the enemy.
The three dissolution formulae of each element
are based on three basic alchemical professions:
chemist, blacksmith and locksmith.
HARVESTING USING THE SHARPNESS
OF SCYTHE
During the game, you will be presented with your
weapon of choice, the Sharpness of Scythe. A
tremendously enhanced Solar staff, this weapon
can be used in two ways
•
As a bashing weapon, like the Solar staff, used to
attack human opponents
• As a harvesting weapon, where the special harvesting gems (crystals) in the weapon’s head (the
“rosette”) are used to trap nightmare creatures of
the Fog inside them, which can then be released as
your minions in battles against other opponents
Utility belt change
When you equip the Sharpness of Scythe, you will
notice a change in the utility belt. The first six slots
of the belt can now only be used to host harvesting gems, which you will collect during the game.
Only the two slots on the right of the primary utility belt can be used as general-purpose slots, hosting potions and magical focuses. All items in the
utility belt (including harvesting gems) are still
selected using standard utility belt keys.
23
22

VIEW CONTROL
You can switch camera (and control) modes by
TAB key (by default).
Camera mode: free
By default, the camera (view) of the scenery is
“free”, which means that it keeps absolute angle
you set by cursor keys or mouse middle-button.
Alternative keyboard navigation in this mode is disabled (enabled only when in combat mode) and
you control your character by using “point and
click” with mouse right-button. Pushing the cursor
to the edges of the screen rotates camera in that
direction. Pressing mouse middle-button allows
you to adjust camera angle by mouse. Press mouse
middle-button to return to normal mode again.
Camera mode: first person
By using “first person” camera mode you can
reach camera angles that other two modes can not
(angles close to vertical). Cursors are replaced
with crosshairs. Keyboard navigation is enabled
and you turn the camera together with the character by using mouse. Point and click movement by
using the mouse right-button still works. By clicking the mouse middle-button you toggle free camera mode: camera angle is not bound to mouse
and free-mode cursor is active to find and interact
with hotspots. Press the mouse middle-button to
return to normal mode again. In combat, “first person” mode is inaccessible and the camera automatically switches to a more practical third person
“locked” mode.
Camera mode: locked
“Locked” camera mode obeys the same movement
and cursor interaction rules as the “first person”
mode, except that you can adjust the camera distance from the character by using the “PgUp” and
“PgDn” keys (by default) or the mouse wheel.
Turning the camera (using the mouse) also turns
the character, but alternative “point and click”
movement still works.
Camera controls
The camera can be manually controlled using the
camera rotation and zoom keys. Those keys are
used as follows
• The “ROTATE CAMERA LEFT” key
rotates the camera to the left
• The “ROTATE CAMERA RIGHT” key rotates the
camera to the right
• The “ROTATE CAMERA UP” key rotates the camera up
• The “ROTATE CAMERA DOWN” key rotates the
camera down
•
The “ZOOM CAMERA IN” key zooms the camera in
• The “ZOOM CAMERA OUT” key zooms the camera out
• Pushing the cursor to the edges of the screen
rotates camera in that direction
By default, the manual camera control keys are
bound to the cursor (arrow) keys for rotation, and
the PageUp/PageDown as the zoom in/out keys.
You can also use the mouse wheel to zoom the
camera in or out.
GAME SETTINGS
The game settings are located in the quest log window, accessible through the “QUEST WINDOW”
key (by default, the “Q” key). In the quest window,
select the “game” tab to open the settings window.
You may save and quit the game in this menu.
When you next load the game, it will start at
exactly this point in the storyline, with your saved
character properties.
RESTARTING AN EPISODE AND
RESURRECTING WITHIN AN EPISODE
The restart episode option will reload the current
episode or an already completed episode of your
choice, with your CURRENT character properties.
If your current character is much more powerful
than it was when you first began playing the
episode, the episode statistics (obstacle strengths,
enemy strength) will adjust to make the game
more difficult.
The restore last saved game option will reload latest saved game (game automatically saves when
entering a new location).
When you die in the game, you will be given the
option to either restart the episode, or
resurrect. There are three possible
resurrection options, which may not be present at
all times:
• Resurrect – if chosen, you will resurrect in your
home location, with your health and stamina
restored.
• Resurrect (Level down location) – you will
resurrect at the current point in the game,
somewhere in the same game location; all enemies
will have their difficulty level lowered.
• Retry (Lose bonus day) – you will resurrect at
the current point in the game, somewhere in the
same game location, but will lose a day of bonus
time (the extra time available at the end of each
episode).
Note: Restarting an episode will save your CURRENT character properties as the your initial
episode properties. If you later reload an episode,
those saved character properties will be used.
Note: Sometimes, when you lose in combat, you
will have to resurrect instead of reloading the
game to advance in the storyline.
The settings options allow you to tune the game to
your system. For more information, refer to the
game release notes.
2524

2726
KEYBOARD SHORTCUTSKEYBOARD SHORTCUTS
GENERAL
CANCEL Esc cancels the current selection or action
if no action is in progress it opens
the game menu
REFERENCE CHART
Backspace
brings up the reference chart with info on
the RPG system
ADVENTURING MODE
MOVE FORWARD W* walk/run forward
MOVE BACKWARD S* walk backward
TURN LEFT A* rotate (turn) left
TURN RIGHT D* rotate (turn) right
ACTION1 – ACTION4 F1 – F4 selects an action (on item, character, prop,
location)
CTRL + ACTION1 – ACTION4 CTRL + F1 – F4 show the tool-tip on the selected action
“QUESTS” J opens quest window
CHARACTER SHEET H opens character sheet window
MAP M opens map window
INVENTORY I opens inventory window
SWITCH WEAPONS Z
switches between primary/secondary weapon
UTILITY BELT TOGGLE B
switches between primary/secondary utility belt
BELT 1 – BELT 8
(utility belt – normal) 1 - 8 uses utility belt item 1-8
BELT 1 – BELT 6
(utility belt – harvesting) 1 - 6 uses harvesting gem (crystal) 1 – 6
Note: this is only available when the
Sharpness of Scythe is equipped
CTRL + BELT 1- BELT 8 CTRL + 1 - 8 Show tool-tip for the selected item
EFFECTS TOGGLE P shows/hides magical effect indicators of
equipped items (provides a cleaner view of
the environment when switched off)
COMBAT MODE
ACTION1 – ACTION4 F1 – F4 selects school of combat
F1: low stamina burn, short range
F2: medium stamina burn, high hit probability
F3: medium stamina burn, high damage
F4: high stamina burn, long range
COMBAT ATTACK W moves in range and attack enemy
Note: You must HOLD this key to stay in
attack mode.
* These keys are disabled in the “free camera” mode.
COMBAT DEFEND Q defends enemy strikes only, do not attack
Note: You must HOLD this key to stay in
defend mode
COMBAT RETREAT S retreats from enemy
STRAFE LEFT A strafe left
STRAFE RIGHT D strafe right
SWITCH ONE/TWOHANDED T switches between one- and two- handed
weapon use
SWITCH ENEMIES C switches player combat focus among
available enemies
SCROLL TEXT PgUp/PgDn scrolls up/down dialog, journal,…
SKIP DIALOG Space skips dialog node
SPELLCASTING
CYCLE OFFENSIVE MAGIC F5 selects offensive school of magic
CAST OFFENSIVE TERRAN F6 casts offensive spell in the terran sphere
CAST OFFENSIVE LUNAR F7 casts offensive spell in the lunar sphere
CAST OFFENSIVE SOLAR F8 casts offensive spell in the solar sphere
CYCLE ENHANCEMENT MAGIC F9 selects enhancement school of magic
CAST ENHANCEMENT TERRAN F10
casts enhancement spell in the terran sphere
CAST ENHANCEMENT LUNAR F11 casts enhancement spell in the lunar sphere
CAST ENHANCEMENT SOLAR F12 casts enhancement spell in the solar sphere
VIEW CONTROL
ROTATE CAMERA LEFT Left Arrow rotates the camera left
ROTATE CAMERA RIGHT Right Arrow rotates the camera right
ROTATE CAMERA UP Up Arrow rotates the camera up
ROTATE CAMERA DOWN Down Arrow rotates the camera down
ZOOM CAMERA IN PageUp zooms the camera in
ZOOM CAMERA OUT PageDown zooms the camera out
CYCLE CAMERA VIEW TAB toggles the first person view
TOGGLE CURSOR MODE Caps Lock Toggles between free cursor mode and
camera control mode
CHANGE CURSOR MODE Middle mouse button Changes between free cursor mode and
camera control mode
KEY NAME DEFAULT DESCRIPTION
ASSIGNMENT
KEY NAME DEFAULT DESCRIPTION
ASSIGNMENT

Materia of Life", all the findings of his group are
described and explained. Immediately, the highest
members of the Church begin an analysis of the text,
judging its conformance with the holy dogma.
(1320 - 1330)
The Exchange of Popes
The Church committee declares the manuscript
incompatible
with the dogma. The Pope yields
under pressure, and a massive persecution of
Liturgica scholars is at hand. The scholars, who on
the other hand secretly reached beyond the mere
theory, use their newly acquired abilities to assassinate the Pope and his clique. Cardinal
Accantasan becomes the new Pope, whose first
step is to move the Seat back to Rome.
The agents of the Church, supporting the new
Pope, effectively remove the theological elite of
the Old World. The renewed Church publicly
announces its liturgical magic powers, rejects its
former meddling with profane affairs while
keeping its pastoral service, and transcends into
the sphere of theological, spiritual and Liturgica
research. Scholars search for the true accordance
between the new theory and the dogma, and the
golden age of interpretations begins.
As the king of France has no heir, a continent-wide
war is at hand. The Liturgica scholars secretly
intervene at the last moment, healing the king, and
providing a heir to the throne. This is noted as one
of the first successful political actions of the
liturgical scholars, which will much later serve as
a reason for the foundation of the new Inquisition.
(1330 - 1340)
The Link
After years of research, the Church connects all
the important cathedrals of the Old World into a
system of Liturgica resonance. The system, called
'The Link', is a magical system powerful enough to
enable wireless instantaneous communication
and continent-wide spellcasting across Europe. It
is also a platform for research on weather control
and healing.
(1349)
The Black Death
The plague epidemic erupts in the city of Kaffa in
1347. A ship sailing to Genova brings the disease
onto the main continent in 1348. From
1349 on, the plague epidemics spreads
across the continent, mercilessly slaying whole villages and towns.
The Druid revival in Anglia
The English nobility, led by the king, take
advantage of the situation to establish a new
church. From traditional sources, the druidic
rituals and religion are revived as a basis for their
populist and secessionist goals. To the people,
they spread belief that the plague is the
punishment installed by the old, abandoned gods.
Massive gatherings are organized to renew the
testament with the druidic deities.
After some weeks, the plague epidemics, after
taking a horrible toll of the population, suddenly
stops and effectively vanishes.
End of Black Death: The Fog
A sudden retreat of the disease increases the
political power of the new druids. The
inhabitants of British isles are raised into a riot
against the holy Church, whose temples in
Scotland and Ireland are burnt to the ground. In
England, though, the angry mob casts the bell of
the London Link Cathedral into the Thames.
The last message to arrive in Rome is: "we are
under attack." The Link is now broken, horrifying
the church as it loses influence and magical
power. A rescue army is sent to London immediately by Vatican, but it never returns, never to be
seen again.
In Anglia, the unification of people under the new,
“druidic” rule of the former nobility enables
Scotland and Wales to be finally annexed to form
the new Anglia, a unified state.
The European mainland
Reports arrive from all over Europe, indicating that a fog-like mist is forming
over the land, filling alpine valleys
and moving towards large
cities. “The Fog”, as it is
called, rapidly overwhelms Europe in a
couple of weeks,
covering all cen-
APPENDIX
WORLD HISTORY AND
WORLD ORDER
The game starts in the year 1996 and takes place
in Europe, with an alternative history line,
beginning to differ from the existing one in the
late Middle Ages.
(14th. Century)
Background
The late Middle Ages of Europe. War and disease,
poverty, the struggle for power between the
Church and the feudal rulers. After an
intervention of the French monarchy, the Holy
Seat moves into the city of Avignon.
The Church of this period plays many roles: it is an
institution of diplomacy and ideology andit
meddles into everyone's political affairs across
the Old World. On the other hand, it carries out its
research on sorcery in perfect secrecy. Officially,
though, the Church bans and persecutes sorcery
and witchcraft...
(1290 - 1313)
The birth of Liturgica
Under the Pope's patronage, a group of scholars is
formed secretly within the Church, to discover the
true facts on sorcery and magic. The group has
access to the most protected Vatican
archives, enabling them to study even the oldest
early-Christian and pre-Christian manuscripts.
(1309)
The Holy Seat moves to Avignon
(1313)
The first theory on Liturgica
Brasio Accantasan, a High Cardinal in lead of the aforementioned group of scholars, concludes the key manuscript on the theory of Liturgica, the liturgical magic.
In the manuscript, titled "The Lecture on Triple Nature
of Earth: The Influence of Spiritual Spheres on The
28 29

of emergency and censorship, there are less free
interpretations. All attempts to connect the religious dogma with liturgical knowledge fail, and
the Church starts moving its focus from spiritualism towards material progress.
(18th century)
Unrest in Europe
Social differences widen in South Europe, which
is in an economic crisis. Large upheavals result,
which are quickly stopped in their tracks by the
Church army.
In the east, the Osman Empire starts to display its
expansionistic ambitions. On the Balkans and over
the Mediterranean Sea, the Osman often attack
against the east border. The forces of the Holy
Roman Republic, led by the Church armies, successfully repel all attacks and re-conquer the territory. The Republic secures Greece, extending the
state, and is embraced by the local population. At
the beginning of 19th century, the Holy Roman
Republic and the Osman Empire agree on a permanent, but fragile, peace.
Substantial disagreements appear between the
Moor and Osman states, rendering any long-term
alliance against the Holy Roman Republic unthinkable.
0In the 18th century, a group forms within the
Church, which returns to old investigations about
the nature and origin of the Fog. In old, preChristian notes, they find key data, which might
have forecasted the forming of Fog. Additional
clues, also brought from ancient books, indicate
possible changes, which might happen at the turn
of the millennium.
This group is rumoured to have spawned several
legends, such as the later establishment of the sect
of Harvesters, which are a renegade group of liturgical scholars, and the seeding of the Prophecy,
which survives among the populace and foretells
the end of the terror, produced by the Fog.
The liturgical knowledge of the church increases
steadily through the centuries. The level of lore
skill available today seemed unattainable two
centuries beforehand.
(19th century)
World trade
The Osman Empire and the Holy Roman Republic
establish trade routes, extending to the Far East.
For the first time, Europe is regularly supplied
with Oriental goods.
Using mountain peaks of the South Europe, the
Church establishes a liturgical semaphore system
for a fast communication between the cities,
churches, and monasteries. This is the Churches’
first attempt at replacing the Link on a limited
scale, using the latest liturgical methods.
tral European countries. Anything the Fog covers
turns into badlands, killing every human settler.
Anyone venturing into the Fog never returns.
People, who came close to the Fog, report seeing
monsters, demons, and beasts materializing
around them. Few survive such encounters.
With the Link no longer working, the Fog spreads
over the southern part of Europe. It is weaker and
less lethal near the big cities hosting the Link
cathedrals (Avignon, Rome), but no one knows
why. The Link cathedrals are abandoned, but not
destroyed, as remnants of the past.
(1350 - 1450)
Fighting Fog
Years of darkness in horror across
Europe
The Fog spreads more slowly towards the south,
allowing the Church to devise an emergency plan
of defence. An old liturgical technique of chiming,
a form of resonant bell-tolling, originally designed
to control the weather, proves as a powerful
repelling weapon in pushing the Fog back from
the Mediterranean region. A borderline is established, and constant liturgical tolling is required to
keep the Fog at distance.
The Fog disturbs and disconnects many well-established trade routes and means of communication.
The south stays isolated for centuries. Officially,
nothing is known of the nations up north, or even
if any such nations persisted after the Fog's
appearance.
(1450)
The Holy Roman Republic
In the middle of 15th century, the Fog stretches
from the Atlantic Ocean to Siberia, all possible
contacts beyond the south of Europe with any
other part is blocked. The Link has been broken
for a hundred years, disabling all long-distance
communication and unified liturgical control over
Europe.
The Italian church steps up its
fight with the Fog and push-
es it to a line which now
defines the north bor-
der. Even by using
its strongest spells
of tolling, this new equilibrium cannot be disrupted.
The Church completes its political reformation,
and then apparently subsides in the background.
Its real influence, however, becomes stronger
through time, exerting pressure through its covert
operations.
The public believes that feudal reign is supreme
and unobstructed, with the Church providing
only pastoral, liturgical, and theological services.
The Church establishes four prime monk orders
to research the Basic truth, the connection
between Christian dogma and Liturgica.
At the north border, the Church remains
important in its defence role, perfecting their
skills of the tolling in the Church sorcery labs. The
big city cathedrals become independent units, led
by the most competent cardinals.
The states of Italy, France, Spain, and all remaining
Fog-bordering territories join to form a single
state, the Holy Roman Republic, ruled by the
Senate, comprised of local feudal lords (barons)
and citizen nobles.
The Moors conquer North African territories,
presenting a new threat to the Republic.
(15th century)
The fall of Byzantium
After the fall of Byzantium into Osman hands, the
Italian Church has no other Christian opposition
in Europe.
(17th century)
The Italian Church formally establishes its secret
service, the Inquisition, and no longer hides its
political ambitions. Using its powers, based on
liturgical knowledge, it controls official rulers.
Using large donations from the ruling class, the
Church is also able to establish its own mercenary
army, used for interventions in various parts of
South Europe.
All attempts of the Holy Republic to regain South
Spain’s Moor-ruled territories fail.
The spiritual development in the South fades. The
constant threat of Fog and Moors allow for a state
3130
 Loading...