


TABLE OF CONTENTS |
|
INTRODUCTION................................................................................................ |
1 |
Quick Start............................................................................................................ |
1 |
GETTING STARTED.............................................................................. |
2 |
System Requirements ................................................................................ |
2 |
Installing the Game .................................................................................... |
2 |
Electronic Documentations.......................................................................... |
3 |
Starting the Game ...................................................................................... |
3 |
TUTORIAL................................................................................................ |
4 |
Basic Information ...................................................................................... |
4 |
Reviewing Your Troops................................................................................ |
5 |
Building a Unit .......................................................................................... |
8 |
Deploying Your Troops ................................................................................ |
9 |
Turn 1 ........................................................................................................ |
11 |
Turn 2 ........................................................................................................ |
14 |
Turn 3 ........................................................................................................ |
15 |
Turns 4 & 5 ................................................................................................ |
16 |
Lashing Out at Luga .................................................................................. |
16 |
Race for Riga.............................................................................................. |
18 |
THE BASIC SCREENS, MENUS, AND BUTTONS........................ |
19 |
The Start Screen ........................................................................................ |
19 |
Playing a Scenario...................................................................................... |
20 |
Playing a Campaign .................................................................................. |
22 |
Playing a Multiplayer Game........................................................................ |
25 |
Creating a Battle ........................................................................................ |
29 |
The Headquarters Screen............................................................................ |
30 |
The 3D Battlefield ...................................................................................... |
34 |
GAME CONCEPTS.................................................................................. |
37 |
Game Turn ................................................................................................ |
37 |
Movement .................................................................................................. |
38 |
Combat ...................................................................................................... |
41 |
ARMY MANAGEMENT ........................................................................ |
45 |
Leaders ...................................................................................................... |
45 |
Orders........................................................................................................ |
51 |
Equipment.................................................................................................. |
57 |
Unit Class Descriptions .............................................................................. |
60 |
TROUBLESHOOTING .......................................................................... |
65 |
CREDITS .................................................................................................. |
67 |
1 INTRODUCTION: Quick Start
INTRODUCTION
Can you be the next great general? You have four campaigns to find out.
From the burning waste of the steppes, to the outskirts of Moscow, you lead the forces of the Soviets or the Germans as you battle across beautifully rendered 3D battlefields. In PANZER GENERAL III SCORCHED EARTH your commanders are the key to the optimal use of every class of unit, from Infantry to Bomber. Special abilities for leaders and units mean no two armies are ever the same, and no two battles have the same result. Bold manoeuvering and careful use of equipment can often mean the difference between victory and defeat.
Quick Start
You can install PANZER GENERAL III SCORCHED EARTH by inserting the game disc in your CD-ROM drive, and following the on-screen instructions. If you encounter difficulty installing the game, or for more detailed instructions, see the section Getting Started, immediately following. Once the game is installed, double-click on the PANZER GENERAL III SCORCHED EARTH icon to begin. (You can also start the game from the Programs menu.) When the introductory movie ends, the Main Menu screen appears.
You can begin a game from this screen, or if you want a brief introduction to the game, select Tutorial from the Main Menu and open the manual to the Tutorial section beginning on page 4. It provides a step-by-step battle plan to familiarise you with the screens and basic features of a PANZER GENERAL III SCORCHED EARTH campaign. For more detailed information on or about the game as a whole, turn to Basic Screens, Menus, and Buttons and Game Concepts, starting on pages 19 and 37, respectively.
In addition, hot text is available throughout the game. Hot text is a brief description of game interface that is activated by placing the mouse cursor over a screen element. You can also right-click on most buttons and options for a detailed explanation.

GETTING STARTED: System Requirements 2
GETTING STARTED
This section provides detailed information on installing and running PANZER GENERAL III SCORCHED EARTH on your computer. If you encounter technical difficulties during installation or game play, consult Troubleshooting beginning on page 65.
What Comes With the Game
Your game box should contain this User Manual, and a PANZER GENERAL III SCORCHED EARTH CD. This manual explains how to play and contains important information on menus, campaigns, scenarios, unit classes and equipment. Additional documentation is available in PDF format on the game CD. To get the game running on your computer, see the installation instructions following.
System Requirements
To play PANZER GENERAL III SCORCHED EARTH, be sure your system meets the following minimum system requirements:
•Pentium® 2, 266 MHz IBM PC or compatible
•32 MB of RAM
•Windows® 95 or Windows 98 - NOTE: This is a Windows 95/98 game and cannot be played on Windows NT systems, including Windows 2000. Multitasking is not recom-
mended when playing PANZER GENERAL III SCORCHED EARTH
•An uncompressed hard drive with 350MB free
•8 X CD-ROM drive or faster
•A 4MB 3D Video Card
•A 100% Windows compatible mouse
In addition to the basic system requirements, the game requires that DirectX 7.0 be installed to your hard drive. The option to install DirectX 7.0 appears during the game installation. At the end of installation, you are prompted to register PANZER GENERAL III SCORCHED EARTH electronically. For network play, you need a DirectPlay compatible network adaptor. For internet or head-to-head modem play, you need a DirectPlay compatible modem.
PANZER GENERAL III SCORCHED EARTH also features online game play access via the Mplayer® network. For installation instruction and system requirements, see What is Mplayer.com? on page 26.
Installing the Game
You must install PANZER GENERAL III SCORCHED EARTH game files to your hard drive and have the PANZER GENERAL III SCORCHED EARTH CD in your CD-ROM drive to play this game. Insert the CD into the CD-ROM drive. When the pop-up window appears, click on the Install option. If you have disabled the Autorun function, or if it does not operate, explore the CD and dou- ble-click on the Setup icon. Follow all on-screen prompts to complete the installation.

3 GETTING STARTED: Starting the Game
Uninstalling the Game
Choose Settings from the Windows Start menu, and select Control Panel. In the Control Panel, select Add/Remove Programs, left-click on PANZER GENERAL III SCORCHED EARTH, and click on the Add/Remove button. The game and all of its components are then removed from your hard drive, except for your saved games and edited scenarios.
Electronic Documentation
Located on the game CD are two documents formatted as Adobe Acrobat files. Unitdb.pdf contains detailed tables listing the abilities of every unit in the game. Refcard.pdf is a brief summary of useful game play information that can be printed for your reference.
If you do not already have the Adobe Acrobat Reader, you can install the software following these instructions:
Insert the game CD in your CD-ROM drive, explore the CD, and double-click on the acroread folder, located in the root directory. Double-click on the file entitled ar405eng.exe and follow the on-screen prompts.
Once Acrobat Reader is installed on your system, you can read the document by opening the start menu, clicking programs and then the PGIII Scorched Earth folder and select either of the two pdf files listed there.
Starting the Game
Every time the CD-ROM drive is closed with the CD in place, the Panzer General III Scorched Earth Autorun program displays a menu with the options to run the game, install DirectX, install Adobe® Acrobat®, and view the Readme.txt file. PANZER GENERAL III SCORCHED EARTH can also be started by opening the Start menu, selecting Programs, choosing the folder where the game was installed and clicking on the PANZER GENERAL III SCORCHED EARTH program item.
For complete and specific “how to play” information, please refer to the appropriate sections of the manual. Some changes were made too late to include in this manual. Please read the Readme.txt file in your game directory for more information.
Note: Screen saver utilities should be turned off before starting to play PANZER GENERAL III
SCORCHED EARTH.
Saving Games
PANZER GENERAL III SCORCHED EARTH requires space on your hard drive for Saved Games and temporary files. Each saved game can take up to 200Kb of hard drive space.
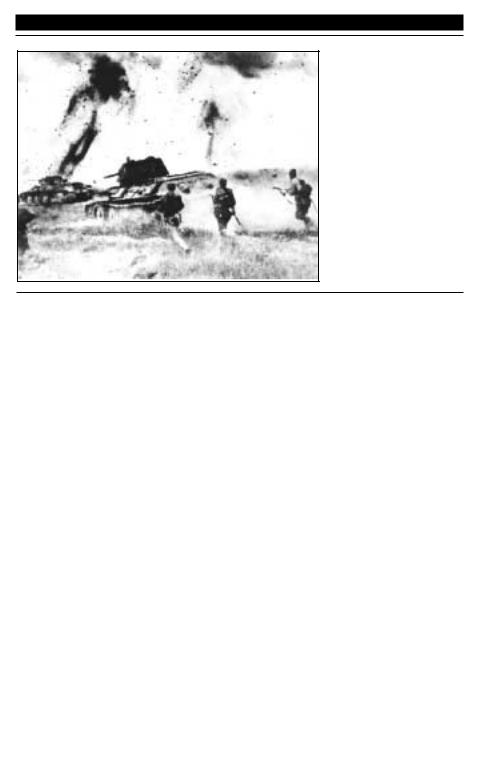
TUTORIAL: Basic Information 4
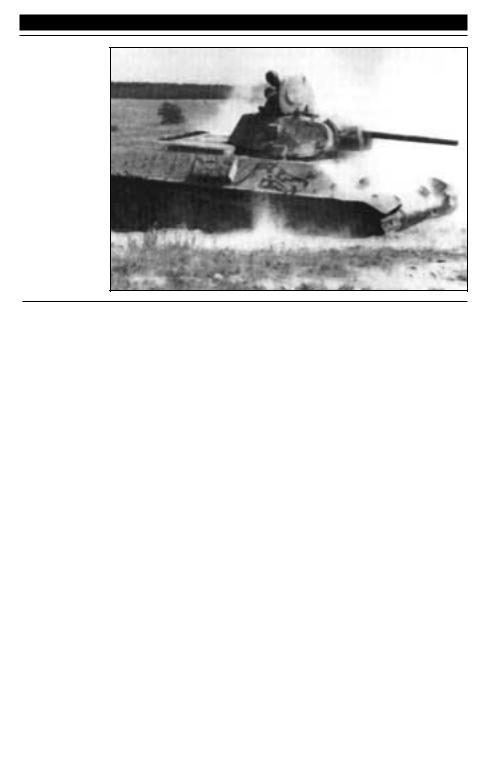
T-34 on the advance.
TUTORIAL
This tutorial is intended to explain basic menus and button functions, and to step you through an introductory scenario. For detailed information about the menus and options in PANZER GENERAL III SCORCHED EARTH see Basic Screens, Menus, and Buttons, starting on page 19. For explanations of various aspects of play, see Game Concepts, starting on page 37. For detailed strategy notes and game play hints, see the Readme.txt or Readme.pdf file, located in your PG3D directory.
Basic Information
Before you run the tutorial there are a few things you need to know:
Using the Mouse
In this manual, the term “left-click” means move the mouse pointer to the desired area on the screen and pressing the left mouse button. Left-clicking selects units, presses buttons, and operates screen features.
“Right-click” means move the mouse pointer to the desired area and pressing the right mouse button. Right-clicking once on a unit, piece of equipment, or leader icon displays a card with information about that unit, equipment, or leader. Right-clicking on a button opens a help box with descriptive text about that button’s function.
In PANZER GENERAL III SCORCHED EARTH, whenever the mouse stops over a button or icon, smart text describing the area under the cursor appears over the object in question. When the cursor stops over a terrain hex or unit, information appears in the small info cards in the bottom centre of the 3D Battlefield. This makes identifying buttons and units easy during game play.
5 TUTORIAL: Reviewing Your Troops
Equipment Class and Type
In this tutorial, there are two important ways of referring to equipment (your units), one is equipment class and the other is equipment type. There are eight different equipment classes in PANZER GENERAL III SCORCHED EARTH: Infantry, Tank, Recon, Anti-tank, Artillery, Air Defence, Fighter, and Bomber. Within each class are numerous types, for example: within the tank class of units, the T-34/76A is one type, and the KV-1 is another type.
Starting the Tutorial
At the Start screen choose Tutorial from the main menu, which brings you to the Campaign map. Later in the Tutorial and in other campaigns, this screen allows you to choose the path your army takes in a campaign. For now, there is only one battle available, indicated by the Russian flag icon. When you click on the flag, a brief description of the battle to take place appears at the bottom of the screen. Left-click on the checkmark that also appears to Load the Scenario.
Once the Loading screen clears, the Scenario Info screen appears. The main feature of the screen is a scenario briefing, which describes the objectives of this particular mission. In this case your primary task is to capture the city of Novobila. Continue to the Headquarters screen by left-clicking on the checkmark button.
Reviewing Your Troops
Motor Pool |
|
|
|
|
|
|
|
|
|
|
|
|
|
|
|
|
|
|
|
|
|
Change Leader |
|
|
|
|
|
|
|
|
|
|
|
|
|
|
|
|
|
|
|
|
|||
|
|
|
|
|
|
|
|
|
|
|
|
|
|
|
|
|
|
|
|
|
||
|
|
|
|
|
|
|
|
|
|
|
|
|
|
|
|
|
|
|
|
|
|
|
|
|
|
|
|
|
|
|
|
|
|
|
|
|
|
|
|
|
|
|
|
|
Sort Order |
|
|
|
|
|
|
|
|
|
|
|
|
|
|
|
|
|
|
|
|
|
|
Available Leaders |
|
|
|
|
|
|
|
|
|
|
|
|
|
|
|
|
|
|
|
|
|
|
|
|
|
|
|
|
|
|
|
|
|
|
|
|
|
|
|
|
|
|
|
|
|
|
|
|
|
|
|
|
|
|
|
|
|
|
|
|
|
|
|
|
|
|
|
|
Change Sort Order |
Slots Available |
|
|
|
|
|
|
|
|
|
|
|
|
|
|
|
|
|
|
Exit Headquarters |
|||
|
|
|
|
|
|
|
|
|
|
|
|
|
|
|
|
|
||||||
|
|
|
|
|
|
|
|
|
|
|
|
|
|
|
|
|
|
|
|
|
|
|
|
|
|
|
|
|
|
|
|
|
|
|
|
|
|
|
|
|
|
|
|
|
|
|
|
|
|
|
|
|
|
|
|
|
|
|
|
|
|
|
|
|
|
|
|
|
|
|
|
|
|
|
New Unit |
|
|
|
|
|
|
|
|
|
|
|
|
|
|||
|
|
|
|
|
|
Roster Bar |
||||||||||||||||
|
|
|
|
|
|
|
|
|
|
|
|
|
|
|
|
|
|
|
|
|
|
|
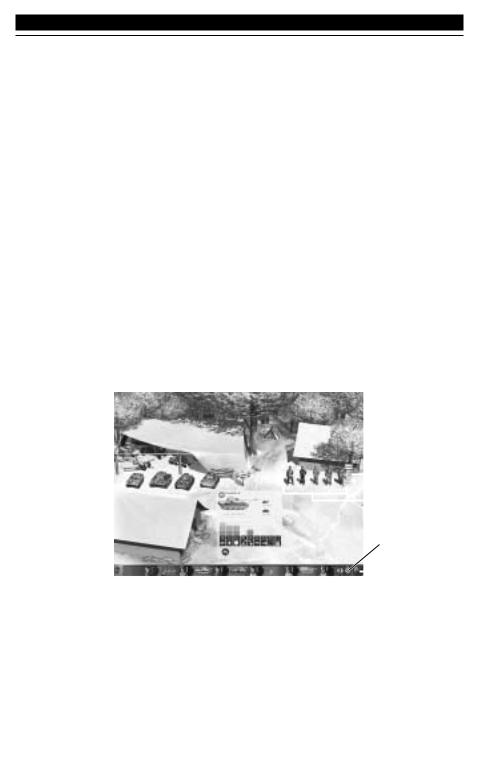
This screen is one of the most important parts of PANZER GENERAL III SCORCHED EARTH because this is where units are built by selecting equipment and assigning a leader. The screen has three tents displayed: the Motor Pool Tent in the upper left, the Leader’s Tent in the upper right, and the Command Tent in the lower left. The area in the lower right is the Parade Ground where information about your units is shown. Across the bottom of the screen is the Roster bar, a strip of tabs which is the roster of your units.
TUTORIAL: Reviewing Your Troops 6
Roster Bar
If you examine one of the roster tabs, you can see that there are two icons plainly visible on each tab. The icon on the left represents the equipment type, the icon on the right represents the leader. On the left end of the Roster bar is a circle containing a number, in this case it should read 02. This is the number of unit slots you have in your army that can be filled by building units.
At the right end of the Roster bar are scroll arrows, the Change Sort Order button and the Exit button. Left-clicking on the Change Sort Order button changes the order that units are displayed, indicated by the small icon above the button. The choices are:
•Tank Icon: Sorts the roster by equipment class in the following order: Infantry, Tank, Recon, Anti-tank, Artillery, Air Defence, Fighter, Bomber
•Flag Icon: Shows the promotion level of the unit’s leader with the highest on the left
•Heart Icon: Shows the unit’s health
•Arrows Icon: Shows the number of actions remaining
Move the cursor to the bottom of the screen and right-click on one of the units in the Roster Bar. Two large cards appear in the Parade Ground. These cards reveal an important aspect of the game, since each unit consists of a leader (on the right) and an equipment type (on the left).
Unit Cards
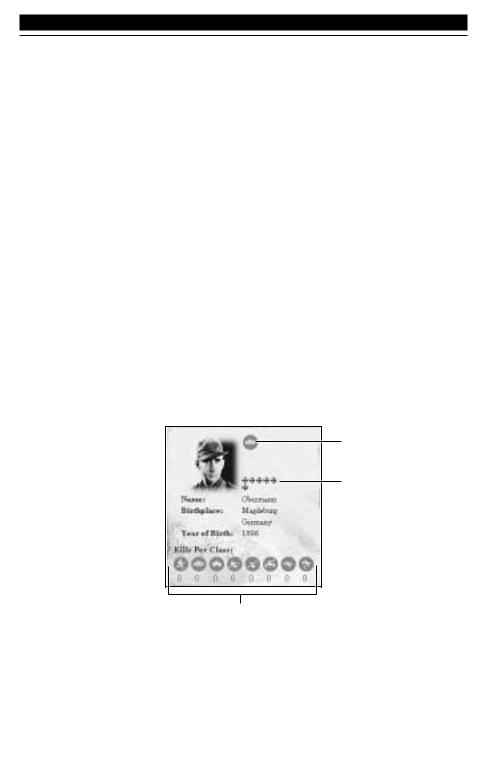
All of the information that appears on the Leader and Unit Cards is discussed in detail later in this manual, see Leader Cards and Equipment Attributes starting on pages 46 and 58 respectively, so for now only what you need to know to play the tutorial scenario will be explained.
Class
Promotion Level
Number of Kills
The most important information on the Leader Card at this time is the round icon next to the leader’s portrait and the row of symbols (iron crosses) below it. The first round icon represents the equipment class of the leader. A leader can be assigned to command any kind of equipment, but if they are assigned to an equipment class they don’t match, they suffer certain restrictions. See Orders, starting on page 51 more information.
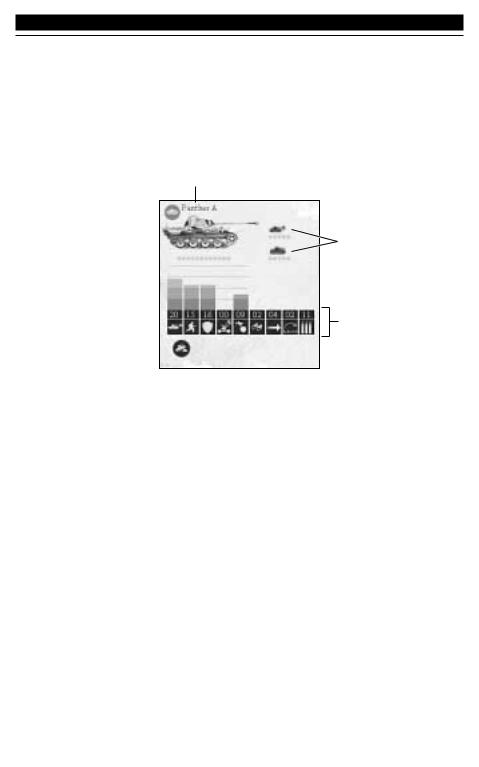
7 TUTORIAL: Reviewing Your Troops
The row of symbols indicates the promotion level of the leader; the number of actions, called regular orders, that this leader may perform in a given turn. Some examples of actions include: move, fight, dismount from transport, rally from suppression, entrench, resupply, or refit. Actions are also used to activate veteran orders which are unique to each equipment class and give the unit benefits for a particular kind of action. These symbols are different for each nationality in PANZER GENERAL III SCORCHED EARTH: the Soviets have red stars, the Germans have small, gray crosses.
Type Name
Equipment Class 
Equipment Attributes
Equipment Statistics
Equipment Specials 
The equipment card shows a photo of the equipment and a firing tank icon above a truck icon just to the right of the photo - all three have rows of green dots beneath them. The dots below the equipment photo represent the Strength attribute of the equipment. As a unit takes damage, these dots change colour. The row beneath the firing tank icon represents the Fire attribute, the number of times that equipment can shoot. The row beneath the truck icon represents the Move attribute, which is the maximum number of times the equipment can move. These factors are limited by the capability of the leader attached to a particular type of equipment. No unit can move or attack more times than the leader has actions.
Across the bottom of the Unit Card are the unit’s statistics; the higher the number, the better the rating. The shaded graph above each rating gives a quick reference of the relative strength of each rating. The ratings are:
•Hard Attack |
•Air Attack |
•Air Defence |
•Firing Range |
•Soft Attack |
•Defence |
•Sighting Range |
•Profile |
•Close Combat |
•Indirect Defence |
•Move |
•Ammo |
More information about these can be found under Equipment Attributes starting on page 58.
Click on the cards to close them and clear the way to build a unit to fill your available unit slot.
TUTORIAL: Building a Unit 8
Building a Unit
There are some leaders standing in front of the Leader’s Tent, go ahead and right-click on each in turn. As their Leader Cards appear in the Parade Ground, note which equipment icon is shown, and the number of actions they can perform. For this scenario, they are unlikely to have more than three actions, so their equipment class is an important factor. Leaders are generated randomly, with differing levels and class abilities. You have only two open slots available, so you will want to chose the tank leader with the highest level by left-clicking on its figure, which moves that leader into the Roster bar and a new tab with a green background appears. If no tank leader is available, you may select a different class leader. The number of slots shown on the left end of the Roster bar changes to 01.
Equipment is selected from one of the eight classes represented by the icons in the Motor Pool Tent in the upper left part of the Headquarters screen; Tank, Anti-tank, Infantry, Fighter, Artillery, Air Defence, Recon, and Bomber. Left-click on a piece of equipment to display the array of equipment types available to you at this time. These appear in a row in front of the tent. Move the cursor over the motor pool tent, and then click on the tank icon, located in the upper-left corner of the tent. The available tanks that you can requisition will be displayed in front of the motor pool tent. You can view the equipment information by right-clicking these tanks. Holding the cursor over a piece of equipment gives you a quick look at it for easy comparison of the different types available. You will notice that the tank on the far left, a Panther A, has the highest ratings. Choose this tank by left-clicking on it, which moves the equipment onto the tab, assigning it to the leader you selected previously.
If you change your mind about the unit you built, scroll through the Roster bar until you see a unit tab with a green background, this is your new unit. Left-clicking on this tab disbands your unit and returns the equipment to the Motor Pool and the leader to the Leader Tent. Your available slots goes back up to 02 if you disband this unit, and goes back to 01 when you build a new one. For your second new unit you might consider a bomber or second tank.
Promoting a Leader
Activate Promotion Cursor
Parade Ground
Promote Leader
9 TUTORIAL: Deploying Your Troops
You begin the campaign with three promotions which you may give to your leaders; based on how well your army does in the battles, you may be rewarded additional promotions during the course of a campaign. It is up to your discretion which of your leaders receives a promotion, though a leader can only receive one promotion per battle.
To promote a leader, left-click on the medals display located on the back wall of the Leader’s Tent. This will bring up red flags on the parade grounds above the Roster bar where the leaders you chose stand for review. You may then select the leaders to be promoted by left-clicking on their icon in either the Roster bar if they are assigned to a unit or their icon in front of the Leader’s tent. If you have more than six unassigned leaders in your army, you may view up to twenty of them at once by left-clicking on the blue sign on the post outside the Leader’s tent.
Since the battle you are about to fight in the tutorial is a short one, you will want to promote the leaders which are already assigned to units so they will have the greatest mobility and power possible at the start of the battle. An easy way to decide which leaders to promote is to sort them according to promotion level by left-clicking on the sort button located to the right of the Roster bar until the flag icon appears. You can then scroll to the right to find the lowest ranking leaders. Left-click on the last three units in the Roster bar to move the leaders onto the parade ground for promotion. Award each leader a promotion by left-clicking on the red flag beneath his icon.
Once you have finished building your units and promoting your leaders, left-click on the red button with the X on it at the far end of the Roster bar to proceed to deployment.
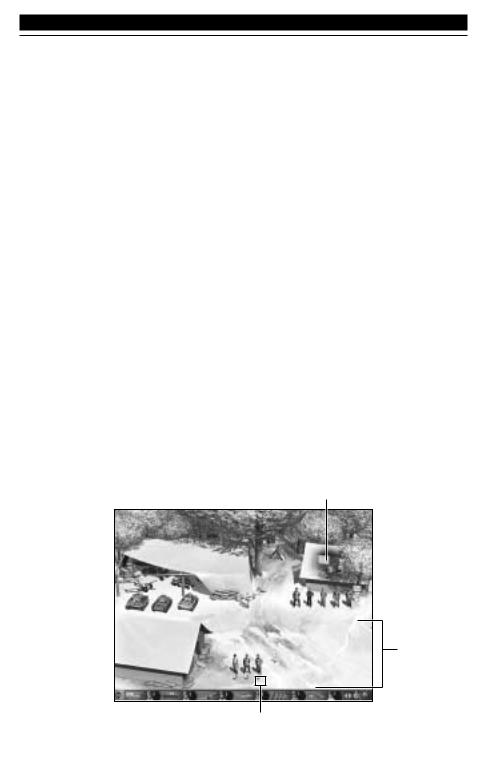
Deploying Your Troops
What Your Screen
Might Look Like
After Deployment
Currently Selected Unit
 Exit Deployment
View Strategic Map

TUTORIAL: Deploying Your Troops 10
The locations where you are able to deploy units are highlighted with brighter spots and the cursor changes to include the “Deployment OK” symbol (two curved downward pointing arrows). Click on one of the highlighted spots to deploy the unit you just built. A good spot would be to shore up your right flank by placing your new unit on the bridge below and to the left of the town of Uryupinsk, which is held by your Grenadiers. If you decide you would like to place the unit in another spot, you can click on the unit again, putting the unit back in the Roster bar, and then select another deployment spot by clicking on another highlighted location.
Viewing the Game Map
In order to place your troops where they will be most effective you may need to manipulate the map. Once play has started, rotating the screen in a 3D environment is critical to finding both your units and the enemy units. Rotating the 3D environment will also allow you to take full advantage of the terrain and Line of Sight.
Scrolling across the map in PANZER GENERAL III SCORCHED EARTH is achieved simply by moving the cursor to the map edge of the direction you wish to scroll. To rotate the screen, right-click on the map and hold it down. Then move the mouse pointer to the centre of either the right or left side of the screen. The screen will rotate to either the left or right depending on what side of the screen you moved the mouse pointer.
Zooming the map is a similar process. Simply right-click and move the cursor to the top of the screen to zoom closer and move the cursor to the bottom of the screen to zoom farther away.
To tilt the map vertically, use the PageUp and PageDn keys.
Viewing the Strategy Map
Airfield
City 
During your deployment phase, you may wish to view the overall battlefield. Click on the Strategy Map button, the one that looks like a compass, located on the bottom-left side of the Interface bar. This takes you to the strategic map where you can review the entire battlefield from a bird’s eye perspective to locate objectives and plan your strategies. See Strategy Map on page 36 for more detailed information.
When you are finished reviewing the map and deploying your new unit, click on the red EXIT DEPLOY MODE button in the lower-right corner to start your first turn.
11 TUTORIAL: TURN 1
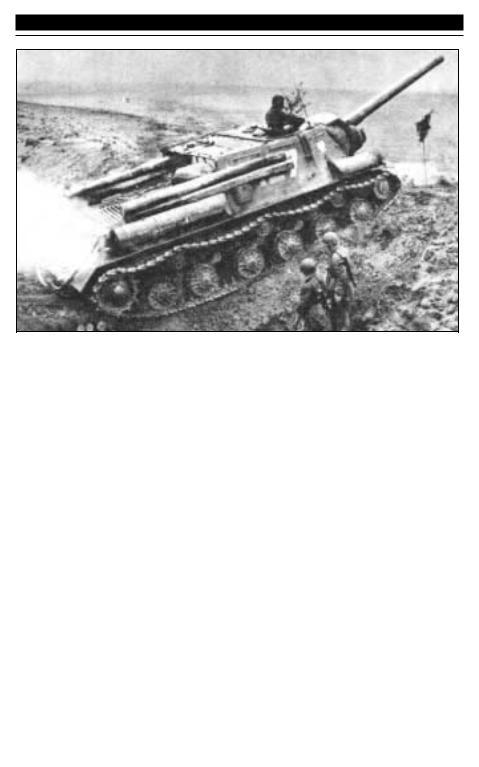
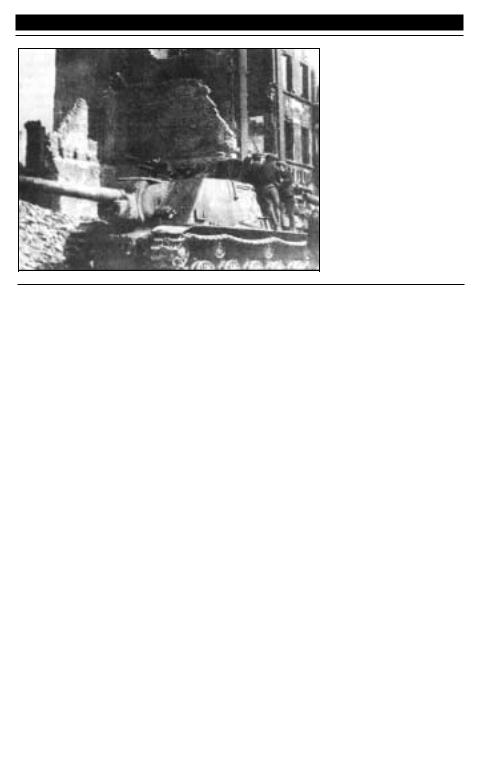
Zveroboy:
A Soviet ISU-152 "Animal Killer" tank destroyer.
Turn 1
Your turn begins with a view of the game map; your Stosstruppen unit is selected.
Scouting the Area
Select your PSW 234/2 reconnaissance unit as the active unit by either clicking on it in the Roster bar or on the tactical map. If you are unsure which unit is the PSW 234/2, you can briefly hold the cursor over the various units on the map and the right-hand card in the centre of the interface bar will change to indicate the type of equipment under the cursor. The type of terrain, along with its elevation and map coordinates, is similarly displayed when the cursor is not over a unit.
Once you have selected the unit, a yellow highlight appears under the unit to indicate it is the active unit, while the green highlights indicate where that unit can move. The active unit is also highlighted in yellow on the Roster bar. The small info cards in the centre of the interface bar now change to display information about the selected unit with the equipment type and Strength attribute on the left side, and the leader portrait and number of actions on the right.
The left of the equipment card are two rows of coloured lights with the Fire and Move attribute icons next to them. The top row only displays three green lights, meaning that this unit could fire three times. The rest of the row is black, indicating that three is the maximum number of times this type of equipment could fire. The bottom row has four green lights, three yellow lights and the remainder are black. This unit could move up to seven times if the leader that was assigned to it had that many actions. If this leader improves later, some of the yellow lights will become green.
Move your PSW 234/2 reconnaissance unit by left clicking on the green highlighted hex that is the farthest along the road towards Novobila. This will bring your unit within spotting range of a Russian Conscripts unit and a KV-85 tank. Leaders in the Recon class have a special ability they may use only when assigned to Recon equipment type; namely, their first move is always free. So there are still three green lights for both attributes, Fire and Move.

TUTORIAL: Turn 1 12
The reconnaissance unit’s primary function is spotting enemy units, and you can increase the effectiveness of this by using an action to have your unit send out patrols which increase its spotting range. Click on the Recon Patrol action button (the binoculars icon in the first row of buttons) to activate this special ability called a Veteran Order. Note that now, both the Fire and Move indicators have only two green lights, this is because the Recon Patrol order used up one of the leader’s actions. Doing so reveals a Russian 45mm Anti-tank unit south of the forest.
Charging the Line
One of the key concepts in modern warfare is combined arms tactics, which is the use of different weapons together to deliver a swift and lethal attack. You will want to use these tactics in order to break through the defensive line formed by the Russian units near the road.
Select your JU87G Bomber and fly it over the Russian tank by clicking on the green highlight in the hex with the tank. The highlight turns red when the Bomber arrives over its target to indicate that the tank may be attacked. Move the cursor over the KV-85 tank and it changes to an attack reticle, with numbers on either side of it. These are the estimated losses for this combat, friendly on the left, enemy on the right. These are not guaranteed, and may be altered by special abilities or unknown factors for either side such as an unspotted artillery piece. This is merely a tool for estimating any given unit’s ability to damage another unit it is capable of attacking. When this cursor appears in the hex over the KV-85 tank, fire on it by left-clicking.
You can examine the battle results by right-clicking on the enemy unit to bring up its Unit Card. Red indicates a strength point that has been destroyed, yellow indicates a suppressed strength point, green means OK. Suppressed Strength attribute points return at the end of the turn but are not available on attack or defence until then. Click to close the card. Your first attack is unlikely to have destroyed or fully suppressed the Russian tank unit, so you will want to attack it a second time; and then bring up your StuGIIIG Anti-tank unit to finish off the KV-85.
Artillery is generally very effective against Infantry units, so select and then move your 15 sFH 18 artillery unit within firing range of the Russian Conscripts. The 15 sFH 18 has a range of 4, which you can check by right clicking on the unit, either on the tactical map or in the Roster bar, to bring up its equipment and Leader Cards. Select the artillery unit and left-click on the furthest highlighted hex down the road, which should put your unit within range. Dismount the artillery so it is ready to fire by clicking on the far right button of the lower row of the unit actions (the two arrows at right angles). Moving and dismounting use one action each, leaving the 15 sFH 18 a single action, unless you promoted its leader. You may now fire on the Conscripts by left-clicking.
It is important to note before making a direct attack on the Conscripts, that they are in forest terrain. Forest gives Infantry an advantage over other equipment classes by providing cover for the Infantry and making it difficult for tanks to manoeuver. You therefore want to use your own Infantry to make the attack, so select and move your Stosstruppen unit into the forest next to Conscripts. This requires two moves. Again, if the first attack is insufficient to destroy the enemy, you will want to make a follow-up attack. If the unit retreats, however, you should use the Stosstruppen’s remaining action to pursue the enemy. By having one of your units adjacent to the damaged enemy unit, you prevent that unit from refitting and regaining its Strength attribute. Move your Tiger tank down along the road in preparation for an attack on the 45mm Anti-tank gun. Also move your Panther A down the road west of the river to guard against an attack by the enemy, as well as setting up your own flanking attack.
13 TUTORIAL: TURN 1
Preparing Your Defenses
Now that you have beaten back the enemy’s forces, you should use your remaining units and actions to prepare for a possible counterattack by the enemy. Bomber units, for example, are vulnerable to enemy Fighter attacks, so protect yours by bringing up your Me 109g Fighter unit. Select the Me 109g, and then click on a highlighted hex adjacent to the shadow your Bomber casts on the ground. This puts your Fighter next to the Bomber so that it can provide protective fire if an enemy attacks. You should also move your 20mm(Q) FlaK Air Defence artillery into a position to protect any vulnerable units. A good place to set up your ADA would be on the road at the edge of the forest. Be sure to remember to dismount your ADA so it is ready to fire.
Move your Elefant forward to protect your artillery. However, leave your Grenadier Infantry unit in Uryupinsk in order to protect the town. This is your enemy’s primary victory objective, and if your enemy captures it, you lose the scenario. Units automatically entrench at the end of your turn if they have the available actions.
Finally, you can use your PSW 234/2 unit’s remaining actions to either chase down any damaged enemy units, or move it adjacent to one of your forward units to help camouflage it from enemy spotting. The latter is a special ability of reconnaissance units, and can be used very effectively in setting up ambushes to trap the enemy.
Before Ending Your Turn
Look at your Roster bar, if all of your units have moved the background colour of their tab is dark gray, if any have actions remaining the tab background is light gray. Now might also be a good time to go through your roster and examine all your units for damage. Any units with yellow dots indicating suppression, and any actions left, can try to Rally using the button with the flag on it in the regular orders row. End your turn by clicking on the red button in the lower-left corner of the screen.
What the 3D Battlefield
May Look Like at the Current Weather
End of Turn 1.
Options Panel
 End Turn

TUTORIAL: TURN 2 14
Turn 2
If possible, you will first want to hunt down and destroy any enemy units you attacked and damaged in the previous turn in order to finish them off while they are in a weakened state, thereby saving your own units costly attacks against refitted units.
Hunting the Enemy
It is likely that the Russian 45mm Anti-tank gun and/or Conscripts retreated towards the river if they were damaged but not destroyed. Move your Panther A across the river to search for enemy units in that area, and attack them if possible. Your reconnaissance unit should prove valuable in seeking out the enemy, so move along a sweeping path through likely enemy areas. For example, you can skirt along the edge of the forest and approach the enemy airfield, using the Recon Patrol order to spot well hidden units. Then, as you find the enemy, move in other units to destroy them. With its long range, your JU87G Bomber is especially useful in mopping up retreating enemy units like the 45mm Anti-tank gun.
Taking Care of Your Troops
You should also refit any of your units which suffered serious damaged. Left-click on the Change Sort Order button until the heart icon is visible, which sorts your units by their Strength attribute. Notice that some of your units now have a red background instead of the light gray. This indicates that they have suffered damage in combat. As a unit becomes more and more damaged, the red background spreads across the tab. Units with more than 25% damage, have a small amount of red, units with more than 50% damage have a greater amount, and units with more than 75% are red all across. The other important factor about having taken damage is that the unit may suffer damage to a specific attribute, either Move or Attack, and lose actions in one area while retaining actions in another. The green or yellow lights for your unit’s actions on the Interface bar turn red if this is the case.
Units can run out of ammo and/or become damaged during combat. A yellow warning flag appears on a unit when its ammo supply is running low; and this flag turns red if the unit is completely out of ammo. Two of the buttons on the Orders row remedy this situation. If they are not adjacent to an enemy unit, for one action the Resupply order replenishes a unit’s ammo supply.
The Refit button can also only be used when no enemy units are adjacent. This order takes the entire turn, but restores all destroyed strength points and provides full resupply while repairing one attribute, either Move or Fire. More information is available under Refit and Resupply on page 52.
Preparing for an Assault
The Russians may have responded to your attack by sending an IL-2M3 Bomber after one of your units. If the Bomber is visible, intercept the enemy with your Fighter. Remember, you can determine an air unit’s exact location by its shadow on the ground. Select your Me 109g and then click on a spot adjacent to the enemy Fighter’s shadow. Once your Fighter has moved, attack by clicking on the enemy air unit. This should eliminate the IL-2M3 or send it fleeing.
Since your army is still slightly out of reach of its primary objective, concentrate on setting up for an assault on your primary objective during this turn. This is best achieved by moving your armoured units such as tanks and Anti-tanks into forward positions, with support units such as artillery just to the rear. Group your units in this manner on the road, with your Tiger tank in the lead. If there is an enemy T34/76C next to that attack it with your tank. Go ahead and attack any other units within range as long as it does not expose your own unit. After all, it never hurts to soften up the enemy before an assault.
15 TUTORIAL: TURN 3
Turn 3
At times during the course of a battle, you may be given the opportunity to bring in reinforcements. The turn information pop-up indicates when new slots are available. Slots also become available whenever you lose a unit in combat. Since it is often difficult to rush reinforcements to the front lines, you usually want to bring them in as soon as they become available, as is the case at the beginning of turn three.
Bringing in Reinforcements
Click on the Headquarters button, the flag on the right hand side of the interface bar, in order to return to the Headquarters screen to build a new unit. Do this in the same manner as at the beginning of the battle, selecting both a leader and a piece of equipment to form the unit. You want a unit that can get to the battle quickly, and nothing does this better than a paratrooper, called a Fallschirmjäger in the German army. Once you have created one, return to the tactical map and click on the Toggle Deploy button in order to deploy the Fallschirmjäger. Place your Fallschirmjäger in the airfield so that you can paradrop the unit on this turn.
Making a Paradrop
With the Fallschirmjäger unit selected, notice that the cursor changes as you move it beyond the unit’s ground movement range, when it stops over an otherwise legal hex. Before performing the paradrop, scout the target area as much as possible. Dropping into the midst of enemy units would likely mean the end of your paratroopers.
Use your reconnaissance unit to scout the area around the airfield. Protecting the town is a Katyusha 132 artillery piece and a GAZ/37 Air Defence unit. The latter should be your first target, since it prevents your Bomber from being able to make an effective attack. Move the closest of your tank units to attack the GAZ/37, destroying it if possible.
Once the Air Defence artillery has been taken care of, you are ready for the paradrop. Select your Fallschirmjäger by clicking on it in the Roster bar. Then move your cursor to an unoccupied hex next to the Katyusha 132 which should be in Novobila, and click on that location. The artillery can provide support fire for units defending the town, inflicting severe losses on you for any attack which doesn’t first take care of this threat, so attack the enemy’s artillery once your Fallschirmjäger has landed. If this does not significantly suppress the artillery, attack the Katyusha 132 with your JU87G Bomber.
City of Novabila |
Airfield |
 End Turn

TUTORIAL: Turn 4 & 5 16
Capturing Your Objective
Once the enemy’s artillery is damaged and suppressed, concentrate on capturing Novobila itself. First, you have to break through any enemy units preventing you from reaching the town. Armoured units, such as tanks and your Anti-tank units, are best suited to this task. Next, you should use your own artillery to attack the Russian Infantry holding the town’s primary position, indicated by orange HQ building and radio tower.
Once you have completed your preparatory attacks, move your Stosstruppen Infantry unit adjacent to the town for the main assault. Attack with your Stosstruppen Infantry as many times as you can, and if this is not enough to dislodge the defenders bring in any other available units to complete the job. You want to go all out in this attack since capturing Novobila on this turn will earn you a major victory.
Turns 4 & 5
If the Russians proved especially tough or your own units did not have enough actions, use the remaining turns to keep up the assault in a similar fashion until the town is captured. When the scenario ends, there is a brief victory animation, followed by the Summary screen where you can view your tally of enemy units in one of two ways: total units destroyed and units destroyed by leader.
Left-click on the checkmark in the lower right corner to proceed. At this point, you are given the option to save your game. Do this, giving it a descriptive name such as, Mid Tutorial.
The Campaign map now shows your progress in the campaign with your victorious battle indicated by the German flag. You are also presented with two choices of where to fight your next battle, each with a different type of victory condition. The battle to the east, Lashing Out at Luga, requires you to destroy designated enemy target units in order to win. The battle to the south, Race for Riga, requires you to exit several units from the map. You may choose either of these battles to play first; then once you have completed it, you can load the save you made after the end of your first battle in order to play the other.
In either case, you will proceed first to the scenario briefing screen, where you may wish to review the new equipment and leaders; and then to your army Headquarters. Here you can build new units or reorganise your army to better suit the upcoming battle, and award your leaders with the promotions you received, either four or two depending on whether you scored a major or minor victory in the previous battle.
Lashing Out at Luga
As the briefing states, this scenario is a search and destroy mission, and you should keep this in mind when building your units.
Customising Your Army
One of your additional slots should be used to build a new reconnaissance unit to help you find your targets. Since mobility is often more important than sheer fire power in a search and destroy mission, replace your 15 sFH 18 artillery with a self-propelled artillery piece, such as a Wespe, and your Elefant Anti-tank unit, which has a low movement rating, with something faster, such as the new JgdPz IV/48 you received in your motor pool.
17 TUTORIAL: Lashing Out at Luga
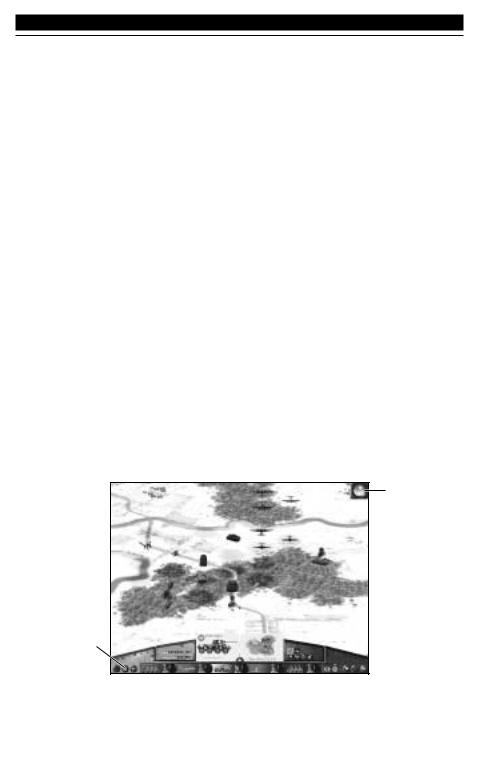
Russian infantry supporting an attack.
Of course, to ‘destroy’ is the other half of the mission, so you want to add another unit which packs a hefty punch. Either an additional tank, such as the new Panther G you received in your motor pool, or a Bomber would be a good choice.
Mission Tactics
Your first task in this scenario is to find the designated target units that you have been ordered to destroy. There are six of them: three Russian Guards Infantry, two T-34/76B tank units and one IS-2 tank unit. Each of these is identifiable by an icon, a red target reticle, placed above the unit.
Key to victory in this scenario is using the combined arms tactics that you learned in the opening scenario. As you advance your attacks, soften up your targets with indirect fire, followed up with the hard hitting spearheads of your heavy armour. Also important is the ability to contain the enemy forces you encounter. Nothing is more frustrating to a commander than hammering the enemy with everything he has only to see it retreat to safety where it can refit. Use your light equipment to pursue and contain damaged enemy units.
At the beginning of turn three in this scenario, you will receive two auxiliary reinforcements which appear at the edge of the map near the town of Berestova. These are units which you may use to supplement your regular forces much as you would if you had received a slot increase or replaced a destroyed unit. Auxiliary units, however, are transferred out of your army at the end of the scenario.
If the course of the battle is going well for your forces, you may wish to try to capture one of the secondary objectives that your army is tasked with. Secondary objectives are represented on the tactical map by an orange command tent.

TUTORIAL: Race for Riga 18
Race for Riga
Not surprisingly in breakout or retreat scenarios in which you must exit units from the map, the speed of your units is a critical factor to the success of your mission. Replace your towed equipment, such as your 15 sFH 18 and 20mm(Q) FlaK, with self-propelled versions of the same equipment type, even if their attack or defence ratings are lower.
Also, take advantage of the special abilities of certain equipment types. For example, Pioniere Infantry have the Bridging special which make them more useful than the Stosstruppen heavy Infantry when you need to get your forces across rivers.
Although employing air power is generally an excellent tactic for protecting your units, you should have noticed in the briefing screen that the weather is rainy, which will severely hamper any air operations for an indeterminate length of time. In addition, only ground units may be exited from the map. Therefore, you may want to replace your JU87G Bomber with another reconnaissance unit to help you scout for possible enemy ambushes.
Keep in mind that highly mobile equipment types often gain their speed by sacrificing heavy armour and/or firepower, so you also need to make sure your units can be protected long enough to reach their objective. Fill out any open slots in your army with equipment types that combine both mobility and protective characteristics. For example, taking an additional self-propelled artillery piece would be a good idea, as would including the new Panther G tank that you received in your motor pool.
When you examine the units in your Roster for this scenario, notice that two of the units have a gray background. These are auxiliary units which have been temporarily assigned to your army to help you achieve your objectives and which are already deployed on the battlefield at the beginning of the scenario. You will not be able to replace them, however, and they will be transferred out of your army at the end of the scenario.
Crucial to victory in this scenario is careful planning, especially in the route you plan to use. You should, for example, expect the heaviest resistance at key points in the region such as near cities and at river crossings. These are often unavoidable, so approach them in force in order to break through quickly. Examine the tactical map to find the exit points on the map. There are two of them, located on the central roads leading off the south edge of the map and designated with a large arrow. To exit a unit, move it onto the arrow.
Careful planning of your units’ individual moves is also important. Keep your units in a tight formation as you move across the map. It does you no good to have a fast unit way out in front of the rest of your units, or to allow a slow one to straggle far behind. The enemy can easily swoop in to pick off isolated units.
Although you are only required to exit six units to gain a victory, it is possible for you to improve your score if you are able to get extra units safely off the map. Remember, however, that your score is also dependent on how long it takes you to complete the victory. If you have many damaged units or they are far from the exit points, you may want to settle for the victory you already have in hand. Should you choose to continue the battle, you will be given the option to quit the battlefield at the end of each turn.
19 BASIC SCREENS, MENUS, AND BUTTONS: The Start Screen
BASIC SCREENS, MENUS, AND BUTTONS
These sections provide step-by-step suggestions to familiarise you quickly and easily with the basic screens, menus, and buttons in PANZER GENERAL III SCORCHED EARTH.
The Start Screen
Battle Generator
New Campaign
New Campaign
High Scores
Credits
Multiplayer |
Load Game |
Quit |
Tutorial |
Options |
When you begin Panzer General III Scorched Earth the first screen represents an historian’s desk. As you move your mouse pointer over the graphics in the office the text option becomes highlighted in the centre of the screen. You can either left-click on the graphic or on the text in the centre of the screen.
Play Scenario
Brings up the Scenario Selection screen, from which you can select and start a single player scenario. For more information, see Playing a Scenario, beginning on page 20.
New Campaign
Brings up the Campaign Selection screen, from which you can select the army commander for your army. This also determines the nationality and theatre of operation for your game. For more information, see Playing a Campaign, beginning on page 22.
Options
Brings up the System Options dialog box, from which you can choose the game options you wish to have on or off during game play.
•Animations: Slider increases or decreases unit animation - speed.
•Music On/Off: Enables or disables the volume control slider for in-game music.
•Sound On/Off: Enables or disables the volume control slider for in-game sound effects.
•Hot Keys: Displays the list of hot keys.
•Fog of War: Enables or disables Fog of War, your ability to examine enemy units and leader statistics and specials.
 Loading...