

Page 1

Introduction
Hearts of Iron II is the sequel to Paradox Entertainment's
award-winning Hearts of Iron, a game where you will guide
your nation to glorious victory (or ignominious defeat) in
the World War II era. With several Grand Campaigns, numerous Battle Scenarios, multiplayer capability, and your
choice of the more than 70 playable countries that spanned
the globe at the time, Hearts of Iron II will give you hour
upon hour of challenge and entertainment.
This is a highly complex grand strategy game, not a
historical simulation or FPS. With Hol2's nearly limitless
options and exceptional depth comes a comparable learning curve. It may take some time to become familiar with
its richness and its multitude of controls, so don't be surprised if your first few campaigns end in disaster. There is
no "right" or "wrong" way to play Hol2, and no sure way
to win. You'll probably find that the lessons you learn in
your early defeats will be just as valuable as any that you
later gain through victory. Use those experiences and don't
be afraid to experiment or save the game and then try a
variety of alternatives.
While this manual will familiarise you with most of the
ins and outs of Hearts of Iron II, the most valuable resource
of all is the Paradox public forums (www.paradoxplaza.
com/forums), You can usually get the answer to any question you might have about the game in a matter of hours
(if not minutes), It's also a place where tips and strategies
are exchanged, where people from around the world will
arrange multiplayer games, where you can read about oth-
ers' Hol2 experiences (or post your own), and where new
battle scenarios and user game modifications will often be
developed. This is also where you'll find Paradox's latest
post-release enhancements available for download and a
large number of FAQ's and other resources.
Installation
System Requirements
To play Hearts of Iron II you will need to meet the following
minimum requirements:
Pentium III 450MHz (800MHz or better recommended)
Windows® 98/ME/2000/XP 128Mb RAM (512Mb or
more is highly recommended) 900Mb free hard drive
space 4Mb Video Card DirectX compatible (8Mb or more
recommended) DirectX compatible sound card DirectX9.0
or higher (included on the CD).
Installation Procedure
Place the Hearts of Iron II CD in your CD-ROM drive. If
you have AutoPlay enabled on this drive the installation
screen will appear automatically. If the AutoPlay doesn't
start: or is disabled for this drive: then click Start> Run and
then type X:\Setup.exe to launch the installation program
(replace "X" with the drive designation for the CD-ROM in
which you placed the Hearts of Iron II CD: usually D or E
on most systems). Simply follow the on-screen prompts
to install the game.
Keeping Up To Date
Paradox is deeply committed to its customers and in my
experience their product support is almost unparalleled in
the gaming industry. The developers read (and frequently
participate in) the discussions on the public forums and will
often implement some of the best player-requested features or enhancements post release. They also make minor
tweaks or alterations to existing features and squish the
occasional bug that had previously escaped detection. You
can go directly to the downloads page at www.paradoxplaza.com/downloads.asp under the Hol2 heading or visit
the thriving community at www.paradoxplaza.com under
the same heading. (You probably think I get paid to promote
their forums, but I don't. They're just that good!)
Getting Started
Launching the Game
Click Start> Program Files> Paradox Entertainment
Hearts of Iron 2> Hol2 to launch Hearts of Iron It's opening
movie. Hol2 (and most Paradox titles for that matter) tend
to launch a little more slowly than some games because
Paradox leaves a large number of files in simple text format
to make them easily modifiable by users who might want to
tweak unit values, write their own events, or even construct
new battle scenarios on their own. This gives the game
immense flexibility, but it also means that those files must
be compiled when the game loads.
Note: you may experience some issues if the Bink Player
(a small program used to play the opening movie) does not
correctly release resources on your system when it finishes
playing the opening movie. If you suspect that you are
experiencing this problem you can easily resolve it by going
to the main folder where you installed Hol2 and renaming
the avi folder to avi_old. This will disable the opening movie
and take you directly to the Main Menu on launch.
For Beginning Players
If you're new to Hearts of Iron and Paradox games I would
recommend that you begin by reading the next section: Key
Concepts: and then work your way through the tutorial scenarios. These will introduce you to the most important parts
of the interface and get you up and running fairly quickly,
though they focus mostly on "how" to do something, not
"why". Once you're more comfortable and have done a bit
of your own experimentation you'll probably want to come
back to the other sections where you will find detailed
descriptions of all the controls and some of the underlying
strategies and tips.
My best advice would be a mixture of "don't panic" and
"be patient". Hol2 can seem a bit intimidating and complex
at first, but once you've played it for a little while you'll find
that most aspects of it are quite intuitive. Remember that
a full grand campaign game is quite long and that if you
rush headlong into battle without preparing for it, you're
likely to be just about as successful as you would be if you
tried to do it in real life. If you can't find the answer to a
question you have in this manual, don't forget that you can
probably get one almost immediately on (yep, you guessed
it...) the Paradox public forums.
For Hoi Players... What's
New?
If you're a Hearts of Iron vet, then you'll find that Hol2
builds upon the best aspects of the Hoi engine, adds some
important new features, incorporates a few big game-play
changes, and has undergone some pretty significant interface changes. You may want to simply dive in and explore,
but I'd recommend that at a minimum you read the Key
Concepts section (and glancing: or reading: through the
entire manual really wouldn't be such a bad idea).
The complete "what's new" list is far too long to present
here, but major changes include a complete revamp of
the technology system, further abstraction of the air and
naval system, a significantly expanded set of diplomatic
options, and many military changes (there are lots of new
units; brigades are now detachable; carriers have integral
aircraft; and the new "movement is attack" combat system
now initiates combat when you begin to move to an enemycontrolled province). Other changes include a revised map
with more provinces, greater generalisation (and realism)
for resources and global trade, major changes to the supply and convoy systems, a lot of very nice revisions to the
various interfaces, the introduction of battle scenarios that
use only small portions of the map and may involve only
a few nations, a newly expanded MP option that allow
more than one human player to be in control of a country,
implementation of a new air and naval basing system, a
change in the way that provincial assets are purchased and
deployed.. .and much, much, much, much, much more!
Key Concepts
As I said in the introduction, Hearts of Iron 2 is a game
of considerable complexity. It is vital to understand that
virtually every aspect of the game is interconnected. It
can (and will) take time to learn how each of the game
elements interacts with each other, and to gain a good
degree of control over the nation you are playing. The goal
of this section is to give you a broad overview of the major
components of Hol2: to give you an introduction to its key
concepts before moving on to the subsequent sections that
detail each feature and interface in turn.
The Second World War: indeed almost every war fought
throughout history: was not purely a matter of pitting man
against man on the field of battle; nor is Hol2 merely a large
digital battlefield. Simply fielding a larger army than your
enemy will not ensure victory, and neglecting the "engine
of war": your economy: can be perilous for your chances
of survival. It is vital, then, to ensure that your nation has
the necessary economic infrastructure and political wherewithal to stand against your enemies if attacked, or to support any aggressive moves you might wish to make.
A huge army might seem invincible at first glance, but
it can easily succumb to a seemingly weaker force that is
equipped with more modern weapons, is in better supply, or is superbly trained and led. Elite forces can tip the
balance in a conflict, as can employing a strategy that
uses terrain or weather to your advantage. Your ability to
coordinate every element of your armed forces to bring
them to bear against your enemy will also greatly increase
your chances of winning. Armies may be held in reserve
or support other actions; air forces may be used to soften
up an enemy's defences, disrupt his troops' organisation,
hamper his supply, or even gut his industry; and navies
can actively patrol enemy waters to embargo the import
of much-needed resources or even bombard and invade
his shores.
Victory
The ultimate goal of Hearts of Iron II is to guide your nation
to victory. For those who play a conventional game, there
are a number of provinces located around the globe that
have a victory point value, and there are the three main
political factions: the Axis, the Allies, and the Comintern.
Each campaign game has a predetermined end date: usually December 30th, 1947: and the victor is the faction
which controls the highest point total of these provinces
when the scenario ends. The shorter battle scenarios may
have somewhat different victory conditions.
Although this is the only measure of victory recognised by the game, you might wish to consider alternate
"personal achievement" criteria if you choose to play a
"doomed" nation, or a country that is not a member of one
of the factions and remains aloof. If you are participating
in a multiplayer game where it is likely that there will be
more than one player on the victorious side you may want
to establish some "house rules" about victory too, The
choice is yours'.
Page 2

The Engine of War
While Hol2 is undeniably a game that focuses on war, it
is not exclusively about war. Conflict is costly: very costly:
and can involve immense expenditures in resources and
lives before a victor is declared. The engine that propels
a nation through war and ultimately leads to its success
or failure is its capacity for industrial production; and it is
frequently for economic or geopolitical reasons that wars
are waged: and often won and lost: in the first place.
Natural Resources
If your economy is the engine that will propel you through
war, then natural resources are the fuel that powers the
engine. Although there were hundreds of resources that
played a key role historically, Hol2 distils them into four
distinct categories: energy sources, metals, oil, and rare
materials. Energy, metal and rare materials are used on a
daily basis by your factories to provide you with industrial
capacity (see below), while oil is consumed by many of your
armed forces (the navy, air force, and motorised parts of
the army) to remain operational.
Natural resources are drawn from provinces throughout
the world that are under your nation's control, or you may
acquire them via trade or direct cash purchases from other
nations if you lack territories where they occur naturally.
Any excesses you have may be stockpiled, or sold or traded
to other nations who are in need. If you lack any of these,
then your economy and your military will grind to a halt,
most likely dooming your nation to failure.
Industrial Capacity
To continue our analogy, industrial capacity (abbreviated
throughout as "IC") is the engine that drives your nation's
economy. This represents your overall ability to manufacture goods and is determined by the number of factories
that you have operating in your nation. The more factories
you have, the greater your potential industrial capacity.
Your IC should be thought of as an ability and not as a
thing. You can't store ICs in the way that can stockpile
natural resources. You can only use them: up to your daily
capacity: to manufacture products.
Factories require natural resources in order to operate. In
Hol2, this is abstracted such that each factory withdraws
energy, metal and rare materials from your stockpiles each
day in order to run at full capacity and generate IC. If resources are plentiful, then your factories will generate their
full potential IC. If you run short of a necessary resource,
then some of your factories will begin to shut down until you
can find a new supply: usually through purchase or trade...
or, of course, through conquest. Running out of a resource
altogether is almost certain to doom your nation unless you
can resolve the situation quite rapidly, so you may wish to
consider controlling your rate of resource consumption by
artificially capping your production during plentiful periods.
Shortages of fuel, however, may be alleviated by converting
some of your energy stockpile into oil; but this is a very
inefficient process unless you have researched advanced
technologies to improve the conversion rate,
IC Allocation, Production and
Gearing Bonuses
Resources are consumed by factories to generate the IC
you require to manufacture the various things that you will
need in the game. You will often lack sufficient capacity
to do everything you want to, so you must decide how to
carefully allocate whatever amount you have. IC is used by
the assembly lines that manufacture your tanks, warships
and airplanes. It produces the ammunition and supplies
needed to equip and maintain your troops. It is also used
to upgrade your existing armies and to make the various
consumer goods needed to keep your population happy. A
country that lacks sufficient IC will soon find its forces in
disarray and its population in revolt, A country with surplus
IC can convert this into cash which you can use to fund re-
search, purchase natural resources, or to conduct certain
other types of foreign diplomacy,. .or to stockpile supplies
and prepare for war. Excess IC can also be left voluntarily
unused, which conserves natural resources that might be
required in the future.
A steady flow of resources and a healthy complement
of factories will be vital to your success, but, as you'd
expect, this may not be quite so simple to achieve as you
might like. Some resources may have to be imported from
your distant territorial holdings or obtained through trade
with other countries, Imports will be at risk of loss if your
enemy conquers your source or actively engages in blockade and embargo activities. Further, your industry may be
subjected to a bombing campaign if you lack control of the
skies, resulting in the destruction of factories and a drop
in available capacity.
An additional consideration when deciding how to al-
locate IC will be whether to take advantage of a possible
gearing bonus. This reflects the efficiencies of scale that
are achieved through the production of many Identical
items over a longer period of time, but It lacks some of the
flexibility: and easy modernisation: of a more generalised
approach to manufacturing.
Infrastructure
Without the necessary infrastructure: roads and railways: it
is difficult to efficiently move men and equipment through-
out your nation. Factories may only be built in provinces
that have enough existing infrastructure to deliver the nec-
essary raw resources and then to transport the finished
goods away from them; and the construction rates for
some provincial assets are greatly accelerated by higher
levels of infrastructure. Your armed forces will require
these same assets to assist their movement and efficiently
bring supplies and fuel from regional depots to the forces
on the front lines. If you have insufficient infrastructure:
or it is reduced by enemy bombing campaigns: then your
troops will slow to a crawl and run short of supplies, which
will greatly reduce your combat capabilities and increase
your rate of attrition (loss of troops and equipment due to
illness, mechanical breakdowns, etc.).
Domestic Policies and Government
While Hol2 places you in supreme command, it would be
impossible for you to govern every single aspect of your
country. Instead, each nation has a set of domestic policies that determine what type of government is in place,
what its trade practices might be, what type of army it
will field, and how large a say the government permits its
population in its affairs. Democracies, in particular, have
strict limitations on the diplomatic actions they may take
without provocation.
Domestic policies have numerous effects in the game,
the most prominent of these being that they determine who
will govern your nation and who will serve on your "cabinet"
to attend to the myriad of little details that need taking care
of on a day-to-day basis. They are not advisors (they don't
make suggestions to you as you play) but their individual
characteristics will give you bonuses: or penalties: to your
actions. Some may be adept at foreign relations, others
may provide a boost to your economy, still others may
champion military doctrines that will benefit your armed
forces in certain ways. Domestic policies also have Individual effects that may affect your Industry, recruitment,
public sentiment and foreign interactions,
You will begin the game with a set of domestic policies
that reflects your selected nation's historical situation at
the time. During play you may periodically make minor
adjustments to your policies, which could result in some
changes to your government and the people that serve on
your cabinet, but you are generally prohibited from making
drastic or rapid policy reversals except through a few very
special circumstances.
Dissent and Partisans
Depending on your domestic policies, your population may
also play a prominent role In determining what actions
you may take: even to the point of making it impossible to
declare war on a nation unless public opinion is on your
side. Policy settings will also influence the public's demand
for consumer goods, and falling to meet these demands
will have negative consequences by causing dissent: their
overall level of happiness: to become worse. Dissent has
two significant impacts: it will cause your troops to begin
fighting more poorly; and it will greatly increase the likeli-
hood of your public rising in open rebellion against you. You
can control dissent: reduce it or at least mitigate things
somewhat: by allocating a larger share of your IC to the
manufacture of consumer goods (though this will reduce
your ability to meet the production and supply demands of
your military). Providing excesses of consumer goods will
reduce dissent, while falling short in this area will cause
dissent to increase, You will need to maintain a careful bal ance between the needs of your military and the happiness
of your subjects throughout the game. '
Captive populations (the people who live in foreign
provinces that you occupy) will be much less interested in
working for you and far more likely to rebel than ones who
feel that they naturally belong under your rule. Partisans:
nationalists who remain loyal to their former government
and oppose your occupation: will reduce a province's in-
dustrial capacity and supply efficiency and may also be-
come openly militant if you fail to maintain sufficient forces
to keep them under control. An alternative to maintaining
rigid military control is to voluntarily grant partisans their
freedom, allowing them to form a new nation and establish
a government of their own. You will lose the majority of
the economic benefits from provinces they are granted,
but they will generally be friendly towards you if you al-
low them their sovereignty; while if they achieve freedom
on their own, you will lose all economic benefits and the
fledging nation will actively side with your enemies and
seek to destroy you.
Diplomacy and Trade
International diplomacy will also be a significant compo-
nent of your success. There are many diplomatic options
available to you, Including negotiating one-time exchanges
of goods, arranging an open-ended trade agreement,
forming alliances or declaring war, and your ability to do
any of these will depend on the type of relationship you
have with the nation involved. Hol2 keeps track of evolv-
ing international relationships and bases many of its ac-
tions: or its willingness to agree to diplomatic proposals:
on these, Fortunately, you have some diplomatic options
available to you to improve your relationship with other
countries, although any hostile actions you make will tend
to undermine these efforts. There are other diplomatic
alternatives that will change your relationship: non-aggres-
sion pacts, guarantees of independence, or more hostile
actions such as engineering a coup of a nation or issuing
an outright demand for some of its territory that you feel
is rightfully yours.
It's rare that a nation can stand alone against the world,
so you will probably wish to be part of an alliance. Although
limited alliances are possible between almost any two or
more nations, Hol2 considers the three main historical
Page 3
factions to be of paramount importance: the Axis (led by
Germany), the Allies (led by the United Kingdom) and the
Comintern (led by the Soviet Union). Depending on the
actual historical situation, some nations will begin the
campaign or scenario already as a member of an alliance,
while others will be neutral. As the game progresses, the
factions may attempt to influence other nations to join their
alliance, or neutral countries may even petition to join an
alliance, if they have a good relationship with its members.
Alliances may freely move forces and trace supply through
the territories of their member nations. They will frequently
supply friendly forces and can lend divisions or even entire
armies to an ally when the situation warrants that they be
under their control. Neutral territories must be respected at
all times (movement and the tracing of supply is prohibited),
unless you can negotiate military access for your troops
with that nation's government.
The other major diplomatic activity you will conduct
is trade. You will probably establish a number of openended trade agreements where you and other countries
will exchange resources, cash or goods on a daily basis
to meet your respective industrial needs. You can also
negotiate one-time deals of this nature, or more complex
trades that involve the exchange (or purchase) of land or
even technological blueprints. You are also able to Simply
donate resources, land or blueprints to another nation if
you wish.
The success or failure of your diplomatic attempts will
depend on the domestic policies, cabinets, political leanings and size of the two nations involved. It will also vary
with the attractiveness of a proposal and the relationship
that exists between them. Not surprisingly, the more har-
monious two nations are, the more likely it is that an offer
will be accepted and the more balanced a deal they may
be willing to negotiate. Successful diplomacy can even be
its own reward, since each successful effort will usually
further improve your relationship.
Technology
Another key domestic activity you will engage in is the
research of new technologies. Some of these will improve
your industrial capabilities, but the majority of advances
are designed to enhance various elements of your armed
forces. You may discover superior military doctrines, better arms and armaments, larger tanks and naval vessels,
advanced aircraft with greater range, or more subtle advances such as systems that allow better observation of
enemy movements or detection of their forces. You may
even decide to pursue and deploy atomic weaponry. Need-
less to say, falling behind in the arms race is not likely to be
a good idea, unless you can meet your enemy with overwhelming force (and even then, victory is not assured).
Research is conducted by funding teams of scientists
to work on research projects. The number of projects you
can conduct simultaneously will depend on your overall IC
(a large nation can have as many as five projects ongoing
at a time), and the nation that you select will determine the
variety and calibre of your available teams. You will need to
assign teams to your projects with some care, since each
team will usually have a skill level and also certain areas
of expertise associated with it. One that excels at avionics,
for instance, can be expected to produce positive results in
a new aircraft design far more rapidly than it would if you
asked it to work on finding a better hull for your submarines.
The length of time it will take to research a project depends
on your teams' abilities, their overall skill level, the project's
complexity, and your ability to maintain a steady flow of
funding to the team.
Once you have achieved a new level of technology, you
will need to implement it. In most cases, existing equipment can be improved by allocating IC to its upgrade. Major
breakthroughs for technologies that haven't previously existed (as well as significant naval model upgrades) must be
manufactured from scratch. You have the option to keep
as much obsolescent equipment in the field as you like,
upgrade it, or scrap it to recoup some of its manpower.
Preparation and Support of
the Military
There are many components that must fall into place for
a campaign to be successful. Armed forces must have
access to a continual flow of supplies and ammunition
if they are to remain in fighting form, and they will need
strong and capable leaders who are able to command
them effectively, maintaining an overall level of discipline
and organisation. Factors such as terrain, weather, and
the placement of defensive structures will greatly influence
their performance: as will their previous experience in such
combat situations.
Supply, Outfitting and Transport
Capacity
Your ability to supply, outfit and transport your troops
will be vital to your military success, Armies require am-
munition and food (supplies) to fight, Motorized vehicles,
aircraft and naval vessels will also need fuel (oil) if they
are to remain operational. For overseas engagements, you
will also need to be able to move men and equipment
great distances that are too far (or impossible) to reach
by normal means.
You will need to pay attention to (and maintain) your supply chains to avoid having your armies end up in disarray
and unable to fight. Supplies are manufactured by allocat-
ing IC to their production and then are transported to your
forces along your supply chains. This can involve ground
supply (using your provincial infrastructure), naval supply
(via convoys), air supply (via your airborne transports), or a
combination of these: all of which can also be disrupted by
enemy actions. If your supply chains are damaged or cut by
the enemy, or if you lack sufficient oil and supplies for your
military, your chances of survival are exceedingly slim.
There is also the issue of transport capacity to consider.
This reflects the infrastructure (roads, railways, etc.) that
are in place to move large volumes of materials and men
in a reasonable period of time. Each province has an infrastructure level (which you can increase) that will limit
this volume and can be damaged or otherwise diminished
by enemy aerial bombardment. Sea supply demands that
you devote enough convoys to the task and have an available port to offload those supplies. If those convoys are
left undefended, they can quickly fall prey to enemy sub-
marines, surface vessels and even aerial bombardment,
so you will need to provide escorts or other protection
for them as well. Airborne supply tends to be very tricky
and not particularly efficient, because the capacity of the
aircraft is limited, they require fuel to operate, and unless
you assign them some protection your enemy's fighters will
probably shoot them out of the skies faster than you can
replace them. Nevertheless, this is a method of keeping
your troops alive until you can find an alternate means of
getting resources to them. Don't be surprised to find an en-
emy actively engaged in disrupting your supply: particularly
if he enjoys naval or aerial supremacy. Of course you can
employ similar tactics in return, disrupting his supply and
encircling his troops to achieve devastating effects.
Organisation and Entrenchment
Land forces that are constantly moving don't have much
time to prepare themselves against an enemy attack and
have a tendency to become somewhat "stretched out" or
disorganised. The same is true of armies that are con-
stantly subjected to naval barrages or aerial bombardment.
Hol2 models this aspect of war using the concepts of or-
ganisation and entrenchment.
Organisation is a measure of the cohesiveness of a force:
how able it is to receive and respond to orders, how well it
is supplied, how competently and thoroughly its command
structure has been established, and is also an indicator of
its general morale. Each of your units: land, naval and air:
must have a sufficient level of organisation to engage in
battle, and without it they will break and retreat in disarray. A force that is engaged in combat will begin to lose
organisation, and the longer it continues to fight the greater
the loss will be. The addition of new recruits to replace
casualties will also reduce organisation proportionally to
the number of newcomers added, and if a unit finds itself
without a source of supply, then organisation will plummet rapidly.
While moving, a unit's organisation will usually remain
static unless the terrain it is traveling through cannot support the size of the force (or if it is moving without supply).
If it ceases its movement and avoids battle for a while,
then its organisation will gradually recover. The maximum
organisation is determined by its leadership and experience (see below) and can also be increased through the
research of various combat doctrines and some equipment
advances.
A land unit that is stationary for a time will also begin to
entrench itself in a province by selecting the most defensible ground, preparing foxholes and snipers' nests, estab-
lishing command and aid stations, organising munitions,
and so on. This will give that unit a bonus in any subsequent
defence of that province and can make it difficult to over-
come without a concerted effort on the part of an attacker.
The longer a force remains in place, the more "dug in" it will
become; but this entrenchment bonus is immediately lost if
it begins to move and even if it later returns to a province
it must begin the process from scratch.
Command, Leadership and
Experience
The effectiveness of a force relies heavily on its previous
combat experience and on the officers that you assign to
your front-line commands. Each time a unit engages in
battle, it will gain some valuable combat experience and
over time: and repeated conflict: it will begin performing
noticeably better. The resulting veteran units may become
the backbone of your armed forces, but as they suffer cas-
ualties their losses will be replenished with green recruits
which, not surprisingly, dilute their effectiveness.
Individual units may be instructed to act independently,
but most often you will wish to group them into larger forces:
often using a mixture of unit types to achieve the desired
overall balance and combat effectiveness. Commanding
larger numbers of units requires special leadership skills
that are possessed by only a handful of people, so you
will need to draw from a pool of your officers, assigning
someone to lead each of your forces. Various officers will
have different skills or areas of expertise, so selecting the
right man for the job can be extremely beneficial. Each
officer also has his own level of combat experience which
will increase as you continue to employ him. You may find
that at some point you may wish to promote him to an even
higher rank in your military, increasing the number of individual units he can command without incurring a penalty.
Junior ranked officers tend to accumulate experience more
rapidly than senior ones, however, so this will often prove
to be something of a balancing act.
Page 4
Very large-scale operations bring an added level of
complexity to the overall command. It is one thing to issue
orders to a collection of divisions all occupying the same
general location, but another thing entirely to manage mul-
tiple army groups, whole armies, or even multiple armies
assembled along a front. In such instances, you will likely
need to establish special headquarters divisions: a unit unsuited for direct combat, but one that improves the overall
supply efficiency of large numbers of forces and gives them
a greater likelihood of achieving positive results. When you
are considering massive offensives or the defence of an
entire front, this special division can have a dramatic effect
on the overall success of your operations.
In a larger sense, however, you will always be in ultimate
control of your military and it will be up to you to plan your
attacks and arrange for suitable defence of your territories.
Hol2 includes some handy features that make it as easy
as possible to coordinate your forces and use them to
maximum effect, and to assign long-term missions that
your officers will then proceed to carry out unless you
instruct them to do otherwise. Leadership and experience
simply help to determine how effective they will be in fulfilling your orders.
Defences and Fortifications
While armed forces are required to protect your territories
from the enemy's advances, there are up to three different
defence Installations that you may be able to construct to
help improve your chances of defeating an assault. You can
also build radar sites: if you have the required technology:
to improve the effectiveness of your aerial defences.
The construction of defences requires a commitment of
1C until their production is complete. They can be damaged
by enemy attacks: requiring further allocation of resources
to repair them: and they can be captured and used against
you if they fall into enemy hands. Each of these installations
can be added to by further IC investment, increasing their
size, quality and effectiveness. This is a worthwhile investment and can become the difference between successfully
warding off an enemy's assault rather than succumbing
to his advance.
Land fortifications are a network of bunkers, gun emplacements and minefields that you can construct in a
province to help your army repel enemy land forces. They
are particularly effective in protecting your infantry from
tanks, mechanized units and artillery forces where they
might otherwise be overrun or destroyed. They also offer
some shelter from aerial bombardment although they are
not designed to actively counter such attacks. A land forti-
fication offers no resistance by itself and must be manned
to have any effect.
Entrenchment bonuses are combined with the land for-
tification bonuses, resulting in an almost insurmountable
defence if a force remains stationary for long enough in a
province that has been heavily fortified. A good example
of this would be the French Maginot line at the onset of the
war (an obstacle that the German high command wisely
chose not to attempt with a frontal assault). The only methods of dealing with forces that man such a defence are to
bombard them over a long period of time, cut off their supply and hope to starve them into submission, or to take your
chances (which aren't good) with a series of massive successive assaults on their position. Paratroopers: if they are
available to you: will by-pass defensive fortifications and
may be an effective component in an assault, although they
incur other penalties and are usually fairly lightly armed.
Needless to say, your best bet is to use a combination of
all of these strategies whenever possible.
Coastal fortifications are a similar series of trenches, gun
emplacements and other devices constructed along the
shoreline of a province and must also be manned by your
troops if they are to have any effect. They will present a
major obstacle to enemy troops attempting to land in the
area. Even an elite marine unit will find it hard to break
through to establish a beachhead.
Anti-aircraft guns offer a third possible means of defence.
Unlike land and coastal fortifications, anti-aircraft guns do
not need to be manned by your forces in order to operate
(their construction includes a manpower component). Their
function is to provide added defence against air missions
flown against targets in the province and to disrupt any
enemy aircraft that pass overhead. They will not in any way
help to defend you against the assault of a ground force
or naval invasion. Enemy aerial attacks against factories,
infrastructure, bases, other fortifications, or any forces
stationed in that province will be subjected to withering
return fire from your anti-aircraft batteries. This will not
only hamper the inbound flight's organization: thus reducing the impact and extent of the damage from the attack:
but it will also most likely inflict a number of casualties as
well. Enemy squadrons whose missions cause them to fly
overhead will also be subjected to fire, although the effect
will be somewhat less.
If you have researched the necessary technologies,
you will also be able to build radar sites in your territories,
These stations will greatly improve any aerial defence that
you mount in that province against enemy bombers and
fighters, and may also allow you to detect approaching
enemy naval vessels and aircraft in an adjacent sea zone.
Radar sites do not need to be manned by your troops to
be operational.
Naval and Air Basing
Military vessels and aircraft usually have special require-
ments that necessitate the construction of dedicated port
facilities and air fields to fully meet their needs. Hearts of
Iron II simulates this using a system called basing.
Each squadron must be assigned to an air base that is
located in a province that you control or that is friendly to
your forces, and all operations that it conducts must be
launched from that base and then return to it after the mission has been flown. If you assign too many air wings to too
small a base, then you may find that the ground staff will
have trouble maintaining and servicing all of those aircraft
in a reasonable period of time. You can either enlarge the
base to increase its capacity (although the maximum size
is limited) or reassign some of the squadrons to a different
base that has sufficient space for them. If there isn't a
suitable location then you can also construct a new base to
house them: although this will take some time to prepare.
Similarly, naval bases are needed to act as home ports
for your fleets. Ships are assigned to them and must return
periodically to conduct minor: or not so minor: repairs. Any
number of ships may use the same naval base, however
a base's size determines how rapidly it can repair those
vessels and its location will affect what seas your navies
will be able to patrol. Existing naval bases can be enlarged
and new ones can be built, again with certain restrictions.
There are also many provincial ports that your fleets may
use as temporary moorings; however those harbours lack
the facilities to carry out any repairs to your vessels or
offer them supply.
Bases are susceptible to bombardment or can fall Into
enemy hands. Enemy aircraft can be given missions to
strike at your ports or crater your runways, reducing their
basing capacity and forcing you to spend time and resources to repair them. If you lose control of a province that
contains a base, then any forces that used it as "home" will
find themselves out of supply and forced to rebase.. .and
your foe will be able to use the captured facility as a new
base for his forces, once he has effected repairs to the
inevitable damage it sustains during its capture. You should
pay close attention to the locations of your enemy's bases
and either render them inoperative or consider attempting their capture, and you should also take precautions to
prevent the enemy from doing the same to yours.
Weather, Terrain and Time of Day
Weather and terrain played significant roles in the historical
outcomes of military operations. It was the onset of winter
that did much to halt the initial German advance into Russia in 1941, and it was Burma's inhospitable terrain that
added a heavy toll to the loss of life in that region. Most
military actions also had to be conducted during daylight
hours, since target recognition was very poor in an era
when human eyesight was (more or less) the only available
instrument. All three conditions are taken into consideration in Hearts of Iron II.
Weather is synthesized by the game according to a complex random model and will play a prominent role in your
games. Both rain and snow will have a negative effect on
your military operations, reducing units' combat effectiveness: in some cases, quite significantly, Combat resolution
also includes a "visibility" component which adverse conditions will reduce, unless specialised equipment has been
discovered by your scientists and supplied to your forces.
Certain types of terrain will reduce movement speeds,
hamper supply, and impose penalties to combat as well.
The effect will vary depending on the unit type (generally
impacting more severely on motorised units than on foot
soldiers), and in most cases the terrain will give a defender
an advantage, reflecting his ability to make strategic defensive use of the landscape.
Hearts of Iron II is played on a global stage over a period
of years and includes accurate modelling for both local time
of day and for seasonal variations in the length of a region's
daylight hours. Most units perform very poorly in the hours
between dusk and dawn when visibility is poor, so you will
need to take this into consideration when planning your
attacks. Certain technological advances may mitigate this
somewhat, but you will probably have better success if
you plan your large-scale operations to begin shortly after
dawn during seasons when the daylight hours are long.
Combat
Hearts of Iron 2 does not seek to model combat on a highly
detailed, microscopic level. You do not control individual
soldiers, squads, platoons, companies or even battalions.
In Hol2 you will issue orders to divisions (or whole armies)
and your battles will represent a contest for the control of
much larger regions of land (provinces) rather than individual beachheads or buildings. The actual hand-to-hand
fighting occurs behind the scenes: in your CPU: and your
progress is displayed using graphic and numeric feedback
as each combat ensues.
Movement is Attack for Land
Battles
A significant change in actual battle mechanics has been
introduced in Hearts of Iron II. In previous Paradox games:
and in many other strategy games, for that matter: a land
force would be ordered to engage an enemy in a neighbouring province, move there, and then upon its arrival a
combat would ensue. The loser would then retreat from
the province and the victor would remain. This is not the
case in Hol2. Instead, the game employs the concept of
"movement is attack" in all land-based battles.
Combat is Initiated as soon as a land force begins to
10
Page 5
move towards an enemy province that is being defended.
The battle will rage on until one of the sides has gained the
upper hand, at which point either the aggressor's movement is discontinued (if it loses) or the defending force
begins to withdraw and the victorious attacker conducts
its movement into the province and assumes control. This
system alleviates a number of common issues (such as
being unable to tell where an enemy unit is moving until it is
too late) and also offers a number of new operational pos-
sibilities for both the attacker and the defender. Forces in
adjacent provinces may support the armies involved in the
battle, and behind-the-lines reserves may be positioned to
make a last-ditch effort to shore up the defences. Air and
naval battles, however, do not use this combat method and
will contest an air or sea zone while jointly occupying it.
Orders
Particularly if you play a larger nation, you will find that the
sheer number and geographic separation of the forces you
field can make them a daunting task to manage. To reduce
the micromanagement requirements and allow you to focus
on the zones of greatest activity, Hol2 allows you to give
standing orders to most units. When you are initiating a
large-scale assault involving large numbers of units or a
combination of land, naval and air forces, you will also need
to carefully coordinate these attacks to achieve maximum
effect. The game's order interface makes this surprisingly
easy to achieve.
Each unit has a useful set of orders that may be given
to it beyond the basic "move here" or "attack right now"
commands, An available option: which depends on the unit
type: is selected on the order interface and then the force
will carry out these orders exactly as you have instructed.
The specific options are detailed later in the manual, but
the concept that you should understand is that the order
interface includes the ability to set a date and time that
you would like a force to begin an action, allowing you to
coordinate the orders of multiple units. In many cases, you
will also be able to set a date and time (or operational con-
dition) for it to discontinue operations or even give a unit a
set of standing orders to repeat the same mission multiple
times, allowing you to focus your attention elsewhere while
it goes about its business.
Air and Naval Combat
Air and naval operations do exist, of course, but are ab-
stracted to a greater degree in Hearts of Iron II; otherwise
the added level of complexity would be overwhelming to
most players. You will usually assign general orders to
each air wing or flotilla: giving specific time period and
other parameters that you would like it to follow: and you
may then pretty much leave it to its own devices to carry
out these operations until it receives new ones or the or-
ders expire.
This is not to say that combat won't occur between these
forces: it will, and quite frequently at times. When this oc-
curs, there are special rules that govern the engagements
which take the types of units involved into consideration, as
well as the time of day and weather conditions. Aerial combat is further limited by the range of the aircraft involved,
as they will eventually need to break off and return to base
to avoid running out of fuel and ammunition.
It is vital to understand that neither sea zones nor the
air space above provinces are subject to control in the way
that the provinces themselves are. There is no "ownership"
of them, and neither aircraft nor naval vessels are capable
of capturing a province. Most often you will use them in
support of your armies, seeking to soften up an enemy's
resistance through bombardment or to hamper: or even cut
off: his lines of supply. Combat between them will therefore
most likely be a contest to determine whether you are able
to carry out these goals.
The Fog of War
This doesn't refer to a weather condition, but rather to dark-
ened regions of the map where the game will hide things
from you: particularly the dispositions of armed force: that
you aren't in a position to know. It is assumed that you will
have sufficient reconnaissance and intelligence sources
to determine some basic information about provinces:
even in your enemy's territory: but you will be unaware
of the location of any forces that don't belong to you and
are outside your territory or beyond the sighting range of
your units. You will be aware of enemy units occupying
provinces adjacent to your troops, but you will usually have
only a very vague idea of their complement and size until
such time as you engage them. You may also wish to fly
several long-range missions deep into enemy territory prior
to an attack to gain additional information about possible
reinforcements and reserves that the fog of war will otherwise obscure. Keep in mind that some units: particularly
submarines: are able to hide their presence, but there are
technologies you can research to assist you in detecting
and identifying them. Fortunately, your allies will share all
of their knowledge of enemy positions (and also their own
force dispositions) with you as well.
Strategic Redeployment and the
Force Pool
Any new military units you produce will enter your force
pool and can then be deployed at your discretion to any
valid location. Naval forces and air forces have an additional deployment prerequisite: they must be assigned
to specialised bases that are constructed to house and
support them. These bases are limited with respect to
the numbers units they can effectively handle, and this
number can be temporarily reduced as a result of damage
from enemy attacks.
Land units that are already in the field may be temporarily withdrawn from active service and strategically
redeployed elsewhere without the need to manage their
exact movements. As long as they don't have to cross
water (which require the use of naval transports and thus
active management), they will arrive at their new posting
after a period of time. This redeployment method is not
possible for naval or air forces, which must be rebased
via conventional means.
The Main Menu
To begin playing Hearts of Iron II click Start > Programs
> Paradox Entertainment > Hearts of Iron 2 > Hol2 and
after a moment or two the opening movie will play. You will
then see a status screen displaying the progress as the
main game engine is loaded and, once this has finished,
you will be presented with the Launch Menu. This gives
you the options of starting a single player game, starting a
multiplayer game, playing the tutorials, viewing the game
credits, or exiting the game.
Single Player Games
Most often you will probably be playing a single player
game, pitting your skills against the computer. Click "Single
Player" on the Launch Menu and the main menu screen
will appear.
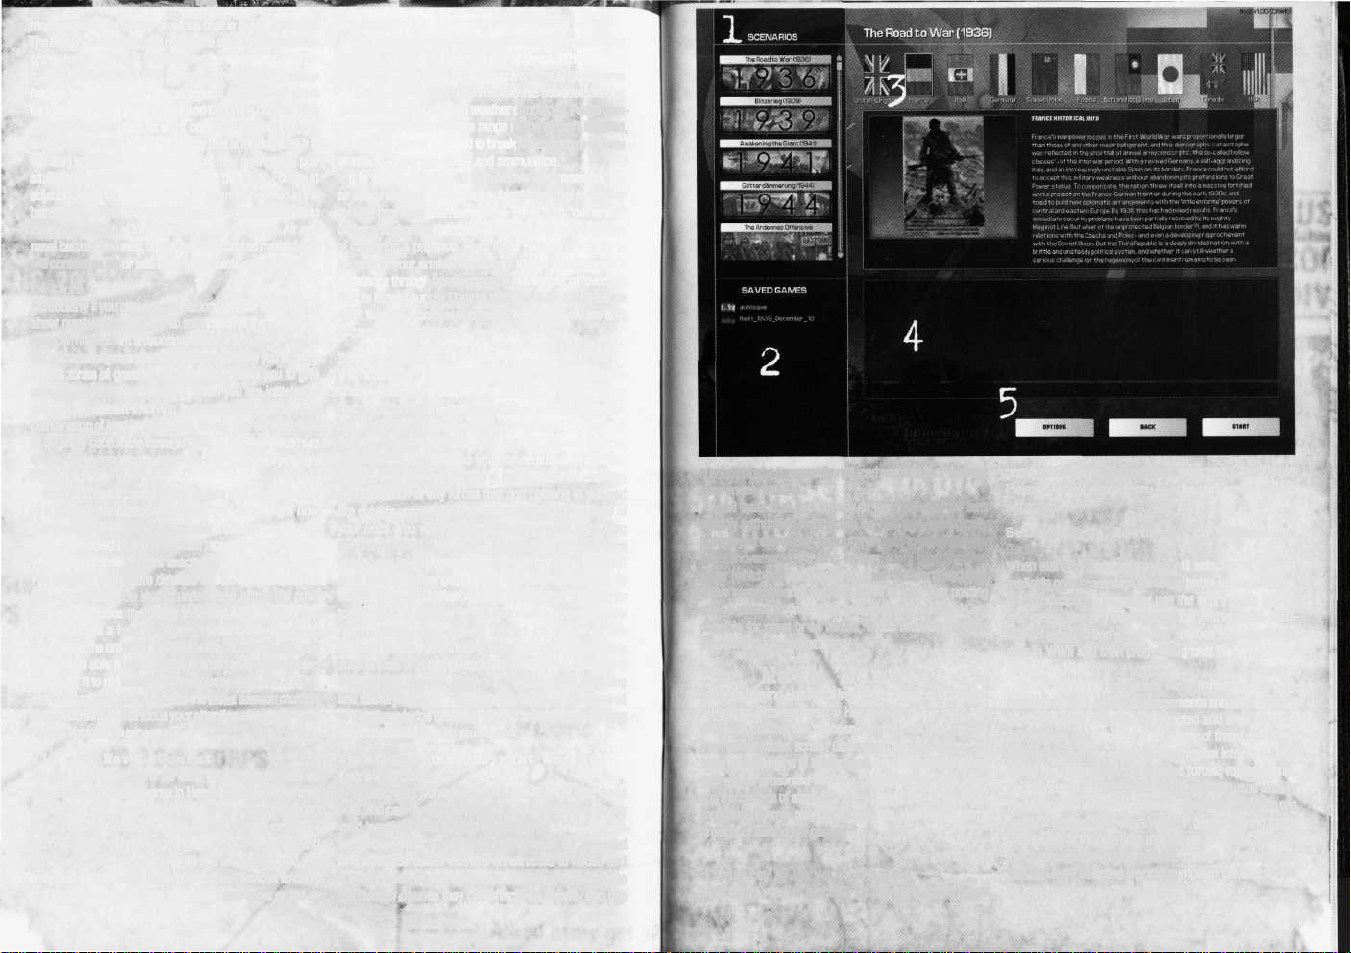
Selecting a Scenario or Save
Game
When starting a new game you will select from a list of
available grand campaign games or battle scenarios (area
1). Grand campaigns games use the entire globe and allow you to play any available nation in the world, starting with each nation's historical position at a significant
date in WWII and then progressing until the end date in
December 1947.
Battle scenarios are usually more limited in scope, focussing on short, specific engagements and often restricting the nations that may be selected and even the part
of the globe that is being used. Many of these scenarios
disable some of the game's more complex interfaces, providing the player with only scripted forces, replacements,
and resources to accomplish their goals with, and usually
having special victory conditions. The battle scenarios are
great for playing fairly short "what if" games around major
offensives, or for one-time multiplayer games of strategy.
For the purposes of this manual, though, I will assume
that you have selected a grand campaign game and that
all interfaces are available to you.
11
12
Page 6

Difficulty: there are 5 levels of difficulty that will apply
Game Options
global modifiers to most aspects of the game (industry,
resources, combat, movement, and more). At easy and
very easy levels, the Al nations will be handicapped and
the player will be given artificial bonuses. At hard and
very hard levels, the reverse is true. (You can see and
even change the precise modifiers used by looking at the
difficulty.csv file in the db folder).
A.I. Aggressiveness: this adjusts how the A.I. reacts
to the player's actions during the game, ranging from
"coward" to "furious". At furious level, the Al will tend
to declare war at the slightest provocation and will be
considerably more actively militaristic; while at coward
level the Al will tend to be more conservative and gener-
ally defensive.
Game Speed: this can be set prior to starting a game
or from within the game itself using the "ctrl" and "+"
or"-" keys. In a multiplayer game, only the host may
change the game speed.
Share Countries: Change this to "ON" for a multiplayer
game where you wish to allow more than one player to be
able to select the same country. This option is disabled
in single player games.
Autosave: this allows you to set how often the game will
automatically be saved and may also be changed from
within the game via the options menu. In multiplayer
mode, only the host computer will save the game.
Use Counters: by default Hol2 uses animated sprites to
toggle this to "ON" to have units displayed as traditional
NATO counter pieces instead.
Once you have begun play you can save your game at
any time. To load a saved game, simply scroll through
the list of file names (area 2) and select the one you wish
to resume.
Selecting a Nation
After you have selected a grand campaign, battle scenario
or saved game the nation selection portion of the main
menu (area 3) will display up to ten national flags. Click
on one of these to select that nation and display a brief
overview of its historical situation during that era. If you
don't see the flag of the nation you wish to play, right-click
on any of the flags to display a list of additional nations and
select the one you want. If you still can't find the desired
nation, then either it doesn't exist (it has been eliminated
from the game due to conquest) or you have selected a battle scenario where that country is not available for play.
Changing the Game Options
At the bottom of the screen (area 5) you will see three
buttons. Click the Options button to change the settings to
suit your preference (see side bar). If you make a change
this will be displayed in the log area of the main menu
(area 4). If you don't change anything then the game will
use the same settings as the last time you played or will
use the default settings if this is your first game. If you
made a mistake and intended to play a multiplayer game
or tutorial, you can click the Back button to return to the
start menu.
Launching the Game
Once you have selected a country and changed any options,
click the Start button to begin the game. This button will
remain greyed out until you have selected a country.
Multiplayer Games
Multiplayer games are started in much the same way that
a single player game is launched; however, there will be at
Connection Types
You will need either a fast Internet connection (DSL/
Cable with TCP/IP protocol installed) or a connection
to a Local Area Network (LAN) to play Hol2 in multiplayer mode.
LAN: This connection is established automatically by
searching for any hosted games on your LAN. Either click
"host" or select a detected game and click "join".
Valkyrienet: This is a service provided at no charge by
Paradox as both a meeting place for players and a con-
nection handler to make it easier to host or join games.
Hol2 also allows the host to set a password that guests
must enter to be able to join private games.
Internet: You will need to enter the IP address of the
host computer in order to join an internet game. This
can change each time the host connects to the internet
if it is not a permanent connection. If you are hosting a
game you can determine your IP address by establishing
an internet connection and then chose Run from your
computer's Start menu.
If you are using Win98 or WinME type winipcfg and
then click OK and make a note of the IP Address and
then communicate it to your guests (via email, IRC or
If you are using Win2000 or WinXP type cmd and then
click OK. In the new window that appears type ipconfig.
Make a note of the IP address displayed and then com-
municate it to your guests.
Routers and Firewalls
It is common for computers to be "behind" routers or be
protected by firewalls.
Firewalls: vNet and internet multiplayer games use
ports 2300-2400, 28800-29000 and 47400-47700
for communication. You will need to make these available
to host or join a game. Note that this will result in limited
exposure to malicious internet users and that you do so
at your own risk.
Routers: since there are many different routers on the
market, each with unique software controls, please consult your user manual for details. You will also need to
have a network client installed in Windows networking. If
you're having trouble, ask for help in the Hol2 Multiplayer
subforum on Paradox's website.
least two additional steps to perform before you may begin
play. One player will act as the "host" of the game and the
other players will join as "guests". Up to nine additional
players may join (Hol2 supports a maximum often players)
and I would recommend that the player with the fastest
and most stable connection be chosen for internet games,
since this has a greater impact on performance than the
host's computer specifications, If connection speeds are
equal, then the host should be the player who has computer
with the best performance. Only the host may select the
scenario or saved game to be played and only the host may
change the game options.
When you click the Multiplayer button on the initial menu
you will be asked to specify the type of connection you wish
to use (see sidebar) and to enter your name. Type your
name in the space provided and then click the button that
corresponds to the connection type you wish to use. Unless
you are using Valkyrienet (vNet) you will then be asked
whether you wish to host a game or join a game as a guest.
Note that all players must be using the same version of the
game (this is checked automatically when the connection is
first established to ensure that there are no file discrepancies). I also recommend that you disable any non-essential
software that might be running in the background on your
computer as this will often affect stability.
The vNet connection will take you to a free service where
players frequently meet to start new games. Since vNet
supports all of Paradox's games, you will need to select
the Hol2 channel from the channel listing which will take
you to a chat location where you can arrange a new game.
Once you've found a few people to join, you must designate
a host. Since vNet can be busy at times and some people have expressed a desire to be able to create "private"
games, Hol2 now allows the host to set a password that
must be entered to join a game. Once you're ready, the
person who is hosting will click the Host button and type
in a password. The other players will soon see the game
listed and should select it and click Join and then type in
the password when prompted. Establishing the connection
will be handled by vNet for you automatically. (Note: once
you start the game the connection is handed off to the host
and the game will disappear from the vNet list.)
Once you've established a connection, the main menu
screen will appear, however you will notice a few differences. Saved games will now be found at the end of the
scrollable list in the game selection are (area 1) and a listing of all players will now appear in the area at the bottom
left of the screen (area 2). I hope that you never need to
use it, but the host also has the ability to ban a guest from
the game by highlighting the player's name and clicking
the Ban button. On a more positive note, you are also able
to chat with other players while viewing this screen by
typing in the space below the narrow line in the log area
of the screen (area 4).
The host may now select the scenario or saved game to
be played. If a saved game is chosen, then there will be a
brief pause as the game is compressed and then the trans-
fer process will begin to send the save game file to the other
players. You will see a status indicator beside each player's
name, indicating whether the transfer is still in progress
or whether it is complete. I strongly advise players to wait
until everyone has completed this transfer before selecting
countries, since this is a common source of subsequent
problems. Most players who frequent vNet follow a protocol
whereby all players wait until the host has confirmed that
everyone has completed the save game download. The
host will then select a nation which signals that it is safe
for the guests to do so as well. I would also advise against
using the Windows operating system's Alt+Tab facility during download as this will almost always cause the transfer
to freeze or become corrupt. With a decent connection
speed, this process shouldn't take very long and you can
safely chat with one another while waiting.
You will notice that the game options submenu now al-
lows you to change the Share Countries setting to "yes".
This allows more than one player to select the same nation,
13
14
Page 7

•
which is otherwise prohibited. If two or more players play
the same nation (up to the maximum of ten may do so),
then each of these players will be able to use any interface
or control for that country. There are no limitations to this,
so I would recommend you agree on areas of responsibility
ahead of time to prevent disagreements during play,
Once all players have selected their nations, the Start
button will become active for the host. When the host
clicks this, the scenario (or saved game) will be launched
on each system and when all players have finished this
process (slower systems will take longer to complete the
launch) the game will begin. Another vNet custom that I
recommend for any multiplayer game is for each player to
use the chat feature to type "in" or "here" once the game
has launched.
You may also chat with one another during the game by
pressing the tab key, typing a message, and pressing the
enter key. You have the ability to make your chats "private"
by selecting the player (or players) you wish to have receive
your communications. For your convenience, there are several preset chat filters that allow you to quickly address
messages to the people you wish. After you press the enter
key, the chat message will display on the recipient's main
game screen and be recorded in his history log.
There are a few other important differences between
single player and multiplayer games. The game speed
setting may be adjusted during play using the "Ctrl" and
"+" or"-" keys, but this may only be done by the host. Any
player may pause the game at any time but other players
may un-pause it after a delay of 30 seconds. Any message
boxes or events that would normally cause the game to
pause automatically (depending on your message settings)
will display normally but will no longer pause the game.
Some of these will expire if you don't respond to them and
disappear after a period of time. Others will disappear if
they are no longer valid.
Tutorials
If you select the tutorial button in the Launch Menu you can
play the Hol2 tutorials. For more details, see the Tutorial
section near the end of the manual.
Credits / Exit
Click on the Credits button in the Launch Menu to see a list
of the many people involved in the design, development,
production and betatesting of Hearts of Iron II. The Exit
button will quit the game and return you to Windows.
The General
Interface
There are very few parts of the Hol2 interface that are
visible at all times. The majority of your screen will contain
a display of context-sensitive information that will change
depending on the type of action you are taking. There is
one area: at the top of the screen: that never changes.
This provides a quick reference to some of the most critical
pieces of game information and also gives you access to
all of the principle interfaces. There are also a few other
things that aren't directly part of any other interface but
have global impact on the game. Taken together, these are
best described as "the General Interface".
The Top Bar
This is the area at the very top of the screen that will be
visible at all times and displays a quick overview of the state
of your nation. It also gives you access to each of the main:
and vitally important: interface screens.
Status Overview
The upper portion of the bar shows a series of icons and
values which you will refer to frequently. This allows you to
quickly review your reserves of energy, metal, rare materials, oil, supplies and cash. It also displays your manpower
pool, national dissent level, and your transport and industrial capacities. Hovering your mouse over any of these will
reveal an expanding tooltip that gives you a more detailed
summary of that item: particularly your daily income and
expenditures. If the daily change is a detrimental one, then
the value will be displayed in red. Each is described in detail
in the relevant section of the manual.
The Folder Tabs
Immediately below the status overview is a set of click-
able folder tabs that give you access to the five main Hol2
interface screens which we'll later look at one by one in the
manual. Everything displayed below the top bar depends
on which of these folders you've selected.
View Map: Clicking this folder tab displays the interface
that you'll use most often: the Main Map Folder. This is
used to view the map of the world where you'll find details
of your provinces, examine and issue orders to your units,
deploy new units, and perform most other common in-
game actions.
Technology: This is the Technology Folder, where you will
Menu
assign specialized teams to begin working on research
projects, and where you may review the technologies that
you already have available to you and their effects.
Production: This tab displays the Production Folder where
you control your national budget, initiate the construction
of new units and industrial and defensive structures for
your provinces, and see a summary of such important
things as your current trade agreements, convoys and
resource depots.
Diplomacy: This tab takes you to the Diplomacy Folder,
where you may set your domestic policies, conduct diplomacy with other nations, and view diplomatic and political
information about the other nations in the world.
Statistics: This brings up the Statistics Folder: a set of
detailed charts that allow you to view summaries of almost
all of the important information about your nation, armed
forces, and the rest of the world. There are some very
handy "redundant" interfaces on these pages that allow
you to make a number of similar adjustments very rapidly,
and many items are hot- linked to allow you to quickly jump
to a province or unit on the Main Map without having to
search for it or use one of the other methods of locating
items.
The Date/Pause Button
The current date and time are displayed in a button at the
bottom right of the top bar. The time shown always reflects
Greenwich Mean Time (GMT) and, depending on what portion of the map is presently displayed, could be significantly
different from the local time. If you click on this button, the
game will pause for as long as you wish. Clicking on it again
will resume play. You can also press the pause button on
your keyboard to pause and resume.
The Game Management Menu Button
Immediately to the right of the date/pause button is a button labelled "Menu". Clicking this will bring up the Game
Management menu where you may select from several
options:
Save: Allows you to save your game in its current state.
The default file name will be your country, date and time,
but you may change this to whatever you like by simply
typing in a new name. Once the save is complete you will
be returned to the game.
Options: This brings up the in-game options submenu
(similar to the new game options) where you may change
the game speed, toggle between sprite icons and counters,
change your autosave settings, and adjust your sound effects and music volumes. There is also a box at the bottom
of this submenu allowing you to change your message
settings.
Hints: This turns on the hint boxes that are displayed when
the game first launches..
Message Settings
Hol2 allows you to customise the way that messages are
displayed. For each type of message you may select it
and then set it to display in one of the following ways:
Do Not Display: use this setting to suppress this message from displaying at all.
Display in Log Only: these messages will only display
in the history log
Message Notifier: these messages display a small icon
on the right side of the screen. Clicking on it opens the
message box. (This option is not available for all mes-
sage types.)
Message Box: this setting is for more important information and will cause messages to appear in a large mes-
sage box as well as being recorded to the history log.
Message Box with Pause: this setting will bring up a
message box and pause the game until you click "okay"
on the box. Note that in multiplayer games the auto-
pause function is disabled and this message will simply
bring up a message box.
Surrender: This ends your current game session (we all
have to sleep sometime). Your current game data is lost
when you exit so make sure you've saved first.
Return: Returns to the game.
Message Boxes
You will receive many messages informing you of things
that are happening during play. These may be notifications
of foreign diplomatic offers; they could be reports from
your armed forces advising you that they have engaged
in battle or arrived at a destination; they might be reports
from your scientists announcing a new technology; or they
could simply be an intelligence report about international
affairs that may not seem to directly affect you.
Messages can be displayed in several ways, and when
you first install Hol2 these will initially be set to certain
defaults which you can later change to suit your preference.
The most important ones will cause a message box to ap-
pear on the screen and will pause the game until you have
acknowledged it. Ones that are somewhat less important
will be displayed in a message box but will not pause the
game. Others will display a small message notification
symbol at the right edge of the screen, waiting for you to
open and respond to it. Many of these have a time limitation and will blink for a short while before disappearing.
Messages that are probably of only minor importance will
simply be written to your history log. Those that are likely
to be irrelevant to you: notice of a trade agreement being
signed between two nations with whom you have no ties:
will not be displayed at all.
15
16
Page 8

You can change most of your game's message settings
by clicking on the top bar's menu button, then clicking the
options button and then selecting the message settings
button. This will display a scrollable list of message types
that you can set to any one of the display options. You may
also change the notification setting for a particular type
of message in-game (without entering the submenu) by
right clicking on the message when it appears (even in
the history log) and then selecting the new display mode
from the options box.
Events
Hearts of Iron II also incorporates a special event system.
These are usually historical events of great significance
that have been programmed to occur during the course
of your game and that can't easily be modelled using the
regular game engine. In some cases, there are prerequisite
conditions that must be met in order for an event to trigger,
and many of them have a degree of randomisation to make
the exact date of their occurrence somewhat unpredict-
able. There are also a variety of recurring random events
that may have very beneficial: or possibly detrimental:
effects.
At first glance, an event box may look somewhat similar
to message box, but there are a couple important distinc-
tions. An event will always display in a box (this cannot be
changed via the message settings) and will cause a single
player game: but not a multiplayer game: to pause until
you have responded to it. Most events include explanatory
text to give you some details about their historical context. Many events will offer you more than one possible
response and the effects of most events are often quite
significant: although in a few cases the exact implications
of a choice will be hidden. Events may also cause an additional event to trigger, possibly for you or potentially for
another nation. It is also possible that an event will result
in changes that couldn't be achieved otherwise during the
normal course of a game (huge shifts of domestic policy
or dramatic changes in public opinion). An event may also
cause certain officers or cabinet members to become
available: or be removed from the game.
Read the text carefully and hover your mouse pointer over
the available response options to see an expanding tooltip
that describes the event effects. Once you have made your
decision and clicked the appropriate response, the message box will disappear and the game will resume.
Tool Tips
Hearts of Iron II has an extensive set of expanding tooltips that should greatly reduce your need to refer to this
manual and that will often provide pre-
cise numerical details that: for a variety of
reasons: I have intentionally omitted from
this text. Most tooltips are two-tiered, If
you hover your mouse pointer briefly over
an object, a context-sensitive tooltip will
appear. If you leave the pointer there for
about three seconds, it is quite probable
that the tooltip will further expand to give
you even more detailed information.
All numerical values displayed in tooltips will use current
in-game data, almost always including any applicable modifiers, Exceptions to this rule are typically due to "hidden"
information of which you may not be aware. For instance,
a tooltip that comes up when hovering over an enemy force
will only provide as much information as your current intel-
ligence and technology permits you to know and could be
misleading if you have not detected the entire force.
Right Click Menus
Many items in the game: particularly those on the Main
Map Interface Screen: have context-sensitive quick menus
that may be accessed by right clicking on the province,
sprite or item. Some also require that you hold down the
control (Ctrl) key as you do so. These act as shortcuts to
commonly used controls or interfaces to make it easier for
you to manage various aspects of the game. In particular,
you will use the right-click and ctrl+ right-click unit orders
menus on a regular basis to set and coordinate your military activities. I have tried to include an indication in this
manual of every instance where these menus are available,
but if in doubt it isn't a bad idea to try it (doing so will never
cause the game to crash or malfunction).
The Main Map
Folder
Overview
This is the default starting screen and the folder that you
will use most often. It is here that you will view the map of
the world, see your troops (and your enemy's troops), de-
ploy your units, issue orders to your armed forces, monitor
ongoing battles, survey provincial defences and resources,
and much, much more.
You can access the main map view by clicking on the
VIEW MAP folder tab on the Top Bar. The main map interface screen is divided into several important sections:
1. The Main Map: The largest area of the screen, this is
where you will see a portion of the world map and be able
to view and select your provinces and units.
2. The Hot Buttons: This is a set of six
buttons that give you quick and convenient access to your provinces, troops and
deployment queue.
3. The Information Panel: The information displayed in this area will change,
depending on what you are doing. Most
actions in the Main Map interface involve
viewing and often changing something
in this panel.
4. The Mini Map: This is a small clickable map that displays
the entire globe and gives an approximate graphical rep-
resentation of the current local time of day. It can also be
useful for locating your forces around the world.
5. The Mapmode Buttons: This is a set of ten small but-
tons that you will click to change the information displayed
on the main map. Some will cause a fairly drastic change of
the map display, while others act more as filters.
6. The History Log: This is a scrollable running log of game
messages and events.
Since the main map and accompanying context-sensitive information panel places just about everything you'll
need at your fingertips during the course of basic play, it is
important to know how to navigate it, and how to interpret
the information you see there.
Navigating The Main Map
The world is divided into more than 2500 individual prov-
inces and sea zones. This is far too many to be displayed
on the main map while still giving you any useful graphical
information, so the main map area displays just one small
part of the globe at a time.
Sometimes, you will want to view the main map at a very
high level of magnification, where only a handful of provinces will be visible, but where it's easy to see and select
your military units. At other times you may wish to get a
less detailed "big picture" of what's going on: where you
can quickly survey several hundred provinces or look at the
general location of troops along a front or in a theatre. You
can zoom in and out between Hol2's four different levels of
map resolution by clicking on the small"+" and"-" buttons
located on the right edge of the Mini Map. You can also use
the "+" and "-" keys on your keyboard (both the regular
keys and the number pad keys will work).
The Main Map can be scrolled by moving your mouse
pointer to any of the edges of your screen. Doing so will
cause the map to begin scrolling in that direction (left, right,
up or down) until you. remove the pointer from the map
edge. You can also use the Mini Map to quickly jump to
a different area of the world by clicking on the part of the
world that you want to view. Another method is to use
the Province Hot Button to jump to one of your nation's
17
18
Page 9

provinces. Simply click on the button (the
first of the six buttons...it has a small
graphic of a map) and a scrollable list of
your provinces will appear in the information panel. Click on one of these to center
the map on that province. The next four
hot buttons (see below) can also be used
to jump to the location of a specific land,
air or naval force, or to a combat currently
being fought.
Message boxes that appear during play
will often include a "goto" button that you
can click to take you quickly to the relevant area of the map. If you know the
name of the province you would like to go
to, you can also press the"?" button on
your keyboard and type the name of the
province (spelling is important!) into the
box that appears on your screen. Many of
the pages in the Statistics Folder include
a "hyperlink" that will take you directly to
a province when you double-click on its name. That's quite
a few methods.. .and I'm undoubtedly forgetting some!
Provinces
Each province: and most importantly, who controls it: is the
basic unit of measure for victory in Hol2. There is a distinc-
tion between "national" provinces, "owned" provinces and
"occupied" provinces. National provinces are ones that have
historically belonged to a nation for a long period of time
and where the population is generally content with being
part of that nation. The only time they will become upset
with their government is when it takes actions that are not
popular in the view of the public. National provinces will be
the heart of your economy and provide you with the bulk of
your military recruits. Owned provinces do not share this
sense of nationality, but have been under a nation's dominion long enough that only very small pockets of resistance
remain to fight for independence. They tend to generate
only a modest economic benefit to your nation and are
usually not inclined to join your armed forces. An occupied province is one that has only recently come under the
control of a nation: almost invariably as a result of a hostile
action: and where the public not only resents its new rulers, but will usually try to actively oppose them. These
provinces tend to contribute very little to your economy
and are not suitable for recruiting purposes.
Not only can provinces contribute vital natural resources
or industrial capacity to your nation, but they can also
provide additional defences or strategic assets for your
military. Even a quick glance at a province on the main
map will reveal important information about it, particularly
in conjunction with several of the different
map viewing modes. Clicking anywhere
within a province's borders will change
the display in the information panel on the
left side of the screen to provide all the
essential details about the province, This
is the Province Information Panel.
Province Name
Each province's name appears on the
Main Map and in the top left corner of the
Province Information panel. Hovering your
mouse over the province will also display
a tooltip with its name, terrain, any special weather conditions, as well as the
name of the nation that owns it and controls it (if different). In some mapmodes,
the tooltip will also identify the area and
region to which the province belongs (this
can be important when issuing certain
orders for your military).
Province Ownership and Control
The flag of the nation that owns the province appears just
below its name in the information panel. You can click
on the flag to open the Diplomacy Folder with this nation pre-selected. If this province is currently occupied
by another nation, then the flag of the controlling nation
will be partially superimposed over the owning nation's
flag. It is the controlling nation that receives any assets
from a province.
Victory Point Value
The victory point value of the province (if any) is displayed
as a number inside the star on the information panel. National capitals are also identified by a red circle on the
main map, and non-capital provinces of particular strategic
importance: a "key province": will have a red star on it
when viewed using the victory point mapmode (it will not
be displayed in other mapmodes). If you have captured
most of an enemy nation's key points, then it will be far
more likely to accept your terms for its surrender. If you
control all of a nation's key points, then you may impose
extremely harsh terms if you wish: including its annexation
and removal from play.
Terrain
A province's terrain is displayed in the picture on the
information panel, and is also colour-coded on the main
map when using the terrain mapmode. Terrain plays an
important role in combat, affecting movement rates and
supply as well as the outcome of battles. The following are
the various terrain types:
Plains: Depicted on the map in light beige, this type of
terrain is ideal for the movement of all types of units and
has no modifying effect on combat.
Forest; Depicted in green, forest slows down the movement of all units. Defenders gain bonuses in combat, and
attacking units with wheels or tracks will have additional
penalties reflecting the extra difficulty of manoeuvring.
Hills: Hilly terrain is displayed in tan and slows down the
movement of all units. Defenders gain a small bonus, while
attackers: particularly units with wheels or tracks, incur a
penalty. One specialised infantry unit: the mountaineers:
ignore these penalties.
Mountain: Mountainous regions are displayed in grey and
cause a drastic reduction to movement speed. Defenders enjoy modest bonuses in this terrain, while attacking
units (particularly wheeled or tracked ones) are heavily
penalised. Only the special mountaineer units are exempt
from penalties (and defending mountaineers have very
large bonuses).
Desert: Yellow regions indicate desert terrain. This terrain
is simply not very pleasant to fight in. The performance of
both sides will be noticeably (and fairly equally) reduced:
particularly in the case of cavalry units.
Marsh: Marshes and swampland are depicted in pale
green and, as you'd expect, can have a large impact on
the movement rates of wheeled or tracked units. Attackers
suffer penalties (particularly motorised units) while defenders enjoy a modest bonus. Special marine infantry divisions
tend to operate better in these conditions.
Jungles: Displayed in dark green, jungle is very inhospita-
ble terrain for movement and ideal for defence. Any attacking units that are not on foot will be nearly useless.
Urban: Urban areas (large cities) are depicted in a yellowish-brown colour. Defenders usually enjoy a modest
advantage, since it Is assumed that they have had the
opportunity to select the optimum defensive positions.
Because of winding streets and a multitude of physical
obstacles, infantry generally perform better than other unit
types in an urban area.
Water: Lakes and sea zones are displayed in blue on the
map, Clicking on them will display only limited information,
since they cannot be owned and no structures can be built
in them. Note that for the purposes of Hol2, the seaway
between the Great Lakes and the Gulf of St. Lawrence is
considered impassable to naval and supply vessels, even
though this wasn't strictly the case historically. There are
also several narrow bodies of water that may only be used
by your ships if you control the adjacent provinces (see
Naval Combat section).
Rivers: Rivers are displayed on the main map as blue lines
between provinces and will present a challenge for military
forces that attack across them. If possible, you should try
to avoid launching such an assault if there is an alternative
avenue of approach, although having engineer brigades
will mitigate this penalty to a degree.
Beaches: While many provinces have a coastline, not all
of them are suitable sites for the landing of an invasion
force on the scale of Hol2. Invasions (landing forces from
a naval transport) are restricted to provinces that have an
additional beach icon: a beige-coloured, crescent-shaped
symbol placed on the coastline. These operations are very
tricky to accomplish and are quite risky, if there is much
opposition to the attack.
Weather
Not only does terrain play a role in movement and combat,
but weather and weather-related conditions can also hamper your efforts. You can check the weather conditions using the Weather mapmode and the prevailing conditions are
also indicated in the Province Details. Most of the effects
will favour the defender over the attacker: although both
forces are usually penalized: and the degree of the effect
is determined by the severity of the conditions.
Rain: This is shown on the weather map as a rain cloud.
Land forces are only slightly affected by this weather condition. Naval units will suffer somewhat greater penalties and
have difficulty locating their targets; and air units will lose
almost all of their effectiveness.
Storm: A storm is a severe form of rain and is shown as
a rain cloud with occasional flashes of lightning. Naval
vessels are severely hindered in storms and land units will
generally have a fairly tough time of it as well. Air units
cannot fly missions if their base is experiencing a storm
and shouldn't bother taking off if these conditions exist over
their target, since their drastically reduced performance
will make the mission little more than a waste of fuel.
Muddy: This terrain condition is common in certain global
regions and is shown in the weather mapmode in brown
(unaffected provinces are shown in beige). This will only
affect the performance of land units: particularly any that
rely on wheels or are extremely heavy: and unlike most
other weather conditions will very strongly favour the defenders in battle.
Snow: Snowfall tends to affect attacking ground units
slightly more than defenders, and will have a very negative impact on any air missions. Naval vessels will perform
poorly as well.
Blizzard: This is extremely heavy snowfall that will make
your aerial units effectively useless (and they are grounded
if there is a blizzard over their air base) and will also have a
significant impact on all land and naval battles and movement. Blizzards are displayed as very dense clouds with
thick heavy snow falling from them.
Frozen: Regions will become frozen at certain times of
19
20
Page 10

year, reflecting extremely icy and hazardous conditions
that will affect movement but only slightly reduce combat
capabilities. Defenders have only a slight advantage on
frozen ground.
Provincial Borders and Crossing
Points
Regardless of the mapmode view you use, provincial borders are shown as a black-dashed line on the Main Map,
while national boundaries are traced with red lines, Rivers
are depicted using blue lines along provincial boundaries
(there are some modest geographic liberties taken with
river placement for game design reasons, and only rivers
of some significance are taken into consideration). Each
provincial boundary is also listed on the right side of the
information panel when a province is selected (the label
space is limited to the first six characters of the adjacent
province's name) along with an indication of the type of
connection it has with it neighbour. A green dash indicates
a border that is not impeded. A blue river icon means that
there is a river that must be crossed to move across this
border and, if contested by an enemy force, an attacker
will incur a river-crossing penalty (for more details, see the
Combat section). If there is a unit engaged in battle in an
adjacent province, a small red "under fire" symbol will be
displayed on the provincial boundary as well. If the bound-
ary is considered impassable, a red line will be displayed.
Clicking on one of the border names or icons will change
the display to show the Province Details in the information
panel for that province instead.
Some very narrow bodies of water may be traversed
without the need for naval vessels and are shown using
a blue water icon in the boundary listing. Since these
crossing points are not displayed on the Main Map, you
should pay careful attention to the province boundary listing whenever you are in a province that might have one.
If a hostile fleet occupies the sea area, it will prevent you
from using or attacking across that narrow strait, If the
province you are moving to contains enemy forces, then
the combat will be treated as an invasion and is subject to
the same penalties as a normal amphibious invasion (see
the Combat section for details).
Provincial Assets
The area immediately below the province's picture provides
detailed information about each of its assets: its natural
resources, industrial conditions (factories, infrastructure
and partisanship), its defences, and any other provincial
improvements that have been built there. These are de-
scribed in detail elsewhere, so you may encounter some
terms here that you are unfamiliar with, and may need to
refer back to after you have read the other sections.
If the province you are viewing is currently controlled by
21
22
Page 11

Quick Build Buttons
If the province you are viewing is one that is currently under
your control, some of the provincial asset values will be
displayed in grey and will also act as Quick Build buttons
that allow you to quickly issue a production order for more
of that item to be built in this province. For infrastructure,
factories, land fortifications and naval fortifications, this is
one of only two ways to issue a production order. I will detail
this in the Production Folder section of the manual and give
only brief instructions here. Click on one of the Quick Build
buttons to place a production order for this item to be built
in this province. You will see the production order appear
in your national Production Queue (which is displayed in
the Production Folder) and this will also be displayed in the
lower portion of the information panel for this province. You
may click on the Quick Build button a number of times to
order the serial production of multiple identical units
Right-Click, Province Menu
Right-clicking in the main map area of a province you own
will display a menu of all possible province improvements
that may be built, allowing you to quickly initiate construction of these in exactly the same way as using the above
hot buttons mentioned above, but also allowing you to
build some of the other improvements that aren't included
as own-province hot buttons. Right-clicking on another
nation's province will display several context-sensitive
options that you may select to quickly initiate a diplomatic
action with that nation. Each of these is described in detail
in the relevant portions of the manual (Production and
Diplomacy).
The Hot Buttons
The six Main Map hot buttons provide a quick means of
gaining an overview of (and locating) your provinces and
armed forces. While details about combat and armed
forces will be given in the Combat section, an overview
of each is given here.
The Province Hot Button
Clicking on the province hot button displays a list
of all of your currently controlled provinces in the
information panel. This allows you to conduct a
very fast survey of your nation's resources and any recent
enemy activity. To the right of each province's name is its
current industrial capacity, an indication of the type of resources (if any) that have been drawn from it, as well as its
manpower value. If a battle is currently being fought there,
or if it has very recently been attacked by enemy bomb-
ers or naval bombardment, then a red "battle" icon will
appear adjacent to its name. To the left of each province
is a small symbol that will be green if the province is one
of your owned provinces, or red if the province is normally
owned by another country but is currently under your occupation. Clicking on any of the small "header" icons at
the top will sort the list in descending order. You can click
the Provinces header to return to an alphabetical sorting.
Clicking on the province name will center the main map
on that province and display the Province Details in the
information panel.
The Land Forces Hot Button
Clicking on this button will display a list of all
provinces that currently contain your land forces
in the information panel, as well as basic information about the forces stationed there: the number of divisions and their overall strength and organization and the
portrait of their commanding officer. If an army is presently
...carrying out orders that you have given it then a summary
of the orders will be displayed here, and if it is involved
in an attack the combat icon will appear adjacent to its
current strength. You may jump quickly to the province by
clicking on the province's name in the information panel,
or you may bring up details about any army by clicking on
its name in the listing (the main map will also jump directly
to that province).
The Air Forces Hot Button
Click this hot button to display summary informa-
tion about your air forces. Each of your provinces
that contain an air base will be listed here. To the
right of the base's name are two values: the overall size
of the base and its current operational size. If an air base
has been attacked by enemy bombers, then the operational size may be less than the base size. As long as you
devote IC to reinforcements, then the base will gradually
be repaired and will become fully operational once more.
There is no restriction to the number of air wings that may
be stationed at a base, however if this number exceeds
the base's current operational size, you will experience
decreases in the rate that units regain organisation, are
repaired, or are upgraded. It is possible to base your air
wings in an ally's air base: although you are subject to the
same size restrictions: at which point the ally's province
will also appear in this listing.
Your air units will be listed immediately below their current base assignment, You will see a unit's current mission
and location (which may be different than its base if it is
flying at the time that you review the information) as well
as its leader, strength and organisation. This panel can also
be used to quickly issue new orders to your air forces by
clicking the order box in the lower right corner of the unit's
listing and issuing new orders. Click on a squadron's name
to jump to its location on the map and to review detailed
information about its composition.
The Naval Forces Hot Button
The Naval Forces hot button is very similar
to the Air Forces hot button. Clicking it will
bring up a complete listing of your naval bases
and the various units that have been assigned to each.
The base size and current operational status are shown
beside the name of the port (naval bases are subject to
aerial attack). Naval units are listed below their base,
along with a summary of their current location, orders,
commanding officer, strength and organisation. Clicking
on a unit will center it on the map and the information
panel will display more detailed information about its
components. Just as with the Air Forces hot button, you
may quickly issue new orders to your naval units from
this panel.
The Active Combats Hot Button
When you engage in large-scale operations, it
can be easy to lose track of all of the various
combat activities that are currently underway:
even though you will receive a message when each one
commences, The Active Combats hot button becomes
an invaluable tool for quickly locating and evaluating the
status of any battle.
When you click this hot button, you will see a complete
scrollable listing of all active military engagements. Each
will feature a summary of the size and nationality of the
forces involved, the portraits of the two opposing commanders, and a graphic representation that shows each
force's current strength and organisation. The attacker is
always listed on the left and the defender on the right.
Below them is a battle status bar that gives an approximate idea of who is currently prevailing. If you click on
any of the active combats listed in the panel, then you
will jump to the location in the main map and the Combat
Details (a detailed battle analysis) will be displayed in the
information panel.
In very large wars, you may have a huge number of
battles in progress, so you can also filter which active
combats are shown when you click the hot button. You may
choose to see a list of only the land, air, naval, or bombing
engagements by clicking on the appropriate icon at the top
of the listing. Click the "all" icon to return to a complete
listing of all active combats.
The Force Pool
Hot Button
The sixth hot but-
ton is used to view
and deploy new
units from your force pool.
will give you details of how to
use this interface later in the
manual so it will suffice to indicate here that if you click
on the Force Pool hot button you will be given a list of all
of the available units in your force pool. These are the new
units that you have built or recruited using the production
interface and that are now ready for active duty and are
simply waiting for you to issue them an assignment. If
you have given orders for the strategic redeployment of
a land unit then it: and its intended new location: will appear in this list as well. You can only review: not change:
a strategic redeployment order and the force is listed here
only for your reference and convenience. Important note:
each item awaiting deployment in the force pool will tie up
national transport capacity as well as consuming a daily
allotment of supplies. This may hurt your ability to efficiently supply your forces that are already on the front lines.
Items in the force pool will also have very poor organisation
when first deployed and will not be upgraded with the
most recent technological advances until they have been
placed in the field.
The Mini Map and Mapmode
Buttons
The Mini Map has three primary uses: If you left click any-
where on the Mini Map then the main map will move to
be centered on that location, making this a quick way to
jump between theatres. The Mini Map also has a graphic
representation of the approximate local time of day for any
portion of the globe. A dark band will sweep across the Mini
Map, indicating that it is night time in that region. The third
function of the map is accessed by right clicking on the Mini
Map and selecting the type of force you would like to view.
Small red dots will then appear on the Mini Map, showing
you the locations of all forces of that type.
On the right edge of the Mini Map are small"+" and"-"
buttons. Clicking on these will change the magnification
of the main map. You can also use the"+" and"-" buttons
on your keyboard to do the same thing. Hol2 permits four
different levels of main map magnification. Along the base
of the information panel, below the Mini Map, is a series
of ten Mapmode buttons that allow you to quickly change
the main map view to provide you with important: often
essential: information at a glance,
Terrain Mapmode
This is the standard display mode, with provinces shown
colour-coded by terrain type
(see the Provinces section
above for a description of
each terrain type). Province
improvement symbols are
shown, but the portions of
the map that are not within
24
Page 12

visual range of your alliance's provinces or military units
will be covered by the fog of war.
Political Mapmode
While the unit and province improvement display remains
the same as the terrain mapmode, in this view all provinces
are colour-coded to show the controlling nation instead
of the terrain.
Weather Mapmode
Click this button to view the prevailing weather trends
around the world. Provinces will be coloured beige unless the conditions are muddy (brown) or frozen (white).
Animated Icons will show the current weather trends in
provinces and sea zones, indicating frequent rain, storms,
snow or blizzards. If you're planning a major offensive,
check this map before you launch it.
Economic Mapmode
This mapmode provides a quick means of checking re-
source locations and industrial capacity. Provinces belonging to your nation are colour-coded in light green if
they contain at least one factory; or in dark green if they
belong to you but do not contribute at all to your nation's
industrial capacity. Any province that has some type of
natural resource or manpower value will contain the ap-
propriate icon to indicate its presence. You can also use
the Territorial Information summary in the Statistics folder
or the World Atlas information that is in the pdf file included
with the game.
Supply Mapmode
This mapmode displays military units and is therefore subject to the fog of war. Each province will be colour-coded
to indicate whether it is currently within allied supply. If it
is currently within supply then it will be shaded in green,
and if it lies outside of an allied supply chain then it will be
red. The shading of each province indicates its approximate infrastructure level. Darker shadings indicate lower
infrastructure levels and lighter shadings indicate excellent infrastructure. Note that enemy and neutral provinces
that are adjacent to allied provinces will also usually be
displayed in green, since a unit that moves there would
remain in supply. Sea zones through which either supply
convoys or resource convoys will run are also indicated on
the map as a clear blue colour, rather than the standard
greenish-blue tint. This only indicates that the convoy path
has been created, but does not indicate that a sufficient
number of vessels have been assigned to actually carry out
that duty. Supply (and convoys) will be discussed in detail
in the Production and Combat sections.
Partisan Mapmode
This mapmode will give you a quick indication of the risk of
partisan activity in your provinces. Light green indicates a
national province which has no risk of rebellion. Dark green
indicates an occupied province where any risk of partisan activities is being suppressed by your forces. Various
shades of red indicate provinces where partisans are active
(the darker the shading the more active they are) so these
should be carefully monitored. A tooltip details all current
partisan-related conditions. Partisans are discussed in
•detail in the Diplomacy Section.
Region and Area Mapmode
The next two buttons will display a colour-coded map of ei-
ther regions (large province groupings) or areas (somewhat
smaller subdivisions of the regions, usually about 3 or 4
provinces in size). Areas and regions are used for many of
the orders that you will give to your air force or navy and
do not indicate ownership or control, so you may find these
modes convenient when issuing such orders.
Diplomatic Mapmode
It is easy to lose track of who is at war with whom, and
who is allied with whom, so this mapmode allows you to
determine this at a glance. The map display is colour-coded
and context-sensitive. Click on a province to view the world
from its controlling nation's perspective. A medium-green
province is currently controlled by that nation. A light green
province belongs to one of its allies and a dark green
province is one that the nation considers to be its natural
property but is currently owned by another nation (whether
friend or foe). A red province is currently controlled by
another nation with which the nation is at war.
Victory Points Mapmode
This mapmode can be used to quickly locate provinces
that have an assigned victory point value. Green shading indicates that a member of your alliance occupies the
province; orange shading indicates that a neutral country
occupies it; and red shading means that it is currently controlled by an enemy. Provinces with very high victory point
values (often national capitals) will be darker in colour than
those with lower point values. Key provinces of particular
strategic importance for peace negotiations are marked
with a red star in this mapmode.
The History Log
The history log is a scrollable sequential list of the messag-
es and events you have had during the game. In multiplayer
mode, it will also record any chat messages you send or
receive. You can scroll back up through recent messages
(those received during your current session of play) and this
log is also saved for future reference. A full log may be read
using the History Log screen in the Statistics folder. If you
wish, you may hide the message log by clicking the small
button at the top left corner of the log and later restore it
by clicking on the button again.
The Technology
Folder
Overview
Technology is an integral component of Hearts of Iron II and
your degree of overall achievement will have a significant
impact on many things. Your domestic affairs will benefit
from new efficiencies in extraction, conversion and production rates, and your military will deploy new technologies
to gain a crucial edge over your enemies. You may even
begin nuclear experimentation that can lead to powerful
new energy sources.. .and the atomic bomb.
Unlike most things in Hol2, this does not require a direct
allocation of IC. New technological advances are gained
by hiring a team of scientists, assigning them a research
project to work on, and then after a period of time, the
team will announce that it has achieved this new technology. The length of time will depend on the nature of the
project and on the skills and expertise of your team. You
are also limited in the number of projects you may work
on simultaneously. The maximum number of projects and
the specific teams that are available to you will depend
on which nation you are playing, and on your nation's
economic strength,
Research speeds may be further improved (or hindered)
somewhat by several of your cabinet ministers. Your rocketry research will be greatly aided if you have built rocket
test facilities in at least one province; and your nuclear
research will benefit similarly from a nuclear reactor site.
The only other way to accelerate your research is to ac-
quire blueprints from another nation. Gaining an edge over
your enemy: or at very least maintaining an approximate
technological parity: will almost certainly be vital to your
overall success.
Selecting Research Teams
The left side (area 1) of the Technology Folder will display
up to five teams of scientists, each of whom may be assigned a project to work on. When you first start playing
this area will be empty, waiting for you to assign research
teams to each slot and then give them each a project to
pursue. Depending on the nation you are playing, you may
have as many as five slots, or as few as one, The number of
available slots is based on your nation's current industrial
capacity.
Click on a blank team slot to display a list of the teams
26
Page 13
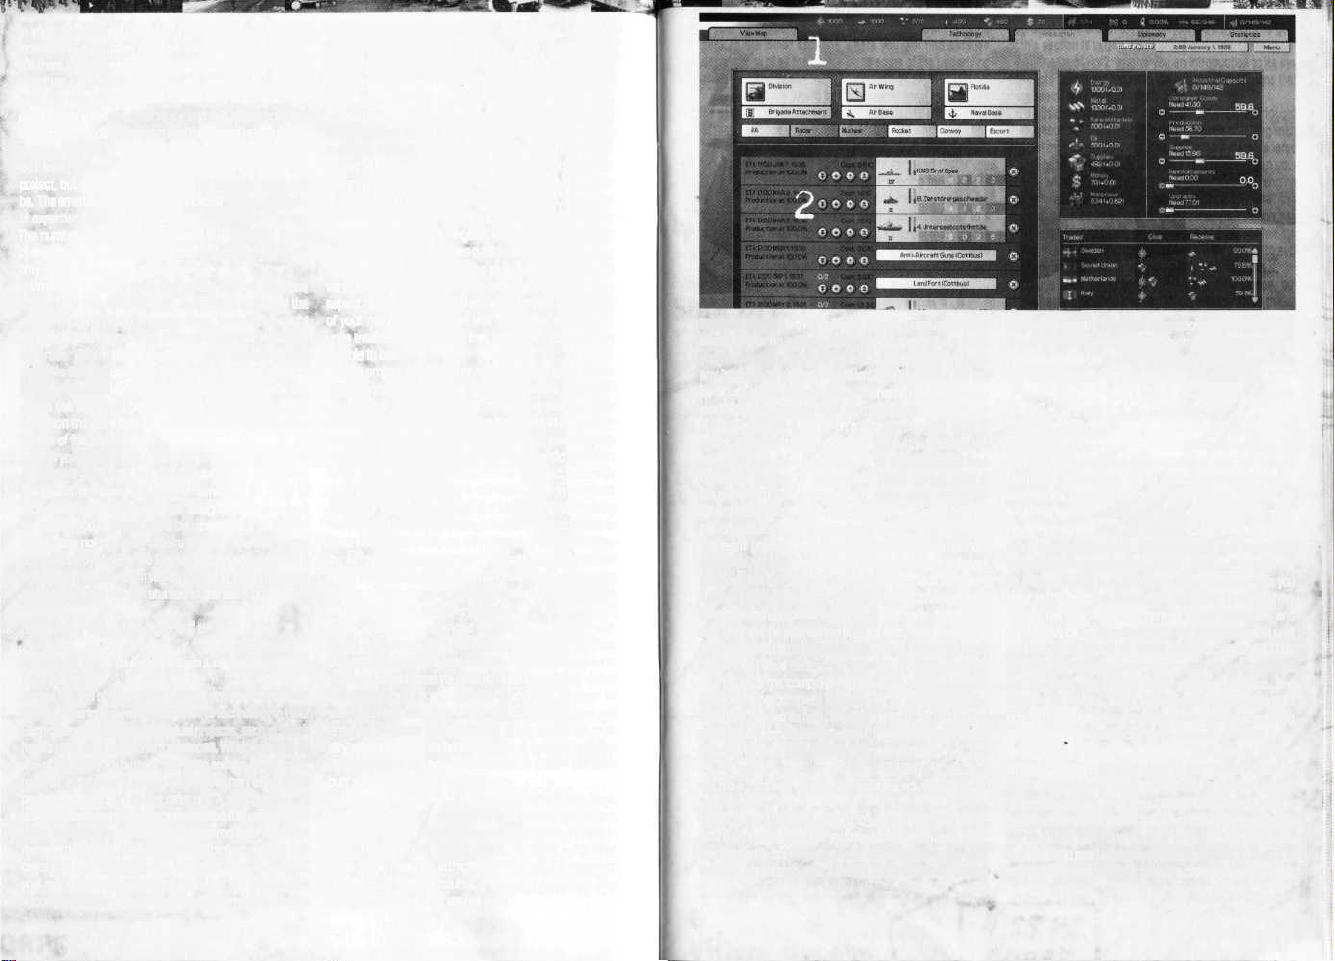
in your nation's pool, Some of these may be headed by
individuals, while others will be identified as companies
but there are no benefits or penalties to selecting one over
the other. Each team will have a skill level and will have at
least one area of expertise. The skill level is an indication
of the team's overall proficiency and will affect both the
daily cost of funding the team and the overall rate at which
it will be able to research a new project. The higher the
skill level, the less time the team will need to complete a
project, but the higher the daily cost of financing them will
be. The small colour-coded icons indicate the team's areas
of expertise (fields of research at which the team excels).
The number of available teams: and their skill and areas
of expertise: will depend on the country you select and will
only rarely change during play.
Whenever possible, try to find a team that has expertise
in the fields that relate directly to the components of the
project that you intend to assign them, even if they might
be less skilled overall than another team that lacks this
expertise. Each area of expertise that matches a com-
ponent's field requirement will give the team a research
bonus when working on a project, so the more fields that
match the better. A lower skill level will also result in a
reduction the daily cost of financing the team during the
course of the project.
Once you have chosen a team (by clicking on it) a portrait
or logo will appear in the project slot of the technology
folder and you'll see the team's name and its areas of
expertise. Since you haven't yet assigned a project for it
to work on you, will also see a comment that it is idle and
that it does not currently require funding. Idle teams may
be replaced by clicking the Replace button and selecting a
new team. The new team will be placed in that project slot
and the old team will be returned to the team pool.
Research Projects
Selecting and Assigning a
Project
Across the top of the screen (area 2) are a set of buttons
listing the various general categories of technology in Hol2.
Each category has many individual projects, each of which
has its own set of component advances. When you click on
one of the category buttons, the main section of the folder
(area 3) will display a colour-coded flowchart of all of the
projects that are part of that category. A dark green entry
indicates that you have already completed this project; light
green indicates that you have all the prerequisite advances
necessary to begin researching the project; yellow indicates that a team has already begun work on the project;
and red indicates that you lack some of the prerequisite
accomplishments to begin research. The arrows in the flow
chart indicate the prerequisites for each project, making it
easy to see what steps must be taken if you are looking far
forward into your research future. All of the secret weapons
have prerequisites in other categories that must first be
completed before you may begin to research them.
Clicking on any one of the projects will display the Project
Details (area 4) and its component advances. Each component will have a difficulty rating and a specified field that is
the primary discipline that relates to the component. The
overall project completion time will be reduced for each
of the assigned team's areas of expertise that correspond
to one of the components' primary fields; but the higher
the difficulty rating, the longer it will take to research that
component. You will also see a list of the benefits you may
expect upon completion of the project. The effects will
vary significantly from project to project. Some improve an
aspect of your economy; others will increase the abilities
of your military; and others will make new or improved
units available to you that a less advanced nation will not
be able to use.
Each project has one other factor that can play a role in
determining how long it will take to research: the historical year that it appeared. This reflects the need for other
sub-components that aren't directly included in the technology tree's multitude of components but played a role
historically in it being possible to make scientific advances
in this area. If you begin researching a project before its
historical time period, then it will take longer to complete
since your team will need to spend additional time inventing
those (hypothetical) subcomponents. Highly complex or
advanced projects may be very difficult and time consuming to complete, and it is very unlikely that a nation will
be able to complete research on all of them during the
course of a single game (for many nations it will be nearly
impossible to research everything).
Progressions in advanced levels of rocketry research
will be nearly impossible without appropriate test facilities
being constructed to assist your scientists. If you intend to
pursue this field, then you should build at least one rocket
test site as soon as you are able to and then increase its
size whenever possible. This province improvement will
drastically reduce your research times of further rocketry advances. The same is also true of nuclear research
projects, which will progress very slowly unless you have
built a nuclear reactor in at least one of your provinces.
As mentioned earlier, all research projects will take much
less time if you begin with a set of blueprints for the project.
It is highly unlikely that a nation will simply give blueprints
to you; however you may be able to negotiate a one-time
trade if you make an attractive enough offer during your
negotiations.. .and of course, an enemy's blueprints may
occasionally come your way as a result of espionage activi-
ties (this is a game event). If you are lucky enough to steal
blueprints for an advanced technology, they will not grant
you knowledge of any prerequisite advances, nor give you
any bonuses to researching them. The blueprints will not
be of use to you until you have reached a point where you
would be able to begin work on that project.
Once you have decided on a project that your team is
able to research, click the Start Project button to assign the
team to this project. The main area of the screen will then
change to display the project details with an indication of
the overall progress being made on the project. Money will
be withdrawn from your national cash reserves to finance
the project and, as time passes, you will be able to see
the team gradually researching each of the component
advances. You will also see an indicator showing the overall
progress being made on the project. If you lack sufficient
funds to continue financing the team's work on the project,
then research progress will slow dramatically, the team's
skill level will be set (temporarily) to zero, and a large red
dollar sign will be displayed as a warning. This penalty will
be removed once the team's financing has been restored.
After all of the components have been researched, the
project will be complete and you will be notified that the
team has finished its task. Whatever effects the technology
gives will be immediately available, however in many cases
this will require some degree of implementation.
Cancelling and Reassigning a
Project
Only one team may be assigned to a project at any one time.
At any time that you wish you may cancel the project and
then assign it to a different team (or abandon it and start
work on something else instead) by clicking the Cancel
Project button on the project details screen. You will lose all
of your progress towards this project: including any components that have been completed and all cash invested: so
this should only be done under dire circumstances.
Implementing New
Technology
The effects and implementation of a new technology will
vary depending on the type of project and are far too
numerous to list here. Some effects are instantaneous
and require no direct action or IC allocation: they will be
implemented immediately and automatically: while other
projects may have few (or no) immediate effects and act
more as stepping-stones along the road to a major new
technological breakthrough. Many military advances will
be improvements to existing technology and any units you
have in the field will need to be upgraded to take advan-
tage of the new benefits. There are many unit types and
some province improvements that will not be available until
you have researched the prerequisite technologies. This
includes specialised infantry units (mountaineers, marines,
paratroopers, etc.), radar sites, nuclear weapons, and
many of the heavier, larger or more advanced tank, aircraft
and ship designs. You can check all of this by consulting
the details of the advances in the technology folder.
Upgrades to existing units are accomplished by allo-
cating IC to the Upgrades slider in the Production folder.
Naval advances that result in a new model type cannot be
upgraded, though, and in such instances you will have to
manufacture a new vessel to implement the advance. You
will also have to decide whether to mothball the obsolescent vessel to recoup its manpower, or whether to keep it in
active service and benefit from the crew's experience.
27
28
Page 14

Technology Summary
Clicking the Overview button (at the extreme upper right
of the category buttons) will display a summary of the effects of all the technologies you currently possess. This is
where you can gain a rapid overview of the most advanced
unit types that are available, the benefits enjoyed by your
nation's industry, as well as all of the mission types that
you are able to order and how effectively your forces will
be able to carry them out. Remember that some units
and mission types will not become available until you have
researched the necessary technologies and/or doctrines.
If you see a mission listed as "no" or a unit type with-
out a model listing, then you lack one of the prerequisite
technologies. For such an innocuous little button this sure
packs a wallop from a human player's point of view. I can
only urge you to review it frequently!
The Production
Polder
Overview
The Production Folder is the interface you will probably
use most frequently (other than the Main Map Folder). It is
used for two main purposes: issuing new requisition orders
and managing your economy, It is here that you will recruit
new divisions, construct new aircraft and naval vessels,
and build some of your provincial assets. You will then be
able to adjust the priority that each order is given by mak-
ing changes to this in the production queue. It is also the
folder you will use to manage your nation's IC allocation to
meet various domestic and military needs and will manage
the disposition of your network of convoys. Failing to pay
attention to your economy will have devastating effects
that can cripple your nation, by promoting civic unrest or
leaving your armed forces without the fuel or supplies they
need to operate.
The screen is divided into two sections. The left side
displays the Production Orders interface and the Production Queue; while the right side shows the vitally important
Industrial Capacity Allocation sliders, a summary of your
national resources, trade agreements and convoy activity,
and the location and size of your resource depots. Well
look at each of these in turn.
Production Orders and the
Production Queue
The Production Orders interface (area 1) and Production
Queue (area 2) are displayed on the left side of your screen
in the Production Folder. Every time you wish to recruit new
forces or construct one of several province assets, you
will initiate a new production order, confirm the type and
quantity desired, and then issue the order. It will then be
added to the bottom of the scrollable Production Queue
listing, where you may subsequently review, manage or
cancel it. It is also possible (and in some cases mandatory)
to place orders for some province assets directly from the
Province Details information panel, but the priority of those
orders is managed from the Production Queue. Let's look
at all of these controls.
Placing a Production Order
Production Orders are easy to place in Hearts of Iron
II. Begin by clicking one of the dozen or so production
category buttons on the Production Orders interface to
indicate the type of item you wish to build. If an item has
prerequisite technological advances that you currently lack
then the button will be greyed out on the interface until your
scientists have researched them. The Division, Air Wing,
Flotilla and Brigade Attachment categories will display a
slightly different Order Details interface than the others,
since there are a number of possible items that you may
select from each one. The remaining categories require no
further selection and will display a "simple" Order Details
interface.
Orders for "simple" items are always manufactured using the most current technology, so there is only one type
you may build. Click on the name of the item you wish to
build to display the Order Details interface. If you wish to
build only one unit, then you can click the Start Production button and the order will be placed immediately. The
Order Details interface will disappear and you will see that
an order for one unit has been added to the bottom of
your Production Queue (you may need to scroll down the
list to see it). If you want to order more than one unit, you
may do so by adjusting the Serial Runs or Parallel Runs
values. We'll come back to the meaning of (and distinction
between) those options in a few moments.
Placing orders for divisions, brigade attachments, air
wings, and flotillas is slightly different since you will usu-
ally have a variety of available unit types and must choose
which one to manufacture. Begin by clicking on one of
these four buttons in the Production Orders interface to
display the more "complex" version of the Order Details
interface. Scroll through the list of available unit types (area
3) to locate the type of unit that you would like to build.
The length of the list and the types of units available will
depend on your current technology level. Since you aren't
expected to be able to remember all of the various unit
types and then apply all of the additional modifiers that your
current technology might give, detailed unit information is
displayed (in area 4) when you select a name from the
unit type list. The meaning of each of these is described
in detail in the Combat section of the manual, so the only
note I will add here is that the organisation and morale
values shown are not the maximum values, but rather the
initial deployment values of those items.
You will also want to refer to the cost of the unit and its
required production time (area 6). All military units not
only require a daily allocation of IC during their production but also require an initial amount of manpower to be
withdrawn from your national manpower pool. If you lack
the manpower then you may still place the order and it will
be withdrawn as soon as it becomes available, however
production of the item will not begin until the manpower
becomes available.
Once you have decided which unit to build, you may click
the Start Production button to place an order for one unit.
If you wish to order multiple units, then you may adjust the
serial or parallel production run values (area 5: which we'll
discuss in a moment). Once you've confirmed your order,
the Production Queue will be updated to reflect this.
For all order types there is a daily IC requirement that
must be maintained for production to proceed at full speed.
If you fail to allocate sufficient IC to production then the
manufacture of items at the bottom of the Production
Queue will not begin until you either increase your IC al-
location, or until items with a higher priority (higher up the
queue) have been completed and the IC that they were
using becomes available.
Production Runs
The Order Details interface for both simple and complex or-
ders will provide you with an option to increase the number
of units produced in a production run (serial runs) as well
as to place multiple identical production orders at a time
(parallel runs). This is designed to make the production
interface as convenient as possible for you to use when
you want to manufacture large numbers of the same Item
or have ongoing, continuous production of it.
If you increase the "serial runs" value of the Order De-
tails this will issue an order for multiple, identical items to
be manufactured sequentially. When you click the Start
Production button a single order entry will be added to the
Production Queue and your factories will begin to manufacture the first unit. When production is complete the unit
will be added to your Force Pool and your factories will then
begin manufacturing the second unit. This process will
continue: with the units becoming available one by one:
until your order has been filled. If you look at the order in
the Production Queue (after it has been placed) you will
see the total number of units ordered as well as which of
those units is currently being manufactured.
Increasing the "parallel runs" value will issue a series
of identical orders and each of the units will be manufactured at the same time. This is a quick way of placing
multiple identical orders without being forced to go through
29
30
Page 15
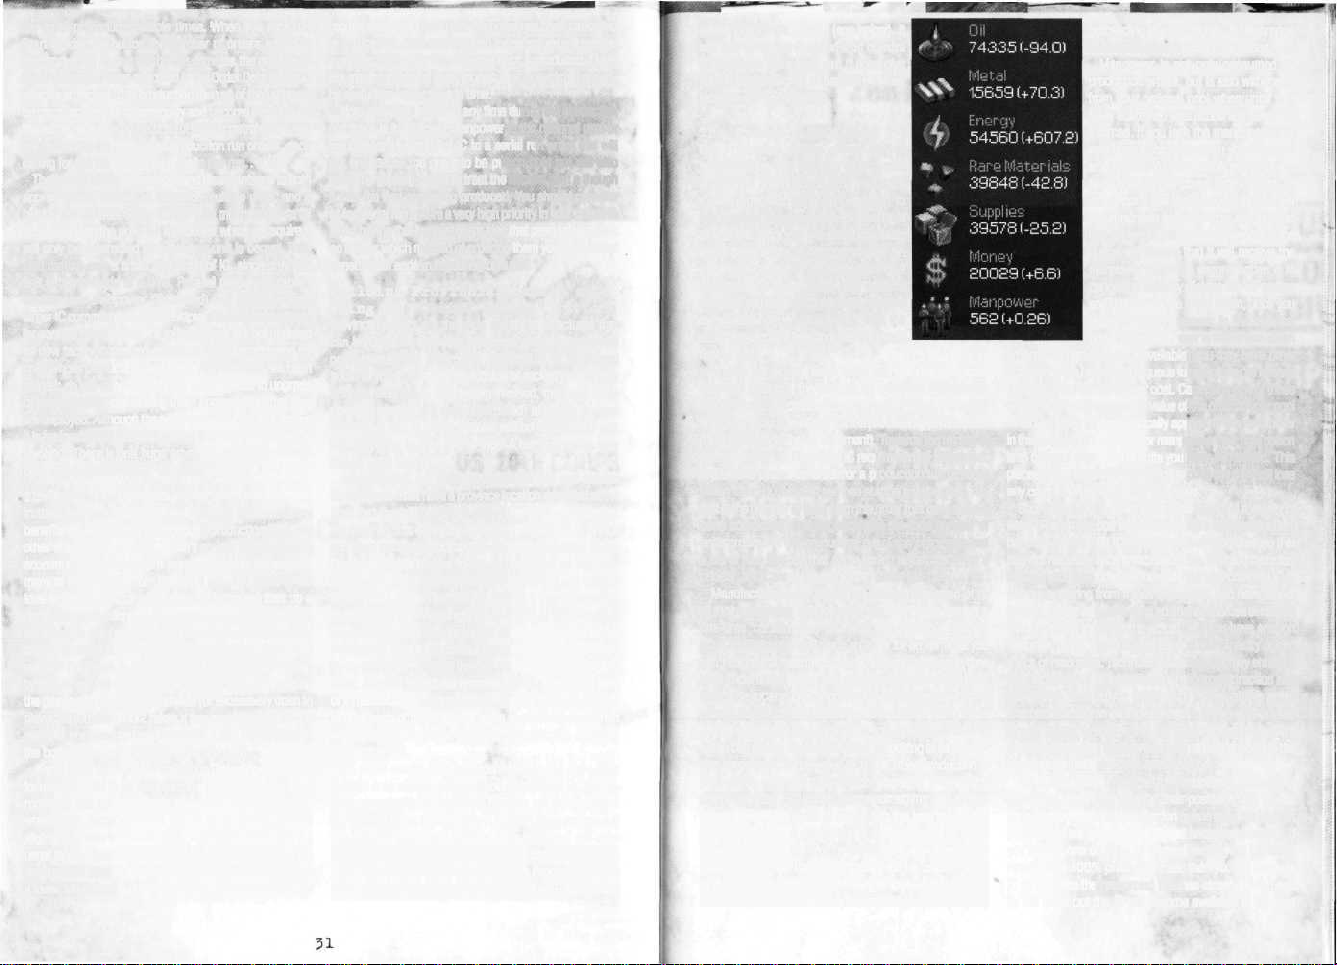
the order procedure multiple times. When you click the
Start Production button the number of orders added to
the Production Queue will be the same as the number of
parallel runs you have specified in the Order Details. If you
allocate sufficient IC to production then all of the units will
be manufactured simultaneously and become available on
the same date, If you use both of these controls then you
will be issuing multiple serial production run orders, each
calling for the same number of units per run..
There are obvious advantages and disadvantages to both
approaches of issuing an order for multiple units, and a
hidden one as well. Serial orders take much longer to fill
but spread out the drain on manpower which: if required:
will only be subtracted as each new unit is begun. They
also require only a small allocation of IC, since only one
unit is being made at a time. Parallel orders will rapidly
deplete your manpower (if needed) and demand much
larger IC commitments, but multiple units will be available
far sooner. Serial orders for military units are not updated
as new technological advances are discovered: even for
units whose production begins after the advance has been
gained: so you may find yourself being forced to upgrade
or even consider disbanding them immediately after they
are deployed. Although the same is true for parallel orders,
it is far less likely to happen during the shorter time period
involved. There is one huge advantage, though, that ap-
plies only to serial orders: the gearing bonus.
The Gearing Bonus
In the "real world" there are significant manufacturing
benefits to be gained from dedicated production lines and
other efficiencies of scale. I won't go into the underlying
economic principles: there are volumes on the subject,
many of them dating from the WWII era. The heart of the
idea is that if a factory (or series of factories) sets up a
dedicated production line and can purchase its raw materi-
als based on a high volume of consumption, then the overall
cost of production and length of time it takes to make each
unit will decrease. In Hearts of Iron II this is represented
by something called the "gearing bonus." To avoid making
the gearing bonus unduly complex (or excessively open to
player exploitation) Hol2 takes a few small liberties in the
way it is implemented and awarded. Let's get straight to
the bottom line (and please pardon the pun).
If you place a serial run Production Order: one that calls
for multiple units to be manufactured in a single production
run: then you will be eligible to receive a gearing bonus
where each successive unit that is produced will require
slightly less time to manufacture. The first unit will take the
usual length of time and require the full allocation of IC. The
next unit will require slightly less time to produce (and thus
a lower total IC consumption) and the subsequent unit will
require even less time. Until the order has been cancelled
or completed, each unit that you manufacture will receive
a gearing bonus that increases as each is produced. There
is a maximum bonus level, though, beyond which there will
be no further reductions in time.
Note, however, that if at any time during the production
run there is insufficient manpower in the national pool or
insufficient allocation of IC to a serial run order this will
not only cause the order to be put on hold but will also
reset the gearing bonus to treat the current item a though
it was the first one being produced. You should consider
giving serial run orders a very high priority in your queue to
avoid having this happen. Note also that provincial assets:
no matter which method of ordering them you use: do not
benefit from serial run gearing bonuses.
Building Provincial Assets and
Using the "Quick Orders" Buttons
Provincial assets are the wide variety of structures that
can be built to make your provinces more economically
productive, more defensible, or provide an additional
boost to your research in the fields of rocketry or nuclear
science. Depending on the item involved, there are three
possible ways that it may be ordered: although in most
cases only two of those options will be available to you.
The exception to that rule is the AA battery, which may
use all three methods.
Infrastructure, factories, land fortifications and coastal
fortifications must have a province location specified at the
time that the initial order is placed for their construction.
You may do this either by selecting the desired province
and then using the appropriate Quick Build button in the
Province Details display, or by right-clicking on the province on the main map and selecting the asset you wish to
build. Using either method will initiate a new production
order for that item, adding it to the listing at the bottom of
the Province Details information panel, as well as to the
Production Queue. If you subsequently order additional
items (via either method) they will be added to your original
order. All orders for these items are serial orders. The level
of infrastructure in a province will greatly affect the length
of time each of these assets takes to produce: and when
each asset is completed it will be automatically deployed
to the province.
All other assets may be ordered using the right-click
method or by placing a simple Production Order for it as described earlier in this section. The order will then be listed
in the Production Queue while it is being manufactured. If
you use the right-click method then the asset will automatically deploy to the province upon completion (which
I find very convenient!). If you use the Production Order
method then the asset will be "sent" to your Force Pool to
await deployment instead (see below). It
will then force you to spend a bit of extra
time placing them later, but it does give
you an added degree of flexibility in their
location and construction.
The Production Queue
The Production Queue allows you to
quickly review and manage your current
production orders. Each time you place
a new order, an entry will be added to
the queue's scrollable list. On the right
side of the entry you will see some basic
details about the unit being produced: an
icon that shows its type and a listing of
its name and basic attack and defence
values. If you used the quick order method
to requisition a provincial asset, then the
auto-deployment location will be identified as well.
On the left side of each line's entry is the estimated
date and time that the unit will be ready for deployment.
Below this is the "production percentage" value, indicating
whether production of this item is proceeding at full speed
(I'll come back to that in a moment). Towards the middle of
the line you will see the daily IC requirement of the project.
If you have placed an order for a production run (a serial
order) then you will also see two numbers below this. The
first is the number of units from this order that have already
been completed, and the second is the total number of
units ordered in the production run. Each entry also has
a set of four buttons that allow you to adjust the order's
priority, and Cancel Development button (an "X").
Manufacturing new items requires an allocation of IC
to their production and for many items will also involve a
one-time "consumption" of manpower from your national
pool. While you can still place an order for an item that you
can't afford, its manufacture will not begin until such time
as sufficient manpower and resources become available.
Both are allocated on a priority basis in the queue: which is
always sorted in order of priority: so the orders at the top of
the list will always be allocated to and manufactured first.
You can review an order's status by looking at its production percentage. If this value is 100%, then production is
proceeding normally and you can expect it to be ready
on its reported ETA date (unless something like a drop
in available IC happens to affect it in the interim). If it is
less than this, then production is being delayed by either
a lack of necessary IC or by insufficient manpower. Any
order that isn't at 100% production will be colour-coded
in yellow or orange to make it easy to spot when scanning
the Production Queue. Yellow means that production is only
proceeding at a partial rate, while orange
indicates that production has halted.
Manpower is not only consumed by
production orders, but is also withdrawn
from your national pool when units that
have sustained casualties are being reinforced. If you lack the manpower for a
new production order, then you have four
alternatives. You can simply wait until you
have enough manpower in your pool: at
which point the available manpower will
be withdrawn automatically and production will begin. Increasing its priority in the
queue will ensure that it will receive the
manpower sooner. A second option is to
cancel the order by clicking the "X" button
and then place the order again, once you
have enough manpower in the national
pool. Since manpower is withdrawn when
an order is first placed (if available) you may have other
orders that are higher in the queue for which you've already
paid the required manpower cost. Cancelling one of these
will return the full manpower value of the order to your pool
which will then be automatically applied to the next order
in the queue that is waiting for manpower. Your final option
is to disband some of the units you have in the field. This
places their manpower back into the pool, but they will lose
any combat experience that they have.
Shortfalls in IC allocation can be dealt with in a variety of
ways. The simple one is to allocate more IC to production:
but this will take that IC away from something else, so this
may not necessarily be a viable solution. Building more factories in your provinces will increase the total potential IC (if
you are suffering from a lack of capacity and have lots of
resource reserves), or finding additional sources of natural
resources will increase the actual IC if you have enough
factories, but they aren't operating at full capacity due to
a lack of resources. Technological advances may enhance
your factories' IC or improve your resource extraction and
conversion rates so you might want to look at this as an
alternative, Your remaining option is to change the priority
of your orders to ensure that the ones you need most are
produced first, and that lower priority orders are put on the
back burner until you have an excess of IC.
The IC that you've allocated to production is assigned to
orders based on their priority: their position in the queue.
Orders at the top of the production queue have the highest
priority and will get any new IC that becomes available. If
you cancel one or more of the orders that are currently
running at a 100% production rate, then you will lose any
IC (and hence the resources) that has already been used
by the order but the IC will become available to the next
32
Page 16

order in the queue. You should avoid doing this too often
since it wastes valuable resources: and you could lose any
gearing bonuses on that order. Fortunately, there is another
solution: changing the priority of an order.
Click on an order's small "prioritise" buttons to assign it
a new priority in the queue. Moving it to the top will ensure
that it receives any available IC and begins production immediately; however this will also cause your other orders
to be bumped downwards in priority and will result in at
least one of your other orders now stopping (or slowing)
in production. Any degree of progress that this bumped
order has received to date will be saved and included once
production resumes, but any gearing bonus that an order
is receiving will be forfeited. You may also send an order
to the bottom of the queue if it isn't particularly urgent,
or you may shuffle its position by making smaller adjustments to move it up or down one position relative to the
other orders.
Once the production of an order is complete, the order
will be removed from the Production Queue and the newly
built item will appear in the Deployment Queue. If you used
the quick order method for a province improvement, it will
be deployed automatically to the province instead of to the
Deployment Queue, The IC that the order was using will
be applied to the next order in the queue that is currently
running at less than 100% capacity. Note that if you al-
locate more IC to production than is currently required to
fill your orders, the excess capacity will not be used and
no resources will be consumed.
Two final notes about the Production Queue: At the beginning of some games, you may discover that there are
some items already in the queue and that they require no
IC allocation. This is completely normal and is because
they have been "prepaid" for you as a special bonus in the
scenario's design. The other important note is that the IC
allocation in the Production Queue (and in all other information displays in the Production Folder) is only updated
at midnight each day. If you are placing sizeable orders, be
sure to check back once a new day has begun.
Deploying Unassigned Provincial
Assets
If you placed an order for certain province assets using
the simple Production Orders method, you will need to deploy them from the force pool once production is complete.
All other province asset orders will be deployed automatically to whatever province you have already chosen to build
them in. In all cases, choose the location carefully because
provincial improvements can't be moved after they've been
deployed and are vulnerable to bombardment and capture.
Building up industry that is within easy striking range of
enemy bombers will likely be a waste of assets, and there
is often very little point in heavily fortifying a province that
is many miles away from any likely front.
Deploying a new provincial asset is quite simple. Click on
the View Map folder tab and then click on the Force Pool
hot button. This will display a list of any assets (and military
units) that have not yet been deployed. Scroll through the
list until you see the provincial asset that you wish to deploy,
then click on it. The provinces on the main map change to
a colour-coding as soon as you do this, with green indicating that the asset can be placed in this province. Click
anywhere in one of the valid provinces and the asset will
be deployed there. Invalid locations will be ones that don't
belong to you, are already at maximum capacity, or that
are completely cut off from your capital.
Deploying Military Forces and
Rockets
The deployment of new military forces and rockets is
similar to the method used for province improvements, but
there are some additional options and restrictions. Please
see the Combat section of the manual for instructions on
how to do this, Military forces will tie up some of your
transport capacity until you deploy them so you should
usually try to do so as soon as you possibly can.
National Resources
We now turn our attention to the right half of the Production
Folder and will begin with the information displayed in the
upper left portion of that side of the screen: a summary of
your national resources. The data that you see displayed
in the national resources area of the production screen
reflects your current stockpile or pool of each resource
type and the daily change to this value (in brackets). This
is the same information that you can view on the top bar
but saves you the trouble of using the expanding tooltips
to see the daily rate of change for each. The information
displayed is updated on a daily basis (at midnight), with
the exception of the supplies stockpile
(updated hourly) and the manpower
pool (updated as soon as manpower
is used to order a new unit and also
drawn from daily for any necessary
reinforcements).
It is also important to note that
the values reflect only your national
stockpile levels and do not include
any resources that might be located
at your depots. The daily change values indicate the rate of change to the
national stockpile, so the figure you
see displayed reflects any transfers
that you are making to and from your
depots, and any trade agreements that
you might have in place. If this is being
impeded or otherwise affected by enemy convoy raiding or
a shortage of transports, then the values may not reflect
your potential rates of change: or any changes to your
depot levels. This can be a fairly important consideration
that many new players overlook.
Oil
Oil is available only in a limited number of locations
throughout the world: predominantly the south-central
USA, Colombia, Caucasus and parts of the Middle East:
in the form of natural petroleum reserves. Historically it
was also extracted or synthesised: albeit inefficiently: from
other resources (coal, "oil shale", etc.), which is repre-
sented in Hol2 by the ability to convert energy resources
into oil. This will be done automatically for your stockpile
of oil is low, but the amount that may be converted is
based on your national IC level and your technology. Only
a small amount of energy (determined as a percentage of
your national IC value) may be transformed into oil on a
daily basis, and the conversion rate you achieve will vary
depending on the advances you have researched. At the
beginning of the game this will be very poor, but will Im-
prove steadily as your scientists discover new methods of
synthetic oil refining.
Oil is the fuel that powers your naval vessels, aircraft,
and any other military units that are motorised (tanks,
mechanised infantry, etc.). If you lack the oil to supply
them then these units will grind almost to a halt (incur large
reductions to their movement rates) and will suffer large
operational penalties in combat (a reduced organisation
value). You can see a unit's daily oil requirements by view-
ing the unit details and looking at the "fuel consumption"
value. Land units consume only half this amount if they are
stationary and aren't involved in combat.
Metal
This resource represents a variety of
common metals, with iron ore being
the predominant one considered. The
largest global reserves are found in
the mid-west and south-west USA,
Sweden, China, England, Japan and
Ukraine: although additional sources
are scattered throughout the world.
Certain technological advances can
improve your extraction rates.
Energy
The energy resource represents a
number of different materials that are
used to generate the power that your
factories require to operate. Historically
this came predominantly from coal fire generation, as well
as hydro-electric facilities, wood-burning plants, and several other sources. While this resource is well distributed
throughout the globe, the greatest concentrations may be
found in Germany, England, and parts of North America.
Energy may also be converted into oil if your stockpile of
the latter is low: although the rate of this conversion will
be poor unless your scientists have discovered improved
methods of synthesis.
Your factories will demand a healthy supply of power,
each one consuming two units of energy for every unit of
IC that it produces daily. As with metal, a lack of energy will
reduce production to the level of your daily intake.
Rare Materials
This might be thought of as Hol2's "catch-all" for materials
that were consumed on a daily basis but don't belong to
the metal or power categories. These are natural resources
(or materials derived or synthesised from natural reserves)
that are relatively rare or were consumed in only limited
quantities. Examples might include rubber, sulphates, gold,
potash, and other such resources and may be found scat-
tered here and there around the globe.
Rare materials were used for various components in a
large number of manufacturing processes during this era
and a reasonable supply will be vital to keep your factories
running. Each factory will consume one unit of rare materials for every two units of IC it produces.
Supplies
Supplies aren't a natural resource that you will find lying
around in a province. Instead, these are manufactured
by allocating IC to the production of basic allotments of
food and ammunition that your military forces will need to
survive. Each unit has different requirements (which can
be seen by referring to the unit details' supply consump-
33
34
Page 17

tion rate) and failure to meet its needs will result in very
poor organisation values, plummeting morale, and a high
rate of attrition. I'll remind you here (although the details
are presented later in the manual) that simply having supplies does not ensure that they will reach your troops. You
will need to establish supply chains for that purpose and
have sufficient transport capacity and infrastructure to
ship goods along them, Unlike fuel, supplies are always
consumed at their full daily rate.
This is cold hard cash.. .and it doesn't grow on trees. For-
tunately, there are several ways of increasing your cash
reserves. Any IC allocated to the manufacture of consumer
goods will generate some amount of money, and excess
allocations are treated as a surplus and converted directly
into cash. You may also receive money as part of a diplomatic transaction when you negotiate either a one-time
exchange or a trade agreement.
Money's two most crucial functions in your nation are to
finance projects for your research teams and for the multitude of diplomatic actions that have a cash cost associated
with them. Money may also be used during negotiations
with other nations to purchase raw materials or supplies. If
you have no national cash reserve, then your technological
progress will grind to a halt and there will be many common
diplomatic options that you won't be able to initiate.
Manpower
Manpower is a resource that is treated somewhat differently than the others. A review of the main map using the
economic mapmode filter will display a variety of provinces
that have a large enough population to contribute manpower to your national pool on a daily basis. They will continue
to do so until the maximum size of the pool (which is also
based on the total manpower values of your provinces) has
been reached. At that point your national pool will remain
constant until you draw from it: either for the production of
new armed forces units or for reinforcements to replenish
casualties due to combat or attrition.
Partisan and Occupation Effects
on Resources and Industrial
Capacity
Captive populations are reluctant workers at best, so even
if you are able to prevent outright rebellion you should not
expect the workers in owned or occupied provinces to be
as productive as those who are full-fledged citizens of your
nation. Owned and occupied provinces are both subject
to heavy penalties to the extraction of oil, metal, energy
and rare materials from their soil (occupied province more
so than owned provinces), and these same penalties are
applied to their industrial capacity. This may be modified
by your domestic policies and cabinet, and will also be
affected by the efforts of partisans who will further reduce
provincial IC by the degree of their activities, unless your
forces are able to suppress them. The populations of non-
national provinces do not serve in your armed forces except
under very unusual circumstances and thus any manpower
values in those territories will not be added to your manpower pool. An occupied province also reduces your transport capacity (we'll discuss that subject shortly).
Industrial Capacity (IC)
and IC Allocation
To the right of the National Resources summary is one of
the most Important interfaces in the game: the Industrial
Capacity Allocation sliders. These are used to allocate your
available industrial capacity to the five main areas of production, effectively controlling your economy.
At the top of this area are three values: your current
unused IC, your available IC, and your base IC. The base
amount is simple sum of all the factories that are in your
nation. During wartime this amount may be reduced
if your enemy conducts a bombing campaign against
your factories. Remember, too, that occupied provinces
contribute less than their full IC to your economy. The
available IC reflects the actual daily IC production which
is the base amount, modified by your ministers, domestic
policies and any technological bonuses you might have.
If you lack sufficient natural resources then the available
IC will plummet. Partisans also have a direct effect on
available IC, with every percentage point of partisanship
reducing a province's industrial output by that amount. The
unused IC value indicates that you are allocating more IC
than necessary to at least one area of production. Having
some amount of unused IC isn't such a bad idea, because
this excess IC allocation is "ignored" for the purposes of
consuming resources and provides a buffer against small
fluctuations of your nation's total IC production. This can
be particularly important in multiplayer games where you
may have only limited time to fine-tune your allocation
levels and can benefit from having this "slush fund" of IC
to temporarily offset losses until you have time to attend
to them. It also allows you to conserve resources, saving
them for occasions when you really need them.
Each slider displays your current daily IC allocation to
this area at its right end. Immediately above the slider is
the amount of IC that you need to allocate in order to meet
your current needs. The sliders can be adjusted by either
clicking on the"+" or"-" buttons at either end (usually
used for small changes) or by dragging the indicator tab
(for larger changes). The sliders are always zero-sum, so
adjusting one in one direction will cause all others to ad-
just slightly in the opposite direction to | Convoys:
compensate. You can lock a slider in
place to prevent it from moving when
you adjust other sliders (which is very
handy for ensuring that you don't accidentally under-allocate to a slider) but
you should note that if you have locked
all but one slider you will not be able
to adjust it without unlocking at least
one more.
Consumer Goods
You will need to allocate some of your
industrial capacity to the manufacture
of consumer goods: the various basic
commodities that your population consumes on a daily
basis: and you should expect your public to become quite
upset if you fail to provide for their needs. While their demands will vary depending on your domestic policies, your
cabinet ministers, and whether you're at war or not, if
you fail to allocate sufficient IC to this area then national
dissent will rise. Dissent will reduce the performance of
your military and at higher levels it makes your nation
more susceptible to foreign coup attempts and may even
lead to open rebellion in your provinces. If you allocate
excess IC to consumer goods then your national dissent
will gradually recede.
Allocations to this slider also generate cash revenue. You
will need that money to fund your research projects and
for many of your diplomatic activities, so some excess al-
location may be needed unless you are selling resources
to another nation and earning enough
money that way.
Production
The production slider is used to al-
locate IC towards the manufacture of
the orders in your Production Queue.
Allocation shortfalls will result in low
priority orders being placed on hold
until new IC becomes available and
could result in the loss of the gearing
bonus for an order. Excess allocation
of IC to production is ignored and is
displayed in the summary as "unused
IC". Remember: unused IC does not
consume resources so this is an excellent means of conserving those
valuable resources until you need them
and for guarding against unexpected
fluctuations that may result from enemy bombing campaigns against your
industrial base.
Supplies
As mentioned earlier, it is vital to en-
sure that you are supplying your military with a daily allotment of food and
ammunition. This is withdrawn from
your national stockpile of supplies
and sent out to them along your supply chains. You can trade for supplies
with other nations, but it is usually far
more efficient to allocate IC to their
manufacture. Whatever quantities you
manufacture will be added to your national stockpile at a rate of three units
of supplies for every unit of IC that you
allocate. A warning though: having supplies in your national
stockpile doesn't mean that your armed forces will receive
those supplies. The delivery of supplies depends entirely on
whether your supply chains are intact and unimpeded, and
on the effective supply efficiency in the provinces where
your forces are located. This slider's sole function is to
manufacture and stockpile the necessary materials.
Reinforcements
This slider allocates industrial capacity to reinforcements
and repairs. It is used to train replacements and repair
equipment for units whose strength has been reduced as
a result of combat or attrition. Military forces have a "human" component as well, so as you are reinforcing them
you will also need to have sufficient manpower available
in your national manpower pool to be withdrawn to meet
those requirements. The amount needed depends on the
original manpower cost of the unit and
on the percentage of strength that it
has lost. This slider is also used to rebuild and repair any provincial assets
(infrastructure, factories, bases, etc.)
that have been damaged as a result
of enemy bombardment. Failing to al-
locate sufficient IC to the reinforcement
slider will reduce the rate at which all of
these replenishments occur, while any
excess allocations will be ignored and
included in your unused IC total (thus
also conserving natural resources).
Upgrades
As you gain new military technologies
you will be able to upgrade the abilities
of your existing land and air units, and
the air groups attached to your carriers.
Naval vessels cannot be upgraded. This
is done by allocating IC to the upgrades
slider and will require a prolonged in-
35
36
Page 18

vestment (often up to several months)
to complete. Your forces will continue
to operate normally at their old combat
values during this time. Insufficient allocation will increase the length of time
that this upgrade will require, while excess investment is ignored and added
to your unused IC total. Air units only
upgrade during the times when they
are idle and at their assigned home
base, and if too many units are assigned to the same air base then this
process will take far longer.
National
Transport
Capacity (TC)
Although your nation's transport capacity (TC) is not displayed directly in
the production folder this is something
that is fully dependent on your nation's
Industrial Capacity. Transport capacity
is an abstraction that Hearts of Iron II uses to represent
your country's overall ability to move men, equipment and
supplies throughout each nation. It is the underlying factor that will determine whether you can get the necessary
supplies, reinforcements and technological upgrades to
your armed forces in a timely manner.
The Top Bar will always display your nation's transport
capacity and how much of it is being used. The base
amount of TC is determined by your national IC output
and can be increased by researching certain technologies.
This total value indicates the limit of your ability to move
"stuff" around: supplies, fuel, and divisions that are either
in your force pool or are being strategically redeployed.
If your required TC exceeds your available TC then your
ability to carry out this vital task will be reduced...and
your troops will move more slowly and may even begin to
starve unless they are in a very favourable location. We'll
look at this again (in detail) when we discuss supply and
supply efficiency in the Combat section.
International Trade
Summary
The method of establishing new international trade agree-
ments is discussed in detail in the Diplomacy section;
however the Production folder also includes a summary
of all active trade agreements since they will impact on
your flow of resources. Each line item identifies the trading nation, the type of goods being exchanged, and the
current trade efficiency. Hovering your mouse over any
item in this scrollable list allows you to view the precise
details of the agreement. International
trade does not use convoys to transport
the goods back and forth. Instead, this
is abstracted to "invisible" commercial
shipping that will attempt to ensure
that the goods reach their destination.
These vessels are subject to enemy
disruption if either nation is currently
at war with a nation that has a navy.
Any enemy vessels that are assigned
to convoy raiding will automatically disrupt and sink some percentage of the
trade goods being exchanged, resulting
in a reduction of trade efficiency. You
will see a percentage value displayed at
the right edge of each trade entry that
indicates the current trade efficiency.
If it becomes impossible to establish
a direct link with your trading partner:
although this may be traced through
friendly territory: your trade efficiency
will drop to zero. Goods will continue to
be shipped (even though they won't arrive at their intended
destination) until one of the trading partners cancels the
agreement.
You may cancel a trade agreement by right-clicking on its
listing in the trade summary and then confirming that you
wish to cancel it. You may also cancel an agreement in the
Diplomacy Folder by selecting the nation, then using the
"Cancel Trade Agreement" diplomatic option and specifying
the agreement to cancel.
Convoys
Convoys are the essential vessels used to ferry natural
resources from any provinces that you control overseas
back to your national stockpiles, and to send supplies and
fuel to your troops abroad. Without convoys, you will be
unable to Import resources from your own colonial possessions (if any) or to keep your supply chains open and
operational. Hol2's convoy system is somewhat abstracted,
relieving you of the need to micromanage their specific
actions. Rather than giving orders to individual ships, you
will designate a route and then make special convoy and
escort vessels available to traffic along (and defend) that
route. The convoys will then go about their business and
only appear as routes on the map (when viewing it using
the convoy mapmode). Their assigned route is subject to
enemy interference, though, with convoy vessels being
common prey for enemy submarine packs. Escorts will
attempt to fight back, defending the otherwise unarmed
supply vessels, but you would be well advised to manufac-
ture new convoy and escort vessels on a regular basis if
your economy depends heavily on imports or if your troops
will be engaged in many overseas campaigns.
The convoy section of the Production Folder allows you
to quickly review your existing convoy routes. For each one
you will see the port of origin, port of destination, cargo
type, and the number of convoy vessels and escorts currently assigned to the route (shown as convoys/escorts).
If this text is red then the number of transports assigned
to the route is too few to maintain it at full efficiency. If
the text is white then you have a sufficient number. Im-
mediately below the text will be the icons of the types of
resources that this convoy has been permitted to carry
(see below). This does not necessarily mean that they are
being shipped, however, since the depot may not have any
of that type of resource. The actual daily transport of goods
is displayed in a tooltip that appears when you hover your
mouse over the route. Limited air supply of ground forces
is possible, but this is not treated as a regular convoy so it
won't appear in this summary. See the Air Combat section
for details on air supply.
At the top of the summary area, you will see the number
of transports and escorts in your convoy pool that are
currently without an assignment and are available for
new routes (or to expand existing routes). Click on the
Convoys button to display the Convoy Management interface where you can adjust many common aspects of your
convoy routes. You may view and control even more details
of individual convoys' activities using the Convoy Details
interface, accessed by clicking on the route's listing in
either the main Production Folder's summary or in the
Convoy Management interface.
The Convoy Management and Convoy
Details Interlaces
The upper portion of the Convoy Management interface
is similar to the production folder's basic view, providing
a scrollable list of all existing convoys and an expanding
tooltip that details the goods being transported. For each
route you will see the number of convoys and escorts cur-
rently assigned to that route (which will be red if you have
not assigned enough vessels to the task) and there are
small"+" and "-" buttons beside these that allow you to
change these quantities. Each route also has a prioritise
button (an arrow pointing upwards) that is used to assign
the relative priorities of each route if you elect to have
the route maintained automatically for you. This indicates
which routes are most important to you, ensuring that any
available convoy vessels will be assigned to keep those
goods flowing if you have an insufficient number of vessels
to maintain all of your routes at full capacity. We'll discuss
how to use convoy automation in a moment.
37
38
Page 19

You can click on a route listing (either here, or in the
Production folder's summary) to display an even more
detailed interface for that convoy. The Convoy Details
interface includes information about the route that the
convoy is taking and allows you to set limits on the types
of materials that the convoys will carry. You cannot adjust
the convoy's route, but you can specify exactly which materials are to be transported by checking (or un-checking)
the appropriate resource checkbox. You may also adjust
the number of vessels assigned to the route, and you may
cancel a route altogether by clicking the Cancel Convoy
button in the middle of the panel.
The lower section of the Convoy Details interface is the
same as the Convoy Management's lower section and is
used to create a new convoy route and to control the level
of route automation. To manually create a new convoy
route, click on the button that corresponds to the type of
route you wish to establish: a resource or a supply convoy.
You will then be asked to select a port of origin from the list
of possible valid ports. This is whichever port you want the
convoy to use as its starting point. You are then asked to
select from a list of possible destination ports: the ports
you wish to deliver the resources to. Click OK to establish
the route. By default, a supply convoy will pick up supplies
and fuel (if they are available) and will deliver them to the
destination port. A resource convoy will pick up all natural
resources and deliver them to the destination port. Goods
carried by a convoy to a destination port that is directly land-
linked to your capital will automatically transport those
goods to your capital and add them to your national stock-
pile. If this is not possible, then a new depot will be created
in the destination port's province and all inbound goods
will be placed there for subsequent distribution. Note that
you can create a second convoy route to transport goods
from one depot to another, This is a very useful technique:
particularly when supplying forces in the Pacific theatre:
since it may require fewer vessels and be somewhat less
susceptible to enemy anti-convoy activities then creating
a large number of long-distance direct routes.
After you have created the convoy route you may need
to use the Convoy Details interface to allocate convoys
and escorts to protect them: and possibly to make adjustments to the default goods being transported: before it
will become active. You won't need to do this if you have a
sufficient number of unassigned vessels and have enabled
the "auto-maintain convoy" option, but you might want
to adjust its priority, Once created, it will usually require
a few days of game time before you begin to see much
activity along a new route since the flow of materials will
take some time to be established. You should also check
the route periodically if you are maintaining it manually to
ensure that it is still active. It might cease to be functional
if there are no materials available for it to carry, or if enemy
anti-convoy activities are intercepting and destroying the
majority of the vessels.
The most common error that new players make when
manually establishing convoys is to forget that oil is both
a resource and a supply. If you set up a default supply
convoy to a depot and a default resource convoy to pick
up from that depot and transport raw materials elsewhere,
the oil that you intend to place in that depot as fuel for your
troops will be carried away by your second convoy since
it's a resource. After you've done this a couple times: and
suffered the devastating battle consequences of being out
of fuel: you'll probably begin to remember to set the mate-
rial transport limitations.
If all of this sounds just a little bit too complex and
overwhelming then you'll be very happy to know that you
can delegate almost all aspects of convoy management
using the three buttons that appear at the bottom of both
the Convoy Management and Convoy Details interfaces.
You may elect to have your "unseen assistants" establish
and remove resource convoys automatically for you as
required. You may also have them do the same for your
supply convoys, and you may ask them to maintain the
routes by assigning new transports and escorts as they
become available. If you automate convoy management
you will still be responsible for ensuring that there are a
sufficient number of vessels (convoys and escorts) for the
"assistants" to work with, and for assigning priorities to
each of the routes.
When you are at war you should also be sure to check
the status of your convoys on a regular basis. Enemy
vessels and aircraft can be ordered to engage in convoy
disruption activities that will attempt to locate and sink a
portion of your merchant marine. While escorts will help
mitigate this to a degree, it is still probable that you will
lose some percentage of your shipments and that some
of your transports and escorts will be sunk. You should
make provisions to build new convoy vessels periodically
to replace these inevitable losses.
Resource Depots
The lower right portion of the Production Folder is a scrol-
lable listing of all the resource depots that you currently
have throughout the world. Depots will exist for one of
three reasons: either it is your nation's capital; or you have
natural resources being extracted from provinces in that
region but there is no direct land link to your capital so
they are being stockpiled locally to await convoy transport
to your capital; or a depot has been established to act as
a supply dump of oil and supplies for your troops in that
region. I mentioned above that you can use air transports to
supply your armed forces: although this is very costly and
inefficient so it should only be done in case of emergency.
This is an air mission (described in detail in the Air Combat
section) and does not appear in the convoy listing, but the
depot of supplies and oil that you establish by doing this
will appear in the depot listing.
The first depot in the list will always be your national
capital and will reflect the same resource stockpiles that
are reported in the Top Bar and National Resources summary. All natural resources listed as being located at one
of your other depots are not included in the National and
Top Bar values and will not be available to your factories
for use until they are shipped: via convoy: to your capital.
Generally you will wish to move all natural resources from
your depots to your capital as soon as possible to avoid
risking their capture and to make them available to industry
(or international trade). In the case of a depot that is also
supplying your armed forces you will probably want to leave
some oil behind and ship some supplies to it.
The Diplomacy
Folder
General Overview
While the Main Map interface screen may be your window
on the world, the Diplomacy Folder screen is the interface that governs most of your interactions with it: or at
least those that don't directly involve bloodshed. It Is here
that you will form alliances, declare wars, negotiate trade
agreements, flex your international muscles or lend a helping hand to a friend (or would-be friend), and generally
conduct all of your diplomatic activities. This is also the
folder where you may review the domestic policies and
governments of the nations of the world and, perhaps even
more significantly, control your own. Let's look at the main
areas of the folder before we go into the detailed descriptions of the information and controls available for each:
1. Your Nation and Government: The top left corner of the
folder will always display your nation's flag and name, as
well as your form of government and current belligerence
value. If you click on the flag then details of your nation will
be displayed in the rest of the interface.
2. World Nations: This is a scrollable list of all nations in
the world. If a nation ceases to exist then it will be removed
from this list, and any new nations that are formed during
the game will be added to it. The information displayed in
the rest of the diplomacy folder will change depending on
which nation you have selected, as will the options available to you in the interfaces, Beside each nation's name
you may see one or more resource icons. This indicates
that the nation currently has a daily surplus of this item
and might be interested in trading it for something else
(this display is updated at midnight each day and the icons
will not be displayed until 24 hours have elapsed from the
start of the game).
There are tabs at the top of this area that you can click
to filter the list and display only those nations that are
members of one of the three major factions: the Axis, the
Allies or the Comintern, Many nations will not be aligned
with one of the three major factions: particularly early in the
game: so you will need to locate them in the master listing
(you can return to this by clicking the All tab). Another very
quick and simple means of selecting a nation is to click on
any province on the main map that is currently controlled
by that nation. Their flag will be displayed in the information panel and clicking it will automatically bring you to the
Diplomacy Folder and pre-select that nation.
3. Selected Nation, Government Type, Relationship and
Diplomatic Details: The top of this area will display the
flag and name of the country you have selected from the
list (by default it will be your nation). Beneath the flag you
will see that nation's form of government, your relationship
with them (unless the selected nation is yours), and that
nation's current belligerence value, All of the known details
of its diplomatic status and activities will be itemised in
a scrollable list below this, including any wars that it is
engaged in, alliances it has, as well as a variety of other
possible diplomatic conditions that might exist.
4. Selected Nation's Government and Cabinet: Here
you will see photographs of the selected nation's head of
state, head of government and cabinet. If you have selected
your own nation then you will see the people that currently
occupy these positions in your government and cabinet
and can click on a portrait to change the minister (if a
replacement is available). Expanding tooltips will appear
over each picture, detailing that person's traits and any
bonuses or penalties these might give. Note that in some
cases, an individual may hold more than one position. In
particular, the head of state and head of government are
often the same person, if the type of government does not
distinguish between these positions.
5. Diplomatic Options: This area is the main diplomatic
interface of the folder, allowing you to access a variety of
possible options. The actions available to you will depend
on the nation selected, your respective governments, your
relationship, and any belligerence values.
6. Selected Nation's Domestic Policies: This area dis-
plays the domestic policies of the nation you have selected
from the list. If you have selected your own nation, then
this will also be the interface you use to make changes to
those policies. This may only be done rarely and within
certain restrictions that are determined by your type of
government.
39
40
Page 20

Domestic Policy
Overview
Our detailed look at the Diplomacy Folder begins with the
Domestic Policy area, displayed as seven distinct policy
sliders. Don’t be fooled by the small size of this part of the
screen… it’s a deceptively important one! Each slider has
a label at either end, representing two opposing views. The
slider position determines which view the nation tends to
favour, and how strongly it does so. We’ll take a closer look
at the meaning of each in a moment.
Domestic policies have far-reaching implications on a
nation. Some will give bonuses or penalties in your day-today activities, while others will limit or affect your diplomatic or domestic actions or will alter the nature and quality
of your armed forces. The first two sliders determine the
type of government that is in power and will have a limiting effect on the allowable positions of some of the other
sliders. Further, they determine which ministers will serve
on the cabinet and can have a significant impact on your
relationship with other nations. While you can examine any
nation’s domestic policies, it is your own country’s policies
that will be of greatest interest to you. You can easily review
these by clicking on your nation’s flag in the top left corner
of the folder. Hovering your mouse over any slider will give
you details about the current effects that your policy setting
has on your nation, and hovering it over the small “+” or
“-” buttons at either end will show the effects of changing
your policy by one step in that direction. Wait! Don’t change
them quite yet…
The domestic policy of your nation can be changed by
clicking on either the “+” or “-” button on the end of a slider.
Drastic policy changes are impossible and certain types of
governments will place restrictions on the allowable positions of some of the sliders. You are allowed to make only
one policy change every six months, and this is limited to
adjusting only one slider by only one step. Since each slider
has ten distinct steps and it may take several of these to
achieve any significant change, you should carefully consider your policies and determine what change will benefit
you most before making a change. The only other means of
altering domestic policy is by the choices you make when
you receive one of the game’s special events.
The Democratic: Authoritarian
Slider
This slider repres ents a nation’s political pluralism :
whether it is highly democratic, highly authoritarian, or
somewhere in between. When combined with the setting
of your Political Left-Political Right slider, this will determine your government type and the default ministers who
will rule the nation. Your level of democracy will have a
large impact on your ability to declare war on a nation. The
more democratic you are the more provocative (belligerent)
another nation must be before your public will allow you to
declare war on the offender. The populations of democratic
societies generally expect higher levels of consumer goods
and are more upset when their government plunges them
into war. Occupied provinces, however, are somewhat
less resist ant towards their occupiers as t hey are given
somewhat more freedom of expression.
The Political Left: Political
Rig ht Slider
This slider determines the general political leanings of your
nation. When combined with the setting of the DemocraticAuthoritarian slider this will determine your government
type and the ministers who will rule the nation. It can also
have a significant impact on your relationship with other
countries and may limit the allowable set tings of several
of your other domestic policy sliders (see Government
Types below) .
The Open Society: Closed Society
Slider
This slider determines the measure of freedom enjoyed by
your citizens. An open society is somewhat more prone
to national dissent and generally has a more difficult time
countering enemy intelligence activities, although any conquered provinces will have a lower level of partisanship.
A closed societ y is better able to repress partisans and
counter enemy intelligence activities, but is more likely to
have trouble controlling national dissent. Scientists who
work on projects for open societies also tend to require
somewhat higher levels of funding.
The Free Market: Central
Plan ning Slider
This slider affects aspects of your economy. Free market
societies generate more cash from their IC allocation to
consumer goods: though demand will be higher, too: and
enjoy reductions in the cost and time required to complete
production orders and upgrades. Scientists will also earn
considerably higher salaries when working on research
project s. A more regulated, centrally governed economy
will offer lower salaries to their scientists but the cost and
time required to complete production orders and upgrades
will be greater. While consumer demand will be lower, correspondingly less cash is generated from IC allocations to
consumer goods.
The Standing Army: Dra fted Army
Slider
This slider determines whether a country maintains a
largely professional military force or whether servicemen
are only draf ted in times of trouble. Nations who rely on
drafted armies will receive a significant gearing bonus, but
41
Page 21

Government
National Socialist
Fascist
Paternal Autocrat
Left Wing
Radical
Leninist
Stalinist
Social
Conservative
Market Liberal
Social Liberal
Social Democratic
the organisation of their armies will be lower and they will
gain experience more slowly. Nations with standing armies
tend to be better organised and even their raw recruits will
be more experienced, but they will not receive nearly as
large a gearing bonus in the industrial sector.
Policy Set tings
Authoritarian &
Far right
Authoritarian &
Somewhat right
Authoritarian &
Slightly right
Authoritarian &
Slightly lef t
Authoritarian &
Somewhat left
Authoritarian &
Far left
Democratic &
Strongly right
Democratic &
Somewhat right
Democratic &
Somewhat left
Democratic &
Strongly left
Advantages and Limitations
This government is adept at maintaining good international relations, but
tends to favour central planning over a free market. You will be restricted to
policies that lean very strongly towards central planning and a closed society.
Similar to the above, a Fascist government may be slightly
more open and free with its trade if it wishes.
This government enjoys modest international relationships
with slightly less central planning. This permits further policy
flexibility for trade and the openness of its society.
This nation is somewhat more heavily weighted towards central planning
and has some dif ficulties on the international scene. It does, however,
allow a greater openness of society and better trade flexibility.
This government is generally poorly regarded internationally, and tends
to be more restrictive of trade and on the openness of its society.
Stalinist governments are not generally liked by other nations and are highly
committed to central planning, closed society and are ver y restrictive of trade.
This societ y is fairly flexible with regards to its internal markets, and
may be somewhat open or closed, depending on preference. Trade is
somewhat restricted, and although there is some flexibilit y in terms
of how frequently it intervenes in international affairs, this has little
or no beneficial impact on its relationship with other nations.
Neutrally regarded on the world scene, this government favours
a free market and is usually a very open society. Market
liberals also tend to adopt inter ventionist policies.
This very open society is usually far less inclined to
meddle in foreign affairs and is neither highly centrist in
its planning nor highly suppor tive of a free market.
Social democrats lean towards central planning and somewhat
more isolationist policies, occasionally harming their relationships
with other nations. They do not attempt to restrict their
societies, although they are never entirely open either.
The Hawk Lobby: Dove Lobby
Slider
This slider indicates the relative strength of the pro -war
versus the pro-peace lobby in a nation. Nations with a
strong hawk lobby will enjoy reduced production times and
costs, while more peaceful nations will enjoy a better return
on all IC allocations to consumer goods and often enjoy a
somewhat more accepted international diplomatic position.
You will find that a public t hat favours a more hawkish
political stance volunteers more readily for military service
and won’t have as much dissent when their government
under-funds its consumer goods allocation.
The Interventionism:
Isolationism Slider
This slider determines a nation’s interest in being part of:
and interfering in: the larger international community. Nations that actively involve themselves on the world stage
enjoy fewer restrictions and lower cost s for conducting
diplomatic activities (some diplomatic actions require cash)
but are generally poorer at smoothing over any diplomatic
blunders. They are ver y likely to create or join alliances.
Isolationist nations incur higher costs on the occasions
that they do engage in diplomatic activities: and in some
cases may not be able to engage in them at all. A strongly
isolationist nation will refuse to join an alliance ( it cannot
42
Page 22

even be invited ) and cannot even create an alliance ; but
such nations are generally good at maintaining and repairing poor relationships. The position of this slider will also
partially determine the necessar y level of belligerence that
another nation must have before you will be allowed to
declare war on them. The more of an interventionist you
are, the less provocation will be required before you may
interpose and the less upset your public will be when you
act on it. Isolationist societies also tend to have a somewhat higher demand for consumer goods.
Govern ment
The position of the first two domestic policy sliders will
determine the type of government that is in power in a nation, as well as the ministers who be available to help rule it.
Each government type imposes certain restrictions on the
possible ranges of some of the other sliders. There are ten
distinct forms of government used in Hearts of Iron II :
Cabinet and M inisters
These are the highest-ranking officials in a nation’s govern-
ment. Unlike the various field of ficers who directly command a country’s armed forces, the ministers are those
who hold the highest levels of authority and carry on their
day-to-day business away from the front lines. Many ministers possess specific individual traits or characteristics that
may play a large role in certain aspects of your economy
or military.
The cabinet of each nation is automatically assigned
based on the prevailing domestic policy conditions: particularly the type of government: forming a body of ten
officials who will oversee its affairs. Each minister may
possess personalit y traits that make him ideally suited to
hold that post : although in many cases there are tradeoffs bet ween his natural expertise and his corresponding
deficiencies. You can achieve amazing success simply by
taking advantage of your ministers’ attributes and working
to minimise or avoid the less desirable aspects of their
personalities.
Appointment of Ministers
Ministers are appointed automatically in Hearts of Iron 2
based on a nation’s domestic policies and drawn from
the available pool of potential officials in the region. Every
countr y will appoint ten ministers to serve on its cabinet,
although in some regimes a minister may occupy more
than one cabinet position (most notably in the case of a
dictatorship, where the head of state will usually also hold
the head of government post).
The ministerial files of the game not only include the
names of almost ever y significant government official of
the era, they also contain additional “possible” ministers
who did not historically occupy posts on cabinet. During
the course of play, these ministers may come to power as
a result of the domestic policies you pursue; or through
civil war, dissident uprisings, an enemy-funded coup d’état,
or as a result of special events. You may also voluntarily
change many of your ministers by clicking on the appropriate portrait and selecting from the list of other available
ministers. The ones that are listed will depend on your
current domestic policies, so you may find that some prospective ministers may not be available until you have made
a significant change to your policies.
It is not practical, in the space available in this manual,
to detail each of the various ministers’ possible traits and
their effects. This information is clearly displayed in the
expanding tooltips that appear when you hover your mouse
over each person’s portrait and is included in a table that
is part of the supplemental pdf file you installed with the
game. The following is a general summary of each nation’s
cabinet positions:
The Head of State
The Head of State occupies the highest position in the
nation. He will often have a trait that will have a significant
effect on your nation (and the AI’s actions) and the person
that occupies this position is usually: though not always :
determined by the type of government that is in place.
The Head of Governm ent
The Head of G overnment is in charge of directing the na-
tion’s general affairs and its cabinet. He may have any one
of a number of widely var ying traits that may affect the
industry, diplomacy or military success of his nation.
The Foreign Minister
The Foreign Minister is charged with conducting the major-
ity of a nation’s international diplomacy and may possess
traits that will benefit or hinder those activities to various
degrees. These traits will of ten give bonuses to certain
diplomatic options while incurring penalties for other types
of negotiations.
The Minister of Arma ment
The Minister of A rmament oversees all research and pro-
duction in a nation. His traits will usually af fect research
times, production time and costs, and resource availability:
although most characteristics will involve potential tradeoffs in opposing areas.
The Minister of Security
Charged with maintaining the internal stabilit y of a nation, the Minister of Security will usually possess traits
that will af fect domestic affairs. He may be proficient at
maintaining lower levels of dissent, or partisanship, or be
adept at preventing hostile diplomatic attempts ( such as
an enemy-funded coup d’état) .
43
Page 23

The Head of Military
Intelligence
The Head of Militar y Intelligence is the counterpar t to the
Minister of Securit y. He will direct your intelligenc e efforts abroad and his agents could provide vital and timely
information about your enemy’s activities. Depending on
his specific area of focus, this could result in advanced
warning of large troop build-ups, the theft of enemy technological secrets, important information about the enemy’s
industrial activities, or may affect the likelihood of a coup
d’état attempt that you fund of being successful.
The Chief of Staff
The Chief of S taff is responsible for a nation’s combined
armed forces and will usually subscribe to a “school” of
thought about how best to wage war. He is usually biased
towards one of the three main divisions of the armed forces
(army, navy or air force) and will give that one par ticular
group an extra edge over the others.
The Chief of the Army
The Chief of the Army direct s the overall activities of a na-
tion’s ground forces. He will usually have a combat doctrine
that provides bonuses to certain t ypes of engagements
or to a specific type of land unit that he prefers above
the others.
The Chief of the Nav y
The Chief of the Navy directs the overall activities of a na-
tion’s maritime forces. He, too, will tend to prefer a specific
doctrine that may have decisive benefits and may favour
one type of vessel over all others.
The Chief of the Air Force
Like his army and navy counterparts, the Chief of the Air
Force will subscribe to a doctrine that may give some of
your aerial units advantages in certain t ypes of missions.
Other Nations’ Domestic Policies
and Min isters
There is a tendency of newer players to pay very little atten-
tion to the policies and cabinets of other countries. While
it is arguably not particularly vital for you to review the
domestic situation of smaller, more remote nations with
whom you will rarely come into contact, it can be a serious
oversight to ignore the capabilities of an enemy. You should
evaluate a foe’s strengths and weaknesses, seeking to take
advantage where you can and perhaps even tailor your own
domestic af fairs to either counter or exploit them.
Dissent and Partisans
Dissent is a global effect in your nation and can be thought
of as a barometer of overall pubic satisfaction. It affects all
provinces equally: whether national, owned or occupied:
and is displayed in the Top Bar at all times. There are two
direct and important effects of allowing your nation’s dissent levels to rise : you will suffer decreased performance
from your armed forces, and you will increase the likelihood
of civil disobedience.
As far as your public is concer ned, the most unsettling action you can take is to plunge your nation into war
without cause or provocation. In some cases, your type of
government and your domestic policies will prevent you
from going to war at all; but in those instances where
you are permitted to make a declaration ( and choose to
do so) some portion of your public will object to this action, causing a sudden rise in dissent. The amount of this
increase will depend entirely on your “reasons” for going
to war and are also modified by your domestic policies.
If you are declaring war simply to satisfy your territorial
ambitions (or for the sheer fun of waging war) then your
public will take a very dim view of it. If you declare war as
a result of a casus belli : a “just cause”: then your public
will be far more understanding. A casus belli may result
from another nation having control of one of your national
provinces ( as displayed on the diplomacy mapmode ). But
it can also occur if you guarantee the independence of a
nation which is then attacked by a third party. Because
you have made these diplomatic assurances, your public
will be quite supportive if you subsequently declare war on
the aggressor. There will be no rise in dissent if you find
yourself at war as a result of one of your allies declaring
war, or due to a nation declaring war on you or a member
of an alliance you belong to.
Dissent is not limited to foreign affairs. The most common reason for it rising is actually as a result of your failure,
domestically, to meet the consumer goods expectations
of your public. If you allocate too little of your industrial
capacity to their production, then dissent will begin to rise.
The demand for those goods: and the rate at which dissent
rises if you fail to meet that demand: will depend on your
domestic policies and possibly on your cabinet ministers.
As the level of dissent rises, the most immediate effect
you will notice is that the performance of your armed forces
will begin to suffer. Low levels of dissent will have only a
marginal impact on their combat abilities, however higher
levels may place your forces at a significant disadvantage.
There is also a chance that dissent may reach a level where
your public will rise in open rebellion and seek to overthrow
what they view as a corrupt and malevolent government.
They will also be far more open to accepting foreign financ-
ing of a coup d’état, something that could have devastating
consequences for your nation.
The only way to reduce public dissent is to allocate excess IC to the production of consumer goods ( which also
has the side benefit of generating additional cash for your
44
Page 24

national treasury) . The rate of the decrease is determined
by the extent of your over-allocation, by your domestic
policies, and may be fur ther modified by the capabilities
of your cabinet ministers.
Partisanship is a concern only in non-national provinces,
and is tracked on a province-by-province basis. Non-national owned provinces will usually have fairly low levels of
militancy, while occupied provinces will generally be much
higher. In both cases, this may also be compounded by
your current level of national dissent. Detailed partisanship values are displayed in the information panel when
you are reviewing a province’s details, or may be seen as
a graphic representation on the main map when you click
the partisan mapmode button.
Partisanship damages the economy of a province, hampering the supply and movement of troops in that territory,
and increasing the likelihood of open rebellion. In owned
provinces this effect is slightly less than in occupied provinces, but neither should be expected to contribute a very
high percentage of their industrial or resource potential.
The risk of rebellion is represented directly by the parti-
sanship level and will be further modified by your national
dissent values, and this same partisan percentage is also
applied as a reduction to your nation’s transport capacity. This may be overcome by maintaining a large enough
standing force to suppress their efforts; however neither
type of province will contribute to your national manpower
pool except under very unusual circumstances, and each
occupied province you control will reduce your transport
capacity by at least 1 point.
The only way to reduce the level of par tisanship in a
province is to keep the resistance movements in check
by placing troops there to maintain order. Most land units
have a suppression value. This value is subtracted from
the partisanship value when the troops are located in a
province, and the value is doubled when the troops have
been specifically ordered to engage in anti-partisan activities (we’ll look at how to do this when we get to the Land
Combat section) . If the suppression value is high enough,
then the additional percentage effects of partisanship may
be completely eliminated; but the base reduction to resource extraction and industrial capacity: and the minimum
loss of 1 point of transport capacity in occupied territories:
cannot be removed.
The factor that will most heavily influence partisanship
and national dissent is the degree to which your society
is open or closed. Open societies have national province
populations that will be considerably more militant about
your actions, but owned and occupied populations are generally very happy to be allowed to express their opinions
and are less likely to revolt. The opposite is true of a closed
society. To a lesser degree your Minister of Security: who
is responsible for such domestic affairs: may be able to
influence the dissent or partisanship levels if he possesses
the correct skills.
Beware ! Partisans and dissidents who rise in rebellion
may be heavily armed and quite difficult to defeat. Failing
to deal with them promptly may result in them achieving
independence, forming their own government, and estab lishing a new nation: one that will be in conflict with your
own. Neighbouring provinces may even decide to join in the
rebellion and it is quite possible that other members of the
international community could be drawn into the affair.
Diplomacy: International
Affairs
Overview
We now turn our attention to international affairs : your
nation’s ability to engage in diplomatic activities with the
world’s other nations. The options available to you when
conducting diplomacy will depend on the relationship that
exists between your countr y and the nation with which
you are attempting to enter into discussions. The overall
stance is of prime importance: whether you are allied, at
war with, or neutral towards one another: but other factors may also play a pivotal role in the likely success of
your negotiations: your relationship with the nation, your
cabinet (most notably, your foreign minister), your respective forms of government and domestic policies, your prior
diplomatic actions, your military successes or failures, and
your overall wealth.
Other Nations’ Domestic Policies
and Cabinets
While you have no direct way to affect other nations’ domestic situation, you should periodically review the domestic policies and cabinets of the other nations in the world:
particularly those with whom you are at war. This may
give you an added insight into their overall strengths and
weaknesses and might suggest tactics that are more likely
to be successful. This is easily done by selecting a nation’s
name or flag from the list of world nations in the Diplomacy
Folder. You can also click on a nation’s flag when viewing
one of its Province Details to go directly to the Diplomacy
Folder with that nation pre-selected for you.
National Relationships
Hearts of Iron II uses a diplomatic model that assumes
that each nation in the wor ld has a specific view about
each other nation in the world, and that any two nations
are capable of conducting at least some level of diplomacy. The success or failure of a diplomatic action: and in
many cases, the diplomatic options that are available: will
depend on the relationship value that exists bet ween the
45
Page 25

two nations. When you select a country in the Diplomacy
Folder, you will see your current relationship value with
that nation displayed near the top of the screen. This value
indicates generally how that nation “feels” about you and
can range between -20 0 (you detest one another) and
+200 ( you’re the best of friends) . Although you cannot
view a nation’s relationship values with other nations in
the world, these are tracked and will modify the diplomatic
activities between AI-controlled nations. If you examine the
details of the diplomatic agreements that they have in place,
however, you will get a prett y good idea of their general
leanings. Nations with similar government types will tend
to be very friendly towards one another, as will nations who
are joint members of an alliance.
Your relationship with a country will affect the diplomatic
options available to you and will also impact on the likelihood of a proposal being accepted. Alliances are usually
limited to nations that have a very good relationship : at
least at the time that the alliance is first formed: and trade
deals and negotiated deals are far more likely to be met
with a favourable response if your nations are on friendly
terms. Some diplomatic options are specifically designed
to improve relationships between nations, while others
are almost guaranteed to re sult in a worsening of this
value. In most cases, a relationship will improve when a
diplomatic proposal is accepted : thus opening the door to
further interactions: and will worsen if it is declined. The
other factor that affect s international relationships is each
nation’s belligerence.
Belligerence
Every nation has a belligerence value that is displayed below the relationship value. Think of this as a special means
used to measure and evaluate each nation’s actions. The
more actively aggressive you are, the higher this value will
become. Entering into wars without provocation, annexing
countries, initiating coups, and similar activities will tend to
make other nations think of you as belligerent and a danger
to their continued survival. Freeing nations from oppression: or even just keeping a low profile over a significant
period of time: will tend to make nations think of you as being more friendly and trustworthy. Each of these actions (or
inactions ) will alter your belligerence value and affect your
diplomacy. The most visible result of a high belligerence
value is to exert a continuous downward pressure on your
relationship values with other nations. Even your closest
allies will begin to view you with some degree of suspicion,
overcoming the normal bonuses that apply to relationships
between allies. Neutral countries will tend to dislike you
rather intensely, and enemies will become commit ted to
your destruction. If you allow your belligerence to reach
epic levels you could even find that the entire world sud-
denly becomes obsessed with your destruction.
A less obvious effect is that a limit is placed on democracies where they may not declare war unless the “target”
nation has a sufficiently high belligerence value and the democracy has a strong enough policy of intervention. These
factors are weighted, meaning that the more democratic a
nation is and the less it leans towards interventionism, the
higher the required belligerence value of a target nation
needs to be in order for the democracy to declare war.
Other than going out of your way to free nations that
you have already conquered, you can reduce your own
belligerence value by being on your best behaviour for a
prolonged period of time. If you do this for long enough,
the international community will slowly forgive and forget
your previous transgressions and your belligerence value
will slowly recede.
The Three Factions: The Allies,
The Axis and The Comintern
While an alliance can be formed between any two neutral
nations, there are three pre-existing factions in Hearts
of Iron II that are considered to be natural and dominant
alliances: the Axis, the Allies, and the Comintern. A nation may only belong to one alliance and, upon joining, is
automatically considered to be allied with any other nation
which is also a member of that alliance. That nation is then
prohibited from joining a second alliance without first leaving their existing one.
The Allies : This alliance is headed by the United Kingdom
and will appeal primarily to democratic nations. In virtually
all games there are a number of nations that are already
a member of this alliance (mostly Commonwealth nations,
and possibly France or the USA, depending on the game).
In several of the battle scenarios “The Allies” may actually
be treated as a single nation rather than as a collection
of nations (it uses a special flag with a green star on it
as its insignia ).
The Axis: Germany begins the 1936 Grand Campaign
game as the only member of this alliance of fascist nations, though others may be interested in joining. For game
purposes, Japan is also treated as a fascist nation to increase the probability that they will join the Axis alliance
at the outbreak of war.
The Comintern : The Soviet Union leads the alliance of
communist nations, and in most games Mongolia and
Tannu Tuva will also begin as members. Although histori-
cally the Comintern and Allies formed what would normally
be viewed as an alliance, this relationship is not established
in the game setup of later campaigns to allow the player a
little more freedom of diplomatic action (although both the
Comintern and the Allies will be at war with Germany).
I should point out that the nations who lead these three
46
Page 26

factions are not only considered to be alliance leaders
(see below ) but are also pro-
grammed to be ex tremely reluctant to agree to any peace
terms other than the outright
annexation of a member of
another alliance. You should
expect any other offers of surrender to be rebuf fed when
they are involved.
Spheres of
Influence
Before we lo ok at the various diplomatic options, you
should be aware that there is an additional component
to diplomacy that is not readily apparent from any of the
interfaces but will have an impact on the outcome of your
actions. This is termed “spheres of influence” and represents the historical situation where a number of larger
nations took a ver y dim view of other nations conducting
diplomacy in an area that was geographically close to their
interests without their expressed permission. This is most
easily seen by watching which countries have their independence guaranteed by larger A I nations, since they will
typically do so for any nation in their sphere that isn’t diametrically opposed to their form of government. Be warned
that stepping on their diplomatic toes can result in no small
degree of resentment, a drop in your relationship values,
and could even lead to war.
Initiating Diplomacy
To initiate any diplomatic action, select the countr y from
the listing at the left side of the Diplomatic Screen. The Diplomacy Options area will now display a list of all available
actions that you may take with this nation. Ones that you
may perform immediately are highlighted in orange, while
others may be greyed out if you fail to meet a necessary
condition to initiate that action: generally a case where the
relationship or belligerence values are too high or too low.
Some diplomatic options require cash to perform, so this
could also prevent you from taking an action until your national cash reser ves have increased. There are also some
diplomatic options that will only appear if you are at war
with a nation: or not at war with a nation. There are also
options that will only be displayed if you have sele cted
your own nation as the “target”. A tooltip will appear when
you hover over an option, briefly detailing what it means
and also informing you of the cost of the action and any
prerequisites that you currently fail to meet.
Once you decide on an action, click on it. In many cases
a new interface will appear that allows you to specify additional details, while in other cases the action may take
place immediately or you may
be asked to confirm the action. If there is a cash cost
for the diplomatic action, it
will only be deducted when
you confirm the actio n and
dispatch your diplomat. You
will not lose the money if
you change your mind and
cancel the action; but o nce
confirmed, the money will be
deducted whether or not the
diplomatic offer you send is
agreed to. ( For instance, the cost of sending a diplomat
to negotiate milit ary access will not be returned to you if
the access is declined.) The cost of a diplomatic action
will fluctuate, depending on your domestic policies, your
cabinet, and the size of the nations involved (which explains
why I don’t give precise costs in the sections that follow ).
The tooltips will indicate the exact cost of each action.
Once you have sent a diplomatic message to a nation,
you will have to wait for a period of time before you are able
to initiate any further diplomacy with that nation (although
you may conduct diplomacy with other nations if you wish).
If a response is required, you will usually receive it within
a day or two ( although human players may take longer to
answer in multiplayer games), but you must wait a full week
before another message may be sent to that nation. When
you receive a diplomatic message that requires a response
(usually a trade offer), you will have a limited period of
time to respond before it becomes invalid and disappears
from your screen. The following are the various diplomatic
options that may be available to you :
Offer Trade Agreement
There are two different types of trades that can be arranged
between two nations: a trade agreement and a trade negotiation. Trade negotiations are one-time transactions that
may involve a very wide range of items, while trade agreements are open-ended deals that involve an ongoing daily
exchange of resources. There is a small cost required to
propose a trade agreement. When you click on the offer
trade agreement option, a secondary interface appears.
Each of the resources (including supplies and cash) will
be represented by a slider on the interface. There will be
maximum end points set for each slider, limiting what you
may request or offer. These endpoints are based on the
daily rate of change of each of the resources : on the right
side for your nation and on the left side for the nation with
which you are negotiating. If you have no daily increase of
a resource, then you will not be able to of fer that item ( regardless of your stockpiles) and if the target nation has no
47
Page 27

daily increase of an item then
you will not be able to request
it. The exception to this is that
you may offer more than your
own daily rate of ch ang e
of money or supplies if you
currently have stockpiles of
those items; but you c annot
reque st them regardless of
that nation’s stockpiles. You
can check the resources that
a nation might be interested
in bar tering before you open
the interface by looking at the
small resource icons adjacent
to the country’s name in the
diplomatic list. An icon will indicate a daily surplus of a
resource and means that you might be able to barter for it
(reminder: these icons are updated at midnight each day
and will not appear until the first game day has elapsed).
To set the terms of the proposed trade agreement, simply
adjust the sliders to indicate the resources you would like to
exchange. Shif ting a slider to the left of the mid-point will
indicate that you are offering that resource, while shifting
it to the right means that you are asking for that resource
in return. Once you are satisfied with the deal, click the
OK button to send the offer. There is a numeric display
near the bottom of the inter face that indicates the chance
that the nation will accept your proposal, but the accuracy
of this value will depend somewhat on your minister of
intelligence’s reports and on your foreign minister’s persuasiveness. It is also affected by your belligerence value
and by the relationship between your two nations, and is
further modified by both nations’ domestic policies. Don’t
be too shocked if a nation declines a trade in spite of a
100% acceptance probability: and it’s similarly possible
that a nation might agree to an offer even though the
chance seems slim.
If a trade agreement is accepted, the exchange of goods
will begin on the next day and will continue until one of the
two nations decides to cancel the deal or is no longer able
to supply that resource. There is a trade ef ficiency factor,
however, that will modify the actual amounts that each
nation receives. The efficiency reflects the small losses in
goods that may occur naturally if they must travel great distances (shipwrecks, etc.) and potentially very large losses
if one (or both) of the nations involved is at war with an
enemy who is engaging in convoy disruption activities. The
routes used by ships involved in trade agreements are not
shown on the supplies mapmode, but you must still be able
to trace a line of supply through your respective nations’
territories, or through the territories of those nations who
are friendly towards you and
with whom you have a treaty
of access. If you are unable
to do that: or if the route is
heavily blockaded by enemy
vessels : then no ne of the
goods will arrive at their desired destinations and there
is little point in proceedin g
with the offer. Note that the
full shipment of goods that
you are sending will still be
withdrawn daily, but that you
will receive less in return.
Cancel Trade
Agreement
If you have a trade agreement with another nation then
you will have the option to cancel it if you wish. The most
likely reasons for doing so would be a drastic reduction in
trade efficiency or a change in the availability of a resource.
When you click on this option, you will be given a list of all
existing agreements that you have with that nation. Simply
select each of the agreements that you wish to cancel (an
X will appear) and then click okay. You may also cancel a
trade agreement directly from the production screen by
right-clicking on the trade deal. There is no negotiation
involved in cancelling an agreement: it is cancelled automatically by this action: however it may damage your
relationship with your former trading partner.
Open Negotiations
This diplomatic option is used to negotiate a one-time trade
between your nation and any another nation with who you
are not at war. The range of items that can be bar tered
may include resources, provinces and even technological
blueprints. There is also a small cost involved in negotiating the deal. An interface will appear when you click the
open negotiations button that is divided into two halves:
the items being offered by your nation will be on the left
and the items you wish to receive in exchange will be on
the right. As you assemble your of fer any prov inces or
blueprints that would be exchanged will be listed below
the nations, and the amounts of any resources involved
will be displayed beside the appropriate icons towards the
bottom of the interface.
Territor y may be included in a deal by clicking on the
Provinces tab (on the appropriate side) and then selecting
the province name from the list. The name of the province
will appear at the bottom of the screen when you click on
it, and if you change your mind you may simply click on
that listing to remove it. Note that you may only offer to buy
or sell non-national provinces.
48
Page 28

The same technique is used for including a blueprint in
the deal, however the Blueprints tab will be greyed out and
cannot be selected unless the nation you are negotiating
with is an ally, or if one of you is a puppet to the other. It
will also be grey if a nation has no technology to offer that
its ally doesn’t already possess. You may only request or
offer blueprints for projects that a nation currently has
the necessary prerequisites to begin researching ( or is
already researching) .
Resources may be offered or requested by clicking on
the Resources tabs. You may only offer up to the total
amount that you have in your national stockpile, or request
up to the amount that the other nation has in its own (again,
this is an underhanded way to evaluate another nation’s resource stockpiles) . As you adjust the sliders, the amounts
being offered or requested will be displayed beside the
appropriate icon at the bot tom.
As you assemble the proposal, the chance of the deal
being accepted will be displayed at the bottom of the interface. This is the base chance and is modified by the same
sorts of factors as af fect trade agreements, so keep this
in mind as you are putting the proposal together. The only
deal that would be automatically accepted is one where
you are giving something away for free: offering something
on your side of the interface while requesting nothing in
return. Once you are satisfied with your offer click the OK
button (or click the cancel button to abort the diplomatic
action ) and the proposal will be sent. If the target nation
accepts the deal, then the exchange will be made. Beware!
Negotiated deals are subject to the same trade efficiency
modifiers as trade agreements are, so not all of the resources exchanged will necessarily reach their intended
destinations. Provinces and blueprints are not subject to
enemy embargo.
Influence Nation
This is a fairly common diplomatic action where you will
send money to a nation in an attempt to improve the relationship that exists between you. There is no acceptance
required for this “gift” and you will usually see at least some
improvement in your nations’ relationship af ter choosing
this option. The degree of change will depend on a variety
of factors: particularly the capabilities of your foreign minister and your relative government types: and will have no
additional or lasting benefits beyond this one-time boost.
Alliances: Offer Alliance/Bring
to Alliance/Join Alliance
An alliance is a special relationship that exists between
two or more nations: usually for protection and military
cooperation. New alliances may be formed between any
two nations that are not already part of an alliance, and
whichever nation that creates the alliance will become the
alliance leader. The alliance leader is the only nation that
may invite new nations to join the alliance, or accept the
petition of an otherwise un-allied nation who wishes to
join. At the beginning of each campaign game, there are
three pre-existing alliances: the Axis, the Allies and the
Comintern. Germany is always the alliance leader of the
Axis. The United Kingdom is always the leader of the Allies.
The Soviet Union is always the leader of the Comintern.
There is a special case in the 1936 Grand Campaign where
Germany has no other allies at the beginning of the game:
even if you are the one to propose and arrange an alliance
with Germany, Germany will be the alliance leader and you
will be deemed to have joined the Axis.
If you wish to form a new alliance, you cannot already be
allied to any other nation and you must issue your invitation
to a nation that is also not already allied. If it is possible to
create one, the offer alliance option will be available in the
list of diplomatic actions. Creating an alliance is usually
a fairly expensive process and is only likely to succeed if
you have a good relationship with that nation and you have
fairly similar types of government. Larger nations will also
tend to be somewhat disinclined to accept an offer made
by a smaller, weaker nation; and a nation that pur sues
isolationist policies is very unlikely to be interested in your
offer (in fact, unless a democratic nation with a strong
isolationist policy is already at war, it cannot offer or be
asked to form an alliance, nor can it ask or be asked to
join an existing alliance) .
Once an alliance has been formed, the leader of the alliance may invite additional members to join (as long as they
are not already a member of another alliance) by selecting
the nation and using the bring to alliance diplomatic option. This will be a somewhat less expensive process than
creating an alliance, and the likelihood of the offer being
accepted is governed by a similar set of considerations
as forming alliances. If you aren’t par t of an alliance and
wish to become a member of one, then you may petition
the alliance leader to allow you to join by selecting the join
alliance option. This is a relatively inexpensive option and
the leader’s response is determined by the same set of
preferences as has already been mentioned. If you aren’t
sure who the alliance leader is, you can select any member
of the alliance and then hover your mouse over the join
alliance option. If the selected member isn’t the leader
you will see a tooltip that indicates that you can’t ask this
nation and identifies the alliance leader.
Alliances are ver y tight international bonds. Allies will
share all of their territorial and armed forces information
with one another, removing the fog of war over those provinces for all member nations. If a member of an alliance
declares war or is the recipient of a declaration of war,
then the entire alliance immediately becomes involved in
49
Page 29

the conflict. Alliance members grant unconditional military
access to one another. They will also provide supply for
each others’ forces as required and will allow navies and
squadrons to make free use of their bases.
Once an alliance is involved in a war, no member may
leave that alliance until it has concluded a peace treaty
with the enemy and is no longer involved in the war. Be
cautious when forming an alliance or adding new members
to it after it has been created. There is no provision for an
alliance leader to either ban a member nation from an
alliance or to dissolve the alliance. An alliance leader may,
however, decide to leave the alliance if he wishes (see
below) , at which point a new leader is chosen from among
the remaining alliance members. Similarly, if an alliance
leader is annexed then a new leader will be appointed
from the survivors.
Alliance leaders always conduct peace treaties on behalf
of the entire alliance (except for their own annexation), and
all terms that an alliance leader agrees to are binding on
all other alliance members. S eparate peace treaties may
be negotiated by non-alliance-leaders, but these are only
binding on the two nations involved in the negotiations. If
an alliance leader negotiates a peace treaty with a non-alliance-leader, then the terms agreed to by the alliance leader
are binding on his entire alliance, but the terms agreed
to by the non-alliance-leader will only affect his nation
separately and the remaining members of that alliance
will still remain at war.
Leave Alliance
If you are a member of an alliance, you may elect to disassociate yourself from it by selecting this option. You may not
leave an alliance if it is at war. The cash cost for leaving an
alliance is quite steep and has a very negative impact on
your relationship with all other member countries. It goes
without saying that you are not allowed to declare war on
another member of an alliance you belong to ; thus you
must leave the alliance if you wish to do so. Although it
might seem odd: and is admittedly very unlikely to happen:
an alliance leader is permitted to leave an alliance that he
has created ( as long as it is not at war).
Send Ex peditionary Force
This option allows you to lend a force to one of your allies.
This is a free diplomatic option (it doesn’t cost any money
to do) and relinquishes control over one existing force to the
target nation. The new national controller will then assume
all responsibilities for issuing it orders and replenishing its
losses, however it will remain under the command of the
officer you have assigned to it and cannot be disbanded.
The nation you’ve lent it to may continue to use it until the
force is either eliminated or returned to you voluntarily (you
cannot request its return ).
When you select this option, an interface will appear that
allows you to select which force to send to your ally. Since
the listing is a scrollable list of every force that you possess
but doesn’t det ail its complement (other than total size,
strength and organisation), I would recommend that you
predetermine which one you intend to send before initiating this action. If you currently control another nation’s
expeditionary force and wish to return it, click on this option
in the Field Command Details menu to place it back under
its home nation’s direct control.
Assu me Military Control/
Relinquish Military Control
If you are allied to another nation you may ask that nation
to allow you to assume military control over its forces. This
request will cost a moderate amount of money to initiate
and is likely to be accepted only if you are significantly
larger and stronger than the nation to whom you are making the request. If accepted, you may then issue orders to
that nation’s armed forces but their reinforcement and the
decision as to whether to begin production of any new units
remains at their discretion.
Once you have been granted military control over a nation, you will remain in control until you return control back
to that nation via the relinquish military control diplomatic
action (which has a modest cost associated with it) , or
until the nation either is annexed or leaves your alliance
for some reason. If you grant military control to another
nation then the only way to regain control of your armed
forces ( without being annexed and thus losing the game )
is to leave the alliance.
Gua rantee In dependence
This is a relatively inexpensive option that allows you to
guarantee the independence of a nation for the nex t five
years. This is a formal declaration that warns that you will
take a very dim view of any hostilities that are initiated
against this nation and will very likely act in its defence. In
the event that a third party does declare war on that nation,
you will have a casus belli against the aggressor, allowing
you to declare war without paying a heavy political price
for that declaration (either domestically or internationally) .
You are not required to make such a declaration, though,
nor do you suffer any ill ef fects for failing to do so. This
is a method for a democratic nation to bypass the normal
belligerence and interventionism restrictions that would
otherwise prevent it from making a declaration of war.
Offer Non-Aggression Pact
This diplomatic option is used to arrange a two-year mutual
non-aggression pact with another nation and involves a
moderate cost to negotiate. In essence you are asking
another nation to formally sign an agreement where both
50
Page 30

nations commit to remaining peaceful towards one another
for the duration of the pact. If accepted it will usually have
a positive effect on the relationship between your two nations and will incur very hefty penalties if it is subsequently
broken prior to its expiration. A nation cannot declare war
on a nation with which it has signed a non-aggression pact
without first formally cancelling it, so this may offer you
some degree of security and, at very least, a minimum of
a week’s advance notice before a war can occur between
your t wo nations. Once a pact has expired, there are no
further assurances of peace, nor is there any additional
penalty if either nation subsequently declares war (beyond
the penalty for the declaration of war itself).
Non-aggression pacts have a good chance of being accepted if you have a fairly competent foreign minister, are
significantly larger or more powerful than the other nation,
have a fairl y low belligerence factor, or enjoy a decent
relationship with the other nation.
Cancel Non-Aggression Pact
This option will only be available if you have an existing
non-aggression pact with a country. Although this will severely damage your relationship, you are prohibited from
making a declaration of war on a nation with whom you
have a non-aggression pact and thus you must cancel it
before you will be able to declare war. Needless to say, a
country that breaks a non-aggression pact with you should
be watched ver y closely.
Ask for Military Access/ Cancel
Military Access/Revoke Military
Access
This diplomatic option is a request to a nation to allow your
forces to move freely through its provinces and also to be
able to trace supply through them. Without this, you are
prohibited from entering or supplying through a neutral
nation’s territory. The cost to initiate this request is modest,
but most nations will not be willing to grant you access unless you enjoy a very good relationship. Allies automatically
grant one another access, so it is not necessary to arrange
a special treat y unless you expect that at some point they
(or you ) might leave that alliance.
A military access treaty is not a reciprocal arrangement.
A separate access treaty would have to be requested by
the other nation before it could move forces through your
nation’s provinces. While an access agreement is in place,
you will be prohibited from declaring war on a nation that
is granting you access. Beware! A nation that grants you
access is not under the same constraints and may declare
war on you at any time and without warning.
Military access may be revoked by either the nation at a
modest cost by selecting the cancel (or revoke) military access diplomatic option. If a nation does this, then it is likely:
Democracy and
Isolationism
A democratic nation with a strong domestic policy of
isolationism will not be able to declare war on another
nation unless the target of the declaration has a very
high belligerence value or declares war against a nation
whose independence you have guaranteed. Democratic
isolationists will also be unable to join alliances or create
new alliances unless that democracy is already at war.
probable in fact : that the nation is planning to declare war
on you in the near future, so you should be on your guard.
Besides souring your relationship, a nation whose access
is revoked is also given a casus belli, allowing it to declare
war without paying the usual domestic or diplomatic cost.
Liberate Nation
This option is only available if you have selected your own
nation and if you control provinces that can become part
of a nation that does not currently exist. If you click liberate
nation you will be asked what country you wish to create
from a list of possible nations. A tooltip will advise you of
the provinces that will become part of the new nation (and
cease to be considered yours). When you have selected
the new nation and clicked OK the new independent nation will be formed and will be added to the list of nations
in the world.
If you voluntarily liberate a nation, it will begin its new political life as a puppet regime and will send you a portion of
the resources it extracts from its provinces each day. It will
also become a member of whatever alliance you currently
belong to (if any) and you will begin your new relationship
with them at a very high standing. The liberation of a nation will be greeted warmly by the international communit y,
usually causing your belligerence value to decrease.
Release Puppet
If you have a nation that is under your control as a puppet
regime you may decide to release it to its own devices. The
only immediate effect is that you will cease to receive any
portion of its national income, but this is considered a very
benevolent action that is likely to improve your relationship
with many par ts of the international community.
Demand Territory
This option will be available if a nation owns one or more
provinces that are considered to be your national provinces
(shown in dark green on the diplomatic mapmode) . This
is not a peace treaty option ! It is a demand that the nation return territory to you that is rightfully yours. The cost
of sending your diplomats will depend on the amount of
territory involved, and although it does not increase your
51
Page 31

belligerence, it will seriously degrade your relationship
with that countr y regardless of whether or not it agrees
to your demands.
Coup Nation
Coup N ation is a means of financing a coup d’état of another nation. If you have sufficient funds to send to the
insurgent s, then you can select this option regardless of
whether or not you are at war with that nation. The attempt
will not always be successful, being influenced primarily
by the target nation’s level of dissent, although this is also
modified by the abilities of your Minister of Intelligence and
the target nation’s Minister of Security.
Declare War
This option sends a formal declaration of war to another
nation. Making a declaration of war without a casus belli is
a very belligerent action. Democratic nations will not even
have this option available to them unless the recipient of
their declaration has either provided provocation, or has
a very high belligerence value and the democracy has a
firm domestic policy of interventionism. While there is no
monetar y cost for declaring war, doing so also risks civil
unrest unless there is a very strong reason for the conflict.
When you click on the action, an interface will appear that
informs you of the effect this will have on your national
dissent level and advises you of any allies that the target
nation might have. If you wish to proceed, click the OK button. If you change your mind you may click Cancel.
A declaration of war will automatically plunge all allies of
both nations into the conflict as well: they have no choice in
the matter: although they do not pay a political or domestic
price for doing so. Once begun, war can only be ended by
concluding a peace treaty, or by all nations on one side of
the conflict being eliminated. The subject of a declaration
of war will also gain a small amount of sympathy from the
international community, resulting in a modest reduction
of his belligerence value.
Sue for Peace
The sue for peace diplomatic option will only be available if
you are at war. There is no cash cost to initiate this action
and you may sue for peace whether you feel that you are
in a position of victory, or one of defeat. When you sue for
peace, you will first be asked what t ype of peace you are
interested in negotiating. If you feel that you are winning
the war, then select the “insist on demands” button to assemble the terms of your enemy’s surrender. If you are in
a losing position, then you may wish to select the “beg for
peace” button to put together a proposal of what you’d be
willing to give up to go to peace. If you would be content
with a return to the status quo before the war broke out :
making neither concessions nor demands: then select the
“white peace” button. Whichever option you select, a new
interface will appear that will depend on what type of peace
you are pursuing.
Before we look at the options, though, it is important to
understand the distinction between peace treaties negotiated by an alliance leader and those that are negotiated
by some other nation that is part of an alliance. T his is
something that I touched on earlier when discussing alliances and bears repeating: When an alliance leader is
involved on one side of the negotiations in a peace treat y,
any agreement that is reached is binding on every member
of that side’s alliance. If a nation that is not the alliance
leader agrees to peace treaty, then it is only that nation :
and not the alliance it belongs to: that is bound by the
agreement. The only peace agreement that will end a war
completely is one negotiated between the alliance leaders
of the two sides that are at war. Any other agreement will
result in only a partial peace, with the extent of the peace
being determined by whether one of the nations involved in
the negotiations was an alliance leader or whether neither
of them was. Before you offer terms or decide to accept
an offer that is sent to you, be absolutely certain that you
know what you are agreeing to and who you’re agreeing
to it with, or you could be in for a very big (and potentially
nasty ) surprise ! When an alliance leader is involved in a
peace negotiation it can ar range for one (or more) of its
alliance members to be the beneficiar y of any land being exchanged (they must currently occupy it for this to
be possible), but it can also force an alliance member to
concede territories, if those provinces are occupied by the
enemy. A n alliance leader cannot, however, bind an alliance member to any special peace terms such as forced
disarmament, military access, or forcing them to become
a puppet of the enemy. Annexation : the worst possible
outcome of war for a nation: is not negotiated using the
“sue for peace” option. I t is a separate option and is only
binding on the nation that is annexed.
If you are pursuing a white peace, then you can simply
click on the white peace option to send the offer. If your
enemy agrees to the proposal, then all nations included in
the peace will sign the truce and a peace treaty will exist
between you for the next five years. If a nation occupies
any provinces that are owned by a nation that is part of
that peace treaty, then these are returned to their rightful
owner (but provinces owned by a nation that is still at war
will remain occupied). There will be no further compensation received by either side. I should warn you that a white
peace does not preclude a resumption of hostilities. War
may be declared again by any nation at any time: though
with an added penalty for breaking the peace treaty: so
this should be regarded as something of a tenuous arrangement at best.
52
Page 32

If you wish either to beg for peace or insist on demands,
a s omewhat different inter face appears where you will
set the terms you are willing to agree to. You will see a
numeric evaluation of your current warscore (which reflects
victories, defeats, conquered provinces and provinces lost
to the enemy) and a variety of possible peace conditions.
Several special terms may only be included in the negotiations if you are insisting on demands: and those terms will
apply only to the nation with whom you are negotiating,
not to any nations that are par t of that alliance: but the
overall inter face will be generally the same in both cases.
Each peace term has a “value” and as you assemble your
offer in the center area of the interface these are tallied
at the bottom.
You can make multiple demands and can mix various
types of terms to assemble your final offer. The possible
peace conditions include :
Territory : You may specify territory whose ownership is to
change hands if the peace is agreed to. If you are insisting
on terms, then you may only demand provinces that you
currently occupy. If you are an alliance leader, then you
may also demand provinces that are currently occupied by
your allies and ownership would transfer to your ally in that
instance (the recipient of each province that you demand
is clearly indicated). If you are begging for peace, then
you may also offer any provinces that you own, whether
or not they are occupied by the enemy. N ote that all occupied provinces not included in the treaty will revert to
their rightful owners when the treaty is signed.
Forced Disarmament: This option may only be demanded
by a victor (not offered by a loser) and may only be imposed
upon the nation with whom you are directly negotiating (not
one of his allies). If the enemy agrees to this, he will be
forced to disband his entire military.
Milita ry Access: This is another term that may only be
demanded by a victor. If agreed to this will give the victor
unrestricted access to move through the loser’s territor y.
Make Puppet: If you have a high enough war score: usually
because you control many of the enemy’s key provinces
(identified by a red star in the victory points mapmode): you
may demand that an enemy submit to you and allow the
establishment of a puppet regime in his nation that is loyal
to your government. If accepted, the enemy will succeed all
territorial claims to your nation and a new government will
be installed that is of the same type as yours. The new puppet will leave any alliance it is currently a member of and
will join your alliance instead. It will automatically grant your
country militar y access to their lands and henceforth a portion of the puppet’s daily revenues will also be transferred
to you (as a sor t of tribute or war reparations). This is a
fairly hostile action : although not as belligerent as outright
annexation: and will probably only be accepted if you enjoy
vast military supremacy and the target nation feels that it
has little or no chance of survival other wise.
Once you are satisfied with the terms, click the OK button to send your offer. I should caution you that an enemy
is unlikely to agree to a proposal that is close to the exact
warscore value and is much more likely to accept it if there
is large benefit to doing so. Certain nations will also be
highly resistant to accepting any peace terms whatsoever
(beyond outright annexation ) with certain other nations:
particularly the faction leaders. As with any diplomatic
option it may take a day or two to receive a response and
you will not be able to initiate further diplomacy with that
nation until at least one week has elapsed. If the peace
is agreed to, then all nations involved in the deal will sign
the peace treat y which will be in force for the subsequent
five years: but it is no more binding that was the case
with white peaces. Any territory that does not exchange
ownership as the result of the terms will be returned to
its rightful owner.
Annex Nation
If you are at war with a nation and have achieved a crushing
victory (you must occupy all of its key provinces: identified
by a red star when viewing the main map in the victory
point mapmode) the annex nation option will become available. Annexation is the most devastating demand that you
can impose and is treated as a separate diplomatic peace
option due to several special considerations related to its
terms. T he target nation must lay down it s arms and dissolve its government, surrendering ownership of all of its
territories and for all intents and purposes becoming part
of your nation. This is always handled as separate peace,
so even if the defeated nation is an alliance leader it is in
no way binding on any of its alliance members. There is
no cost to offer this “peace” but it is a demand that will
remove that nation from the game (unless it later reforms
as a result of partisan uprisings) and is considered the
most hostile and belligerent action possible. Don’t expect
your demand to be accepted if the target nation still has
some capacity to wage war; and if it is accepted then
you should expect other nations who are not very closely
aligned with you to treat you as a pariah in the international
community for a long time afterwards. If you enjoy this high
a margin of victory you may wish to consider the “puppet
regime” peace term instead : one that will be considerably
less damaging to your reputation: or some other combination of highly punitive terms.
If an alliance leader is annexed, then a new leader will
be chosen from amongst those nations that remain and
the state of war will continue to exist with that alliance. If
there are no remaining alliance members, then the war
will be over.
53
Page 33

The Statistics
Folder
Overview
The Statistics Interface is primarily a means of gaining and
reviewing large quantities of global information quickly, and
for comparing your nation’s progress to that of others. Each
table of information relates to an aspect of the game: general summaries, economic information, convoy summaries,
technology and milit ary comparisons, a complete listing
of your armed forces including their locations, strengths
and combat stats, and a place where you may view the
full-length version of the history log. A large number of the
tables have “hot links” allowing you to double-click to jump
to a specific unit or province, or have right-click menus that
allow you to conveniently issue orders or make changes
without going directly to a unit or provincial location. Due
to the number of statistics sub-folders, their fairly self-explanatory nature and the limited overall size of this manual
(for game-packaging reasons in some markets), I cannot
provide details for each of the sub -folders in this text.
Selecting and Using a
Statistics Sub-Folder
Each of Heart s of Iron II’s subfolders (there are more than
twenty of these) can be accessed by paging through them
using the left and right arrows at the bottom of each folder.
They are also grouped into five general categories : Sum-
mary, Economic, Technology, Military and History: and you
will see a set of buttons at the bottom of the folder which
you can click to quickly jump to the appropriate group of
folders that relate to that category.
There are some fairly common features available in the
statistics subfolders. In many cases, the column headers
can be clicked to sor t the data in the tables in ascending
order according to that heading, and clicking it again will
reverse the sort order. Double-clicking on an individual
line in a table will usually jump directly to: and select: the
item in question (a province, unit, leader or supply route).
In some cases, you can right click on an item to display
a context-sensitive menu that allows you to take a direct
action from the subfolder.
When you have finished reviewing the information and
leave the Statistics Folder (or use the quick-jump feature ),
HoI2 will remember the last statistics subfolder that you
were viewing and the sort category and order that you last
used for that folder. When you nex t open the Statistic s
Folder it will return to you that exact same view.
Combat: The Art Of
War
General Overview
We now (finally!) come to the part of the manual that deals
with combat: a section that is designed to familiarise you
with the various combat interfaces and to introduce you
to some basic strategies that are likely to be successful
in your games. Beyond the odd one-on-one struggle that
may occur once in a while, combat is one of the most
complex systems of the game and can have the most farreaching ef fects. I f you approach it from the “Oh, there’s
an enemy force…I’ll attack it!” standpoint, without taking
any other factors into consideration, you are very likely to
lose not only the battle but also the entire war. Instead, you
must consider variables such as terrain, weather, supply,
leadership and the operational capabilities of your forces
if you are to achieve any lasting success. This shouldn’t
come as a surprise : since this is a grand strategy game:
but it will probably t ake some time for you to gain a full
understanding of c ombat’s intricacies…and quite a bit
more to become a master of the art of war. I will assume
for this entire section that you are familiar with the contents
of the previous sections of the manual, thus allowing me
to avoid redundant descriptions or being forced to go off
on tangents.
You will notice that I avoid giving detailed unit descriptions in this section. In part this is due to space limitations
(though many useful charts and tables can be found in
the .pdf file included with the installation) but largely it
is because the characteris tics of each unit will change
many times during the game to reflect the modifiers that
new technological advances will give you. An overview of
the basic details can be found in the military subfolders of
the Statistics Folder; and a more thorough description is
included in the unit specifications in the Production Orders
interface. For individual units, though, the most detailed
information is shown in the Unit Details interface. The big
advantage of using in-game information is that it reflects
the actual statistics of your units, including any modifiers.
The effectiveness of most armed forces relies on the real
Field Command
For the sake of clarity I will use the term “field command”
or simply “command” throughout the remainder of the
Land Combat section to refer to any force on the map
that is commanded by an officer and that you can issue
an order to, regardless of whether it is a single division,
a corps or an army.
54
Page 34

life principle of a chain of command, and since you can’t be
expected to issue orders to every single NCO in your army
in every single t heatre of war, HoI 2 implements a c ommand structure to help you. As we’ve already seen in the
Diplomacy section of the manual, you will have a national
Chief of Staff and then three subordinates: the Chief of the
Army, the Chief of the Air Force, and the Chief of the Navy.
For human-controlled nations, these individuals will sit
quietly behind the scenes and allow you to issue your own
orders, their primar y function being limited to giving you a
few select bonuses to certain military areas: although you
could think of them as being the ones who relay your orders
to the troops and see to their supply. Your role as a player
is to wear the multiple hats of the combined Joint Chiefs
of Staff and issue orders to your army, navy and air force.
Each of these branches of the armed forces uses a slightly
different set of rules, and so to avoid introducing too much
confusion we will examine each one in somewhat isolated
detail before we combine them again. As you read, it is
worth keeping in the back of your mind that your eventual
success will probably depend on using a combination of at
least two: and occasionally all three : branches when you
are planning your attacks.
We’ll begin by looking at your land forces, since they
are the units over which you have the greatest degree of
control and they are the only units that are capable of conquering a province. Once we’ve thoroughly explored their
various interfaces and controls, we’ll move on to look at the
differences and similarities of the interfaces that you will
encounter and use to control your air forces and navies.
The Land Forces
Overview of Force Structu re and
Field Comma nds
Hear ts of Iron I I doesn’t allow you to control individual
soldiers, nor will you see any house-to-house or even townto-town fighting as you play the game. Combats represent
large-scale offensive and defensive actions: a scale where
the struggles involve large numbers of men and equipment,
and where the prize is the control of an entire province.
Your jo b is to plan ahead, prepare and position suitable
forces, ensure their supply, and then issue the necessary
orders to your field commanders and entrust them to carry
them out to your advantage.
While the precise structure and size of armies in the
WWII era varied somewhat from nation to nation, HoI2
abstracts and generalises this to avoid confusion and
maintain ease of play. The smallest land unit that can be
directly controlled in the game is the division: a unit that
represents many thousands of men or a large assembly of
military vehicles (e.g. tanks, trucks or half-tracks). There is,
however, a smaller unit size available in HoI2 : the brigade.
These are specialised units that cannot operate alone and
must be “attached” to divisions to provide a bonus to some
aspect of the division’s performance. Due to their cost, it
is unlikely that you will attach a brigade to every division,
but you are able to reassign one by detaching it from its
current division and then at taching it to another. This is a
somewhat disruptive process, though, and will take some
time to accomplish.
Individual divisions may operate in isolation, but more
often will be grouped together to form a “corps” or “army”.
You have complete control over the way that divisions are
grouped and may arrange them in more or less any combination or number that you like. T he terms “army” and
“corps” are simply a semantic distinction that the game
uses when automatically assigning names to forces (a
smaller grouping is usually called a corps and a larger
grouping is called an army ), but there is no functional difference between them beyond their sheer size. This size,
however, introduces one specific issue that is of vital importance: leadership. When you issue orders you will select
a force (of whatever size and composition) and then tell its
commanding officer what you would like the force to do.
He will then arrange for that force to carr y out your orders
to the best of their ability; however, their performance will
depend on a large number of factors (the individual division
types, their level of technology, the terrain, the weather,
and more) and most importantly on the rank and skills of
that commanding officer.
Each nation begins the game with a specific set of military officers that historically served in that nation’s armed
forces and were of high enough rank that they were ( at
some point) in charge of an entire division of men (or more).
Each of these officers will either be in the of ficer pool
awaiting assignment, or be pre-assigned to command one
of the forces that are present when the game first star ts.
As you create new forces: either by building new ones or
by combining or subdividing existing ones: officers must be
assigned to lead them. You may maintain complete control
over officer assignments or you may delegate this process
to the computer to take care of (think of it as letting your
Chief of the Army oversee it) . Each officer has several
attributes that will affec t the per formance of the troops
he commands: his rank, skill, experience, and p ossibly
also a special area of exper tise. Of these, the one to pay
the most direct attention to is his rank, since this is the
attribute that determines the maximum number of divisions that he is able to handle before his field command
will begin to incur a combat penalty. Whenever more than
one field command is operating within the same province,
there are additional considerations that will contribute
to the outcome of the battle. This becomes somewhat:
55
Page 35

but not terribly: more complex when an
operation is staged using multiple field
commands, launching their attacks from
several different provinces.
At the beginning of each game, you will
have a certain number of pre-existing divisions that are based on the approximate
historical order of battle of that nation.
For some countries, this could be quite
a large number, while for a few others
it could p ossibly be none at all. Some
of these may have brigades attached to
them and some may already be grouped
into larger commands, and each will have
a pre-assigned officer. Any further forces
you require must be obtained by placing
a production order and waiting until they
are ready for deployment. When ready,
they will appear in your forc e pool to
await deployment. Divisions that engage
in battle will gradually gain valuable combat ex perience which will improve their
capabilities over time. Unfortunately they
are also likely to experience casualties
that will need to be replenished with reinforcements. Raw recruits will fill those vacant positions
but will also dilute a division’s experience. Of ficers also
gain combat experience which can lead to improvements
in their skill levels and might prompt you to promote them
in rank . It will take them a lit tle while to get used to this
new level of command, so there will be a period of time
where they will not perform quite as well as they did prior
to their promotion. Now that you have a rough overview of
the forces, let’s look at them in greater detail…
Division Types
Your divisions are used to defend your territories from en-
emy attack, or to launch offensives of their own to conquer
and then occupy enemy provinces. Only land forces are
able to capture and hold an enemy province, although their
effor ts will often need to be supported or assisted by air
and naval units. While your air force and navy may hinder
an enemy advance, neither is able to defend a province, so
you will need to deploy your land forces to protect them.
Divisions can be of a variet y of different types, each
one having its own specific advantages and disadvantages
which will vary depending on terrain, weather, and even the
type of enemy they are facing. While there are more than a
dozen varieties, they can be classified in three broad categories: foot soldiers, mounted troops, and armour: which
I’ll describe in a moment. As your technology improves,
each unit’s specifications will also improve, provided that
you allocate sufficient IC to upgrade them
with your most recent advances. It is also
likely that not all of the division types will
be availa ble to you at the beginning of
a campaign, since many require specific
advances in equipment or achievement of
a particular type of army doctrine. Check
the detailed descriptions in the Technology Folder to determine what is required
for their production and then instruct your
scientists to work towards that goal if you
feel that you will need that type of specialised combat force in the future.
The most numerous and versatile unit
is probably the foot soldier, with the most
common type bein g the infantr y division. While they will find themselves at a
disadvantage in the open, they generally
perform better than mounted or armoured
units in less hospitable or obstructed terrains. Infantry is usually fairly inexpensive
to recruit, relatively fast to train, and does
not consume any of your precious oil :
though of course they won’t move as fast
as the other units. There are specialist
infantry types who perform particularly well in certain roles
but are more expensive and time-consuming to prepare.
Marines are particularly effective for coastal invasions,
mountaineers excel in hilly and mountainous areas, and
airborne infantry are the only units that may be used to
attack from air transpor ts. If you are in desperate need of
a quick influx of troops at low cost, you might find that a
militia division’s generally poor performance is sufficient:
at least for a while.
Mounted units perform in much the same way that infantry do. The most basic of these is the cavalry division:
an obsolescent holdover that predates the First World War,
but which was still used in some parts of the world. Not
surprisingly, they tend to perform very poorly against most
other units and have few advantages other than a more
rapid rate of movement than foot soldiers. The majority of
your mounted units will be infantry who use motorised vehicles (primarily trucks) to move more rapidly, but which are
more expensive to outfit and will consume a quantity of fuel.
Motorised infantry are much more susceptible to aerial
attack and will run into difficulties where the roads are
poor or terrain becomes an obstacle. Mechanised infantry
divisions : who use armoured vehicles such as halftracks:
are very expensive and consume even more fuel, however
they have better attack and defence capabilities than any
other infantry unit: although they remain easier targets for
enemy tactical bombers.
56
Page 36

Infantry and mounted infantry are no match for tank
divisions when it comes to sheer firepower and the ability
to withstand punishment. As your technology advances,
you will have the ability to build larger tanks with heavier
armaments and armour which will further increase the
amount of damage that they can both inflict and sustain.
Armoured units are expensive, though, and consume fuel
at an alarming rate. They also perform very poorly when
the terrain is rough or filled with obstacles.
There are two other specialised division types that merit
extra attention but are detailed later in this section. A garrison division is a special infantry unit whose sole function
is to suppress the activities of partisans. They are highly
restricted in their method of movement and are utterly
unsuited to combat situations, but they are unparalleled
at maintaining law and order in any enemy provinces that
you might occupy. The other unit type is the headquarters
division. These act as large mobile command and control
centers, assisting very highly ranked officers (generals
and field marshals) to manage larger numbers of divisions,
improve supply efficiency, and provide improved combat
capabilities for any nearby forces (forces that are in the
same province or an adjacent one). They are, however, a
division that is primarily designed for tactical and logistical support and are not heavily armed or suited to combat
themselves.
Brigade Types
There are a variety of brigades that may be attached to your
divisions to enhance their abilities; however each division
may only have a single brigade attachment. A brigade's
area of expertise is fairly self-explanatory when you review
its details in the production interface. Note that the specific
values are added to the abilities of the division they are attached to, thus usually improving their performance quite
significantly: although sometimes there is a small trade-off
in another area. Brigades may range from anti-tank to
anti-aircraft specialists, or may be able to support your
divisions by providing withering artillery (or even rocket)
fire. Engineers will improve both the defensive capabilities and movement rates of your divisions, while additional
armour can be attached to bump up the attack strengths
of a force. The available brigade types will depend largely
on what technologies you have researched, as will their
effectiveness.
A brigade is created in exactly the same way that a division is ordered, but they are never deployed by themselves.
Instead, brigades must always be attached to a division:
which is determined at the time that it is deployed from
the force pool: although they may later be detached and
returned to the force pool for subsequent redeployment
elsewhere,
Division Details
Before we look at deployment or movement, or begin assembling corps or armies, let's take a close look at the
details of an individual division and the meaning of each
of its specifications. These can be seen for any unit by
first selecting any field command and then selecting the
division that you are interested in reviewing. Select any
field command by clicking on it on the Main Map, using
the Land Forces Hot Button, or via several of the subfolders in the Statistics Folder. The information panel will then
display the name of the commanding officer and a list of
the divisions in his command (we'll come back to the Field
Command Details display shortly). Clicking on any one of
the listed divisions will display the Division Details for that
unit in the information panel, as well as giving you a few
options for that specific division.
Division Name: At the top of the information panel you will
see the division's name. While this is assigned automatically when the division is first created, you can change it
any time you like by clicking on the unit name and then
typing a new name.
Division Type: Below the division name you'll see a
picture and then a description of the division type. The
specific model represented by the division will follow in
parentheses.
Brigade Attachment: If there is a brigade attached to this
unit then the brigade type and model names will appear
immediately below the division name. There will also be
an inset picture of the brigade in the lower right quarter of
the division's picture.
Commander: You will see a picture of the division's current commanding field officer. Remember that this officer
may command a number of divisions if they are grouped
together into a corps or army. Clicking on the officer's
portrait {or anywhere in this field command summary bar
except the Orders Box) will return you to the Field Command Details display in the information panel.
Command Strength and Organisation: Beside the commander's picture is a graphic display of the percentage
strength (orange bar) and the percentage organization
(green bar) of the entire field command. This is the average of all forces under that leader's command, so it may
be different than the individual division's values if it is
presently part of a larger command. Again, you can click
almost anywhere in this area to return to the Field Command Details instead.
Command Name and Size: Beside this you will see the
name and the number of divisions in the field command.
Command Orders Box: The command's current mission
is displayed in the Orders Box immediately below its name.
You may click on this box to issue new orders directly from
this interface or cancel its existing orders. Note that doing
this will update the orders for all divisions
in this field command.
Location Details: Below the command
bar is a second bar that indicates the
current location of this division. This is
the same bar that is displayed for each
province in the information panel when
you click the Province Hot Button. You will
see the province name, IC, resources and
the total number of divisions (including
allies) presently located in this province.
Clicking on this bar will close the Division
Details and display the Province Details in
the Information Panel instead.
Strength: This is a division's current operational strength. When first built it will
be at 100% but can then be reduced as
a result of combat casualties or attrition
losses. If a division is in supply, then it
will gradually replenish to 100% (as long
as you allocate some of your IC to reinforcements). If the strength ever drops
to 0% then the division will be destroyed. As a division's
strength is reduced the amount of damage it will inflict
on an enemy is also reduced by a corresponding amount.
Regardless of how fantastic its other combat values might
be, if a unit is near destruction then it will contribute very
little to a battle.
Organisation: This is the division's current level of organi-
sation, reflecting its internal command structure, intrinsic
cohesiveness, and readiness to fight. Although expressed
as a percentage value it might be more appropriate to think
of it as a capped index value instead. Early in the game
the maximum achievable organisation level of a division
will rarely exceed much more than 40% or 50%, but as
your technology advances you will be able to reach much
higher levels, Domestic policies and your Chief of Staff and.
Chief of the Army may further increase a division's cap:
even allowing it to exceed the 100% mark. Organisation
may be lost as a result of bombardment, prolonged move-
ment (particularly in poor terrain), and during combat. It
will also plummet if your troops are out of supply and will
be fairly low when divisions are first deployed and when
they are strategically redeployed over great distances. If
organisation drops below 5% the division will lose its ability
to fight and will try to withdraw. Organisation is regained
when a division is in supply and remains stationary (and
out of combat) for a period of time. The infrastructure of
a province (which affects the efficiency of supply) and the
morale of a division will also have an effect on the rate of
regain (or loss).
Morale: Each division has a morale value that represents
its willingness to persevere in the face
of adversity and is similar in almost all
respects to organisation. It, too, will
rarely approach 100% until very late in
the game, when a division's experience
and your nation's technology will boost
the maximum level that a division may
attain. As long as a division is in supply,
high morale will allow it to perform better in combat, reduces the rate at which
it loses organisation during combat, and
increases the rate at which organisation
is regained. Morale is slowly lost during
combats and will drop rapidly if a division
is out of supply. Once it drops too low
(below about 30%) it will actually cause
the rate of organisation loss to accelerate.
Should morale reach 0% your division will
break and run in utter disarray.
Softness: Each division has a "hard" and
"soft" component to its strength. The hard
portion is its armour (tanks, trucks, ma-
chinery, etc.) while the soft component is its personnel.
The softness value indicates the percentage of a division's
makeup that is considered as a soft target. This has a
significant effect on the types and degree of damage that
different types of enemy units will inflict during combat.
An infantry division will usually have a softness value of
nearly 100% while a tank division has a far lower value
(probably around 30%).
Hard Attack: I'll describe the specific meaning of attack
and defence values in detail when we look at the actual
mechanics of combat, but roughly speaking this value in-
dicates the attack power of the division when engaging an
enemy division that has a fairly large "hard" component (i.e.
a low softness value). The higher the attack number the
more likely it is that it will inflict some damage to a "hard"
target (e.g. a tank division).
Soft Attack: This value indicates the general attack power
of the division when engaging soft targets. A high number
here indicates that it probably do well against divisions that
have a high softness component (e.g. infantry divisions).
Air Attack: When a division is attacked by aerial units it
may have the ability to fight back and inflict some dam-
age. The air attack value indicates how well it is able to
do this and will be fairly good if the division has an anti-air
brigade attached.
Defensiveness: The division's defensive capabilities are
divided into two components: defensiveness and tough-
ness. The defensiveness value is used when a division
is defending a province against an attack initiated by an
enemy. Roughly speaking, the higher the value, the better
57
58
Page 37

the division will be at withstanding enemy fire.
Toughness: This is the second component of a division's
defensive capability and is used when the division is
launching an attack of its own against another province.
A high value indicates that it can withstand more of the
enemy's return fire as it makes this assault.
Air Defence: This value indicates how well a division is
able to defend against enemy tactical bombing attacks.
This value is mostly an indication of how difficult a target
it is to hit and how resilient it is. It does not imply an ability
to fight back.
Suppression: This is an indication of a division's basic
capabilities at suppressing partisanship in a province.
The value is subtracted from the province's partisan value
(which determines partisan effects and activities) and can
be further enhanced by giving the unit orders to engage in
anti-partisan activities, which doubles the effective sup-
pression value.
Maximum Speed: This is the maximum speed that the
unit can travel in clear, unobstructed terrain. This will be
reduced in less hospitable terrain or inclement weather.
Supply Consumption: The supply amount that this division needs on a daily basis is listed here and will fluctuate
depending on the current strength of the unit. Note that this
is the amount of supplies it requires and is not necessarily
the amount it is receiving.
Fuel Consumption: Any division that uses vehicles of any
sort will require a daily supply of fuel (oil) equal to this
value if it is currently moving or if it is engaged in combat,
A stationary unit that is not engaged in combat uses half
this amount. Fuel consumption is also dependent on the
current strength of the division.
Experience: Each division gains combat experience whenever it engages in battle. An experienced unit will receive
combat bonuses and tends to maintain its organisation
and morale far better than a division filled with recruits.
When any casualties that a division sustains are replaced
through reinforcement, the newly recruited men will dilute
the division's experience level.
Effective Supply Efficiency: This is the division's current
rate of supply efficiency which is determined by a large
number of factors (details will follow in the subsection
on Transport Capacity and Supply Efficiency). Roughly
speaking, this indicates whether a unit is fully supplied
or whether it will be subject to some penalties for being
undersupplied.
Attach/Detach Brigade Button: If the division currently
has a brigade attached to it, then clicking on this button
will detach the brigade and return it to the force pool. If
the division does not have a brigade attached to it and a
suitable one is available in the force pool, then clicking on
this button will allow you to select and attach a brigade
from the force pool.
Disband Button: Clicking this button disbands the division and returns some of its manpower to your national
manpower pool.
Remember that not all units of the same type will have
the same division stats, since these are dependent on
whether or not a division has been upgraded to the latest
technology. Any brigade that is attached to a division will
also have its abilities added to the division's stats reported
in the information panel. Several of the division stats will
also be modified by the unit's experience level and by
the abilities of the commanding officer: the source of yet
further discrepancies between two otherwise identical
divisions.
Field Command Details
Corps and armies are created by grouping divisions into
a larger fighting force: a field command. Before we look
at how to do this, let's have a look at the information you'll
see when you select a typical field command: a summary
of the divisions that make up the command and their most
critical statistics.
Command Name: The name of the field command appears
at the top of the information panel. As was the case with
individual divisions, the command name is assigned automatically (based on size and nation) but can be changed by
clicking on its name and then typing in a new one.
Commander: The portrait and name of the officer who is
currently in command appears just below the field command's name. Clicking on the officer's portrait will allow
you to select a new commander from the pool of available leaders. Hovering you mouse over his portrait will
display the officer's stats. (Details of how to change an
officer and the meaning of his stats are described in a
later subsection).
Overall Size, Strength and Organisation: The number of
divisions of the field command is listed immediately below
the commander's name. In brackets beside this is the total
force strength and their average level of organisation.
Current Mission: The current mission that this command
is engaged in will be listed in a small box. Clicking here is
one of several ways to change their mission (details about
missions is also in a later subsection).
Quick Status Icons: A variety of icons may appear in the
space below the mission box. Most relate to the command's current conditions of supply, whether they are dug
in or not, etc. (and all have tooltips to identify them).
Supply Source: If the field command is in supply, then the
source of that supply will be listed. If it isn't, then you will
see a warning to this effect, and the location from which
it is attempting to draw supplies.
Command Location: You will see the current location
of the field command. Clicking on the location box will
display the province information panel. If this field command is currently engaged in battle then this display will
change quite dramatically, showing the "Combat Quick
View" summary instead. This is similar to the summary
that you will see for each battle when you click the Active
Combats Hot Button.
Effective Supply Efficiency: This is the field command's
current effective supply efficiency (details follow shortly,
in the Transport Capacity subsection).
Division Listing: The majority of the information panel
below this point will display a scrollable listing of each division that is currently part of this command. Clicking on one
of the divisions will display the Division Details information
panel (described in the previous subsection). Each division
will also display the following basic details:
Division Type: An icon indicating the type of division (infantry, mech. infantry, etc.) and its technology level.
Strength Bar: A red bar that indicates the division's approximate strength. If you hover over this bar a tooltip will
appear that displays the exact numerical strength value.
Organisation Bar: A green bar that indicates the division's
approximate organisation. This, too, has a tooltip that will
give the division's exact numerical organisation value.
Fuel Status Icon: A small oil icon below the strength and
organisation bars will show the division's fuel supply status. This will be blue if the division is in supply and red
if it isn't. ••
Division Name: The division's name.
Division Main Stats: Below the division name you will see
a summary of the five main division statistics that you will
refer to most often. In order from left to right these are the
Hard Attack, Soft Attack, Air Attack, Defensiveness, and
Air Defence values.
Brigade Icon: If there is a brigade attached to the division, there will be an icon at the right edge of the division
listing to indicate that this is the case and what type of
brigade it is.
Prioritized: It is possible to assign a priority to a field command to ensure that divisions in this command are the first
to receive any available reinforcements and upgrades. Click
this button to identify that this command should be treated
as a priority in this regard.
Offensive Button: This allows you to allocate additional
fuel and supplies to this command for a major offensive.
This locks the supply efficiency at 120% for the next 30
days, but will consume a large amount of supplies and
fuel (details of supply and supply efficiency are in a subsequent section).
Load Button: This is a quick way to issue an order for the
entire command to be loaded onto transport vessels (if they
are present and sufficient space is available). The load
button will not be displayed unless you are in a province
that contains a port or naval base.
Reorganise: Clicking this button opens an interface that
allows you to easily remove divisions from this field command and assign them to a separate command that will
be created.
Field Officers
The officer that you assign to lead a field command will
have a significant effect on the performance of your troops
in battle. Each nation begins with its own pool of officers
that can be assigned to command its forces: each with his
own unique characteristics and holding one of four possible ranks. As a commander's forces participate in battle,
he will become progressively better at his job and may
eventually be suitable for promotion.
When you select a field command the current command-
ing officer will be identified at the top of the information
panel. If you hover your mouse over his portrait, a tooltip
will display his personal stats and clicking on his portrait
will show your officer pool, which contains a detailed list
of all officers that are currently unassigned to commands.
If you click on any officer in this list, he will be assigned
to replace the current field commander and the existing
commander will be returned to the officer pool. Each officer
has five personal values:
Rank: An officer's rank determines how many divisions he
can effectively command without the divisions incurring
penalties. There are four distinct ranks used in Hol2: Field
Marshal (commands up to 12 divisions), General (9), Lt.
General (3) and Maj. General (1). If he commands more
than this number of divisions during an attack, he will be
considered to be overstacked. A field marshal or general
whose army includes an HQ division will also enjoy a large
command bonus (as well as several other benefits). You
can promote an officer to the next rank if he has a skill
rating of at least one. This will enable him to control more
divisions but will reduce his current skill level (by one), and
reduce the rate at which he will gain further experience.
This is done by clicking the promote button.
Skill: The skill of an officer indicates his overall performance ability. As he gains more and more combat experience, he will gradually increase in skill level. This confers
a special combat bonus on his troops that increases as his
skill increases. An officer who is overstacked cannot effectively command his troops and any skill bonus he provides
59
60
Page 38

will be ignored for all of his forces. When you promote an
officer, his skill is reduced by one level.
Historic Skill: There is also a value relating to each officer's skill that is buried within the game design (shhhh.. .don't tell the designers that I told you this secret!)
and reflects the individual's historic accomplishments. The
historic skill level acts as a modifier to the rate at which
he will accumulate experience. If he is significantly below
his historic levels he will tend to accumulate experience
much more rapidly; and once his skill exceeds this he will
tend to be much slower in accumulating more (this is a
modifier and not a cap).
Experience: Each time an officer commands a force in
battle and is victorious, he will gain a small amount of
experience. Eventually, he will gain enough experience to
increase his skill level by one point. The rate at which an
officer accumulates experience depends on his rank and
how often he Is In combat (and: shhhhh!: his historic skill
rating). The higher an officer's rank, the more slowly he
will gain experience.
Trait: Each officer may have a particular doctrine or area
of expertise that is listed at the bottom of his stats. These
traits, described in the next subsection, give special abilities or bonuses that are applied to any division that is di-
rectly under his command, unless he is overstacked, in
which case they are forfeited for all divisions.
Beware of overstacking an officer! It is probably the single most damaging thing you can do to your chances of
winning a battle. An officer who is overstacked forfeits all
bonuses that his traits and skill would normally give to the
divisions under his command. Further, the "extra" divisions
that are assigned to him will be subject to an additional,
severe combat penalty.
You may, if you wish, delegate the task of assigning and
promoting officers by clicking the Auto-Promote or Auto-
Assign leader buttons at the bottom of the officer selection
interface. If you do so, then your Chief of the Army will see
to these functions as best as he is able. If you are using this
function, the officer assignments are checked and updated
at midnight each day, based on the number of divisions the
officer currently commands.
If you have a very large number of field commands, it is
possible that you will exhaust your pool of historical leaders.
If this happens then "generic" officers will be created as
required, however they will be of very poor quality, do not
gain experience, and will "disappear" again once removed
from command. In that situation, you may need to remove a
historical leader from one command (which returns him to
the pool and replaces him with a "generic" officer) and then
assign him to a new command that is in more urgent need
of his abilities. When a division is first deployed from the
force pool, it will also be commanded by a generic officer
unless it is deployed directly into an existing command.
Don't forget to assign a "real" officer to any division that is
likely to see combat action as soon as possible.
Field Officer Traits
A field officer may have specific traits that will characterise
his style of command or identify areas where he possesses
exceptional abilities. If he has such a trait, it will be identified in the tooltip that appears when you hover your mouse
over his portrait and will benefit any divisions under his
direct command. Warning! This bonus is lost if the officer
is overstacked.
Logistics Wizard: This officer is able to achieve impressive
economies of both supply and fuel efficiency. Divisions
under his command will consume both at a reduced rate.
Defensive Doctrine: This officer is very good at preparing
his troops to defend against enemy attacks and counterattacks, improving their defensiveness and toughness
values.
Offensive Doctrine: This officer is very good at manoeuvring his forces to gain maximum tactical advantage, giving
them bonuses to all attack values.
Winter Specialist: This officer excels at winter warfare,
guiding his forces with such skill that they incur no penalties to movement or combat in those conditions.
Trickster: An expert at camouflage and deception, divi-
sions under this officer's command will always gain the
advantage of surprise, are very difficult for enemy aircraft
to target, and are usually completely invisible to enemy
intelligence activities.
Engineer: Divisions under the command of an engineer are
able to cross rivers without incurring the normal movement
or attack penalties that other units will suffer.
Fortress Buster: This officer is particularly good at assaulting enemy fortifications.
Panzer Leader: A panzer leader is able to increase the
movement speed of his forces and if he commands predominantly armoured divisions he is able to improve their
attack abilities and may even achieve sudden and devastating victories by blitzing through enemy lines,
Commando: This officer is best suited to lead, mountaineers, marines or paratroopers who receive large bonuses
to both their attack and defensive values when under his
command,
Old Guard: This officer is of the old school and not particularly imaginative. Neither he nor the divisions under his
command will learn as much during combat, thus reducing
the rate at which they will gain experience.
Selecting and Organising Field
Commands
Selecting a field command can be done in a variety of
different ways:
• Click on its sprite on the Main Map. If there is more than
one field command present in the province, then you
will see a series of small bars appear below the sprite.
Repeated clicks will cycle through the field commands
in the province or you can click on one of the small bars
to select a specific force.
• Left-click and drag your pointer to highlight a portion
of the map. When you release the mouse button, any
command that is inside the highlighted area will be
listed in the information panel; then simply click on the
command to select it from the list.
• Click on a province on the Main Map to display a list
of the field commands located there, then click on the
command in that list to select it.
• Click the Land Forces Hot Button and then select one of
the field commands from the list of all commands. This
will also center the map on that command's location.
• You may also use a number of the tables in the Statistics
folder to select a command by double-clicking on the
unit's name in the chart,
• Hold down the shift key on your keyboard to select multiple field commands (they don't have to be in the same
province). While doing this if you click on a selected
command then it will be de-selected.
Note that the "left-click and drag" method will also select
multiple commands.
You can merge multiple field commands into a single new
force if they are all located in the same province. To do
this, select the field commands you want to merge using
one of the above methods and then click the Merge button
at the bottom of the information panel. Remember that
the highest ranking officer will assume command of this
force (all other commanders will be returned to the leader
pool). If you have elected to select your own officers, then
don't forget to check that he is capable of leading the total
number of divisions that you have assembled and replace
him if necessary. If you are using auto-assign for officer
assignments, then you should wait until after midnight to
issue orders to them. This is because your Chief of the
Army will not change officer assignments until midnight,
and if a field command is currently carrying out a mission
or is in the midst of combat then he will not change the
officer assignment.
You can split a field command into two separate commands by selecting the force and then clicking the Reorganise button in the information panel. A list of each
division in the existing command will be displayed in the
information panel. Click the small"+" button beside any
division that you would like to remove from this command
and add to the new one. If you are allowing the Chief of
the Army to place leaders for you, then he will assign an
appropriate officer from your leader pool to take command,
who will assume command at midnight. If you have chosen
to assign your own officers, then this new force will be
commanded by a "generic" leader, so don't forget to assign a more competent leader after creating the new force
(assuming one is available in the officer pool).
Shortcut Keys
Hearts of Iron II allows you to assign up to ten different
force selections for rapid access at a later time using a
shortcut key. To set the assignment select any division,
field command or even multiple field commands using the
method described above. While they are selected, hold
down the Ctrl key on your keyboard and then press any
number key on your keyboard (not on your numeric keypad) . You may, at any later time, return to that selection by
pressing the number key once more (without holding down
the Ctrl key), and pressing the number key a second time
will center the map on that selection. You may also use this
same technique for your air forces and naval forces, and
up to a total of ten such selections may be stored. If you
assign a new selection to a shortcut key that already has
an assignment, then the old assignment will be overwritten
by the new one. While this feature is mostly a matter of
convenience, it is vital in multiplayer games where your
house rules discourage (or even forbid) pausing the game
since you can set up these shortcut keys to allow you to
quickly jump to major theatres that are separated by a
considerable distance.
61
62
Page 39

Deploying Divisions from the
Force Pool
When a production order has been completed, the newly
created division will be placed in the force pool to await
deployment. Begin by clicking on the Force Pool Hot Button to display a list of all forces that await deployment
and then select the unit you wish to deploy. The main
map will change to display all valid deployment locations
in green and the information panel will now display a list
of any field commands that the unit can be added to. If
you click on a province on the map, then the division will
be placed there, If you click on a field command, then the
division will be added to that command. In both cases this
happens immediately.
You should deploy new forces fairly promptly in most
cases, because they will not begin to gain organisation
until you do so, nor will they be upgraded to take advantage
of any technologies you might have finished researching
from the time that the production order was initially placed.
There is also no supply-consumption advantage to leaving
a force in the pool, since it will consume its daily requirement whether it has been deployed or not, It will also tie
up 2 points of transport capacity (see below) until it has
been deployed.
Attaching Brigades
Attaching a brigade can be done in almost the same manner as adding a new division to an existing field command.
There is one additional step, however, since you must
identify which division in that command is to receive the
brigade. A second method of attaching a brigade: and the
one that I would recommend for ease of deployment: is to
locate the division that you wish to attach it to first, then
click the attach brigade button to display any brigades that
are currently available in the force pool, and then simply
click on the brigade to attach it. You may only attach one
brigade to each division, and there are limitations to the
type of brigade that a division may accept. These are detailed in the charts in the accompanying pdf file and are
generally limited to being of a similar overall type of unit.
Transport Capacity and Supply
Efficiency
Now that we've looked at the internal details of divisions
and commands and how to deploy new ones, let's look
at the next important component of a successful military
venture: supply. To do this, we must first look at the subject
of your nation's transport capacity and supply efficiency.
As you may recall from the Production section, transport
capacity (TC) is an abstraction that Hearts of Iron II uses
to represent a nation's overall ability to move goods and
materials, It is the product of your nation's industrial capac-
ity, as modified by available technologies, and is consumed
by sending supplies and fuel to your armed forces. It is also
used by any items currently awaiting deployment from your
force pool and by any divisions that are being strategically
redeployed. A further drain is placed on TC by each enemy
province that you occupy. As long as you are careful to
ensure that the total available transport capacity exceeds
your total use of that capacity, then you should run into
the fewest possible problems when it comes to supplying
your troops in the field.
If you hover your mouse over the TC icon in the Top Bar,
you'll see a breakdown of your current TC usage and below
this you'll see your base supply efficiency (BSE). This is
the theoretical maximum efficiency that you could achieve
under ideal conditions, however for the troops in the field
this is then modified by the local infrastructure, representing the ability to deliver supplies to those units.. The effective supply efficiency (ESE) is therefore the base supply
efficiency modified by the amount of infrastructure in the
province, This can be further reduced if an enemy bomber
force is conducting certain types of bombing campaigns
against the province (these missions are detailed in the
Air Combat section),
Because of its wide-ranging effects, it would be hard to
over-emphasise the importance of the effective supply efficiency value. A division that is located in a province with low
ESE will suffer increased attrition rates, reduced movement
speeds, and will take much longer to upgrade or to regain
its strength and organisation. During combat, low ESE will
also tend to result in more rapid loss of morale and organisation, making it more likely that your forces will break off
their attack more quickly and will sustain higher casualty
rates. When combined with other possible modifiers (due
to terrain, weather, climate and enemy logistic strikes), this
could easily result in a persistent rate of loss that makes it
virtually suicidal for a division to remain there.
Only two things can be used to offset this potentially
devastating effect. A headquarters division has the effect
of increasing the ESE noticeably for all divisions within
a one-province radius of its location. You can also use
the option of placing a field command on the offensive,
which will increase their supply efficiency by 120% for
the next 30 days but will double the amount of supplies
they consume.
Attrition
This is the harmful effect that a low supply efficiency will
have on your forces. Any force that is not receiving enough
supplies will begin to suffer attrition, which reduces both
your troops' strength and their organisation. In "real life"
this didn't necessarily mean that soldiers perished, but lack
of supply can lead to all sorts of ailments that resulted in
soldiers becoming too ill to fight or in equipment being used
in conditions that exceeded their design specifications and
breaking down. The degree of attrition is determined by the
effective supply efficiency in a province as modified by the
terrain, weather conditions and climate. All of these will
take their toll on your forces and can deal just as crippling
a blow as any direct enemy attack can achieve; so you
should do everything you possibly can to avoid placing
your troops in a situation where attrition levels will be high,
unless there is a very large strategic advantage for doing
so that cannot be achieved in any other way.
Supply Chains
Now that we've looked at transport capacity and supply
efficiency we can address the overriding issue supplying
your forces. In "real life" the logistics involved in supply
chain management are very complex and time consuming, but it's not one of the more interesting or entertaining
roles for a player to assume so Hearts of Iron II abstracts
this using the previously described transport capacity and
supply efficiency systems. What remains: and what you
must pay close attention to: is the issue of supply chains.
For the sake of clarity (and convenience) I'll be using the
term "supplies" in this section to refer to both the supplies
and the fuel (oil) that your divisions require to operate. You
will need to concern yourself with both.
A supply chain is the actual path that your supplies will
take in order to reach your troops. It must start at a depot
that has the necessary supplies and then follow an unbroken chain of adjacent provinces until it reaches your divisions. If that chain is broken then the supplies will cease to
reach your troops and they will begin to suffer rather nasty
attrition effects that will reduce their strength and organisation. A supply chain must be traceable through friendly
provinces: ones that you control, that your allies control, or
provinces belonging to nations with whom you have a treaty
of military access. You cannot trace a path through enemy
provinces, or provinces belonging to neutral nations (unless, as just mentioned, you have a military access treaty
with them). You cannot trace supply directly across water
but you can create a new depot in a coastal province that
you control and then use convoys to ship supplies to that
depot from somewhere else (usually you capital).
You can also be supplied by one of your allies: provided
that they have the necessary supplies in their depot. Of
course this can put undue strain on their supply capabilities, eventually causing problems if there is a large
concentration of allied troops in an area. Keep in mind
that the reverse is true as well: that your allies may draw
supply from you if they need to (and they won't ask you
before they do it so this is a good reason to maintain extra
supplies in a depot),
Supply chains are created automatically for you if your
divisions can trace an unbroken path of provinces to a
friendly depot that has the necessary supplies. It is assumed that the necessary supplies can reach the provincial
border without much trouble, so the ESE calculation is only
applied to the province that your divisions are currently
occupying, not to each province in the chain. This abstraction (and somewhat incorrect assumption) is necessary
to prevent undue CPU load that would slow the game to a
crawl, and to avoid forcing you to micromanage the exact
route that every single one of your supply chains uses when
there are multiple possible paths. When the supply chain
is created, it will always use the closest available source
of supply first. This could easily be an ally's depot rather
than your own, as long as it has the necessary supplies. If
that depot lacks the necessary supplies, the next closest
depot will be used, etc. As long as you or your allies have a
depot somewhere that has the supplies and can be linked,
you will remain in supply.
While the Supply Mapmode will display all provinces that
currently could receive supplies, this doesn't necessarily
mean that the supplies are actually in place. If you become
cut off from your capital: or if you lack the supplies and
fuel in your national stockpile: or an allied source of supply then you will be in very deep trouble. The best way to
check a division's current supply status is to select the field
command and look at its status. A small dot appears in the
status area to indicate that the field command is in supply
and the source of that supply is listed immediately below
this. If it isn't in supply, this will be indicated as well.
Overseas Supply
While supply chains are established automatically, overseas supply also requires that a flow of goods move from
your capital (where supplies are manufactured and collected) to whichever depot is acting as the supply source for
your forces. You can have this done automatically for you by
selecting the Auto-Create/Destroy Supply Convoys option
in the Convoy Management interface (which is accessed
via the Production Folder). You may prefer to manage this
yourself: using the same interface: to build up extra supplies. Don't forget to correctly identify the materials that
this convoy should transport; and if that depot is also a
collection point for oil from local provinces then you will
also need to ensure that any convoys that are shipping
goods back to your capital don't end up taking oil away
from this location.
Air Supply
In an extreme situation your field command may become
completely cut off from supply. In such a case it is possible
to use transport aircraft to ship supplies to your encircled
63
64
Page 40

forces but this is extremely expensive and very inefficient:
not to mention that enemy fighters will do their best to blow
your transports out of the skies. Using air supply will create
a new depot in the province that your transports are shipping to: a depot that could subsequently be captured by
the enemy: and should be considered as only a short-term
emergency measure. Details of how to assign this mission
are given in the Air Combat section.
Reinforcement
Any unit that is in supply and that has sustained casualties
may be reinforced back up to full strength by allocating
some of your national IC to reinforcement. The details are
then handled automatically for you by deducting the nec-
essary manpower and IC and gradually replenishing your
divisions. This can take some time and the newly added
strength will reduce your unit's experience a bit since these
reinforcements are new recruits, not battle-hardened vet-
erans. If you check the prioritise button for a field command
it will be given top priority for reinforcement but it will still
take a bit of time for the losses to be replenished. There
is no way to prevent reinforcements from being made to
a division other than to allocate no national IC at all to
reinforcement: but in that case none of your divisions would
be returned to full strength.
Upgrading
New technologies will be made available to your forces
as soon as the research has been completed. To upgrade
your units you must allocate some of your national IC to
this purpose, and the units must be in supply to receive
the advances. This does not dilute their experience but can
take a little while to achieve. As with reinforcements, units
can be given precedence by clicking the prioritise button
in the field command information panel. Units in the force
pool are not upgraded until they have been deployed, and
any units that weren't in supply at the time that the new
technology became available will be upgraded once they
are back in supply.
Disband
To disband any division, go to the division details informa-
tion panel and click the disband button. This will return
some manpower to your national manpower pool (if there's
room in the pool) but their experience is lost: as is the original investment in IC that you made to produce the division.
You will probably not need to do this very often unless you
are seeking to reduce your overall national force strength
to conserve transport capacity, or minimise the amount
you must spend on manufacturing supplies. Remember
that divisions that consume oil do not do so unless they are
moving or in combat, so oil stockpiles may be maintained
simply by keeping those forces stationary.
Basic Army Movement
As long as no combat is involved, you can order field com-
mands to move from one province to another with relative
ease. Select the force (or forces) that you wish to move
and then right-click on the province that you would like it to
move to. A movement arrow will appear and the force will
immediately begin to move to that province (the colour of
the arrow will always be blue if you're moving to a friendly
province or red if you're advancing into enemy territory).
The province does not need to be adjacent to the province
they currently occupy, however it must be possible for the
field command to move to the new province without cross-
ing water or entering a neutral country's territory. You may
only move into one of your provinces, your allies' provinces,
a province belonging to a neutral country with which you
have a treaty of military access, or into enemy territory.
The length of time it will take to move into an adjacent
province depends on the terrain and weather conditions
of the province that it is moving to (not the province that
it currently occupies), the movement rate of the slowest
division in that command, and the ESE of that province, The
ETA will be displayed in the Field Command Details display,
just below the mission box and the mission will be updated
to Indicate that the force is moving. If any of these move-
ment conditions change the ETA will be revised to reflect
this. As the movement occurs, the blue movement arrow
will give a graphic indication of its progress (the arrow turns
darker). If you want to stop the unit from moving and cancel
the order, select it and then right click in whatever province
it is currently located.
If you hold down the Ctrl key when you right-click on the
"target" province the Orders Interface will appear (you will
use this extensively for combat). For simple movement
you should use the "attack" mission since an attack on a
friendly province is automatically recognised as an order to
move there. You will see the date and time that the force is
expected to arrive if the conditions do not change and may
adjust this to any (later) time or date if you wish: a useful
means of synchronising the arrival of multiple units. The
unit will not begin to move until you click the OK button
to issue the order.
When you are moving to a more distant location the path
that is chosen automatically for your force may not be the
one you wish it to use. This might be due to the terrain it
must traverse, or you might wish to keep it away from an
enemy's border to keep its presence a secret, or you may
wish to avoid a location that is subject to frequent enemy
bombardment. Whatever the reason, you may easily select
the path that a force will use by holding down the shift key
and then right-clicking on each province you wish it to
use. You may combine the use of the shift and Ctrl keys to
further refine the orders.
Transporting Troops on
Ships
To move land forces across water you
must transport them using your naval
transport vessels. Each naval transport
has sufficient carrying capacity to handle
one full division and, if necessary, an attached brigade. To be able to transport
a field command you must either have
a sufficient number of transports or you
must reorganise your force until it is the
appropriate size. Once you have done
this, there are two ways to load a field
command onto a transport vessel. If the
force is in a port that also contains the
transports you intend to use then you can select it and click
the load on transports button. The force will be immediately
loaded and you can then issue orders to your transport
as to where to take them. The other option for loading
troops is used when the transports are in an adjacent sea
area (usually because your troops are not in a port). In
this instance, select your force and then right click on
your transports to issue an order for them to begin loading. This process will take some time and leaves both your
field command and your transports open to enemy attack.
Should this happen, the process will be halted until the
enemy has been repelled and then it will resume. If your
navy fails to successfully defend against the attack then
the entire process is cancelled (but, fortunately, no portion
of your field command will be damaged). Once loading has
been completed you can select the transports and issue
them their orders.
Unloading of transports will occur automatically if their
destination is a port. If you wish, you may unload your force
from a transport when it is in the sea zone adjacent to a
desired friendly province. To do this, select the transports
and then click unload button, This will automatically select
the field command that you are transporting and you may
then right click to designate the province you want them to
unload to. Again, this will take some time to complete and
is subject to enemy interference. Unlike the loading process, failure here can be catastrophic if a
transport is sunk since your troops will
go down with the ship. As you will have
gathered from the comments above, it is
much faster and safer to load and unload
your troops in a friendly port if at all possible, and to reserve "adjacency" loading
and unloading only for emergencies.
Unloading troops to an adjacent prov-
ince that is in enemy hands can be done
by using the adjacent sea zone unloading
method or by using the naval "amphibious
assault" mission. To launch such an attack the province must have a beach.
Strategic Redeployment
For basic redeployment of land forces to
more distant locations it is usually easiest
to issue them a strategic redeployment
order instead of physically moving them
there, While this usually takes slightly
longer than marching, there are several
advantages to this technique. The first is
purely a matter of convenience since the
order is very simple to issue. A less obvious one is that during the course of their
redeployment they are not subject to attrition losses or
enemy attack: both of which can take their toll. Strategic
redeployment will use 2 TC of your national transport capacity for each division being redeployed this way.
Issuing a strategic redeployment order is remarkably
easy to do. Simply select the field command that you wish
to redeploy, then hold down the Ctrl key on your keyboard
and right-click on the province where you want the force
to redeploy. It must be a province that you control: not one
that is controlled by an ally: and there must be a land link
through friendly territory between its current and intended
locations. Because you are using the Ctrl and right-click
combination the order interface will be displayed, from
which you need only select the strategic redeployment
option. The exact arrival date will be displayed (In this
instance it is exact, but you can't adjust it) and you can
then click the OK button to issue the order (or click Cancel
if you change your mind).
The field command will be immediately removed from
the map and placed in the force pool with a notation as to
where it is being redeployed and the date that it will arrive.
During this time you cannot change or abort these orders.
If their destination province falls into enemy hands before
they arrive then they will be placed in the first available
friendly territory that is along the route that they were taking to the originally intended province.
Transporting
Paratroopers
Unlike naval transports which can carry
any type of land division, air transports
are only able to carry airborne infantry.
Each air transport can carry one division
of paratroopers and the method for loading and unloading is more or less exactly
the same as it is for naval vessels. The
only difference is that you must select
the target province for the paratroop-
65 66
Page 41

ers to jump into, or select an airbase for
the transports to land at to deliver their
troops.
Basic Land Combat
Overview
Now that we've looked at the details of
your forces, deployment, basic movement
and supply, we can finally begin to dis-
cuss combat. To avoid throwing too many
options and variations at you all at once,
we'll start by looking at what happens
when one of your land forces engages an
enemy's land force: a simple one-on-one
engagement between two opposing field
commands. This will introduce the basic
rules that make up the core of Hearts of
Iron It's combat system. In subsequent
sections we'll look at more complex situations where multiple forces are participating, and where air forces and navies
get involved.
Combat, in Hearts of Iron II, represents the struggle for
control of large provincial areas and should be thought of
as a series of engagements, rather than a single battle
between two large forces. Battles can often last for many
, hours, days, or even weeks, depending on the size of the
forces involved and how well the enemy has prepared to
defend the province. It will continue in a series of combat
rounds until one side is either victorious or is ordered to
disengage. If the defender is victorious or the aggressor
breaks off the attack then things will remain status quo. If
the defender chooses to flee or has been forced into full
retreat, the attacker will begin to move into the province
to clean up the last pockets of resistance and begin the
occupation of the newly-conquered province.
Entrenchment! Digging In
Before we look at initiating combat and how it's resolved,
we need to quickly touch on two subjects: entrenchment
and provincial defences. Entrenchment is an indication
of how well prepared the defending force is to repel an
attack and will be available after you have researched the
appropriate technology to enable it. You
can check the status of your land forces
by selecting the field command and look-
Ing for a small shovel icon in the status
area. If there's a shovel then your force
is entrenched: or "dug in": to at least
some degree. If you hover your mouse
over the shovel a tooltip will appear to
show your dug-in status. The higher the
number the better prepared they are and
the greater their defensive bonus will be.
A force that remains stationary in a prov-
ince for a while will become increasingly
dug-in, raising their bonus until it reaches
its maximum possible value. The bonus is
immediately lost if it begins to move.
While there is no way to check an enemy's status you could make an educated
guess if you know roughly how long they
have been there. A well-entrenched enemy will be considerably harder to defeat;
and attackers do not receive a dug-in bonus, obviously, since they are moving.
Province Defensive
Structures
While entrenchment can help a defender
repel an attack it is a poor substitute for a
network of fixed defensive structures that
are designed specifically for this purpose.
A force that is in a province that contains
land fortifications will gain a very large
edge in combat: proportional to the size of the fortification : in addition to any entrenchment bonus they receive. A
division that is entrenched, in supply, at full strength, and
well organised can be an almost unbeatable opponent so
it is best to find a way of reducing at least a few of those
factors before launching an assault against them.
Land fortifications only aid a defender against an attack
from another province, not against one that comes from the
sea. Coastal fortifications perform the reverse function, repelling sea invasions but having no effect against an army
that is advancing from an adjacent province; and neither
of these defences have any impact unless there are forces
present to man them, and neither of them are used against
any paratroopers who attack you: although paratroopers
are subject to a separate combat penalty. Anti-aircraft and
radar installations require no one to man them but have no
effect whatsoever on advancing land forces (though they
will help you against any supporting enemy aircraft).
Initiating Basic Land Combat
All land battles in Hol2 involve two sides: an attacker and a
defender. Combat is initiated whenever a
field command is ordered to move into an
adjacent province that contains an enemy
field command. The defender is always
the force that occupies the province and
is attempting to hold it; and the attacker
is always the force that is attempting to
capture the province. When you order a
field command to move into an undefended enemy-controlled province there will be no combat and a movement
arrow will appear. The arrow will be red to indicate that the
command is moving to occupy an enemy province.
In all cases where the province is defended, right-clicking on a province will automatically display the Orders
interface so there is no need to hold down the Ctrl key as
you do so (though it isn't a bad habit to use the Ctrl key
anyway, just to get into the
habit for other situations where you do). The Orders inter-
face will have a list of all context-sensitive orders that the
field command is able to perform and the attack option
will be preselected. The interface will also indicate the day
and time that the attack is to begin and will usually display
the current date and time. This won't always be the case
because the game tracks your recent orders and if it seems
appropriate the default time will be set to coincide with the
others. It might take a little getting used to but this feature
is an incredible time-saver.. .and the default attack time
can easily be overridden by adjusting the values using the
"+" and "-" buttons. To simply go ahead and launch the
attack, click the OK button. The Orders interface will close
and the field command's orders panel will be updated to
reflect its new mission. If the attack is to begin immediately
then the red movement arrow will also appear on the map
(as long as you have the unit selected) but if you have set
a delay on the timing then the arrow will not appear until
the attack actually begins.
As soon as the combat begins a variety of game interfaces will also be updated to reflect the fact that a battle
is taking place. In any interface where the field command
is listed (e.g. if you click on the Land Forces Hot Button)
you will see a small red battle symbol at the right edge of
the display. If you click the Province Hot Button you will
see the same symbol beside the province name. This same
symbol also appears in the border type display of the Prov-
ince Details information panel. Depending on your current
message settings you may get a pop-up message box to
inform you that battle has been joined. The easiest way
to view battle locations, though, is to click on the Active
Combats Hot Button which will display the combat quick
view (see below) for any battle or provincial occupation
that is currently underway.
Timing Your Attack
It is usually best to launch an attack that is timed to begin
at daybreak (or at least during daylight hours) since most
forces don't fight very well at night. This is easily done
on the Orders Interface where you can adjust the exact
date and time that you would like the attack to begin. The
time displayed in the Orders Interface is always GMT, not
local time, but a small symbol in the interface will indicate
whether this will be a daytime or night time attack. In more
advanced combats you will frequently use this interface to
time the various components of your attack (e.g. to conduct
preliminary aerial bombardment to soften up the enemy
before your land forces begin to advance) or to gradually
escalate the scale of the conflict.
Basic Combat Resolution
As soon as battle is initiated you will notice that the Field
Command details in the information panel changes to
display a "combat quick view" at the top (in place of the
usual province details). The mission box will display the
unit's current orders ("Attack" if it is the aggressor) and
below this will be a brief graphical summary of the current
status of the battle with the province name and battle
icon in the center. On either side you'll see the portraits of
the opposing commanding officers, their current strength
and organisation, the number of divisions involved on both
sides, and their nationalities. The attacker will always be
listed at the left side of the summary and the defender at
the right. Below this is a bar that stretches from left to
right across the bottom of the battle summary, indicating
which side currently seems to hold the advantage. If this
is mostly red then the attacker seems likely to win. If it's
green then the defender would seem to be prevailing. This
status is not a guarantee of victory, however, since many
things may happen during the course of a battle that could
tip the balance.
This same combat quick view also appears in the list
that is displayed when you click on the Active Combats Hot
Button (remember that you can filter this list to display only
a particular type of battle). If you click anywhere on the
combat quick view display on either interface the information panel will change to display the combat details view.
As is the case with the quick view, the attacker is always
listed on the left side of the display and the defender on
the right.
The name of the province that the two forces are vying
for is listed at the top. The portrait of each commander
will be displayed below his national flag, along with two
numbers: the number of divisions that he currently com-
mands, and the maximum number of divisions that he is
able to command. If the first number is smaller than the
second, then the commander's capabilities are not being
exceeded, but if the first number is greater he is commanding too many divisions and is deemed overstacked.
The severe penalties received for overstacking are detailed
later in this section.
There is a small "event box" just below this that stretches
between the two leaders' portraits. Normally it will be
empty; however there are special combat events that may
occur during the course of battle. These are far more likely
67
68
Page 42

to be in your favour if you have a high-ranking leader who
commands an HQ division somewhere in the vicinity. If an
event does occur, it will be listed here (details on combat
events may be found a little later in this section).
In the next section of the information panel, you'll see a
series of symbols that will change as the battle progresses,
and the same red-green battle status bar that appears
in the quick view. The symbols that appear in this area
will indicate various special combat conditions that are
affecting the battle, conditions such as entrenchment,
nighttime combat, river crossing, overstacking, weather
conditions, and more. Each of these will have an effect
on how combat is resolved and are shown as quick visual
"clues" as to what factors might be influencing the battle.
Details concerning the exact bonus or penalty will vary
somewhat depending on unit type: and a unit's technology:
so the precise values of the modifiers are not displayed
here, but are incorporated into the next part of the infor-
mation screen.
The balance of the information panel displays a complete scrollable listing of the units involved on both sides
of the conflict and a graphic representation of each one's
remaining strength and organisation. An expanding tooltip
is available for each division that contains precise details
about the various bonuses and penalties that it is receiv-
ing to its combat values and which are totalled to give its
current attack and defence effectiveness (i.e. the attack
effectiveness and defence effectiveness values shown in
the tooltip include all of the various modifiers that are listed
below them). These will change: and are updated: on an
hourly basis as the combat progresses.
A combat can last for as little as a few hours or possibly
for as long as a few weeks, though the majority will prob-
ably be waged for a matter of days. Battles are subdivided
into "rounds", with each round lasting for one hour. During
each round a variety of things will occur:
• There is a chance that a combat event may occur at
the beginning of the round, representing a special advantage that one side has managed to achieve over the
other. The likelihood of one happening that favours your
side is determined by the land doctrines that you have
researched (which may increase the odds of a specific
event occurring) and are also considerably more likely
if you have an active HQ division in a province that is
adjacent to the battle or involved in the battle. (To be
active, it must be commanded by a general or by a field
marshal). If an event occurs, then its effects will remain
active for eight hours (i.e. for the next 8 rounds) and no
other combat event can occur until it has expired.
• The attackers will inflict some damage to whatever
provincial assets exist in the province. If the defenders
have a land fortification (or a coastal fortification in the
case of an amphibious assault) then it will sustain some
direct, intentional damage. The amount of damage is
tripled for divisions with an engineer brigade attached
to them. There will also be some collateral damage to
infrastructure, factories, and other structures that will
reduce their operational conditions until the damage
has been repaired.
• The combatants will exchange fire, with each side likely
sustaining some level of casualties and probably experiencing a slight reduction in organisation and morale.
• Both combatants will also draw a measure of supplies
and oil to sustain them for the next combat round. This
will be at a somewhat higher rate than their normal
hourly consumption, and if there is a lack of either then
their combat organisation and morale will begin to drop
quite sharply. Running out of supplies or fuel is a sure
way to lose a combat.
• At the end of each round, the operational status of each
division is checked to see whether it is able to continue
fighting. A division that has sustained enough casualties to reduce its operational strength to zero will be
eliminated. More often, though, a division will reach
a point where its organisation has been reduced to a
level where it cannot continue to fight (below 5%) and
will begin to withdraw. It may still be fired upon (and
will try to defend itself) but it will no longer attempt to
inflict casualties on its enemy.
This cycle will repeat each hour that the combat continues
until either one side has been completely eliminated (which
is quite rare unless the battle is very lopsided), or until at
least 50% of a side's divisions are in the process of withdrawing from battle. You may, however, elect to disengage
from combat at any time if you feel that your chances of
winning are slim and you would like to preserve as much of
your force as possible. If you are the attacker then you can
do this by selecting the field command and then right-click
in the province that they currently occupy. In the case of
a defender, you can select the force and then right-click
anywhere, since there are special rules that govern retreat
from a province.
Exchanging Fire
In the above description I simply indicated that the two
sides "exchange fire" each hour. This is actually a very
complex process whose precise mechanics are embed-
ded in the game engine; but you need to have at least
some idea of how it works in order to be able to make an
informed decision about whether to initiate a combat and
what forces might be useful for you to build, deploy, and
order into the battle. Here's roughly what happens...
The firing phase of the combat is subdivided into a
number of "shots"...shot 1, shot 2, shot 3, shot 4, etc.
until all possible shots have been fired. For each of those
shooting rounds, each division on both sides will randomly
select an enemy division to fire at and then will target either
its hard or its soft component. The likelihood of it picking a
soft target is equal to the enemy division's softness value,
so if your division is shooting at an enemy division with a
softness of 70% then there's a 70% chance that it will
target the soft component and a 30% chance it will target
the hard component.
Your division then checks whether it is "allowed" to shoot
by checking its hard or soft attack value. Whether a division
is allowed to shoot depends on what shot number it is and
on the attack value it has against the target type it has
selected. Example: if it chooses a hard target and has a
hard attack value of 5, then it will be allowed to shoot if it
is presently shot #5 or earlier. If it's shot #6 or later, then
it is not permitted to shoot. That doesn't necessarily mean
that its attack is over for this round of combat, because if
it happens to have a soft attack value that is higher then it
might still select a soft target for a later shot and be able
to shoot. Example: if that a division has a soft attack value
of 12 then it will be allowed to shoot if it happens to select
a soft target any time up to round #12.
If a division is allowed to shoot then it will so, but the
target division will also have a chance to avoid being hit.
Whether the target is able to avoid the shot is determined
by either its defensiveness value or its toughness value:
depending on whether it is the defender or the attacker
in the overall combat. If it is defending a province then it
uses its defensiveness value; if it is a division on the attacking side then it will use its toughness value. This value
is the number of times that it may attempt to avoid being
hit during each full combat round. Example: an attacking
division that has a toughness value of 10 may attempt to
avoid being hit on the first ten times that it is targeted
by defending divisions during each combat round. If it is
targeted by 5 enemy divisions in the first shot, then by 4
divisions in the second shot and then by 4 divisions in the
third shot then it can only attempt to avoid 10 of those
12 shots. It would not be able to avoid any subsequent
shots that were fired at it until the start of the next combat
round. In normal combat situations, a division will be able
to avoid a majority of the shots directed towards it, so it is
unlikely to sustain significant damage unless its avoidance
opportunities have been exhausted while its enemy still has
additional shots remaining.
A shot that successfully hits its target will inflict damage
on the target division. The extent of that damage depends
on the type of the division that fired the shot and on the
type of target it selected. Foot soldiers (infantry, marines,
militia etc.), cavalry and motorised infantry will generally
inflict a bit more damage to a soft target than a mechanised
infantry or armoured division will achieve; however the
latter are more effective against hard targets than their
"weaker" brothers in arms. There is also a strength com-
ponent to the damage, with the percentage of strength that
the shooting division has lost being applied to the amount
of damage it can inflict.
But wait.. .there's one more twist! You might have been
wondering what the tooltip values of "attack effectiveness"
and "defence effectiveness" mean and then guessed: incorrectly as it turns out: that these values might represent
your chances of hitting a target or avoiding getting hit. They
don't. The attack effectiveness modifies your division's
soft and hard attack values by that percentage, while the
defence effectiveness is applied to your defensiveness or
toughness value (depending on whether you are the attacker or defender). This means that they will increase or
decrease the number of shots that each division may fire
in each round, and the number of shots that they might be
able to avoid when they are targeted. Attack and defence
values must be whole numbers (you can't partially shoot
or partially defend) so any fractions that result from the
effectiveness modifiers are ignored. That means that a soft
attack value of 5.99999 would restrict a division to firing
at a soft target only during the first 5 shots of the round;
and that a defensiveness of 5.99999 would allow you to try
avoiding a shot only five times during that round.
All of the above occurs every combat round until the
battle is over, and is thus repeated: and are likely to change
to at least some degree: on an hourly basis. What will tend
to have the greatest impact on a battle, therefore, is the
quality of the forces that you employ and the modifiers that
come into play during the course of the engagement.
Modifiers That Affect Battle
There are a great many factors that will play a role in the
outcome of a battle. Almost all of these are modifiers that
are applied to the attack and defence effectiveness values,
thus altering the number of possible shots you can fire
or avoid each round. Some of these will remain constant
throughout the course of a battle: things such as terrain
modifiers: while others may have shorter durations (night
time penalties, or possibly changing weather effects). It
isn't practical to list them all here (and many have already
been mentioned earlier in the manual) so I will only highlight a few of the more significant ones.
Leadership will have a very large impact on the effec-
tiveness of your forces. Some officers have traits that will
give significant bonuses that can offset other penalties
or give certain types of divisions an advantage; and an
officer with high levels of skill can also give a substantial
boost to these values. The biggest issue you'll encounter,
though, will be the nearly catastrophic penalties incurred
69
70
Page 43

if your leader is overstacked. As you'll recall, each leader
has a rank and this rank will determine how many divisions
he can command without penalty. This number is doubled
when an officer is within a one-province radius of an active
HQ division. If he exceeds his limit then all of the divisions
under his command will forfeit any bonuses that his trait
• or skills would normally have given them. Worse still, the
"excess" divisions will receive a 75% penalty to both their
attack and defence effectiveness values. This will make
them very easy for the enemy to hit and also means that
they aren't likely to be able to shoot very many times during a round. When we move on to look at more complex
combats, we will discuss the effects of having multiple
officers participating on one side of a battle.
Beyond the possible weather and terrain modifiers:
which, as detailed earlier, can occasionally be nasty: there
is a large penalty applied to night time attacks and, to a
somewhat lesser degree, defence. Making an amphibious
landing, crossing a river or parachuting out of the sky will
also limit your effectiveness, although the latter has the
benefit of avoiding the very substantial penalties incurred
for attacking a fortification.
National dissent will also impose a noticeable penalty on
your forces if you allow it to rise. At low levels it may only
hamper your forces slightly, but the higher it rises the more
painful its effects will become. If you expect to be involved
in many combats, you would be very well advised to deal
with your domestic situation as rapidly as possible...or
face the consequences.
There are a host of modifiers supplied by various techno-
logical advances: particularly by combat doctrines: as well
as by such things as your current ESE, the experience of
your forces, and so on. While it might seem that most large
modifiers favour the defender: and that is actually the case
for simple battles such as the ones we're considering here:
when we look at more complex combats you will find that
•this can easily be offset by an envelopment factor, which
is applied when the attack is launched across multiple
provincial borders. It will take some time to become familiar
with all of the possible situations and resulting modifiers,
so my advice to you is to play the game, try various alternatives, and learn from experience. Pay close attention to
the tooltip details during combat as you're learning, and
you may want to pause periodically to spend some time
reviewing them for each division if a combat isn't going
quite the way that you think it should.
Combat Events
During each round of combat, there is a small chance that a
special combat event will be triggered. When this happens,
the Combat Details will display the event name in a small
box that extends between the two leaders' portraits. Only
one combat event can be in effect at a time, and the effect
lasts for the next 8 hours. The chance of a favourable (for
your side) event happening increases if you have an HQ
division participating in: or adjacent to: the battle.
Counterattack: This is a concerted attempt by the defending side to launch a minor counter-offensive to disrupt the
enemy's plans. While the defenders will suffer somewhat
higher strength losses during this period, they will inflict
significant organisation losses on the attacker.
Assault: This represents a particularly forceful sustained
attack, where the attackers will suffer higher strength
losses than normal but will inflict much higher organisation damage to the defenders.
Encirclement: This indicates that the attacking force has
briefly managed to pin down and encircle the defenders
in a small area of the province. While this effect lasts, the
defenders will suffer much higher strength losses and the
attacker will rarely suffer very much loss of organisation
(although they may sustain the normal strength losses).
Ambush: The attacker has managed to ambush the enemy
forces, inflicting much higher rates of strength and morale
damage to the defenders, while at the same time greatly
reducing the amount of those same types of losses that
they sustain themselves.
Delay: The defending side is employing a delaying action
that greatly reduces the amount of strength loss it sustains
during this time.
Tactical Withdrawal: During this period, the defender is
making a careful tactical withdrawal to a preferred combat
location in the province. Both sides will sustain reduced
levels of strength and organisation loss, but the defender
will sustain even lower organisation losses than the attacker.
Breakthrough: The attacker has managed to overrun an
enemy's defences in part of the province. This will seri-
ously disrupt the defender's organisation and reduce the
strength losses sustained by the attacker. If the defender
has an HQ division involved in the combat, it is likely to
sustain heavy casualties as a result of the breakthrough.
End of Combat
Combat ends when one side breaks, is eliminated, or
when one side is ordered to disengage. There are several
possible outcomes:
Attacker Breaks or Disengages: The simplest outcome
occurs when the attacking side either breaks or is ordered
to disengage. In this instance, the battle will cease and
the forces of both sides will remain exactly where they
are. A defender who wishes to pursue this advantage
would now have to make an attack of his own against
the enemy forces.
Defender Eliminated: This is also a straightforward
(though rare) situation. If the entire defending force is destroyed, then the combat stops, the defender's divisions
will disappear from the map, and the attacker will begin
moving to occupy the province.
Defender Breaks or Disengages: The third possible outcome is that the defender loses the battle and is forced (or
elects) to retreat. The combat ends and two things happen:
the attacker now begins moving to occupy the province
and the defender must withdraw from the province. The
direction of the defender's retreat is not something that a
player can decide (even if he is the defender and voluntarily
disengages) but is determined automatically by a set of
rules that govern retreat. The defender must retreat to
an adjacent province that he is permitted to enter (it must
be controlled either by him, by his ally, or by a nation with
whom he has a treaty of access). If there is more than one
of these then the choice is made more or less randomly.
If there isn't a province that meets those criteria, then the
defender may retreat to an adjacent sea zone if he has sufficient transport vessels available there to carry the number
of divisions that are retreating. If there is nowhere for the
defender to retreat to then his entire force will surrender
and will be eliminated.
Occupation of Enemy Territory
Once a defender has been defeated: or in a situation where
there is no defending force: the attacking army now begins
to move into the province to occupy it. You can view its
progress by selecting the field command and looking at the
red movement arrow. It will take a little time to accomplish
the occupation, and this process could be delayed by the
arrival of new defenders in the province. If that happens,
a new combat immediately ensues and must be resolved
before the occupation can continue (but the extent of the
attacking force's occupation is saved and will resume from
the point it left off, if it is victorious), Once the field com-
mand has finished occupying the province, it will complete
its move and control of the province will change.
Occupation will cause some degree of additional damage
to all provincial structures (air and naval bases, infrastruc-
ture, factories, etc.), even in cases where there has been
no combat involved in the province's capture. This represents an enemy's rearguard or last-ditch actions to make
as few of these assets available to the enemy as possible,
so you will need to allocate some IC to repairs (reinforcements) before these will become operational once more.
More Complex Land Combat
Overview
We will now look at somewhat more complex battle planning and actions. It is rare that a simple, direct assault by
a handful of divisions will gain much ground on a front: or
do much to defend one. This section looks at coordinating
attacks from more than one province, advanced defence
options, and some special orders that you may wish to
issue, and a few perks associated with some of the elite
units available in the game.
Multiple Attacking or Defending
Field Commands
The first thing we'll look at is the fairly common situation
where there are two or more field commands located in the
same province: and thus more than one officer: and they
both engage in the same battle. This is handled differently
depending on whether they are attacking or defending.
When attacking, the highest ranking officer determines
how many divisions may participate in the battle without
receiving the nasty effectiveness penalty for being overstacked; however all other combat modifiers that a division receives are based on the trait and skill levels of their
immediate commander and will be forfeited if he has too
many divisions assigned to him. Be sure to double check
that in any instance where you use more than one field
command to attack from a single province that there is an
officer of sufficient rank to command all of the divisions
involved in the attack.
When two or more field commands are defending, how-
ever, the field officers are treated individually, and their
ranks' stacking limits are added together to determine the
total number of divisions that may defend without incurring
a stacking penalty. Remember, though, that even if one
officer has "empty spots" in his command and can "assist" another officer who is overstacked to eliminate the
combined forces' overstacking penalty, the divisions that
are directly assigned to the overstacked officer will lose
any benefit from his skill or traits.
Let's look at a situation where you have a lieutenant general in a province with 3 divisions assigned to his command,
as well as a major general in that same province with one
division. While neither is individually overstacked, if they
jointly attack another province then the lieutenant general
will command the entire force of four divisions and thus,
for the purposes of the attack and defence effectiveness
values in the attack, he is overstacked and one of the
divisions will receive a 75% penalty. However, since each
individual commander is within his command limit, any
traits and skill bonuses that they have will be applied to the
divisions that they command directly. If they are defending
against an attack, however, their ratings are combined and
they would not be overstacked.
If we take a similar situation, but suppose that in this
instance the lieutenant general has 2 divisions and the
major general also has 2 divisions, things get messy. If
they are attacking, then the lieutenant general commands
71
72
Page 44

the entire force and will be overstacked (thus one division
will receive a -75% penalty). Further, because the major
general is personally overstacked, neither of his divisions
would receive his skill or trait modifiers. The lieutenant
general is not personally overstacked, however, so his two
divisions would benefit from his traits and skill. If they are
defending then their ratings are combined together and
the 75% overstacking penalty would be removed (since
jointly they can command 4 divisions); but since the major
general is personally overstacked, neither of his two divi-
sions would benefit from either his skill or is traits. In that
instance, the one division that is being "handled" by the
lieutenant general (for overstacking purposes) would not
benefit from the Iieutenant general's skill or traits either. As
you can see, the best rule of thumb is to never overstack
an officer!
Envelopment and Multiple-Front
Attacks
One of the most effective tactics that can be employed by
an attacking force is to launch their attack from several
different provinces against the same target. This is for
two very important reasons: the defender will suffer an
attack and defence effectiveness envelopment modifier;
and the attacking leaders may stack their division limits
to bring a much larger number of divisions to bear against
the enemy.
When a province is attacked across more than one border, the defending forces will receive a 10% envelopment
penalty for each extra angle of attack. For example, if you
can attack a single enemy province from four different
adjacent provinces then that enemy will receive a 30%
envelopment penalty to his attack effectiveness and his defence effectiveness. If you have paratrooper divisions then
you may also use them for "vertical envelopment", meaning
that this airborne invasion is treated as a separate angle
"of attack for the purposes of determining an envelopment
penalty. Keep in mind, too, that while paratroopers are not
nearly as effective in combat as some forces, they are also
not subject to any penalties from defensive fortifications.
A naval invasion force also counts as an angle of attack,
although they are subject to penalties if the province contains coastal fortifications.
The other benefit is that each province's attacking force
is handled separately for the purposes of determining overstacking. If two generals were to attack from the same
province then they would be able to use only one of those
general's command ratings and could only attack with nine
divisions before incurring an overstacking penalty. If those
same two generals attacked from two different provinces
then they are not considered to be combined so each of
them could command nine divisions in the attack, enabling
a total force of 18 divisions to participate without penalty.
Be careful though. This doesn't let them stack their rat-
ings to eliminate a penalty. For example: if a general with
five divisions and major general with two divisions attack
from the same province then there would be no overstack-
ing penalty applied to the major general's "extra" division
because the rating of the overall commander of the attack
is used for determining that penalty (although neither of
the major general's divisions would receive his skill bonus
or trait bonuses). If those same two officers attacked from
different provinces, then the general is no longer able to
take command of the major general's "extra" division. So
not only would the major general's two divisions forfeit his
skill and trait bonuses, but one of them would also receive
the 75% penalty for overstacking.
It is fairly easy to overlook such an error, because the
leadership summary at the top of the Combat Details will
display the sum of those two commanders' ratings. In the
above example, if the general and major general attack
from the same province the summary would indicate that
the general is in command and that he has seven divisions
with a leadership capability of nine divisions. If they attack
from separate provinces, then the general would still be
identified as being in command and having seven divisions,
but his total command allowance would be listed as ten
divisions (his nine, plus the major general's one) so you
might not notice that there is actually a situation where one
of those divisions is being heavily penalised.
Attacking an Attacker
There is a rather curious situation that can arise quite often
where an attack has been launched against a province
and then the attacker is, itself, attacked from a different province. In this case the field command that is both
attacking and defending will actually participate in both
battles simultaneously. It will perform normally in the combat that it initiated, but for its defensive battle it will have
forfeited any advantages that entrenchment or provincial
fortifications would have given it, and it will receive an
additional 50% flanking penalty. Needless to say this is
a situation that you should avoid having happen to you if
at all possible, and that you should look to exploit if the
opportunity arises.
Special Orders: Support Attack
There will be occasions where you'd like a field command
to participate in an attack against a province but not move
to that province if you are victorious. This can be done by
issuing a support attack order. Select the field command
that you would like to have support the attack and then
right-click on the province that is being attacked. The
Orders Interface will appear and you will see the default
"attack" pre-selected. Change this to select the "support
attack" option instead. The divisions will then participate
normally in the battle; however, if you are victorious they
will not begin moving to occupy the province, You may also
issue this order by clicking the orders box for the field command and then selecting the "support attack" option from
the drop-down list, You will then be given a list of possible
provinces that you may support the attack against and you
then need only select the appropriate one from the list.
Special Orders: Support Defence
Just as you may support an attack, you may also support
a defence, although the effect is somewhat different. To
issue this order you must be adjacent to the province that is
being attacked: or that you think might be attacked. Select
the field command, then click its orders box and select the
"support defence" option, then select the province you wish
to support from the drop-down list of possible orders. The
Orders Interface will then be displayed, allowing you to
specify how long you would like the support defence orders
to remain in effect. If the province you intend to support is
already under attack then you may simply click the OK button. If you are setting this order as a contingency against
a suspected attack then you will need to specify how long
you would like the field command to continue waiting for
the attack to occur. When you click OK the field command
will not begin its support until the province it is supporting
is attacked by an enemy. If this doesn't happen by the time
the order expires, you will receive a message to inform you
that your order has been completed.
You may also issue this order by holding down the Ctrl
key and right clicking on the province you wish to support.
This will immediately display the Orders interface, but you
will need to change the order from the default attack order
to the support defence order and then set the mission
parameters exactly as before. I find this a more convenient
method to issue the order.
The effect of the support defence order is that the field
command will wait until the province it is supporting has
been attacked, at which time it will immediately (and au-
tomatically!) march to the aid of the defenders. Because
it was anticipating the attack, it will be able to reach the
battle in half the normal time it would take for it to move
into that province. This may be a particularly effective
means of withholding a portion of your forces back from
the front lines, and thus enticing your enemy to attack what
he perceives as a weakness. Once he has committed his
forces, you will then have your supporting divisions arrive
and: hopefully: turn the tide of the battle.
Special Orders! Reserves
This order is very similar to the support defence order, ex-
cept that you will exchange the speed of response for an
added degree of versatility. The reserves order does not
require a province to be specified. You simply select it
from the orders menu or hold down the Ctrl key and right
click on the province in which it is currently located. You
will then need to set the expiry date for the order to tell
the commander how long you would like him to maintain
this order.
A field command that is operating as a reserve will wait
until any province that it is adjacent to is attacked, and then
immediately march to support it. It does so at its regular
rate of movement, however, so it will take longer to get
there. While the reserves order might not seem all that
useful in a single player game where you may pause and
issue orders any time you like, if you play in a multiplayer
game that has a "house rule" that prohibits pausing during
the game (and most MP games have this to some degree)
then this order becomes invaluable!
Special Orders! Anti-Partisan
Duty
You may order any type of division to engage specifically in
anti-partisan duty. Doing so will double their suppression
value and thus greatly reduce the effects and likelihood of
partisan activities in any occupied provinces. This order is
given just as each of the other special orders is done, using
the Ctrl and right-click Orders Interface or by selecting it
from the drop-down list when you click the orders box. You
will almost certainly wish to assign your garrison divisions
to anti-partisan activities, since this will maximise their
suppression abilities.
Special Forces: Garrisons
A garrison force is a somewhat unique division that is
limited to one very important specialised function: antipartisan duties. Garrison divisions can only move via the
strategic reinforcement order (which allows them to reach
any other province that is linked by a friendly land route
to their current location) or by loading them onto a trans-
port and then off-loading them at a destination port. They
can participate defensively in a battle if they are attacked,
but otherwise they are exclusively used for suppressing
partisans: a task at which they excel. Placing a garrison
division in an occupied province and assigning them to
anti-partisan duty will provide at least double (if not triple!)
the suppression value of any other type of unit. If you are
pursuing an aggressive course of conquest, make sure you
have lots of these forces available.
Special Forces! Marines
Marines are a special type of infantry division who are
trained specifically for assaulting coastal provinces (although they also enjoy some benefits when operating
in swampy terrain), While any type of division may be
73
74
Page 45

carried by transports and may participate in an invasion,
marines receive greatly reduced penalties during an amphibious assault. Remember also that it is a province's
coastal fortifications: not land forts: that are used when
defending against an invasion from the sea, An additional
consideration is that there is a cumulative penalty for amphibious assaults where each division committed to the
attack receives a progressively higher penalty. This may
be offset by having your larger naval vessels conduct a
shore bombardment mission during the assault, which will
reduce the defenders' effectiveness.
Marines are also treated as having a limited degree of
intrinsic self-transport capability over short distances of
water, allowing them to conduct attacks along chains of
islands without the need for dedicated naval transport vessels. They cannot traverse large stretches of water, but they
can move short distances by themselves. If you're fighting
in the Pacific, marines are nearly indispensable,
Special forces: Paratroopers
Paratroopers are lightly armed infantry divisions that are
quite weak and ineffective when on the ground; however
this Is the only unit in Hol2 that is capable of being loaded
on an air transport and it is when they are used for airborne
invasions In support of a larger offensive that they truly
shine. As we discussed in the envelopment subsection
above, paratroopers present an additional angle of attack
that will give the defenders an extra 10% envelopment
penalty to both their attack and defence effectiveness.
Paratroopers also ignore the normal penalty for attacking a province with land or coastal fortifications: although
they are subject to an airborne attack penalty themselves,
representing the rather "hit and miss" disorganisation of
such missions in that era.
Airborne assaults can be made behind enemy lines if
you feel that you can gain a strategic advantage by cutting
off supply or capturing an enemy base. Keep in mind that
they will be out of supply and in a very perilous situation,
so their chances of survival will be very slim. On occasion,
though, the sacrifice may be worth it.
Special Forces: Mountaineers
Another specialised infantry division is the mountaineers.
These units perform just like regular infantry divisions in
most cases; however, they excel at moving and fighting
in rugged terrain or bad weather and suffer much lower
penalties to supply efficiency. If you must engage in bat-
tles in these conditions, consider assigning the task to
your mountaineers.
Special Forces: HQ Divisions
An HQ division is a large, mobile command and logistic
control centre that must be assigned directly to a senior
ranked field officer (general or field marshal) for their ef-
fects to become active. All three effects will apply to all
land forces that are either located in the same province
or in an adjacent province; and they will apply even if an
adjacent force is attacking into a more distant province!
The three effects are:
• All officers will be able to command double their rank's
normal limit of divisions before overstacking effects
occur (i.e. before divisions that they command lose
the trait and skill bonuses, or suffer the nasty 75%
overstacking combat penalty).
• All divisions will receive a modest boost to their ESE.
They will move faster, suffer lower attrition rates, regain
their organisation more rapidly, have a small combat
bonus, etc.
• The chance of a favourable combat event occurring
during battle will be significantly increased.
I should point out that an HQ division's intrinsic combat
capabilities are very poor. This is a unit that represents
strategic and logistics personnel, communications, supply
management, rear area medical recovery facilities, etc. I
would recommend keeping it away from the front lines and
using its tremendous capabilities to greatly improve your
abilities across a much broader front.
Advanced Land Combats
Overview
While most players develop styles of their own, I will briefly
present a few common tactics that might be worthy of your
consideration, I should also point out that there are special
leadership and stacking issues that should be considered
when ground forces are attacked by enemy aircraft. Those
are detailed in the air combat section, rather than here.
Troops Mix, Terrain and Weather
While it might seem aesthetically pleasing to assemble
that "killer" 12-division super-tank army with heavy armour
brigades attached to each, a well-balanced mix of troops
with support from the skies can very quickly turn the tables
against you. Your tanks will be at the mercy of enemy
tactical bombers and anti-tank brigades, and land forts
can provide more than ample protection for the defenders
to shrug off your attack. You should take great care to
assemble armies with the "right mix" of equipment and
personnel if you want to win most of your battles, A few
brigades of engineers, for example, are invaluable when
attacking enemy fortifications or crossing rivers, but are
only marginally effective when on the defensive. Against
a determined enemy, you can never underestimate the
importance of controlling the skies and carrying some
extra AA defences for those times when your airplanes
have to refuel.
Terrain and weather should never be ignored. Armour is
usually devastating in open plains but more or less useless
in swamp, mountains or jungle; and all the tactical bomb-
ers in the world aren't going to help you in the midst of the
winter's worst blizzards. Rivers can be vitally important
as defensive barriers and are often obstacles that get
overlooked when planning attacks. The combat penalties
should make you think twice about attacking across a river,
unless you have lots of engineers to assist you. If you fail
to take any of these factors into consideration, then you
are likely to find yourself on the retreat far more often
than your enemy. Soldiers and leaders gain very little from
defeat (dead soldiers and ruined equipment aren't going to
win you any wars, either) and this has the additional effect
of bolstering enemy confidence and adding to his troops'
experience, which is often a devastating combination,
Softening Up the Enemy
A well-entrenched enemy force is a very difficult foe to
defeat, particularly one that occupies a province with ap-
propriate fortifications. It will usually be crucial to soften up
the enemy to the greatest degree possible prior to launch-
ing your attack, and then continue to damage them as
much as possible as the combat progresses.
The easiest means of doing this is to delay the timing
of your attack by an hour or two and to conduct as powerful an aerial bombardment as possible first (at dawn).
You should send in a mixture of bombers with a variety
of missions to try to inflict heavy organisational damage
and impair their supply efficiency. You will probably not
inflict very much strength damage, but casualties should
usually be considered a secondary objective. Maintaining
a persistent bombardment during the ensuing land combat
will greatly increase the likelihood of your troops being able
to defeat the enemy, and remember that you can always
bomb for casualties later (as they retreat). You may also
use naval bombardment during combat if the province is
coastal, if you have some large capital ships in the vicinity,
and if you include an amphibious assault as a component
of your attack. This also has the benefit of adding to the
envelopment.
Of course the same strategy is likely to be applied
against you, so you should try your best to build up your
AA defences and keep a strong fighter presence in the
air: which will disrupt the enemy bomber formations and
limit the damage they can inflict. If you lack the sea power
to force an enemy fleet away from your shores, then you
may need to devote some of your air power to making
them pay for being so close. When you're on the defensive
you should also remember to use bombers of your own to
disrupt enemy supply and damage their organisation,
Staggered Attack Strategy
If you simply must attack a well-defended province because there is no other alternative, your only option may
be to use the above strategy and hope for the best. Against
a well-established defence you may still fail to capture a
province, but if you have the manpower and resources
to spare then your next approach would be to set up an
unrelenting series of attacks from a succession of armies.
While you might fail the first few times, you may eventually be able to grind the defenders down to nothing. This
is a very costly: and at times dangerous: technique that
should only be used if you are confident on all other fronts.
If applied doggedly, though, it will eventually gain you that
province you so desperately want. Be very careful in your
timing, however, to avoid committing too many divisions
simultaneously to a battle.
Advanced Command Organisation:
HQ and Leadership
The most common error a new player will make is to fail
to pay close enough attention to his leadership, There is
a false sense of power that assembling a huge mass of
troops will engender (after all, there's a schoolyard bully
mentality that comes along with putting 50 or 60 divisions
in a large stack) so you must always remember that the
penalties for exceeding leadership capabilities will make
any excesses almost meaningless. In fact, the likelihood
of you losing a battle increases dramatically when you are
significantly overstacked, because those excess units will
eliminate the commander's skill and possible trait bonuses
and will contribute virtually nothing to your offence. They
are also very likely to sustain serious casualty and organisation losses and break: thus taking the rest of the army
with them. If you absolutely have to bring large numbers
of troops to bear against an opponent then your best: and
perhaps only: chance at victory is to ensure that you have
an HQ division nearby to double your command capabilities,
bolster your supply, and possibly produce a combat event
that could turn the tide.
The other thing that players often overlook: or fail to capitalise on: is the traits of the various field officers. You may
easily find that a small number of divisions commanded
by a "lowly" Lt, General with the commando trait can push
back an enemy in a situation where a succession of Field
Marshals with 12 divisions each might easily fail. Look at
the context of the battles you expect to engage in and then
try to ensure that you have the right officers on hand to fight
them. Don't forget your Chief of the Army's traits either,
since he may give an overall benefit that can be employed
if you structure your forces to take advantage of it,
75
Page 46

Broad Front Defensive
Counter-Attack
Initiatives
When fighting along a broad defensive
front with many interlinking provinces, it
sometimes pays to disrupt an enemy's
attack by launching attacks of your own
against his advancing or supporting
troops. While those aren't battles you'll
necessarily win, the flanking effects and
additional strength and organisation
damage you inflict might be enough to
disrupt the enemy's troops and blunt the
main thrust of his advance. Remember,
too, that in such a situation he will not
have the benefit of using fortifications
against you, nor will he have an entrenchment bonus.
You should carefully consider holding
forces in reserve behind your front lines.
Not only does this keep them fresh and
ready to step up to help meet a concerted
attack, but it can also be used as a lur-
ing tactic if the enemy is unaware of their
presence. Presenting an apparent weak
spot in your front line may induce your enemy to take a
chance and attack you in what might otherwise be a poor
choice of battlegrounds. Once he commits, take advantage
of the support defence order to quickly move your main
forces into position and inflict nasty casualty levels. Once
you have won the battle: which is very likely: you can then
press the advantage by following up with an attack of your
own against his now-weakened forces, In many cases
this is your only good chance to punch a hole through a
strong enemy front. Needless to spy, this is yet another
situation where having an HQ division nearby can have
an enormous effect.
Envelopment, Encirclement, and
Supply
Another all-too-common error made by new players is to
forget the nasty effects of envelopment. There will be times
when it would be more prudent to withdraw from a situa-
tion than to allow your enemy to assault you from multiple
angles of attack. If you're very lucky you might even be
able to turn a well-considered retreat into a situation where
you may turn the tables and envelope your enemy's overeager advance.
Troops can't fight if their stomachs are empty and they
have no more rounds of ammunition in their machine guns
and rifles. Even the largest tank doesn't present much of a
threat if it lacks the fuel to manoeuvre or power the rotation
of its turret. Ensuring a steady, uninterrupted flow of supplies to your troops is
absolutely vital: just as finding methods
to cut your enemy's supply chains can
inflict a more devastating blow than any
frontal assault could do.
I've already stressed this point at least
once, but I'll repeat it here: do not allow
yourself to run out of or become cut off
from supply. It is the single most damag-
ing thing that can happen to your troops.
Without supply you will see your forces'
organisation plummet and their strength
decline. That impenetrable defensive line
of fortresses and men that you've as-
sembled will rapidly crumble, and, after
a couple months of patiently waiting for
starvation to set in, your enemy will over-
run you like a searing-hot knife cutting
through butter.. .and of course that is ex-
actly the situation you should be looking
to exploit yourself (particularly if you're
playing Germany in 1939 and are faced
with the massive French fortifications of
the Maginot Line).
The Naval Forces
Introduction
In many respects, you will find that Hearts of Iron II 's naval
system is very similar to the land system with only a few
rather major distinctions: the concept of "basing", naval
missions, and the mechanics of the actual naval combat.
Deployment and general control interfaces are almost
identical, but the flexibility of the missions that you can
order your navies to perform will greatly reduce your need
to micromanage them. As with the land section, we'll begin
by taking a detailed look at individual units and then look
at how to use them in combat.
Flotilla Types
The naval flotillas you will build and use are generally di-
vided into four distinct classes of ship which will largely
determine how they behave in combat. Each unit, regard-
less of type, is called a flotilla and multiple flotillas can be
assembled into larger groups which may be variously called
"squadrons", "fleets" or "task forces" depending on size
and composition. Squadrons are usually smaller groupings
while fleets are usually larger. For the sake of clarity I will
use the term "fleet" throughout this section to denote any
group of two or more naval flotillas.
A Capital Ship is a large naval vessel such as an aircraft
carrier, battleship, battle cruiser or heavy cruiser and may
also sometimes be referred to as a "core vessel". Unlike
all other units in Hol2, where a division represents a large
number of soldiers or a full division of tanks, these naval
units are actually individual ships (despite the fact that they
are called a flotilla). A Screening Vessel is a smaller ship
type whose primary function is to protect and escort other
ships. The destroyer is the standard screening vessel and
each destroyer unit in Hol2 represents a flotilla of similar
ships. A light cruiser also acts as a screening vessel, even
though each unit represents an individual ship. You should
try to ensure that you have at least one screening unit for
each capital ship in a fleet, or you will be subject to combat
penalties. The third class of vessel is the submarine. Again,
a single unit represents a flotilla of subs and will usually
perform the duties of convoy disruption or act as a stealthy,
predatory component of a larger fleet. The final class of
vessel is the transport: a flotilla of non-combat vessels
used for ferrying troops across the seas. If a transport
flotilla is forced into combat, it will behave as a core vessel
and try to maintain the greatest possible distance from
the enemy forces.
Carrier Air Group
While land forces have a wide variety of possible brigade
attachments, there is only one unit that serves such a purpose in naval combat: the Carrier Air Group (or CAG). The
production of CAG's is ordered from the Air Wing section of
the Production Orders interface and then may be deployed
from the force pool to any available aircraft carrier (using
the same method you use to attach a brigade to a division).
A CAG may only be attached to a carrier, however, and a
carrier may only have one CAG attached to it at a time.
The CAG represents a standard complement of aircraft
that can operate from this moving nautical platform and are
able to perform a variety of functions. These roles include
spotting, direct attacks against enemy vessels, providing
air cover for the fleet, and also shore assignments that are
normally conducted by tactical bombers (although they
lack the sheer impact of their land-based cousins). In effect a CAG is a multi-purpose air wing and, without one, a
carrier is just a very large and costly piece of flotsam.
Flotilla Details
You can access the Flotilla Details information panel by
selecting any fleet and then clicking on one of the flotillas.
I will not provide a detailed description of any data listed
here that is equivalent to a land division's statistics.
Flotilla Name: This is assigned automatically, but you can
change it if you wish.
Flotilla Type: You will see a representative picture of this
class of vessel and a description of its type and specific
model.
CAG Attachment: If the flotilla is an aircraft carrier that
has an attached CAG, then the type and model name of
the airplanes will appear immediately below the carrier's
name. There will also be an inset picture of the aircraft in
the lower right of the picture.
Commander: The commanding officer of this fleet. You can
click anywhere on this bar to return to the fleet details.
Fleet Strength and Organisation: A graphic display of
the percentage strength (orange bar) and the percentage
organization (green bar) of the entire fleet. The exact values
are displayed in the accompanying tooltip.
Fleet Name, Size, and Command Box: The name and
the number flotillas in the fleet. If the fleet is currently
executing orders, then an order summary will be shown
in the command box. You may issue new orders directly
from here, but keep in mind that it will be issued to all
flotillas in this fleet,
Location Details: The current location of this fleet.
Strength: The flotilla's current percentage combat
strength.
Organisation: The flotilla's current combat organisation.
Morale: The flotilla's current morale.
Sea Attack: This flotilla's attack value against enemy naval
vessels except submarines.
Shore Bombardment: The attack value used by this flotilla
when targeting shore defences.
Air Attack: Attack value that will be used against any enemy aircraft that attack you.
Sea Defence: The flotilla's defence value against other
naval attacks.
Air Defence: The flotilla's defence value against aerial
attacks.
Maximum Speed: The flotilla's maximum speed.
Supply Consumption: The daily supplies required by this
flotilla.
Fuel Consumption: This flotilla's daily oil consumption
rate when moving. It will use half of this amount if it is
sitting idle at sea, and consumes no fuel at all when in
base or at a port.
Range: The flotilla's effective mission range is the maximum distance it can travel from its assigned naval base
during naval operations. When combining flotillas into
fleets, the flotilla with the shortest range will be used to
impose the fleet's range restriction.
Sea Detection Capability: The flotilla's ability to detect
other naval vessels. Surprise and manoeuvring plays a
very large role in naval combat, and the ability to spot an
approaching enemy can be particularly important.
Air Detection Capability: The flotilla's ability to detect
aircraft in the vicinity.
Sub Detection Capability: The flotilla's ability to detect
enemy submarines.
Sub Attack: The flotilla's attack value against subma-
77
78
Page 47

Visibility: This is how easy the enemy will find it to spot
this flotilla.
Experience: This flotilla's current experience level.
Maximum Firing Distance: Naval combat in Hol2 requires
that a ship close within range of its target before it may
commence firing. This value is the maximum possible
range of this flotilla's guns. For carriers this is the CAG's
maximum attack range.
Effective Supply Efficiency: The flotilla's current ESE.
Ship's Log: Hol2 keeps track of the vessels that a flotilla
has sunk, Click on this button to view your ship's log of
recorded kills.
Attach/Detach Brigade Button: This can only be done
by an aircraft carrier and is used to attach or detach a
Carrier Air Group.
Disband Button: Click this button to disband the flotilla
and recoup some of its manpower.
Fleet Details
The Fleet Details information panel is almost identical to
the one used for field commands, with only two major differences that should be pointed out here:
Base and Range: Just below the orders box you will see
the usual supply icon (a small circle) but below this you will
now see the current naval base assignment and effective
mission range of the fleet. A fleet may never be further
away from its assigned naval base than its mission range
value, thus limiting the overall distances it may travel un-
less rebasing.
Primary Statistics: The main statistics shown for each
flotilla are also different. From left to right they are the Sea
Attack, Air Attack, Sea Defence and Air Defence values.
Leadership
Just as with land forces, a suitable officer should be as-
signed to lead each of your fleets. The number of flotillas he
can command without overstacking penalty depends on his
rank, with the possible ranks being Rear Admiral (who can
control 6 flotillas), Vice Admiral (12 flotillas), Admiral (18
flotillas) and Grand Admiral (30 flotillas). In naval combat,
both sides are treated as "attackers" and since the battle
takes place in a single sea zone there is no "envelopment"
or "multiple angle" consideration. The highest ranking of-
ficer on each side will determine the maximum number of
flotillas that may participate before overstacking penalties
apply, but individual officers' abilities will still be used for
determining skill and trait benefits. Just as in land combat, these benefits are forfeited if an officer is personally
overstacked (even if the total combined force is within the
most senior officer's stacking limit). Note, also, that there
is no naval equivalent of an HQ.
Leader Traits
Naval officers sometimes possess a trait that will enhance
the abilities of each flotilla in the fleet they are assigned to
command. This advantage is lost if the officer is currently
assigned to command more flotillas than his rank allows.
Sea Wolf: This officer is a superb submarine tactician.
Every submarine in a fleet he commands will be much
harder to spot and will gain additional attack bonuses. Note
that the fleet can be of mixed classes, but only submarines
will benefit from his special bonuses.
Blockade-Runner: This commander is particularly adept
at avoiding combat: particularly with enemy subs: when
he wishes to. Of course he will have a hard time "hiding"
a capital ship, but his transports and screens can often
slip past a1 submarine pack undetected.
Superior Tactician: A leader with this trait excels at naval
manoeuvring tactics. His flotillas will enjoy combat bonuses
to both their attack and their defence values.
Spotter: This officer has an uncanny ability to predict the
location, of the enemy, increasing the detection capabilities
of all flotillas under his command.
Ports and Naval Bases
Many coastal provinces have a port, but only a few of these
will be full-blown naval bases with the ability to outfit and
provision naval vessels. Each fleet must be assigned to a
specific naval base: a large port with appropriate facilities:
which will ferry supplies and fuel to the fleet when it is
engaged in a mission, and to which a fleet must return to
be repaired after combat or refitted with the latest technological advances. A simple port appears on the main map
as a small anchor icon, while a naval base is a larger: but
similar: icon. The icon will be blue if there is at least one
vessel currently located in the harbour, or grey if there are
currently no vessels located there.
Any number of flotillas may be assigned to the same
naval base: including allied vessels: but the speed with
which any repairs and upgrades occur will depend directly
on the size of the base and the number of vessels it is
prepared to service. You may place a production order to
build a new base or enlarge an existing one. This will take
some time to complete and is limited to a maximum size
of level 10. The operational size of a base may be reduced
if the base is subjected to enemy attack (and is severely
damaged if captured) and may require an allocation of IC
to repairs (reinforcements) before it is fully operational
once more. Allied vessels that avail themselves of your
naval base will draw their supplies from your stockpiles:
which can result in some unexpected demands on your
supply chains at times. Of course the reverse is true: if
you base your vessels out of an ally's facilities and your
ally might take a little time to adjust to your increased
demands (assuming that he has the stockpiles to even
meet those demands).
The location of a fleet's base will determine what sea
areas it can patrol, since each flotilla's mission range is
limited and cannot be exceeded except when rebasing. You
will need to assign the fleet a new home base (using the
rebasing order described in a subsection below) to allow it
to operate in some of the more remote areas you may want
it to patrol. A fleet may enter any friendly port (a province
that lacks a base) to load and unload troops: or to avoid
an enemy: but it cannot take on supplies or be repaired
or refitted there. The combination of the above rules can
lead to a very common player error: simply moving a fleet
to a different port or base will not rebase it. You must
either return to your home base or use the rebasing order
to assign it to a new naval base.
Naval Supply
Hearts of Iron II assumes that there are support vessels
that are able to re-provision a navy while they are con-
ducting their missions: even if they are in the middle of
the ocean: but the base must have access to supplies
and fuel in order to do so. Simply assigning a fleet to a
base does not guarantee the fleet's supply. A base acts
as the last link in a supply chain that must stretch unbro-
ken from a depot that contains the necessary supplies
and oil. If you play the USA you will find that this is a
common oversight: particularly in the Pacific, where you
will have fleets operating many miles from the continental
USA. Don't forget to set up a convoy to ferry supplies and
oil to each of the depots you will need to create in each
of the many islands where you base your fleets. You will
need quite a few convoys to do this and may find it easier
to set up a few larger depots somewhere close (possibly
Hawaii, Midway, Wake Island, etc.) and then have smaller
convoys ship goods from there to the various forward naval
bases you are using in the theatre. Remember, too, that
allies may occasionally rebase their vessels to your naval
port facilities and that they will be expecting you to meet
their provisioning needs.
The mission range value prohibits you from ordering
a fleet to perform duties beyond its maximum range;
however it will allow you to move your fleets within that
range restriction even if you are out of supplies and oil
(the assumption being that at least a bare minimum of
food and fuel can be scrounged to keep them moving).
Operating without the full availability of supplies and fuel
will greatly reduce your movement speed and will cause
your fleet to become disorganised very quickly. Engaging
enemy vessels when you are operating in under-supplied
conditions is a very good way to suffer rapid defeat and
lose a lot of ships.
Deploying Flotillas from the
Force Pool
Deployment of flotillas is done in the same way that land
divisions are deployed: except that the allowable locations
will, of course, be limited to provinces with naval bases.
You may attach a flotilla to an existing fleet or deploy it to
a suitable province's naval base. The newly deployed flotilla
will use the base assignment of the fleet it has been added
to (or the base you deploy it to directly). Caution: Naval
vessels cannot use strategic redeployment to move to a
different theatre of operations, so choose your deployment
location carefully if you wish to avoid being forced to sail
half-way around the world to move into position.
Attaching/Detaching Carrier Air
Groups
Carrier Air Groups represent an air wing that has both
fighter and torpedo plane capabilities and is able to base
itself on an aircraft carrier. These are effectively treated
as a "naval brigade" and are attached and detached in
exactly the same way that land brigades are attached to
divisions. A CAG may only be attached to an aircraft carrier
and a carrier may only act as a base for one CAG at a time.
Without a CAG, a carrier effectively loses its military value.
Since CAGs are aircraft, a carrier's effectiveness is also
greatly hampered by adverse weather conditions.
Reinforcement, Upgrading and
Obsolescence
As mentioned above, a fleet may be resupplied during its
missions, but it must return to its assigned naval base and
remain there for a while if you wish to repair any damage
that your flotillas have sustained and to upgrade to any
new technologies. This requires an appropriate allocation
of IC (to reinforcements and upgrades respectively) and
time. The amount of time required to complete these tasks
depends on the size of the base and on the number of
flotillas that are based there (even if some of them aren't
in port at the moment).
New technologies will begin to make improved ship designs available; and unlike land units, your existing naval
vessels cannot be upgraded. You may wish to keep an
obsolescent flotilla in active service for a while: particularly
if it is highly experienced: or you may decide to mothball
(disband) it to recoup some of the manpower for your national pool and free up resources for newer, more advanced
vessels. CAG's are treated as an air force unit for upgrade
purposes, and are able to be fully upgraded, given enough
time and resources.
Selecting and Combining -
Flotillas
Flotillas are assembled into fleets (and removed from them)
79
80
Page 48

in the same way that land forces are managed, but you
should take particular care to ensure that you include at
least one screening vessel for each capital ship in a fleet to
avoid incurring combat penalties. The varieties of options
for selecting fleets are virtually identical as well, except
that the listing of all national fleets is accessed through
the Naval Forces Hot Button. When you click on the button,
the display in the information panel will change to provide
a complete listing of all naval bases that currently belong
to your nation. You will see two numbers beside the base's
name: the base size and its current operational size. Below
each base's name you will see a list of the fleets that are
currently assigned to use this as their home port, as well
as their size and a graphic representation of their current
strength and organisation. Just because a fleet is listed
under a base does not mean that it is currently located
there. It only indicates that this is their home naval base
assignment. Allied naval bases will not normally appear on
this display, however if you have assigned one of your fleets
to an allied base then it will be included in the list until such
time as you reassign the fleet to a different location.
If a fleet is carrying out a mission, then its mission box
wilt provide a summary of the mission and a tooltip will give
you additional details of the mission's parameters. You may
click directly on the fleet name to select the fleet and center
it on the map, or you may click on the mission box to assign
it a mission directly from this interface. If a small red combat icon appears in this listing, then your fleet is engaged
in battle (and thus might be worth having a look at, if you
weren't previously aware of this).
Basic Naval Movement
Basic naval movement is done using the
normal game controls, but in some ways
is even easier since sea zones (the naval
equivalent of a province) aren't subject
to national control. Right-clicking in any
sea zone will order your fleet to move
there and attempt to engage any enemy
vessels it encounters. If you move multiple sea zones then your fleet will also
engage any enemies it meets along the
way. There are only two limitations on sea
movement:
Fleet range: You cannot exceed the
maximum range of the "worst" flotilla in
the fleet. Hol2 makes this simple to avoid
by prohibiting any order that would take
a fleet out of range of its assigned base.
When a fleet is selected, you will see a
tooltip for each sea zone that displays the
fleet's range and the distance from the
fleet's naval base to that sea zone.
Denied Zones: There are several sea zones that represent
very narrow straits, canals, or channels. Enemy control of
the adjacent province will deny your fleet passage through
that zone. These include the Panama Canal, Suez Canal,
Kiel Canal and Sea of Marmara.
If you wish to move your fleet to a province that contains
a port or a naval base, then simply right click on the province. Because there are a several possible options in the
way that a fleet and province can "interact," you will see
an abbreviated list of these orders. Select the move option
to enter the harbour. Even if the province contains a naval
base, this will not rebase your fleets; nor will a base or a
port that you move to be able to offer you fuel or supplies
when you arrive. Ports cannot meet the needs of military
vessels and you must use the rebase option to allow a naval
base to offer you supply.
As you will soon discover (in the Naval Combat section),
opposing fleets do not necessarily engage when they are
both in the same sea zone. Each zone represents a fairly
large expanse of water and it is entirely possible that two
fleets may simply fail to detect one another's presence
unless they have excellent spotting capabilities. Even when
you have spotted an enemy fleet, it is rarely safe to assume
that you've sighted its entire complement of ships.
Rebasing a Fleet
You may assign a fleet to a different naval base by issuing it
an order to rebase. If you select a fleet and then right-click
on a province that contains a naval base (it must belong to
you or to an ally) then the rebase option
will appear as one of the options in the
context-sensitive list of possible naval
missions. A second method of rebasing
is click on a fleet's mission box in any
interface that displays a mission. Select
Rebase from the list of available missions and then select the base you wish
to assign from a new list that is displayed
of all possible bases. Be careful when
rebasing (using either method) because
the maximum range is ignored for this
order. Fleets will proceed to their new
base, but if this exceeds double their
range value then: depending on the total
distance travelled: they may suffer a very
large temporary organisation loss. While
it is moving to this new distant base your
fleet could be attacked by enemy ves-
sels or aircraft (which could easily have
disastrous results).
Basic Naval Combat
Overview
When two (or more) enemy fleets are located in the same
sea zone, there is a possibility that a naval battle will ensue. Whether a battle occurs or not depends on whether
one of the fleets successfully spots the other and is currently under orders to engage. Like land combats, naval
combats represent prolonged engagements that can take
some time to resolve. The method of resolving a battle is
a bit different, however, due to naval combat's positioning
and range concepts. As I mentioned above, both sides are
treated as "attackers" when determining the maximum
fleet size before there are overstacking effects (see the
naval leadership section above). The underlying concepts
of attack values, defence values, and combat efficiencies
are the same, but the targeting is also handled somewhat
differently (and more selectively).
When the fleets first spot one another there will be some
distance of ocean lying between them and each fleet will
have a starting positioning value. Think of this as being
an indication of how well a ship is positioned relative to
an enemy in order to bring its main weapons to bear on
a target. As the battle progresses, the fleets will begin to
close the distance between each other and try to manoeu-
vre for better positioning: something that will be seriously
hampered for a side that lacks sufficient screening vessels.
Each ship will begin to fire at the enemy's vessels once the
distance that separates it from them is within the range of
the ship's weapons. Carriers will usually begin their attacks
first, since their weapons (airplanes) have the greatest
range; then the battleships will open fire, and then cruisers,
and so on. At some point one side will be either sunk or will
wish to disengage: though it will take some time to disen-
gage, during which further damage is likely to be inflicted
on the retreating fleet. Let's look at the details.
Visibility
Before combat can begin a fleet needs to first detect the
enemy fleet. When (or whether) this happens is determined
by the visibility and detection abilities of each flotilla, is
further modified by their officers' abilities, and can then
be reduced by weather conditions. A "spot check" is made
periodically until one fleet detects the other, or one of them
leaves the sea zone. If a spot check succeeds and the fleet
has orders to engage, an enemy combat will begin.
Initiation of Naval Combat
When combat is first initiated, the positioning of each fleet
will be determined as well as the distance between them.
This depends largely on the officer's skills and on the naval
doctrines that have been researched: though weather will
also have an impact. You will be notified that combat has
begun and the fleet information panel will display a combat
quick-view that is similar to the one used for land combats.
The same quick view will also be added to Active Combats
Hot Button listing. Clicking on the quick view will display
the detailed battle view.
Naval Combat Resolution
At first glance, the naval details will look very similar to the
land combat version: and in some respects it is. You will
see the flags of the nations involved, the leader portraits
(with detailed tooltip), the battle status bar and conditions
icons, and a complete list of units involved on both sides
(also with detailed tooltip). What won't look familiar is the
range and positioning information displayed between the
two flags, and the very small targeting icons that appears
just below the strength and organisation bars of each unit:
each of which is an essential component of naval combat
(and there are additional vital details in each one of these
items' tooltips).
Naval battles progress on an hourly basis. Each hour
both commanders will try to manoeuvre their fleets into a
more favourable position and will try to attain what each
feels is the optimum range to achieve maximum effect.
Their skill level and rank will have a great impact on their
ability to achieve this, as will having a sufficient number of
screening vessels to protect the capital ships.
The starting distance between the two fleets will usually
(though not always) be greater than the maximum range of
any of their vessels' attacks capabilities, so the first hours
of "combat" are likely to be a succession of manoeuvres
with the gap between the fleets slowly closing. You can tell
at a glance whether a flotilla is in range yet by looking at
the small targeting icon. If it has a red bar through it then
the range is still too great for it to begin attacking any vessels that the fleet has spotted. You can find out the unit's
maximum targeting range by looking at the tooltip that is
displayed when you hover your mouse over the icon. The
same tooltip will also indicate the flotilla's current attack
and defence effectiveness.
The commanding officer will decide upon an overall fleet
range that he feels is the optimum separation based on
his fleet composition and what he knows of the enemy's
fleet composition. He will try to close to this distance and
then maintain it throughout the course of the battle. This
will be nearly impossible if he has insufficient screening
vessels to work with. At the same time, he will attempt to
manoeuvre his ships into an optimum attack and defence
position. The current distance between the two fleets is
displayed in the center of the small black box between
the national flags. If you hover your mouse over this value,
a tooltip will report the separation that each commander
considers to be his fleet's optimum.
81
82
Page 49

Each fleet's current positioning is displayed on either side of the distance value.
Positioning will become very critical once
the fleets have come within range of one
another, so you may want to watch both
values as the fleets begin to close to get
a sense of the two commanders' relative
skill levels as they vie for an advantage.
The positioning values will change by
smalt amounts each hour and if you find
that yours remains much lower than your
enemy's then you may want to break off
the combat to avoid sustaining heavy losses.
Once a ship is in range of an enemy fleet, it will attempt,
to fire upon the enemy vessels. Its ability to do this suc-
cessfully is based on the positioning of its fleet (not the
enemy fleet). If your positioning is 20%, for example, then
you will have a 20% base chance of successfully hitting
an enemy vessel. If you miss by a very large margin you
might even accidentally hit one of your own fleet's flotillas,
so the higher your positioning the better. The number of
attacks each flotilla may make each hour is determined by
its naval attack value.
If a flotilla succeeds in scoring a hit, then its target will
be determined. The likelihood that it will target a screening
class of ship is based on the enemy's positioning so, for
example, if your opponent's positioning is 30% then there's
a 30% chance that you will target a screening vessel and
a 70% chance that you will target a core vessel. There are
a couple exceptions to this rule, though: carriers are very
much more likely to target a core vessel; submarines are
also very likely to target a core vessel and may decide to
withhold fire if they aren't able to do so (until a submarine
fires, it remains hidden and will be very hard to spot); and
screening vessels will always target an enemy submarine
if they are aware of its existence. Screens that are part of
a very well-positioned fleet also have a chance, each hour,
of detecting a hidden submarine. Even if a hit is scored,
it will still be necessary to determine whether (and how
much) damage is done to the enemy vessel (based on
the same methods used in land combat). Once a ship has
targeted a vessel, it is very likely to continue firing at it until
it has been destroyed; although there is a possibility that
is will switch targets: particularly if a "preferred" target
presents itself.
As the battle progresses, the flotillas will gradually suffer
loss of organization or be sunk. When the organisation of a
flotilla drops low enough, the flotilla will break and attempt
to withdraw. Just as in land combat, a fleet that has more
than 50% of its flotillas in retreat will break off combat
automatically and attempt to sail out of range. Enemy
ships will continue to fire on them until
the maximum range of all enemy ships
has been exceeded, at which point the
combat will reach its conclusion. You may,
if you wish, manually order your fleet to
break away at any time by selecting it and
ordering it out of the sea zone.
Time of Day and
Weather Effects on
Naval Combat
Just as with land combat, night time
hours and poor weather conditions are
generally very bad for naval combat. Positioning will be
greatly affected and there is a significant reduction in the
chance of inflicting damage. Unlike land combat, however,
the defender and attacker suffer equal penalties, unless
one has a technological advantage over the other in this
area. Carriers will be highly ineffective in poor weather,
since their CAG's are severely penalised in these con-
ditions. In very adverse weather (storms and blizzards),
CAGs cannot fly at all.
Out-Of-Supply Effects on Naval
Combat
If a fleet is operating without supplies or fuel, then it would
be well advised to turn tail and run as soon as it becomes
aware of an enemy presence in a sea zone. If it stays and
fights, it is probable that it will suffer a particularly hum-
bling defeat and will be very lucky if it manages to escape
in anything larger than a life boat.
Force Composition Effects
I have stressed the importance of having a good balance
of screening vessels to support your capital ships, but I
will do so again. You will receive a positioning penalty un-
less you have at least one screen for each capital ship.
Your capital ships will also be unable to maintain a safe
engagement distance from the enemy, and are thus far
more likely to be sunk.
End of Naval Combat
Once the fleets have disengaged from combat, the vanquished fleet must retreat from the sea zone. This will be
to a randomly selected adjacent zone that is usually (but
not always) in the general direction of its base. If there is
a friendly port or naval base adjacent to the sea zone then
it will retreat there instead. The victor of the combat may
elect to stay in the sea zone or continue whatever mission
it was engaged in when "interrupted" by the combat. Unlike land combat, sea zones are not assigned control so
no territory changes hands.
Enemy Occupation of a Port or
Base
If an enemy land force manages to gain control of a naval
base or port that contains a fleet, then that fleet will be
scuttled. Any fleets that are assigned to a naval base that is
captured will be un-based and will rapidly lose supply and
. organisation until they have been given a new, valid base
assignment. Your personnel will sabotage the naval base
before fleeing, though, so it will take a little while before the
enemy will be able to make effective use of that facility.
Naval Orders
Overview
When a fleet isn't in port, it is fairly rare that you won't want
it to be doing something: anything: rather than just sitting
around in a sea zone. Submarine packs will probably be
used to disrupt enemy convoys and transport movement,
surface fleets will want to continually patrol certain portions of the ocean.. .and for a player with a large number of
fleets, this would quickly become a nightmare of repetitive
mouse-clicking. Heart of Iron II allows you to do this if you
really want to, but it also includes a number of extremely
useful naval missions in the Naval Orders interface that
allow you to automate such routine chores. There are also
some specialised naval orders that usually require an ele-
ment of either timing or special targeting: for instance a
carrier may send its planes to attack a province's naval
port facilities or its air bases and you will need to identify
which of these is your intended target. The Naval Orders
interface allows you to do this as well.
In most cases, you will issue "standing orders" to carry
out a mission for a specified period of time, under certain
conditions, and in a particular part of the world's oceans
or possibly against a target province's assets or forces.
Once you've issued the orders, you can largely leave those
fleets to their own devices: even if they run into an enemy force: which goes a long way toward eliminating the
micromanagement and complexity that would otherwise
plague a naval nation. An additional reduction to potential
micromanagement is the assumption of additional support
vessels that will resupply and refuel fleets that are on an
assigned patrol. Rather than forcing you to keep track of
the distance each fleet has travelled and then return it
to base, naval missions are restricted to targets that are
within the mission range of the fleet and they will only need
to return to base for repairs or upgrades (or for a faster rate
of organisation recovery).
All of the naval orders may be accessed by selecting the
fleet and then either holding down the Ctrl key and rightclicking on the target or by clicking in the naval orders box
in the information panel. The second of those methods will
display every naval mission that is available (some may
not be, due to fleet composition or insufficiently advanced
technology levels) and will usually require you to specify a
target zone, area or region from a list of valid potential targets, After selecting the target, the Naval Orders interface
will appear. If you use the "Ctrl and right-click" method to
issue an order, then only context-sensitive missions will
be displayed and the Naval Orders interface will appear
as soon as you have chosen the mission (since you have
already identified the target by clicking on it).
Naval Orders Interface
This interface is used to set specific mission parameters
whenever you issue a naval order. We will see an identical set of controls when we take a look at the possible
Air Orders.
The top portion of the interface has three toggle buttons
on the left (day/night/both) that are used to specify when a
fleet should initiate combat after detecting an enemy. You
should probably keep this set at "day" for most naval com-
bat missions (unless you have advanced night technolo-
gies), since most vessels perform very poorly in the dark.
To the right of these buttons, you will see a slider where
you may set the condition parameters for the mission. This
is used to establish a minimum level of strength that each
flotilla in the fleet must maintain in order for the mission
to continue. If any flotilla's strength level falls below this
value, then the fleet will return to its naval base for a period
of time: until all flotillas in the fleet have been repaired to a
suitable strength level: and then resume its mission.
The lower half of the interface allows you to adjust the
mission's time parameters, possibly delaying the date that
it should begin the mission and setting its duration by as-
signing an end date. The default values are usually for
the mission to begin immediately and to continue for one
month, but these can be changed to whatever values you
desire by clicking the appropriate "+" and "-" buttons. If
you have recently set parameters for another fleet's mission, then the default settings will be identical for the next
fleet's mission. Once the mission is complete, the fleet
will return to its assigned naval base to await new orders.
If you use Hol2's default message settings, you will be
given a mission status report when it arrives back at its
base, informing you that it is ready for new orders. This
message has a "select" button that allows you to quickly
select the fleet and issue it a new mission.
Rebase
I've already described this order, so I'll simply remind
you that moving a fleet to a new naval base or to a port
will not reassign it to be based there. You must use the
rebase order.
83
84
Page 50

Move
This order is one of the available alternatives when "target-
ing" a province. This instructs the fleet to enter the port
or naval base of that province, but since this is not its
assigned naval base it will not take on any fuel or supplies.
The move order is most often used to send transports
to a port to pick up a land division for a subsequent sea
transport or amphibious assault mission.
Attack
Although this isn't a mission that you can select from the
menu, this is the mission type that will be displayed when
you use a simple right-click to move a fleet to a new sea
zone. The fleet will move to that sea zone via the most
direct path and will engage any enemy vessels that it encounters there. Because it is steaming at full speed to its
destination it is quite unlikely that it will spot an enemy
fleet during its voyage, but it will engage any that it manages to detect.
Naval Interdiction
This is a naval order that instructs your fleet to patrol the
sea zones within a particular area. It will randomly move
through those zones and will initiate an attack against any
enemy surface fleets it encounters. The chances of it spotting a fleet are slightly less than the chances of it doing so
when stationary in a single sea zone, however this allows
you use a single fleet to cover a somewhat larger area of
water (but you are less likely to spot any submarines).
Naval Combat Patrol
This order is nearly identical to the naval interdiction order;
however, a naval combat patrol is designed to cover a much
larger section of the ocean. It will move randomly through
the sea zones in a specified region, but because it is cover-
ing a much larger region it is somewhat more likely that
an enemy fleet: and particularly enemy submarines: could
escape its detection or slip by it unobserved.
Convoy Raiding
This order instructs your fleet to patrol a sea area with the
primary purpose of disrupting enemy commercial shipping. Any enemy convoys that trace their path through
a sea zone that is currently patrolled by a navy with this
mission must attempt to slip past the patrol. There is a
reasonable chance that at least some of them will fail to
do so and will be sunk: although if they are accompanied
by escorts then their chances increase significantly. These
limited actions are not displayed as battles in the game, but
are reflected by a reduction in the convoy efficiency and
trade efficiency values that are displayed in the Production
Folder. A country that relies on foreign shipments and trade
to obtain the necessary resources is in great danger from
this action: as are any troops that depend on those convoys
for their supplies. Submarines are particularly effective at
this mission and should be feared by all merchant vessels.
Caution though: A fleet that engages in this order will not
attempt to detect an enemy's naval forces.
Anti-Submarine Warfare (ASW)
Since enemy submarines pose a terrible threat to your sup-
plies, you may wish to issue a fleet an order to patrol a sea
area and Specifically look for submarines. This mission is
ideally suited to light cruisers and destroyers, which are
particularly good at locating and engaging submarines,
though this reduces the likelihood that they will spot and
engage an enemy surface fleet.
Shore Bombardment
Shore bombardment is an order that can only be given to a
fleet that contains at least one capital ship (heavy cruiser
or larger), and is only used to support invasions. The fleet
will be instructed to train its main batteries on the specified
province during an amphibious assault, which will result in
the enemy receiving a penalty to both attack and defence
effectiveness during the battle. This can help to considerably offset your landing force's invasion penalties.
Carrier Port Strike
This order may only be given to a fleet that has at least
one carrier with a CAG attachment. The carrier's airplanes
will be ordered to attack an enemy port or naval base and
attempt to sink any ships that are docked there (but they
usually lack the armaments to damage the base itself).
Enemy fighters and AA defences in the vicinity are likely
to take exception to this action; and this mission cannot
be flown at all if the carrier is located in a sea zone that is
experiencing very adverse weather conditions.
Carrier Airbase Strike
This is also an order that may only be given to a fleet that
has a CAG attached to a carrier. This order is the same
as the Air Mission "Runway Cratering" (explained in the
Air Combat section below) and is an attack against a
province's air base in an attempt to reduce its operational
strength. Again, keep an eye on the weather, and on any
enemy AA and fighters in the vicinity.
Sea Transport
A sea transport mission is used to transport land forces
to a friendly port once they have been loaded on board
the vessels. They will unload automatically upon reaching
their destination.
Amphibious Assault
This mission is used to instruct transport vessels to take
the land forces they are carrying to a sea zone just off
an enemy province, in preparation for an invasion. When
the transports arrive in position, the land
troops will then automatically begin their
invasion of that province, To invade a
province from the sea, the province must
have a suitable area for the troops to land:
which is indicated by the presence of a
beach icon on the province's shoreline. It
is not possible to invade a province that
does not have a beach. If you prefer, you
may load troops on the transport and
then manually position the vessels in the
adjacent sea zone. Then click the unload
button on the transport and then select
the province you wish your land forces
to invade.
Amphibious assaults are conducted in
the same manner that normal land battles are handled, however there are significant penalties for the invading forces
(although considerably less for marines)
and it is a province's coastal fortifications
rather than its land fortifications that will
assist the defending troops in repelling
the attack. Be aware that launching a
successful large scale naval invasion
is extremely difficult since each division participating in
the invasion will increase the total amount of the invasion penalty. If the beach is well defended, then you will
probably need to conduct a very strong aerial and naval
bombardment campaign in support.
Advanced Naval Strategies
It is arguable that Hearts of Iron II's greatest combat emphasis is on land battles; however you should not discount
the importance of your navies. Land troops are nearly
useless without supply, and in many cases this supply
must be traced across water and is in jeopardy of enemy
anti-convoy activities. Those same actions will also cut of
sources of natural resources and greatly reduce trade ef-
ficiency, resulting in a shortage of the materials needed to
keep your industrial base operating at maximum capacity.
Tactically, therefore, it is prudent to patrol your convoy
routes and dispatch any enemy vessels you may find there;
and also to employ this technique to weaken your enemy
before attacking,
There will be instances where your land combats take
place in coastal provinces with beaches. Don't underes-
timate the potential impact of launching an amphibious
assault as part of that combat, and supporting it with naval
bombardment: particularly if you can arrange for a large
number of capital ships to shell the enemy position. The ex-
tra shore bombardment and envelopment penalties to the
enemy land force's effectiveness could
easily swing the battle in your favour.
Naval invasion is a risky affair, although
one that may reap great rewards if the
location and timing are well chosen. Re-
member that land force encirclement will
cause great losses to enemy organisation
so it may be worth considering a naval
"flanking" manoeuvre to get in behind an
enemy defensive line rather than trying
to assault it directly. If you must make a
direct assault: usually because the target
is an island with no alternate means of
approach: it is better to be patient if possible. Try blockading the target for a while
with a fleet devoted to destroying convoys.
The enemy supply depot will probably dis-
solve fairly quickly and his organisation
with then begin to drop. Then, after a little preliminary aerial bombardment, your
forces can move in with support from your
capital ships' shore bombardment.
Just as land divisions may block a
handful of narrow straits, naval vessels
are able to prevent land forces from
crossing them as well. Don't miss this great opportunity
to hold an enemy at bay (particularly in the Pacific island
chains) until you are able to assemble the necessary forces
to begin making direct attacks against those pockets of
resistance or launch a full scale invasion of your own.
The Air Forces
Overview
Air Combat in Hearts of Iron II is a blend of the land combat
and naval combat systems. Air forces are assigned missions to patrol the skies for enemy aircraft, or to conduct
extended bombing campaigns against enemy ground forces, installations and infrastructure. Air transports: normally
used by your paratroopers: can also be used for temporary air supply of encircled forces if absolutely necessary.
These missions are assigned through an order interface
that is virtually identical to the one we just looked at for
naval orders. Combat between aircraft, though, is handled
much more like land combat, but with only a limited number
of combat rounds being possible due to limitations in fuel.
Never underestimate the devastation that will occur if you
lose control of the skies.
Air forces, like navies, must be assigned a base from
which to operate and may only land in provinces that have
such a base. Like naval bases, air bases have limited available space to handle a flow of aircraft, so exceeding this
85
86
Page 51

limitation will greatly reduce the flow of supplies and fuel,
and will significantly increase the length of time required
to complete repairs and technological upgrades.
Air Force Types
Air forces are made up of individual air wings, each of
which represents a number of similar-type airplanes that
have an area of expertise. The Air Combat equivalent of a
division is called an Air Wing (or wing). Groupings of wings
are usually called squadrons or sometimes air groups or air
forces. The precise wording will vary somewhat from nation
to nation, but their function is identical. For the purposes of
this section I will use the term "squadron" when referring
to any combat group of air wings.
Air wing types can be categorised by their size, range
and general function. Strategic bombers are the largest
of these and are relatively slow-moving aircraft that can
carry very large bomb loads over fairly great distances.
Their missions are usually flown against large fixed em-
placements such as infrastructure, factories, fortifications
and other such targets that require the impact of larger
payloads and have no ability to avoid being hit. Tactical
bombers are somewhat smaller and more manoeuvrable,
specialising in precise targeting which is much more effective against moving targets (land forces). Close Air Support
craft are inexpensive, very short range dive bombers which
can inflict very high casualty levels on ground forces, but
are unable to defend themselves particularly well against
either ground defences or other aircraft. Naval Torpedo
Attack Planes are land-based aircraft that are specially
outfitted with munitions suited to attacks against naval
vessels and convoys.
The smallest, fastest and most manoeuvrable aircraft
available fall under three different general types: fighters, interceptors and escorts. Escorts are the slowest of
the three types, but they also have the greatest range, so
they are suited to the task of escorting bombers. More
than anything their function is to tie up enemy fighters
and distract ground defences, allowing the bombers they
escort to succeed with their missions. Interceptors are the
bomber pilot's worst nightmare. This airplane has excellent
weaponry and speed for bringing down the larger aircraft,
but is limited by its range and manoeuvrability. The fighter
is something of a multi-role aircraft. It has slightly greater
range and slightly better attack capabilities than an interceptor but is much more likely to be shot down itself.
It can also participate in limited attacks against ground
and naval targets, but is unable to stand much in the way
of return fire.
There is one last class of "wings" that are ordered from
the Air Wing menu of the production folder. These are
the flying bombs and flying rockets that historically began
with the German V1 and V2 and would eventually (in the
post war years) lead to ICBMs. All of these are Included
in Hol2's technology tree (since some war technology is
deemed possible, although difficult to attain) and are handled through the Air Combat interface.
Air Wing Details
The sprites for squadrons are only displayed on the main
map when they are in flight, so they can be a little harder to
locate and select until you are used to handling them. You
can easily spot an air base with a squadron In it because it
will be blue in colour instead of grey. You will also see the
squadron listed in the information panel when you select
a province that contains one. The Air Forces Hot Button
displays a complete list of all squadrons and their current
base assignments and is probably the fastest and most
convenient method of rapid selection.
You can access the Air Wing Details information panel
by selecting any squadron and then clicking on one of the
wings. As with land and naval divisions, the data displayed
in the information panel will reflect any technological upgrades that this unit has received, so it may vary slightly
between otherwise identical units. I will not provide a detailed description of any data listed here that is equivalent
to a land or naval division's statistics.
Air Wing Name: Assigned automatically, you may change
this to anything you like.
Air Wing Type: Below a representative picture of this
class of airplane you will see a description of its type and
specific model.
Commander: The commanding officer of the squadron this
wing has been assigned to. You can click anywhere on this
bar to return to the squadron details,
Squadron Strength and Organisation: A graphic display of
the percentage strength (orange bar) and the percentage
organization (green bar) of the entire squadron. An expand-
ing tooltip gives precise details of these values.
Squadron Name, Size and Order Box: The name and the
number of wings in the squadron. If the squadron is cur-
rently executing orders, then a summary will be listed in the
order box. You may assign a new order by clicking on the
box and selecting a new mission from the scrollable list..
Location Details: The current location of this air wing.
Strength: The wing's current combat strength.
Organisation: The wing's current organisation.
Morale: The wing's current morale.
Strategic Attack: This is the attack value against strategic
targets such as infrastructure, factories, fortifications and
other provincial assets.
Soft Attack: The attack value used when conducting tacti-
cal attacks against soft land targets.
Hard Attack: The attack value used when conducting tacti-
cal attacks against hard land targets.
Naval Attack: The attack value when this wing attacks
a naval target.
Air Attack: This is the attack value used when the target
is another aircraft.
Surface Defence: This is the defence value used when
being fired upon by AA, land forces or naval forces.
Air Defence: This defence value is used when the wing is
being attacked by another aircraft.
Maximum Speed: The wing's maximum speed.
Supply Consumption: The daily supplies required.
Fuel Consumption: This wing's daily oil consumption rate
when in flight. It will use no oil when on the ground.
Range: The wing's maximum range is the maximum distance it can travel from its base. When combining wings
into squadrons, the wing with the shortest range will determine the squadron's range.
Sea Detection Capability: The wing's ability to detect
naval vessels.
Air Detection Capability: The wing's ability to detect other
aircraft in the vicinity.
Experience: This wing's current experience level.
Effective Supply Efficiency: The wing's current ESE
value.
Attach/Detach Nuke: This button will only appear once
you have achieved a technology level that allows you to
deploy a nuclear bomb on a rocket or strategic bomber.
Clicking it will ask you to confirm that you wish to remove
a bomb from your nation's nuclear arsenal. If you confirm
this, the next mission flown by that unit will include the
option to deliver the bomb against the target. You may
later detach it and return it to your arsenal, if you wish.
The button will be greyed out unless the wing is able to
carry a nuclear bomb.
Disband Button: Click this button to disband the wing and
recoup some of its manpower,
Squadron Details
The Squadron Details information panel is nearly identical
to the one used for naval commands, including the squad-
ron's current base assignment and operational range. The
set of primary statistics listed for each wing are (in order
from left to right) the values for air attack, naval attack,
soft attack, hard attack, strategic attack, air defence, and
surface defence.
Leadership
Officers perform a similar function for squadrons as they do
for both ground and naval forces. Each leader in your officer
pool will have the ability to control between one and twelve
wings at a time: depending on his rank: without incurring
a penalty for overstacking. Air officer ranks are similar to
their land force counterparts, with a Maj. General being
able to command 1 wing, a Lt. General may command up
to 3 wings, an Air General may command up to 9 wings,
and an Air Marshal may command as many as 12 wings.
Since air combat, like naval combat, occurs in a single air
zone, the stacking, skill and trait effects are handled in
exactly the same way as they are used in naval combat.
Defending officers' leadership ratings do not stack to allow
larger numbers of wings since, for these purposes, there
is no defender.
Leader Traits
Air officers: may also possess a special trait that will improve the combat abilities of the squadrons they command,
although these are forfeited if the leader is overstacked.
Tank Buster: This officer excels at commanding squadrons
that primarily attack tactical land targets such as tanks,
mechanised infantry and motorised Infantry.
Superior Tactician: This officer is a combat ace, inspiring his squadrons to exceptional performance in air-to-air
combat.
Spotter: An officer with this trait can spot a needle in
a haystack, He is particularly good at aerial reconnaissance, reporting enemy force strengths with remarkable
accuracy.
Carpet Bomber: Ideally suited to command squadrons of
strategic bombers, this officer has a proven record of effective attacks against large provincial structures such as
factories and infrastructure.
Night Flyer: An officer with this ability will negate many
of the normal penalties for flying night missions against
targets of all sorts.
Fleet Destroyer: The tricky timing of pulling out of a steep
attack and releasing a torpedo takes a special sort of skill...
and this officer certainly has it. Naval vessels beware!
Air Bases
The rules that governing air movement and basing are very
similar to those of the naval bases. Each squadron must
be assigned to an air base and may only land in a province
that contains one (you may use either your own air bases
or those of an ally), If you station more wings at a base
than the size of the base allows, then you will suffer from
reduced rates of strength and organisation recovery, and it
will take longer to upgrade your aircraft to the latest technology. Airfields may be damaged by enemy aerial attacks,
with runways becoming too cratered to accommodate the
normal allotment of aircraft (although this can be repaired
over time by allocating IC to reinforcement).
You can review the size and operational status of a base
by selecting a province that contains a base and then
hovering your mouse over the airbase symbol. A tooltip
will inform you of the maximum base size and its current
effective size (which will be lower than the total base size
87
Page 52

if its runways are cratered). The tooltip does not indicate
how many wings are currently assigned to the base, however, so it may be more convenient to use the Air Force
Hot Button to view a list of all bases and the number of
squadrons that are stationed in each. New air bases and
enlargements to existing bases are most easily ordered by
right-clicking on the province and using the Quick Build
production order method.
There is one other very special condition that relates to
air bases: if the province in which an air base is located
is experiencing a storm or a blizzard, then any squadrons
that are based there will be grounded until the weather
has dissipated.
When conducting normal missions, a squadron is limited
by its maximum range. A squadron is able to exceed this
range in one special instance only: rebasing. A squadron may rebase to any other base that you control in the
world and this is handled in exactly the same way that
long-distance naval rebasing is done, except that it must
be ordered through the orders box. The route selected may
only pass through air zones above friendly provinces or sea
zones and once you exceed your normal flight range your
organisation will drop to nearly zero, so if you are attacked
during the balance of your flight you will almost certainly be
torn to shreds. (Note: this long-distance rebasing actually
represents a combination of air movement and commercial shipments of partially-disassembled aircraft so it's not
quite as strange as It seems.)
Air Wing Deployment, Supply,
Reinforcement and Upgrades.
Air wings are deployed from the force pool in the same
manner as other forces are deployed (and they must be
assigned to an air base). They also draw their supply from
their assigned air base just as naval flotillas do. If the base
cannot be kept supplied, then your wings will suffer from
these shortages, although they are still able to scrape up
barely enough fuel to get into the air. Organisation will drop
rapidly and they should be rebased immediately, if possible,
since they will be almost useless for combat purposes.
Being out of supply also reduces the wing's rate of
organisation recovery and upgrade, which will be further
hampered if there are too many wings assigned to a base
that isn't large enough to support them. Unlike naval forces,
however, air wings may be fully upgraded to the most recent technologies if sufficient IC is allocated to upgrades.
This process will remove the old aircraft from the wing and
replace them with more recent models without losing the
experience of the air crews. You will normally only need to
consider disbanding a wing if you feel that it is no longer
useful and is tying up transport capacity that could be
better used elsewhere.
Combining Air Wings Into
Squadrons
Air wings are combined and divided into squadrons in exactly the same manner as land and sea units are controlled.
If there is a land unit present in the province you will find
it easiest to click on the "stack" to cycle through it until an
air unit is selected. Then hold down the shift key and select
the locations other wings or drag a box around them since
the "held" selection of the first unit will filter all subsequent
selections to air units only. You shouldn't need to do this
very often as the vast majority of the orders you give to
your wings will be missions.
Basic Air Movement
The air system is somewhat different than the land and
naval system, because there is no "basic" movement order
for a wing. If you right-click on a province the Air Orders
menu will appear automatically and the items listed are
context-sensitive to the location you clicked on and to the
type of wings that are in the squadron. This might take a
little getting used to, but is due to the basing restriction:
all movement must begin and end at a wing's assigned
air base.
There is one very interesting distinction that is worth
keeping in mind when you are issuing orders to squadrons:
most of these are missions which will be flown against a
target area (a series of provinces within an area of the
map). The specific province chosen by your wing for each
sortie will be determined automatically based on what your
Chief of the Air Force (a.k.a. your computer) determines is
the most beneficial target to select that will maximise the
damage, minimise the losses, and still obey your orders. If
you use the order box or the "Ctrl and right-click" method
of setting the order then he will be in complete control
of the operational assignments. If you simply right click
directly on a possible target province and then select the
mission from the drop-down orders list, the first target
he will order the squadron to strike will be against that
province, regardless of whether he happens to feel that
it is a sortie that is likely to have a favourable outcome.
No matter what method you use, your squadron will never
target your own forces.
Air Combat and Air
Missions
Air orders and combat are integral to one another, since
the type of mission will determine the overall type of com-
bat. The general mechanism of combat is the same as the
one used in land combat, however each air mission has a
specific type of "target" for its attack. I will describe each
mission in turn, indicating the purpose of the attack type
and the type of damage it inflicts.
Orders are issued by either right-clicking on a province
to bring up a context-sensitive list of possible missions, or
you may select a squadron and then click on its order box
in the information panel to issue a new order. If you use the
latter method you will usually be asked to specify a location
(province or area) as the target for your mission. The list of
locations will be filtered (and colour-coded) by the range
of the selected squadron. You may select the target area
(or occasionally a target province) from the list, or you may
click on the map to assign it.
Air missions are flown in a series of sorties. Each sortie
may attack any target that is within the range of the squadron, but all combats are limited to a five hour duration,
after which the air unit will begin to run low on fuel and be
forced to break off the attack. Be careful when assigning
a mission to a squadron since an order will be available for
that squadron as long at least one wing in the squadron
has a value greater than zero in the primary attack type
prerequisite. Many fighters, for instance, have at least a
small tactical attack capability but are generally very inef-
fective at conducting ground attacks against even the most
vulnerable targets. Make sure you select an appropriate
type of mission to assign to a squadron.
Beware of enemy AA batteries. Any time that a squadron
enters the air zone above a province with AA batteries they
will be subjected to a burst of fire as the wings pass: even
if the wings are merely flying to a more distant target or
are returning from it. This will usually result in a limited
amount of strength loss and somewhat more organisation
loss. If you are attacking targets in a province that contains
AA the batteries will continue to fire during each and every
round of the combat, which can add up to quite a lot of
damage over time. Fortunately air missions use the same
mission parameters interface that we saw when we looked
at naval missions, so you can specify a minimum strength
level below which the next sortie will be delayed until the
wing has been suitably reinforced.
Air Combat
Three different types of aerial combat are likely to occur
during your game: air-to-air, air-to-ground, and air-to-ship.
All three use the standard combat mechanism that we've
seen before, with the appropriate attack and defence
values being determined by the type of target selected.
Example: if a squadron spots and attacks a fleet, the
squadron's wings will use their naval attack and surface
defence values (the surface defence value is used when
both naval and land forces return fire), while the flotillas will
use their air attack and air defence values. Air combats are
limited to a maximum of five hours, after which the wings
must return to base. When air squadrons attack ground
forces there is one very important issue relating to the
ground forces' ability to return fire. Unlike land battles, land
forces do not gain the additive leadership ratings and HQ
bonuses for stacking, and the overstacking penalties are
calculated somewhat differently. The rating of the highest
ranking officer (exclusive of any HQ modifier) determines
the maximum number of divisions that can defend against
an air attack without penalty. If the total number of divisions exceeds this, then the air attack and air defence
values of every division in the battle will be penalised by
2% for each overstacked division. Example: a field marshal
with 20 divisions including an HQ would not be overstacked
in a land combat; however if he is attacked from the air
then he is only able to command 12 divisions. This would
result in him being overstacked by 8 divisions, thus all 20
divisions would suffer a 16% penalty to their air attack and
air defence values during combat.
Air Superiority Mission
This mission is the standard fare of a fighter squadron. This
instructs your squadron to patrol the skies within the target
area (usually 2-5 provinces) and to attack any enemy fighters or bombers they encounter. The attack and defence
values used are the air values and will reduce both the
strength and organisation of the enemy aircraft,
Ground Attack Mission
This is a standard assignment for tactical bombers and
close air support, though any airplane with a hard or soft
attack value may attempt this mission. Your squadron will
attack any enemy ground forces within the assigned area,
selecting their target provinces automatically based on their
perceived priority, and the mission's objective is to damage
or destroy as many units as possible (thus this attack will
primarily affect the enemy's strength, not his organisation).
Generally any enemy troops that are attacking your own will
be assigned the highest priority. The attack values used
are the wings' hard and soft attacks, and the defenders
will return fire with their air values. Air wings use their air
defence values to avoid being shot by the land units, while
the land forces use their air defence values.
Interdiction Mission
This order is very similar to the ground attack; however its
primary objective is to disrupt the enemy's organisation
rather than to inflict casualties. This, too, is an area-based
attack that is suited to squadrons that contain a large
number of tactical and close air support wings.
Naval Strike Mission
This order instructs your squadron to patrol an area of water
and to attack any enemy vessels it can spot. As you would
expect, it is the wings' naval attack values that are used
for this type of mission, so torpedo planes are the optimum
group to handle this assignment.
89
90
Page 53

Port Strike Mission
This is an order that can be given to any wing that has
either a naval attack value or a strategic attack value and
will strike a port or naval base that you specify. Torpedo
planes {or any other wing with a naval attack value) will attempt to sink any vessels that are currently in that harbour,
thus using the naval attack value of the wings. Units with
strategic attack values: usually the larger bombers: will
target a naval base's facilities (if the port contains a naval
base) but will not attack the naval vessels. If a wing has
both a naval attack and a strategic attack value, the type of
target will be determined randomly for each shot,
Bomb Convoys Mission
This is an aerial version of the naval convoy raiding order.
Your naval bombers wilt patrol an area of the ocean and
attack any enemy convoys that are traversing the area
(therefore this uses naval attack values). While these will
not be visible as battles on the screen, the convoys will be
persistently targeted, thus reducing the enemy's supply
efficiency and trade efficiency. Your torpedo planes will
gradually sustain some damage if the convoys are supported by escorts, so you may need to periodically reinforce
a squadron that is conducting these raids over an extended
period of time.
Strategic Bombardment Mission
As its name suggests, this mission is usually assigned
to strategic bombers. Your bombers will be given the as-
signment of trying to damage enemy infrastructure and
factories within the targeted area, although enemy AA
batteries may take their toll on your planes: and enemy
fighters may be on the look-out for you. Any wing in the
squadron that has no strategic attack value will not participate in the attack and will act as escorts against enemy
fighters instead.
Logistical Strike Mission
This is a second type of strategic bombing sortie, however
the goal of this mission is to directly affect the supply
efficiency of any enemy troops stationed in the area that
is targeted. The specific provinces that are attacked are
based on a priority selection system similar to the one used
by your tactical bombers. As was the case with strategic
bombardment, any wing without a strategic attack value
will perform the function of escort for your bombers.
Runway Cratering Mission
The third strategic attack targets a specific enemy air base
and attempts to inflict as much damage to it as possible.
You should expect enemy fighters to scramble to intercept:
and AA will also attempt to destroy you: so it is wise to
send some escorts along to assist you.
Installation Strike Mission
The final strategic mission type is an area-based mission
that will specifically target enemy installations such as
AA batteries, radar installations, rocket test facilities and
nuclear reactors. This can be a very dangerous and costly
mission since it places your bombers in-direct conflict with
the enemy batteries, but a series of successful missions
may bear fruit by greatly reducing the defensiveness of
troops or the disruptive effects of AA fire when you return
to attack the province's other assets,
Airborne Assault Mission
Airborne assaults are very risky manoeuvres, since your
paratroopers will be placed in great jeopardy when they
land. As mentioned earlier, the loading of air transport is
handled in the same way as naval transport, except that
only paratrooper divisions may make this attack. Once
loaded, select the province you wish to drop them into
and they will carry out their mission. Since transports don't
have any attack capabilities and only limited defence abilities, you will almost certainly want to assign some fighters
to protect them. We discussed the effects of an airborne
assault in some detail in the land combat section, so I
will simply refresh your memory by reminding you that
paratroopers present an additional angle of attack for
envelopment and are able to ignore any land or coastal
fortifications.
Air Supply Mission
This is not an attack mission, but rather a temporary means
of supplying encircled troops. Only transport aircraft may
be used to ship supplies in this manner, and they are gener-
ally very inefficient in doing so. Each transport can carry
only a small amount of fuel and supplies (and will also
consume its own share of both while conducting this mission), so it should be done only in extreme emergencies.
If circumstances force you to do this, select the target
province that you would like to transport the materials to
and they will fly there and establish a new depot (or add
to an existing one) before returning back to their base. You
should expect enemy aircraft to try to intercept you to
prevent you from making your delivery.
Rebase
This order reassigns a squadron to a new air base. As
mentioned above, the base does not need to be within the
squadron's range. A squadron will move to the new base
location via a route that does not enter enemy or neutral
air space, but the squadron could be intercepted while it
is moving to its new location.
Air Combat Modifiers
Overview
Air combats are resolved in much the same way that land
combats are resolved: and the combat details screen is
virtually identical: however there is a time limit of five
hours placed on the combat, due to the range limitations
of the aircraft. Once they have exhausted their limit they
will return to their base to recuperate for the next sortie.
Remember that a squadron cannot capture a province
and can only soften up the defences to assist advancing
land forces.
Visibility
Just as naval vessels can be difficult to spot and intercept,
the same is true of aircraft. Just because two opposing
squadrons occupy the same air space does not mean
that they will necessarily engage one another. Visibility
is greatly affected by weather and time of day. The same
is true of squadrons that have a mission to attack naval
vessels, thus they will not be able to carry out their attack
unless they successfully detect their target.
Weather and Time of Day Effects
on Air Combat
If a force manages to spot an enemy in adverse condi-
tions, it will probably enjoy quite an advantage of surprise,
however these conditions are generally very poor (or nearly
Impossible) for air-to-air combat and will usually end fairly
inconclusively. Remember, too, that squadrons are unable
to fly sorties if their air base is currently under storm or
blizzard conditions. There are some technologies that will
improve your night-fighting capabilities and that might give
you a significant advantage when tangling with the enemy
at night. Otherwise, I would recommend that you use the
mission parameters interface's feature to limit sorties to
be conducted during daylight hours.
Targeting
While intercepting and engaging enemy aircraft is difficult
in adverse weather conditions or at night, it is equally disruptive to aircraft that are conducting bombing missions
against provincial or naval targets, since they will have
great difficulty locating and effectively attacking their objectives. Until you have researched advanced night bombing and radar technologies, you would be well advised to
restrict your campaigns to the daylight hours. No matter
how advanced your technology, bombing missions carried
out in bad weather will rarely be worth the cost of the fuel
needed to reach the target.
Occupation of an Air Base
Occupying an enemy province that contains an air base will
allow you to use that base for your own squadrons once the
inevitable sabotage damage has been repaired. If you find
that one of your own provinces that contain an air base is
under attack, you should take steps to find a safer home
for any aircraft you might have stationed there unless you
are absolutely assured of victory. Wings that are still on the
ground when a base is captured are destroyed.
Advanced Air Strategies
Overview
As you read through the various air missions, you will un-
doubtedly have realised the tremendous effect that your air
force can have on your chances of success. I will outline
a few of these in this section to add extra emphasis to
their importance.
The Air Force as a Leveller of
Nations
While large-scale civilian bombardment is not modeled
in Hearts of Iron II, the impact of a relentless bombing
campaign cannot be overstated. Destroying an enemy's
infrastructure and industrial capacity with strategic bombing can bring him to his knees by striking directly at his
economy and transport capacity. While damage sustained
by these targets may be repaired, it requires a time and
IC investment that can cripple other aspects of his over-
all strategy. Look for areas that have very large factory
density: and preferably as little defence as possible: or
conduct a preliminary logistical bombing campaign on your
enemy's front line positions to make it painful for him to
supply his forces in offensives and hamper his defences.
The reduced ESE alone could easily result in significant
attrition, movement and combat penalties.
It goes without saying that you should protect your own
industry and forces as much as possible. If you have the
ability to concentrate your industry in a remote and fairly
inaccessible location, you should probably attempt to do
so; and regardless of where you place your factories, you
should take care to protect them with AA batteries and
possibly even a squadron or two of interceptors that conduct regular air superiority patrols.
The Air Force as a Hammer
Similarly, the air force has an amazing ability to soften up
enemy defences. Used against province defences or enemy
armies, this can make all the difference between the success and failure of a ground offensive. While you might
expect a direct tactical ground attack to be an excellent
solution to winning a campaign, it is often the disruptive
effects of other forms of bombing that will net you the
greatest gains if you have a fairly decent ground force to
follow up behind your assault. Reducing an enemy's supply
efficiency and organisation will usually result in far more
91
92
Page 54

victories than a direct strike to inflict casualties. Remember,
too, that air attacks against very large ground forces tend
to be fairly successful and low risk, since air-to-ground
combat does not allow defending officers to stack their
leadership abilities or to benefit from the presence of an
HQ division. Watch out for any supporting interceptors,
though, and keep in mind that the enemy may have AA
brigades attached to some of his divisions in addition to
any provincial AA batteries that you can see.
The Air Force Used Indirectly
Just because aerial attacks on convoys don't result in excit-
ing battle screens does not meant that you should overlook
their potential role in disrupting enemy supply and trade efficiency. A large-scale campaign can nearly halt the flow of
vital natural resources or make it very difficult to get fresh
food and fuel to remote forces. This indirect approach to
inflicting damage can reap great rewards if it is maintained
relentlessly over extended periods of time.
Although air supply is horribly expensive and inefficient,
it may be able to make the difference between a force be-
ing able to hold out long enough for land forces to break
through in relief or watching entire divisions be obliterated
before your eyes. Don't rely on this technique, but don't
overlook it either.
The Air Force on Defence
Given the above points, it should be obvious that losing
control of the skies can have a devastating effect. It will
reduce your ability to soften up the enemy: thus making all
of your land battles much longer and more costly affairs:
but will also expose you to a wide range of potentially
crippling blows to your industry and supply. There is a
temptation to deploy all of your fighters near the front lines,
but you should consider saving some for the less glorious
role of protecting your provincial assets from an enemy's
long range bomber attacks.
Flying Bombs and Rocket Bombs
Flying bombs and rocket bombs are treated as single-use
air wings. These unmanned arsenals can deliver a large
amount of damage to any strategic target in a province.
They are not immune to interception or AA batteries, but
it is rare that one may be utterly destroyed before it is
able to deliver at least a partial blow to a target. When
you are ready to use one, simply select the unit and then
target it exactly the same way that you would target any
other air mission. Since they only have a strategic attack
value, you will see an abbreviated list of relevant missions.
Select the mission you want and click OK to confirm the
order. The unit will then fly to its target and conduct its
attack, Once this is over, the bomb will be removed from
your arsenal (and the map), so if these weapons are part
of your intended ongoing strategy you will need to order a
steady stream of production.
The Bomb
The last subject we'll look at in this section (and In the
manual) is the one that finally brought an end to nearly
seven years of bloody global conflict, and has haunted
international politics ever since. Atomic weaponry may
be developed by persistently conducting research in the
Nuclear technology path of the industry category. This will
eventually allow you to build a nuclear reactor which will
operate as a test and research facility to speed future
research and, later, for manufacturing the essential, deadly
components of your nuclear arsenal.
Once you have completed the Nuclear Power advance,
switch to the Secret Weapons category and begin work on
a nuclear waste bomb project. Once that is complete, you
will be able to place a production order to increase the size
of your reactor to level 6: the minimum level required to
manufacture a bomb. As soon as this enlargement is complete, the reactor will begin to build an atomic bomb which,
when ready, will be placed in your national nuclear arsenal,
which is shown on the top bar. Each reactor that you build
that is at least this size will contribute to your arsenal.
A nuclear bomb may be prepared for delivery by attaching it to a strategic bomber or a sufficiently advanced flying
rocket (a ballistic missile or ICBM). Once the technology
is available, if you select one of these wings and look at
the details in the information panel you will see a "nuclear"
button at the bottom that will appear beside the disband
button, Clicking this will remove one bomb from your national arsenal and deploy it on that wing. If you wish, you
may later unload the bomb if you have not yet used it.
If you decide to unleash the bomb's fearsome power,
select a squadron on which the bomb is loaded and then
right click on your intended target. Select the nuclear attack mission from the orders options and then confirm that
this is really what you intend to do. As long as the wing that
carries the bomb survives whatever defences the enemy is
able to muster, it will detonate. Not surprisingly, the effects
are devastating.. .but they also have one additional side
effect: the victory point value of the targeted province will
drop: most likely to zero, but in a few instances it may still
retain a value of 1.
93
94
Page 55

Introduction
Installation
System Requirements
Installation Procedure
Keeping Up To Date
Getting Started
Launching the Game
For Beginning Players
For Hoi Players... What's New?
Key Concepts
Victory
The Engine of War
Natural Resources
Industrial Capacity
IC Allocation, Production and
Gearing Bonuses
Infrastructure
Domestic Policies and Government
Dissent and Partisans
Diplomacy and Trade
Technology
Preparation and Support of the Military
Supply, Outfitting and Transport Capaci
Organisation and Entrenchment
Command, Leadership and Experience
Defences and Fortifications
Naval and Air Basing
Weather, Terrain and Time of Day
Combat
Movement is Attack for Land Battles
Orders
Air and Naval Combat
The Fog of War
Strategic Redeployment and the Force
Pool
The Main Menu
Single Player Games
Selecting a Scenario or Save Game
Selecting a Nation
Changing the Game Options
Launching the Game
Multiplayer Games
Tutorials
Credits / Exit
The General Interface
The Top Bar
Status Overview
The Folder Tabs
The Date/Pause Button
The Game Management Menu Button
Message Boxes
Events
Tool Tips
Right Click Menus
The Main Map Folder
Overview
Navigating The Main Map
Provinces
Province Name
Province Ownership and Control
Victory Point Value
Terrain
Weather
Provincial Borders and Crossing Points
Provincial Assets
Context-sensitive Information
Quick Build Buttons
Right-Click Province Menu
The Hot Buttons
The Province Hot Button
The Land Forces Hot Button
The Air Forces Hot Button
The Naval Forces Hot Button
The Active Combats Hot Button
The Force Pool Hot Button
The Mini Map and Mapmode Buttons
Terrain Mapmode
Political Mapmode
Weather Mapmode
Economic Mapmode
Supply Mapmode
Partisan Mapmode
Region and Area Mapmode
Diplomatic Mapmode
Victory Points Mapmode
The History Log
The Technology Folder
Overview
Selecting Research Teams
Research Projects
Selecting and Assigning a Project
1
2
Cancelling and Reassigning a Project
Implementing New Technology
Technology Summary
The Production Folder
Overview
Production Orders and the Production
Queue
Placing a Production Order
Production Runs
The Gearing Bonus
Building Provincial Assets and Using th
"Quick Orders" Buttons
The Production Queue
Deploying Unassigned Provincial Asset
Deploying Military Forces and Rockets
National Resources
Oil
Metal
Energy
Rare Materials
Supplies
Money
Manpower
Partisan and Occupation Effects on
Resources and Industrial Capacity
Industrial Capacity (IC) and
IC Allocation
Consumer Goods
Production
Supplies
Reinforcements
Upgrades
National Transport Capacity (TC)
International Trade Summary
Convoys
The Convoy Management and Convoy
Details Interfaces
Resource Depots
The Diplomacy Folder
General Overview
Domestic Policy
Overview
The Democratic: Authoritarian Slider
The Political Left: Political Right Slider
The Open Society: Closed Society Slide
The Free Market: Central Planning
Slider
The Standing Army: Drafted Army Slide
The Hawk Lobby: Dove Lobby Slider
The Interventionism: Isolationism Slide
Government
Cabinet and Ministers
Appointment of Ministers
The Head of State
The Head of Government
The Foreign Minister
The Minister of Armament
The Minister of Security
The Head of Military Intelligence
The Chief of Staff
The Chief of the Army
The Chief of the Navy
The Chief of the Air Force
Other Nations' Domestic Policies and
Ministers
Dissent and Partisans
Diplomacy: International Affairs
Overview
Other Nations' Domestic Policies and
Cabinets
National Relationships
Belligerence
The Three Factions: The Allies, The Ax
and The Comintern
Spheres of Influence
Initiating Diplomacy
Offer Trade Agreement
Cancel Trade Agreement
Open Negotiations
Influence Nation
Alliances: Offer Alliance/Bring to Allian
Join Alliance
Leave Alliance
Send Expeditionary Force
Assume Military Control/Relinquish
Military Control
Guarantee Independence
Offer Non-Aggression Pact
Cancel Non-Aggression Pact
Ask for Military Access/ Cancel Militar
Access/Revoke Military Access
Liberate Nation
Release Puppet
Demand Territory
Coup Nation
Declare War
Sue for Peace
Annex Nation
The Statistics Folder
Overview
Selecting and Using a Statistics SubFolder
Combat: The Art Of War
General Overview
The Land Forces
Overview of Force Structure and Field
Commands
Division Types
Brigade Types
Division Details
Field Command Details
Field Officers
Field Officer Traits
Selecting and Organising Field
Commands
Shortcut Keys
Deploying Divisions from the Force
Pool
Attaching Brigades
Transport Capacity and Supply
Efficiency
Attrition
Supply Chains
Overseas Supply
Air Supply
Reinforcement
Upgrading
Disband
Basic Army Movement
Transporting Troops on Ships
Strategic Redeployment
Transporting Paratroopers
Basic Land Combat
Overview
Entrenchment: Digging In
Province Defensive Structures
Initiating Basic Land Combat
Timing Your Attack
Basic Combat Resolution
Exchanging Fire
Modifiers That Affect Battle
Combat Events
End of Combat
Occupation of Enemy Territory
More Complex Land Combat
Overview
Multiple Attacking or Defending Field
Commands
Envelopment and Multiple-Front
Attacks
Attacking an Attacker
Special Orders: Support Attack
Special Orders: Support Defence
Special Orders: Reserves
Special Orders: Anti-Partisan Duty
Special Forces: Garrisons
Special Forces: Marines
Special Forces: Paratroopers
Special Forces: Mountaineers
Special Forces: HQ Divisions
Advanced Land Combats
Overview
Troops Mix, Terrain and Weather
Softening Up the Enemy
Staggered Attack Strategy
Advanced Command Organisation: HQ
and. Leadership
Broad Front Defensive Counter-Attack
Initiatives
Envelopment, Encirclement, and
Supply
The Naval Forces
Introduction
Flotilla Types
Carrier Air Group
Flotilla Details
Fleet Details
Leadership
Leader Traits
Ports and Naval Bases
Naval Supply
Deploying Flotillas from the Force Pool
Attaching/Detaching Carrier Air Groups
Reinforcement, Upgrading and
Obsolescence
Selecting and Combining Flotillas
Basic Naval Movement
Rebasing a Fleet
Basic Naval Combat
Overview
Visibility
Initiation of Naval Combat
Naval Combat Resolution
Time of Day and Weather Effects on Na
Combat
Out-Of-Supply Effects on Naval
Combat
Force Composition Effects
End of Naval Combat
Enemy Occupation of a Port or Base
Naval Orders
Overview
Naval Orders Interface
Rebase
Anti-Submarine Warfare (ASW)
Shore Bombardment
Carrier Port Strike
Carrier Airbase Strike
Sea Transport
Amphibious Assault
Advanced Naval Strategies
The Air Forces
Overview
Air Force Types
Air Wing Details
Squadron Details
Leadership
Leader Traits
Air Bases
Air Wing Deployment, Supply,
Reinforcement and Upgrades.
Combining Air Wings Into Squadrons
Basic Air Movement
Air Combat and Air Missions
Air Combat
Air Superiority Mission
Ground Attack Mission
Interdiction Mission
Naval Strike Mission
Port Strike Mission
Bomb Convoys Mission
Strategic Bombardment Mission
Logistical Strike Mission
Runway Cratering Mission
Installation Strike Mission
Airborne Assault Mission
Air Supply Mission
Rebase
Air Combat Modifiers
Overview
Visibility
Weather and Time of Day Effects on Ai
Combat
Targeting
Occupation of an Air Base
Advanced Air Strategies
Overview
The Air Force as a Leveller of Nations
The Air Force as a Hammer
The Air Force Used Indirectly
The Air Force on Defence
Flying Bombs and Rocket Bombs
The Bomb
95
96
 Loading...