


™

™
TABLE OF CONTENTS
INTRODUCTION . . . . . . . . . . . . . . . . 4
THE LEXICON (GAME MECHANICS) . . 6
How to Install and Start Playing . . . . . . . . . . 6 How to Get Help . . . . . . . . . . . . . . . . . . . . . 7 Starting Out . . . . . . . . . . . . . . . . . . . . . . . . 8 Character Generation . . . . . . . . . . . . . . . . . . 9 The Interface . . . . . . . . . . . . . . . . . . . . . . . 13 Multiplayer . . . . . . . . . . . . . . . . . . . . . . . . . 34
THE SPINE OF THE WORLD
(WORLD INFORMATION) . . . . . . . . 41
The Spine of the World . . . . . . . . . . . . . . . . 42
Faerun and the North . . . . . . . . . . . . . . . . . 42
What Has Come Before . . . . . . . . . . . . . . . . 55
Introduction to the AD&D Rules . . . . . . . . . 55
Character Actions . . . . . . . . . . . . . . . . . . . . 56
Combat . . . . . . . . . . . . . . . . . . . . . . . . . . . 57
Casting Spells . . . . . . . . . . . . . . . . . . . . . . 60
Saving Throws . . . . . . . . . . . . . . . . . . . . . . 60
Morale . . . . . . . . . . . . . . . . . . . . . . . . . . . . 61
Combat Effects and Recovery . . . . . . . . . . . 61
Experience and Gaining Levels . . . . . . . . . . 63
Attributes . . . . . . . . . . . . . . . . . . . . . . . . . 64
Magic and the Spell System . . . . . . . . . . . . 74
Spells . . . . . . . . . . . . . . . . . . . . . . . . . . . . 76
Mage . . . . . . . . . . . . . . . . . . . . . . . . . . 76
Priest . . . . . . . . . . . . . . . . . . . . . . . . .105
2 |
ICEWIND DALE™ |

Outfitting Yourself . . . . . . . . . . . . . . . . . . |
124 |
Arming Yourself . . . . . . . . . . . . . . . . . . . |
126 |
Magical Items and Treasure . . . . . . . . . . . |
128 |
Tables . . . . . . . . . . . . . . . . . . . . . . . . . . . 132
CREDITS . . . . . . . . . . . . . . . . . . . . 141 INDEX . . . . . . . . . . . . . . . . . . . . . . 146 LIMITED WARRANTY . . . . . . . . . . 150 INTERPLAY WEBSITE . . . . . . . . . . 152
™
BLACK ISLE STUDIOS |
3 |

™
INTRODUCTION
Many tales have reached me of the south, and of the cities and caravans and wonders of Baldur’s Gate and the lands
around. These things no longer carry the wonder they once did since my journey north, to the Ten Towns. The accomplishments of men seem insignificant here, where all falls within the shadow of the Spine of the World.
There are many tales of the Spine of the World; there are times when I feel it is more a force than a range of mountains — one needs only look at them to feel their majesty and their presence. Since my wounding on the battlefield in service to Tempus, I have had much time to reflect on virtues and what is noble in life — in fact, I have little else to occupy my time than write since taking my position here in Easthaven. Thus, it has to come to pass that within this volume are my writings on Easthaven, Kuldahar, and the lands around. One of the local leaders, Hrothgar, has gifted me with some of his tales and advice, and I have taken some of his quotes to fill the pages of this volume
— not all, for were I to record all he says, his ramblings would fill another volume. Nonetheless, there is the wisdom of the battlefield in him, and his words ring true.
Heed this volume; know its ways of battle and spells, tactics and movement. What you read here may keep you from death’s door. The path to victory lies in knowing your strengths . . . and using them as a hammer against your enemies.
If you are deserving, then may Veiros’ flank be facing you when the battle is joined.
— Everard, Trusted Sword, Order of the Broken Blade
Easthaven, Eleint, 1281 DR, the Year of the Cold Soul
4 |
ICEWIND DALE™ |

BALDUR’S GATE & ICEWIND DALE
When Baldur’s Gate was released in 1998, it was met with tremendous critical acclaim. It was obvious that many role-players enjoyed adventuring in the world of the Forgotten Realms, and now, Black Isle Studios brings you another title set in the same world, a computer role-playing experience you may undertake either alone or with your friends. Icewind Dale is an epic that puts the fate of the Forgotten Realms in your parties’ hands — countless people depend on you, and it’ll only be through your blood and perseverance that the Forgotten Realms may be saved.
Icewind Dale uses Bioware’s Infinity engine, and many of the mechanics described in this manual will be familiar to those who have played Baldur’s Gate and Tales of the Sword Coast. If you wish to refresh your knowledge of the interface, feel free to thumb through the manual and read what you wish. The notable differences are the spells section, the world background, and the small listing of arcane items at the end.
HOW TO USE THIS MANUAL
This manual is intended as a reference guide for Icewind Dale, not something that needs to be read from cover to cover. Refer to it when you need to, or if you are confused about a certain aspect of gameplay. (“What is THACO? Anyone?”) Several tables and an index have been provided at the end of the book to allow you to get the information you need at a glance, and a quick reference card has been included in the game box.
This manual is divided into two parts. One is the “Lexicon,” which gives you the information you need on character creation, interface, and running multiplayer games in Icewind Dale. It’s the nuts and bolts of the game, and it has everything you need to get up and running. The second part, “The Spine of the World,” gives you information on the area of Icewind Dale itself, the Forgotten Realms world, and definitions of certain aspects of the Advanced Dungeons & Dragons rules, which may be new to some players.
So without further ado, wrap your cloak around you and prepare for your journey into the north...
™
BLACK ISLE STUDIOS |
5 |

™
THE LEXICON
HOW TO INSTALL AND START PLAYING
To install Icewind Dale, first insert the CD-ROM labeled Icewind Dale Disc 1 into your CD-ROM drive and follow the on-screen instructions. If your Autorun is not enabled, click on the icon representing your CD-ROM Drive under ‘My Computer’ from your desktop. This will bring up a listing of the files on Icewind Dale Disc 1. Find AUTORUN.EXE and double click to launch in install application.
Press the ‘Install’ button to begin installing.
After installing the game, other options will be available on the launch menu:
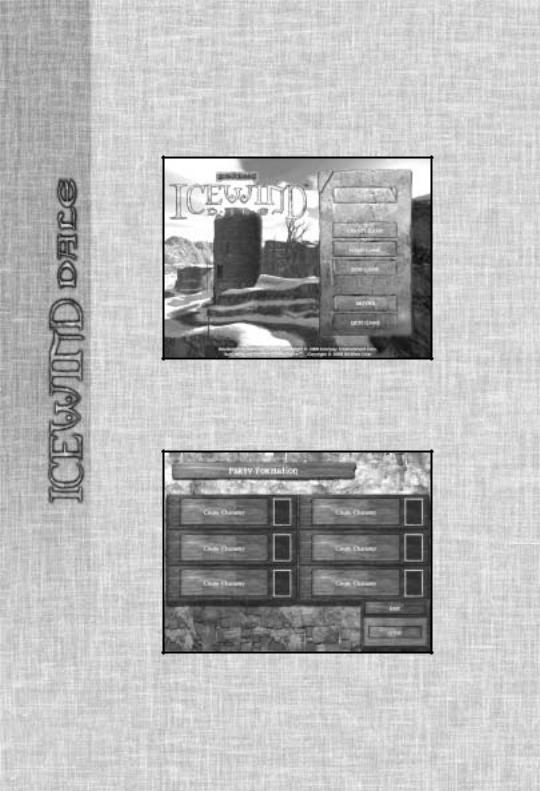
Play. After you have everything set, click on the Play button to begin playing. After viewing the logo and introduction movies, select “Create Game” to go directly into Character Creation and begin your adventure in the Spine of the World!
To start playing again later, select the Icewind Dale application from the Black Isle Studios program group in your Start Menu.
View Readme. The readme file contains last minute information and changes that could not be printed in this manual. Please take the time to view the readme file if you are having any problems with this product.
Uninstall. When you’re ready, the Uninstall option will remove Icewind Dale from your computer, except your saved games.
Exit will close the launch window.
6 |
ICEWIND DALE™ |

HOW TO GET HELP
TROUBLESHOOTING DOCUMENTS ONLINE!
Interplay Entertainment Corp. Technical Support now offers troubleshooting guides with complete installation and setup instructions as well as information that will help you overcome the most common difficulties. If you have access to the World Wide Web, you can find these at www.interplay.com/support/.
Here you will find troubleshooting information on as well as information on regular system maintenance and performance.
DirectX |
www.interplay.com/support/directx/ |
Joysticks |
www.interplay.com/support/joystick/ |
Modems and Networks |
www.interplay.com/support/modem/ |
(For game-specific information and additional troubleshooting, visit our main page at www.interplay.com)
If you have questions about the program, our Technical Support Department can help. Our web site contains up-to-date information on the most common difficulties with our products, and this information is the same as that used by our product support technicians. We keep the product support pages updated on a regular basis, so please check here first for no-wait solutions:
www.interplay.com/support/
If you are unable to find the information you need on our web site, please feel free to contact Technical Support via e-mail, phone, fax, or letter. Please be sure to include the following information in your e-mail message, fax, or letter:
•Title of Game
•Computer manufacturer
•Operating system (Windows 95, DOS 6.22, etc.)
•CPU type and speed in MHz
•Amount of RAM
•Sound card type and settings (address,
IRQ, DMA)
•Video card
•CD-ROM
•Mouse driver and version
•Joystick and game card (if any)
•A copy of the CONFIG.SYS and AUTOEXEC.BAT files from your hard drive
•A description of the problem you're having
If you need to talk to someone immediately, call us at (949) 553-6678 Monday through Friday between 8:00AM-5:45PM, Pacific Standard Time with 24 hours, 7 days a week support available through the use of our automated wizard. Please have the above information ready when you call. This will help us answer your question in the shortest possible time. When you call you will initially be connected with our automated wizard. For information pertaining to your specific title, press "1" on the main menu and listen carefully to all prompts. All titles are listed alphabetically. After you have selected your title, the most common difficulties will be listed. If the difficulty you are having is not listed or you need additional assistance, you may press "0" on your games main menu, and you will be transferred to a Technical Support representative. No hints or codes are available from this line.
Interplay Entertainment Corp. Support Fax: (949) 252-2820 Interplay Entertainment Corp. Technical Support
16815 Von Karman Avenue • Irvine, CA 92606
HOW TO REACH US ONLINE
INTERNET E-MAIL: support@interplay.com
WORLD WIDE WEB: www.interplay.com
FTP: ftp.interplay.com
™
BLACK ISLE STUDIOS |
7 |
STARTING OUT
You can play Icewind Dale either solo (creating your own party) or multiplayer (adventuring with one or more of your friends, with each of you controlling one or more characters). The following directions regarding character creation and interface apply equally to both types of games, but the means of starting a single-player game and a multi-player game differ.
™
Single Player Game: When you begin the game, you’ll be presented with the Main Menu screen. If you wish to start a single player game, make sure the Game Mode at the top of the screen is set to "Single Player" (it should be by default), then select "Create Game," and you’ll be taken to the Party Formation Screen.
From here, you will be presented with six empty character slots, each with a "Create Character" button. Each of these slots allows you to create a brandnew character by clicking on the button. To create a brand-new character, follow the steps listed in "Character Generation," below.
8 |
ICEWIND DALE™ |
Once you have created a character, the empty slot will be replaced with the character's name. You can remove a character by clicking on the name of the character, then on the 'Delete' button on the sub-menu that pops up. Doing so frees up the slot for another character.
If you wish to back out of this screen simply select 'Exit.' Click 'Done' when you have created all the characters for your party, and Icewind Dale will begin.
For more information on the Party Formation Screen, see page 30.
Multi-Player: For details on how to start a multiplayer game, refer to the Multiplayer section on page 34.
CHARACTER GENERATION
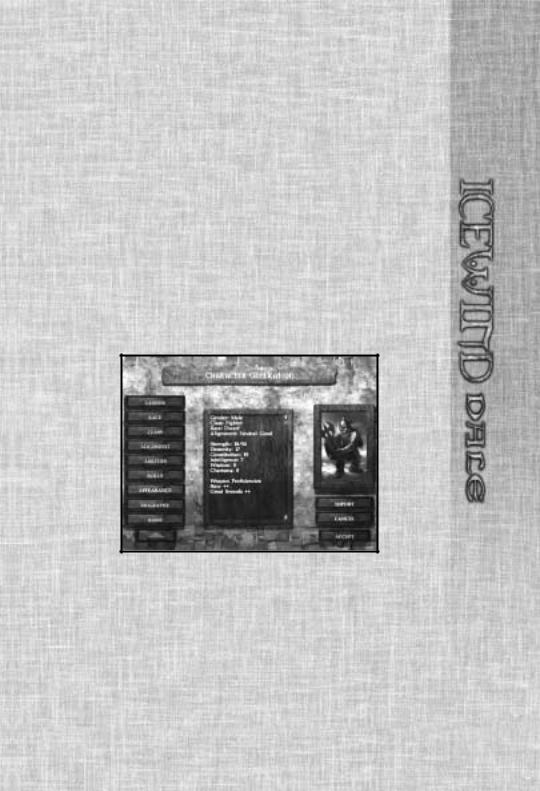
Your first task in Icewind Dale is to create your party. When you start the game, you’ll be presented with the following character creation screen. Follow the steps below; at any point in the process you may press “Cancel,” and you’ll be asked if you wish to return to the main game screen. If you find that you don’t like some of your choices and wish to ‘back up,’ simply press the “up” arrow at the bottom left of the screen.
™
GENDER
Choose your character’s sex, male or female. This has no effect on anything other than your portrait selection and your character’s model in the game. When you have chosen your gender, click on the ‘Done’ button in the bottom right of the screen. (You’ll need to select ‘Done’ after every choice you make below.)
PORTRAIT SELECTION
Choose your character’s portrait. If you want, you can import a customized picture of your character rather than use one of the ones provided. For
BLACK ISLE STUDIOS |
9 |

™
information on how to customize your character’s portrait, sounds, biography, and behavior, see the Character Record section on page 26.
RACE
Choose your character’s race, whether human, elf, half-elf, dwarf, gnome or halfling. The strengths and weaknesses of each one will be described in the text box beneath the choice. Your race may affect certain dialogue choices in the game as well as what class you can be, so choose carefully. If you wish further details on each race, see “Races,” on page 64.
CLASS
The classes and class combinations available to the race you have chosen will be highlighted. Choose the class you want from the list. The text box beneath the selection box contains descriptions of each class.
Multiclassed characters are available to non-humans only and share the traits and restrictions of both classes. Human characters can choose to become dual-class later in the game.
Dual-class characters start their adventuring life as one class and then later switch to a different class. When the character chooses to switch classes, the abilities of the former class are unavailable until the character surpasses the level of their former class with the level of their new class. At this time, the abilities of both classes are available at their current level. The character can never advance further in the former class. Only humans can be dualclassed characters.
If you wish further details on each class, see “Classes,” on page 65.
ABILITY SCORES
Six ability scores define your character: Strength (STR), Dexterity (DEX), Constitution (CON), Intelligence (INT), Wisdom (WIS),and Charisma (CHR). They are listed on this screen with the values the computer has randomly determined for your character (the values are calculated as if you rolled three 6-sided dice for each ability, then are adjusted, depending on your character’s race). Any class minimums will be automatically selected for the character for abilities that were too low (i.e. if the character needs a 17 charisma to be a paladin, and the computer rolled a 12, then the character will receive 17). You can subtract points from an ability to add to another; however, you cannot lower an ability below racial or class minimums. The text box on the bottom of the screen describes each ability. Reroll your abilities as many times as you want until you get a combination you like.
ALIGNMENT
Alignment defines how your character acts, whether in a lawful or chaotic manner, with good or evil intentions - depending on your choice of class,
10 |
ICEWIND DALE™ |
you may not be able to choose certain alignments (paladins must be lawful good, for example, and thieves may not be any lawful alignment, and so on). Each alignment has a caption describing it in detail. Read over each carefully before choosing.
Those who turn their back on their own natures harm themselves as well as others — if a ranger or paladin does not uphold their alignment, then they will lose the special abilities of their class.
- Everard
PROFICIENCIES
Every character has trained in a weapon during their life; your weapons of preference are listed on this screen, each one described in the text box on the bottom of the screen. Your class usually limits what weapons you can use and how skilled you can become with the weapons you have chosen (mages, for example, don’t have a great weapon selection because they’ve been nose deep in books most of their life). As long as their class permits use of the weapon, a character can wield a weapon that they lack proficiency for, but they will incur a penalty on all rolls with that weapon. While most classes only allow you to spend one point in each weapon, fighters, paladins, and rangers are allowed to spend more than one. Every point above one gives them a bonus to their attack rolls, damage rolls, and number of attacks per round.
Note, however, that only fighters can assign more than 2 points to a given proficiency. Rangers, paladins, and multi-classed fighters are all limited to 2 points. Dual class fighters may only add points above 2 if they are active in the fighter class.
THIEF ABILITIES
If your character is a thief (or a multiclassed character with thief abilities), you have four thief skills: Pickpocket, Open Locks, Find Traps and Stealth. Each one is described in the text box on the screen. You start out with 30 points to allocate on your thief skills, and 20 points every level after the first. Keep in mind that your Dexterity and your race will affect the starting levels in your thief skills.
SPELLS
If your character is a wizard, priest, or druid (or a multiclassed wizard, priest or druid), you can choose a selection of first level spells you can start the game with. Consult the Spells Section on page 76 if you want more details on the spells you’re choosing.
RACIAL ENEMY
Rangers have a “hated enemy,” a type of humanoid or creature they have dedicated their lives to stopping. When attacking this creature they get a special bonus. Rangers can pick from the following creatures: Cadaverous Undead (ghouls, zombies and wights), Giants, Goblins, Lizard Men, Orcs,
™
BLACK ISLE STUDIOS |
11 |

™
Salamanders (fire and frost), Skeletal Undead (skeletons, liches), Spectral Undead (ghosts, shadows, wraiths, specters), Spiders, Umber Hulks and Yuan-Ti.
APPEARANCE
Choose the colors that will appear on your character’s model. Although your hair and skin color are set in stone after you initially select them, the colors of your clothing can be changed on the inventory screen over the course of the game.
BIOGRAPHY
This button allows you to type in your character's personal biography. You can choose to leave it blank. The biography can be accessed in the game from the "Customize" button in the Character Record screen.
NAME
Last but not least, name your character. Either click on the box or start typing your name. When you’re done, press ‘ENTER,’ or click ‘Done.’
POLISHING OFF YOUR CHARACTER
If you’re satisfied with the character, click the button marked ‘Accept’ at the lower right of the screen. If not, just click on the “up” arrow and backtrack through your choices and make ones you’re happier with.
IMPORT
This button allows you to import characters you have already created into a new multiplayer or single-player game.
STARTING GOLD
Every character starts with a nest egg, though the value varies according to the character’s class. The gold piece ranges include:
Class |
Starting Gold |
Warrior |
50gp-200gp |
Wizard |
20gp-50gp |
Rogue |
20gp-120gp |
Priest |
30gp-180gp |
Multi-class characters use the class that gives them the best amount of gold (i.e., a mage/thief starts with 20gp-120gp).
12 |
ICEWIND DALE™ |

THE INTERFACE
This section describes all the functions of the windows, buttons and menus in the Icewind Dale interface. While many of the features are self-evident when you play, you may want to look over this section for some of the finer points of the interface to make exploring the Spine of the World a little easier.
MOUSE BUTTONS
LEFT-CLICK
Left-clicking (“L-clicking”) the mouse is the equivalent of an “action” button. It can perform the following functions:
Selects a character or a portrait (if a character or group was selected before, this character or group is unselected and the new character is selected instead).
If the SHIFT key is held down while L-clicking on various characters on the field or on the portraits, multiple characters are selected.
If the CONTROL key is held down while L-clicking on unselected characters, the characters will be added to the current character selection.
Double clicking on a portrait centers the view on that character.
Pushes buttons – selects action for the character: guard, talk, attack (click on weapon),etc.
Casts spells and uses items once they have been selected.
On terrain, walks selected character(s) to targeted location (note: use R-click to move in formation mode).
L-click and drag on terrain or portraits – selects multiple characters (creates draggable selection box).
Picks up items with current selected character(s). If more than one character is selected, the top-most portrait (the “leader”) walks over to and picks up the item.
L-click and drag on a portrait moves that portrait in the group order
– inserts into space between characters you move portrait to. On the clock pauses and unpauses the game.
RIGHT-CLICK
Right-clicking (“R-clicking”) the mouse has a variety of functions, usually related to information, canceling actions, and formation control. Rightclicking performs the following functions:
On a portrait brings up that character’s Inventory Screen.
On an item or spell on inventory or spell page brings up the appropriate Item or Spell properties screen.
™
BLACK ISLE STUDIOS |
13 |

™
14
Cancels current actions - either attacks or spell casting.
On a monster or non-player character (NPC) or after clicking on a selected character plays selection sound for that character or monster.
On terrain - selected character walks there in formation mode (R click and hold, and drag, rotates the formation if more than one character is selected).
On Quick Weapons, Quick Spells, Quick Items, and Group Formations slots allows for the configuration of the slot type. After R-clicking, the current options for that quick slot will appear. You can select one for the slot by L-clicking on it.
MOUSE MOVEMENT
The main game area will scroll up, down, left or right if you move the mouse to the edge of the screen, either in windowed or full screen mode. This also occurs if you use the number pad arrow keys.
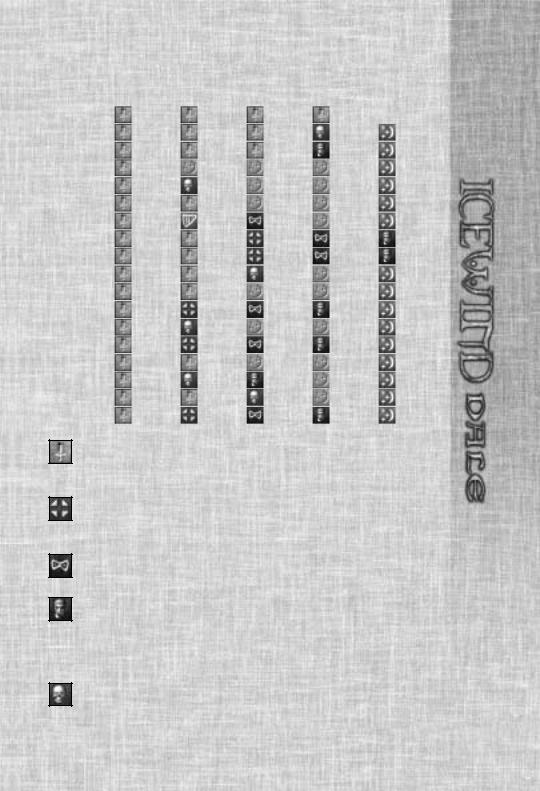
THE MAIN INTERFACE
LEFT MENU BUTTONS:
Game
Screen 
Maps
Journal 
Inventory
Character
Record 
Mage Spell
Book
Priest
Spell Scroll
Options 
Party 
Formation /
Character
Arbitration
Clock
|
|
|
|
RIGHT |
MAIN GAME AREA |
|
|
MENU |
|
BUTTONS: |
||||
|
|
|
Character |
|
|
|
|
||
|
|
|
|
Portraits |
|
|
|
|
|
 Select All
Rest
DIALOGUE WINDOW |
AI On/Off |
BOTTOM MENU BUTTONS
(12 character buttons shown here – will display 9 group buttons if a single character is selected)
ICEWIND DALE™
MAIN GAME AREA
You’ll be seeing this screen the most while playing Icewind Dale. The mouse clicks and other buttons do the following on this screen:
L-click selects characters; also, a L-click and Shift or L-click and Ctrl combination will select or select/deselect multiple characters; also, a click and drag on the main game area causes a box to be drawn and any character inside will be selected (this may be used with the Shift key add to the selected characters, or Ctrl, to remove characters).
L-click gives commands (see buttons, below) to the selected character(s).
R-click cancels an action and also does formation rotation and movement when a group is selected. (R-click and hold to rotate a formation.)
Note that the cursor changes when moved over objects or characters or NPCs to indicate the default action. The default action mode can be changed by L-clicking on the buttons at the bottom of the screen.
Action Cursors
Action cursors pop up when you can perform certain actions. If a given cursor is selected it may be changed by clicking on a different action button, by hitting “ESC,” or by L-clicking an area where the cursor has no effect (e.g. a non-object or the interface border). Casting spells is cancelled by a R-click, or finished by a L-click on a creature or area (depending on the type of spell).

 Select: You can select the character.
Move: You can walk on this point, if you can reach it (there may be a door or other obstacle in the way).
 Blocked Location: You cannot walk on this point.

 Travel: If you move here, you will leave the map.

 Doors: Opens or closes the highlighted object.

 Enter: Walk through the entry or hallway.

 Stairs: Go up/down staircases.

 Pick up Item: Pick up an item.

 Attack: Attack a target creature you click on.

 Unlock: Use thief skills to unlock a locked object.
™
BLACK ISLE STUDIOS |
15 |
™
Remove Trap: Your thief can try to remove this trap from the highlighted area.

 Pickpocket: Your thief can attempt to steal from the selected character.

 Spell: You are going to cast a spell.

 Info: You can left-click on this area to receive information text about it.
 Rotate Formation: You can rotate the party’s formation.

 Change Order: You can swap two characters’ position.

 Use Item: You can use the highlighted object (lever, switch, etc.)
The Fog of War: Most actions cannot be performed in areas that you cannot see. Every character can see a certain distance away from them, and anything beyond that is called the “fog of war” (i.e., the area is ‘blacked-out’ or gray-shaded). This means your characters cannot see around a building until they move to the corner, and that they cannot see through walls.
BOTTOM MENU BUTTONS
Unlike the left and right menu buttons, the bottom menu buttons are not static. They change depending on the currently selected character and if more than one character is selected. The buttons on the bottom menu break down as follows:
2 Action Buttons (F1-F2 hotkeys)
The two left-most buttons do the following:
Guard/Protect: Protects either an area or another character. If this mode is selected, the desired ground area is L-clicked, and then the cursor is dragged, a circle will appear; this represents the area that will be guarded. The character will move freely
within this area but will not leave it. He will respond to attacks but will not leave the guard/protect area until moved somewhere else or if told to guard/protect another area. If a character is selected to be protected, the character will be followed and any creatures attacking the character will be attacked. If the Guard/Protect mode is chosen but the cursor is not L- clicked and dragged, the character will remain stationary and will not move, though he will respond to attacks.
Dialogue: This selects the dialogue cursor, which will initiate dialogue if L-clicked on any friendly or neutral creature.
16 |
ICEWIND DALE™ |
5 Character Buttons (F3-F7)
The five middle buttons break down according to class:
Class |
Slot1 (F3) |
Slot2 (F4) |
Slot3 (F5) |
Slot4 (F6) |
Slot6 (F7) |
|||||
Fighter |
|
Quick Weapon 1 |
|
Quick Weapon 2 |
|
Quick Weapon 3 |
|
Quick Weapon 4 |
|
|
|
|
|
|
|
|
|
|
|
|
|
Paladin |
|
Quick Weapon 1 |
|
Quick Weapon 2 |
|
Quick Weapon 3 |
|
Turn Undead |
|
Cast Spell |
|
|
|
|
|
|
|
|
|
|
|
Ranger |
|
Quick Weapon 1 |
|
Quick Weapon 2 |
|
Quick Weapon 3 |
|
Stealth |
|
Cast Spell |
|
|
|
|
|
|
|
|
|
|
|
Wizard |
|
Quick Weapon 1 |
|
Quick Spell |
|
Quick Spell |
|
Quick Spell |
|
Cast Spell |
|
|
|
|
|
|
|
|
|
|
|
Cleric |
|
Quick Weapon 1 |
|
Turn Undead |
|
Quick Spell |
|
Quick Spell |
|
Cast Spell |
|
|
|
|
|
|
|
|
|
|
|
Druid |
|
Quick Weapon 1 |
|
Quick Weapon 2 |
|
Quick Spell |
|
Quick Spell |
|
Cast Spell |
|
|
|
|
|
|
|
|
|
|
|
Bard |
|
Quick Weapon 1 |
|
Bard Song |
|
Thieving |
|
Quick Spell |
|
Cast Spell |
|
|
|
|
|
|
|
|
|
|
|
Thief |
|
Quick Weapon 1 |
|
Quick Weapon 2 |
|
Find Traps |
|
Thieving |
|
Stealth |
|
|
|
|
|
|
|
|
|
|
|
Fighter/Thief |
|
Quick Weapon 1 |
|
Quick Weapon 2 |
|
Find Traps |
|
Thieving |
|
Stealth |
|
|
|
|
|
|
|
|
|
|
|
Fighter/Cleric |
|
Quick Weapon 1 |
|
Quick Weapon 2 |
|
Turn Undead |
|
Quick Spell |
|
Cast Spell |
|
|
|
|
|
|
|
|
|
|
|
Fighter/Wizard |
|
Quick Weapon 1 |
|
Quick Weapon 2 |
|
Quick Spell |
|
Quick Spell |
|
Cast Spell |
|
|
|
|
|
|
|
|
|
|
|
Wizard/Thief |
|
Quick Weapon 1 |
|
Find Traps |
|
Thieving |
|
Stealth |
|
Cast Spell |
|
|
|
|
|
|
|
|
|
|
|
Cleric/Wizard |
|
Quick Weapon 1 |
|
Turn Undead |
|
Quick Spell |
|
Quick Spell |
|
Cast Spell |
|
|
|
|
|
|
|
|
|
|
|
Cleric/Thief |
|
Quick Weapon 1 |
|
Find Traps |
|
Thieving |
|
Stealth |
|
Cast Spell |
|
|
|
|
|
|
|
|
|
|
|
Fighter/Druid |
|
Quick Weapon 1 |
|
Quick Weapon 2 |
|
Quick Spell |
|
Quick Spell |
|
Cast Spell |
|
|
|
|
|
|
|
|
|
|
|
Cleric/Ranger |
|
Quick Weapon 1 |
|
Turn Undead |
|
Stealth |
|
Quick Spell |
|
Cast Spell |
|
|
|
|
|
|
|
|
|
|
|
Fighter/Wizard/Cleric |
|
Quick Weapon 1 |
|
Quick Weapon 2 |
|
Turn Undead |
|
Quick Spell |
|
Cast Spell |
|
|
|
|
|
|
|
|
|
|
|
Fighter/Wizard/Thief |
|
Quick Weapon 1 |
|
Find Traps |
|
Thieving |
|
Stealth |
|
Cast Spell |
|
|
|
|
|
|
|
|
|
|
|
Quick Weapon: These slots correspond to the quick weapon slots on the inventory page. Load a weapon into these slots (R-click to choose that weapon) and it will appear in the relevant slots here.
Find Traps: This is a mode that thieves can choose; they will continue to look for traps while it is active. If an action other than movement is selected for that character, this mode ends.
Thieving: This includes pick pockets, open locks, and remove traps, depending on the target chosen.
Stealth: Thieves can choose this mode, and if successful they become almost invisible. The next attack of the thief, if successful, is a backstab, and this will cause either double, triple, or quadruple damage depending on the level of the thief. Moving into the light or launching an attack can cause the hide to fail.
Turn Undead: This is a mode that clerics can choose (the cleric persists in turning undead until an action other than movement is selected). Clerics in this mode will attempt to “turn” undead creatures
™
BLACK ISLE STUDIOS |
17 |
™
(if successful the undead run away for a time, or may be destroyed if the cleric is powerful enough). Evil clerics using this ability may actually be able to gain control over some undead creatures.
Cast Spells: Available to clerics and wizards. It pulls up the memorized spell list of the cleric or wizard and the cleric or wizard can cast a spell from this list.
Quick Spells: These are configured by R-clicking on the Quick Spell slot - this brings up a list of all currently memorized spells. Once configured, the spell is ready for use at the push of the appropriate button or by L-clicking on that slot.
Bard Song: This is possible by Bards — the bard character will begin playing a song, which continues until any action other than movement is selected for that bard. While the song is playing, the party morale and luck is higher. (Luck decreases attack rolls and damage caused by enemies).
4 Item buttons (F8-11)
Use Item: If L-clicked, allows you to use any item with usable properties that you are wearing.
Quick Item (x3): You may ready any item in the personal inventory for quick use by R-clicking on any of these three slots and selecting from all items held personally to configure that slot (much as per Use Item). This is analogous to the usage of quick spells. If an item is used up or dropped or traded it must be removed from the quick item slot(s). If using an item causes a spell to be cast which must be used on a character or monster or terrain, the cursor will change accordingly and you must L-click on the target to use the item. R-clicking will cancel use.
Weapons with magical powers can have their magic powers configured in the quick items slots, but not the quick weapons slots (only weapons with physical attacks go into the quick weapon slots).
Special Abilities button (F12)
Some classes, such as paladins and druids, have special abilities. Clicking on this button brings up a character’s special abilities:
Cure Disease: Paladins have the ability to cure disease once per day. This is identical to the 3rd level priest spell, Cure Disease.
Lay Hands: Paladins can magically heal a target of their choice. “Laying on Hands” heals 2 hp per level once per day.
18 |
ICEWIND DALE™ |
Shapechange: This is possible by high-level druids (level 7). This allows them to turn into a polar bear, winter wolf, or boring beetle..
BOTTOM MENU GROUP BUTTONS
When more than one character is selected, you get a new set of buttons along the bottom of the screen:
Guard/Protect, Dialogue, and Attack are analogous to the buttons for a single selected character.

 Stop: Stops all current party actions.
Quick Formation buttons: Formations form in the same order as top down on the character portraits bar (top character is #1 in formation, and down the list). If less than six characters are selected, they will form up to the
number of characters selected, filling in the first, second, third, etc. formation slots until done. Formation movement is accomplished by R- clicking and holding (for rotation of the formation), or L-clicking, both only when a group is selected.
Quick formations work analogously to quick spells, quick weapons or quick items. They allow for real-time tactical combat: pull your mage into the middle of your party, or advance your fighters to the front quickly by using the formations. The quick formation slots are configured via a R-click which brings up all available formations; L-click selects one as the formation for that quick formation slot. L-click subsequently on that button selects the current party formation. Movement into formations is then achieved by L-clicking the terrain in the game, or by R-clicking and holding, to rotate the formation.
RIGHT MENU BUTTONS
On the bottom right side of the menu are the following buttons:
Select All: Selects or unselects all six characters.
AI on/off: Turns a character’s (or group of character’s) AI on or off. Characters with AI turned off will not react to their environment unless manually controlled and will not move or otherwise do anything unless dictated by their unmodifiable section of script (the portion that players are unable to change, representing the personality of that character).
Rest: When you select the Rest button on the world screen, you're entire party will rest until everyone is at full health. When you
select the Rest button on any other screen, you will be presented with three options: normal Rest (8 hours), Rest Until Healed (rest until
™
BLACK ISLE STUDIOS |
19 |
™
everyone is at full health) and Cancel. When you select Rest or Rest Until Healed and confirm, time will pass in the game, and your characters will heal and regain their spells. Keep in mind that resting is normally allowed only in inns, outdoor areas (provided all the monsters in the vicinity or on the map have been slain), or with permission from a local resident. It is possible that you will be attacked while resting in certain areas if a group of wandering monsters chances upon your party.
Character Portraits: The character portraits select that character if L-clicked upon; if R-clicked, they bring up the inventory page for that character.
Character Portrait Status: The colors of the character portraits indicate if they are being attacked or taking damage from poison (flashing red), or dead (darker gray). Damage to the character is represented on the character portrait as a red bar (i.e. the portion of the portrait that is the normal color is the portion of hit points still remaining to the character). If you move your cursor over the portrait of a character, the hit point total and the name of that character will appear. In addition, there is a default hot-key command that displays the party's current health and maximum health, just by pressing the “.” key. The current health/max health appears on the character portraits in the game.Character portraits will also display status icons (if your character is Charmed, Held, etc.) as well as the level up icon if one of your characters has enough experience to advance to the next level.
Character Portrait Order: To change the order of characters in your party, drag and drop their character portraits to exchange them in the party order. For example, to switch the order of “Char1” and “Char2” left-click on Char1, hold down the mouse button, then move the cursor over Char2. Release the mouse button and Char1 and Char2 should switch places.
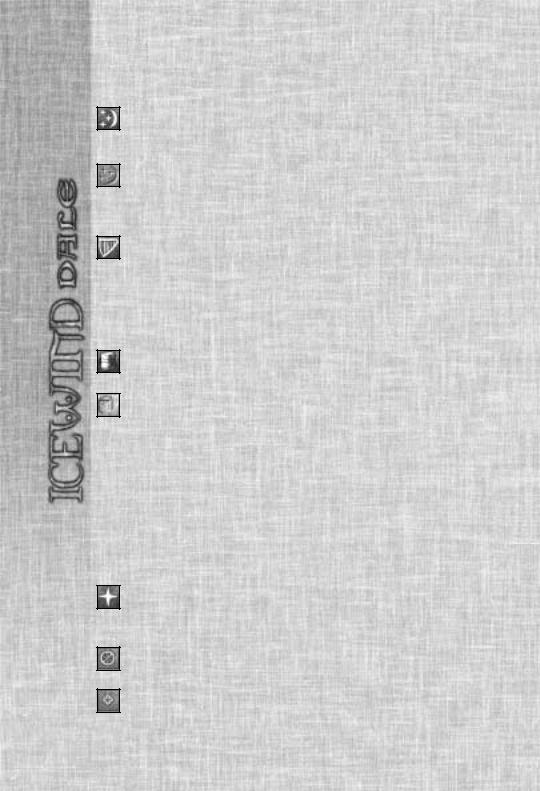
LEFT MENU BUTTONS
The buttons down the left side of the interface give you direct access to the various interface screens in the game. The buttons are as follows:
|
Return to Game |
|
Mage Spell Book |
|
Map |
|
Priest Scroll |
|
|
||
|
Journal |
|
Options |
|
|
||
|
Inventory |
|
Party Formation/ |
|
|
||
|
Character Record |
|
Character Arbitration |
|
|
||
|
|
||
|
|
|
|
|
|
|
|
Each of these buttons takes you directly to the interface screen for the character selected. If the entire party is selected, the appropriate screen for the party leader will come up.
20 |
ICEWIND DALE™ |
Clock
This picture represents the passage of time in the game. L clicking on this button has the same effect as pressing the space bar — it will pause and unpause the game.
TOOL TIPS
“Tool Tips” are the small information windows that pop up whenever you leave your mouse cursor over any object in the game for a period of time (including buttons, characters, items, signs, and so on). The time it takes the tool tip to pop up is set in the options; to bring up the Tool Tips instantly, press the “Tab” button.
DIALOGUE WINDOW
You’ll be speaking to a number of people in Icewind Dale over the course of the game. To initiate dialogue, simply left-click on the dialogue action button, then select the person you want to speak to. You cannot speak to anyone with a red circle (the red circle means they’re hostile and don’t want to talk to you).
Dialogue occurs with the selected character only; changing the character who is having the dialogue is not possible until dialogue is exited and restarted with a new character selected. If multiple characters are selected, the top-most selected character (in the portraits on the right side of the screen) is the one who initiates the dialogue.
There are three sizes to the dialogue window: small, medium and large, which can be adjusted with the side buttons. The small and medium sizes may be expanded to the large size during game play by L-clicking the small “up” button at the right side of the dialogue window. There is a scroll bar at the right of the dialogue window that may be used to scroll up or down in the dialogue queue.
When you speak to someone, you will be presented with a list of numbered options for what to say in red. You can either L-click on what you want to say from the list, or hit the number of the response you want to choose.
Keep in mind that your options can vary depending on your character’s statistics (Intelligence, Charisma), their class, and their race. When more text scrolls up in the window than can be read at once, or when dialogue is paused to give you a chance to read the text, you can L-click anywhere in the dialogue window to view more text. The text that has been already read can be reviewed with the scroll arrows on the right (up or down).
During dialogue the character who is talking has his portrait highlighted and will flash in the main game area. The NPC being spoken to will also flash.
Keep in mind that there are points in the game where even a character who is hidden or invisible will still be seen and spoken to in order to allow the advancement of the plot.
™
BLACK ISLE STUDIOS |
21 |
™
STORES, INNS, TAVERNS, AND TEMPLES
All the stores in Icewind Dale use a similar interface for the buying and selling of goods, information, and services. When you speak to the owner of a store, a panel will replace the bottom portion of the screen with buttons for the various services offered. These services include:
Rent Rooms: Inns usually have four different types of rooms that the player can use to rest at night, ranging from peasant rooms to nobleman’s lodgings. The more expensive the room, the more you’ll heal while you rest.
Buying and Selling: This screen is broken into a Buy window and a Sell window. Items the store offers are shown in the Buy window. Items from the character’s inventory are shown in the Sell window. To buy an item, L-click on it in the Buy window. The item icon will become highlighted, but will not be purchased until you L-click “Buy” at the bottom of the window. You may select multiple items and the total for all selected items will be shown next to the “Buy” button. The Sell window works the same way, although the shopkeeper may not want to buy the items in your inventory (unwanted items are gray-shaded). Items unusable by the character are shaded red.
Note that prices in stores can vary according to the Charisma of the buying or selling character, and it can also vary based on how many items of a particular type the store already carries. (If Pomab in Pomab’s Emporium already has fifty goblin battle axes, and you bring him another, then chances are, you won’t get top dollar for it.)
Drinks and Rumors: Bartenders and innkeepers are good for buying drinks and catching up on the local gossip. Items offered at a bar vary from expensive liquors to cheap ales. Upon ordering a drink, the proprietor may share rumors he has heard lately. Be careful, however, as your characters can become intoxicated if they drink too much and the bartender won’t hesitate to cut you off.
Steal: Thieves can attempt to steal items from a store. The Steal screen works the same as Buying and Selling, except that no gold is exchanged. When an item is selected to be stolen, the thief’s skills are checked - if successful, the item is added to the thief’s inventory; if unsuccessful, prepare for the guards to come busting in.
Donate: You can donate money at a temple by selecting this option. When you donate, you may hear a rumor from the priest, and the party’s reputation may be increased depending on the amount of gold donated.
Purchase Healing: Temples usually offer healing services for a price. A menu will appear showing the services offered and the price. Select
22 |
ICEWIND DALE™ |
the service you wish to receive and select the character who needs the healing.
Identify: Shops and Temples can usually identify more items than your characters, at a cost of 100 gold. If you cannot select the item from the list, then the proprietor cannot identify the item.
CONTAINERS
Certain items and containers can be picked up or opened; these are identified with a blue highlight when you move the cursor over them. L- click will allow you to open a container, and a new panel will appear at the bottom of the screen. The left side of the panel shows the items that are on the ground or in the container and the right side is a small portion of the selected character’s inventory. Clicking on items on the left side of the panel moves the items from the ground or container into the character’s inventory. If the character’s inventory is full, the item will not be transferred.
This process can be reversed. Items can be moved from a character’s inventory into a container or onto the ground by L-clicking on them in the right side of this panel.
Note that items added to a character’s inventory will automatically stack with others of the same kind.
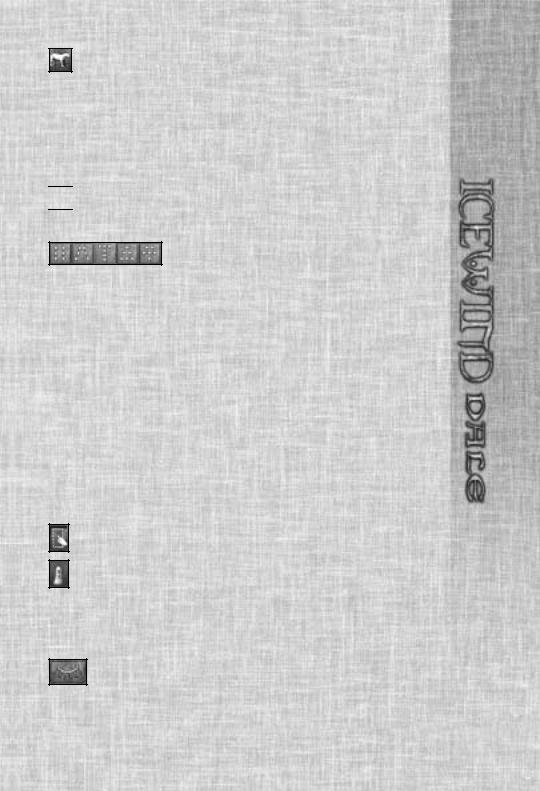
MAPS
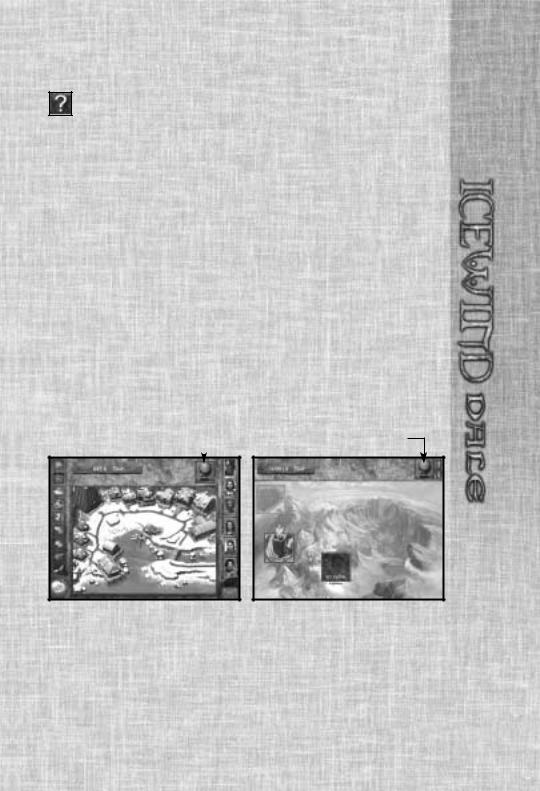
Area Map
TO WORLD MAP |
|
BACK TO AREA MAP |
|
||
|
|
|
™
L-clicking the map button brings up the map the selected character(s) are on. Areas that have been visited are lit up, areas that haven’t are dark. The character(s) current position(s) are shown on the map by dots.
World Map
Clicking on the World button on the Area Map brings up the World Map. An icon above the appropriate map shows your characters’ current location.
BLACK ISLE STUDIOS |
23 |
™
24
Usually only the areas visited thus far on the world map will be shown. Note that you cannot travel between areas unless you either know about them or you have traveled to the edge of the current area and brought up the world map with the “Travel” icon. To move to another area, highlight the area and click on it.
Note that your World Map will occasionally be updated through dialogue and events in Icewind Dale, allowing you to access more areas.
JOURNAL
The journal is a diary of your adventures. It’ll automatically make notes of important people, plot points, quests and the completion of quests so you can refer to them later.
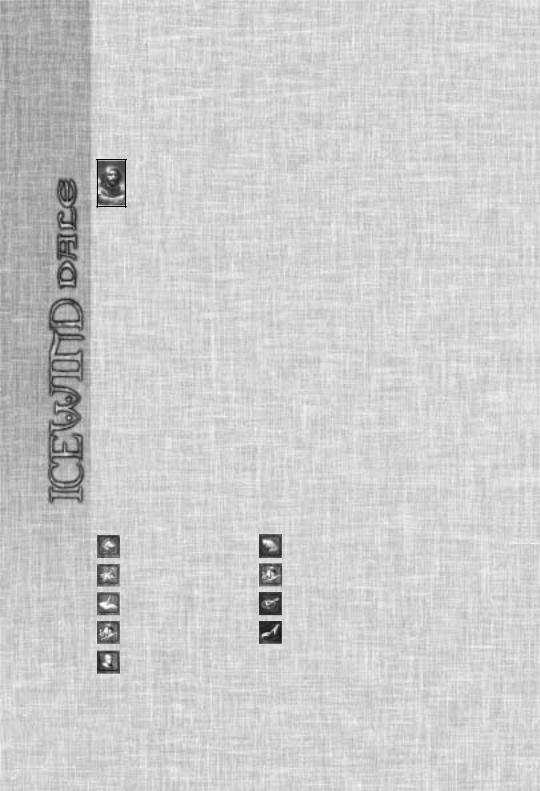
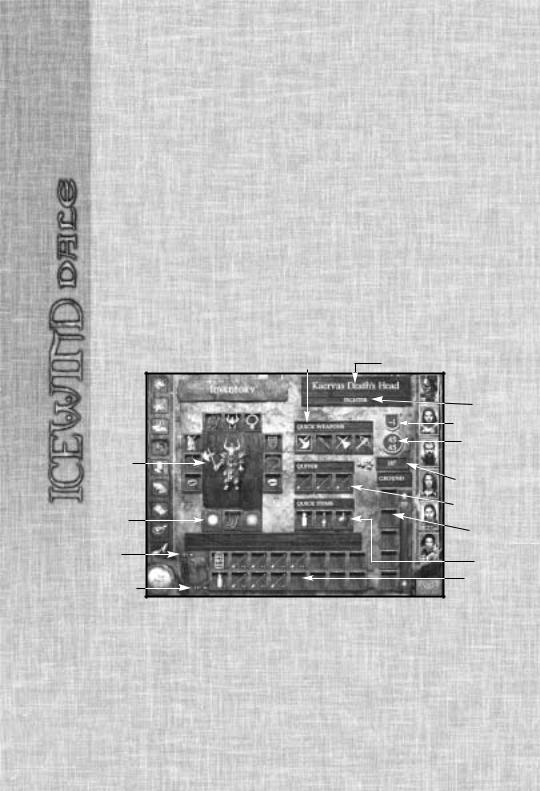
INVENTORY SCREEN DESCRIPTION
The inventory page can be accessed by L-clicking the Inventory button on the left of the screen or by R-clicking a Character Portrait. Items in your inventory will be shown with either a red or blue tint. Red items are not usable by the characters holding the item. Blue tinted items are magical but have not yet been identified. Items with a blue outline are magical items that have been identified.
Quick Weapon Slots |
Character Name |
|
|
Character |
|
|
Class |
|
|
Armor Class |
|
|
Hit Points |
|
|
(current/ |
|
Paper Doll |
maximum) |
|
|
Group Gold |
|
|
Ammunition |
|
Character |
Ground |
|
Appearance |
||
Slots |
||
|
||
Weight |
Quick Item |
|
Carried |
Slots |
|
Max Weight |
Personal |
|
Inventory |
||
|
The middle of the screen is taken up by the “Paper Doll” representation of the character. Along the bottom of the screen is the character’s personal inventory and encumbrance. Items can be dragged and dropped to be equipped on the Paper Doll, or dragged and dropped onto other characters’ portraits to give the item to another character.
Stackable items can be unstacked by double L-clicking on the item. Unstacked items can be stacked by dragging and dropping them on top of each other.
ICEWIND DALE™

Items placed in the “Ground” slots will be dropped at the character’s feet and can be picked up from the main game area.
The group pool of gold is shown on this page as well.
Encumbrance
Each character can carry only a certain amount of weight, determined by their Strength. Exceeding this weight causes the character to move slower or stop completely depending on how overloaded they are. The character’s current weight load is shown next to the Personal Inventory.
The Paper Doll Inventory: Equipped Items
There are 16 distinct areas in the equipped items section: helm, armor, bracers, cloak, amulet, L ring, R ring, gauntlets, boots, up to 4 weapons (R hand, from which the quick attacks are chosen), the quiver (of up to 3 sets of ammunition), and the shield slot (L hand).
Quick Weapon Slots
The weapons put into the quick weapon slots determine the quick attacks available (these slots are like a bandolier of weapons available - for a mage, this could hold a dagger, for a fighter it could be a crushing weapon to use against undead, a bow for distant encounters and a sharp edged weapon for close combat). When a new weapon is put into the weapon slots on the inventory page, it generates a default quick attack in the quick attack button for this character at the bottom of the main interface screen.
Only one bow or crossbow may be equipped at a time. Both bolts and arrows may be in the quiver but only those usable by the current equipped weapon appear as quick attack choices on the main interface screen.
A shield may be equipped only if no 2-handed weapons are present in the weapon slots. If a 2-handed weapon is in one of these slots, the shield is not equipable and a message to this effect appears in the inventory message line: “Cannot equip (2-handed weapon in use).” A similar message is displayed if a shield is equipped and the player tries to move a 2-handed weapon into one of the 4 weapon slots: “Cannot equip (shield in use).”
Quick Item Slots
These slots represent miscellaneous items that are kept at the ready (potions, for example). These items can be accessed easily during combat (similar to “Quick Weapons” above). Healing potions are great candidates for these slots.
Personal Inventory
This is your “backpack.” You can carry only 16 different items or stacks of items, regardless of your encumbrance.
™
BLACK ISLE STUDIOS |
25 |
™
Items Property Page
If an item is R-clicked upon, the view changes to the Items Property page. This page contains the item’s icon, description and picture. Characters with high “Lore” abilities can automatically Identify certain magical items. If the item is currently unidentified, there will be a button to allow you to try to magically Identify it with a scroll or a spell. Potions may be drunk from this page. If the item is a scroll, wizards will have the opportunity to try to ‘Write Magic’ and add the scroll spell to their spell book. Certain magical items may even have special “Abilities” that can be accessed from this page
— including the ability to configure the item’s magical powers.
Character Appearance
Clicking on the colored boxes will allow you to pick from a palette of colors for your character to use for clothing colors. You can change these at any time.
Rest
L-click on this button to rest your characters. Some areas are better suited for resting than others, so select your campsite carefully. Resting is normally allowed only in inns, outdoor areas (provided all the monsters in the vicinity or on the map have been slain), or with permission from a local resident.
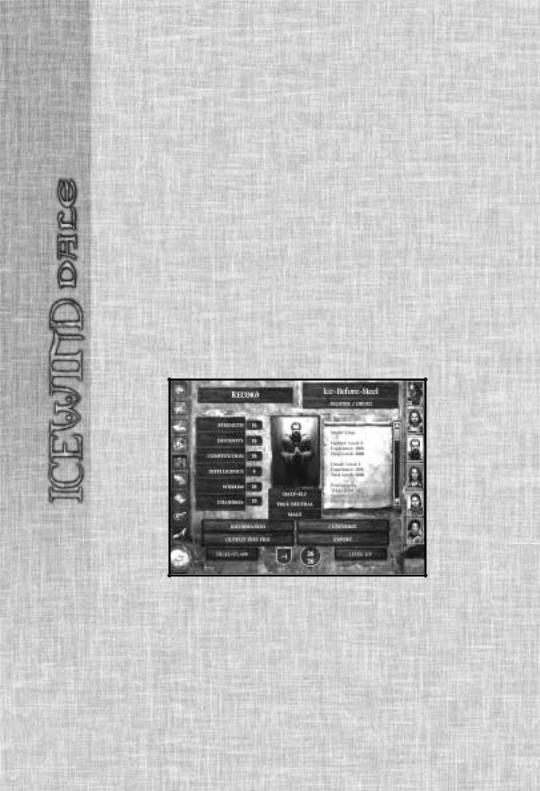
CHARACTER RECORD
The character record page shows all the vital statistics and abilities of the selected character.
Dual-Class
This page is available to human characters only — after 2nd level you can convert a character to dual-class.
When you choose dual-class, a new interface screen will come up where you can choose the character’s new class. Paladins and bards are not allowed to
26 |
ICEWIND DALE™ |

dual-class. The character must meet the minimum requirements for the new class in all areas, including statistics and alignment. The character must have at least a 15 in all the prime requisites of his first class, and 17 in those of the second class.
The dual-class page is similar to the character generation page — making a character dual-classed is almost like starting a character over. As a new dual-classed character, the character starts with only the 1st-level abilities and restrictions of his new class, though he retains his hit point total from his prior class.
After a character becomes dual-classed, he can only use the abilities of his new class until he surpasses the level of his original class, at which point he can freely use the abilities of either class. No further advancement is ever allowed in the first class, all further development is in the new class.
Level Up
This button is dimmed until the character gains enough experience points to gain a level. When the player clicks the “Level-Up” button, a level up screen will be shown. All changes to the character sheet are highlighted. For a thief or bard, the player must distribute new thief skill points. A new proficiency slot requires a player to choose a weapon proficiency.
Information
This page allows you to compare how the characters in your party are playing, including stats such as ‘number of kills’ and ‘favorite weapon.’
Customize
This page allows you to change a character’s appearance, voice, biography, clothing colors, or scripts (the computer code that controls behaviors/ reactions to situations).
Custom Portraits: The measurements for player portraits are 36x58 pixels for the small ones (8-bit color only) and 110x170 pixels for the large ones. Put these in the Portraits directory (in the install directory for the game) and add an S to the end of the small portrait name and an L to the end of the large portrait. The names must be 1-7 letters long, maximum.
For example:
XXXXXXXS.bmp for small (36x58, 8-bit) XXXXXXXL.bmp for large (110x170, 24-bit)
For multiplayer, each player must have a copy of the portraits; otherwise they will see a blank icon where the other player’s custom portraits would be.
Custom Sound: If you want your character to have customized sounds, the following is a list of the WAV files required to create custom sound personality sets. In the ‘Sounds’ folder located in the directory in which Icewind Dale is installed in, you will need to create a subdirectory that is used to store your new character personality. The new folder can be up
™
BLACK ISLE STUDIOS |
27 |

™
to 32 characters in length. This folder will be displayed in the game as one of the voice set options. Below is a listing of all the required voice sounds that are needed in that new subdirectory. Replace the xxxxx with a unique name that would not be used in other subdirectories. For example, mysnd01, mysnd02, etc. As long as the xxxxx is unique, the voice sounds will show up and work properly with Icewind Dale.
All of the sound files must be 22 kHz, 16-bit , mono WAV files.
xxxxx01.wav: Morale Failure 1 xxxxx02.wav: Morale Failure 2 xxxxx03.wav: Battle Cry 1 xxxxx04.wav: Battle Cry 2 xxxxx05.wav: Battle Cry 3 xxxxx06.wav: Battle Cry 4 xxxxx07.wav: Battle Cry 5 xxxxx08.wav: Becoming Leader 1 xxxxx09.wav: Becoming Leader 2 xxxxx10.wav: Tired 1 xxxxx11.wav: Tired 2 xxxxx12.wav: Bored 1 xxxxx13.wav: Bored 2 xxxxx14.wav: Hurt 1 xxxxx15.wav: Hurt 2 xxxxx16.wav: Selected Common 1 xxxxx17.wav: Selected Common 2 xxxxx18.wav: Selected Common 3 xxxxx19.wav: Selected Common 4 xxxxx20.wav: Selected Common 5 xxxxx21.wav: Selected Common 6
xxxxx22.wav: Selected Common 7 xxxxx23.wav: Selected Action 1 xxxxx24.wav: Selected Action 2 xxxxx25.wav: Selected Action 3 xxxxx26.wav: Selected Action 4 xxxxx27.wav: Selected Action 5 xxxxx28.wav: Selected Action 6 xxxxx29.wav: Selected Action 7 xxxxx30.wav: Selected Rare 1 xxxxx31.wav: Selected Rare 2 xxxxx32.wav: Selected Rare 3 xxxxx33.wav: Selected Rare 4 xxxxx34.wav: Being hit 1 xxxxx35.wav: Being hit 2 xxxxx36.wav: Being hit 3 xxxxx37.wav: Dying 1 xxxxx38.wav: Dying 2
xxxxx39.wav: Reaction to partymember dying 1
xxxxx40.wav: Reaction to partymember dying 2
Custom Biography: You can customize your character's biography with the customize button. Simply click on the text and edit it. You can also choose to export the file and share it with others. See the readme file for more details.
AI Scripting: For information on creating custom AI scripts please read the ScriptCompiler.doc located in the ScriptCompiler Directory located on CD 1. You can read this file using either Microsoft Word or WordPad.
Export
This allows you to save the character’s file to your computer for use in other games of Icewind Dale. The character’s current status will be saved, including hit points, experience points, level, class, inventory, etc.
28 |
ICEWIND DALE™ |
Output Text File
Clicking this button will cause your character's statistics to be outputted to a text file. The text file name will be the same name as your character. The text file will go into the directory of your current save game, or, if you haven't saved your game yet (you've just started a new game, for example), then it will go into the "Default" folder under saved games.
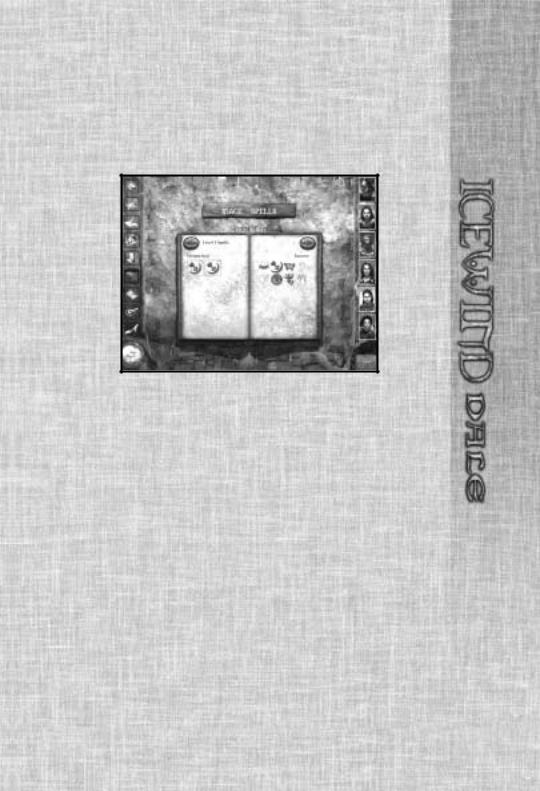
MAGE AND PRIEST SPELL SCREENS
These screens are where you choose your mage and priest spells.
The spells your wizard or priest knows are shown on the right. If you R-click on a spell icon, a display page will come up with a spell description. To memorize a spell, L-click on it. The spell appears on the left in the “memorized” area, but remains shaded (and unusable) until the character has a chance to rest. (See the Rest button on page 19). Spells can only be cast when they are memorized.
The memorized spells of the wizard or priest are shown on the left. Every time the spell caster sleeps he will memorize the spells in this area, allowing them to be cast. If the memorized spell area is full and you want to memorize a different spell, L-click on the spell, and it will vanish.
™
BLACK ISLE STUDIOS |
29 |
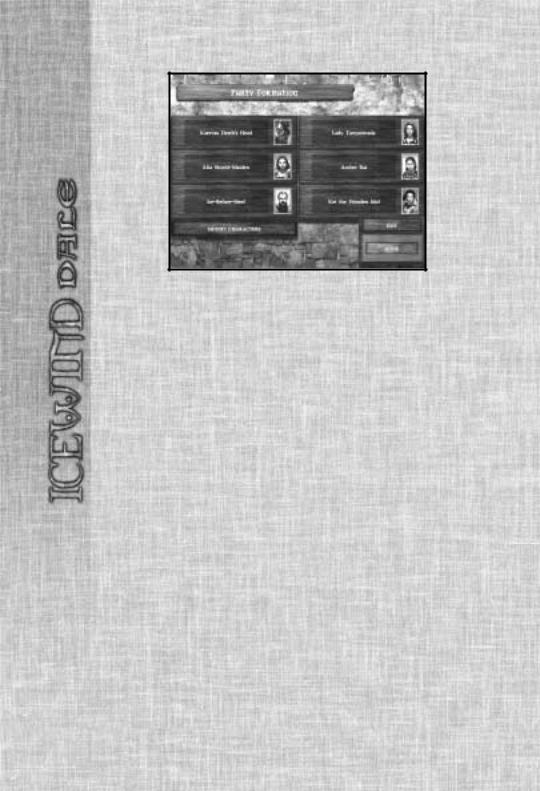
PARTY FORMATION SCREEN
™
This screen allows you to change your party configuration (it is also called the Character Arbitration screen in multiplayer, see page 34 for details of how this screen works in multiplayer). On this screen you can delete characters, import new characters, or in multiplayer games, change the permissions for each character. Each created character is identified by name. By clicking on the name (or on the empty box) a sub-menu pops up that will allow you to either delete (if there is a character already in the slot) or create a new character (if the slot is empty). If you delete a character, they are gone and lost forever.
Importing a new character is done by selecting ‘Create’ and going through the character generation screen. If you choose to import a character into Icewind Dale, the character will start at first level.
OPTIONS SCREEN
Save, Load, and Quit:
These buttons allow you to save games to your hard disk, discard your current game and load a previously saved game, and quit to the main menu.
Graphics:
Brightness/Contrast adjusts the brightness and contrast of the display.
Color Depth toggles your display between 16, 24, or 32 bit color. The other graphic options on this page should be used only if Icewind Dale is not displaying correctly on your system. Please refer to the Readme file for the latest information on how to correct any display errors.
Static Animations: This option toggles the background animations in the game. Turning them off will improve performance.
|
Translucencies: This option toggles translucencies on and off. Certain |
|
|
ghosts and shadows are translucent, but they will be made solid when this |
|
|
toggle is on. Spell effects will not be translucent, but this should improve |
|
30 |
performance on slower machines. |
ICEWIND DALE™ |
 Loading...