

Edited by PETER LERT
An Introduction to the SAS . . . . . . . . . . . . . . . 1
The SAS Since World War II . . . . . . . . . . . . . . . . . . . . . . . . . 4
SAS Today. . . . . . . . . . . . . . . . . . . . . . . . . . . . . . . . . . . . . 5
Installing the Game . . . . . . . . . . . . . . . . . . . . . . . . . . . . . . . 6
Playing the Game . . . . . . . . . . . . . . . . . . . . . 6
Campaign Selection . . . . . . . . . . . . . . . . . . . . . . . . . . . . . . 7
Equipment Selection. . . . . . . . . . . . . . . . . . . . . . . . . . . . . . . 9
Selecting and Setting Up Your Team. . . . . . . . . . . . . . . . . . 8-10
Debrief Menu . . . . . . . . . . . . . . . . . . . . . . . . . . . . . . . . . . 11
Load/Save Menu . . . . . . . . . . . . . . . . . . . . . . . . . . . . . . . 13
Getting the Action Ready . . . . . . . . . . . . . . . . . . . . . . . . . . 14
Strategy . . . . . . . . . . . . . . . . . . . . . . . . . . . 15
Choosing Weapons and Equipment . . . . . . . . . . . . . . . . . . . 15
The Mission Briefing . . . . . . . . . . . . . . . . . . . . . . . . . . . . . 17
Strategy For Selecting Men and Weapons . . . . . . . . . . . . . . . 18
Keyboard Commands . . . . . . . . . . . . . . . . . . . . . . . . . . 19-20
Items and Weapons. . . . . . . . . . . . . . . . . . . 30
The Combat Manual. . . . . . . . . . . . . . . . . . . 36
Using the Drawings . . . . . . . . . . . . . . . . . . . . . . . . . . . . . . 36
Combat in Open Country . . . . . . . . . . . . . . . . . . . . . . . . . . 37
Close Range Combat. . . . . . . . . . . . . . . . . . . . . . . . . . . . . 43

Hidden and Dangerous
An Introduction to the SAS
by Peter Lert
It was 1941. In a British army field hospital in North Africa, a lanky Scot
sweltered in the heat.
This was subaltern (2nd Lieutenant) David Stirling. Only 26, he came from a
long line of Scottish warrior aristocrats; the battle of Bannockburn had been
fought near his ancestral home, Stirling Castle. Before the outbreak of World
War II, the 6-foot 5-inch Stirling had been training for an assault on Mt. Everest.
Now he’d come to Africa to help fight the Germans...but he’d run into an unanticipated delay.
He’d initially joined the Scots Guards, but—eager for action—he’d transferred to 8 Commando, commonly called “Layforce” after its commander, Col.
(later General) Robert Laycock. Early in the war, Layforce had made significant
inroads against the Germans in North Africa. Losses, however, had been heavy;
landing in numbers as high as 200 men at a time, Layforce units often met fierce
resistance. Now, most of Layforce had been transferred to Crete; the small
remainder was a fighting force in name only.
In the meantime, Stirling had met Jock Lewes, an Australian serving in the
Welsh Guards. Lewes had scrounged a supply of parachutes; he and Stirling
decided these would be the best way to infiltrate small units behind enemy lines,
and they started practicing parachute jumps at once. It was an unfortunate landing from one of these jumps that had put Stirling in the hospital.
During the two months in the hospital, Stirling had plenty of time to look back
on some of Layforce’s less successful exploits and formulate his own ideas. His
pencilled memo to Gen. Sir Claude Auchinlek, Commander in Chief for Africa,
included the following six main points:
INTRODUCTION TO THE SAS
1.) The Germans would be most vulnerable along lines of communication—transport
depots, fuel and ammo dumps, and, especially, airfields.
2.) Large commando raids, such as those attempted by Layforce, made surprise unlikely .
3.) Small units would be more efficient, particularly if they could be placed stealthily
behind enemy lines.
4.) These units would be trained in parachuting, infiltration techniques by land and
sea, and “scrounging”—“Why carry hundreds of pounds of weapons and ammunition into enemy areas when you can steal them from the enemy once you’re
there?”
5.) Given the scarcity of military resources, the proposed units would be self-sufficient
in terms of planning, training, and—to the greatest possible extent—supply of
weapons and equipment.
6.) Finally, Stirling’s proposed units would be ready for combat by November of 1941.
1

Stirling still had a formidable obstacle to overcome: the rigid protocol and
chain of command of the Royal Army made it unlikely that his memo would ever
get as far as Gen. Auchinlek. Characteristically, he left the hospital on crutches,
slipped through a perimeter fence and into General HQ, and took refuge in the
first office he saw. Luckily, it was the office of the Deputy Commander Middle
East, Gen. Ritchie—who was captivated by the idea and carried it to Gen.
Auchinlek.
It also didn’t hurt that the Royal Army in general—and its Middle Eastern and
North African units in particular—had a soft spot for small, individualistic units
under the command of colorful, charismatic officers. The year before, an of ficer
experienced in desert travel and navigation, Major Ralph Bagnold, had formed
the Jeep-borne Long Range Desert Group (LRDG); another Major , Russian émigré
Vladimir Peniakoff, had spent years among the desert Arabs between the wars
and was currently spying in Libya with a handful of picked men. (He would go on
to form a highly effective intelligence and sabotage group with one of World War
II’s most unlikely official names: “Popski’s Private Army.”) And, of course, every
such commander lived in the long shadow of a similar officer who’d ser ved only
a few hundred miles east, and less than 25 years earlier: the almost mythical T.
E. Lawrence, “Lawrence of Arabia.”
With Auchinlek in favor of the idea, Stirling was promoted to the rank of
Captain and allowed to raise a unit of 60 men and six officers (most of the latter
fellow Layforce veterans). It had long been suspected that Allied communications
in North Africa were compromised, so the new small unit was dubbed “L
Detachment of the Special Air Service Brigade” in the hope that the Germans
would think it an airborne unit of sigificant size (considering, at the very least, the
mythical detachments A through K). A training facility was set up in the Suez
Canal Zone, while much of the necessary weaponr y and equipment were “liberated” from the nearby supply depot of a New Zealand division that was currently occupied elsewhere (at Tobruk). The men were trained in parachuting, desert
navigation, weapons handling, and demolition techniques.
The Detachment’s initial deployment was hardly an unqualified success. The
Allied situation was far from good, with Malta under siege and the Desert Fox
INTRODUCTION TO THE SAS
pushing toward Egypt from the west. With his unit trained to a high degree of
readiness, and under pressure both to gather intelligence and to harass the
Germans in anticipation of a later large Allied operation, Stirling and his men
parachuted behind enemy lines in mid-November of 1941 to begin Operation
Crusader despite highly unfavorable weather conditions. Some of his transports
were shot down; others were forced to land at German-held airfields. Those units
that managed to parachute into the African night were separated by high winds
from their parachute containers with most of their weapons and equipment.
Ultimately, only 22 of them managed to reach the rendezvous points where jeeps
from the LRDG were waiting to extract them.
2

Unfazed—and impressed with the way the LRDG jeep troops were able to
extract his men—Stirling redesigned his combat tactics for ground insertion,
rather than the dangerous and unpredictable parachuting. Teaming with the A
Squadron of the LRDG, the SAS set up an advance base deep in the desert south
of Benghazi, where they were tasked with disrupting enemy air movement in
anticipation of an operation on 21 and 22 December of 1941.
This operation was considerably more successful. Jock Lewes had developed
a compact demolition charge, the “Lewes Bomb,” that weighed only a pound.
Placed on top of the wing of a parked enemy aircraft, it would burn a hole
through the skin, then drop, flaming, into the fuel tank; a single trooper could
carry enough of them to destroy an entire squadron of enemy aircraft. (There
were, of course, other means as well. When one of Stirling’s most famous officers, Irish rugby player Patrick “Paddy” Mayne, found himself faced with one
more aircraft than he had Lewes bombs for, he simply climbed into its cockpit and
ripped the wiring from behind its instrument panel with his bare hands.)
Thus, the Special Air Service was born. In subsequent months, it became
Rommel’s scourge in North Africa, destroying some 400-odd aircraft and scores
of supply depots and, on at least one occasion, coming close to either capturing
or killing the Desert Fox himself. By late 1942, the SAS had grown to regiment
strength.
Within the regiment, in addition to “regular” SAS troopers (if anyone in such
an “irregular” unit could be so described), were some highly specialized units.
The Special Interrogation Group (SIG), for instance, was composed entirely of
German speakers (largely Palestinian Jews—the later Israelis—of German
descent). Wearing only captured German unifor ms and equipment and speaking only German, the deceptively named SIG could move about behind enemy
lines with relative impunity. Another unit, the SAS Special Boat Section (not to be
confused with other, later SBS units attached to the Royal Marines) used inflatables and folding canoes to penetrate enemy installations by water—for example,
to attach limpet mines to German shipping in ports considered secure by the
enemy.
Meanwhile, back in the desert, David Stirling carried on SAS operations with
his customary panache. Inspired by the LRDG, SAS had developed formidable
armed Jeeps of their own. While they often continued to infiltrate German desert
airstrips by stealth, another favorite tactic was to simply come driving in out of the
desert at high speed, guns blazing, to destroy as many aircraft and supplies as
they could in one quick pass before vanishing into the darkness once again. They
also did a good deal of old-fashioned spying; in March of 1942, Stirling brazenly drove his own Jeep, christened “Blitz Buggy,” into the German-held dockyards
at Benghazi, parked it in a convenient garage, and donning a pair of sunglasses as a disguise, strolled casually about the docks. At one point, he and one of
his German-speaking friends even berated a German sentry for his lax per for mance of duty.
INTRODUCTION TO THE SAS
3

A major blow to the SAS came during one of their last North African operations when Stirling—by now a Lieutenant Colonel—was captured. After four
escapes and recaptures, he was ultimately sent to the infamous Castle Colditz in
Germany, a supposedly escape-proof prison. Little did the Germans know that
some of the captured RAF pilots at Colditz were busily at work building a glider
(the “Colditz Cock”) out of stolen bed slats and curtain fabric, intending to launch
it from the roof by a catapult powered by a falling rock-filled bathtub. To the great
disappointment of the glider builders, Colditz was recaptured by the Allies, and
Stirling freed, before they had a chance to see if their creation would really fly.
In addition to its effect on morale, the major consequence of Stirling’s capture
was that the SAS no longer had a special champion at HQ. It soon came under the
organizational command of other parachute regiments or raiding formations.
Nonetheless, it continued as an extremely effective force, by now grown to two regiments (one commanded by Stirling’s brother). In subsequent months the SAS and
its SBS continued to operate in the Greek islands, and later in Sardinia and Italy.
When the Allies landed in Normandy on June 6, 1944, they found that their
way had already been prepared by SAS units; and when the Germans tried to
rush reinforcements to the beachheads, they found railway lines and road bridges
blown up by small independent SAS units, while others harried them and kept
thousands of troops tied up in German rear areas, making them unavailable to
fight the invaders. Basic SAS technique was to set up a base in a remote area
(forests, mountains, etc.) with good parachute landing zones, then make sorties
to attack the Germans. In many of these operations, they enlisted the aid of local
underground forces such as the French Maquis; in later operations, their areas of
endeavor spread to the Low Countries and ultimately even into Germany itself.
Throughout the war, SAS units were effective to an extent far beyond their modest numbers. After all, if a handful of men could not only destroy materiel and
interrupt lines of communication, but also keep hundreds or even thousands of
Germans occupied looking for them, those Germans were rendered ineffective for
other tasks. Similarly, the mere threat of SAS interference often forced the
Germans to change their plans.
4
THE SAS SINCE WORLD WAR II
In the years since World War II, the SAS has remained in existence. It also
INTRODUCTION TO THE SAS
remains, by choice, a somewhat shadowy organization, one that’s extremely
reluctant to reveal details about its makeup or operations. SAS teams have
served “behind the scenes” in almost ever y conflict in which Great Britain has
been involved, ranging as far afield as fighting insurgents in Yemen, Oman, or
Malaysia, operating covertly against drug cartels in South America...or as close
to home as Northern Ireland or even downtown London, where an SAS operation stormed and recaptured the Iranian embassy from terrorists in May of 1980.
At any time, the regular SAS regiment numbers only about 350 officers and men,
but in overt conflicts such as the Falkland Islands or the Gulf War, its effectiveness
has been far beyond its modest numbers. For example, it’s widely believed that
the reason that Royal Air Force Tornados were so effective against many of
Saddam Hussein’s concealed mobile Scud missile launchers was that most of them
were pinpointed and targeted by four-man SAS teams operating—sometimes for
days on end without any support—within Iraq.

SAS TODAY
By now , all modern armies have similar small, elite special-purpose units—but
it’s generally acknowledged that the SAS remains, not only the model for most of
them, but also probably the unit with the highest standards, and the one most difficult to join.
No one (whether an officer, a noncom, or an enlisted man) can enter SAS
directly; all must have at least three years’ service in another army unit.
Applications to join SAS are rigorously screened; after that, those candidates in
whom the Regiment is interested must pass the standard Army Battle Fitness test.
They then move to the SAS home base (presently at Stirling Lines in
Herefordshire, although shortly to be moved to a nearby RAF base) for a grueling
3 to 4 weeks of further physical testing and training, including forced marches (first
alone, later in groups) through the rugged Brecon mountains of Wales. The culminating “exercise” is a 46-mile endurance march, carrying 55-pound packs, that
must be completed in under 20 hours—regardless of weather. Men have been
known to die during these exercises.
Those who make it this far without being “retired” (either voluntarily or summarily) are only at the beginning of their training, and are still far from being
accepted into the SAS. Only after another 14 weeks of continuation training, followed by 6 weeks of jungle training in the Far East and 4 weeks of parachute training in England and France, do they receive the coveted sand-colored beret with its
badge of a winged dagger and Stirling’s original slogan, “Who dares, wins.”
Even then, they’re only at the beginning of advanced training—to which they’re
traditionally welcomed with the message, “getting the beret isn’t nearly so hard as
keeping it.”
The basic SAS unit is four men. Within the Regiment, troops are divid-
ed into four main areas of specialization:
• mountaineering: including rock and ice climbing
INTRODUCTION TO THE SAS
• amphibious assault: including SCUBA, submarine operations, underwater
demolition, etc.
• surface mobility: including assault vehicles and special Land Rovers remi-
niscent of LRDG operations
• airborne assault: including both HALO (High Altitude, Low Opening) and
HAHO (High Altitude, High Opening) parachuting as well as more typical
“parachute regiment” low-altitude jumping.
Within a four-man group, there are also four basic areas of specialization in
addition to troop specialization: leader, scout, medic, and signaler. Although
SAS now uses some of the most sophisticated satellite radios and encryption
equipment, they remain unique (at least in the Royal Army) in that they still remain
proficient in Morse Code as well, with the basic requirement for signaler at least
eight words per minute. (In some cases, old-fashioned Morse is still the best way
to communicate over long distances with low-powered, and hence difficult to
detect, radios—and in this era of “video game war,” the likelihood that the opposition has anyone who can understand Morse Code is smaller all the time!)
5
Of course, each man must also be highly proficient in skills such as close combat, weapons, demolition, map-reading and navigation, and emergency field
medicine; most are also fluent in at least one foreign language (formerly Arabic
and Malay were most common, but now Russian and other northern European
languages are receiving more emphasis). Typically, there’s enough cross-training
and combined skills in any four-man group to enable it to carry out almost any
SAS mission, even of one or more men are incapacitated.
A typical tour in the SAS is three years, after which men return to their “parent” units; this not only keeps the SAS fresh, but spreads its unique esprit and skills
throughout the Royal Army . Exceptional officers and men may be invited to either
extend their tours or return to the Regiment after an interval with their parent unit.
This, then, is the SAS. In playing Hidden and Dangerous, you’ll join SAS
units for campaigns during World War II, when the Regiment was first formed—
but the techniques you’ll learn are every bit as useful today, and they’re still being
used every day on both over t and secret SAS missions all over the world. Good
luck...and good hunting.
Installing the Game
Place the HIDDEN AND DANGEROUS CD-ROM in your drive and be sure all
other Windows applications are closed. If the installation program does not start
automatically, click on “My Computer,” then on the icon for your CD drive, and
finally on the icon for “Setup.” Follow screen prompts during the installation
process.
For optimal performance, we recommend the “full installation” option. This
places more data on your (faster) hard disk and reduces the number of times the
(slower) CD drive must be accessed during gameplay.
If you need to uninstall HIDDEN AND DANGEROUS, select the HIDDEN AND
DANGEROUS group from your “Start” menu, then click on UNINSTALL.
6
Starting the Game
Click on the HIDDEN AND DANGEROUS icon. The first time you run the game,
you’ll be asked a few simple hardware configuration questions. It’s best to just
INTRODUCTION TO THE SAS
accept the program’s suggestions; if you have any problems, you can change
settings later by clicking on the Hardware Configuration icon in the HIDDEN
AND DANGEROUS program group. Once hardware has been configured and
you have selected the HIDDEN AND DANGEROUS icon again, you’ll be taken
to the HIDDEN AND DANGEROUS opening screen.
If you want to set parameters manually, consider the following tips.
• Triple buffering will speed operation on cars with 8MB or more memory,
but not on 3DFX cards.
• If your graphics card has 6MB or less memory, select the Low detail textures to ensure smooth graphics and gameplay.
• If you decide to use a higher screen resolution (i.e. 1024x768), your
graphics card must have at least 8MB of memeory.
Game Menu
MENU 1
This menu appears after the short opening
animation and allows you to choose whether to
start a game, set options, etc. Select any item by
placing the mouse cursor on it (it will enlarge) and
either left-clicking or pressing ENTER.
• Start New Game
• Start a New Game (Single Player)
• Selecting a Game Profile
The first time you start the game, you will be asked for a name to be used with
your “profile.” Each time you exit the game, your score and the current state of the
game are stored in your profile.
The next time the game is started, all available profiles are displayed. To pick
up where you left off, select the desired profile and press ENTER. To start a new profile, select <create new> and choose a new profile name. To delete any stored profile, select it and press the DEL key. Warning: deleted profiles cannot be restored.
NOTE — Profiles are updated at the end of each mission. Scores for all com-
pleted missions are also stored in the profile and affect all subsequent missions.
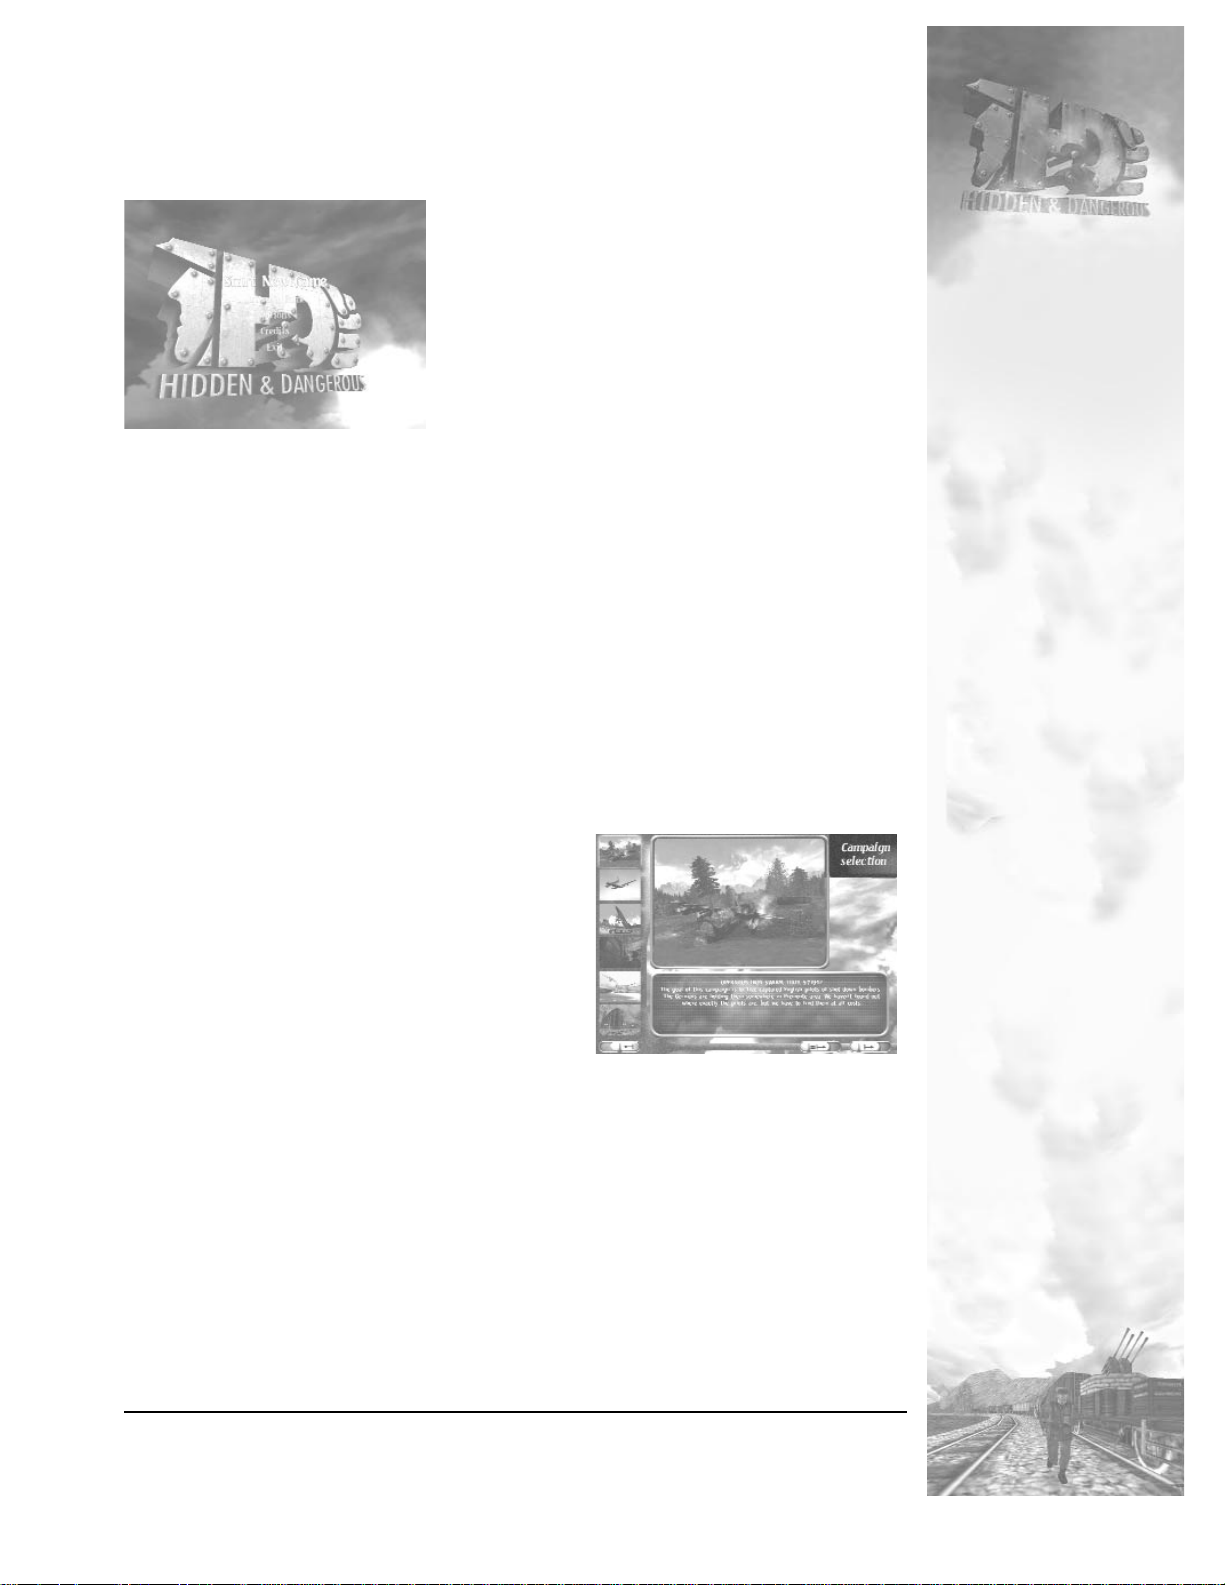
Campaign Selection
MENU 2
Gameplay in
HIDDEN AND DANGEROUS
takes place during six separate campaigns, each
of which is further divided into individual missions.
Just as in real life, each mission must be completed
before the next can be started; and all the missions
in a given campaign must be completed before
moving on to the next.
The first time you start
HIDDEN AND DANGEROUS
, only the first campaign
is available; it’s the only one shown in color , and the only one with associated text.
Campaigns that are not yet available are shown in black and white.
• Each campaign includes an animated Intro, which can be started by
pressing “Play Intro.” The Intro can only be viewed if the campaign is
available (i.e., in color).
7
PLAYING THE GAME
Mission Select
Once you’ve selected a campaign, this menu allows you to choose your mission. This menu functions in a similar way to the CAMPAIGN SELECTION, with
unavailable missions “grayed out.” When you first begin a campaign, only the
first mission is available; thereafter, new missions become available one at a time
Each new mission will provide text explaining its goals. The story line runs through
all missions within one campaign. Move on to the next menu by pressing “OK”.
You can return to previous menu by pressing “Back”.
• You can replay any previous mission anytime you wish. To find out what
equipment is at your disposal after completing preceding missions, or
what losses you have suffered, select the mission by pressing the left
mouse button and choose “Mission status”. A display with all necessary
information appears. To return to the Mission select menu, press “Back”.
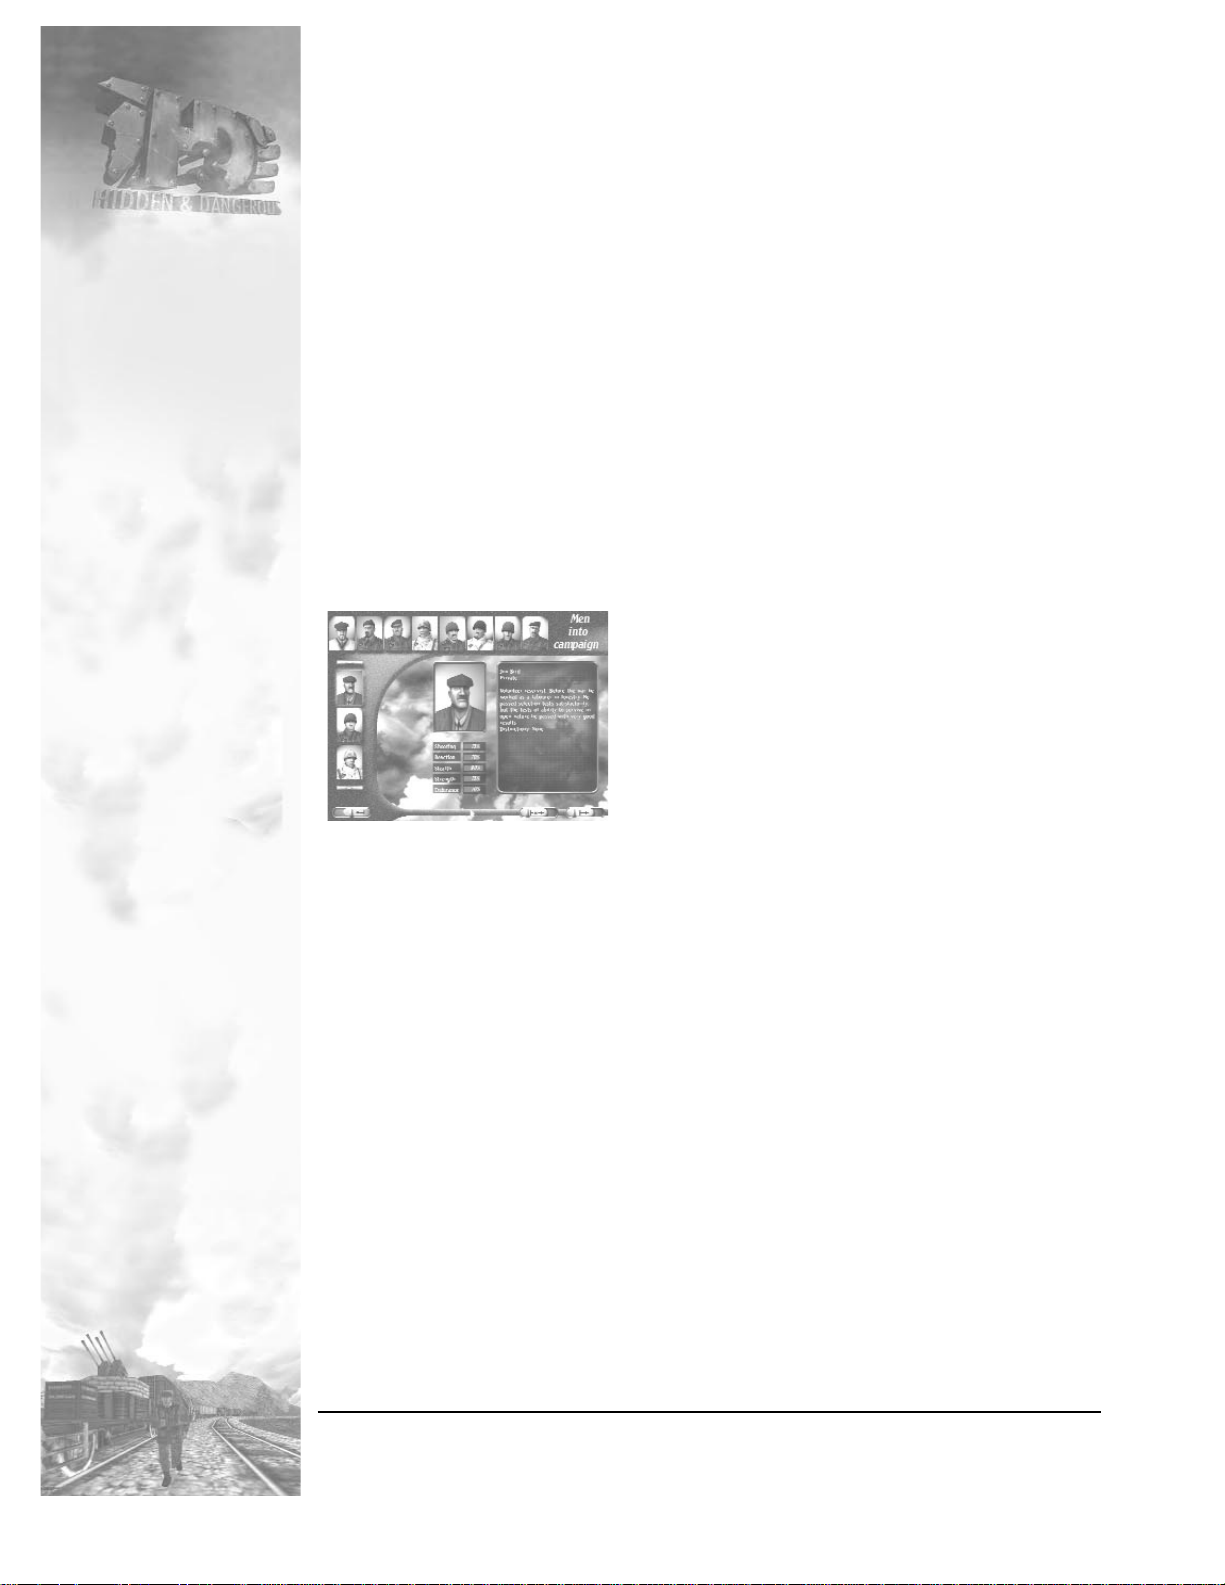
Selecting Your Team
MENU3
When playing the first mission of a new campaign, you need to choose the soldiers for your
team. Pictures of available soldiers appear near
the left border of the screen; buttons above and
below them allow you to scroll through the list of
soldiers.
You may choose up to 8 soldiers for each campaign; their pictures will
appear along the top of the screen. Choose a soldier by left-clicking on his name.
His photo, a short bio, and a window detailing his skills will appear in the middle of the screen. If you are satisfied with his abilities and wish to have him on
your team, press “Add a man to team”. He is then added to the list of chosen soldiers. Continue until you have completed your team; you may take fewer than
eight soldiers if desired. To delete a soldier, select him by left-clicking his picture
on your team lineup, then click on “Remove a man from team.” When your team
is complete, move to the next menu by pressing “OK”. To return to the previous
menu, press “Back”.
• If you prefer not to choose soldiers yourself, use the button “Auto set-up”.
The computer will choose 8 soldiers at random.
• You can add or delete soldiers by double-clicking with the mouse.
• Tips on choosing soldiers are provided below.
8
PLAYING THE GAME
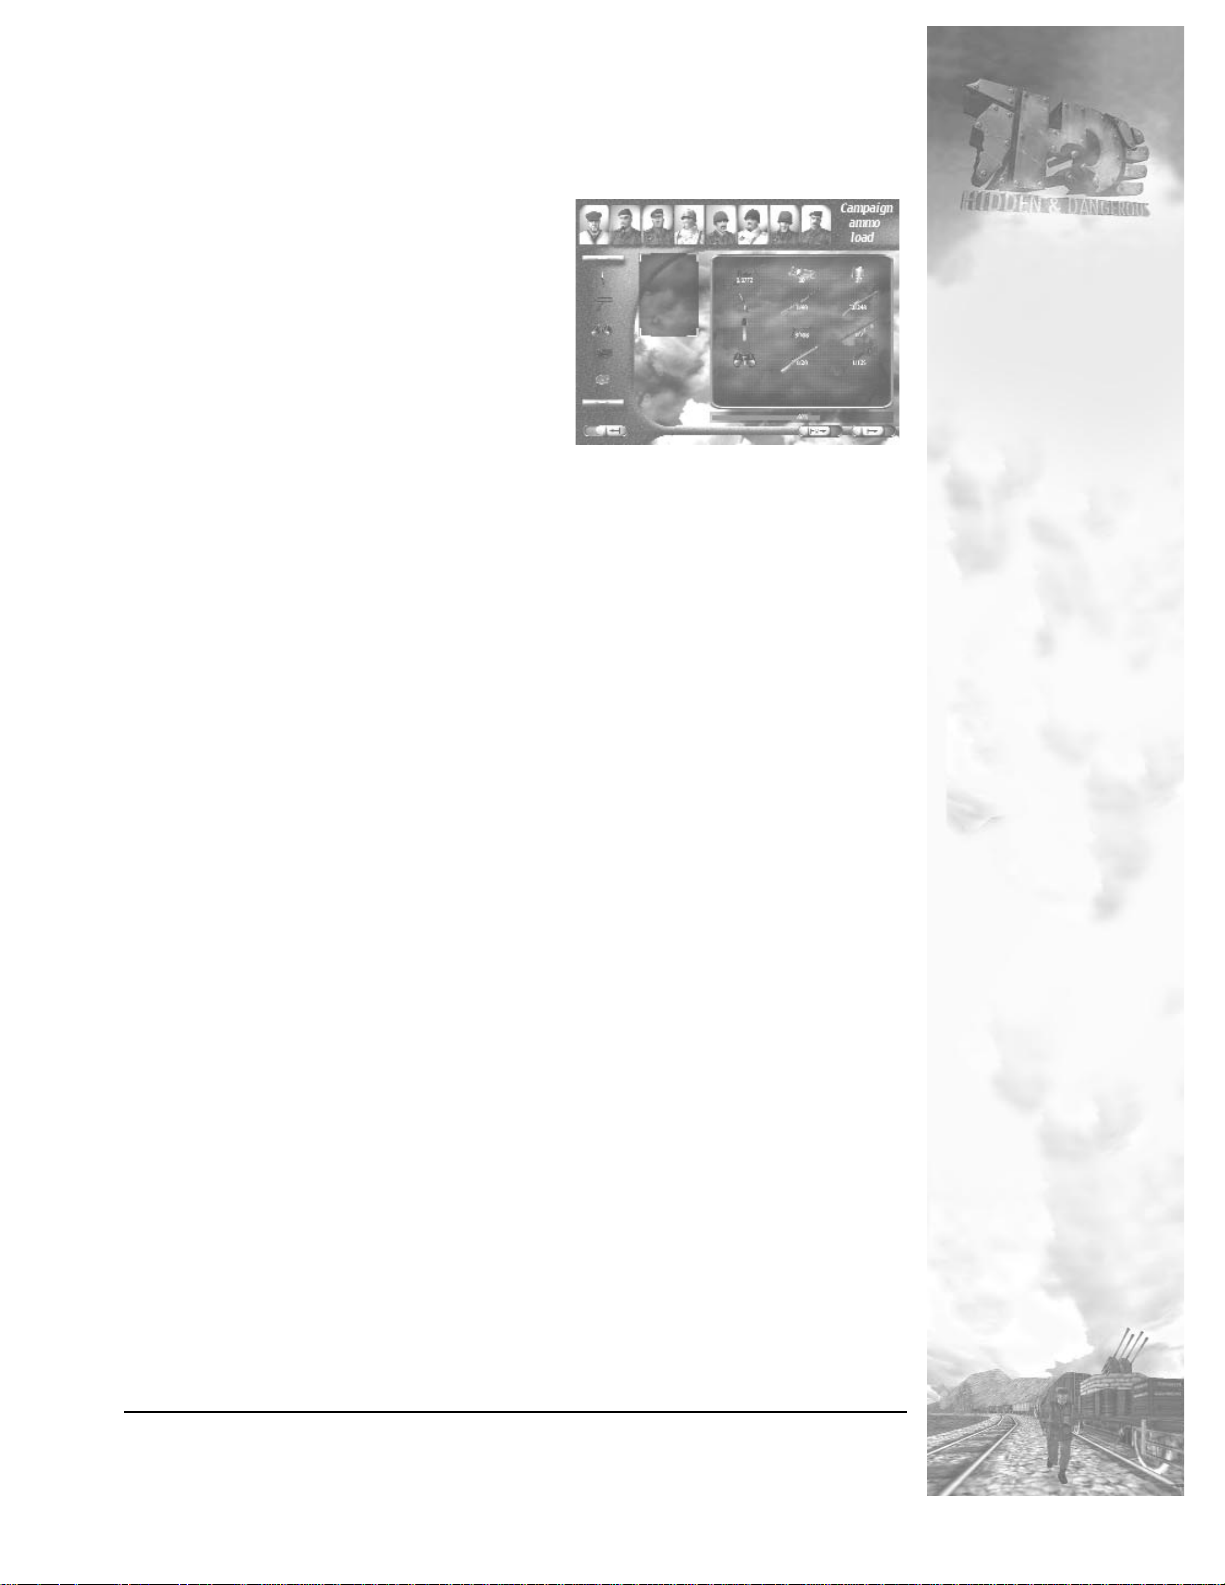
Equipment Selection
MENU4
To carry out a mission, you need to select
the weapons and equipment the soldiers carry
into action. Choose suitable weapons by
scrolling the column on the left-hand side. At
the beginning of the game, only Allied
weapons are available, but as campaigns
progress, you can capture enemy weapons
and equipment as well. By the last campaign,
you should have collected quite an arsenal!
The weapons selected for each campaign
are arranged in a large window at the right side of the screen. Data about the
weapons is displayed in a smaller window in the middle of the screen. To add any
weapon, click on it, then click on “Add item.” The weapon, with basic essential
ammo, will then appear in the large window. The figures under each weapon
show the number of weapons and quantity of ammo carried.
You can add other weapons by pressing button “Add item”, and more ammunition by pressing “Add ammo”. Remember, though, that weapons and ammo are
heavy—your men can carry only a limited quantity of each. The progress indicator under the larger window shows the load they are carrying (in percent of the
total possible).
To remove items you don’t need, click the item, then “Remove item” or
“Remove ammo” as appropriate. Proceed to the next menu by pressing “OK”.
Return to the previous menu by pressing “Back”.
• If you prefer to let the computer select your weapons for you, click on
“Auto set-up”. The computer will choose an optimum selection of weapons
and ammunition.
• Some campaigns may require special equipment, such as time bombs.
Special equipment is automatically added to the list when you use “Auto
set-up”. Naturally, you can modify the list according to your needs.
• You can also add or delete weapons by double-clicking the mouse.
• Strategy for choosing weapons is described in a special chapter.
9
PLAYING THE GAME
Briefings
You will get all the necessary information concer ning the mission via a written
and audio briefing, taking place over a 3D map of the area. Important points are in
red. First, you’ll be briefed on the specific goals of the mission, next on the most significant dangers, and finally, you’ll see some suggestions as to the simplest way of
carrying out the mission. The order and methods of tackling each task are entirely up
to you.
• You can go back to the briefing whenever you wish during the play by press-
ing the key F1.
• Stop the briefing whenever you wish by pressing the key Esc.
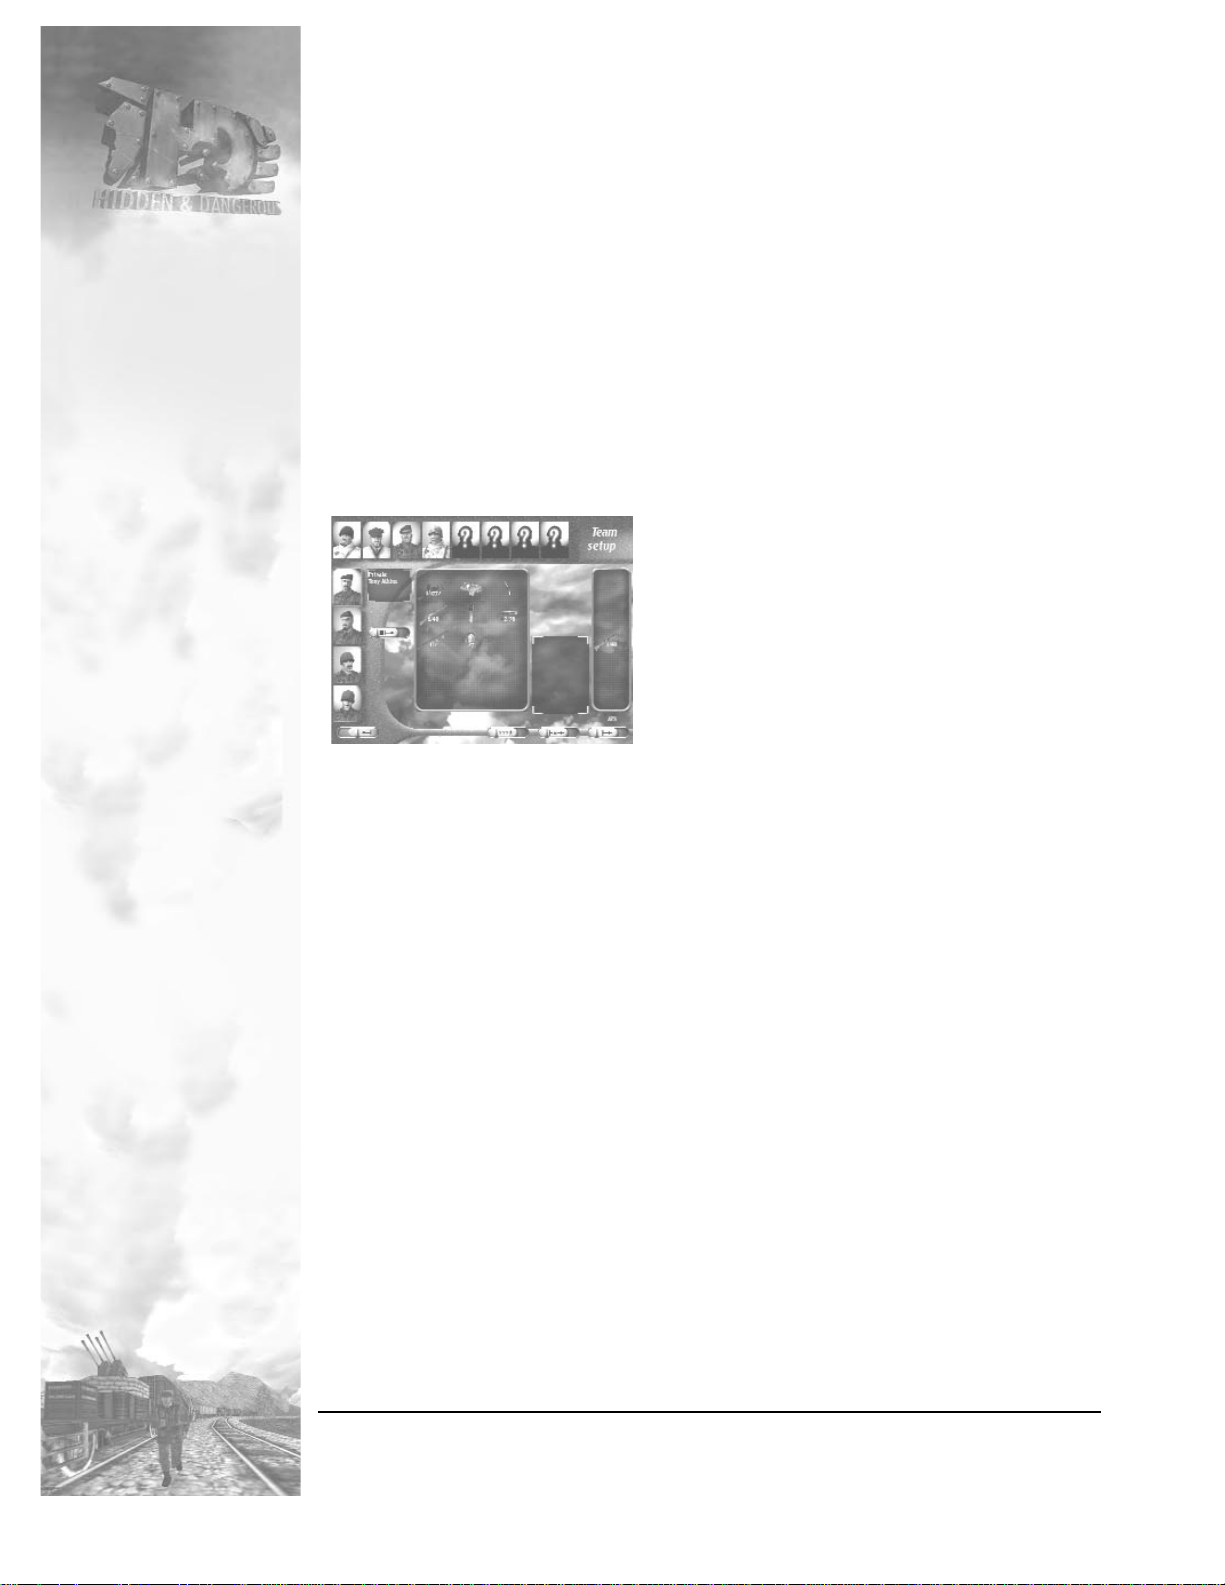
Setting Up Your Team
MENU 5
This is the menu you will work with most often.
You’ll select four men (the basic unit of the SAS),
and choose how they’ll be equipped for each mission. Remember, though, that if you lose a man
during the course of a mission, you cannot replace
him until you have completed the entire campaign
— “Once you’re dead, you’re dead.” Any
weapon left behind on the battlefield is also lost.
On the other hand, if you capture any enemy weapons, you may use them in subsequent missions.
Soldiers that you have chosen for a campaign appear at the top of the screen.
Clicking on any soldier, then on the “Add a man to the team” button, will place him
on your four-man mission team (displayed at screen center). To remove any soldier
from the list, right-click on him, then click on “Remove a man from team”. Choose
other soldiers in a similar fashion. You may choose fewer than four soldiers if you
wish.
The next step is to equip your soldiers. When you click on the image of a chosen soldier, a column with information about the weapons he’s carr ying appears on
the right-hand side of the screen. The weapons available to your unit are shown in
the large middle window. Just as in the previous menu, you can transfer, add or
delete weapons as required. Remember that there are limits to how much anyone can
carry; the percentage of what a soldier can carry is displayed on an indicator at the
bottom right corner of the screen. When you’ve chosen and equipped your men, click
on “OK” to proceed on or “Back” to return the to the previous menu.
• If you prefer to let the computer select your weapons for you, click on “Auto
set-up”.
• To view any information about an individual soldier, left-click on him, then
click “Soldier info”.
• Strategy for selecting the correct men for a mission is described in a special
chapter.
10
PLAYING THE GAME
Debrief Menu
This is displayed after completing a mission. You will be given the result of
your mission, the quantity of ammo used, and your losses. If the mission was a
success, the next mission will become available to you. If you have finished the
last mission in the campaign, the next campaign will become accessible.
NETWORK PLAY
Up to four players may play
HIDDEN AND DANGEROUS
over a network.
Network play parameters must be set up before a network game can be started.
SETTINGS
Choose the type of connection desired: direct (cable between two machines),
modem, or network. Left-click or press ENTER to cycle between available options.
MODEM CONNECTION FOR DirectPlay
This type of connection allows only two players. Select the type of modem
used, then enter the telephone number to be dialed; if you leave the DATA column
blank, your modem will wait for a call from the other player.
SERIAL CONNECTION FOR DirectPlay
This connection uses a direct serial cable between two computers and supports only two players. A Microsoft Windows inset screen will appear to allow
you to set communications parameters, which must be identical for both computers.
IPX CONNECTION for DirectPlay
This connection allows up to four players to participate over a LAN. It is not
necessary to set parameters.
INTERNET TCP/IP CONNECTION FOR DirectPlay
This connection type allows up to four players to participate via the Internet.
(If no connection parameters are entered, it will also work on a LAN.) For Internet
play, input the IP address and port number.
If other network connections are active on the computer, they’ll appear on this
menu. Parameter selection may be necessary for some types; others may operate
without parameter selection.
PLAYER’S NAME
Enter the name you wish to use for network play.
START NETWORK GAME
In a network game, one player’s computer becomes the HOST, while other
players log in using the JOIN function. Before clicking on CONNECT to start a
network game, all communications parameters must be set correctly (see above).
11
PLAYING THE GAME
To begin a network game as host, first click on CONNECT, then on HOST
GAME. Select a player profile from those stored on the HOST computer; then
you’ll see the message “Waiting For Other Players.”
Additional players join the game by clicking on CONNECT, then on JOIN
[HOST NAME]. As soon as the first additional player has logged in, the START
THE GAME command becomes available on the host computer, as well as a list
of players logged in.
NOTE — Wait until all the players you expect are listed on the HOST computer before starting the game. Once the game has been started (by clicking on
START THE GAME), no additional players can log in.
• The maximum number of players is four: one host and three client play-
ers.
• If the JOIN [HOST NAME] message does not appear on the client com-
puter(s) after “Waiting for other players” appears on the host computer,
check network and communication parameters.
• If the names of client players don’t appear on the host computer after
they’ve clicked on the JOIN [HOST NAME] command on the client computers, check network and communications parameters.
NETWORK GAME RULES
Once the client computer(s) have connected with the host, the game can
begin. Major elements of gameplay are controlled from the HOST computer.
These include selection of the campaign and mission to be played, as well as
selection of team members and equipment (weapons and ammo). Prior game status (which campaigns/missions and team members, etc.) is based on the profiles
stored on the HOST computer; profiles generated in single-player games can be
used in network play, and vice versa.
While only the host computer can make mission and equipment selections,
the selection menus are displayed on all computers connected.
12
PLAYING THE GAME

Therefore, selection of characters and equipment should be discussed among
all players before the HOST player makes the choices. While selections are being
made on the host computer, any player can enter a “chat” mode by pressing F4.
Any message you type will be sent to all connected players when you press
ENTER.
Once a network game has started, the host computer will assign a soldier to
each connected player. You can change among soldiers the same way as in a single-player game, but each character can only be controlled by one player at any
time. If you try to control a character already assigned to another player, that
player’s name will appear above the character’s head. If there are fewer than four
(human) players, the host computer will control one or more characters. You can
switch into any of these characters any time you wish.
Load/Save Menu
If you need to take a break from the game, you can SAVE it at any time. Press
ESC during play to choose from three options - Resume, Save, Quit. If you choose
Resume you will return to the game without saving it.
Choosing Save will save the current status of the game. Note you only have
one save “slot” per mission and profile; subsequent SAVEs during the same mission will overwrite what’ s been stored earlier. It’s not a bad idea to SAVE from time
to time on general principle — this will help you recover in case there’s a system
or network crash.
To load a saved game, go to the Mission selection menu. To play , simply click
Load for the mission you want to return to. If you choose Quit you will exit
HID-
DEN AND DANGEROUS
completely.
Note that both single-player and network games can be saved. However, a
network game can only be saved to the HOST computer.
13
PLAYING THE GAME
• Whenever any player switches to the map view or any of
the menus, the game will halt temporarily for all connected
players.
• If you aim a weapon at one of your own team (“friendly
fire”) using the external sight, the aiming cross (F2) will turn
red and the character’s name will appear above the soldier
you’re aiming at.
• If your character is killed and there are no other (computer
controlled) characters available to switch into, you can still
watch the rest of the gameplay as a spectator.
• Conditions to end a mission (successfully or otherwise) are
the same as in single-player mode.
• You can send messages to any other player during a mission by pressing F4.
14
PLAYING THE GAME
OPTIONS
These screens allow you to set controls, sound levels, and graphics parameters.
CONTROLS
This menu allows you to redefine any and all keys used in
HIDDEN AND DAN-
GEROUS
. To change any key assignment, click on the desired function, then press
ENTER. The original key will be replaced by a blinking exclamation point. Press the
new key to which you want to assign the selected function.
There are more key assignments than will fit on one screen; scroll up and down
as required to see the entire list.
SETUP MOUSE: In this menu, you can set mouse sensitivity and swap directions.
SOUND SETUP: Select music or game sounds with the mouse, then use the
left and right cursor keys to change the volume.
CREDITS: Roll the credits for the game.
EXIT: The program will ask, “Yes” or “No”. If you confirm “Yes”, you will return
to your Desktop.
Getting the Action Ready
Strategy for selecting your men in a campaign.
At the beginning of the game you have 40 men at your disposal. Each man
has a “mug shot” and a listing of his own particular skills and personal histor y.
The individual skill ratings are:
SHOOTING
Gives info about the accuracy of his shooting. A soldier with 100%
value of SHOOTING always hits the target he is aiming at. This would
be an ideal soldier to use as a sniper. Soldiers with lower SHOOTING
ratings will not be as accurate, but can still be deadly with automatic
weapons.
REACTION
Gives info about the speed of his reactions. This characteristic is not
apparent when you control the soldier directly. However, when the
computer is controlling a soldier with higher values of REACTION, he
reacts to enemy’s fire much more readily.
STEALTH
Soldiers with greater stealth are harder to see and hear, and therefore
have a better chance of moving undetected behind enemy lines.

15
STRATEGY
STRENGTH
This parameter determines the amount of equipment and weapons that
the soldier is able to carry. The higher the value, the more he can carry .
ENDURANCE
This parameter determines what injuries the soldier can endure. The
higher the value, the more hits he can survive.
You are allowed to select 8 soldiers for a campaign. A good marksman will
definitely be very useful, because in most missions a sniper represents your best
weapon. Really good snipers are rare in the game; if you lose one in a mission,
it will probably be best to replay the mission. Soldiers with an average shooting
ability are suitable for providing cover, and are very effective when equipped with
an automatic weapon. Soldiers able to carry heavy loads are useful as carriers
of light machine guns and bazookas. The importance of being able to react quickly will become apparent once you send the soldier against the enemy. If he has
an automatic weapon and enough ammunition, he’ll emerge as the winner from
most encounters.
When choosing a soldier, bear in mind that if you lose one of your soldiers,
he is lost for the duration of the campaign. The missions become more difficult
and demanding as the game progresses, so you should try to save the best and
most capable soldiers for the final stages of the game. Let us remind you again
that once you lose a soldier, he is lost forever!
Choosing Weapons and Equipment for the Campaign
There are many types of weapons and equipment available in this game,
each of them suitable for a different purpose. It is, however, possible to divide
them into several categories:
SNIPER RIFLES
Equipped with a variable magnification telescopic sight. In the hands
of an experienced sniper, this is a superior weapon.
SUBMACHINE GUNS
An ideal basic weapon. Effective against groups of enemies and in
interiors (such as inside buildings). Can go through a lot of ammunition
in a short time unless carefully used. Not particularly accurate at long
range.
MACHINE GUNS
The best weapon to be used when you are outnumbered. Can only be
fired from prone position, and requires a great deal of ammunition.

BAZOOKAS
This weapon can be devastating, especially against a high concentration of enemy armor. It is the only weapon with which an individual soldier can destroy a tank. Its main disadvantage is the heavy weight of
both the weapon and its ammunition. In addition, its backblast requires
that it be fired only from a standing or kneeling position (not prone).
HAND GRENADES
There are two types of hand grenades used in this game. Timed hand
grenades explode 6 seconds after being thrown and are ideal for clearing interiors. Contact hand grenades explode on impact and are, therefore, more suitable for fighting in open terrain.
MINES
Mines are automatically armed as soon as they are placed. Anti-personnel mines are 100% lethal to soldiers who step on them (and they
cannot distinguish between friend or enemy). Anti-tank mines reliably
eliminate tanks and any other vehicles.
PISTOL
Suitable as a stand-by weapon, in case your soldier finds himself without any rifle or submachine gun ammunition. Limited range and accuracy. May not kill an enemy immediately except with a head shot.
KNIFE
If you manage to creep up close enough to an enemy soldier, you can
save some ammunition...and the knife is silent.
SIGNAL FLARE
Illuminates surroundings to let you see the enemy nearly as well as in
daylight. Unfortunately, he can see you just as well.
UNIFORMS
If you use a disguise and wear an enemy uniform, you won’t be recognized. However, anyone may slip up and reveal himself.
EXPLOSIVES
The goal of some missions is to destroy equipment. Charges with timing devices are suitable for this purpose.
16
STRATEGY

CAMERA
Not essential for any mission, but if you’d like a memento, you may
take a snapshot at any time. It will be stored in the HIDDEN AND DANGEROUS home directory.
BINOCULARS
Enable you to watch your enemy from great distance.
RADIO TRANSMITTER
Essential in certain situations. When switched on, provides a homing
signal for artiller y or bombers.
The basic combination of weapons can be similar for all campaigns. It definitely pays to take a submachine gun for each member of the team, as this is the
most versatile personal weapon available. You have 4 men in the unit; consider
that some submachine guns may be lost in the battlefield. It is also essential to
have enough ammunition. Each soldier may fire 100 - 130 rounds in the course
of one mission. Another essential weapon is a sniper rifle: not only can you pick
off enemies from a safe distance, it also uses ver y little ammunition (ideally, one
round per kill).
Light machine guns are useful in most of the missions, but are heavy and use
a great deal of ammunition (at least 300 rounds per mission). It’ s also a good idea
to take some hand grenades, as these are invaluable for clearing groups of soldiers and in interiors.
Mines can prove very useful against enemy vehicles as well as personnel. For
skirmishes at night, you will need flares, and if you should come upon some heavy
enemy armor, several bazookas could be your only chance. Make sure to have a
few pistols - just in case you need them in an emergency. Even though you can
capture some equipment from the enemy, it is always better to have your own
equipment in sufficient quantities.
• All weapons available are described in a special chapter. •
The Mission Briefing
Follow the instructions given about the mission and your goal very carefully.
Divide your men in such a way that the loss of one man will not seriously affect the
whole mission. Sometimes you can recover weapons from your killed comrades, but
don’t count on it. If the mission involves enemy armored vehicles, make sure that you
are equipped with anti-tank mines and bazookas. Don’t forget the machine guns;
their range and rate of fire are superior to that of submachine guns.
17
STRATEGY
Strategy For Selecting Men and Weapons
When selecting your team and determining how to equip your men, consider
your mission requirements very carefully. Try to capture as many weapons from enemies as possible.
When choosing your men, consider the type of the mission they are to carry
out. Think about the necessity to salvage all the weapons from the battlefield; the
amount of equipment your unit can carry is always limited, and it’s vital to
“stretch” it whenever possible.
Before you go into action, consider carefully how to use each man during the
mission. For instance, to be effective, a sniper has to concentrate entirely on his
target, and thus needs another man to cover him during action. A machine-gunner will probably not carry any side weapon, and thus also needs cover. Always
make sure that your men have sufficient ammunition; other wise, they are of ver y
little use. If the fighting is to take place in interiors, make sure each man is issued
at least two (delayed-action) hand grenades.
ACTION!
• Soldier’s Movements
• Controlling the Views
• The game offers several viewing options.
• 1st Person View
This view , in effect, “makes you the soldier
you are controlling,” and allows you to “see
through his eyes.” If you are holding a
weapon in your hands, you will see that
weapon’s “sight picture.” Moving the mouse
changes both your direction of view (and the aim of your weapon) and your
direction of movement. This is an ideal view for both general movement and for
shooting. The - and = keys cycle through the 1st person and external views.
VIEW 1
External Views
In this case, you see your character from
the rear and can follow his actions. You can
move your viewpoint in and out (- and = keys)
as well as up and down (successive presses of
the \ key). This view works well when your
soldier is crawling or moving through obstacles. You can shoot while using this view,
either with or without the external sight.
18
STRATEGY

19
STRATEGY
VIEW 2
To activate the external sight, press the F2 key . A line of fire and sighting cross
will appear.
INFO 1
Controlling the Soldiers
While playing, all the functions are controlled by means of the keyboard and
the mouse. You can re-define keyboard functions in the menu or directly in the
game. The standard keyboard is arranged thus:
TAB, Shift + TAB . . . . . . . . . . .Select soldier (cycles through soldiers)
1, 2, 3, 4 . . . . . . . . . . . . . . . . . . . . . . . . . . . .Select soldier directly
Cursor LEFT . . . . . . . . . . . . . . . . . . . . . . . . . . . . . . . . . .Move left
Cursor RIGHT . . . . . . . . . . . . . . . . . . . . . . . . . . . . . . . .Move right
Cursor UP . . . . . . . . . . . . . . . . . . . . . . . . . . . . . . . .Move for ward
Cursor DOWN . . . . . . . . . . . . . . . . . . . . . . . . . . . . . . .Move back
Shift + cursor Up . . . . . . . . . . . . . . . . . . . . . . . . . . . .Run forward
Shift + cursor Left/Right . . . . . . . . . . . . . . . . . .Move left/right faster
and roll if in prone position
Alt + cursor UP . . . . . . . . . . . . . . . . . . . . . . . . . . . . . .Silent move
Ctrl . . . . . . . . . . . . . .Fire / Prepare weapon / Throw hand grenade
Shift + Ctrl . . . . . . . . . . . . . . . . . . . . . .Special hand grenade throw
R . . . . . . . . . . . . . . . . . . . . . . . . . . . . . . . . . . . .Reload magazine
X . . . . . . . . . . . . . . . . . . . . . . . . . . . . . . . . . . . . . . . . . . . .Jump
A . . . . . . . . . . . . . . . . . . . . . . . . . . . . . . . . . . . . . . . . . .Turn left
D . . . . . . . . . . . . . . . . . . . . . . . . . . . . . . . . . . . . . . . . .Turn right
W,S . . . . . . . . . . . . . . . . . . . . . . . . . . . . . . . . . . . . .Change pose
Mouse move . . . . . . . . . . . . . . . . . . . . . . . . . . . . . . . .Turn around
Left mouse button. . . . .Fire / Prepare weapon / Throw hand grenade
U . . . . . . . . . . . . . . . . . . . . . . . . .Use gun, vehicle, light, Get item,
Get inventory from dead soldiers,
move up and down ladders
Right mouse button. . . . . . . . . . . . . . . . . . . . . . . . . . . .Rotate body
C . . . . . . . . . . . . . . . . . . . . . . . . . . . .Center body (straight ahead)
Right mouse button held down,
move mouse forward . . . . . . . . . . . . . . . . . . . . .Zoom Sniper Scope
Hero Moves

Using Your Inventory
There are many objects available in this game, each used in various ways
and for various purposes:
WEAPONS
• Sniper rifles
When you select the sniper rifle, you must use the 1st person view. A telescopic sight will be projected on the screen when your soldier stops moving. To
zoom the sight, hold down the right mouse button and move the mouse. Fire by
clicking the left mouse button. A soldier’s ACCURACY rating is most critical when
using the sniper rifle. If it’s high, the shot will almost always be in the center of the
sight. Remember to watch the ammo info displayed in the upper right-hand corner of the screen.
20
STRATEGY
View control
\ . . . . . . . . . . . . . . . . . . . . . . . . . . . . . . . . . . . . . .Change elevation
- , = . . . . . . . .Change distance; cycle between 1st and 3rd person view
F1 . . . . . . . . . . . . . . . . . . . . . . . . . . . . . . . . . . . . . . .Replay briefing
F2 . . . . . . . . . . . . . . . . . . . . . . . . . . . . . .Toggle external sight on/off
F11 . . . . . . . . . . . . . . . . . . . . . . . . . . . . . .Display Mission Objectives
Space Bar . . . . . . . . . . . . . . . . . . . . . .shift to over view (strategic) map
Game control
Commands
Home . . . . . . . . . . . . . . . . . . . . . . . . . . . . . . . . . . . . . . .Follow me!
End . . . . . . . . . . . . . . . . . . . . . . . . . . . . . . . . . . . . . . . . . . . . .Stop!
Page Up . . . . . . . . . . . . . . . . . . . . . . . . . . . . . . . . . . . . . .Move on!
Insert . . . . . . . . . . . . . . . . . . . . . . . . . . . . . . . . . . . . . . . . . . . .Hey!
Page Down . . . . . . . . . . . . . . . . . . . . . . . . . . . . . . . . .Hold your fire!
Delete . . . . . . . . . . . . . . . . . . . .Cancel last command to active soldier
[ , ] . . . . . . . . . . . . . . . . . . . . . . . . . . . . . . . . . . . .Change inventory
ENTER . . . . . . . . . . . . . . . . . . . . . . . . . . . . . . .Use item / Free hands
ENTER pressed 3sec . . . . . . . . . . . . . . . . . . . . . . . . . . . . . .Drop item
Inventory

21
STRATEGY
Note — You will find more details about shooting from the sniper rifle in a
special chapter.
• Submachine Guns
When shooting from submachine guns, any view can be used. If you’re using
the 1st person view, use the sight of the weapon to aim at the enemy; use the
external sight for external view. Most submachine guns available during WW II
could not fire a single round; a single press of the trigger will fire a short burst of
shots. Use this when shooting at a group of enemies.
Note — Keep track of the ammunition in the magazine. Before charging into
a room, make sure that you have enough ammunition to shoot a burst of shots.
Reload the magazine if necessary.
• Machine guns
Capable of a high rate of accurate fire, the machine gun is an extremely
powerful weapon. Its disadvantages are the weight of both the weapon and its
ammunition, and the fact that it can be fired only from the prone position (soldier
must lie down before firing). Thus, placement of the weapon before you commence firing can be critical.
Note — You should assign at least one additional man to protect the machine
gunner at all times.
• Bazooka
This weapon is most effective at short range. Use its sight to aim at vulnerable areas of enemy armored vehicles (for example, a round may not penetrate the
heavy armor on a tank turret, but it can destroy the tracks and bogies). Two or
more rounds may be required for a heavily armored target.
To use the bazooka, the first mouse click will ready it for firing, and the sights
will slide out. If you move at this point, the weapon will automatically be resafetied. Once you have aimed, the second click will fire the bazooka.
Note — When shooting at a moving target bear in mind that the bazooka
round flies much more slowly than a bullet; lead the target slightly to compensate.
• Flares
A flare allows you to see the terrain during night missions. After being fired,
it flies up to 50m and illuminates terrain with white light. Your soldier will normally
shoot it straight up; if you wish to shoot in a forward direction, the soldier has to
bend forward.
Note — Using the flare allows you to see the enemy much better. However, it
means that the enemy will see you very easily too.
• Pistol
This is a back-up weapon which cannot be used while the soldier is running.
If you are standing still and press the trigger, the soldier pulls out the gun and the
sight appears. This gun stands no chance against automatic weapons of the
enemy.

Note — Due to its small caliber and low muzzle velocity, the pistol is not a
very effective weapon. However, you can still kill an enemy with it and capture his
equipment, provided you hit the right spot. Aim at his head.
HAND GRENADES AND EXPLOSIVES
• Hand Grenade
When throwing a hand grenade, you can regulate the length of the throw. If
you keep the mouse button pressed for a few seconds, an indicator showing the
throwing power will appear. There are two types of hand grenades available. The
delayed-action hand grenade is suitable for combat taking place in interiors; you
can even throw it around a corner or into a room by letting it bounce off a wall.
The contact hand grenade is suitable for outside fighting and for providing cover,
because it explodes immediately on impact.
Note — The hand grenade is usually less effective than most people would
think. If you throw it into a room, be cautious going in, as surviving enemies might
still be hiding under a table or behind furniture.
• Mines
Mines are most effective when used in large numbers. However, if you expect
enemy traffic in a certain area, a small quantity of mines might prove to be ver y
effective. When expecting enemy armor, mine the probable access routes along
which the enemy is likely to advance. To lay a mine, choose it from the inventory
and then use it.
Note — Caution! The safety pin on the mine is removed immediately after it
has been laid on the ground, so it represents a threat to you and your soldiers as
well as to the enemy.
• Explosives
Used in a number of missions. Choose the most effective spot for laying the
charge. Set the time delay of the explosion by using the Forward/Backward buttons for movement. Press “U” again and the time remaining to detonation will
start ticking off. The time remaining to detonation can be seen in the upper right
corner of the screen.
Note — Caution! This explosive is very powerful, with large blast radius
effect. Keep a safe distance. You should also consider the possibility of chainreaction explosions around you as well.
DISGUISES
• Uniforms
If you succeed in getting hold of an enemy uniform or some civilian clothes,
you can wear them and move about behind enemy lines undetected. This can be
advantageous in many situations. However, every disguise is blown with time so
it is necessary to avoid staying in the same place for too long.
22
STRATEGY

Note — Avoid using weapons (except captured ones) when disguised if you
don’t wish to be discovered. A man wearing an enemy uniform but using an
Allied weapon is somewhat conspicuous!
MISCELLANEOUS
• Knife
A useful silent weapon, provided you manage to get near enough to the
enemy. Of course, it does not need any ammunition.
• Camera
You can take a screenshot whenever you wish. The pictures are stored in the
HIDDEN AND DANGEROUS
root directory in PCX (Paintbrush) format.
• Radio transmitter
Allows you to control fire of your supporting artiller y. Transmitters are used
for marking coastal targets that can be blasted by the Navy from a distance of up
to 20 km. After you’ve planted the transmitter, the crew of the ship locates and
aims at the exact position, until the target is destroyed. Naturally, your unit needs
to get to a safe distance before the shooting commences, so a timed delay is necessary before the transmitter switches on.
• Binoculars
If the visibility is good and the enemies alert, they can discover you at a distance of 300 m. Therefore, proceed cautiously and use your binoculars to survey
all suspicious-looking places and discover any enemy who might be hiding.
Using Weapons and Objects Found in Missions
There are plenty of objects to be found in missions. Some of them can even
be captured and used both immediately and in subsequent missions. There are
several kinds of these objects:
FIXED WEAPONS
These are usually installed on vehicles or on guard towers. It is impossible to
take them with you, but if they are loaded, you can use them in place. These fixed
weapons are mostly modified versions of your machine guns or searchlights. In
some missions, you may be able to control the cannon of an enemy tank. If you
manage to eliminate the crew, approach the weapon from the back and press the
USE button (“U” key). You will then be able to aim the weapon with the mouse and
shoot by pressing the FIRE button. If you wish to control a tank or a cannon, search
the item until you find the correct spot. This will then allow you to use it.
Note — Use as many enemy weapons as you can; save your own ammunition.
When fighting in vehicle garages, you can use the weapons installed on cars.
23
STRATEGY

VEHICLES
You can use many vehicles found in the missions. Find the driver seat, then
press the “U” key . Provided you manage to get into the driver’s seat, you can drive
the vehicle (if there is enough fuel in it, that is). You can shoot and throw hand
grenades from some places in some vehicles (for instance, the back of a truck).
You can switch over into a member of the team riding on the vehicle; you will be
able to drive the vehicle even though you are not switched directly into the driver. You can damage the vehicle if you hit something. If a vehicle is hit by enemy
fire, it may explode, killing all aboard.
Note –
• If you are being pursued by enemies in a vehicle and you manage to elimi-
nate them without blowing the vehicle up, you can use the captured vehicle
yourself.
• If the vehicle has a weapon installed on it, it can be used whether the vehi-
cle is stationary or in motion.
• Shots from handguns present no danger to armored vehicles; use this to
your advantage.
• Use vehicles for blocking the enemies’ access routes.
• Cause chaos in the enemies’ car-park by blowing up some vehicles.
• You can even drive the vehicles in the interiors of buildings.
MISCELLANEOUS EQUIPMENT AND WEAPONS
Look around carefully and search for the enemy arsenal; you may be able to
get some weapons there. Other weapons may still be boxed. Look for boxes with
hand grenades and Panzerfausts (German bazookas). To collect objects, stand
next to the object you wish to pick up and press the “U” key. If your man is
already carrying too much, he will be unable to pick it up. In this case, you can
discard some unnecessary weapons or leave the object behind.
Note — You can obtain quite a lot of equipment in this way, which just might
help you to accomplish your mission. While moving through the mission area,
keep your eyes open for unexpected goodies.
ACQUIRING WEAPONS FROM FALLEN SOLDIERS
It is possible to obtain weapons from both your own and enemy casualties.
Stand next to or on top of the dead soldier and press the “U” key. In place of your
inventory, the inventory of the person being searched appears. Having chosen an
item, press ENTER and the object will be transferred into your inventory. If you are
over-loaded already, you will hear a rejection signal. Press the “U” button again to
return to normal.
Note — Always try not to leave your weapons behind on the battlefield. You
have only a limited quantity of ammunition and weapons, so time spent searching
fallen soldiers for weapons is well spent.
24
STRATEGY

Note — The “Follow me!” command can be used in a situation when you
need to move the whole group somewhere else. While you are moving, the rest
of soldiers are running in a loose formation behind you. As soon as you stop, the
soldiers take up wing positions (depending on their number) and cover your
flanks.
DIALOGUE WITH CIVILIANS / CAPTIVES
In some missions, it is possible to talk with certain characters. The dialogue is
automatically activated as soon as you approach them. Listen carefully; you might
gain some important information.
Note — Avoid shooting aimlessly. Don’t shoot at civilians. They might provide
you with important information.
CONTROLLING FELLOW FIGHTERS
You have up to 4 soldiers in each mission. While you can control only one at
a time directly, other soldiers can carry out orders issued either on the map, or in
real time. How to control your soldiers using this map is described below.
SWITCHING BETWEEN SOLDIERS
You can see the soldier you are controlling in the center of the screen (provided you have not selected the 1st person view). In the lower part of the screen
are icons showing the state of all four soldiers on your mission. The active soldier
is highlighted. You can cycle through the soldiers by hitting the TAB or Shift + TAB
keys (forward or reverse cycle), or select them directly using numbers 1 through
4. As soon as you change to a different soldier, the appropriate icon is highlighted. Soldiers not under active control or specific orders guard their positions
and automatically defend themselves when attacked.
REAL TIME COMMANDS
In some cases, you can issue commands directly to other soldiers. This can be
sufficient for most control purposes. There are 5 such commands you can issue by
using hot-keys; these are described under CONTROLLING THE SOLDIERS. The
active soldier will call out the commands in the direction he’s facing, and all soldiers within 15 meters will hear him. These are the commands:
25
STRATEGY
Real Time
Follow me ! . . . . . . . . . . . . . . . . . . . . . . .Soldiers run in the same direction
as you, while covering each other.
Stop! . . . . . . . . . . . . . . . . . . . . .Soldiers halt and survey the surroundings.
Move on! . . . . . . . . . . . . . . . . . . . . . .Soldiers move slightly ahead of you.
Hey! . . . . . . . . .A soldier standing in your line of fire moves out of the way.
Hold your fire! . . . . . . . . . . . . . . . . . . . . . . . . . .Ever ybody holds their fire
and waits for you to start shooting.

Map Mode Strategy (Overview Map)
When coordination is very impor tant, it is possible to program more complicated actions on the overview map. You may switch over to the map by pressing
the SPACE BAR. The game pauses, giving you a chance to plan and program the
action without worrying about time. In this chapter, you will find out how to use
the map.
MAP 1
Changing the Map View
To be able to plan the action in detail, you
may want to zoom or rotate the map display.
Clicking on the icons with the mouse controls
the view of the map.
MAP 2
Icons
1. This icon cancels map mode and returns to the game (same as hitting the SPACE bar).
2. Use this icon to rotate the map. Keep the left mouse button
depressed and move the mouse left or right.
3. This icon zooms the map in and out. Hold the left mouse button
down and move the mouse up or down.
4. Press and hold the left mouse button on this icon to shift the map
around the screen.
5. If there are any multi-story buildings in the game, you can switch
from floor to floor by using this icon.
Note — You can also control the map without using these icons. When in the
map mode, you can shift the map by pressing the right mouse button. When you
press both buttons on the mouse simultaneously, you can rotate the map, and
zoom in.
MAP 3
Map Information
The map shows the position of your soldiers. Green
circles indicate Allied soldiers. A rotating circle indicates the currently active soldier. A circle with black
stripes indicates a dead soldier . You can switch between
soldiers on the map by clicking directly on the soldier,
or on his icon in the bottom part of the screen.
26
STRATEGY

Note — If you switch to another soldier, the map shifts and turns in the same
direction as the soldier is facing.
The map also indicates the position of enemy troops, ringed in red. A red circle with a black stripe means that the enemy soldier is dead. Only enemy soldiers
visible to your soldiers are visible on the map.
Note — Use the map to establish who is shooting at you.
Positions of civilians are also indicated on the map (if they appear in a mission).
The civilians are shown in blue.
MAP 4
This map makes orientation in the terrain much easier. The compass in the upper right-hand corner of the screen turns simultaneously with the map. Find the direction in which you need to move,
then switch back to game mode.
MAP 5
This map also indicates positions of all hardware
and stationary weapons on the scene.
Programming the Soldiers
The main function of this map is to enable you to program major, time-synchronized actions for your men. The line of icons in the left part of the screen and
the four timelines (one for each soldier) at the bottom of the screen serve this
purpose.
After you have issued a soldier with an order, the program will determine the
time necessary for carr ying out the order and move that soldier’s icon along the
timeline for a distance corresponding with the duration of action. You can discard
any icon by marking it with the mouse and pressing DELETE. You can shift the
icons along the timeline to synchronize soldier’s actions. When you have programmed all the soldiers as required, you can exit the map mode and switch back
to the game. The soldiers will immediately carry out their orders.
27
STRATEGY
MAP 6
If you decide to switch to a soldier
while he’s executing a programmed
action, the program is interrupted and
you can control him directly. If you then switch to another soldier, the previous soldier will continue his original instructions.
There is no point in programming more than 3 soldiers. During the game, one
soldier will always be under direct control.
Explanation of Map Commands
MOVE
After pressing this icon you can mark the point to which the soldier should
proceed. A line is draw pointing out the route he will take. You can “stack”
several of such icons, one after the other. When carrying out this task, your
soldier will be listening carefully for any suspicious sounds and will survey his
surroundings constantly for trouble. If he is ambushed or if he spots an enemy ,
he will take the necessary action.
FOLLOW
When issuing “FOLLOW ME!” during play , your soldier will be assigned to follow another soldier. You can then click on whoever the soldier is to follow. Use
this in a situation when you want one soldier to follow the route of another.
Note — When determining whom the soldier is to follow, you can also
use the icon in the bottom part of the map.
USE
Point out the object the soldier is to use. If you point him to a fixed machine
gun and click GUARD, he will fire it at any enemy within range.
USE INVENTORY
Instruct a soldier to use an object from his inventory. He can exchange his
weapons, or lay a mine or a time bomb.
ATTACK
If you see an enemy on the map, you can command one of your soldiers to
attack.
GUARD
The soldier holds his position, keeping watch in the direction you have indicated. As soon as he spots an enemy, he starts shooting.
28
STRATEGY

WAIT SIGNAL
Used to coordinate action between soldiers. When a soldier encounters this
signal, he will hold his position. He will resume his programmed orders upon
hearing either a shot or the real-time “Hey!” command. If attacked while waiting, he will defend himself automatically.
STAND
Soldier stands up.
KNEEL
Soldier kneels.
LAY
Soldier lies down.
Note — When a soldier receives a command to move to another location, he will move in whatever stance was commanded last. Bear this in mind
when programming your soldiers and adjust their stance as necessary.
CONCLUDING A MISSION
The mission ends after you have fulfilled all the assigned tasks, or when you
fail to carry out the key goal of the mission, or when all your men are lost.
Achieving a Mission Goal
If you have carried out all the tasks of the mission successfully, and at least
one of your soldiers has survived, the mission has been completed and the next
mission or campaign will become available. If you’ve lost three soldiers, you
might want to consider re-playing the mission, since the losses may otherwise limit
your choices for future missions.
Failing a Mission
If all the members of your team have been killed, or the goal of the mission
is not achieved, or if a friendly VIP is killed, the mission ends with failure.
Subsequent missions will not be available until earlier ones have been carried out
successfully.
29
STRATEGY

Description of the Objects Available in the Game
This chapter explains which objects you can use in the game.
Objects in Inventory
30
ITEMS AND WEAPONS
ITEM 01
Military binoculars suitable for medium distance sur veillance of
enemy.
Magnifying power: 4x
Weight: 0.25 Kg
ITEM 04
In several missions you come across locked doors. Find the key to
unlock them.
ITEM 08
Anti-tank mine used mainly against armored vehicles. Explosion
is concentrated to penetrate armor.
Weight: 11 kg
ITEM 09
Anti-infantry mine used for elimination of infantry. More dispersed explosion.
Weight: 6 kg
ITEM10
A TNT based explosive or plastic explosive equipped with time
detonator.
Weight 1.5 Kg
ITEM11
A special medium sized camera for espionage use. Press F10 to
capture a screen shot and store it (in .PCX format) in the HIDDEN
AND DANGEROUS root directory.
ITEM13
System for radio homing, used by Navy and Air Force. Once
activated, it automatically calls in artillery or air strikes.
Weight: 2 kg

31
ITEMS AND WEAPONS
ITEM33
Coding and decoding equipment. The Allies discovered and
cracked this equipment before the start of the war. Without the
key to the code, the equipment is quite useless. Aboard ships,
they used to keep the key to the code on a special type of paper
that dissolved in water, preventing the key from falling into the
wrong hands.
ITEM12
Colt model 1911-standard US Army semiautomatic pistol (usually
issued to officers).
Calibre: .45 Effective range: 40 m
Magazine: 8 cartridges Weight: 1.2 kg
ITEM14
Sten gun
Submachine gun used by British Army.
Calibre: 9mm Effective range: 160m
Magazine: 32 cartridges Weight: 3.7 kg
ITEM16
MP 44
German assault rifle designed for paratroopers.
Calibre: 7.92 Effective range: 700m
Magazine: 35 cartridges Weight: 4.3 kg
ITEM17
Johnson M 41
Standard American Army rifle.
Calibre: 0.30 Effective range: 400m
Magazine: 5 cartridges Weight: 4.75 kg
ITEM15
MP 40
Submachine gun used by enemy paratroopers (commonly called
“Schmeisser”).
Calibre: 9mm Effective range: 150m
Magazine: 32 cartridges Weight: 4.70 kg
Weapons

32
ITEMS AND WEAPONS
ITEM18
Lee Enfield Mk 4
One of the best sniper rifles.
Calibre: .303 Effective range: 800m
Magazine: 5 cartridges Weight: 4.2 kg
ITEM19
K 98
Enemy (German) sniper rifle.
Calibre: 7.92mm Effective range: 1500m
Magazine: 5 cartridges Weight: 5 kg
ITEM 20
Bren gun
Submachine gun. Modified type ZB 26.
Calibre: 7.62 Effective range: 600m
Magazine: 30 cartridges Weight: 8 kg
ITEM 21
Browning
Light machine gun used by British Army.
Calibre: 0.30 Effective range: 1500m
Magazine: ammunition belt Weight: 14 kg
ITEM 22
MG 34
Standard German light machine gun.
Calibre: 7.92 Effective range: 600m
Magazine: 30 cartridges Weight: 8.5 k
ITEM 23
ZB 26
Czechoslovakian light machine gun.
Calibre: 7.62 Effective range: 600m
Magazine: 30 cartridges Weight: 9 kg
ITEM 24
Panzerfaust
Enemy anti tank rocket launcher, based on a rocket with a chem-
ical warhead.
Weight: 8 kg

33
ITEMS AND WEAPONS
ITEM 25
M1A1 Bazooka is the American anti tank weapon.
Weight: 13 kg
ITEM 26
Enemy hand grenade
(Nicknamed “potato masher” due to its wooden handle and
round shape.)
Weight: 1 kg
ITEM 27
British hand grenade
Mills grenade dating from the twenties.
Weight: 0.7 kg
ITEM 29
Knife, Fairbairn and Sykes
Combat knife used by Commando units and SAS since 1939.
Weight: 0.3 kg
ITEM 32
Flare gun used primarily for lighting terrain at night. Can also be
used for signaling.
Weight 1 kg
CAR 1
WV 82 Kubelwagen
4 seat, 3 places to fire from, 4x2 jeep
Engine 24hp/3000rpm, 4-cyl, 85cc
Weight: 725 kg Maximal speed: 80 km/h
CAR 2
SdKfz. 251
2 seat, 1 place to fire from, 1 standing place - fixed machine
gun, Semi-caterpillar armoured transporter
Engine 120hp/2000rpm, 8-cyl, 11752cc
Weight 9000 kg Maximal speed: 60 km/h
Vehicles

34
ITEMS AND WEAPONS
CAR 5
Mercedes
2 seats inside the cabin, no shooting -2 seats in the back, shoot-
ing possible, 4x2 3500kg truck, Engine: 60hp/2800rpm, 6-cyl,
3600cc, Weight: 2700kg Maximal speed: 75 km/h
CAR 3
Opel Admiral
4 seats—cannot shoot from this car. 4x2, 4-door limousine
Engine: 75hp/3200rpm, 6-cyl 4-stroke OHV, 626cc
Weight: 1540kg
Maximal speed: 132 km/h
CAR 4
Opel-Blitz 3,6-36S
2 seats in the cabin, no shooting - 2 standing places in the
back, shooting possible from these, 4x2 3300 kg truck
Engine: 68hp/2800rpm, 6-cyl, 3626cc
Weight: 2500kg Maximal speed: 85 km/h
CAR 6
BMW-R75 motorcycle
1 drivers seat (no shooting) - 1 sidecar seat with fixed machine
gun Sidecar motorcycle
Engine: side-valve 26hp/4400rpm, 2-cyl OHV, 745cc, 4-stroke
Weight: 410 kg (with sidecar), Maximal speed: 92 km/h
CAR 7
Panzerkampfwagen IV
1 seat for the driver - 1 seat - the gunnerm Supporting infantry tank
Engine: 300hp, Maybach HL 120 PRM
Weight: 20 000 Kg Maximal speed: 42 Km/h
CAR 8
Panzerkampfwagen VI Tiger - SdKfz 181
1 seat - the driver - 1 seat - the gunner, Heavy war tank
Engine: 694hp, Maybach HL 230 P45
Weight: 56 900 Kg Maximal speed: 37 Km/h

35
ITEMS AND WEAPONS
BOAT
Gunboat
1 place - the pilot - 2 standing places to fire from - 1 standing
place, fixed machine gun. A modified river boat.
Weight: 3500 Kg Maximal speed: 15 Km
ITEM 05
Standard British SAS uniform.
Other British Army Services use similar uniforms.
Weight: 2 Kg
ITEM 06
Civilian - It is possible to use civilian disguise to move unnoticed
through enemy territory.
Weight: 2 Kg
ITEM 07
Standard German uniform. Other German Army Ser vices and SS
use similar uniforms.
Weight: 2 Kg
ITEM 03
Camouflage uniform used for COMBA T OPERATIONS in Arctic or
winter conditions.
Weight: 2 Kg
AIRPLANE
Avro LANCASTER
2 standing places, possible to fire from1 seat in the rear turret (no
shooting possible) - 1 seat in the upper turret - fixed machine gun,
Heavy bomber, Engines: four Rolls-Royce Merlin XXIV, 12 cylinders. V block, liquid-cooled engines of 1,620 hp each
Maximal range: 4,070 km
Maximal speed: Fully loaded - 462 km/h
Uniforms

36
COMBAT
Standing Soldier
Walking Soldier
Skulking Soldier
from side
Crouching Soldier
from side with rifle
Soldier with
machine gun
Rifleman
Sign for movement
Sign for grenade
throwing and
forward field of fire
British grenade
German grenade
Soldier
with bazooka
Crouching Soldier
from side
Soldier throwing
grenade
Walking Soldier
without rifle
Hidden and Dangerous
The Combat Manual
How to Use the Combat Manual
Introduction
This Combat Manual contains suggestions and information designed to help
you understand the strategy of controlling your soldiers. All tactical recommendations contained in the manual are designed especially for the Hidden and
Dangerous game. Even though the game is built to reflect reality as closely as possible, some situations may differ slightly from real combat situations, as practiced
by the members of special forces.
Remember - these are suggestions, not necessarily hard and fast rules.
Improvise!
“No plan of action survives the first contact with the enemy.”
—attributed to Karl von Clausewitz, On War
Using the Drawings
Most suggestions are accompanied by schematic drawings. When required,
the drawings include numbers, marking individual soldiers, and letters, indicating
individual points of tactical steps or stages.
Legend

Combat in Open Country
Long Distance Combat
Combat in open country and long distance combat have a lot in common.
Passive reconnaissance is used in this type of combat: rather than planning a fullscale attack, select targets for weapons effective in long distance fighting (sniper
rifle, machine gun). All attacks are usually concentrated at one or two target
points, ideally fairly close to each other. You can use either targeted (sniper) or
non-targeted (machine guns or other weapons) fire to soften-up an enemy position. This may provoke an enemy response, so it’s important to provide cover for
each member of the squad.
Movement
Troop Posture
Movement in the upright (standing) position should be used only in the most
urgent situations for fast crossing of short distances. This kind of movement should
not be used without cover being provided by other squad members.
Movement in the crouched position can be used for fast and relatively safe
progress in open country with other squad members providing cover.
Movement in the crawling position is the safest way of protecting yourself
against enemy fire. The slow rate of progress is the only disadvantage. It is ideal
for reconnaissance.
Movement in open terrain forces soldiers to minimize their silhouettes. Figure
1 indicates a soldier standing up, and hence very vulnerable in open country; the
soldier shown on Figure 2 is in the correct position.
COMBAT
Fig. 1 Fig.2
When moving from point to point, the squad should move in a way that will
hide them from enemy patrols. T ry to utilize all covering terrain obstacles between
you and enemy, even the smallest obstacles! The soldier in Figure 3 is incorrectly
positioned; the soldier in Figure 4 is correctly positioned for movement.
Fig. 3 Fig.4
37

Moving as a Team
Reconnaissance
Reconnaissance in the open country is of the utmost importance. Enemy
machine gun posts lie everywhere waiting for soldiers whoare not careful. Squad
members with the highest STEALTH levels should be selected as the reconnaissance patrol. The higher these levels are, the lower the chance of being discovered by the enemy. The reconnaissance soldier should move for ward in stages,
carefully surveying the terrain with the binoculars or the rifle telescopic sight as
he goes. He should not engage in combat, unless acting as a sniper in part of a
wider plan. In some areas it may be necessary to provide cover for the reconnaissance soldier.
Forward Movement in Formation
Firing cover is necessary during any movement in open country. Figure 5
shows forward movement of the squad with cover being provided from one side
by a machine gunner and by the other squad members.
Fig. 5 Fig.6 Fig.7
COMBAT
If you are not sure from which side the enemy will attack, choose the alternative shown in Figures 6 and 7. Red arrows indicate the direction where trouble
is expected. During movement, try to be in control of the moving unit. If you have
to respond to any sudden surprises, your squad is able to take cover and react to
the enemy attack.
Lateral Movement in Formation
If you know the approximate position of the enemy and are sure there is an
immediate threat, you can use the alternative method indicated in Figure 8. The
first moving squad member takes the reconnaissance role here. The remaining
squad members provide cover in the direction of anticipated enemy attack. It is
recommended that you control the moving soldier directly in case of any unexpected occurrences.
Fig. 8
38

If you suspect that your opponent could be ahead of you, use the alternative
method indicated in Figure 9. In this case allocate one team member to cover the
advance of the other soldier.
Fig. 9
You can use these tactics for movement to both the right and the left. Where
the terrain incline is steeper, your advance is slower . Remember, when you’re high
up, it’s easier for the enemy to spot you.
Retreat
If enemy resistance is too strong, try to retreat and regroup. If you are under
enemy attack from only one side, use the tactics indicated in Figure 10. A soldier
armed with a rifle or non-automatic weapon should retreat first, covered by fire
from submachine gun and machine guns. Soldiers armed with automatic
weapons should begin their retreat only after the others have taken their supporting retreat positions.
COMBAT
Fig. 10 Fig.11
Should the enemy attack from both sides, use the tactics indicated in Figure
11. Tr y to merge both attacks into one and eliminate them with fire from automatic weapons.
Should the enemy attack from three directions, then you’ve been surrounded
and have no other option than to try and find the best way to retreat under fire.
Lots of luck!
39

Firing
Weapon Ef fectiveness
Weapons and their use are described according to their usefulness in
specific situations:
Sniping
In long distance combat, a sniper is a formidable asset and a fearsome opponent. He usually takes the role of the reconnaissance soldier, surveying the terrain
for light infantry units. You should use him to soften up the enemy positions, and
it’s a good idea to allocate him at least one partner armed with an automatic
weapon. This is both because a sniper rifle is not an ideal weapon for close combat, and because the sniper must concentrate only on his target. Your sniper
should be the man with the highest SHOOTING level in the squad. Control him
personally, as this is the best way to select the required targets.
The Machine-Gunner
The machine gun is a devastating weapon in experienced hands. However, it
is relatively unwieldy, so it’ s absolutely necessary to protect it against attacks from
the sides.
If you are moving into an area that is obscured by fog, darkness, etc., it’s a
good idea to shoot into the area ahead. This fire may not cause heavy loses to
the enemy, but it will force him to squat down, decreasing your chance of being
discovered. (Don’t do this with a machine gun, however, as its muzzle flashes will
reveal its location to the enemy.)
The Rifleman
40
COMBAT
The rifle is, despite its relatively low rate of fire, a fairly effective weapon in
open country. It differs from the submachine gun in being more accurate and of
larger caliber, giving it greater range and allowing it to cause greater damage
per shot.
The Submachine Gun or Automatic Rifle
Close range combat is best for the submachine gun; in long range combat, it
suffers from its lack of accuracy. In open country, the submachine gun is suitable
for supporting roles (see Attacking as a Team - Common Situations) and for providing covering fire.
The automatic rifle combines the advantages of both the submachine gun and
the rifle, due to its high rate of fire and good accuracy at long range. This type
of weapon is suitable for the majority of combat situations.
The Pistol
The pistol is only suitable as a reserve weapon when your ammunition is getting low. Its only real advantages are its small size and weight.

Attacking as a Team - Common Situations
Negotiating High Terrain in the Open Countr y
Large obstacles such as hills or large buildings can make progress through
the terrain very dif ficult. Figure 12 indicates bypassing such an obstacle. First of
all, reconnaissance men are sent to the left and right sides of the hill to survey the
area (best equipped with binoculars and automatic weapons). Then the two
remaining squad members approach one side of the hill and take up their firing
position there. The reconnaissance man from the other side of the hill will be the
last to get there.
Fig. 12 Fig.13
When trying to get your man (e.g. your sniper) to the top of the hill, follow
the instructions on Figure 13. Recall your reconnaissance man and allow him to
move slowly towards the top together with another member of the squad providing cover. Proceed slowly, similar to the attacking a plateau. Throw hand
grenades onto the top of the hill before you reach it.
Attacking a Hilltop Plateau
COMBAT
By “plateau” we mean a flat area on top of a hill or other terrain obstacle. If
you suspect that the enemy occupies it, proceed according to Figure 14. First send
two team members as reconnaissance to the foot of the hill (best equipped with
binoculars and automatic weapons) with the rest of the team following slightly
behind. If you’re spotted, try to get to the foot of the hill as fast as possible in order
to get cover from enemy fire (see Figure 15). Before reaching the top of the hill,
throw a hand grenade. Run up to the top with your soldiers only after it has
exploded.
If there’s a higher point than your target plateau in the vicinity, tr y to occupy
it with a machine gun or sniper, it may help you to eliminate or weaken the
enemy’s defenses on the plateau. But beware! Y our enemy may do the same thing,
so watch out for enemy snipers located on top of any hills.
Fig. 14 Fig.15
41

Attacking from a Plateau
Once you have secured the plateau, you have an invaluable opportunity to
eliminate any opponent located below you. According to Figure 16, allocate one
or two squad members to cover your rear and move your man carrying the
machine gun to the edge of plateau. Quickly choose your targets, using binoculars or the telescopic sight on your sniper’s rifle, and commence firing. It is very
difficult to take cover against such an attack, and providing you have the situation fully under control, you may try to launch a sortie with one or two team members (see Figure 17).
Fig. 16 Fig.17
Laying Traps
Some more aggressive opponents may try to move up on you once you’ve
been spotted. Use this characteristic of the enemy to lay ambushes for them in the
terrain, see Figure 18. The most important factor is to fire a short provocative
burst from the edge of the terrain obstacle, then move back quickly to get out of
the firing field of your own soldiers.
Determining the Direction of Enemy Fire
COMBAT
Determining which direction the enemy fire is coming from may sometimes be
difficult. If you’re retreating, tr y to locate the enemy by their tracer rounds (day)
or muzzle flashes (night). Both situations are shown in Figures 19 and 20.
Fig. 19 Fig.20
Using Hand Grenades and Explosives
Hand Grenades
The German “potato masher” assault hand grenades explode on impact and
are recommended for long distance combat in the open country. British hand
grenades explode after a short delay , so any unevenness in the terrain may cause
the grenade to roll away from the target before it explodes. Specific uses of the
hand grenades are described in the section Attacking as a Team - Common
Situations.
42

Mines
Effective use of mines is possible only in open countr y when laying traps for
tank units, etc. However, laying mine fields may prove tricky should you forget
where you laid them!
Timed Charges
This type of explosive is useful for the destruction of specific targets, rather
than in direct combat.
Bazookas and Panzerfausts
These missile type weapons have a devastating effect, not only on enemy
armored combat vehicles, but also on enemy troops. Their relatively low accuracy and high weight are their only disadvantage
Tips
• Never engage in individual combat when in open terrain. Cooperation of
the whole team leads to success.
• Don’t forget to use binoculars for long range surveillance.
• Use supporting fire from automatic weapons.
• Provide cover for the rear of the group.
• None of the above standard situations provides all the answers.
Improvise!
COMBAT
Close Range Combat
Street Combat
Close range combat differs from the combat in the open countr y in that reconnaissance combined with the use of hand grenades, provoking fire, and luring
enemy soldiers into ambushes are all heavily used. T raps and various ambush points
are commonly used around the intricate terrain. These aspects force soldiers to
search for alternative ways to allow them to attack the enemy from the rear.
Movement
Troop Posture
Movement in an upright position may be used only in the most urgent cases
for fast crossing of short distances.
Movement in a crouched position in the streets of a town is relatively safe if
other team members provide cover. Short distances are preferred.
Movement by crawling is the safest way to protect oneself against being spotted and put under enemy fire. Slow progress is the only disadvantage. Soldiers in
a prone position are vulnerable from attacks from above (e.g. from a church
tower). When looking around a corner, always do so lying down; this is because
your head offers a smaller target than the whole body.
43
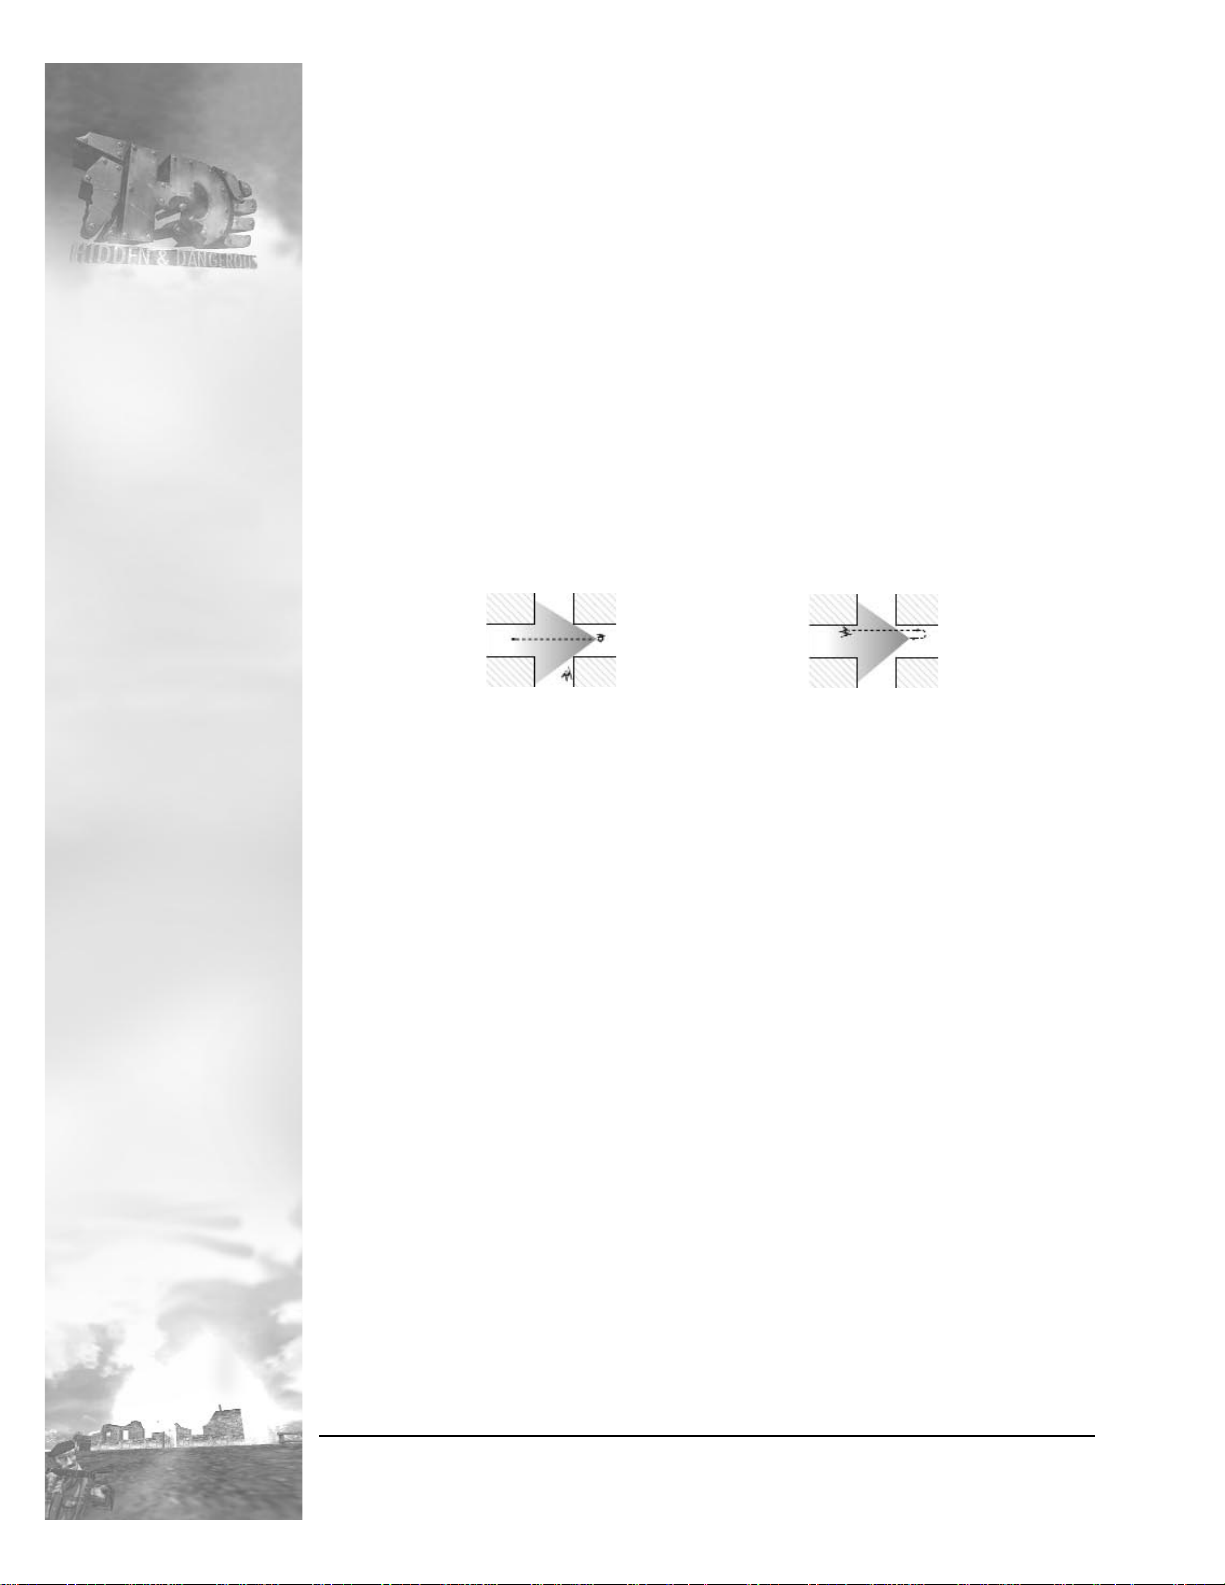
Moving Forward
Always move forward along a wall in a crouched position. If you are in the
middle of the street, lie down. When you are approaching an intersection, proceed
according to Figure 21 and keep to the side of the street from where you are expecting any trouble. An unprepared enemy is less likely to notice you. Don’t forget to
check up the opposite arm of the intersection from time to time.
There are situations in the streets when it may be necessary to run from one
intersection to another. If you are alone, this can be very dangerous. Proceed
according to Figure 22. First of all, find out how far the enemies are in the street
marked A (see Reconnaissance). Should the enemy be too close, try to find another way to eliminate the enemy. The last variation is an extreme solution for a lone
fighter. Should the enemy be quite far (50 m or more), an individual soldier may
attempt to run across the street. Again, this is a very risky maneuver! Sometimes the
enemy will try to pursue you; if so, it is advisable to wait a little after crossing the
street and check behind.
Fig. 21 Fig.22
COMBAT
Other tactics in the streets are very limited, but in a pinch, almost anything is
possible - snipers, grenade throwing, etc.
Moving as a Team
Reconnaissance
In intricate streets, you cannot operate without reconnaissance. Reconnaissance
in streets differs from open countr y in that it is more aggressive and not limited to
just surveying and monitoring targets. The reconnaissance soldier should stay in
continuous contact with his fellow men; they can help if he gets in trouble.
His first task is to find enemy positions not visible to his team where enemy
snipers may be operating. It is necessary to evaluate these positions and establish
where the enemy snipers are aiming. Based on this information, it is possible to designate positions where the squad could eliminate the snipers. If you are able to catch
the enemy snipers unaware, try to eliminate them immediately. Remember: One forgotten enemy sniper represents at least one dead comrade!
44
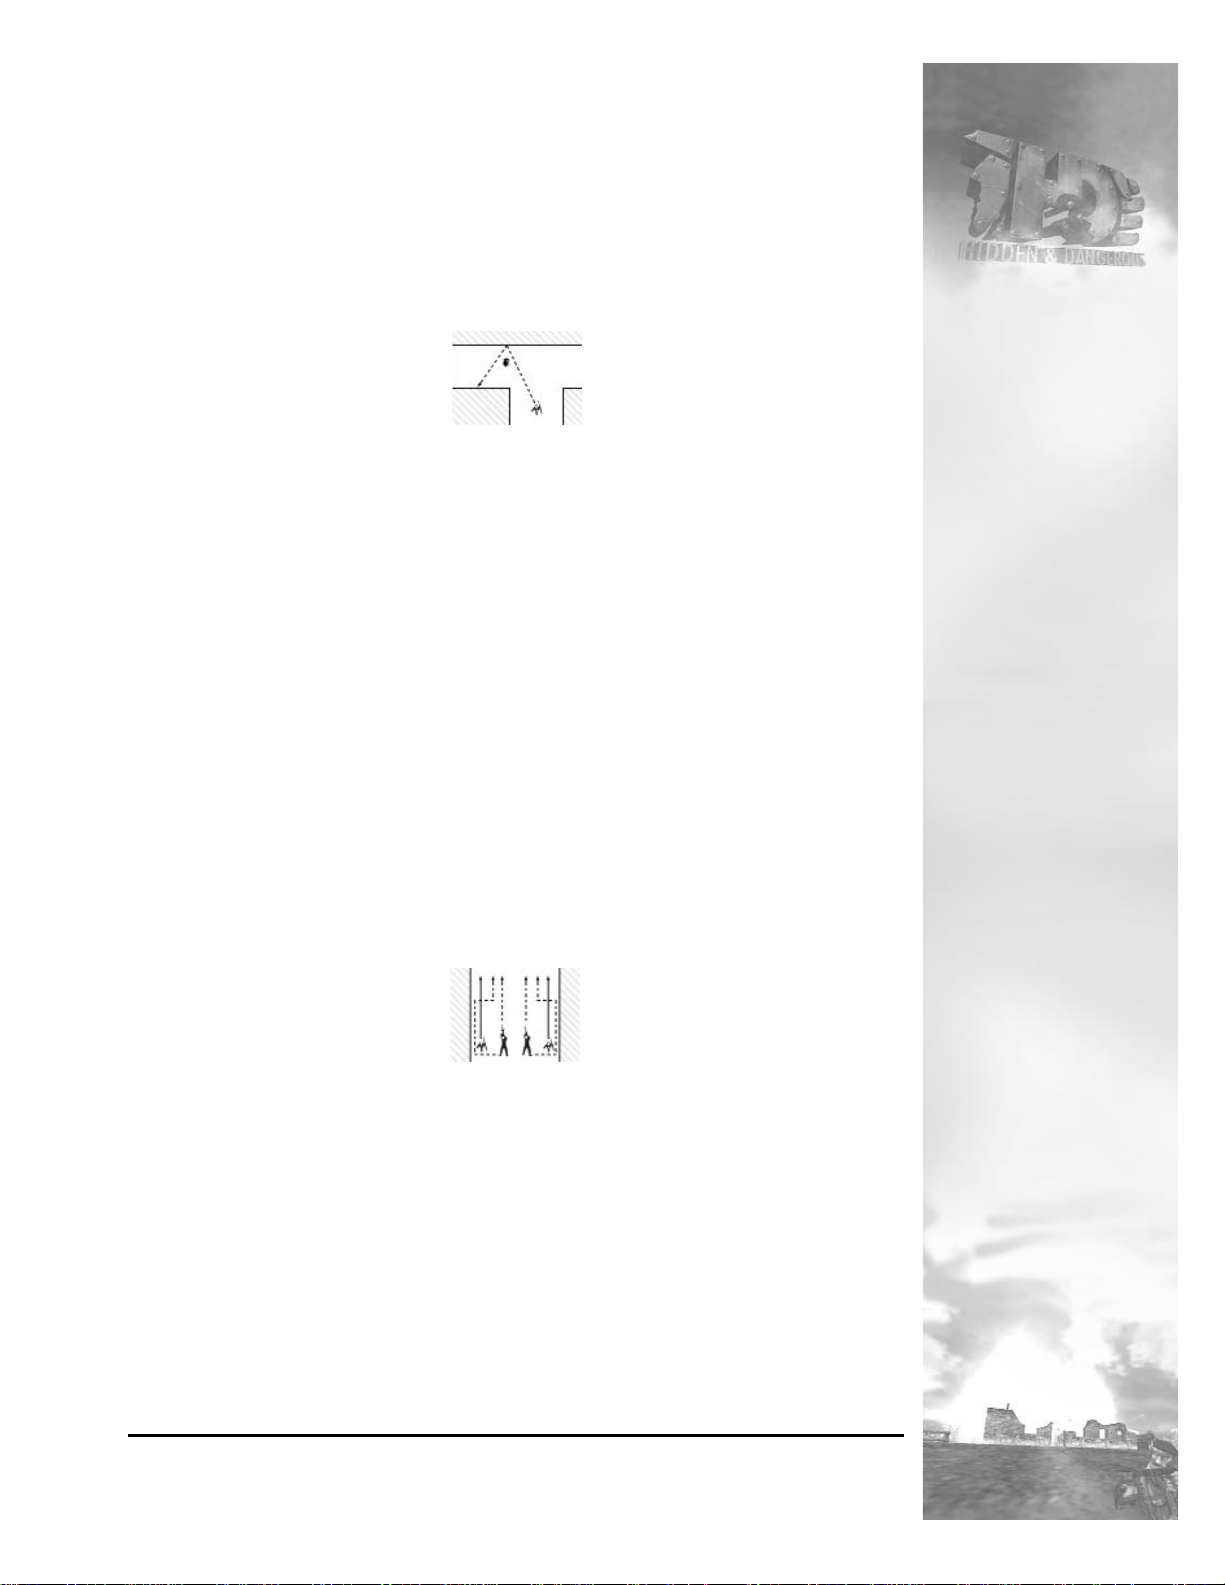
If you are not sure whether there is an enemy around the corner, see Figure 23.
Throw a British (time delay) hand grenade against the wall of the building opposite
and then listen. If you hear any screams of injured enemy soldiers, you have confirmation that there was someone behind that corner . If you don’t hear anything, you
cannot really be sure, but nobody will kill you from close range whilst they are
crouched down protecting themselves against the explosion.
Fig. 23
As soon as you get to an elevated position, immediately carry out a reconnaissance of the vicinity. You always see more from higher positions, and the surrounding area may be suitable for a sniper position.
Forward Movement in Formation
It is definitely safer to move alongside buildings; the walls provide full side cover
with street lampposts providing partial cover against enemy fire. For movement
through the streets, use the instructions provided in Figure 24. A machine-gunner and
a sniper lie in the middle of the street (both of them are effective for longer distances)
and the men armed with submachine guns move alongside the buildings (they are
effective for close distances). If there is a row of street lights, place your sniper and
machine-gunner in a way that will allow them, in case of need, to take cover behind
the street lamp posts. After your submachine gunners have taken their positions,
move the other team members forward as close as possible to the walls alongside
submachine gunners. When you are sure that there is no danger, you may move all
your men forward. Don’t forget to check the rear of your group occasionally.
COMBAT
Fig. 24
45

COMBAT
Lateral Movement in Formation
If your whole team is pinned down by a wall, it is better to spread your men all
the way across the street. See Figure 25. Start the maneuver by first moving the two
members who will be able to provide covering fire for movement of the remainder
of the team. Now carefully proceed with the third soldier moving into position at
point A. Execute a quick reconnaissance and continue to point B. Follow up by moving the remaining member of the team. You are now in a situation similar to
Forward Movement in Formation.
Fig. 25
Retreat
Should you come across opposition that’s too strong, consider retreating. If
you’re attacked from one side in a narrow corridor or street where there is no
chance to retreat, see Figure 26. The large arrow indicates the direction of enemy
attack. Riflemen and soldiers armed with non-automatic weapons should be moved
back first. Covered by submachine gun fire, they should take defensive positions
and provide covering fire for the retreating submachine gunners. Because everything in street combat happens at a substantially shorter range than in the countr y,
the submachine gunners have to move in phases. First move to point A and provide
fire support to the remaining team members; only then do they run to point B.
Sometimes it is possible to retreat around a corner. If so, see Figure 27. First,
pull your soldiers back to point A under covering fire provided by the other team
members. Now comes the risky phase of the maneuver, when you have to retreat
with the remaining two soldiers to point B. The soldier marked number 2 retreats
first, followed under covering fire by number 1. Should the enemy press too hard,
it is possible to retreat with both soldiers at the same time, but this is more dangerous. Soldier number 4 retreats behind the corner last. Now retreat soldiers number
1 and 2 to point C. The remaining soldier then retreats behind the corner.
Another method is to retreat to both arms of the T-Junction. See Figure 28.
Using this method, move the whole team to the edge of the intersection. Then recall
the soldiers that are further away from the T-junction, followed by the rest of the
team. Should the enemy press too hard, you may retreat the whole team simultaneously, but again, there is a high risk of loss.
46
Fig. 26 Fig.27 Fig.28

Firing
Weapon Ef fectiveness
Weapons and their uses are listed according to their usefulness in a given
area (i.e. the submachine gun is best for combat in interiors, etc.)
The Submachine Gun or Automatic Rifle
A submachine gun or automatic rifle is a very af fective weapon for urban
combat, because the fighting is usually at very short range. It is advisable to equip
at least three members of the team with submachine guns for street combat (even
specialists, such as the sniper). Soldiers equipped with these weapons can then
provide covering fire.
The Machine-Gunner
The machine gun is suitable for use in long streets as heavy fire support, but
proves a bit clumsy for fighting in small lanes. It’s generally recommended for support fire only. The long period of time required for setting it up is its only disadvantage
Sniping
Sniping is ideal for assaults, traps and ambushes in town combat. A good
sniper is also a priceless asset in eliminating enemy snipers. The sniper in your
team must be the man with the highest SHOOTING level. Tr y to control him personally and select the most important targets.
The Rifleman
COMBAT
The rifle is not very useful for shor t-range combat. Low rate-of-fire and the
small magazine put the rifle at a disadvantage against a submachine gun.
The Pistol
The pistol is suitable only as a reserve weapon when the ammunition is getting low. Its only advantages are its small size and light weight.
Attacking as a Team - Common Situations
Moving Past Narrow Side Streets
Enemy soldiers may be hiding in narrow side streets leading to main
avenues, so it’s very important to be careful when moving past such a street junction. Figure 29 indicates how to make a survey of such a street. One team member covers the entry into the lane while the second one quickly side steps to the
middle of the lane, firing bursts or throwing hand grenades. Then move to the
other side of the lane. Never stop or retreat to your original starting point. Any
hanging around might cost you a team member. Side stepping past the lane may
be substituted with sideways rolls or somersaults.
Fig. 29
47
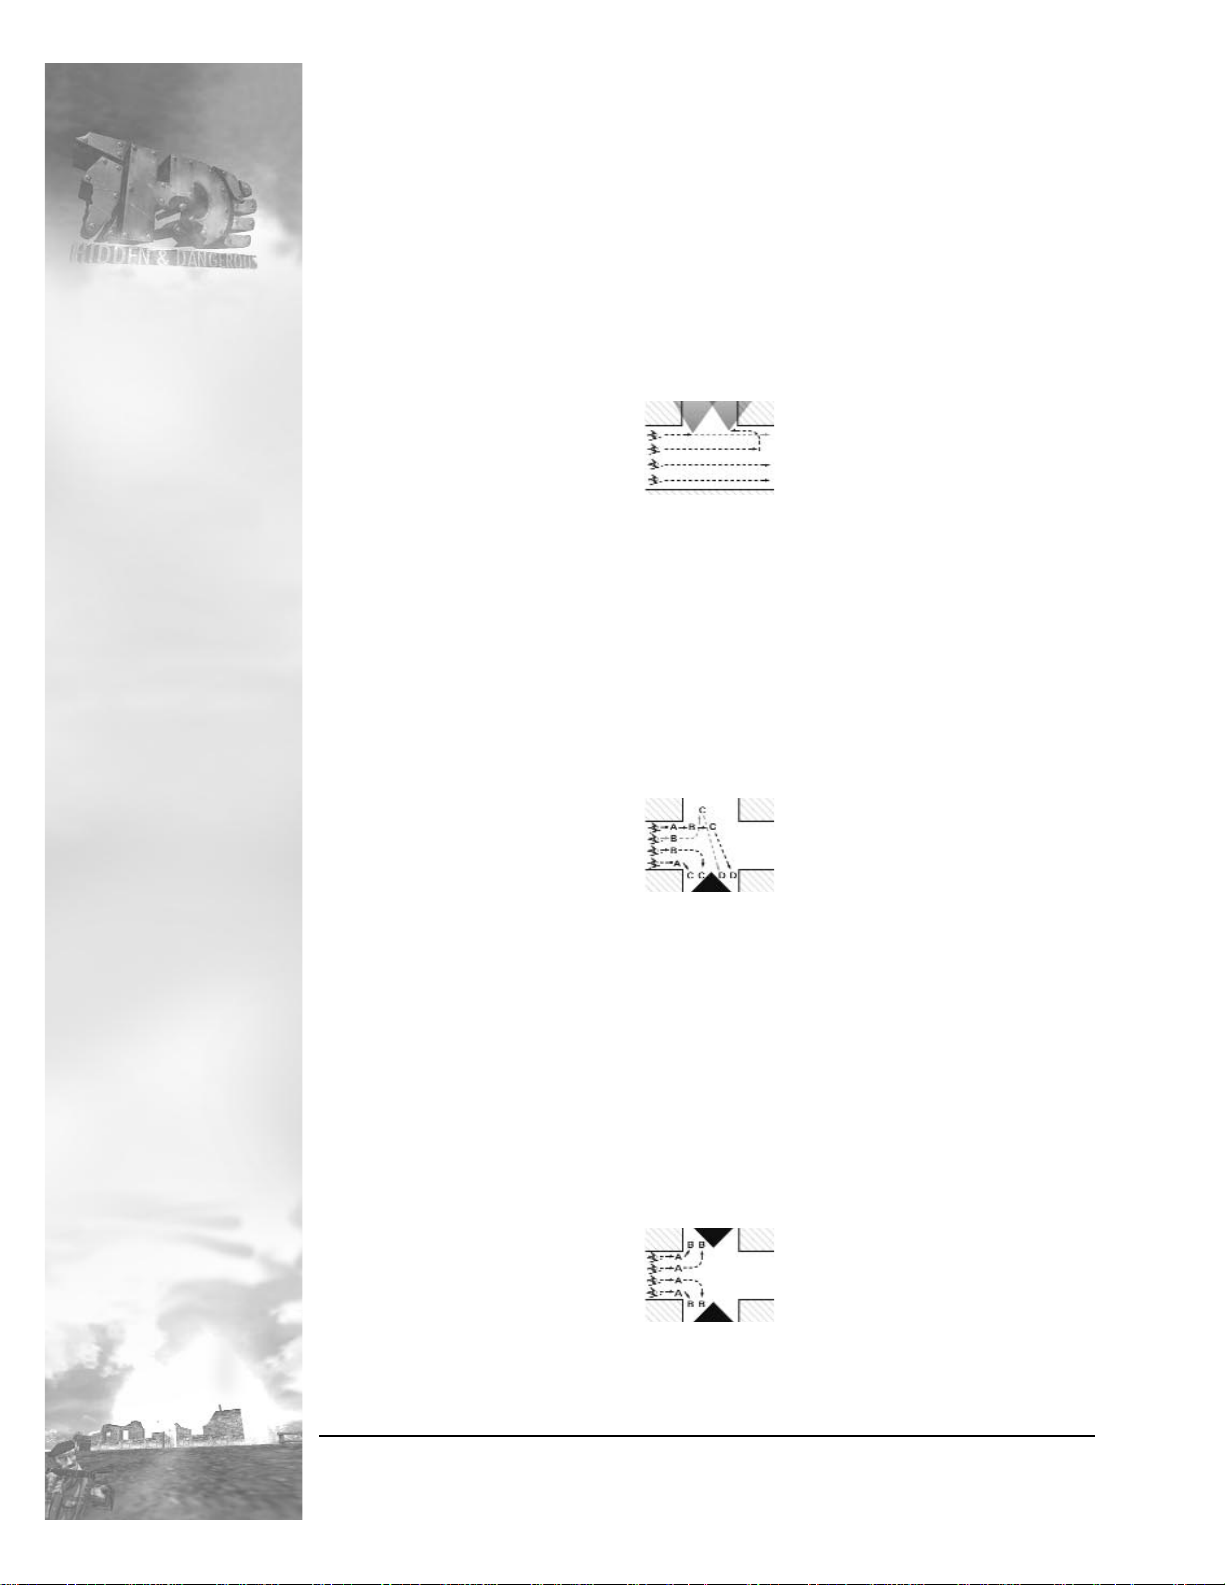
Moving Past Intersections
Moving through an ordinary intersection may present a difficult obstacle under
combat conditions. It is a maneuver that can require a great deal of coordination.
Figure 30 provides instructions how you might pass through a T-shaped intersection. Start by placing a submachine gunner or machine gunner at the mouth of
the street and follow that up by a quick run by the rest of the team to the other side
of the street. Once on the other side of the street, pick a soldier to lie down at the
other corner to provide covering fire for your last soldier.
Fig. 30
Figure 31 describes a situation in which an enemy attack may come from one
side. Start by moving two soldiers to point A; they should have a good view of the
opposite streets. The second phase is to move one soldier up the street and follow
up the arm of the intersection where you suspect the enemy may be located. The
inside team members move simultaneously to points marked B. In the following
phase, the soldiers closer to the enemy fire a burst into the street and lie down. The
remaining members of the team provide cover from points marked C. In the last
phase, the remaining soldiers will move to position D.
48
COMBAT
Fig. 31
If you think the enemy may be down both sides of the intersection, first consider whether different routes are available in the area. If there is no other way, you
may try a risky alternative consisting of two-man groups moving simultaneously to
both sides of the intersection (see Figure 32). Start by moving your soldiers into positions where they can see directly into the opposite sides of intersection (points A).
Then simultaneously fire bursts into both sides of the intersection (points B).
Throwing a British (delayed action) hand grenade into the side streets of an
intersection may be added to any of these movements, as described in the section
Reconnaissance.
Fig. 32

Attacking Barricades
Barricades and roadblocks are often used in towns. Overcoming such an
obstacle, defended by a dedicated garrison, may prove to be an almost impossible task. Your best bet is probably to fire at the barricade with a machine gun or
rifle before commencing any attack; follow up with moving very carefully forward. Even if the defenders seem to be eliminated, there may be more in reserve.
To make sure, throw two to three hand grenades over the barricade, eliminating
any remaining defenders hiding behind it.
Using Hand Grenades and Explosives
Grenades
German assault hand grenades (for direct attack, etc.) and British timed hand
grenades (for throwing with rebound, etc.) are both recommended in short range
urban combat.
Mines
Mines are not very useful in the shor t-range urban combat.
Timed charges
This kind of explosive is only suitable for the destruction of specific targets
and therefore not very useful for direct combat. Parked tanks and armored vehicles are an exception to this.
Bazookas and Panzerfausts
These weapons have devastating effects, not only on enemy armored vehicles, but also on troops. They’re also effective when against street barricades.
Their only disadvantages are relatively low accuracy and high weight.
Tips
• If you decide to take individual action, always plan well and don’t forget
the remaining members of the team. Only the cooperation of the whole
team will lead you to success.
• Never neglect reconnaissance and conduct a thorough search of locations
where snipers could be hiding.
• Use supporting fire from automatic weapons.
• Provide cover for the rear of the group.
• None of the standard situations provide all the answers! Improvise!
Combat in Interiors
COMBAT
Combat inside buildings resembles street fighting. It is completely dominated by the use of automatic weapons and hand grenades. Reconnaissance is very
difficult due to the many hiding places available to the enemy. The close conditions make soldiers vary the tempo of the combat between wild shoot-outs and
careful surveillance or even the use of explosives. This makes all indoor combat
extremely dangerous.
49

Movement
Troop Posture
Movement in an upright position is dangerous indoors for the same reasons
as mentioned above. Its main advantage is the ability to start moving fast.
However, you will make yourself a larger target for the enemy.
The crouching position is relatively safe in narrow corridors even without
cover by other team members. The only serious danger is in large halls or rooms,
where slow movement will give the enemy more time to see you. Despite this, it
remains the safest and most effective way to move indoors.
Crawling is the safest way to avoid being discovering by the enemy . However,
it is often less than ideal indoors because of the slow pace and low agility of the
crawling soldier. Nevertheless, you’ll find it ver y handy in some situations. (see
Attacking as a Team - Common Situations).
Moving Forward
Always move alongside walls in a crouching position. Larger spaces should
be crossed by running. Remember, there may be an enemy waiting behind every
corner, so stop before each turn and sur vey what lies ahead (see Moving as a
Team - Reconnaissance). Other obstacles that require the soldier’s attention are
stairs. Overcoming this obstacle is described in Moving as a Team - Common
Situations - Reconnaissance.
COMBAT
Moving as a Team
Reconnaissance
Reconnaissance in interiors is closely tied to a combat activity. You will find
more on this in the section Attacking as a Team - Common Situations Reconnaissance.
Moving Forward
Moving the team forward is dif ficult because of the limited space available;
it’s impossible to have any type of squad formation. Therefore, it’s useful to divide
the team into two equal groups. The first group watches ahead and the second
group the rear (Fig. 33). One soldier (No. 4) in the second group should be
standing in a position where he is able to support the front group with covering
fire if necessary.
Fig. 33
50

Follow Figure 34 when advancing. First, move soldier 1 -- if you wish to
cover his movement, turn soldier number 4 to face the front. Now shift soldier 2
and then, quickly, number 4. It is possible to cover number 4 by turning number
2 around so he is facing the rear. Last, shift number 3 into the space between
numbers 1 and 4.
Fig. 34
You will usually have two soldiers moving along a passage (see Fig. 35).
Both of them will be aiming forward, but from time to time check the rear. When
advancing, take turns covering each other.
Fig. 35
Moving in Large Rooms
Similar rules apply for movement in large rooms. It is very important to move
along the sides and keep watch of all the entrances through which enemies might
approach. You will find more on this in chapter Close Range Combat - Street
Combat.
Retreat
Should the opposition be too heavy, you may have to retreat. Any attempt at
retreating in buildings is complicated by the limited space. Retreat along the
walls, with covering fire coming from the middle of the passage.
Another variation is to retreat along one wall while one member of the team,
positioned by the opposite wall, provides the cover.
During the retreat you’ll need covering fire from an automatic weapon (submachine gun, machine gun, etc.). If there is a heavy concentration of enemy soldiers, it is useful to throw a timed hand grenade just before you start retreating.
An attacker will definitely be unpleasantly surprised at what he finds instead of
you. (Remember-don’t try this with a German “potato masher” contact grenade.)
COMBAT
51

Firing
Weapon Ef fectiveness
The Submachine Gun or Automatic Rifle
Just as long-range combat is dominated by the sniper rifle, indoor combat is
dominated by the submachine gun. Its advantages include high rate of fire, large
magazine capacity, and the speed and ease of use; it’s a devastating weapon in
shoot-outs. Always be sure to reload the magazine after even the most minor
encounters with the enemy . There’s nothing worse than running out of ammunition
and having to reload during a shoot-out!
The Machine Gunner
In spite of its awkwardness, the machine gun can prove to be a very effective
weapon in interior combat. It is mainly suitable for providing cover, or for creating a stationary firing position. It is not suitable for a swift attack or defense.
The Pistol
As opposed to other situations, the pistol can be used relatively effectively in
interior encounters.
The Rifleman
The rifle is a somewhat unsuitable weapon for interiors. Due to its low rate of
fire and small magazine, it is really only a supporting type of weapon.
Sniping
COMBAT
Sniping is limited to a great extent by its narrow field of vision. If you choose
to use a sniper indoors, make sure to assign to him to at least one guard with an
automatic weapon.
Attacking as a Team - Common Situations
Reconnaissance
Reconnaissance often sees you using “wild” shooting, or throwing hand
grenades into places you wish to search. Remember that the enemy may be hiding around every corner, and you should therefore advance cautiously.
When moving about in interiors, the main question is who is hiding around
the next corner. Take heed of the advice as described in Figures 36, 37, and 38.
In Figure 36 you can see how to safely negotiate the L-shaped corner. Enter
the alley very quickly (side stepping); in fact, you should just look in quickly. Fire
a short burst from your submachine gun or throw a hand grenade and then
retreat. Quickly reload your submachine gun and look down the alley again.
Instead of side stepping, you can use a somersault.
52
Fig. 36 Fig. 37 Fig. 38

Figure 37 shows how to reconnoiter in corridors with a T-junction. Quickly
side-step into the corridor, fire a burst from your submachine gun or toss in a
hand grenade, then retreat to the opposite side of the passage. Quickly reload
your weapon and look into the passage again. Instead of sidestepping, you can
do a somersault.
Figure 38 shows how to negotiate a junction between two passages. Start the
maneuver with a quick sidestep into the passage, or better - only a look in, fire a
burst from your submachine gun or throw a hand grenade and retreat. Turn
around to the other side. Quickly reload your weapon, wait a moment, and then
look again into the passage. Instead of a sidestep, you can use a somersault.
Moving Past Narrow Side Streets
If there are enemies in the street similar to the one shown in Fig. 38, advancing your team could be hazardous. Proceed as follows: first, place one of your
team in a position from which he can see into the alley from the side; then, with
another soldier, sidestep and fire a burst from a submachine gun or throw a hand
grenade. Continue to the other side. Don’t stop to return! See Figure 39.
COMBAT
Fig. 39
Entering and Exiting Rooms
There can be various surprises lurking in rooms. When entering a room,
apply the method as described previously in Moving Past Narrow Side Streets.
After the explosion of the hand grenade, one soldier runs into the room and
sprays it with a burst from a submachine gun, as shown in Fig. 40. Then quickly
step aside to make way for the next member of the team. The size of the room
and number of enemies present determine the number of your men running into
the room.
Fig. 40
If possible, exit rooms into passages that you have already cleared. If you
have to enter passages that have not been searched yet, throw a hand grenade
first. It will also serve you well to study the plan of the building and tr y to find
alternative ways.
53

Moving Up and Down Stairs
Staircases are the only obstacles in interiors on which you can safely use a
German (contact) hand grenade. Move very slowly to the edge of the stairs and
throw the hand grenade on either the stairs or the landing (Fig. 41). Don’t stick
your head out! After the explosion, creep carefully to the edge accompanied by
two members of the team (to provide cover).
The same method illustrated in Figure 41 applies for going up the stairs (see
Fig. 42). Don’t ever throw a grenade directly onto the stairs if you still want them
to be there for you to use!
Fig.41 Fig. 42
In case of emergency, you can use British hand grenades equipped with a
timing device, but be careful as they could roll down the stairs!
Using Hand Grenades and Explosives
Hand Grenades
COMBAT
During fights in interiors, use only British hand grenades, except for some
specific situations. To throw one around a corner, bounce it off a wall.
Mines
Mines are not very ef fective in interiors. It is possible to create various traps,
but as the skirmishes take place very fast, mines are not really the best way of
eliminating the enemy.
Timed Charges
This type of explosive is suitable for destroying specific targets, not for direct
fighting.
Bazookas and Panzerfausts
If you’re not one hundred percent sure of what you are doing, don’t use these
weapons indoors-you could bring the whole building down around you.
Tips
• Before going on individual jaunts, plan precisely and don’t forget the rest
of your team... Only cooperation with the other members of the team will
lead to success.
• Submachine guns and hand grenades dominate indoor combat.
• Provide cover for the rear of the group.
• None of standard situations are all-round fixes. Improvise!
54

Using Vehicles in Combat
Vehicles give the team a great advantage when fighting the enemy. The only
disadvantage is the concentration of your men in one place. This exposes all your
soldiers to the risk of being eliminated if an accident happens or if the vehicle is
hit by enemy fire. This risk is less if you can use an armored vehicle.
Non-Armored Vehicles
Using non-armored vehicles in combat should be very limited, as they’re
completely vulnerable to enemy infantry weapons. Use non-armored vehicles only
for transport, rather than in direct combat. The use of vehicles and its coordination with reconnaissance is described in the section Using Vehicles in Combat Armored Vehicles.
Passenger Automobiles
Used only for transport.
Jeeps
It is possible to equip a jeep with a light gun. They are fast and can go almost
anywhere, but they’re very vulnerable.
Motorcycles and Sidecars
Motorcycles are fast and maneuverable, but very vulnerable. A very effective
machine gun can be installed on the sidecar.
Trucks
COMBAT
If you have to fight from a truck, troops can shoot from the back of it. It is rel-
atively slow and is very vulnerable.
Armored Vehicles
Armored vehicles cannot easily be damaged by fire from infantry weapons;
they can prove to be very useful in accomplishing tasks. They are truly vulnerable
only to antitank mines or to Bazookas and Panzerfausts.
Armored Personnel Carrier
An APC protects two members of the team adequately and partially protects
the other two men against enemy fire. Moreover, it’s equipped with a heavy
machine gun and can provide the team with very welcome suppor ting fire. It can
only be eliminated by heavy weapons (bazookas, tanks, etc.). You will find more
information in Combat Strategy against Enemy V ehicles and Armored Equipment.
Tanks
Like the armored personnel carrier, the tank is also resistant to infantry
weapons fire and some newer types even survive fire from heavy weapons.
Controlling the gun turret is relatively simple, but steering the tank requires practice and knowledge of the machine.
55

Common Situations
Reconnaissance in a Vehicle
The most common obstacle is a corner . Even around the smallest of curves, there
can be a tank lurking, waiting for you, or a soldier with a panzerfaust. See Fig. 43.
First, place a soldier on the outer side of the curve and send another one through
the terrain. If it is impossible to proceed through the terrain, advance along the inner
side of the turn, walking on the road. The other soldier should be equipped with
infantry anti-tank weapon (bazooka, panzer faust).
Fig. 43
Attacking with Armored Personnel Carrier
See Fig. 44. Choose two soldiers from the squad, and equip at least one of
them with an anti-tank weapon. Advance forward, widening the gap as you
progress. Meanwhile, the APC’s machine gunner is searching for infantry targets,
covered by one infantryman. The anti-tank soldier can then destroy any tank he
sees. If you can, attack enemy tank crews while they’re “mounting up” — a tank
without a crew is just a heap of expensive scrap metal.
56
COMBAT
Fig. 44
Tips
• Don’t get in the way of your own vehicle. It hurts!
• Don’t forget to use reconnaissance.
• Use options and advice given in these chapters.
• If you decide to go into action alone, plan it precisely and don’t forget
that you are a team.... Only good cooperation of the team will lead you
to achieving your goal.
• Use weapons installed on vehicles.
• Provide cover for your rear at all times.
• None of the methods that are mentioned in common situations are fool
proof. Improvise!

Combat Strategy against Enemy Vehicles and Armor
Vehicles and armor can cause you a lot of trouble. A few rounds from infantry
weapons are usually sufficient to eliminate non-armored vehicles, but with armored
vehicles and tanks, it is necessary to carry out some effective countermeasures.
Anti-Vehicle Weapons
Infantr y Weapons
Infantry weapons such as rifles and submachine guns are very effective when
used against non-armored vehicles, but they are quite useless against armored
vehicles.
Special Anti-Tank Weapons
Specialized anti-tank weapons are heavy and unsuitable for fighting enemy
troops, but they are exactly what you need to catch a Tiger!
Bazookas
The bazooka is a reloadable anti-tank system. It is not a very precise
weapon, but it’s your best friend when fighting enemy tanks.
Panzerfausts
This is a one shot anti-tank system. It is not a very precise weapon, but, again,
it’ll do the trick when needed. It is also lighter than a bazooka.
Anti-Tank Mines
COMBAT
These are cumbersome but effective weapons against tanks. Lay at least two
mines in the path of the tank to be sure of a hit.
Non-Armored Vehicles
These are easy to steal for your men. The only exception is the armed motorcycle.
Passenger Automobile, Jeeps, Trucks
Any weapon can eliminate these vehicles. Dangers are the possible explosion
of the fuel tank, and being captured by the enemy.
Motorcycles and Sidecars
If you let the machine gun installed on the motorbike shoot first, it could cause
trouble for your squad. Eliminate the crew immediately after “eyeballing “ it.
Armored Vehicles
These vehicles are very well protected. Their destruction by infantry is a very
tricky task.
Armored Personnel Carrier
Infantry weapons cannot harm the crew of an armored personnel carrier. It
is a good idea to use a sniper to eliminate the vulnerable machine gunner on top.
Then a man armed with an anti-tank weapon can move in to destroy the vehicle
itself.
57

Tanks
Infantry weapons cannot damage tanks; even an antitank weapon won’t
always work on the first try. A method is described in the section - Common
Situations. Fig. 45 shows the vulnerable spots on a tank (colored gray).
Fig. 45
Common Situations
How to Destroy a Tank
Place your soldiers as shown in Fig. 46. Place a soldier equipped with a
bazooka behind an obstacle in the terrain and assign him one guard armed with
submachine gun. As soon as the tank crosses the line marked on the sketch, fire
a shot into its side. If you can hit the “bogies” (the wheels on which the tracks run),
the tank is crippled and can be finished off at your leisure.
COMBAT
Fig. 46
Tips
• Handle anti-tank weapons with care - they are very dangerous and can
have very unpleasant ef fects. Remember the backblast of the bazooka or
panzerfaust.
• Cover your rear at all times.
58

Technical Support
If you have a technical problem concerning the operation of our software,
please contact our technical support staff. When you call or write, be at your
computer if possible and have the following information ready: computer
type, available hard drive space, total RAM, type of video card, and a list of
options you chose when you installed the game.
TECHNICAL SUPPORT: 1-410-933-9191, M-F 9-5pm, EST
TalonSoft, P.O. Box 43730, White Marsh, MD 21236
If you would like to contact us on-line, you will find us at:
http://www.talonsoft.com
E-mail us at talon@talonsoft.com
Note: This information is for technical support only and representives
cannot provide game hints or suggestions.
By accepting the terms of this agreement, you are granted the right by TalonSoft, Inc. (a subsidiar y of
Take-Two Interactive) to use one copy of the enclosed software program. You may not rent or lease it,
disassemble, decompile, reverse engineer or modify the software in any way.
The enclosed software program, libraries, graphics, and all written material are the sole property of
TalonSoft, Inc. and its suppliers, and are protected under the copyright laws of the United States and
all International Treaties.
This software product is sold AS IS, TalonSoft, Take-Two, its suppliers, dealers or distributors make no
warranty with respect to the performance, quality, merchantability or fitness for any purpose of the
software.
Any change, deviation or exemption from the conditions expressed in this license agreement must be
authorized in writing by TalonSoft, Inc.
Hidden and Dangerous
Manual Published by
TM
™

Illusion Softworks
Lead Programming
3D modeling
2D graphics
3D animations
Sound effects
Design
Sound Design
Level design
Production
Additional work
Lead tester
Testing
Michal Baeik
Peter Kubek
Radek Bouzek
Martin Benes
Jan Zatecky
Michal Chovanec
Petr Nimec
Radek Bouzek
Michal Baeik
Martin Benes
Michal Chovanec
Radek Bouzek
Peter Kubek
Tomas Pluhaøik
Martin Tuma
Petr Vochozka
Pavel Sirue k
Tomas Høebieek
Pavel Prochazka
Daniel Vavra
Roman Hladik
Petr Olsansky
Vaclav Kral
Tomas Pluhaøik
Michal Axmann
Martin Bartko
Ales Filka
Ondøej Nydrle
Jiøi Junek
Petr Bohumel
David Dresler
Viktor Prochazka
Take 2 Europe
Vice President
International Marketing
Simon Jobling
UK Marketing Manager
Gavin White
UK PR Executive
Amy Curtin
International Marketing
Manager
Rachel England-Brassy
International Marketing Coordinator
Line Moeller
UK PR Manager
Brian Baglow
Product Manager
Julian Hoddy
Production Manager
Jon Broadbridge
International Development
Director
Simon Little
Business Development Director
Greg Baverstock
Head of European Development
Matt Spall
Producer
Ken Jordan
Lead Tester
Ron Jackson
QA Dept
Darren ‘Dazzler’ Lloyd
Gary Sims
Charlie Johnstone
Adam Rabin
Lee Brown
Nick Sneddon
Chris Lacey
Gregory Mathews
Patrick Chan Kain Lin
Daley Salami
Tarantula Studios
Lead Tester
Mark Lloyd
QA Dept
Tim Bates
Charlie Kinloch
Jim Thompson
Paul Byers
Andy Mason
TalonSoft Team
President &
Chief Creative Officer
Jim Rose
Executive Producer
Anthony Farmer
Producer
Ashton Fletcher
Project Management
Chris Mate, Melissa Farmer
Musical Arrangement
Jim Rose
Creative Services Director
Melissa Farmer
Players Guide R&D
Joseph Hummel
Game Development
Ashton Fletcher, Anthony Farmer,
Brian McGinn, Kurt Miller
Production Design
Chrissy Lagna, Peter Meunch,
Steve Estes, Melissa Farmer
Art Direction
Jim Rose, Melissa Farmer
Promotional Video Editing
Brian Webber
Production Coordinator
Linda Wratchford
Public Relations Director
Mike Gathagan
Technical Support
Phil Santiago, Frank Runge,
Matt Kreager, Lisa Nawrot
Marketing Director
Greg Bauman
Marketing Manager
Mark Moon
Playtesting
The TalonSoft Beta Brigade, Christopher
Pick, Robert Veska, Bomont Humphrey,
Brian Carlson, Christopher P. Young,
Jeffrey P. Balut, John Steffen, Hong Chol
Kim, Aaron Beznick, Daniel Buffington,
Frank D. Bunney Jr., Brandon Hatfield,
Michael A. George, Chad Harris
Vice-President, PC North America,
Take 2 Interactive
Jamie Leece
Sales, Take 2 Interactive
Robert Blau, Steve Glickstein,
Kevin Shepard, Paul Flynn
Mars Publishing
(Manual Production)
Publisher
Edwin E. Steussy
Managing Coordinator/Design
Amy I. Yancey
Editor/Historical Copy
Peter S. Lert
Graphic Artist
Michael Duggan

NOTES

 Loading...