

Page 1
VALV
E
Page 2
GETTING STARTED
Installation
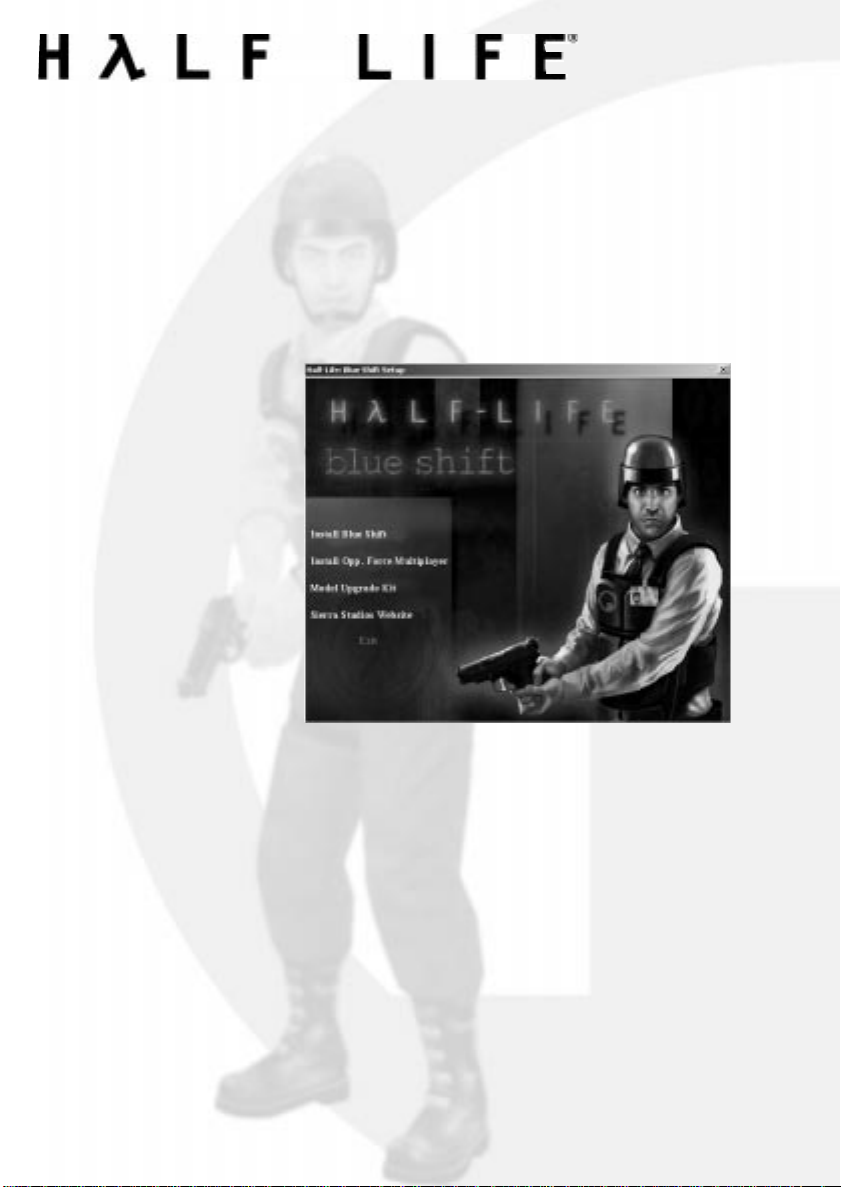
Insert the game CD into your CD-ROM drive. If your CD-ROM drive
has AutoPlay enabled, the Blue Shift installation menu will appear once
your computer has had a moment to examine the contents of the CD.
If AutoPlay is not enabled
on your computer,
double-click the "My
Computer" icon on your
desktop. Double-click the
CD-ROM drive icon. If
the Blue Shift installation
menu does not appear,
double-click
"autorun.exe" (found on
the Blue Shift CD).
Follow the on-screen instructions to install Blue Shift, Opposing
Force Multiplayer
Minimum System Requirements
Windows 95, Windows 98, Windows Me, Windows 2000 or
Windows NT(with service pack 4)
Intel Pentium 233 or AMD K6-2
32 MB ram
400 MB HD
2x CD-Rom drive
SVGA, high-color (16-bit)
Win-compatible sound card
32-bit Internet service provider with 28.8+ modem or LAN (for multiplayer modes)
Recommended System Requirements (For Half-Life HD Pack)
Intel Pentium III or AMD Athlon
64 MB ram
nVidia TNT 2, GeForce, 3dfx Voodoo 3 or better 3d video card (OpenGL or Direct 3D)
4
.
Page 3
BLUE SHIFT
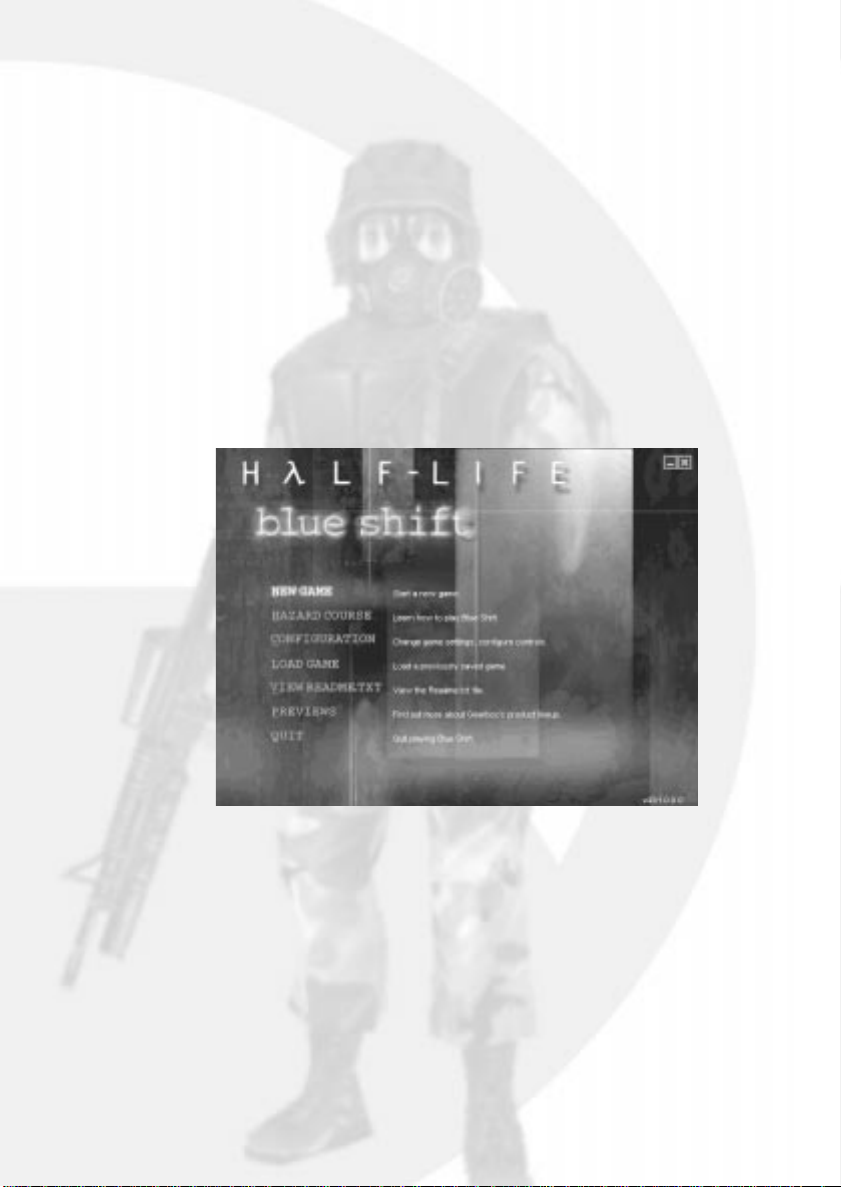
The Main Menus
The Main Menu in Blue Shift or can be accessed at any time during a
game by hitting the Escape Key . Use your mouse or the Up and Down
arrow keys to highlight options and click or press the Enter key to
activate the option. Hit the Escape key at any time to go to the
previous screen.
This is the main menu for Blue Shift
5
Page 4

Resume Game
If you are in the middle of a game of Blue Shift when you bring up the
menu, you'll have the option to Resume Game to return you to the
action.
New Game
When you start a new game, you'll be asked to choose a skill level
Easy - Enemies are weak and are easy to kill
Medium - Enemies do more damage, but are
easy to kill
Hard - Enemies do a lot of damage and are
difficult to kill
Hazar d Course (B lue Shift)
Access the Hazard Course at any time to perfect maneuvers like
jumping and crouching, using objects and firing weapons. These
training areas offer target ranges and obstacle courses presented by a
qualified guide who will teach you the skills specific to each game. If
you are new to action games, we highly recommend that you visit the
Hazard Course before you begin a new game.
Configuration
Set game options, optimize video and audio settings for your system
and customize keyboard controls to your liking. After setting your
configuration, click on the Done button to apply your settings and return
to the Main Menu. Click the Use Defaults button to restore the original
default settings.
Controls
The grid shown in the Controls screen lists the default keyboard and
mouse configuration. It also makes it easy to customize the
configuration: just click on key/button in the second column, press
Enter, then press the key you wish to associate with that key/button.
Control Screen Descriptions
6
Page 5
BLUE SHIFT
Action
option
Key/Button
Alternative
more than one key or button, select an alternate in the
right-hand column.
See the "Controlling the Action" section of this manual for a listing and
description of the default mouse and keyboard configuration.
- Describes the player action / interface
- Specifies the key or mouse control
associated with that action
- If you want to make an action accessible by
Advanced Controls
The options found in the Advanced Controls menu allow you to use a
crosshair or autoaiming, adjust mouse or joystick options and
sensitivity. Descriptions of each option are printed in the menu.
Audio
The Audio menu is used to adjust volume settings, sound quality,
advanced audio support and CD music. To hear Half-Life's music, you
must have the CD in your CD drive. To adjust the volume of CD music,
use the Windows volume control tool.
Video
Set video resolution, choose video drives and adjust brightness in the
Video configuration menu. Blue Shift will check your system for the
presence of OpenGL and Direct3D video drivers. It may ask you to
verify the results of this check. If you have one or both drivers currently
installed on your system, they will appear as choices at the top of this
screen. You can also choose to run Blue Shift in software rendering
mode. If you do not have 3d video drivers installed, Blue Shift will
default to software rendering mode. It is highly recommended to only
use 3d video drivers when using the Half-Life Upgrade Kit.
7
Page 6
Content Control
Use Content Control to disable graphically violent visuals. This is a
password-protected feature designed to let parents control the level of
violence in the game. Once enabled, you will need to re-enter your
password to turn Content Control off.
Load Game / Save Game
Choose and start a previously saved game. Or, if a game is already
running, you can choose to save your game with this option.
Multiplayer
Join a multiplayer game on the Internet, chat with other players, set up
your own LAN game or customize your multiplayer game character.
Multiplayer is only available with Opposing Force. For more information
about Multiplayer options, see page 24.
View Readme.txt
The readme.txt file contains basic information on system performance,
product features and troubleshooting. It may also contain information
about the game that has changed or was updated since this manual
was printed. If you ever have difficulty with the game, it is highly
recommended that you browse the readme.txt file.
Website
Visit the Gearbox Software website for more information about this title
or future titles in development. (www.gearboxsoftware.com)
Quit
Exit the software. Don't forget to save your game before quitting.
8
Page 7
BLUE SHIFT
Controlling The Action
You may want to charge into a room and start shooting everything in
sight. Sometimes we do too. But in this game, there are many other
ways to interact with your surroundings. Half-Life: Blue Shift’s
environments are as realistic as possible and this level of realism will
affect the way you move around. For instance, there's gravity - if you
climb into the rafters and stand on weak ceiling tiles, don't be surprised
if they collapse under your weight. There are also multiple surface
effects - yes, wet floors really are slippery. And, if hit hard enough, glass
will break. You can also shoot bullets into walls to leave marks that
could be useful location reminders when lost.
Try experimenting with your environment. Use your wits as well as your
weapons to outsmart opponents and navigate through tough spots.
9
Page 8
To make your experience as comfortable as possible, the interface is as
customizable as you'd like to make it - so if you like, use the
configuration menus to set up your controls as you'd like them.
However, if you'd rather trust us to pick an appropriate configuration for
you, here is a description of the basic default controls:
Move forward W
Move backward S
Move left (strafe) A
Move right (strafe) D
Walk / Run SHIFT
Look left / right Push mouse left / right
Look up / down Push mouse up / down
Jump SPACE
Duck Ctrl
Crawl Ctrl + movement
Use E
Flashlight F
Show Score TAB
(Multiplayer only)
Select Weapon # key (1-7)
Fire (Primary) Left mouse button (Mouse 1)
Fire (Secondary) Right mouse button (Mouse 2)
Reload R
The following key bindings are for Opposing Force CTF. These are default
settings and the console commands.
Throw Powerup
Change Team
Change Player Model
Flag Information
P
N
B
I
10
Page 9

BLUE SHIFT
On-Screen Information
The HUD
In Blue Shift, the HUD is available from the start of the game. It is an
on-going barometer of health, available energy and remaining
ammunition. The HUD allows you to survey and select from your
weapons arsenal and inventory items. It also alerts you when you are
sustaining environmental damage.
Flashlight
Battery
Armor
Damage Type
Indicator
Health
Weapon selection
Weapons fall into seven
general categories
Low-tech
Hand guns
Rifle, shotgun & crossbow
Heavy military hardware
Heavy, experimental or alien weapon
Weapons that can be tossed or placed
( shown expanded )
Ammunition
Advanced alien weapons
11
Page 10

As you discover weapons, they automatically get added to their proper
categories. The categories correspond to keys 1-7 on your keyboard.
You can switch weapons in several ways:
1. Toggle through all your available weapons by repeatedly
hiting the Next Weapon ( ] ) or Previous Weapon ( [ ) keys.
Hit the Enter key or press the Primary Attack button to select
the highlighted weapon.
2. Jump directly to a specific weapon category by hitting the
number key that corresponds to hit. Then, counting down the
column, hit the same category number again as many times
as needed to match the position of the desired weapon. Hit
the Enter key or press the Primary Attack button to choose the
weapon.
3. Customize your keyboard configuration.
To fire your weapon, press the Primary Attack button (Left mouse
button). To fire a weapon's secondary function, press the Secondary
Attack button (Right mouse button). To reload your weapon, hit the
Reload (R) key.
Danger Monitors
Your HUD has visual and audio alarms to warn you when the
environment is threatening your health. If you see any of the following
symbols, act fast:
Radiation
Acid or corrosive chemical
Poisonous Biohazard
Cold
Fire
Asphyxiation
Electric Shock
12
Page 11

black mesa
research
facility
Operating Duties for:
Security Guard
“Working to make a better tomorrow for all
mankind.”
Blue Shift
All materials contained in this document are confidential. This booklet must be returned to the Office of
the Administrator upon termination or dismissal.
13
Page 12

Blue Shift
14
Page 13

Black Mesa Personnel
Many scientists, security guards and other personnel
populate the Black Mesa Research Facility. Each civilian
employee is granted security access
specific to his or her duty, so it will
be necessary to gain clearance
from the personnel.
As you go about your day-to-day activities, it's helpful
to communicate with your coworkers. Simply approach
them, show them your badge (hit the Use key) and they should respond.
Report all breaches of authority to your administrative sponsor.
When on duty, you'll often be called upon to not only protect secured
areas of the facility, but to help out with general maintenance tasks.
Follow instructions well and you'll be assured long and stable employment
with the Black Mesa Research Facility.
Blue Shift
Enemies
The Black Mesa Research Facility is involved in a wide spectrum of
scientific research, some of which involves what may appear to be strange
species of animal. Should any of the research specimens escape, you
may be called upon to assist in their capture.
There are over a dozen different species. Some are capable of working in
teams, others are loners. Some will attack without provocation and track
you by your scent. Others would rather avoid conflict and chose to prey on
lesser creatures. In all cases, consider these species extremely
dangerous.
This barnacle is a stationary
creature that attaches itself to
ceilings and lies in wait. Its passive
approach doesn't make it any less
deadly. Of course, plenty of the
species Black Mesa Research
Facility is studying are quite mobile
- you'll see.
15
Page 14

Additionally, in extreme circumstances, your
government may send in a
dangerous and very efficient
clean-up crew. It will be your
duty to assist the military in
any way necessary to deal
with whatever threat they've
been dispatched for.
This is just one of several different
militia types. Be on the lookout for
soldiers and trained assassins.
Blue Shift
Using Things
Doors and Buttons - Many objects can be manipulated by hitting the
Use key. Some doors, for example, open automatically. Others require
you to open them with the Use key. Finally, some doors will only open
with the correct security clearance code or retinal scan. In these cases,
try Using the keypad or retinal scanner located near the door. There are
other buttons you may have to Use to operate elevators, machinery or
lab equipment located through the facility.
16
Levers and Wheels - Sometimes, you'll encounter levers and wheels
that must be continually pulled or turned to achieve the desired effect.
In this case, you'll need to hold the Use key down to perform the action.
Crates, Carts, Chairs and Barrels - Sometimes it's helpful to move
things out of the way or move them into a good position for climbing.
Pull boxes and carts into new positions by holding down the Use key
and walking slowly backwards. To push a moveable object, just walk
up to it, then continue moving steadily. Add the Use key when pushing
things forward to give the object extra momentum.
Power Ups - Activate wall-mounted First Aid kits by stepping up to
them and holding down the Use key. In Blue Shift, Barney's vest and
helmet are unaffected by HEV suit chargers.
Equipment
Page 15

As Barney Calhoun, you'll be issued a number of useful items. You may
also come into possession of other valuable pieces of equipment to be
utilized at your discretion. If you have any questions about the
appropriateness of any utilities you discover during the course of your
employment, contact the office of the administrator.
Flashlight
The standard issue flashlight can be toggled on and off by pressing the
Flashlight Button (F). The flashlight uses batteries that will drain over
time, so don't forget to turn it off when you exit a dark area. The
flashlight's batteries will recharge themselves automatically when not in
use.
Armor Vest and Helmet
When you begin assignment with Blue Shift,
you must wear an armor vest and helmet.
This armor will protect you from damage.
Changing facilities are located in the security
center locker room where you will find your
armor. If your protective equipment ever
becomes damaged beyond the point of
usefulness, you may find fresh vests and
helmets located throughout the facility.
Weapons
The Black Mesa Research Facility is built upon a decommissioned military
missile base. Therefore, there are many armories and weapons caches
located throughout the facility. You'll be issued a standard 9mm side arm,
but much, much more powerful weapons may become available to you
during the course of your duty.
Blue Shift
To learn more about selecting a particular weapon from your inventory and
firing it, see the section about Weapon Selection in your training manual.
Some of the weapons you'll find have an alternate attack mode. Discover
which weapons have two uses and experiment with your options.
17
Page 16

Crowbar
The Black Mesa Research Facility is a complicated
place where a crowbar can really come in handy.
Things like barrels, boxes, gears, crates and vents
can be pried open, smashed or otherwise wrenched
loose with the crowbar. You'll find critical paths that
have been blocked or sealed shut. You can dig through such obstacles
with your crowbar. You can also use your crowbar to break glass and
bludgeon approaching enemies.
Blue Shift
Pistol
You acquire this 9mm pistol early in the
game. Although it may seem outdated as you
acquire more technologically advanced
weapons, don't forget about it; it's one of the few weapons that fire
underwater.
18
Assault Rifle
This is one of the first
weapons you'll find with
both primary and
secondary attack
options. The military
assault rifle has an
attached grenade
launcher (secondary
attack). It has great range and fires rapidly. Its primary attack fires 50round clips of 9mm bullets, while the secondary attack launches
grenades.
Page 17

WAR DEPARTMENT
BASIC FIELD MANUAL
Soldier’s handbook
January 13, 2000
Including CB40, March 20, 1998
NOTE.
No initial distribution will be made of this manual as it contains
only minor changes to the November 1, 1999, edition.
Replacement of copies now in the hands of individuals is not
authorized.
19
Page 18

SOLDIER’S HANDBOOK
108. (a) knowing your squad
ENGINEER
The engineer is equipped with
the tools necessary to adapt to
changing situations in the field.
He can even be utilized to cut
through sealed doors. To have a
torch engineer work for you, lead
him to a door that needs cutting
and he'll do his job. The engineer
is capable of fighting with his
sidearm, but care should be taken
to keep your engineers alive at all
costs. If you lose the only
engineers available to cut a
passage, you may fail your
mission. Also, be careful not to
allow the torch soldier's fuel tank
to sustain damage. If the canister
is pierced, it is likely to explode.
SOLDIER
The squad assault soldier is
equipped with a shotgun, MP5 sub machinegun or an M249 light machinegun.
Sometimes, soldiers may carry
grenades. These soldiers will
loyally follow you should you
give the order. Simply face the
grunt and hit your Use key.
You can also command the
soldier to guard the area
around where he stands. "Use"
him again and he'll stay put.
MEDIC
The medic is trained in first aid
and emergency surgery and has
the ability to heal wounded
soldiers in the field. To get the
help of a medic, face him and
press and hold your Use key. The
medic will continue working on
you as long as the Use key is held
or until you are fully healed.
Medics do carry limited supplies
and if used repeatedly will no
longer be able to heal you or
your squad. During combat
other soldiers may call for a
medic and if he can hear them,
he'll try to run to their aid.
Medics are equipped with a .357
Desert Eagle sidearm for
combat, but are best kept safely
behind the front lines.
20
Page 19

SOLDIER’S HANDBOOK
109. regarding objects in combat
Radio
Communication could be considered to be
the most important tool of any soldier.
Radios are used to allow soldiers in the field
to maintain constant communication with
each other. The radio is usually a stationary
object, therefore it cannot be carried
around. But, the usefulness of a radio in
the field should never be ignored. Face the
radio and hit your Use key to operate it.
Ropes
Ropes can be used to elevate troops to higher
ground or safely rappel to lower surfaces.
Learning how to use gravity and inertia to
swing on ropes allows them to be used in
creative ways. Ropes are similar to ladders to grab one, simply touch it. You can climb
up and down by moving forward and back.
Press jump key to leap off of the rope. You can
swing yourself before letting go of the rope to
hurtle yourself through the air.
PROPERTY OF UNITED STATES GOVERNMENT
21
Page 20

SOLDIER’S HANDBOOK
110. maintaining your equipment
YOUR POWERED combat VEST (pcv)
Early in the game, you must find and wear the Powered Combat Vest (PCV) your
military has provided you with. The vest can be recharged periodically and the
greater the charge, the more protective power your vest has.
To recharge your vest, seek out a wall-mounted HEV or PCV
charger, or pick up batteries along the way.
Night Vision Goggles
The soldier’s mask and goggles are used in conjunctino with the Powered Vest to
provide you with night vision. The goggles use a special r echargeable battery within
the vest, so cells used for armor protection are not drained
when night vision is in use. The goggles can be toggled on and
off and will provide you with bisibility in the dark. They are
not as useful in bright areas, however, so it is only
recommended that you use your goggles only in low light
conditions.
22
PROPERTY OF UNITED STATES GOVERNMENT
Page 21

SOLDIER’S HANDBOOK
111. rules governing execution of arms
desert eagle .357
The Desert Eagle is provided as a standard side-arm for field soldiers. It is therefore
best used in close range combat. For assault teams, this weapon is fitted with a laser
sight, making it the perfect tool for clearing trip mines and other small targets that
require patient pin-point accuracy. The soldier has to be careful when using the laser
sighting because it can reveal their position to the enemy. While the Desert Eagle
does utilize a clip that allows a higher capacity than revolver type handguns, soldiers
shouldn ’t burden themselves with much reserve ammunition. Never carry more than
36 rounds of .357 ammo.
Class Pistol (Group 2)
Ammunition .357 Caliber
Damage Medium
Capacity 7 Shots per Clip
m-40a1 sniper rifle
The Sniper Rifle is used for exactly what the name implies, long range accuracy. The
reload time is long and it fires only one shot at a time. But, the rifle is equipped with
a high powered scope to enable a soldier to take out a target at distances up to half a
mile. For obvious reasons this is not a close combat weapon. But, when used
effectively, a sniper rifle can deliver many casualties as well as demoralize surviving
enemies.
Class Rifle (Group 6)
Ammunition 7.62mm NATO
Damage Very High
Capacity 5 Shots per Clip
m-249 saw light machine gun
The Squad Assault Weapon (SAW) is the ultimate team combat gun. It can be used
from a fall back position as a support weapon for suppressing fire or it can be used
by a point soldier to quickly repel a defending force. Extra ammunition should
always be kept available as the rate of fire of the M-249 causes most soldiers to burn
through their stock seconds into the battle. While firing from a crouched stationary
position the SAW is most accurate, but the accuracy rate decreases when fired while
in motion.
Class Machine Gun (Group 6)
Ammunition 5.56mm
Damage High
Capacity 50 Shots per Belt
PROPERTY OF UNITED STATES GOVERNMENT
23
Page 22

MULTIPLAYER
The Opposing Force multiplayer features eliminate the hassle of getting connected to the game of
your choice. Whether you’re new to multiplayer games or a seasoned veteran, you’ll appreciate how
fast and easy it is to get into the action.
(Note: For best results, connect to the Internet before selecting a multiplayer game.)
Opposing Force’s multiplayer selections include:
Quickstart Chat Rooms Customize Exit
Internet Games LAN Game Visit WON
Quickstart
Select Quickstart to get online and playing as fast as possible. Once you’ve logged on to our
system, it will automatically check the list of current games and drop you into the best available
game.
Internet Games
Use this feature if you prefer to browse the list of available games. The list reports the speed of the
network, which multiplayer map is being played, the name of the game being played, and the current
number of players/maximum number allowed in the game.
Connect: To join a game, click on the game name,
then click on Connect
Create game: Host a new game on your computer
View game info: Check players’ names and scores,
and review the rules chosen for your game.
Refresh: Get the latest information on the current list
of games.
Update: Request a new listing of available games.
Filter: Look at a subset of available games.
Add server: Add a specific game to the list by
manually entering its Internet address.
Chat Room: Visit the Chat rooms to hook up with
other players.
Exit: Go back to the main multiplayer menu.
Chat Rooms
Chat rooms are a great place to meet friends, taunt opponents or discuss strategy. To make getting
started easy, a chat room will be selected for you automatically. Join in the discussion or switch to a
different room by selecting List rooms. You can also search for a specific player or room name of a
private chat room, you will be asked for a password before you can join the room.
LAN Game
You can also play multiplayer Opposing Force on a LAN (Local Area Network). If you choose LAN
game from the menu, Opposing Force will automatically check your LAN for active games. You can
join a current game, refresh the list of games, create a new game, or add a specific game to the list
by manually entering the Internet address.
Customize
Opposing Force gives you the ability to customize the appearance of your character in multiplayer
games. Select from a list of options for player face, model and skin.
You can also select a “spray paint” image that can be used to mark your territory or announce your
clan affiliation. Use the T key to apply your image to walls and other surfaces.
Visit WON
Connect to the WON website to get the latest news on multiplayer games in the Half-Life universe.
You’ll also find tips and strategy guides, contests, mod and skin libraries and links to Half-Life fan sites.
24
Page 23

BLUE SHIFT
DEATHMATCH
Opposing Force multiplayer includes a collection of “deathmatch” maps created by some of the most
reknowned first person action game designers in the industry. You can play deathmatch on a LAN or on
the internet. The premise of deathmatch is to kill or be killed. The player that earns the most kills is the
winner. The “All Star”designers who created custom arenas for Half-Life: Opposing Force are described
below:
Richard "Zdim" Carlson - In the past, Richard has worked on Thief 2 at Looking Glass and American
McGee’s Alice at Rogue Entertainment. For the “All Star” collection, Richard created “Blue Meanie”
(op4_meanie).
Marin "Kandyman" Gazzari - Marin is a well known amateur designer who created the famed
“Kndybase” maps for Quake as well contributing to the ZerStorer single player episode for Quake. For
the “All Star” collection, Marin created “Kandy One” (op4_kndyone) as well as re-creating the original
Kndy Base map for Half-Life: Opposing Force (op4_kbase).
David "Kevlar" Kelvin - When Gearbox contracted David, he was working on Unreal 2 for Legend
Entertainment after having contributed multiplayer designs to Monolith’s Shogo. Since his work on the
“All Star” collection, David joined Grey Matter to work on Return to Castle Wolfenstein. His maps for
OpFor include “Disposal” (op4_disposal) and Xen Dance (op4_xendance).
Tom "Paradox" Mustaine - Long ago, Tom contributed to Final Doom for id Software. Since then he’s
been behind such games as SiN and Heavy Metal: FAKK 2 at Ritual Entertainment. For the “All Star”
collection, Tom created “Paradox Park” (op4_park) and “Rubble” (op4_rubble).
Stephen "Reichert" Palmer - Stephen earned a reputation as a strong designer in the Quake era with
his “Dark Forest” single player mission. Stephen managed the development of all of the “All Star” maps
and contributed “Outpost” (op4_outpost). Since the “All Star” project, Stephen Palmer joined Gearbox
full time as a designer.
Eric Reuter - Eric Reuter has a long background of games development, including work on 3dRealms’
Shadow Warrior and Epic Megagames’ Unreal. For the “All Star” collection, Eric created “Demise”
(op4_demise).
The Levelord(TM) - The famous Levelord created award winning games like Duke Nukem 3d, Quake:
Scourge of Armagon and others and contributed “The Repentafrag” (op4_repent) to the OpFor “All Star”
collection.
Choose these maps when creating a LAN or internet multiplayer game, or choose the classic Half-Life
deathmatch levels which appear in the map selection list.
25
Page 24

HALF-LIFE OPPOSING FORCE CTF
Overview:
The goal in Half-Life: Opposing Force Capture The Flag (OpFor CTF) is simple:
Capture the opposing team's flag and return it to your flag in your home base.
The team who captures the most flags is the winner - but there are many other
goals to strive for in OpFor CTF!
Joining or Creating a New Game
To start or join a CTF game, navigate the multiplayer menus (as described on
Page 24) and choose a game running a CTF map (designated with “op4ctf_” in
the map name). When creating a game, do so as if you’re creating a
deathmatch game, but choose a CTF map.
Entering The Game:
When you first enter a CTF game you will be in spectator mode. You can fly
around and explore if you are unfamiliar with the map.
Opposing Force CTF throws players into the classic confrontation of Soldiers vs.
Civilians. Therefore, player's may join either the Civilian Black Mesa team
(Orange) or the Soldier's Opposing Force team (Green). At this menu screen
you can choose to join either of these teams specifically, become a spectator or,
if you don't care what team you are on and just want to help out the team with
the fewest members, you can select the "Auto Assign" choice.
26
Page 25

BLUE SHIFT
Scoring
The only way to score a capture in OpFor CTF is to return the enemy's flag to
your own flag in the flag base. Each flag capture earns 1 capture point for your
team as displayed in the flag HUD. Individual players may also score personal
points by defeating the enemy, defending their flag or protecting a friendly flag
runner.
The Power-Ups
Opposing Force CTF includes five Power-Up items that will give the owner extra
enhancements or abilities. When a player is the owner of a Power-Up, a large
icon will appear on the middle left side of their HUD showing what Power-Up
they currently possess. In addition to this, all of the Power-Up items have audio
cues that will play when the Power-Up is in use. These audio cues can be heard
by all players, friend or foe, who are standing within earshot of the owner of the
Power-Up. To collect a Power-Up, simply touch it. The Power-Up will disappear
from the ground and your HUD will update to display that you are now carrying
the item. To drop a Power-Up, press the “Throw Power-Up” key (check your key
configuration screen from the game menus)
Ammo Power-Up
Death Power-Up
Health Power-Up
Jump Power-Up
Shield Power-Up
End Game Statistics
In addition to rewarding the winning team at the end of each game with a banner
that's displayed for all players to see, OpFor CTF keeps track of many statistics
that are reported in the end game menus. Also, when the end game menu is
active, you can toggle between the standard scoreboard and the statistics
screen.
27
Page 26

Gearbox Credits:
Production / Direction
Blue Shift and Opposing Force:
Randy Pitchford
Art Direction
Blue Shift and Opposing Force:
Brian Martel
Art, Models and Animation
Blue Shift and Opposing Force:
Stephen Bahl
Brian Martel
Landon Montgomery
Additional Art, Models and
Animation for Blue Shift:
Matthew VanDolen
Lead Level Designer
Blue Shift and Opposing Force:
Rob Heironimus
Level Designers
Blue Shift and Opposing Force:
Matt Armstrong
Rob Heironimus
David Mertz
Randy Pitchford
Mike Wardwell
Level Designers
Opposing Force Online:
Stephen Palmer
Brian Hess
Programming
Blue Shift:
Sean Cavanaugh
Patrick Deupree
Installation Programming:
Christopher McArthur
Sound Effects
Blue Shift and Opposing Force:
Rob Heironimus
Stephen Bahl
Writing
Blue Shift and Opposing Force:
Rob Heironimus
David Mertz
Randy Pitchford
Writing
Opposing Force:
Kristy Junio
Manual:
Kristy Junio
Eli Luna
Brian Martel
Landon Montgomery
Randy Pitchford
Manual Layout:
Eli Luna
Voices:
Jon St. John
Kathy Levin
Mike Shapiro
Harry S. Robbins
Original Music:
Stephen Bahl
Chris Jensen
Administration:
Stephen Bahl
Landon Montgomery
Programming
Opposing Force:
Patrick Deupree
John Faulkenbury
Steve Jones
Sean Reardon
28
Page 27

BLUE SHIFT
Sierra Studio Credits:
Sr. Vice President:
J. Mark Hood
Sr. Producer:
Jeff Pobst
Assistant Producer:
Bernadette Pryor
VP Marketing:
Jim Veevaert
Director of Marketing:
Lee Rossini
Koren Buckner
Brand Manager:
Charles Holtzclaw
Marketing Assistant:
Michael Cowan
Director of QA:
Gary Stevens
QA Supervisor:
Ken Eaton
QA Lead Tester:
Jim Gentle
Web Editior:
Guy Welch
Director of PR:
Genevieve Ostergard
PR Associate Manager:
Kellie Cosner
Creative Services:
Mike Rodgers
Orlena Yeung
Valve is...
Ted Backman
Kelly Bailey
Jeff Ballinger
Aaron Barber
Yahn Bernier
Ken Birdwell
Derrick Birum
Steve Bond
Charlie Brown
Dario Casali
Francis Chu
John Cook
Daniel Cross
Mike Dunkle
Mike Dussault
Rick Ellis
Dhabih Eng
Bill Fletcher
Pat Goodwin
Jaime Guthrie
John Guthrie
Brian Jacobson
Erik Johnson
Chuck Jones
Paul Jones
Marc Laidlaw
Jeff Lane
Chia Chin Lee
Lars Liden
Doug Lombardi
Randy Lundeen
Scott Lynch
Gary McTaggart
Chris Newcombe
Gabe Newell
Dave Riller
David Sawyer
Eric Smith
David Speyrer
Jay Stelly
Harry E. Teasley
Steve Theodore
Mikel Thompson
Bill Van Buren
Robin Walker
Josh Weier
Doug Wood
Gearbox would like to give
Special Thanks To:
Richard Carlson
Kellie Cosner
Amanda Dunn
Marin Gazzari
David Kelvin
Joe Kennebec
Doug Lombardi
Gabe Newell
Frank Nuccio
Tom Mustaine
Genevieve Ostergard
Jeff Pobst
Dustin Porter
Eric Reuter
Danny Richardson
David Sawyer
Rob Selitto
John Shaffstall
Richard Gray
Sierra Studios QA
Valve Software
Captivation Digital
Laboratories
Vivendi Universal
Interactive Publishing
Localisation Credits:
Fiona Wilson
Barry Kehoe
David Doheny
David Hickey
Justin Gregg
Neill Fleming
Damian Bennett
Andy Clark
29
 Loading...