

Page 1
Page 2

TABLE OF CONTENTS
Requirements and Installation . . . . . . . . . . . . . . . . . . . . . . . . . . . . . . . . . . . .5
Recommended System Requirements . . . . . . . . . . . . . . . . . . . . . . . . . . . . . . . .5
Installing . . . . . . . . . . . . . . . . . . . . . . . . . . . . . . . . . . . . . . . . . . . . . . . . . . . . .5
Playing . . . . . . . . . . . . . . . . . . . . . . . . . . . . . . . . . . . . . . . . . . . . . . . . . . . . . . .6
Uninstalling . . . . . . . . . . . . . . . . . . . . . . . . . . . . . . . . . . . . . . . . . . . . . . . . . . .6
The Readme File . . . . . . . . . . . . . . . . . . . . . . . . . . . . . . . . . . . . . . . . . . . . . . . .7
The Main Menu
. . . . . . . . . . . . . . . . . . . . . . . . . . . . . . . . . . . . . . . . . . . . . . . . . .7
Fly Now
. . . . . . . . . . . . . . . . . . . . . . . . . . . . . . . . . . . . . . . . . . . . . . . . . . . . . . . . .8
Training
. . . . . . . . . . . . . . . . . . . . . . . . . . . . . . . . . . . . . . . . . . . . . . . . . . . . . . . . .8
Custom Configuration
. . . . . . . . . . . . . . . . . . . . . . . . . . . . . . . . . . . . . . . . . . . .9
Individual Missions
. . . . . . . . . . . . . . . . . . . . . . . . . . . . . . . . . . . . . . . . . . . . .12
Starting Single-Player . . . . . . . . . . . . . . . . . . . . . . . . . . . . . . . . . . . . . . . . . . .12
Starting Multi-Player . . . . . . . . . . . . . . . . . . . . . . . . . . . . . . . . . . . . . . . . . . . .12
Loading Weapons . . . . . . . . . . . . . . . . . . . . . . . . . . . . . . . . . . . . . . . . . . . . . .13
Creating a New Mission . . . . . . . . . . . . . . . . . . . . . . . . . . . . . . . . . . . . . . . . .15
Campaigns . . . . . . . . . . . . . . . . . . . . . . . . . . . . . . . . . . . . . . . . . . . . . . . . . . . . .20
Starting a Campaign . . . . . . . . . . . . . . . . . . . . . . . . . . . . . . . . . . . . . . . . . . . .20
Reading Intelligence Reports . . . . . . . . . . . . . . . . . . . . . . . . . . . . . . . . . . . . .22
Reviewing the Preflight Briefing . . . . . . . . . . . . . . . . . . . . . . . . . . . . . . . . . . .22
Assigning Pilots . . . . . . . . . . . . . . . . . . . . . . . . . . . . . . . . . . . . . . . . . . . . . . .23
Loading Weapons . . . . . . . . . . . . . . . . . . . . . . . . . . . . . . . . . . . . . . . . . . . . . .24
Mission Planning . . . . . . . . . . . . . . . . . . . . . . . . . . . . . . . . . . . . . . . . . . . . . .26
The Post-Flight Debriefing . . . . . . . . . . . . . . . . . . . . . . . . . . . . . . . . . . . . . . .28
Changing Crew Assignments . . . . . . . . . . . . . . . . . . . . . . . . . . . . . . . . . . . . .28
Flying the Next Mission . . . . . . . . . . . . . . . . . . . . . . . . . . . . . . . . . . . . . . . . . .29
The Cockpit MFD Displays . . . . . . . . . . . . . . . . . . . . . . . . . . . . . . . . . . . . . . .30
AND Display . . . . . . . . . . . . . . . . . . . . . . . . . . . . . . . . . . . . . . . . . . . . . . . . . .30
System Damage . . . . . . . . . . . . . . . . . . . . . . . . . . . . . . . . . . . . . . . . . . . . . . .30
Tactical Situation Map . . . . . . . . . . . . . . . . . . . . . . . . . . . . . . . . . . . . . . . . . . .30
Radar Advance Warning System (RAWS) . . . . . . . . . . . . . . . . . . . . . . . . . . . .32
Fire Control Radar (FCR) . . . . . . . . . . . . . . . . . . . . . . . . . . . . . . . . . . . . . . . . .33
Weapons Display . . . . . . . . . . . . . . . . . . . . . . . . . . . . . . . . . . . . . . . . . . . . . .33
Target Acquisition Designation Sight (TADS) . . . . . . . . . . . . . . . . . . . . . . . . . .34
Engine Display . . . . . . . . . . . . . . . . . . . . . . . . . . . . . . . . . . . . . . . . . . . . . . . .35
Map Screen . . . . . . . . . . . . . . . . . . . . . . . . . . . . . . . . . . . . . . . . . . . . . . . . . .36
In The Pilot’s Seat . . . . . . . . . . . . . . . . . . . . . . . . . . . . . . . . . . . . . . . . . . . . . .38
Takeoff . . . . . . . . . . . . . . . . . . . . . . . . . . . . . . . . . . . . . . . . . . . . . . . . . . . . . .38
Aggressive Takeoff . . . . . . . . . . . . . . . . . . . . . . . . . . . . . . . . . . . . . . . . . . . . .39
3
Page 3

4
Adjusting Airspeed . . . . . . . . . . . . . . . . . . . . . . . . . . . . . . . . . . . . . . . . . . . . .40
Liftoff and Low Altitude Hover . . . . . . . . . . . . . . . . . . . . . . . . . . . . . . . . . . . . .42
Liftoff and Hover at High Altitude . . . . . . . . . . . . . . . . . . . . . . . . . . . . . . . . . .43
Transition to Hover . . . . . . . . . . . . . . . . . . . . . . . . . . . . . . . . . . . . . . . . . . . . .43
Rapid Climb . . . . . . . . . . . . . . . . . . . . . . . . . . . . . . . . . . . . . . . . . . . . . . . . . .44
Rapid Descent . . . . . . . . . . . . . . . . . . . . . . . . . . . . . . . . . . . . . . . . . . . . . . . .45
Flying Backwards . . . . . . . . . . . . . . . . . . . . . . . . . . . . . . . . . . . . . . . . . . . . . .45
Flying Sideways . . . . . . . . . . . . . . . . . . . . . . . . . . . . . . . . . . . . . . . . . . . . . . .46
Engaging Ground Targets . . . . . . . . . . . . . . . . . . . . . . . . . . . . . . . . . . . . . . . .47
Engaging Aerial Targets . . . . . . . . . . . . . . . . . . . . . . . . . . . . . . . . . . . . . . . . .47
Navigating Waypoints . . . . . . . . . . . . . . . . . . . . . . . . . . . . . . . . . . . . . . . . . . .49
Speed Control . . . . . . . . . . . . . . . . . . . . . . . . . . . . . . . . . . . . . . . . . . . . . . . .49
Masking . . . . . . . . . . . . . . . . . . . . . . . . . . . . . . . . . . . . . . . . . . . . . . . . . . . . .50
Flying Ridges and Valleys . . . . . . . . . . . . . . . . . . . . . . . . . . . . . . . . . . . . . . . .51
The Communications Menu . . . . . . . . . . . . . . . . . . . . . . . . . . . . . . . . . . . . . .51
Realistic Flight Mode . . . . . . . . . . . . . . . . . . . . . . . . . . . . . . . . . . . . . . . . . . .54
Copilot/Gunner (CP/G) . . . . . . . . . . . . . . . . . . . . . . . . . . . . . . . . . . . . . . . . . .57
Communicating with the Pilot . . . . . . . . . . . . . . . . . . . . . . . . . . . . . . . . . . . . .57
Gunner’s and ORT Cockpits . . . . . . . . . . . . . . . . . . . . . . . . . . . . . . . . . . . . . .58
Acquiring Targets with the FCR . . . . . . . . . . . . . . . . . . . . . . . . . . . . . . . . . . . .59
Acquiring Targets with the TADS . . . . . . . . . . . . . . . . . . . . . . . . . . . . . . . . . . .60
Engaging Targets . . . . . . . . . . . . . . . . . . . . . . . . . . . . . . . . . . . . . . . . . . . . . .61
Basic Tactics . . . . . . . . . . . . . . . . . . . . . . . . . . . . . . . . . . . . . . . . . . . . . . . . . . .66
Two Pieces of Advice . . . . . . . . . . . . . . . . . . . . . . . . . . . . . . . . . . . . . . . . . . .66
Offensive Tactics . . . . . . . . . . . . . . . . . . . . . . . . . . . . . . . . . . . . . . . . . . . . . .66
Defensive Tactics . . . . . . . . . . . . . . . . . . . . . . . . . . . . . . . . . . . . . . . . . . . . . .69
Guide To Vehicles . . . . . . . . . . . . . . . . . . . . . . . . . . . . . . . . . . . . . . . . . . . . . .71
AH-64D Apache . . . . . . . . . . . . . . . . . . . . . . . . . . . . . . . . . . . . . . . . . . . . . . .71
WAH-64D Apache . . . . . . . . . . . . . . . . . . . . . . . . . . . . . . . . . . . . . . . . . . . . . .72
UHT-2 Tiger . . . . . . . . . . . . . . . . . . . . . . . . . . . . . . . . . . . . . . . . . . . . . . . . . .74
Mi-28N Havoc . . . . . . . . . . . . . . . . . . . . . . . . . . . . . . . . . . . . . . . . . . . . . . . .75
Helicopter Weapon Systems . . . . . . . . . . . . . . . . . . . . . . . . . . . . . . . . . . . . . .76
U.S. Vehicles . . . . . . . . . . . . . . . . . . . . . . . . . . . . . . . . . . . . . . . . . . . . . . . . .83
British Vehicles . . . . . . . . . . . . . . . . . . . . . . . . . . . . . . . . . . . . . . . . . . . . . . . .86
German Vehicles . . . . . . . . . . . . . . . . . . . . . . . . . . . . . . . . . . . . . . . . . . . . . .87
Russian Federation Vehicles . . . . . . . . . . . . . . . . . . . . . . . . . . . . . . . . . . . . . .88
Appendix: Guide to Acronyms . . . . . . . . . . . . . . . . . . . . . . . . . . . . . . . . . . . .93
Technical Support
. . . . . . . . . . . . . . . . . . . . . . . . . . . . . . . . . . . . . . . . . . . . . .95
Grant of License
. . . . . . . . . . . . . . . . . . . . . . . . . . . . . . . . . . . . . . . . . . . . . . . .96
Credits
. . . . . . . . . . . . . . . . . . . . . . . . . . . . . . . . . . . . . . . . . . . . . . . . . . . . . . . .98
Page 4

5
REQUIREMENTS AND INSTALLATION
Recommended System Requirements
Before you can install Gunship! and start playing, check this list to make sure that your
computer has everything you need:
Operating System: Windows®95/98
Processor: Pentium
®
266MHz or higher
Memory: 32MB RAM
Hard Disk Space: 150MB Free
CD-ROM Drive: 4X Speed
Video: SVGA video card with 2MB video memory*
Sound: Sound card*
DirectX: DirectX version 7.0 (included) or higher
Modem: 28.8kps (28,800 baud) for modem/Internet play
* These devices should be compatible with both Windows 95/98 and DirectX version
7.0 or higher.
If you think you have all of these, but still have a problem running the game, please
contact Customer Support for assistance. (Details can be found on page 95.)
Installing
If you have all of the required equipment, then it’s time to install the game. To do so,
follow these instructions:
• Turn on your computer (Windows 95/98 should load automatically).
• Open the CD-ROM drive, place the Gunship! CD in it, and close the drive.
• This is a Windows "AutoPlay" CD-ROM. That means that just putting the disk in the
drive for the first time starts up the installation program.
If Autoplay Doesn’t Work
If the Autoplay feature does not work when you put the CD in the drive, here’s how to
start the installation program yourself:
• Double-click your "My Computer" desktop icon.
• In the window that opens, double-click your CD-ROM drive (it’s usually the D drive).
• In the list that appears, find a file named setup.exe and double-click it.
The installation program should begin.
Page 5

6
• Click the Install button to continue. (If you change your mind at this point, close the
window to Exit.)
• Follow the on-screen instructions to install the game. The installation program copies
some files to your hard drive from the CD-ROM, then adds Gunship! to the programs
in your Start menu.
• Gunship! requires DirectX 7.0 or higher in order to run. If you do not have this already
installed on your computer, click Yes when asked if you would like to install it.
Playing
Once the automated installation and set-up are complete, the game is ready to play.
To start:
• Make sure that the CD-ROM is in your drive.
• Now simply click on the Play Gunship! button when the title box appears.
Alternatively (if the box doesn’t appear), you can click the Windows Start button, then
choose Programs > MicroProse > Gunship! > Play Gunship! to run the game.
Uninstalling
If you decide to remove Gunship! from your computer, follow these easy instructions.
• Put the Gunship! CD-ROM in your drive.
• Now simply click on the Uninstall button when the title box appears.
• If you do not have the Gunship! CD handy, you can still uninstall the game. Here’s how:
• Click the Windows Start button.
• Select Settings, then Control Panel.
• In the Control Panel window, double-click on Add/Remove Programs.
• Select Gunship! from the list of programs and click the Add/Remove button.
• Follow the on-screen instructions to remove the game from your hard drive.
Note: The uninstall procedure won’t remove files you’ve created—such as Saved Game
files. You can delete these leftover files manually.
Page 6
7
THE README FILE
The Gunship! CD-ROM game has a ReadMe file, where you can view updated information
about the game. To view this file, click the Windows Start button, the Programs menu,
the MicroProse sub-menu, then Gunship!. Finally, click the ReadMe option. You can also
get to the ReadMe file by double-clicking on it in the Gunship! folder on your hard drive.
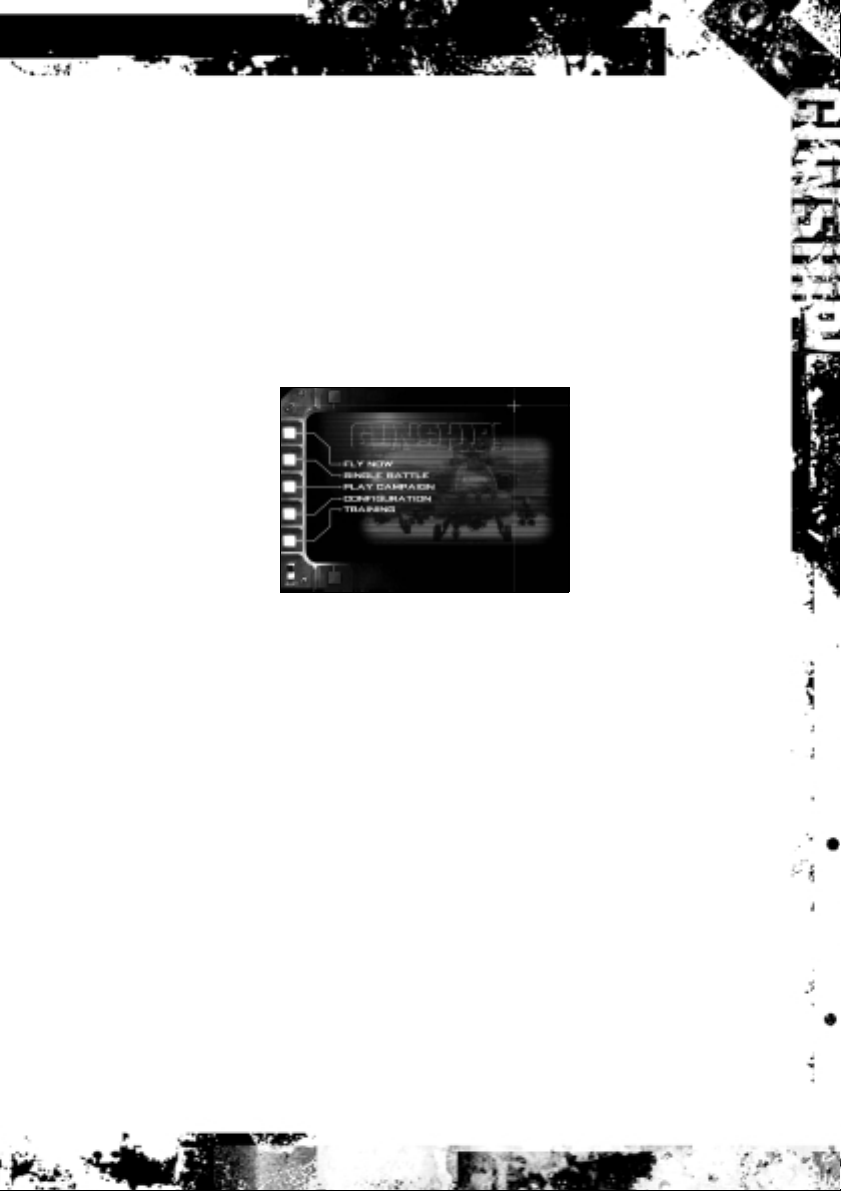
THE MAIN MENU
When you first fire up the game, you see the Main menu screen. Everything begins and
ends here, so let’s briefly run through the available options, then move on to the action.
Fly Now Jump right in and fly one of five action oriented missions with the
current difficulty settings.
Single Battle Fly an individual mission that is not part of a larger campaign.
Play Campaign Fly and fight a number of missions for your chosen side as one part
of a large, ongoing, military campaign.
Configuration Modify the game difficulty settings and configure Gunship! to work
well with your computer’s hardware.
Training Fly training missions designed to help you learn the rudiments of
flying a combat helicopter.
One other thing you should know; there are a couple of useful features available on
nearly every screen in the game:
• In most places, there is a Main button in the lower right corner of the screen.
Click this button to return directly to the Main menu (the first one you see when you
start up Gunship!).
• There’s also a Quit button in the lower left corner. Clicking Quit takes you out of the
game completely.
Page 7

8
Terms We Use
Just to avoid confusion, here are the meanings of a few common terms that we use
throughout this manual:
Click Click the left mouse button once.
Select Click the named option.
Double Click Click the left mouse button twice in quick succession.
Right Click Click the right mouse button once.
FLY NOW
The Fly Now option is for those folks who just want to jump right into a helicopter and
fly. Select this option from the Main menu to start an action-oriented battle using the
current difficulty settings.
After you click Fly Now, you go directly to the pre-flight briefing. You’ll be assigned at
random to fly the AH-64D, the WAH-64, the Eurocopter Tiger, or the Mi-28. You can
alter your flight path using the Mission Planning button and change your weapons
loadout using the Arming button. (The details on how to do these things are in the
Mission Planning and Loading Weapons portions of the Campaign section,
respectively.) When you’ve configured your flight, click the Take Off button in the upper
right corner.
TRAINING
For those of you whose attack helicopter skills are a little rusty, Gunship! provides
training sessions to help you get back up to speed. Select Training from the Main
menu to reach the Training Mission screen.
The training missions are designed to help you learn to fly and fight a helicopter from
the pilot’s seat. The Gunship! Quick Start guide was written to compliment this training.
It can be helpful to read the corresponding section while you’re flying each mission.
Don’t worry about getting shot down; enemy fire doesn’t damage you during training.
Select a mission by clicking it, watch the training movies, read the basic briefing, then
click the Take Off button to enter the mission and begin.
Page 8

CUSTOM CONFIGURATION
The Configuration option on the Main menu lets you set up the game to work well with
your computer’s hardware and adjust the overall difficulty of the game. There are three
buttons along the lower edge of the Configuration screen, each of which illuminates
when active.
Windowed/Full Screen
The first button, which is labelled Windowed, determines whether the game runs in a
window or takes up the entire screen. When you click this button, the label changes to
indicate the result of clicking the button again. That is, if the button "Windowed" is
highlighted, you are currently in Windowed mode, and vice versa.
Battle Settings
The Battle Settings button calls up the Battle Settings screen, on which you control the
difficulty and realism of the game. This rating affects the award, promotion, and experience
points you receive for each campaign mission. The lower you set the difficulty rating, the
more difficult it will be to earn promotions and medals. The options on this screen are:
Default Settings These three buttons let you quickly configure your difficulty to
one of three pre-designed modes of play.
Action sets all options to their easiest and least realistic modes.
Average puts all the options in the middle.
Simulation uses the most difficult and realistic settings.
Flight Model This determines the realism of the physics of flight.
Easy greatly simplifies the flight mode and removes external
influences such as wind and rain. The flight controls are
simplified: Collective controls only altitude and is not affected
by airspeed; the cyclic controls only airspeed and direction;
and the pedals are completely disconnected from torque and
remain fully functional at all airspeeds.
Enhanced attenuates the effects of outside influences, such as
wind, without removing them altogether. The flight controls
are realistically interconnected, but simplified. For example,
changes in torque require co-ordinated pedal changes, but the
effect is less pronounced than in real life.
Realistic mode has all outside influences fully functional and
all controls fully cross connected. This setting most closely
approaches real life flight.
9
Page 9

Player Weapon Effects This setting controls the overall effectiveness of your weapons.
In addition to damage bonuses, this includes plusses to
armour penetration, blast radius, and tracking ability.
Note: This affects only your weapons; it has no effect on any
other weapons in the game.
Exaggerated weapons are two to three times more deadly
than normal.
Enhanced weapons are roughly 50% more effective than usual.
This setting makes weapons like rockets and the cannon more
effective against heavily armoured targets and reinforced bunkers.
Realistic weapons operate at their normal, real-world
effectiveness. Soft weapons, such as anti-personnel
rockets, will not be particularly effective against armour and
reinforced bunkers.
View Mode Which viewpoint you begin each mission in is under your
control through this option.
Outside has you start in a viewpoint flying behind
your helicopter.
Pilot Cockpit causes you to begin in the Pilot cockpit.
Gunner Cockpit (no surprise) starts you in the Gunner cockpit.
Player Vulnerability This setting determines how much punishment your helicopter
can take before damage effects set in.
Invulnerable makes your helicopter completely invincible.
Resistant doubles the armour protection of your helicopter,
letting it take roughly twice as much damage as usual.
Realistic sets your helicopter’s armour protection to
real-world levels.
Ammunition This option controls whether your helicopter has realistically
limited amounts of ammunition.
Unlimited gives you unlimited weapons.
Normal limits you to your helicopter’s realistic weapons load.
Enemy Skill The setting you choose for this option determines the overall
quality of your enemies (the strength of the artificial intelligence).
There are four possibilities: Poor, Good, Veteran and Elite.
10
Page 10

11
IHADSS All of the weapons your helicopter carries have limited zones
of fire, which are reflected on the IHADSS (Integrated Helmet
And Display Sight System) display you see in the various
cockpits. This setting determines just how firm the limits on
those zones are.
Action loosens the weapon firing constraints on the IHADSS,
making all weapons easier to use.
Realistic displays realistic weapon firing constraints on
the IHADSS.
Game Settings
The Game Settings button switches you over to the Game Configuration screen, where
you can adjust the game according to your computer’s hardware and your preferences.
Music Volume Sets the volume of the in-game music.
Master Sound Volume Controls the overall volume of all sounds in the game.
Sound Effects Volume Determines the volume of special sounds, such as weapons
fire and explosions.
3D Object Density This controls the number of three dimensional objects
displayed on the screen at any given time. The setting cycles
between Software, Low, Medium, and High. Using the lower
settings can result in the game running faster, though it might
also reduce the graphic quality somewhat.
Graphics Mode Cycles through the available display drivers. The options are
Software (no 3D accelerator card), and Direct 3D HAL.
Screen Resolution Controls what screen resolution you use in the game. Choose
the resolution that works best for you.
In Game Language This option gives you control over what languages the units in
the game speak. Use the Local setting to have all in-game
speech use your default language. For example, in the US or
UK version of the game, everyone would speak English, while
in the German version, all units would speak German. Actual
allows the units to speak in their actual languages. Thus,
German forces would speak German, Russian forces would
speak Russian, and so on.
Page 11

INDIVIDUAL MISSIONS
Flying a campaign is great, but sometimes you don’t want to commit yourself to a long
term project—or maybe you’re playing with friends. In both cases, what you want is to
fly a single battle, one mission. That’s what the Single Battle option on the Main menu
is all about. This mode lets you fly a pre-generated, individual mission completely
separate from any campaign.
Starting Single-player
A single-player individual mission is similar to a Fly Now mission, except that the battle
is set up entirely according to the current difficulty settings. (Fly Now missions are
always action oriented.) To begin a single-player stand-alone mission:
• Select Single Battle from the Main menu.
• Choose a mission from the Battle List. Scroll up and down as necessary, and then
select the name of the mission you wish to fly.
• Click the Single Player button to indicate that this is a one player mission, not a multiplayer session.
• Click the Play button to move on to the Mission Briefing.
Once you have familiarised yourself with the contents of your briefing, you might want
to alter the flight path for your flight or any of the other flights in your unit. To do so,
click the Mission Planning button on the pre-flight briefing screen. This takes you to the
Mission Planning screen. Please refer to Mission Planning in the Campaigns section for
the details on how to use the Mission Planning screen.
After the briefing and any changes to the flight plan, you have the opportunity to fix
your weapons load-out before lifting off (use the Arming button).
Starting Multi-player
Single Battle mode also lets you fly pre-generated individual missions with friends over
a modem, serial, LAN (Local Area Network) or Internet connection. One player must
serve as the game "host"—the computer that manages the overall battle. Other players
then join the hosted game session. The battle conforms to the current difficulty settings
on the host’s computer. To begin a multi-player, stand-alone mission:
• All players select Single Battle from the Main menu.
• Only the host selects a mission from the Battle List, then clicks the Host button.
(Generally, the player with the fastest computer should act as host. If multiple people
plan to join an Internet-based session, the player with the fastest Internet connection
should act as host.)
12
Page 12

13
• The host then selects a provider type, enters a name for the battle, and enters a player
name and a session name.
• The host can then click the Create button. This takes you to a chat screen. Once all of
the players have joined, click Launch to send everyone to the Ready Room.
• Players wishing to join the battle click the Multi-player button on the Single Battle
screen, then the Join button.
• Joiners then enter a player name for themselves and select a connection type.
• Joiners can then choose from a list of the battles available over the connection they
chose. Select one, then click the Join button. This takes each joiner to the Ready Room.
In the multi-player Ready Room, players select the helicopters they will fly in the battle.
They can also chat with each other until the mission begins. All players can and should
view the mission briefing and make sure the weapons load-out of their individual
helicopter is as they want it (use the Arming button).
Important Notice Regarding Chat
Hasbro Interactive does not monitor, control, endorse, or accept responsibility for the
content of text or voice chat messages transmitted through the use of this product.
Use of the chat function is at your own risk. Users are strongly encouraged not to
give out personal information through chat transmissions.
Kids, check with your parent or guardian before using the chat function or if you are
concerned about any chat you receive.
The player in the first helicopter on each side is the Flight Leader. Leaders can change
the flight plan for their side. To do so, click the Mission Planning button. This takes you
to the Mission Planning screen. Please refer to Mission Planning in the Campaigns
section for the details on how to use the Mission Planning screen.
• Joiners, when they’re ready to fly, must click the Take Off button. This locks out all
further changes and tells the host that that player is ready to go.
• The host, after all the players are locked in, should click the Take Off button to start
the mission.
Loading Weapons
You can gain access to your weapons load-out by clicking the Arming button on the
pre-flight Briefing screen. At the Load-out screen, you can change what weaponry your
helicopter carries. Note, however, that your helicopter is always loaded with the maximum
amount of 30mm ammunition (for the cannon) that that type of helicopter can carry.
Page 13

14
AH-64 Apache Uses High-Explosive, Dual Purpose (HEDP) rounds. These are
most useful against soft targets and moderately armoured
vehicles. The Apache can carry 1,200 rounds in all settings.
Eurocopter Tiger Carries High-Explosive, Dual Purpose (HEDP) rounds. These are
most useful against soft targets and moderately armoured
vehicles. The number of rounds this copter can carry is determined
by the Weapon Effects setting. Realistic mode loads 450 rounds;
Enhanced loads 900 rounds; Exaggerated loads 1,200 rounds.
Mi-28 Havoc Fires Armour Piercing, High-Explosive (APHE) rounds, best used
against soft targets and lightly armoured vehicles. The number of
rounds is determined by the Weapon Effects setting. Realistic
mode loads 250 rounds; Enhanced loads 500 rounds; Exaggerated
loads 750 rounds.
First of all, use the Helicopter Select buttons (along the top of the Arming screen) to
select which helicopter or helicopters your changes are to be applied to. Click the
Select All button to make arming changes to all available helicopters.
The Configuration is a shortcut that lets you choose between three pre-defined
weapons load-outs:
Std/Atk The Standard Attack load-out consists of anti-tank missiles on the
outer hardpoints and rockets on the inner hardpoints.
Anti-tank An Anti-tank configuration places anti-tank missiles on both the
inner and outer hardpoints. Note: This option is not available for
the Mi-28N.
Reconnaissance This configuration trades off firepower to keep the helicopter
light, fast, and agile. Rockets are loaded on both the inner and
outer hardpoints.
The AAM button adds air-to-air missiles to the selected helicopters.
The ATGM button (directly below the AAM button) cycles through the anti-tank missiles
available for the nationality you are flying for. The possible load-outs are:
U.S. 8 Hellfire K (laser guided) missiles, or
8 Hellfire L (radar guided) missiles, or
4 Hellfire K and 4 Hellfire L missiles
UK 8 Hellfire K (laser guided) missiles, or
8 Hellfire L (radar guided) missiles, or
4 Hellfire K and 4 Hellfire L missiles
Page 14

15
Germany 8 HOT 3 (wire guided) missiles, or
8 TRIGAT (infrared) missiles
Russia 16 AT-9 (laser guided) missiles, or
16 AT-16 (laser guided) missiles
Finally, the Rocket Selection buttons—A, B, and C—let you determine the type of
rockets loaded at each of the three positions within the rocket pods.
• Selection A chooses the rocket type loaded in the outer ring of the rocket pod.
• Selection B chooses the rocket type loaded in the middle ring of the rocket pod.
• Selection C chooses the rockets loaded in the middle of the pod.
The available rocket types are:
HE The High Explosive warhead is best used against soft targets and
lightly armoured vehicles.
MPSM The Multi-Purpose Sub-Munition warhead carries a mix of nine
anti-personnel and anti-tank sub-munitions. This is effective
against unarmoured vehicles up through moderately armoured
vehicles, as well as structures and enemy troops.
FLECHETTE Flechette rockets carry 1,200 hardened steel flechettes (steel darts)
which are expelled like a shotgun blast on detonation. This is
extremely effective against troops.
Creating a New Mission
Using the Gunship! Battle Builder, you can create your own, customised missions, add
them to the Battle List, and play them—both as single-player battles and multi-player
sessions. When you’re ready to begin designing your own missions:
• From the main menu, select Single Mission.
• Click on Battle Builder.
The Battle Builder presents you with a set of screens on which you choose settings
according to your preferences. The buttons along the bottom of every screen allow you
to jump in any order from one to another, changing settings at will. Whenever you are
happy with all the settings on all the screens, click the Build button to have Gunship!
generate the mission based on the selections you’ve made. The mission, once
generated, is added to the Battle List. You return to the Single Battle screen, where you
can immediately try out your new mission.
Page 15

Setup
The first of the Battle Builder screens allows you to select where your battle will take
place (a theatre map) and provide some of the basic parameters for the mission.
Theatre Map Use the buttons along the top of the screen to select which
campaign map you want to use. The options are North Poland,
Central Poland, Slovakia, Belarus, and the Ukraine. Once you have
chosen an area, select the specific location of your battle by
clicking that location on the displayed map.
Nationality This determines which military force you’ll be flying for.
The options are US (the default), UK, German and Russian.
Weather You can choose the type of weather that will predominate during the
mission. Select from Clear, Partly Cloudy, Overcast, Rain, and Storm.
Time of Day This controls the time that the battle takes place. The options are
Dawn, Day, Sunset, Twilight, and Night.
Mission Name Enter the name by which you want your mission known. The name
you enter appears in the Battle List.
Enemy Nationality If you set your Nationality to Russian, you may choose to fight
against the U.S. Army, the British Army, or the German Army. If you
chose any other Nationality, the only possible enemy in Gunship! is
the Russian forces.
Place Units
The Place Units screen is the one you use to determine the locations of both sides’
forces on the map.
• First of all, use the Nationality button to switch to the side for which you want to
place units.
• Next, use the side buttons to select a unit. The first click activates the button and
makes the current platoon in that button active. Additional clicks cycle through the unit
types available through that button. Each button represents a different type of units:
Helicopters cycles through the different helicopter platoons.
Combat includes the various tank, armour, and infantry platoons.
Miscellaneous gives you the various Headquarters, supply, and emplacement platoons.
Air Defense is where you get air defense gun and missile platoons.
Support lets you place artillery and close support aircraft units.
• Left click in your selected location on the map to place a platoon of the type you’ve
chosen. Right click on a platoon to remove it.
16
Page 16

17
Unit Orders
Once you’ve put some units into place, you can use this screen to give those units
waypoints and orders. The Next and Previous buttons cycle through the platoons in the
mission. Whatever unit is selected is the one you can give orders to and set waypoints for.
Note: On this screen you can give orders to Helicopter units and Ground units, no others.
To set waypoints, click on the map at each point where you want to place a navigation
waypoint for the selected unit. For each unit, you may assign up to six waypoints.
(If you make a mistake, you can delete a waypoint by right-clicking on it.)
Once you’ve created the flight path, the unit has a route. Now, you can give the unit
specific orders to follow at each waypoint along that route. You do this by configuring
the waypoints. The buttons along the right side of the screen let you configure
waypoints. First, select the waypoint you want to configure using the Waypoint
Number button.
The two types of unit you can give orders to on this screen—Helicopter and Ground
units—each has its own format for orders. Let’s take them one at a time.
Helicopters
Waypoint Type This button cycles through the available types of waypoints.
Each standard type has a default setting for all of the other entries.
You can override these settings individually using the rest of
the buttons.
Speed This setting and the next (Flight Profile) are interconnected.
With this, you control how quickly the pilot will fly to get to this
waypoint. The actual speed varies, depending on the Flight Profile,
because of the need to dodge terrain. There are three options:
Slow is 30 to 50 kts.
Tactical is 50 to 80 kts.
Sprint is maximum possible speed at all times.
Flight Profile This setting determines the altitude that the helicopter’s pilot
should strive to maintain between the previous waypoint and this
one. There are three options:
Nap of the Earth orders the helicopter to maintain an altitude below
60ft; 30ft is optimum. The pilot has permission to reduce speed as
necessary to maintain this altitude.
Contour tells the pilot to keep to an altitude below 100ft; 70ft
is optimum.
Page 17

Cruise orders the altitude kept between 100 and 150ft, and the pilot
can and should rise to 200ft if no enemies are present.
Combat Mode This gives the helicopter its overall orders regarding its
combat mission between the previous waypoint and this one.
The options are:
Search and Destroy orders are to open fire on and advance toward
any enemy unit. The helicopter is to continue its mission once
either all targets are destroyed or visual contact is lost.
Suppression of Enemy Air Defenses (SEAD) tells the helicopter to
open fire on and advance toward enemy air defense sites.
Engage orders mean to open fire on any detected enemy only if
doing so does not delay the mission for more than one minute.
After one minute, the helicopter is to continue on its mission.
Bypass orders the helicopter to seek cover, avoid contact, and
continue toward the waypoint.
Priority Target This determines what type of target the helicopter should attack
first, if there is a choice.
Ground Units
Waypoint Type This button cycles through the available types of waypoints.
Each standard type has a default setting for all of the other entries.
You can override these settings individually using the rest of
the buttons.
Formation Use this to set what formation the platoon will use while travelling
to the waypoint. The options are Line, Wedge, Vee, Echelon
Right, Echelon Left, Column, Staggered Column, Extended Line,
and Diamond.
Speed This setting controls how quickly the platoon moves to
the waypoint.
Slow is 5mph or 9kph.
Medium is 18mph or 30kph.
Fast is maximum possible speed.
Combat Mode This setting determines the action the unit should take when it sees
the enemy. The options are:
18
Page 18

19
Assault orders the unit to open fire on and advance toward any
enemy unit. The unit should then continue the mission once either
all targets are destroyed or visual contact is lost.
Attack by Fire tells the unit to find a hull down position if one is
nearby and engage the enemy. The unit should then continue the
mission once either all targets are destroyed or visual contact
is lost.
Engage orders the unit to open fire on any detected enemy while
continuing to move to the waypoint.
Bypass tells the unit to seek cover, avoid contact, and continue
toward the waypoint.
Orientation Orders the unit to face in a specific direction when it reaches the
waypoint. This is critical if enemy contact is expected.
Unit Timing
Unit Timing is the screen where you set delay times, assign call signs, and determine
the target status of all the units in your battle.
Waypoint This button cycles through the waypoints you’ve set. Use this
to choose one, then you can assign a delay time to the
selected waypoint.
Delay Time Using this, you can order a unit to pause for a set amount of time
when it reaches the selected waypoint. Each click adds 30 seconds
to the delay time of the selected waypoint. Right-click to subtract
30 seconds.
Callsign This button lets you cycle through the possible call signs for each
type of unit. Choose one, and it will be used to identify the selected
unit in all communications and identification in your mission.
Objective Status Use this to determine how the player must treat specific units in
order to achieve victory in the mission. That is, you are setting what
someone playing your mission must do to win. Select each special
or important unit in turn, and assign it one of the following roles:
Primary Target is a unit that must be destroyed for the other side
to win.
Secondary Target is a unit that, if destroyed, gives bonus award
points to the other side.
Protection is a friendly unit that must live through the battle for its
side to win.
Page 19

Objectives
Finally, you can set the objectives for the entire battle—the victory conditions. Use the
Next and Previous buttons to toggle between the sides of the fight. You can set multiple
objectives for any battle, but there is a limit of three objectives per side.
Objective Area Click on this repeatedly to cycle through the radius options: 1, 2,
and 3km radii. When you’ve chosen a size for the objective area,
click on the map to place the centre of a circular area with the
indicated radius. (If you make a mistake, you can right-click on the
are to remove the objective.) To win the mission, a player must
ensure that there are no enemy units remaining in the objective
area at the end of the battle.
Define Sector After you click this, you "draw" a sector box on the map by clicking
to mark the upper left and lower right corners of a rectangular area.
To win the mission, a player must ensure that there are no enemy
units remaining in this rectangular defensive sector at the end of
the battle.
Objective Line For this option, you click on the map to select the two end points of
the line. This creates an objective line. A player must reach this line
with ground units by the end of the battle in order to win.
Defensive Line As above, for this option you click on the map to select the two end
points of the line. This sets a "rear area line" that the enemy must
not be allowed to reach with ground units. A player must prevent
the enemy from reaching this line in order to win.
CAMPAIGNS
There’s nothing wrong with Single Battles, but sometimes you want to sink your teeth
into something more. For those times, Gunship! offers the Campaign mode, in which
you take your place as part of a large, ongoing military situation. Through the course of
the campaign, you’ll fly quite a number of missions, with varying objectives and
different styles of action needed for success. To begin, select the Play Campaign option
from the Main menu.
Starting a Campaign
When you select Play Campaign from the Main menu, you are presented with the
Campaign Selection screen. Your first decision is to choose which unit you’ll be flying
for; the buttons along the sides of the screen represent the available units. Your choice
determines the type of helicopter you’ll be flying, what nationalities you’ll be flying for
20
Page 20

21
and against, the available armament, and your forces’ starting positions. Your unit
options include:
Russia 20th Guards Army
U.S. 1st Cavalry Division
1st Armour Division (US)
UK 1st Armour Division (UK)
Germany 5th Panzer Division
Once you’ve selected a unit, pertinent information about that unit appears in the
Information Sidebar. The sidebar displays the unit’s patch and the following data:
• Unit Name is the full name of the selected unit.
• Mission is the next mission to be flown by this unit in the current campaign. If you
are just starting a new campaign, the Mission number is 0 (zero).
• Win/Loss notes the ratio of wins to losses in the campaign to date. When you
succeed on a mission, it counts as a win. Any time you fail and have to re-fly a
mission, it counts as a loss.
• The Fatigue rating provides an overall estimate of the unit’s battle readiness.
• Status describes the deployment status of the unit. "Ready" indicates that the unit has
not been deployed to a campaign. "In Progress" means that this unit has already
started a campaign. Joining a unit with "In Progress" status places you in the middle
of that saved campaign. "Complete" tells you that the campaign has been finished.
The buttons along the bottom of the screen provide access to the campaigns. If you
select a unit with "Ready" status (a unit not currently involved in a campaign), you only
have one valid option:
Start Campaign Click this to begin a campaign with you assigned to the
selected unit.
If the unit you select is currently involved in a campaign (its status is "In Progress" or
"Complete"), there are two options:
Continue Campaign Click this to rejoin the saved campaign in progress, flying for the
unit you selected.
Reset Unit If you want to remove a unit from its current campaign so that
you can use that unit, click this button. Note: This option clears
all the campaign data associated with the specified unit,
irrevocably deleting the campaign in progress. All forces return to
their starting positions, and the unit’s status reverts to "Ready."
Page 21

Reading Intelligence Reports
Once you start a campaign, you’re taken to the Intelligence screen, and your campaign
intelligence briefing begins running. You can watch it start to finish (a good idea),
or you can jump to specific sections using the buttons on the right.
• The NATO Forces button provides whatever information is known about the positioning
of NATO (North Atlantic Treaty Organisation) forces. When you select this, the map
shows the location of blue units and indicates the lines separating battlefield sectors.
Note: Because the situation changes once the campaign is underway, this button is
available only at the start of a campaign, not after you have begun the first mission.
• Likewise, the Russian Forces button provides any information known about Russian
force locations, with the map similarly displaying red units and sector divisions.
Note: Because the situation changes once the campaign is underway, this button is
available only at the start of a campaign, not after you have begun the first mission.
• The Situation button details friendly and enemy movements. The description indicates
which forces are moving, while the map uses red and blue arrows to graphically
illustrate the progress of red and blue forces, respectively.
• The Sector Briefing button (the actual label changes based on your sector of operations)
zooms the map in to display only the sector relevant to your actions. Force positions are
displayed in greater detail, and a box highlights the Area of Operations (AOR) for your
upcoming mission.
The Intelligence screen is the jumping-off point to all other pre-flight activities. Buttons
along the bottom edge of the screen provide access to the Mission Briefing, Mission
Planner, Arming screen, and Crew Assignments.
Reviewing the Pre-flight Briefing
After you’ve got the information you need from the Intelligence screen, you should
proceed to your Mission Briefing (click the appropriate button near the bottom of the
screen). The map zooms in to display only your Area of Operations (AOR), and your
briefing begins automatically. Like the campaign intelligence briefing, you have the option
of watching start to finish (a good idea) or jumping to specific sections using the buttons
on the right. These five buttons provide information about your current assignment:
Mission The mission section of the briefing describes your objectives,
identifies your flight’s call sign for this mission, and details your
flight plan on the map.
Operations This section lists any operational restrictions or warnings for your
AOR. You might, for example, be instructed to remain within a
certain zone or warned of enemy surface-to-air defenses.
22
Page 22

23
Friendly Forces This shows the last known positions of friendly forces operating
within your AOR.
Enemy Forces This displays the last known positions and headings of enemy
forces within your AOR.
Weather The weather section provides a forecast for the next 24 hours in
your AOR. Poor weather reduces visibility and degrades laser and
IR performance. Note: As with all weather forecasts, there is some
margin for error.
Assigning Pilots
By using the Crew Assign button, you can take control over the assignment of crews to
helicopters for your mission. During a campaign, your unit has a limited number of
flight crews. Each crew consists of a pilot and a CP/G (co-pilot/gunner), and every
crewmember has varying skills and capabilities.
Flying is tough work to begin with, and flying combat sorties is doubly difficult. Action
wears crews down, and they can become fatigued. Fatigued crew members are less
effective, and their skills suffer temporary degradation. Flying increases crew fatigue,
but when you allow them to skip a mission, a crew can rest and get over some or all of
their fatigue.
You can modify the crew assignments for each mission. Your goal should be to ensure
that the highest-skilled and best-rested crew is assigned to each task. This can be a
balancing act. If a mission is particularly critical, you might wish to assign a higher-skilled
crew, even though their fatigue rating is rising—as long as their skills haven’t suffered.
Of course, this means the crew must rest even longer after the mission before they’ll be
ready for combat again.
The Crew Assignment screen displays the available helicopters along the top and the
available crews along the left side. Note: Only helicopters displayed in green can be
assigned to the mission. Damaged aircraft are in red, and you cannot use those in this
mission. The number of missions required to fix an aircraft is directly related to the
severity of damage it sustained. Destroyed helicopters are dimmed out (and cannot be
repaired). You have a limited number of replacement helicopters, so don’t waste them.
If, during pre-flight, it turns out that there are fewer available aircraft than are required
for the mission, the campaign is lost.
Select a helicopter, then click on the crew you want. This assigns that crew to the
selected helicopter. If there was already a crew assigned to that helicopter, they are
removed and the currently selected crew replace them. The centre display provides
information about the selected crew:
Page 23

Rank Indicates the current rank of the crew. Higher rank generally implies
higher experience and better skill.
Name Lists the names of the crew members. If you wish, you can edit
your crew’s names as you see fit, using the Personnel screen.
Position Notes whether each crew member is a Pilot or CP/G.
Fatigue Tracks each crew member’s present fatigue rating. This scale runs
from 1 to 10, with 10 being the worst fatigue. The higher this
rating, the more skills suffer and the more rest the crew member
needs to recover. As the fatigue rating rises, skill level temporarily
decreases.
Skill Describes this crew member’s overall capability, this scale runs
from 1 to 10, with 10 being the best, highest skill rating. Skill
ratings decrease temporarily as a crew member’s fatigue rises.
Resting the crew member reduces the fatigue and returns the skill
rating to normal. As the crew survives missions during a campaign,
skill increases, reflecting combat experience gained.
Awards Lists ribbons and medals awarded to this crew member. The small
number adjacent to each ribbon indicates how many times the crew
member has received that particular award.
Note: Either the Company Commander’s crew or one of the two Platoon Leader crews
must be assigned to each mission.
Loading Weapons
You can gain access to your weapons load-out by clicking the Arming button on the
pre-flight Briefing screen. At the Load-out screen, you can change what weaponry your
helicopter carries. Note, however, that your helicopter is always loaded with the
maximum amount of 30mm ammunition (for the cannon) that that type of helicopter
can carry.
AH-64 Apache Uses High-Explosive, Dual Purpose (HEDP) rounds. These are most
useful against soft targets and moderately armoured vehicles.
The Apache can carry 1,200 rounds in all settings.
Eurocopter Tiger Carries High-Explosive, Dual Purpose (HEDP) rounds. These are
most useful against soft targets and moderately armoured vehicles.
The number of rounds this copter can carry is determined by the
Weapon Effects setting. Realistic mode loads 450 rounds;
Enhanced loads 900 rounds; Exaggerated loads 1,200 rounds.
24
Page 24

25
Mi-28 Havoc Fires Armour Piercing, High-Explosive (APHE) rounds, best used
against soft targets and lightly armoured vehicles. The number of
rounds is determined by the Weapon Effects setting. Realistic
mode loads 250 rounds; Enhanced loads 500 rounds; Exaggerated
loads 750 rounds.
First of all, use the Helicopter Select buttons (along the top of the Arming screen) to
select which helicopter or helicopters your changes are to be applied to. Click the
Select All button to make arming changes to all available helicopters.
The Configuration is a shortcut that lets you choose between three pre-defined
weapons load-outs:
Std/Atk The Standard Attack load-out consists of anti-tank missiles on the
outer hardpoints and rockets on the inner hardpoints.
Anti-tank An Anti-tank configuration places anti-tank missiles on both the
inner and outer hardpoints. Note: This option is not available for
the Mi-28N.
Reconnaissance This configuration trades off firepower to keep the helicopter light,
fast, and agile. Rockets are loaded on both the inner and
outer hardpoints.
The AAM button adds air-to-air missiles to the selected helicopters.
The ATGM button (directly below the AAM button) cycles through the anti-tank missiles
available for the nationality you are flying for. The possible load-outs are:
U.S. 8 Hellfire K (laser guided) missiles, or
8 Hellfire L (radar guided) missiles, or
4 Hellfire K and 4 Hellfire L missiles
UK 8 Hellfire K (laser guided) missiles, or
8 Hellfire L (radar guided) missiles, or
4 Hellfire K and 4 Hellfire L missiles
Germany 8 HOT 3 (wire guided) missiles, or
8 TRIGAT (infrared) missiles
Russia 16 AT-9 (laser guided) missiles, or
16 AT-16 (laser guided) missiles
Finally, the Rocket Selection buttons—A, B, and C—let you determine the type of
rockets loaded at each of the three positions within the rocket pods.
Page 25

• Selection A chooses the rocket type loaded in the outer ring of the rocket pod.
• Selection B chooses the rocket type loaded in the middle ring of the rocket pod.
• Selection C chooses the rockets loaded in the middle of the pod.
The available rocket types are:
HE The High Explosive warhead is best used against soft targets and
lightly armoured vehicles.
MPSM The Multi-Purpose Sub-Munition warhead carries a mix of nine
anti-personnel and anti-tank sub-munitions. This is effective against
unarmoured vehicles up through moderately armoured vehicles, as
well as structures and enemy troops.
FLECHETTE Flechette rockets carry 1,200 hardened steel flechettes (steel darts)
which are expelled like a shotgun blast on detonation. This is
extremely effective against troops.
Mission Planning
Click the Mission Planning button to call up the Mission Planning screen. Here, you can
control your flight path and waypoint actions for the upcoming mission.
To begin creating your flight path, click on the map at each point where you want to
place a navigation waypoint. You may assign up to six waypoints. (If you make a
mistake and want to delete a waypoint, right-click on it.) Once you’ve created the flight
path, the unit has a route. Now, you can give the unit specific orders to follow at each
waypoint along that route. You do this by configuring the waypoints. The buttons along
the right side of the screen let you configure waypoints.
First, select the waypoint you want to configure using the Waypoint Number button.
Waypoint Type This button cycles through the available types of waypoints. Each
standard type has a default setting for the Speed, Flight Profile,
Formation, Combat Mode, and Priority Target for the selected flight.
You can override these settings individually using the rest of the
buttons. The default settings are:
Checkpoint (CP): Fly to this point and continue forward without
stopping.
Assembly Area (AA): Fly to this waypoint, avoiding combat, then
loiter for 5 to 10 minutes or until the leader issues the "Go"
command.
Battle Position (BP): Fly slow NOE to this waypoint and assume a
26
Page 26

27
firing position. Engage enemy forces for 5 to 10 minutes or until
the leader issues the "Go" command.
Patrol Area (PA): Fly to this waypoint and patrol for 5 to 10
minutes or until the leader issues the "Go" command.
SAR Landing Zone: Attack helicopters treat this as a PA waypoint.
Transport helicopters fly to this waypoint, avoiding combat, then
search for friendly troops, land, and pick them up.
Landing Zone (LZ): Attack helicopters treat this as a PA waypoint.
Transport helicopters fly to this waypoint, avoiding combat, then
land and drop off troops.
Speed This setting and the next (Flight Profile) are interconnected.
With this, you control how quickly the pilot will fly to get to this
waypoint. The actual speed varies, depending on the Flight Profile,
because of the need to dodge terrain. There are three options:
Slow is 30 to 50 kts.
Tactical is 50 to 80 kts.
Sprint is maximum possible speed at all times.
Flight Profile This setting determines the altitude that the helicopter’s pilot
should strive to maintain between the previous waypoint and this
one. There are three options:
Nap of the Earth orders the helicopter to maintain an altitude below
60ft; 30ft is optimum. The pilot has permission to reduce speed as
necessary to maintain this altitude.
Contour tells the pilot to keep to an altitude below 100ft; 70ft
is optimum.
Cruise orders the altitude kept between 100 and 150ft, and the pilot
can and should rise to 200ft if no enemies are present.
Combat Mode This gives the helicopter its overall orders regarding its combat
mission between the previous waypoint and this one.
The options are:
Search and Destroy orders are to open fire on and advance toward
any enemy unit. The helicopter is to continue its mission once
either all targets are destroyed or visual contact is lost.
Suppression of Enemy Air Defenses (SEAD) tells the helicopter to
open fire on and advance toward enemy air defense sites.
Page 27

Engage orders mean to open fire on any detected enemy only if
doing so does not delay the mission for more than one minute.
After one minute, the helicopter is to continue on its mission.
Bypass orders the helicopter to seek cover, avoid contact, and
continue toward the waypoint.
Priority Target This determines what type of target the helicopter should attack
first, if there is a choice.
The Post-flight Debriefing
When your mission is over, win or lose, you’re led immediately to the Debriefing after
you exit the cockpit. Three status buttons along the right side of the screen give you
access to the detailed report on the results of your efforts.
• The top button provides an overall summary of your mission, including your success
or failure and the ramifications thereof. The updated map shows you the new
positions of the friendly and enemy forces within your AOR.
• The middle button provides casualty statistics for the overall mission.
• The bottom button provides details on your specific performance, indicating your kills
and awards.
When you’re finished here, click any of the available buttons at the bottom of the screen
to use one of the post-flight options, as described in the next two sections.
Changing Crew Assignments
One of the post-flight options on the Debriefing screen provides access to your flight
crews. Click the Personnel button to move to the Personnel screen. This is where you
manage the crews in your unit.
Every unit is assigned eight crews to fly six helicopters; the extra crews allow you to
rest battle-weary team members. Use the buttons along the right and left sides of the
screen to select an individual crew. Statistics for the selected pilot and CP/G appear in
the centre display. These include rank, skill level, fatigue, and awards. The buttons
along the top of the screen provide these functions:
Move Pilot Use this to swap pilots between two crews. Click Move Pilot, select
a pilot, and then click the pilot position in any other crew. If the
move is valid, the two pilots (or the pilot and the empty position)
will be swapped.
28
Page 28

29
Move Gunner This button lets you move gunners in the same fashion as the
Move Pilot button lets you move pilots.
Promotion This button lets you promote crew members to higher rank. Each
crew member in the platoon has a starting rank and a maximum
rank. In addition, every platoon has a limit on the number of crew
members that can hold any particular rank. After a mission, you
have a limited number of "promotion points" that you may use to
promote team members as you see fit. To promote someone,
select a crew, click the crew member of that crew you want to
promote, then click Promotion. You’ll notice that as a crew
member rises in rank, further promotions require more points.
For example, promotion from Warrant Officer 1 to Warrant Officer
2 is "cheaper" than promoting a 1st Lieutenant to a Captain.
Medals The button that allows you to award medals to outstanding
members of your team is similar in function to the Promotion
button. You have a limited number of "award points" that you may
use to give medals to your crew members. Select a crew, click the
member of that crew to whom you want to give a medal, and click
Medal. You are presented with a list of available medals; pick one.
(Note: Only crew members who flew in the mission just finished
are eligible for awards.)
Rename This button lets you rename any crew member. Changing your
crew members’ names (giving them nicknames, if you prefer to
think of it that way) often helps you remember who’s who, so that
you can better manage their skills and assignments.
Flying the Next Mission
The Debriefing screen provides one of two options, depending on the outcome of the
mission you just finished.
• If your mission was a success, you have access to the Next Mission button. Click this
to move on to the briefings for the next mission in the campaign.
• If you failed the mission, you have the opportunity to Fly Again. Click this button to
return to the briefings for the mission you just flew.
Page 29

THE COCKPIT MFD DISPLAYS
The cockpit of a modern attack helicopter has changed drastically in the last decade.
The analog dials and the banks of tape displays are mostly gone, and the few remaining
non-digital instruments are relegated to the role of back-up instruments. In place of all
this lost equipment is the Multi-Function Display—the MFD. This computer-like screen
can not only show all of the information that was once shown by individual
instruments, but also radar displays, maps, and views from the helicopter’s sensors.
Where the cockpit was once crowded with dials, there is now room for ample window
space. The new "glass cockpits" allow the crew much greater situational awareness,
which makes it possible to engage targets faster.
There are two MFDs in most cockpits. You control what information each one displays
by cycling through the possible options using [E] for the left MFD and [R] for the
right MFD.
AND Display
The AND display is a small screen that constantly displays the helicopter’s grid location.
System Damage
This MFD display shows any damage taken by
the helicopter during flight. It is broken into two
areas. The top of the display is a top-down line
drawing of the helicopter. The bottom contains
15 chip lights showing the status of the major
systems. As systems are damaged or destroyed,
the affected area will change colour from green
to red. The corresponding chip lights will also
change colour. Red coloured systems are
damaged or destroyed.
The major systems are as follows:
Transmission The transmission transfers power from the engines to the rotor.
Damage causes the rotor to lose power, lowers its maximum
torque, and can cause the engines to overheat and catch fire.
(Transmission damage is ignored in Easy flight mode.)
Hydraulics A hydraulics failure results in slower response times and a stiffer
stick. (Hydraulics damage is ignored in Easy flight mode.)
Fuel A fuel hit results in a fuel leak that can shorten mission time.
30
Page 30

Avionics An Avionics hit results in losing the radar and some fire control
equipment. You cannot fire missiles in LOBL FCR mode if you
have avionics damage.
Rotor Rotor damage causes the rotor to lose power, lowers its maximum
torque, and can cause vibrations and eventual failure.
(Rotor damage is ignored in Easy flight mode.)
Drive Train The drive train affects the tail rotor and its ability to offset the
main rotor torque. If damaged, it will require constant right pedal
input to offset this torque. (Drive train damage is ignored in
Easy flight mode.)
MFD This means that one or both MFDs are damaged. A damaged MFD
will go dark and display the word MALFUNCTION. Of course,
if both MFDs are damaged, you can’t see the damage MFD.
PNVS This is the Pilot’s Night Vision System. If it’s damaged, IHADSS
mode, thermal mode, and zoom mode do not work in the Pilot’s
Cockpit. The cannon is only able to fire fixed forward in LOS
mode, but is not affected in TADS mode.
TADS If the Target Acquisition and Designation System is damaged,
IHADSS mode, thermal mode, and zoom mode do not work in the
Gunner’s Cockpit or the ORT cockpit. Weapons cannot be placed
in TADS mode. Additionally, the laser range finder and designator
no longer function, preventing you from firing any laser
guided missiles.
Weapons This reports damage to the fire control system in the helicopter.
Depending on the severity of the damage, the Air to Air Missiles,
Anti-Tank Guided Missiles, or both can be unusable. If you try to
use a damaged weapon, MALFUNCTION appears in your
IHADSS display.
Gun The cannon is disabled. If you try to use a damaged weapon,
MALFUNCTION appears in your IHADSS display.
Weapon Stub This message results from damage to the weapon pylons on one
Wings of the stub wings. A damaged wing can prevent you from firing
weapons mounted on that wing.
Jammer This shows a malfunction in the jamming system, the counter-
measures dispensers, or both. In addition, the RAWS MFD no
longer functions.
31
Page 31

Left Engine An engine hit causes one engine to malfunction and shut down.
A second hit can shut down the other engine. This results in
immediate loss of power. You should use the power you have to
exit the battle area and look for a good landing spot. While all of
the helicopters can fly on one engine, they cannot operate in
combat. You will have the ability to limp away. If both engines are
hit, look for a spot to autorotate to.
Right Engine This is the same as Left Engine, but on the other side of
the helicopter.
Tactical Situation Map
This map is similar to the one on the Main Map
screen, and you can zoom it from a 10x10 km
view to a 5x5 km area. The map shows your
aircraft and a small yellow number for each of
your waypoints.
Radar Advance Warning System (RAWS)
This is the early warning and detection system used to detect enemy search and tracking
radar and warn you about missile launches (incoming, that is) and the beginning of gun
attacks. All threat symbols appear on the MFD at their relative bearing from your current
heading. Once they’re identified, search radar strobes are replaced with the appropriate
threat symbols on the indicator. You can set the RAWS for a 5 or 10km range.
• Your helicopter is shown as the crossed circle in the centre of the display.
• A helicopter with active radar or lasers shows as a small, sideways figure eight.
• Fixed wing aircraft appear as small chevrons.
• Surface to Air Missile radar systems are displayed as a letter S. By itself, an S indicates
that the launcher is in search mode but has not acquired your helicopter. When the S is
surrounded by a solid box, the launcher has started an active track of your helicopter.
When the box is flashing, the launcher has fired a missile at you!
• Anti-Aircraft artillery is shown as a small tetrahedron with a stick gun. By itself, the
symbol indicates that the gun is in search mode but has not acquired your helicopter.
When the symbol is surrounded by a solid box, the gun has started an active track of
your helicopter. When the box is flashing, the launcher has fired a missile at you!
32
Page 32

• Threats that disappear from the environment are "ghosted" for a short time. The ghost
symbol—a dashed outline of the appropriate target type—is used when a target has
been blocked by terrain, destroyed, or you otherwise lose your track on it.
When a target is locked on to you, the symbol flashes.
Fire Control Radar (FCR)
Two types of helicopter in Gunship! use millimetre-wave radar systems. (In Action
mode, the FCR is combined with the RAWS on all aircraft.) The Longbow radar system
combines air and ground radar into one package. It is available on the AH-64D and
WAH-64D Apache. Only one in three Apaches will mount the radar. The Mi-28N Havoc
also incorporates a Fire Control Radar system.
You can switch the FCR between 5 km and 10 km ranges. It displays all vehicles in line
of sight. Hills and large buildings can block the radar, but trees and small buildings do
not. Infantry never show up on radar. The FCR functions differently in the Action and
Realistic modes of the IHADSS.
In Action mode, the FCR is combined with the RAWS on all aircraft. The radar sweeps a
full 360 degrees around the helicopter and shows only living, enemy units. Surface to air
missile (SAM) and air defense vehicle (ADV) units are displayed using the same symbols
as on the RAWS. Other units are shown as follows:
• A small square for heavy armoured or tracked vehicles.
• A circle for lighter or wheeled vehicles.
In Realistic mode, the radar is only available on those helicopters which mount a radar
system. The FCR shows all vehicles—friendly as well as enemy—and does not lose
contact when a vehicle is destroyed. This means that you should take care in engaging a
target on radar information alone. In addition, the realistic radar sweep is 360 degrees
only for air targets; it is limited to the front 60 degrees for ground targets. The two radial
lines on the display represent the ground search area.
Weapons Display
The weapons display maintains an inventory of
the helicopter’s munitions.
33
Page 33

Pilot Box The pilot box is the box in the upper left hand corner of the MFD.
It displays the vision system that the pilot is currently using,
the weapon presently selected, and that weapon’s active mode
of operation.
Gunner Box The gunner box is the box in the upper right hand corner of the
MFD. It displays the vision system that the gunner is currently
using, the weapon presently selected, and that weapon’s active
mode of operation.
Weapons The weapons display is in the centre of the screen. It shows the
current weapon loads on each hardpoint. As the weapons are fired,
the circles dim dramatically.
Rocket Pods The rocket pods have two parts: the pod outline itself and the three
letters in the lower centre of the MFD. These letters represent the
three sectors in which the rockets are located. If rockets are the
selected weapon, the sector presently selected is highlighted. The
number displayed inside the rocket pod outline is the number of
rockets remaining for that sector.
Gun Ammo The counter for gun ammo is the centre box in the MFD. It shows
the rounds remaining for your cannon.
Chaff and Flare The chaff and flare counters are at the bottom of the MFD.
These show the countermeasures remaining in each launcher.
Target Acquisition Designation Sight (TADS)
This MFD is only available in the Pilot’s Cockpit
and the outside views. The TADS MFD shows
what the gunner is looking at or has locked on to.
(Note: We recommend that you do not leave this
MFD selected unless you have a fast machine
with a 3D accelerator card.)
34
Page 34

Engine Display
The engine display shows engine temperature,
rotor speed, and collective level. All of the gauges
have digital readouts below them.
Engine Torque The two torque gauges are the left-most set of vertical bars. The
Top Chevron shows maximum level of operation. The Inside Dot
shows the ideal level of operation. Top Arrows represent the
maximum level of operation with a damaged Transmission or
Rotor. Bottom Arrows represent the maximum level of operation
at startup.
Temperature Bars The temperature bars are the two right-most vertical bars on the
MFD. They represent the temperature of both engines measured in
TGT (Turbine Gas Temperature). The Top Outside Arrows represent
the maximum level of operation, while the Inside Dot shows the
ideal level of operation.
RPM Bars These are the centre trio of bars. The two outside bars are the
Engine RPM readings (left and right), and the centre bar is the
Rotor RPM reading. On the Engine RPM Bars, the two dots
represent the normal operating range of the engine. On the Rotor
RPM Bar, similar dots show the normal operating range of the rotor.
35
Page 35

MAP SCREEN
You can open the Map screen any time you’re in the helicopter by pressing N. This is a
full-screen map of the battlefield. (To return to the game, use the keyboard shortcut for
any other cockpit or view.) On the Map screen, you can:
• Change waypoints and orders for all of your helicopter units. (This works as described
on page 17.) Use the Next and Previous buttons below the map to cycle through your
helicopter units.
• Locate all friendly units in the battle. NATO units are always blue, while Russian
Federation units are always red. The map displays one icon for each ground platoon
and one for each individual helicopter and jet. The icons are:
Attack Helicopter
Aircraft
Infantry Fighting Vehicle Platoon
Transport Helicopter
Main Battle Tank Platoon
Armoured Personnel Carrier Platoon
Armoured Reconnaissance Platoon
Scout or Armoured Car Platoon
Armoured Tank Destroyer Platoon
Air Defense Vehicle Platoon
36
Page 36

37
Self Propelled Artillery Battery
Mortar Battery
Supply Transport Platoon
Tank Destroyer Platoon
Infantry Platoon
Surface to Air Missile Battery
Multiple Launch Rocket Battery
Headquarters Unit
Supply Installation
• Locate all enemy units which have been spotted. That is, only those units observed by
forces on your side are shown. The map displays one icon for each ground platoon and
one for each individual helicopter and jet. The icons are the same ones listed above.
• Call in artillery fire. Click the Support button, below the map. Your workspace
changes into a list of artillery and support assets. Set your Target Reference Point
(TRP) by clicking anywhere on the map. (To move the TRP, just click another location.)
To call for artillery support once your TRP is set, select any of the support units with
an "Available" rating.
Page 37

IN THE PILOT’S SEAT
As pilot, you’re responsible for the safety of your crew and your helicopter. It’s your job
to navigate into hostile territory, close on enemy forces, and provide a stable firing
platform while the CP/G shoots enemies. After the battle, it’s your job to find your way
home and safely land the helicopter. Ducking and weaving between trees and over hills at
50, 70, or even 100 knots while flying just 20 or 30ft above the ground, evading
enemy fire, and navigating through hostile territory requires a steady hand and finely
honed reflexes.
In the Pilot’s Cockpit, you have access to the MFDs, the helicopter flight controls, and a
tailored version of the IHADSS—one that focuses on flying and navigation rather than
weapons employment. Your first duty is to fly the helicopter, sometimes under the
direction of the CP/G. Until you’ve got that well in hand, don’t worry about the weapons;
your gunner will take care of them.
Takeoff
Getting a helicopter airborne without endangering your life, your crew’s life, or the lives
of those around you is not a particularly easy task. It requires co-ordinated cyclic,
collective, and pedal adjustments. In this exercise, we will rise into a hover and transition
to forward flight.
First, note your current heading on the IHADSS. It is also helpful to identify some
landmark, such as a tree or building, directly ahead of your helicopter. Increase the
collective very slowly. This increases the angle of attack of the main rotor blades,
thereby increasing the downward thrust they generate. As the thrust increases, the
helicopter will rise.
Once the fuselage is off the ground, it will attempt to rotate and twist opposite the
direction the rotor blades are moving. Consequently, as soon as the helicopter lifts off,
you should immediately apply pedal opposite this rotation. Watch the heading scale on
the IHADSS or a landmark to verify that you’ve stopped the rotation. If the nose begins
to turn back in the other direction, you’ve applied too much pedal. Let up slightly until
your heading remains constant. At the same time, the helicopter’s nose will try to dip.
Immediately, but gently, pull the cyclic back to maintain a level attitude. The faster you
increase the collective, the faster you will ascend—and the faster you must apply
counter pedal and cyclic inputs.
38
Page 38

39
Apply rudder and cyclic as necessary during
the ascent to maintain current heading and a
level pitch.
Let the helicopter climb to 50ft, then gently push the nose down by moving the cyclic
forward. This tilts the plane of the rotor blades, directing some of the thrust backwards.
The helicopter will begin to move forward. Since some of the thrust is directed
backwards rather than downward, the helicopter will begin to descend slightly.
Increase the collective (while applying corrective pedal and cyclic inputs) until the
altitude holds steady.
Aggressive Takeoff
Combat situations might require a more expedient departure. Rapid takeoffs require
substantially more co-ordination between the collective, cyclic, and rudder inputs. Begin
by noting both your current heading (as indicated on the IHADSS) and the desired
departure heading. Use this info to determine whether you should initially turn right or
left to get to your departure heading.
Begin your takeoff by applying pedal to the direction you want to turn. That is, if you
planned your initial turn to the left, apply a generous amount of left pedal. Next—quickly,
but smoothly—increase collective to 70 percent or more (depending on the helicopter
type and payload weight). The helicopter should leap off the ground and begin spinning
toward the desired heading. As the nose swings to the departure course, reduce
the pedal input (or apply opposite pedal, if necessary) to hold the nose on the
desired heading.
Push the nose forward to build speed quickly
during the ascent.
Page 39

Meanwhile, let the nose dip slightly as the helicopter rises. If you dip the nose too much,
you’ll accelerate quickly, but will also drop back to the ground and crash. If you don’t
lower the nose enough, the helicopter will climb like a rocket, quickly reaching several
hundred feet.
If you properly co-ordinate all these factors, the helicopter will leap off the ground,
simultaneously spinning to the desired course and lunging forward. Adjust collective as
necessary to maintain the desired altitude during departure.
Adjusting Airspeed
Altering your airspeed in a helicopter is more difficult than in a fixed-wing aircraft. In a
helicopter, the collective doesn’t impact speed like the throttle does in a jet fighter. The
collective alters the pitch of the rotor blades, thereby altering the amount of downward
force being generated. To change the helicopter’s airspeed, you pitch its nose up and
down to alter the direction of the rotor blades’ thrust. To accelerate, push the nose
forward, directing the thrust backwards. To decelerate, pull the nose up, thereby
directing the thrust forward.
Altering the direction of the thrust, however, reduces the amount of thrust pointing
directly downward. Consequently, you need increased collective to maintain your altitude.
Of course, increasing collective requires increased pedal input to counter the torque.
Pushing the nose forward builds forward
airspeed but causes loss of altitude.
Level off and increase collective to maintain
altitude and forward speed.
40
Page 40

41
To increase speed, push the cyclic forward while simultaneously increasing collective
and applying left pedal. If your altitude drops, add more collective. If your altitude
increases, lessen the collective. If the nose yaws to either direction, apply pedal to the
opposite direction. Likewise, to decrease speed, pull back on the cyclic and pitch the
nose upwards. Again, adjust collective up or down as necessary to maintain altitude,
along with any necessary pedal corrections.
The IHADSS navigation symbols change based on your airspeed. All modes show the
current waypoint number, distance to that waypoint, TADS range readout, target
designation, heading, and selected weapon, but information about the helicopter’s
position and movement change according to its airspeed.
Below 7 knots, the IHADSS switches into Hover mode. In Hover mode, a position box
represents the helicopter’s location when the hover began. If the helicopter drifts, the
position box moves across the display. If you want to return to the original hover point,
simply return the position box to the centre of the screen.
Hover mode
Next, from 7 to 60 knots forward airspeed, the IHADSS enters Transition mode. Note the
velocity vector extending from the IHADSS gun cross. This line shows you the general
direction of the aircraft’s motion. Any side slip causes the line to point to the left or right,
and flying backwards causes the line to point down. The longer the line, the faster the
helicopter is moving.
Transition mode
Page 41

Finally, above 60 knots the IHADSS switches to Flight mode. This is very similar to
Transition mode, minus the velocity vector line.
Flight mode
Liftoff and Low Altitude Hover
Hovering requires that the downward thrust generated by the rotor blades be equal to
the weight of the helicopter (including the weight of fuel and weapons). Further, you
must keep the fuselage level; pitching or banking the plane of the rotor blades redirects
the downward thrust and moves the helicopter. Finally, you must maintain sufficient
pedal input to prevent any yawing.
At low altitude, the rotor downwash essentially reflects off the ground, creating a
"cushion of lift" beneath the helicopter. This cushion, called "ground effect", extends to
approximately 50ft above the surface, depending on the type of terrain. Rough surfaces
tend to reflect the downwash in random directions, degrading the cushion and reducing
the height of the ground effect. It takes somewhat less torque to hover "in ground effect"
(below 50ft or so) than it does at 100ft.
IHADSS Hover mode shows.
42
Page 42

Begin your takeoff normally by slowly increasing collective until the helicopter begins to
gently lift off the ground. Apply appropriate left pedal to halt yawing, and carefully keep
the cyclic centred to prevent gaining any airspeed. Note the torque reading on the
IHADSS; the torque required to hover within ground effect will be slightly less than the
current reading.
Let the helicopter ascend straight up, being careful to maintain a level attitude and
airspeed at zero. At about 40ft, lower the collective until the torque reading drops by
2 percent. Continue lowering the torque in 1 or 2 percent intervals until your climb
stops. If the helicopter descends, you’ve lowered the torque too much and need to
increase it slightly. When you’re sitting in a stable hover, you’ve taken advantage of
ground effect.
Liftoff and Hover at High Altitude
The process for hovering out of ground effect is practically identical to hovering in
ground effect, except that above 50ft or so you’ll need somewhat more torque to
maintain the hover.
Begin the process by executing a smooth lift-off, applying just enough torque to begin
an ascent. Since you’re currently in ground effect, it requires less torque to climb than
when above ground effect. Maintain the current torque reading, applying pedal and
cyclic as necessary to prevent any other movement. If you’ve applied the minimum
collective required to climb within ground effect, the ascent should slow and ultimately
stop as you climb above 50ft. Without any further control inputs, the helicopter should
hover at this torque setting.
If the helicopter continues to climb, you’ve applied a little extra collective. Reduce the
collective by 1 or 2 percent at a time until the ascent stops. If you reduce collective to
the torque required for an in ground effect hover, the helicopter will continue to descend
until about 50ft. It will then slow and eventually enter a hover somewhere within the
ground effect cushion.
Transition to Hover
Slowing forward motion and entering a hover is a critical skill, useful during landings as
well as when darting between hills on a battlefield. As you approach the desired hover
point, pull the cyclic back to lift the nose forward. This redirects some of the rotor
downwash forward, reducing your forward airspeed. Of course, this reduces lift, and the
helicopter will begin to descend. Increase collective to maintain altitude. This has the
added benefit of redirecting more thrust forward, thus decelerating the helicopter even
more quickly.
43
Page 43

Watch your forward airspeed closely. As it drops below 15 knots, lower the nose slightly.
If you maintain the nose up attitude, the helicopter eventually slows down, then begins
flying backwards. You must ease the cyclic forward as your speed approaches zero,
so that the helicopter is level when you reach zero forward speed.
Keep in mind that you increased the collective earlier. As you lower the nose and direct
more of the downwash straight down, the helicopter will begin to rise. As you lower the
cyclic, ease the collective down to reduce torque and prevent a rapid climb. As your
airspeed reaches zero, set the collective to provide the necessary thrust for an in ground
effect or out of ground effect hover, as applicable.
If your initial airspeed is very high (80 knots or more) or you need to stop very quickly,
it will be necessary to pull the nose well above the horizon. The higher you pull the nose,
the more downwash you direct forward, and thus the quicker you slow the helicopter.
Naturally, this requires substantially increased collective to maintain altitude. You must
monitor your airspeed closely. Again, as airspeed drops to 15 knots, push the nose down
by moving the cyclic forward. Reduce collective at the same time. As your airspeed
reaches zero, move the helicopter into a level flight attitude and set the collective for the
amount of torque required for a hover.
Rapid Climb
Generally speaking, at a constant torque setting you’ll maintain a constant height over
rolling terrain, with the helicopter descending and ascending in synch with the ground.
If you approach a steep vertical surface or find yourself about to collide with a ground
object, however, you might need to climb—and in a hurry.
The vertical velocity indicator shows a
rapid ascent.
A fixed-wing aircraft pilot initiates a climb by pulling back the stick. In a helicopter,
pulling back the cyclic first slows the helicopter (since some of the downwash is being
directed forward) and also causes it to descend (since not all the thrust is being directed
downward). Slowing down in the face of an obstacle might be beneficial, but descending
almost certainly will not be helpful.
44
Page 44

You must increase the collective to make the helicopter climb. The faster you need to
climb, the more torque you need to apply. As you approach an obstacle or steep vertical
surface, do not pull back on the cyclic unless you want to slow down.
Rapid Descent
If you increase collective to rapidly increase altitude, it stands to reason that you would
rapidly decrease collective to rapidly decrease altitude, right? Not necessarily. A rapid
descent with little or no forward motion can lead to a disastrous condition called
"settling with power." Basically, the helicopter is caught in a descent and even full torque
might not break out of it. The helicopter can continue to sink until it crashes.
Reducing collective to reduce altitude works well only as long as you don’t need to drop
too far, too fast. For a safer rapid descent, push the cyclic forward as well as reducing
the collective. Pushing the nose down will build forward airspeed and prevent settling
with power.
Flying Backwards
The helicopter has the almost unique ability to fly backwards. This can be very useful
when manoeuvring into a firing position—or backing away from enemy forces. To make
the helicopter back up, begin by pulling back on the collective. This raises the nose,
directs some of the downwash forward, and slows the helicopter. Eventually, the
helicopter will come to a complete stop, then begin moving backwards.
Flying backwards at 13 knots.
The more you pitch the helicopter up, the faster your backwards motion becomes.
Keep in mind, though, that this reduces the amount of downwash being directed down,
causing the helicopter to descend. If you need to back up in a hurry and pitch the nose
very high, be sure to add collective in order to maintain your altitude.
Also, keep in mind that you can’t see out the back of the helicopter. You’re basically
flying blind while moving backwards, and could collide with a building or a hill.
45
Page 45

To stop the backwards motion, simply pull the nose down by pushing the cyclic forward.
As the nose drops, the downwash will be directed backwards, thereby pushing the
helicopter forward (and up). Your reverse speed will slow, the helicopter will stop, and it
will then eventually begin to move forward again.
Flying Sideways
Flying sideways, or "slipping", is another unique helicopter ability. It is especially useful
on the battlefield. Rising over a hill or building to engage enemy troops exposes you to
return fire. The higher your altitude, the more likely you’ll be detected and fired upon.
Using slipping, however, the helicopter can "slide" around an obstacle to obtain a clear
view of the target while remaining at very low altitude.
To practice slipping, begin by entering a hover. Once you’re hovering, apply either left or
right pedal to yaw the nose until you’re facing a large object, such as a building.
Alternatively, you can monitor the heading reading on the IHADSS or use a distant hill for
a landmark, but using a nearby building tends to work much better.
Very gently apply left cyclic. This will bank the helicopter to the left, direct the downwash
to the right, and therefore push the helicopter left. The nose of the helicopter may yaw to
the left as well, creating a slight turn—especially if you have any forward motion. In this
case, apply opposite pedal (the right pedal in this case). Apply just enough pedal to stop
the yawing. If you’ve done this correctly, the building should appear to slide to the right
across your windscreen while your heading remains constant.
Note that the ball on the skid/slip indicator will move in conjunction with your slip; when
this ball is centred, the helicopter is not slipping. The velocity vector (extending from the
crosshairs) also points out the general direction in which the helicopter is moving.
The velocity vector and skid/slip indicator show
this helicopter to be skidding forward and left.
To stop the sideways motion, apply right cyclic and bank the aircraft slightly to the right.
This redirects the downwash to the left and slows the aircraft. It might be necessary to
adjust your pedal inputs to maintain a constant heading. When the sideways motion
stops, returning the helicopter to a level attitude will re-enter you in a hover. If you
continue banking to the right, the helicopter will begin sliding to the right, and you might
46
Page 46

need to apply left pedal to prevent the nose from yawing. Again, if this manoeuvre is
performed correctly, the building should appear to slide to the left across the windscreen
while the helicopter maintains a constant heading.
Engaging Ground Targets
The attack helicopter’s primary mission is to seek out and destroy ground targets.
However, that’s not your worry. As pilot, you’re responsible for getting the aircraft to the
battle, manoeuvring into firing position, and getting home again. The CP/G, your gunner,
is responsible for finding targets and locking them up. During a fight, the CP/G could
choose to engage targets well off to either side of the helicopter’s nose—and therefore
well outside of a weapon’s firing envelope. You have to work closely with the CP/G to
make sure that the helicopter is pointed at the right spot so that he can fire.
The Alternate Sensor Bearing indicates where the
CP/G is looking.
The CP/G notifies you when he’s engaging (locking) a target and announces the type of
target (air, ground, infantry, and so on). That’s your cue to turn the helicopter toward his
target. Look at the compass at the top of the IHADSS display. Along the bottom edge,
you’ll note a solid triangle called the Alternate Sensor Bearing (ASB). This marker
indicates where the CP/G is looking. If the CP/G hasn’t chosen a target, the Alternate
Sensor Bearing marker will cycle from side to side, indicating his search pattern. Once
he’s locked a target, the marker will stay fixed. Simply turn the helicopter until the ASB
marker is directly centred on your compass display.
For more information on working with the gunner and using your weapons from the
Pilot’s Cockpit, please refer to the Gunship! Quick Start guide.
Engaging Aerial Targets
Although the attack helicopter’s primary mission is engaging enemy ground forces, most
operators have adapted some form of air-to-air missile for helicopter use. Intended
primarily for self defense, such systems are usually short-ranged, heat-seeking missiles.
47
Page 47

Missile seeker tracking a target without a radar
lock on.
When you press 8 to select your air-to-air missile, a circle appears on the forward view.
(This is, of course, assuming you are armed with them; if not, go back to the Arming
screen and add them to your load-out.) Inside this circle, a small diamond executes a
search pattern. The diamond represents where the missile seeker is looking. You will
initially hear a low-pitched "growl," indicating that the missile is not tracking a target.
Missile seeker tracking a target with a radar lock,
but outside of launch parameters.
To engage aerial targets, turn the helicopter to bring a target within the circle. You can
engage aerial targets with or without a radar lock. Once the missile’s seeker acquires
the target, the diamond will track the target’s position and the "growl" will increase to a
higher pitch. If the target moves outside of the missile’s firing envelope, the seeker
diamond and the TD box (if you have a lock on) will become dashed. Turn the helicopter
to bring the target back toward the centre of the circle. When the diamond and TD box
turn solid, you may fire.
The solid TD box indicates the target is within
firing parameters.
48
Page 48

Navigating Waypoints
Most battles occur over unfamiliar terrain, often at night or in poor visibility. Navigating
under such circumstances is hard enough—and then the enemy starts shooting at you.
Once the CP/G has begun engaging targets, you’ll need to make frequent manoeuvres to
bring your weapons to bear. All of this is very distracting, and it’s easy to become
disoriented and lost.
The IHADSS shows distance and bearing to the
current waypoint.
Fortunately, the helicopter’s onboard computers are keeping track of not only where
you are but where you ought to be, as well. The pilot’s IHADSS display shows the
current waypoint number and the range and bearing to it. The waypoint number and
distance to the waypoint (in kilometres) appear in the lower left region of the IHADSS.
The bearing to the waypoint is marked by the Command Heading indicator—the caret
(^) just below the compass display. Simply turn the helicopter until the Command
Heading indicator is centred on the compass, and you’ll be flying right toward the next
waypoint—no matter how lost or off course you might have become.
Note that your waypoints are all set before the mission begins. You can alter them and
your flight path using the Mission Planning button on the pre-flight Briefing screen.
Speed Control
During typical combat operations, attack helicopter pilots are expected to reach their
targets within 30 seconds before or after the assigned time. Although the Apache, for
example, is capable of flying in excess of 100 knots, such strict Time on Target (ToT)
requirements rarely necessitate such speeds. During the opening minutes of the 1991
Gulf War, U.S. Army AH-64 Apaches penetrated Iraqi airspace and engaged various radar
sites in preparation for massive fixed-wing air strikes. Taking these radar sites down
would be crucial to the survival of Coalition aircraft heading into Iraq. The Apaches,
however, did not charge into Iraqi territory at 90 knots. Instead, they moved slowly—
as slowly as 25 knots by some accounts—to minimise their visibility to Iraqi forces.
49
Page 49

A well-planned mission will time your waypoints and ToT such that breakneck, reckless
speed is not required. Controlling your speed is critical to battlefield survival. On average,
you should expect to fly at 60 knots or less through the majority of your flight. Slower
targets are more difficult for the enemy to detect—plus, it’s easier to slow the helicopter
and enter a hover (especially behind an obstacle) should you unexpectedly encounter
enemy forces.
Masking
On the modern battlefield, you can encounter a variety of weapons platforms with optical,
laser, thermal, and radar guidance systems. Despite the diversity, all of these systems
share one common weakness; they can’t hit what they can’t see. Hills, rocks, mountains,
ridges, and other mounds of dirt (as well as buildings) are extremely effective at blocking
all types of electromagnetic energy. Trees, especially heavy foliage, are also effective at
hiding objects, especially in the optical, laser, and thermal bandwidths.
Attack helicopters, whose very mission takes them into the heart of the battlefield, rely
heavily on such terrain features to hide them from enemy air defenses. This tactic of
hiding behind buildings, hills, and trees is called masking. Masking is a dual-edged
sword, however. While it prevents the enemy from shooting at you, it also prevents you
from shooting at them. Consequently, it is necessary to unmask, or move from behind
the obstacle and obtain a clear line of sight to the enemy, in order to fire your
weapons effectively.
Masked behind trees.
When you are transiting the battlefield, you should pay close attention to the terrain.
Watch for terrain features or structures that can hide your helicopter from the enemy.
When you’re ready to engage enemy forces, unmask slowly. You want to expose as little of
your helicopter as is absolutely necessary. If masked behind a building, consider sliding right
or left while maintaining the current altitude. Generally speaking, the higher you fly, the more
likely it becomes that you’ll be spotted. Sliding out from behind the building usually presents
less risk than rising above it. In the case of hills, cliffs, and other terrain features, sliding is
still preferable, but might not always be an option. If you’re hovering behind a long ridgeline,
your only option might be to slowly increase altitude until you’ve crested the ridge.
50
Page 50

Unmasked above trees to fire.
Once you’re unmasked, the CP/G will have a clear line of sight to the target. He can lock
targets using either the radar or the TADS. Keep in mind, though, that you’re exposed to
return fire as well. This is where Lock On After Launch (LOAL) mode becomes effective.
If, after you unmask, the CP/G fires weapons in LOAL mode, you can then re-mask the
helicopter, wait for the missiles to close on the target area, then unmask again. With
LOAL, the CP/G can re-lock the targets and guide the missiles home.
Flying Ridges and Valleys
When manoeuvring through valleys, always stay along the edge of the ridge, near the top.
Avoid flying along the centre of the valley floor. Flying either behind the top edge of a
ridge or along a valley floor provides an equal amount of protection; the helicopter is
sufficiently masked in either case. However, if you unexpectedly encounter enemy forces
moving up the same valley, it is much more advantageous to be near the edge of the
valley. If you’re flying along the ridgeline, you can quickly move up and over the ridge,
masking yourself along the opposite side. If, on the other hand, you’re caught in the
middle of the valley—along its floor and besieged by anti-aircraft fire—you’re basically
stuck out in the open, and your chances of escape are low.
The Communications Menu
The days when a solo warrior battled alone among the enemy hordes are gone.
Today’s battlefield requires co-ordinated, carefully orchestrated manoeuvres by multiple
participants. You might have as many as four groups, or flights, of helicopters in the air
during a given mission. Although these other flights will have individual missions and
flight paths, always remember the old adage, "No plan survives contact with the enemy".
In other words, the battlefield is a fluid, rapidly changing environment. Plans made just
two hours prior to the mission might be hopelessly outdated by the time the mission
launches. It’s up to you to assess the ever-changing battle conditions during your flight
and re-deploy the other helicopters (and yours!) as necessary.
51
Page 51

Press t to call up the Communications menu. Using this, you can issue orders to
your wingman and any other flights under your command. When it first opens, the
Communications menu lists the available flights—one through four. Option 5 is All
Helicopters, and 6 represents any support artillery or air support you have available.
Select who you want to contact by pressing the number key (along the top row of the
standard keyboard, not the numeric keypad) that corresponds to the option. This opens
the Command menu for the unit. (If you make a mistake, you can use t to back out
level by level.)
The options on the Command menu depend on what type of unit you selected. They can
include the following:
Waypoint Number Use this to select any one of the unit’s waypoints. You can then
modify the unit’s orders for that waypoint.
Waypoint Type This button cycles through the available types of waypoints. Each
standard type has a default setting for the Speed, Flight Profile,
Formation, Combat Mode, and Priority Target for the selected flight.
You can override these settings individually using the rest of the
buttons. The default settings are:
Checkpoint (CP): Fly to this point and continue forward
without stopping.
Assembly Area (AA): Fly to this waypoint, avoiding combat,
then loiter for 5 to 10 minutes or until the leader issues the
"Go" command.
Battle Position (BP): Fly slow NOE to this waypoint and assume a
firing position. Engage enemy forces for 5 to 10 minutes or until the
leader issues the "Go" command.
Patrol Area (PA): Fly to this waypoint and patrol for 5 to 10 minutes
or until the leader issues the "Go" command.
SAR Landing Zone: Attack helicopters treat this as a PA waypoint.
Transport helicopters fly to this waypoint, avoiding combat, then
search for friendly troops, land, and pick them up.
Landing Zone (LZ): Attack helicopters treat this as a PA waypoint.
Transport helicopters fly to this waypoint, avoiding combat, then
land and drop off troops.
Speed This setting and the next (Flight Profile) are interconnected. With
this, you control how quickly the pilot will fly to get to this waypoint.
The actual speed varies, depending on the Flight Profile, because of
the need to dodge terrain. There are three options:
52
Page 52

Slow is 30 to 50kts.
Tactical is 50 to 80kts.
Sprint is maximum possible speed at all times.
Flight Profile This setting determines the altitude that the helicopter’s pilot should
strive to maintain between the previous waypoint and this one.
There are three options:
Nap of the Earth orders the helicopter to maintain an altitude below
60ft; 30ft is optimum. The pilot has permission to reduce speed as
necessary to maintain this altitude.
Contour tells the pilot to keep to an altitude below 100ft; 70ft
is optimum.
Cruise orders the altitude kept between 100 and 150ft, and the pilot
can and should rise to 200ft if no enemies are present.
Combat Mode This gives the helicopter its overall orders regarding its combat
mission between the previous waypoint and this one.
The options are:
Search and Destroy orders are to open fire on and advance toward
any enemy unit. The helicopter is to continue its mission once either
all targets are destroyed or visual contact is lost.
Suppression of Enemy Air Defenses (SEAD) tells the helicopter to
open fire on and advance toward enemy air defense sites.
Engage orders mean to open fire on any detected enemy only if
doing so does not delay the mission for more than one minute.
After one minute, the helicopter is to continue on its mission.
Bypass orders the helicopter to seek cover, avoid contact,
and continue toward the waypoint.
Priority Target This determines what type of target the helicopter should attack
first, if there is a choice.
Orders Use this to give immediate action instructions to other helicopters.
Possible orders are:
Fire at Will lets the aircraft’s crew use their weapons as they see fit.
Hold Fire restricts weapon use and engagement to immediate
self defense.
53
Page 53

Go to next Waypoint tells a helicopter flight to ignore their current waypoint and continue
to the next one. This is the "Go" order.
Make Active Waypoint orders a flight to make the selected waypoint
their active, current waypoint. All waypoints previous to that one are
ignored and deleted.
Support This calls in artillery and air support. To use this, you must have an
active Target Reference Point (TRP) and support units available.
To set a TRP, place your view over a target or area and press 7.
(To move the point, repeat the procedure.) Once a TRP is set, you
can open the Command menu, select Support, and an entry appears
for each available type of support mission. When you select a
mission, it is automatically called in on your current TRP.
Realistic Flight Mode
When you start Gunship!, one of the reality options is a choice between Easy simplified
flight, Enhanced flight and Realistic flight. Realistic flight is more difficult for novices, but
once you get the hang of it, the controls are more flexible and useful, especially at high
speeds. However, if Realistic flying is too frustrating, start with Easy flight and work your
way up. Enhanced is the midpoint between the two other modes. When you've conquered
Easy, but you don't yet feel ready for Realistic, Enhanced is a useful in-between step.
Easy Flight vs. Realistic
In Easy Flight, neither the pitch nor roll, altitude nor airspeed of the helicopter has any
effect on lift. This means that regardless of how you manoeuvre the cyclic joystick, lift is
not affected. (Thus, power dives will not work.) The collective is the only control that
affects lift in Easy flight. Any time you want to add lift (to climb, slow your descent, and
so on) or reduce lift (to slow your ascent, begin or increase a descent, and such), you
must move the collective.
In Realistic flight, the pitch, roll, altitude, and airspeed affect lift as they would in a real
helicopter. Among other things, Realistic flight means that at high speed you can fly the
helicopter like an aeroplane. A slight pitch up slows the helicopter and causes a climb
(by reducing speed into the 30-90 knot area for maximum translational lift), while a steep
pitch down puts the helicopter into a fast power dive. Here are some of the other features
of Realistic flight:
Ground Cushion Effect: At altitudes of 25 feet or less, your helicopter gains a little extra
lift at low speeds. The lift you gain varies with altitude, and it
disappears entirely if you’re flying too fast.
54
Page 54

Translational Lift: At speeds of 30 to 90 knots, you gain considerable extra lift.
The amount varies with your helicopter’s speed.
Roll and Lift: Whenever it experiences any significant amount of roll, the
helicopter loses some lift. This lift loss increases as the helicopter
rolls further left or right.
Altitude and Lift: At higher altitudes, you have less lift due to the thinner air. This
lift loss is really only noticeable above 1,000 feet, and it increases
as you get higher and higher. What this boils down to is that you
must adjust the collective to maintain level flight.
A Few Realistic Manoeuvres
Here’s a brief introduction to a few manoeuvres using Realistic flight. They are in order so
that you can do one immediately following the other.
Climb to Hover Move the collective up slowly until you rise off the ground.
At about 50 feet, return the collective to the neutral position. Here,
the helicopter is truly level, with no pitch down or up. Note that
the reticle is on the horizon line and airspeed is zero. The
collective is adjusted so the Rate of Climb indicator is centred.
From a hover, you can cause your helicopter to ascend straight
upwards or descend straight downwards by changing the
collective.
Rotate in Hover This is only possible at extremely low speeds or when hovering.
Move your rudder slightly to the right. If you’re using the
keyboard, press the right arrow once. Your helicopter begins to
rotate to the right. Return the rudder to centre or press the
opposite arrow key, and you’ll stop turning. Now, rotate to the
left. The more rudder you add, the faster the helicopter rotates.
Stop your rotation. You’re ready to begin flying.
Skid Sideways This is only possible at speeds under 40 knots or when
hovering. Move the cyclic joystick left or right to roll the
helicopter. Due to your lack of airspeed, the helicopter skids left
or right without forward motion. Unless the collective is
adjusted appropriately, a skidding helicopter loses some lifting
power and, thus, loses altitude.
55
Page 55

Forward Flight Begin pushing forward lightly on the joystick to "pitch down" the
helicopter. At the same time, slightly increase collective to keep
from losing altitude. You’ll begin to move forward. The farther
you pitch down, the more your speed increases, and the more
collective you have to add. Try not to push all the way, as this can
cause you to lose altitude too quickly. When your speed reaches
50 to 100 knots, ease off the stick until your speed stabilises.
You are now in level flight. To slow down, pull the stick back
toward you. You will both slow down and gain altitude; this is
called "flaring". If you wish to keep a steady altitude, decrease
collective as you flare. The further you pitch up, the more your
speed decreases, and the more collective you have to subtract.
Watch your speed! When you have stopped, release the stick.
If you maintain this attitude, you will begin to fly backwards.
Practice level flight until you’re comfortable with all this.
Turning Return to level flight at about 75 knots. Next, push the stick left
slightly. Your helicopter rolls into a banking left turn and begins to
lose altitude. Slightly increase collective to offset this loss. As you
turn, observe the change in your digital heading readout at the
top of the screen. Return the stick to centre. You’ll roll back to the
right, level out, and return to level flight. Practice turning in both
directions until you are satisfied with your skills.
Level Flight In level flight, the helicopter is pitched down ("nose down").
The greater the pitch, the faster the forward flight. Note that in
forward flight, the reticle is always below the horizon line.
The Rate of Climb indicator is centred, indicating flight is level.
In combat flying, a typical level flight speed is 100 to 150 knots.
If you’re descending (the marker is below centre), add some
Collective Up until the marker is centred. Conversely, if you’re
ascending, put in some Collective Down. When the Rate of Climb
indicator is on the centre mark, you are in level flight.
Change Altitude When flying, the easiest way to climb or descend is to raise or
lower the collective. When you reach your new altitude, put in an
equal and opposite amount of collective for a second, then set the
collective in a neutral position. Remember, it’s easy to overcorrect and put in too much collective. This results in you
"chasing the needle." After each change in the collective, wait a
second or two for the aircraft to stabilise. Practice flying around
until you are ready to move on.
56
Page 56

Power Dive When flying level at 100-150 knots, another way to descend is to
push the cyclic joystick forward (pitch down) into a power dive.
As you approach the altitude you desire, gently pull the cyclic
joystick back (pitch up) until the Rate of Climb indicator again
stabilises at zero. Similarly, another way to climb is to pitch up
slightly, reducing your airspeed to 50-100 knots. When you reach
the desired altitude, pitch down again until the Rate of Climb
indicator stabilises. This method exchanges speed for altitude or
vice-versa. This technique of flying is not unlike flying an
aeroplane. Using it, you can change altitude without disturbing
the collective.
CO-PILOT/GUNNER (CP/G)
The modern, high-tech battlefield is a fast-paced, demanding, and very unforgiving
environment. Detecting, identifying, and locking targets on a confused and chaotic
battlefield, combined with selecting and firing the appropriate weapon within its launch
envelope, demands your full attention. Consequently, the modern attack helicopter carries
a crew of two, so that the CP/G can focus full attention on finding and destroying enemy
targets—while someone else flies the chopper.
From the CP/G’s seat—the Gunner’s Cockpit—you have access to the MFDs, the ORT,
weapons selection, and a tailored version of the IHADSS—one that focuses on weapons
and targeting rather than the helicopter’s speed and attitude. In addition, you can also
communicate to the pilot through a series of brief commands. Your duty is to find, lock,
and kill targets, often with the help of the pilot.
Communicating with the Pilot
As CP/G, your job is to find and engage targets; the pilot is responsible for flying the
helicopter. When you locate enemy forces, however, you’ll need to guide the helicopter
into a proper attack position. To do this, you need to communicate your needs to the
pilot. You do so through a set of handy command keys, which allow you to give your pilot
a wide variety of instructions:
8 1/3 Speed
9 2/3 Speed
0 Full Speed
W No Orders (Give control back to the pilot.)
H Stop and Hover
= Increase Altitude by 25ft
57
Page 57

- Decrease Altitude by 25ft
[ Turn Left
] Turn Right
G Turn to my Direction
; Slide Left
! Slide Right
0 Break to Cover
P Pop-Up
Gunner’s and ORT Cockpits
The gunner actually has two views to work with; the Gunner’s Cockpit and the Optical
Relay Tube (ORT) Cockpit. The former gives you a larger field of view and better
awareness of the overall situation, while the latter gives you a magnified, stabilised,
but much limited view for precise targeting.
Press 2 to move to the CP/G position in the Gunner’s Cockpit view (also called head’s
up mode). The MFDs and instrument panel are all visible, along with your IHADSS
display. The CP/G’s IHADSS is similar to the pilot’s display, showing airspeed, heading,
and altitude, but the crosshairs are replaced by a targeting box. As gunner, you do not
see the velocity vector or waypoint information—you don’t need them. Along the bottom
edge of the display, the Target Acquisition and Designation System (TADS) readout waits
to show the range to the target (when the laser is activated). Along the compass at the
top of the display, the alternate sensor bearing indicates the direction you are facing,
as compared to the direction the helicopter is facing.
The CP/G’s IHADSS display.
The field of view display spans the bottom of the screen. The large outer box, called the
Sensor Field of Regard, shows the available range of motion for your sensor. The centre
of the box represent the nose of the helicopter, while the sides of the box represents the
sensor’s left and right gimbal limits. The smaller box within, called the Field of View
display, indicates the actual view position of the sensor.
58
’
Page 58

Press 3 to switch into the ORT view. This is a full-screen, heads down targeting
readout. The ORT is very similar to the periscope on a submarine; it provides a stabilised,
magnified view through the TADS. When you’re using the ORT, you are no longer fighting
the helicopter’s movement to get a target lock (that’s what we mean by stabilised). This
makes it much easier to engage targets at long range. The major disadvantage of using
the ORT view is that you lose the situational awareness that the IHADSS provides. Try
both of these "cockpits" and use the one that better fits your style of play—or alternate
depending on the situation.
The ORT view.
Acquiring Targets with the FCR
The Fire Control Radar (FCR) is your primary tool for locating enemy targets at long
range. To activate it, cycle the MFD until the radar display appears. (If the radar is not
selected in an active MFD, it is automatically placed in standby mode.)
Cycle radar contacts with the < and > keys.
You can use C and V as necessary to adjust the magnification level of the MFD so
that your intended targets are readily distinguishable. Next, use < and > to cycle
through your radar contacts. When you do, a targeting box on the IHADSS moves to
overlay each new contact, and so does the designator box on the radar MFD. IF you
want to lock on a particular target, press / when the designator is on that contact. The
IHADSS targeting becomes a solid, target designator (TD) box, highlighting the locked
target. Note that the FCR TD box is yellow, to distinguish it from the TADS TD box. You
can have up to four targets locked up at one time with the FCR.
59
Page 59

(To unlock a target, cycle to it and press / again.) You can launch radar guided
missiles (and only radar guided missiles) at targets locked with the fire control radar.
For more detail on these weapons, read the description of LOBL, in the section on
Anti-Tank Missiles.
Lock the radar contact using the / key.
A quick cautionary note: When the IHADSS is in Easy mode, only "living" enemy units are
displayed in your radar. When you’re in Realistic mode, all targets, both friend and foe
living and already destroyed, are shown. Be very careful when you’re engaging targets
with only radar contact.
Acquiring Targets with the TADS
The laser-based Target Acquisition and Designation System (TADS) provides an alternative
method for designating contacts. The TADS laser, effective only within visual range, follows
the IHADSS targeting box, giving you a quick way to lock visually acquired targets.
The TADS targeting box prior to locking a target.
Using the TADS is relatively simple. First, activate the laser by pressing the z.
A letter ‘L’ starts flashing along the bottom of the IHADSS, to indicate that the laser is
active. The numeric readout to the right of this L reads the range in meters, as measured
by the laser range finder, to the point under the IHADSS targeting box. Steer the targeting
box over the desired enemy vehicle, then press L. The target designator (TD) box
appears over the target and the range to the target (in meters) appears on the bottom of
the IHADSS. The TADS will track the locked target until the lock is broken, either by the
gunner or by an intervening physical object.
60
Page 60

A TADS locked target.
You can now launch weapons at the locked target. For more detail on engaging with your
weapons, read the next section, Engaging Targets.
Engaging Targets
The attack helicopter was designed to do exactly that: attack! Fancy flying and clever
manoeuvres have yet to destroy an enemy tank. Success on the battlefield demands that
you be intimately familiar with your weapon systems and their use.
Cannon
The onboard 30mm cannon automatically follows your IHADSS movements, always
pointing exactly where you’re looking. It has a 120 degree arc of movement to either side
of the helicopter and can fire almost straight down. The cannon’s rate of fire varies based
on the helicopter you’re flying, but is generally in excess of 600 rounds per minute and is
effective to a range of roughly 1 km. The cannon is effective against a wide variety of
targets, including lightly armoured vehicles. Wheels and tracks on heavily armoured
vehicles are susceptible to 30mm fire, which can reduce their capability to fight even if
the 30mm rounds do not actually penetrate their armour. You can select the cannon as
the active weapon by pressing 5.
The cannon tracks the TADS.
61
Page 61

When the cannon is the active weapon, the targeting box becomes targeting crosshairs.
The gun follows any IHADSS movements, and you can fire it in two ways:
• Lock the desired target using the TADS. The gun then fires wherever the TD
box indicates.
• Fire the cannon without locking a target by simply pointing the crosshairs at the desired
object and pulling the trigger. The cannon will fire where the crosshairs point. This
method works well in emergency situations for firing quickly at close range targets.
Since the target is not locked, however, the crosshairs move as the helicopter moves,
making this method less accurate in the normal Gunner Cockpit view. In the ORT,
however, the view is stabilised, which allows you to engage targets more accurately at
longer ranges.
You may fire the cannon without first locking
a target.
Unguided Rockets
Every attack helicopter in Gunship! can carry some form of unguided rocket. As the name
implies, rockets are self-propelled, unguided (they just fly straight ahead) weapons. They
have an effective range of 2 to 3km. Since rockets are unguided, they’re not particularly
accurate. Numerous factors, like movement of the helicopter during firing and gusts of
wind during flight, can and will cause them to miss their mark. Consequently, rockets are
usually fired in bunches—salvos—in an effort to blanket the target area with fire.
Target locked, but rocket I-beam too far
from target.
62
Page 62

Rockets can be equipped with a wide variety of warheads. Which one you want to use
depends on the intended target. Warheads range in power from high explosives to antipersonnel sub-munitions. Rockets are generally used against "soft" and "medium" targets,
including enemy troops, trucks, lightly armoured vehicles, and buildings. Rockets are not
particularly effective against hardened bunkers, nor against heavily armoured vehicles
like tanks.
Target locked, I-beam on target, ready to fire.
Make rockets the current weapon by pressing 6. If you have more than one type
loaded, pressing 6 more than once cycles through the available rocket types.
The IHADSS crosshairs become an I-beam. This I-beam is dashed when you have it
aimed outside of the proper firing parameters—out of its targeting cone. Lock a target
using either the FCR radar or the TADS laser, then have the pilot turn the helicopter to line
up the I-beam over the desired target. (Use G to tell the pilot to turn to your current
heading.) Instruct the pilot to move forward if it’s necessary to get into rocket range.
When the I-beam turns solid, fire when ready!
You may fire rockets without first locking a target.
You can also fire rockets without first locking a target. The rockets will strike wherever the
I-beam points when they’re launched. This method is less accurate, but it can work well
in emergencies or after your avionics sustain battle damage.
63
Page 63

Anti-tank Missiles
Anti-tank missiles come in two basic varieties: laser guided and radar guided. In both
cases, the launching platform (your helicopter) must illuminate the target with the
appropriate energy source. The missile then homes in on the reflected energy—laser or
radar. Although anti-tank missiles are the attack helicopter’s most powerful weapon, the
need to maintain a target lock can leave the helicopter exposed to enemy fire. As a result,
anti-tank missiles have been developed to fire in one of two modes: Lock On Before
Launch (LOBL) and Lock On After Launch (LOAL).
There are also two less ordinary types of anti-tank missile—Optical Wire Guided (OPWIRE)
and Infrared Fire and Forget (IRFF). These are only available to you when flying the Tiger.
LOBL
Lock On Before Launch is the easiest and most intuitive method of firing anti-tank
missiles. Press 7 to cycles through the available missile types and modes.
The current type and mode appear in the lower right of the IHADSS. When LOBL
appears, that indicates that your current weapon is a laser guided anti-tank missile
ready to be fired in LOBL mode. Similarly, LOBL FCR indicates a radar guided anti-tank
missile ready to be fired in LOBL mode.
Cycle the 7 key until the weapon readout
displays LOBL.
As the name implies, LOBL launches require you to establish the appropriate radar or laser
lock before firing the missile. Once a lock has been established, the target designator box
appears on the IHADSS over the designated target. If the box is dashed, your target is
outside the missile’s launch envelope. To get it into the envelope, instruct the pilot to turn
toward the target and close the range. Once the box becomes solid, you can fire the missile.
Here’s the catch; you must maintain the laser or radar lock for the entire flight of the
missile (and while you’re out there, you are a target for enemy fire). Any obstruction that
gets between you and the target—including hills, trees, and buildings—will block the
laser beam or radar waves and break the target lock. If that happens, the missile "goes
dumb" and (eventually) flies into the ground.
64
Page 64

LOAL
To protect your helicopter from enemy fire while the missile is in flight, you can choose to
fire anti-tank missiles in Lock On After Launch mode. With LOAL, you locate the desired
target, but do not establish a lock. Next, instruct the pilot to manoeuvre the helicopter near
some obstacle—a ridge line or a building, for example. With your helicopter hovering just
above the obstacle and facing the target, select the appropriate missile type and mode by
cycling with 7 and observing the launch mode indicator in the lower right of the
IHADSS. LOAL indicates that a laser guided missile is ready to be fired in LOAL mode.
When you’ve selected, fire a missile in the general direction of the target. As soon as
the missile is away (and beyond the obstacle), instruct the pilot to decrease altitude
until you’re safely hidden behind the obstacle. The launch mode indicator changes to a
Time of Flight (TOF) counter. This displays, in seconds, how much longer the missile
will fly. During the final seconds of the missile’s flight, the TOF counter changes to
display the word LASE. This is your cue to unmask and lock the target. Quickly order
the pilot to manoeuvre above or around the obstacle, then find and lock the target—
using laser or radar, depending on the type of missile you fired—before the counter
reaches zero. If the missile hasn’t already passed the newly locked target, it will detect
the reflected energy, turn and engage the target.
A more aggressive approach calls for firing multiple missiles, staggered 10 to 15 seconds
apart. (This one takes some serious skill to perform.) After you’ve fired the missiles, order
the pilot to descend and wait until the first missile nears the target. Order a climb above the
obstacle and quickly lock a target. Once the first missile strikes the target, quickly select
another target. Repeat this process until all of the missiles in flight have struck targets.
OPWIRE
To improve on accuracy, some missiles—like the HOT 3 carried by the Eurocopter
Tiger—were designed to unreel a thin copper wire behind them as they fly. In this way,
the launching helicopter remains in constant contact with the missile, and the gunner can
provide additional guidance instructions until the wire is broken. Wire guidance missiles
follow the current TADS aim-point. In some situations, this even allows you to change
targets in mid-flight. Sudden turns or drastic course adjustments, however, might break
the wire. If the wire breaks, you lose all control over the missile.
IRFF
The Infrared Fire and Forget is possibly the most convenient missile for the helicopter
crew. Once launched, a fire and forget missile lives up to its name; you can go on your
way without worrying about it. These weapons have an internal infrared (heat) sensor
that they use to guide themselves to their target, which you designate for them using a
TADS lock. Once launched, the missile neither needs nor accepts further guidance.
Used correctly, flares can "distract" these missiles.
65
Page 65

BASIC TACTICS
You know how to fly and shoot, but that’s only the beginning. There’s a world of tactics
and strategies you can use, both in combat and out of it. This section introduces a few
basic tactical ideas. Hopefully, these will help you keep your helicopter alive long enough
that you can start developing tactics of your own.
Two Pieces of Advice
Make a plan. Before takeoff, you should always examine the map of the operations area.
Based on what you already know of your mission, you can do several things to increase
your chances of success even before you get into the helicopter. Among them:
• Look for flight paths that give you cover all or most of the way to your target area.
Also look for good hiding places. Even if you don’t use them, the enemy might.
• Don’t trust intelligence regarding enemy locations. While your briefing includes the best
information available to you, that info could be out of date or incomplete.
Remember your mission. When you’re in the air, don’t get sidetracked by other targets
until after the mission is complete. It’s easy to take a little time and hit a few targets of
opportunity, but it’s all worthless if you miss your main target or run out of ammo
before you reach it.
• Be willing to change your flight plan. The plan devised by Operations is usually a good
one, but it might not be the best one for you. The same goes for the flight plan you
made before takeoff. If the situation changes once you’re in the air, your ability to be
flexible and adapt in mid-mission might be what saves the day.
• Set Battle Positions in good firing spots, at least 1 or 2 kilometres from your target.
This gives you a good selection of targets in your weapons range and makes it harder
for them to fire at you.
• The indirect approach is generally best. Setting your waypoints on the primary target
and flying full speed at a few hundred feet of altitude toward the target might work on
training missions, but its pure suicide in combat.
Offensive Tactics
You will not be sent out in your helicopter gunship on a mission to defend yourself.
You are assigned targets, and your success is measured based on your ability to destroy
those targets. That’s where offensive tactics come in handy.
66
Page 66

The Approach
The vast majority of gunship flights are ground-attack missions. You are ordered to knock
out hard or soft targets in a certain area—often an area protected by SAMs (Surface-toAir Missiles) and AA (Anti-Aircraft) guns.
The standard technique is to fly in quick dashes ("bounds"). Fly from one covered position
to another, staying below 100 feet. Before making a dash, hover and pop up briefly to
between 100 and 200 feet. Search quickly for potential enemies, then drop low again and
check your instruments. Your RAWS and RADAR can give you critical information.
Pick your next covered position, rotate to face that direction, then pitch down and zoom
forward! Stay as low as possible. When selecting routes, use cover such as hills, trees,
and buildings to screen yourself from enemy fire.
The Battle Position
Once you have detected your targets, do not swoop in for a close range attack! Find a
good covered position and go into a hover behind it. Conduct a pop-up (described below)
and engage one target. As soon as that target is destroyed—but no more than 20
seconds later—drop back down behind cover. Move a short distance, staying under
cover, and repeat the pop-up. This gives you the maximum time to use your weapons,
but keeps you always able to get under cover before your opponents can hit you.
Pop-up Attacks
The "pop-up" technique is simple. Hover behind a cover that screens you from suspected
enemy positions. Climb up over the obstruction until you're just above the top of the
cover. Scan around and watch your threat display. If you recognise an important target
immediately, open fire. If not, drop back down into cover. You can now consider your
situation and decide if you want to pop up again and attack those targets or bound on,
avoiding them. If you decide to attack, pop up just long enough to knock out your
selected target, then drop back into cover.
Selecting Weapons
Use the right weapon for the job. At longer ranges (over 2 kilometres), use ATGMs
against vehicles and bunkers; use FFARs against infantry, AA gun sites, and buildings;
and use AAMs against enemy aircraft. If you are brave enough to get in close, your best
all-around weapon is the cannon. At ranges beyond 700 meters or when making side
shots, however, the cannon consumes large amounts of ammunition for each hit, due to
its poor accuracy at longer ranges.
67
Page 67

SEAD
SEAD stands for Suppression of Enemy Air Defense. One of the strengths of the
helicopter is that it can sneak up on targets, taking full advantage of terrain cover.
Therefore, it is much better suited to attacking air defense units than traditional
fixed-wing aircraft. US Army-Air Force co-operation tactics plan for helicopters to attack
anti-aircraft units while ground attack jets bombard ground targets.
The key to eliminating enemy air defenses is engaging them quickly. Enemy anti-aircraft
defenses have a reaction time of 5 to 20 seconds, depending on the quality of the
equipment and skill of the crew. When targeting any AA site, you must destroy it during
this time. Against enemy SAMs, you have a little extra time and some warning, because
you can see the missile coming on the threat display. Use that time to activate
countermeasures (chaff and flares) or dive for cover. Enemy guns are tougher, due to the
combination of the short range and their high muzzle velocity. Guns are also not affected
by chaff and flares.
Tank Hunting
The helicopter gunship was designed to kill tanks. It’s just a matter of loading up with
ATGMs and heading out to the happy hunting grounds. At a range of 4 or 5 kilometres,
it’s like shooting fish in a barrel. If you prefer, you can come closer and cut them apart
with the cannon or bomblet rockets. Keep in mind that the U.S. Army expects a 14 to 1
kill ratio. (That is, when you destroy your 14th tank, the helicopter has paid for itself; it’s
become a cost-effective weapon.) In your eagerness to create scrap metal, make sure you
don't blast friendly tanks by accident.
Most tanks don't carry any AA weapon larger than a heavy machine gun, but recent
doctrine and field tests indicate that some tanks can use their main guns effectively
against slow moving helicopters. Infantry Fighting Vehicles (IFVs) are a greater threat,
because most are armed with a 20 to 30mm auto-cannon, and their companion infantry
carry light IR (infrared) homing missiles. The biggest problem in tank hunting is that
specialised air defense vehicles have a nasty habit of travelling with the tanks and IFVs.
Whenever you see a large concentration of armour, expect to find an air defense vehicle.
Find it and take it out first. Then make sure it was alone before moving on to the armour.
Infantry and Bunkers
Infantry in open ground are difficult to see with the naked eye. Thermal sights make
spotting infantry easier, but only at relatively short ranges-1 to 2 kilometres. Infantry
might carry machine guns and other light weapons, and they are sometimes equipped
with light IR homing missiles. You can attack infantry with rockets or the cannon. If you
charge in fast and low, you might get them before they're ready to get you!
68
Page 68

Attacking infantry is tricky, because it’s often hard to tell the good guys from the bad
guys. Always check your map to avoid making costly and painful mistakes. On the plus
side, bunkers are easy to destroy. They can be seen at range and destroyed using ATGMs.
However, most bunkers have thick roofs that are nearly impervious to cannon fire.
Defensive Tactics
The most common problem you'll have in the air is surviving enemy ground fire.
This includes enemy anti-aircraft artillery (AAA) and surface-to-air missiles (SAMs). From
a pilot’s point of view, these fall into three categories: radar-guided threats, IR threats, and
optically guided (which your instruments don’t warn you about).
Enemy Sensors
Only the higher quality Air Defense Vehicles and SAMs use radar-guided systems.
These weapons have search radar which can "see" you at long ranges—day or night and
through light cover. Radar, like normal eyesight, is blocked by objects on the ground.
As a result, ground-based radar has a "dead zone" into which it cannot see. Above this
dead zone, the radar can and will find you. The dead zone becomes smaller and lower as
you approach the radar. (Think of the radar as extending in a cone upward and outward
from the site, and you’ll have a good visualisation of how this works.) The best defense
against radar is to stay low and use cover.
Units using visual or thermal systems generally have a much more difficult time finding
your helicopter. The accuracy of both is degraded by weather and time of day, just as
your systems are. Pay attention to visual and thermal conditions during any battle.
When visibility is bad, it usually results in close in, split-second engagements.
Surviving Gunfire
After tracking you for sufficient time, enemy guns will open fire and continue firing until
they knock you down. You must either break their track on you or destroy the weapon.
There are no other options. If you can’t take out the gun in a hurry, the best way to
survive is skillful evasive flying.
Surviving SAMs
After a SAM battery has tracked you for a few seconds, it launches a missile.
Missiles come in all three flavours: IR-guided, radar-guided, and visually-guided.
Bear in mind that IR-guided missiles have their "seeker" on board the missile, while radar
and visual guidance missiles are controlled from the launching vehicle.
When a missile is homing in on you, you have several options. If you detect the incoming
missile early, you can fly behind cover and break the lock. For radar and optically guided
missiles, once the line of sight between them and you is broken, you are reasonably safe.
IR missiles, however, can reacquire you if you leave cover (break cover) too soon.
69
Page 69

Your other option is to drop chaff and flare countermeasures. These work only over short
ranges, and you drop them in groups (so you don’t have to pick). It's important to wait a
bit before launching these decoys, since they bum out after a short while and the missile
might then home in on you again. Countermeasures are best used in combination with
evasive flying. It is always better to let the terrain take the missile hit than your helicopter.
All missiles have a universal weak point—they have a huge turning radius. If you let one
get close, then dart off perpendicular to its flight path, it will be unable to turn fast enough
to hit you. This tactic is fairly easy to use in a high-speed jet aircraft, but it is far more
difficult to accomplish in a relatively slow-moving helicopter—especially when the missile
you’re trying to avoid is flying at 1,000 mph or faster. It takes enormous skill, split-second
timing, and steady nerves to "turn inside" a missile with a helicopter.
Evasive Flying
Another way to avoid a threat is to dive to a lower altitude while turning parallel to or away
from the threat. If you get lower and avoid closing the range, an enemy often loses sight
of you. Enemy weapons aimed by eyeball (many AA guns and a few SAMs) cannot be
jammed or decoyed. Against these threats, evasive flying is your only defense. Another
evasive technique is to slow your speed once you're low. Slow movement at low altitude
is very hard to spot at a distance. It is quite possible to "sneak up" on enemy positions
unnoticed with a helicopter.
Evasive flying is also superior to jamming and decoys because it doesn't broadcast your
position. Both types of countermeasures, not to mention firing your weapons, reveal your
presence to the enemy.
Damage
If you don't respond in time to a threat, the gunfire or missile will hit you. You'll see the
flash of explosions around the edge of the cockpit. In training that’s all you'll see; your
helicopter cannot be damaged. In a real battle, however, the explosion might penetrate
your armour. You will know immediately when something has been damaged and is
malfunctioning. Check the damage display to find out what’s wrong.
If you suffer too many damaging hits, the structural integrity of your helicopter will fail,
causing a general power failure. The actual number of hits varies with the situation, and
enemy weaponry, but a good rule of thumb is expect the worst after you've suffered three
or four damaging hits. The only way to survive a general power failure is to successfully
"auto-rotate" to a landing. (Explaining how to perform this advanced manoeuvre is beyond
the scope of this guide. We only mentioned it so that you’d know it’s possible.)
If your helicopter is heavily damaged, you should abort its mission and send it to safety.
Transfer your view to another helicopter, if there are any, and continue the mission.
Few targets are worth the risk of losing an aircraft that is incapable of finishing the
mission anyway.
70
Page 70

GUIDE TO VEHICLES
AH-64D Apache
The AH-64D Apache first entered service in 1998
with the U.S. Army. It is currently replacing the A
model through new construction and
remanufacture. One in three deployed Apaches will
mount the millimetre wave, Longbow radar. This
will greatly increase its ability to locate targets
through the rain, fog, and smoke that defeat FLIR
and Thermal imaging. The complete Longbow
system can be installed in less than four hours in
the field, allowing this system to be moved from
non-mission capable aircraft to operational ones.
Other modifications in the D model include the "manprint" cockpit, with large MultiFunction Displays, more powerful 701C engines, larger generators, air to air missile
capability, a digital auto-stabiliser, an integrated navigation system that includes Global
Positioning capability, digital communications, and data transfer abilities. This last
upgrade allows the AH-64D to be part of an integrated battlefield data system, in which
information is passed from units down to command headquarters and then back to the
units, allowing real-time information exchange.
Specifications
Dimensions
Length: 51ft (15.54m)
Rotor Width: 48ft (14.63m)
Airframe Width: 19ft 1in. (5.82m) with weapon racks
Height: 14ft 1.25in. (4.3m)—16ft 3in. (4.95m) with Longbow Radar installed
Weight
Empty Weight: 11,800lb (5,352kg)
Maximum Fuel Weight: 2,442lb (1,108kg)
Mission Gross Weight: 17,650lb (8,006kg)
Power Plant
Engines: two GE T700-701C turboshaft engines
Continuous OEI: 1,890 SHP (1,409kW)
71
Page 71

Emergency OEI: 1,940 SHP (1,447kW)
Maximum Combat Speed: 158kts (293kph)—141kts (261kph) with Longbow
Rate of Climb (combat load): 2,530ft/min (771m/min)
Range: 105 nautical miles (168km)
Armament
M230 30mm chain gun (1,200rds.)
Up to 16x AGM-114K or L Hellfire II ATGM
Up to 76x M261 70mm FFAR rockets
2x AIM-9L Sidewinder missiles
Armour
Aircraft can continue flying for 30 minutes after being hit by 12.7mm rounds
from below. Resistant to 23mm fire in critical areas.
WAH-64D Apache
This is the British Army version of the Apache,
built by GKN Westland. The WAH-64D’s formidable
surveillance and target acquisition capability,
combined with weapon systems and avionics
improvements, represent a significant increase in
capability compared to the Lynx Mk 7 TOW
currently in service with the British Army. Unlike
the U.S. Army, the Royal Army plans to equip all of
their WAH-64Ds with the Longbow radar system.
Several modifications have been incorporated to meet specific UK requirements.
The biggest is the incorporation of the Rolls Royce Turbomeca RTM322 turboshaft
engine. The Helicopter Integrated Defensive Aids System (HIDAS), provides an integrated
Radar; Laser and Missile warning sensors and countermeasures system. Other changes
include folding main rotor blades, a new communications system that is compatible with
UK standards, and a new rocket launcher system able to use the Canadian CRV7 rockets.
72
Page 72

Specifications
Dimensions
Length: 51ft 10in. (15.8m)
Rotor Width: 42ft 7 3/4in. (13m)
Airframe Width: 14ft 10in. (4.52m) with weapon racks
Height: 17ft 1/4in. (5.2m)
Weight
Empty Weight: 7,275lb (3,300kg)
Maximum Fuel Weight: 2,249lb. (1,020kg)
Mission Gross Weight: 13,227lb (6,000kg)
Power Plant
Engines: two MTU/Rolls Royce RTM322 turboshaft engines
Continuous OEI: 1,990 SHP (1,474kW)
Emergency OEI: 2,100 SHP (1,556kW)
Maximum Combat Speed: 147kts (272kph)
Rate of Climb (combat load): 2,530ft/min (771m/min)
Range: 119 nautical miles (191km)
Armament
M230 30mm chain gun (1,200rds.)
Up to 16x AGM-114K or L Hellfire II ATGM
Up to 76x 2.75in. CVR-7 FFAR rockets
4x Starstreak missiles
Armour
Aircraft can continue flying for 30 minutes after being hit by 12.7mm rounds
from below. Resistant to 23mm fire in critical areas.
73
Page 73

UHT-2 Tiger
This is the German anti-tank and support version
of the Eurocopter Tiger. The Tiger is a joint
development project of Germany, France, and
Spain; the first German Tigers are scheduled for
delivery next year. The original plan for the UHT
version did not include a gun system, but recent
information indicates that they are reviewing this
option. The Gunship! version of the helicopter is
built to this latest specification.
The Tiger differs from the other attack helicopters in Gunship! in that it has its main
targeting sensor in a mast-mounted sight. The mast sight includes TV, FLIR, and laser
ranging and designation systems. The pilot uses a separate FLIR system under the nose
of the aircraft. The Tiger does not incorporate a Fire Control Radar system.
The Tiger is smaller than either the Apache or the Havoc. It is very manoeuvrable and has
a faster response time. This is somewhat offset by its lighter weapons and lack of radar.
Specifications
Dimensions
Length: 51ft (15.54m)
Rotor Width: 48ft (14.63m)
Airframe Width: 19ft 1in. (5.82m) with weapon racks
Height: 16ft 3in. (4.95m)
Weight
Empty Weight: 11,800lb (5,352kg)
Maximum Fuel Weight: 2,442lb (1,108kg)
Mission Gross Weight: 17,041lb (7,746kg)
Power Plant
Engines: two Rolls Royce RTM322 turboshaft engines
Continuous OEI: 1,285 SHP (958kW)
Emergency OEI: 1,556 SHP (1,160 kW)
Maximum Combat Speed: 145kts (269kph)
Rate of Climb (combat load): 2,106ft/min (642m/min)
Combat Range: 205 nautical miles (342km)
74
Page 74

Armament
Giat AM-30-781 30mm cannon (450rds.)
Up to 16x TRIGAT or HOT3 ATGM
Up to 44x 2.75in. FFAR rockets
4x Stinger missiles
Armour
Aircraft is resistant to hits by 12.7mm rounds, and tolerant of 23mm fire in
critical areas. It has less armour than the Apache, requiring some care be
taken.
Mi-28N Havoc
Development of the Havoc started in 1980, and this
helicopter was ready to go into production in the late
1980s. The fall of the Soviet Union, however,
delayed any deployment of the aircraft. The N model,
designed with a mast-mounted radar and advanced
night and all weather capabilities, was first flown in
1997. Although the Russian government announced
that same year that the Ka-50 had "won" the
competition to replace the venerable Mi-24 Hind,
production planning for the Mi-28N proceeded normally—but it was not offered for foreign
sale. This follows standard Soviet-style procedures, intended to increase sales of one type of
weapon system while development continues on a second system meant for their own use.
Mission critical features of the Mi-28 include a mast-mounted millimetre wave radar
system, advanced thermal sensors under the nose, an armoured cockpit, advanced fuel
tanks, a self contained auxiliary power unit, and a state of the art navigation system.
Little is known about the exact specifications of the Russian radar system.
Specifications
Dimensions
Length: 55ft 9 1/4in. (17.01m)
Rotor Width: 56ft 5in. (17.2m)
Airframe Width: 16ft 1/4in. (4.88m) with weapon racks
Height: 18ft 5in. (5.61m)
75
Page 75

Weight
Empty Weight: 17,846lb (8,095kg)
Maximum Fuel Weight: 2,947lb (1,337kg)
Mission Gross Weight: 25,705lb (11,600kg)
Power Plant
Engines: two Klimov TV3-117VM turboshaft engines
Continuous OEI: 2,070 SHP (1,545kW)
Maximum Combat Speed: 145kts (270kph)
Rate of Climb (combat load): 2,677ft/min (816m/min)
Combat Range: 108 nautical miles (200km)
Armament
2A42 30mm chain gun (250rds.)
16x 9M114 Kokon or 9M120 Vikhr Anti-Tank Guided Missiles
Up to 80x 80mm UB-20 FFAR rockets
4x 9M29 Igla AD Air to Air missiles
Armour
Armour is similar to that of the Apache, with additional protection of the cockpit
and engine areas.
Helicopter Weapon Systems
The data in this section provides the basic, unclassified information on the major weapons
systems used by the helicopters in Gunship! that you can fly. The name of each weapon
includes both its type and model number, and there are separate entries for different
ammunition types. For those of you who might not be familiar with military terminology,
a few of the categories deserve a little explanation:
Platforms Simply indicates which helicopters can be armed with the weapon.
Muzzle Velocity Describes how fast a shell is moving when it leaves the gun. Missiles
and rockets do not have a muzzle velocity, instead, they have an
Average Flight Speed.
Penetration Is a rough indication of how much armour the round can go through.
Penetration is listed in terms of a number of millimetres of Rolled
Homogenous Armour (RHA) at optimum striking angles. For kinetic
energy weapons, this number is the value for a hit at a range of
76
Page 76

approximately 1,500 to 2,000 meters. Beyond this range, penetration
for these weapons begins to fall off radically as the range increases.
Penetration is the most likely information to be classified, and in many
cases, the information here has been estimated from calculations based
on other data.
Rate of Fire Measures the speed at which automatic weapons can fire. In all cases,
this information is listed as a number of rounds the gun could fire in
one minute (rds/min).
Guidance Describes the type of system used to get guided missiles to
their targets.
Guns
M230 30mm Chain Cannon
Platform: AH-64D and WAH-64D Apache
M789 HEDP (High Explosive Dual Purpose)
Penetration: 250mm
Muzzle Velocity: 805m/sec
Rate of Fire: 625rd/min maximum
M799 HEI (High Explosive Incendiary)
Penetration: 50mm
Muzzle Velocity: 805m/sec
Rate of Fire: 225rd/min maximum
Giat AM-30-781 30mm cannon
Platform: UHT-2 Tiger
HEAPI (High Explosive, Armour Piercing, Incendiary)
Penetration: 200mm
Muzzle Velocity: 1,025m/sec
Rate of Fire: 750rd/min maximum
SAPHEI (Semi Armour Piercing, High Explosive, Incendiary)
Penetration: 100mm
Muzzle Velocity: 1,025m/sec
Rate of Fire: 750rd/min maximum
77
Page 77

2A42 30mm Cannon
Platform: Mi-28N Havoc
30mm API (Armour Piercing Incendiary)
Penetration: 84mm
Muzzle Velocity: 990m/sec
Rate of Fire: 800rd/min
30mm HEI (High Explosive Incendiary)
Penetration: 35mm
Muzzle Velocity: 940m/sec
Rate of Fire: 800rd/min
Anti-Tank Guided Missiles
AGM-114K Hellfire
Platform: AH-64D and WAH-64D Apache
Range: 8000m
Penetration: 1200mm
Average Speed: 450m/sec
Guidance: Laser Homing
Special: Top Attack, Tandem Warhead
AGM-114L (Longbow) Hellfire 2
Platform: AH-64D and WAH-64D Apache
Range: 8000m
Penetration: 1200mm
Average Speed: 450m/sec
Guidance: Active Millimetre Wave Radar
78
Page 78

HOT 3
Platform: UHT-2 Tiger
Range: 4000m
Penetration: 1067mm
Average Speed: 300m/sec
Guidance: Wire Guided
Special: Top Attack, Tandem Warhead
ATGW-3LR TRIGAT
Platform: UHT-2 Tiger
Range: 5000m
Penetration: 1800mm
Average Speed: 475m/sec
Guidance: Imaging Infra-red fire and forget
Special: Top Attack, Tandem Warhead
9M114 Kokon (AT6 Spiral) ATGM
Platform: Mi-28N Havoc
Range: 4000m
Penetration: 711mm
Average Speed: 200m/sec
Guidance: Wire Guided
Special: Tandem Warhead
79
Page 79

9M120 Vikhr M (AT16) ATGM
Platform: Mi-28N Havoc
Range: 6000m
Penetration: 1300mm
Average Speed: 300m/sec
Guidance: Laser Guided
Special: Tandem Warhead
Air to Air Missiles
AIM-9L Sidewinder
Platform: AH-64D Apache
Range: 5000m
Average Speed: 600m/sec
Guidance: InfraRed Seeker
Starstreak
Platform: WAH-64D Apache
Range: 6000m
Average Speed: 600m/sec
Guidance: Laser Guided, kinetic warhead
80
Page 80

FIM-92C STINGER
Platform: UHT-2 Tiger
Range: 4500m
Average Speed: 500m/sec
Guidance: InfraRed Seeker
9M29 Igla-AD (SA16 Gimlet) SAM
Platform: Mi-28N Havoc
Range: 4000m
Average Speed: 350m/sec
Guidance: InfraRed Seeker
Rockets
M261 Launcher
Platform: AH-64D Apache
M151 High explosive Warhead
Penetration: 80mm
Target Type: light vehicles, structures, infantry
M261 Multi-Purpose Sub-Munition (MPSM)
Penetration: 500mm (each bomblet)
Target Type: medium and light armour, infantry
M255 Flechette Warhead
Penetration: 5mm
Target Type: helicopters, infantry
M264 WP White Phosphorus Warhead
Penetration: 0mm
Target Type: Create smoke screen with limited anti-personnel ability
81
Page 81

CRV7 Launcher
Platform: WAH-64D Apache
RA79 High Explosive, Incendiary, Semi-Armour Piercing (HEISAP) Warhead
Penetration: 80mm
Target Type: light vehicles, structures, infantry
M261 Multi-Purpose Sub-Munition (MPSM)
Penetration: 500mm (each bomblet)
Target Type: medium and light armour, infantry
WDU500 Flechette Warhead
Penetration: 5mm
Target Type: helicopters, infantry
TDA Type 68-22 Launcher
Platform: UHT-2 Tiger
253 ECC High Explosive Warhead
Penetration: 80mm
Target Type: light vehicles, structures, infantry.
256 EAP Multi-Purpose Sub-Munition (MPSM)
Penetration: 500mm (each bomblet)
Target Type: medium and light armour, infantry
ABL Flechette Warhead
Penetration: 5mm
Target Type: helicopters, infantry.
S-8 Launcher
Platform: Mi-28N Havoc
S-8BM High Explosive Warhead
Penetration: 90mm
Target Type: light vehicles, structures, infantry
S-8RM Multi-Purpose Sub-Munition
Penetration: 500mm (each bomblet)
Target Type: medium and light armour, infantry
82
Page 82

S-8KM Flechette Warhead
Penetration: 5mm
Target Type: helicopters, infantry
S-8 II Smoke Warhead
Penetration: 0mm
Target Type: Create smoke screen with limited anti-personnel ability
U.S. Vehicles
H60 Blackhawk Light Attack/Recon Helicopter
The Blackhawk is the U.S. Army’s mainstay
transport helicopter. Unarmoured and only lightly
armed, it cannot fight its way to a target. Instead,
it requires gunship escorts to clear the way so it
can deliver its payload behind enemy lines
M1A2 Abrams Main Battle Tank
This latest version of the Abrams MBT has new
armour, a commander’s independent thermal
viewer, and a new land navigation system.
The U.S. is the only nation to use depleted
uranium in both its armour arrays and its antitank gun rounds.
M2A3/M3A3 Bradley Infantry/
Cavalry Fighting Vehicle
The Bradley IFV is the replacement for the M-113
APC in the U.S. Army. Originally placed in
service in 1981, the Bradley has many variants,
including the Cavalry Fighting Vehicle or M3. The
major difference between these two vehicles is
that the IFV is designed to carry infantry, while
the cavalry vehicle carries a 2-man scout team
and more ammunition. The Linebacker air defense version of the Bradley is basically a
cavalry version with the TOW launcher replaced by a Stinger missile launcher.
83
Page 83

M4C2V Tactical Operations Centre based
on Bradley
This new command and control vehicle is based on
the Bradley chassis. It carries the latest command
and control equipment and computer systems.
HUMMV M2, M19, or TOW Hummer with .50 cal
MG or 40mm Auto Grenade
The HMMWV entered service in the 1980s and has
a multitude of variants. This vehicle is replacing the
jeep in service throughout the U.S. Military. It can
be armed with a variety of weapons, including the
M2 .50 calibre heavy machine gun, the M19 40mm
Auto Grenade launcher, and the TOW2 launch tube.
HMMWV Avenger Hummer with Avenger Air
Defense Turret
This air defense version of the ‘Hummer’ carries
the Stinger missile and a Vulcan 20mm cannon.
M113 A3 APC
This latest version of the M-113 entered service in
1987 and featured a more powerful engine,
appliqué armour and other improvements.
84
Page 84

M901 ITOW Cherry Picker TOW on M-113
This variant of the M-113 adds TOW (Tubelaunched Optical Wire guidance) capabilities to the
basic vehicle design.
M577 TOC Tactical Operations Centre on M-113
The M577 is a command and control version of
the M-113 Armoured Personnel Carrier. It is fitted
with additional radios, a table, a map-board, and a
tent on the rear (for additional space).
M109A6 PALADIN SPG 155mm Howitzer
This is the newest version of the standard, selfpropelled howitzer that has been in use by the U.S.
Army since the 1950s. The latest version, the A6,
includes an automatic fire control system, global
positioning system, upgraded suspension, and
improved armour.
MLRS Multiple Launch Rocket System
The MRLS is designed to be an area coverage
weapon to complement regular artillery.
85
Page 85

British Vehicles
Challenger II MBT
The Challenger II was developed privately by
Vickers Defence Systems. The British Army
selected it as a replacement for the Chieftain MBT
in 1991. Deliveries of this new tank started in 1994.
The Challenger’s main weapon is a fully stabilised,
rifled 120mm main gun.
Warrior II IFV
The Warrior IFV first entered service in 1986,
and has now finished production. The Warrior II
is fitted with the additional protection of
passive armour
.
Scimitar CFV
The Scimitar is a small, light reconnaissance
vehicle. While it looks like a small tank, it does not
have the armour or armament for the job. As a
scout, this fast, easy-to-hide vehicle more than
holds its own. The 30mm cannon makes it deadly
to light vehicles.
Marconi ADV IFV
The newest British air defense vehicle mounts a
Marconi radar-controlled twin 30mm turret on a
Challenger hull.
86
Page 86

German Vehicles
Leopard 2A5 MBT
This latest member of the remarkable Leopard line
adds Chobham type armour and a longer 120mm
smoothbore cannon. The distinctive angled shape
of the turret is unmistakable. In addition, a hunterkiller system similar to the M1A2’s CITV has been
added. The Leopard is once again one of the best
tanks in the world.
Marder II IFV
The Marder II IFV is an upgrade of the original
Marder, intended to replace the BMP-1s
inherited from East Germany. The Marder’s
smaller size makes it harder to spot than the
Bradley or Warrior.
Gepard ADV
The Gepard is an improved version of a venerable
air defense vehicle. It incorporates a new digital
fire control computer, optronic auto tracking
sensors (to allow the gun to be used without the
radar), and a laser range finder for use against
ground targets. The twin 35mm guns are effective
against all attack helicopters.
TH-800 Puma CV
The TH-800 is a new series of 8-wheeled
reconnaissance vehicles currently in development.
This version is based on the most likely
configuration. It should reach deployment in the
next 3 to 5 years.
87
Page 87

Russian Federation Vehicles
Mi-24P Hind-F Heavy Attack Helicopter
The USSR’s first fire support helicopter, the Hind
entered service in the late 1960s. The Hind-F
version started production in the late 1970s and is
the version currently in service.
Ka-50 Black Shark Light Attack Helicopter
This attack helicopter is in direct competition with
the Mi-28 for the Soviet market. It is currently in
small-scale production.
MI-8 HIP Heavy Transport Helicopter
Developed in the early 1960s, the HIP has
undergone constant upgrade and improvements.
The most current version is the MI-17, with its
more powerful engines. This helicopter is the
standard transport helicopter in Russian service.
T-80UM2 Black Eagle MBT Main Battle Tank
A mockup of the Black Eagle was first seen in 1997
at the Omsk weapons show. It is a major upgrade
of the T-80U tank. The biggest change moves the
autoloader to the back of the turret, correcting a
major design flaw in the older versions. The Black
Eagle incorporates better armour protection and the
Arena missile defense system. This information has
not been confirmed, but it is rumoured to mount a
gun larger than the standard 125mm.
This tank equips most Guards Tank units.
88
Page 88

T-90E MBT Main Battle Tank
The T-90E is basically an upgrade to the T-72
that contains the improvements of the T-80 MBT,
2nd generation reactive armour (RA), and an
ATGM defense suite. The tank retains the diesel
engine of the T-72, however. It is also rumoured
that the T-90 can fire an additional missile type
besides the AT-11, with its 5,000m range and
700mm of armour penetration. It is used by
Russian Federation and Belarus tank units.
T-80U Snow Leopard MBT Main Battle Tank
First seen by the west in 1989 and equipped with
2nd generation reactive armour and a turbine
engine, the T-80 is the follow-on to the T-64.
The T-80U can fire the AT-11 ATGW through its
main gun. The AT-11 rides a laser beam and has a
range of 5,000m. The main gun is also fully
stabilised for fire while on the move. This tank is
used by both Russian Federation and
Ukrainian forces.
BMP-3 Infantry Fighting Vehicle with 100mm +
30mm Gun
First seen in public in 1990, the BMP-3 is a very
intelligent design. It combines the high explosive
and missile firing capability of the 100mm low
pressure gun with the rate of fire and light antiarmour ability of the 30mm autocannon. Other
design features correct most of the problems
with the BMP design.
BMP-2 Infantry Fighting Vehicle with
30mm Gun
This Infantry Fighting Vehicle was first seen in
public in 1982. It is based on the BMP-1.
Improvements include a two-man turret and a
new engine.
89
Page 89

BTR-T Tracked APC
This unique vehicle is basically the hull of a T62
tank, modified to carry a 30mm auto cannon
turret and an infantry squad. It is the most
armoured APC in service.
BTR-80a 8-Wheeled APC
This replacement for the BTR-80 adds a heavier
punch to counter the success of the Bradley
IFV’s 25mm chain gun.
BTR-80 8-Wheeled APC
First used in the 1980s by the Soviet Army, the
BTR-80 was a replacement for the BTR-70 and
BTR-60 series of vehicles. Its major improvements
included the reduction to one engine, easier
ingress and egress, and improved elevation for the
main armament.
BRDM-3 4-Wheeled AC with ATGM
First seen in 1977, this upgrade to the BRDM-2
vehicle carries the AT-5 ATGW, which has the
capability to penetrate up to 600mm of armour
with its heat warhead.
90
Page 90

BRDM-2 4-Wheeled Armoured Car
The BRDM-2 boasts better performance than the
BRDM-1, heavier armament, an NBC system,
and night vision equipment. This vehicle entered
service in 1966.
2K22M TUNGUSKA-M Air Defense Vehicle
The replacement for the ZSU-23/4 Shilka was
first observed in 1986. It has a computerised fire
control system with a laser range finder and
radar. The cannon are effective out to 3,000m,
and the missiles out to 8km.
ZSU-23/4 Shilka Air Defense Vehicle
The ZSU 23-4 Shilka first entered service in
1965. This anti-aircraft system uses radar for
tracking and aiming of its weapon system.
2S19 MSTA-S SPG SP 155mm Gun
First seen in 1990, this artillery platform uses the
chassis of a T-80 tank. The weapon system has a
range of 24,700m, and with extended range
projectiles it can reach 40,000m. With the autoloader, the 2S19 can fire eight rounds a minute.
91
Page 91

FROG Launcher Large Ballistic Missile Launch
Vehicle
The FROG-7 (Free Rocket Over Ground) system
is designed to engage targets in the enemy’s rear
and normally operates at ranges from 8 to 18km
behind the front lines.
BM9A52 Smerch MLRS Multiple Launch
Rocket System
The RUSSIAN FEDERATION equivalent of
America’s MLRS, the Smerch (Sandstorm) can
launch its 12 missiles in 38 to 40 seconds.
The range of the missiles or rockets is from
20,000 to 70,000m.
9K35M3 Strela-10M3 Self Propelled SAM
Launcher
First seen in the 1970s, the SA-13 Gopher is
based on the MTLB chassis. The missile has an
engagement range of 800-5,000m at altitudes
from 10-4,000m.
9K331 TOR-M1 Self Propelled SAM Launcher
The SA-15 system provides air defense at ranges
less than 12,000m and altitudes less than
6,000m. Developed during the 1980s, this
system can track and lock onto the 10 most
dangerous targets simultaneously.
92
Page 92

APPENDIX: GUIDE TO ACRONYMS
AA Anti-Aircraft or Assembly Area
AAA Anti-Aircraft Artillery
AAM Air to Air Missile
AOR Area Of Operations
APHE Armour Piercing High Explosive
ASB Alternate Sensor Bearing
ATGM Anti-Tank Guided Missile
AVI Avionics
BP Battle Position
CASREP Casualty Report
CO CMDR Company Commander
CP Checkpoint
CP/G Co-Pilot/Gunner
DPICM Dual Purpose Improved Conventional Munitions
DRV TRN Drive Train
FCR Fire Control Radar
FFAR Folding Fin Aerial Rocket
FOV Field Of View
FRAGO Fragmentary Order
FROG Free Rocket Over Ground
HE High Explosive
HEAPI High Explosive Armour Piercing Incendiary
HEDP High Explosive Dual Purpose
HEISAP High Explosive, Incendiary, Semi-Armour Piercing
HIDAS Helicopter Integrated Defensive Aids System
HUD Heads Up Display
HYD Hydraulic System
IFV Infantry Fighting Vehicles
IHADSS Integrated Helmet And Display Sight System
IR Infrared
IRFF Infra-Red Fire and Forget
JAMR Countermeasures and Jamming system
L ENG Left Engine
LASE Target must be designated by laser at this time.
LOAL Lock On After Launch
LOBL Lock On Before Launch
LOBL FCR Lock On Before Launch - Fire Control Radar
93
Page 93

LOS Line Of Sight
LZ Landing Zone
MLRS Multiple Launch Rocket System
MFD Multi-Function Display
MFDs See MFD
MPSM Multi-Purpose Sub-Munition
MSL LNCH Missile Launch
NOE Nap Of the Earth
OPWIRE Optical Wire Guided
ORT Optical Relay Tube
PA Patrol Area
PLT LDR Platoon Leader
PNVS Pilot’s Night Vision System
R ENG Right Engine
RTB Return To Base
R/IR-CM-SET See JAMR
RA Reactive Armour
RAWS Radar Advance Warning System
RF Russian Federation
RKTS Rockets
ROC Rate Of Climb
RP Recon Point
SAM Surface to Air Missile
SAPHEI Semi Armour Piercing High Explosive Incendiary
SEAD Suppression of Enemy Air Defense
SPOTREP Spotting Report
SRBM Short Range Ballistic Missile
TADS Target Acquisition and Designation System
TD Target Designator
TGT Turbine Gas Temperature
TOF Time Of Flight
TOT Time On Target
TOW Tube launched Optical Wire guidance
TRANS Transmission
TRP Target Reference Point
VT Variable Time Fused
WAYPT Waypoint
WPNS Weapons
94
Page 94

TECHNICAL SUPPORT
For technical support, the Infogrames United Kingdom Helpline is open to telephone
calls from 10:00 to 19:00 Monday to Friday (except Bank Holidays):
Technical Helpline Infogrames UK
21 Castle Street - Castlefield
Manchester
M3 4SW
ENGLAND
Tel: 0161 827 8060/1
E-mail: helpline@uk.infogrames.com
For further information visit the official web sites :
http://www.uk.infogrames.com
http://www.infogrames.com
INFOGRAMES END USER LICENSE AGREEMENT
PLEASE READ CAREFULLY. BY USING THIS SOFTWARE, YOU ARE AGREEING TO BE
BOUND BY THE TERMS OF THIS LICENSE. IF YOU DO NOT AGREE TO THESE TERMS,
PROMTLY RETURN THE PRODUCT IN ITS PACKAGING TO THE PLACE WHERE YOU
OBTAINED IT.
95
Page 95

GRANT OF LICENCE:
INFOGRAMES (hereinafter "the Licensor") grants you a non-exclusive licence to use this
disc and any accompanying documentation (hereinafter collectively known as 'the
Software')subject to your acceptance of the following provisions.
USE:
You are permitted to use the Software in machine–readable only on a single computer,
except that the multi-player executable file may be installed on more than one computer
solely for the purposes of enabling multi-player play in accordance with the Software’s
documentation. You may copy the Software only to install it on a single computer and for
backup purposes in support of your use of the Software, except that the multi-player
executable file may be copied for the purposes of enabling multi-player play in accordance
with the Software’s documentation. If you copy the Software you must reproduce all
copyright and other proprietary notices that are on the original copy of the Software.
RESTRICTIONS:
You may not use, copy, modify or transfer the Software, or any copy thereof, in whole
or in part, except as expressly provided for in this Agreement. Any attempt to transfer
any of the rights, duties or obligations hereunder is void. You may not rent, lease, loan,
resell for profit or distribute the Software, or any part hereof. You may not reverse
engineer, disassemble, decompile or translate the Software or otherwise attempt to
derive the source code of the Software except to the extent that reverse engineering
cannot be contractually restricted.
NO WARRANTY:
THE SOFTWARE IS LICENSED TO YOU ON AN "AS IS" BASIS, AND THE LICENSOR
(INCLUDING ITS SUB-CONTRACTORS, SUPPLIERS AND/OR RESELLERS) MAKES NO
EXPRESS OR IMPLIED WARRANTIES OF ANY KIND, INCLUDING WITHOUT
LIMITATION, THE IMPLIED WARRANTIES OF MERCHANTABILITY, FITNESS FOR A
PARTICULAR PURPOSE, SUITABILITY FOR PURPOSE, SATISFACTORY QUALITY AND
THEIR EQUIVALENTS UNDER THE LAWS OF ANY JURISDICTION AND YOU ACCESS
THE SOFTWARE ENTIRELY AT YOUR OWN RISK AND OF YOUR OWN VOLITION. THE
DISCLAIMER OF WARRANTY REFERRED TO ABOVE CONSTITUTES AN ESSENTIAL
PART OF THIS AGREEMENT AND ANY AND ALL USE OF THE SOFTWARE HEREUNDER
IS ONLY AUTHORISED SUBJECT TO YOUR ACCEPTANCE OF THE PROVISIONS
RELATING TO 'NO WARRANTY' AS DETAILED ABOVE. THIS CLAUSE DOES NOT
EFFECT YOUR STATUTORY RIGTHS AS A CONSUMER.
96
Page 96

TITLE:
Title, ownership rights, and intellectual property rights in the Software shall remain with
the Licensor. The Software is protected by copyright and other intellectual property
laws and by international treaties. Title and related rights in the content accessed
through the Software is the property of the applicable content owner and is protected
by applicable law. The license granted under this Agreement gives you no rights to
such content.
TERMINATION:
This Agreement and the licence granted hereunder will terminate automatically if you
fail to comply with the provisions contained herein. Upon termination, you must
destroy any and all copies of the Software and any related documentation.
LIMITATION OF LIABILITY:
IN NO CIRCUMSTANCES SHALL THE LICENSOR (INCLUDING ITS SUB-CONTRACTORS,
SUPPLIERS AND/OR RESELLERS) BE LIABLE TO YOU OR ANY OTHER PERSON FOR
ANY INDIRECT, SPECIAL, INCIDENTAL, OR CONSEQUENTIAL DAMAGES (WHETHER
FORESEEABLE OR NOT) NOR FOR DAMAGES FOR LOSS OF BUSINESS, LOSS OF
PROFITS, LOSS OF CONTRACTS OR ANTICIPATED SAVINGS, LOSS OF GOODWILL,
WORK STOPPAGE, COMPUTER FAILURE OR MALFUNCTION (WHETHER FORESEEABLE
OR NOT) IN CONTRACT, TORT (INCLUDING NEGLIGENCE), BREACH OF STATUTORY
DUTY, PRODUCT LIABILITY OR OTHERWISE ARISING FROM OR IN ANY WAY
CONNECTED WITH THE USE OF THE SOFTWARE OR THIS AGREEMENT AS SHALL
APPLY HAVING REGARD TO THE LAWS OF APPLICABLE JURISDICTIONS. IN NO EVENT
WILL THE LICENSOR BE LIABLE FOR ANY DAMAGES IN EXCESS OF THE AMOUNT
LICENSOR RECEIVED FROM YOU FOR A LICENCE TO THE SOFTWARE, EVEN IF THE
LICENSOR SHALL HAVE BEEN INFORMED OF THE POSSIBILITY OF SUCH DAMAGES.
YOUR STATUTORY RIGHTS AS A CONSUMER ARE NOT EFFECTED BY THIS PROVISION.
NON-ASSIGNMENT:
For the avoidance of any doubt, nothing in this Agreement shall entitle you to in any
way assign or transfer any or all of the rights granted to you in accordance with the
provisions of this Agreement to any third party.
GENERAL:
This Agreement represents the complete agreement concerning the licence granted
hereunder and may be amended only by a writing executed by both parties. Any action
related to this Agreement will be governed by English law. If any provision of this
Agreement is held to be unenforceable, that provision will be removed and the
remaining provisions will remain in full force.
97
Page 97

CREDITS
Development Team
Executive Producer Scott Spanburg
Producers Chris Bowling
Tim Goodlett
Designers Tim Goodlett
Warren Capps
Lead Programmer Scott Spanburg
Lead Artist Mike Bates
Programmers Brandon Gamblin
Nathan Mefford
Michael Braley
Rob Knopf
Artists Mathew Bell
Evan Brown
Rob Cloutier
Erik Ehoff
Joe Morel
Sam Laskowski
Betsy Kirk
David Austin
Music Roland J. Rizzo
Sound FX Mark G. Reis
Voice Talent Marc Biagi
Rick Bowman
Ryan Drummond
Mike Keeney
Gary Kohler
Debra Matthews
Lani Minella
Dave Rivas
Doug Terry
Tom Zahorik
Lance Baldwin
Manuals Tom Basham
Tim Goodlet
98
Page 98

© 2000 copyright Infogrames Interactive, Inc.
 Loading...