

Page 1

Page 2

© 2006 ArenaNet, Inc. and NC Interactive, Inc. All rights reserved. NCsoft, the interlocking
NC logo, ArenaNet, Guild Wars, Guild Wars Factions, and all associated logos and designs
are trademarks or registered trademarks of NCsoft Corporation. All other trademarks are
the property of their respective owners.
Photosensitive Seizures
SEIZURE WARNING – Please Read Prior to Playing
A very small percentage of individuals may experience seizures when exposed to certain
light patterns, ashing lights, or ashing images. Children and teenagers are more susceptible to seizure than adults, but even those with no history of seizure or epilepsy could
experience them while playing or watching video games.
Symptoms of seizures include: lightheadedness, altered vision, jerking or shaking of the
extremities, loss of awareness, confusion, twitching or full convulsions. Convulsions can
lead to other injuries by causing an individual to fall off of a chair and/or strike objects
nearby.
If you or anyone in your family has an epileptic condition or history of seizures, consult
your physician prior to playing this game – you could have an undiagnosed condition.
If you experience any of the aforementioned symptoms of a seizure while playing STOP
PLAYING AND CONSULT YOUR DOCTOR IMMEDIATELY. Parents should ensure their
children are not experience symptoms.
In order to reduce the risk of photosensitive epileptic seizures, you should play NC
Interactive games in a well-lit room while you are alert and awake. Avoid poorly-lit rooms
and playing when fatigued.
2
3
Page 3
4
5
CONTENTS
About These Manuscripts .................................................................6
A Word from Master Togo of Shing Jea Monastery
Book I:
Empire of the Dragon ..............................................................................8
Chapter 1:
Canthan Culture ................................................................................9
The Emperor’s Court
The Celestial Ministry
The Vassal Factions
The Gods in Cantha
The Canthan Calendar
..................................................................10
.................................................................10
.....................................................................12
....................................................................18
.................................................................22
Chapter 2:
Allies .................................................................................................27
Chapter 3:
Enemies .............................................................................................41
Book II:
Heroes of Cantha .....................................................................................48
Chapter 1:
The Hero’s Path .................................................................................49
Interesting Times
Creating Your Character
Attributes .....................................................................................51
Leveling Up
Chapter 2:
The Eight Professions .......................................................................55
Make Your Choice
Assassin.......................................................................................58
Ritualist .......................................................................................60
Warrior ........................................................................................62
Elementalist .................................................................................64
Monk ...........................................................................................66
Ranger .........................................................................................68
Mesmer .......................................................................................70
Necromancer ...............................................................................72
.........................................................................50
..............................................................50
................................................................................53
......................................................................56
.........................7
Skills .................................................................................................74
Secondary Professions
................................................................75
Chapter 3:
Exploring Cantha ..............................................................................77
It’s 1582 CC. Do You Know Where Your Character Is?
Getting Around
Mini-Map ....................................................................................79
District Menu
Map Travel
Towns and Landscapes
............................................................................78
..............................................................................81
..................................................................................81
................................................................84
.............78
Chapter 4:
Adventuring ......................................................................................91
The Good Fight
Come Equipped
Your Inventory
Loot and Treasure
The Skill Bar
Staying Alive
Missions and Quests
Meeting the Challenge
Guilds ..........................................................................................108
Alliances .....................................................................................109
...........................................................................92
...........................................................................92
............................................................................92
.......................................................................97
...............................................................................98
...............................................................................100
...................................................................103
................................................................106
Chapter 5:
Player vs. Player ................................................................................111
Playing PvP
Creating a PvP Character
PvP Combat
Tournament Play
Tournaments: Common Factors
Tournaments: Variable Factors
Tournament Battles
Observer Mode
.................................................................................112
............................................................113
.................................................................................114
.........................................................................116
..................................................116
....................................................116
.....................................................................116
............................................................................120
Credits: ...........................................................................................122
Page 4

6
7
AbOuT ThESE MANuSCripTS
These texts comprise a selection of documents found in the vast
libraries of Imperial Cantha. The Empire of the Dragon holds sway
over the Canthan continent to the south of Tyria, and has a rich and
unique history that these manuscripts can only begin to describe. For
further secrets and a deeper understanding of Cantha, along with indepth looks at the adventures you will have in this strange land of
jade seas and petried forests, investigate the Guild Wars Factions
Guidebook, on sale separately.
On the following pages you will receive a personal welcome from
Master Togo of Shing Jea Monastery which leads into Book I: Empire
of the Dragon. This section contains a summary of Canthan history,
along with an overview of the events that transpired in the year 872
BE by Tyrian reckoning. The death of the 27
a massive, sometimes tragic impact on the next 200 years. These
manuscripts tell the tale of the Betrayer, Shiro Tagachi, his defeat at the
hands of the Luxon and Kurzick champions, and how Canthan culture
survived. You will also learn about important players on the current
scene—including Master Togo—as well as an overview of politics,
religion, economics, and society in Cantha. Finally, you will get a look
at some of the foes you will face in your adventures.
Book II: Heroes of Cantha contains all you need to know to begin the
life of a hero in Cantha, along with a few pointers for visitors from the
northern Tyrian continent. Here you will learn in detail how to play
Guild Wars Factions and learn the basics of survival and success in
the Empire of the Dragon. For pointers on gameplay and your direct
interaction with the in-game world, head to this section.
For instructions on installing
please see the printed insert that came with your copy of the game.
Guild Wars Factions on your computer,
th
Canthan emperor had
A WOrd frOM MASTEr TOgO
Of ShiNg JEA MONASTEry
I bid you welcome to Cantha, my students. You are ready to study the
professions of the hero, including two ancient disciplines unique to the
Empire of the Dragon. You could summon Spirits from beyond with
the magic of the Ritualist, or strike down the most dreaded adversaries
with the swift, silent techniques of the deadly Assassin. You may
grow into a mighty Warrior, or embrace the path of the powerful
Elementalist. The methods of the manipulative Mesmer may prove
to be your destiny, though the holy strength of the Monk could be
the school that calls to your soul. Perhaps you will bring the dead to
defend Cantha as a Necromancer, or take on the mantle of Ranger and
strike at your enemies with bow, trap, and beast.
Study the faces of your enemies and meet them with force should you
encounter them on the Shing Jea countryside, the streets of Kaineng
City, the calcied Echovald Forest, or the glittering Jade Sea. Master
your professions and choose your allies wisely. When the time comes
to take up arms, you’ll have nary a moment to react. There will be
little opportunity for idle contemplation, for soon you must step out
into a greater world. When that moment comes you must be ready to
kill those who would do the same to you. You must be prepared to help
those in need and seek alliances with those who may appear more foe
than friend.
Foul things are afoot in Cantha, and they hope to strike at the very heart
of what we are. This evil wishes to erase our kind and rule a kingdom
of misery. We will not allow this. We will defend this kingdom with
the will of the gods and the strength of our ancestors. Attend to your
training and master your abilities, for you hold the fate of the Empire
of the Dragon in your hands.
—Master Togo
Page 5

Book I:
Canthan
Culture
E
MPIR
OF THE
E
DRAGON
8
Page 6
10
11
ThE EMpErOr’S COurT
Many nobles make up the bulk of the emperor’s court—trusted
advisors, sycophantic yes-men, and in a few cases outright spies for
the Kurzicks or Luxons. (These spies do not realize the emperor knows
full well of their existence and uses them to control what information
reaches these vassal cultures from the court of Emperor Kisu.) The
court is distinct from the ofces of the Celestial Ministry, in that its
members are literally in the emperor’s presence for much of the day.
The court is also where one will nd the personal representatives of
the Emperor Kisu, who act on his behalf in a number of arenas, both
political and military. The Emperor’s Blade is the ruler’s able right
hand, a deadly master of swordsmanship. The Emperor’s Voice speaks
the Canthan monarch’s words. The Emperor’s Hand does Kisu’s
bidding in cases where violence may not be needed, but words will
not be enough.
ThE CElESTiAl MiNiSTry
The vast Empire of the Dragon contains hundreds of thousands of
people. Many are human; some on the fringes of humanity, but Emperor
Kisu rules all. Yet one man, even an Ascendant Emperor, cannot see
to all of the concerns and laws governing so many. To keep Cantha
running effectively, a bureaucracy is and always has been key. This
bureaucracy—known collectively as the Celestial Ministry—has grown
in size and power over the years, though not necessarily in efciency.
Emperor Kisu knows that the bureaucracy is too large, and in places
too corrupt, but even the sovereign ruler of Cantha can only do so
much to stem the tide of a growing bureaucratic class in Kaineng City.
The Celestial Ministry is divided into four smaller Ministries, each one
devoted to a different aspect of Cantha’s imperial government. These
ministries, each named after one of the four major elements, have been
created over several hundred years to (ostensibly) meet certain needs
that the Celestial Ministry could not handle. Their elemental names—
Fire, Earth, Air, and Water—are traditionally tied to specic (and
largely mythical) powers. The most visible function of all Ministries
is tax collection, which makes them even more unpopular among
the masses. Most Canthan citizens love their emperor, but hate the
bureaucracy that runs his empire.
Ministry of Flame
The Ministry of Flame is the oldest of the four smaller organizations
within the Celestial Ministry. The Ministry of Flame controls law
enforcement and justice; convicted criminals may be incinerated.
Mythical Power: Control over the sunrise and sunset.
Ministry of Earth
The Ministry of Earth is synonymous with paperwork; record keeping,
building projects, accounting, and more fall under this ministry’s
purview. The Ministry of Earth is infamous for beginning public
projects that never seem to get nished, but prove protable to the
friends and allies of the ministry.
Mythical Power: Control over the bounties of the land—animal,
vegetable, and mineral.
Ministry of Water
This ministry controls the city’s water supply, irrigation, and the shing
industry, as well as sharing direct control of Cantha’s harbors with the
Ministry of Wind (an eternal bone of contention).
Mythical Power: Controls rainfall as well as the moon’s rise and
set.
Ministry of Wind
The Ministry of Wind oversees all trade and shipping that relies on the
wind—over land or across the sea. Ship captains pay taxes that (the
ministry claims) make the winds blow in the desired direction. The
Ministry of Wind shares control of Cantha’s ports with the Ministry
of Water.
Mythical Power: Controls the winds and storms.
Page 7
12
13
ThE VASSAl fACTiONS
The Luxons, like their sworn enemies the Kurzicks, have long been
“vassals” of Cantha—politically and economically absorbed by the
empire long ago, but allowed to maintain distinct cultures and ways
of life. All Luxons are united in their distrust of the Kurzicks, their
frequent competitors for power and territory, and vice versa. But there
was a time when the two vassal cultures were at peace. That peace was
shattered when Shiro Tagachi killed the 27
Though the Luxon and Kurzick champions slew Shiro and avenged
the emperor’s death, they died along with thousands of others when
the Jade Wind washed over the land. The Luxons and Kurzicks have
been at odds ever since.
th
emperor 200 years earlier.
The Luxons of the Jade Sea
For a scant few seconds the storm that followed Shiro’s death wail
roiled the sea, spawning waves that reached hundreds of feet into the
air. An instant later, everything was frozen in place, but not because
of a sudden cold front—the sea was not turned to ice. It had become
solid jade. In order to survive, the Luxons had to adapt to a literally
landlocked lifestyle, unable to transport goods to market or even sail
to the nearby islands for fresh water. Their merchant ships had become
one with the petried ocean, and the currents that took them to farung lands were now still as glass.
The traditionally seafaring Luxons became nomads sailing on a lifeless
sea. They contrived ways to adapt their giant ships to the jade waves.
They now carry out extensive jade mining operations on the frozen
sea, uncovering magical oddities and precious resources made up of
the petried life embedded in the unmoving waves.
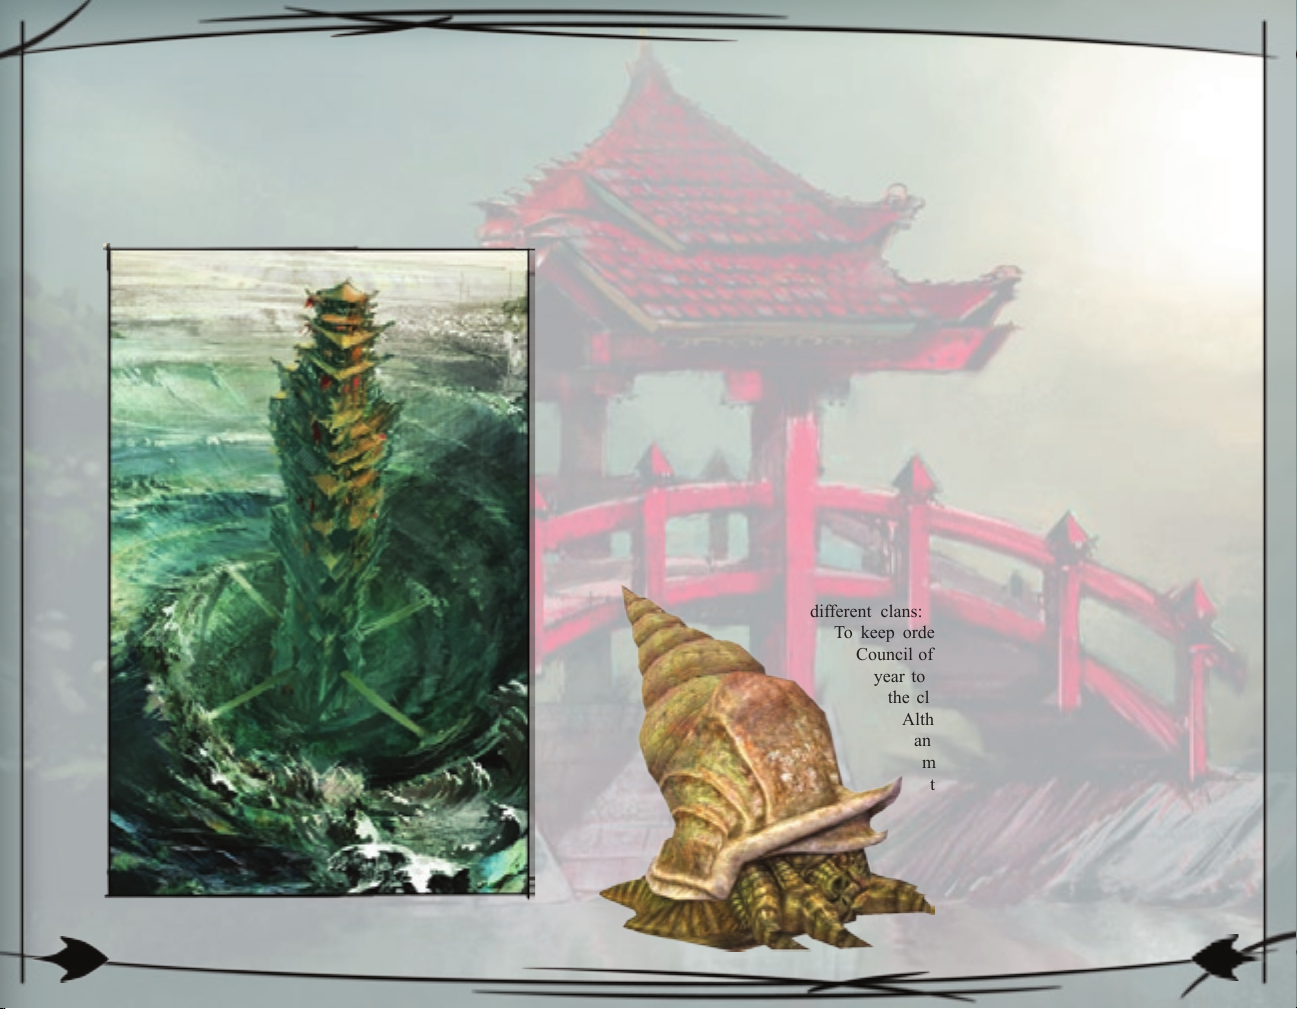
Today, the Luxons have grouped themselves into three
different clans: the Serpent, the Turtle, and the Crab.
To keep order, the Luxons invest authority in their
Council of Elders, the ruling body that meets each
year to modify and approve the “code” that all
the clans will follow for the next 12 months.
Although the clans often battle against one
another, this is less about warfare and
more about demonstrating which clan is
the strongest and most powerful. These
battles are usually fought by each clan’s
champion, along with that champion’s
elite guard. No matter how much the
clans may disagree, they all come
together when the Kurzicks need to be
taught a lesson.
Page 8
14
15
The Kurzicks of Echovald Forest
When the Jade Wind swept through the branches of Echovald Forest,
it turned everything to stone. Birds crashed to the forest oor in midight. Deer leaped from the ground as esh and blood, and came to
earth little more than life-like statues. Now, two centuries later, life
has cautiously returned. The Kurzicks were the rst to venture back to
the forest. There they have adapted to their petried surroundings and
have begun to carve their culture into this new landscape.
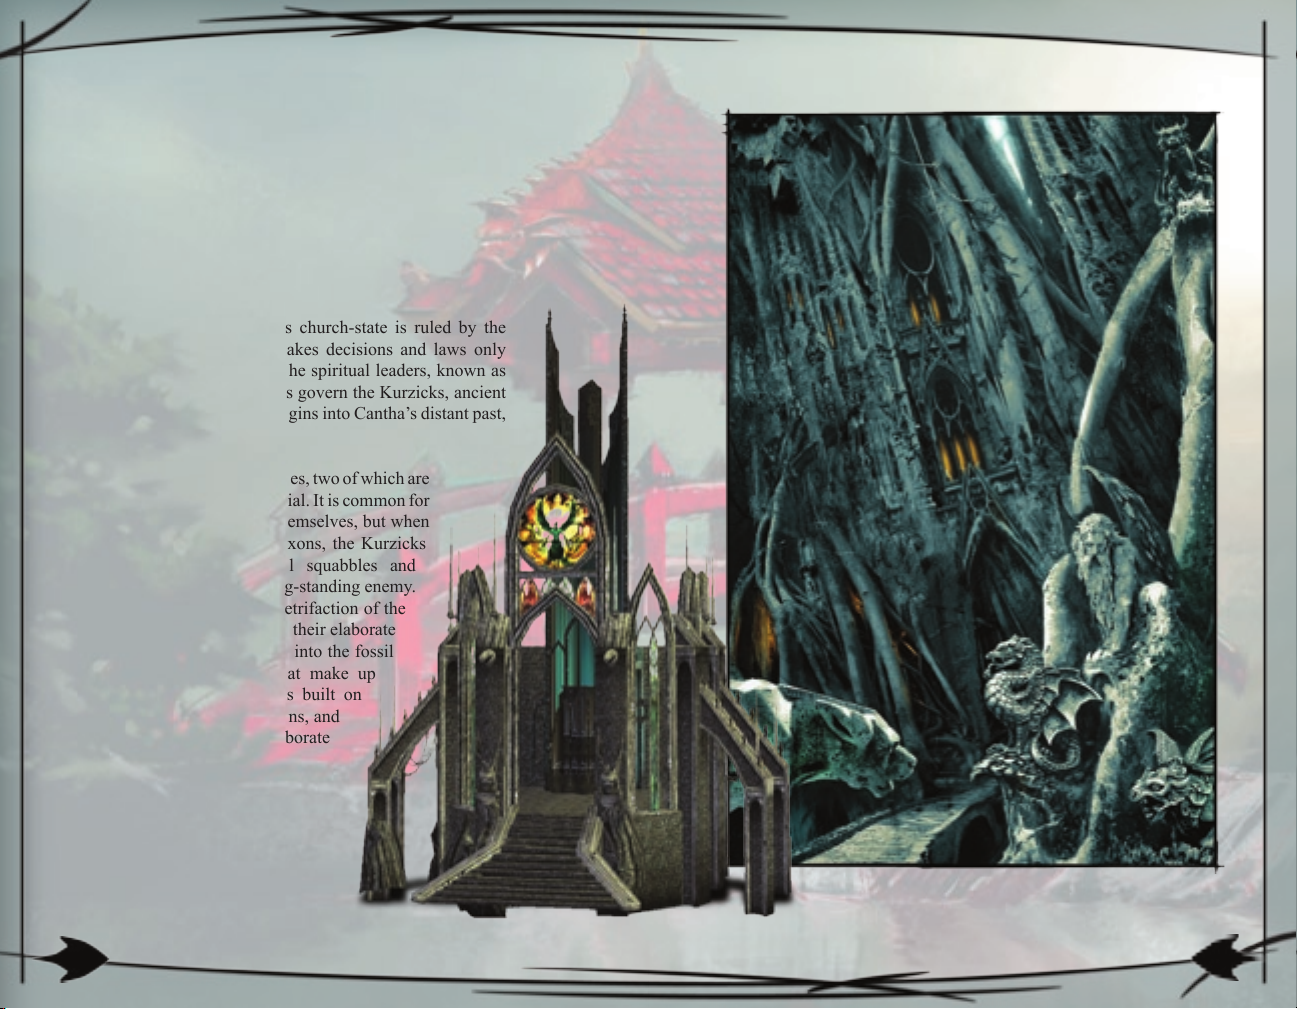
To the devout Kurzicks, everything is a sign; a portent of what
is to come. They nd a divine message and meaning in
everything they witness. This church-state is ruled by the
Council of Nobles, which makes decisions and laws only
after receiving counsel from the spiritual leaders, known as
the Redemptors. Great Houses govern the Kurzicks, ancient
families that can trace their origins into Cantha’s distant past,
and beyond.
Today there are ve main Houses, two of which are
the most powerful and inuential. It is common for
the Houses to argue among themselves, but when
it comes time to ght the Luxons, the Kurzicks
quickly forget their internal squabbles and
focus their hatred on their long-standing enemy.
Since Shiro’s death and the petrifaction of the
forest, the Kurzicks have built their elaborate
homes and cathedrals directly into the fossil
trunks of enormous trees that make up
the forest. Kurzick culture is built on
ceremony, rituals, and traditions, and
this is reected in their elaborate
architecture and art.
Page 9

16
17
The Tengu of Cantha
Tengu are a unique species of avian humanoids found in both Tyria and
Cantha. Females are generally larger than males of the species, though
their plumage is plainer, even drab. Tengu lost the ability of ight some
time in the distant past, but can use their almost human hands to wield
all manner of weapons—when they want to. Their talons make most
weapons superuous. Tengu hate cooked food, and most live on a diet
of fresh, raw meat.
The Angchu Tengu of Cantha have long been cut off from their
kinfolk to the north—though Canthan merchants travel frequently
to Tyria, few take along Tengu passengers. The Angchu are one of
two Tengu tribes found in Cantha, and are the more peaceful of the
two. (The more primitive and warlike Sensali Tengu will attack any
humans—and any Angchu Tengu—on sight.) The Angchu have
found ways to live with the humans that nominally control their
land, while the Sensali prefer a nomadic life. The Angchu Tengu
have learned much more articulate ways to communicate, and for the
most part remain at peace with their human neighbors. The Angchu
reserve most of their hatred and aggression for the Yeti people of the
mountains, their sworn enemies since the days before Cantha even
existed as a unied nation. The Canthans tolerate the Angchu Tengu,
but few view them as equal with humans.
The largest Angchu settlement is known as Aerie in the common
language (which supplanted ancient Canthan long ago, even on the
southern continent). Both Tengu tribes have many names for the
place, but refer to it as Aerie when speaking to outsiders. Aerie is
ruled by Merlin Featherstone, a wise, gruff, but generally respected
old Tengu who acts as the settlement’s mayor, sheriff, judge, and
(if necessary) executioner. Most Canthans attribute the ongoing
peace between Aerie and the humans of Cantha to Featherstone’s
leadership. But even Merlin Featherstone cannot be held responsible
if a foolish human tries to venture into Aerie (or any other Tengu
village) during the lean months of winter. During that season, when
fresh meat is scarce, the Angchu Tengu can become as hostile and
territorial as their Sensali cousins.
Page 10
18
19
ThE gOdS iN CANThA
The Tyrian gods are worshipped throughout the world, including
distant Imperial Cantha. The worship and perception of the gods within
the Empire of the Dragon has taken on a uniquely Canthan cast, and
the ve greater gods of the pantheon share the Canthan heavens with
an assortment of lesser demigods comprised of eternal ancestor spirits
and legendary heroes granted divine status by the diverse inhabitants
of the realm.
Among the two most populous and distinct vassal cultures in the
Empire, the Kurzicks practice a particularly devout and pious form
of worship tied to the great Kurzick Houses. The Luxons, on the other
hand, believe not only in the ve greater gods of the Tyrian pantheon,
but also three demigoddesses—the three queens Alua, Elora, and
Ione.
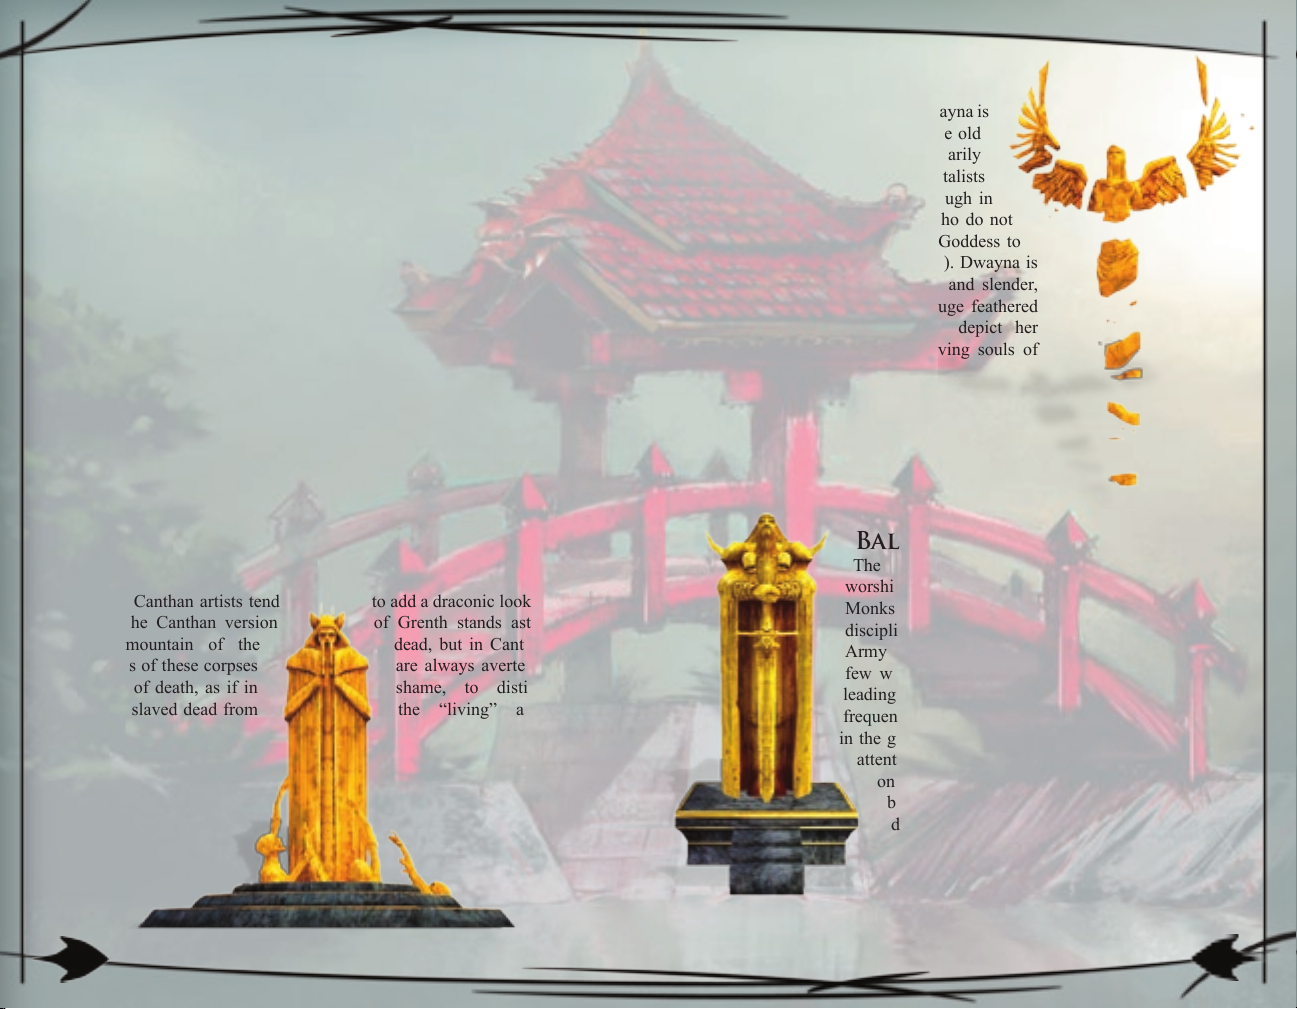
Dwayna
The goddess of life and air, Dwayna is
the even-tempered leader of the old
gods. Her followers are primarily
healing Monks and Elementalists
specializing in Air Magic (though in
times of war, there are few who do not
send a prayer to the Winged Goddess to
spare them or their loved ones). Dwayna is
often depicted as young, tall, and slender,
rising above the ground on huge feathered
wings. Canthan artists often depict her
oating above the vibrant, living souls of
their eternal ancestors.
Grenth
Necromancers learn early that the way to true power is by bowing
down at the foot of the god of death and ice to pledge total, undying
allegiance. The Assassins of Cantha pay homage to Grenth, and rarely
take on a job unless a priest of Grenth places a blessing upon the task.
Ritualists, who speak to and control the darker forces of the underworld,
also draw strength from Grenth’s teachings. Statues of Grenth depict
the god with the body of a man and the narrow, skeletal head of
a beast; Canthan artists tend to add a draconic look to the
skull. The Canthan version of Grenth stands astride a
small mountain of the dead, but in Canthan art
the faces of these corpses are always averted from
the god of death, as if in shame, to distinguish
these enslaved dead from the “living” ancestor
spirits.
Balthazar
The god of war and re, Balthazar is often
worshipped by Warriors and Elementalists, though
Monks devoted to the Protection or Smiting
disciplines can also be found among his devotees.
Army commanders and guild lords will often say a
few words to the Bastion of Martial Glory before
leading their followers into battle. Balthazar is
frequently shown holding a greatsword, its tip lodged
in the ground, with a pair of battle hounds sitting at
attention at his feet. In Cantha, the sword is usually
one of the single-edged imperial style, and the
battle hounds are usually replaced with winged
drakes.
Page 11
20
21
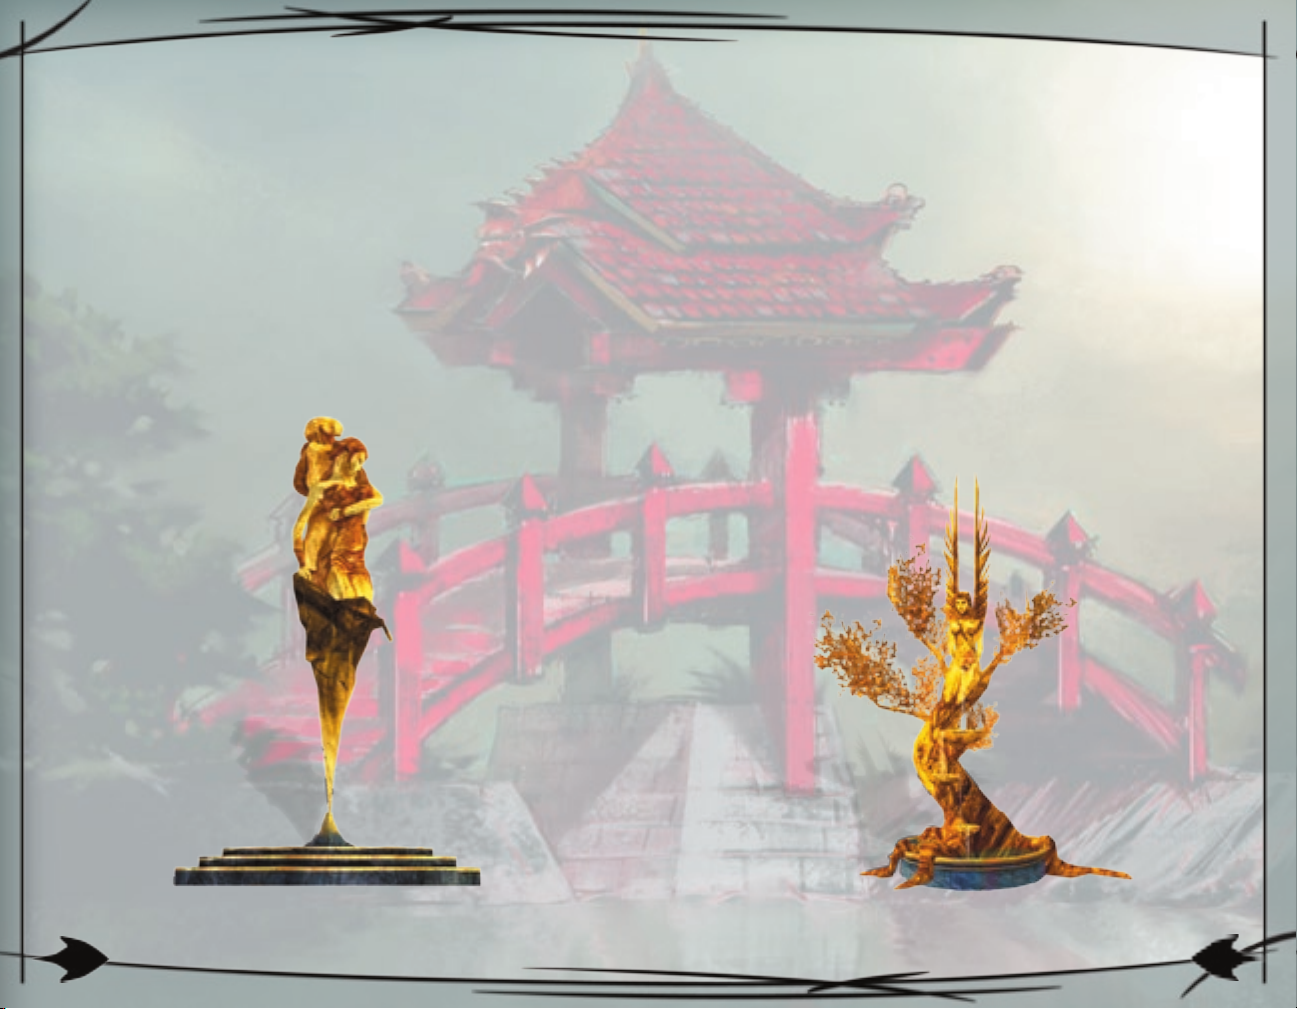
Lyssa
Twin goddesses of beauty and illusion forming a paradoxically singular
entity, Lyssa is the patron god of the Mesmer profession in the northern
Tyrian continent. In Cantha she also represents the incarnation of luck,
both good and bad. Many Canthan Assassins revere Lyssa more for
her intrinsic duality than her famous beauty and have been known to
invoke her charms. Depictions of Lyssa in Canthan culture reect the
typical northern style: lithe twin gures of exquisite beauty entwined in
an eternal dance.
Melandru
Many Canthans, especially the suspicious Luxons and the warlike
Kurzicks, believe that the goddess of earth and nature has abandoned
the empire. They believe that not even Melandru could have withstood
Shiro Tagachi’s literally petrifying death cry. But Melandru’s devoted
followers—the Rangers, Earth Elementalists, and many cultist sects—
know that this is merely a misunderstanding of what the goddess truly
represents. They know that the goddess endures within the crystalline
shell of the once-thriving Canthan landscape. Melandru is frequently
depicted in both Cantha and Tyria as a tall, winged dryad from the
waist up. But whereas northerners see a creature whose lower half
grows naturally into a living tree, Canthan artists usually describe a
severe gure ensconced in an outcrop of Echovald quartz. Melandru’s
roadside temples offer shelter, food, and water to weary travelers even
in Cantha, though such shrines are few, and separated by long stretches
of lifeless stonescape.
Page 12

22
23
ThE CANThAN CAlENdAr
The Canthan Empire uses its own dating system for strictly internal
and local affairs. When dealing with outsiders such as the Tyrians of
the northern kingdoms, most Canthans can easily convert from the
mathematically sound Canthan calendar to the more commonly used
Mouvelian dating system. The Mouvelian calendar begins counting
years from the moment the gods left Tyria, an event known as the
Exodus; years are labeled BE (Before the Exodus) or AE (After the
Exodus). In Cantha, the years are counted from the date the clans
unied into the Empire of the Dragon under Lord Emperor Kaineng
Tah: the year 510 BE according to the Mouvelian calendar. The years
before this date are not considered important enough to number, and
are simply referred to as the early, middle, or late pre-imperial era.
Mouvelian Seasons Canthan Months
Season of the Zephyr (Air aligned) days 1-90
Season of the Phoenix (Fire aligned) days 91-180
Season of the Scion (Water aligned) days 181-270
Changhai
Zhoyo
Nongkam
Zalfawn
Saita
Mikan
Nemnai
Beibacah
Suzhen
Season of the Colossus (Earth aligned) days 271-360
Yundinfang
Songtahn
Kainengtah
Months and Seasons
Unlike the Mouvelian calendar, which divides the 360-day year into
four seasons aligned with the elements, the Canthan calendar—also
360 days—is broken into 12 months of 30 days each. Each month once
aligned perfectly with the cycles of the moon, but over time the two
cycles have diverged. Today, the new moon usually appears roughly
halfway through any given Canthan month.
Most months of the Canthan calendar have names whose origins are lost
to history and predate the empire by centuries. Only two—Changhai
and Kainengtah—have relatively recent origins. These months, which
bookend the Canthan year, are named for the two most celebrated
emperors in Canthan history: Kaineng Tah, the Lord Emperor who
united the Canthan clans; and Chang Hai, a prince who followed
the path of the hero and became Ascendant before taking the throne.
Chang Hai became the rst of many such “Ascendant Emperors.”
Page 13

24
25
uNifiEd TiMEliNE
Note that “CC” (for “Canthan Calendar”) is only used in
Tyria and other non-Canthan cultures. In Cantha, the year 1
CC is simply the year 1.
Canthan
Calendar
1582 CC 1072 AE
1581 CC 1071 AE
1580 CC 1070 AE End of the Guild Wars.
1568 CC 1058 AE
1527 CC 1017 AE
1523 CC 1013 AE The rst Guild Wars begin.
1450 CC 940 AE Cantha’s embassy formally closed in Ascalon City.
1412 CC 902 AE
1382 CC 872 AE
731 CC 221 AE Cantha begins trading with Tyria.
684 CC 174 AE Serpents leave the world of men.
511 CC 1 AE
Mouvelian
Calendar
Signicant Events
Present day. Master Togo summons Mhenlo to the Shing Jea
Monastery.
Resurgent trade between Cantha and the devastated Tyrian kingdoms formalized in the Second Treaty of Lion’s Arch. Bay of Sirens
renamed Sea of Sorrows after upswing in shipwrecks.
Kintah dies and is succeeded by his son Kisu, who becomes the
31st Canthan emperor.
The Luxons and Kurzicks of Cantha end formal diplomatic contact,
communicating with each other only when required (and almost
always through ofcial liaisons of the Celestial Ministry).
Long-standing trade agreements between the Tyrian kingdoms and
the Canthan Empire dissolved by imperial decree.
Shiro Tagachi slain in the Harvest Temple of Cantha after killing
Emperor Angsiyan. The bloodline is unbroken when his son Hanjai
(Kisu’s great-great grandfather) ascends to the throne.
Prince Chang Hai, a Warrior Monk, becomes rst Ascendant
emperor of Cantha.
Canthan
Calendar
510 CC Year 0 The gods leave Tyria.
509 CC 1 BE Gods give magic to the races of Tyria.
410 CC 100 BE
305 CC 205 BE Humans appear on the northern continent.
51 CC 459 BE Kurzicks declare independence from Cantha, become vassal clan.
48 CC 462 BE Luxons formally secede from the Empire, become vassal clan.
46 CC 464 BE Lord Emperor Kaineng Tah dies under mysterious circumstances.
0 CC 510 BE
Late Pre-Imperial Era
Middle
Pre-Imperial
Era
Early PreImperial Era
Mouvelian
Calendar
786 BE
1769 BE The Forgotten arrive in Tyria.
10,000 BE
Signicant Events
High-planes human settlements become known as Ascalon.
Ascalon’s new king receives rst Canthan ambassador.
Canthan clans unite under Kaineng Tah, rst Lord Emperor of the
Dragon.
Humans appear in Cantha for the rst time and settle the northern
coastline before spreading completely across the continent. Their
development is unhindered by the Forgotten.
Last sign of Giganticus Lupicus—true giants—on Tyria (best
guess).
Page 14

Page 15

Allies
Page 16

Emperor Kisu
28
29
Born in: Kaineng City
Nation: Cantha
Profession: Ritualist
Age: 50
Master Togo
Born in: Kaineng City
Nation: Cantha
Profession: Ritualist
Age: 65
Emperor Kisu grew up admiring his elder
half-brother Togo in Kaineng City. Both
were sons of the last emperor, Kintah, but
Kisu was the legitimate son of Kintah and
his wife, while Togo—though 15 years
Kisu’s senior—was born to the emperor’s
favored concubine Yuki. The two were
always close, but when Kisu left to take
on the duties of empire, Togo followed a
different path. Kisu became the sovereign
ruler of several hundred thousand souls
on the southern continent, while Togo
studied the ways of magic and ritual. The
emperor is respected and beloved by the
Canthan people, even though few have ever
actually seen him in person outside of the
urban areas of Kaineng City.
When not holding court, Emperor Kisu
often dwells in his own palatial, private
section of the city, Raisu Palace, which is
forbidden to all but the emperor and those
he chooses to allow inside. And every year during the Harvest Festival,
he travels (with a well-armed entourage) to the temple where Shiro
Tagachi slew Kisu’s ancestor 200 years earlier, in deance of fear or
fate.
Son of the previous Canthan emperor
and his beloved concubine, Yuki, Togo
grew up in the palace and helped
raise his young half-brother, Kisu.
Though Kisu was next in line for the
imperial throne, he and Togo were
always close, and the elder half-
brother helped oversee the future
emperor’s education alongside
the palace tutors. When Kisu left
his studies behind to take on the
imperial role, Togo left for Shing
Jea Monastery, eventually rising
to a leadership position. In the time
since, each has grown accustomed
to running his own “empire”—Kisu
the literal Empire of the Dragon, and
Togo the most respected and holy
academic institution in the land. There
is no ill will between them, despite the
petty efforts of some underlings to drive
wedges between the half-brothers. Still,
for the safety of each, their blood relationship
is not widely publicized.
Togo went on to become an accomplished Ritualist and was key
to several Canthan military victories before he was named the new
Master of Shing Jea Monastery upon the death of Master Botah. To
the casual observer, Togo would appear to have been shunned by
the palace, possessing no power. A closer look reveals that he is the
emperor’s “behind-the-scenes” man; Kisu rarely makes a move of any
importance without consulting his half-brother rst.
Page 17

Nika
30
31
Born in: Wajjun Bazaar
Nation: Cantha
Profession: Assassin
Age: 22
Mhenlo
Born in: Serenity Temple
Nation: Ascalon
Profession: Monk
Age: 22
Nika’s past is shrouded in nearly as much
mystery as Nika herself, though Master
Togo has learned a bit about her—
everyone knows the master of Shing
Jea Monastery. She has also let slip to
Master Togo, if not to Mhenlo and his
friends, that she was born in Wajjun
Bazaar, a market district not far from
one of the largest ports in Cantha. Her
father died mysteriously before she
was born; her mother sent Nika to the
secretive Conclave at a very young
age to learn the art of the Assassin,
a trade that the women of her family
had practiced for centuries. Her mother,
in fact, runs the largest Assassin’s guild
in all of Cantha. Nika killed her rst man
at age 10, and made her rst solo kill when
she was 12. She has never murdered anyone,
to her way of thinking—assassination is her
business, and she kills only to defend herself or
her friends, or to fulll a licensed contract.
Nika joins Mhenlo’s group almost by accident.
She is impressed by the way the disparate group
of heroes works so efciently, and offers to ll
a void left by a set of twin sisters that left the
group earlier. She is wholly dedicated to only
two things—avenging her ancestor Vizu and
protecting the Empire of the Dragon.
Born in Serenity Temple
to a priest of Dwayna and
priestess of Balthazar,
Mhenlo has been steeped
in the teachings of healing
and smiting magic. A
devoted servant of both
Dwayna and Balthazar,
he has studied hard
his entire life, and
has been rewarded by
both the gods of his
provenance. But paying
allegiance to two gods
has not been without its
consequences; having
no clear path to follow,
Mhenlo has a tendency to
overanalyze situations and
possible consequences, not
sure whether to take the path
of aggressive strength or that of
defensive grace.
Mhenlo spent much of his life inside Serenity Temple, paying
homage to the old gods and studying the Path, which will lead him
to enlightenment. He also spent a long stretch of his youth studying
under Master Togo of Shing Jea Monastery, where he was exposed
to even more religious and philosophical teachings that made it no
easier for the young monk to nd a focus in life. But the teachings
of Togo and the Ritualist’s wisdom made a deep impact on Mhenlo.
When Master Togo sends a request for Mhenlo’s aid, the monk wastes
no time gathering his friends and setting out for Cantha.
Page 18

Devona
32
33
Born in: Rin
Nation: Ascalon
Profession: Warrior
Age: 24
Devona is quite serious and very direct in her dealings with other
people. She aspires to be a great Warrior, just like her father. Sometimes
this aspiration turns into a tremendous internal pressure to succeed.
Devona’s father was one of the leaders of a prestigious and highly
respected guild—Ascalon’s Chosen. He lost his life defending the
city walls against a raid by an Orrian guild during the last Guild War.
Devona was only a little girl at the time, but since that day, she has
dedicated her life to mastering the martial arts of sword and hammer.
Devona naturally rises to lead most any group she is with, and in Cantha
she often butts heads with both Togo and Mhenlo, despite her lack of
experience on the southern continent. She always assesses any situation
before rushing in. This often puts her at odds with the brash Cynn or
the impulsive Lo Sha—and when her temper
gets the best of her, this often erupts into
verbal, though not physical, conict.
But whatever differences she might
have with her allies, she is loyal to
a fault. Devona would sacrice
her own life to save the life
of a friend, and frequently
puts herself in harm’s way
to protect those who travel
with her. Devona was the
rst of Mhenlo’s friends
to volunteer to join him in
Cantha. Indeed, there was
no question she would join
him, she told the monk.
Loyalty demanded it.
Lo Sha
Born in: Kaineng City
Nation: Cantha
Profession: Mesmer
Age: 25
Lo Sha is one of the most brilliant teachers
at Shing Jea Monastery, but like many true
geniuses, he is somewhat addled when it
comes to small details. And like many
Mesmers, he is justiably vain and proud.
Headmaster Kaa likes to say that if Lo Sha
would focus on his skills as much as he
focuses on his fellow Mesmer instructor,
Mei Ling, he could be one of the
greatest Mesmers in Canthan history.
So far, Lo Sha’s obsession with
Mei Ling has kept him just shy of
true greatness, but even so, few can
equal his talent with illusion, inspiration,
and domination magic.
Lo Sha joins Mhenlo’s group at Master
Togo’s insistence—Togo is one of the
few beings Lo Sha truly respects,
and the Mesmer would follow the
master of Shing Jea Monastery into
the underworld if asked. He prefers,
however, to remain at the monastery
whenever possible, studying new and
spectacular ways to manipulate the
perceptions of others—especially
Mei Ling’s.
Page 19

Eve
34
35
Born in: Unknown
Nation: Ascalon
Profession: Necromancer
Age: 20
Eve hasn’t a clue where she was born—she was found as a young child
stealing food from a sleeping vagrant in the back alleys of Ascalon City.
Fortunately for Eve, she was not found by a city guard but by a kindly
matron, who brought her to the Holy Dwayna Academy for Wayward
& Incorrigible Girls (Ascalon City branch). Wherever Eve had come
from, she had already learned to read at an advanced level before she
ended up at the school students called the “Wayward Academy,” and
voraciously devoured every text in the library. It wasn’t long before
Eve’s curiosity (and her ability to both manipulate and avoid Matron
Irma) led her to a secret library in the bowels of the Academy. There,
forbidden texts opened up an entirely new world to young Eve. By the
time she was 15, she had raised her rst bone minion.
Eve had never gotten along with the other girls—she much preferred
the company of her tomes and scrolls. When, one day, a few of her
fellow students pulled an especially vicious and humiliating prank
on her, Eve literally pounced upon the leader of her tormentors, bit
the girl’s ear off, and swallowed it whole. That was the end of Eve’s
studies at the Holy Dwayna Academy for Wayward & Incorrigible
Girls, and not even Matron Irma mourned her departure.
Of all Mhenlo’s
friends, Eve
is probably the most
independent, and it
would not take much for
the Necromancer to leave them
behind and strike out on her own.
But she is smart enough to know that
loyal allies—even the living—are
valuable to one with her powers. She
has joined the expedition to Cantha
to learn new ways to manipulate
the powers of necromancy, and,
she freely admits, to see what kinds
of horrors might be created from
Cantha’s unique species. Eve’s one
constant companion is a human skull
she found in the hidden library. She
insists that the skull—which she calls
“Adam”—speaks to her and dispenses
wise advice at critical junctures. No
one else has ever heard the
skull say a word.
Eve met Mhenlo, Cynn, Devona, and Aidan during the Charr invasion.
She was in the graveyard, experimenting with new methods of undead
resurrection, when the Charr ooded into the cemetery on the heels of
Mhenlo and the others. More out of curiosity than any noble intentions,
Eve ordered the Charr to stop. When the beastly creatures turned on
her instead, thinking her easy prey, she simply raised her hands and
called forth a small army of the dead to meet them. The Charr never
stood a chance. Eve was amused when Devona asked the Necromancer
to join them, but has since become a good friend of Devona, Aidan,
and Mhenlo. She is often in conict with Cynn, but the two respect
each other’s power enough to get along when the going gets rough.
Page 20

Cynn
36
37
Born in: Surmia
Nation: Ascalon
Profession: Elementalist
Age: 20
A former child prodigy, Cynn always had people catering to her every
whim. Her family was among the nobility in the city of Surmia—until
the Charr invasion and the Searing. When Ascalon was destroyed,
Cynn was caught outside the Wall (Surmia was one of the rst places
to fall during the initial assault). A magical projectile fell directly upon
her palatial home, killing her parents and trapping her under a broken
table for several days. A Charr warband discovered her while looting
the city. They dug her out, thinking to make a meal of her, but Cynn
had other ideas. She single-handedly wiped out
the entire warband, turning
them and the remains of her
home into little more than a
smoldering pile of ash.
Cynn is a bit of a princess but
with a decidedly dark streak. She’s
often cynical and ippant when dealing with
authorities or situations that seem hopeless. She’s
highly intelligent, and magic comes easily to her.
Because of her experiences during the Searing,
Cynn has developed a rather cavalier attitude
toward her own death. Consequently, she tends
to bite off more than she can chew, and often
gets herself and her friends into trouble. She has
joined Mhenlo’s expedition to Cantha to satisfy her
own curiosity, to learn new ways to make things
explode, and out of an honest (though well-hidden)
desire to stop the mysterious threat in Cantha
before the southern continent sees the same kind
of devastation that has wracked the northern
realms of Tyria.
Argo,Turtle
Clan Champion
Born in: Cavalon
Nation: Luxon
Profession: Elementalist
Age: 37
The Turtle Champion is respected
and honored throughout the Luxon
territories for his courage, his
profound sense of justice, and his awe-
inspiring power on the battleeld. He
was the rst Luxon Champion to earn
his title in mortal combat that ended
without the death of either combatant.
Argo’s opponent, Tullus, had fought
bravely, and continued to keep his guard
deantly up even after the bloody loss of
a foot and many other injuries. Rather
than strike Tullus down as the crowd
demanded, Argo simply declared
himself the victor and handed Tullus
his sword. The gesture allowed his foe
to leave the arena alive and with honor
intact, but was a clear indication of Argo’s victory—to hand
over his weapon showed that the future champion had nothing to fear.
Justice was served, the bloodlust of the crowd was relatively satised,
and this noble act earned Argo the admiration of all the clans. Even the
Kurzicks honor Argo’s bravery and skill, as a foe against whom they
themselves can hope to prove worthy.
Even more than the Luxons’ traditional enemies, Argo carries
generations of hatred in his heart for the Canthan Empire, which he,
and many Luxons, believe has kept his people cornered in the most
desolated section of the continent, the Jade Sea. Yet as much as he
despises the Canthan Empire, the continent is still his home. And
when threats arise that no one faction can face alone, Argo might be
convinced to join forces with the Kurzicks—and perhaps even with the
Canthan oppressors—to ght for the survival of all.
Page 21

Aidan
38
39
Born in: Borlis Pass
Nation: Ascalon
Profession: Ranger
Age: 32
The son of a huntsman, Aidan grew up with a quiver of arrows on
his back. He never knew his mother, who died in childbirth while his
family was on a wagon train from Kryta to Ascalon. As soon as the
boy was old enough to hold a bow in one hand, Aidan’s father packed
up just the good steel heads of their tools and the two men headed off
into the wild. They found a spot in the middle of a forest clearing,
retted their tools with hand-carved handles, and built their own home
from scratch.
Aidan is a survivor. Nothing is out of the question if it means he
and his companions will live for another day. He thinks fast and acts
even faster, with an inner calm and silent condence his friends nd
infectious. Aidan has wisdom his younger counterparts lack, though he
never feels the need to lord it over them. To Master Togo, Aidan is a
youngster, and the Ranger has easily let the mantle of wisdom pass to
the Ritualist. Aidan was glad to join Mhenlo on his journey to Cantha,
though he is troubled nightly by the thought of his homeland having to
get by without him. This is not arrogance, but
simple recognition of fact.
Countess
Danika zu Heltzer
Born in: Arborstone
Nation: Kurzick
Profession: Monk
Age: 22
Danika zu Heltzer dwells with the rest of
her family in the fortress-like Cathedral
zu Heltzer, a monument to Saint Viktor
(one of the two champions who slew
Shiro Tagachi on the day of the Jade
Wind). Like her father Count Petrov
zu Heltzer, leader of the great
Kurzick House that bears their last
name, Danika is proud to name the
venerable Viktor as an ancestor.
Unlike her father, Danika is much
more open-minded toward non-
Kurzicks and the other Kurzick
Houses. This is probably
attributable to her avid reading
habits. To overcome the
extreme boredom of what she
considers her “imprisonment”
in the cathedral, she has
voraciously devoured the contents
of countless tomes in the zu Heltzer
family library, especially those that speak
of other lands and other peoples.
Danika has never been more frustrated with the Kurzicks’ isolationist
policies, which she believes can only lead to the further decline of her
people, and indeed her world. She is eager to venture into the world
outside Echovald Forest, and nd new allies for all the Kurzicks. Like
Argo, her sense of justice is strong, and she would be among the rst
of the Kurzicks to set aside factional differences should a greater threat
arise. She has even had some contact, against her father’s strict orders,
with House Vasburg, the longtime rivals of House zu Heltzer.
Page 22

Page 23

Enemies
Page 24

42
43
Shiro Tagachi
No one but Shiro Tagachi knows what made this sacred imperial
bodyguard—the emperor’s most trusted servant—turn on his master
on the Day of the Jade Wind. Did Shiro plan to sever the unbroken
imperial bloodline and crown himself emperor? Was it revenge he
sought, for some perceived wrong the emperor had done
to Shiro or the Tagachi family? Could Shiro have
been seeking some form of power that historians
can no longer comprehend?
Whatever his motive, Shiro’s act has been
literally carved in stone. On the last day
of the Harvest Festival, the emperor’s
favored bodyguard arrived at the
Harvest Temple and was waiting when
the emperor reached the pinnacle of
the temple’s tower. Shiro cut down the
emperor of Cantha where he knelt on
the holy oor, staining it forever with
the monarch’s blood. Shiro himself
was slain only moments later, but his
revenge on those who killed him was
the most signicant event in Canthan
history since Kaineng founded the
empire. In Shiro’s nal moments,
he drew on all of his ill-gotten power
to drain the emperor’s very soul away.
Seething with magic but mortally wounded,
the treacherous bodyguard screamed, and
his voice washed over an area hundreds of
miles across. Shiro’s death wail became the
Jade Wind, a cataclysmic wave of energy that
turned trees, animals, people, and open water
into stone and crystal.
In the wake of Shiro’s fall, the empire carried
on. But Shiro’s legacy on the continent is
undeniable and permanent. Today, many signs
point to Shiro’s return after two centuries in
the border realms of the afterlife. A spectral force driven by rage, a
thirst for power, and a special kind of madness, he corrupts everything
in his wake. The Canthan people know nothing of this, and suspect
that the hideous results of “the Afiction” are some kind of monstrous
plague. But even those who know that Shiro stalks the shadows
have no idea of the power seething within him— or what he might do
with it.
The Afflicted
The Aficted are simply living
creatures—animal, human,
plant—that have had the
misfortune to get too close
to Shiro’s malevolent spirit.
Those left unharmed refer to
this “disease” as the Afiction
and fear that, left unchecked,
it could become an epidemic.
The Afiction is not contagious
in this way, but considering the
other more obvious dangers the
creatures present, steering clear
of the Aficted is wise in most
any case.
Anyone or anything could become
Aficted, which lends this so-called
plague an even more terrifying
aspect than any single, normal
disease. The resulting mutations are
unpredictable monstrosities with all
of the combat strengths the original
person or creature possessed, but
altered and augmented in terrifying ways by
the Afiction.
Once someone or something becomes Aficted, there is no cure.
Killing the Aficted is the only way to give the tortured soul peace;
hesitation or pity will only result in death—yours.
Page 25

44
45
The Crimson Skull
This piratical cult is a menace to all free people in
Cantha and presents a constant danger on the roads
cutting through the continent’s less-populated rural
areas. Crimson Skull forays into civilized Cantha
have become more regular and murderous in the last
200 years. Entire settlements have been slaughtered
by these outlaws. Death serves the Crimson Skull
two-fold: as something to worship, and a way to get
very, very rich. Within their number the Crimson Skull
count trained Ritualists, Elementalists, and Rangers,
among others.
The Wardens
The mysterious and ancient
Wardens guard the areas of Cantha
hit hardest by Shiro’s legacy. Protectors
of the Echovald that was, they now guard
the petried forest it has become. They may once have
been human, perhaps powerful druids or holy men, but
they long ago merged with the spirit they served to
become something altogether different.
associated with the smallest forms and shapes of nature—leaves, moss,
seashells, and so on. Higher up are those Wardens who take their name
from particular trees or larger forms of sea life, while those protectors
that lead the clans take the names of the seasons.
The Naga
Tyrian visitors claim that the serpentine Naga resemble the Forgotten
of the northern continent, but the two species are unrelated. Like the
Wardens, the Naga people lost their homes
when the Jade Wind struck. But the Naga
population—water-dwelling creatures
related to sea snakes which evolved a
culture at peace with humans—was
nearly wiped out by Shiro’s death
wail. Thousands became one with
the sea when it turned to gemstone.
Hundreds more, mostly traders or
mercenaries, died with the humans
of Cantha on land. The only Naga
that survived were those far enough
away not to be trapped in the water
when it turned to jade, and those survivors—
only a few dozen in number—were scattered
and terried.
Now they stand as the ultimate protectors of the
Echovald that is. The clan claims the right of
vengeance for what Shiro Tagachi wrought, and
blames all humans for the Jade Wind that stripped
the woods and sea of life, but inexplicably left the
Wardens unharmed. Driven nearly mad, enraged
at their failure to fulll their only purpose, they work
in their own mysterious ways to reverse the effects of
Shiro’s death, but until they succeed, they will threaten
any humans they encounter.
Wardens do not take names as such, but take their
monikers from their rank in the clan’s natural hierarchy.
The lowest ranked, least powerful Wardens are
If not for a Naga priestess named Hanasha Coraln the entire race might
well have died out within a few years, perhaps even a few months. The
priestess used what power she had left to revive those survivors she
could nd, who then brought more survivors to her, until a united Naga
tribe of barely 40 individuals gathered. Under her guidance, the Naga
abandoned their ancient moral codes and began to propagate freely
and often, so that someday they might make the humans pay for what
they had done.
Now, 200 years later, the Naga are nothing like the peaceful culture
that shared the coast with the Canthans of old. They have aggressively
taken back whole stretches of crystallized sea and petried coastline
from the humans, and make any journey through the Jade Sea even
more perilous.
Page 26

46
47
The Dredge
On the northern continent of Tyria, the mole-people known as the
Dredge are a pitiable race, enslaved by the wicked Stone Summit
dwarves and ready to ght alongside any who will help free them from
their masters’ whips. In the Echovald Forest of Cantha, a few small
colonies of escaped Dredge jealously defend their prized freedom.
The offspring of a few desperate escapees from the Shiverpeaks
who tunneled for hundreds of miles to reach their strange
new home, these Dredge have no reason to
feel any friendship toward humans or anyone
else—they escaped slavery on their own,
and plan to establish their race anew in the
petried woodlands.
Dangerous Creatures
Dragons
Dragons of all shapes, sizes, and origin have called Cantha home for
thousands of years, since long before the tribes of old joined to form
the empire that took them as its symbol.
Yeti
The primitive and brutal enemies of the Tengu, the Yeti are just
intelligent enough to form a hunter-gatherer society, but one with
a deep tradition of honor and courage (as the Yeti understand these
concepts).
Dredge villages are marked by large
dirt mounds. The mole-people live
primarily in the tunnel networks
linking the mounds together. Those
who underestimate the ferocity
and aggressiveness of the Canthan
Dredge do so at their peril.
Gangs of Kaineng
The Celestial Ministry ostensibly runs the bureaucracy of the Canthan
government, while the emperor rules as the sovereign monarch and
commander of the entire Canthan military. Commerce, however, falls
largely to the two largest organized crime organizations in Kaineng
City. The two gangs—something of a misnomer, since each gang
contains hundreds if not thousands of captains, money-men, thugs,
and the like—control almost all trade, legal and illegal, in the Canthan
capitol. The Am Fah and the Jade Brotherhood are in a state of constant
cold warfare which sometimes spills out onto the streets, along with a
lot of blood. For hundreds of years, neither has been able to topple the
other, and out of necessity the gangs have been known to cooperate
during the occasional crackdowns on their activities. Were one gang
or the other ever to gain the upper hand, the resulting trade monopoly
could conceivably lead to a coup against the throne, so the emperor’s
personal agents help ensure that never happens.
Mantids
These beastly insects have begun to appear with more frequency in the
countryside and other areas surrounding Shing Jea Monastery. Mantids
form small hives in the caves that dot the area, and are always on the
lookout for prey—either to feed themselves, or their queen’s eggs.
Kirin
These peaceful spirit monks have become corrupted by Shiro’s return,
and will sometimes strike out at the living. Approach any Kirin with
caution.
Oni
There are some who say that the demonic, savage Oni originate in
the Mists, others from someplace even more distant, dark, and cut
off from the world of sanity. They are killers from beyond, appearing
from nowhere to butcher their victims, for what reason no one knows.
Whatever their purpose or origin, the Oni are among the most deadly
things on two legs in Cantha.
Page 27

Book II:
The Hero’s Path
H
EROE
OF
S
CANTHA
Page 28

iNTErESTiNg TiMES
50
51
The Empire of the Dragon is in dire peril. It is a time for the heroes of
Cantha and intrepid explorers from the northern continent to gather at
Shing Jea Monastery under the tutelage of Master Togo. Only through
the efforts of these bold adventurers will Cantha survive the ominous
threat that lurks at the edge of the shadows. With Master Togo’s
guidance and a strong spirit you will become Cantha’s last, best hope.
NOTE: This chapter assumes you have created a new
roleplaying character that begins life at level 1,
fresh from home and ready to learn. (For information on
creating PvP-only characters, see Book II, Chapter 6.)
CrEATiNg yOur ChArACTEr
Heroes are male or female, large or small, and are made up of any one of
56 potential combinations of the eight professions: Assassin, Ritualist,
Warrior, Elementalist, Monk, Ranger, Mesmer, and Necromancer.
Individual heroes can eventually learn as many as 150 unique skills
per character. The most important choices you must make for your new
hero are rst a primary profession, and soon thereafter a secondary
profession. These choices determine armor, skills, and ghting style,
as well as the overall gameplay experience.
You can create four heroes per unique Guild Wars account, or six
characters if you own and install both the Guild Wars core campaign
and Guild Wars Factions. You can delete and create new heroes at any
time and switch up your skills and attributes whenever you’re in town.
Experiment with profession combinations, skills, and attributes until
you create the hero that suits you best.
ATTribuTES
Every profession possesses up to ve attributes. Attributes are specic
to the professions you choose, and your hero’s pool of attribute points
is derived from the combination of your primary and secondary
professions. The rst attribute listed is available only to a character
that chooses that profession as a primary. For example, a Warrior/
Monk would have access to the primary Warrior attribute, Strength.
A Monk/Warrior would get Divine Favor as a primary attribute. Either
combination would possess the four normal Monk attributes and the
four normal Warrior attributes, but the primary attribute will make each
one play differently and serve a different function in the adventuring
party.
Most skills are tied to a specic attribute; improving an attribute
automatically improves those related skills. Each profession’s attributes
make for distinctive battle strategy, and the specic attributes you
choose to improve help you to create a ghting style all your own.
Page 29

NOTE: You can nd a skill’s attribute listed in the skill’s
52
53
description. Mouse over skill icons to read
descriptions.
Primary Attribute
Each profession has a powerful primary attribute available only to
characters choosing it as their primary profession. For example, the
Mesmer can put points into Fast Casting, which increases spell casting
speed. The secondary profession you choose will not have access
to this primary attribute, so it’s important to note each profession’s
primary attribute when considering which profession will be your rst
choice.
Attribute Points
For each level you gain, you receive attribute points to improve the
effectiveness of your skills. Allocating points to an attribute increases
the power of skills and weapons tied to that attribute. Increase
the attributes tied to the skills and weapons you think you’ll use
most often.
Changing Your Attributes
You can adjust your attributes at any time as long as you are in a town
location. This exibility allows you to adjust your gameplay to adapt
to new situations and effectively harness new weapons and spells. For
instance, if your Warrior nds a rare sword but you have trained the
Warrior in axes by pumping up the Axe Mastery attribute, you can
simply go to town, reallocate the attribute points you have in Axe
Mastery and put them into Swordsmanship instead.
lEVEliNg up
As you travel through Cantha and accomplish the heroic tasks set
before you, your character will earn experience points and gain
character levels. With each level comes an increase in maximum
Health (which makes you harder to kill) and an increase in Energy
(from which you draw power for many skills). The highest level your
roleplaying character can reach is 20, which is, not coincidentally, the
starting level of a ready-made PvP character.
Improving Attributes
Each level awards you attribute points to spend improving your
attributes. Your primary profession determines your primary attribute,
such as the Ritualist’s Spawning, which boosts the strength of summoned
spirits; the Assassin’s Critical Strikes, an attribute that increases the
chance of scoring a critical hit; or the Elementalist’s Energy Storage,
which permanently increases maximum Energy, allowing you to use
more skills more often. The number of points you receive when you
gain a new level increases as you gain more experience.
Skill Points
With experience you’ll gain skill points, which entitle you to train new
skills from your primary and secondary professions. With each skill
you learn, your skill arsenal becomes more versatile.
Page 30

CuSTOMiziNg
The professions, skills and attributes you choose to learn and improve
over time result in a unique
create. You can further customize your hero by choosing the character’s
sex and appearance, and make your armor set unique with dyes that
you might nd as loot or purchase from a dye trader. And don’t forget,
you can delete a character at any time to free up space for a new one.
Guild Wars experience for each hero you
54
Page 31

The Eight
Professions
Page 32

MAkE yOur ChOiCE
56
57
Assassin, Ritualist, Warrior, Elementalist, Monk, Ranger, Mesmer,
or Necromancer: Every profession has its own strengths and
characteristics, a weapon or magic specialty, and a unique set of skills
with which to deal damage, manipulate the enemy or environment, or
protect and heal allies. Each profession provides a set of attributes,
which determines the effectiveness of weapons and skills in battle.
Your primary profession determines your hero’s basic ap-
Primary Profession
Secondary Profession
pearance, including the type of armor the hero wears. It also
provides several attributes that improve skills over time includ-
ing a primary attribute that is not available when the profession
is chosen as a secondary.
Your secondary profession provides your hero with a second
set of attributes and skills to complement the rst. (Your sec-
ondary profession does not have access to the primary attribute
for that profession.)
Page 33

ASSASSiN
58
59
The Assassin walks the shadows, a deadly viper ready to strike at the
heart when the enemy least expects it, nowhere and everywhere all at
once. Assassins are masters of their chosen weapon, the dagger, and
are expert at inicting Critical Strikes that cause massive damage. The
Assassin is trained to efciently link attacks together in a chain that
does not give the enemy a chance to hit back. They have mastered the
ability to move as shadows—Assassins wear only lightweight armor
and prefer to avoid damage by not being there when the enemy’s strike
lands. Their other magical skills include Hexes that lower the target’s
defenses and protect the Assassin from harm.
Assassin Attributes
Critical Strikes
(Primary)
Dagger Mastery
Deadly Arts
Shadow Arts
For each point spent on this primary attribute, the Assassin
gains an additional 1% chance to score a critical hit. Assassins
can also gain Energy whenever they score a critical hit in this
way.
Boost the Dagger Mastery attribute to boost the damage the
Assassin inicts with daggers and the chance to land a critical
hit with a dagger. Many skills, especially dagger attack skills,
become more effective with increased Dagger Mastery. This
attribute also improves your chance of performing a Double
Attack and striking with both daggers at once.
Increase the Deadly Arts attribute to improve the duration and
effectiveness of Hexes and other skills that make a single
enemy vulnerable to the Assassin’s strikes.
Put points into the Shadow Arts attribute to improve skills that
boost the Assassin’s defenses and allow instantaneous shadow
movement.
Page 34

riTuAliST
60
61
Ritualists channel otherworldly energies that summon allies from the
void and employ mystic binding rituals that bend those allies to the
Ritualist’s will. They hood their eyes to better commune with spirits
that grant great power and protection to Ritualists and their comrades.
The energy they channel drives Ritualist skills which enhance the
deadliness of an ally’s weapon and wreak havoc on an enemy’s
Health. The Ritualist can also use the remains of the dead to defend
the living—not by reanimating corpses as a Necromancer would, but
through the ritual use of urns and ashes. Where the Ranger lives as one
with the spirit world, the Ritualist can and will be its master.
Ritualist Attributes
Spawning
(Primary)
Communing
Restoration Magic
Channeling Magic
For each point of Spawning the Ritualist takes, summoned
or animated creatures gain 4% more Health. Spawning also
makes many Ritualist skills related to spirit creatures more
effective.
Increase the Communing attribute to boost the Ritualist’s ability
to summon and command otherworldly allies.
Spend points in Restoration Magic to add to the duration and
effectiveness of Ritualist skills that heal an ally’s injuries.
Build up the Ritualist’s Channeling Magic attribute to increase
the duration and effectiveness of skills that inict spiritual harm
on enemies.
Page 35

WArriOr
62
63
Those who choose to follow the path of the Warrior have chosen a
profession dedicated to up close and personal violence—and they
love every minute of it. The Warrior is the classic hack-and-slash
fantasy hero: tough, strong, and expertly wielding melee weapons
on the battleeld (in other words, what many MMO gamers call “the
tank.”) Warriors are masters of the axe, the sword, and the hammer,
though most choose to focus on one weapon over the others. With
their heavier armor and higher hit points, Warriors can soak up the
abuse that other characters in the group can’t handle, and give
other professions in the party such as Rangers or Elementalists the
distance needed to make use of ranged abilities. Many Warrior skills
are powered by adrenaline, a special power pool generated as the
Warrior ghts, instead of Energy. This means the Warrior, already
a profession with low maximum Energy, will still have plenty of
skills to use even when Energy runs out. A Warrior’s Tactics skills
are often defensive in nature and help the Warrior both protect and lead
his troops. Strength is the Warrior’s primary attribute; greater Strength
lets the Warrior improve all Strength-based skills and more readily
pierce an opponent’s armor.
Warrior Attributes
Strength
(Primary)
Swordsmanship
Axe Mastery
Hammer Mastery
Tactics
Strength, available only to Warrior primaries, increases the
chance to pierce an opponent’s armor. Strength is the basis of
many skills that inict greater damage on foes.
Swordsmanship increases basic sword damage as well as
damage dealt by sword skills.
Improve Axe Mastery to increase basic axe damage and dam-
age dealt by axe skills.
Hammer Mastery increases basic hammer damage and dam-
age dealt by hammer skills.
Tactics increases the effectiveness of Shouts and Stances that
give the Warrior and allies an advantage in battle.
Page 36

ElEMENTAliST
64
65
The Elementalist commands the four elemental forces: earth, air, re,
and water. With magic derived from the very foundations of nature
itself, Elementalists can inict more damage in a single strike than
any other profession. Earth magic triggers quakes and volcanoes,
envelopes foes in solid rock, and can add to the strength and stamina
of allies. Air magic is driven by the power of storms and lightning,
granting allies greater speed or targeting specic foes with a focused,
high-damage attack. Fire magic is often considered the most purely
destructive form, inicting searing pain and damage on multiple
enemies. The magic of Water is highly manipulative. Water magic
summons ice and mist to slow enemies down and blur their vision,
inicts freezing cold damage, and even protects allies from other
forms of magical attack. The primary Elementalist attribute, Energy
Storage, gives the Elementalist the highest maximum Energy in the
game. This makes other professions that use a lot of Energy, like the
Monk or the Mesmer, natural choices for an Elementalist’s secondary
class. Elementalists should never be at the fore of melee combat; but
when surrounded they can tap into a full stable of handy area-of-effect
skills just in case.
Elementalist Attributes
Energy Storage
(Primary)
Fire Magic
Water Magic
Earth Magic
Air Magic
The Elementalist’s primary attribute, Energy Storage, increases
maximum Energy and boosts skills that help regenerate Energy.
Improve Fire Magic to increase the duration and effectiveness
of the Elementalist’s re skills, which inict re damage and can
affect large areas.
Allocate points to Water Magic to increase the duration and
effect of the Elementalist’s water skills, which slows enemy
movement and turns the blood of foes to ice.
Build up Earth Magic to increase the duration and effectiveness
of the Elementalist’s earth skills, which can protect both hero
and ally or inict damage that bypasses enemy armor.
Air Magic increases the duration and effectiveness of the
Elementalist’s Air skills, which pierce armor, cause Blindness,
and knock enemies at.
Page 37

MONk
66
67
The Monk can speak directly to the gods of Tyria, opening a conduit for
divine magic that can heal and protect allies in battle or unleash holy
power upon the Monk’s enemies. The Monk’s connection to the gods
is illustrated in the primary Monk attribute, Divine Favor, which grants
extra healing ability and makes Monk skills more effective. Monks
often choose to focus on one of the other attributes: Healing Monks
build up the Healing Prayers attribute to revive allies and mend their
wounds. Smiting Monks put points into Smiting Prayers, which inict
damage on foes and work especially well against undead enemies.
Protection Monks pump up the Protection Prayers attribute and use
magic that prevents allies and themselves from taking damage in the
rst place. The Monk is the denitive Guild Wars “support profession,”
and will probably never have to wait for a group invitation. Combined
with a secondary like Warrior or Ranger, Monks can also be quite
effective when it comes to hurting the enemy.
Monk Attributes
Divine Favor
(Primary)
Healing Prayers
Smiting Prayers
Protection Prayers
Every point spent in this primary Monk attribute grants a small
healing bonus to all Monk spells that target allies. Divine Favor
also pumps up the duration and potency of spells that call forth
divine powers to aid the Monk’s allies.
Healing Prayers increases the duration and effectiveness of
spells that allow the Monk to heal allies.
Smiting Prayers boosts the duration and damage caused by
skills that harm foes—especially the undead.
Protection Prayers adds to the duration and power of Protection
spells that keep you and your allies safe.
Page 38

rANgEr
68
69
The Ranger is more in touch with living nature than any other
profession. Where the Elementalist harnesses and tames the power of
the elements, the Ranger lives as one with life in all its abundance,
and utilizes unique survival skills that come from this connection.
Rangers can perform nature rituals that manipulate the environment
to hinder enemies, or draw on the power of the wilderness to heal and
assist allies in battle. The Ranger can also tame the beasts of the wild
and command them to ght at the Ranger’s side. The Ranger is the
master of the targeted distance attack and Rangers get the most out of
ranged weapons like bows. The Ranger’s primary attribute, Expertise,
demonstrates the benets of communing with nature. Non-spell skills
(such as Traps or Rituals) will use less energy the more points you pour
into Expertise. In a party, the Ranger is often called upon to pull foes
toward the group with a well-aimed arrow. Rangers combine effectively
with any secondary profession that performs well at a distance.
Ranger Attributes
Expertise
(Primary)
Expertise lets you manage your Energy efciently by shrinking
the cost of non-spell skills.
Beast Mastery
Marksmanship
Wilderness Survival
Beast Mastery improves skills that make your animal compan-
ion more effective in battle.
The Marksmanship attribute adds damage to basic bow attacks
and is the base attribute for most bow skills.
Wilderness Survival improves a Ranger’s defensive Stances,
Preparations, Traps, and environmental Enchantments that
affect the entire battleeld.
Page 39

MESMEr
70
71
The Mesmer is not content with living in reality—Mesmers prefer to
create their own realities. Mesmers are the mental masters of illusion,
control, and domination, subverting an enemy’s Energy for their own
purposes and supporting the entire party in battle with powerful, mind-
bending magic. Domination skills put Mesmers in command of a foe’s
Health and Energy, while Illusion can inict damage, slow or even
halt an enemy, and drain away the powers of those who oppose them.
The Mesmer can call on Inspiration to steal Energy directly from the
opposition, and the primary Mesmer attribute Fast Casting works just
like it sounds—you can sling your spells at a much higher rate than any
other profession. The Mesmer is a powerful damage dealer, support
player, or both. They should usually avoid the front lines, but can turn
the tide of most any ght in seconds.
Mesmer Attributes
Fast Casting
(Primary)
This primary attribute lets the Mesmer cast spells more often
and for greater overall effect than any other profession.
Domination
Illusion
Inspiration
This attribute boosts the duration and effect of your Domination
spells, which allow you to control your enemies’ actions.
Increase your Illusion attribute to extend the duration and effect
of Illusion spells that deceive enemies, hinder their movement,
and their ability to cast spells.
Put points into Inspiration to pump up the duration and effect of
your Inspiration spells, which steal Energy from enemies.
Page 40

NECrOMANCEr
72
73
The Necromancer wields the fury of the netherworld and inicts it
upon enemies foolish enough to stand in the way. The dark arts of the
Necromancer—Curses, Death Magic, and Blood Magic—usually take
a toll on the user by forcing a sacrice of Health, but the harm that
befalls a Necromancer’s foes in return makes this a small, if painful,
price to pay. Necromancers can command the corpses of their enemies
as deadly foot soldiers using Death Magic, while Blood Magic drains
Health from foes and transfers it to the Necromancer. Curses hurt the
Necromancer, but hurt the Necromancer’s opponents even more by
sapping enemy Enchantments and healing abilities. Necromancers keep
their Energy bars full with Soul Reaping, the primary Necromancer
attribute, which feeds upon the deaths of others. The Necromancer
requires patience and discipline to master.
Necromancer Attributes
Soul Reaping
(Primary)
Soul Reaping, the Necromancer’s primary attribute, improves
your ability to gain Energy whenever a creature near you dies.
Curses
Blood Magic
Death Magic
Add points to Curses and boost the duration and effectiveness
of Curse skills, reducing your enemies’ effectiveness in battle.
Blood Magic adds to the duration and effectiveness of skills that
steal Health from enemies and give it to you.
Increase Death Magic to increase the duration and effect of
skills that deal cold and shadow damage, as well as those that
summon undead minions for you to command.
Page 41

SkillS
74
75
If attributes and the distribution of attribute points sketches out your
character in broad strokes, skills are where you apply the nely painted
detail to your heroic creation. You can check out all of the skills your
character currently knows by hitting the K key or going to the main
menu and selecting Skills. You can equip up to eight skills at once,
creating a unique character “build” ready to handle most any situation.
Most skills are linked to a particular attribute, and also carry a subtype
such as Stance, Spell, Hex, or Shout.
Your hero can only equip skills or move those skills around on the Skill
Bar when in a town. But when you’re in town, your entire array of skills
is available to choose from. The skill list is organized by the attribute
the skills are attached to, so you can be sure to select skills that t the
hero’s key abilities. If your Necromancer has all of his attribute points
in Blood Magic and none in Curses, selecting a Curse skill is probably
not the way to go (unless you use attribute refund points to adjust your
attributes while you’re at it).
players in your party so that there’s a minimum of skill overlap. For
example, if there are two Monks in the party, one may choose to set
up as the healer for the group with skills linked to the Healing Prayers
attribute, while the second acts as the party’s protector, choosing a
selection of skills tied to Protection Prayers.
Secondary Professions
Early in your adventures, you will have the opportunity to take on
a secondary profession. Your character’s appearance will continue to
reect your primary profession choice—a Monk/Warrior and a Monk/
Necromancer will both look like Monks when it comes to clothing.
The secondary profession is not about cosmetics—it’s about choices.
Secondary professions give your character access to a whole new set
of attributes and skills. You will not be able to use the primary attribute
for the secondary profession. Every character gets only one primary
attribute, and that attribute will always be the one attached to the
primary profession, as the name implies.
For example, a Ritualist might choose to take on Necromancer as a
secondary profession. The new Ritualist/Necromancer would gain
the attributes Curses, Blood Magic, and Death Magic. The primary
Necromancer attribute, Soul Reaping, would be unavailable since the
character already possesses Spawning, the primary Ritualist attribute.
There are no set rules for how to build your two-profession character.
You can divide your attribute points any way you wish, creating a
versatile jack-of-all-trades or a master of a few more powerful ones.
Many players opt for the latter, but the choice is yours.
Builds
You will hear the term “build” a great deal in relation to character
building in Guild Wars Factions, especially in relation to PvP play. Your
character build refers to the specic assortment of skills and attributes
that you have selected to take on a particular mission or quest. Many
players tend to settle into a preferred build that they fall back on, while
others like to adjust skills for every new enemy. The skills in a solid
character build should work well together, and work well against the
foes you expect to encounter. You should also take into account the
other members of your group—it’s a good idea to confer with the other
Potential Profession Combos
Just as there is no right or wrong primary profession, there is no right
or wrong combination of professions—every profession match-up has
the potential to be used in a unique way, and you have up to 56 different
ways to put professions together. Tinker with your characters until you
nd the profession combos that suit your play style the best.
Page 42

Page 43

Exploring
Cantha
Page 44

78
79
iT’S 1582 CC. dO yOu kNOW
WhErE yOur ChArACTEr iS?
Locations found in Imperial Cantha (and the northern Tyrian
kingdoms, should you choose to visit them) can ultimately be broken
down into two types: towns and everything else. Uncertain where you
are? Click the right mouse button and look around with your character.
Hold down the left Ctrl key while you do it. Do you see other players’
names in blue? If so, you are likely in one of the locations collectively
called towns which can range from a smaller outpost to a thriving
mission hub. Alternatively, do you see red dots on your mini-map and
red names onscreen like “Crimson Skull Ritualist” when you hold
down left Ctrl? If so, then you are outside of a town in the great, wide,
everything else.
gETTiNg ArOuNd
You won’t get very far unless you learn how to navigate your hero.
You can move your character around using the keyboard, the mouse,
or a combination of both. Note that some stretches of the landscape
are impassable such as steep ledges and towering cliffs—efcient
movement is not just a matter of nding the right direction; it is also
necessary to discover the correct path.
Keyboard Movement
Mouse Movement
To move using the mouse, aim the mouse pointer at a patch of ground
and click the left mouse button. Your hero will automatically walk to that
location. This is often a great way to maneuver around obstacles and
rough terrain when the path may not be entirely clear.
To exercise direct mouse control, hold down both mouse buttons at
once. You can steer by moving the mouse left or right whether you are
using the click-move method or double-button style.
Camera Control
Use the mouse to change the camera’s angle (your view of the world)
or to zoom in and out on the action. You can also invert the camera
controls (a common choice for players of rst-person shooters) in-
game via the Menu > Options > Control Setup page.
Zoom
Rotate Camera
Scroll the mouse wheel forward and backward to zoom in and
out on your character and the environment.
Hold down the right mouse button and move the mouse to
change the camera angle (also known as “mouselook”).
Run W
Autorun R (or press W twice)
Turn Left A
Turn Right D
Back up S
Reverse Direction X
Strafe Left Q
Strafe Right E
MiNi-MAp
The mini-map gives you an overview of your current area and appears
by default in the upper right corner of your screen. With it, you can
track the locations of allies, enemies, NPCs, and other players. You can
also use the mini-map to communicate strategy with your teammates
by clicking the mini-map to “ping” that area or by left-clicking and
dragging the mouse to draw on the mini-map. Drawing is especially
useful when coordinating your group’s movements and strategy,
or when you’re leading a less experienced team of allies through a
mission or quest with which you are familiar.
Page 45

80
81
Allies: Green dots represent your allies.
diSTriCT MENu
When you’re in a town or outpost, the District menu appears in the
upper left corner of your screen. When a large number of people enter
the same location, additional districts may appear to keep towns and
outposts from getting overcrowded. When meeting friends, be sure to
specify which district you are in so they can nd you easily. No matter
which District you are in, you can always whisper to a specic player
or get in touch with your guild mates, but your global chat will only go
out to the other players in your town and District.
Choose the desired district from the drop-down menu.
Players
Foes: Red dots indicate the location of foes.
NPCs:
Danger Zone:
Ping:
Mission Pings:
Map Drawing:
Blue dots represent other online players inside the connes of
a town. When they are on your team, players become allies
(green dots).
Green dots represent non-player characters (such as villagers,
traders, and henchmen) not hostile to your party.
This circle represents the radius beyond which monsters cannot
detect you. Monsters inside this “aggro” zone can become
aggressive and attack you.
Click to “ping” the mini-map and point out a location for party
members.
During missions, red pings often indicate high-priority targets.
Green pings indicate the location of important items.
Click and drag to draw on the mini-map to diagram strategy for
your allies. Opponents in PvP cannot see your side’s mini-map
drawings.
International Districts
Guild Wars Factions lets you play with anyone, anywhere, anytime.
While your Guild Wars account is specic to the country you live in,
you can meet and adventure with players from other countries using
International Districts. For example, if you normally play in the
American region, and you have a friend in the Korean region, the two
of you can meet in the International District of any town and form a
party together. Use the drop-down menu in the upper left of the screen
to get there.
MAp TrAVEl
The world map opens up every available map location. In overview
mode, the display shows the entire continent. The close-up map
shows your current region as well as the towns and outposts you
have previously visited. Switch between views by clicking the left
mouse button.
Page 46

82
83
Map Travel
Press M to bring up the travel map. To instantly travel to any town you have
visited before, click on its icon. (Press M again to exit.)
Map Markers
Special icons mark towns, markets, guild halls, and mission areas on
the map travel screen. They appear as pins when in overview mode,
and as more distinct markers when zoomed in. Mission locations are
represented by a shield, while towns and outposts have their own
symbols. As you complete missions, additional map locations become
available. You can also unlock new locations by simply walking there
and blazing your own path. You may encounter plenty of monsters
to ght along the way, but it’s not the most efcient way to earn
experience and advance in the game, as quests and missions generally
earn you greater rewards than combat alone.
Town
Sparring Mission
PvP Mission
Tracing Your Steps
The map is also available during missions or when exploring the
landscapes between towns to meet a quest objective. Press U to
bring up the Area map. Your path is marked with a red dotted line
that shows you where you are, where you’ve been, and where you’re
going. The details of each area map are
revealed only as you encounter that area;
until then you will only see a foggedout view. You can use map travel even
in the middle of combat but remember:
you will be abandoning your allies if you
do so and will have to try the mission all
over again.
Completed Mission
Guild Hall
From the overview map, click once to zoom in for a closer look at a region.
(Click again to zoom out.)
Click to use boat travel and access other world maps.
While zoomed in, click a location icon and read about the area. Click Travel
to travel instantly.
Press M or click the map button to exit the map and return to your current
location.
Page 47

84
85
TOWNS ANd lANdSCApES
Towns are the social hub of Guild Wars Factions. When you are
in a town, you can see and meet other players, visit merchants and
trainers, collect quests from quest-givers, form an adventuring party
(or hire henchmen if you prefer to play solo), and even organize your
fellow gamers into an impromptu dance party. While in town you can
rearrange your skills and attributes and trade up for better equipment.
Once you leave town (either by walking out the front gate or entering
the mission attached to that location) you will no longer see other
player characters, but will have the whole world to yourself and to your
party. You may encounter NPCs—especially collectors, merchants, or
traders—while in these areas.
an offer in gold or trade for another item from the trading player, but
you must accept the offer to seal the deal.
Meet the Townsfolk
Most of the following types of NPCs can be found in towns. Smaller
outpost towns will usually be inhabited by a less diverse variety of
non-player characters—a merchant, a Xunlai storage agent, one or two
quest-givers or storyline gures—while the larger hub towns (which
are distinguished by a larger icon on the map) usually have a more
varied population. Mission towns—signied on the map by the large
shield icon—are geographically large, but like outposts they have a
limited variety of NPCs.
Buying and Selling
As you ght the good ght across Cantha, you will collect a lot of
loot from fallen foes. Often this will be gold (accepted as legal
tender throughout the world of
comes in the form of an item: a weapon, a piece of armor or a shield,
perhaps a salvageable hunk of your enemy’s
hide. Most town marketplaces offer merchants
and outtters, weaponsmiths, crafters, and
trading vendors of various types who can take
these items off your hands in exchange for
what you really want—better items or even
more gold.
... With NPCs
Left-click on a vendor to start a transaction. Most trades are a simple
matter of selecting the item you wish to buy or sell using the appropriate
tabs at the top of the commerce window and the left mouse button, but
sometimes you will need to adjust for market forces by obtaining a
price quote. To easily spot NPC vendors in the crowd, hold down the
left Alt key.
... With Player Characters
You might nd better equipment (and better deals) buying and selling
with your fellow players. To trade with another player, target that player
and hit the Trade button at the top of the screen. You may then submit
Guild Wars). Sometimes the loot
Henchmen
Henchmen are computer-controlled adventurers who are always
available to help round out your party so you can take on missions
even when you don’t have the required number of living players. Need
one more player in your party? Hire a henchman who lls the specic
party niche you need. Want to play a difcult mission by yourself?
Hire several henchmen who can ll the roles normally taken by your
fellow players.
During a mission, henchmen will follow you and attack the targets you
choose. They’ll also heal your party (and will resurrect fallen party
members if possible). Henchmen take their share of the spoils of each
mission, including experience points earned from vanquishing enemies
and loot, but will not take from XP earned completing your objective.
Look for henchmen in towns and outposts near mission gateways.
Merchants
Merchants sell many basic supplies, such as Identication Kits that tell
you exactly what a magical item in your inventory does, or Salvage
Kits that allow you to recover crafting materials from otherwise useless
loot. Merchants, like other vendors, will buy all manner of items from
you—weapons and armor, found items, dye, and crafting materials.
Look for [Merchant] after the NPC’s name when you’re looking
to trade.
Page 48

86
87
Weaponsmiths
Whenever you acquire a new weapon that you plan to
equip and use, it pays to visit a Weaponsmith to have
it customized. If you plan to sell armaments on the
open chat market, don’t customize them—customized
weapons are only useable by the individual player
they are tailored for, rendering them useless for
everyone else (except Weaponsmiths). Look for the
[Weapons] sufx after the name of a Weaponsmith
when you’re ready to trade implements of war.
Armor is always customized for the character using it, so don’t bother trying
NOTE:
to sell or purchase armor from other player characters. And always use
common sense when trading with other players, and take a good look at
what you’re buying and selling before you agree to a trade.
Trader’s specialty is indicated after the NPC’s name ([Dye Trader]
for example).
Xunlai Storage Agents
Xunlai Agents are NPCs belonging to an ancient, respected, and utterly
incorruptible banking guild. Xunlai Agents can be found in most
every town you encounter. Each character wishing to utilize storage
must pay a Xunlai agent 50 gold pieces to open an account. Once this
nominal fee is paid that character will never have to pay again. The
storage account is shared by all of the characters on your Guild Wars
account, making it an easy way to transfer gold or items from one
hero to another. For example: if your level 20 Warrior/Monk nds a
rare bow that your level 15 Ranger/Elementalist could make good
use of, your Ranger can withdraw the item from storage for use. By
effectively using an agent to store your useful and valuable items, you
free up your character’s personal inventory so you can acquire new
spoils. Xunlai Storage Agents are easy to spot since they do not have
proper names—just look for any NPC named Xunlai Agent [Storage].
Crafters
The Crafter can create new armor out of raw materials you’ve found
or salvaged, such as shells, hides, ingots, or slabs of rock. Crafters
can also upgrade existing items for you using upgrade components
you’ve acquired, such as hilts, pommels, hafts, grips, and bowstrings.
[Armor] will appear after the name of armor Crafters. Weaponsmiths
can sometimes craft items as well.
Traders
Traders buy and sell items you can use to alter existing ones or to create
new items. Traders base their prices on what the market is currently
offering, so you must get a price quote when you want to sell or buy
an item in a Trader transaction. Traders deal in dyes that you can use
to customize your character’s armor, runes that add powerful bonuses
to weapons and armor, and scrolls that improve magical abilities.
There are also traders who deal exclusively in materials (either rare
or common) that Crafters can use to create new armor and weapons.
If you’re simply out for gold, you can usually get a better price for
your materials from Traders than with a Merchant or Outtter. The
Skill Trainers
The Skill Trainer sells skills belonging to all professions, though each
vendor usually boasts a unique selection. The Skill Trainer may offer
skills that you can alternately earn by accomplishing quests; so spend
your skill points (and the gold that the Trainers require) wisely. At
higher levels, Skill Trainers sell the Signet of Capture, which is a
special item that temporarily takes up a skill slot. As the name implies,
this signet allows you to capture skills—including valuable elite
skills—from any fallen “boss” enemy. Boss enemies are identied by
a proper name (rst and last) and are bathed in a colorful aura, which
signies their power. They are usually located at the heart of an enemy
stronghold or territory and are signicantly more powerful than their
surrounding minions. The boss must have skills that you can use or
the Signet of Capture will be unable to target the fallen foe. A Skill
Trainer’s name is followed by [Skills].
Page 49

88
89
Collectors
Collectors are one of the only
types of NPCs you nd as
often outside of a town as you
do inside. Collectors are NPCs
who, for whatever personal
reasons, need large quantities
of certain trophy items
which fall from the bodies of
enemies you slay in the wild.
Many Collectors offer a wide
variety of somewhat powerful
weapons and other items in
exchange for these trophies,
while a few can give you
high-grade magical armor you
won’t nd for sale at a Crafter. Even if you don’t have a great need for
whatever reward the Collector has to offer, you can almost always turn
a prot selling that reward later, trading it to a friend, or giving it to
one of your own alternate characters via Xunlai storage. Collectors are
identied by the sufx [Collector] after their names. Don’t be surprised
to nd them in the most unlikely and inhospitable landscapes.
a dire foe, or act as a temporary ally you must protect at all costs. Some
NPCs are essentially part of the environment (like guards, town criers,
or other students) or become such when the quests they assign you have
been completed. Others might provide you with a bit of information
about the current region, including history, current conditions, and
local enemy activity.
Encountering Other Heroes
To communicate with other heroes, use the chat commands to speak to
the entire town, to your party members, or to a single, specic player.
You can buy and sell rare items on the Trade Chat (usually for a better
price than you’d get at the Merchant). You can chat exclusively with
the members of your current team using using Team Chat (press #), or
check in with the members of your guild on Guild Chat by pressing
the @ key. Interacting with other players, competing with other guilds,
and teaming up for quests and missions is essential to maximizing the
gameplay experience.
Chatting
You can type messages into the chat window and send them instantly
to everyone in the area, or just to your team or guild specically.
Quest-Givers
Many NPCs have no particular profession related to buying or selling.
But like most citizens, they require the services of a hero or two (or
six, or eight). If an NPC has a quest to offer, you will see a green
exclamation point over that NPC’s head. You may not always return to
the same NPC to “cash in” that quest for experience and other rewards,
so consult your Quest Log (press L) to keep track of your current quests,
missions, and objectives. Some quest-giving NPCs have multiple jobs
to hand out throughout the story, so check back with your old contacts
as often as you like.
Other NPCs
Not every NPC buys, sells, or even offers quests. Sometimes an NPC
might be part of a quest or mission objective. For example, an NPC’s
job could be to pass on crucial information or ght at your side against
To open the chat window, press Enter.
To chat, type your message in the text eld, then press Enter again.
To select a specic chat channel, left-click on the appropriate tab, or use the shift and
number keys associated with that channel. Team Chat, for example, can be accessed by
hitting the # symbol (i.e., shift +3).
To review a chat session, click on the word balloon symbol in the lower left and use the
scroll bar to view the text.
To whisper a private message to another character, bring up the Whisper Chat menu
by pressing “. Enter the player's name you wish to converse discreetly with and tab over to
the message eld to type your text. Whispering works across districts and geography and is
the best way to track down friends when you're not sure where they are.
Page 50

Emotes
Your character can perform a number of different
actions that help you communicate (and entertain)
your fellow players. To perform an emote, hit Enter
to bring up the chat window, then the / key followed
by the name of the emote. For example, /dance will
make your character get down and boogie until you take
another action; /laugh will cause your character to erupt
with hearty laughter. Experiment with different commands
to see what your hero can do. A list of emotes can be found
in the Guild Wars Factions Quick Reference card, and in the
Factions Guidebook (on sale separately).
Forming a Party
Missions are generally designed to support 4–8 players.
Travel directly to the mission area to nd party members,
or stop in towns along the way to recruit a team. It’s
simple to add a player to your party. Just left-click on
the player with the mouse pointer, and then press the
+ symbol next to
the character’s
name to add that
player to your
party. If the other player
is already in a party, you
will have the option to
join that team if there is
room. Party leaders are designated
by a blue icon oating over their
heads, which denotes the size of
the current group. You can invite
henchmen onto the team in the
same manner, but they do not
have the option to refuse.
90
Page 51

Adventuring
Page 52

92
93
ThE gOOd fighT
Combat is a way of life. Master the basics of ghting before you jump
headlong into the game, or risk a premature trip to the afterlife. Read
on and get educated.
COME EquippEd
Before you enter a mission or a wilderness area (in other words, before
you leave town), load your Skill Bar with the eight skills you think will
serve you best in the coming conict. At the start of the game you’ll
have empty space, but as you learn and earn more skills you’ll need
to be selective in how you equip your character’s skills. Your hero’s
armor (courtesy of your primary profession) is already equipped. Make
sure your chosen weapon is at the ready, and any alternate weapons are
loaded onto the quick weapon menu (keys F1–F4).
names written in light blue, while the names of uncommon items
are displayed in purple text. The most rare and valuable tools of the
trade have names written literally in gold. Unique items belonging to
a single boss will sometimes drop when that boss dies; these items’
names are shown in green (boss items are not necessarily better than
gold or purple items).
Currency
Head Slot
Guild Cape
Chest Slot
Equip Weapons
Equip weapons and armor from your Items menu, which manages the items you have acquired.
yOur iNVENTOry
There are two ways to access your inventory. Press the I key to bring
up the inventory interface that lets you equip weapons, armor, and offhand items like shields and artifacts. You can then navigate between
your backpack, belt pouch, and extra bags with keys F5–F8. Press F9
to bring up a separate window that displays all of the items in all of
your bags at once. Bags are expandable via certain upgrades, and you
can expand your inventory even more by opening an account with a
Xunlai Storage Agent.
Item Rarity
An item’s worth is determined by its usefulness and rarity. Common
items—including weapons, armor, and most anything else—will have
names in white lettering. Magic items with innate magical power have
Primary
Weapon
Off-Hand
Bags
Salvage Kit
Key
Dye
Identication
Kit
Trophy
Hand Slot
Legs Slot
Feet Slot
Salvage Item
Rune
Crafting Material
Page 53

94
95
If you’re looking to sell items, be sure to hit Trade Chat before you go
straight to the Merchant or Trader. You will almost always get a better
price from your fellow gamers if you’re a reasonable negotiator.
Weapons
Every profession has a unique type of weapon all its own (though any
profession can use any weapon if necessary), but only the character
type that meets a weapon’s requirements will get the most out of it.
For example, a Warrior with high Swordsmanship skill would want to
use a sword that required a certain level of Swordsmanship attribute
points. That same Warrior, however, would not be able to get the most
out of a bow that required 8 attribute points in Marksmanship—but a
Ranger certainly would nd that bow effective. When you nd or buy
a weapon you intend to use for a while, be sure to hit the Weaponsmith
in town. This type of NPC can customize your weapon so that it does
more damage, but no other character will be able to use it (meaning
you likely won’t nd a buyer).
Armor
Your primary profession determines what type of armor you wear—a
Ranger/Necromancer is always going to look like a Ranger. Pieces of
armor, unlike weapons, are customized by default when you buy them.
You can purchase armor from an armor crafter NPC if you have the
components (bought from a Materials Trader, for example) and gold to
meet the crafter’s price. You might also nd Collector NPCs that offer
you even better armor in exchange for trophies you collect from fallen
enemies—this armor is often your best option if it’s available. Enemies
occasionally drop armor when felled, but it is customized for them and
cannot be worn by heroes.
Kits
Merchants sell two item types crucial for getting the most out of the
other items in your inventory: Identication Kits and Salvage Kits.
Identication Kits come in two varieties: normal and superior. The only
difference between the two is the number of times you can use them.
When you nd a magic item of any kind, the word “unidentied” will
appear beneath its name in your inventory. Use Identication Kits to
nd out the true identity of an item and its most effective use. Salvage
Kits are divided into normal and expert classication. Normal Salvage
Kits can break down most anything in your inventory into materials
like leather or cloth which are useful for crafting. Expert Salvage Kits
let you retrieve Runes and upgrade components from valuable magic,
uncommon, rare, or boss items. Expert Salvage Kits can also let you
salvage rare materials from most any common item. To use any kind of
kit, simply double click on it and then click once on the item you wish
to identify, salvage, or augment.
Salvage Items
Salvage items are the remains of enemy armor. You can’t use these
items yourself, but you can use a normal Salvage Kit to break them
down into useable materials for crafting. Some rare salvage items also
contain Runes or weapon upgrades, so be sure to use an Expert Salvage
Kit on those items after identifying them.
Crafting Materials
Crafting materials come in two avors: common and rare. Crafters
such as Armorsmiths and Weaponsmiths use items like tanned hide
squares, shells, wood planks, and steel ingots to create weapons and
armor, among other items. You can sometimes nd materials dropped
by enemies, and you can also get them by salvaging other items. When
you need a specic crafting material—especially something rare—your
best bet is to hit the Materials Trader NPC and bring along some gold.
By the same token, you can unload materials you don’t expect to use at
the Materials Trader and get some of that hard-earned gold back.
Runes
Runes are arcane symbols that magically alter the nature of a piece
of armor. Certain uncommon or rare found items—especially magical
salvage that appears to have no other use—contain Runes you can
retrieve with an Expert Salvage Kit. You will be notied when you
identify an item that contains a Rune, and if it’s not one you intend to use
it might fetch some gold from the Rune Trader in town. Your character
can only use Runes tied to your primary profession—your Warrior/
Necromancer cannot use the Necromancer Minor Rune of Curses,
but can use the Warrior Rune of Minor Swordsmanship. Note that the
effects of Runes do not stack—if that same Warrior/Necromancer is
Page 54

96
97
already using Ringmail Gauntlets of Minor Swordsmanship, using that
Rune to create a Gladiator’s Helm of Minor Swordsmanship will give
you no benet.
Upgrade Components
Upgrade components are similar to Runes and have similar effects,
except that they can only be applied to weapons, whereas Runes
can only be applied to armor. Weapons can also be modied by two
different types of components—a single staff can be upgraded with
both a staff wrapping and a staff head, for example. Upgrades can be
used by any character profession—although, again, the weapon type
should sync up with your attributes if you want to get the most use
out of it.
Scrolls
Scrolls are special items that lend your hero a temporary enhancement,
often an effect to augment the amount of experience you and your
party receive. They also come in differing levels of rarity. Some scrolls
have effects with distinct time limits. Rare Scrolls can be purchased
from a Rare Scroll trader, and are usually quite expensive.
Trophies
So you’ve been adventuring for a few levels, and your bags are packed
with carapaces, jawbones, lodestones, and other trophies of your
battles. If you need gold, you can sell trophies to the Merchant. You
might hold on to those items if you have the room in your inventory
and don’t need instant cash. Collector NPCs will take those pieces of
fallen foes and turn them into magic items of much more use to you.
Some Collectors offer armor that’s often better than what you can get
from a Crafter.
Quest Items
Quest items take up slots in your inventory like any other item, but
usually cannot be sold to a merchant. Sometimes you might receive
more quest items than you need to satisfy a given quest objective,
however, and you can sell such items on the “open market” of Trade
Chat. In general, you have no more need for the item once you’ve
nished the quest.
Bundle Items
Bundle items are special objects in the game world that don’t t into
your backpack or bag—your character must carry them in both hands,
preventing you from using melee attack skills until the bundle item is
set down. Bundle items are usually associated with quest or mission
objectives, and represent items you must personally deliver somewhere
else (though Ritualists can spawn bundle items for use, and PvP ags
are “non-mission” bundles). Using instant map travel while carrying
a bundle item will only rob you of the bundle item in question. Some
special bundle items give you a magical bonus when you drop them (or
while you carry them). In a group, bundle items are usually carried by
professions which use magic, since carrying one does not prevent you
from casting Spells, Enchantments, or other magical skills.
lOOT ANd TrEASurE
As you defeat enemies, items or gold will usually fall next to the corpse
of the fallen. Gold can be picked up by any player character in the
group, and is divided among all party members (including henchmen).
You may only pick up loot items that have been reserved for you at
random (if you are playing completely solo you will always be that
random player).
Page 55

98
99
ThE Skill bAr
Your Skill Bar holds a maximum of eight skills, so it’s important to
carefully choose which skills to arm your hero with prior to leaving
town and entering battle. Your currently equipped skills are displayed
in the Skill Bar. Each Skill Bar slot is mapped to a number key on
your keyboard. To examine all of your available skills, hit the K key
on your keyboard.
Equip Skills
Use Skills
Skill Tips:
Drag skills from the Skills menu to the Skill Bar. You can only equip skills in
towns and outposts.
Click the target foe or ally on which you wish to use the skill, then either click
on the skill to activate it or use the corresponding number keys (1–8).
Most skills have an Energy cost. Keep track of how much Energy a
skill requires and how much you have readily available, especially if
your character uses magic often.
You can use non-attack skills (skills that do not require the use of a
weapon) on an enemy or ally while continuing to attack your primary
target with your weapon. These non-attack skills are usually Spells.
To target an ally with (for example) a healing Spell without letting up
on the enemy you are attacking, simply click on the ally's name on
the Party menu, then use the healing Spell. To target an enemy in this
fashion (since some offensive Spells can be used without changing
your attack target) hold down the Shift key while you target that
enemy.
Some skills—particularly those associated with the Warrior
profession—require adrenaline and will recharge automatically during
combat since you build up adrenaline during the ght. Adrenaline is
a bit like Energy, except you do not have a bar with which to track it.
To check on your current adrenaline levels, just check an adrenalinebased skill on the skill bar. When it is brightly lit, the adrenal skill is
ready to use.
Some skills require a particular weapon type, such as a sword, axe,
or bow. If a skill reads "Sword Attack," you cannot use that skill while
wielding any other kind of weapon.
You cannot alter your Skill Bar in any way while outside of town
except in rare cases where you have unlocked a new skill from an
NPC or enemy boss. In town, you can rearrange and sort your skills
to your heart's content.
Signet skills do not cost Energy to use, but usually take time to
activate—time during which you can be interrupted or hit. Use
cautiously!
Many Assassin skills make use of the Shadow Step ability, which is
not a skill in and of itself. Shadow Step allows an Assassin to move
instantaneously to a target and makes this profession highly effective
against a single foe.
The Ritualist uses many Spirit skills introduced in Guild Wars
Factions. These Spirits act as allies and sometimes grant special
enhancements to the party, but do not move around like a
Necromancer’s minions.
Active skills are fully lit. Darkened skills are temporarily inactive
and require either recharge time or adrenaline in order to utilize, or
reect a single-use skill that has been spent (such as a Resurrection
Signet).
Page 56

100
101
Range and Distance
Any spells you cast will reach no farther
than the edge of your danger or aggro zone,
marked by the white circle around your
character on the mini-map. This distance is
roughly 88 feet in the game world. Various bows
have ranges which fall inside this radius (like the
at bow) or extend much further outside the aggro
zone (like the long bow). For a deeper introduction to
ranged attacks, explore the in-game PvP tutorial on the
Battle Isles.
Melee attacks and skills calling for you to touch the target
require you to be within two feet of your opponent. Any
attack affecting a character or foe “adjacent” to your
primary target is effective within 13 feet of the user.
Shout skills have a range of about 40 feet—a little
less than half the range of a Spell.
STAyiNg AliVE
others cause it to degenerate. As your level increases, your maximum
Health increases as well. Arrows to the right or left of your Health bar
will tell you which way your Health is going, and sometimes it will
change color depending on the effect you are suffering. Being struck
with a Poison effect, for example, turns the Health bar a sickly green.
When your Health reaches zero, your character dies. Depending on
the current mission or adventure, you may be resurrected on the eld
by your allies, at your base by your priest, or (in solo missions) at
the nearest outpost or resurrection shrine. Each death incurs a Death
Penalty, which lowers your maximum Health and Energy. You can
work off your Death Penalty by earning experience points or gaining a
Morale bonus by defeating an enemy boss. When the mission ends or
you return to a town or outpost, Death Penalties are removed.
During any battle, keep an eye on your Health bar and be ready to heal
yourself or alert your team (Ctrl-click on your health bar to “report”
your status to teammates) before your Health gets too low. A critical
hit can reduce your Health drastically, and some Hexes and Conditions
can cause Health to degenerate rapidly. If you have any qualms about
your party healer being able to reach you in time, consider bringing
along a skill such as Healing Signet that can keep you from dying.
Health & Energy
Health and Energy are a hero’s most crucial resources, and
their levels must be monitored constantly. Health keeps you alive, and
Energy allows you to harness skills to increase your offensive and
defensive capabilities in battle.
The Health Bar
The Health bar measures your current well-being. Damage is usually
dealt by an enemy, though some skills like Curses also have a negative
effect. Healing skills replenish Health. Your maximum Health is
determined by your profession and current level. Health regenerates
over time outside of combat, and while some Spells speed regeneration,
The Energy Bar
Energy powers most skills and Spells, so maintaining this resource is
critical in battle. The Energy bar displays the amount of Energy you
have with which to use skills. Each skill has an Energy cost associated
with it, and using a skill will deplete that cost from your Energy bar
(note that sometimes the Energy cost is zero as is the case with most
Signets and adrenal skills that draw on a different resource). Your
maximum Energy is determined by your profession, though some
skills and conditions temporarily increase or decrease your maximum
Energy. Some magical items provide a permanent or temporary
increase.
Page 57

102
103
When you are under a Hex or some other negative Condition, your
Health and/or Energy may degenerate, as indicated by the arrows in
the Health or Energy bar. Left arrows [<<<] indicate degeneration,
while right arrows [>>>] indicate regeneration. More arrows
mean faster Health and Energy regeneration or degeneration.
Regeneration and degeneration can accelerate rapidly if you don’t
keep an eye on them.
Death and Resurrection
Your character may die multiple times while ghting or exploring in
a particular area. When you die, allies can resurrect you on the eld
using a skill or signet (when in PvP a priest at your team’s base can do
the job). In cooperative missions, the death of the entire party means
you have failed as a team and must return to the outpost to try again.
A “wiped” party on a quest in an explorable area will simply resurrect
at the nearest resurrection shrine. In the latter case, you will return to
life with a death penalty (DP), which reduces your maximum Health
and Energy.
The Death Penalty
Each time you take a death penalty your maximum Health and Energy
levels are reduced by 15% (this number can be modied under some
circumstances—for example, if you already have a +4% morale boost
from slaying two named boss enemies, your DP will come to only
11%, but at the cost of your morale boost). Each consecutive death
stacks on more DP, increasing by 15% every time, for a maximum of
60%. You can work off DP by earning experience points in battle, or
more quickly by gaining morale boosts from boss enemies. All Death
Penalties are cancelled when you return to a town or outpost.
Morale Boost
Slaying certain enemies gives you a morale boost expressed in much
the same way as the death penalty—except the positive percentage is
applied to your stats instead of a negative. The enemies which give
your party a morale boost are the same enemies you can sometimes
steal skills from after they’re dead using a Signet of Capture. These
enemies, referred to as “named foes” or “bosses” since they have a
proper rst and last name instead of a generic one, are easy to spot
thanks to the glow around their bodies. Each one your party destroys
gives you a +2% morale boost. Note that under some specic
circumstances, non-boss enemies will also give you a morale boost—
in such cases, you will be told which “no-name” enemies you can slay
to get the advantage.
Enchantments and Hexes
Spells of the Enchantment and Hex subtype are excellent examples
of magical powers that can boost or lower your abilities in battle.
Enchantments provide aid for a period of time by providing offensive
and defensive advantages such as extra armor, repower, or healing.
When you cast an Enchantment Spell on yourself (or when an ally casts
one on you) an icon appears onscreen to tell you what Enchantment
you are under.
Hexes work in the opposite fashion. If an enemy casts a Hex Spell on
you, an icon appears depicting the Hex with which you’ve been aficted.
Mouse over these icons for information about the Enchantment or Hex
currently affecting you.
MiSSiONS ANd quESTS
If you are playing a roleplaying character, much of that hero’s life
will be taken up with missions and quests which earn that character
experience, provide you with valuable loot, and allow you to explore
the full scope of the rich storyline running through the game. Missions
and quests provide you with the goals and objectives you must meet to
advance the story and grow into a legendary hero of Cantha.
Don’t Go It Alone
Most missions and quests are easier to complete with several players—
and in many cases, a large group of players can be critical to your
success. To nd other players to adventure with, travel to a town and
use the chat system to invite players to join your team. Computercontrolled henchmen are always looking for work aiding heroes at the
gates of towns and outposts, so consider dragging a few along if you
don’t feel like recruiting total strangers.
Page 58

104
105
Finding Your Way
Note that the correct path to your destination will not always be in the
same direction as the green pointer. Often, the only way to get to a
particular spot is by following a course that may twist and turn in the
“wrong” direction for a time. If one or more member of the party has
been through the area before, let them plot a course on the mini-map to
guide you to the destination.
Fighting Creatures
Virtually anywhere you travel outside the safe connes of a town, you
are likely to encounter hostile creatures that will happily eat you or
your party for lunch. This may be true when you are engaged in the
story mission at Minister Cho’s Estate, or if you simply decide to go
for a stroll outside Senji’s Corner. Keep the following in mind if you
want to survive.
Calling Your Target
You can effectively coordinate attacks by “calling the target.” To
call your target, rst target the enemy with Tab or by left-clicking
on the enemy’s name. Hold down the Ctrl key and hit the Space bar
(or the number for the Skill you’re using) to start your attack. Your
character will automatically send a message to the party declaring “I’m
attacking [enemy’s name]!” You will also see a small crosshair icon
appear next to your name on the Party menu. Other party members
need only left-click on the crosshair and they will target the exact same
foe you are going after. Focusing on a single foe is often an excellent
strategy—most groups will home in on the enemy’s healer or healers
at the onset of a battle, or will gang up on an especially tough boss
character. Calling targets works just as well in cooperative play as it
does in PvP. Most groups like to assign calling to an individual player,
often a ranged attacker who will be pulling enemies, or a tank character
running into the fray.
Targeting Enemies
To quickly target and attack the nearest creature, press Tab to highlight
an enemy, then press Space to attack. Tab targeting allows you to cycle
through the enemies you can see on your mini-map. To reset the cycle
you can press the \ key to re-target the closest foe. This is useful when
you are involved in an especially intense melee—enemies move around
while you’re ghting them, and if you only use the Tab key you might
unintentionally target a distant foe, thus drawing more hostiles to your
location before you and your team are ready to deal with them.
Targeting Allies
You can target allies by clicking on the ally’s name in the Party menu
or by selecting the actual ally. When you’ve targeted a friendly, you
can perform various actions on them. You can heal allies, open a Trade
window (by clicking the Trade button at the top of the screen), and
follow the ally by hitting the Space Bar (note that once you catch up
to the ally, you will need to hit the Space Bar again to keep following).
The follow command is useful when a group leader is guiding others
through an unfamiliar area.
Communication Made Easy
The same principle that lets you call targets also gives you a quick
and simple method for communicating with your party in the heat of
battle without the distraction of typing words. The “Crtl + command”
trick works with just about every command and with many interface
elements. For example, say you want to nd out (and share) your level
and how far away you are from earning your next level. Just hold down
the Ctrl key and click on the XP bar. Your character will declare to the
party, “I’m level __ and I’m __% to my next level.” If you want to let
the party healer know you’re in Health trouble, hold down the Ctrl key
and click on your Health bar. Perhaps you want to describe exactly
which skill you are using, either on an ally or on an enemy. Again, Ctrl
+ command comes to the rescue—hold down Ctrl, hit the skill you
want to use, and your character will declare (for example) “I’m using
Resurrect on [ally’s name]!”
Page 59

106
107
MEETiNg ThE ChAllENgE
Story Missions
When you begin Guild Wars Factions, a limited number of story
missions await you. As you complete them, others will become
available. The map displays available story missions and also tells
you which ones you’ve already completed. Missions are the primary
vehicles for advancing the epic storyline in
lot of XP to go along with detailed and dramatic cinematic cut scenes
illustrating the epic nature of the game.
In order to successfully complete a mission or secondary objective, you
must meet its goals before you end your online Factions session. You
can attempt missions at will, so feel free to come back and complete
objectives later, if you wish. When a mission objective has been
completed, the mission shield icon appears onscreen with a written
summary of the experience you have earned.
NOTE TO GUILD WARS VETERANS: Unlike missions in the Guild Wars Prophe-
cies campaign, story missions in Factions do not feature bonus mission
objectives. Instead, you will be awarded between 1 and 3 sword
icons based on your performance on the mission; each mission is con nected by special “link quests.”
Factions and they offer a
Special Missions
Two new mission subtypes are introduced in Guild Wars Factions.
These missions are similar in structure to story missions, but do not
have an impact on the storyline. To play these missions you will still
go to a town, gather a party of players or NPCs, and hit the “enter
mission” button to begin. To learn more about elite and challenge
missions, check out the Factions Guidebook.
Elite Missions
Elite missions are a special cooperative play challenge for high-level
characters. An elite mission is played by a large group of characters on a
dungeon-style map featuring multiple rooms, and offers many rewards
in the form of gold and rare items. Elite missions allow parties of up
to 12 players to team up and face the danger together. Each one has a
unique set of objectives and victory conditions, and are only accessible
to the highest-ranked alliances on either the Luxon or Kurzick side.
Challenge Missions
Challenge missions, like elite missions, are designed for highlevel characters looking for big danger and bigger rewards, but are
not restricted to the highest-ranked
alliances. Challenge missions feature
specic goals and objectives depending
on the map. Challenge mission maps
are smaller than elite mission maps,
and are noteworthy for the waves of
foes you will face which frequently
re-spawn in a small area. Challenge
missions feature a maximum party size
of eight, upping the difculty factor.
Quests
While in towns or adventuring
areas, you can take on quests to earn
experience and other rewards. Quests
are similar to missions in that you are
provided with a set of objectives and a
Page 60

108
109
dened goal. Unlike missions, quests are optional and not necessary to
advance the core storyline. Heroes receive quests from “quest-giver”
NPCs—look for such characters with an exclamation point oating
above their heads. The exclamation means that the particular NPC
either has a new quest to offer or has information critical to your
current quest.
Quests (and missions, while you are attempting them) are clearly
described in your Quest Log (press L to bring it up). To nd the next
objective on a given quest, simply highlight it in the log. The next
objective will then appear as a green starburst icon on your mini-map
(or if the starburst is out of range or in a different zone, a green arrow
points you in the right direction).
guildS
A guild is a society of heroes joined together under a common banner.
Each member is attired in a common cape designed by the leader of
that guild. Guilds ght for prestige and honor in the competitive arenas
found throughout the Battle Isles, a part of the world dedicated solely
to such combat. Guilds are, naturally, at the heart of
your guild (should you choose to join one) you compete against others
in PvP missions and tournaments, the results of which determine each
guild’s ranking in the
Guild Wars world. You can create your own
guild, or if you’re invited, you can join one of the many already in
existence.
When you create or join a guild, all of your player characters
automatically become members. Your rank in the guild determines
whether you can invite other players into the guild and grant them
membership. To bring up information on your guild (including the
“guildies” currently online) press the G key; to chat with members of
your guild press Enter and then select the appropriate tab.
Guild Halls
As the members or your guild gain wealth and earn levels, you will
want to consider a Guild Hall. You will need a substantial sum of gold
(many guilds form a gold pool to share the cost) and a Celestial Sigil,
which is earned by accomplishing legendary and high-level deeds in
the Hall of Heroes. There are several styles of Guild Halls to choose
from in a wide variety of landscapes. Your Guild Hall is a place where
you can meet and socialize with other guild members—and your
character may even have to ght to defend it.
Guild Wars. With
Create a Guild
Invite Members
Join a Guild When you are invited to join a guild, you can accept or decline.
Guild Ladder
Visit the Guild Registrar in any large town to create a new guild.
Follow the onscreen instructions to name your guild and create
a unique emblem for your members to wear.
When you invite players to join your guild, they’ll receive an invitation, which they must accept in order to become a member.
If the person you invited already belongs to a guild, you will
receive notication and your invitation will not be sent.
Your guild earns rating points for each battle victory, and the
Guild Ladder on the Guild Wars website tracks the top 1000
guilds according to rating points earned.
AlliANCES
When a single guild is not enough, it’s time to form alliances. An
alliance is a group of guilds that can freely visit each other’s guild
halls, can easily identify one another in town, and share a single
alliance chat channel. Alliances take their name from the founding
guild, and the leader of that guild is also the leader of the alliance.
No more than ten guilds can be in an alliance. Alliances can help each
other gain faction points based on the actions of their members; they
also represent an even larger group of familiar players with whom you
can go adventuring. In Factions, alliances are aligned with either the
Luxons or the Kurzicks.
Forming an Alliance
An alliance leader (or a guild leader who wants to become an alliance
leader) can invite other guilds to join an alliance. The guild leader
sending the invitation handles this through the in-game user interface;
and the alliance leader (presumably with a little help from fellow guild
members) pays 1,000 gold pieces to bring the invitees into the alliance.
An outside guild cannot ask to join an alliance—invitations to join
an alliance only come from within the alliance. Any guild leader can
remove his guild from an alliance at any time.
Page 61

110
Page 62

Player -VS-
Player
Page 63

112
113
plAyiNg pVp
Player vs. Player, or “PvP,” is the core of the competition that puts the
“competitive” in the Competitive Online Roleplaying Game. There are
many varieties of PvP competition. You will sometimes nd yourself
on a randomly selected team, though more often you will choose your
group before entering a PvP contest. Your objective might be as simple
as eliminating the other team, or it could be far more complex. PvP
matches may also involve dangerous computer-controlled enemies on
the map, so be watchful.
team vs. team contest, usually for control of a resource or strategic
location in that area. These are in essence player vs. player combat
arenas, but with specic victory conditions found only in that mission.
Competitive missions are one style of PvP play that does not take place
in the Battle Isles (a unique section of the world comprised entirely of
PvP arenas). Ready-made PvP characters will not be able to compete
in these missions, heroes will need to roleplay to reach them. Once you
have reached a competitive mission, however, you may go back and
play through it again as often as you like.
The Battle Isles
PvP combat takes place in a region of the world dedicated solely to
testing the mettle of heroes—the aptly named Battle Isles. Here acolytes
of the Zaishen Order, a devout sect dedicated to the war god Balthazar,
train for a never-ending series of PvP battles. Newly created pre-made
PvP characters begin in this PvP zone, others may nd transport here
by ship. The Zaishen Order considers combat a sacred rite, and ensures
that all ghts are fair ghts within their holy arenas.
Make Your Name
on the Isle of the Nameless
You can learn all about PvP gameplay—and Guild Wars Factions
combat in general—on the Isle of the Nameless. This is the starting
location for all new PvP characters, and offers a full course of techniques
and training. And while the focus is on player vs. player, you should
check out this area even if you never intend to set foot in an arena. For
starters, you will nd out all about various Conditions you might nd
yourself suffering (such as Bleeding or becoming Dazed) and learn
what skills and professions are effective against such conditions. The
Isle of the Nameless also features training arenas (in case you do plan
to go on to greater PvP glory) and targeting aids that can teach you the
relative distance meant by terms like “adjacent” or “nearby.”
Competitive Story Missions:
PvP or Not PvP?
Competitive story missions are placed in the storyline of Guild Wars
Factions that will see your character joining one side or another in a
CrEATiNg A pVp ChArACTEr
You might join PvP combat with a fully developed level-20 roleplaying
character. This will give you a wider variety of choices when it comes
to skill selection and equipment, and experienced players tend to nd
Page 64
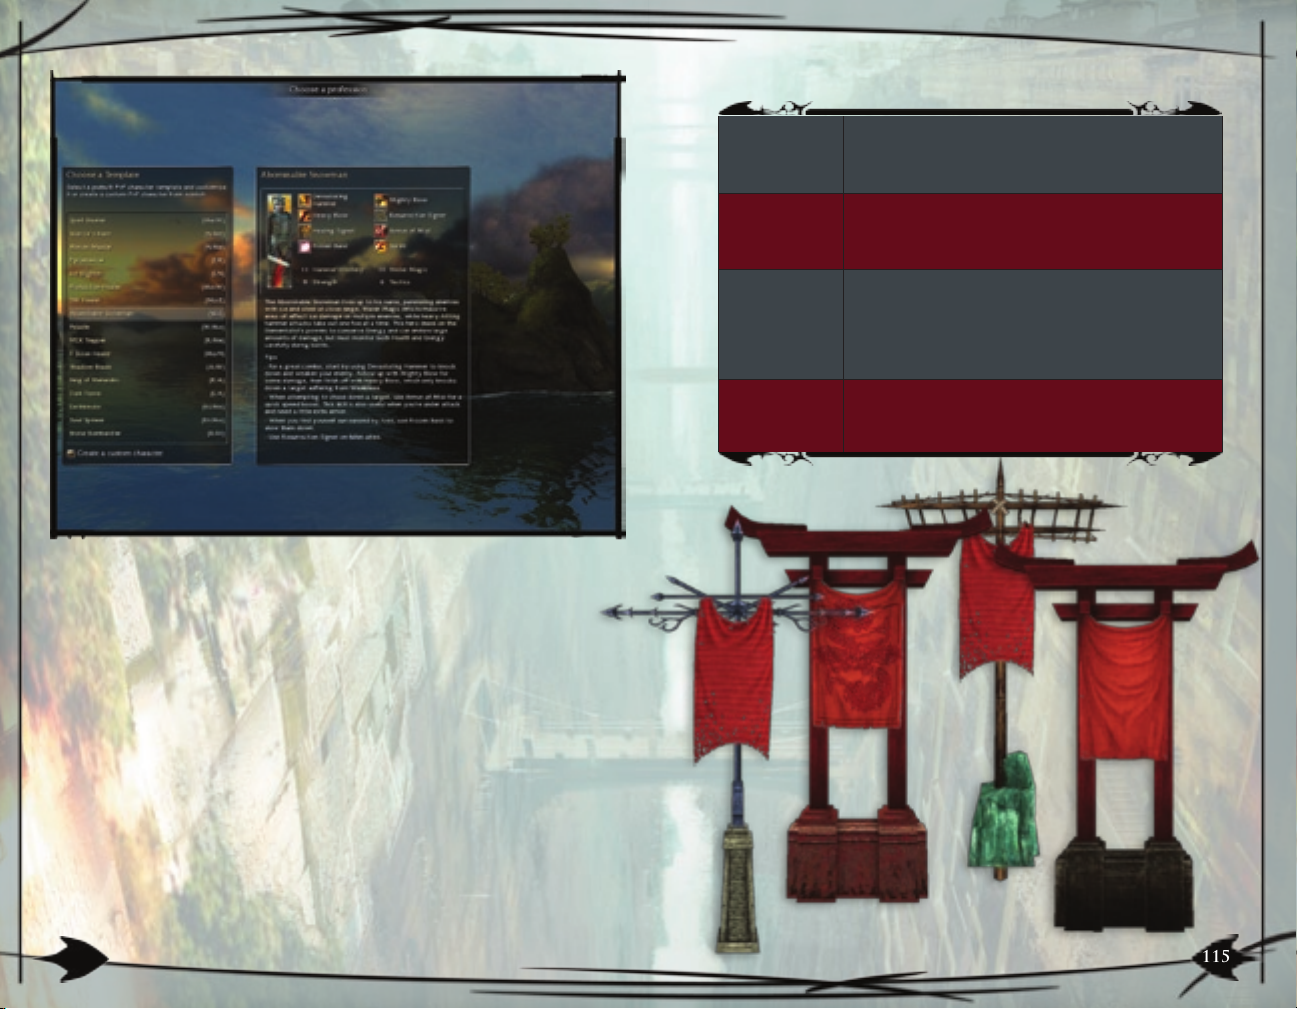
114
115
Arena
Guild Battles
Alliance Battles
Enter the Arena and compete in PvP gladiator-style battles for experience, or just for fun. Arena matches don’t require you to form a party;
the Arena creates teams automatically from available players. The
Arena is a great place to nd PvP action any time.
Guild Battles pit guild against guild in a variety of situations that will test
your skills and team spirit. Winning Guild Battles earns rating points for
your guild, which increase your overall guild ranking and your guild’s
position on the Guild Ladder.
These battles take place on special alliance battle maps found in the
realm of Cantha. Alliance battles pit groups of guilds against each other
in a quest to gain glory for their chosen faction—in this case, either
Luxon or Kurzick. Players in alliance battles will gain faction points
for helping one side or the other; the total faction points on either side
determines factional control of other key locations on the map.
such characters perform strongly in player vs. player. If you want
to get right to the ghting, you can create a new PvP character that
starts at level 20 and comes with a smaller assortment of skills and
equipment. Pre-built PvP characters can still be customized to a certain
extent through weapon and armor choices.
pVp COMbAT
PvP battles consist of two or more teams of 4–8 players apiece all
battling for supremacy. Team up with fellow guild members or other
online players for PvP battles in Arenas, Guild Battles, or Tournament
play. Use Team Chat and the mini-map to communicate strategy with
your team, and be ready to adjust tactics on the y!
Tournament Play
Tournament play lets your guild compete for worldwide Guild Wars
supremacy. Winning in the tournament earns you fame points.
Page 65

116
117
TOurNAMENT plAy
Guild Wars Factions features continuous tournament action wherein
tens of thousands of teams compete for ranking and for the top position
on the Guild Ladder. Assemble a team and engage in a series of battles
which will challenge your skills and test your limits. The Guild Ladder
Guild Wars website tracks each guild’s wins and losses, and rates
on the
each guild accordingly. In Worlds at War, the international
tournament, countries compete for worldwide Guild Wars supremacy.
Guild Wars
TOurNAMENTS:
COMMON fACTOrS
All tournament battles have the following in common:
Ghostly Hero: In each tournament battle, your team is aided by a
Ghostly Hero. Some battles require you to keep him alive in order
to succeed. Your Ghostly Hero resurrects along with your team.
Morale Boost: The Morale Boost removes a percentage of any
existing Death Penalties (DP) from all team members. If your team
has no DP, each member receives a boost to maximum Health and
Energy.
Win Condition: Defeat all enemy NPCs.
Lose Condition: Your party is defeated and cannot be resurrected.
NPCs: Ghostly Hero
Morale Boost: Faster victory grants a larger morale boost. The clock
will not start until a player approaches the enemy.
Tips:
Keep your healers toward the rear and form a wall around them.
Interruptions skills help defeat enemy healers.
The morale boost for this battle carries over to future battles.
Annihilation
The goal in Annihilation battles is to survive until all other teams have
been eliminated.
Win Condition: Defeat all members of the opposing team.
Lose Condition: Opposing team defeats your entire team.
NPCs: Ghostly Hero, Priest
Morale Boost: Kill the enemy priest.
TOurNAMENTS:
VAriAblE fACTOrS
Resurrection: Priests, when present, will resurrect dead team
members every 2 minutes. If the priest is killed, dead team
members stay dead unless a team member resurrects them. Some
battles feature a permanent Resurrection Circle that cannot be
destroyed.
TOurNAMENT bATTlES
Guild Wars tournament battles generally fall into one of these
categories:
Qualifier (Single Party)
This is the rst stage of the tournament. Battle a team of NPCs to prove
yourself worthy of competing in the tournament.
Tips:
Keeping your priest alive is extremely important in these battles;
watch out for Rangers and Elementalists attacking your priest from
a distance.
Some Annihilation battles feature obelisks, which your team should
attempt to control for an advantage. Take your ag to the obelisk to
control it.
Capture the Relic
In a Capture the Relic battle, two teams compete to collect enemy
relics within a ten-minute period. To score a point, capture the enemy’s
relic and bring it to your Ghostly Hero. Another relic will spawn when
the rst is delivered; capture as many relics as possible before the
clock runs out. This battle type features a Resurrection Circle as well
as braziers, which keep track of the score. The color and intensity of
the ames (small, medium, and large) indicate which team is winning
and by how many points.
Page 66

118
119
Win Condition: Collect more relics than the opposing team before the
clock runs out.
Lose Condition: Collect fewer relics than the opposing team before
the clock runs out.
NPCs: Ghostly Hero
Morale Boost: Kill the enemy Ghostly Hero.
Tips:
While carrying a relic, avoid using skills or attacking, otherwise
you’ll drop the relic.
Movement is slowed while carrying a relic; due to their heavy armor
and speed-enhancing skills, Warriors often make the best relic
runners.
Press and hold Alt and rotate the view to nd a relic on the
ground.
Use movement debuffs to defend your team’s relic.
Some Capture the Relic battles feature a door; controlling the door
is the key to victory in these battles.
King of the Hill
The object of King of the Hill battles is to be the team in control of
the dais when the clock runs out. Your Ghostly Hero must claim the
dais using a “claim” Spell, which takes ve seconds to complete. This
battle type features a Resurrection Circle.
Win Condition: Your team controls the dais when the clock runs out.
Lose Condition: The opposing team controls the dais when the clock
runs out, or your party is defeated and is unable to resurrect.
NPCs: Ghostly Hero
Morale Boost: Awarded every two minutes your team controls the
dais.
Page 67

120
121
ObSErVEr MOdE
Ever wish you could see championship battles rsthand and catch Guild
Wars legends in the making? Want to check out a PvP map before you
try it? Are you looking to scope out the competition and pick up new
strategies? Maybe you just want to watch your friends battle to victory
and see your enemies battered without putting in the effort yourself? If
the answer to any of those questions is “yes,” Observer mode is made
for you. You can choose to enter Observer mode from the main menu
(or by pressing B) to check out a guild battle or a guild tournament
battle going on in one of the PvP arenas. To leave Observer mode, use
the menu, hit B again, or hit M to use ordinary map travel (which will
take you back to the character you are playing).
Using Observer Mode:
Press U while in Observer mode to open or close the
map overlay.
Matches are made available for observation 15 minutes
after the match starts. If you are the rst one to
view the match it will play back from the beginning.
Any observer who joins after the rst person will enter
Observer mode as the match is in progress. Later
observers may miss the beginning of the
match, but will be able to view it simultaneously alongside
all other observers present.
The overhead view centers on a random player when you
enter Observer mode. You can switch your focus to another
character by left-clicking on that character.
You can also change your view by left-clicking on a
character's icon on the observation map.
You can use the Tab key to cycle through visible players.
If you wish to observe without centering your view on a
single character, nd one of the small camera icons
on the map and click on it. Your view will move to that
point.
Turn on the Auto-Camera feature (click the check box in
the upper right corner of the screen) to let Observer mode
take over for you. Auto-Camera will move from camera to
camera (and sometimes from player to player) to
let you follow the action with ease.
Press the O button while in Observer mode to see the score window,
which tracks the Health and morale of each team throughout
the game.
While in Observer mode, you can chat with other observers
using Observers Chat. Players in the match will not be able to
see observer comments at any time.
Page 68

Credits
ArenaNet
Executive Producers:
Mike O’Brien Jeff Strain
Patrick Wyatt
Designers:
James Phinney
Isaiah Cartwright Darrin Claypool
Michael Ferguson Eric Flannum
Kevin Gadd Jeff Grubb
John Hargrove Stephen Hwang
Colin Johanson Curtis Johnson
Albert Liao Andrew McLeod
Ben Miller Linsey Murdock
Mike O’Brien Jonathan Peters
Brian Porter
Artists:
Daniel Dociu
Scott Albaugh Richard Anderson
Matthew Barrett Aaron Coberly
Rebecca Coffman Kevin Dalziel
Horia Dociu David Dunniway
Brant Fitzgerald Katharine Hargrove
Levi Hopkins Trevor Howell
Susan Jessup Wei-Che (Jason) Juan
Kekaipo’inalu Kotaki Tonya Lyle
Matthew Medina Kristen Perry
Bobby Pontillas Heron Prior
Scott Robinson Delly Sartika
Jason Stokes Barry Sundt
Xia Taptarakunekane Chris Turnham
Christian Venturini Billy Wardlaw
Jason Wiggin Doug Williams
Environment Artists:
Dave Beetlestone
Win Arayaphong Ely Cannon
Jesse Christensen Justin Fawcett
Tami Foote Josh Foreman
Peter Fries Jens Hauch
Jason Jones James McMillan
Programmers:
Brett Vickers
Jim Scott
Jesse Bernoudy James Boer
Stephen Clarke-Willson Shana Cooke
John Corpening Kevin Ehmry
Lewis Mohr Joe Mullenix
Mike O’Brien Eric Rane
Chae Seong Lim Braeden Shosa
Austin Spafford Jeff Strain
Denis Suhanov Patrick Wyatt
Mark Young John Zipperer
Writers:
Jess Lebow
Cory Herndon Stacie Magelssen
Marti McKenna Bobby Stein
Producers:
Jay Adams Shawn Sharp
Business Team:
Tommy Park
Jenny Bendel Tyler Kim
Lisa LaFay Steve Shepard
Kevin Simons
Community:
Gaile Gray
Natasha Hoover John Stumme
IT:
Peter Petrucci
Steve Becker Erin Brooks
Trey Valenta
Localization:
Adam Vance
Mehdi Mousavi Yuhong Wang
Organized Play:
Michael Gills
QA:
David Stiner
Kyle Elliott John Holes
Chelsea Kibler Elijah Miller
Randy Parcel Ryan Scott
John Thomas Mike Zadorojny
Web and Visual Design:
Ron Critcheld
Andrew Patrick AJ Thompson
Reagan Wright
Contractors:
Andrio Abero Sam Bragg
Lisa Chido Kirill Federspiel
S.P. Miskowski
NCsoft Interactive:
Robert Garriott
Mandy Van Ackeren Toree Alessi
Lisa Bell Neal Buckmaster
Dan Campbell Michael Craighead
Cristina Cromartie Luisa Donovan
Matt Esber Nathan Emmott
Hoss Fatemi JoAnna Frazar
Chris Freeman Dorothy Ferguson
Deborah Gates Andy Hunter
Peter Jarvis Martin Knapick
Edward Knapp Greg Latson
Will Leverett Jeff Lewis
Jennifer Lyons Jessi Knox Marshall
Michael McDonnell Kellee McKeever
Lisa Mandile John Melvin
Jeff Moreaux Sean Neil
Athena Peters Keith Quinn
Victoria Richardson Dylan Servantes
Jonathan Shelus David Swofford
Steven Tonkin Stefan Trel
Alaric Weigle Cullen Wilson
Billing:
Reneé Lasswell
Michael Augustine Bethany Baldwin
Travis Campbell Matt Chernicky
Michael Chirieleison Amy Crews
Ben Furtado John Garcia
Leslie Lomeli Marissa McWaters
Rachelle Ockert John Rabon
Colby Robbins David Ruckel
Lance Schibi Margaret Sheehan
Stephen Shultz Amanda Slade
Patrick Wagner
Page 69

Tech Support:
Chris Allen Nick Bellamy
John Bishop Trollis Crider
Josh Grifth Steven Hurtado
Donovan Kennedy Connon Kuhnhausen
Michael Lafond Jason Lifsey
Hayden Linder Russell Stinnett
Bill Wilson Tim Wilson
NCsoft:
Tack Jin Kim
Kyung Mi An Woo Ju Cho
Chris Chung Jung Hoon Choi
Bidam Jang Kyewon Jeon
Woo Jin Jeon Ho Jeon
YoungSeo Jeong Dong Joon Kim
Eugene Kim Hee Jung Kim
Hwa Sun “Harry” Kim HyeWon Kim
In Goo Kim Jae Hwan Kim
Jin Soo Kim JinSeop Kim
June Kim Kenny Kim
Yeo Eun Kim Yong Kon Kim
Hyung Suk Kwon Dongmin Lee
Eun Jung Lee GilJin Lee
Han Joo Lee Jong Bai Lee
Paul Lee Young Mi Lee
Roger Lew Jisun Min
Peter Park
Jae Chan Shin Paha Schulz
Kevin Seo Yena Sohn
Hui Jeong Yang
Daehyun (Shimmer) Shim
NCsoft Europe:
Geoff Heath
Al Aldridge Anna Andre
Cinzia Barrella Thomas Bidaux
Volker Boenigk Paul Bone
David Bonin Maddalena Cipriani
Loic Claveau Deborah Coster
Gaelle Daam Eric Emanuel
Ismael Fernandez Allan Fowler
Aegir Hallmundur Max Heath-Brown
Angelika Hell Karine Humbert
Julia Irler Caroline Jany
Sean Kang Martin Kerstein
Thomas Kiss Véronique Lallier
Luisa Mari John Marshall
Sarah Mason Dirk Metzger
Tina Mueller Manuel Prueter
Rene Reichert Stephen Reid
Sarah Rogers Jean-Marc Rouchouse
Nick Schaefer Kevin Taylor
Sebastien Vidal Samuel Watts
Alex Weekes Kieran Weir
Marcus Whitney
NCJapan:
Taek Hun Kim
Park Chan Ranko Fukui
Shinichi Ichikawa Kevin Jang
Nana Kikuchi JC Kim
Yuki Kimura Jin Woo Lee
Susumu Mizukoshi Rutsuko Nakamura
Masa Ogura Makoto Ono
Takashi Onodera Hiroaki Tashiro
Yasuhito Tsujimura Takashi Yamano
Wataru Yokouchi Choi Yoon-seok
Seita Yoshitaka
NCsoft Taiwan:
Jung Kim
John Chen Andrew Chen
Tony Chen Cooper Chen
Peggy Chu Lulu Chung
Ping Hsien Elsa Hsu
Tad Huang George Huang
Jo Huang Yuan Juin
Sean Kim Bill Lee
Betty Lee Kerry Li
Eva Lu Aries Tsai
Jer Wang Ashely Wang
Chen Wen Minglun Wu
Quad Software:
Florin Bostan Mihai Daranga
Cristian Necula Daniel Vijoi
Adrian Licuriceanu
Omni Interactive Audio:
Alistair Hirst
Chase Combs Lisa Elliott
Matt Ragan Robert Ridihalgh
Tom Smurdon Daylon Walden
Artistry Entertainment:
Jeremy Soule Julian Soule
Liquid Development
NCRC (NCsoft China R&D Center)
Tommy Lee
Bokki Chae Liu De Hui
Dong Jia Gao Liang
Qin Yu Zhang Yu
Cinematics:
Sung Jun Ahn
Kevin Chen Jung Eik Choi
Yong Jue Ham Jae Ik Hwang
Jae Gil Lim Seung Goo Kang
Hyung Jun Kim Jeong Il Kim
Sang Hoon Kim Yu Jin Kim
Eun Sung Lee Seo Jeong Lee
Dae Hong Min Chang Soon Park
Jun Wan Park Da Woom Song
Cheol Woong We Min Young Yoon
Sang Il Zeon Digital Frontier Inc.
Shane White – Storyboards
Voice Casting and Production:
Blindlight, LLC.
Dawn Hershey, C.S.A. (Casting Director)
Lev Chapelsky Alexandra Dorris
Dave Lieber Jan Sarah Sink
Voice Direction:
Dean Orion
Sound Engineer and Dialog Editor:
Tal Miller J. David Atherton
Voice Actors
Fred Tatasciore Nolan North
Diane Michelle Akiko Morisson
James Sie Paul Eiding
James Horan Nika Futterman
Mona Marshall Gregg Berger
Peter Giles Darryl Kurylo
Bob Joles Vanessa Marshall
Steve Blum Audrey Wasilewski
Page 70

The product name Miles Sound System, the Miles logo, and XMIDI are all copyrighted
and trademarked by RAD Game Tools, Inc. Copyright 1991-2005 RAD Game Tools, Inc. All
Rights Reserved. Printed and produced in the United States of America.
The product name Miles Sound System, the Miles logo, and XMIDI are all copyrighted
and trademarked by RAD Game Tools, Inc. Copyright 1991-2005 RAD Game Tools, Inc. All
Rights Reserved. Printed and produced in the United States of America.
LIMITED WARRANTY
The following warranty and support information applies only to customers in the United
States and Canada, and only to original consumer purchasers of products covered by this
warranty.
NC Interactive, Inc. and ArenaNet Inc. warrant to the original purchaser of the enclosed
product (the “Product”) that the media containing the Product will be free from defects in
material and workmanship for a period of ninety (90) days from the date of purchase (the
“Warranty Period”). NC Interactive’s and ArenaNet’s entire liability and your exclusive remedy under this limited warranty shall be, at NC Interactive’s and ArenaNet’s option, repair
or replacement, without charge, of all or the affected portion of any Product that proves to
be defective in material or workmanship during the Warranty Period.
EXCLUSIONS FROM WARRANTY
This warranty applies only to defects in factory materials and factory workmanship. Any
condition caused by abuse, unreasonable use, mistreatment, neglect, accident, improper
operation, destruction or alteration is not a defect covered by this warranty. Parts and
materials subject to wear and tear in normal usage are not covered by this warranty.
LIMITATIONS
This warranty is in lieu of all other warranties and no other representations or claims of
any nature shall be binding on, or obligate NC Interactive or ArenaNet. Other than the warranties set forth above (which are limited to the ninety (90) day period described above),
NC Interactive and ArenaNet products are provided “as is” without express or implied war-
ranties of any kind, including, without limitation, warranties of merchantability and tness
for a particular purpose. NC Interactive and ArenaNet do not warrant that the products will
be error free or will operate without interruption. In no event will NC Interactive and/or
ArenaNet be liable for any special, incidental, or consequential damages resulting from
possession, use or malfunction of NC Interactive and ArenaNet products. Some states do
not allow limitations as to how long an implied warranty lasts and/or exclusions or limitations of incidental or consequential damages. So the above limitations and/or exclusions
of liability may not apply to you. This warranty gives you specic rights, and you may also
have other rights that vary from state to state. Neither NC Interactive or ArenaNet nor your
retail dealer has any responsibility for any incidental or consequential damages relating to
your use of the product, including, without limitation, any damages for loss of data or loss
of prot, or for any incidental expenses, loss of time, or inconvenience. As some states do
not allow the exclusion or limitation of incidental or consequential damage, the foregoing
limitation or exclusion may not apply to you.
HOW TO OBTAIN WARRANTY SERVICE
To obtain warranty service, please send the defective Product, together with a copy of your
original sales receipt, your return address, name and telephone number (should contact be
necessary) and a brief note describing the defect to NC Interactive at the following address:
6801 N. Capital of Texas Hwy, Bldg. 1, Ste. 102, Austin, TX 78731-1780. The defective product
must be post marked within ninety (90) days from the date of purchase. Proof of purchase
in the form of a dated receipt must be included to obtain warranty service. The shipping
costs for sending the defective product to NC Interactive is the sole responsibility of the
Customer. NC Interactive and ArenaNet will not be liable for any damage that occurs during
shipping.
If you have warranty questions, you can also contact our Customer Support department via
email at: support@plaync.com [INSERT OTHER E-MAIL ADDRESS IF THIS IS WRONG]
CUSTOMER SUPPORT
For customer support, account support, and technical support questions, please visit the
support section of the Guild Wars website at:
http://support.guildwars.com
At this site you will nd a searchable knowledge base containing useful answers to frequently asked questions, solutions to common issues, and detailed information regarding
additional contact methods if your answer or solution is nowhere to be found.
Page 71

TM
www.guildwars.com
TM
®
 Loading...