

Page 1

GROUND
CONTROL
Field Commander’s Handbook
Version 1.61
Page 2

TABLE OF CONTENTS 0
3
TABLE OF CONTENTS
Message From Crayven High Command ..............................2
Table of Contents ..............................................................3
1. Introduction ..................................................................5
System Requirements ......................................................6
Installing Ground Control....................................................6
Installing DirectX ..............................................................6
2. Background ..................................................................7
The Order of the New Dawn ..............................................7
The Crayven Corporation ................................................13
3. Quick Start ................................................................20
4. Playing the Game ........................................................21
Single Player Game ........................................................23
Multiplayer Game ..........................................................25
Options ........................................................................26
Credits..........................................................................26
5. The Management Interface ..........................................27
Briefing ........................................................................27
Configure Dropships........................................................27
Configure Squads ..........................................................29
Mission Debriefing ..........................................................30
6. Commanding your Strike Force ....................................31
The Command Environment ............................................31
Camera control ..............................................................31
The Tactical Map ............................................................32
Calling down the Dropships ..............................................33
-- GROUND CONTROL FIELD COMMANDER’S HANDBOOK --
0 Message From Crayven High Command 0
2
You will soon be a commander of a CLSV-601 Command APC, assigned to
active duty on the Crayven heavy cruiser CSS ASTRID attached to 34th Assault
Regiment located to the contested colony of Krig-7B. As a field commander in
the 34th Assault Regiment you will be required to configure your own strike
team as appropriate for missions assigned to you. You and your squads will be
transported to designated combat zones on the planet surface in UV/4
Dropships, where you will personally lead them into battle to complete your
mission objectives. Between active combat duty you will be accommodated
aboard the CSS ASTRID.
The acquisition operation on Krig-7B is under a joint corporate-military jurisdiction and your commanding officer on this campaign will be Director Enrica
Hayes. All information regarding this operation is to be viewed as strictly confidential. Breach of confidentiality will lead to summary execution according to
directive #9, paragraph 65.
To your aid you have received the Ground Control Direct Command Interface
System (GC-DCIS) and the Field Commander’s handbook.
Remember the Crayven Corporation allows you to be all you can be!
-- GROUND CONTROL FIELD COMMANDER’S HANDBOOK --
Page 3

5
This Field Commander’s Handbook will teach you how to interact with the
Ground Control Direct Command Interface System - GC-DCIS - available
onboard your CLSV-601 Command APC.
The Field Commander’s Handbook also contains a refreshment tactic section
intended to refresh the very basics of the tactics taught at the Ney Vesta
Academy of Martial Arts.
“Configuration of terrain is an aid to the enemy.
Analyzing the enemy, taking control of victory, estimating ravines and defiles, the distant and near, it
the Tao of the superior general. One who knows
these and employs them in combat will certainly be
victorious. One who does not know these or employ
them in combat will certainly be defeated.”
-Sun-Tsu
Please note that the keyboard commands mentioned in this manual are referenced to the default settings. If the default settings have been changed, the
keyboard commands may no longer be true to your system.
-- GROUND CONTROL FIELD COMMANDER’S HANDBOOK --
4
The Squad Buttons ........................................................34
Squad Behavior Menu ....................................................35
Ordering your squads......................................................36
7. Options ......................................................................39
General Options..............................................................39
Video Options ................................................................39
8. Multiplayer ................................................................41
Multiplayer setup............................................................41
Internet Standard game ..................................................45
Internet Drop-in game ....................................................48
Local Area Network (LAN) ..............................................49
9. Ground Control Tactics ................................................50
Knowing your battlefield terrain ........................................50
Line of Sight ..................................................................50
Suppressive Fire ............................................................50
Flanking maneuvers ........................................................51
Friendly Fire ..................................................................51
Combined Arms ............................................................51
Squads and Experience....................................................52
10. Technical Manual ......................................................53
Crayven Corporation units................................................53
The Order of the New Dawn units ....................................68
11. Credits ....................................................................83
12. Technical Support......................................................87
13. Warranty ................................................................88
14. Default Buttons and Key Settings ..............................89
-- GROUND CONTROL FIELD COMMANDER’S HANDBOOK --
0 TABLE OF CONTENTS
1 INTRODUCTION 0
Page 4

2 BACKGROUND 0
7
-- GROUND CONTROL FIELD COMMANDER’S HANDBOOK --
0 1 INTRODUCTION
6
SYSTEM REQUIREMENTS
Minimum System Requirements
The Ground Control Direct Command Interface System (GC-DCIS) requires that
your Command APC onboard computer is equipped with:
Pentium II 233 MHz or Pentium II 200 with 3D Accelerator Card
32 MB RAM
250 MB HD Space
CD-ROM: 4x or better
640 x 480 SVGA high color (16-bit) 4 MB Video Card
DirectX 7.0a (included on CD)
Windows® compatible sound device
Mouse and Keyboard
Recommended System Requirements
For maximum combat performance Crayven Tactical Military Operations recommend the following:
Pentium II 333 MHz or better
64 MB RAM
3D accelerator card (Glide or Direct3D compatible)
450 MB HD Space
Installing Ground Control
Crayven High Command recommends that you take the time to run Disk
Defragmenter on the current hard drive before you install the game. Disk
Defragmenter is activated via the Start button on the Windows taskbar in the
[programs/accessories/system tools] group. Follow its instructions.
In order to install the GC-DCIS to your Command APC onboard computer safely, you need to insert the Ground Control CD into your CD-ROM and follow the
instructions on the screen.
If no instructions shortly appear, double-click on the “my computer” icon on
your desktop. Double-click on the CD-ROM drive icon. In the file window, doubleclick on the file icon of AUTORUN.EXE. Follow the instructions on screen.
Installing DirectX
The Ground Control Direct Command Interface System requires that you have
Microsoft DirectX 7.0a or higher installed. During the installation your onboard
system will be checked to see if you have correct drivers installed. Should you
require new drivers, you will be asked if you would like to install DirectX 7.0a.
-- GROUND CONTROL FIELD COMMANDER’S HANDBOOK --
THE ORDER OF THE NEW DAWN
Introduction
The Order of the New Dawn is Earth’s largest religious faith, and if its financial
strength were rated against the world’s corporations, it would be the third
largest. The Order counts nearly 700,000,000 Faithful among its ranks, and
its holdings range from Mars to the Spinward Reaches.
The Order’s ranks are divided into three great branches of service. The first
of these is the Manus Dei, “the Hands of God”, by far the largest grouping
of the Faithful; of the Order’s 700 million members, nearly 600 million belong
to the Manus Dei. The Hands of God are the workforce of the Order, both
Earthside and abroad. They come from every technical and labor discipline,
and many are recruited directly from the ranks of other corporations. While
there are laws regarding the appropriation of skilled workers between
corporations, religious conversion is currently unrestricted, and so the Manus
Dei is constantly being refreshed with a steady influx of talent. It is not unusual
for the Order to actively try to convert corporate personnel involved in hightech research projects.
Page 5

2 BACKGROUND 0
9
critics are quick to point out that this treasure was not saved merely for the
benefit of humanity. Since 2177, the works collected in the L.A.N. have been
protected under the existing salvage laws of the GCC, and are no longer considered to be “in the Public Domain”. Many irreplaceable classics of human art
and literature are thus copyrighted to the Church in perpetuity, and every reader of Charles Dickens, William Butler Yeats and Joseph Conrad must pay royalties to the church.
The ancient Order also preserved the Spicelegium Dei, “God’s Gleaning”, which
consists of over 700,000 cryogenically preserved tissue samples of human,
plant, and animal life on Earth. The S.D. has been replicated many thousands
of times since 2157, and is still archived by scholars of the Order on Earth,
Europa (Sol 5B), and Proxima 3. It has yet to be surpassed as a reference
library of uncorrupted genetic material from before the Age of Chaos.
Historians estimate that the Order’s underground shelters were opened in the
year 2097, just 48 months after the destruction of the Old World. Although
radiation levels were still dangerous, the brothers and sisters of the Order
quickly realized that the world above them had not been completely destroyed,
and that there were many survivors in need of help. Although their shelters
were not set to open for another fifteen years, the Order opened its doors and
returned to the surface early, hoping to make a difference to the billions of
refugees and convert them to the cause in the process. During the last six
months of a bitter nuclear winter, the Church set up way stations around the
globe to provide shelter to the homeless, and share its remaining supplies with
those in need.
Throughout the Age of Chaos, the Order of the New Dawn built and fortified
over 130 Sanctuaries world-wide. These facilities served many functions in
that dangerous age: to minister to the sick and starving, to provide shelter to
the weary and destitute, to educate the young, and to spread the teachings of
the New Dawn Bible. The most important function of the Sanctuaries, however, was to keep the peace; it was during these years that the armed forces
branch of the Church, the Pax Dei, was established. During this time the Vox
Dei and Manus Dei helped to reclaim thousands of hectares of farmland, and
began carefully supervised breeding programs to re-create many species of
livestock. By luck, faith, or just cold, shrewd sense, the Order came out of the
second Dark Age as the pre-eminent political and spiritual power on Earth.
Unfortunately for the long-term plans of the Order, although the 16 Minutes’
War killed hundreds of millions, destroyed dozens of great cities and brought
the human race very nearly to its knees, the long twilight of chaos was not
enough to kill many major Corporations. By the year 2157, several of these
mighty juggernauts had risen from the ashes, and were once again uniting vast
sections of the Earth under the terms of peace and profit. When the new
Global Central Command was established, the Order of the New Dawn considered it more of a Free Trade organization than an actual powerful ruling body.
This changed when the GCC passed the “Religious Constraint Agreement”-a
0 2 BACKGROUND
8
The second branch of the Order is much smaller than the Manus Dei, but without them, no branch of the Order could exist. The Pax Dei, as they are
known—the “Peace of God”, in common tongue-is a standing security force of
over 90 million men and women. These soldiers form the colonial armies of
the New Dawn and see themselves as the Holy Defenders of the Faith, dedicated to protecting the Order and its interests on Earth and throughout the
galaxy. Members of the Pax Dei provide policing and security for the Order’s
settlements on no fewer than fourteen worlds, and they are also called to provide pilots and crew for any and all vessels belonging to the Church. Given
their grounding in the faith of the New Dawn, Pax Dei troops have a very high
morale factor under fire and will often fight to the last soldier unless directly
ordered to retreat.
The third and final branch of the Order is the Vox Dei, “the Voice of God”, and
functions as the spiritual arm of the church. Members of the Vox include
Ministers, Astronomers and Inquisitors. The Order only allows men to join the
ranks of the Vox Dei, and only after many months of continuous indoctrination.
The Ministers effectively rule the Order and make all strategic decisions, both
economic and military. The Sacred Astronomers are the priest-scientists of the
Order, and guide both the exploration of new worlds and research into new
technologies. The Inquisition is the Order’s internal police force and intelligence
division, and their task is to examine threats to the spiritual purity of the Order
from without and within. A sub-branch of the Inquisition trains the BattlePriests; these men accompany most military units to observe behavior in combat, and make sure field commanders are issuing orders that are “spiritually
correct”. The Vox Dei is the smallest of the 3 Order branches, and numbers
slightly over 10 million personnel.
History
Little is known of the earliest days of the Order, which was founded in the troubled years before the Sixteen Minutes’ War. Although it is believed that the
great majority of the Order’s pre-war records survived the nuclear exchange on
March 27, 2093 intact, they are believed to have been lost in the intervening
centuries. Today we know only that The Order of the New Dawn was founded
by a small coalition of men and women of Faith, who united in common cause
during the dark days of the latter 21st century. Foreseeing the coming cataclysm, these early cultists dedicated themselves to preserving as much technology and knowledge as possible, in order to bring about a New Dawn after
the inevitable holocaust. Many analysts have observed that without the Sixteen
Minutes’ War, the Order would have been just another apocalyptic cult.
But the End of the Civilized World did indeed come, and the proto-Order was
ready for it—and even the corporations, no matter what they may think of the
Order in the present day, do not deny the dept all of humanity owes them. The
greatest prize saved by the Order was the Liber Aurorae Novae, the Book of
the New Dawn: millions of digitally stored books, recordings, and images, which
members of the Order chose to save from the coming holocaust. Of course,
-- GROUND CONTROL FIELD COMMANDER’S HANDBOOK -- -- GROUND CONTROL FIELD COMMANDER’S HANDBOOK --
Page 6

2 BACKGROUND 0
11
resolve battles as fast as possible. When on the defensive, the Order will use
the speed of its armor to make a series of guerilla raids against enemy supply
and command centers until the enemy advance is slowed and the Order can
regain the initiative.
Despite their dependence on high technology, the backbone of the Pax Dei is
still the powered infantryman. Known as Crusaders, Order infantry takes the
brunt of any assault or defense mission. When combined with the Order’s
Heavy Artillery units, Crusaders can overwhelm almost any defense, and many
a corporate position has gone down under the human wave attacks of the Pax
Dei. While these tactics cost heavily in terms of manpower, the Order training
Seminaries produce Crusaders at the rate of over a million every solar year.
Between advanced weaponry and sheer manpower, the Pax Dei can continue a
campaign long after it becomes too expensive for even the richest corporation.
Intercepted Personnel File
Name: Brother Jarred Stone
Branch: Pax Dei
Rank: Deacon
Age: 29
Height: 5’11
Weight: 170 lbs
Date of Birth: 142-2390
Place of Birth: Rosario Sanctuary, Buenos Aires District
Education: Light of the Pampas Children’s Collective,
Rosario Sanctuary, XXX-2394
Osculum Dei Middle Seminary, 230—2404
Called to the Pax Dei: 015-2410
Basic Training: Dawn Forge Combat Seminary, Brasilia Sanctuary
Advanced training:
Sword of Dawn Testing Grounds, Mons Olympus Sanctuary
Assignment: Pax Dei Crusader Corps, 333-2414
Battle of Guderian Prime, 127-2415
Wounded: Received the Heart of Zion
Awards: The Order of Venus for Courage in the Field of Combat
Fleet Action, Battle of King’
s Cross 256-2416
Wounded: Received the Heart of Zion
Awards: The Star of Dawn for Heroism in the Field of Combat
Promoted to Deacon: 022-2417
Current Assignment: Defense of Krig-7B
0 2 BACKGROUND
10
powerful legal block against the Order’s influence in economic matters, and one
that was backed with the armed force of corporate security divisions.
Despite their dedication to peace, the Order did not surrender its power easily,
and open warfare once more scarred the Earth’s surface as the Pax Dei battled corporate troops for control of various power centers. The Order and the
Corporations battled off and on for seventeen years, until a unilateral cease-fire
was signed in 2177, when the World Court announced that the Order would
be allowed to incorporate its holdings. While its power was greatly diminished,
and the Order now found itself constrained by most of the same laws that
bound the Corporations, the Order was still powerful, and retained many of the
lands and cities it had reclaimed during the Dark Years. Since then, The Order
of the New Dawn has been a respected member of the Terran Commodities
Exchange and a powerful corporation in its own right, holding many valuable
copyrights and patents.
Over the past two and a half centuries, the Order has pursued its interests
peacefully whenever possible, but the lesson of 2157 has never been forgotten, and the Church defends its interests with force when necessary.
Pax Dei Technology and tactical doctrines
The Order of the New Dawn has possessed a technological advantage over
the corporations since the end of the Dark Years and, while that lead has been
diminished over the centuries, the Pax Dei still holds the high tech edge over
its opponents. While most corporate forces are restricted to high efficiency
bore cannons and mass drivers for heavy weapons, the Order has used it
mastery of high-energy physics to produce various beam weapons and lightning
generators. These energy weapons pack a much heavier punch than their
projectile counterparts and are, of course, free of logistical constraints like
ammunition.
The Order’s energy manipulation technology is also
displayed in their use of
anti-grav generators as
the propulsion for their
heavy armor units. This
generation of hoverdynes
being currently used by the
Pax Dei in the field are the
first of their kind to see
combat. A hoverdyne is
much faster and more
maneuverable than an
analogous terraydyne, but
it cannot currently pack as much armor. Later generations of hoverdynes may
have more powerful grav generators and hence heavier armor, but for the time
being, Pax Dei armored units will depend on speed and heavy firepower to
-- GROUND CONTROL FIELD COMMANDER’S HANDBOOK -- -- GROUND CONTROL FIELD COMMANDER’S HANDBOOK --
Page 7

2 BACKGROUND 0
13
THE CRAYVEN CORPORATION
Introduction
The Crayven Corporation is currently the largest incorporated body listed in by
the Terran Commodities Exchange. The organization employs over
900,000,000 men, women and children on Earth and abroad, and produces
a range of products as well developing vast off-world petrochemical and biological assets.
Crayven Corporation holdings span the known galaxy, from Earth to the furthest reaches of human-explored space. Although the output of Crayven factories, farms and mining facilities offer a wide range of production, they are perhaps best known for their terra-forming projects. Crayven technologies have
been crucial in the terra-forming of a variety of marginal worlds including the
eight colonies that Crayven has established under its sole ownership.
History
The Crayven Corporation began its life in the year 2162, as a small construction company; its original name was Crayven Construction, and it was based on
the Australian continent, jointly owned by the partnership of Crayven, Schindler
and Beck. The founder of the company, Reno Crayven, was a talented businessman and a gifted architect; he formed the triune partnership with
Schindler and Beck to take advantage of their greater capital and political
resources. The services that Crayven Construction provided were very much in
demand by various Australian business concerns during the Heresy War, and
Crayven backstabbed and hamstrung the competition unmercifully in search of
the mot lucrative and influential contracts. His company prospered and expanded, and the year before the armistice of 2177 was signed, Reno Crayven
bought out his partners in a bitter takeover struggle. Amidst rumors of kidnapping and blackmail, Reno consolidated his new company, the Crayven
Corporation, and applied for membership in the GCC in 2178.
The Crayven Corporation grew throughout the Reconstruction era, and many of
the structures that Reno Crayven built between 2178-2202 are still celebrated
as wonders of post-war architecture. The Kenji Arcology on Okinawa, the Sunrise
Cathedral in Monterrey, and the Domed Gardens of Mars are only a few of the
many buildings still standing which bear the stamp of Reno Crayven’s personal
0 2 BACKGROUND
12
Jarred Stone was born behind the
walls of the Rosario Sanctuary, in an
Order hospital which had opened its
doors to the poor, and was adopted
by the Order of the New Dawn. He
was given the name Jarred Stone,
after the doctor and nurse who delivered him, and taken to the Light of
the Pampas Children’s Collective,
where the sisters of the Manus Dei
cared for him until his 14th birthday.
At this point, vocational testing
revealed he would best serve the
Order in the ranks of the Pax Dei, as
a soldier. And so he was sent on to
the Forge of Dawn combat seminary.
His first combat trainer, the Paladin Valerius, was so impressed with Brother
Stone’s aptitude for war that he made only one comment on the young man’s
chart: “Jarred Stone will make a perfect soldier; his body is strong and his
Faith is stronger. His one weakness may be that he has no weakness-even
when faced with the impossible, he shows no fear, no doubt, no hesitation.”
In his first year of active duty, Stone served on the line in no less than six
armed conflicts, including the battle of Guderian Prime. There Stone led two
squads of Crusaders over the walls of a Benton-Yutan mining fortress, and
destroyed the automated turrets which held the rest of his company pinned
against the bluffs. The lives of over a hundred of his fellow Crusaders were
thus saved, and although Brother Stone was badly injured, he was still able to
negotiate a peaceful surrender of the fortress without further bloodshed, once
he realized that his commanding officer had been killed in the fighting.
Brother Stone’s initiative and valor earned him a short rest at the Nova Roma
Sanctuary, where he received treatment for the injuries he suffered on
Guderian Prime. As soon as he was able, he rejoined his Company in a fleet
action at King’s Cross, where the Armada of Dawn captured two heavy cruisers belonging to Dai Sheung Heavy Industries.
Brother Stone distinguished himself once more in the boarding action against
the DSS Seoul’s Champion, when he broke though an enemy barricade and
rescued several brothers of the Vox Dei. The brothers, who had been captured by Dai Sheung when their Temple on King’s Cross 3 was destroyed, were
being held onboard the Lafayette for ransom. As a reward for his extreme
heroism, Jarred Stone was promoted to the rank of Deacon and given command of his own Company.
-- GROUND CONTROL FIELD COMMANDER’S HANDBOOK -- -- GROUND CONTROL FIELD COMMANDER’S HANDBOOK --
Page 8

2 BACKGROUND 0
15
valor. They did not interfere with the elder Crayven’s plans any further, and the
old man went ahead with his new initiative unopposed.
Crayven personally took the helm of the new division, Crayven Enterprises, and
laid out a bold plan for building a large-scale terra-forming project on Mars.
The result was the Domed Gardens, an indoor paradise containing over 50
square miles of ancient Earth-style forest. Filled with sparkling waterfalls and
lakes, a self-sustaining weather system, and over 5,000,000 species of plant
and animal life, this man-made Eden became the jewel in the Crayven corporate crown-as well as providing a test of Reno Crayven’s terra-forming theories
on an unprecedented scale. With the passing of the six-month milestone for
viability of the Gardens, plans moved forward for the colonization of the planet
known as Vesta 3-better known to us today as the jewel world Ney Vesta.
Because Reno Crayven’s own body was too frail to survive the rigors of FTL
travel, he was never able to see his dream being realized by the planetary engineers, construction crews, and science teams of Crayven Enterprises. Crayven
died on Mars in 2237, in a small pavilion in the center of his Domed Gardens.
A modest granite obelisk stands in the same spot today, and bears a simple
panel of stainless steel with his name, date of birth, and date of death inscribed
on it. It was the only monument stipulated in his will.
For nearly two hundred years since the landing of the first terra-forming crews
on Ney Vesta, the Crayven Corporation has pursued its goal to be first and
foremost among the stars. They have established seventeen colonies on fourteen separate worlds, as well as countless water- and ore-mining facilities on
asteroids and nearby moons. Crayven expertise in both terra-forming and
genetic engineering has made their consulting services the most valuable
investment that any would-be colony can make in its own future. This is why
the Crayven Corporation’s motto hasn’t changed for 182 years: “We Bring
New Worlds to Life”.
Crayven Security Forces
The Crayven military grew from a small self-defense force in the era following
the 16 Minutes’ War to a fully-fledged military unit during the Heresy Wars.
Crayven technology has always placed reliability at the forefront, and while other
Corporations can field equipment with higher performance characteristics,
Crayven vehicles and battle-suits are unmatched in their strength and durability
under fire.
0 2 BACKGROUND
14
genius. Most of the profits from these rebuilding projects was funneled into
CrayArms, the wholly owned weapons and ammunition subsidiary of the Crayven
Corporation.
Reno Crayven was more just than a builder and an artist, however; he was
also a visionary. It was his dream not just to indulge his talent for architecture
on Earth, but to shape whole new worlds for the future. The discovery of FTL
drive in 2207 interested him greatly, and for many years he obsessively battled
other members of the GCC for their technological secrets. If his earlier business tactics might be regarded as unscrupulous, the Reno Crayven of this period could be called downright Machiavellian-but as always, he could never be
formally charged with any misconduct, since witnesses or claimants against
him had a tendency to die before they could testify against him. In the year
2231, when he was diagnosed with a rare and terminal form of bone cancer,
many of his enemies rejoiced and began counting his days.
But Reno Crayven was not finished. He was already heavily invested in antigrav and jump drive technologies. Given the limited time he had left among the
living, he decided to risk everything that he had gained from a lifetime of hard
work and sound investment to realize his greater dream. His impending death,
rather than inspiring cautious consolidation or the need to make amends,
made him even more bold in his ambitions; he felt that he had nothing to lose.
Unfortunately, Crayven’s descendants did not agree. While Reno Crayven liquidated billions of dollars of corporate assets, as well as the totality of his personal wealth, to form a new subsidiary known as Crayven Enterprises, his
immediate heirs, the children of his half-sister Murielle Crayven, protested this
endangerment of their long-awaited inheritance. Reno Crayven responded to
their gambit for control of the “family” company by ruthlessly crushing their
attempts to have him declared mentally incompetent, and writing them out of
his will completely. His eldest nephew, Julian Crayven, was ousted as chairman of the board of the Crayven Corporation, after his Uncle moved to deprive
him of his controlling share of the company’s stock. Whether Julian Crayven
intended to put up more of a fight against his Uncle Reno is unknown; the
younger man died in a plane crash within two weeks of the signing of the new
will, and thereafter his siblings decided that discretion was the better part of
-- GROUND CONTROL FIELD COMMANDER’S HANDBOOK -- -- GROUND CONTROL FIELD COMMANDER’S HANDBOOK --
Page 9

2 BACKGROUND 0
17
Personnel
Major Sarah Parker’s Bio
Age: 35
Height 5’8”
Weight: 155
Date of birth: 045-2384
Place of Birth: Chicago district, Crayven Holdings
Education: Training CrËche 1275DZ, Chicago district, Crayven Holding
Enlisted Crayven Security Division: 045-2401
Basic Training: Crayven Security Base Alpha, Panama district,
Crayven Holdings
Advanced training: Crayven Security Academy, Gamma Dome, Pluto
Assignment:
Crayven Security powered infantry corp.
Awards: Bravery Bonus, 231-2404 (Acquisition Op, Wolf 328-2A) Bravery
Bonus, 011-2405 (Counter Insurgency op, Wolf 328-2A)
Conspicuous Gallantry Bonus, 351-2408
(Acquisition Op, Gamma Hydrea 4)
Wounded Bonus, 355-2408 (Acquisition Op, Gamma Hydrea 4)
Fines: None
Assignment:
Cross training, Crayven Security commando corp. 002-2409
Awards: Bravery Bonus, 304-2410 (Security Sweep Op, Barnard’s Star 2)
Wounded Bonus, 304-2410 (Security Sweep Op, Barnard’s Star 2)
Extreme Heroism Bonus, 115-2412
(Acquisition Defense Op, Sigma Draconis 4-G)
Wounded Bonus, 115-2412
(Acquisition Defense Op, Sigma Draconis 4-G)
Termination Achievement Bonus, 115-2412
(Acquisition Defense Op, Sigma Draconis 4-G)
Fines: Refusal Penalty, 323-2412 (Security Sweep Op, Wolf 328-2A)
Assignment:
Transfer Request, Crayven Security ground control. 089-2413
Awards: None
Fines: Refusal Penalty, 156-2414 (Counter Insurgency Op, Beta Iridani 2)
Dereliction Penalty, 200-2414 (Counter Insurgency Op, Beta Iridani 2)
Refusal Penalty, 045-2416 (Acquisition Defense Op, Wolf 328-6D)
Refusal Penalty, 306- 2418 (Acquisition Op, Epsilon Iridani 3)
Cur
rent Assignment: Acquisition Op, Krig-7B
Status: Probationary
0 2 BACKGROUND
16
The Crayven Corporation fields a very balanced military force, centered around
their next-generation main battle terradyne. Heavy infantry is usually deployed
to screen the terradyne units from enemy anti-armor and artillery attacks.
While Crayven Commanders tend to save air assets for breakthroughs and
assaulting heavily fortified bases, an aeroydyne interceptor wing is almost
always attached to a ground division to act as combat air patrol for any operation.
The Crayven Corporation favors slow, methodical offensives, and this is reflected in their unit designs. Overall the Crayven vehicles have much stronger
armor in their front panels compared to the rear. The Crayven military motto
is “Better safe than sorry”, which is apparent in their terradyne designs.
Once enemy territory has been penetrated, the Crayven division on point will
dig in to secure the objective while a fresh unit moves up to take their place
on the spearhead.
This means most Crayven unit Commanders will see themselves in a series of
short tactical engagements over specific objectives instead of long strategic
advances. When deploying offensively, Crayven dropships will often try and
get as close to their objectives as possible before landing and dropping off
their troops. Some Crayven commanders prefer using dropships in waves, so
that the units from one drop will clear an objective in order for reinforcements
to arrive from another dropship. This “leapfrog” method of deployment has
become a Crayven Security hallmark, and it keeps enemy commanders from
correctly assessing the true objective or Crayven force levels.
-- GROUND CONTROL FIELD COMMANDER’S HANDBOOK -- -- GROUND CONTROL FIELD COMMANDER’S HANDBOOK --
Page 10

2 BACKGROUND 0
19
past 6 years, but each time her amazing record up to and including the action
on Sigma Draconis has won her a stay against dismissal.
At this point Major Parker can no longer be considered a promising officer and
she receives only low priority combat assignments where her usefulness on the
battlefield will not be compromised by her problems with Corporate authority.
0 2 BACKGROUND
18
Analysis
Major Parker had all the signs of
becoming a superlative soldier. She
applied for a position in the Crayven
Security the exact moment she
reached the age of consent at 14.
After an exemplary training period,
marred only by one or two incidences
of excessive force during combat exercises, she entered the Powered
Infantry Corps. During an acquisition
Operation against an illegal TerraTech
claim on Wolf 328-2A, Parker, then a
Corporal, single-handedly rallied her
platoon that had come under heavy
fire from TerraTech artillery.
Personally destroying 3 Artillery pieces
earned her a Bravery Bonus. The first
of many.
Sarah Parker quickly rose through the ranks while continuing to receive bonus
after bonus for her conduct on the battlefield. She was asked to take training
as a Commando and accepted the transfer in 2409. She achieved the rank of
Major by the age of 28 and seemed she was bound for the Fast Track until the
Battle of Hanson’s Rift in 2412.
Major Parker’s Commando unit was stationed at firebase Zulu on the main
continent of Sigma Draconis when it was attacked by the Order of the New
Dawn, who had declared the planet sacred ground and filed Jihad against any
corporate holding which did not immediately evacuate. The firebase was cut off
and subjected to wave after wave of attack. When relief finally arrived, they
found no Crayven survivors except for a badly wounded Major Parker, whose
bunker was surrounded by over 800 Crusader bodies. Major Parker underwent extensive psychiatric treatment.
When she returned to combat duty her CO noted that despite the rewards
given for her combat valor, she seemed strangely ungrateful, and the quality of
her performance became a problem. Things came to a head during a boarding action when she refused a direct order to void the atmosphere of an
enemy Drop ship.
After suffering a fine for her misconduct, Major Parker requested a transfer
back to standard ground control, where she has remained to this day. Her
combat skills are still exemplary, but time and again she has refused to carry
out special commands given her regarding efficient termination of Enemy
Assets. She has been in front of a performance review board twice in the
-- GROUND CONTROL FIELD COMMANDER’S HANDBOOK -- -- GROUND CONTROL FIELD COMMANDER’S HANDBOOK --
Page 11

4 PLAYING THE GAME 0
21
Ground Control is a game of tactical action oriented combat. In Ground Control
you are the Commander of a special operations task force operating from a
starcruiser orbiting the planet Krig-7B. The goal of the game is to archive
your mission objectives, which will span from destroying enemy installations
to protecting engineer teams while they archive their objective. To aid you in
completing your objectives you have your task force. The task force consists of
several squads that you control. Before entering a mission you have the option
of changing their general outfit, unit type and equipment. Be careful with your
task force, as surviving squads will receive experience after each battle.
SQUADS
Your strike team consists of one or more squads. As the campaign progresses
you will receive new squads and destroyed squads will be replaced with fresh
new ones. The squad box indicates the squad’s name, current unit configuration
and attributes. A squad belongs to one of the four available branches:
Infantry The lightest and slowest soldier on the battlefield. They can be
transported inside the Command APC.
Assault Assault vehicles are the units that excel in offensive
maneuvers, and acquiring strategic locations.
Support Support units fill a special niche on the battlefield, be it anti-air
or long range artillery fire.
Aerodyne The airborne aerodynes’ main advantage is their great speed
and unobstructed movement.
0 3 QUICK START
20
This section is for Field Commanders eager to start their Military career as
soon as possible. When you start up Ground Control you first have to select a
video renderer, and select what video mode in which to play the game.
Depending on your system configuration, different options will be displayed.
Click OK to continue.
After the movie is played you will see the main menu. Click on the
SINGLE
PLAYER
button. If it is the first time you run GC on your computer, you will be
asked to select difficulty. Select a difficulty level and then click OK.
The game will start, the three first missions will be the Boot Camp, which will
teach you how to play Ground Control and how to quickly master the basics
of the game.
When you have played through the Boot Camp missions continue to read
the next section in the manual
PLAYING THE GAME
.
-- GROUND CONTROL FIELD COMMANDER’S HANDBOOK -- -- GROUND CONTROL FIELD COMMANDER’S HANDBOOK --
Page 12

4 PLAYING THE GAME 0
23
Single Player Game
Single Player Game allows you to access the single player game. The first
time you select Single Player Game on you computer you immediately start a
new game. You will be asked to provide a game name (optional) and to
select a difficulty level. The next time you access the Single Player Game you
will have a few options:
Continue Game
Continue Game will allow you to continue on the last game played. A description of the last game played will be displayed to show you the name of the
game, the name of the next mission and the difficulty setting. Selecting
CONTINUE GAME
will immediately take you to the current mission’s briefing.
Screenshot of the
Single Player
Game menu.
0 4 PLAYING THE GAME
22
A squad can be changed into another unit type of the same branch when that
unit type becomes available. For example in later missions a Marine squad can
be changed into a Jaeger Special Forces squad. For more information about
units see section 9, the Tactical Manual. Killed squads will be replaced with
new fresh inexperienced squads between missions but all experience and
medals will be lost in the process.
Dropships
Your strike force is brought down to the battlefield in large AV/U4 “Behemoth”
dropships. Each dropship is capable of transporting four squads complete with
equipment down to the battlefield.
The Ground Control Direct Command Interface System is an advanced piece of
software developed solely for the purpose of commanding military elements in
combat situations.
As a beginning Crayven Field Commander it is highly recommended that you
read through these directives to get familiar with the Ground Control interface.
Screenshot of the
Main Menu
-- GROUND CONTROL FIELD COMMANDER’S HANDBOOK -- -- GROUND CONTROL FIELD COMMANDER’S HANDBOOK --
Page 13

4 PLAYING THE GAME 0
25
The list to the left contains all the saved games available. The list to the right
contains all missions played within a selected game. Choose a game and
a mission to start at, and then left click on
START GAME
.
Custom Game
Custom Game allows you to access missions and campaigns that you have
created yourself or downloaded from the Internet. Pressing
CANCEL
will take
you back to the Single Player Game screen.
Custom Campaigns
If you have any custom campaigns on your computer, you can select them in
the top left list and then click
START GAME
. A campaign is a series of missions,
usually linked together. When playing a custom campaign you will automatically
start the next mission after the debriefing as in the usual Single Player Game.
Custom Missions
Custom Missions allows you to play a single custom mission available on your
computer. Select a mission from the list and then click
START GAME
.
Multiplayer Game
Multiplayer Game allows you to engage in multiplayer battle over the Internet or
on a LAN (Local Area Network). A multiplayer game requires that you have an
Internet connection or access to a LAN in order to run. For more information of
how to play on the Internet over WON (World Opponent Network) or on a LAN
see section 8, Multiplayer.
Screenshot of the
Custom Game
screen.
0 4 PLAYING THE GAME
24
New Game
New Game will allow you to start a new game. Note that the previous game
will still be available, but through the Change Game selection. When you select
NEW GAME
, a prompt will ask you to name the game (optional) and select
difficulty. The difficulty levels are:
Easy, Normal
and
Hard.
The
Normal
difficulty
setting is recommended for most players. If you are a very experienced player,
you should select the
Hard
difficulty setting.
Load Game
Load Game allows you to load another game stored on your computer.
Selecting
LOAD GAME
takes you to a new screen.
Screenshot of the
Change Game
screen.
Screenshot of the
New Game
prompt.
-- GROUND CONTROL FIELD COMMANDER’S HANDBOOK -- -- GROUND CONTROL FIELD COMMANDER’S HANDBOOK --
Page 14

5 THE MANAGEMENT INTERFACE 0
27
As a Field Commander in the Crayven Corporation, it is your duty to configure
your strike force before you are dropped into a combat zone. The GC-DCIS
software will aid you in this process but it is ultimately your responsibility to
make sure your strike force is balanced correctly.
Briefing
Before the mission you will receive a mission briefing stating your objectives.
Pay attention to the briefing, as it will give you hints of what to expect in
the mission.
During the briefing your objectives and other vital locations are displayed on
the tactical map. Move the mouse over the objective for a short description.
Use the REPLAY button to replay the briefing or SKIP button to skip it. When
you are ready to begin the mission select
START MISSION
or select
CONFIGURE DROPSHIPS
to configure your strike team.
Configure Dropships
Before you go into a mission you have the option to configure the strike force
you will be using. Once committed to a strike force, it is not possible to change
it during the mission. Changing your strike team is optional, if you don’t want to
worry about the strike team, ANNIE-1, the artificial intelligence advisor will do it
for you.
Screenshot of the
Mission Briefing
screen.
0 4 PLAYING THE GAME
26
Options
Options allows you to modify the performance of Ground Control or to configure
the controls. Note that all changes only apply to the current commander.
For more information about the different options, see section 7, Options.
Credits
Pressing Credits will show you the hard working people involved in the making
of Ground Control. Return to the main menu by pressing
ESCAPE
on
your keyboard.
-- GROUND CONTROL FIELD COMMANDER’S HANDBOOK -- -- GROUND CONTROL FIELD COMMANDER’S HANDBOOK --
Page 15

5 THE MANAGEMENT INTERFACE 0
29
Configure Squads
On this screen you can configure the details for each Squad that you plan
to bring with you to the battlefield.
The left area of the screen shows you the Squads that are currently assigned
to the Dropship(s). The larger right part of the screen displays the details
of the currently selected (or highlighted) Squad.
LEFT-CLICK on a Squad Tab to start configuring it. The right part of the screen
shows you information about the chosen Unit Type, the Unit Edition and
the currently selected Special Weapon and Special Equipment.
To change Unit Type, click on one of the available unit type icons on the top of
the screen. Note that you will not always have access to all unit types. In early
missions only one type might be available, in later missions up to four possible
types may be available. For more information about unit types, see the Technical
Manual, Section 9
To change Unit Edition, click one of the four Edition Tabs below the unit description
text. The different editions slightly change Firepower, Speed, Armor and Range.
Pick an edition that is appropriate for the way you expect to command your
troops in the current mission.
To change Special Weapon and/or Special Equipment, click on one of the icons
in the lower part of the screen. Note that you will not always have access
to Special Weapons and Special Equipment. As the game progresses you will
receive more Weapons and Equipment to select from for each unit.
0 5 THE MANAGEMENT INTERFACE
28
Here you can decide what squads you want in each dropship. Early missions
allow you to put squads in only one dropship. Later missions allow you to add
squads to all three dropships and may provide more squad choices than you
can fit in all three dropships. Some squads may be left behind and you’ll have
to choose which ones you take into battle.
The list on the left of the screen contains slots for any unassigned squads.
The three areas on the right of the screen contain slots for each of the three
dropships. To move a squad from its current location, LEFT-CLICK on a Squad
Tab. This will pick up the Squad Tab. To place the Squad in a Dropship or in
the unused list, just LEFT-CLICK on an empty squad space in either area. If you
put it in a squad space that is occupied, you will switch Squad Tabs and
automatically pick up the one that previously occupied the slot.
To configure the details of the squads that are currently assigned to the
dropships, enter the CONFIGURE SQUADS screen by clicking on the Configure
Squads button in the bottom of the screen.
Autoload
The Artificial Advisor will automatically configure your drop ships if the AUTOLOAD
checkbox is checked. You can also manually move squads between drop ships
and the unassigned list by clicking on the squad to select it and then click
again on the slot you want it in. When the AUTOLOAD is checked, the advisor
will also configure your squads, equipping them with special weapons and
equipment. Click on CONFIGURE SQUADS to change their setup manually.
Note that only the squads in the drop ships will be available during the mission.
The Dropship Loadout
screen is where you
assign your available
squads to one of the
three available dropships.
1. Squad Tab
2. Dropship 1
3. Dropship 2
4. Dropship 3
5. Configure Squads
button
6. Available unassigne
squads
7. Autoload checkbox
8. Start Mission
button
-- GROUND CONTROL FIELD COMMANDER’S HANDBOOK -- -- GROUND CONTROL FIELD COMMANDER’S HANDBOOK --
The Configure Squad
screen allows you to
customize you squads.
1. Dropships
2. Squad Tab
3. Unit Type
4. Unit Edition
5. Special Weapon
6. Equipment
Page 16

6 COMMANDING YOUR STRIKE FORCE
31
In order to become a successful Field Commander you need to master how
to order your Strike Force and interact with the battlefield.
The Command Environment
Camera control
The camera is your point of view and it is free-roaming, meaning that you can
position it anywhere on the battlefield and have it face any direction. The camera
view position on the battlefield is displayed on the tactical map. Note that even
though you can place the camera anywhere does not mean you can see units
or buildings. Only enemy units and buildings that your own units or allies can
see are visible in your view. For more information about the line of sight, see
section 9, Ground Control Tactics.
Rotate the camera view by moving the mouse cursor to the left or the right
edge of the screen. By moving the mouse to the top or the bottom screen
Image of the
Command
Environment with
legend below.
1. Battlefield View
2. The Tactical Map
3. Dropship button
4. Squad buttons
5. Squad Behavior
Menu
0 5 THE MANAGEMENT INTERFACE
30
Mission Debriefing
After a mission, successful or not, you will be presented with a debriefing
screen. On this screen you are informed if your last mission was a success or
failure. Additionally, the rotating model of Krig-7B shows you the progress
of the current campaign.
Click STATISTICS to see detailed mission statistics and the battle performance for each participating squad. Click on one of the SQUAD TABS to see
the battle performance for the selected squad. Note that you will receive
replacements for squads killed in battle.
If you failed the mission you can click RESTART MISSION to try again. If the mission
was a success, click NEXT MISSION to go the briefing of the next available
mission.
-- GROUND CONTROL FIELD COMMANDER’S HANDBOOK -- -- GROUND CONTROL FIELD COMMANDER’S HANDBOOK --
The Camera View Cone is displayed on
the Tactical Map.
Page 17

6 COMMANDING YOUR STRIKE FORCE0
33
The larger tactical overview displays your current and completed mission
objectives. Objectives are marked on the tactical overview with blue circles and
in addition they are represented with boxes to the left of the overview. Moving
the cursor over the objective displays more information about the objective.
The sensors aboard your Command APC are capable of detecting both friendly
and enemy weapons fired in the combat zone. Weapons fire is indicated by
small white moving dots.
Calling down the Dropships
You and your strike team are still loaded aboard dropships launched from
the Crayven battle cruiser orbiting the planet Krig-7B when the mission starts.
The dropships will not touch down on the planet surface until you order them
down to do so. The available dropships are displayed on the left side of
the screen as small icons.
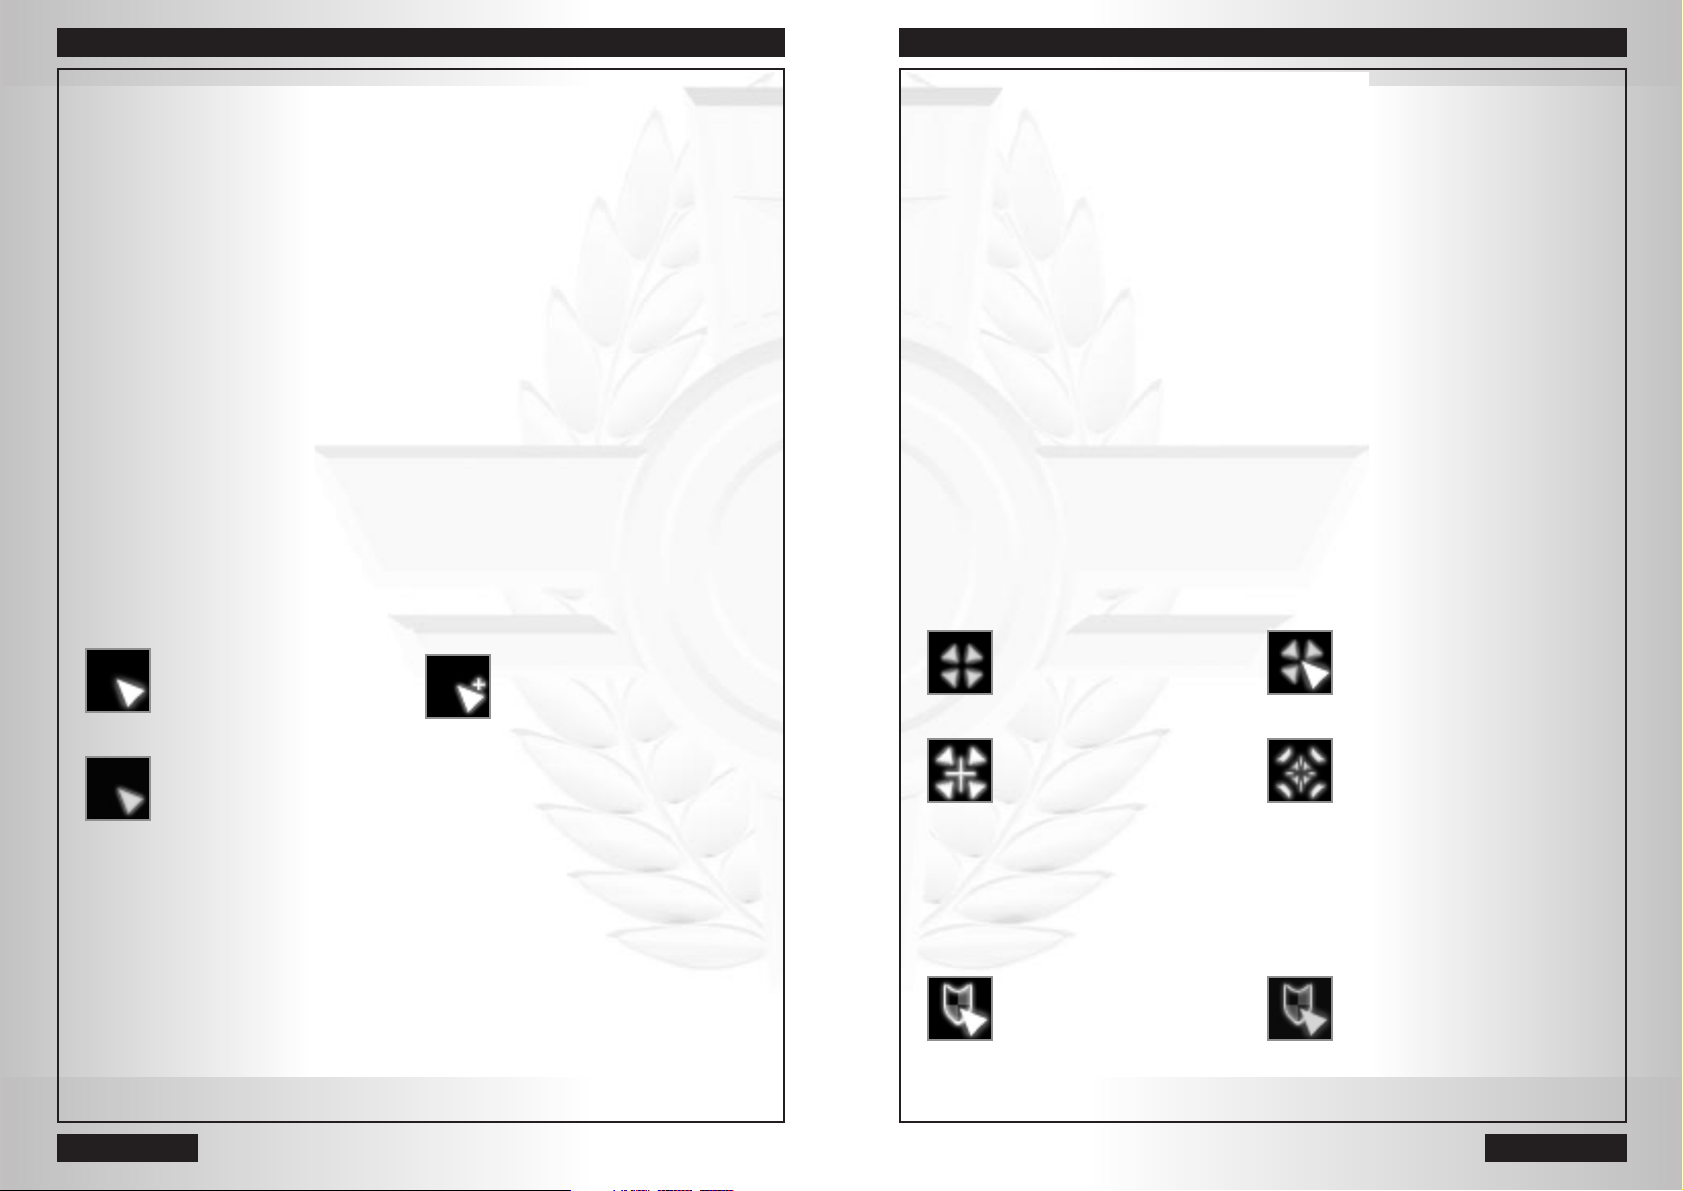
To call down a dropship, simply click on the dropship icon
and then on a dropzone on the tactical map. Possible drop
zones are displayed on the tactical map as yellow pulsating
circles that appear once you have clicked on a dropship.
The dropships will initiate the drop sequence as soon as you
have called them down. The squads will be unloaded as soon
as the dropship arrives. Your Command APC will always
arrive with the first dropship ordered down.
Be advised that you may have more than one possible drop zone in some missions.
Drop all your dropships to the same drop zone or spread them out - it is your
call and your soldiers’ lives may depend on it. You are in no hurry to drop your
squads, survey the terrain and your objectives and select the best approach.
You must be on the alert once you have committed and called down a dropship
The tactical overview
is activated by clicking
on the small arrow
icon next to the small
map or by pressing
the M key on
the keyboard.
Move the mouse over
the objective box to
see more information
about the objective.
6 COMMANDING YOUR STRIKE FORCE
32
edge, you tilt the camera view upwards or downwards. The camera view is
moved forward, backwards or sideways with the ARROW keys. Note that you
cannot move the camera view outside the boundaries of the map.
The altitude of the camera view can be changed with the
PAGE UP
or
PAGE
DOWN
keys. Press
PAGE UP
to go to a higher altitude and
PAGE DOWN
to go
to a lower altitude. If your computer mouse is equipped with a mouse wheel,
you can use it to change the altitude as well.
You can also move the camera instantly to any location on the battlefield by
simply left clicking with the mouse on the small map or on the tactical overview.
You can order the camera view to track a certain squad by double clicking on
the squad or its squad button. When the camera view tracks a squad it will follow it around the battlefield. The camera keeps tracking the squad until you
press an
ARROW
key or until you double click on another squad.
The Tactical Map
In the bottom left corner is the Tactical Map, the Field Commanders best
friend. The tactical map shows you a top-down view of the entire battlefield.
The units you command show up as
green dots, with the currently
selected squad(s) blinking. Friendly
non-controlled units or buildings are
displayed by yellow dots while enemy
units or buildings appear as red
dots. A white cone marks your
current camera view position, with
your view expanding along the cone.
Use the cone to quickly see where
your view is on the battlefield.
Blue circles on the tactical map indicate that the position is the location
of a mission objective. The blue circle
will disappear when you have completed
the objective.
Yellow, pulsating circles indicate a possible drop zone. Drop zone circles are
only displayed when a dropship is activated and indicate that you can order a
dropship to land at that location.
Clicking on the tactical map with the LEFT mouse button instantly moves your
camera view to that location. It is also possible to issue orders to selected
squads on the small map, just like you would do in the camera view.
The small arrow button, up and to the right of the small map toggles the larger
tactical overview map on and off. Pressing M on the keyboard also toggles
the tactical overview on and off.
-- GROUND CONTROL FIELD COMMANDER’S HANDBOOK -- -- GROUND CONTROL FIELD COMMANDER’S HANDBOOK --
Page 18

6 COMMANDING YOUR STRIKE FORCE
34
to a drop zone. Note that you do not have to drop all available dropships at
once. A dropship can be held back in order to be used as reinforcements later
in the mission.
The Squad Buttons
As a Field Commander it is of utmost importance to quickly be able to select
and issue orders to your squads. All squads under your command will be
represented on the screen with a squad button.
A squad is selected by clicking on a squad button with the LEFT mouse button.
A double click on a squad button makes the camera view orbit and track
the squad.
HINT: The Function keys are preset hotkeys for selecting individual squads. F1
quickly selects squad 1 and F2 selects squad 2 and so on. The Command APC
is reached by pressing the <BACKSPACE> key.
The squad button gives you information about your squad’s health even
to the point of individual units within the squad.
The icon on the squad button identifies the squad’s unit type and the vertical
bar on the left side of the bar is the squad’s overall health. When a squad is
taking damage, the bar slowly moves down and changes color from green to
red. Green indicates full health while red indicates close to death or destruction.
The squad button also displays the health of individual units within the squad by
showing green or red dots for each unit that is part of the squad.
The three squares to the far left of the button are the behavior settings.
The brightness of the square indicates which setting in a mode is chosen.
The position of the boxes indicates which mode.
• Top - Attack Mode
• Middle - Movement Mode
• Bottom - Current Formation
The Squad Buttons allow you to quickly select and
give orders to your squads.
-- GROUND CONTROL FIELD COMMANDER’S HANDBOOK --
6 COMMANDING YOUR STRIKE FORCE
35
Squad Behavior Menu
The squad behavior menu allows you to change the behavior of your squads.
The menu can be shown or hidden with the <B> key on the keyboard. To change
behavior on a squad, make sure it is selected, then click on the new behavior
button.
There are three different behaviors you can
change:
Attack Mode
Affects when the squad will attack the enemy.
• In FREE FIRE mode your squad will automatically engage enemies within their weapon
range. With multiple enemies present, it will
attack the enemy it fears the most.
• In RETURN FIRE mode your squads will only
open fire if fired upon first.
• In HOLD FIRE mode the squads will secure
their weapons and not fire until you give them
specific orders or change their attack mode.
Movement Mode
Affects how the squads move around.
• DEFENSIVE MOVEMENT - The squad moves cautiously and when it encounters
an enemy, the units will immediately halt and turn to face the enemy.
• OFFENSIVE MOVEMENT - The squad always moves to the location you’ve
ordered them to, even if they are fired upon. The squad will return fire if its
attack mode allows it.
• HOLD POSITION - The squad will not move an inch from its current position
except for making sure their fronts are facing the enemy.
A squad in Hold
Position mode will not obey any movement orders until a new mode is selected.
Formation
Orders the squad to maintain one of three different formations.
• BOX - The squad groups in to a tight box formation.
• LINE - The squad forms up on a line.
• COLUMN - The squad forms up on a column, following the leader.
The Squad Behavior Menu allows you to
change the squad’s attack and movement
modes and in addition, to select a formation.
-- GROUND CONTROL FIELD COMMANDER’S HANDBOOK --
Page 19
6 COMMANDING YOUR STRIKE FORCE
37
You can give your squad(s) waypoints by holding down the <SHIFT> key when
issuing move orders. Your squad will move to one waypoint at a time until
reaching the final waypoint.
Attack orders
If the cursor is over an enemy, it will change to an attack cursor. Click on
enemy units with the LEFT or RIGHT mouse button to issue an attack order.
Your squads will move towards the target if needed and attack the target when
it gets in range.
It is possible to issue multiple attack orders by LEFT clicking, holding down
the button and dragging a box around the enemies. When selecting your
squads this way, the box will be colored red.
Holding down the <SHIFT> key is another method of stacking attack orders.
HINT: It is possible to stack both move and attack orders. Your squad will
execute your orders in the order you gave it.
Holding down the <CTRL> key while issuing orders will force an attack command.
Holding down <CTRL> while clicking on the ground will order the squad to suppress
the desired location. This is especially useful with Artillery squads. Holding
down <CTRL> will override the context-sensitive cursor with an attack command
in the same way the <ALT> key does for a move command.
Attack: target in range Attack: Target out of range
(red outline) Unit will move to attack
(red and blue outline)
Force fire on location: Force fire on location:
target in range target out of range
(red outline) Unit will move to attack
(blue outline)
Follow/Guard orders
You can order a selected squad to follow another squad by simply RIGHT clicking
on the squad you wish to have followed. The originally selected squad will follow
that squad until another order is given. A squad following another squad will
attack enemies attacking the followed squad.
Guard targeted squad Cannot guard targeted squad
(blue outline) (red outline)
6 COMMANDING YOUR STRIKE FORCE
36
Ordering your squads
Giving orders to your squads is a simple task mainly handled with the mouse.
When you get more proficient commanding your squads you should start
experimenting with the shortcut keys described in each section below.
Selecting Squads
To select a squad simply LEFT click on its squad button in the interface or click
directly on the unit in the 3D view. The squad button of a selected squad is
highlighted and a green circle encompasses all the units in the squad.
Select several squads by holding down <SHIFT> and click on the squad buttons
of the squads you want to select. You can also select several units by LEFT
clicking, holding down the button, and dragging a box around the units on
the battlefield. This is called drag selecting. When selecting your squads this
way, the box will be colored green.
Movement
The position of the cursor automatically determines the type of order issued
when you click. To move your selected squad, move the mouse cursor to
the desired location where you want the squad to move. Then click on empty
ground with the LEFT or RIGHT mouse button and you will issue a move command to the desired location. Note that your squads cannot move on all terrain
.
Some terrain is simply too steep or occupied by trees or other landscape
features. When you move the cursor over impassable terrain it will change
to a Cannot move there cursor.
Allowed move command Set movement waypoint
(Blue Outline) (Blue Outline)
Squad(s) cannot move there
(Orange Outline)
It is possible to decide what direction your squad should face after a move.
Click on the desired location with the RIGHT mouse button, hold down the button
and you will see a direction vector appear. Move the mouse to change the direction
the squad will face and when you are satisfied release the RIGHT mouse button.
The cursor may change if it is placed over enemy or friendly units. Holding
down the <ALT> key on the keyboard while issuing orders will force a move
command instead of the command due to the cursor change. In this way you
can override the context-sensitive command system.
-- GROUND CONTROL FIELD COMMANDER’S HANDBOOK -- -- GROUND CONTROL FIELD COMMANDER’S HANDBOOK --
Page 20

7 OPTIONS 0
39
The options menu can be reached either from the MAIN MENU or by pressing
ESCAPE on you keyboard and selecting OPTIONS in a mission. Note that
certain options such as changing Render API (Graphics Mode) is not available
from inside a mission.
General Options
Music Volume - This slider controls how loud the music is played. Note that
dragging the slider to the far left disables music all together and might
increase performance a little.
Voice Volume - This slider controls how loud the message voices are played
during the missions and during the briefings. If you drag the slider to the far
left, messages will still be displayed in message boxes.
SFX Volume - This slider controls how loud the sound effects (gun fire, explosions,
engines etc.) are in the game. We recommend you keep this slider far to
the right for maximum experience.
Team Markers - The options toggles the team markers on and off. Turn
the team markers off for a more realistic battlefield. Note that turning off
the team markers does not affect performance.
Map projectiles - This option allows you to toggle on/off the projectiles on
the tactical overview.
Squad Waypoints - This option allows you to hide the lines between a squad’s
waypoints. Toggle waypoints off for a more realistic battlefield.
Video Options
Render API - This option allows you to change the currently selected render
API. Note that you have to click ACCEPT before the renderer changes.
Resolution - This option allows you to change the game resolution.
View Distance - Moving the slider increases/decreases the distance you can
see on the battlefield. Lowering the view distance increases the performance.
Software Rendering is especially sensitive to the view distance. Note that
changing the view distance does not affect your units, but simply how far you,
the player, can see on the battlefield.
6 COMMANDING YOUR STRIKE FORCE
38
Loading/unloading infantry into the Command APC
The Command APC can be used to transport infantry in combat. To order your
infantry to board the Command APC, simply select the infantry and then click
with the RIGHT mouse button on the Command APC directly or its Squad
Button. The infantry will move to the Command APC and board it. An “APC”
icon will be displayed on the squad buttons of infantry loaded inside
the Command APC.
To unload an infantry squad, simply select the squad button and give it a move
order on the terrain. The infantry will disembark and move to the selected location.
Load into Command APC
(blue outline)
Special Weapons and Equipment
Your squads can be equipped with both special weapons and equipment before
the mission starts. The Special Weapon and equipment icon is only visible
when the actual squad is selected. The spheres next to the icon display
the number of remaining charges. As charges are used, the spheres turn red.
Special Weapons are powerful weapons with only a limited number of charges.
To use a special weapon click on its icon with either mouse button and then click
on the desired target, ground or unit. Your squad will move within weapon range
if needed. To cancel the special weapon, simply click on the special weapon icon
again.
Pressing the <W> key on the keyboard will also activate a selected squad’s
special weapon.
Special Equipment is activated as soon as you press on the squad’s equipment
icon or press the <E> key on the keyboard. For a more detailed description and
effects of special weapons or equipment, see section 9, the Technical Manual.
Fire special weapon Deploy equipment at position
(red outline) (blue outline)
Grouping Squads
You can form groups among your squads and assign the group to a special
shortcut key to be able to quickly select several squads. Select the squads you
wish to add to the group and then press <CTRL> and a number key
(1,2,3...9). To select the group of squads simply click on the designated
number (1-9).
-- GROUND CONTROL FIELD COMMANDER’S HANDBOOK -- -- GROUND CONTROL FIELD COMMANDER’S HANDBOOK --
Page 21

8 MULTIPLAYER 0
41
Ground Control features extensive multiplayer capabilities that are all easily
reached from the game. Ground Control multiplayer, to play versus another a
person, can be played over the Internet or on a LAN.
Ground Control multiplayer can be played in standard game mode or in
the drop-in game mode. The drop-in game mode allows people to join existing
games that are already in progress.
To play Ground Control over the Internet you create or use an existing
WON.net account or register a new account. WON accounts are free of
charge and can easily be created through Ground Control. You must already
have internet access with your own internet service provider in order to access
or create your own free WON.net account.
Multiplayer setup
If you already have a WON account, simply enter your login name and
password. You should also select the appropriate connection speed.
If you don’t have a WON account, simply click on the CREATE NEW WON
ACCOUNT button. You will be asked to enter a login name (max 31 letters) and
a password. Unless the login name is taken, your registration is instantaneous
and you are ready to prove your worth on the multiplayer battlefield.
Internet Standard game
When you click on the INTERNET STANDARD GAME you will connect to
the World Opponent Network (WON.net) where you will see all available games
and opponents.
0 7 OPTIONS
40
Priority Level - This option changes the current priority level. Move the slider
to the left to lower the priority level. A lower priority level will reduce the number of special effects and particles. Lower the priority level if you need
to increase the performance.
Texel Center - This option allows you to change the texel center. Change this
slider ONLY if you experience strange offsets in the art.
Tracks - This toggle turns the tracks after vehicles on or off. Certain Hardware
cards cannot handle tracks properly and will be turned off. Turning off tracks
has a minimal impact on performance in hardware mode but having tracks on
does lower performance in software mode.
Cloud Shadows - Toggle the cloud shadows on/off
Fog - Toggles the fog effect on or off. If you are running GC in software mode
you will notice better performance with the fog turned off.
Lensflares - This option toggles the lensflare effects on or off.
Bumpmap - This option toggles the ground bumpmap on or off. There is no
real performance gain in turning off the bumpmap.
Specular Light - This option toggles the specular lighting on or off.
Ground Quality - (Software only) This option allows you to improve/reduce
the quality of the ground rendering. Lowering the ground quality will
increase the performance.
Unit Quality - (Software only) This option toggles High Unit quality on or off.
Turning this on will reduce the performance slightly.
Blend - (Software only) This option turns on the blended transparency, mainly
used in the interface to make it look better and makes shadows look better.
Additive - (Software only) This turns on additive transparency, which makes
explosions and muzzle flames look much better. Turn the additive transparency
off if you need to improve the performance.
-- GROUND CONTROL FIELD COMMANDER’S HANDBOOK -- -- GROUND CONTROL FIELD COMMANDER’S HANDBOOK --
Page 22

8 MULTIPLAYER 0
43
Chat Rooms
The chat rooms are stages for finding people to play with. The list on the left
side of the screen displays the people in the chat room. To chat simply enter
your message in the chat box at the bottom of the right section of the screen.
Additionally, you’ll notice web links on these two screens. Web links are
designated with a circle-W Icon and will launch your web browser to take
you to news, strategy, and community pages for Ground Control.
View Games - Allows you to see all games started in the current room.
0 8 MULTIPLAYER
42
Select Room
Join Room - When you log on to WON you will want to select a CHAT ROOM
from the list. Select a room from the list and click JOIN ROOM or simply double click on the room name.
Create Room - You can also create your own room by clicking on the CREATE
ROOM button. You will be prompted to give the room a name and if you want, a
password.
Refresh List - Gets the latest list of rooms. This can take some time depending
on the speed of your connection so it is not done automatically.
-- GROUND CONTROL FIELD COMMANDER’S HANDBOOK -- -- GROUND CONTROL FIELD COMMANDER’S HANDBOOK --
Page 23

8 MULTIPLAYER 0
45
Join an Internet Standard Game
When you join an existing game you will enter the Game Lobby. The player who
created the game cannot start the game until all players have checked the
ready box. When all players have checked the ready box and the hosting player
presses start, all players are brought to a Briefing screen. Press START GAME
to drop down to the planet surface or enter the DROPSHIP LOADOUT as usual
to configure your squads.
1. Players
2. Current Map
Options
3. Map info
4. Chat
5. Currently Selected
Map
6. Available Maps
Players
All players currently in the Game Lobby are listed in this box.
Ready Box - The leftmost icon in the players section is the ready box. Check
this box to indicate that you are ready to play. Note that the game cannot start
until all players have checked their ready box.
Player Color - Click on the Player Name bar to cycle between the available
colors. You can not check the ready box if you have the same color as another
player.
Force - Click on the force icon to switch between Crayven or Order forces.
Team - Click on the Team Number icon to change team. Note that certain
maps only allow a set number of teams.
Current Map Options
Displays the currently selected options for the map. Only the player who
created the game can change the options.
0 8 MULTIPLAYER
44
Both games starting up and games in progress are displayed in the list. To join
a game simply double click on the game name or highlight the game name and
click the JOIN GAME button.
The icon in front of the game displays its current status:
Game waiting for players - click to join
Password protected game waiting for players
Game in progress - not possible to join
Create Game - This button allows you to create a new game. You will be
prompted to enter a name and to supply a password (optional). You can also
change the max number of players that will be able to join your game.
Refresh List - Gets the latest list of games. Since this can take some time
depending on your connection, it does not happen automatically.
-- GROUND CONTROL FIELD COMMANDER’S HANDBOOK -- -- GROUND CONTROL FIELD COMMANDER’S HANDBOOK --
Page 24
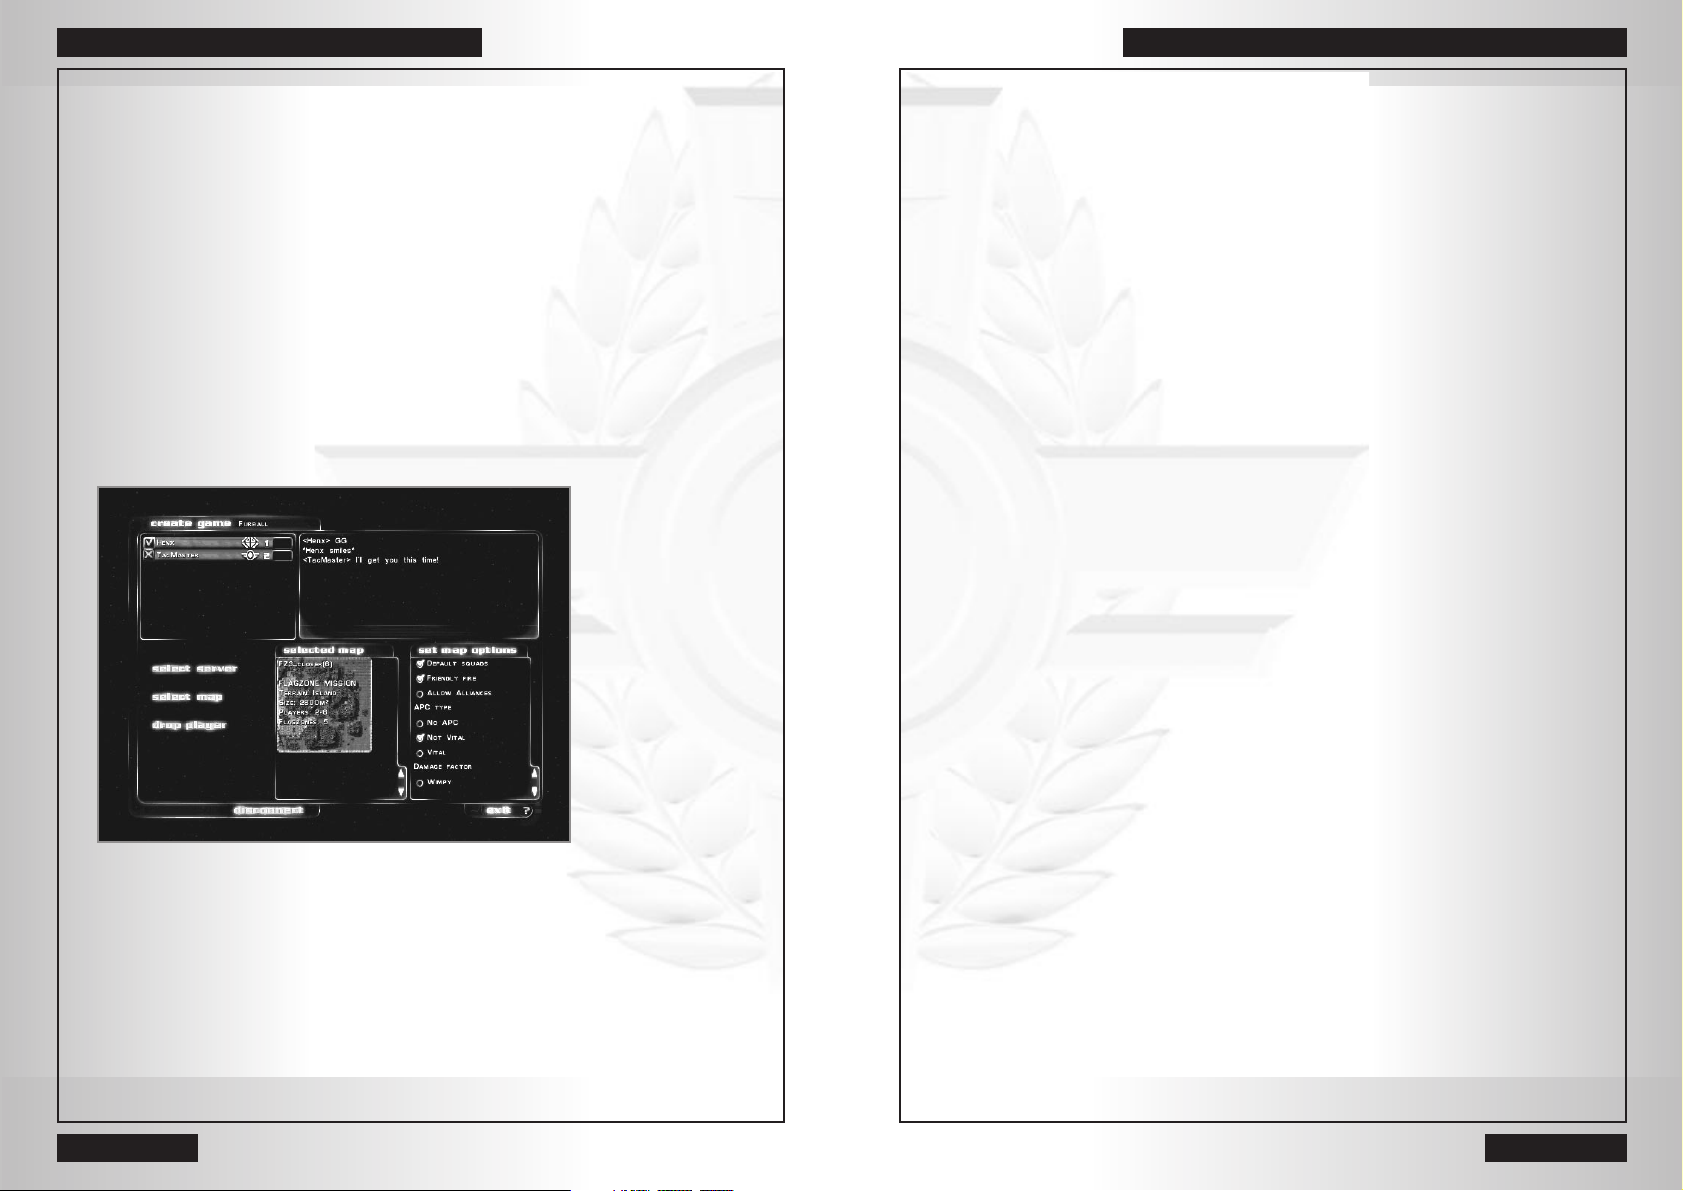
9 TECHNICAL MANUAL 0
47
Multiplayer Map Options
The host can change the map options for more varied gameplay.
Default Squads - With this option checked players are not allowed to change
the default strike force.
Friendly Fire - With this option checked Friendly Fire is turned on.
Allow Alliances - With this option checked players are allowed to be on
the same team. Unchecked this option forces “free for all” games.
APC Type (Vital)- A player is defeated if his Command APC is destroyed.
APC Type (Not Vital) - A player is not defeated when his Command APC is
destroyed.
APC Type (None) - Players will not have the Command APC on the battlefield.
Damage Factor - Changing the damage factor changes the pacing of the
game. The higher damage factor, the more damage weapon inflicts. Higher
damage leads to faster games.
Time Limit - The match ends when the time limit is reached. A time limit
of zero disables the time limit function.
Score Limit - The match ends when the score limit is reached. Score is
achieved by controlling score zones and for killing enemy units. A score limit of
zero disables the score limit function.
Reinforcements - If the reinforcement box is checked killed squads will be
replaced during the game according to the REINFORCE INTERVAL.
Replacement squads will arrive in dropships and must be called down by
the player.
Tech Level - Determines the units, special weapons and equipment available.
Consult section 9, the Technical Manual, for units and their respective tech
level.
0 8 MULTIPLAYER
46
Map Info
Displays information about the selected map.
Currently Selected Map
Displays the map that will be played. Click on the map name to view it in
the MAP INFO panel.
Available Maps
Displays a list of the maps that are available on the server. Click on the map
names to view it in the MAP INFO panel.
Create an Internet Standard Game
As the creator of a game (host) you can change all the options and choose
which map to play. In Ground Control you do not host a game on your own
machine, the game is hosted on dedicated Ground Control servers. Before you
can make any changes or select map you must select a server to host
the game.
Select Server - Click this button to select a server. Select a server with a low
ping for best performance. Click the ACCEPT button when you have selected a
server.
Select Map - Click the button to select a map to play. Select the map you wish
to play from the list of AVAILABLE MAPS and then click ACCEPT.
-- GROUND CONTROL FIELD COMMANDER’S HANDBOOK -- -- GROUND CONTROL FIELD COMMANDER’S HANDBOOK --
Page 25

8 MULTIPLAYER 0
49
Hosting a LAN Drop-in Game
Hosting a drop-in game allows you to configure the map options as usual but
also to set up a map cycle. When the victory conditions have been met,
the game switches to the next map in the cycle.
1. Player information
2. Available Maps
3. Map Cycle
4. Add map to cycle
5. Remove map from
cycle
6. Global Map Options
7. Specific Map
Options
Player information - Change your color, force and team.
Available Maps - A list of the available maps. Add a map to the map cycle by
double clicking on a map.
Map Cycle - A list of the maps currently in the map cycle. Remove a map from
the map cycle by double clicking on a map.
Global Map Options - All the options in this panel applies to all the missions in
the map cycle.
Specific Map Options - Options that only applies to the currently selected map
in the map cycle panel. It is recommended that you have the reinforcement box
checked in drop-in games.
0 8 MULTIPLAYER
48
Internet Drop-in game
The Internet Drop-in Game allows for near instant action. In a Ground Control
Drop-in Game you never meet up in the Game Lobby, action awaits on the planet
surface. When the time limit or score limit is reached, a new map is loaded
and the battle continues.
When logging on to WON.net you will receive a list of games together with
the number of players, network speed and the current map being played.
Double click on a game or select the game in the list and the press the JOIN
GAME button to enter.
The pre-game screen will display the player names of the people playing
the game together with their chosen force and team. You will also be able
to see all the maps in the map-cycle and the configured map options.
Choose your forces wisely since you cannot change your dropship loadout once
planetside.
Join Game - Click this button to join the selected game. It is also possible
to double click on the game you wish to join.
Refresh List - Gets the latest list of available drop-in games.
Drop-in game Drop-in game, password
required
Local Area Network (LAN)
Playing Ground Control on a Local Area Network works the same way as on
the Internet with a few exceptions. When you enter the LAN screen you will be
presented with a list of the games currently available on the LAN.
Join Game - Click on the button to join the selected game. It is also possible
to double click on the game you wish to join.
Create Game - Allows you to create a new game on the LAN. You will be
prompted to enter a game name, a password (optional), and maximum number of players. Check the Drop-in checkbox if you want it to be a Drop-in game.
Refresh List - Gets the latest list of available LAN games.
-- GROUND CONTROL FIELD COMMANDER’S HANDBOOK -- -- GROUND CONTROL FIELD COMMANDER’S HANDBOOK --
Page 26

9 GROUND CONTROL TACTICS 0
51
wisely and try to suppress an enemy unit if you need to slow down their
progress. Even if your units don’t inflict any major damage it might give you
enough time to regroup.
Soldiers of the Pax Dei are notorious for their coolness under fire due their
fanatical faith and do not suffer as heavily from suppressive fire as Crayven
soldiers.
Flanking maneuvers
Terradynes and Hoverdynes have thicker armor in the front than in the rear. It
is important to use this wisely; a controlled attack from the flanks or the rear
will hurt the enemy a lot more than an all-out frontal assault. It is equally
important to deny the enemy the opportunity to attack your units from the rear
or else they will quickly slaughter your units.
When attacking your enemy, have fast units ready to circle around the enemy
and attack them from the rear.
Friendly Fire
It is imperative to avoid friendly fire. Units within a Squad will automatically
avoid firing at each other. Avoid grouping several Squads in tight locations or
your units will become casualties of friendly fire, especially when you take into
account that the armor is weaker in the rear.
Certain units such as the Crayven Rocket Terradyne fire their weapons above
other units and can be positioned behind other squads in an offensive maneuver.
Note that Friendly Fire is disabled when playing on EASY difficulty setting.
Combined Arms
You have many different unit types at your disposal, learn their strengths and
weaknesses to create a powerful strike force. Know that a force consisting
entirely of heavy terradynes and artillery vehicles are extremely vulnerable to
aerodynes. Similarly an aerodyne force requires ground support to fend off
enemy anti-air.
Artillery vehicles have extremely efficient long-range attacks. However, they are
very vulnerable to attacks from enemy units. Make sure to have protective
units around your Artillery vehicles or you will quickly lose them. Artillery vehicles
do not automatically attack when they detect enemy units unless you order
them into FREE FIRE MODE which can be very dangerous if the enemy moves
near your own troops. You as the Commander should keep artillary units in
HOLD FIRE MODE and then give a direct order on what to target. Make sure
that you don’t have any friendly units near the target point or the effect will be
devastating.
0 9 GROUND CONTROL TACTICS
50
Knowing your battlefield terrain
Only a foolish Field Commander would send his strike team into a combat zone
without surveying the surrounding battlefield. Knowing how the terrain affects
your units is a cornerstone on the road to victory.
Elevated positions
Having your squads attack from elevated positions is very advantageous. Their
accuracy will increase when firing at targets below themselves. Also note that
squads on high ground will usually be blessed with an unobstructed view.
Likewise it is important to deny the enemy high ground. You can use your
artillery to clear enemy captured hills.
Slopes and impassable terrain
Infantry have much better movement capabilities than Terradynes and
Hoverdynes. Most hills and mountains can be climbed by Infantry while only
some Terradynes and Hoverdynes can move on steep terrain. Use this knowledge
to position your infantry on high ground where they cannot be easily reached
by enemy vehicles.
Line of Sight
To detect enemy units they must be within your own units view range and
unless your units are equipped with radar they must also have an unobstructed
line of sight to the enemy. Hills and other terrain features block the line of
sight. Smaller targets such as infantry can easily hide in small furrows, while
large terradynes require larger depressions in the ground to stay hidden.
Scout vehicles and other light units have better view range compared to
the heavier vehicles. Therefore it is useful to make sure reconnaissance
squads support your heavier units. You can bring up a unit’s view range by
holding the mouse cursor over the unit and press the <r> key. The blue circle
indicates the units view range and the red circle indicates the weapon’s
maximum range.
Note that the enemy can always detect your units’ presence if they fire their
weapons, as weapon firings are detectable from orbit.
Stealth & Perception
Certain units such as the Crayven Jaeger Special Forces have excellent stealth
rating, allowing them to sneak almost up to the enemy. The perception rating
indicated how good a unit is to spot a stealthy unit. For more information
about unit types’ stealth and perception rating, see the Technical Manual in
section 9. A stealthy unit can move within an enemy’s view range without being
detected.
Suppressive Fire
Units under attack will slow down and receive an accuracy penalty as it
becomes suppressed. Vehicles will “button up” and infantry will keep their
heads down. Light units can even suppress heavy units. Use this knowledge
-- GROUND CONTROL FIELD COMMANDER’S HANDBOOK -- -- GROUND CONTROL FIELD COMMANDER’S HANDBOOK --
Page 27

10 TECHNICAL MANUAL 0
53
The following section has been authorized for Crayven military personnel of
ranking FC-E/9 or higher only.
Crayven Corporation units
Crayven Command APC - CLSV-601 “Rhino”
Firepower Medium Armor Medium
Health Very High Speed Medium
View range Medium Stealth None
Perception Low Tech level n/a
The CLSV-601 Command Armored
Personnel Carrier (APC) is the
most
important unit on the battlefield, it is
the vehicle from where the Field
Commander controls his strike
force and allows the Commander to
transport infantry. The four-manned
APC is crewed by a driver, gunner,
repair-manager and the Field
Commander. The extremely well
protected inside compartment of
the Command APC contains
the advanced Ground Control
Direct Command Interface System GC-DCIS, designed to assist
the Commander in controlling their
forces. An infantry transport compartment is located in the rear and allows up
to 20 marines to cram in for transport.
The Command APC is armed with the Welby-Simms Cor13-1 .50 Autocannon,
capable of dealing with all but the heaviest of titanium layered terradyne armors.
The APC is armored with heavy B-25 Titanium shockplates also fitted to the
Crayven main battle terradyne. The Command APC is not however, an assault
terradyne, the armor and autocannon are for pure defensive reasons. With all
the equipment fitted to the Command APC, it is one of the heaviest terradynes
operational today. A heavily improved Zephrim fusion engine powers the APC.
A SULAC-29 Repair module is fitted on the Command APC that gives it the very
important ability to repair other units.
The Field Commander is further protected inside the APC in a hard-shell pod,
designed to keep the Commander alive should the APC be destroyed. The pod
contains enough life supporting systems to keep the Commander alive for several
weeks until a rescue operation can be launched.
0 9 GROUND CONTROL TACTICS
52
Scout vehicles have excellent reconnaissance capabilities and will detect enemy
units at long range. An Artillery strike is much more powerful when using forward observers to pinpoint the enemy’s location.
Infantry is hard to detect and are capable of climbing steep slopes. Keep them
well protected against fast firing enemies and use the Command APC to transport
them quickly into battle.
Squads and Experience
Each Squad that survives a mission receives experience depending on its
performance in the mission. Experience is accumulated over missions and
affects the efficiency of a Squad. A veteran Squad will have increased ACCURACY, STEALTH, PERCEPTION and inflict more DAMAGE than a fresh Squad. Use
your Squads wisely and make sure to build a balanced and experienced Battle
Group. Note that Squads do not gain any experience in the multiplayer game.
-- GROUND CONTROL FIELD COMMANDER’S HANDBOOK -- -- GROUND CONTROL FIELD COMMANDER’S HANDBOOK --
Page 28

10 TECHNICAL MANUAL 0
55
Crayven Special Forces - CCSF-9 “Jaeger”
Firepower Medium Armor None
Health Low Speed Very Slow
View range Extreme Stealth Extreme
Perception Extreme Tech level 2
The Crayven Corporation special forces also known
as the “Jaegers” are the masters of stealth and
infiltration. A favorite tactic is to deploy a Jaeger
unit on high ground where they have an excellent
view over the battlefield. Using their Gauss rifles
they are able to deliver a good amount of damage
before being detected. Another tactic is to equip
the Jaeger squad with demolition charges and have
them blow up important enemy structures.
Jaeger units are primarily armed with a K516d High
Impact Gauss Rifle. It is a heavy sniper rifle designed
to take out heavily armored soldiers and lightly
armored vehicles. A Jaeger sniper rifle is powerful
enough to punch through the armor of a light
to medium terradyne.
The Jaeger’s combat suit is designed purely for stealth.
The Jaeger armor consists of an environmentally
secure bodysuit of flexible cloth covered with lam
inated armor pieces. The armored sections are made of duralloys layered with
battleplastics.
Even though they are physically trained they stand no chance in close combat with
enemy vehicles or even enemy infantry.
Special Weapons
GyroJet Ammunition
Special HEAT rounds for taking out enemy vehicles. 3 charges.
140mm RAW 140mm Rifle Attached Warheads, fires an explosive
fragmentation grenade designed to take out enemy infantry
and light vehicles. 1 charge.
Equipment
Personal Medkit Personal medkit capable of extreme healing acceleration
repairing damaged tissues, also includes basic tools for
armor field repairs. 3 charges.
Demolition Kit A Demolition kit that is triggered by the Field Commander.
3 charges.
Vision Enhancer
Helmet mounted vision enhancer. Increases the possible view
range with advanced image intensifier equipment. 3 charges.
0 10 TECHNICAL MANUAL
54
Infantry Units
Crayven Rifle Infantry - CCMIB-2 “Marine”
Firepower Very Low Armor Very Low
Health Low Speed Very slow
View range Medium Stealth Medium
Perception Low Tech level 1
Infantry have always been and will always
remain an important role in any army.
The Crayven Marines are highly trained
infantry soldiers who fight alongside
terradynes carrying out special assignments.
Infantry can be loaded into the Command
APC for protection and transport.
Their primary weapon is the Welby-Simms
Dev20011 “Devastator” assault rifle, which
is adequate for enemy infantry but underpowered against armored targets such as
terradynes or hoverdynes.
Considering the devastating firepower
deployed on the battlefield, personal armor is essential. Marine combat armor is
designed for maximum mobility with optimum protection and is the toughest
protection available to infantry short of powered armor. The CB39 Battlesuit is
composed of a fused amalgam of hardened alloys, ceramic plates and Polysteelbattleplastics formed to allow maximum maneuverability. The armor consists of a
rigid exoskeletal armor covering most of the body with an undersuiting of mesh and
resilient webbing to protect exposed locations such as joints, neck and the groin.
A marine squad can be equipped with the RMM-9 Mortar, lobbing high-explosive
grenades in a high arc towards the target or the CG-89mm Anti-tank rocket launcher. It fires an 89mm rocket capable of defeating most tanks unlucky enough to be
in its way.
Special Weapons
RMM-9 Infantry Mortar Rifle mounted mortar, capable of indirect fire with
limited blast radius. 3 charges.
CG-89mm AT Rocket Disposable Anti-Terradyne rocket capable of defeating
heavy terradyne armor. 3 charges.
Equipment
Personal Medkit Personal medkit capable of extreme healing acceleration
repairing damaged tissues, also includes basic tools for
armor field repairs. 3 charges.
Deployable Radar Small portable radar station that once deployed relays all
tactical information to the Command APC. 1 charge.
-- GROUND CONTROL FIELD COMMANDER’S HANDBOOK -- -- GROUND CONTROL FIELD COMMANDER’S HANDBOOK --
Page 29

10 TECHNICAL MANUAL 0
57
Crayven Light Terradyne - CT-917 FST “Jackal”
Firepower Medium Armor Medium
Health Medium Speed Good
View range Medium Stealth Low
Perception Low Tech level 1
The CT-917 FST light terradyne
mainly used for fast attack or
scouting missions. The Jackal’s
coaxial weapon mount allows it
to target both ground and air
units. Its Piranha 4-4 SlugDrive
is optimized for maximum
maneuverability and speed.
Its turret is fitted with a servo
contraption allowing for fast
rotation and tilting mounted
with a coaxial Welby-Simms Cor
13-1.50 AC, an autocannon
capable of tearing infantry to
shreds and, given some time,
can pound through heavy terradyne armor. The weapons dual fire system is configured
for optimal performance, assuring the crew that a steady stream of hot tungsten
rounds will harass the target.
Except for being a fast terradyne, the Jackal can also be equipped with additional
firepower in the form of deployable Marduk GS-5 Sentry Guns. The sentry guns can
be placed in strategically important places to assist the defense or serve as early
warning systems for the creative Field Commander.
Special Weapons
Depleted Uranium Rounds The rounds have a penetrator made of depleted uranium
that dramatically increases its ability to penetrate armor.
3 charges.
HE Grenade Launcher Fires High-Explosive grenades in a ballistic trajectory, mainly
designed to take out infantry or light vehicles. 3 charges.
Equipment
Repair Module Repair module that allows simple repairs to armor plates and
also includes several auxiliary backup systems. 3 charges.
Sentry gun - Autocannon A deployable sentry gun armed with a single Autocannon.
Cannot be moved after being placed. 1 charge.
Sentry gun - Rocket A deployable sentry gun armed with an Anti-Tank Launcher
rocket launcher. Cannot be moved after being placed.
1 charge.
Sentry gun - Anti-Air A deployable sentry gun armed with an Anti-Air missile
system. Cannot be moved after being placed. 1 charge.
0 10 TECHNICAL MANUAL
56
Assault Units
Crayven Scout Terradyne - CLSV-112 FSV “Locust”
Firepower Low Armor Low
Health Medium Speed Good
View range High Stealth Good
Perception High Tech level 1
The CLSV-112 FSV is mainly
used for fast attack or
scouting missions. The twoseated Locust is able to
outrun most terradynes as
it is designed with speed
and stealth in mind. With
its extremely good view
range it is the eyes and the
ears of the Crayven military.
The Locust’s main drawback
is its light armor, or so say
its drivers. The light polysteel
15 armor is mainly designed to absorb small arms fire and shrapnel. Direct hits
from large caliber guns are not deflected in any way.
The Locust is armed with the Welby-Simms HePeX-932 - Cutter, which is the result
of intense field research and according to field Commanders, the best machine gun
available today. It features an integral cooling system, advanced recoil absorption
padding and the brand new GTI-Targeting computer. The scout terradyne is however
not intended to engage enemy terradynes. Its gunmount has two-positions, one for
engaging ground targets and a second when firing at aerodynes.
The Scout Terradyne can be equipped with a FinnTech Mine Layer unit, which effectively
allows the scout to assume the additional role of a minelayer unit.
Special Weapons
Depleted Uranium Rounds The rounds have a penetrator made of depleted uranium
that dramatically increases its ability to penetrate armor.
3 charges.
HE Grenade Launcher Fires High-Explosive grenades in a ballistic
trajectory,mainly designed to take out infantry or light
vehicles.3 charges.
Equipment
Repair Module Repair module that allows simple repairs to armor plates
and also includes several auxiliary backup systems.
3 charges.
Minelayer unit A minelayer unit allows the Locust to deploy anti-vehicle
mines. 3 charges.
-- GROUND CONTROL FIELD COMMANDER’S HANDBOOK -- -- GROUND CONTROL FIELD COMMANDER’S HANDBOOK --
Page 30

10 TECHNICAL MANUAL 0
59
Crayven Annihilator Terradyne - DTT-1203 “Grizzly”
Firepower Good Armor Great
Health Great Speed Low
View range Medium Stealth None
Perception None Tech level 3
Crayven’s heaviest tank is
the DTT-1203 Annihilator
Terradyne. The terradyne is
a technological marvel with
its twin Zephrim SlugDrive
engine capable of generating
enough energy to move this
113 ton titanium-alloy hulk.
The four-crewed Grizzly is a
recent addition to the
Crayven military with only seven years of active service.
The Annihilator terradyne is mainly deployed in siege situations where its devastating
firepower really is of maximum use.
The primary armament of the Annihilator is the double-barreled 120mm MT-LCGx2.
It is a very powerful gun, easily out-matching any conventional large caliber gun on
the market today. The new Welby-Simms ShellLoader2000x is able to feed the gun
at maximum speed without any jamming risk whatsoever. The weapon is however
unsuitable for stealth missions where its muzzle flames easily reveals its position.
Special Weapons
HE Rounds A high explosive round set to detonate on impact, it is
useful against infantry and other light targets. 3 charges.
Advanced HE Round An even more powerful high explosive round set to deto-
nate on impact. 1 charge.
Equipment
Repair Module Repair module that allows simple repairs to armor plates
and also includes several auxiliary backup systems.
3 charges.
Missile Countermeasure When activated protects the squad against incoming
missiles, rockets and grenades. 3 charges.
0 10 TECHNICAL MANUAL
58
Crayven Main Battle Terradyne - SFB-209 AAT “Wolf”
Firepower Great Armor Good
Health Good Speed Medium
View range Medium Stealth None
Perception None Tech level 2
The SFB-209 AAT is the main battle
terradyne in the Crayven Army. The
terradyne excels at offensive maneuvers
but requires the support of other
vehicles, such as Anti-Air, and scout
terradynes. There have not yet been
any official requests for a complete
overhaul of the Wolf, even though it
is the oldest terradyne model in
the Crayven repertoire.
The main armament of the Wolf is a Reinhart LAK4-150mm - Storm. The 150mm
large caliber gun is considered to be a most efficient and accurate weapon system,
firing fin-stabilized sabot rounds. The barrel is configurable for multiple settings with
extended recoil absorbers and specially designed Tak-2 coils that give the gunner
full control of the gun. A serious weakness with the Wolf is its inability to target
aerodynes, which leaves it heavily relying on other support vehicles.
Since the Wolf is an armored assault terradyne it is expected to withstand direct
enemy incoming fire and subsequently only the best armor is sufficient. The Wolf is
normally armored with B-25 Titanium shockplates but this armor can be bolstered
by attaching additional armor plates.
Wolf tank commanders are generally unpleasant to be around as they consider
themselves to be better than any fighting unit. They develop a strange bond with
their tanks and it is common practice for them to repair a wolf tank as long as its
crew is alive no matter how badly damaged.
Special Weapons
HE Rounds A high explosive round set to detonate on impact, it is
useful against infantry and other light targets. 3 charges.
Advanced HE Round
An even more powerful high explosive round set to detonate
on impact. 1 charge.
Equipment
Repair Module Repair module that allows simple repairs to armor
plates and also includes several auxiliary backup
systems. 3 charges.
Improved Targeting Computer
Improves the accuracy of the squad. 3 charges.
Deployable Repair Station Deploys a repair station, similar to the one found on
the Command APC. The station cannot be moved
once placed. 1 charge.
-- GROUND CONTROL FIELD COMMANDER’S HANDBOOK -- -- GROUND CONTROL FIELD COMMANDER’S HANDBOOK --
Page 31

10 TECHNICAL MANUAL 0
61
Crayven Anti-Air Terradyne - APF-331 MAAG “Ocelot”
Firepower Great Armor Medium
Health Medium Speed Good
View range Very good Stealth None
Perception Medium Tech level 2
The APF-331 MAAG (Mobile
Anti-Air Gun) manufactured by
the Crayven Corporation is a
terradyne designed to shoot
down enemy aerodynes.
The Ocelot depends heavily on
computer and radar capabilities
in order to target and track
enemy aerodynes and is therefore
very vulnerable to enemy EW
tactics. The Ocelot is a twomanned vehicle requiring only
a driver and a gunner. When its
onboard radar picks up a potential
target it automatically swings
the turret and barrel to
the correct firing angle, leaving
the gunner to press the fire
button.
The Ocelot is primarily armed with a Hugh 75mm 2xAC Air Defense Cannon.
The four parallel mounted Autocannons sends an extremely deadly hail of rounds in
supersonic speed towards the enemy.
An Ocelot depends on battle tanks for protection while it accurately removes
aerodynes from the sky since it cannot target ground vehicles. Its light Polysteel-15
armor is not capable of shielding the vehicle from anything more powerful than
infantry fire. It relies on speed and maneuverability to survive the battle.
Equipment
Repair Module Repair module that allows simple repairs to armor plates
and also includes several auxiliary backup systems.
3 charges.
Image intensifier system When activated, improves view range for limited
amount of time. 3 charges.
0 10 TECHNICAL MANUAL
60
Support Units
Crayven Rocket Terradyne - DTA-266 AMRLT “Firecracker”
Firepower Good Armor Medium
Health Medium Speed Medium
View range Medium Stealth None
Perception None Tech level 1
A well balanced battleforce
routinely attaches support
terradynes to its core units
of main battle terradynes.
The DTA-266 AMRLT is an
excellent support terradyne
capable of defeating both
terradynes and aerodynes.
It is not intended to be
deployed in the frontlines but
rather behind the protection
of more armored terradynes
such as the Wolf or the Grizzly.
The Firecracker’s primary weapon is the Crayven OSI-L2 - Hurricane Air Defense
Anti Tank Missile System. It is equipped with the latest Crayven TrueSight targeting
modification that establishes a direct neural link between gunner and missile. The
gunner is able to target and fire with minimum response time and with extreme
precision. Once the missile is airborne it locks onto the targets alpha emissions.
Since humans alone do not generate enough quantities of alpha emissions, the missiles cannot establish a lock-on and are considered harmless against infantry.
The light Meshed H2 armor fitted to the Firecracker does not provide enough protection against enemy anti-tank weapons. The nature of the ADAT missile system
allows the Firecracker to use other vehicles for protection as its missiles are
launched high into the air before striking down on its target from the above.
Special Weapons
Hammerhead warhead Missile specially designed to take out aerodynes.
3 charges.
Hellfire warhead Homing missile warhead designed to take out ground
vehicles. 3 charge.
Equipment
Repair Module Repair module that allows simple repairs to armor plates
and also includes several auxiliary backup systems.
3 charges.
Image intensifier system When activated, improves view range for limited amount
of time. 3 charges.
-- GROUND CONTROL FIELD COMMANDER’S HANDBOOK -- -- GROUND CONTROL FIELD COMMANDER’S HANDBOOK --
Page 32

10 TECHNICAL MANUAL 0
63
Equipment
Repair Module Repair module that allows simple repairs to armor plates
and also includes several auxiliary backup systems. 3
charges.
Image intensifier system When activated, improves view range for limited amount
of time.3 charges.
Aerodyne Units
Crayven Light Scout Aerodyne - AV/U-122 LSA “Hawk”
Firepower Low Armor Low
Health Medium Speed Extreme
View range Extreme Stealth Good
Perception Good Tech level 1
The Crayven Corporation often uses the
AV/U-122 LSA for deep scout missions as
well as low-threat patrols. The Hawk is
equipped with advanced sensors, both
passive and active, and routinely relays its
information to the nearest BattleSat in
orbit, which in addition to its high flying
altitude makes it the best scout unit in the
Crayven military.
The Hawk is lightly armed and lightly armored
and is generally not suited for heavy combat.
Its high stealth enables it to sneak up on its
enemies and deliver a hit-and-run blow, but
more importantly, identify targets for the Artillery terradyne or other long range weapons.
The Hawk is armed with a belly mounted Welby-Simms 20mm Chaingun pod capable
of penetrating light terradyne armor. The Hawk is highly successful engaging infantry
or bomber aerodynes but is no match against attack or fighter aerodynes. The Hawk
is only armored with VonTec 45I-3 Stealth plates, relying on its low target profile
and evasive combat maneuvers to avoid incoming fire.
Special Weapons
Depleted Uranium Rounds The rounds have a penetrator made of depleted uranium
that dramatically increases its ability to penetrate armor.
3 charges.
HE Grenade Launcher
Fires High-Explosive grenades in a ballistic trajectory, mainly
designed to take out infantry or light vehicles. 3 charges.
Equipment
Image Intensifier
Increases the squad’s view range when activated. 3 charges.
Countermeasure system Protects the squad against incoming missiles and rockets
when activated. 3 charges.
Afterburner
Boosts the squad’s flying speed when activated. 3 charges.
0 10 TECHNICAL MANUAL
62
Crayven Artillery Terradyne - APP-671 CAT “HOG”
Firepower Fantastic Armor Medium
Health Great Speed Slow
View range Low Stealth None
Perception None Tech level 4
The APP-671 HOG is a mobile
artillery terradyne that fires ballistic
artillery grenades. The HOG works
best when used together with other
units acting as forward observers,
such as Jaegers or scout terradynes.
The artillery unit can target the ground
in order to suppress enemies or
force them choose another route.
Commanders must be careful when
ordering an artillery strike as friendly
units can be hit which can spell
disaster during a combat mission.
A crew of six soldiers mans the Hog, including the terradyne commander, making it
the most crew demanding vehicles in the strike force.
“Mobile artillery units cause more casualties to the
enemy and have a greater adverse effect on his will to fight
than any other weapon.” Crayven Field Commander Illena Mackenzie
The primary weapon of the HOG class artillery is a 155mm howitzer that with its
fully automatic breech block and hydro-pneumatic recoil system allows a rate of fire
of three rounds per second. It is very adept in taking out enemy buildings with its
siege-like weapon. A unique cooling system consisting of five barrels rotate into
place in order to avoid overheating problems during extreme combat situations.
The heavy turret is extremely slow and it requires a few seconds to align its barrel
to the designated target. It is hardly useful to fire the howitzer while moving.
The volatile warheads stored inside the HOG requires its heavy polysteel-20 armor
plating to be extremely durable, but even with the powerful Zephrim SlugDrive its
speed is limited to a slow crawl.
Note that an artillery unit defaults to hold fire mode, and will never automatically
attack another enemy on its own unless the mode is changed. A direct order from
the Field Commander is required to fire in this mode.
Special Weapons
Tactical Nuclear Shell
The TacNuke is reserved for extreme conditions as it totally
annihilates everything within its blast radius. 1 charge.
Jannice warhead Extremely accurate computer guided artillery shells. 3 charge.
-- GROUND CONTROL FIELD COMMANDER’S HANDBOOK -- -- GROUND CONTROL FIELD COMMANDER’S HANDBOOK --
Page 33

10 TECHNICAL MANUAL 0
65
Crayven Fighter Aerodyne - AV/F-1001 FA “Delta”
Firepower Great Armor Medium
Health Medium Speed Great
View range Medium Stealth Low
Perception Low Tech level 5
The Crayven Corporation manufactured AV/F-1001
FA Delta is the latest advanced fighter aerodyne in
the AV/F(Fowler) series. The Delta - powered by two
SecAmp fusion engines complemented with standard
Lavnoc hover drives - is able to pull off amazing
maneuvers at low altitude. The one-manned fighter
is equipped with an extremely advanced computer
system aiding the pilot, feeding him with topology
data and vector plans. The system is intimately
hooked into the pilot’s combat suit and regulates
all pressure and stimulants the pilot needs.
The Delta can fly into low orbit if necessary, but is
more often transported in AV/U4’s, as its combat
capabilities are severely lowered without its maneuver
advantage.
The Crayven fighter aerodyne is primarily loaded with
N69-PDU GLORY missiles, capable of destroying enemy aerodynes in a heartbeat.
The GLORY missiles are Air-to-Air only.
Special Weapons
Improved AIM Missile Dramatically more powerful air-to-air missile warhead.
3 charges.
Equipment
Image Intensifier Increases the squad’s view range when activated. 3 charges.
Countermeasure system
Protects the squad against incoming missiles and rockets
when activated. 3 charges.
Afterburner Boots the squad’s flying speed when activated. 3 charges.
0 10 TECHNICAL MANUAL
64
Crayven Attack Aerodyne - AV/U-309 HAA “Vulture”
Firepower Good Armor Low
Health Medium Speed Great
View range Medium Stealth None
Perception None Tech level 5
The Crayven AV/U-309 HAA or
Vulture, is one of the most
effective terradyne busting units
available in the Crayven arsenal.
It is primarily designed as a
terradyne breaker, capable of
quickly approaching the enemy
and blowing him to pieces.
A favorite tactic amongst Vulture
commanders is to circle
the enemy and attack from
behind where he least expects it
and where the armor is weaker.
The Vulture is armed with the W-T SR-II Mosquito, which is a good 84mm aerodyne
mounted rocket launcher considering its weight and targeting system. Its primary
drawback is its relatively short range. Upon detonation the Mosquito rocket showers superheated fragments over a wide area making it critical for Field
Commanders to make sure no friendly forces are close to the target. The Vulture’s
rocket launcher can also target other aerodynes but with limited success as the
rocket’s guiding system is designed for slower ground units.
The Vulture can quickly reach a designated location on the battlefield and use its
firepower wherever need making it great for surprise support activities. The Vulture
is - like all aerodynes - extremely vulnerable to enemy anti-air and enemy fighter
aerodynes.
Special Weapons
ICM-DP TseTse Rocket The Improved Conventional Munitions, Dual Purpose
Rocket contains shaped-charge
grenades, which have
an improved effectiveness against armored targets. 2
charges.
HE Firefly Rocket The High Explosive Firefly Rocket is designed to take out
enemy infantry. 3 charges.
Equipment
Image Intensifier Increases the squad’s view range when activated. 3
charges.
Countermeasure system Protects the squad against incoming missiles and rock-
ets when activated. 3 charges.
Afterburner Boosts the squad’s flying speed when activated. 3
charges.
-- GROUND CONTROL FIELD COMMANDER’S HANDBOOK -- -- GROUND CONTROL FIELD COMMANDER’S HANDBOOK --
Page 34

10 TECHNICAL MANUAL 0
67
0 10 TECHNICAL MANUAL
66
Crayven Bomber Aerodyne - AV/U-45 SRBA “Condor”
Firepower Extreme Armor Low
Health Good Speed Good
View range Medium Stealth None
Perception None Tech level 5
The sight of the Crayven
Corporation manufactured AV/U45 SRBA (Short-Range Bomber
Aerodyne) Condor, strikes fear
into the enemy as it is loaded with
pure destruction in the shape
of bombs and guided missiles.
The Condor is a short-range
bomber aerodyne able to surgically
bomb enemies of the Crayven
Corporation. It can be loaded with
up to 8,000 kilo’s worth of
bombs without sacrificing its flight
qualities.
Typically the Condor is deployed in combat regions together with an escort; relying
on the escort for both protection and reconnaisance. Since the Condor lacks
the speed and maneuverability of the Delta, it is highly vulnerable to both enemy
aerodynes and anti-air guns. Compared to other aerodynes the Condor moves like
a snail but packs the firepower of a small sized army.
The Condor is armed with High Explosive bombs, which are dropped over the enemy.
Fast moving units such as light terradynes are hard to hit but buildings and other
immobile structures are no match for a Condor.
Special Weapons
Tactical Nuclear Bomb The TacNuke is an extremely powerful weapon and is
only used when absolutely no other alternatives
remains as it wipes out everything within its radius.
1 charge.
Fragmentation Bomb The fragmentation bomb sends white-hot metal over an
extremely large radius. It is not capable of destroying
vehicles but certainly severely damaging them.
1 charge.
Equipment
Image Intensifie Increases the squad’s view range when activated.
3 charges.
Countermeasure system Protects the squad against incoming missiles and
rockets when activated. 3 charges.
Afterburner Boosts the squad’s flying speed when activated.
3 charges.
-- GROUND CONTROL FIELD COMMANDER’S HANDBOOK -- -- GROUND CONTROL FIELD COMMANDER’S HANDBOOK --
Page 35

10 TECHNICAL MANUAL 0
69
Infantry Units
Order Shock Infantry - OCRU-1001 “Crusaders”
Firepower Very Low Armor Very Low
Health Low Speed Very Slow
View range Medium Stealth Medium
Perception Low Tech level 1
The Crusaders are the shock infantry of the Pax Dei,
the military division of the Order of the New Dawn. Many
soldiers view the Crusaders with extreme respect and it
is considered to be very prestigious to be a Crusader in
the Pax Dei.
The Crusaders primary armament is the Cobra AAG-50
“Soul Cleanser” Storm Carbine. In order to operate
the gun properly a heavy combat suit with an enhanced
exoskeleton is needed, such as the Crusader armor. It is
powerful enough to seriously damage light vehicles but
against heavier targets, the Crusaders need to approach
from the rear where the armor is weaker.
The powered exoskeleton worn by the Crusaders allows
them to go head-to-head against enemy terradynes even
though a frontal assault would be futile. Order Field Commanders regularly inject
different combat drugs into the Crusaders in order to improve their aggressiveness
factor. As a result many Crusaders are burned out at an early age.
The Crusader combat armor is designed for maximum mobility with optimum
protection and is the toughest protection available to infantry short of powered
armor. Crusaders are classified as infantry and can be loaded into a Command
APC for transport.
Special Weapons
Focused Storm Pulse An energy draining weapon configuration to take out
armored vehicles. 3 charges.
SMAUG-12 Flamethrower
The SMAUG-12 is an accessory mounted on the standard
Crusader pulse rifle and is extremely effective against
enemy infantry. Its main drawback is its short range.
3 charges.
Equipment
Personal Medkit
Personal medkit with drugs for extreme healing acceleration
and repairing damaged tissues, also includes basic
tools for armor field repairs. 3 charges.
Deployable Radar Small portable radar station that once deployed relays
all tactical information to the Command APC.
1 charge.
0 10 TECHNICAL MANUAL
68
The Order of the New Dawn units
Order Command APC - O5/DCAPC
Firepower Medium Armor Medium
Health Very High Speed Good
View range Medium Stealth Low
Perception Low Tech level n/a
The O5/DCAPC Command APC is
the Order battlefield nerve center.
In addition to being able to transport Crusaders and Templars, it
houses the Order Deacon - the
equivalent of the Crayven Field
Commander. The Command APC
can carry up to 20 fully armed
and armored Crusaders without
sacrificing its excellent combat
maneuverability. It is equipped with
fully hydraulic rear doors to ensure
that the infantry can enter and exit
the vehicle no matter
the circumstances.
The turret located on top of the vehicle mounts a slightly modified 200 kilocycle
Electro Discharge Canon that has a very useful armor penetrating capability.
The weapon is also capable of limited air defense, even though it is not its primary
purpose.
The Order Command APC is extremely robust and can operate under extreme
conditions that would wreck many other hoverdynes.
A modified version of the Crayven SULAC-29 Repair system is mounted on
the Command APC that enables it to swiftly repair units.
-- GROUND CONTROL FIELD COMMANDER’S HANDBOOK -- -- GROUND CONTROL FIELD COMMANDER’S HANDBOOK --
Page 36

10 TECHNICAL MANUAL 0
71
Assault Units
Order Scout Hoverdyne - W/SAH-4 “Apus”
Firepower Low Armor Low
Health Medium Speed Great
View range Good Stealth Good
Perception Good Tech level 1
The one-manned W/SAH-4
hoverbike is mainly used for
scouting purposes even though
its turret-mounted pulse laser
can engage both enemy infantry
and terradynes. When used in
combat encounters, it is usually
deployed for hit-and-run strikes,
relying on its speed and
maneuverability to remain
unscathed. The pilot’s modified
Crusader armor is wired into
the powerful sensors fitted to
the hoverbike blessing him with
an extremely detailed image of
the surrounding terrain and elements. The hoverbike is armored with light polysteel15 and is not suitable for frontal assaults against enemy assault terradynes.
The Apus is powered with a Mk.IV Durfire Advanced Grav Engine with four titanium
plated outlets, with the back turbines providing momentum and the two front outlets controlling the direction. Advanced targeting and visual enhancing equipment is
standard on the Apus, strengthening its scout role.
The hoverbike’s primary weapon - the SourKodd 8Bx10 “BerZerk” - is a light pulse
laser mounted on a small turret located behind the pilot with full 360 degrees
movement. Its targeting system is somewhat limited in targeting fast moving
aerodynes. A RamTech minelayer unit can be fitted to the rear chassis at the Field
Commanders discretion, giving it a secondary defensive role.
Special Weapons
Electro Dagger The Electro Dagger sends forth an extremely concentrated
electro discharge that is designed to penetrate heavy armor.
3 charges.
Electro Field Electro Field is an area effect variant of the Electro Dagger
designed to wipe out concentrations of enemy infantry.
3 charges.
Equipment
Repair Module Tools and software for minor field repairs to armor plates and
vital systems. 3 charges.
Minelayer unit Deploys Anti-tank mines. 3 charges.
0 10 TECHNICAL MANUAL
70
Order AT Infantry - ATI-720 “Templar”
Firepower Great Armor None
Health Very Low Speed Very Slow
View range Medium Stealth Medium
Perception Low Tech level 2
The Order Templars are anti-terradyne infantry armed with
the Retribution shoulder Anti-Armor Missile System capable of
demolishing most terradynes in a matter of seconds. Only
combat-proven female members of the Pax Dei are allowed
to join the Templar division because of old dogmatic reasons.
The primary weapon of a Templar is the GrU-6 Retribution Shoulder
Anti-Armor Missile System. The weapon system is considered
to be the most powerful infantry weapon available today and it is
rumored that the Crayven Corporation are currently researching
and developing their own version. Retribution missiles are capable
of defeating the most powerful terradyne armor with ease and
spreading death and chaos on the battlefield. A Crayven Field
Commander is urged not to underestimate the small frame of
the Templars as they are certainly one of the Orders most deadliest units. Templars
are regularly loaded into Command APC’s for quick transport and added protection.
Internal Memorandum: Major Thomas, Crayven Field Commander in
the 13th Assault Regiment mentioned in battle report 450/DT-2419
that an entire strike force consisting of three Wolf squads bumped
into a single Templar squad on a routine mission on Sigma Draconis-4.
Only two Wolf terradynes managed to survive the encounter.
They executed, according to Major Thomas, an unsanctioned fallback
and were charged with showing cowardice in the face of the enemy.
However the Templar does have a severe weakness; they are completely defenseless
against enemy infantry as a soldier does not generate a strong enough tracking
signal for the powerful Retribution missiles. Templars are seldom encountered alone
on the battlefield without a Crusader squad attached or other means of protection.
Special Weapons
MicroNuke Warhead Retribution missile with a micronuke shape-charged warhead
designed to crack open heavy armored vehicles. 3 charges.
Anti-Air Warheads Multiple homing anti-air Retribution loaded missiles. 3 charges.
Equipment
Personal Medkit Personal medkit with drugs for extreme healing acceleration
and repairing damaged tissues, also includes field repairs.
3 charges.
Image intensifier Improves view range when activated. 3 charges.
Personal Cloaker Cloaks squad when activated. 3 charges.
-- GROUND CONTROL FIELD COMMANDER’S HANDBOOK -- -- GROUND CONTROL FIELD COMMANDER’S HANDBOOK --
Page 37

10 TECHNICAL MANUAL 0
73
Order Main Battle Hoverdyne - O1/MAT-3 “Lynx”
Firepower Great Armor Good
Health Medium Speed Good
View range Medium Stealth None
Perception None Tech level 2
The O1/MAT-3 is the Order
Main Battle Hoverdyne, a
medium sized hoverdyne
with a turret-mounted
particle beam accelerator.
The Lynx have good speed
and maneuverability rating
compared to the Crayven
equivalent making it an ideal
offensive hoverdyne for
most combat situations.
The Lynx turret mounts the
Shogata-PDX9 “Messenger”
which is the latest version
of the first energy based vehicle weapon ever produced. The weapons internal fusion
reactor heats particles into plasma, which is accelerated out of the specially designed
barrel against the target. The Shogata-PDX9 is incredible expensive and requires
enormous resources for upkeep compared to conventional large caliber guns. In
order to preserve the secrecy of the plasma accelerators, the Order have installed
a remote controlled self-destruct device that overheats the fusion reactor, resulting
in a massive and lethal plasma burst.
The turret does not have an adequate targeting computer for aerodyne tracking,
making it defenseless against enemy aerodynes. Its electro-treated heavy polysteel-20
shockplates, mainly concentrated to the front and sides, are however capable
of withstanding a great deal of punishment before collapsing.
Special Weapons
Plasma Sunburst The Plasma Sunburst explodes on impact, sending molten
plasma over a wide area, lethal to infantry. 3 charges.
Plasma Moonburst The Plasma Moonburst is a single charge anti-infantry weapon.
1 charge.
Equipment
Repair Module Tools and software for minor field repairs to armor plates
and vital systems. 3 charges.
Protectorshield When activated protects the squad against all weapons.
3 charges.
Speed booster Improves movement speed when activated. 3 charges.
0 10 TECHNICAL MANUAL
72
Order Light Hoverdyne - O1/SAC-34 LAT “Sculptor”
Firepower Medium Armor Medium
Health Medium Speed Good
View range Medium Stealth Low
Perception Low Tech level 1
The O1/SAC-34 LAH is
a highly advanced
hoverdyne used for
reconnaissance patrols,
fast attack and deep
scout missions.
The fitted Rover-8005
battle engine makes it
fast and maneuverable.
The primary weapon
mounted on the
Sculptor is the Order
developed 20kMhz Electro Discharge Cannon “Lightning Strike”. It is still considered by
the Tech Priests in the Pax Dei to be highly experimental and ongoing modifications
and tweaking are made on a monthly basis. Even so it has been authorized to be used
on the battle field. The rapid firing Electro Discharge Cannon is capable of defeating
light titanium alloys with ease. The turret is equipped with both ground targeting
sensors and a Hugh G4 aerodyne tracking unit.
Order forces regularly use the Sculptor for fast flanking maneuvers, letting heavier
hoverdynes soak up the main enemy fire. The Electro Cannon can be extremely devastating when engaging enemy infantry as it’s rapid firing system is better suited for
small targets compared to the particle beam accelerators fitted on heavier Order
hoverdynes.
The Sculptor is lightly armored with a layer of titanium fused Heavy Polysteel-15 and
can definitively hold its own unless cornered by Anti-Tank defeating weapons.
Special Weapons
Electro Dagger
The Electro Dagger sends forth an extremely concentrated electro
discharge that is designed to penetrate heavy armor. 3 charges.
Electro Field
Electro Field is an area effect variant of the Electro Dagger
designed to wipe out concentrations of enemy infantry. 3 charges.
Equipment
Repair Module Tools and software for minor field repairs to armor plates and
vital systems. 3 charges.
Deployable Defender
The defender system shoots down incoming missiles, rockets
System
and grenades when deployed. Once deployed it cannot be moved.
1 charge.
Deployable Cloaks an entire area when deployed. It cannot be moved once
Cloaking Unit deployed. 1 charge.
-- GROUND CONTROL FIELD COMMANDER’S HANDBOOK -- -- GROUND CONTROL FIELD COMMANDER’S HANDBOOK --
Page 38

10 TECHNICAL MANUAL 0
75
Internal Memorandum: Field Commander Mackenzie filed in her battle
report 23/JM-2419 that during the initial landing engagement she
successfully destroyed two Volans units with a single marine squad.
The marine squad equipped with CG-89mm AT Rockets managed slip
behind the hoverdynes. It should be noted, however, that the marine
squad was killed right after their victory by a Sunburst from one of
the surviving hoverdynes. The deceased soldiers were postmortem
awarded the Crayven Medal of Valor.
An interesting side note is that the number of heavy hoverdyne units so far
detected on Krig-7B, far exceeds the number stationed at any other Order
conflict zone.
Special Weapons
Plasma Sunburst The Plasma Sunburst explodes on impact, sending molten
plasma over a wide area, lethal to infantry. 3 charges.
Plasma Moonburst The Plasma Moonburst is a single charge anti-infantry
weapon. 1 charge.
Equipment
Repair Module Tools and software for minor field repairs to armor plates
and vital systems. 3 charges.
Protectorshield When activated protects the squad against all weapons.
3 charges.
Speed booster Improves movement speed when activated. 3 charges.
0 10 TECHNICAL MANUAL
74
Order Heavy Hoverdyne - O1/WL8 “Volans”
Firepower Good Armor Great
Health Great Speed Medium
View range Medium Stealth None
Perception None Tech level 3
The massive
O1/WL8 Volans is the
Order of the
New Dawn’s
largest hoverdyne capable
of unsurpassed
destruction.
The Volans is
sometimes
called God’s
Might in inspiring
Order speeches. The hoverdyne is often employed by the Order as stationary guns
additionally protected by sandbags or other protection. Some critics claim that
the Volans is too slow on the battlefield and that it would be more suitable
to call it a mobile cannon instead of a hoverdyne.
It is an incredible honor to command and crew a Volans and the privilege are only
given to those soldiers with an impeccable religious background. Volans crews are
selected from the children of the priesthood at an early age and are both mentally
and physically trained during their entire adolescence.
The fearsome Volans is not only huge on the battlefield; it’s turret supports
a twin mounted Shogata-PDX9 particle beam accelerator. It was praised during
the Atherstone acquisition for its supreme firepower and accuracy but the skilled
Pax Dei technicians have not yet been able to improve its relatively slow fire rate.
The fusion generator is not able reenergize the particle accelerator any faster
without endangering the crew.
The Volans armor consists of a thick titanium-4 layer, reinforced with electro-treated crysteel bars. The heavy armor is responsible for its low acceleration but,
according to most Pax Dei officers, is still a good tradeoff.
-- GROUND CONTROL FIELD COMMANDER’S HANDBOOK -- -- GROUND CONTROL FIELD COMMANDER’S HANDBOOK --
Page 39

10 TECHNICAL MANUAL 0
77
Equipment
Repair Module Tools and software for minor field repairs to armor plates
and vital systems. 3 charges.
Protector shield When activated protects the squad against all weapons.
3 charges.
Image Intensifier Improves view range when activated. 3 charges.
Order Anti-Air Hoverdyne - O1/AAPBT-600 “Pavo”
Firepower Good Armor Medium
Health Medium Speed Good
View range Good Stealth None
Perception None Tech level 2
The O1/AAPBT-600 is
another example of
the latest Order weapon
technology that’s barely
been through a thorough
field test. The Pax Dei
have recently begun
to replace their older
Anti-Air Missile System
with the new FUR/X9
“Stryke” Lightning
Generator. The Pavo
uses the same hoverdyne
battle-proven O3-chassis
with the top module replaced. The Pavo has one single purpose, and that is to destroy
enemy aerodynes. It accomplishes this with an annoying accuracy.
Its aerodyne defeating weapon is a fixed mounted high frequency lightning generator
which literally slices incoming aerodynes. The lightning balls generated by the weapon
system seemingly homes in on the target aerodyne. However the lightning generator
requires enormous amounts of energy to operate and has been fitted with a powerful
Zephrim engine. The Lightning Generator system is according to Crayven Intelligence,
not yet completely stable and requires an intricate cooling system, which as of this
date does not work well in hot and dry regions.
The internal cooling system is it main weakness and prohibits it from being fitted
with heavy shock plates. The current design is armored with amalgam fused layers
of Polysteel-15. Due its grav engine, the Pavo is much faster and maneuverable
than most Crayven terradynes.
Equipment
Repair Module Tools and software for minor field repairs to armor plates and
vital systems. 3 charges.
Image Intensifier Improves view range when activated. 3 charges.
0 10 TECHNICAL MANUAL
76
Support Units
Order Beam Platform - O12/BT-MV Mk. II “Lacerta”
Firepower Fantastic Armor Medium
Health Medium Speed Good
View range Good Stealth None
Perception None Tech level 1
The Order of the New Dawn
has adopted BehemoTech’s
BT-MV Mk.II into their
ever-growing military arsenal.
The Lacerta is essentially a
grav fitted three-crewed
platform supporting a heavy
beam weapon. It is primarily
a long-range support weapon
for taking out enemy defensive
structures.
The sole armament of
the Lacerta is the X9k Purifier weapon system mounted on top of the hoverdyne
chassis. The sheer amount of concentrated energy generated by the Purifier beam
is powerful enough to blast through any known armor alloy available to ground
vehicles today.
The highly advanced Purifier weapon system is linked to an improved version of the Seccom
FFI targeting scanner, feeding the targeting computer with extremely detailed and
accurate information of targets’ movement trajectory, and environmental effects.
Internal Memorandum: Several Field Commanders have reported
that they’ve seen the Purifier beam “bounce” from several targets,
effectively hitting more than one target. Crayven Intelligence has not
been able to confirm these sightings and no Beam Platform has
been captured with its weapon system intact. If these sightings are
more than visual glitches, it could prove useful to approach Beam
Platforms in scattered formations.
The Beam Platform is armored with relatively light armor, amalgam fused layers
of Polysteel-15 and can be destroyed with infantry carried weapons.
Special Weapons
SCU-Frequency Prism Increases the frequency of the Purifier Beam for a better
rate of fire. 3 charges.
SCU-Focus Prism Focuses the Purifier Beam, making it amazingly powerful.
3 charges.
-- GROUND CONTROL FIELD COMMANDER’S HANDBOOK -- -- GROUND CONTROL FIELD COMMANDER’S HANDBOOK --
Page 40

10 TECHNICAL MANUAL 0
79
Order Drone Carrier - O11/BEHCCA “Orion”
Firepower Medium Armor Medium
Health Great Speed Medium
View range Good Stealth None
Perception Fantastic Tech level 3
The O3/BEHCCA
Drone Carrier is
an Order support
hoverdyne
designed to stay in
the background of
combat encounters.
A single Rover2000 grav engine,
with four side
mounted articulating
energy outlets, powers the six-crewed hoverdyne. Inside the heavily armored belly
of the Carrier is a large container module where heavy payloads of GHE Spider
Drones are stored.
An advanced targeting system identifies enemy ground vehicles and calculates the
targets’ movement vector and signature. The data is then transferred to a computer
inside each of the GHE spider drones. The drones are launched out of the carrier
and as soon as they touch ground they home in on their target’s signature. The eightlegged spider drone is highly maneuverable and their combat speed tops most
terradynes. The advanced computer onboard the drone makes all necessary movement
corrections required to successfully strike the target. When the drone comes within
a pre-programmed detonation range, optimal range being 5 meters,
the drone
explodes, sending shrapnel towards the target. To guarantee the destruction
of the target, a batch of drones are usually sent out at once.
Special Weapons
Advanced Spider Drone Spider drones with an advanced guidance system and
increased explosive payload. 3 charges.
Equipment
Repair Module Tools and software for minor field repairs to armor
plates and vital systems. 3 charges.
Protectorshield When activated protects the squad against all weapons.
3 charges.
Image Intensifier Improves view range when activated. 3 charges.
0 10 TECHNICAL MANUAL
78
Order Artillery Hoverdyne - O4/DN9-FO OAH “Sagitta”
Firepower Fantastic Armor Medium
Health Great Speed Medium
View range Low Stealth None
Perception None Tech level 4
The O4/DN9-FO OAH or
Sagitta is a mobile artillery
hoverdyne armed with a
ballistic Proton Particle
Launcher. The Sagitta is
relatively slow compared to
other Order hoverdynes, yet
it still moves faster than
most Crayven terradynes.
The Artillery hoverdyne is
really fearsome when used
in conjunction with stealthy
forward observers.
A single gunner operates the weapon system launcher and it actually requires
surprisingly little maintenance compared to other Order energy weapons, though
greater care must be taken with its ordinance. The primary weapon, a BPPL-12
“Defiance” ejector, lobs overpacked and unstable proton particle clusters in a high
ballistic arc towards the target. Upon impact, the Schröedinger repulsor field
generators are disabled, creating an enormous energy discharge, resembling a
miniature nuclear detonation. While the heat and energy of such an explosion is
deadly in its own right, the sub-particle emissions of the blast cause electrons of
atmospheric molecules in the surrounding atmosphere to be literally stripped off.
This causes a powerful ionization field and wreaks havoc with all surrounding
electronic equipment. The dissipation of this ionization field, however presents
the most significant problem leading to recombination-independent photogeneration
which emits enough energetic photons to literally reduce armor to molten slag.
Infantry...does not survive a ground zero blast. The Artillery hoverdyne is fitted with
an internal fusion reactor that provides the launcher with the needed energy to
maintain the Schröedinger repulsor fields on all ordinances.
The Sagitta requires tight protection from other hoverdynes, even though its
Polysteel-20 shock plates keeps the chassis intact for prolonged firefights.
Special Weapons
TankBuster Discharge Improved armor-defeating capabilities. 1 charge.
LongRange Discharge A setting allowing the launcher to lob the cluster to
extreme long ranges. 3 charges.
Equipment
Repair Module Tools and software for minor field repairs to armor
plates and vital systems. 3 charges.
-- GROUND CONTROL FIELD COMMANDER’S HANDBOOK -- -- GROUND CONTROL FIELD COMMANDER’S HANDBOOK --
Page 41

10 TECHNICAL MANUAL 0
81
Order Attack Aerodyne - OA2/HAA-309 “Phoenix”
Firepower Good Armor Medium
Health Medium Speed Great
View range Medium Stealth None
Perception None Tech level 5
The Phoenix or OA2/HAA-309 is one of
the most feared Order aerodynes as its terradyne
breaking ability is legendary or as the Pax Dei
uncannily expresses it - divine. The Phoenix
relies on its high speed and stealthy maneuvers
to get within range of the enemy and then
launches a deadly barrage of torpedoes.
The aerodyne’s single engine outlet and its active
VonTec Mk. III electronic countermeasures give
the enemy a hard time hitting it. Its aerodyne
Polysteel-15 layered armor gives it little or no
protection when weapons do hit.
The Phoenix is primarily loaded with Hugh SZX3000 “Jaguar” SCREAM torpedoes. The SCREAM
torpedo warheads contains a shaped-charged
director in the nose to provide the warhead with
an enhanced armor penetrating capability.
A secondary warhead explodes milliseconds
later - inside the armored layers of the target.
The weapon system can with limited success also target other aerodyne targets,
however it is no match versus a true aerodyne fighter such as the Crayven Delta.
Special Weapons
Fragmentation Torpedo The fragmentation torpedo is specifically designed to take
out enemy infantry and light vehicles. 3 charges.
Solar Torpedo The Solar Torpedo’s main function is to totally annihilate
enemy structures. It is not very useful versus terradynes
due the torpedo’s extremely slow velocity. 2 charges.
Equipment
Protector Shield Protects the aerodyne against all incoming enemy fire
when activated. 3 charges.
Image Intensifier Improves view range when activated. 3 charges.
0 10 TECHNICAL MANUAL
80
Aerodyne Units
Order Recon Aerodyne - OA1/FAS-T12 “Lyra”
Firepower Low Armor Low
Health Medium Speed Fantastic
View range Great Stealth Good
Perception Good Tech level 1
The OA1/FAS-T12 Lyra is a fast, highaltitude, scout aerodyne suitable for
reconnaissance patrols and targetidentifying missions. The Lyra is unrivaled
in speed and maneuverability and easily
outruns any Crayven aerodynes. Its
main strength is its incredible long-range
sensors that bestow an Order Field
Commander great insight to the battlefield.
The Lyra is not intended to actively
participate in combat with its thin armor
and relatively weak weapon system.
Its main armament is a fixed belly
mounted Veevaert JSM-6 Scatter
Laser. The scatter laser main strength
is its extreme high rate of fire, while its main weakness is its low firepower. The Lyra
is a one-man craft and the scatter laser is equipped with an improved auto-targeting
computer allowing the pilot to concentrate on the flying.
Special Weapons
Electro Dagger The Electro Dagger sends forth an extremely concentrated
electro discharge that is designed to penetrate heavy
armor. 3 charges.
Electro Field Electro Field is an area effect variant of the Electro
Dagger designed to wipe out concentrations of enemy
infantry. 3 charges.
Equipment
Protector Shield Protects the aerodyne against all incoming enemy fire
when activated. 3 charges.
Perception Increases the probability of detecting stealthy or cloaked
units. 3 charges.
Image Intensifier Improves view range when activated. 3 charges.
-- GROUND CONTROL FIELD COMMANDER’S HANDBOOK -- -- GROUND CONTROL FIELD COMMANDER’S HANDBOOK --
Page 42

11 CREDITS 0
83
0 10 TECHNICAL MANUAL
82
Order Fighter Aerodyne - OA3/AN-9000 “Draco”
Firepower Great Armor Medium
Health Medium Speed Great
View range Medium Stealth Low
Perception Low Tech level 5
The Order’s answer to the Delta
fighter is the OA3/AN-9000
“Draco” and it is considered to be
a worthy opponent.
As a fighter craft its main objective
is to eliminate enemy fighter aerodynes and attack aerodynes.
The Draco’s weapon system cannot
engage ground targets and must
rely on other units to take out
enemy Anti-Air capable units.
The Draco is crewed by a pilot and
a gunner, both in direct contact
with the Field Commander’s APC.
The Draco is primarily armed with
Air-To-Air Dell-Hugh RV4 Plasma
Missiles. When the missiles are
launched, a mechanism in the warhead generates a powerful energy
field, filing a particle confinement
with plasma that is released upon
detonation. It takes a second or two
for the missile to generate the plasma, making the weapon system not entirely
efficient for extreme close aerial combat. The gunner can however arm the missiles
before they are launched but due to the hazards of having armed plasma missiles
in the launch tubes, this highly unusual form of attack is only used by truly suicidal
pilots.
Most weapons easily penetrate the Draco Light Polysteel-15 armor, which is also
considered to be Draco’s main weakness.
Special Weapons
Improved Plasma Missile An improved and more powerful Air-to-Air Plasma
missile. 3 charges.
Equipment
Protector Shield Protects the aerodyne against all incoming enemy fire
when activated. 3 charges.
Image Intensifier Improves view range when activated. 3 charges.
-- GROUND CONTROL FIELD COMMANDER’S HANDBOOK -- -- GROUND CONTROL FIELD COMMANDER’S HANDBOOK --
Massive Entertainment
DIRECTOR & LEAD GAME DESIGNER
Martin Walfisz
LEAD SOFTWARE ENGINEER
Dan Andersson
TECHNICAL DIRECTOR
Mats Grahm
ART DIRECTOR
Tobias Strömvall
LEAD MISSION DESIGNER
Henrik Sebring
GAME DESIGN
Martin Walfisz
Henrik Sebring
SOFTWARE ENGINEERING
Dan Andersson
Johannes Norneby
Martin Rystrand
Daniel Ljungberg
3D ENGINE DEVELOPMENT
Mats Grahm
Niklas Hansson
ART
Tobias Strömvall
Thomas Bengtsson
Orhan Karagöz
Joakim Månsson
Glenn Kristoffersen
MISSION DESIGN
Henrik Sebring
Per Edman
Niklas Larsson
Anders Olsson
Johan Persson
MUSIC & AUDIO EFFECTS
Ola Strandh
PROJECT MANAGEMENT & QA
LEAD
Peter Kullgard
QA TEAM
Peter Kullgard
Martin Persson
Richard Hultgren
Carl Fransson
Fredrik Jansson
GAME STORY
Marcus Skyler
Henrik Sebring
Martin Walfisz
MANUAL CONTENT
Henrik Sebring
Marcus Skyler
ADDITIONAL ART
Magnus Larsson
Jonas Dahlin
PR COORDINATOR
Anne Eckles
FINANCES
Mats Melander
SPECIAL THANKS TO
Christian Pérez
Susan Lewis (ThinkBIG)
Paul Grace
Jeff Lee
Magnus Nilsson
Sven Jansson
Tomas Althén
Arne Borg
Johan “Bepp” Ramestam
Andreas “Diktator” Selling
Christian Franzén
Åsa Wiebe
Stefan Sylvén
Fredrik Nilsson
Patrik Berander
John Tillberg
Cpt. Björn Kullgard
Page 43

11 CREDITS 0
85
-- GROUND CONTROL FIELD COMMANDER’S HANDBOOK --
LeAnn Koehnen
Lisa Dyson
Huck Liggett
Talent Paymaster
The Talent Fund, Half-Moon Bay, CA.
Cast of Characters
Sarah Parker
Jennifer Hale
Deacon Stone
Dee Baker
Annie-1
Allison Levine
Ghost
Andre Ware
Enrica Hayes
Tasia Valenza
Paladin Magnus
Gregg Berger
Cardinal Aegeri
Philip Clarke
Sergeant Cole
Nathan Carlson
Major Thomas
David Jeremiah
Bishop Delendre
Mark Klastorin
“M”
Nick Guest
Additional Voice Acting
Anne Eckles
Lina Ehn
Squad & Dropship Voices
Dee Baker Gregg Berger
Nathan Carlson Philip Clarke
Nick Guest Jennifer Hale
Nick Jameson David Jeremiah
Mark Klastorin Joyce Kurtz
Allison Levine Michael McGaharn
Daran Norris Anneliza Scott
Tasia Valenza Andre Ware
QUALITY ASSURANCE
QA Manager
Gary Stevens
QA Supervisor
Ken Eaton
QA Lead
Chris Mason
QA Testers
Chad Martin Danny Harrison
Dan Nations Quang Pham
Erinn Hamilton Lester Stocker
Phil Kuhlmey Joe Easter
Zach Hays Dave Thomas II
Dave Johnson Mark Storie
Brian Theissen Brian Burnett
Chris Lee Ryan Watson
Michael Grant Craig Bradford
HARDWARE COMPATIBILITY
Compatibility Lab Manager
Pat Callahan
Compatibility Lab Technicians
Brad Rosenthal
Eric Leaf
SUPPORT STAFF
Corp. Product Certification
Matthew Kangas
Tech. Support Manager
Brian Moss
Tech. Support Lead
Tracy Green
LOCALIZATION
Producer
Barry Kehoe
Engineering Lead
Sean Forsyth
Engineering
Stephen Forsyth
Joanne Russel
QA Lead
Sean Moran
Graphics Lead
David Fleming
Audio
Bill Sweeney
ROW Producer
Warren Wright
SPECIAL THANKS
Hubert Jolly
Dave Grenewetzki
Dave Williamson
Ralph Giuffre
Suki Hayre
Brad Nelson
Emmanuel Schalit
Kelly Zmak
0 11 CREDITS
84
Mathias Malmqvist
Elizabeth Lindau
Ronnie Nilsson
Patrik Nilsson KA2
Chefen KA2
The Swedish Armed Forces
For Sierra Studios
Senior Vice President
J. Mark Hood
DEVELOPMENT
Producer
Jeff Pobst
Assistant Producer
Bernadette Pryor
CINEMATIC DIRECTION
Directing & Editing
Jim Carey
Additional Direction
Jeff Pobst
MARKETING
Vice President Marketing
Jim Veevaert
Director of Marketing
Koren Buckner
Associate Product Manager
Marc Tardif
Marketing Producer
Glenn Oliver
Web Editor
Guy Welch
Marketing Info. Manager
Ingrid Pelzer
Marketing Info. Assistant
Jelaine Kraetsch
European Brand Manager
Djamil Kamal
PUBLIC RELATIONS
Public Relations Manager
Hillary Crowley
Sr. Public Relations Manager
Genevieve Ostergard
Public Relations Coordinator
Kellie Hobin
PACKAGE DESIGN
MarCom Manager
Justin Kirby
Creative Services
Orlena Yeung
BlueSpark Studios
David Brzozowski
Dien Duong
Game Manual
Cheryl Sweeney
WON.NET NETWORKING
Producer
Ross Perez
Engineers
Mike Nicolino
Erik De Bonte
Lee Olds
Noel Wade
Brian Rothstein
Len Skiena
Dean Webster
Quality Assurance
Eric Harman
David Cain
DIALOGUE RECORDING
Voice Directing & Casting
Jeff Pobst
Voice Recording Specialist
Ben Houge
Voices Recorded at
Hollywood Recording Services
Hollywood, CA
Voice Recording Engineer
Alex Triujeque
Voice Casting Agency
The Voicecaster, Burbank, CA
Voice Casting Agents
Martha Mayakis
-- GROUND CONTROL FIELD COMMANDER’S HANDBOOK --
Page 44

12 TECHNICAL SUPPORT 0
87
0 11 CREDITS
86
Fiona O’Carroll
Mark Iverson
Michael Fuller
Doug Lombardi
Adam Fossa
Christine Smith
Tassie Medlin
Patricia Rice
Beth Freeman
Patricia Smith
Ground Control Beta Testers
VERY SPECIAL THANKS TO
Spouses and families (for (most of them) still being there despite us ignoring
them during crunch time)
The Offspring for Pretty Fly (for a White Guy)
Everyone at the Squad Leader photo session
PC for providing beer at desparate times
Kauren
Baugen
Husqvarna
Laserdome
Food at Palermo/Petros/Piaff/Brunnen/The Chinese place
Cillas Bafe
Coca Cola
The coffee machine (yes, it also makes chocolate!)
Brutal-Akademien
Slitz
Massive Mobile
...and everyone else who helped out! THANKS!
Uses Bink Video, Copyright © 1997-2000 by RAD Game Tools, Inc.
-- GROUND CONTROL FIELD COMMANDER’S HANDBOOK -- -- GROUND CONTROL FIELD COMMANDER’S HANDBOOK --
2:
A, B, C
Before you call our technical support lines, please check that you have read the Readme file included on the game
disk #1. You may well find a very quick answer to the problem that you are facing as these files contain answers
to most common problems. If the answer is not here, make sure you have precise details of any error message that
you receive, and details regarding the specifications of your computer before you call us, as this will help us in
giving you a faster and more efficient service.
3:
D, E, F4:G, H, I5:J, K, L6:M, N, O7:P, R, S8:T, U, V9:W, X, Y0:Q, Z
CUSTOMER SERVICES
Technical Support Tel: (0118) 920 9111
Fax: (0118) 987 5603
Lines open 24 hrs, 365 days a year, using our automated technical support attendant. This system includes
answers to all commonly posed questions and problems with our new and major titles. It is set up in a friendly and
easy to use menu system that you navigate through using a touch tone telephone. If the answer to your question
is not in our automated system, then you will be transferred to a technician between the hours of 9am and 5pm
Monday to Friday.
Here are some key-presses that will allow you to navigate through our automated attendant. Note that these are the
standard letter assignments that are given to UK telephones so if your phone has letters on the keypad, please use
them instead:
If you would prefer to write to us, please send your mail to the following address:
HAVAS INTERACTIVE UK Ltd.
Customer Services / Mail Order / Tech Support Department
2 Beacontree Plaza
Gillette Way
Reading • Berkshire
RG2 0BS
United Kingdom
Sierra UK Web site
http://www.sierra-online.co.uk
UK Website includes technical support, mail order, chat rooms, product information, game demos and
much, much more.
Hintline Number
0891 660 660
Price - 60p per min at all times - Max call length - 5 minutes - Max call charge - £3.00
Page 45

MULTIPLAYER 0
89
-- GROUND CONTROL FIELD COMMANDER’S HANDBOOK --
14 DEFAULT BUTTONS & KEY SETTINGS
. . .
camera up
menu squad select camera down
select APC
select/attack move
Move Mouse Cursor to the Edges
of the Screen to Turn/Tilt Camera.
MOUSE CLICK COMMANDS
Left Click Right Click
Automatic: no keyboard keys pressed
Cursor over Friendly Unit Select Guard Unit
Cursor over Terrain Move Move & Point
Cursor over Enemy Unit Attack Attack
Cursor over APC & Infantry Selected Select APC Load Squad
into APC
While pressing Attack Modifier
(<CTRL> key on keyboard Attack Location or Box Around
Enemy Units to Attack
While pressing Move Modifier
(<ALT> key on keyboard) Move & Point
While pressing Guard Modifier
(<G> key on keyboard) Guard Unit
Ground Control automatically determines the action to take when you click a mouse
button based on your cursor location. This system is designed to be intuitive and
many people enjoy the game without ever looking at this table. It is there for your
reference.
For greater control, the automatic system can always be temporarily overridden by
using one of the three modifier keys described above. If you desire, you can
additionally disable the automatic context feature entirely in the options menu.
multiple select, stack
orders, & set waypoints
Move
modifier
Attack
modifier
move camera
0 13 WARRANTY
88
WARRANTY
Each company of the HAVAS INTERACTIVE group is named “HAVAS INTERACTIVE” in the paragraphs below:
Havas Interactive warrants for a period of ninety (90) days from the date of purchase that the software title contained in this package shall be free from defects in material and workmanship. In the event that this software titles proves defective during that time
period, Havas Interactive will provide the customer with a functionally equivalent disk upon receipt by Havas Interactive of proof
of purchase and the defective product.
REPAIR, REPLACEMENT, OR REFUND AS PROVIDED IN THIS WARRANTY IS THE EXCLUSIVE REMEDY OF THE CONSUMER. HAVAS
INTERACTIVE SHALL NOT BE LIABLE FOR ANY INCIDENTAL OR CONSEQUENTIAL DAMAGES FOR BREACH OF ANY EXPRESS OR IMPLIED
WARRANTY. EXCEPT TO THE EXTENT PROHIBITED BY APPLICABLE LAW, ANY IMPLIED WARRANTY OF MERCHANTABILITY OR FITNESS FOR
A PARTICULAR PURPOSE ON THIS PRODUCT IS LIMITED IN DURATION TO THE DURATION OF THIS WARRANTY.
Some countries do not allow the exclusion or limitation of incidental or consequential damages, or allow limitations on how long an
implied warranty lasts, so above limitations or exclusion may not apply to you.
COPYRIGHT NOTICE
The software title and the manual are copyrighted. All rights reserved. They may not, in whole or part, be copied, photocopied,
reproduced, translated, or reduced to any electronic medium or machine-readable form without prior consent, in wirting, from Havas
Interactive. The user of this product shall be entitled to use the product for his or her own use, any commercial use being excluded,
but shall not be entitled to sell or transfer the reproductions of the software or manual to other parties in any way, nor to rent or
lease the product to others without written permission of Havas Interactive.
[You are entitled to use this software title on a single computer in a single location and on only one terminal at any given time. Any
further use is prohibited.]
-- GROUND CONTROL FIELD COMMANDER’S HANDBOOK --
Page 46

0 NOTES
91
-- GROUND CONTROL FIELD COMMANDER’S HANDBOOK --
0 MULTIPLAYER
90
KEYBOARD COMMANDS
Camera Control
<UP ARROW> Camera Movement Control
<DOWN ARROW>
<LEFT ARROW>
<RIGHT ARROW>
<PAGE UP> Move camera up
<PAGE DOWN> Move camera down
<HOME> Fine tune camera altitude up
<END> Fine tune camera altitude down
Mouse Control
(these four keys are held down while clicking a mouse button)
<CTRL> Attack Modifier key, forces mouse click to issue an attack com-
mand
<ALT> Move Modifier key, forces mouse click to issue a move com-
mand
<G> Guard Modifier key, tells currently selected unit to guard unit
clicked on
<SHIFT> Select multiple units, stack orders, or set movement waypoints
<R> While mouse curosor is over a unit, show that unit’s range
<NUMPAD 0> Auto-snap mouse cursor to nearest unit
Squad Control
<E> Use Special Equipment
<W> Use Special Weapon
<J> Toggle Movement mode
<K> Toggle Attack mode
<L> Toggle formation
<SPACE> Cancel current order
Squad Selection
<S> Select all squads
<D> Deselect all squads
<F1>,<F2> Select specific squad, <F1> = squad 1, <F2> = squad 2, ...
<BKSP> Select APC
<CTRL> + <1..9> Create group out of selected squads and assign to number key
<1..9> Select group 1-9
Interface and Game Control
<M> Show tactical overview (map) and detailed objectives
<B> Hide/Show Squad Behaviour Menu
<I> Hide/Show Interface
<PAUSE> Pause game
<RETURN> Chat (in multiplayer only)
<TAB> Show player information (in multiplayer only)
<PRINT SCREEN> Screen Capture
-- GROUND CONTROL FIELD COMMANDER’S HANDBOOK --
....................................................................................................................
....................................................................................................................
....................................................................................................................
....................................................................................................................
....................................................................................................................
....................................................................................................................
....................................................................................................................
....................................................................................................................
....................................................................................................................
....................................................................................................................
....................................................................................................................
....................................................................................................................
....................................................................................................................
....................................................................................................................
....................................................................................................................
....................................................................................................................
....................................................................................................................
14 DEFAULT BUTTONS & KEY SETTINGS
Page 47

0 NOTES
92
-- GROUND CONTROL FIELD COMMANDER’S HANDBOOK --
....................................................................................................................
....................................................................................................................
....................................................................................................................
....................................................................................................................
....................................................................................................................
....................................................................................................................
....................................................................................................................
....................................................................................................................
....................................................................................................................
....................................................................................................................
....................................................................................................................
....................................................................................................................
....................................................................................................................
....................................................................................................................
....................................................................................................................
....................................................................................................................
....................................................................................................................
 Loading...