


All about the
Use&Care
of your Gas Wall Oven
TA B L E O F C O N T E N T S
Welcome & Congratulations.................................... |
2 |
Setting Oven Controls............................................ |
7 |
Important Safety Instructions................................. |
3 |
Care & Cleaning (Cleaning Chart).......................... |
15 |
Grounding Instructions........................................... |
5 |
Care & Cleaning................................................... |
16 |
Oven Ignition........................................................ |
5 |
Adjusting the Oven Temperature........................... |
19 |
Liquefied Petroleum (Propane) Gas Conversion........ |
5 |
Before You Call ................................................... |
20 |
Before Setting Oven Controls.................................. |
6 |
Major Appliance Warranty..................................... |
22 |
<![endif]>B .Rev 2016) (June A00327402
www.frigidaire.com USA 1-800-944-9044 |
www.frigidaire.ca Canada 1-800-265-8352 |
WELCOME & CONGRATULATIONS
Product Registration
Register Your Product
The PRODUCT
REGISTRATION CARD should be filled in completely, signed and returned to
Electrolux Home Products.
Serial Plate Location
Please record your model and serial numbers below for future reference.
Model Number:
Serial Number:
Purchase Date:
NOTE
Please attach sales receipt here for future reference.
Congratulations on your purchase of a new appliance! At
Electrolux Home Products, we are very proud of our product and are completely committed to providing you with the best service possible. Your satisfaction is our number one priority.
We know you’ll enjoy your new appliance and Thank You for choosing our product. We hope you consider us for future purchases.
PLEASE CAREFULLY READ AND SAVE THESE INSTRUCTIONS
This Use & Care Manual contains general operating instructions for your appliance and feature information for several models. Your product may not have
all the described features. The graphics shown are representative. The graphics on your appliance may not look exactly like those shown. These instructions are not meant to cover every possible condition and situation that may occur. Common sense and caution must be practiced when installing, operating and maintaining any appliance.

 WARNING
If the information in this manual is not followed exactly, a fire or explosion may result causing property damage, personal injury or death.
FOR YOUR SAFETY:
—Do not store or use gasoline or other flammable vapors and liquids in the vicinity of this or any other appliance.
—WHAT TO DO IF YOU SMELL GAS:
•Do not try to light any appliance.
•Do not touch any electrical switch; do not use any phone in your building.
•Immediately call your gas supplier from a neighbor's phone. Follow the gas supplier's instructions.
•If you cannot reach your gas supplier, call the fire department.
—Installation and service must be performed by a qualified installer, servicer or the gas supplier.
©2015 Electrolux Canada Corp. All rights reserved
Printed in United States
2
IMPORTANT SAFETY INSTRUCTIONS
Read all instructions before using this appliance.
Save these instructions for future reference.
DEFINITIONS |
CAUTION |
|
This is the safety alert symbol. It is used to alert you |
||
to potential personal injury hazards. Obey all safety |
This symbol will help alert you to situations that |
|
messages that follow this symbol to avoid possible injury |
||
may cause bodily injury or property damage. |
||
or death. |
||
|

 WARNING
This symbol will help alert you to situations that may cause serious bodily harm, death or property damage.

 IMPORTANT
IMPORTANT indicates installation, operation or maintenance information which is important but not hazard-related.

 WARNING
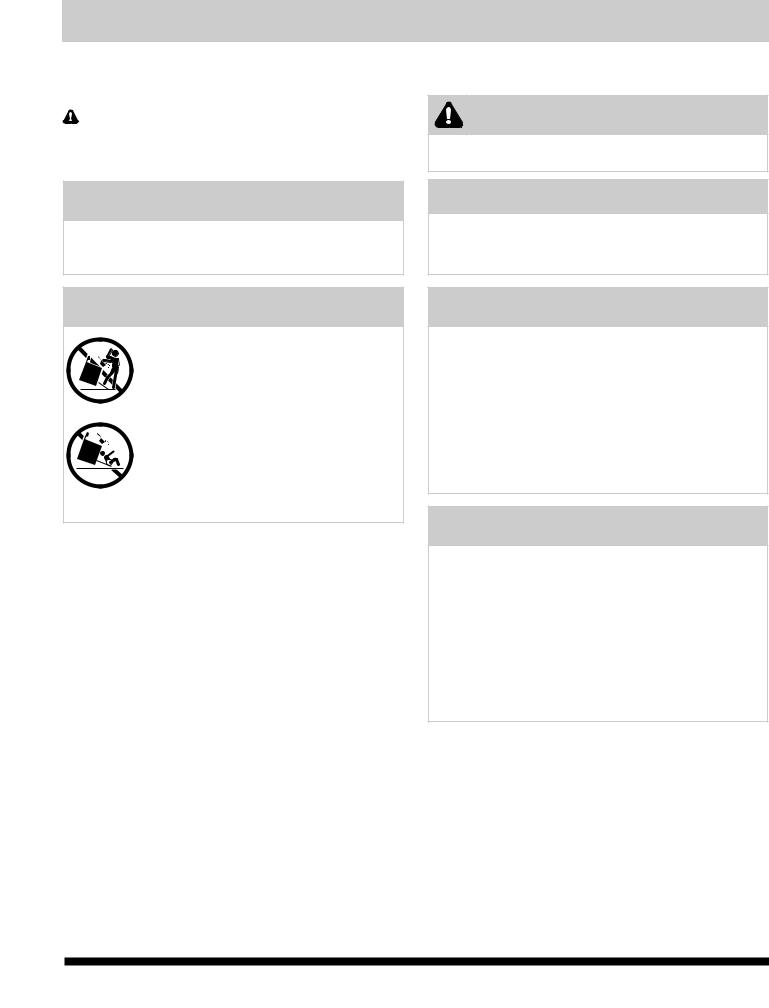
• All appliance can tip.
• Injury to persons could result.
• Install anti-tip bracket packed with
your appliance.
• See Installation Instructions.
To reduce the risk of tipping, the appliancemustbesecuredbyproperly installed anti-tip bracket provided
with the unit. Refer to the Installation
Instructionsforproperanti-tipbracket installation.
•Remove all tape and packaging wrap before using the appliance. Destroy the carton and plastic bags after unpacking the appliance. Never allow children to play with packaging material. Do not remove the wiring label and other literature attached to the back of the appliance. Do not remove model/serial number plate.
•Proper Installation—Be sure your appliance is properly installed and grounded by a qualified electrician or installer in accordance with the National Fuel Gas Code ANSI Z223.1 latest edition, and the National Electrical Code ANSI/
NFPA No. 70 (U.S.A.) or CSA C22.1, PART 1 (Canada)—latest editions and local code
requirements. Install only per installation instructions provided in the literature package for this appliance.
Ask your dealer to recommend a qualified installer, technician or an authorized repair service. Know how to disconnect the electrical power to the appliance at the circuit breaker or fuse box in case of an emergency.
•User Servicing—Do not repair or replace any part of the appliance unless specifically
recommended in the manuals. All other servicing should be done only by a qualified technician. This may reduce the risk of personal injury and damage to the appliance.

 CAUTION
Electronic controllers can be damaged by cold temperatures. When you use your appliance for the first time, or if it has been used for a long period of time, make sure that it has been exposed to a temperature above 0°C/32°F for at least 3 hours before connecting it to the power supply.
Do not store items of interest to children in the cabinets above an appliance. Children climbing on the appliance to reach items could be seriously injured.

 WARNING
Stepping, leaning or sitting on the door(s) or drawer of this appliance can result in serious injuries and may also cause damage to the appliance. Do not allow children to climb or play around the appliance.
Do not use the wall oven for storage.
NEVER use this appliance as a space heater to heat or warm the room. Doing so may result in carbon monoxide poisoning and overheating of the oven.
•Never modify or alter the construction of the appliance by removing panels, wire covers, or any other part of the product.
•Remove the oven door from any unused wall oven if it is to be stored or discarded.
•Storage in or on Appliance—Flammable materials should not be stored in an oven, or in the
broiler drawer (if equipped). This includes paper, plastic and cloth items, such as cookbooks, plastic ware and towels, as well as flammable liquids. Do not store explosives, such as aerosol cans, in or near the appliance.
3

IMPORTANT SAFETY INSTRUCTIONS
•Do not leave children alone—Children should not be left alone or unattended in the area where an appliance is in use. They should never be allowed to sit or stand on any part of the appliance.
•DO NOT TOUCH INTERIOR OVEN BURNER OR
INTERIOR SURFACES OF THE WALL OVEN UNTIL THEY HAVE COOLED. The oven heating burner may be hot even though the flames are not visible. Areas near the burner may become hot enough to cause burns. During and after use, do not touch, or let clothing or other flammable materials touch these areas until they have had sufficient time to cool. Among these areas are the oven vent openings, the surfaces near these openings, oven door, window and broiler drawer.
•Wear Proper Apparel—Loose-fitting or hanging garments should never be worn while using the appliance. Do not let clothing or other flammable materials contact hot surfaces.
•Do Not Use Water or Flour on Grease Fires— Smother the fire with a pan lid, or use baking soda, a dry chemical or foam-type extinguisher.
•When heating fat or grease, watch it closely. Fat or grease may catch fire if allowed to become too hot.
•Use Only Dry Pot holders—Moist or damp pot holders on hot surfaces may result in burns from steam. Do not let the pot holders touch the flame
or burners. Do not use a towel or other bulky cloth instead of a pot holder.
•Do Not Heat Unopened Food Containers—Build-up of pressure may cause the container to burst and result in injury.
•Removetheovendoorsfromanyunusedappliance if it is to be stored or discarded.
•IMPORTANT—Do not attempt to operate the oven during a power failure. If the power fails, always turn the oven off. If the oven is not turned off and the power resumes, the oven will begin to operate again.
Food left unattended could catch fire or spoil.
IMPORTANT INSTRUCTIONS FOR USING YOUR OVEN
•Use Care When Opening an Oven Door—Stand to the side of the appliance when opening the door of a hot oven. Let hot air or steam escape before you remove or replace food in the oven.
•Keep Oven Vent Ducts Unobstructed. The wall oven is vented at the upper control panel trim or grille. Touching the surfaces in this area when the wall oven is operating may cause severe burns. Also, do not place plastic or heat-sensitive items near the oven vent. These items could melt or ignite.
4
•Placement of Oven Racks. Always place oven racks in desired location while oven is cool. If the rack must be moved while the oven is hot, use extreme caution. Use pot holders and grasp the rack with both hands to
reposition. Do not let pot holders contact the oven burner flame or interior of the oven or broiler drawer. Remove all utensils from the rack before removing the rack.

 WARNING
NEVER cover any slots, holes or passages in the oven bottom or cover an entire rack with materials such as aluminum foil. Doing so blocks air flow through the oven and may cause carbon monoxide poisoning. Aluminum foil linings may trap heat, causing a fire hazard.
•Do not use your broiler pan without its insert.
The broiler pan and grid allow dripping fat to drain and be kept away from the high heat of the broiler.
•Do not cover your broiler grid or oven bottom with aluminum foil. Exposed fat and grease could ignite.
•Do not touch a hot oven light bulb with a damp cloth. Doing so could cause the bulb to break. Disconnect the oven or shut off the power to the oven before removing and replacing the bulb.
IMPORTANT INSTRUCTIONS FOR CLEANING YOUR OVEN
•Clean the wall oven regularly to keep all parts free of grease that could catch fire. Do not allow grease to accumulate.
•Kitchen Cleaners/Aerosols—Always follow the manufacturer's recommended directions for use. Be aware that excess residue from cleaners and aerosols may ignite causing damage and/or injury.
SELF-CLEANING OVENS
•Clean in the self-cleaning cycle only the parts of the oven listed in this owner's guide. Before self-cleaning the oven, remove any utensils stored in the oven.
•Do not clean the oven door gasket. The door gasket is essential for a good seal. Care should be taken not to rub, damage or move the gasket.
•Do not use oven cleaners. No oven cleaner or oven liner protective coating of any kind should be used in or around any part of the oven.

 CAUTION
The health of some birds is extremely sensitive to the fumes given off during the self-clean cycle of any range. Move birds to another well ventilated room.
IMPORTANT SAFETY INSTRUCTIONS
IMPORTANT
The California Safe Drinking Water and Toxic Enforcement Act requires the Governor of California to publish a list of substances known to the state to cause cancer, birth defects or other reproductive harm, and requires businesses to warn customers of potential exposure to such substances.
SAVE THESE INSTRUCTIONS
|
Grounding Instructions (electric ignition models only) |
|||||
|
|
|
|
|||
IMPORTANT: READ AND SAVE THESE INSTRUCTIONS. |
|
|
|
|||
|
|
|
FOR COMPLETE INSTALLATION AND GROUNDING |
|||
|
WARNING |
|
||||
|
|
INSTRUCTIONS. DO NOT OPERATE THE OVEN USING A |
||||
|
|
|
TWO-PRONG ADAPTER OR AN EXTENSION CORD. |
|||
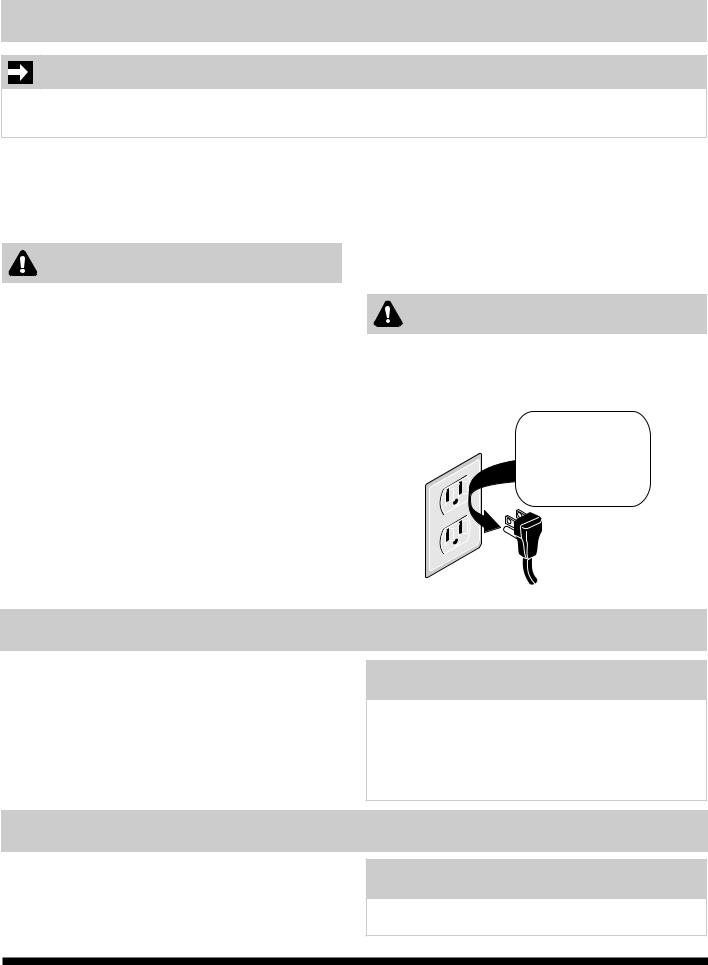
This appliance is equipped with a 3-prong grounding |
|
|||||
|
|
|
|
|||
|
|
|
|
|||
plug for your protection against shock hazard and |
|
|
WARNING |
|
||
should be plugged directly into a properly grounded |
|
|
|
|
||
receptacle. DO NOT cut or remove the grounding |
|
Avoid fire hazard or electrical shock. Do not use an |
||||
prong from this plug. |
|
|||||
|
adaptor plug, an extension cord, or remove grounding |
|||||
|
|
|
||||
For personal safety, this oven must be properly |
prong from electrical power cord. Failure to follow this |
|||||
warning can cause serious injury, fire or death. |
||||||
grounded. For maximum safety, the power cord must |
||||||
|
Grounding |
|
||||
be plugged into a 120V—60 Hz. outlet that is correctly |
|
Do not, under any |
||||
polarized and properly grounded. |
|
type wall |
||||
If a two-prong wall receptacle is the only available outlet, |
|
receptacle |
circumstances, |
|||
|
|
cut, remove, |
||||
it is the personal responsibility of the consumer to have |
|
|
or bypass the |
|||
it replaced with a properly grounded three-prong wall |
|
|
grounding prong. |
|||
receptacle installed by a qualified electrician. |
|
|
|
|||
DO NOT UNDER ANY CIRCUMSTANCES CUT OR REMOVE |
|
|
|
|||
THE THIRD ROUND GROUNDING PRONG FROM |
|
|
Power supply |
|||
THE POWER CORD PLUG. SEE THE INSTALLATION |
|
|
||||
INSTRUCTIONS PACKAGED WITH THIS OVEN |
|
|
cord with 3-prong |
|||
|
|
|
|
|
grounding plug |
|
|
|
|
|
|
|
|
When you turn the oven on, the glow bar igniter begins to heat. When the lighter is hot enough, in less than 1 minute, the gas flows into the burner and is ignited.
The igniter glows bright orange when hot. It cycles on and off with the thermostat and will glow whenever the burner is on.
Oven Ignition

 WARNING
Do not attempt to light the oven burners during a power failure. The oven burner valves will not open up and will prevent the gas from flowing through the burner valves to the burners. In the event of a power failure, turn the TemperatureControlknobtoOFF.Whenpowerresumes,turn the Temperature Control knob back to desired temperature.
Liquefied Petroleum (Propane) Gas Conversion(some models only)
The appliance can be used with Natural Gas or Liquefied Petroleum (Propane) Gas. It is shipped from the factory for use with Natural Gas.
Refer to the Installation Instructions for conversion from Natural
Gas to Propane Gas, or from Propane Gas to Natural Gas.

 WARNING
Severe shock or damage to the appliance may occur if the appliance is not installed by a qualified installer.
5

BEFORE SETTING OVEN CONTROLS
ARRANGING OVEN RACKS
ALWAYS ARRANGE OVEN RACKS WHEN THE OVEN IS
COOL (PRIOR TO OPERATING THE OVEN). Always use oven mitts when using the oven.
To remove an oven rack, pull the rack forward until it stops. Lift up front of rack and slide out.
To replace an oven rack, fit the rack onto the guides on the oven walls. Tilt the front of the rack upward and slide the rack back
into place.
AIR CIRCULATION IN THE OVEN
For best air circulation and baking results allow 2-4" (5-10 cm) around the cookware for proper air circulation and be sure pans and cookware do not touch each other, the oven door, sides or back of the oven cavity. The hot air must circulate around the pans and cookware in the oven for even heat to reach around the food.
NOTE
Always use caution when removing food from the oven.
OVEN VENTS LOCATION
The oven is vented through the upper control panel trim and grille or through the bottom grille of the upper control panel. When the oven is on, warm air is released through the vents. This venting is necessary for proper burner operation in the oven and good baking results. DO NOT block the vents. Doing so may cause baking failures, fire or damage to the wall oven.
TYPES OF OVEN RACKS
Yourapplianceisequippedwithflatovenracks(seefigure1).
Figure 1
Flat oven rack

 CAUTION
Always use pot holders or oven mitts when adjusting the oven racks. Wait until the oven has completely cooled if possible. Oven racks may be HOT and may cause burns.
6
SETTING OVEN CONTROLS
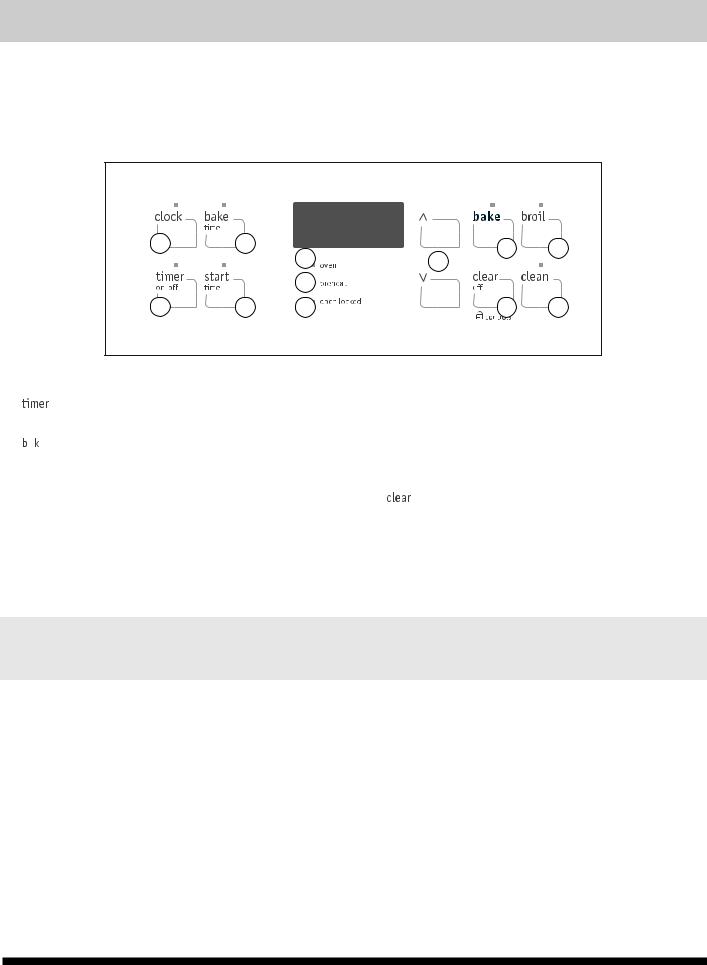
CONTROL PAD FEATURES
READ THE INSTRUCTIONS CAREFULLY BEFORE USING THE OVEN. For satisfactory use of your oven, become familiar with the various features and functions of the oven as described below. Detailed instructions for each feature and function follow later in this Use & Care Guide.
Note: The appearance of your oven control may differ slightly from the one illustrated below. However, all functions are the same. Also, push buttons or pads may be shaped differently than those appearing in this Use and Care Guide.
1 3
2 |
4 |
5 |
9 |
11 |
8 |
|
|
6 |
|
|
7 |
10 |
12 |
Oven Control Key Pads
1.

 - Used to set the time of day.
2.

 - Used to set or cancel Timer. The minute timer does not start or stop cooking.
3.

 - Used to enter the length of the cook time desired.
4.

 - Used to set the desired start time for baking. May be used with COOK TIME to program a delayed timed bake or clean cycle.
5.Oven Indicator Light - Will glow each time the oven unit turns on to maintain the set oven temperature.
6.Preheat Indicator Light - Will glow when the oven is first set to operate, or if the desired temperature is reset higher than the actual oven temperature.
7.Door Lock Indicator Light -Will flash until the door locks when the self-clean cycle is in use. It glows constantly after the door locks.
8. and
and  - Used along with the function pads to select oven temperature, cook time, start time (when programming an automatic start time), time of day, clean time and minute timer.
9.
 - Used to enter the normal bake feature.
10.
 - Used to cancel any function previously entered except the time of day and minute timer. Press CLEAR
OFF to stop cooking. Also the CLEAR OFF pad is used to activate oven lockout setting.
11.

 - Used to select the variable broil function.
12.

 - Used to select the Self-Cleaning cycle. A 2 or 3 hours Self-Clean time may be selected.
*Note: The OVEN indicator light on the electronic display will turn ON and OFF when using the Bake feature and during preheat. This is normal and indicates that the oven is cycling to maintain the selected baking temperature. When the preheat indicator light turns OFF, your oven is ready.
FOR A SILENT CONTROL PANEL
When choosing a function, a beep will be heard each time a pad is pressed. If desired, the control can be programmed for silent operation. Press and hold Delay
Start. After 7 seconds, the control will beep once. This will block the controls from sounding when a pad is pressed. To return the sound, press and hold Delay Start again for 7 seconds until the control beeps once.
Note: The control will return to the audible mode after a power outage.
TEMPERATURE CONVERSION
The electronic oven control is set to operate in °F (Fahrenheit) when shipped from the factory. The oven can be programmed for any temperature from 170°F to 550°F (77°C to 287°C).
To change the temperature to °C (Celsius) or from °C to °F (control should not be in a Bake or Clean mode):
1.Press BROIL. "— —" appears in the display.
2.Press and hold the  until "HI" appears in the display.
3.Press and hold BROIL until °F or °C appears in the display.
4.Press the  or
or  to change °F to °C or °C to °F.
5.Press any control pad to return to normal operating mode.
7
 Loading...