

Page 1

KONFORMITÄTSERKLÄRUNG
DECLARATION OF CONFORMITY
Standard references: DIN EN 166: 2002-04, DIN EN 170: 2003-01 · 89 / 686 / EEC
KOMPERNASS HANDELS GMBH · BURGSTRASSE 21 · 44867 BOCHUM · GERMANY
Semi Uguzlu (Qualitätsmanager), erklärt folgende Konformität gemäß EU-Richtlinie und Normen für Artikel:
Schutzbrille QB1207
Semi Uguzlu (Quality Manager), declares the following
conformity in accordance with the EU directive and
standards for products: Protective glasses QB1207
Semi Uguzlu (Responsable qualité), explique la conformité
suivante selon la directive européenne et les normes pour
l‘article: Paire de lunettes de protection QB1207
Semi Uguzlu (Vodja kakovosti), vsebuje navedbe o naslednji skladnosti v skladu z direktivo EU in standardi, ki
veljajo za ta izdelek: Zaščitna očala QB1207
Semi Uguzlu (Manager jakosti), prohlašuje následující shodu podle směrnice EU a příslušných norem pro výrobek:
Ochranné brýle QB1207
Semi Uguzlu (manažér kvality), vyhlasuje nasledujúcu
zhodu podľa smernice EU a noriem pre výrobok:
Ochranné okuliare QB1207
Semi Uguzlu (Direttore del Reparto Qualità), dichiara la
seguente conformità secondo direttiva EU e le norme per
l‘articolo: Occhiali protettivi QB1207
Semi Uguzlu (Kwaliteitsmanager), verklaart de volgende
conformiteit conform de EU-richtijn en normen voor artikel:
Beschermingsbril QB1207
Semi Uguzlu (Laadunvalvoja), saa tietoa EU-direktiivien ja
normien mukaisesta tuotteiden vaatimustenmukaisuudesta:
Suojalasit QB1207
Semi Uguzlu (Kvalitetsansvarig), förklarar följande konformitet enligt EU-direktiv och normer för artikeln:
Skyddsglasögon QB1207
Semi Uguzlu (Kvalitetsmanager), erklærer følgende
overensstemmelse iht. EU-direktiv og standarder for artikel:
Beskyttelsesbrille QB1207
Semi Uguzlu (Responsable de calidad), se declara la siguiente
conformidad de acuerdo con las directivas y normativas europeas para el artículo: Gafas protectoras QB1207
Semi Uguzlu (Gestor de qualidade), declara a seguinte
conformidade com as directiva EU e normas para o
artigo: Óculos de protecção QB1207
Semi Uguzlu (manager za kvalitetu), izjavljuje slijedeću
sukladnost prema EU-smjernicama i normama za artikl:
zaštitne naočale QB1207
Semi Uguzlu (Manager de calitate), se declară următoarea
conformitate cu directivele şi standardele EU pentru articolul:
Pereche ochelari de protecţie QB1207
Semi Uguzlu (Мениджър по качеството), разяснява
следното съответствие с директивите и стандартите
на ЕU за артикула: Предпазни очила QB1207
Semi Uguzlu (Menadżer jakości), oświadczamy, iż
niniejszy artykuł jest zgodny ze stosownymi dyrektywami
i normami EU: Okulary ochronne QB1207
Semi Uguzlu (minőségellenőr) kijelenti az EU-irányelv
és a termékszabványok szerinti megfelelőséget:
Védőszemüveg QB1207
Semi Uguzlu (Διαχειριστής ποιότητας), δηλώνει την
ακόλουθη συμμόρφωση σύμφωνα με την Οδηγία της ΕU
και τα πρότυπα για το προϊόν:
Ζευγάρι προστατευτικά γυαλιά QB1207
Bochum, 11.03.2015
Page 2

4-IN-1 PETROL MULTI-TOOL FBK 4 A1
4-IN-1 PETROL MULTI-TOOL
Translation of original operation manual
Read carefully before using machine!
BENZINE-COMBIAPPARAAT 4-IN-1
Vertaling van de originele gebruiksaanwijzing
Voor gebruik van de machine zorgvuldig lezen!
IAN 110011
OUTIL MODULABLE À ESSENCE 4 EN 1
Traduction du mode d'emploi d'origine
Lire consciencieusement avant d'utiliser a machine !
BENZIN-KOMBIGERÄT 4 IN 1
Originalbetriebsanleitung
Vor dem Gebrauch der Maschine sorgfältig lesen!
Page 3

Before reading, unfold both pages containing illustrations and familiarise yourself with all functions of the device.
Avant de lire le mode d'emploi, ouvrez les deux pages contenant les illustrations et familiarisez-vous ensuite
avec toutes les fonctions de l'appareil.
Vouw vóór het lezen de beide pagina‘s met de afbeeldingen open en maak u vertrouwd met alle functies
van het apparaat.
Klappen Sie vor dem Lesen die beiden Seiten mit den Abbildungen aus und machen Sie sich anschließend
mit allen Funktionen des Gerätes vertraut.
GB / IE Translation of original operation manual Page 1
FR / BE Traduction du mode d'emploi d'origine Page 19
NL / BE Vertaling van de originele gebruiksaanwijzing Pagina 37
DE / AT / CH Originalbetriebsanleitung Seite 55
Page 4

5a
5b
5%
6!
5@
5#5$
5^ 5&
5*
5(6)
Page 5

6&
6* 6( 7) 7!
7@
1a
1e
7#
2c
5@
7^
6(
7^
6@
6$6# 6%
6^
7#
7$ 7% 7^
1b 1c 1d
7$
2b
1f
7%
2a
7!
6(
3a 3b 3c
3d
3h
3e 3f
3i
3g
4
H1
H2
Page 6

5a 5b
5e 5f
5@
5c
5d
6a 6b
A
6c 6d 6e
Page 7

Contents
GB
IE
Introduction .................................2
Intended use ........................................2
Features............................................2
Package contents.....................................3
Technical data.......................................3
Safety information ...........................5
Operational safety instructions for hedge trimmers ...........5
Complementary safety instructions for hedge trimmers ........6
Operational safety instructions for the pole pruner ...........7
Precautions against kickback............................7
Operational safety instructions for the strimmer .............8
Operational safety instructions for the cutting blade..........8
Safety equipment.....................................9
Before use .................................. 9
Attaching the round handle.............................9
Fitting the quick release mechanism ......................9
Fixing/attaching the carrying harness.....................9
Fitting the hedge trimmer ..............................10
Removing the hedge trimmer...........................10
Swivelling the hedge trimmer...........................10
Mounting the saw chain and blade .....................10
Removing the saw chain ..............................10
Tightening and checking the saw chain ..................10
Lubricating the chain .................................10
Sharpening the saw chain.............................10
Attaching the extension attachment......................10
Fitting/removing the protective guard ....................11
Installing/replacing the cutting blade ....................11
Installing/replacing the strimmer ........................11
Putting on the carrying harness .........................11
Setting the cutting height ..............................11
Fuel and oil ........................................11
Before use .................................12
Starting when the engine is cold ........................12
Starting when the engine is hot .........................12
Working with the hedge trimmer........................13
Cutting techniques ...................................13
Working with the pole pruner ..........................13
Sawing techniques ..................................13
Working safely .....................................13
Transport ..................................13
Cleaning ...................................13
Maintenance ...............................14
Storage and transportation ...................14
Troubleshooting.............................15
Motor unit .........................................15
Pole pruner ........................................15
Hedge trimmer......................................15
Maintenance interval ........................15
Pole pruner ........................................15
Hedge trimmer......................................15
Spare part orders ...........................15
Disposal ...................................16
Appendix ..................................16
Warranty..........................................16
Service............................................16
Importer...........................................16
Translation of the original Conformity Declaration ..........17
FBK 4 A1
1
Page 8

4-IN-1 PETROL MULTI-TOOL FBK 4 A1
GB
IE
Introduction
Congratulations on the purchase of your new appliance. You have selected
a high-quality product. The operating instructions are a part of this product.
They contain important information on safety, usage and disposal.
Before using the product, familiarise yourself with all handling and safety
guidelines. Use the product only as described and for the range of applications specified. Please also pass these operating instructions on to any
future owner(s).
Intended use
Long-handled hedge trimmer
This appliance is intended for the cutting and trimming of hedges, bushes
and flowering shrubs in the home environment. This is a hand-held appliance with an integrated motor unit with linear reciprocating cutting blades.
WARNING!
► Hedge trimmers are not suitable for use by children.
Pole pruner
This appliance is intended for trimming branches in trees.
3-section cutting blade/strimmer
Use with 3-section cutting blade: for cutting high grass, undergrowth and
light scrub.
Use with strimmer: for cutting grass and small weeds.
Extension attachment
CAUTION!
■ Do not use the extension attachment/boom
the 3-section cutting blade/strimmer attachment!
Any other use which is not expressly permitted in these operating instructions may damage the appliance and represents a serious risk for the user.
Please make sure that you pay attention to the restrictions in the safety
instructions Pay attention to the national regulations which may restrict the
use of the machine. Any other uses of or modifications to the appliance are
deemed to be improper usage and may result in serious physical injury.
Not intended for commercial use.
PROHIBITED APPLICATIONS!
Due to the physical risk posed to the user, the appliance may not be used
to perform the following activities: cleaning footpaths and as a shredder
for shredding tree and hedge sections. Furthermore, the appliance may not
be used to level ground elevations such as molehills. For safety reasons,
the appliance may not be used as a drive unit for any other devices. The
user, not the manufacturer, is liable for any resulting damage or injuries of
any kind.
in combination with
5^
Features
Motor unit
Safety lock-out
On/Off switch
Carrying lug
4 x fixing bolts (with snap ring, washer and nut)
Round handle
5a
Rubber ring
5b
Pin
Barrier bar
Cover
Screw grip
Safety lever
Boom
Throttle control
Spark plug connector
Choke lever
Starter pull cord
Fuel tank
Filler cap
Fuel pump (primer)
Air filter housing cover
Hedge trimmer attachment FBK 4 A1-1
Handle
Lock/release
Transmission case
Cutter bar
Base plate (hedge shears)
Control lever
Front boom (hedge trimmer)
Locking hole
Drive shaft
Pole pruner attachment FBK 4 A1-2
Front boom (pole pruner)
Safety ring
Oil filler cap
Oil tank
Blade
Saw chain
Grinder support
Stop
Locking hole
Drive shaft
Nut
Thread
Sprocket cover
Blade guide
Blade hole
Guide rail
Oil dispenser
Chain sprocket
Oil adjusting screw
Chain tensioner pin
Chain-tensioner screw
2
FBK 4 A1
Page 9

Strimmer/cutting blade attachment FBK 4 A1
4 x bolts (with snap ring, washer and nut)
Blade guard
3-section cutting blade
Strimmer with cutting filament
5@
Front boom (strimmer/3-section cutting blade)
5#
Locking hole
5$
Drive shaft
5%
Extension attachment
Boom
5^
Screw grip
5&
Safety lever
5*
Cover
5(
Locking hole
6)
Drive shaft
6!
Accessories
Carrying harness
6@
Blade guard
6#
Chain guard
6$
Organic chain oil
6%
Oil/petrol mixing canister
6^
Safety goggles
6&
M4 Allen key
6*
M5 Allen key
6(
SW 8/10 open-ended spanner
7)
Spark plug wrench/flat-blade screwdriver
7!
Tool bag
7@
M10 nut (left-hand thread)
7#
Pressure plate cover
7$
Pressure plate
7%
Drive plate
7^
Package contents
1 Motor unit
1 Hedge trimmer attachment FBK 4 A1-1 (hereinafter hedge trimmer)
1 Pole pruner attachment FBK 4 A1-2 (hereinafter pole pruner)
1 Strimmer/cutting blade attachment FBK 4 A1
1 Extension attachment
1 Handle with barrier bar
1 Strimmer with cutting filament
1 3-section cutting blade
1 Carrying harness
1 Protective cover for chain
1 Protective cover for blade
1 Oil/petrol mixing canister
1 100 ml organic chain oil
1 Tool bag
1 M4 Allen key
1 M5 Allen key
1 Spark plug wrench/flat-blade screwdriver
1 SW 8/10 open-ended spanner
1 Safety goggles
1 Operating manual
Technical data
Motor unit
Engine type: 2-stroke engine, air-cooled,
chrome cylinder
Engine output (max.): 1.35 kW/1.85 hp
Cylinder capacity: 42.7 cm³
Engine idle speed: 3000 min
Max. engine speed
with 3-section cutting blade: 9200 min
with strimmer: 8700 min
with chainsaw: 9200 min
with hedge trimmer: 9200 min
Max. cutting speed
with 3-section cutting blade: 6900 min
with strimmer: 6525 min
with chainsaw: 20 m/s
with hedge trimmer: 1550 min
Ignition: Electronic
Drive Centrifugal clutch
Weight:
(empty tank): approx. 5.6 kg
Tank size: 1200 cm
Spark plug: TORCH L7RTC
Fuel consumption at
max. engine performance: 0.6 kg/h
Specific
fuel consumption
at max. engine performance: 446 g/kWh
Hedge trimmer FBK 4 A1-1
Cut length: 425 mm
Cutting capacity: 20 mm
Weight
(ready for use): approx. 2.24 kg
Pole pruner: FBK 4 A1-2
Weight (ready for use): approx. 1.6 kg
Recommended fill level (oil tank): 140 cm
Cut length: approx. 260 mm
Blade: Oregon Type 100SDEA318
Saw chain Oregon 91P040X
Oregon 91P040E
Strimmer/
cutting blade attachment: FBK 4 A1
Strimmer with cutting filament (IAN 110011)
Filament cutting circle Ø: 43 cm
Filament length: 8.0 m
Filament Ø: 2.0 mm
3-section cutting blade (IAN 110011):
Cutting blade cutting diameter Ø: 25.5 cm
-1
-1
-1
-1
-1
-1
-1
-1
3
3
GB
IE
FBK 4 A1
3
Page 10

Noise and vibration data:
GB
Noise measurement value determined in accordance with ISO 22868,
IE
EN ISO 10517. The A-rated noise level is typically as follows:
Hedge trimmer
Sound pressure level L
Uncertainty K
WA
Sound power level L
Guaranteed sound power level L
Uncertainty K
WA
: 98.79 dB(A)
pA
: 2.5 dB
: 109.53 dB(A)
WA
: 114 dB(A)
WA
: 2.5 dB
Pole pruner:
Sound pressure level L
Uncertainty K
WA
: 97.06 dB(A)
pA
: 2.5 dB
Sound power level: 110.87 dB(A)
Uncertainty K
: 2.5 dB
WA
Strimmer/3-section cutting blade:
Sound pressure level L
Uncertainty K
pA
Sound power level L
Uncertainty K
WA
: 97.64 dB(A)
pA
: 2.5 dB
: 111.27 dB(A)
WA
: 2.5 dB
Wear ear protection to prevent hearing damage!
NOTE
The vibration level specified in these instructions has been measured
►
in accordance with the standardised measuring procedure specified
in EN ISO 11806-1, EN ISO 10517, EN ISO 11680-1 and can be
used to make equipment comparisons. The specified vibration emission value can also be used to make an initial exposure estimate.
WARNING!
► The vibration level varies in accordance with use and may be higher
than the value specified in these instructions in some cases. There is
a risk of underestimation of the vibration load if the appliance is used
regularly in this manner. For an accurate estimate of the vibration
load during a specific working period, the periods during which the
appliance is switched off or is running but not actually being used
must also be taken into consideration. This can significantly reduce
the vibration load over the total working period.
WARNING!
■ You can reduce the vibration risk, for example, the risk of Raynaud's
phenomenon, by taking regular breaks during which you rub your
hands together.
Explanation of the symbols on the motor unit:
Vibration values (vector total of three directions) determined in accordance
with EN ISO 11806-1, EN ISO 10517, EN ISO 11680-1 :
Hedge trimmer
Vibration at the front handle: Vibration emission value
= 4.182 m/s
a
h,D
Uncertainty K = 1.5 m/s
2
2
Vibration at the rear handle: Vibration emission value
= 9.695 m/s
a
h,D
Uncertainty K = 1.5 m/s
2
2
Pole pruner:
Vibration on the front handle: Vibration emission value
= 3.855 m/s
a
h,D
Uncertainty K = 1.5 m/s
2
2
Vibration on the rear handle: Vibration emission value
= 7.590 m/s
a
h,D
Uncertainty K = 1.5 m/s
2
2
Strimmer:
Vibration on the front handle: Vibration emission value
= 4.864 m/s
a
h,D
Uncertainty K = 1.5 m/s
2
2
Vibration on the rear handle: Vibration emission value
= 9.750 m/s
a
h,D
Uncertainty K = 1.5 m/s
2
2
3-section cutting blade:
Vibration on the front handle: Vibration emission value
= 4.622 m/s
a
h,D
Uncertainty K = 1.5 m/s
2
2
Vibration on the rear handle: Vibration emission value
= 7.708 m/s
a
h,D
Uncertainty K = 1.5 m/s
2
2
Warning! Read the operating instructions before use!
Wear protective gloves!
Wear safety shoes!
Wear ear protection!
Wear a hard hat!
Wear safety goggles!
Important, hot parts. Keep a safe distance away!
Explanation of the symbols on the hedge trimmer:
Risk of fatal electrical shock! Keep at least 10m away from
overhead power lines!
Caution! Falling objects.
Especially when cutting above head height.
Caution! Risk of injury due to running blades!
Keep a safe distance away!
4
FBK 4 A1
Page 11

Explanation of the symbols on the pole pruner!
Risk of fatal electrical shock! Keep at least 10m away from
overhead power lines!
Protect the appliance from rain and moisture!
Caution! Falling objects.
Especially when cutting above head height.
Caution! Risk of injury due to running blades!
Explanation of the symbols on the strimmer/cutting blade
attachment!
Caution! Left-hand thread.
Protect the appliance from rain and moisture!
Beware of flung objects!
Beware of recoil!
Attention! Risk of injury from rotating cutting blade!
Keep hands and feet away!
Attention – petrol is highly flammable!
Risk of explosion! Do not spill fuel!
Turn the appliance off and disconnect the spark plug before
performing any maintenance work!
Caution! Risk of suffocation!
Attention! Poisonous CO vapours (carbon monoxide vapours)!
Do not use the appliance in closed rooms!
Warning! Do not use circular saw blades for the cutting
blade function.
20 h
Add a little grease after every 20 hours of operation
(gear grease)
A distance of 15 metres must be maintained between the
machine and third parties!
The cutting tool continues running after it is turned off
(cutting blade/cutting filament)!
Important, hot parts. Keep a safe distance away!
Sound power level LWA data in dB.
Fire, naked flames and smoking are prohibited!
Safety information
IMPORTANT! READ CAREFULLY BEFORE USE! KEEP FOR YOUR
RECORDS.
Operational safety instructions for hedge trimmers
NOTE
► The hedge trimmer is supplied completely assembled.
► Instructions and pictorial representations regarding the settings and use
of the hedge trimmer and/or its controls, maintenance, lubrication by
the user can be found in these instructions and on the fold-out page.
► Notes on the working position (see fold-out page)
► Notes on the operating controls (see fold-out page)
► Note on the safe handling of fuel (see section "Preparation", point f).
► Notes on the recommended replacement or repair of parts or the
Customer Service and specification of spare parts to be used,
inasmuch as these affect the health and safety of the user, can be
found in these instructions.
► The explanation of all graphical symbols, information, features and
technical data as well as the procedure in the event of accidents and
faults can be found in these instructions.
► Blocked tool: remove any blockages from the cutter bar
WARNING!
■ Children may never use the hedge trimmer.
■ Stay alert, watch what you are doing and use common sense
when operating the appliance. Do not use the appliance while
you are ill, tired or under the influence of drugs, alcohol or medication. A moment of inattention while operating the appliance may
result in serious personal injury.
■ Avoid improper use. Use the machine only as described under
"Intended use".
.
Familiarise yourself with the operating instructions before you
operate the appliance.
Preparation
a) THE HEDGE TRIMMER CAN CAUSE SERIOUS INJURIES! Read the
instructions on correct handling, preparation, maintenance, starting and
stopping the hedge trimmer very carefully. Familiarise yourself with all
manual controls and the proper use of the hedge trimmer.
b) Children may never use the hedge trimmer.
c) Beware of overhead power lines.
d) Do not use the hedge trimmer while anyone, especially children, is in
the vicinity.
e) Wear appropriate clothing! Do not wear loose clothing or jewellery
which could get caught in moving parts. We recommend wearing
heavy-duty gloves, non-slip footwear and goggles.
f) Handle fuel carefully. It is highly flammable and the vapours are
explosive. The following points should be followed:
– Use only specially-designed containers.
– Never open the tank filler cap or top up the petrol tank while the motor
is running or hot. Allow the motor and the exhaust components to cool
down before refuelling.
– Do not smoke.
– Refuel outside only.
– Never store the hedge trimmer or the fuel tank in a room where there is
an open flame, for example in a hot water boiler.
GB
IE
FBK 4 A1
5
Page 12

GB
IE
– If the petrol has overflowed, do not attempt to start the engine. Remove
the machine from the fuel-contaminated area before restarting.
– Always replace the filler cap after refuelling and close it securely.
– If the tank is empty, this should be done in the open.
g) If the cutting unit comes in contact with a foreign object or if the operating
noise increases or the hedge trimmer starts to vibrate abnormally, stop
the engine and allow the hedge trimmer to come to a standstill. Pull the
spark plug connector off the spark plug and take the following action:
– check for damage;
– check for loose parts and secure all the loose parts;
– replace damaged parts with equivalent parts or have them repaired.
Wear ear protection!
Wear safety goggles!
■ Familiarise yourself with the operation of the hedge trimmer so that you
know how to stop immediately in an emergency.
Operation
a) The engine is to be immobilised before:
– cleaning or removal of a blockage;
– inspection, maintenance or work on the hedge trimmer;
– setting the working position of the cutting unit;
– if the hedge trimmer is to be left unattended.
b) Always make sure that the hedge trimmer is in the proper working posi-
tion before the engine is started.
c) During operation of the hedge trimmer, always ensure that you have firm
footing, especially when using a ladder.
d) Do not use the hedge trimmer if it has a defective or badly worn cutting
unit.
e) To minimise the risk of fire, ensure that the engine and the silencer are
free of residues, leaves or leaked lubricant.
f) Ensure that all supplied handles and safety guards are mounted when
operating the hedge trimmer. Never attempt to operate an incompletely
assembled hedge trimmer or a hedge trimmer with non-approved modifications.
g) Always use both hands if the hedge trimmer is equipped with two
handles.
h) Always familiarise yourself with your environment and be aware of potential
dangers that you may not be able to hear because of the noise of the
hedge trimmer.
Maintenance and storage
a) If the hedge trimmer is shut down for maintenance, inspection or storage,
switch off the engine, pull the spark plug connector off the spark plug
and ensure that all rotating parts have come to a standstill. Allow the
machine to cool down before carrying out an inspection, settings, etc.
b) Store the hedge trimmer where the petrol vapours cannot come into
contact with flames or sparks. Always allow the hedge trimmer to cool
down before storage.
c) When transporting or storing the hedge trimmer, cover the cutting unit
with the protective cover for the cutting unit.
Complementary safety instructions for hedge
trimmers
Environmental safety
■ Only operate the hedge trimmer in daylight or good artificial light.
■ While trimming, ensure that you do not come into contact with objects
such as fence wire or plant supports. They could cause damage to the
cutter bar
wires or other foreign bodies.
■ Be aware of your environment and all possible hazards that you may
be unable to hear while cutting the hedge.
DANGER!
► In the event of imminent danger or an emergency, switch off the
engine immediately.
Electrical safety
■ Hold the power tool only by the insulated grips as the cutting blades
could come into contact with hidden power lines. Contact between
the blades and a live wire may make exposed metal parts of the power
tool live and could give the operator an electric shock.
Personal safety
■ During operation, no other person or animal may be within a radius
of 15 metres. The operator is responsible for third parties within the
working area.
■ During operation, ensure that you have proper footing and balance at
all times, especially when used on steps or ladders.
■ Never grasp the hedge trimmer by the cutter bar
■ Keep your hands away from the cutting blades. Do not attempt to
clear cuttings or hold onto the material to be cut while the blades
are still in motion. Remove any jammed clippings only when the
appliance has been switched off. A moment of inattention while oper-
ating the hedge trimmer may result in serious personal injury.
■ Wait until the tool has come to a standstill before putting it down.
Use and handling
CAUTION!
► Between tasks or after completion of a task, do not set the cutter bar
down on its tip as this could cause damage to the cutter bar .
■ Before use, always check that the blades, the blade screws and other
parts of the cutting tool are not worn or damaged. Never work with a
damaged or heavily worn blade.
■ After making settings to the working angle, check whether both setting
levers are clicked firmly into place. If one of the setting levers remains
open, the second could be unintentionally be released by a branch
and the cutter bar
■ Never use the hedge trimmer with defective or missing safety guards.
■ Never grasp the hedge trimmer by the safety guards.
■ Carry the hedge trimmer by the front handle when switched off, and
with the cutter bar facing away from your body. When transporting
or storing the trimmer, always put on the protective cover. Careful
handling of the appliance reduces the likelihood of accidental contact
with the moving blades.
■ Store the hedge trimmer in a dry, high or closed space out of the reach
of children.
■ Do not attempt to repair the equipment unless you have received the
necessary training.
■ For safety's sake, change worn or damaged parts.
DANGER!
► In the event of imminent danger or an emergency, switch off the
engine immediately.
. Inspect the hedge to be cut carefully and remove any
.
could swing down.
6
FBK 4 A1
Page 13

Operational safety instructions for the pole pruner
CAUTION! RISK OF INJURY!
► To prevent injuries, never touch the appliance above the safety ring
while it is running.
Preparation
■ Always wear a hard hat, hearing protection and safety gloves. Also
wear eye protection to prevent splashes of oil or sawdust from falling
into your eyes. Wear a dust mask to protect yourself from dust.
■ Wear sturdy, non-slip boots.
■ Do not use the appliance in the rain.
■ Before use, check the appliance's safety condition, especially the blade
and the saw chain.
■ Do not use the appliance near overhead power lines. Maintain a
minimum distance of 10 m to overhead power lines.
Electrical safety
■ Do not use the appliance in a potentially explosive environment con-
taining flammable liquids, gases or dusts. The sparks generated by the
machine could ignite the vapours or gases.
■ Appliances with defective switches must be repaired immediately to
avoid damage or injuries.
Personal safety
■ Never use the appliance while standing on a ladder.
■ Do not lean too far forwards while using the appliance. Ensure you are
standing firmly and keep your balance at all times. Use the supplied
carrying harness to spread the weight evenly on the body.
■ To avoid injuries due to falling branches, do not stand under the branches
that you want to cut off. Be aware of branches that may spring back
and cause injuries. Work at an angle of approximately 60°.
■ Be aware that the appliance can kick back.
■ Keep an eye not only on the branches being cut, but also on falling
material, to avoid tripping.
■ Cover the guide rail and the chain during transport during transport
and storage using the cover.
■ Avoid unintentional starting of the appliance.
■ Store the appliance outside the reach of children. Only those who are
fully acquainted with the operating instructions and the appliance itself
may operate the appliance.
Use and handling
■ Never start the appliance before the blade, saw chain and sprocket
covers have been fitted correctly.
■ Do not cut any wood that is lying on the ground and do not attempt to
saw roots that are protruding from the soil. Avoid immersing the saw
chain in the soil at all costs, as this could blunt the saw chain.
■ If the appliance accidentally comes into contact with a solid object, turn
off the engine immediately and inspect the appliance for damage.
■ After 30 minutes' work, take a break of at least one hour.
■ If the pole pruner is shut down for maintenance, inspection or storage,
switch off the engine, pull the spark plug connector off the spark plug
and ensure that all rotating parts have come to a standstill. Allow the
machine to cool down before carrying out an inspection, settings, etc.
■ Service the appliance carefully. Check for misalignment or binding
of moving parts, breakage of parts and any other damage that may
impair the tool’s operation. If damaged, have the power tool repaired
before use. Many accidents are caused by poorly-maintained tools.
■ Keep cutting tools sharp and clean. Properly maintained cutting tools
with sharp cutting edges are less likely to jam and are easier to control.
■ Therefore, have the appliance checked by qualified specialists. Use
only the replacement parts recommended by the manufacturer.
Precautions against kickback
CAUTION KICKBACK!
► Be aware of the danger of kickback when working with the appliance.
There is a risk of personal injury. You can avoid kickbacks by being
careful and using the correct sawing technique.
■ Contact with the tip of the rail can, in some cases, lead to an unexpected
rearwards reaction resulting in the guide rail flying upwards towards
the operator (see Fig. A).
Bild 1
Fig. A
■ Kickbacks can occur if the tip of the guide rail touches an object or if
the wood bends and the saw chain gets caught in the cut (see Fig. B).
Fig. B
■ If the saw chain jams in the upper edge of the guide rail, the rail can
kick back violently towards the operator.
■ Any such reaction can lead to you losing control over the saw and
possibly injuring yourself. Do not rely solely on the chainsaw's built-in
safety devices. As the user of a chainsaw, you can take a number
of measures to avoid accidents and injury. A kickback is caused by
incorrect use or misuse. It can be avoided by taking proper precautions
as given below.
■ Hold the saw firmly with both hands, with your thumb and fingers
around the handles of the chainsaw. Hold your body and arms in
a position in which you can withstand kickback forces. If suitable
measures are taken, the operator can control the recoil forces. Never
let go of the chainsaw.
■ Avoid an abnormal posture and do not saw above shoulder height.
This will prevent inadvertent contact with the tip of the rail and allows a
better control of the chainsaw in unexpected situations.
■ Always use the replacement rails and saw chains specified by the
manufacturer. Incorrect replacement rails and saw chains can lead to
a tearing of the saw chain and/or kickback.
■ Follow the manufacturer's instructions for sharpening and mainten-
ance of the saw chain. Setting the depth stop too low can increase the
risk of kickback.
■ Do not saw with the tip of the blade. This can lead to kickback.
■ Ensure that there are no objects on the ground that you can trip
over.
GB
IE
FBK 4 A1
7
Page 14

Operational safety instructions for the strimmer
GB
Preparation
IE
■ Wear close-fitting clothes that offer good protection, such as long
trousers, sturdy work shoes, heavy-duty protective gloves, a hard hat,
a protective mask for your face or safety goggles to protect your eyes
and good ear plugs or some other hearing protection against noise.
■ Always use the enclosed shoulder strap.
■ Always ensure that the handles are dry and clean and that no petrol
mixture is present.
■ Before working, check the area for objects such as pieces of metal,
bottles, stones, etc, which could get thrown up and cause injuries to the
user.
■ Before starting the engine, make sure that the strimmer is not in contact
with any obstacles.
■ Do not use the appliance until you have familiarised yourself with its
use.
Electrical safety
■ Never use the appliance near highly flammable liquids or gases, either
in closed rooms or in the open. This may result in explosions and/or
fire.
■ Do not work with a damaged or incomplete appliance or an appli-
ance that has been modified without the consent of the manufacturer.
Never use the unit with defective protective equipment. Do not use the
appliance if it has a defective on/off switch. If the appliance has been
dropped, check for significant damage or defects.
Personal safety
■ This appliance may only be operated, adjusted and maintained by
appropriately trained individuals and adults.
■ If you are not familiar with the appliance, practice handling the appliance
while the engine is off.
■ Do not touch the exhaust.
■ Do not operate the appliance under the influence of alcohol or drugs.
■ Always hold the appliance with both hands. Your thumbs and fingers
should encircle the handles.
■ Work posture: Do not operate the appliance in an uncomfortable
position, when you are unbalanced, with arms fully stretched or with
only one hand.
■ Always ensure that you have a solid and firm stance.
■ Do not use the appliance if spectators or animals are in the direct vicin-
ity. Maintain a minimum distance of 15 metres between the operator
and other people or animals when trimming. Maintain a minimum distance of 30 metres between the operator and other persons or animals
when mowing down to the ground.
■ When mowing on a slope, always stand at a lower level than the
cutting tool. Never cut or trim on an icy, slippery hill or slope.
■ Any modifications to the product may risk personal safety and void the
manufacturer's warranty.
■ Children should be supervised to ensure that they do not play with the
appliance.
■ Do not use the appliance if it is damaged or if there are visible defects.
Use and handling
■ Use the appliance only for its intended purpose: cutting grass, mowing,
pruning branches, cutting and trimming hedges and bushes.
■ Do not use the appliance for extended periods; take regular breaks.
■ Ensure that screws and connecting elements are firmly tightened. Never
operate the appliance if it is not correctly adjusted, incomplete or if it is
not properly assembled.
■ Open the fuel tank slowly in order to allow any pressure which may have
built up in the tank to dissipate. To prevent the risk of fire, move at least 3
metres away from the refuelling area before starting the appliance.
■ Guide the strimmer to the desired height. Avoid contact with small
objects (e.g. stones) when using the strimmer.
■ Always hold the strimmer on the ground when the appliance is in
operation.
■ Do not use the appliance unless the appropriate protective guard has
been installed and is in good condition.
■ Do not use any other cutting tools. For your safety, only use the
accessories and additional devices that are indicated in the operating
instructions. The use of parts other than those recommended in the
operating instructions, or other accessories, can put you at risk of injury.
■ Always trim and cut using the high speed range. Do not let the engine
run at a low speed when starting to mow or trim.
■ When starting and operating the appliance, ensure that it does not
come into contact with the ground, stones, wire or other foreign material. Switch off the appliance before you put it down.
■ Switch off the appliance before you put it away.
■ Always turn the engine off before working on the cutting tool.
Operational safety instructions for the cutting
blade
Preparation
■ The cutting blade flings objects and soil with great force. These can
blind or cause other injuries. Wear eye, face and leg protection. Always
remove objects from the work area before using the cutting blade.
■ The cutting blade continues running after the throttle lever has been
released. A running-down cutting blade can inflict cuts to yourself or
other people standing nearby. Turn the engine off and make sure that
the cutting blade has come to a complete stop before performing any
work on the cutting blade.
Personal safety
■ The appliance can blind and cause injuries to bystanders. Maintain a
minimum distance of 15 metres in all directions between the appliance
and other people or animals.
Use and handling
■ Do not use the appliance if any of the cutting blade accessories have
not been properly installed.
■ The cutting blade can kick back from objects with force. This can cause
injuries to your arms and legs. If the appliance comes into contact with
a foreign body, immediately shut down the engine and wait until the
cutting blade has come to a complete stop. Check the cutting blade for
damage. Always replace the cutting blade if it is bent or cracked.
8
FBK 4 A1
Page 15
Safety equipment
The relevant plastic protective guard for the cutting blade or filament
operation must be installed when working with the appliance in order to
prevent objects from being flung away.
WARNING!
■ Never mow/trim while other individuals, especially children or animals,
are in the vicinity.
■ Maintain a safety distance of 15 m. Turn off the appliance immedi-
ately if this distance is not maintained.
CAUTION! RISK OF POISONING!
■ Exhaust gases, fuels and lubricants are toxic. Exhaust gases must
never be inhaled.
WARNING!
■ Petrol is highly flammable. Store petrol only in the containers
provided.
■ Refuel only outdoors and do not smoke.
■ The filler cap must not be opened and refuelling must not take place
while the engine is running or when the appliance is hot.
■ Do not attempt to start the engine if the petrol has overflowed. In-
stead, remove the appliance from the area polluted by petrol. Do not
attempt to restart the appliance until the petrol fumes have dissipated.
■ For safety reasons, the petrol tank and filler cap must be replaced if
they are damaged.
Limit the noise development and vibrations to a minimum!
■ Only use appliances that are in good condition.
■ Maintain and clean the appliance on a regular basis.
■ Adapt your working method to the appliance.
■ Do not overload the appliance.
■ Have the appliance inspected if necessary.
■ Switch the appliance off when not in use.
■ Wear protective gloves!
Before use
CAUTION!
■ Always wear non-slip footwear and appropriate safety clothing
such as protective gloves, a hard hat, a protective mask and safety
goggles as well as hearing protection.
■ Check the area in which the appliance is to be used and remove any
objects that may be caught and slung away.
■ Before use and after dropping or other impacts, always visually in-
spect the appliance to check whether the cutting tool, mounting bolts
and the entire cutting unit are damaged. Worn or damaged cutting
tools and mounting bolts must be replaced.
■ Always carry out a visual inspection before use to check whether the
cutting tools are worn or damaged. To prevent imbalance, worn or
damaged cutting tools and mounting bolts should be replaced only
as complete sets.
Attaching the round handle
♦ Start by fitting the rubber ring 5a on the boom .
♦ Attach the barrier bar
♦ The pin
♦ Push the round handle
♦ Insert the 4 mounting bolts
♦ Tighten the bolts
5b
on the barrier bar must be pushed into one of the two
holes on the boom to lock it into place.
boom .
and secure them with the 4 nuts in the barrier bar
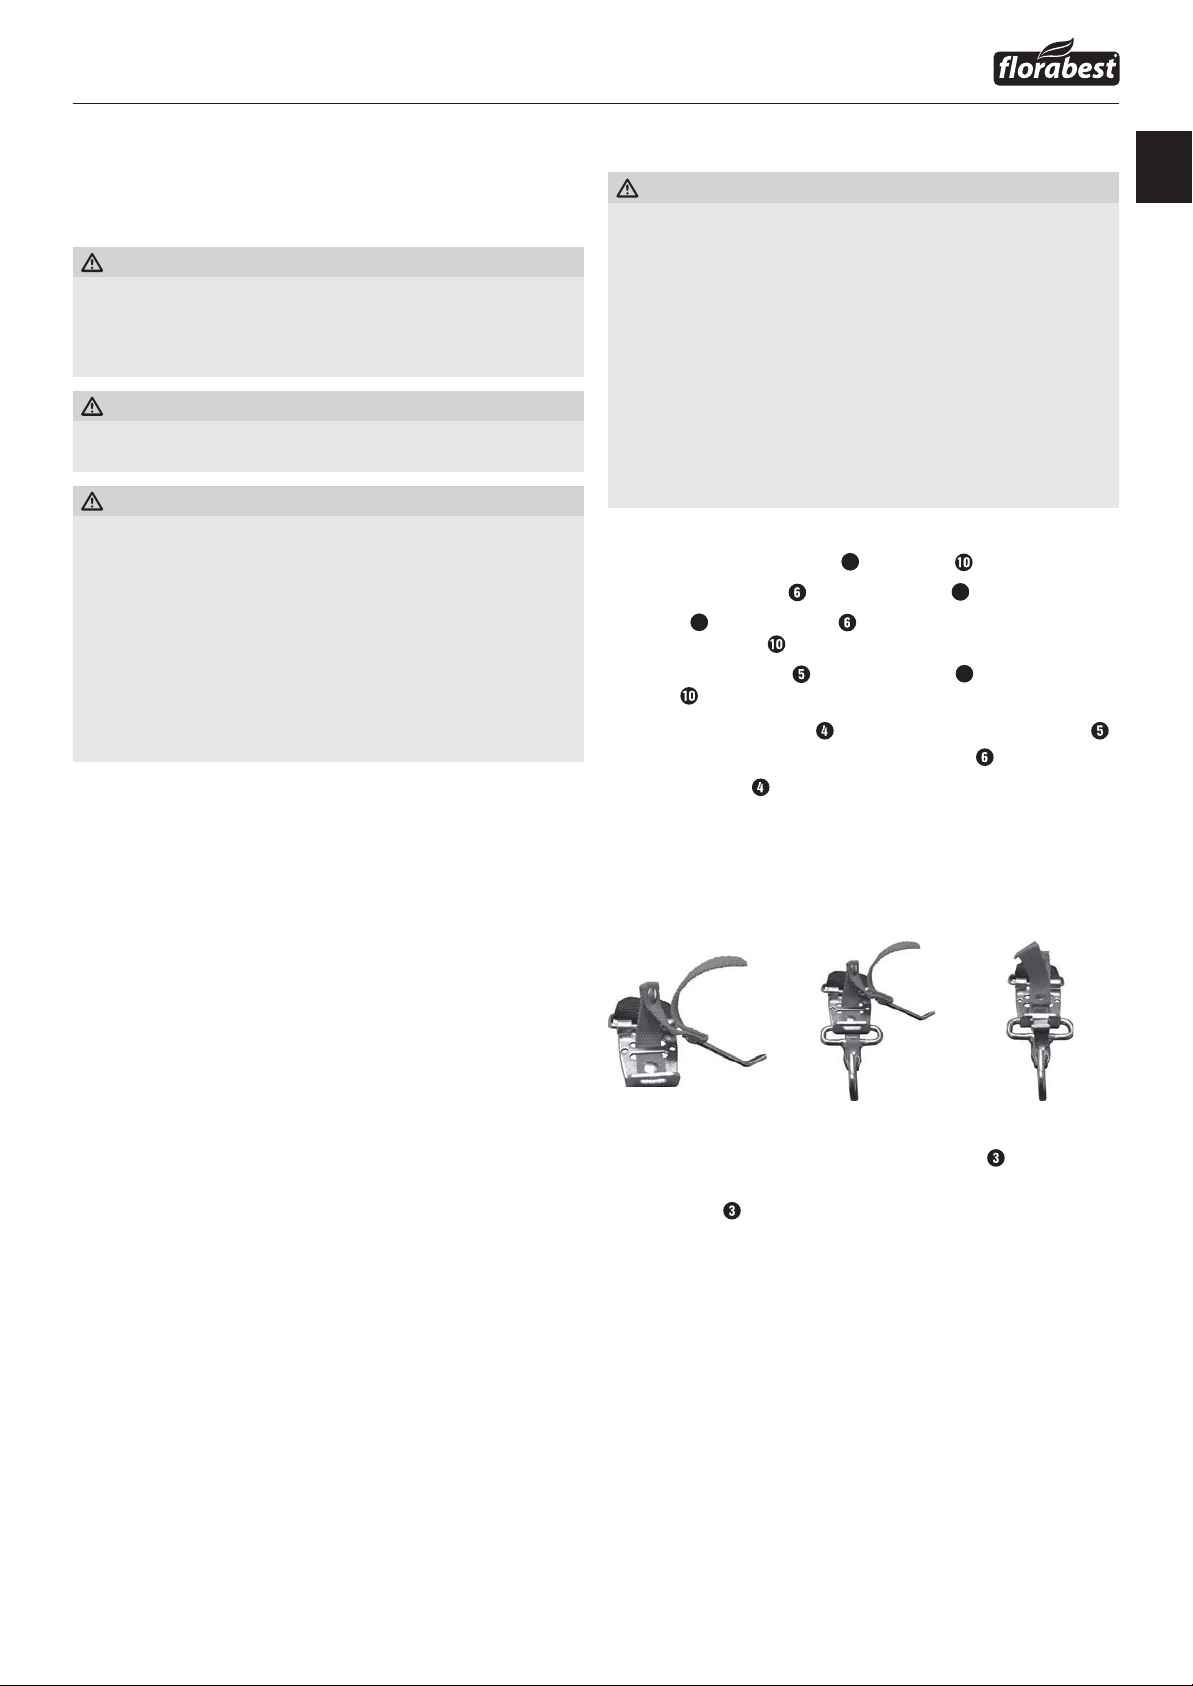
Fitting the quick release mechanism
♦ Hook in the carabiner and secure it with the red strap on the quick
release mechanism (see figures). Pull on the red strap if you have to
release the appliance quickly.
onto the rubber ring 5a from below.
onto the rubber ring 5a provided on the
from above through the round handle
.
.
GB
IE
FBK 4 A1
Fixing/attaching the carrying harness
♦ Hook the carrying harness 6@ into the carrying lug .
♦ Adjust the length of the carrying harness
carrying lug
is at hip height when hooked in place.
to your size so that the
6@
9
Page 16

Fitting the hedge trimmer
GB
IE
♦ Start by undoing the screw grip on the boom of the motor unit.
♦ Push the front boom
motor unit.
♦ The safety lever
♦ Press the cover
hold it down.
♦ Tighten the screw grip
NOTE
► The assembly of the pole pruner/strimmer/3-section cutting blade/
extension attachment is carried out in the same order.
of the hedge trimmer onto the boom of the
must click into the locking hole .
that protects the safety lever downwards and
.
Tightening and checking the saw chain
WARNING!
► Wear protective gloves! There is a danger of injury from the sharp
cutting teeth.
♦ Turn the chain-tensioner screw
flat-blade screwdriver
♦ The saw chain
whether the saw chain
NOTE
► A new saw chain
7!
must lie against the underside of the blade. Check
stretches and must be tightened more regularly.
in a clockwise direction using the
to increase the tension.
can be drawn by hand over the blade .
Removing the hedge trimmer
♦ Undo the screw grip .
♦ Press the safety lever
trimmer out of the boom
NOTE
► Disassembly of the pole pruner/strimmer/3-section cutting blade/
extension attachment is carried out in the same order.
and pull the front boom on the hedge
on the motor unit.
Swivelling the hedge trimmer
♦ Release the lock/release .
♦ Press the control lever
desired position.
♦ Allow the control lever
(hedge trimmer)
and swivel the hedge trimmer into the
to click into the recess in the base plate
.
Mounting the saw chain and blade
WARNING!
► Wear protective gloves! There is a danger of injury from the sharp
cutting teeth.
NOTE
► Pay close attention to the running direction of the saw chain
the blade
► Depending on wear, the blade
♦ Undo the nut
♦ Remove the sprocket cover
♦ Lay the saw chain
♦ Now fit the blade
♦ Lay the guide rail
tensioner pin
chain
♦ Now you can tighten the saw chain
checking the saw chain").
♦ Replace the sprocket cover
and at the base plate (pole pruner) .
can be turned.
using the open-ended spanner 7).
.
over the blade starting at the tip.
and saw chain .
over the blade guide while inserting the chain
in the blade hole . At the same time, lay the saw
over the chain sprocket .
(see section "Tightening and
and tighten the nut gently.
Removing the saw chain
♦ You may have to loosen the saw chain to remove the blade
and the saw chain
chain"). Follow these instructions in reverse order.
(see section "Tightening and checking the saw
on
Lubricating the chain
♦ Remove the oil filler cap .
♦ Fill the oil tank
♦ The chain lubrication can be increased or decreased using the oil
adjusting screw
♦ Press and then turn the oil adjusting screw
the chain lubrication.
♦ Press and then turn the oil adjusting screw
the chain lubrication.
WARNING!
► Never work without chain lubrication!
If the saw chain runs dry, the cutting equipment may become irreparably damaged in a short time. Always check chain lubrication and
oil level in the tank before starting work.
NOTE
► Use only saw chain oil. Preferably biodegradable. Do not use waste
oil, motor oil, etc.
► While working, check whether the chain lubrication is working
correctly.
with approx. 100ml of organic chain oil 6%.
.
clockwise to decrease
anticlockwise to increase
Sharpening the saw chain
NOTE
A grinder can be attached to the grinder support
►
during grinding.
► You will find detailed information on sharpening in the sharpening
set, e.g. from Oregon.
► Alternatively, you can use an electrical saw chain sharpening device
and follow the manufacturer's instructions .
► If you have any doubts about carrying out the work, the saw chain
should be replaced.
for a secure grip
Attaching the extension attachment
CAUTION!
■ Do not use the extension attachment/boom
the 3-section cutting blade/strimmer attachment!
NOTE
► Use the extension attachment/boom
heights.
5^
in combination with
5^
for working at greater
10
♦ Fit the extension attachment/boom
hedge trimmer/pole pruner. The assembly is carried out in the same
manner as for the attachments described previously.
between the motor unit and the
5^
FBK 4 A1
Page 17

Fitting/removing the protective guard
WARNING!
■ When working with the 3-section cutting blade, the protective guard
must be fitted. Fold the metal sheet of the front boom 5# down
slightly. The protective cover
and the boom
attached to the front boom
Allen key
mounting arm. The protective guard
5#
and the open-ended spanner 7).
6*
is positioned between the metal sheet
is now
with 4 screws . Use the supplied
5#
Cutting equipment Protective equipment
3-section cutting blade
Strimmer with cutting filament
5@
WARNING!
■ Do not use any other cutting equipment apart from that which is
supplied with the product. The use of any other cutting equipment
or protective equipment is deemed to be improper and carries a
significant risk of accidents.
Protective cover
Protective cover + cutting filament
protective guard
C
Installing/replacing the cutting blade
■ Fit/remove the 3-section cutting blade as shown in Figures 1a–1f.
■ Find the hole in the drive plate
block it with the supplied Allen key
■ Place the 3-section cutting blade
■ Fit the pressure plate
■ Fit the pressure plate cover
■ Now tighten the nut
■ The 3-section cutting blade is fitted with a plastic cover on delivery. This
must be removed before use and refitted during periods when not in use.
■ The plastic cover can now be removed.
CAUTION! Left-hand thread!
CAUTION! SHARP EDGES, WEAR PROTECTIVE GLOVES
■ Fit the cutting filament protective guard
■ The cutting filament protective guard C must be fitted when working
with the cutting filament. The cutting filament protective guard
(pre-fitted on delivery) is fitted as shown in Figure 2a.
■ Ensure that the cutting filament protective guard
into place. There is a blade A on the inside of the cutting filament protective guard C. This is covered with a safety cover B (see Fig. 2a.).
■ Remove the safety cover
finishing work.
CAUTION! SHARP EDGES, WEAR PROTECTIVE GLOVES
■ To remove the cutting filament protective guard C from the protective
guard
three mounting pins. CAUTION! RISK OF INJURY!
, take a tool, such as a screwdriver, to carefully remove the
over the thread on the splined shaft (see Fig. 1c).
7%
with the spark plug wrench 7! (see Fig. 1f).
7#
, align it with the opposite hole and
7^
.
6(
on the drive plate 7^ (see Fig. 1b).
(see Fig. 1d).
7$
C
on the protective guard .
C
C
is correctly clicked
B
before starting work and replace it after
Installing/replacing the strimmer
■ Fit/remove the strimmer 5@ as shown in Figure 2c.
■ Find the hole in the drive plate
block it with the supplied Allen key
■ Place the pressure plate
plate elevation
■ Now screw the strimmer
CAUTION! Left-hand thread!
7%
7%
on the drive plate elevation 7^.
5@
, align it with the opposite hole and
7^
.
6(
on the drive plate 7^. Place the pressure
onto the thread.
Putting on the carrying harness
NOTE
The following adjustments can be made to make sure that you can
■
work without becoming fatigued. The settings may vary depending
on your body size.
■ Before starting work, adjust the carrying harness
size.
■ Balance the appliance with the fitted cutting tool so that the cutting
tool swings just over the ground without the need to move the appliance with your hands.
1.) Put on the carrying harness
into place (see Fig. 3a).
2.) As shown in Figure 3b, pull on the belt
harness
3.) To tighten the two shoulder straps, pull on the two shoulder straps as
shown in Figure 3c.
4.) To ensure to the correct position of the appliance on the carrying
harness, pull the belt as shown in Figure 3d.
5.) Hook in the carabiner
quick release mechanism (see Figures 3e–3g).
6.) Now take the appliance and hang it, as shown in Figure 3h, so that the
carrying lug
also be moved by loosening the screw
optimum orientation of the appliance.
centrally on your body and adjust the upper body size.
6@
clicks into the carabiner . The carrying lug can
and close the clasps so that they click
6@
to position the carrying
6@
and secure it with the red strap on the
and sliding it to achieve the
to suit your body
6@
Setting the cutting height
■ Put on the carrying harness 6@ and hook in the appliance (see section
"Putting on the carrying harness").
■ Use the various belt straps on the carrying harness
optimum working and cutting position (see section "Putting on the
carrying harness").
■ Perform a few circular movements without starting the engine in order to
find the ideal shoulder strap length (see fig. 6a).
■ The carrying harness
anism. Pull on the red strap
quickly (see Fig. 3i).
CAUTION!
■ Always use the carrying harness
the appliance. Put on the carrying harness
started the engine and it is ticking over. Switch off the engine before
removing the carrying harness
is equipped with a quick-release locking mech-
6@
if you have to release the appliance
when you are working with
6@
6@
.
6@
to adjust the
6@
as soon as you have
Fuel and oil
■ Only use a mixture of unleaded petrol and special 2-stroke engine oil.
Mix the fuel mixture in accordance with the fuel mix table.
■ Add the respective correct amounts of unleaded petrol and 2-stroke
oil to the supplied oil/petrol mixing canister
Then shake the canister well.
Fuel mix table
Mixing process: 40 parts petrol to 1 part oil
(see "Fuel mix table").
6^
Petrol 2-stroke oil
0.5 litre 12.5 ml
GB
IE
FBK 4 A1
11
Page 18

Before use
GB
IE
CAUTION!
■ Please pay attention to the statutory provisions in the relevant noise
protection regulations.
Before starting the appliance, always check that:
■ The fuel system is not leaking.
■ The protective equipment and cutting equipment is complete and in
perfect working order.
■ All screw connections are firmly tightened.
■ All moving parts can move smoothly and freely.
Starting when the engine is cold
CAUTION!
■ Never allow the starter pull cord to whip back This could cause
damage.
1.) Fill the fuel tank
2.) Press the primer
3.) Switch the on/off switch
4.) Pull the choke lever
5.) Hold the appliance firmly and pull out the starter pull cord
point of first resistance. Now pull hard on the starter pull cord
The appliance starts.
6.) If the engine does not start, repeat steps 4–5.
7.) As soon as the engine is running, press the safety lock-out
press the throttle
If the engine does not start after several attempts, read the "Troubleshooting guide" section.
CAUTION!
■ Always pull the starter pull cord
the starter pull cord firmly when the starter pull cord retracts.
Do not allow the starter pull cord to whip back.
NOTE
■ At very high ambient temperatures it is possible that even a cold
engine has to be started without using the choke!
(see also the section "Fuel and oil").
6 times.
to "I".
into position " ".
to activate the automatic choke.
straight out. Hold the handle of
Starting when the engine is hot
(The appliance has been turned off for less than 15–20
minutes)
1.) Switch the on/off switch
2.) The choke lever
motor.
3.) Hold the appliance firmly and pull out the starter pull cord
point of first resistance. Now pull hard on the starter pull cord
The appliance should start after 1–2 pulls. If the appliance still hasn't
started after 6 pulls, repeat steps 1–7 under "Starting when the engine
is cold".
Turning the engine off
Emergency stop sequence
If you need to stop the appliance immediately, switch the on/off switch
to "0".
Normal sequence
■ Release the throttle lever
to its idling speed. Then switch the on/off switch to "0".
to "I".
does not need to be pulled out to start a warm
and wait until the engine has slowed down
to the
.
and then
to the
.
Optimal working procedures
Before using the appliance, practice all working techniques (see Figs.
6a–6c) with the engine stopped.
Extending the cutting filament
To lengthen the cutting filament, rev the engine to full throttle and tap
the strimmer
knife A on the cutting filament protective guard C cuts the thread to the
permissible length (see Fig. 6d).
CAUTION!
Grass/weed residues can get caught under the protective guard
■ Remove the remains using a scraper or similar item when the engine
is switched off.
Various cutting methods
Trimming/mowing (3-section cutting blade or strimmer)
■ Swing the appliance in a scything motion (see Fig. 6a).
■ Hold the cutting tool parallel to the ground and set the desired cutting
height.
Low trimming (with strimmer)
■ Hold the appliance with a slight incline to the ground (see Fig. 6b). Al-
ways cut away from your body. Never pull the appliance towards you.
Short mowing (with strimmer)
■ Short mowing removes all the vegetation right down to the ground.
Angle the strimmer 30° to the right. Set the handle to the desired
position (see Fig. 6c).
Cutting against trees/fences/foundations (with strimmer)
NOTE
■ The filament will wear or fray quickly if it comes into contact with
trees, rocks, walls or foundations. The filament will break off if it
strikes fence mesh.
CAUTION!
■ Do not use the appliance to remove any objects from footpaths, etc.!
The appliance is powerful and can fling small stones or other objects
15 metres or more and may cause injuries or damage to cars,
houses and windows.
Jamming
Immediately turn off the engine if the cutting tool becomes blocked.
Remove all grass and scrub from the appliance before restarting the
appliance.
Preventing kickback
When working with the cutting blade there is a risk of kickback if the blade
strikes against solid obstacles (tree trunks, branches, tree stumps, rocks or
similar). This will result in the cutting tool being catapulted back against the
direction of rotation. This can lead to the loss of control of the appliance.
Do not use the cutting blade near fences, metal posts, boundary stones or
foundations. To cut weak shrubs, position the appliance as shown in Fig.
6e to avoid kickbacks.
on the ground. The filament extends automatically. The
5@
Wear safety goggles!
.
CAUTION!
■ The 3-section cutting blade must be stationary when the engine is
idling. If the 3-section cutting blade is rotating adjust the carburettor!
12
FBK 4 A1
Page 19

Working with the hedge trimmer
Cutting techniques
■ The double-sided cutter bar allows cutting in both directions or by using
swinging movements from one side to the other.
■ For a vertical cut, move the hedge trimmer evenly forwards or up and
down in an arc.
■ For a horizontal cut, move the hedge trimmer in a scything motion
along the edge of the hedge so that cut branches fall to the ground.
■ See fold-out page (Figure A).
NOTE
► Remove thicker branches with a branch cutter.
Working with the pole pruner
Sawing techniques
Working safely
■ Keep the appliance, the cutting mechanism and the chain guard 6$ in
good condition to prevent injury.
■ If the appliance has been dropped, check for significant damage or
defects.
■ Observe the specified working angle max. 60°±10° to ensure safe
working (see figure).
max. 60°±10°
GB
IE
WARNING!
► Pay attention to falling clippings.
► Be aware of the danger of branches flying back.
NOTE
►
Place the stop
and quietly.
► Now you can begin sawing.
Sawing off small branches
♦ Saw small branches (Ø 0–8 cm) from the top down (see figure).
Sawing off larger branches
♦ When sawing larger branches (Ø 8–25 cm), first make a relief cut A
(see figure). A relief cut also prevents peeling of the bark on the main
trunk.
♦ Saw from the top
on the branch. This will help you work more safely
B
to the bottom A.
■ Do not use the appliance while standing on a ladder or with unsteady
footing.
■ Do not be tempted into making a poorly considered cut.
You could endanger yourself and others.
■ Children should be supervised to ensure that they do not play with the
appliance.
■ Change your working position regularly. Using the appliance for a long
time can lead to vibration-related circulation disorders of the hands.
You can extend the usage duration by means of appropriate gloves or
by taking regular breaks. Note that any personal predisposition to poor
blood circulation, low external temperatures or large prehensile forces
can reduce the usage period.
Transport
■ Use the protective guards 6# 6$ when transporting the appliance.
■ Ensure that the appliance cannot switch on during transport (see
figure).
B
A
Saw in sections.
Trim long or thick branches before you make the final cut (see figure).
C A B
cb a
2
1
FBK 4 A1
Cleaning
Cleaning the engine unit
NOTE
■
Clean the appliance thoroughly after every use.
■ Always switch off the appliance before cleaning and then disconnect
the spark plug connector
■ Clean the appliance regularly with a damp cloth and a mild detergent.
Make sure that no water can penetrate into the interior of the appliance.
Cleaning the pole pruner
■ The pole pruner must be cleaned of sawdust at regular intervals.
♦ Remove the sprocket cover
♦ Remove the saw chain
♦ Keep the saw chain
and the oil supply.
.
.
from the blade and clean the guide rail .
sharp and check the tension; check the oil level
13
Page 20

Cleaning the hedge trimmer
GB
IE
♦ Check the hedge trimmer for loose screws on the cutter bar
tighten these if necessary.
♦ Remove stuck cuttings.
♦ Maintain the cutter bar
Cleaning the strimmer/3-section cutting blade attachment
♦ Remove stuck cuttings.
♦ Keep the 3-section cutting blade
using an oil spray or an oil can.
sharp to facilitate your work.
and
Spark plug maintenance
1.) Pull off the spark plug connector
2.) Unscrew the spark plug using the spark plug wrench
3.) Assembly takes place in the reverse order.
Electrode gap = 0.6 mm (distance between the electrodes between which
the ignition spark is generated). Check the spark plug for contamination
after the first 10 hours of operation and clean it with a copper wire brush
if required.
Afterwards, service the spark plug after every 50 hours of operation.
.
supplied.
7!
Maintenance
Replacing the strimmer/cutting filament
1.) The strimmer
replacing the strimmer. Press the marking (see Fig. 5a), turn the cover
and remove one half of the casing (see Fig. 5b).
2.) Remove the spool bobbin
3.) Remove any remaining cutting filament.
4.) Double the new cutting filament in the middle and hook the loop that
you have made into the recess on the spool bobbin (see Fig. 5d).
5.) Wind the filament tightly in an anticlockwise direction. The spool bobbin
6.) Hook the last 15cm of the two ends of the filament into the opposite
filament holders
7.) Guide the two ends of the filament through the metal lugs in the strimmer
housing (see Fig. 5e).
8.) Press the spool bobbin
9.) Reconnect the two halves of the housing.
10.) Pull hard on the two ends of the filament to free them from the filament
holders (see Fig. 5f).
11.) Cut any excess filament back to about 13 cm. This reduces the load
on the engine when starting and warming up.
12.) Refit the strimmer (see section "Installing/replacing the strimmer").
Skip points 3–6 if you are replacing the entire strimmer.
Air filter maintenance
Contaminated air filters reduce the engine performance due to low air
supply to the carburettor.
Regular inspection is essential. The air filter
every 25 hours of operation and cleaned if necessary.
The air filter must be checked more frequently if the air is dusty.
1.) Remove the cover of the air filter housing
2.) Remove the air filter
3.) Clean the air filter
air).
4.) Assembly takes place in the reverse order.
CAUTION!
■ Never clean the air filter with petrol or flammable solvents.
is removed as described in the section Installing/
5@
from the strimmer housing (see Fig. 5c).
separates the two halves of the cutting filament (see Fig. 5d).
(see Fig. 5e).
into the strimmer housing (see Fig. 5e).
must be inspected after
.
.
by tapping or blowing it out (with compressed
Grinding the protective guard blade
A
The blade
to be the case, undo the 2 screws that hold the blade
filament protective guard
blade
of the cutting edge.
Adjusting the carburettor
Remove the cover of the air filter housing
Adjusting the throttle cable
If the appliance no longer reaches maximum speed after a while and all
other causes as described in the "Troubleshooting" section have been ruled
out, this may mean that the throttle cable needs to be adjusted. To adjust
the throttle cable, screw in the screw
as the lock nut H2 correctly (see Fig. 4).
Lubricating the gears
■ Add liquid gear grease after every 20 hours of operation (approx. 10 g)
to lubricate the angle gear.
♦ To do this, undo the screw (see Fig. 2c) to press the gear grease
into the gear housing.
♦ After filling the gearbox, close the lubrication hole with the screw
(see Fig. 2a) can become blunt over time. If you find this
A
onto the cutting
C
. Clamp the blade A in a vice. Grind the
A
with a sharpening stone and make sure you maintain the angle
.
or the adjusting screw H1 as well
Storage and transportation
■ Store the appliance in a safe location.
■ Store the appliance and accessories in a safe location which is
protected against naked flames and sources of heat/sparks, such as
gas-powered water heaters, dryers, oil stoves or mobile heaters, etc.
■ Ensure that the protective guard
free of cutting residue when storing.
■ The plastic cover for the 3-section cutting blade must be refitted for
transport and storage.
■ Always turn the appliance off before performing any maintenance work
and remove the spark plug connector .
Storing the appliance
The appliance must be prepared for storage if it is to be stored for longer
than 30 days. Otherwise the residual fuel in the carburettor will evaporate
and leave a gooey sediment. This may make starting the appliance more
difficult and result in expensive repair work.
1.) Remove the filler cap
Carefully empty the fuel tank
2.) To remove all fuel from the carburettor, start the engine and leave it to
run until it stops.
3.) Allow the engine to cool for about 10 minutes.
4.) Remove the spark plug (see section "Spark plug maintenance").
to relieve any pressure in the fuel tank .
, the strimmer 5@ and the engine are
.
.
14
FBK 4 A1
Page 21

5.) Add 1 teaspoon of 2-stroke oil to the combustion chamber. Pull the
starter pull cord
with oil. Replace the spark plug.
NOTE
■ Store the appliance in a dry place and away from possible ignition
sources.
Start-up after storage
1.) Remove the spark plug (see section "Spark plug maintenance").
2.) Pull the starter pull cord
from the combustion chamber.
3.) Clean the spark plug and observe the correct electrode gap on the
spark plug.
4.) Fill the fuel tank
Transporting
■ If you are planning to transport the appliance, empty the fuel tank
as explained in the section "Storage".
several times in order to wet all mechanical parts
quickly in order to remove any excess oil
. See the section "Fuel and oil".
Troubleshooting
Motor unit
Problem Possible cause Remedy
The engine does
not start.
The engine starts
but does not run
at full power.
The engine does
not run smoothly.
Soot deposits or
wetness on the
spark plug.
Incorrect start-up process. Follow the instructions
regarding starting.
Incorrect adjustment of the
choke lever
Contaminated air filter. Clean air filter.
Incorrect spark plug gap. Clean the spark plug
Incorrect carburettor adjustment.
.
Set the choke lever
".
to "
and adjust the spark
plug gap or replace
the spark plug.
Clean spark plug or
replace it with a new
spark plug.
Maintenance interval
Pole pruner
The figures given here are based on normal operating conditions. In the
event of more difficult conditions, such as strong dust generation and
longer daily working hours, the given intervals are to be reduced correspondingly.
Appliance part
Lubricating the
chain
Saw
chain
Guide
rail
Sprocket
Hedge trimmer
The figures given here are based on normal operating conditions. In the
event of more difficult conditions, such as strong dust generation and longer
daily working hours, the given intervals are to be reduced correspondingly.
Action Before
check
check and
note sharpness
check
chain
tension
sharpen
check
(wear,
damage)
clean and
turn
deburr
replace
check
replace
starting
work
X
X
X
X
Weekly In the
event
of
faults
XX
X
X
In the
event
of damage
XX
GB
IE
As required
X
X
Pole pruner
Problem Possible cause Remedy
Motor is running,
saw chain
does not move.
No work progress.
Hedge trimmer attachment
or pole pruner attachment
is not connected properly
to the motor unit.
Saw chain
heating or is sagging.
dry/over-
Check assembly.
Top up the oil or regrind, replace or tighten
the saw chain
Hedge trimmer
Problem Possible cause Remedy
Motor is running,
blades do not
move.
Hedge trimmer attachment
or pole pruner attachment
is not connected properly
to the motor unit.
Check assembly.
FBK 4 A1
.
Appliance part
Cutting
blades
Action Before
starting
work
visual inspection
clean
X
After
completion
of work
As required
XX
Spare part orders
Ordering spare parts
The following information should be provided when ordering spare parts:
■ Type of appliance
■ Item number of the appliance
■ Device ID number
Current prices and information are available at
www.kompernass.com
15
Page 22

Disposal
GB
IE
The packaging is made from environmentally friendly material and
can be disposed of at your local recycling plant. The appliance
and its accessories are made from various materials, such as
metal and plastic.
Your local community or municipal authorities can provide information on
how to dispose of the worn-out appliance.
Environmental protection
■ Carefully empty the petrol and oil tank and dispose of your appliance
at a recycling plant. The plastic and metal parts used can be separated
and recycled.
■ Dispose of waste oil and petrol at a waste collection centre, do not
dump these into the sewerage or drainage system.
■ Dispose of contaminated maintenance material and working materials
at a collection point provided for this purpose.
Appendix
Service
WARNING!
■ Have your appliance repaired by qualified specialists only. Always
use genuine spare parts. This will ensure the ongoing safety of the
appliance.
Service Great Britain
Tel.: 0871 5000 720 (£ 0.10/Min.)
E-Mail: kompernass@lidl.co.uk
IAN 110011
Service Ireland
Tel.: 1890 930 034
(0,08 EUR/Min., (peak))
(0,06 EUR/Min., (off peak))
E-Mail: kompernass@lidl.ie
IAN 110011
Hotline availability:
Monday to Friday from 8:00 a.m. to 8:00 p.m. (CET)
Warranty
You are provided a 3-year warranty on this appliance, valid from the
date of purchase. This appliance has been manufactured with care
and inspected meticulously prior to delivery. Please retain your receipt
as proof of purchase. In the event of a warranty claim, please contact
your Customer Service unit by telephone. This is the only way to guarantee free return of your goods.
The warranty only covers claims for material and manufacturing defects,
not for damage sustained during carriage, components subject to wear
and tear or damage to fragile components such as switches or batteries.
This appliance is intended solely for domestic, not commercial, use.
The warranty shall be deemed void in cases of misuse or improper handling,
use of force and modifications/repairs which have not been carried out
by one of our authorised Service centres. Your statutory rights are not
restricted by this warranty.
The warranty period is not prolonged by repairs effected under the warranty.
This also applies to replaced and repaired components. Any damage and
defects present at the time of purchase must be reported immediately after
unpacking, but no later than two days after the date of purchase. Repairs
carried out after expiry of the warranty period shall be subject to charge.
Importer
KOMPERNASS HANDELS GMBH
BURGSTRASSE 21
44867 BOCHUM
GERMANY
www.kompernass.com
16
FBK 4 A1
Page 23

Translation of the original Conformity
Declaration
We, KOMPERNASS HANDELS GMBH, Custodian of Documents:
Mr. Semi Uguzlu, BURGSTR. 21, 44867 BOCHUM, GERMANY,
hereby declare that this appliance complies with the following standards,
normative documents and EC directives:
Machinery Directive
(2006/42/EC)
Outdoor directive
(2005/88/EC)
Emissions directive
(2012/46/EU)
Applied harmonised standards:
EN ISO 11806-1: 2011
EN ISO 10517: 2009+A1
EN ISO 11680-1: 2011
Type/appliance designation:
4-in-1 petrol multi-tool FBK 4 A1
Year of manufacture: 02 - 2015
Serial number: IAN 110011
GB
IE
Bochum, 05/12/2014
Semi Uguzlu
- Quality Manager -
The right to effect technical changes in the context of further development
is reserved.
FBK 4 A1
17
Page 24

18
FBK 4 A1
Page 25

Table des matières
FR
BE
Introduction ................................20
Usage conforme ....................................20
Équipement ........................................20
Matériel livré .......................................21
Caractéristiques techniques............................21
Consignes de sécurité ........................23
Consignes de sécurité relatives aux taille-haies.............23
Consignes de sécurité complémentaires pour les taille-haies . . 24
Consignes de sécurité de travail pour l'élagueuse ..........25
Mesures de prudence contre le rebond ..................25
Consignes de sécurité de travail pour les bobines de fil ......26
Consignes de sécurité de travail pour la lame de coupe .....27
Dispositifs de sécurité ................................27
Avant la mise en service ......................27
Montage de la poignée ronde .........................27
Montage du mécanisme de déclenchement rapide .........27
Fixation / montage de la ceinture de port ................27
Montage du taille-haies...............................28
Démontage du taille-haies.............................28
Faire pivoter le taille-haies.............................28
Monter la chaîne de scie et la lame .....................28
Démonter la chaîne de scie............................28
Tendre et vérifier la chaîne de scie ......................28
Graissage de la chaîne...............................28
Affûter la chaîne de scie ..............................28
Monter la perche....................................29
Montage/démontage du capot de protection .............29
Montage/ remplacement de la lame ....................29
Montage/remplacement de la bobine de fil...............29
Mettre la ceinture de port .............................29
Réglage de la hauteur de coupe........................29
Carburant et huile ...................................30
Mise en service .............................30
Démarrage à froid...................................30
Démarrage à chaud .................................30
Travailler avec le taille-haies ...........................31
Techniques de coupe.................................31
Travailler avec l'élagueuse.............................31
Techniques de scie...................................31
Travail sûr .........................................31
Transport ..................................31
Nettoyage .................................32
Maintenance ...............................32
Entreposage et transport .....................33
Recherche d'erreurs .........................33
Unité moteur .......................................33
Élagueuse .........................................33
Taille-haies.........................................33
Intervalles de maintenance ...................34
Élagueuse .........................................34
Taille-haies.........................................34
Commande de pièces de rechange .............34
Mise au rebut...............................34
Annexe....................................34
Garantie ..........................................34
Service après-vente . . . . . . . . . . . . . . . . . . . . . . . . . . . . . . . . . . 35
Importateur ........................................35
Traduction de la déclaration de conformité originale ........35
FBK 4 A1
19
Page 26

OUTIL MODULABLE À ESSENCE 4 EN 1
FBK 4 A1
Introduction
FR
BE
Nous vous félicitons de l'achat de votre nouvel appareil. Ainsi, vous venez
d'opter pour un produit de grande qualité. Le mode d'emploi fait partie de
cet appareil. Il contient des remarques importantes concernant la sécurité,
l'usage et la mise au rebut. Avant d'utiliser le produit, veuillez vous familiariser avec toutes les consignes d'utilisation et de sécurité. N'utilisez le
produit que conformément aux consignes et pour les domaines d'utilisation
prévus. Si vous cédez le produit à un tiers, remettez-lui également tous les
documents.
Usage conforme
Élagueuse sur perche
Cet appareil est idéal pour l'élagage et la coupe de haies, buissons et
arbustes d'ornement dans le secteur domestique. Il s'agit ici d'un appareil
manuel à transmission intégrée, dont les lames linéaires se déplacent en
avant et en arrière.
AVERTISSEMENT!
► Les taille-haies ne sont pas faits pour être utilisés par les enfants.
Élagueuse
Cet appareil est destiné aux travaux d'élagage d'arbres.
Lame à 3 dents / bobine de fil
Utilisation avec la lame à 3 dents: pour couper l'herbe haute, les broussailles et les plantes ligneuses.
Utilisation avec la bobine de fil: pour couper l'herbe et les herbes peu
nombreuses.
Perche
ATTENTION!
■ Ne pas utiliser la perche / le manche
lame à 3 dents / la bobine de fil!
Toute autre utilisation non expressément approuvée dans ce mode d'emploi
peut endommager l'appareil et présenter un risque sérieux pour l'utilisateur.
Respectez impérativement les restrictions figurant dans les consignes de
sécurité. Veuillez respecter les réglementations nationales qui peuvent
restreindre l'utilisation de la machine. Toute autre utilisation ou modification
de la machine est considérée comme non conforme et présente des risques
d'accidents non négligeables.
Non prévue pour une utilisation commerciale.
UTILISATIONS INTERDITES!
Pour éviter les blessures, l'utilisateur ne doit pas utiliser l'appareil pour les
travaux suivants: pour le nettoyage des trottoirs et comme broyeur à végétaux pour le broyage de tronçons d'arbres et de haies. En outre, l'appareil
ne doit pas être utilisé pour niveler les reliefs tels que les taupinières. Pour
des raisons de sécurité, l'appareil ne doit pas servir d'unité d'entraînement
pour d'autres appareils de tous types. L'utilisateur/opérateur est responsable des dommages ou blessures de toute sorte qui pourraient en résulter,
non le fabricant.
en combinaison avec la
5^
Équipement
Unité moteur
Verrouillage de sécurité
Interrupteur marche/arrêt
Anneau de transport
4 x vis de fixation (avec circlip, rondelle et écrou)
Poignée ronde
5a
Bague en caoutchouc
5b
Broche
Étrier barrière
Cache
Poignée vissée
Levier de sécurité
Manche
Accélérateur
Cosse de bougie d'allumage
Levier étrangleur
Cordon de démarrage
Réservoir d'essence
Couvercle du réservoir
Pompe à carburant "Primer"
Cache du boîtier du filtre à air
Taille-haies FBK 4 A1-1
Poignée
Verrouillage/déverrouillage
Boîte d'engrenages
Barre de coupe
Plaque (taille-haies)
Levier de réglage
Manche avant (taille-haies)
Trou de blocage
Arbre d'entraînement
Élagueuse FBK 4 A1-2
Manche avant (élagueuse)
Bague de protection
Couvercle du réservoir à huile
Réservoir à huile
Lame
Chaîne de scie
Touret
Butée
Trou de blocage
Arbre d'entraînement
Écrou
Filetage
Cache de pignon
Guide-lame
Alésage de lame
Rail de guidage
Graisseur par gouttes
Pignon
Vis de régulation d'huile
Goupille de tension de chaîne
Vis de tension de chaîne
20
FBK 4 A1
Page 27

Bobine de fil / lame FBK 4 A1
4 x vis de fixation (avec circlip, rondelle et écrou)
Capot protecteur
Lame à 3 dents
Bobine de fil avec fil de coupe
5@
Manche avant (bobine de fil / Lame à 3 dents)
5#
Trou de blocage
5$
Arbre d'entraînement
5%
Perche
Manche
5^
Poignée vissée
5&
Levier de sécurité
5*
Cache
5(
Trou de blocage
6)
Arbre d'entraînement
6!
Accessoires
Ceinture de port
6@
Gaine protectrice pour la lame
6#
Gaine protectrice pour la chaîne
6$
Huile pour chaîne bio
6%
Bouteille mixte huile/essence
6^
Lunettes de protection
6&
Clé à six pans M4
6*
Clé à six pans M5
6(
Clé plate SW 8/10
7)
Clé pour bougie d'allumage / tournevis à fente
7!
Trousse à outils
7@
Écrou M10 (filetage à gauche)
7#
Cache plaque de pression
7$
Plaque de pression
7%
Disque d'entraînement
7^
Matériel livré
1 unité moteur
1 taille-haies FBK 4 A1-1
1 élagueuse FBK 4 A1-2
1 bobine de fil / lame FBK 4 A1
1 perche
1 poignée avec étrier barrière
1 bobine de fil avec fil de coupe
1 Lame à 3 dents
1 ceinture de port
1 gaine protectrice pour chaîne
1 gaine protectrice pour lame
1 bouteille mixte huile/essence
1 huile bio pour chaînes 100 ml
1 trousse à outils
1 clé à six pans M4
1 clé à six pans M5
1 clé pour bougie d'allumage / tournevis à fente
1 clé plate SW 8/10
1 lunettes de protection
1 mode d'emploi
Caractéristiques techniques
Unité moteur:
Type de moteur: moteur 2 temps, refroidi par air,
cylindre chromé
Puissance du moteur (max.): 1,35 kW / 1,85 CV
Cylindrée: 42,7 cm³
Vitesse de rotation à vide moteur: 3000 min
Vitesse de rotation moteur max.
avec lame à 3 dents: 9200 min
avec bobine de fil: 8700 min
avec scie à chaîne: 9200 min
avec taille-haies: 9200 min
Vitesse de coupe max.
avec lame à 3 dents: 6900 min
avec bobine de fil: 6525 min
avec scie à chaîne: 20 m/s
avec taille-haies: 1550 min
Allumage: électronique
Entraînement: accouplement centrifuge
Poids:
(réservoir vide): env. 5,6 kg
Contenance du réservoir: 1200 cm
Bougie d'allumage: TORCH L7RTC
Consommation de carburant
à puissance max. du moteur: 0,6 kg / h
Consommation spécifique
de carburant
à puissance max. du moteur: 446 g / kWh
Taille-haies: FBK 4 A1-1
Longueur de coupe: 425 mm
Écart entre les dents: 20 mm
Poids
(opérationnel): env. 2,24 kg
Élagueuse: FBK 4 A1-2
Poids (opérationnel): env. 1,6 kg
Quantité d'huile recommandée pour
le réservoir à huile: 140 cm
Longueur de coupe: env. 260 mm
Lame: Oregon type 100SDEA318
Chaîne de scie: Oregon 91P040X
Oregon 91P040E
Bobine de fil / lame : FBK 4 A1
Bobine de fil avec fil de coupe(IAN 110011):
Ø cercle de coupe du fil: 43 cm
Longueur du fil: 8,0 m
Ø fil: 2,0 mm
Lame à 3 dents(IAN 110011):
Ø cercle de coupe de la lame: 25,5 cm
-1
-1
-1
-1
-1
-1
-1
-1
3
3
FR
BE
FBK 4 A1
21
Page 28

Informations relatives aux bruits et aux vibrations:
Valeur de mesure du bruit déterminée conformément à ISO 22868, EN
ISO 10517. Le niveau de bruit A pondéré typique s'élève à :
Taille-haies:
FR
Niveau de pression acoustique L
BE
Imprécision K
: 2,5 dB
WA
Niveau de puissance acoustique L
Niveau de puissance acoustique garanti L
Imprécision K
: 2,5 dB
WA
: 98,79 dB(A)
pA
: 109,53 dB(A)
WA
: 114 dB(A)
WA
Élagueuse:
Niveau de pression acoustique L
Imprécision K
: 2,5 dB
WA
: 97,06 dB(A)
pA
Niveau de puissance acoustique: 110,87 dB(A)
Imprécision K
: 2,5 dB
WA
Bobine de fil / lame à 3 dents:
Niveau de pression acoustique L
Imprécision K
: 2,5 dB
pA
Niveau de puissance acoustique L
Imprécision K
: 2,5 dB
WA
: 97,64 dB(A)
pA
: 111,27 dB(A)
WA
Porter une protection auditive pour éviter les
dommages auditifs !
REMARQUE
Le niveau de vibrations indiqué dans ces instructions a été mesuré conformé-
►
ment aux méthodes de mesure décrites dans la norme EN ISO 11806-1,
EN ISO 10517, EN ISO 11680-1 et peut être utilisé pour la comparaison
d'appareils. La valeur d'émission des vibrations mentionnée peut être également utilisée pour une évaluation préliminaire de l'arrêt.
AVERTISSEMENT!
► Le niveau de vibrations va évoluer selon l'usage et peut dans certains
cas se situer au-dessus de la valeur indiquée dans les présentes instructions. La sollicitation due aux vibrations pourrait être sous-estimée,
lorsque l'appareil est régulièrement utilisé de cette manière. Afin
d'obtenir une estimation précise de la sollicitation due aux vibrations
pendant un certain temps de travail, il convient également de tenir
compte des périodes pendant lesquelles l'appareil est éteint ou allumé,
mais n'est pas effectivement utilisé. Ceci peut considérablement réduire
la sollicitation due aux vibrations pendant toute la durée du travail.
AVERTISSEMENT!
■ Réduisez également les risques de vibrations tels que le risque d'une
maladie des doigts morts grâce à des pauses de travail fréquentes dans
lesquelles vous frottez par ex. les paumes des mains l'une contre l'autre !
Explication des plaques signalétiques sur l'unité moteur:
Valeurs de vibration (somme vectorielle de trois directions) déterminées
conformément à EN ISO 11806-1, EN ISO 10517, EN ISO 11680-1:
Taille-haies:
Vibrations sur la poignée avant: Valeur d'émission des vibrations
= 4,182 m/s
a
h,D
Imprécision K = 1,5 m/s
2
2
Vibrations sur la poignée arrière: Valeur d'émission des vibrations
= 9,695 m/s
a
h,D
Imprécision K = 1,5 m/s
2
2
Élagueuse:
Vibrations sur la poignée avant: Valeur d'émission des vibrations
= 3,855 m/s
a
h,D
Imprécision K = 1,5 m/s
2
2
Vibrations sur la poignée arrière: Valeur d'émission des vibrations
= 7,590 m/s
a
h,D
Imprécision K = 1,5 m/s
2
2
Bobine de fil :
Vibrations sur la poignée avant: Valeur d'émission des vibrations
= 4,864 m/s
a
h,D
Imprécision K = 1,5 m/s
2
2
Vibrations sur la poignée arrière: Valeur d'émission des vibrations
= 9,750 m/s
a
h,D
Imprécision K = 1,5 m/s
2
2
Lame à 3 dents:
Vibrations sur la poignée avant: Valeur d'émission des vibrations
= 4,622 m/s
a
h,D
Imprécision K = 1,5 m/s
2
2
Vibrations sur la poignée arrière: Valeur d'émission des vibrations
= 7,708 m/s
a
h,D
Imprécision K = 1,5 m/s
2
2
Avertissement! Lire le mode d'emploi avant la mise en service.
Porter des gants de protection!
Porter des gants de sécurité!
Porter une protection auditive!
Porter un casque de protection!
Porter des lunettes de protection!
Attention, pièces brûlantes. Gardez vos distances!
Explication des plaques signalétiques sur le taille-haies:
Danger de mort par électrocution! Tenez-vous au moins à
10 m de distance de lignes aériennes à haute tension.
Attention! Chute d'objets.
En particulier lors de la coupe au-dessus de la tête.
Attention! Risque de blessures dû à la lame en service.
Gardez vos distances!
22
FBK 4 A1
Page 29

Explication des plaques signalétiques sur l'élagueuse:
Consignes de sécurité
Danger de mort par électrocution! Tenez-vous au moins à
10 m de distance de lignes aériennes à haute tension.
Protéger l'appareil de la pluie ou de l'humidité!
Attention! Chute d'objets.
En particulier lors de la coupe au-dessus de la tête.
Attention! Risque de blessures du à la lame en service.
Explication des plaques signalétiques sur la bobine de
fil / la lame:
Attention! Filet à gauche.
Protéger l'appareil de la pluie ou de l'humidité!
Faites attention aux pièces projetées!
Risque de rebond!
Prudence! Risque de blessure par lame rotative!
Tenir les mains et les pieds éloignés!
Prudence - l'essence est extrêmement inflammable!
Risque d'explosion! Ne pas renverser de carburant!
Avant les travaux de maintenance, mettez l'appareil hors
circuit et retirez la cosse de bougie d'allumage!
Attention! Risque d'étouffement!
Prudence! Émanations de CO toxiques
(vapeurs de monoxyde de carbone)!
Ne pas utiliser l'appareil dans des pièces fermées!
Avertissement! N'utilisez en aucun cas les lames de scie
circulaire pour la fonction de lame de coupe.
20 h
Remettez un peu de graisse toutes les 20 heures
(graisse liquide pour engrenage)!
La distance entre la machine et les personnes environnantes
doit être d'au moins 15 m!
L'outil de coupe (lame/fil de coupe) continue de tourner une
fois l'appareil éteint!
Attention, pièces brûlantes. Gardez vos distances!
IMPORTANT! LIRE AVEC SOIN AVANT L'UTILISATION.
CONSERVER POUR VOS DOCUMENTS.
Consignes de sécurité relatives aux taille-haies
REMARQUE
► Le taille-haies est livré entièrement monté.
► Les remarques ainsi que les illustrations imagées concernant le
réglage, l'utilisation des taille-haies ainsi que leurs pièces de réglage,
la maintenance, le graissage par l'utilisateur se trouvent dans ce
mode d'emploi ainsi que sur le volet dépliant.
► Remarques relatives à la position de travail (voir volet dépliant).
► Remarques relatives aux pièces de réglage (voir volet dépliant).
► Remarques relatives à une utilisation sûre du carburant (voir chapitre
"Préparation“ point f).
► Vous trouverez dans ce mode d'emploi les remarques concernant le
remplacement recommandé ou la réparation de pièces ou pour le
service après-vente et les spécifications des pièces de rechange à
utiliser, dans la mesure où celles-ci concernent la santé et la sécurité
de l'utilisateur.
► Vous trouverez dans ce mode d'emploi l'explication de tous les symboles
graphiques, les indications, caractéristiques et données techniques ainsi
que la marche à suivre en cas d'accidents et de pannes.
► Outil bloqué: retirez les matières coincées de la barre de coupe
AVERTISSEMENT!
■ Les enfants ne doivent pas utiliser le taille-haies.
■ Soyez toujours vigilant, faites attention et travaillez avec précau-
tion sur l’appareil. N’utilisez pas l’appareil lorsque vous êtes fatigué ou sous l’emprise de drogues, d’alcool ou de médicaments.
Un moment d’inattention lors de l’utilisation de l’appareil peut entraîner
des blessures corporelles graves.
■ Évitez les utilisations erronées, utilisez la machine uniquement comme
décrit sous "Usage conforme“.
.
Familiarisez-vous avec le mode d'emploi avant d'utiliser
l'appareil.
Préparation
a) CE TAILLE-HAIES PEUT PROVOQUER DES BLESSURES GRAVES!
Lisez avec soin les instructions relatives à la bonne utilisation, à la
préparation, à la maintenance, pour démarrer et arrêter le taille-haies.
Familiarisez-vous avec toutes les pièces de réglage et avec l'utilisation
conforme du taille-haies.
b) Les enfants ne doivent pas utiliser le taille-haies.
c) Prudence avec les lignes électriques aériennes.
d) L'utilisation du taille-haies doit être évitée lorsque des personnes, surtout
des enfants, se trouvent à proximité.
e) Portez des vêtements adaptés! Ne portez pas de vêtements amples ni
de bijoux qui risqueraient d'être happés par les pièces mobiles. Il est
recommandé de porter des gants de protection rigides, des chaussures
anti-dérapantes et des lunettes de protection.
f) Soyez prudent avec le carburant, il est facilement inflammable et les
vapeurs sont explosives. Les points suivants doivent être respectés:
FR
BE
Indication du niveau de puissance acoustique LWA en dB.
Feu, flamme nue et fumée interdits!
FBK 4 A1
– Utiliser uniquement des réservoirs prévus à cet effet.
– Ne jamais retirer la fermeture du réservoir ou remplir de l'essence
lorsque le moteur tourne ou est chaud. Avant le remplissage, laissez
refroidir le moteur et les éléments d'échappement.
23
Page 30

– Ne pas fumer.
– Faire uniquement le plein en extérieur.
– Ne jamais stocker le taille-haies ou le réservoir à carburant dans un local
FR
BE
dans lequel se trouve une flamme nue, comme par ex. dans une chaudière.
– En cas de fuite d'essence, ne pas essayer de démarrer le moteur, mais
retirer la machine de la surface souillée d'essence avant de la démarrer.
– Une fois le plein fait, toujours remettre en place le bouchon du réservoir
et le fermer de manière sûre.
– La purge du réservoir doit être effectuée à l'extérieur.
g) Si le dispositif de coupe touche un corps étranger, ou si les bruits de
fonctionnement venaient à s'amplifier ou le taille-haies à vibrer fortement
de manière inhabituelle, couper le moteur et laisser le taille-haies
s'immobiliser. Retirer la cosse de la bougie d'allumage et prendre les
mesures suivantes:
– vérifier d'éventuels dommages ;
– vérifier d'éventuelles pièces mobiles et fixer toutes les pièces détachées ;
– remplacer les pièces défectueuses contre des pièces semblables ou les
faire réparer.
Porter une protection auditive!
Porter des lunettes de protection!
■ Se familiariser avec l'utilisation du taille-haies afin de pouvoir l'arrêter
immédiatement en cas d'urgence.
Fonctionnement
a) Le moteur doit être immobilisé avant:
– le nettoyage ou l'élimination d'un blocage ;
– le contrôle, la maintenance ou des travaux sur le taille-haies;
– le réglage de la position de travail du dispositif de coupe ;
– lorsque le taille-haies reste sans surveillance.
b) Toujours s'assurer que le taille-haies se trouve de manière conforme
dans l'une des positions de travail prescrites, avant de démarrer le
moteur.
c) Pendant l'utilisation du taille-haies, il faut toujours s'assurer de pouvoir
occuper une position stable, en particulier en cas d'utilisation d'une
échelle.
d) Ne jamais utiliser le taille-haies avec un dispositif de coupe défectueux
ou fortement usé.
e) Afin d'éviter tout risque d'incendie, veiller à ce que l'amortisseur soit
exempt de tout dépôt, de feuilles mortes ou d'écoulement de lubrifiant.
f) Toujours s'assurer que toutes les poignées et les dispositifs de sécurité
sont montés lors de l'utilisation du taille-haies. Ne jamais essayer d'utiliser un taille-haies incomplet ou un taille-haies ayant subi une transformation non autorisée.
g) Toujours utiliser vos deux mains lorsque le taille-haies présente deux
poignées.
h) Toujours vous familiariser avec votre environnement et prêter attention
aux dangers possibles que vous pourriez ne pas entendre à cause du
bruit du taille-haies.
Maintenance et stockage
a) Une fois le taille-haies immobilisé pour une maintenance, inspection ou
un stockage, couper le moteur, retirer la cosse de la bougie d'allumage
et s'assurer que toutes les pièces en rotation se soient immobilisées.
Laisser refroidir la machine avant de la contrôler, de la régler, etc.
b) Stocker le taille-haies là où les vapeurs d'essence ne peuvent pas entrer
en contact avec une flamme nue ou des étincelles. Laisser toujours
refroidir le taille-haies avant de le stocker.
c) Lors du transport ou du stockage du taille-haies, le dispositif de coupe
doit toujours être couvert de la protection adaptée.
Consignes de sécurité complémentaires pour les
taille-haies
Sécurité environnante
■ N'effectuer des coupes de haies qu'à la lumière du jour ou à lumière
artificielle de bonne qualité.
■ Lors de la coupe, veiller à ne pas entrer en contact avec des objets tels
que des grillages ou des tuteurs. Il peut en résulter des dommages sur
la barre de coupe
tous les fils et autres corps étrangers.
■ Soyez conscient de votre environnement et prêt à d'éventuels moments
de danger que vous n'entendez peut-être pas durant la coupe de la
haie.
DANGER!
► En cas de menace de danger ou en cas d'urgence, couper immédia-
tement le moteur.
Sécurité électrique
■ Tenir uniquement l'outil sur les surfaces de poignées isolées, la lame
risquant d'entrer en contact avec des lignes électriques cachées. Le
contact de la lame avec une ligne électrique conductrice de tension peut
mettre les pièces métalliques de l'appareil sous tension et provoquer
une décharge électrique.
Sécurité des personnes
■ Durant l'utilisation, aucune autre personne ou aucun animal ne doit se
trouver dans un périmètre de 15 mètres. L'utilisateur est responsable
envers les tierces personnes dans la zone de travail.
■ Lors de l'utilisation du taille-haies, toujours veiller à une posture stable et
toujours garder l'équilibre, en particulier lors de l'utilisation de marches
ou d'échelles.
■ Ne touchez jamais le taille-haies au niveau de la barre de coupe
■ Tenir toutes les parties du corps éloignées de la lame. Ne pas
essayer de retirer les déchets de coupe lorsque la lame tourne ou
de tenir un matériau à couper. Ne retirer les déchets de coupe
que lorsque l'appareil est mis hors tension. Un moment d'inattention
durant l'utilisation du taille-haies peut provoquer des blessures graves.
■ Patienter jusqu'à ce que l'outil se soit immobilisé avant de le reposer.
. Inspecter avec soin les haies à couper et éliminer
.
24
FBK 4 A1
Page 31

Utilisation et entretien
ATTENTION!
► Entre les opérations ou après la fin de l'opération respective, la barre
de coupe
coupe, pour éviter des dommages éventuels au niveau de la barre
de coupe .
■ Avant l'utilisation, toujours vérifier que la lame, les vis de la lame et
les autres parties de l'outil de coupe ne soient pas usées ou endommagées. Ne jamais travailler avec un outil de coupe endommagé ou
fortement usé.
■ Vérifier une fois l'angle de travail réglé si les deux leviers de réglage
sont enclenchés de manière sûre. Si un levier de réglage demeure
ouvert, le second arrêt peut être déclenché de manière involontaire
par une branche et la barre de coupe
■ Ne jamais utiliser le taille-haies avec des dispositifs de protection défec-
tueux ou qui ne sont pas montés.
■ Ne jamais tenir le taille-haies par son dispositif de protection.
■ Porter le taille-haies par la poignée avant en état hors tension, la
barre de coupe éloignée de votre corps. Lors du transport ou du
stockage du taille-haies, toujours le recouvrir de la protection. Une
manipulation prudente de l'appareil réduit l'éventualité d'un contact
involontaire avec les lames tournantes.
■ Stocker le taille-haies dans un endroit au sec, situé en hauteur et fermé,
en dehors de la portée des enfants.
■ Ne pas essayer de réparer l'appareil, à moins d'être formé en consé-
quence.
■ Par mesure de sécurité, remplacer les pièces usées ou endommagées.
DANGER!
► En cas de menace de danger ou en cas d'urgence, couper immédia-
tement le moteur.
ne doit pas être déposée sur la pointe de la barre de
se rabattrait vers le bas.
Consignes de sécurité de travail pour l'élagueuse
PRUDENCE! RISQUE DE BLESSURE!
► Ne touchez jamais l'appareil en marche au-delà de la bague de
protection
Préparation
■ Toujours porter un casque de protection, une protection auditive et
des gants de sécurité. Porter aussi une protection oculaire pour ne pas
recevoir de projections d'huile ou de poussière de sciure dans les yeux.
Porter un masque anti-poussière.
■ Porter des bottes robustes et anti-dérapantes.
■ Ne pas utiliser l'appareil par pluie ou humidité.
■ Avant l'utilisation, vérifier l'état de sûreté de l'appareil, en particulier de
la lame et de la chaîne de scie.
■ Ne pas utiliser l'appareil à proximité de lignes électriques. Respecter
une distance minimum de 10 m avec les lignes électriques aériennes.
Sécurité électrique
■ Ne pas utiliser l'appareil dans une atmosphère explosive, par ex . à
proximité de liquides, gaz ou vapeurs inflammables. Les étincelles produites par la machine risquent d'enflammer ces vapeurs ou ces gaz.
■ Les appareils dont l'interrupteur est défectueux doivent être immédiate-
ment réparés afin d'éviter tout dommage et blessure.
Sécurité des personnes
■ Ne jamais utiliser l'appareil debout sur une échelle.
■ Ne pas trop se pencher en avant lors de l'utilisation de l'appareil.
Toujours veiller à une posture stable et toujours garder l'équilibre.
Utiliser la ceinture de port comprise dans le matériel livré pour répartir
le poids de manière uniforme sur le corps.
, vous risqueriez de vous blesser!
■ Ne pas se tenir en-dessous des branches à couper afin d'éviter des
blessures causées par la chute de branches. Veiller au retour de
branches afin d'éviter toute blessure. Travailler en respectant un angle
de 60° env.
■ Veiller à éviter tout rebond de l'appareil.
■ Ne pas uniquement surveiller les branches à couper, mais également le
matériel qui tombe pour ne pas trébucher.
■ Recouvrir le rail de guidage et la chaîne avec le cache lors du transport
et du stockage.
■ Éviter tout démarrage involontaire de l'appareil.
■ Entreposer l'appareil hors de portée des enfants. Seules les personnes
qui se sont familiarisées avec le mode d'emploi et l'appareil peuvent
utiliser celui-ci.
Utilisation et entretien
■ Ne jamais démarrer l'appareil avant que lame, chaîne de scie et cache
de pignon ne soient correctement montés.
■ Ne pas couper de bois posé sur le sol et ne pas essayer de scier des
racines dépassant du sol. Éviter dans tous les cas que la chaîne de scie
ne plonge dans la terre, cette dernière s'émoussant sinon immédiatement.
■ Si vous touchez accidentellement un objet solide avec l'appareil, coupez
immédiatement le moteur et contrôlez les dommages éventuels sur
l'appareil.
■ Faire une pause d'une heure au moins toutes les 30 minutes de travail.
■ Une fois l'élagueuse immobilisée pour une maintenance, inspection ou
un stockage, couper le moteur, retirer la cosse de la bougie d'allumage
et s'assurer que toutes les pièces en rotation se soient immobilisées.
Laisser refroidir la machine avant de la contrôler, de la régler, etc.
■ Procéder à la maintenance de l'appareil avec soin. Contrôler si les
pièces mobiles fonctionnent sans aucun problème et ne se coincent
pas, si des pièces sont cassées ou endommagées au point d'entraver
le fonctionnement de l'appareil. En cas de dommages, faire réparer
l'appareil avant de l'utiliser. De nombreux accidents sont dus à des
appareils mal entretenus.
■ Conserver l'outil de coupe bien affûté et propre. Des outils destinés à
couper correctement entretenus avec des pièces coupantes affûtées
sont moins susceptibles de bloquer et sont plus faciles à contrôler.
■ Faire entretenir l'appareil par du personnel qualifié. Utiliser uniquement
les pièces détachées d'origine recommandées par le fabricant.
Mesures de prudence contre le rebond
ATTENTION AU REBOND!
► Lors du travail, veiller au rebond de l'appareil. Il y a risque de
blessure. La prudence ainsi que la technique de coupe adaptée
permettent d'éviter les rebonds.
■ Un contact avec la pointe du rail peut dans certains cas entraîner une
réaction inattendue vers l'arrière, durant laquelle le rail de guidage est
envoyé vers le haut et en direction de l'utilisateur (voir fig.A).
Bild 1
Fig. A
FR
BE
FBK 4 A1
25
Page 32

■ Un rebond peut survenir lorsque la pointe du rail de guidage touche
un objet ou lorsque le bois se plie et que la chaîne de scie se bloque
(voir fig.B).
FR
BE
Fig. B
■ Le grippage de la chaîne de scie sur le bord supérieur du rail de
guidage peut entraîner un brusque rebond du rail en direction de
l'utilisateur.
■ Chacune de ces réactions peut entraîner une perte de contrôle de la
scie et d'éventuelles blessures graves. Ne pas se fier uniquement aux
dispositifs de sécurité intégrés dans la scie à chaîne. En tant qu'utilisateur d'une scie à chaîne, prenez différentes mesures afin de travailler
sans accident et sans vous blesser. Un rebond est la conséquence
d'une utilisation mauvaise ou incorrecte de l'appareil. Des mesures de
prudence adaptées, comme celles décrites ci-dessous, permettent de
l'éviter:
■ Bien tenir la scie des deux mains, les pouces et les doigts entourant
les poignées de la scie à chaîne. Placez votre corps et vos bras dans
une position dans laquelle vous pouvez résister aux forces de rebond.
Lorsque des mesures adaptées ont été prises, l'utilisateur peut alors
maîtriser les forces de rebond. Ne jamais lâcher la scie à chaîne.
■ Éviter un maintien corporel anormal et ne pas scier au-dessus de la
hauteur d'épaules. Ceci permet d'éviter un contact involontaire avec
la pointe du rail et de mieux contrôler la scie à chaîne lors de situations
inattendues.
■ Toujours utiliser les rails de remplacement et les chaînes de scie
préconisés par le fabricant. De mauvais rails et chaînes à scie de
rechange peuvent entraîner la déchirure de la chaîne de scie et/ou un
rebond.
■ Respecter les instructions du fabricant concernant l'affûtage et la
maintenance de la chaîne de scie. Des limiteurs de profondeur trop
bas augmentent la tendance au rebond.
■ Ne pas scier avec la pointe de la lame. Il y a risque de rebond.
■ Veiller à ce qu'aucun objet sur lequel vous pourriez trébucher ne se
trouve par terre.
Consignes de sécurité de travail pour les bobines
de fil
Préparation
■ Porter des vêtements de travail ajustés qui offrent une protection,
comme un pantalon long, des chaussures de sécurité sûres, des gants
de protection résistants, un casque de protection, un masque de
protection pour le visage ou des lunettes de protection pour se protéger
les yeux et des boules quies ou une autre protection auditive contre le
bruit.
■ Utilisez toujours la ceinture de port fournie.
■ Veillez à ce que les poignées soient sèches et propres et qu'elles ne
soient pas entachées de mélange d'essence.
■ Avant le travail, contrôlez le terrain, des objets tels que des pièces
métalliques, des bouteilles, des pierres ou autre peuvent être projetés et
entraîner de graves blessures de l'utilisateur.
■ Avant de démarrer le moteur, assurez-vous que la bobine de fil ne
rencontre pas d'obstacle.
■ Utiliser uniquement l'appareil lorsque vous vous êtes familiarisé avec ce
dernier.
Sécurité électrique
■ N'utilisez jamais l'appareil à proximité de liquides ou de gaz facilement
inflammables que ce soit dans des pièces fermées ou à l'air libre.
Il peut en résulter des explosions ou des incendies.
■ Ne pas travailler avec un appareil endommagé, incomplet ou modifié
sans l'autorisation du fabricant. Ne jamais utiliser l'appareil avec un
équipement de protection défectueux. Ne pas utiliser l'appareil lorsque
l'interrupteur marche/arrêt est défectueux. Si vous avez laissé tomber
l'appareil, vérifier que celui-ci ne présente pas de dommages ou
défauts importants.
Sécurité des personnes
■ Seules les personnes adultes suffisamment formées sont autorisées à
utiliser l'appareil, le régler et à en assurer la maintenance.
■ Si l'appareil ne vous est pas familier, entraînez-vous à l'utiliser lorsque
le moteur est éteint.
■ Ne pas toucher l'échappement.
■ N'actionnez pas l'appareil sous l'influence de l'alcool ou de la drogue.
■ Tenez toujours l'appareil à deux mains. Ce faisant, les pouces et les
doigts doivent entourer les poignées.
■ Posture de travail: ne pas utiliser l'appareil dans une position inconfor-
table, en déséquilibre, les bras tendus ou d'une seule main.
■ Veillez toujours à ce qu'il soit stable.
■ N'utilisez pas l'appareil si des spectateurs ou des animaux se trouvent
dans le voisinage immédiat. Lors des travaux de tonte, maintenez une
distance minimale de 15 mètres entre l'utilisateur et d'autres personnes
ou animaux. Lors de travaux de tonte à ras, veuillez maintenir une
distance minimale de 30 mètres entre l'utilisateur et d'autres personnes
ou animaux.
■ Lors de travaux de tonte sur une pente, veuillez toujours vous placer
en dessous de l'outil de coupe. Ne coupez ou ne taillez jamais sur une
butte ou une pente glissante.
■ Toute modification sur l'appareil peut mettre en danger la propre sécurité
de l'utilisateur et rend caduque la garantie du fabricant.
■ Il faut surveiller les enfants pour être sûr qu'ils ne jouent pas avec l'appareil.
■ N'utilisez jamais l'appareil s'il est endommagé ou présente des défauts.
Utilisation et entretien
■ Utilisez l'appareil uniquement dans le but prévu, comme par ex. la taille
du gazon, les travaux de tonte, les travaux de délestage, la coupe et la
taille de haies et de buissons.
■ N'utilisez pas l'appareil pendant une longue période, faites régulière-
ment des pauses.
■ Veillez à ce que les vis et les éléments de raccordement soient bien serrés.
N'utilisez jamais l'appareil lorsqu'il n'est pas bien réglé, incomplet ou
pas monté sûrement.
■ Ouvrez lentement le réservoir d'essence pour laisser s'échapper la
pression s'étant éventuellement formée dans le couvercle du réservoir.
Pour éviter tout risque d'incendie, éloignez-vous d'au moins 3 m du lieu
de remplissage avant de démarrer l'appareil.
■ Déplacez la bobine de fil à la hauteur souhaitée. Évitez de toucher les
petits objets (par ex. les pierres) avec la bobine de fil.
■ Maintenez la bobine de fil toujours au dessus du sol lorsque l'appareil
est en fonctionnement.
■ N'utilisez l'appareil que lorsque le capot de protection correspondant
est installé et est en bon état.
■ N'utilisez pas d'autres outils de coupe. Pour votre propre sécurité, utili-
sez uniquement des accessoires et appareils auxiliaires indiqués dans
le mode d'emploi. L'usage de tout autre outil ou accessoire que ceux
recommandés dans le mode d'emploi peut signifier pour vous un risque
de blessure corporelle.
■ Taillez ou coupez toujours à un palier de vitesse de rotation élevé.
Ne laissez pas tourner le moteur à faible vitesse de rotation au début
de la tonte ou pendant la taille.
26
FBK 4 A1
Page 33

■ S'assurer que l'appareil n'entre pas en contact lors du démarrage et
pendant le travail avec le sol, les pierres, du fil ou d'autres corps
étrangers. Éteindre l'appareil avant de le reposer.
■ Éteignez l'appareil avant de le reposer.
■ Éteignez toujours le moteur avant de travailler sur l'outil de coupe.
Consignes de sécurité de travail pour la lame de
coupe
Préparation
■ La lame projette des objets et même de la terre violemment. Cela peut
causer la cécité ou des blessures. Portez une protection oculaire, du
visage et des jambes. Retirez toujours les objets de la zone de travail
avant d'utiliser la lame.
■ La lame s'arrête de tourner lorsque l'on relâche l'accélérateur. Une
lame continuant de tourner peut causer des blessures par coupure sur
vous-même ou les personnes environnantes. Avant de procéder à des
travaux quelconques sur la lame, éteignez le moteur et assurez-vous
que la lame s'est arrêtée.
Sécurité des personnes
■ Les personnes présentes peuvent être aveuglées ou subir des blessures.
Maintenez une distance de 15 m au moins dans toutes les directions
entre vous et les autres personnes ou les animaux.
Utilisation et entretien
■ N'utilisez pas l'appareil si toutes les pièces additionnelles de la lame ne
sont pas montées dans les règles de l'art.
■ La lame peut être projetée brutalement par des objets. Ceci peut entraîner
des blessures aux bras et aux jambes. Si l'appareil heurte des corps
étrangers, arrêtez le moteur immédiatement et attendez que la lame
s'immobilise. Vérifiez si la lame est endommagée. Remplacez toujours
la lame lorsqu'elle est tordue ou déchirée.
Dispositifs de sécurité
Lors de vos travaux avec l'appareil, le capot de protection en plastique
correspondant pour fonctionnement avec lame ou fil doit être monté pour
éviter que des objets soient projetés.
AVERTISSEMENT!
■ Ne tondez jamais pendant que d'autres personnes, en particulier des
enfants ou des animaux, sont à proximité.
■ Respectez une distance de sécurité de 15 m. Arrêtez immédiatement
l'appareil dès que quelqu'un s'approche.
ATTENTION! RISQUE D'INTOXICATION!
■ Gaz d'échappement, carburants et lubrifiants sont toxiques. Il ne faut
pas inhaler les gaz d'échappement.
Limitez le niveau sonore et les vibrations au minimum!
■ Utilisez exclusivement des appareils en excellent état.
■ Entretenez et nettoyez l'appareil régulièrement.
■ Adaptez votre façon de travailler à l'appareil.
■ Ne surchargez pas l'appareil.
■ Faites contrôler l'appareil le cas échéant.
■ Mettez l'appareil hors circuit lorsque vous ne l'utilisez pas.
■ Portez des gants de protection.
Avant la mise en service
ATTENTION!
■ Durant la tonte, il faut toujours porter des chaussures de sécurité
antidérapantes et des vêtements de sûreté adaptés, tels que des
gants de sécurité, un casque de protection, un masque de protection
ou des lunettes de protection ainsi qu'une protection auditive.
■ Contrôlez le terrain sur lequel l'appareil est utilisé et éloignez les
objets qui peuvent être happés et projetés.
■ Avant utilisation et après une chute ou d'autres impacts, il faut
toujours procéder à une inspection visuelle pour déterminer si l'outil
de coupe, les boulons de fixation ainsi que l'ensemble de l'unité
de coupe sont endommagés. Les outils de coupe et les boulons de
fixation usés ou endommagés doivent être remplacés.
■ Avant l'utilisation, il convient de toujours vérifier, par le biais d'un
contrôle visuel, si les outils de coupe sont usés ou abîmés. Afin d'éviter un balourd, les outils de coupe et les boulons de fixation usés ou
endommagés doivent toujours être remplacés par jeu entier.
Montage de la poignée ronde
♦ Montez tout d'abord la bague en caoutchouc 5a sur le manche .
♦ Placez l'étrier barrière
♦ La broche
deux trous du manche pour le blocage .
♦ Appuyez la poignée ronde
cet effet 5a sur le manche .
♦ Insérez les 4 vis de fixation
ronde
♦ Serrez bien les vis
5b
de l'étrier barrière doit être enclenchée dans l'un des
et sécurisez-la avec les 4 écrous dans l'étrier barrière .
Montage du mécanisme de déclenchement rapide
♦ Accrochez le mousqueton et sécurisez-le avec la sangle rouge du
mécanisme d'ouverture rapide (voir illustrations). Tirez sur la sangle
rouge si vous devez déposer rapidement l'appareil.
par le bas sur la bague en caoutchouc 5a.
sur la bague en caoutchouc prévue à
par le haut au travers de la poignée
.
FR
BE
AVERTISSEMENT!
■ L'essence est hautement inflammable. Conservez l'essence unique-
ment dans les récipients prévus à cet effet.
■ Faites le plein uniquement à l'air libre et ne fumez pas.
■ Pendant que le moteur est en marche ou que l'appareil est chaud,
ne pas ouvrir le bouchon du réservoir d'essence et ne pas remplir
d'essence.
■ Si de l'essence a débordé, il ne faut pas essayer de démarrer le
moteur. Au lieu de cela, il faut éloigner l'appareil de l'endroit où
l'essence s'est répandue. Il faut éviter toute tentative d'allumage tant
que les vapeurs d'essence ne se sont pas évaporées.
■ Pour des raisons de sécurité, tous réservoir d'essence et bouchons
du réservoir endommagés doivent être remplacés.
FBK 4 A1
Fixation / montage de la ceinture de port
♦ Accrochez la ceinture de port 6@ dans l'anneau de transport .
♦ Adaptez la ceinture de port
l'anneau de transport
hanches.
à votre taille de manière à ce que
6@
une fois accroché se retrouve à hauteur des
27
Page 34

Montage du taille-haies
♦ Commencez par relâcher la poignée vissée sur le manche de
l'unité moteur.
FR
BE
♦ Glissez le manche avant
l'unité moteur.
♦ Le levier de sécurité
♦ Appuyez sur le cache
le bas et maintenez-le appuyé.
♦ Serrez bien la poignée vissée
REMARQUE
► Le montage de l'élagueuse / la bobine de fil / la lame à 3 dents de
coupe / le manche se fait dans le même ordre.
Démontage du taille-haies
♦ Desserrez la poignée vissée .
♦ Appuyez sur le levier de sécurité
taille-haies en dehors du manche
REMARQUE
► Le démontage de l'élagueuse / la bobine de fil / la lame à 3 dents /
le manche se fait dans le même ordre.
Faire pivoter le taille-haies
♦ Desserrez le verrouillage/déverrouillage .
♦ Actionnez le levier de réglage
position souhaitée.
♦ Faites s'encliqueter le levier de réglage
plaque de base (taille-haies)
du taille-haies dans le manche de
doit s'enclencher dans le trou de blocage .
pour sécuriser le levier de sécurité vers
.
et tirez le manche avant du
de l'unité moteur.
et inclinez le taille-haies dans la
dans l'évidement de la
.
Tendre et vérifier la chaîne de scie
AVERTISSEMENT!
► Mettre des gants de protection! Risque de blessure causé par les
dents de coupe tranchantes!
♦ Tournez la vis de tension de chaîne
dans le sens des aiguilles d'une montre, pour accroître la tension.
♦ La chaîne de scie
Vérifiez si la chaîne de scie
la lame
REMARQUE
►
Une nouvelle chaîne de scie se détend
retendue.
.
doit reposer sur la partie inférieure de la lame.
à l'aide du tournevis à fente 7!
peut être tirée à la main au-dessus de
et doit souvent être
Graissage de la chaîne
♦ Retirez le couvercle du réservoir à huile .
♦ Remplissez le réservoir à huile
chaînes bio
♦ Le graissage de la chaîne peut être augmenté ou réduit à l'aide de la
vis de régulation d'huile
♦ Appuyez d’abord puis tournez la vis de régulation d’huile
le sens des aiguilles d’une montre afin de réduire le graissage de la
chaîne.
♦ Appuyez d’abord sur puis tournez la vis de régulation d’huile
dans le sens contraire aux aiguilles d’une montre afin d’augmenter le
graissage de la chaîne.
6%
.
d'environ 100ml d'huile pour
.
dans
Monter la chaîne de scie et la lame
AVERTISSEMENT!
► Mettez des gants de protection! Risque de blessure causé par les
dents de coupe tranchantes!
REMARQUE
► Respectez le sens de rotation de la chaîne de scie
la lame
► Lorsqu'elle est trop usée, la lame
♦ Desserrez l'écrou
♦ Retirez le cache de pignon
♦ Placez la chaîne de scie
♦ Utilisez maintenant la lame
♦ Placez le rail de guidage
la goupille de tension de chaîne
En même temps, placez la chaîne de scie
♦ Tendez à présent la chaîne de scie
vérifier la chaîne de scie“).
♦ Replacez le cache de pignon
et au plaque (élagueuse) .
peut être retournée.
avec la clé plate 7).
.
en partant de la pointe de la lame
avec la chaîne de scie .
au-dessus du guide-lame tout en insérant
dans l'alésage de la lame .
au-dessus du pignon .
(cf. le chapitre "Tendre et
et revissez légèrement l'écrou .
par rapport à
Démonter la chaîne de scie
♦ La chaîne de scie doit le cas échéant être au préalable détendue,
pour retirer la lame
et vérifier la chaîne de scie“). Suivez les instructions dans l'ordre
inverse.
et la chaîne de scie (cf. le chapitre "Tendre
AVERTISSEMENT!
► Ne jamais travailler sans graissage de chaîne!
Lorsque la chaîne de scie tourne à sec, la garniture de coupe est
rapidement détruite de manière irréparable. Avant le travail, toujours
contrôler le graissage de chaîne et le niveau d'huile dans le réservoir.
REMARQUE
► N'utilisez que de l'huile pour chaîne de scie. De préférence
biodégradable. N'utilisez pas d'huile usagée, d'huile moteur etc.
► Contrôlez pendant le travail si le graissage de chaîne fonctionne.
Affûter la chaîne de scie
.
REMARQUE
►
Un touret peut être fixé sur l'aide pour touret
sûr lors de l'affûtage.
► Vous trouverez des informations détaillées concernant l'opération
d'affûtage dans un kit d'affûtage d'Oregon par ex.
► Vous pouvez également utiliser un appareil à affûter les chaînes
électriques et suivre les instructions du fabricant.
► En cas de doute concernant la réalisation du travail, il convient de
procéder au remplacement de la chaîne de scie.
pour un maintien
28
FBK 4 A1
Page 35

Monter la perche
ATTENTION!
■ Ne pas utiliser la perche / le manche
lame / la bobine de fil!
REMARQUE
►
Utilisez la perche/ le manche
♦ Montez la perche / le manche
/ l'élagueuse. Le montage s'effectue de la même manière que décrite
précédemment.
pour effectuer des travaux en hauteur.
5^
5^
en combinaison avec la
5^
entre l'unité moteur et le taille-haies
Montage/démontage du capot de protection
AVERTISSEMENT!
■ Lors du travail avec la lame, le capot de protection
Rabattez la tôle en métal du manche avant
bas. Le capot de protection
et le bras de fixation du manche
maintenant fixé avec 4 vis
aidez-vous de la clé à six pans
estpositionné entre la tôle en métal
5#
sur lemanche avant5#. Pour ce faire,
6*
5#
. Le capot de protection est
livrée et de la clé plate 7).
doit être monté.
légèrement vers le
■ Retirez la sécurité
fois le travail fini.
ATTENTION! BORDS TRANCHANTS, PORTEZ DES GANTS
DE PROTECTION
■ Pour démonter le capot de protection du fil de coupe
protection
précaution les trois goupilles de fixation.
ATTENTION ! RISQUE DE BLESSURES !
B
avant de débuter le travail et repositionnez-la une
C
du capot de
, servez-vous par ex. d’un tournevis pour desserrer avec
Montage/remplacement de la bobine de fil
■ Montez/remplacez la bobine de fil 5@ comme décrit sur la figure 2c.
■ Chercher l'alésage du disque d'entraînement
opposé et bloquer avec la clé à six pans livrée
■ Placer la plaque de pression
Placer l'élévation de la plaque de pression
d'entraînement
■ Visser maintenant la bobine de fil
ATTENTION! Filet à gauche!
7^
.
sur le disque d'entraînement 7^.
7%
sur le filetage.
5@
, l'aligner avec l'alésage
7^
.
6(
sur l'élévation du disque
7%
Mettre la ceinture de port
FR
BE
Garniture de coupe Dispositif de protection
Lame à 3 dents
Bobine de fil avec fil de
coupe
5@
AVERTISSEMENT!
■ N’utilisez aucune autre garniture de coupe que celles qui sont
contenues dans la livraison. Toute autre utilisation ou modification
de l’appareil est considérée comme étant non conforme et s’accompagne de risques d’accident non négligeables.
Capot de protection
Capot de protection + fil de coupe
C
Montage/ remplacement de la lame
■ Montez / remplacez la lame à 3 dents , comme décrit sur les figures
1a - 1f.
■ Chercher l'alésage du disque d'entraînement
opposé et bloquer avec la clé à six pans livrée
■ Placer la lame à 3 dents
■ Enficher la plaque de pression
(voir fig. 1c).
■ Positionner le cache de la plaque de pression
■ Serrez maintenant l'écrou
(voir fig. 1f).
■ À la livraison, la lame à 3 dents est recouverte d'une protection
plastique. Cette dernière doit être retirée avant l'utilisation et remise en
place en cas de non utilisation.
■ La protection plastique peut maintenant être retirée.
ATTENTION! Filet à gauche!
ATTENTION! BORDS TRANCHANTS, PORTEZ DES GANTS
DE PROTECTION
■ Montez le capot de protection de fil de coupe
protection .
■ Lorsque l'on travaille avec le fil de coupe, le capot de protection du fil de
C
coupe
coupe
■ Veillez à ce que le capot de protection du fil de coupe
vraiment. Sur le côté intérieur du capot de protection de fil de coupe
se trouve une lame A. Cette dernière est recouverte d'une sécurité B
(voir fig. 2a).
doit être monté. Le montage du capot de protection du fil de
C
(déjà prémonté en usine) a lieu conformément à la figure 2a.
sur le disque d'entraînement 7^ (voir fig. 1b).
sur le filetage de l'arbre cannelé
7%
avec la clé pour bougie d'allumage 7!
7#
, l'aligner avec l'alésage
7^
.
6(
(voir fig. 1d).
7$
C
sur le capot de
C
s'enclenche
REMARQUE
■ Pour assurer un travail sans fatigue, vous pouvez effectuer les
réglages sur les points suivants. Selon la taille du l'utilisateur, les
réglages peuvent varier.
■ Avant de débuter le travail, régler la ceinture de port
de la taille.
■ Équilibrer l'appareil avec l'outil de coupe monté de manière à ce que
l'outil flotte juste au-dessus du sol sans toucher l'appareil des mains.
1.) Enfilez la ceinture de port
jusqu'à ce qu'elle s'enclenche (voir fig. 3a).
2.) Tirez comme illustré en figure 3b sur la ceinture de port
la ceinture de port
adéquate au tour de torse.
3.) Pour serrer les deux sangles d'épaules, tirez sur les deux sangles
comme illustré en figure 3c.
4.) Afin de régler la bonne position de l'appareil sur la ceinture de port,
tirez sur la ceinture comme illustré en figure 3d.
5.) Accrochez le mousqueton
sangle rouge
6.) Prenez maintenant l'appareil et accrochez-le, comme illustré sur la
figure 3h, avec l'anneau de transport
L'anneau de transport
l'aide de la vis
l'appareil.
6@
du mécanisme d'ouverture rapide.
pour régler la meilleure orientation possible de
et fermez la fermeture encliquetable
6@
au centre du corps et l'adapter de manière
(voir fig. 3e - 3g) et sécurisez-le avec la
dans le mousqueton .
peut également être desserré et déplacé à
6@
6@
Réglage de la hauteur de coupe
■ Mettez la ceinture de port 6@ et accrochez-y l'appareil (cf. le chapitre
"Mettre la ceinture de port“).
■ Les différents régleurs de ceinture sur la ceinture de port
de régler la position de coupe et de travail idéale (voir chapitre
"Mettre la ceinture de port“).
■ Afin de déterminer la longueur optimale de ceinture de port, faites
ensuite quelques mouvements de balancier sans allumer le moteur (voir
fig. 6a).
■ La ceinture de port
C
Tirez sur la sangle rouge
reil (fig. 3i).
est équipée d'un mécanisme d'ouverture rapide.
6@
, si vous devez déposer rapidement l'appa-
en fonction
, pour placer
permettent
6@
FBK 4 A1
29
Page 36

ATTENTION!
lorsque vous travaillez avec
6@
dès que le moteur est
6@
FR
BE
■ Utilisez toujours la ceinture de port
l'appareil. Mettez la ceinture de port
démarré et qu'il tourne à vide. Éteignez le moteur avant de retirer la
ceinture de port
6@
.
Carburant et huile
■ Utilisez uniquement un mélange à base d'essence sans plomb et d'une
huile spéciale moteur 2 temps. Mélangez le carburant en respectant le
tableau des mélanges de carburants.
■ Versez respectivement la quantité adéquate d'essence et d'huile 2
temps dans la bouteille de mélange huile/essence 6^ (cf. "Tableau
des mélanges des carburants“). Secouez ensuite bien le récipient.
Tableau des mélanges des carburants
Procédure de mélange: 40 parts d'essence pour 1 part
d'huile
Essence Huile 2 temps
0,5 litre 12,5 ml
Mise en service
ATTENTION!
■ Veuillez respecter les directives légales relatives à l'ordonnance de la
protection contre le bruit.
Vérifiez l'appareil avant chaque mise en service.
■ Étanchéité du système de carburant.
■ État impeccable et dispositifs de protection et de coupe au complet.
■ Bonne fixation de toutes les vis.
■ Souplesse de toutes les pièces mobiles.
Démarrage à froid
ATTENTION!
■ Ne laissez jamais le cordon de démarrage revenir trop rapidement.
Ceci peut entraîner des dommages.
1.) Remplissez le réservoir d'essence
et huile”).
2.) Appuyez 6x sur la pompe à carburant
3.) Mettez l'interrupteur marche/arrêt
4.) Mettez le levier étrangleur
5.) Tenez fermement l'appareil et tirez le cordon de démarrage
la première résistance. Tirez à présent rapidement le cordon de démar-
. L'appareil démarre.
rage
6.) Si le moteur ne démarre pas, répétez les étapes 4-5.
7.) Dès que le moteur tourne, appuyez sur l'accélérateur
cher le starter automatique.
Si le moteur ne démarre toujours pas au bout de plusieurs essais, veuillez
lire le paragraphe "Élimination des erreurs".
ATTENTION!
■ Tirez toujours le cordon de démarrage
du cordon de démarrage , lorsque le cordon de démarrage
revient en position. Ne laissez jamais le cordon de démarrage
revenir trop vite.
REMARQUE
■ En cas de températures extérieures très élevées, il peut arriver que
l'on puisse démarrer à froid sans starter!
(voir le paragraphe “Carburant
(Primer).
sur "I“.
en position " “.
tout droit. Tenez la poignée
jusqu'à
, pour déclen-
Démarrage à chaud
(L'appareil a été arrêté pendant moins de 15-20 min)
1.) Positionnez l'interrupteur marche/arrêt
2.) Le levier étrangleur
chaud.
3.) Bien tenir l'appareil et tirer le cordon de démarrage
première résistance. Tirez maintenant rapidement sur le cordon de
démarrage
Si l'appareil ne démarre toujours pas au bout de 6 essais, répétez les
étapes 1-7 sous "Démarrage à froid".
Couper le moteur
Procédure arrêt d'urgence
Si nécessaire, arrêtez immédiatement l'appareil, placez pour cela l'interrupteur marche/arrêt
Procédure normale
■ Lâchez l'accélérateur
de rotation à vide. Mettez ensuite l'interrupteur marche/arrêt sur "0".
ATTENTION!
■ Au point mort, la lame doit être arrêtée. Si la lame devait tourner,
réglez le carburateur!
Consignes de travail
Avant d'utiliser l'appareil, entraînez-vous à toutes les techniques de travail
(voir fig. 6a-6c) avec le moteur coupé.
Allongement du fil de coupe
Pour allonger le fil de coupe, laissez tourner le moteur à pleine puissance
et appuyez la bobine de fil
longé. La lame A sur le capot de protection du fil de coupe C raccourcit
le fil à la longueur admissible ( voir fig. 6d).
ATTENTION!
Les résidus de gazon / herbe / mauvaises herbes se retrouvent sous le
capot de protection
■ Retirez les résidus une fois le moteur éteint à l'aide d'une spatule ou
un outil similaire.
Différents types de coupe
Couper/tondre (lame si néc. avec une bobine de fil)
■ Faites se balancer l'appareil dans un mouvement de tonte en forme de
faucille (voir fig. 6a).
■ Positionnez toujours l'outil de coupe parallèle au sol et déterminez la
hauteur de coupe souhaitée.
Couper à basse hauteur (avec bobine de fil)
■ Tenez l'appareil avec une inclinaison légère au-dessus du sol (voir fig.
6b). Coupez toujours en vous éloignant de là où vous vous tenez.
Ne tirez jamais l'appareil vers vous.
Tondre à ras (avec bobine de fil)
■ Quand vous tondez à ras, vous tondez toute la végétation jusqu'au sol.
Pour cela, penchez la bobine de fil de 30 degrés vers la droite. Placez
la poignée en position souhaitée (voir fig. 6c).
Couper l'herbe autour d'arbres/grillages/fondations
(avec bobine de fil)
REMARQUE
■ Si le fil entre en contact avec des arbres, des pierres, des murs en
pierre ou des fondations, il s'use ou s'effiloche. Si le fil tape contre le
grillage d'une clôture, il se casse.
ne doit pas être tiré pour démarrer le moteur
. L'appareil doit démarrer au bout de 1 à 2 essais.
sur "0".
et attendez que le moteur soit passé à la vitesse
sur le sol. Le fil est automatiquement ral-
5@
.
sur "I".
jusqu'à la
30
FBK 4 A1
Page 37

ATTENTION!
■ N'utilisez pas l'appareil pour retirer des objets du trottoir ! L'appa-
reil est puissant et de petites pierres ou autres objets peuvent être
projetés jusqu'à 15 mètres et plus et causer des blessures ou des
détériorations sur les voitures, maisons et fenêtres.
Porter des lunettes de protection!
B
A
2
1
FR
BE
Blocage
Si l'outil de coupe se bloque, mettez immédiatement le moteur hors service.
Enlevez l'herbe et la broussaille de l'appareil avant de le remettre en
service.
Éviter un rebond
Lorsque la lame rencontre des obstacles (tronc d'arbre, nœud, souche,
pierre ou autres) pendant le travail, cela entraîne un risque d'effet de
rebond. L'appareil recule ce faisant brusquement dans le sens contraire du
sens de rotation de l'outil. Cela peut faire perdre le contrôle de l'appareil.
N'utilisez pas la lame à proximité de clôtures, de poteaux métalliques, de
bornes ou de fondations. Pour couper les buissons peu touffus, positionnez
l'appareil comme illustré en fig. 6e pour éviter tout rebond.
Travailler avec le taille-haies
Techniques de coupe
■ La barre de coupe double sens permet la coupe dans les deux directions
ou grâce à des mouvements pendulaires, d'un côté à l'autre.
■ Pour la coupe verticale, déplacez le taille-haies régulièrement vers
l'avant ou bien en forme d'arc vers le haut et vers le bas.
■ Pour la coupe horizontale, déplacez le taille-haies en forme de faucille
vers le bord de la haie pour que les branches coupées tombent au sol.
■ Voir le volet dépliant (figure A).
REMARQUE
► Coupez les grosses branches auparavant avec des cisailles à élaguer.
Scier en morceaux
Vous devez raccourcir les branches longues ou épaisses avant de procéder à la coupe finale (voir illustration).
C A B
cb a
Travail sûr
■ Tenez l'appareil, la garniture de coupe et la gaine protectrice pour la
chaîne
■ Si vous avez laissé tomber l'appareil, vérifier que celui-ci ne présente
pas de dommages ou défauts importants.
■ Respectez les angles de travail prescrits max. 60°±10°, afin de
garantir un travail sûr (voir l'illustration).
dans un bon état d'utilisation afin d'éviter toute blessure.
6$
max. 60°±10°
Travailler avec l'élagueuse
Techniques de scie
AVERTISSEMENT!
► Faites systématiquement attention à la chute des déchets de taille.
► Tenez systématiquement compte du danger de retour de branches.
REMARQUE
► Posez la butée
plus sûre et plus tranquille.
► Commencez d'abord à scier.
Scier une petite branche
♦ Pour les petites branches (Ø 0-8 cm), sciez de haut en bas (voir la
figure).
Scier de grosses branches
♦ Pour les moyennes branches (Ø 8-25 cm) , effectuez d'abord une pre-
mière coupe sous la branche
évite également un épluchage de l'écorce du tronc principal.
♦ Sciez ensuite du haut
sur la branche. Vous travaillez ainsi de manière
A
(voir schéma). La coupe de délestage
B
vers le bas A.
■ N'utilisez pas l'appareil debout sur une échelle ou sur un emplacement
qui n'est pas sûr.
■ Ne vous laissez pas convaincre d'effectuer une coupe irréfléchie.
Ceci pourrait vous mettre en danger ainsi que d'autres personnes.
■ Il faut surveiller les enfants pour être sûr qu'ils ne jouent pas avec
l'appareil.
■ Changez régulièrement de position de travail. Une utilisation prolon-
gée de l'appareil peut entraîner des problèmes de circulation dans les
mains dus aux vibrations. Vous pouvez cependant prolonger la durée
d'utilisation en portant des gants adaptés ou en faisant régulièrement
des pauses. Tenez compte du fait que la disposition personnelle à une
mauvaise circulation, des températures extérieures basses ou des forces
de préhension importantes lors du travail diminuent la durée d'utilisation.
Transport
■ Utilisez les gaines protectrices 6# 6$ lors du transport.
■ Veillez à ne pas mettre l'appareil en marche lorsque vous le portez
(voir figure).
FBK 4 A1
31
Page 38

Nettoyage
Nettoyage de l'unité moteur
FR
BE
REMARQUE
■
Après chaque utilisation, l'appareil devrait être nettoyé soigneusement.
■ Éteignez toujours l'appareil avant les travaux de nettoyage et retirez la
cosse de la bougie d'allumage
■ Nettoyez l'appareil régulièrement à l'aide d'un chiffon humide et d'un
peu de détergent. Veillez à ce que l'eau ne pénètre pas à l'intérieur de
l'appareil.
Nettoyage de l'élagueuse
■ L'élagueuse doit être nettoyée des copeaux de sciure à intervalles
réguliers.
♦ Retirez le cache de pignon
♦ Retirez la chaîne de scie
guidage
♦ Gardez la chaîne de scie
Surveillez le niveau et l'arrivée d'huile.
Nettoyage du taille-haies
♦ Vérifiez que toutes les vis de la barre de coupe
bien serrées, et si nécessaire, resserrez-les.
.
.
.
de la lame et nettoyez le rail de
affûtée et contrôlez sa tension.
du taille-haies sont
11.) Couper les fils qui dépassent sur environ 13 cm. Cela réduit la sollicitation du moteur lors du démarrage et de la chauffe.
12.) Monter à nouveau la bobine de fil (voir le chapitre "Monter / rem-
placer la bobine de fil“). Si toute la bobine de fil est remplacée, ne
considérez pas les points 3-6.
Maintenance du filtre à air
Les filtres à air encrassés réduisent la puissance motrice en raison d'une
amenée d'air au carburateur trop réduite.
Des contrôles réguliers sont par conséquent indispensables. Il faut
contrôler le filtre à air
nécessaire.
Si l'air est fortement chargé de poussière, contrôlez plus souvent le filtre à air.
1.) Retirez le cache du boîtier du filtre à air
2.) Retirez le filtre à air
3.) Nettoyez le filtre à air
comprimé).
4.) Le montage s'effectue dans l'ordre inverse des étapes.
ATTENTION!
■ Ne nettoyez jamais le filtre avec de l'essence ni avec des solvants
inflammables.
toutes les 25 heures de service et le nettoyer si
.
.
en le tapotant ou en le soufflant (à l'air
♦ Retirez les débris verts collés.
♦ Entretenez la barre de coupe
burette d'huile.
Nettoyage de la bobine de fil / de la lame
♦ Retirez les débris verts collés.
♦ Conservez la lame à 3 dents
avec de l'huile en spray ou une
bien affûtée pour faciliter le travail.
Maintenance
Remplacement de la bobine de fil/du fil de coupe
1.) La bobine de fil
"Montage/démontage de la bobine de fil". Appuyer sur les repères
(voir fig. 5a), tourner le couvercle et retirer une moitié du boîtier (voir
fig. 5b).
2.) Retirer le porte-bobine
3.) Retirer les éventuels fils de coupe encore présents.
4.) Placer un nouveau fil de coupe au milieu et accrocher la boucle créée
dans l'évidement du porte-bobine (voir fig. 5d).
5.) Enrouler le fil sous tension dans le sens inverse des aiguilles d'une
montre. Le porte-bobine
(voir fig. 5d).
6.) Accrocher les derniers 15 cm des deux extrémités de fil dans les supports de fil opposés du porte-bobine
7.) Introduire les deux extrémités de fils par les œillets métalliques dans le
boîtier de bobine de fil (voir fig. 5e).
8.) Appuyer le porte-bobine
(voir fig. 5c).
9.) Assembler à nouveau les deux moitiés du boîtier.
10.) Tirer brièvement et vigoureusement sur les extrémités des fils afin de
les détacher du support de fil (voir fig. 5f).
, doit être démontée comme décrit dans le chapitre
5@
du boîtier de la bobine de fil (voir fig. 5c).
sépare les deux moitiés du fil de coupe
(voir fig. 5e).
dans le boîtier de la bobine de fil
Maintenance de la bougie d'allumage
1.) Retirez la cosse de la bougie d'allumage
2.) Desserrez la bougie d'allumage avec la clé pour bougie d'allumage
jointe.
3.) Le montage s'effectue dans l'ordre inverse des étapes.
Écart entre les électrodes = 0,6 mm (écart entre les électrodes entre
lesquelles l'étincelle d'allumage a lieu). Contrôlez l'encrassement de la
bougie d'allumage pour la première fois au bout de 10 heures de service
et nettoyez celle-ci le cas échéant à l'aide d'une brosse à fils de cuivre.
Effectuez ensuite une maintenance de la bougie d'allumage toutes les
50 heures de service.
Affûtage de la lame du capot
A
Avec le temps, la lame
desserrez les 2 vis avec lesquelles la lame
tection de fil de coupe
avec une lime plate et veillez à garder l'angle de l'arête de coupe.
Réglages du carburateur
Retirez le cache du boîtier du filtre à air
Réglage du câble de transmission du carburateur
Si, avec le temps, la vitesse maximale de l'appareil ne peut plus être atteinte
et que toutes les autres causes possibles selon le paragraphe "Dépannage"
sont exclues, il pourrait être nécessaire de régler le câble de transmission
du carburateur. Pour régler le câble de transmission du carburateur, vissez
la vis
ou la vis de réglage H1 ainsi que le contre-écrou H2 correctement
(voir fig 4).
Graissage de l'engrenage
■ Rajoutez toutes les 20 heures de service un peu de graisse liquide pour
engrenage (env. 10 g) pour lubrifier des engrenages angulaires.
♦ Pour cela, ouvrez la vis (voir la fig. 2c) pour enfoncer la graisse
dans la boîte d'engrenages.
♦ Après avoir graissé les engrenages, fermez à nouveau l'ouverture de
lubrification avec la vis
peut s'émousser (voir fig. 2a). Si vous le constatez,
C
. Fixez la lame A dans un étau. Affûtez la lame A
.
.
A
est fixée sur le capot de pro-
.
7!
32
FBK 4 A1
Page 39

Entreposage et transport
■ Rangez l'appareil dans un endroit sûr.
■ Entreposez l'appareil et ses accessoires en sécurité et protégés des
flammes ouvertes et des sources de chaleur/d'ignition telles que les
chauffe-eau à gaz, sèche-linges, poêles à mazout ou radiateurs portatifs,
etc.
■ Tenez toujours le capot de protection,
moteur libres de résidus de tonte lors du stockage.
■ La protection plastique pour la lame à 3 dents
mise en place lors du transport et lorsqu'elle n'est pas utilisée.
■ Avant les travaux de maintenance, éteignez l'appareil et retirez la
cosse de bougie d'allumage .
Entreposage de l'appareil
Si vous rangez l'appareil pendant une durée qui dépasse 30 jours, il faut
le préparer pour cela. Sinon, le reste du carburant se trouvant dans le
carburateur s'évapore et laisse un fond ressemblant à du caoutchouc. Cela
pourrait rendre le démarrage difficile et entraîner des coûts de réparation
importants.
1.) Retirez le couvercle du réservoir
pression dans le réservoir d'essence
avec précaution.
2.) Démarrez le moteur et laissez le tourner jusqu'à ce qu'il s'arrête, afin
d'éliminer le carburant du carburateur.
3.) Laissez refroidir le moteur pendant env. 10 minutes.
4.) Retirez la bougie d'allumage (voir le chapitre "Maintenance de la
bougie d'allumage“).
5.) Versez une cuillère à café d'huile moteur à 2 temps dans la chambre
de combustion. Tirez plusieurs fois de suite lentement sur le cordon de
démarrage
Réintroduisez la bougie d'allumage.
REMARQUE
Rangez l'appareil à un endroit sec et éloigné de toutes sources
■
d'inflammation éventuelles.
Remise en service
1.) Retirez la bougie d'allumage (voir le chapitre "Maintenance de la
bougie d'allumage“).
2.) Tirez brusquement sur le cordon de démarrage
en trop de la chambre de combustion.
3.) Nettoyez la bougie d'allumage et veillez à ce que les électrodes aient
un écart correct au niveau de la bougie d'allumage.
4.) Remplissez le réservoir d'essence
et huile“.
afin de recouvrir tous les composants internes d'huile.
, la bobine de fil 5@ et le
doit être à nouveau
afin de purger une éventuelle
. Videz le réservoir d'essence
afin d'enlever l'huile
. Voir le paragraphe "Carburant
Recherche d'erreurs
Unité moteur
Problème Cause possible Dépannage
Le moteur ne
démarre pas.
Le moteur démarre, mais n'est
pas à pleine
puissance.
Le moteur tourne
de manière
irrégulière.
Bougie d'allumage encrassée
ou humide.
Élagueuse
Problème Cause possible Dépannage
Le moteur tourne,
mais la chaîne
de scie
ne
bouge pas.
Pas de progrès
de travail.
Taille-haies
Problème Cause possible Dépannage
Le moteur
tourne, les lames
restent immobiles.
Procédure incorrecte lors
du démarrage.
Mauvais réglage du levier
étrangleur
Filtre à air encrassé. Nettoyer le filtre à air.
Mauvais écart entre les
électrodes de la bougie
d'allumage.
Mauvais réglage du
carburateur.
L'adaptateur de taille-haies
ou d'élagueuse n'est pas
correctement raccordé sur
l'unité moteur.
La chaîne de scie
sèche ou surchauffée ou
relâchée.
L'adaptateur de taille-haies
ou d'élagueuse n'est pas
correctement raccordé sur
l'unité moteur.
.
est
Suivez les instructions
de démarrage.
Placer le levier étrangleur sur " ".
Nettoyer la bougie
d'allumage et régler
l'écart des électrodes
ou mettre une nouvelle
bougie d'allumage en
place.
Nettoyer la bougie
d'allumage ou la
remplacer.
Vérifier le montage.
Remplir de l'huile ou
affûter, remplacer ou
tendre la chaîne de
scie .
Vérifier le montage.
FR
BE
Transport
■ Si vous voulez transporter l'appareil, videz le réservoir d'essence
conformément aux explications figurant dans le paragraphe "Entrepo-
sage“.
FBK 4 A1
33
Page 40

Intervalles de maintenance
Mise au rebut
Élagueuse
Les indications listées ici réfèrent à des conditions d'utilisation normales.
FR
BE
En cas de conditions difficiles, comme par ex. une forte formation de poussière et des temps de travail quotidiens plus longs, les intervalles indiqués
doivent être raccourcis en conséquence.
Partie de
l'appareil
Graissage de
la chaîne
Chaîne
de scie
Rail de
guidage
Pignon vérifier
Action Avant
vérifier
vérifier et
veiller à un
état affûté
Contrôler la
tension de
chaîne
affûter
vérifier
(usure, détérioration)
nettoyer et
retourner
ébavurer
remplacer
remplacer
le
début
du
travail
X
X
X
X
hebdomadairement
en cas
de
panne
XX
X
X
en cas
de
détérioration
en
cas
de
besoin
X
XX
X
L'emballage est réalisé à l'aide de matériaux écologiques qu'il est
possible d'éliminer auprès de centres de recyclage proches de
chez vous. L'appareil et ses accessoires sont composés de
différents matériaux, comme par ex. le métal et le plastique.
Se renseigner auprès de votre mairie ou des services de votre commune
pour connaître les possibilités de mise au rebut de votre appareil usagé.
Protection de l'environnement
■ Videz le réservoir d'essence ou à huile avec soin et déposez votre
appareil à un point de valorisation. Les pièces en plastique et en métal
utilisées peuvent être triées et être ainsi réutilisées.
■ Déposez les huiles usagées et les résidus d'essence sur un site de stoc-
kage et ne les déversez pas dans les canalisations ou dans les égouts.
■ Déposez le matériel d'entretien pollué et les carburants dans un point
de collecte agréé.
Annexe
Garantie
Cet appareil est garanti 3 ans à partir de la date d'achat. L'appareil a
été fabriqué avec soin et contrôlé consciencieusement avant sa livraison. Veuillez conserver le ticket de caisse en guise de preuve d'achat.
En cas de garantie, veuillez contacter le service après-vente compétent.
Cette condition doit être respectée pour assurer l'expédition gratuite de
votre marchandise.
La prestation de garantie s'applique uniquement aux vices de matériau
ou de fabrication, et non aux dégâts de transport, aux pièces d'usure ou
aux dégâts subis par des pièces fragiles telles que les commutateurs ou les
batteries. L'appareil est uniquement destiné à une utilisation domestique et
non commerciale.
Taille-haies
Les indications listées ici réfèrent à des conditions d'utilisation normales.
En cas de conditions difficiles, comme par ex. une forte formation de poussière et des temps de travail quotidiens plus longs, les intervalles indiqués
doivent être raccourcis en conséquence.
Partie de
l'appareil
Lame Contrôle visuel
Action Avant
le
début
du
travail
X
nettoyer
Suite
à la
fin du
travail
en cas
de
besoin
XX
Commande de pièces de rechange
Commander des pièces de rechange
Les indications suivantes doivent être données lors de la commande de
pièces détachées:
■ Type de l'appareil
■ Référence de l'appareil
■ Numéro d'identification de l'appareil
Vous trouverez les prix et informations actuels à l'adresse
www.kompernass.com
La garantie est annulée en cas d'entretien incorrect et inapproprié, d'usage
de la force et en cas d'intervention non réalisée par notre centre de service
après-vente agréé. Vos droits légaux ne sont pas restreints par la présente
garantie.
L'exercice de la garantie ne prolonge pas la période de garantie. Cette
disposition s'applique également aux pièces remplacées ou réparées.
Signalez sans attendre toute anomalie éventuelle sur le matériel au
moment du déballage et au plus tard deux jours après la date d'achat.
Toute réparation fera l'objet d'une facturation après expiration de la
période de garantie.
34
FBK 4 A1
Page 41

Service après-vente
AVERTISSEMENT!
■ Faites réparer votre appareil exclusivement par des spécialistes
qualifiés et uniquement avec des pièces de rechange d'origine. Vous
garantissez ainsi la sécurité de l'appareil.
Service France
Tel.: 0800 919270
E-Mail: kompernass@lidl.fr
IAN 110011
Service Belgique
Tel.: 070 270 171 (0,15 EUR/Min.)
E-Mail: kompernass@lidl.be
IAN 110011
Assistance téléphonique:
Du lundi au vendredi de 8h00 - 20h00 (HEC)
Importateur
KOMPERNASS HANDELS GMBH
BURGSTRASSE 21
44867 BOCHUM
GERMANY
www.kompernass.com
Traduction de la déclaration de conformité
originale
Nous soussignés, KOMPERNASS HANDELS GMBH, responsables du
document: M. Semi Uguzlu, BURGSTR. 21, 44867 BOCHUM, GERMANY,
déclarons par la présente que cet appareil est en conformité avec les
normes, documents normatifs et directives CE suivants:
Directive Machines
(2006 / 42 / EC)
Directive extérieure
(2005 / 88 / EC)
Directive relative aux émissions
(2012 / 46 / EU)
Normes harmonisées appliquées:
EN ISO 11806-1: 2011
EN ISO 10517 : 2009+A1
EN ISO 11680-1: 2011
Type/ désignation de l'appareil:
Outil modulable à essence 4 en 1 FBK 4 A1
Année de construction: 02 - 2015
Numéro de série: IAN 110011
FR
BE
Bochum, le 05/12/2014
Semi Uguzlu
-Responsable qualité-
Sous réserve de modifications techniques à des fins d'amélioration.
FBK 4 A1
35
Page 42

36
FBK 4 A1
Page 43

Inhoud
Inleiding ...................................38
Gebruik in overeenstemming met bestemming .............38
Uitrusting ..........................................38
Inhoud van het pakket................................39
Technische gegevens.................................39
Veiligheidsvoorschriften......................41
Veiligheidsvoorschriften voor werken met heggenscharen ....41
Aanvullende veiligheidsvoorschriften voor heggenscharen....42
Veiligheidsvoorschriften voor werken met hoogsnoeiers ......43
Voorzorgsmaatregelen tegen terugslag ..................43
Veiligheidsvoorschriften voor werken met draadspoelen .....44
Veiligheidsvoorschriften voor werken met messen...........44
Veiligheidsvoorzieningen..............................45
Vóór de ingebruikname ......................45
Ronde handgreep monteren ...........................45
Snelopeningsmechanisme monteren .....................45
Harnas bevestigen / monteren .........................45
Heggenschaar monteren..............................46
Heggenschaar demonteren............................46
Kantelen van de heggenschaar.........................46
Zaagketting en zwaard monteren.......................46
Zaagketting demonteren ..............................46
Zaagketting spannen en controleren.....................46
Kettingsmering......................................46
Zaagketting slijpen ..................................46
Verlengstuk monteren ................................46
Beschermkap monteren/demonteren ....................47
Mes monteren/vervangen.............................47
Draadspoel monteren/vervangen.......................47
Harnas omdoen.....................................47
Maaihoogte instellen.................................47
Brandstof en olie . . . . . . . . . . . . . . . . . . . . . . . . . . . . . . . . . . . . 47
Ingebruikname .............................48
Starten bij koude motor ...............................48
Starten bij warme motor ..............................48
Werken met de heggenschaar .........................49
Snoeitechnieken.....................................49
Werken met de hoogsnoeier...........................49
Zaagtechnieken.....................................49
Veilig werken .......................................49
Transport ..................................49
Reinigen ...................................49
Onderhoud ................................50
Opslag en transport .........................50
Problemen oplossen .........................51
Motorunit..........................................51
Hoogsnoeier .......................................51
Heggenschaar......................................51
Onderhoudsintervallen ......................51
Hoogsnoeier .......................................51
Heggenschaar......................................51
Bestelling van vervangingsonderdelen .........51
Afvoeren ..................................52
Appendix ..................................52
Garantie ..........................................52
Service............................................52
Importeur..........................................52
Vertaling van de oorspronkelijke conformiteitsverklaring......53
NL
BE
FBK 4 A1
37
Page 44

BENZINE COMBIAPPARAAT 4-IN-1
FBK 4 A1
Inleiding
Hartelijk gefeliciteerd met de aankoop van uw nieuwe apparaat. U hebt
hiermee gekozen voor een hoogwaardig product. De gebruiksaanwijzing
NL
maakt deel uit van dit product. Deze bevat belangrijke aanwijzingen voor
BE
veiligheid, gebruik en afvoer. Lees alle bedienings- en veiligheidsaanwijzingen voordat u het product in gebruik neemt. Gebruik het product uitsluitend op de voorgeschreven wijze en voor de aangegeven doeleinden.
Geef alle documenten mee als u het product doorgeeft aan een derde.
Gebruik in overeenstemming met bestemming
Heggenschaar met lange steel
Dit apparaat is bestemd voor het snoeien en trimmen van heggen, heesters
en sierstruiken in het privéhuishouden. Het gaat daarbij om een met de
hand bediend apparaat met een geïntegreerde aandrijving waarbij de
lineair gemonteerde messen heen en weer bewegen.
WAARSCHUWING!
► Heggenscharen zijn niet geschikt voor gebruik door kinderen.
Hoogsnoeier
Dit apparaat is bestemd voor snoeiwerkzaamheden aan bomen.
Mes/draadspoel
Gebruik met mes: voor het maaien van hoog gras, struikgewas en licht
houtgewas.
Gebruik met draadspoel: voor het maaien van gazons en licht onkruid.
Verlengstuk
LET OP!
■ Gebruik het verlengstuk/de schacht
mes-/draadspoel-hulpstuk!
Elk ander gebruik dat in deze gebruiksaanwijzing niet uitdrukkelijk wordt
toegestaan, kan schade aan het apparaat veroorzaken en een ernstig
gevaar voor de gebruiker vormen. Neem beslist de beperkingen in de
veiligheidsinstructies in acht. Neem nationale voorschriften die het gebruik
van de machine kunnen beperken in acht. Elk ander gebruik of modificatie
van het apparaat geldt als niet reglementair en brengt aanzienlijke risico's
op ongelukken met zich mee.
Niet voor bedrijfsmatig gebruik bestemd.
VERBODEN TOEPASSINGEN!
Vanwege lichamelijke risico's voor de gebruiker mag het apparaat niet
worden gebruikt voor de volgende werkzaamheden: voor het reinigen van
looppaden en als hakselaar voor het verkleinen van snoeisel van bomen
en hagen. Verder mag het apparaat niet worden gebruikt voor het effenen
van grondoneffenheden, zoals molshopen. Om veiligheidsredenen mag
het apparaat niet worden gebruikt als aandrijfaggregaat voor andere
apparaten van welk type dan ook. Voor hieruit voortvloeiende schade of
letsel van welke aard dan ook is de gebruiker/bediener aansprakelijk, niet
de fabrikant.
niet in combinatie met het
5^
Uitrusting
Motorunit
Inschakelblokkering
Aan-/uitknop
Draagoog
4 x bevestigingsbouten (met veerring, sluitring en moer)
Ronde handgreep
5a
Rubberring
5b
Stift
Barrièrebeugel
Afdekking
Schroefgreep
Borghendel
Schacht
Gashendel
Bougiestekker
Chokehendel
Startkoord
Benzinetank
Tankdop
Brandstofpomp (primer)
Kap luchtfilterbehuizing
Heggenschaar-hulpstuk FBK 4 A1-1
Handgreep
Ontgrendeling/vergrendeling
Aandrijfhuis
Messenbalk
Bodemplaat (heggenschaar)
Stelhendel
Voorste schacht (heggenschaar)
Vergrendelingsgat
Aandrijfas
Hoogsnoeier-hulpstuk FBK 4 A1-2
Voorste schacht (hoogsnoeier)
Beschermring
Olietankdop
Olietank
Zwaard
Zaagketting
Slijpsteenhulp
Aanslag
Vergrendelingsgat
Aandrijfas
Moer
Schroefdraad
Kamwielhuis
Zwaardgeleider
Zwaardboring
Geleider
Olieautomaat
Kamwiel
Olieregelingsschroef
Kettingspannerstift
Kettingspannerschroef
38
FBK 4 A1
Page 45

Draadspoel-/mes-hulpstuk FBK 4 A1
4 x bouten (met veerring, sluitring en moer)
Beschermkap
3-tands snijmes
Draadspoel met snijdraad
5@
Voorste schacht (draadspoel/3-tands snijmes)
5#
Vergrendelingsgat
5$
Aandrijfas
5%
Verlengstuk
Schacht
5^
Schroefgreep
5&
Borghendel
5*
Afdekking
5(
Vergrendelingsgat
6)
Aandrijfas
6!
Accessoires
Harnas
6@
Beschermkoker zwaard
6#
Beschermkoker ketting
6$
Bio-kettingolie
6%
Mengfles olie/benzine
6^
Veiligheidsbril
6&
Inbussleutel M4
6*
Inbussleutel M5
6(
Steeksleutel SW 8/10
7)
Bougiesleutel/sleufschroevendraaier
7!
Gereedschapstas
7@
Moer M10 (linkse schroefdraad)
7#
Afdekking drukplaat
7$
Drukplaat
7%
Meeneemschijf
7^
Inhoud van het pakket
1 motorunit
1 heggenschaar-hulpstuk FBK 4 A1-1 (hierna "heggenschaar" genoemd)
1 hoogsnoeier-hulpstuk FBK 4 A1-2 (hierna "hoogsnoeier" genoemd)
1 draadspoel-/mes-hulpstuk FBK 4 A1
1 verlengstuk
1 handgreep met barrièrebeugel
1 draadspoel met snijdraad
1 3-tands snijmes
1 harnas
1 beschermkoker ketting
1 beschermkoker zwaard
1 mengfles olie/benzine
1 100 ml bio-kettingolie
1 gereedschapstas
1 inbussleutel M4
1 inbussleutel M5
1 bougiesleutel/sleufschroevendraaier
1 steeksleutel SW 8/10
1 veiligheidsbril
1 gebruiksaanwijzing
Technische gegevens
Motorunit:
Motortype: 2-taktmotor, luchtgekoeld, chroomcilinder
Motorvermogen (max.): 1,35 kW / 1,85 PK
Cilinderinhoud: 42,7 cm³
Stationair toerental motor: 3000 min
Max. toerental motor
met 3-tands snijmes: 9200 min
met draadspoel: 8700 min
met kettingzaag: 9200 min
met heggenschaar: 9200 min
Max. snijsnelheid
met 3-tands snijmes: 6900 min
met draadspoel: 6525 min
met kettingzaag: 20 m/s
met heggenschaar: 1550 min
Ontsteking: Elektronisch
Aandrijving: Centrifugaalkoppeling
Gewicht:
(lege tank): ca. 5,6 kg
Tankinhoud: 1200 cm
Bougie: TORCH L7RTC
Brandstofverbruik bij
max. motorvermogen: 0,6 kg / u
Specifiek
brandstofverbruik
bij max. motorvermogen: 446 g / kWh
Heggenschaar: FBK 4 A1-1
Snoeilengte: 425 mm
Tandafstand: 20 mm
Gewicht
(bedrijfsklaar): ca. 2,24 kg
Hoogsnoeier: FBK 4 A1-2
Gewicht (gebruiksklaar): ca. 1,6 kg
Aanbevolen vulhoeveelheid
olietank: 140 cm
Snoeilengte: ca. 260 mm
Zwaard: Oregon type 100SDEA318
Zaagketting: Oregon 91P040X
Oregon 91P040E
Draadspoel-/
mes-hulpstuk: FBK 4 A1
Draadspoel met snijdraad (IAN 110011):
Maaicirkel draad Ø: 43 cm
Draadlengte: 8,0 m
Draad-Ø: 2,0 mm
3-tands snijmes (IAN 110011):
Maaicirkel mes Ø: 25,5 cm
-1
-1
-1
-1
-1
-1
-1
-1
3
3
NL
BE
FBK 4 A1
39
Page 46

Geluids- en trillingsgegevens:
Meetwaarde voor geluid vastgesteld conform ISO 22868,
EN ISO 10517. Het A-gewogen geluidsniveau bedraagt gemiddeld:
Heggenschaar:
Geluidsdrukniveau L
Onzekerheid K
NL
Geluidsvermogensniveau L
BE
Gegarandeerd geluidsvermogensniveau L
Onzekerheid K
: 98,79 dB(A)
pA
: 2,5 dB
WA
: 109,53 dB(A)
WA
: 114 dB(A)
WA
: 2,5 dB
WA
Hoogsnoeier:
Geluidsdrukniveau L
Onzekerheid K
: 97,06 dB(A)
pA
: 2,5 dB
WA
Geluidsvermogensniveau: 110,87 dB(A)
Onzekerheid K
: 2,5 dB
WA
Draadspoel/3-tands snijmes:
Geluidsdrukniveau L
Onzekerheid K
Geluidsvermogensniveau L
Onzekerheid K
: 97,64 dB(A)
pA
: 2,5 dB
pA
: 111,27 dB(A)
WA
: 2,5 dB
WA
Draag gehoorbescherming om gehoorschade te
voorkomen!
Trillingswaarden (vectorsom van drie richtingen) vastgesteld conform
EN ISO 11806-1, EN ISO 10517, EN ISO 11680-1:
Heggenschaar:
Trilling bij voorste handgreep: Trillingsemissiewaarde
= 4,182 m/s
a
h,D
Onzekerheid K = 1,5 m/s
Trilling bij achterste handgreep: Trillingsemissiewaarde
= 9,695 m/s
a
h,D
Onzekerheid K = 1,5 m/s
Hoogsnoeier:
Trilling bij voorste handgreep: Trillingsemissiewaarde
= 3,855 m/s
a
h,D
Onzekerheid K = 1,5 m/s
Trilling bij achterste handgreep: Trillingsemissiewaarde
= 7,590 m/s
a
h,D
Onzekerheid K = 1,5 m/s
Draadspoel:
Trilling bij voorste handgreep: Trillingsemissiewaarde
= 4,864 m/s
a
h,D
Onzekerheid K = 1,5 m/s
Trilling bij achterste handgreep: Trillingsemissiewaarde
= 9,750 m/s
a
h,D
Onzekerheid K = 1,5 m/s
3-tands snijmes:
Trilling bij voorste handgreep: Trillingsemissiewaarde
= 4,622 m/s
a
h,D
Onzekerheid K = 1,5 m/s
Trilling bij achterste handgreep: Trillingsemissiewaarde
= 7,708 m/s
a
h,D
Onzekerheid K = 1,5 m/s
OPMERKING
Het hier aangegeven trillingsniveau is gemeten conform een in
►
EN ISO 11806-1, EN ISO 10517, EN ISO 11680-1 genormeerde
meetprocedure en kan worden gebruikt voor apparaatvergelijking.
De vermelde trillingsemissiewaarde kan ook gebruikt worden voor
een voorlopige beoordeling van de blootstelling.
WAARSCHUWING!
► Het trillingsemissieniveau is afhankelijk van het gebruik en kan in
bepaalde gevallen hoger zijn dan de in deze aanwijzingen aangegeven waarde. De trillingsbelasting kan worden onderschat wanneer
het apparaat regelmatig op een dergelijke manier wordt gebruikt.
Voor een nauwkeurige beoordeling van de trillingsbelasting tijdens
een bepaalde werkperiode moeten ook de tijden worden meegerekend waarin het apparaat is uitgeschakeld, of wel loopt, maar niet
wordt gebruikt. Dit kan de trillingsbelasting over de totale werkperiode duidelijk verminderen.
WAARSCHUWING!
■ Verminder ook de trillingsrisico's, bijv. het risico van “dode vingers”,
door vaak werkpauzes te nemen waarin u bijv. uw handen tegen
elkaar aan wrijft!
Betekenis van de aanwijzingsplaatjes op de motorunit:
Waarschuwing! Lees voorafgaand aan ingebruikname de
gebruiksaanwijzing!
Draag veiligheidshandschoenen!
2
2
2
2
2
2
2
2
2
2
2
2
2
2
2
2
Betekenis van de aanwijzingsplaatjes op de heggenschaar:
Draag veiligheidsschoenen!
Draag gehoorbescherming!
Draag een veiligheidshelm!
Draag een veiligheidsbril!
Let op, hete onderdelen. Afstand houden!
Levensgevaar door een elektrische schok! Houd een minimale afstand van 10m tot bovengrondse leidingen aan.
Let op! Afvallende voorwerpen.
In het bijzonder bij werk boven hoofdhoogte.
Let op! Letselgevaar door bewegende messen.
Afstand houden!
40
FBK 4 A1
Page 47

Betekenis van de aanwijzingsplaatjes op de hoogsnoeier:
Veiligheidsvoorschriften
Levensgevaar door een elektrische schok! Houd een minimale afstand van 10m tot bovengrondse leidingen aan.
Bescherm het apparaat tegen regen en vocht!
Let op! Afvallende voorwerpen.
In het bijzonder bij werk boven hoofdhoogte.
Let op! Letselgevaar door bewegende messen.
Betekenis van de aanwijzingsplaatjes op het draadspoel-/
mes-hulpstuk:
Let op! Linkse schroefdraad.
Bescherm het apparaat tegen regen en vocht!
Let op weggeslingerde delen!
Pas op terugslag!
Voorzichtig! Letselgevaar door draaiend mes!
Houd handen en voeten op afstand!
Voorzichtig - benzine is extreem licht ontvlambaar!
Explosiegevaar! Mors geen brandstof!
Schakel het apparaat uit en trek de bougiestekker los
voordat u onderhoudswerkzaamheden verricht!
Let op! Verstikkingsgevaar!
BELANGRIJK! VOOR GEBRUIK ZORGVULDIG LEZEN.
BEWAREN VOOR UW ADMINISTRATIE.
Veiligheidsvoorschriften voor werken met
heggenscharen
OPMERKING
► De heggenschaar wordt volledig gemonteerd geleverd.
► In deze handleiding en op de uitvouwpagina staan afbeeldingen
voor instelling en gebruik van de heggenschaar, de bedieningselementen ervan, onderhoud en smering door de gebruiker.
► Aanwijzingen voor werkhouding (zie uitvouwpagina).
► Aanwijzingen voor bedieningselementen (zie uitvouwpagina).
► Aanwijzingen voor veilige omgang met brandstof (zie hoofdstuk
“Voorbereiding” punt f).
► Aanwijzingen voor aanbevolen vervanging of reparatie van
onderdelen, de klantenservice en specificaties van te gebruiken
vervangingsonderdelen, voor zover die de gezondheid en veiligheid
van de gebruiker betreffen, vindt u in deze handleiding.
► Een uitleg van alle voor de heggenschaar gebruikte grafische
symbolen, gegevens, kenmerken en technische gegevens, alsmede
de handelwijze bij ongevallen en storingen, vindt u in deze
handleiding.
► Geblokkeerd werktuig: verwijder het vastzittende materiaal uit de
messenbalk
WAARSCHUWING!
■ Kinderen mogen de heggenschaar nooit gebruiken.
■ Wees altijd alert, let erop wat u doet en gebruik uw gezond ver-
stand bij het werken met het apparaat. Gebruik het apparaat niet
als u ziek of moe bent of onder invloed bent van drugs, alcohol
of medicijnen. Een moment van onoplettendheid kan bij het gebruik
van het apparaat al tot ernstig letsel leiden.
■ Voorkom verkeerde toepassingen, gebruik de machine uitsluitend
zoals beschreven onder “Gebruik in overeenstemming met
bestemming”.
.
Maak u vertrouwd met de gebruiksaanwijzing voordat u het
apparaat bedient.
NL
BE
Voorzichtig! Giftige CO-dampen (koolmonoxidedampen)!
Gebruik het apparaat niet in gesloten ruimtes!
Waarschuwing! Gebruik in geen geval cirkelzaagbladen
als mes.
20 h
Vul om de 20 bedrijfsuren een beetje vet bij (aandrijfvet)
De afstand tussen de machine en derden moet minstens
15 meter bedragen!
Snijgereedschap (mes / snijdraad) loopt na!
Let op, hete onderdelen. Afstand houden!
Indicatie van het geluidsvermogensniveau LWA in dB.
Vuur, open licht en roken verboden!
FBK 4 A1
Voorbereiding
a) DEZE HEGGENSCHAAR KAN ERNSTIG LETSEL VEROORZAKEN!
Lees aandachtig de aanwijzingen voor correcte omgang, voorbereiding,
onderhoud en reparatie, starten en wegzetten van de heggenschaar.
Maak u vertrouwd met alle bedieningselementen en het gebruik van
de heggenschaar volgens de voorschriften.
b) Kinderen mogen de heggenschaar nooit gebruiken.
c) Pas op voor bovengrondse stroomkabels.
d) Het gebruik van de heggenschaar moet worden vermeden wanneer
zich personen, met name kinderen, in de buurt bevinden.
e) Draag geschikte kleding! Draag geen wijde kleding of sieraden, die door
bewegende delen kunnen worden gegrepen. Het verdient aanbeveling
vaste handschoenen, antislipschoenen en een veiligheidsbril te dragen.
f) Ga zorgvuldig om met brandstof, deze is licht ontvlambaar en de dam-
pen zijn explosief. De volgenden punten moeten worden opgevolgd:
– Alleen speciaal daarvoor bestemde reservoirs gebruiken.
– Bij een draaiende of hete motor nooit de tankdop verwijderen of benzine
bijvullen. Laat voor het bijvullen de motor en de uitlaatdelen afkoelen.
41
Page 48

– Niet roken.
– Tank alleen in de openlucht.
– Berg de heggenschaar of het brandstofreservoir nooit op in een ruimte
waarin zich een open vlam bevindt, bijv. in een geiser.
– Als er benzine uit het reservoir is gestroomd, probeer dan niet de motor
te starten, maar haal de machine voor het starten weg van het met
NL
BE
benzine vervuilde oppervlak.
– Plaats de tankdop na het vullen altijd terug en sluit deze goed af.
– Als de tank wordt geleegd, moet dit in de openlucht gebeuren.
g) Zet u de motor af en laat u de heggenschaar tot stilstand komen, als de
snij-inrichting een vreemd voorwerp aanraakt, of als de werkingsgeluiden
sterker worden of de heggenschaar ongewoon heftig trilt. Trek de bougiestekker van de bougie en neem de volgende maatregelen:
– controleer op schade;
– controleer op losse onderdelen en zet alle losse onderdelen vast;
– vervang beschadigde onderdelen door gelijkwaardige onderdelen of
laat het apparaat repareren.
Draag gehoorbescherming!
Draag een veiligheidsbril!
■ Maak u vertrouwd met de bediening van de heggenschaar, om deze
in geval van nood onmiddellijk te kunnen stoppen.
Gebruik
a) De motor moet worden uitgeschakeld voorafgaand aan:
– reiniging of verhelpen van een blokkering;
– controle, onderhoud, reparatie of werkzaamheden aan de heggenschaar;
– instelling van de werkpositie van de snij-inrichting;
– het ergens zonder toezicht achterlaten van de heggenschaar.
b) Vergewis u er altijd van of de heggenschaar zich volgens de voorschriften
in een van de beschreven werkposities bevindt, voordat de motor wordt
gestart.
c) Tijdens het werken met de heggenschaar moet er altijd op worden gelet
dat een veilige stand wordt ingenomen, vooral bij gebruik van een
ladder.
d) Gebruik de heggenschaar niet met een defecte of sterk versleten snij-
inrichting.
e) Om brandgevaar te verminderen, moet u erop letten dat de motor en
de geluiddemper vrij zijn van aanslag, loof of lekkend smeermiddel.
f) Zorg er altijd voor dat alle handgrepen en veiligheidsvoorzieningen
bij gebruik van de heggenschaar zijn gemonteerd. Probeer nooit een
onvolledige heggenschaar of een heggenschaar met niet-toegestane
modificaties te gebruiken.
g) Gebruik altijd beide handen wanneer de heggenschaar is uitgerust met
twee handgrepen.
h) Maak u altijd vertrouwd met uw omgeving en let op mogelijke gevaren,
die u door het lawaai van de heggenschaar misschien niet kunt horen.
Onderhouden en opbergen
a) Wanneer de heggenschaar vanwege onderhoud, inspectie of opslag
wordt stilgezet, schakelt u de motor uit, trekt u de bougiestekker van de
bougie en vergewist u zich ervan dat alle roterende delen tot stilstand
zijn gekomen. Laat de machine afkoelen voordat u deze controleert,
instelt, enz.
b) Berg de heggenschaar op een plek op waar benzinedamp niet met
open vuur of vonken in contact kan komen. Laat de heggenschaar altijd
afkoelen voordat u deze opbergt.
c) Bij transport of opslag van de heggenschaar moet de snij-inrichting altijd
met de bijbehorende bescherming worden afgedekt.
Aanvullende veiligheidsvoorschriften voor
heggenscharen
Veiligheid van de omgeving
■ Snoei uitsluitend bij daglicht of toereikend kunstlicht.
■ Let op dat u bij het snoeien geen voorwerpen als draden van afraste-
ring of ondersteuning van planten raakt. Dit kan resulteren in schade
aan de messenbalk
verwijder draden en andere oneigenlijke voorwerpen.
■ Wees u bewust van uw omgeving en mogelijk gevaarlijke situaties,
omdat u tijdens het snoeien van de heg mogelijk bepaalde dingen
niet hoort.
GEVAAR!
► Schakel bij dreigend gevaar resp. in noodsituaties onmiddellijk de
motor uit.
Elektrische veiligheid
■ Houd het gereedschap uitsluitend vast aan de geïsoleerde hand-
grepen, omdat de messen verborgen elektricitreitsleidingen kunnen
raken. Bij contact tussen messen en een leiding waar spanning op
staat, kunnen ook metalen onderdelen van het apparaat onder spanning komen te staan, met een elektrische schok tot gevolg.
Veiligheid van personen
■ Tijdens gebruik mogen zich binnen een straal van 15 meter geen an-
dere personen of dieren bevinden. Degene die het apparaat bedient,
is op de plaats van gebruik verantwoordelijk voor derden.
■ Zorg er altijd voor dat u stevig staat als u de heggenschaar gebruikt en
blijf altijd in evenwicht, met name bij gebruik op trappen of ladders.
■ Pak de heggenschaar nooit vast bij de messenbalk
■ Houd uw handen uit de buurt van de messen. Probeer geen
snoeiresten te verwijderen of snoeimateriaal vast te houden als de
messen in werking zijn. Verwijder vastzittend snoeimateriaal alleen
als het apparaat is uitgeschakeld. Een moment van onoplettendheid
kan bij het gebruik van het apparaat al tot ernstig letsel leiden.
■ Wacht tot het gereedschap tot stilstand is gekomen voordat u het
weglegt.
Gebruik en behandeling
LET OP!
► Tussen de werkzaamheden of na beëindiging van een bepaalde
werkzaamheid mag de messenbalk
worden gelegd, om eventuele beschadiging van de messenbalk
te voorkomen.
■ Controleer voor gebruik altijd of de messen, de bouten van de messen
en andere onderdelen versleten of beschadigd zijn. Werk nooit met
beschadigde of zwaar versleten snoeiwerktuigen.
■ Controleer na het instellen van de werkhoek of beide stelhendels stevig
vastgezet zijn. Als een van beide stelhendels niet is vastgezet, kan de
tweede vergrendeling tijdens het werk onbedoeld losraken bij contact
met een wat zwaardere tak, waardoor de messenbalk
klappen.
■ Gebruik de heggenschaar nooit als de veiligheidsvoorzieningen defect
zijn of niet zijn gemonteerd.
. Inspecteer de te snoeien heg zorgvuldig en
.
niet op het messenbalkuiteinde
omlaag kan
42
FBK 4 A1
Page 49

■ Pak de heggenschaar nooit vast bij de veiligheidsvoorziening.
■ Draag de heggenschaar aan de voorste handgreep in uitgeschakelde
toestand met de messen van uw lichaam afgekeerd. Breng altijd de
beschermkoker aan bij transport of als u de heggenschaar opbergt.
Zorgvuldig omgaan met het apparaat verkleint de kans dat u onopzettelijk in aanraking komt met de lopende messen.
■ Berg de heggenschaar op een droge, hoge en afgesloten plaats op,
buiten het bereik van kinderen.
■ Probeer niet zelf het apparaat te repareren, tenzij u daarvoor toerei-
kend bent opgeleid.
■ Vervang voor de zekerheid versleten of beschadigde onderdelen.
GEVAAR!
► Schakel bij dreigend gevaar resp. in noodsituaties onmiddellijk de
motor uit.
Veiligheidsvoorschriften voor werken met
hoogsnoeiers
VOORZICHTIG! LETSELGEVAAR!
► Pak het apparaat als het in werking is, nooit boven de beschermring
beet, om letsel te voorkomen!
Voorbereiding
■ Draag altijd een veiligheidshelm, gehoorbescherming en veiligheids-
handschoenen. Draag ook een veiligheidsbril om te voorkomen dat u
oliespetters of zaagstof in uw ogen krijgt. Draag een stofmasker tegen
stof.
■ Draag stevige schoenen met stroeve zolen.
■ Gebruik het apparaat niet als het regent en onder vochtige omstandig-
heden.
■ Controleer het apparaat voor gebruik op veiligheid, in het bijzonder
het zwaard en de ketting.
■ Gebruik het apparaat niet in de buurt van elektriciteitsleidingen. Houd
een minimale afstand van 10 m tot bovengrondse stroomleidingen aan.
Elektrische veiligheid
■ Gebruik het apparaat niet in een omgeving waar explosiegevaar
heerst, zoals in de buurt van ontvlambare vloeistoffen, gassen of
dampen. De door het apparaat veroorzaakte vonken kunnen dergelijke
dampen doen ontbranden.
■ Een apparaat met een defecte schakelaar moet onmiddellijk worden
gerepareerd, om schade en letsel te voorkomen.
Veiligheid van personen
■ Gebruik het apparaat nooit als u op een ladder staat.
■ Buig bij het gebruik van het apparaat niet te ver voorover. Zorg dat u
altijd stevig staat en bewaar altijd uw evenwicht. Gebruik het meegeleverde harnas om het gewicht gelijkmatig over uw lichaam te verdelen.
■ Ga niet onder de tak staan die u wilt afzagen, om letsel door vallende
takken te voorkomen. Houd ook rekening met terugspringende takken,
om letsel te voorkomen. Werk onder een hoek van ongeveer 60°.
■ Houd er rekening mee dat het apparaat kan terugslaan.
■ Let niet alleen op de af te zagen takken, maar ook op reeds afgevallen
materiaal, om te voorkomen dat u struikelt.
■ Dek het zwaard en de ketting bij transport en opslag af met de koker.
■ Voorkom dat het apparaat onbedoeld wordt gestart.
■ Berg het apparaat op buiten het bereik van kinderen. Alleen personen
die vertrouwd zijn met de gebruiksaanwijzing en het apparaat mogen
het bedienen.
Gebruik en behandeling
■ Schakel het apparaat nooit in voordat u zwaard, ketting en kamwiel-
huis deugdelijk hebt gemonteerd.
■ Zaag geen hout dat op de grond ligt en probeer niet om uit de grond
stekende wortels te zagen. Voorkom in ieder geval dat de zaagketting
zich in de grond ingraaft, omdat hij daardoor meteen stomp wordt.
■ Mocht u per ongeluk een vast voorwerp met het apparaat aanraken,
schakel de motor dan meteen uit en inspecteer het apparaat op eventuele schade.
■ Las na 30 minuten werken een pauze in van minstens een uur.
■ Schakel de motor uit, trek de bougiestekker van de bougie en vergewis
u ervan dat alle roterende delen tot stilstand zijn gekomen wanneer de
hoogsnoeier vanwege onderhoud, inspectie of opslag wordt stilgezet.
Laat de machine afkoelen voordat u deze controleert, instelt, enz.
■ Onderhoud het apparaat zorgvuldig. Controleer of bewegende
onderdelen naar behoren werken en niet klemmen, en of onderdelen
gebroken of zodanig beschadigd zijn, dat hierdoor de werking van
het apparaat wordt beïnvloed. Laat beschadigde onderdelen vóór de
ingebruikname van het apparaat repareren. Veel ongevallen worden
veroorzaakt door slecht onderhouden apparaten.
■ Houd zagen scherp en schoon. Met zorg onderhouden zagen met
scherpe zaagvlakken lopen minder vaak vast en zijn gemakkelijker te
sturen.
■ Laat het apparaat onderhouden door daartoe gekwalificeerd personeel.
Gebruik uitsluitend de door de fabrikant aanbevolen originele onderdelen.
Voorzorgsmaatregelen tegen terugslag
LET OP TERUGSLAG!
► Wees bij gebruik van het apparaat beducht op terugslag. Er bestaat
letselgevaar! U voorkomt terugslag door voorzichtig te werk te gaan
en op de juiste manier te zagen.
■ Als u iets met de punt van het zwaard raakt, kan dat in veel gevallen
een onverwachte reactie in achterwaartse richting veroorzaken,
waarbij het zwaard omhoog en in de richting van degene die het
apparaat bedient, wordt geslagen (zie afb. A).
Bild 1
Afb. A
■ Een terugslag kan optreden als de punt van het zwaard een voorwerp
raakt, of als het hout meebuigt en de zaagketting in de zaagsnede
vastklemt (zie afb. B).
Afb. B
■ Als de zaagketting aan de bovenkant van het zwaard beklemd raakt,
kan het zwaard heftig terugslaan in de richting van degene die het
apparaat bedient.
NL
BE
FBK 4 A1
43
Page 50

■ Beide reacties kunnen tot gevolg hebben dat u de controle over de
zaag verliest en uzelf zwaar verwondt. Vertrouw niet uitsluitend op de
in de kettingzaag ingebouwde veiligheidsvoorzieningen. Neem als
gebruiker van een kettingzaag de nodige maatregelen om zonder ongelukken te werken. Een terugslag is het gevolg van verkeerd gebruik. Dit
is te voorkomen door passende voorzorgsmaatregelen, zoals hieronder
beschreven:
NL
BE
■ Houd de zaag met beide handen vast, waarbij de duimen en de
vingers de handgrepen van de kettingzaag omsluiten. Breng uw
lichaam en uw armen in een dusdanige stand dat u terugslagkrachten kunt opvangen. Als u de juiste voorzorgsmaatregelen neemt, zijn
terugslagkrachten beheersbaar. Laat de kettingzaag nooit los.
■ Vermijd een abnormale lichaamshouding en zaag niet boven schou-
derhoogte. Op die manier voorkomt u dat de punt van het zwaard iets
raakt en bent u beter in staat in onverwachte situaties de controle te
behouden over de kettingzaag.
■ Gebruik altijd de door de fabrikant voorgeschreven vervangings-
zwaarden en zaagkettingen. Onjuiste vervangingszwaarden en
zaagkettingen kunnen de ketting doen breken en/of terugslagkrachten
veroorzaken.
■ Houd u aan de aanwijzingen van de fabrikant voor het slijpen en
onderhouden van de zaagketting. Een te geringe diepte-instelling
verhoogt de kans op terugslag.
■ Zaag niet met de punt van het zwaard. Er is gevaar voor terugslag.
■ Zorg ervoor dat de grond waarop u staat vrij is van voorwerpen
waarover u kunt struikelen.
Veiligheidsvoorschriften voor werken met
draadspoelen
Voorbereiding
■ Draag nauwsluitende werkkleding die bescherming biedt, zoals een
lange broek, veilige werkschoenen, sterke veiligheidshandschoenen,
een veiligheidshelm, een beschermingsmasker voor het gezicht of een
veiligheidsbril ter bescherming van de ogen en goede oorwatten of
andere gehoorbescherming tegen het lawaai.
■ Gebruik altijd het meegeleverde harnas.
■ Zorg ervoor dat de handgrepen droog en schoon zijn en dat er geen
benzinemengsel op komt.
■ Controleer voorafgaand aan het maaien het terrein op voorwerpen,
zoals stukken metaal, flessen, stenen e.d. die kunnen worden weggeslingerd en daardoor letsel bij de gebruiker kunnen veroorzaken.
■ Zorg ervoor dat de draadspoel met geen enkel obstakel in aanraking
komt als u de motor start.
■ Gebruik het apparaat pas wanneer u zich ermee vertrouwd voelt.
Elektrische veiligheid
■ Gebruik het apparaat nooit in de buurt van licht ontvlambare vloeistof-
fen of gassen, noch in gesloten ruimtes, noch in de openlucht. Dit kan
explosies en/of brand tot gevolg hebben.
■ Werk niet met een beschadigd, onvolledig of zonder toestemming van
de fabrikant gemodificeerd apparaat. Gebruik het apparaat nooit als
de veiligheidsvoorzieningen defect zijn. Gebruik het apparaat niet
bij een defecte aan-/uitknop. Controleer het apparaat op duidelijke
schade of defecten als u het hebt laten vallen.
Veiligheid van personen
■ Alleen afdoende geschoolde personen en volwassenen mogen het
apparaat bedienen, instellen en onderhouden.
■ Oefen hoe u het apparaat moet hanteren bij uitgeschakelde motor als
u niet vertrouw bent met het apparaat.
■ Raak de uitlaat niet aan.
■ Gebruik het apparaat niet als u onder invloed van alcohol, drugs of
medicijnen bent.
■ Houd het apparaat altijd met beide handen vast. Daarbij moeten de
duimen en vingers de handgrepen omsluiten.
■ Werkhouding: bedien het apparaat niet in een ongemakkelijke stand,
niet bij ontbrekend evenwicht, niet met uitgestrekte armen of met slechts
één hand.
■ Zorg er altijd voor dat u stevig staat.
■ Gebruik het apparaat niet wanneer toeschouwers of dieren zich in de
onmiddellijke omgeving bevinden. Houd tijdens het maaien een minimale afstand van 15 meter tussen de gebruiker en andere personen
of dieren aan. Houd tijdens maaiwerkzaamheden tot op de grond
een minimale afstand van 30 meter tussen de gebruiker en andere
personen of dieren aan.
■ Blijf bij maaiwerkzaamheden op schuinlopend terrein altijd onder het
snijgereedschap. Maai of trim nooit op een gladde heuvel of helling
waar u kunt uitglijden.
■ Elke modificatie van het product kan de persoonlijke veiligheid in ge-
vaar brengen en resulteert in het vervallen van de fabrieksgarantie.
■ Bij kinderen is supervisie noodzakelijk om ervoor te zorgen dat ze niet
met het product spelen.
■ Gebruik het apparaat nooit als het beschadigd is of gebreken vertoont.
Gebruik en behandeling
■ Gebruik het apparaat uitsluitend voor het beoogde doel, bijv. gras trim-
men, maaiwerkzaamheden, snoeiwerkzaamheden, maaien en trimmen
van heggen en heesters.
■ Gebruik het apparaat niet langdurig achtereen, las regelmatig pauzes in.
■ Zorg ervoor dat bouten en verbindingselementen stevig zijn vast-
gedraaid. Werk nooit met het apparaat wanneer het niet correct is
ingesteld of niet volledig of veilig is gemonteerd.
■ Open de benzinetank langzaam, om eventuele druk die in de benzine-
tank is opgebouwd, te laten ontsnappen. Start het apparaat op minstens
drie meter afstand van de plaats waar u hebt getankt om brandgevaar
te voorkomen.
■ Houd de draadspoel op de gewenste hoogte. Voorkom dat u kleine
voorwerpen (bijv. stenen) met de draadspoel aanraakt.
■ Houd de draadspoel altijd op de grond wanneer het apparaat in
werking is.
■ Gebruik het apparaat uitsluitend wanneer de bijbehorende bescherm-
kap bevestigd en in goede toestand is.
■ Gebruik geen andere snijgereedschappen. Gebruik voor uw eigen
veiligheid uitsluitend accessoires en extra apparatuur die in de gebruiksaanwijzing worden beschreven. Het gebruik van andere dan in
de gebruiksaanwijzing aanbevolen snijgereedschappen of accessoires
kan persoonlijk letselgevaar voor u betekenen.
■ Trim en maai altijd in het hoogste toerentalbereik. Laat de motor bij
het begin van het maaien of bij het trimmen niet op een laag toerental
lopen.
■ Zorg ervoor dat het apparaat bij het inschakelen en tijdens het werk
niet met de grond, stenen, draad of andere oneigenlijke voorwerpen in
aanraking komt. Schakel het apparaat uit voordat u het weglegt.
■ Schakel het apparaat uit voordat u het neerlegt.
■ Schakel de motor altijd uit voorafgaand aan werkzaamheden aan het
snijgereedschap.
Veiligheidsvoorschriften voor werken met messen
Voorbereiding
■ Het mes slingert voorwerpen en ook aarde heftig weg. Dit kan ver-
blinding of letsel veroorzaken. Draag oog-, gezichts- en beenbescherming. Verwijder voorwerpen altijd uit de werkzone voordat u het mes
gebruikt.
■ Het mes draait nog door nadat u de gashendel loslaat. Het nog draai-
ende mes kan snijwonden bij u of omstanders veroorzaken. Schakel de
motor uit en vergewis u ervan dat het mes tot stilstand is gekomen voordat u werkzaamheden van welke aard dan ook uitvoert aan het mes.
44
FBK 4 A1
Page 51

Veiligheid van personen
■ Voor omstanders bestaat er gevaar voor verblinding of letsel. Houd
in alle richtingen een minimale afstand van 15 meter tussen uzelf en
andere personen of dieren aan.
Gebruik en behandeling
■ Gebruik het apparaat niet wanneer niet alle onderdelen van het mes
correct zijn gemonteerd.
■ Het mes kan met een ruk door voorwerpen worden weggeslingerd.
Dit kan letsel aan armen en benen tot gevolg hebben. Stop onmiddellijk
de motor en wacht tot het mes tot stilstand is gekomen als het apparaat
met oneigenlijke voorwerpen in aanraking komt. Controleer het mes op
schade. Vervang het mes altijd wanneer het verbogen of gescheurd is.
Veiligheidsvoorzieningen
Bij werkzaamheden met het apparaat moet de bijbehorende kunststofbeschermkap voor gebruik met het mes resp. de draadspoel zijn gemonteerd,
om het wegslingeren van voorwerpen te voorkomen.
WAARSCHUWING!
■ Maai nooit terwijl andere personen, met name kinderen of dieren, in
de buurt zijn.
■ Houd een veilige afstand van 15 m aan. Schakel het apparaat bij
nadering van mens of dier onmiddellijk uit.
LET OP! VERGIFTIGINGSGEVAAR!
■ Uitlaatgassen, brandstoffen en smeerstoffen zijn giftig. Uitlaatgassen
mogen niet worden ingeademd.
WAARSCHUWING!
■ Benzine is uiterst ontvlambaar. Bewaar benzine uitsluitend in de
daarvoor bestemde jerrycans/vaten.
■ Tank alleen in de openlucht en rook niet.
■ Bij draaiende motor of als het apparaat heet is, mag de tankdop niet
worden geopend en mag er geen benzine worden bijgevuld.
■ Als er benzine gemorst is, mag geen poging worden gedaan om
de motor te starten. In plaats daarvan moet het apparaat uit de met
benzine vervuilde zone worden verwijderd. Elke ontstekingspoging
moet worden vermeden tot de benzinedampen zijn vervluchtigd.
■ Om veiligheidsredenen moeten de benzinetank en de tankdop bij
beschadiging worden vervangen.
Vóór de ingebruikname
LET OP!
■ Draag tijdens het maaien altijd antislip-veiligheidsschoenen en
passende veiligheidskleding zoals veiligheidshandschoenen, een
veiligheidshelm, een beschermingsmasker, een veiligheidsbril en
gehoorbescherming.
■ Controleer het terrein waarop het apparaat wordt gebruikt en verwijder
voorwerpen die gegrepen en weggeslingerd kunnen worden.
■ Voorafgaand aan het gebruik en na het laten vallen of andere
inwerkingen van slagen of stoten moet altijd door visuele inspectie
worden gecontroleerd of de snijgereedschappen, bevestigingsbouten
alsmede de complete snij-unit beschadigd zijn. Versleten of beschadigde snijgereedschappen en bevestigingsbouten moeten worden
vervangen.
■ Voorafgaand aan het gebruik moet altijd door visuele inspectie
worden gecontroleerd of de snijgereedschappen zijn versleten
of beschadigd. Ter voorkoming van onbalans mogen versleten of
beschadigde snijgereedschappen en bevestigingsbouten alleen
paarsgewijs worden vervangen.
Ronde handgreep monteren
♦ Monteer eerst de rubberring 5a op de schacht .
♦ Plaats de barrièrebeugel
♦ De stift
♦ Druk de ronde handgreep
♦ Steek de 4 bevestigingsbouten
♦ Draai de bouten
5b
van de barrièrebeugel moet ter vergrendeling in een van
beide gaten van de schacht worden gestoken.
op de schacht .
greep
en maak ze met de 4 moeren vast in de barrièrebeugel .
Snelopeningsmechanisme monteren
♦ Haak de musketonhaak in (zie de afbeeldingen) en borg deze met
het rode riemstuk van het snelopeningsmechanisme. Trek aan het rode
riemstuk wanneer u het apparaat snel moet afdoen.
van onder af op de rubberring 5a.
op de daarvoor bestemde rubberring 5a
van boven af door de ronde hand-
vast.
NL
BE
Beperk de geluidsontwikkeling en trillingen tot een minimum!
■ Gebruik uitsluitend apparaten die in onberispelijke toestand zijn.
■ Onderhoud en reinig het apparaat regelmatig.
■ Pas uw werkwijze aan het apparaat aan.
■ Voorkom overbelasting van het apparaat.
■ Laat het apparaat eventueel nakijken.
■ Schakel het apparaat uit wanneer het niet wordt gebruikt.
■ Draag veiligheidshandschoenen.
FBK 4 A1
Harnas bevestigen / monteren
♦ Haak het harnas 6@ in het draagoog .
♦ Pas het harnas
ingehangen toestand op heuphoogte bevindt.
aan uw lengte aan, zodat het draagoog zich in
6@
45
Page 52

Heggenschaar monteren
♦ Maak eerst de schroefgreep op de schacht van de motorunit los.
♦ Schuif de voorste schacht
van de motorunit.
moet in het vergrendelingsgat vastklikken.
voor het vastmaken van de borghendel
vast.
NL
BE
♦ De borghendel
♦ Druk de afdekking
omlaag en houd deze ingedrukt.
♦ Draai de schroefgreep
OPMERKING
► De montage van hoogsnoeier/draadspoel/ mes/verlengstuk vindt in
dezelfde volgorde plaats.
Heggenschaar demonteren
♦ Maak de schroefgreep los.
♦ Druk op de borghendel
heggenschaar uit de schacht
OPMERKING
► De demontage van hoogsnoeier/draadspoel/ mes/verlengstuk vindt
in dezelfde volgorde plaats.
en trek de voorste schacht van de
Kantelen van de heggenschaar
♦ Maak de ontgrendeling/vergrendeling los.
♦ Druk op de stelhendel
stand.
♦ Laat de stelhendel
schaar)
vastklikken.
, kantel de heggenschaar in de gewenste
in de uitsparing van de bodemplaat (heggen-
Zaagketting en zwaard monteren
WAARSCHUWING!
► Trek veiligheidshandschoenen aan! Letselgevaar door de scherpe
zaagtanden!
OPMERKING
► Let op de looprichting van de zaagketting
Bodemplaat (hoogsnoeier)
► Bij slijtage kan het zwaard
♦ Maak de moer los
♦ Neem het kamwielhuis
♦ Leg de zaagketting
♦ Bevestig nu het zwaard
♦ Leg het zwaard
tingspannerstift
ketting
♦ Span nu de zaagketting
controleren”).
♦ Bevestig het kamwielhuis
om het kamwiel .
met de steeksleutel 7).
van het apparaat.
op, beginnend op de punt van het zwaard .
met de zaagketting .
op de zwaardgeleider , en plaats de ket-
in de zwaardboring . Leg tegelijkertijd de zaag-
(zie hoofdstuk “Zaagketting spannen en
weer en zet de moer licht vast.
Zaagketting demonteren
♦ De zaagketting moet zo nodig tevoren worden ontspannen om het
zwaard
ketting spannen en controleren”). Voer de instructies in omgekeerde
volgorde uit.
en de zaagketting af te nemen (zie hoofdstuk “Zaag-
van de heggenschaar op de schacht
van de motorunit.
over het zwaard en
.
worden omgekeerd.
Zaagketting spannen en controleren
WAARSCHUWING!
► Trek veiligheidshandschoenen aan! Letselgevaar door de scherpe
zaagtanden!
♦ Draai de kettingspanschroef
de wijzers van de klok mee om de spanning te verhogen.
♦ De zaagketting
liggen. Controleer of u de zaagketting
zwaard
OPMERKING
►
Een nieuwe zaagketting
gespannen.
moet tegen de onderzijde van het zwaard aan
kunt trekken.
met de sleufschroevendraaier 7! met
met de hand over het
rekt uit en moet vaker opnieuw worden
Kettingsmering
♦ Neem de dop van de olietank .
♦ Vul de olietank
♦ De kettingsmering kan door de olieregelingsschroef
hoogd of verlaagd.
♦ Druk eerst en draai dan de olieregelingsschroef
de klok mee om de kettingsmering te verlagen.
♦ Druk eerst en draai dan de olieregelingsschroef
van de klok in om de kettingsmering te verhogen.
WAARSCHUWING!
► Werk nooit zonder kettingsmering!
Bij een droog lopende zaagketting raakt de zaag in korte tijd onherstelbaar beschadigd. Controleer voordat u aan het werk gaat, altijd
de kettingsmering en het oliepeil.
OPMERKING
► Gebruik alleen kettingzaagolie. Bij voorkeur biologisch afbreekbare
kettingolie. Gebruik geen oude olie, motorolie e.d.
► Controleer tijdens het werk of de kettingsmering functioneert.
met ca. 100 ml bio-kettingolie 6%.
worden ver-
met de wijzers van
tegen de wijzers
Zaagketting slijpen
OPMERKING
► Een slijpsteen kan aan de slijpsteenhulp
een stevige greep tijdens het slijpen.
► In een slijpset van bijvoorbeeld Oregon staat gedetailleerde
informatie over het slijpen.
► U kunt ook een elektrische kettingslijper gebruiken en de instructies
van de fabrikant daarvan volgen.
► Als u twijfelt over het slijpen van de ketting, kunt u de ketting ook
vervangen.
worden bevestigd voor
Verlengstuk monteren
LET OP!
■ Gebruik het verlengstuk/de schacht
mes-/draadspoel-hulpstuk!
OPMERKING
Gebruik het verlengstuk / de schacht
►
werkzaamheden uit te voeren.
niet in combinatie met het
5^
om hoger gelegen
5^
46
♦ Monteer het verlengstuk / de schacht
heggenschaar / hoogsnoeier. De montage vindt plaats in dezelfde
volgorde als hiervoor bij de hulpstukken beschreven.
tussen de motorunit en de
5^
FBK 4 A1
Page 53

Beschermkap monteren/demonteren
WAARSCHUWING!
■ Bij werkzaamheden met het 3-tands snijmes moet de beschermkap
zijn gemonteerd. Klap de metaalplaat van de voorste schacht
omlaag. De beschermkap
vestigingsarm van de schacht
nu met 4 bouten
hiervoor de meegeleverde inbussleutel
op de voorste schacht 5# bevestigd. Gebruik
wordt tussen de metaalplaat en de be-
geplaatst. De beschermkap wordt
5#
en de steeksleutel 7).
6*
5#
iets
Snijgarnituur Beschermingsvoorziening
3-tands snijmes
Draadspoel
■ Gebruik geen andere snijgarnituren dan de meegeleverde. Gebruik
van andere snijgarnituren of beschermingsvoorzieningen geldt als
strijdig met de bestemming en brengt aanzienlijke risico’s op ongelukken met zich mee.
5@
WAARSCHUWING!
Beschermkap
Beschermkap + Snijdraad-beschermkap
Mes monteren/vervangen
■ Monteer/vervang het 3-tands snijmes zoals weergegeven op de
afbeeldingen 1a - 1f.
■ Zoek het boorgat van de meeneemschijf
op het tegenoverliggende boorgat en blokkeer de schijf met de meegeleverde inbussleutel
■ Leg het 3-tands snijmes
■ Steek de drukplaat
■ Plaats de afdekking van de drukplaat
■ Draai nu de moer
■ Het 3-tands snijmes
ming. Deze moet voor gebruik worden afgenomen en bij niet-gebruik
weer worden aangebracht.
■ De kunststofbescherming kan nu worden afgenomen.
LET OP! Linkse schroefdraad!
LET OP! SCHERPE KANTEN, DRAAG VEILIGHEIDSHAND-
SCHOENEN
■ Monteer de beschermkap van de snijdraad
■ Bij werkzaamheden met de snijdraad moet ook de snijdraad-bescherm-
kap C worden gemonteerd. De montage van de beschermkap van
de snijdraad C (in de fabriek al voorgemonteerd) vindt plaats zoals
weergegeven op afbeelding 2a.
■ Let erop dat de snijdraad-beschermkap
binnenkant van de beschermkap van de snijdraad C bevindt zich een
A
. Dit is met een beveiliging B afgedekt (zie afb. 2a).
mes
■ Verwijder de beveiliging
deze na het werk weer aan.
.
6(
op de meeneemschijf 7^ (zie afb. 1b).
op de schroefdraad van de tandas (zie afb. 1c).
7%
vast met de bougiesleutel 7! (zie afb. 1f).
7#
is bij levering voorzien van een kunststofbescher-
B
voorafgaand aan het werken en breng
, leg de schijf met het gat
7^
(zie afb. 1d).
7$
C
op de beschermkap .
C
goed vastklikt. Aan de
■ Leg de drukplaat
de drukplaat
■ Schroef nu de draadspoel
LET OP! Linkse schroefdraad!
op de meeneemschijf 7^. Leg de verhoging van
7%
op de verhoging van de meeneemschijf 7^.
7%
op de schroefdraad.
5@
Harnas omdoen
OPMERKING
■ Om zonder vermoeidheid te kunnen werken kunt u op de volgende
punten instellingen uitvoeren. Al naar gelang de lichaamsgrootte
kunnen de instellingen variëren.
■ Stel voorafgaand aan het werken het harnas
met de omvang van het lichaam in.
C
■ Balanceer het apparaat met het gemonteerde snijgereedschap
zodanig uit, dat het snijgereedschap, zonder dat het apparaat met
de handen wordt aangeraakt, net boven de grond zweeft.
1.) Doe het harnas
(zie afb. 3a).
2.) Trek, zoals weergegeven op afbeelding 3b, aan het harnas
harnas
6@
sen aan de omvang van het bovenlichaam.
3.) Trek de beide schouderriemen strak zoals weergegeven op afbeelding 3c.
4.) Trek aan het harnas, zoals weergegeven op afbeelding 3d, om de
juiste positie van het apparaat aan het harnas in te stellen.
5.) Haak de musketonhaak
rode riemstuk
6.) Neem nu het apparaat en hang het, zoals weergegeven op afbeelding
3h, met het draagoog
kan bovendien met de bout
de beste uitrichting van het apparaat in te stellen.
om en voeg de steeksluiting samen tot deze vastklikt
6@
op het midden van het lichaam te plaatsen en aan te pas-
in (zie afb. 3e - 3g) en borg deze met het
van het snelopeningsmechanisme.
in de musketonhaak . Het draagoog
worden losgemaakt en verschoven om
in overeenstemming
6@
Maaihoogte instellen
■ Doe het harnas 6@ om en haak het apparaat in (zie hoofdstuk “Har-
nas omdoen”).
■ Stel met de verschillende riemverstellers op het harnas
werk- en maaipositie in (zie hoofdstuk ”Harnas omdoen”).
■ Maak vervolgens een paar heen en weer gaande bewegingen zonder
de motor te starten om de optimale lengte van het harnas in te stellen
(zie afb. 6a).
■ Het harnas
het rode riemstuk
afb. 3i).
LET OP!
■ Gebruik altijd het harnas
het harnas
loopt. Schakel de motor uit voordat u het harnas
is voorzien van een snelopeningsmechanisme. Trek aan
6@
wanneer u het apparaat snel moet afdoen (zie
wanneer u met het apparaat werkt. Doe
6@
om zodra u de motor hebt gestart en deze stationair
6@
afneemt.
6@
6@
de optimale
6@
NL
BE
om het
LET OP! SCHERPE KANTEN, DRAAG VEILIGHEIDSHAND-
SCHOENEN
■ Om de snijdraad-beschermkap C van de beschermkap 50 te demonte-
ren, gebruikt u bijv. een schroevendraaier om de drie bevestigingspennen voorzichtig los te maken. LET OP! LETSELGEVAAR!
Draadspoel monteren/vervangen
■ Monteer/vervang de draadspoel 5@ zoals weergegeven op afbeel-
ding 2c.
■ Zoek het boorgat van de meeneemschijf
op het tegenoverliggende boorgat en blokkeer de schijf met de meegeleverde inbussleutel
6(
.
, leg de schijf met het gat
7^
FBK 4 A1
Brandstof en olie
■ Gebruik uitsluitend een mengsel van loodvrije benzine en speciale
2-takt-motorolie. Stel het brandstofmengsel samen op basis van de
brandstofmengtabel.
■ Doe de juiste hoeveelheid benzine en 2-taktolie in de meegeleverde
olie-/benzinemengfles
daarna goed.
Brandstofmengtabel
Mengprocedure: 40 delen benzine op 1 deel olie
(zie “Brandstofmengtabel”). Schud de fles
6^
Benzine 2-taktolie
0,5 liter 12,5 ml
47
Page 54

Ingebruikname
LET OP!
■ Neem de wettelijke bepalingen voor bescherming tegen geluidsover-
last in acht.
Controleer het apparaat voor ingebruikname steeds op:
NL
BE
■ Dichtheid van het brandstofsysteem.
■ Onberispelijke toestand en volledigheid van de beveiligingsvoorzienin-
gen en de maai-inrichting.
■ Vastzitten van alle schroefverbindingen.
■ Soepele beweegbaarheid van alle bewegende onderdelen.
Starten bij koude motor
LET OP!
■ Laat het startkoord nooit los zodat het terugschiet. Dit kan beschadi-
gingen tot gevolg hebben.
1.) Vul de benzinetank
2.) Druk 6 x op de brandstofpomp
3.) Zet de aan-/uitknop
4.) Trek de chokehendel
5.) Houd het apparaat goed vast en trek het startkoord
stand voelt. Trek vervolgens het startkoord
start.
6.) Herhaal de stappen 4–5 als de motor niet start.
7.) Druk op de gashendel
motor loopt.
Lees de sectie “Problemen oplossen” als de motor ook na meerdere pogingen
niet aanslaat.
LET OP!
■ Trek het startkoord
koord vast, wanneer het startkoord weer wordt ingetrokken.
Laat het startkoord nooit los zodat het terugschiet.
OPMERKING
■
Bij zeer hoge buitentemperaturen kan het voorkomen dat ook bij een
koude motor zonder choke moet worden gestart!
(zie ook de sectie “Brandstof en olie”).
(primer).
op “I”.
naar positie “ ”.
snel aan. Het apparaat
om de auto-choke te activeren zodra de
altijd rechtuit. Houd de greep van het start-
Starten bij warme motor
(Het apparaat heeft minder dan 15–20 minuten stilgestaan)
1.) Zet de aan-/uitknop
2.) De chokehendel
worden getrokken.
3.) Houd het apparaat goed vast en trek het startkoord
eerste weerstand uit. Trek nu het startkoord
moet na 1–2 keer trekken starten. Als het apparaat na 6 keer trekken
nog niet start, herhaalt u stap 1-7 onder “Starten bij koude motor”.
Motor uitschakelen
Volgorde bij noodstop
Als het apparaat onmiddellijk moet worden gestopt, zet u de aan-/uitknop
op “0”.
Normale volgorde
■ Laat de gashendel
de aan-/uitknop
op “I”.
hoeft voor het starten van de warme motor niet te
snel aan. Het apparaat
los en wacht tot de motor stationair draait. Zet
op “0”.
aan tot u weer-
tot aan de
Werkinstructies
Oefen voordat u het apparaat gaat gebruiken alle werktechnieken (zie
afb. 6a - 6c) bij uitgeschakelde motor.
Snijdraad langer maken
Laat de motor met vol gas lopen en tik de draadspoel
de snijdraad langer te maken. De draad wordt automatisch langer. Het
mes A op de snijdraad-beschermkap C verkort de draad tot de toegestane lengte (zie afb. 6d).
LET OP!
Gazon-/gras-/onkruidresten hopen zich op onder de beschermkap
■ Verwijder de resten bij uitgeschakelde motor met een plamuurmes of
iets dergelijks.
Verschillende maaimethoden
Trimmen / maaien (3-tands snijmes evt. met draadspoel)
■ Beweeg het apparaat in een sikkelvormige maaibeweging heen en
weer (zie afb. 6a).
■ Houd het snijgereedschap parallel aan de grond en stel de gewenste
maaihoogte vast.
Laag trimmen (met draadspoel)
■ Houd het apparaat iets schuin boven de grond (zie afb. 6b). Maai
altijd van u af. Beweeg het apparaat niet naar u toe.
Afmaaien (met draadspoel)
■ Bij afmaaien maait u alle vegetatie tot aan de grond weg. Daartoe
draait u de draadspoel in een hoek van 30° graden naar rechts. Zet
de handgreep in de gewenste positie (zie afb. 6c).
Maaien bij een boom / hekwerk / fundering (met draadspoel)
OPMERKING
■ Als de draad in aanraking komt met bomen, stenen, stenen muren
of funderingen, slijt de draad af of gaat deze rafelen. Als de draad
tegen hekwerk slaat, breekt de draad af.
LET OP!
■ Verwijder met het apparaat geen voorwerpen van looppaden e.d.!
Het apparaat genereert grote krachten, en kleine stenen of andere
voorwerpen kunnen 15 meter en meer worden weggeslingerd en
resulteren in letsel of beschadigingen aan auto's, huizen en ramen.
Klemzitten
Schakel onmiddellijk de motor uit als het snijgereedschap blokkeert. Verwijder gras en struikgewas uit het apparaat voordat u het weer in gebruik
neemt.
Terugslag voorkomen
Bij het werken met het mes bestaat er gevaar voor een terugslag wanneer
het mes in contact komt met vaste obstakels (boomstam, tak, boomstronk,
steen e.d.). Het apparaat wordt daarbij tegen de draairichting van het
snijgereedschap in teruggeslingerd. Dit kan ertoe leiden dat u de controle
over het apparaat verliest. Gebruik het apparaat niet in de nabijheid
van hekken, metalen kozijnen, afperkingsstenen of funderingen. Voor het
maaien van licht struikgewas plaatst u het apparaat zoals weergegeven
op afb. 6e om terugslag te voorkomen.
Draag een veiligheidsbril!
op de grond om
5@
.
LET OP!
■ Bij stationair draaien moet het mes stilstaan. Als het mes draait, moet
de carburateur worden afgesteld!
48
FBK 4 A1
Page 55

Werken met de heggenschaar
Snoeitechnieken
■ De dubbelzijdige messenbalk maakt maaien in beide richtingen of
door pendelbewegingen van de ene naar de andere kant mogelijk.
■ Beweeg bij verticaal maaien de heggenschaar gelijkmatig voorwaarts
of boogvormig omhoog en omlaag.
■ Beweeg bij horizontaal maaien de heggenschaar sikkelvormig naar de
rand van de heg, zodat gesnoeide takken op de grond vallen.
■ Zie uitvouwpagina (afbeelding A).
OPMERKING
► Verwijder dikke takken met een takkenschaar.
Werken met de hoogsnoeier
Zaagtechnieken
Veilig werken
■ Houd het apparaat, de zaag en de kettingbeschermkoker 6$ in goede
conditie, om letsel te voorkomen.
■ Controleer het apparaat op duidelijke schade of defecten als u het
hebt laten vallen.
■ Neem de voorgeschreven werkhoek van max. 60° ±10° in acht, om
veilig te kunnen werken (zie afbeelding).
max. 60° ±10°
NL
BE
WAARSCHUWING!
► Houd terdege rekening met omlaag vallend afgezaagd hout.
► Houd terdege rekening met het gevaar van terugslaande takken.
OPMERKING
►
Zet de aanslag
rustiger.
► Begin pas daarna met zagen.
Afzagen van kleine takken
♦ Zaag bij kleine takken (Ø 0-8 cm) van boven naar beneden
(zie afbeelding).
Afzagen van grotere takken
♦ Maak bij grotere takken (Ø 8-25 cm) eerst een kleine zaagsnede A
om de spanning van de tak te halen (zie afbeelding). Die zaagsnede
voorkomt ook dat de schors van de stam scheurt.
♦ Zaag vervolgens van boven
tegen de tak. Op die manier werkt u veiliger en
B
naar beneden A de tak door.
■ Gebruik het apparaat niet als u op een ladder staat of op een instabiele
ondergrond.
■ Laat u niet verleiden om zonder nadenken te gaan zagen.
Dat kan uzelf en anderen in gevaar brengen.
■ Bij kinderen is supervisie noodzakelijk om ervoor te zorgen dat ze niet
met het product spelen.
■ Neem regelmatig een andere werkhouding aan. Bij langer gebruik van
het apparaat kan de doorbloeding van de handen verstoord raken. U
kunt echter langer met het apparaat werken als u geschikte handschoenen draagt of regelmatig een pauze inlast. Houd er rekening mee dat
de persoonlijke aanleg voor een slechte doorbloeding, lage buitentemperaturen of het gebruik van veel kracht bij het werken de gebruiksduur
kunnen reduceren.
Transport
■ Gebruik bij transport de beschermkokers 6# 6$.
■ Let erop dat u het apparaat niet inschakelt als u het draagt
(zie afbeelding).
B
A
Afzagen in gedeelten
Kort lange of dikke takken in voordat u de laatste zaagsnede maakt om
de tak van de stam te scheiden (zie afbeelding).
C A B
cb a
2
1
FBK 4 A1
Reinigen
Motorunit reinigen
OPMERKING
■ Na elk gebruik moet het apparaat grondig worden gereinigd.
■ Schakel het apparaat uit en maak de bougiestekker los voordat u
reinigingswerkzaamheden uitvoert.
■ Reinig het apparaat regelmatig met een vochtige doek en een beetje
afwasmiddel. Let daarbij op dat er geen water in het apparaat binnendringt!
Hoogsnoeier reinigen
■ De hoogsnoeier moet regelmatig worden vrijgemaakt van zaagspanen.
♦ Verwijder het kamwielhuis
♦ Neem de zaagketting
schoon.
♦ Houd de zaagketting
en de olietoevoer.
.
van het zwaard en maak het zwaard
scherp en controleer de spanning, het oliepeil
49
Page 56

Heggenschaar reinigen
♦ Controleer de messenbalk
bouten en draai die zo nodig vast.
♦ Verwijder vastgeraakt snoeisel.
♦ Verzorg de messenbalk
NL
Draadspoel-/mes-hulpstuk reinigen
van de heggenschaar op losgeraakte
met olie uit een spuitbus of een kannetje.
BE
♦ Verwijder vastgeraakt snoeisel.
♦ Houd het mes
scherp om het werk te verlichten.
Onderhoud
Draadspoel / snijdraad vervangen
1.) De draadspoel
onder “Draadspoel monteren/vervangen”. Druk op de markering (zie
afb. 5a), draai het deksel en neem een behuizinghelft af (zie afb. 5b).
2.) Neem het spoelplateau
3.) Verwijder een eventueel nog aanwezig restant van de snijdraad.
4.) Leg een nieuwe snijdraad in het midden neer en laat de zo ontstane
lus uit de uitsparing van het spoelplateau hangen (zie afb. 5d).
5.) Wikkel de draad onder spanning op, tegen de wijzers van de klok in.
Het spoelplateau
(zie afb. 5d).
6.) Haak de laatste 15 cm van beide draaduiteinden in de tegenoverliggende draadhouder van het spoelplateau
7.) Leid de beide draaduiteinden door de metalen oogjes in de draadspoelbehuizing (zie afb. 5e).
8.) Druk het spoelplateau
9.) Voeg de behuizinghelften weer samen.
10.) Trek kort en krachtig aan beide draaduiteinden om deze uit de draad-
houders los te maken (zie afb. 5f).
11.) Kort overtollige draad tot 13 cm in. Dit vermindert de belasting van de
motor tijdens het starten en opwarmen.
12.) Monteer de draadspoel weer (zie hoofdstuk “Draadspoel monte-
ren/vervangen”). Sla punt 3–6 over als de complete draadspoel
wordt vervangen.
Luchtfilter onderhouden
Vervuilde luchtfilters zorgen voor een afname van het motorvermogen
door te geringe luchttoevoer naar de carburateur.
Regelmatige controle is daarom noodzakelijk. Het luchtfilter
de 25 bedrijfsuren worden gecontroleerd en zo nodig worden gereinigd.
Bij zeer stoffige lucht moet het luchtfilter vaker worden gecontroleerd.
1.) Verwijder de kap van de luchtfilterbehuizing
2.) Neem het luchtfilter
3.) Reinig het luchtfilter
schoon te blazen.
4.) De montage vindt in omgekeerde volgorde plaats.
LET OP!
■ Reinig het luchtfilter nooit met benzine of brandbare oplosmiddelen.
moet worden gedemonteerd zoals beschreven
5@
uit de draadspoelbehuizing (zie afb. 5c).
scheidt daarbij de beide helften van de snijdraad
(zie afb. 5e).
in de draadspoelbehuizing (zie afb. 5e).
.
uit de behuizing.
door het uit te kloppen of (met perslucht)
moet om
Bougie onderhouden
1.) Trek de bougiestekker
2.) Maak de bougie los met de meegeleverde bougiesleutel
3.) De montage vindt in omgekeerde volgorde plaats.
Elektrodenafstand = 0,6 mm (afstand tussen de elektroden waartussen de
ontstekingsvonk wordt opgewekt). Controleer de bougie voor het eerst na 10
bedrijfsuren op vervuiling en reinig deze zo nodig met een koperdraadborstel.
Pleeg daarna om de 50 uur onderhoud aan de bougie.
Beschermkapmes slijpen
A
Het mes
maak dan de 2 bouten los waarmee het mes
kap
met een slijpsteen en let erop dat u de hoek van de snijkant handhaaft.
Carburateurinstellingen
Verwijder de kap van de luchtfilterbehuizing
Gaskabel instellen
Als het maximale toerental van het apparaat mettertijd niet meer wordt
bereikt en alle andere oorzaken zoals beschreven in de sectie “Problemen
oplossen” zijn uitgesloten, kan het nodig zijn de gaskabel af te stellen. Om
de gaskabel na te stellen, draait u de bout
de contramoer H2 correct in (zie afb. 4).
Aandrijving smeren
■ Vul om de 20 bedrijfsuren een beetje aandrijfvet bij (ca. 10 g) om de
♦ Draai hiertoe de bout open (zie afb. 2c) om het aandrijfvet in het
♦ Na het vullen van de aandrijving sluit u de smeeropening weer met de
(zie afb. 2a) kan mettertijd bot worden. Mocht u dit vaststellen,
C
is bevestigd. Zet het mes A vast in een bankschroef. Slijp het mes A
aandrijving te smeren.
aandrijfhuis te drukken.
.
bout
los.
.
7!
A
op de snijdraad-bescherm-
.
resp. de stelschroef H1 en
Opslag en transport
■ Berg het apparaat op een veilige plaats op.
■ Berg het apparaat en de accessoires veilig op, beschermd tegen open
vuur en hitte-/ontstekingsbronnen, zoals gasgeisers, wasdrogers, oliekachels of draagbare radiatoren, enz.
■ Houd de beschermkap
altijd vrij van maairesten.
■ De kunststofbescherming voor het mes moet bij transport en niet-
gebruik weer worden aangebracht.
■ Schakel het apparaat uit en maak de bougiestekker los voordat u
onderhoudswerkzaamheden uitvoert.
Apparaat opslaan
Wanneer u het apparaat langer dan 30 dagen opslaat, moet het hierop
worden voorbereid. Anders verdampt de resterende brandstof in de carburateur met achterlating van een rubberachtig bodembezinksel. Dit kan het
starten bemoeilijken en dure reparatiewerkzaamheden tot gevolg hebben.
1.) Draai de tankdop
te nemen. Giet de benzinetank
2.) Start de motor en laat deze draaien tot hij stopt, om de brandstof uit de
carburateur te verwijderen.
3.) Laat de motor ca. 10 minuten afkoelen.
4.) Verwijder de bougie (zie hoofdstuk “Bougie onderhouden”).
5.) Giet 1 theelepel 2-taktolie in de verbrandingskamer. Trek meerdere
keren aan het startkoord
smeren. Plaats de bougie terug.
, de draadspoel 5@ en de motor bij opslag
los om eventuele druk in de benzinetank weg
voorzichtig leeg.
om alle mechanische delen met olie te
50
FBK 4 A1
Page 57

OPMERKING
■ Berg het apparaat droog en zo ver mogelijk uit de buurt van moge-
lijke ontstekingsbronnen op.
Opnieuw in gebruik nemen
1.) Verwijder de bougie (zie hoofdstuk “Bougie onderhouden”).
2.) Trek snel aan het startkoord
kamer te verwijderen.
3.) Reinig de bougie en let op de juiste afstand tussen de elektroden op de
bougie.
4.) Vul de benzinetank
Vervoeren
■ Wanneer u het apparaat wilt vervoeren, maakt u de benzinetank
leeg zoals beschreven in de sectie “Opslag”.
om overtollige olie uit de verbrandings-
. Zie de sectie “Brandstof en olie”.
Problemen oplossen
Motorunit
Probleem Mogelijke oorzaak Problemen oplossen
De motor slaat
niet aan.
De motor slaat
aan, maar heeft
niet het volledige
vermogen.
De motor loopt
onregelmatig.
Beroete of vochtige bougie.
Foutieve procedure bij het
starten.
Verkeerde instelling van de
chokehendel
Verontreinigd luchtfilter. Reinig het luchtfilter.
Verkeerde elektrodenafstand van de bougie.
Verkeerde instelling van de
carburateur.
.
Volg de aanwijzingen
voor het starten.
Zet de chokehendel
op “ ”.
Reinig de bougie en
stel de afstand van
de elektroden in of
vervang de bougie.
Reinig de bougie of
vervang hem.
Onderhoudsintervallen
Hoogsnoeier
De onderstaande gegevens gelden bij gebruik onder normale omstandigheden. Bij gebruik onder bijzondere omstandigheden, bijvoorbeeld bij veel
stofontwikkeling of lange dagelijkse werktijden, dienen de aangegeven
intervallen overeenkomstig te worden verkort.
Onderdeel
Kettingsmering
Zaagketting
Zwaard
Kamwiel Controleren
Actie Voor
Controleren
Controleren,
ook op
scherpte
Kettingspanning controleren
Slijpen
Controleren
(slijtage,
beschadiging)
Reinigen en
omkeren
Ontbramen
Vervangen
Vervangen
aanvang
van het
werk
X
X
X
X
Wekelijks
Bij storing
XX
X
X
Bij beschadiging
Wanneer
nodig
X
XX
X
NL
BE
Hoogsnoeier
Probleem Mogelijke oorzaak Problemen oplossen
Motor loopt,
zaagketting
beweegt niet.
Het zagen
vordert niet.
De heggenschaar of de
hoogsnoeier is niet correct
op de motorunit bevestigd.
Zaagketting
oververhit of hangt door.
droog,
Controleer de
montage.
Vul olie bij, slijp de
zaagketting
vang of span deze.
, ver-
Heggenschaar
Probleem Mogelijke oorzaak Problemen oplossen
Motor loopt,
messen staan
stil.
De heggenschaar of de
hoogsnoeier is niet correct
op de motorunit bevestigd.
Controleer de
montage.
Heggenschaar
De onderstaande gegevens gelden bij gebruik onder normale omstandigheden. Bij gebruik onder bijzondere omstandigheden, bijvoorbeeld bij veel
stofontwikkeling of lange dagelijkse werktijden, dienen de aangegeven
intervallen overeenkomstig te worden verkort.
Onderdeel
Messen Visuele controle
Actie Voor
aanvang
van het
werk
Reinigen
Na het
werk
X
Wanneer
nodig
XX
Bestelling van vervangingsonderdelen
Vervangingsonderdelen bestellen
Bij het bestellen van vervangingsonderdelen moeten de volgende gegevens
worden opgegeven:
■ Type apparaat
■ Artikelnummer van het apparaat
■ Identificatienummer van het apparaat
Actuele prijzen en informatie vindt u op
www.kompernass.com
FBK 4 A1
51
Page 58

Afvoeren
De verpakking bestaat uit milieuvriendelijke materialen, die u via
de plaatselijke recyclepunten kunt afvoeren. Het apparaat en de
accessoires bestaan uit verschillende materialen, zoals metaal en
kunststoffen.
Informatie over mogelijkheden voor het afvoeren van het afgedankte
NL
apparaat krijgt u bij uw gemeentereinigingsdienst.
BE
Milieubescherming
■ Leeg de benzine- en olietank zorgvuldig en lever uw apparaat in bij
een recyclepunt. De gebruikte onderdelen van kunststof en metaal
kunnen worden gescheiden voor hergebruik.
■ Lever oude olie en benzineresten in bij een afvalverwerkingspunt en
giet deze niet in de riolering of in de afvoer.
■ Lever verontreinigd onderhoudsmateriaal en grondstoffen in bij een
daarvoor bestemd inzamelpunt.
Service
WAARSCHUWING!
■ Laat uw apparaat uitsluitend door gekwalificeerd deskundig perso-
neel en alleen met originele vervangingsonderdelen repareren. Op
die manier blijft de veiligheid van het apparaat gewaarborgd.
Service Nederland
Tel.: 0900 0400223 (0,10 EUR/Min.)
E-Mail: kompernass@lidl.nl
IAN 110011
Service België
Tel.: 070 270 171 (0,15 EUR/Min.)
E-Mail: kompernass@lidl.be
IAN 110011
Bereikbaarheid hotline:
maandag t/m vrijdag van 8:00 uur – 20:00 uur (MET)
Appendix
Garantie
U hebt op dit apparaat 3 jaar garantie vanaf de aankoopdatum. Het
apparaat is met de grootst mogelijke zorg vervaardigd en voorafgaand
aan de levering nauwkeurig gecontroleerd. Bewaar de kassabon als
bewijs van aankoop. Neem telefonisch contact op met uw servicepunt,
mocht u aanspraak willen maken op de garantie. Alleen op die manier
is een kosteloze verzending van uw product gegarandeerd.
De garantie geldt uitsluitend voor materiaal- of fabricagefouten, echter
niet voor transportschade, niet voor onderdelen die onderhevig zijn aan
slijtage of voor beschadigingen van breekbare delen, bijv. schakelaars of
accu's. Het product is uitsluitend bestemd voor privégebruik en niet voor
bedrijfsmatige doeleinden.
Bij verkeerd gebruik en ondeskundige behandeling, bij gebruik van
geweld en bij reparaties die niet door ons erkend servicefiliaal zijn
uitgevoerd, vervalt de garantie. Uw wettelijke rechten worden door deze
garantie niet beperkt.
De garantieperiode wordt door deze waarborg niet verlengd. Dat geldt
ook voor vervangen en gerepareerde onderdelen. Eventueel al bij aankoop aanwezige schade en gebreken moeten meteen na het uitpakken
worden gemeld, echter uiterlijk twee dagen na de aankoopdatum. Voor
reparaties na afloop van de garantieperiode worden kosten in rekening
gebracht.
Importeur
KOMPERNASS HANDELS GMBH
BURGSTRASSE 21
44867 BOCHUM
GERMANY
www.kompernass.com
52
FBK 4 A1
Page 59

Vertaling van de oorspronkelijke conformiteitsverklaring
Wij, KOMPERNASS HANDELS GMBH, documentverantwoordelijke
persoon: de heer Semi Uguzlu, BURGSTR. 21, 44867 BOCHUM,
GERMANY, verklaren hierbij dat dit product voldoet aan de volgende
normen, normatieve documenten en EU-richtlijnen:
Machinerichtlijn
(2006 / 42 / EC)
Outdoor-richtlijn
(2005 / 88 / EC)
Emissierichtlijn
(2012/46/EU)
Toegepaste geharmoniseerde normen:
EN ISO 11806-1: 2011
EN ISO 10517: 2009+A1
EN ISO 11680-1: 2011
Type / apparaatbeschrijving:
Benzine combiapparaat 4-in-1 FBK 4 A1
Productiejaar: 02 - 2015
Serienummer: IAN 110011
NL
BE
Bochum, 5-12-2014
Semi Uguzlu
- Kwaliteitsmanager -
Technische wijzigingen vanwege verdere ontwikkeling voorbehouden.
FBK 4 A1
53
Page 60

54
FBK 4 A1
Page 61

Inhaltsverzeichnis
Einleitung ..................................56
Bestimmungsgemäßer Gebrauch .......................56
Ausstattung ........................................56
Lieferumfang .......................................57
Technische Daten....................................57
Sicherheitshinweise..........................59
Arbeitssicherheitshinweise für Heckenscheren..............59
Ergänzende Sicherheitshinweise für Heckenscheren .........60
Arbeitssicherheitshinweise für Hochentaster ...............61
Vorsichtsmaßnahmen gegen Rückschlag..................61
Arbeitssicherheitshinweise für Fadenspulen................62
Arbeitssicherheitshinweise für Schnittmesser ...............62
Sicherheitsvorrichtungen ..............................63
Vor der Inbetriebnahme......................63
Rundgriff montieren ..................................63
Schnelllösemechanismus montieren......................63
Tragegurt befestigen / montieren .......................63
Heckenschere montieren ..............................64
Heckenschere demontieren ............................64
Schwenken der Heckenschere..........................64
Sägekette und Schwert montieren.......................64
Sägekette demontieren ...............................64
Sägekette spannen und prüfen .........................64
Kettenschmierung ...................................64
Sägekette schärfen ..................................64
Verlängerungsvorsatz montieren ........................64
Schutzhaube montieren/demontieren ....................65
Schnittmesser montieren/ersetzen.......................65
Fadenspule montieren/ersetzen ........................65
Tragegurt anlegen...................................65
Schnitthöhe einstellen ................................65
Treibstoff und Öl ....................................66
Inbetriebnahme.............................66
Starten bei kaltem Motor..............................66
Starten bei warmem Motor ............................66
Arbeiten mit der Heckenschere . . . . . . . . . . . . . . . . . . . . . . . . . 67
Schnitttechniken.....................................67
Arbeiten mit dem Hochentaster .........................67
Sägetechniken......................................67
Sicheres Arbeiten....................................67
Transport ..................................67
Reinigung..................................68
Wartung...................................68
Lagerung und Transport ......................69
Fehlersuche ................................69
Motoreinheit .......................................69
Hochentaster .......................................69
Heckenschere ......................................69
Wartungsintervalle ..........................70
Hochentaster .......................................70
Heckenschere ......................................70
Ersatzteilbestellung..........................70
Entsorgung.................................70
Anhang....................................70
Garantie ..........................................70
Service............................................71
Importeur..........................................71
Original-Konformitätserklärung .........................71
DE
AT
CH
FBK 4 A1
55
Page 62

BENZIN-KOMBIGERÄT 4 IN 1 FBK 4 A1
Einleitung
Wir beglückwünschen Sie zum Kauf Ihres neuen Gerätes. Sie haben sich
damit für ein hochwertiges Produkt entschieden. Die Betriebsanleitung ist
Teil dieses Produkts. Sie enthält wichtige Hinweise für Sicherheit, Gebrauch
und Entsorgung. Machen Sie sich vor der Benutzung des Produkts mit allen
Bedien- und Sicherheitshinweisen vertraut. Benutzen Sie das Produkt nur
DE
wie beschrieben und für die angegebenen Einsatzbereiche. Händigen Sie
AT
alle Unterlagen bei Weitergabe des Produkts an Dritte mit aus.
CH
Bestimmungsgemäßer Gebrauch
Langstielheckenschere
Dieses Gerät ist bestimmt zum Schneiden und Trimmen von Hecken, Büschen und Ziersträuchern im häuslichen Bereich. Es handelt sich hierbei um
ein handgeführtes Gerät mit integriertem Antrieb, bei dem sich die linear
angeordneten Schneiden hin- und her bewegen.
WARNUNG!
► Heckenscheren sind nicht für die Benutzung durch Kinder geeignet.
Hochentaster
Dieses Gerät ist bestimmt für Entastungsarbeiten an Bäumen.
3 Zahn-Schnittmesser / Fadenspule
Verwendung mit 3 Zahn-Schnittmesser: Zum Schneiden von hohem Gras,
Gestrüpp und schwachem Holzgewächs.
Verwendung mit Fadenspule: Zum Schneiden von Rasen und leichtem
Unkraut.
Verlängerungsvorsatz
ACHTUNG!
■ Den Verlängerungsvorsatz / Ausleger
dem 3 Zahn-Schnittmesser-/ Fadenspulenvorsatz verwenden!
Jede andere Verwendung, die in dieser Betriebsanleitung nicht ausdrücklich zugelassen wird, kann zu Schäden am Gerät führen und eine
ernsthafte Gefahr für den Benutzer darstellen. Beachten Sie unbedingt die
Einschränkungen in den Sicherheitshinweisen. Beachten Sie nationale Vorschriften die den Einsatz der Maschine beschränken können. Jede andere
Verwendung oder Veränderung der Maschine gilt als nicht bestimmungsgemäß und birgt erhebliche Unfallgefahren.
Nicht zum gewerblichen Gebrauch vorgesehen.
VERBOTENE ANWENDUNGEN!
Wegen körperlicher Gefährdung des Benutzers darf das Gerät nicht zu
folgenden Arbeiten eingesetzt werden: zum Reinigen von Gehwegen und
als Häcksler zum Zerkleinern von Baum- und Heckenabschnitten. Ferner
darf das Gerät nicht zum Einebnen von Bodenerhebungen, wie z. B. Maulwurfshügeln verwendet werden. Aus Sicherheitsgründen darf das Gerät
nicht als Antriebsaggregat für andere Geräte jeglicher Art verwendet
werden. Für daraus hervorgerufene Schäden oder Verletzungen aller Art
haftet der Benutzer / Bediener und nicht der Hersteller.
nicht in Kombination mit
5^
Ausstattung
Motoreinheit
Einschaltsperre
Ein-/ Ausschalter
Trageöse
4 x Befestigungsschrauben (mit Sprengring, Unterlegscheibe und Mutter)
Rundgriff
5a
Gummiring
5b
Stift
Barrierebügel
Abdeckung
Schraubgriff
Sicherungshebel
Ausleger
Gashebel
Zündkerzenstecker
Choke-Hebel
Startseilzug
Benzintank
Tankdeckel
Kraftstoffpumpe „Primer“
Abdeckung Luftfiltergehäuse
Heckenscherenvorsatz FBK 4 A1-1
Handgriff
Ent-/ Verriegelung
Getriebegehäuse
Messerbalken
Grundplatte (Heckenschere)
Stellhebel
Vorderer Ausleger (Heckenschere)
Arretierungsloch
Antriebswelle
Hochentastervorsatz FBK 4 A1-2
Vorderer Ausleger (Hochentaster)
Schutzring
Öltankdeckel
Öltank
Schwert
Sägekette
Schleifbockhilfe
Anschlag
Arretierungsloch
Antriebswelle
Mutter
Gewinde
Kettenradabdeckung
Schwertführung
Schwertbohrung
Führungsschiene
Tropföler
Kettenrad
Ölregulierungsschraube
Kettenspannstift
Kettenspannschraube
56
FBK 4 A1
Page 63

Fadenspulen-/ Schnittmesservorsatz FBK 4 A1
4 x Schrauben (mit Sprengring, Unterlegscheibe und Mutter)
Schutzhaube
3 Zahn-Schnittmesser
Fadenspule mit Schnittfaden
5@
Vorderer Ausleger (Fadenspule / 3 Zahn-Schnittmesser)
5#
Arretierungsloch
5$
Antriebswelle
5%
Verlängerungsvorsatz
Ausleger
5^
Schraubgriff
5&
Sicherungshebel
5*
Abdeckung
5(
Arretierungsloch
6)
Antriebswelle
6!
Zubehör
Tragegurt
6@
Schwertschutzhülle
6#
Kettenschutzhülle
6$
Bio-Kettenöl
6%
Öl-/ Benzinmischflasche
6^
Schutzbrille
6&
Sechskantschlüssel M4
6*
Sechskantschlüssel M5
6(
Maulschlüssel SW 8/10
7)
Zündkerzenschlüssel /Schlitzschraubendreher
7!
Werkzeugtasche
7@
Mutter M10 (Linksgewinde)
7#
Abdeckung Druckplatte
7$
Druckplatte
7%
Mitnehmerscheibe
7^
Lieferumfang
1 Motoreinheit
1 Heckenscherenvorsatz FBK 4 A1-1(nachfolgend Heckenschere genannt)
1 Hochentastervorsatz FBK 4 A1-2 (nachfolgend Hochentaster genannt)
1 Fadenspulen-/ Schnittmesservorsatz FBK 4 A1
1 Verlängerungsvorsatz
1 Handgriff mit Barrierebügel
1 Fadenspule mit Schnittfaden
1 3 Zahn-Schnittmesser
1 Tragegurt
1 Kettenschutzhülle
1 Schwertschutzhülle
1 Öl- / Benzinmischflasche
1 100 ml Bio-Kettenöl
1 Werkzeugtasche
1 Sechskantschlüssel M4
1 Sechskantschlüssel M5
1 Zündkerzenschlüssel /Schlitzschraubendreher
1 Maulschlüssel SW 8/10
1 Schutzbrille
1 Betriebsanleitung
Technische Daten
Motoreinheit:
Motortyp: 2-Takt-Motor, luftgekühlt, Chromzylinder
Motorleistung (max.): 1,35 kW / 1,85 PS
Hubraum: 42,7 cm³
Leerlaufdrehzahl Motor: 3000 min
Max. Drehzahl Motor
mit 3 Zahn-Schnittmesser: 9200 min
mit Fadenspule: 8700 min
mit Kettensäge: 9200 min
mit Heckenschere: 9200 min
Max. Schnittgeschwindigkeit
mit 3 Zahn-Schnittmesser: 6900 min
mit Fadenspule: 6525 min
mit Kettensäge: 20 m/s
mit Heckenschere: 1550 min
Zündung: Elektronisch
Antrieb: Zentrifugalkupplung
Gewicht:
(leerer Tank): ca. 5,6 kg
Tankinhalt: 1200 cm
Zündkerze: TORCH L7RTC
Kraftstoffverbrauch bei
max. Motorleistung: 0,6 kg / h
spezifischer
Kraftstoffverbrauch
bei max. Motorleistung: 446 g / kWh
Heckenschere: FBK 4 A1-1
Schnittlänge: 425 mm
Zahnabstand: 20 mm
Gewicht
(betriebsbereit): ca. 2,24 kg
Hochentaster: FBK 4 A1-2
Gewicht (betriebsbereit): ca. 1,6 kg
Öltank empfohlene Füllmenge: 140 cm
Schnittlänge: ca. 260 mm
Schwert: Oregon Typ 100SDEA318
Sägekette: Oregon 91P040X
Oregon 91P040E
Fadenspulen-/
Schnittmesservorsatz: FBK 4 A1
Fadenspule mit Schnittfaden (IAN 110011):
Schnittkreis-Faden Ø: 43 cm
Fadenlänge: 8,0 m
Faden-Ø: 2,0 mm
3 Zahn-Schnittmesser (IAN 110011):
Schnittkreis-Schnittmesser Ø: 25,5 cm
-1
-1
-1
-1
-1
-1
-1
-1
3
3
DE
AT
CH
FBK 4 A1
57
Page 64

Geräusch- und Vibrationsinformationen:
Messwert für Geräusch ermittelt entsprechend ISO 22868,
EN ISO 10517. Der A-bewertete Geräuschpegel beträgt typischerweise:
Heckenschere:
Schalldruckpegel L
Unsicherheit K
Schallleistungspegel L
: 98,79 dB(A)
pA
: 2,5 dB
WA
: 109,53 dB(A)
WA
Garantierter
Schallleistungspegel L
DE
Unsicherheit K
AT
CH
Hochentaster:
Schalldruckpegel L
Unsicherheit K
WA
WA
: 114 dB(A)
WA
: 2,5 dB
: 97,06 dB(A)
pA
: 2,5 dB
Schallleistungspegel: 110,87 dB(A)
Unsicherheit K
: 2,5 dB
WA
Fadenspule / 3 Zahn-Schnittmesser:
Schalldruckpegel L
Unsicherheit K
Schallleistungspegel L
Unsicherheit K
: 97,64 dB(A)
pA
: 2,5 dB
pA
: 111,27 dB(A)
WA
: 2,5 dB
WA
Gehörschutz tragen, um Gehörschäden zu vermeiden!
Schwingungswerte (Vektorsumme dreier Richtungen) ermittelt entsprechend
EN ISO 11806-1, EN ISO 10517, EN ISO 11680-1:
Heckenschere:
Vibration am vorderen Griff: Schwingungsemissionswert
= 4,182 m/s2
a
h,D
Unsicherheit K = 1,5 m/s
Vibration am hinteren Griff: Schwingungsemissionswert
= 9,695 m/s2
a
h,D
Unsicherheit K = 1,5 m/s
Hochentaster:
Vibration am vorderen Griff: Schwingungsemissionswert
= 3,855 m/s2
a
h,D
Unsicherheit K = 1,5 m/s
Vibration am hinteren Griff: Schwingungsemissionswert
= 7,590 m/s2
a
h,D
Unsicherheit K = 1,5 m/s
Fadenspule:
Vibration am vorderen Griff: Schwingungsemissionswert
= 4,864 m/s2
a
h,D
Unsicherheit K = 1,5 m/s
Vibration am hinteren Griff: Schwingungsemissionswert
= 9,750 m/s2
a
h,D
Unsicherheit K = 1,5 m/s
3 Zahn-Schnittmesser:
Vibration am vorderen Griff: Schwingungsemissionswert
= 4,622 m/s2
a
h,D
Unsicherheit K = 1,5 m/s
Vibration am hinteren Griff: Schwingungsemissionswert
= 7,708 m/s2
a
h,D
Unsicherheit K = 1,5 m/s
HINWEIS
Der in diesen Anweisungen angegebene Schwingungspegel ist
►
entsprechend einem in EN ISO 11806-1, EN ISO 10517, EN ISO
11680-1 genormten Messverfahren gemessen worden und kann für
den Gerätevergleich verwendet werden. Der angegebene Schwingungsemissionswert kann auch zu einer einleitenden Einschätzung
der Aussetzung verwendet werden.
WARNUNG!
► Der Schwingungspegel wird sich entsprechend dem Einsatz verändern
und kann in manchen Fällen über dem in diesen Anweisungen angegebenen Wert liegen. Die Schwingungsbelastung könnte unterschätzt
werden, wenn das Gerät regelmäßig in solcher Weise verwendet wird.
Für eine genaue Abschätzung der Schwingungsbelastung während
eines bestimmten Arbeitszeitraumes sollten auch die Zeiten berücksichtigt werden, in denen das Gerät abgeschaltet ist oder zwar läuft, aber
nicht tatsächlich im Einsatz ist. Dies kann die Schwingungsbelastung
über den gesamten Arbeitszeitraum deutlich reduzieren.
WARNUNG!
■ Vermindern Sie auch die Schwingungsrisiken z. B. das Risiko einer Weiß-
fingererkrankung durch häufige Arbeitspausen in denen Sie z. B. ihre
Handflächen aneinander reiben!
Erläuterungen der Hinweisschilder auf der Motoreinheit:
Warnung! Vor Inbetriebnahme Betriebsanleitung lesen!
Schutzhandschuhe tragen!
2
2
2
2
Erläuterungen der Hinweisschilder auf der Heckenschere:
2
2
2
2
Sicherheitsschuhe tragen!
Gehörschutz tragen!
Schutzhelm tragen!
Schutzbrille tragen!
Achtung, heiße Teile. Abstand halten!
Lebensgefahr durch Stromschlag! Halten Sie sich
mindestens 10m von Überlandleitungen fern.
Achtung! Herabfallende Gegenstände.
Insbesondere beim Schnitt über Kopfhöhe.
Achtung! Verletzungsgefahr durch laufende Messer.
Abstand halten!
58
FBK 4 A1
Page 65

Erläuterungen der Hinweisschilder auf dem Hochentaster:
Sicherheitshinweise
Lebensgefahr durch Stromschlag! Halten Sie sich
mindestens 10m von Überlandleitungen fern.
Gerät vor Regen oder Nässe schützen!
Achtung! Herabfallende Gegenstände.
Insbesondere beim Schnitt über Kopfhöhe.
Achtung! Verletzungsgefahr durch laufende Messer.
Erläuterungen der Hinweisschilder auf dem Fadenspulen-/
Schnittmesservorsatz:
Achtung! Linksgewinde.
Gerät vor Regen oder Nässe schützen!
Achten Sie auf weggeschleuderte Teile!
Vorsicht vor Rückstoß!
Vorsicht! Verletzungsgefahr durch drehendes Schnittmesser!
Hände und Füße fernhalten!
Vorsicht - Benzin ist extrem leicht entzündlich!
Explosionsgefahr! Keinen Kraftstoff verschütten!
Vor Wartungsarbeiten Gerät abstellen und
Zündkerzenstecker abziehen!
WICHTIG! VOR GEBRAUCH SORGFÄLTIG LESEN.
FÜR IHRE UNTERLAGEN AUFBEWAHREN.
Arbeitssicherheitshinweise für Heckenscheren
HINWEIS
► Die Heckenschere wird vollständig zusammengebaut geliefert.
► Hinweise und bildliche Darstellungen zur Einstellung, Gebrauch der
Heckenschere bzw. deren Stellteile, Wartung, Schmierung durch den
Benutzer finden Sie in dieser Anleitung und auf der Ausklappseite.
► Hinweise zur Arbeitsposition (siehe Ausklappseite).
► Hinweise zu Stellteilen (siehe Ausklappseite).
► Hinweise zum sicheren Umgang mit Kraftstoff (siehe Kapitel
„Vorbereitung“ Punkt f).
► Hinweise für den empfohlenen Austausch oder die Reparatur von
Teilen oder den Kundendienst und Spezifikationen von zu verwendenden Ersatzteilen, sofern diese die Gesundheit und Sicherheit der
Benutzer betreffen finden Sie in dieser Anleitung.
► Erklärung aller an der Heckenschere verwendeten grafischen Symbole,
Angaben, Merkmale und technische Daten sowie die Vorgehensweise
bei Unfällen und Störungen finden Sie in dieser Anleitung.
► Blockiertes Werkzeug: Entfernen Sie das klemmende Material aus
dem Messerbalken
WARNUNG!
■ Kinder dürfen die Heckenschere niemals benutzen.
■ Seien Sie stets aufmerksam, achten Sie darauf, was Sie tun und
gehen Sie mit Vernunft an die Arbeit mit dem Gerät. Benutzen
Sie das Gerät nicht, wenn Sie krank oder müde sind oder unter
dem Einfluss von Drogen, Alkohol oder Medikamenten stehen. Ein
Moment der Unachtsamkeit beim Gebrauch des Gerätes kann zu
ernsthaften Verletzungen führen.
■ Vermeiden Sie Fehlanwendungen, benutzen Sie die Maschine nur
wie unter „Bestimmungsgemäßer Gebrauch“ beschrieben.
.
Machen Sie sich mit der Betriebsanleitung vertraut, bevor Sie das
Gerät bedienen.
DE
AT
CH
Achtung! Erstickungsgefahr!
Vorsicht! Giftige CO-Dämpfe (Kohlenmonoxid-Dämpfe)!
Gerät nicht in geschlossenen Räumen verwenden!
Warnung! Verwenden Sie auf keinen Fall Kreissägeblätter
für die Funktion als Schnittmesser.
20 h
Ergänzen Sie alle 20 Betriebsstunden etwas Fett
(Getriebefließfett)
Der Abstand zwischen der Maschine und dritte muss
mindestens 15 Meter betragen!
Schneidwerkzeug (Schnittmesser / Schnittfaden) läuft nach!
Achtung, heiße Teile. Abstand halten!
Angabe des Schallleistungspegels LWA in dB.
Feuer, offenes Licht und Rauchen verboten!
Vorbereitung
a) DIESE HECKENSCHERE KANN ERNSTHAFTE VERLETZUNGEN VERUR-
SACHEN! Lesen Sie sorgfältig die Anweisungen zum korrekten Umgang,
zur Vorbereitung, zur Instandhaltung, zum Starten und Abstellen der
Heckenschere. Machen Sie sich mit allen Stellteilen und der sachgerechten
Benutzung der Heckenschere vertraut.
b) Kinder dürfen die Heckenschere niemals benutzen.
c) Vorsicht vor oberirdischen Stromleitungen.
d) Der Gebrauch der Heckenschere ist zu vermeiden, wenn sich Personen,
vor allem Kinder, in der Nähe befinden.
e) Tragen Sie geeignete Kleidung! Tragen Sie keine weite Kleidung oder
Schmuck, welcher von sich bewegenden Teilen erfasst werden kann. Es
wird empfohlen, feste Handschuhe, rutschfeste Schuhe und Schutzbrille
zu tragen.
f) Gehen Sie mit Kraftstoff sorgfältig um, er ist leicht entflammbar und die
Dämpfe sind explosiv. Die folgenden Punkte sollten befolgt werden:
– Nur speziell dafür vorgesehene Behälter nutzen.
– Bei laufendem oder heißem Motor niemals den Tankverschluss entfernen
oder Benzin nachfüllen. Lassen Sie vor dem Nachfüllen den Motor und
die Auspuffteile abkühlen.
FBK 4 A1
59
Page 66

– Rauchen Sie nicht.
– Tanken Sie nur im Freien.
– Lagern Sie die Heckenschere oder den Kraftstoffbehälter niemals in
einem Raum in dem sich eine offene Flamme, wie z. B. in einem Warmwasseraufbereiter, befindet.
– Falls Benzin übergelaufen ist, versuchen Sie nicht den Motor zu starten,
sondern entfernen Sie die Maschine vor dem Starten von der benzinverschmutzten Fläche.
DE
AT
CH
– Setzen Sie den Tankverschluss nach dem Befüllen immer auf und ver-
schließen Sie ihn sicher.
– Wird der Tank entleert, sollte dies im Freien vorgenommen werden.
g) Berührt die Schneideinrichtung einen Fremdkörper oder sollten sich die
Betriebsgeräusche verstärken oder die Heckenschere ungewöhnlich stark
vibrieren, stellen Sie den Motor ab und lassen Sie die Heckenschere zum
Stillstand kommen. Ziehen Sie den Zündkerzenstecker von der Zündkerze
und ergreifen Sie folgende Maßnahmen:
– auf Schäden überprüfen;
– auf lose Teile überprüfen und alle losen Teile befestigen;
– beschädigte Teile gegen gleichwertige Teile austauschen oder reparie-
ren lassen.
Gehörschutz tragen!
Schutzbrille tragen!
■ Machen Sie sich mit der Bedienung der Heckenschere vertraut, um Sie im
Notfall sofort stoppen zu können.
Betrieb
a) Der Motor ist stillzusetzen vor:
– Reinigung oder Beseitigung einer Blockierung;
– Überprüfung, Instandhaltung oder Arbeiten an der Heckenschere;
– Einstellung der Arbeitsposition der Schneideinrichtung;
– wenn die Heckenschere unbeaufsichtigt bleibt.
b) Stellen Sie immer sicher, dass sich die Heckenschere ordnungsgemäß
in einer der vorgegebenen Arbeitspositionen befindet, bevor der Motor
gestartet wird.
c) Während des Betriebes der Heckenschere ist immer sicherzustellen,
dass ein sicherer Stand eingenommen wird, besonders wenn eine Leiter
benutzt wird.
d) Benutzen Sie die Heckenschere nicht mit einer defekten oder stark
abgenutzten Schneideinrichtung.
e) Um die Brandgefahr zu vermindern, achten Sie darauf, dass der Motor
und der Schalldämpfer frei von Ablagerungen, Laub oder austretendem
Schmiermittel sind.
f) Stellen Sie immer sicher, dass alle Griffe und Sicherheitseinrichtungen
beim Gebrauch der Heckenschere angebaut sind. Versuchen Sie niemals, eine unvollständige Heckenschere oder eine mit nicht zulässigem
Umbau zu benutzen.
g) Benutzen Sie immer beide Hände, wenn die Heckenschere mit zwei
Griffen ausgerüstet ist.
h) Machen Sie sich stets vertraut mit Ihrer Umgebung und achten Sie auf
mögliche Gefahren, die Sie wegen der Geräusche der Heckenschere
vielleicht nicht hören können.
Wartung und Aufbewahrung
a) Wenn die Heckenschere zwecks Wartung, Inspektion oder Lagerung still-
gesetzt wird, schalten Sie den Motor aus, ziehen Sie den Zündkerzenstecker von der Zündkerze und vergewissern Sie sich, dass alle rotierenden
Teile zum Stillstand gekommen sind. Lassen Sie die Maschine abkühlen,
bevor Sie diese überprüfen, einstellen usw.
b) Lagern Sie die Heckenschere dort, wo Benzindämpfe nicht mit offenem
Feuer oder Funken in Kontakt kommen können. Lassen Sie die Heckenschere immer abkühlen, bevor Sie diese lagern.
c) Beim Transportieren oder bei der Lagerung der Heckenschere ist die
Schneideinrichtung immer mit dem Schutz für die Schneideinrichtung
abzudecken.
Ergänzende Sicherheitshinweise
für Heckenscheren
Umgebungs-Sicherheit
■ Führen Sie Heckenschnitte nur bei Tageslicht oder gutem künstlichem
Licht aus.
■ Achten Sie beim Schneiden darauf, keine Gegenstände wie z. B.
Drahtzäune oder Pflanzenstützen zu berühren. Dies kann zu Schäden
am Messerbalken führen. Inspizieren Sie die zu schneidende Hecke
sorgfältig und beseitigen Sie alle Drähte und sonstige Fremdkörper.
■ Seien Sie sich Ihrer Umgebung bewusst und auf mögliche Gefahrenmo-
mente gefasst, die Sie während des Schneidens der Hecke möglicherweise nicht hören.
GEFAHR!
► Bei drohender Gefahr bzw. im Notfall sofort den Motor ausschalten.
Elektrische Sicherheit
■ Halten Sie das Werkzeug nur an den isolierten Griffflächen, da
das Schneidmesser in Berührung mit verborgenen Stromleitungen
kommen kann. Der Kontakt des Schneidmessers mit einer spannungsfüh-
renden Leitung kann metallene Geräteteile unter Spannung setzen und zu
einem elektrischen Schlag führen.
Sicherheit von Personen
■ Während des Betriebes dürfen sich im Umkreis von 15 Metern keine
anderen Personen oder Tiere aufhalten. Der Bedienende ist im Arbeitsbereich gegenüber Dritten verantwortlich.
■ Achten Sie beim Betrieb der Heckenschere stets auf einen sicheren
Stand und halten Sie stets das Gleichgewicht, insbesondere bei Verwendung auf Stufen oder Leitern.
■ Fassen Sie die Heckenschere niemals am Messerbalken
■ Halten Sie alle Körperteile vom Schneidmesser fern. Versuchen Sie
nicht, bei laufendem Messer Schnittgut zu entfernen oder zu schneidendes Material festzuhalten. Entfernen Sie eingeklemmtes Schnittgut
nur bei ausgeschaltetem Gerät. Ein Moment der Unachtsamkeit bei
Benutzung der Heckenschere kann zu schweren Verletzungen führen.
■ Warten Sie, bis das Werkzeug zum Stillstand gekommen ist, bevor Sie
es ablegen.
Verwendung und Behandlung
ACHTUNG!
► Zwischen den Arbeitsvorgängen oder nach Beendigung eines
jeweiligen Arbeitsvorganges, darf der Messerbalken
Messerbalkenspitze abgelegt werden, um eventuelle Beschädigungen am Messerbalken
■ Prüfen Sie vor der Benutzung immer, ob die Messer, die Messerschrauben
und andere Teile des Schneidwerks abgenutzt oder beschädigt sind. Arbeiten Sie niemals mit beschädigtem oder stark abgenutztem Schneidwerk.
zu vermeiden.
an.
nicht auf der
60
FBK 4 A1
Page 67

■ Prüfen Sie nach der Einstellung des Arbeitswinkels, ob beide Einstellhe-
bel sicher eingerastet sind. Bleibt ein Einstellhebel offen, kann bei der
Arbeit die zweite Arretierung durch einen Ast ungewollt gelöst werden
und der Messerbalken
■ Benutzen Sie die Heckenschere niemals mit defekten oder nicht montier-
ten Schutzvorrichtungen.
■ Halten Sie die Heckenschere niemals an deren Schutzvorrichtung.
■ Tragen Sie die Heckenschere am vorderen Griff im ausgeschalteten
Zustand, den Messerbalken von Ihrem Körper abgewandt. Bei Transport oder Aufbewahrung der Heckenschere stets die Schutzabdeckung
aufziehen. Sorgfältiger Umgang mit dem Gerät verringert die Wahrschein-
lichkeit einer versehentlichen Berührung mit den laufenden Messern.
■ Lagern Sie die Heckenschere an einem trockenen, hoch gelegenen
oder verschlossenen Platz, außerhalb der Reichweite von Kindern.
■ Versuchen Sie nicht das Gerät zu reparieren, es sei denn, Sie besitzen
die notwendige Ausbildung.
■ Wechseln Sie sicherheitshalber abgenutzte oder beschädigte Teile aus.
GEFAHR!
► Bei drohender Gefahr bzw. im Notfall sofort den Motor ausschalten.
nach unten klappen.
Arbeitssicherheitshinweise für Hochentaster
VORSICHT! VERLETZUNGSGEFAHR!
► Fassen Sie niemals das Gerät im laufenden Betrieb oberhalb des
Schutzringes
Vorbereitung
■ Tragen Sie stets einen Schutzhelm, Gehörschutz und Sicherheitshandschuhe.
Tragen Sie auch Augenschutz, um keine Ölspritzer oder Sägestaub in die
Augen zu bekommen. Tragen Sie eine Staubmaske gegen Staub.
■ Tragen Sie robuste, rutschfeste Stiefel.
■ Verwenden Sie das Gerät nicht bei Regen oder Feuchtigkeit.
■ Prüfen Sie vor dem Gebrauch den Sicherheitszustand des Gerätes,
insbesondere das Schwert und die Sägekette.
■ Verwenden Sie das Gerät nicht in der Nähe von Stromleitungen. Halten
Sie einen Mindestabstand von 10 m zu oberirdischen Stromleitungen.
Elektrische Sicherheit
■ Benutzen Sie das Gerät nicht in explosionsgefährdeter Umgebung, wie
in der Nähe von entzündlichen Flüssigkeiten, Gasen oder Dämpfen.
Die von der Maschine produzierten Funken können diese Dämpfe oder
Gase entzünden.
■ Geräte mit defektem Schalter müssen unmittelbar repariert werden, um
Schäden und Verletzungen zu vermeiden.
Sicherheit von Personen
■ Verwenden Sie das Gerät niemals auf einer Leiter stehend.
■ Lehnen Sie sich bei der Verwendung des Gerätes nicht zu weit nach vor-
ne. Achten Sie immer auf einen sicheren Stand und halten Sie jederzeit
das Gleichgewicht. Verwenden Sie den im Lieferumfang enthaltenen
Tragegurt, um das Gewicht gleichmäßig auf den Körper zu verteilen.
■ Stellen Sie sich nicht unter die Äste, die sie abschneiden möchten, um
Verletzungen durch heruntergefallene Äste zu vermeiden. Achten Sie
auch auf zurückspringende Äste, um Verletzungen zu vermeiden. Arbeiten sie unter einem Winkel von ca. 60°.
■ Achten Sie darauf, dass es zu einem Geräterückschlag kommen kann.
■ Beobachten Sie nicht nur zu bearbeitende Äste, sondern auch herunter-
gefallenes Material, um Stolpern zu vermeiden.
■ Decken Sie die Führungsschiene und die Kette bei Transport und Lage-
rung mit der Abdeckung ab.
■ Vermeiden Sie unbeabsichtigtes Starten des Gerätes.
■ Lagern Sie das Gerät außerhalb der Reichweite von Kindern. Nur mit
der Betriebsanleitung und dem Gerät vertraute Personen dürfen dieses
bedienen.
an, um Verletzungen zu vermeiden!
Verwendung und Behandlung
■ Starten Sie das Gerät nie, bevor Schwert, Sägekette und Kettenradab-
deckung korrekt montiert sind.
■ Schneiden Sie kein am Boden liegendes Holz bzw. versuchen Sie nicht
aus dem Boden ragende Wurzeln zu Sägen. Vermeiden Sie auf jeden
Fall, dass die Sägekette in das Erdreich eintaucht, da die Sägekette
andernfalls sofort abstumpft.
■ Sollten Sie aus Versehen einen festen Gegenstand mit dem Gerät
berühren, schalten Sie den Motor sofort aus und untersuchen Sie das
Gerät auf eventuelle Schäden.
■ Legen Sie nach 30 Arbeitsminuten eine Pause von mindestens einer
Stunde ein.
■ Wenn der Hochentaster zwecks Wartung, Inspektion oder Lagerung still-
gesetzt wird, schalten Sie den Motor aus, ziehen Sie den Zündkerzenstecker von der Zündkerze und vergewissern Sie sich, dass alle rotierenden
Teile zum Stillstand gekommen sind. Lassen Sie die Maschine abkühlen,
bevor Sie diese überprüfen, einstellen usw.
■ Warten Sie das Gerät sorgfältig. Kontrollieren Sie, ob bewegliche Teile
einwandfrei funktionieren und nicht klemmen, ob Teile gebrochen oder
so beschädigt sind, dass die Funktion des Gerätes beeinträchtigt ist.
Lassen Sie beschädigte Teile vor dem Einsatz des Gerätes reparieren.
Viele Unfälle haben ihre Ursache in schlecht gewarteten Geräten.
■ Halten Sie Schneidwerkzeuge scharf und sauber. Sorgfältig gepflegte
Schneidwerkzeuge mit scharfen Schneidkanten verklemmen sich weniger und sind leichter zu führen.
■ Lassen Sie das Gerät von dafür qualifiziertem Personal warten. Verwen-
den Sie nur vom Hersteller empfohlene Original-Ersatzteile.
Vorsichtsmaßnahmen gegen Rückschlag
ACHTUNG RÜCKSCHLAG!
► Achten Sie beim Arbeiten auf Rückschlag des Gerätes. Es besteht
Verletzungsgefahr. Sie vermeiden Rückschläge durch Vorsicht und
richtige Sägetechnik.
■ Eine Berührung mit der Schienenspitze kann in manchen Fällen zu einer
unerwarteten nach hinten gerichteten Reaktion führen, bei der die
Führungsschiene nach oben und in Richtung der Bedienperson
geschlagen wird (siehe Abb. A).
Bild 1
Abb. A
■ Rückschlag kann auftreten, wenn die Spitze der Führungsschiene einen
Gegenstand berührt oder wenn das Holz sich biegt und die Sägekette
im Schnitt festklemmt (siehe Abb. B).
Abb. B
■ Das Verklemmen der Sägekette an der Oberkante der Führungsschiene
kann die Schiene heftig in Bedienerrichtung zurückstoßen.
DE
AT
CH
FBK 4 A1
61
Page 68

■ Jede dieser Reaktionen kann dazu führen, dass Sie die Kontrolle über
die Säge verlieren und sich möglicherweise schwer verletzen. Verlassen
Sie sich nicht ausschließlich auf die in der Kettensäge eingebauten
Sicherheitseinrichtungen. Ergreifen Sie als Benutzer einer Kettensäge
verschiedene Maßnahmen, um unfall- und verletzungsfrei zu arbeiten. Ein
Rückschlag ist die Folge eines falschen oder fehlerhaften Gebrauchs. Er
kann durch geeignete Vorsichtsmaßnahmen, wie nachfolgend beschrieben, verhindert werden:
■ Halten Sie die Säge mit beiden Händen fest, wobei Daumen und
Finger die Griffe der Kettensäge umschließen. Bringen Sie Ihren Kör-
DE
AT
CH
per und die Arme in eine Stellung, in der Sie den Rückschlagkräften
standhalten können. Wenn geeignete Maßnahmen getroffen werden,
kann die Bedienperson die Rückschlagkräfte beherrschen. Niemals die
Kettensäge loslassen.
■ Vermeiden Sie eine abnormale Körperhaltung und sägen Sie nicht
über Schulterhöhe. Dadurch wird ein unbeabsichtigtes Berühren mit
der Schienenspitze vermieden und eine bessere Kontrolle der Kettensäge in unerwarteten Situationen ermöglicht.
■ Verwenden Sie stets vom Hersteller vorgeschriebene Ersatzschienen
und Sägeketten. Falsche Ersatzschienen und Sägeketten können zum
Reißen der Sägekette und/oder zu Rückschlag führen.
■ Halten Sie sich an die Anweisungen des Herstellers für das Schärfen
und die Wartung der Sägekette. Zu niedrige Tiefenbegrenzer erhö-
hen die Neigung zu Rückschlag.
■ Sägen Sie nicht mit der Schwertspitze. Es besteht Rückschlagsgefahr.
■ Sorgen Sie dafür, dass keine Gegenstände am Boden liegen, über die
Sie stolpern können.
Arbeitssicherheitshinweise für Fadenspulen
Vorbereitung
■ Tragen Sie anliegende Arbeitskleidung, die Schutz bietet, wie eine lange
Hose, sichere Arbeitsschuhe, strapazierfähige Schutzhandschuhe, einen
Schutzhelm, eine Schutzmaske für das Gesicht oder eine Schutzbrille zum
Schutz der Augen und gute Ohrwatte oder einen anderen Gehörschutz
gegen den Lärm.
■ Benutzen Sie immer den mitgelieferten Tragegurt.
■ Achten Sie darauf, dass die Griffe trocken und sauber sind und keinerlei
Benzingemisch daran haftet.
■ Überprüfen Sie vor dem Arbeiten das Gelände auf Gegenstände, wie
Metallteile, Flaschen, Steine o. Ä. die weggeschleudert werden können und
dadurch Verletzungen beim Benutzer verursachen.
■ Bevor Sie den Motor anlassen, vergewissern Sie sich, dass die Faden-
spule mit keinem Hindernis in Berührung kommt.
■ Benutzen Sie das Gerät erst, wenn Sie sich mit diesem vertraut fühlen.
Elektrische Sicherheit
■ Benutzen Sie das Gerät niemals in der Nähe von leicht entflammbaren
Flüssigkeiten oder Gasen, weder in geschlossenen Räumen noch im
Freien. Explosionen und / oder Brand können die Folge sein.
■ Arbeiten Sie nicht mit einem beschädigten, unvollständigen oder ohne
Zustimmung des Herstellers geänderten Gerät. Benutzen Sie das Gerät
nie mit defekter Schutzausrüstung. Benutzen Sie das Gerät nicht bei
defektem Ein-/ Ausschalter. Prüfen Sie nach Fallenlassen das Gerät auf
signifikante Schäden oder Defekte.
Sicherheit von Personen
■ Nur ausreichend geschulte Personen und Erwachsene dürfen das Gerät
bedienen, einstellen und warten.
■ Sind Sie mit dem Gerät nicht vertraut, üben Sie den Umgang bei nicht
laufendem Motor.
■ Den Auspuff nicht berühren.
■ Das Gerät nicht unter Alkohol- oder Drogeneinfluss betätigen.
■ Halten Sie das Gerät stets mit beiden Händen fest. Dabei sollen Daumen
und Finger die Griffe umschließen.
■ Arbeitshaltung: Das Gerät nicht in unbequemer Stellung, nicht bei
fehlendem Gleichgewicht, mit ausgestreckten Armen oder nur mit einer
Hand bedienen.
■ Achten Sie immer auf festen Stand.
■ Benutzen Sie das Gerät nicht, wenn Zuschauer oder Tiere sich in unmittelba-
rer Nähe befinden. Halten Sie während der Mäharbeiten einen Mindestabstand von 15 Metern zwischen Benutzer und anderen Personen oder Tieren.
Halten Sie bei Abmäharbeiten bis zum Boden bitte einen Mindestabstand
von 30 Metern zwischen Benutzer und anderen Personen oder Tieren.
■ Bei Mäharbeiten am Hang stehen Sie bitte stets unterhalb des Schneid-
werkzeugs. Schneiden oder trimmen Sie niemals an einem glatten,
rutschigen Hügel oder Abhang.
■ Jegliche Veränderungen an dem Produkt können die persönliche Sicherheit
gefährden und lassen die Herstellergarantie verfallen.
■ Kinder sollten beaufsichtigt werden, um sicherzustellen, dass sie nicht
mit dem Gerät spielen.
■ Benutzen Sie das Gerät niemals, wenn es beschädigt ist oder Mängel
aufweist.
Verwendung und Behandlung
■ Benutzen Sie das Gerät nur zum vorgesehenen Zweck, wie Rasentrim-
men, Mäharbeiten, Entastungsarbeiten, Schneiden und Trimmen von
Hecken und Büschen.
■ Benutzen Sie das Gerät nicht über einen längeren Zeitraum, machen
Sie regelmäßig Pausen.
■ Achten Sie darauf, dass Schrauben und Verbindungselemente fest
angezogen sind. Bedienen Sie das Gerät nie, wenn es nicht richtig
eingestellt, nicht vollständig oder sicher zusammengesetzt ist.
■ Öffnen Sie den Benzintank langsam, um eventuellen Druck abzulassen,
der sich im Benzintank gebildet hat. Um Brandgefahr vorzubeugen,
entfernen Sie sich mindestens 3 Meter vom Auftankbereich, bevor Sie
das Gerät anlassen.
■ Führen Sie die Fadenspule in der gewünschten Höhe. Vermeiden Sie
es, kleine Gegenstände (z. B. Steine) mit der Fadenspule zu berühren.
■ Halten Sie die Fadenspule stets auf dem Boden, wenn das Gerät in
Betrieb ist.
■ Das Gerät nur benutzen, wenn die entsprechende Schutzhaube instal-
liert und in gutem Zustand ist.
■ Verwenden Sie keine anderen Schneidwerkzeuge. Zu Ihrer eigenen
Sicherheit verwenden Sie nur Zubehör und Zusatzgeräte, die in der
Betriebsanleitung angegeben werden. Der Gebrauch anderer als der in
der Betriebsanleitung empfohlenen Schneidwerkzeuge oder Zubehöre
kann eine persönliche Verletzungsgefahr für Sie bedeuten.
■ Trimmen und schneiden Sie immer im oberen Drehzahlbereich. Lassen
Sie den Motor zu Beginn des Mähens oder während des Trimmens
nicht in niedriger Drehzahl laufen.
■ Vergewissern Sie sich, dass das Gerät beim Starten und während der Ar-
beit nicht mit dem Erdboden, Steinen, Draht oder anderen Fremdkörpern
in Berührung kommt. Schalten Sie das Gerät aus, bevor Sie es absetzen.
■ Schalten Sie das Gerät ab, bevor Sie es abstellen.
■ Stellen Sie den Motor immer vor Arbeiten an dem Schneidwerkzeug ab.
Arbeitssicherheitshinweise für Schnittmesser
Vorbereitung
■ Das Schnittmesser schleudert Gegenstände und auch Erde heftig weg.
Dies kann Erblindung oder Verletzungen verursachen. Tragen Sie
Augen-, Gesichts- und Beinschutz. Entfernen Sie Gegenstände immer aus
dem Arbeitsbereich, bevor Sie das Schnittmesser einsetzen.
■ Das Schnittmesser läuft aus, wenn der Gashebel losgelassen wurde. Ein
auslaufendes Schnittmesser kann Ihnen oder umherstehenden Personen
Schnittverletzungen zufügen. Bevor Sie am Schnittmesser irgendwelche
Arbeiten vornehmen, stellen Sie den Motor ab und vergewissern Sie
sich, dass das Schnittmesser zum Stillstand gekommen ist.
62
FBK 4 A1
Page 69

Sicherheit von Personen
■ Umstehende Personen können Erblindung oder Verletzungen erleiden.
Halten Sie in allen Richtungen einen Abstand von 15 Metern zwischen
sich und anderen Personen oder Tieren ein.
Verwendung und Behandlung
■ Benutzen Sie das Gerät nicht, wenn nicht alle Schnittmesseranbauten
ordnungsgemäß installiert sind.
■ Das Schnittmesser kann ruckartig von Gegenständen weggeschleudert
werden. Dies kann zu Verletzungen an Armen und Beinen führen. Sollte
das Gerät auf Fremdkörper treffen, stoppen Sie den Motor sofort und
warten Sie, bis das Schnittmesser zum Stillstand gekommen ist. Überprüfen Sie das Schnittmesser auf Schäden. Ersetzen Sie das Schnittmesser immer, wenn es verbogen oder gerissen ist.
Sicherheitsvorrichtungen
Beim Arbeiten mit dem Gerät muss die entsprechende Kunststoffschutzhaube
für Schnittmesser- oder Fadenbetrieb montiert sein, um das Wegschleudern
von Gegenständen zu verhindern.
WARNUNG!
■ Mähen Sie niemals, während andere Personen, insbesondere Kinder
oder Tiere, in der Nähe sind.
■ Halten Sie einen Sicherheitsabstand von 15 m ein. Bei Annäherung
stellen Sie das Gerät unverzüglich ab.
ACHTUNG! VERGIFTUNGSGEFAHR!
■ Abgase, Kraftstoffe und Schmierstoffe sind giftig. Abgase dürfen
nicht eingeatmet werden.
WARNUNG!
■ Benzin ist hochgradig entflammbar. Bewahren Sie Benzin nur in den
dafür vorgesehenen Behältern auf.
■ Tanken Sie nur im Freien und rauchen Sie nicht.
■ Während der Motor läuft oder bei heißem Gerät darf der Tankver-
schluss nicht geöffnet oder Benzin nachgefüllt werden.
■ Falls Benzin übergelaufen ist, darf kein Versuch unternommen werden,
den Motor zu starten. Stattdessen ist das Gerät von der benzinverschmutzten Fläche zu entfernen. Jeglicher Zündversuch ist zu vermeiden,
bis sich die Benzindämpfe verflüchtigt haben.
■ Aus Sicherheitsgründen sind Benzintank und Tankverschlüsse bei
Beschädigung auszutauschen.
Vor der Inbetriebnahme
ACHTUNG!
■ Während des Mähens sind immer rutschfeste Sich erheitsschuhe und ent-
sprechende Sicherheitskleidung wie Schutzhandschuhe, Schutzhelm,
Schutzmaske, Schutzbrille und Gehörschutz zu tragen.
■ Überprüfen Sie das Gelände, auf dem das Gerät eingesetzt wird und
entfernen Sie Gegenstände, die erfasst und weggeschleudert werden
können.
■ Vor dem Gebrauch und nach dem Fallenlassen oder anderen
Stoßeinwirkungen ist immer durch Sichtkontrolle zu prüfen, ob die
Schneidwerkzeuge, Befestigungsbolzen sowie die gesamte Schneideinheit beschädigt ist. Abgenutzte oder beschädigte Schneidwerkzeuge und Befestigungsbolzen müssen ausgetauscht werden.
■ Vor dem Gebrauch ist immer durch Sichtkontrolle zu prüfen, ob die
Schneidwerkzeuge abgenutzt oder beschädigt sind. Zur Vermeidung
einer Unwucht dürfen abgenutzte oder beschädigte Schneidwerkzeuge und Befestigungsbolzen nur satzweise ausgetauscht werden.
Rundgriff montieren
♦ Montieren Sie zuerst den Gummiring 5a auf den Ausleger .
♦ Setzen Sie den Barrierebügel
5b
♦ Der Stift
beiden Löcher des Auslegers
♦ Drücken Sie den Rundgriff
5a
♦ Stecken Sie die 4 Befestigungsschrauben
griff und sichern Sie diese mit den 4 Muttern im Barrierebügel .
♦ Ziehen Sie die Schrauben
des Barrierebügels muss zur Arretierung in eines der
auf dem Ausleger .
Schnelllösemechanismus montieren
♦ Hängen Sie den Karabiner ein und sichern Sie ihn mit dem roten
Gurtstück von dem Schnellöffnungsmechanismus (siehe Abbildungen).
Ziehen Sie an dem roten Gurtstück, falls Sie das Gerät schnell ablegen
müssen.
von unten auf den Gummiring 5a.
gesteckt werden.
auf den dafür vorgesehenen Gummiring
von oben durch den Rund-
fest.
DE
AT
CH
Beschränken Sie die Geräuschentwicklung und Vibration
auf ein Minimum!
■ Verwenden Sie nur einwandfreie Geräte.
■ Warten und reinigen Sie das Gerät regelmäßig.
■ Passen Sie Ihre Arbeitsweise dem Gerät an.
■ Überlasten Sie das Gerät nicht.
■ Lassen Sie das Gerät gegebenenfalls überprüfen.
■ Schalten Sie das Gerät aus, wenn es nicht benutzt wird.
■ Tragen Sie Schutzhandschuhe.
FBK 4 A1
Tragegurt befestigen / montieren
♦ Haken Sie den Tragegurt 6@ in die Trageöse ein.
♦ Passen Sie den Tragegurt
Trageöse
im eingehängten Zustand auf Höhe der Hüfte befindet.
an Ihre Größe an, so dass sich die
6@
63
Page 70

Heckenschere montieren
♦ Lösen Sie zunächst den Schraubgriff am Ausleger der Motoreinheit.
♦ Schieben Sie den vorderen Ausleger
der Motoreinheit.
DE
AT
CH
Ausleger
♦ Der Sicherungshebel
♦ Drücken Sie die Abdeckung
nach unten und halten Sie diese gedrückt.
♦ Ziehen Sie den Schraubgriff
HINWEIS
► Die Montage für den Hochentaster-/ Fadenspulen-/ 3 Zahn-Schnitt-
messer-/ Verlängerungsvorsatz erfolgt in gleicher Reihenfolge.
der Heckenschere auf den
muss in dem Arretierungsloch einrasten.
zur Sicherung des Sicherungshebels
fest.
Sägekette spannen und prüfen
WARNUNG!
► Schutzhandschuhe anziehen! Verletzungsgefahr durch die scharfen
Schneidezähne!
♦ Drehen Sie die Kettenspannschraube
im Uhrzeigersinn, um die Spannung zu erhöhen.
♦ Die Sägekette
ob sich die Sägekette von Hand über das Schwert ziehen lässt.
HINWEIS
► Eine neue Sägekette
muss an der Schwertunterseite anliegen. Prüfen Sie,
längt sich und muss öfter nachgespannt werden.
mit dem Schlitzschraubendreher
7!
Heckenschere demontieren
♦ Lösen Sie den Schraubgriff .
♦ Drücken Sie den Sicherungshebel
Ausleger
HINWEIS
► Die Demontage für den Hochentaster-/ Fadenspulen-/ 3 Zahn-
Schnittmesser-/ Verlängerungsvorsatz erfolgt in gleicher Reihenfolge.
der Heckenschere aus dem Ausleger der Motoreinheit.
und ziehen Sie den vorderen
Schwenken der Heckenschere
♦ Lösen Sie die Ent-/ Verriegelung .
♦ Betätigen Sie den Stellhebel
die gewünschte Position.
♦ Lassen Sie den Stellhebel
(Heckenschere)
einrasten.
, schwenken Sie die Heckenschere in
in die Aussparung in der Grundplatte
Sägekette und Schwert montieren
WARNUNG!
► Schutzhandschuhe anziehen! Verletzungsgefahr durch die scharfen
Schneidezähne!
HINWEIS
► Beachten Sie die Laufrichtung der Sägekette
auf der Grundplatte (Hochentaster) .
► Je nach Verschleiß, kann das Schwert
♦ Lösen Sie die Mutter
♦ Nehmen Sie die Kettenradabdeckung
♦ Legen Sie die Sägekette
auf.
♦ Setzen Sie jetzt das Schwert
♦ Führungsschiene
den Kettenspannstift
zeitig die Sägekette
♦ Spannen Sie jetzt die Sägekette
nen und prüfen“).
♦ Kettenradabdeckung
anziehen.
mit dem Maulschlüssel 7).
an der Spitze des Schwerts beginnend
mit der Sägekette ein.
über die Schwertführung legen, dabei auch
in die Schwertbohrung einsetzen. Gleich-
über das Kettenrad legen.
(siehe Kapitel „Sägekette span-
wieder aufsetzen und Mutter leicht
am Schwert und
gewendet werden.
ab.
Kettenschmierung
♦ Entfernen Sie den Öltankdeckel .
♦ Befüllen Sie den Öltank
♦ Die Kettenschmierung kann durch die Ölregulierungsschraube
erhöht oder verringert werden.
♦ Drücken Sie zuerst und drehen dann die Ölregulierungsschraube
im Uhrzeigersinn, um die Kettenschmierung zu verringern.
♦ Drücken Sie zuerst und drehen dann die Ölregulierungsschraube
gegen den Uhrzeigersinn, um die Kettenschmierung zu erhöhen.
WARNUNG!
► Niemals ohne Kettenschmierung arbeiten!
Bei trocken laufender Sägekette wird die Schneidgarnitur in kurzer
Zeit irreparabel zerstört. Vor der Arbeit immer Kettenschmierung und
Ölstand im Tank überprüfen.
HINWEIS
► Verwenden Sie nur Sägekettenöl. Vorzugsweise biologisch abbau-
bar. Verwenden Sie kein Altöl, Motoröl, usw.
► Kontrollieren Sie während der Arbeit, ob die Kettenschmierung
funktioniert.
mit ca. 100ml Bio-Kettenöl 6%.
Sägekette schärfen
HINWEIS
Ein Schleifbock kann an der Schleifbockhilfe
►
während des Schleifens befestigt werden.
► In einem Schärfset z. B. von Oregon finden sie detaillierte
Informationen zum Schärfvorgang.
► Alternativ benutzen Sie ein elektrisches Kettenschärfgerät und folgen
Sie den Anweisungen des Herstellers.
► Im Zweifel über die Durchführung der Arbeit ist ein Austausch der
Sägekette vorzunehmen.
für den sicheren Halt
Verlängerungsvorsatz montieren
ACHTUNG!
■ Den Verlängerungsvorsatz / Ausleger
dem 3 Zahn-Schnittmesser-/ Fadenspulenvorsatz verwenden!
nicht in Kombination mit
5^
Sägekette demontieren
♦ Die Sägekette muss gegebenenfalls vorher entspannt werden, um
das Schwert
„Sägekette spannen und prüfen“). Folgen Sie diesen Anweisungen in
umgekehrter Reihenfolge.
und die Sägekette abzunehmen (siehe Kapitel
64
HINWEIS
► Verwenden Sie den Verlängerungsvorsatz / Ausleger
höhergelegene Arbeiten durchzuführen.
♦ Montieren Sie den Verlängerungsvorsatz / Ausleger
Motoreinheit und der Heckenschere / Hochentaster. Die Montage erfolgt
in der selben Vorgehensweise wie zuvor bei den Aufsätzen beschrieben.
um
5^
zwischen der
5^
FBK 4 A1
Page 71

Schutzhaube montieren/demontieren
WARNUNG!
■ Beim Arbeiten mit dem 3 Zahn-Schnittmesser muss die Schutzhaube
montiert sein. Klappen Sie das Metallblech des vorderen Ausle-
etwas nach unten. Die Schutzhaube wird zwischen dem
gers
5#
Metallblech und dem Befestigungsarm des Auslegers
Die Schutzhaube
Ausleger
kantschlüssel
5#
wird jetzt mit 4 Schrauben an dem vorderen
befestigt. Nehmen Sie hierzu den mitgelieferten Sechs-
und den Maulschlüssel 7) zur Hilfe.
6*
positioniert.
5#
Schneidgarnitur Schutzeinrichtung
3 Zahn-Schnittmesser
Fadenspule
WARNUNG!
► Verwenden Sie keine anderen Schneidgarnituren außer den im Liefer-
umfang enthaltenen. Eine Verwendung anderer Schneidgarnituren
oder Schutzeinrichtungen gilt als nicht bestimmungsgemäß und birgt
erhebliche Unfallgefahren.
5@
Schutzhaube
Schutzhaube + Schnittfaden-Schutz-
C
haube
Schnittmesser montieren/ersetzen
■ Montieren/Ersetzen Sie das 3 Zahn-Schnittmesser , wie in den Abbil-
dungen 1a - 1f dargestellt.
■ Die Bohrung der Mitnehmerscheibe
genden Bohrung überein bringen und mit dem mitgelieferten Sechskantschlüssel
■ 3 Zahn-Schnittmesser
Abb. 1b).
■ Druckplatte
■ Abdeckung Druckplatte
■ Nun die Mutter
Abb. 1f).
■ Das 3 Zahn-Schnittmesser
tikschutz versehen. Dieser ist vor dem Gebrauch zu entfernen und bei
Nichtgebrauch wieder anzubringen.
■ Der Plastikschutz kann nun abgenommen werden.
ACHTUNG! Linksgewinde!
ACHTUNG! SCHARFE KANTEN, TRAGEN SIE SCHUTZ-
HANDSCHUHE
■ Schnittfaden-Schutzhaube
■ Beim Arbeiten mit dem Schnittfaden muss zusätzlich die Schnittfaden-
Schutzhaube
Schutzhaube
Abbildung 2a dargestellt.
■ Achten Sie darauf, dass die Schnittfaden-Schutzhaube
tet. An der Innenseite der Schnittfaden-Schutzhaube C befindet sich ein
Messer A. Dieses ist mit einer Sicherung B abgedeckt (siehe Abb. 2a).
■ Entfernen Sie die Sicherung
nach dem Arbeiten wieder an.
ACHTUNG! SCHARFE KANTEN, TRAGEN SIE SCHUTZ-
HANDSCHUHE
■ Um die Schnittfaden-Schutzhaube
demontieren, nehmen Sie z. B. einen Schraubendreher zur Hilfe, um
die drei Befestigungsstifte vorsichtig herauszulösen.
ACHTUNG! VERLETZUNGSGEFAHR!
blockieren.
6(
auf der Mitnehmerscheibe 7^ auflegen (siehe
über das Gewinde der Zahnwelle stecken (siehe Abb. 1c).
7%
aufsetzen (siehe Abb. 1d).
7$
mit dem Zündkerzenschlüssel 7! anziehen (siehe
7#
ist bei der Auslieferung mit einem Plas-
C
an der Schutzhaube montieren.
C
montiert werden. Die Montage der Schnittfaden-
C
(werkseitig bereits vormontiert) erfolgt wie in der
B
suchen, mit der gegenüberlie-
7^
C
richtig einras-
vor Arbeitsbeginn und bringen Sie diese
C
von der Schutzhaube zu
Fadenspule montieren/ersetzen
■ Montieren/Ersetzen Sie die Fadenspule 5@ wie in der Abbildung 2c
dargestellt.
■ Die Bohrung der Mitnehmerscheibe
den Bohrung übereinbringen und mit dem mitgelieferten Sechskantschlüssel
blockieren.
6(
■ Die Druckplatte
der Druckplatte
■ Jetzt die Fadenspule
ACHTUNG! Linksgewinde!
auf die Mitnehmerscheibe 7^ auflegen. Die Erhöhung
7%
auf die Erhöhung der Mitnehmerscheibe 7^ auflegen.
7%
auf das Gewinde schrauben.
5@
suchen, mit der gegenüberliegen-
7^
Tragegurt anlegen
HINWEIS
Um ein Ermüdungsfreies Arbeiten zu gewährleisten, können Sie an
■
folgenden Punkten Einstellungen vornehmen. Je nach Körpergröße,
können die Einstellungen variieren.
■ Vor Arbeitsbeginn den Tragegurt
einstellen.
■ Das Gerät mit montiertem Schneidewerkzeug so ausbalancieren, dass
das Schneidewerkzeug, ohne dass das Gerät mit den Händen berührt
wird, nur knapp über dem Boden schwebt.
1.) Legen Sie den Tragegurt
men bis sie einrastet (siehe Abb. 3a).
2.) Ziehen Sie wie in Abbildung 3b dargestellt, an dem Tragegurt
den Tragegurt
umfang entsprechend anzupassen.
3.) Um nun die beiden Schultergurte zu straffen, ziehen Sie an den beiden
Schultergurten, wie in Abbildung 3c dargestellt.
4.) Um die richtige Position des Gerätes am Tragegurt einzustellen, ziehen
Sie an dem Tragegurt, wie in Abbildung 3d dargestellt.
5.) Hängen Sie den Karabiner
ihn mit dem roten Gurtstück
6.) Nehmen Sie jetzt das Gerät und hängen Sie es, wie in Abbildung 3h
dargestellt, mit der Trageöse
kann zusätzlich durch die Schraube gelöst und verschoben
werden, um die beste Ausrichtung des Gerätes einzustellen.
mittig am Körper auszurichten und dem Oberkörper-
6@
an und fügen die Steckschliesse zusam-
6@
entsprechend der Körpergröße
6@
, um
6@
ein (siehe Abb. 3e - 3g) und sichern Sie
von dem Schnellöffnungsmechanismus.
in den Karabiner ein. Die Trageöse
Schnitthöhe einstellen
■ Tragegurt 6@ anlegen und Gerät einhaken (siehe Kapitel „Tragegurt
anlegen“).
■ Mit den verschiedenen Gurtverstellern am Tragegurt
und Schnittposition einstellen (siehe Kapitel „Tragegurt anlegen“).
■ Um die optimale Tragegurtlänge festzustellen, machen Sie anschließend
einige Schwingbewegungen ohne den Motor anzulassen (siehe Abb. 6a).
■ Der Tragegurt
stattet. Ziehen Sie an dem roten Gurtstück
ablegen müssen (siehe Abb. 3i).
ACHTUNG!
■ Benutzen Sie den Tragegurt
arbeiten. Bringen Sie den Tragegurt
gestartet haben und er im Leerlauf läuft. Schalten Sie den Motor aus,
bevor Sie den Tragegurt
ist mit einem Schnellöffnungsmechanismus ausge-
6@
, falls Sie das Gerät schnell
immer, wenn Sie mit dem Gerät
6@
an, sobald Sie den Motor
6@
abnehmen.
6@
optimale Arbeits-
6@
DE
AT
CH
FBK 4 A1
65
Page 72

Treibstoff und Öl
■ Benutzen Sie nur ein Gemisch aus bleifreiem Benzin und speziellem
2-Takt-Motoröl. Mischen Sie das Treibstoffgemisch nach der TreibstoffMischtabelle an.
■ Geben Sie jeweils die richtige Menge Benzin und 2-Takt-Öl in die bei-
liegende Öl-/ Benzinmischflasche
Schütteln Sie anschließend den Behälter gut durch.
Treibstoff-Mischtabelle
Mischverfahren: 40 Teile Benzin auf 1 Teil Öl
DE
AT
CH
Benzin 2-Takt-Öl
0,5 Liter 12,5 ml
Inbetriebnahme
ACHTUNG!
■ Beachten Sie bitte die gesetzlichen Bestimmungen zur Lärmschutz-
verordnung.
Prüfen Sie das Gerät vor jeder Inbetriebnahme auf:
■ Dichtheit des Treibstoffsystems.
■ Einwandfreien Zustand und Vollständigkeit der Schutzeinrichtungen und
der Schnittvorrichtung.
■ Festen Sitz sämtlicher Verschraubungen.
■ Leichtgängigkeit aller beweglichen Teile.
Starten bei kaltem Motor
(siehe „Treibstoff-Mischtabelle“).
6^
Motor abstellen
Not-Aus Schrittfolge
Falls es notwendig ist, das Gerät sofort zu stoppen, stellen Sie hierzu den
Ein- / Aus-Schalter
Normale Schrittfolge
■ Lassen Sie den Gashebel
laufgeschwindigkeit übergegangen ist. Stellen Sie dann den Ein- / AusSchalter
ACHTUNG!
■ Im Leerlauf muss das 3 Zahn-Schnittmesser stillstehen. Sollte sich das
3 Zahn-Schnittmesser drehen, ist der Vergaser einzustellen!
Arbeitshinweise
Trainieren Sie vor Einsatz des Gerätes sämtliche Arbeitstechniken (siehe
Abb. 6a - 6c) bei abgestelltem Motor.
Schnittfaden verlängern
Zur Verlängerung des Schnittfadens lassen Sie den Motor auf Vollgas laufen
und tippen Sie die Fadenspule
tisch verlängert. Das Messer
den Faden auf die zulässige Länge (siehe Abb. 6d).
ACHTUNG!
Rasen- / Gras- / Unkrautreste verfangen sich unterhalb der Schutzhaube
■ Entfernen Sie die Reste bei abgeschaltetem Motor mit einem Spachtel
oder dergleichen.
Verschiedene Schnittverfahren
auf „0“.
auf „0“.
los und warten Sie bis der Motor in Leer-
auf den Boden. Der Faden wird automa-
5@
A
an der Schnittfaden-Schutzhaube C kürzt
.
ACHTUNG!
■ Lassen Sie niemals den Startseilzug zurückschleudern. Dies kann zu
Beschädigungen führen.
1.) Füllen Sie den Benzintank
2.) Kraftstoffpumpe
3.) Ein- / Aus-Schalter
4.) Choke-Hebel
5.) Das Gerät gut festhalten und den Startseilzug
Widerstand herausziehen. Jetzt den Startseilzug
Das Gerät startet.
6.) Sollte der Motor nicht starten, wiederholen Sie die Schritte 4–5.
7.) Sobald der Motor läuft, drücken Sie zuerst die Einschaltsperre
dann den Gashebel
Springt der Motor auch nach mehreren Versuchen nicht an, lesen Sie den
Abschnitt „Fehlersuchplan“.
ACHTUNG!
■ Ziehen Sie den Startseilzug
Griff des Startseilzugs fest, wenn sich der Startseilzug wieder
einzieht. Lassen Sie den Startseilzug nie zurückschnellen.
HINWEIS
Bei sehr hohen Außentemperaturen kann es vorkommen, dass auch
■
bei kaltem Motor ohne Choke gestartet werden muss!
(Primer) 6 x drücken.
in Position „ “ ziehen.
(siehe auch Abschnitt “Treibstoff und Öl”).
auf „I“ schalten.
bis zum ersten
rasch anziehen.
und
, um den Auto-Choke zu lösen.
stets gerade heraus. Halten Sie den
Starten bei warmem Motor
(Das Gerät stand für weniger als 15–20 Minuten still)
1.) Ein- / Aus-Schalter
2.) Der Choke-Hebel
gezogen werden.
3.) Gerät gut festhalten und den Startseilzug
herausziehen. Jetzt den Startseilzug
nach 1–2 Zügen starten. Falls das Gerät nach 6 Zügen immer noch nicht
startet, wiederholen Sie die Schritte 1-7 unter „Starten bei kaltem Motor”.
auf „I“ schalten.
muss zum Starten des warmen Motors nicht
bis zum ersten Widerstand
rasch anziehen. Das Gerät sollte
Trimmen / Mähen (3 Zahn-Schnittmesser ggf. mit Fadenspule)
■ Schwingen Sie das Gerät in sensenartiger Mähbewegung (siehe Abb. 6a).
■ Halten Sie das Schneidwerkzeug parallel zum Boden und legen Sie die
gewünschte Schnitthöhe fest.
Niedriges Trimmen (mit Fadenspule)
■ Halten Sie das Gerät mit einer leichten Neigung über den Boden (siehe
Abb. 6b). Schneiden Sie immer von sich weg. Ziehen Sie das Gerät
nicht zu sich hin.
Abmähen (mit Fadenspule)
■ Beim Abmähen erfassen Sie die gesamte Vegetation bis zum Grund.
Dazu neigen Sie die Fadenspule im 30°- Winkel nach rechts. Stellen
Sie den Handgriff in die gewünschte Position (siehe Abb. 6c).
Schneiden an Baum / Zaun / Fundament (mit Fadenspule)
HINWEIS
■
Kommt der Faden mit Bäumen, Steinen, Steinmauern oder Fundamenten in Berührung, nutzt er sich ab oder franst aus. Schlägt der Faden
gegen Zaungeflecht, bricht er ab.
ACHTUNG!
■ Entfernen Sie mit dem Gerät keine Gegenstände von Fußwegen usw.!
Das Gerät ist kraftvoll und kleine Steine oder andere Gegenstände
können 15 Meter und mehr weggeschleudert werden und zu Verletzungen oder Beschädigungen an Autos, Häusern und Fenstern führen.
Verklemmen
Sollte das Schneidwerkzeug blockieren, stellen Sie unverzüglich den Motor
ab. Befreien Sie das Gerät von Gras und Gestrüpp, bevor Sie es erneut in
Betrieb nehmen.
Schutzbrille tragen!
66
FBK 4 A1
Page 73

Vermeiden von Rückschlag
Beim Arbeiten mit dem 3 Zahn-Schnittmesser besteht die Gefahr des
Rückschlages, wenn dieses auf feste Hindernisse (Baumstamm, Ast, Baumstumpf, Stein oder dergleichen) trifft. Das Gerät wird dabei gegen die
Drehrichtung des Schneidwerkzeugs zurückgeschleudert. Dies kann zum
Verlust der Kontrolle über das Gerät führen. Benutzen Sie das Schnittmesser
nicht in der Nähe von Zäunen, Metallpfosten, Grenzsteinen oder Fundamenten. Zum Schneiden von schwachen Sträuchern positionieren Sie das Gerät
wie in Abb. 6e dargestellt, um Rückschläge zu vermeiden.
Arbeiten mit der Heckenschere
Schnitttechniken
■ Der doppelseitige Messerbalken ermöglicht den Schnitt in beiden Rich-
tungen oder durch Pendelbewegungen von einer Seite zur anderen.
■ Bewegen Sie beim senkrechten Schnitt die Heckenschere gleichmäßig
vorwärts oder bogenförmig auf und ab.
■ Bewegen Sie beim waagerechten Schnitt die Heckenschere sichelförmig
zum Rand der Hecke, damit abgeschnittene Zweige zu Boden fallen.
■ Siehe Ausklappseite (Abbildung A).
HINWEIS
► Entfernen Sie starke Äste mit einer Astschere.
Arbeiten mit dem Hochentaster
Sägetechniken
Absägen in Teilstücken
Kürzen Sie lange bzw. dicke Äste, bevor Sie den finalen Trennschnitt
vornehmen (siehe Abbildung).
C A B
cb a
Sicheres Arbeiten
■ Halten Sie das Gerät, die Schneidgarnitur und die Kettenschutzhülle 6$
in einem guten Gebrauchszustand, um Verletzungen vorzubeugen.
■ Prüfen Sie nach Fallenlassen das Gerät auf signifikante Schäden oder
Defekte.
■ Beachten Sie den vorgeschriebenen Arbeitswinkel max. 60°±10°, um
ein sicheres Arbeiten zu gewährleisten (siehe Abbildung).
max. 60°±10°
DE
AT
CH
WARNUNG!
► Achten Sie grundsätzlich auf das herabfallende Schnittgut.
► Beachten Sie grundsätzlich die Gefahr von zurückschlagenden Ästen.
HINWEIS
► Legen Sie den Anschlag
und ruhiger.
► Beginnen Sie erst dann mit dem Sägen.
Absägen eines kleinen Astes
♦ Sägen Sie bei kleinen Ästen (Ø 0-8 cm) von oben nach unten (siehe
Abbildung).
Absägen größerer Äste
♦ Setzen Sie bei größeren Ästen (Ø 8-25 cm) zuerst einen Entlastungs-
A
schnitt
Abschälen der Rinde am Hauptstamm.
♦ Sägen Sie nun von oben
(siehe Abbildung). Der Entlastungsschnitt verhindert auch ein
B
am Ast an. Dadurch arbeiten Sie sicherer
B
nach unten
2
A
durch.
1
■ Benutzen Sie das Gerät nicht auf einer Leiter stehend oder auf einem
unsicheren Standplatz.
■ Lassen Sie sich nicht zu einem unüberlegten Schnitt verleiten.
Das könnte Sie selbst und andere gefährden.
■ Kinder sollten beaufsichtigt werden, um sicherzustellen, dass sie nicht
mit dem Gerät spielen.
■ Wechseln Sie regelmäßig Ihre Arbeitsposition. Eine längere Benutzung
des Gerätes kann zu vibrationsbedingten Durchblutungsstörungen der
Hände führen. Sie können die Benutzungsdauer jedoch durch geeignete Handschuhe oder regelmäßige Pausen verlängern. Achten Sie
darauf, dass die persönliche Veranlagung zu schlechter Durchblutung,
niedrige Außentemperaturen oder große Greifkräfte beim Arbeiten die
Benutzungsdauer verringern.
Transport
■ Benutzen Sie beim Transport die Schutzhüllen 6# 6$.
■ Achten Sie darauf, das Gerät beim Tragen nicht einzuschalten (siehe
Abbildung).
A
FBK 4 A1
67
Page 74

Reinigung
Reinigung Motoreinheit
HINWEIS
Nach jedem Gebrauch sollte das Gerät gründlich gereinigt werden.
■
■ Schalten Sie das Gerät vor Reinigungsarbeiten immer aus und ziehen
den Zündkerzenstecker
■ Reinigen Sie das Gerät regelmäßig mit einem feuchten Tuch und etwas
DE
AT
CH
Spülmittel. Achten Sie darauf, dass kein Wasser in das Geräteinnere
gelangen kann.
Reinigung Hochentaster
■ Der Hochentaster muss in regelmäßigen Abständen von Sägespänen
gesäubert werden.
♦ Entfernen Sie die Kettenradabdeckung
♦ Nehmen Sie die Sägekette
Führungsschiene .
♦ Halten Sie die Sägekette
nung, achten Sie auf den Ölstand und die Ölzufuhr.
Reinigung Heckenschere
♦ Kontrollieren Sie die Heckenschere auf gelockerte Schrauben am
Messerbalken
♦ Entfernen Sie festsitzenden Grünschnitt.
♦ Pflegen Sie den Messerbalken
Ölkännchen.
Reinigung Fadenspulen-/ Schnittmesservorsatz
♦ Entfernen Sie festsitzenden Grünschnitt.
♦ Halten Sie das 3 Zahn-Schnittmesser
erleichtern.
ab.
.
vom Schwert
scharf und kontrollieren Sie die Span-
und ziehen Sie diese bei Bedarf nach.
mit einem Ölspray oder einem
ab und reinigen Sie die
scharf, um das Arbeiten zu
Wartung
Fadenspule / Schnittfaden ersetzen
1.) Die Fadenspule
zu demontieren. An der Markierung drücken (siehe Abb. 5a), den Deckel
drehen und eine Gehäusehälfte abnehmen (siehe Abb. 5b).
2.) Spulenteller
Abb. 5c).
3.) Evtl. noch vorhandenen Schnittfaden entfernen.
4.) Neuen Schnittfaden in der Mitte zusammenlegen und die entstandene
Schlaufe in die Aussparung des Spulentellers einhängen (siehe Abb. 5d).
5.) Faden unter Spannung gegen den Uhrzeigersinn aufwickeln. Der Spulentel-
trennt dabei die beiden Hälften des Schnittfadens (siehe Abb. 5d).
ler
6.) Die letzten 15 cm der beiden Fadenenden in die gegenüberliegenden
Fadenhalter des Spulentellers
7.) Die beiden Fadenenden durch die Metallösen im Fadenspulen-Gehäuse
führen (siehe Abb. 5e).
8.) Spulenteller
9.) Fügen Sie die Gehäusehälften wieder zusammen.
10.) Kurz und kräftig an beiden Fadenenden ziehen, um diese aus den
Fadenhaltern zu lösen (siehe Abb. 5f).
11.) Überschüssigen Faden auf etwa 13 cm zurückschneiden. Das verringert
die Belastung auf den Motor während des Startens und Aufwärmens.
, ist wie in Abschnitt Fadenspule montieren / ersetzen
5@
aus dem Fadenspulen-Gehäuse entnehmen (siehe
einhaken (siehe Abb. 5e).
in das Fadenspulen-Gehäuse drücken (siehe Abb. 5e).
12.) Fadenspule wieder montieren (siehe Kapitel „Fadenspule montieren /
ersetzen“). Wird die komplette Fadenspule erneuert, überspringen Sie
die Punkte 3–6.
Luftfilter warten
Verschmutzte Luftfilter verringern die Motorleistung durch zu geringe Luftzufuhr zum Vergaser.
.
.
sollte alle
A
an der
bzw.
7!
Regelmäßige Kontrolle ist daher unerlässlich. Der Luftfilter
25 Betriebsstunden kontrolliert werden und bei Bedarf gereinigt werden.
Bei sehr staubiger Luft ist der Luftfilter häufiger zu überprüfen.
1.) Entfernen Sie die Abdeckung des Luftfiltergehäuses
2.) Entnehmen Sie den Luftfilter
3.) Reinigen Sie den Luftfilter
4.) Der Zusammenbau erfolgt in umgekehrter Reihenfolge.
ACHTUNG!
■ Luftfilter nie mit Benzin oder brennbaren Lösungsmitteln reinigen.
Zündkerze warten
1.) Ziehen Sie den Zündkerzenstecker
2.) Lösen Sie die Zündkerze mit dem beiliegenden Zündkerzenschlüssel
3.) Der Zusammenbau erfolgt in umgekehrter Reihenfolge.
Elektrodenabstand = 0,6 mm (Abstand zwischen den Elektroden, zwischen
welchen der Zündfunke erzeugt wird). Überprüfen Sie die Zündkerze
erstmals nach 10 Betriebsstunden auf Verschmutzung und reinigen Sie diese
gegebenenfalls mit einer Kupferdrahtbürste.
Danach die Zündkerze alle 50 Betriebsstunden warten.
Schutzhaubenmesser schleifen
A
Das Messer
dies feststellen, lösen Sie die 2 Schrauben mit denen das Messer
Schnittfaden-Schutzhaube
in einem Schraubstock. Schleifen Sie das Messer
und achten Sie darauf, den Winkel der Schnittkante beizubehalten.
Vergaser-Einstellungen
Entfernen Sie die Abdeckung des Luftfiltergehäuses
Gasseilzug einstellen
Sollte die Maximaldrehzahl des Geräts mit der Zeit nicht mehr erreicht
werden und sämtliche andere Ursachen nach Abschnitt „Fehlerbehebung“
ausgeschlossen sein, könnte eine Einstellung des Gasseilzuges erforderlich
sein. Um den Gasseilzug nachzustellen drehen Sie die Schraube
die Stellschraube
Getriebe fetten
■ Ergänzen Sie alle 20 Betriebsstunden etwas Getriebefließfett (ca. 10 g)
um das Winkelgetriebe zu schmieren.
♦ Öffnen Sie hierzu die Schraube
fließfett in das Getriebegehäuse zu drücken.
♦ Nach dem befüllen des Getriebes schliessen Sie die Schmieröffnung
wieder mit der Schraube
(siehe Abb. 2a) kann mit der Zeit stumpf werden. Sollten Sie
H1
sowie die Kontermutter H2 korrekt ein (siehe Abb. 4).
.
durch Ausklopfen oder Ausblasen (mit Druckluft).
ab.
C
befestigt ist. Befestigen Sie das Messer A
A
mit einem Schleifstein
(siehe Abb. 2c) um das Getriebe-
.
.
68
FBK 4 A1
Page 75

Lagerung und Transport
■ Bewahren Sie das Gerät an einem sicheren Platz auf.
■ Lagern Sie das Gerät und Zubehör sicher und geschützt vor offenen
Flammen und Hitze- /Funkenquellen, wie Gasdurchlauferhitzer, Wäschetrockner, Ölofen oder tragbaren Radiatoren etc.
■ Halten Sie die Schutzhaube
der Lagerung immer frei von Mährückständen.
■ Der Plastikschutz für das 3 Zahn-Schnittmesser
Nichtgebrauch wieder anzubringen.
■ Schalten Sie das Gerät vor Wartungsarbeiten immer aus und ziehen
Sie den Zündkerzenstecker
Gerät lagern
Wenn Sie das Gerät länger als 30 Tage lagern, muss es hierfür hergerichtet
werden. Andernfalls verdunstet der im Vergaser befindliche restliche Treibstoff und lässt einen gummiartigen Bodensatz zurück. Dies könnte den Start
erschweren und teure Reparaturarbeiten zur Folge haben.
1.) Nehmen Sie den Tankdeckel
abzulassen. Entleeren Sie vorsichtig den Benzintank .
2.) Starten Sie den Motor und lassen Sie ihn laufen, bis dieser stoppt, um
den Treibstoff aus dem Vergaser zu entfernen.
3.) Lassen Sie den Motor für ca. 10 Minuten abkühlen.
4.) Entfernen Sie die Zündkerze (siehe Kapitel „Zündkerze warten“).
5.) Geben Sie 1 Teelöffel 2-Takt-Öl in die Verbrennungskammer. Ziehen
Sie mehrere Male an dem Startseilzug
mit Öl zu benetzen. Setzen Sie die Zündkerze wieder ein.
HINWEIS
■ Lagern Sie das Gerät an einem trockenen Ort und weit entfernt von
möglichen Entzündungsquellen.
Erneutes Inbetriebnehmen
1.) Entfernen Sie die Zündkerze (siehe Kapitel „Zündkerze warten“).
2.) Ziehen Sie rasch an dem Startseilzug
Verbrennungskammer zu entfernen.
3.) Reinigen Sie die Zündkerze und achten Sie auf den richtigen Elektrodenabstand an der Zündkerze.
4.) Füllen Sie den Benzintank
, die Fadenspule 5@ und den Motor bei
ist bei Transport und
ab.
ab, um eventuellen Druck im Benzintank
, um alle mechanischen Teile
, um überschüssiges Öl aus der
. Siehe Abschnitt „Treibstoff und Öl“.
Fehlersuche
Motoreinheit
Problem Mögliche Ursache Fehlerbehebung
Der Motor
springt nicht an.
Der Motor
springt an, hat
aber nicht die
volle Leistung.
Der Motor läuft
unregelmäßig.
Verrußte oder
feuchte Zündkerze.
Hochentaster
Problem Mögliche Ursache Fehlerbehebung
Motor läuft, Säge-
bewegt
kette
sich nicht.
Kein Arbeitsfortschritt.
Heckenschere
Problem Mögliche Ursache Fehlerbehebung
Motor läuft,
Messer bleiben
stehen.
Fehlerhaftes Vorgehen
beim Starten.
Falsche Einstellung des
Choke-Hebels
Verschmutzter Luftfilter. Luftfilter reinigen.
Falscher Elektrodenabstand der Zündkerze.
Falsche Vergasereinstellung.
Heckenscherenvorsatz
bzw. Hochentastervorsatz
an Motoreinheit nicht
richtig angeschlossen.
Sägekette
überhitzt oder hängt durch.
Heckenscherenvorsatz
bzw. Hochentastervorsatz
an Motoreinheit nicht
richtig angeschlossen.
.
trocken bzw.
Folgen Sie den Anweisungen zum Starten.
Choke-Hebel
“ stellen.
„
Zündkerze reinigen
und Elektrodenastand
einstellen oder neue
Zündkerze einsetzen.
Zündkerze reinigen
oder durch neue
ersetzen.
Montage prüfen.
Öl nachfüllen bzw.
Sägekette
schleifen, austauschen
oder spannen.
Montage prüfen.
nach-
auf
DE
AT
CH
Transportieren
■ Wenn Sie das Gerät transportieren möchten, entleeren Sie den Benzintank
wie im Abschnitt „Lagerung“ erklärt.
FBK 4 A1
69
Page 76

Wartungsintervalle
Entsorgung
Hochentaster
Die hier aufgeführten Angaben beziehen sich auf normale Einsatzbedingungen. Bei erschwerten Bedingungen, wie z. B. starke Staubentwicklung
und längeren täglichen Arbeitszeiten sind die angegebenen Intervalle
entsprechend zu verkürzen.
DE
AT
CH
Geräteteil Aktion Vor
Arbeitsbeginn
Kettenschmierung
Sägekette
Führungsschiene
Kettenrad
prüfen
prüfen und
auf Schärfzustand
achten
Kettenspannung
kontrollieren
schärfen X
prüfen
(Abnutzung,
Beschädigung)
reinigen und
wenden
entgraten X
ersetzen X X
prüfen X
ersetzen X
wöchentlich
X
X
X
X
bei
Störung
XX
Heckenschere
Die hier aufgeführten Angaben beziehen sich auf normale Einsatzbedingungen. Bei erschwerten Bedingungen, wie z. B. starke Staubentwicklung
und längeren täglichen Arbeitszeiten sind die angegebenen Intervalle
entsprechend zu verkürzen.
bei Beschädigung
bei
Bedarf
Die Verpackung besteht aus umweltfreundlichen Materialien, die Sie
über die örtlichen Recyclingstellen entsorgen können. Das Gerät
und dessen Zubehör bestehen aus verschiedenen Materialien,
wie z. B. Metall und Kunststoffe.
Möglichkeiten zur Entsorgung des ausgedienten Gerätes erfahren Sie bei
Ihrer Gemeinde- oder Stadtverwaltung.
Umweltschutz
■ Entleeren Sie den Benzin- und Öltank sorgfältig und geben Sie ihr
Gerät an einer Verwertungsstelle ab. Die verwendeten Kunststoff- und
Metallteile können sortenrein getrennt werden und so einer Wiederverwendung zugeführt werden.
■ Geben Sie Altöl und Benzinreste an einer Entsorgungsstelle ab und
schütten diese nicht in die Kanalisation oder in den Abfluss.
■ Geben Sie verschmutztes Wartungsmaterial und Betriebsstoffe in einer
dafür vorgesehenen Sammelstelle ab.
Anhang
Garantie
Sie erhalten auf dieses Gerät 3 Jahre Garantie ab Kaufdatum. Das
Gerät wurde sorgfältig produziert und vor Anlieferung gewissenhaft
geprüft. Bitte bewahren Sie den Kassenbon als Nachweis für den Kauf
auf. Bitte setzen Sie sich im Garantiefall mit Ihrer Servicestelle telefonisch in Verbindung. Nur so kann eine kostenlose Einsendung Ihrer
Ware gewährleistet werden.
Die Garantieleistung gilt nur für Material- oder Fabrikationsfehler, nicht
aber für Transportschäden, Verschleißteile oder für Beschädigungen an
zerbrechlichen Teilen, z. B. Schalter oder Akkus. Das Gerät ist lediglich für
den privaten und nicht für den gewerblichen Gebrauch bestimmt.
Bei missbräuchlicher und unsachgemäßer Behandlung, Gewaltanwendung
und bei Eingriffen, die nicht von unserer autorisierten Service-Niederlassung
vorgenommen wurden, erlischt die Garantie. Ihre gesetzlichen Rechte werden durch diese Garantie nicht eingeschränkt.
Geräteteil Aktion Vor
Arbeitsbeginn
Schneidmesser
Sichtprüfung X
reinigen X X
nach
Arbeitsende
bei
Bedarf
Ersatzteilbestellung
Ersatzteile bestellen
Bei der Ersatzteilbestellung sollten folgende Angaben gemacht werden:
■ Typ des Gerätes
■ Artikelnummer des Gerätes
■ Ident-Nummer des Gerätes
Aktuelle Preise und Infos finden Sie unter
www.kompernass.com
70
Die Garantiezeit wird durch die Gewährleistung nicht verlängert. Dies gilt
auch für ersetzte und reparierte Teile. Eventuell schon beim Kauf vorhandene
Schäden und Mängel müssen sofort nach dem Auspacken gemeldet werden,
spätestens aber zwei Tage nach Kaufdatum. Nach Ablauf der Garantiezeit
anfallende Reparaturen sind kostenpflichtig.
FBK 4 A1
Page 77

Service
WARNUNG!
■ Lassen Sie Ihr Gerät nur von qualifiziertem Fachpersonal und nur mit
Originalersatzteilen reparieren. Damit wird sichergestellt, dass die
Sicherheit des Gerätes erhalten bleibt.
Service Deutschland
Tel.: 0800 5435 111 (Kostenfrei aus dem dt. Festnetz/
Mobilfunknetz)
E-Mail: kompernass@lidl.de
IAN 110011
Service Österreich
Tel.: 0820 201 222 (0,15 EUR/Min.)
E-Mail: kompernass@lidl.at
IAN 110011
Service Schweiz
Tel.: 0842 665566 (0,08 CHF/Min., Mobilfunk max. 0,40 CHF/
Min.)
E-Mail: kompernass@lidl.ch
IAN 110011
Erreichbarkeit Hotline:
Montag bis Freitag von 8:00 Uhr – 20:00 Uhr (MEZ)
Original-Konformitätserklärung
Wir, KOMPERNASS HANDELS GMBH, Dokumentenverantwortlicher:
Herr Semi Uguzlu, BURGSTR. 21, 44867 BOCHUM, DEUTSCHLAND,
erklären hiermit, dass dieses Gerät mit den folgenden Normen, normativen
Dokumenten und EG-Richtlinien übereinstimmt:
Maschinenrichtlinie
(2006 / 42 / EC)
Outdoor Richtlinie
(2005 / 88 / EC)
Emissionsrichtlinie
(2012/46/EU)
Angewandte harmonisierte Normen:
EN ISO 11806-1: 2011
EN ISO 10517: 2009+A1
EN ISO 11680-1: 2011
Typ / Gerätebezeichnung:
Benzin-Kombigerät 4 in 1 FBK 4 A1
Herstellungsjahr: 02 - 2015
Seriennummer: IAN 110011
DE
AT
CH
Importeur
KOMPERNASS HANDELS GMBH
BURGSTRASSE 21
44867 BOCHUM
GERMANY
www.kompernass.com
Bochum, 05.12.2014
Semi Uguzlu
- Qualitätsmanager -
Technische Änderungen im Sinne der Weiterentwicklung sind vorbehalten.
FBK 4 A1
71
Page 78

72
FBK 4 A1
Page 79

KOMPERNASS HANDELS GMBH
BURGSTRASSE 21
44867 BOCHUM
DEUTSCHLAND / GERMANY
www.kompernass.com
Last Information Update · Version des informations
Stand van de informatie · Stand der Informationen:
12 / 2014 · Ident.-No.: FBK4A1-012015-4
IAN 110011
3
 Loading...