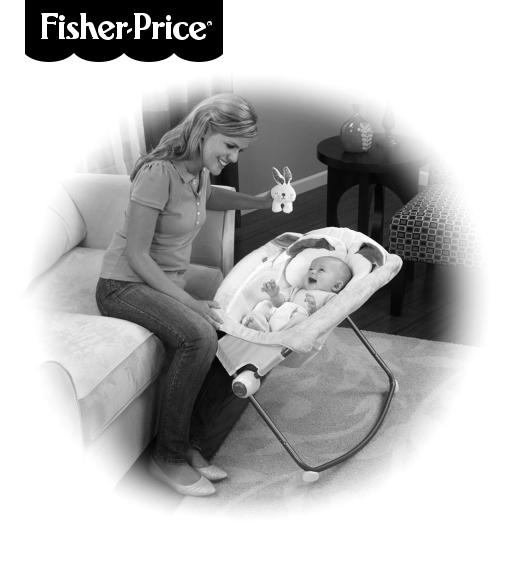
Fisher-Price R6070, W9443, BBF05, BBK11, BBK12 Instruction Sheet
...
BBK13
BLR93
IMPORTANT! Please keep these instructions for future reference. Please read these instructions before assembly and use of this product.
•Adult assembly is required. Assembly instructions on back side of this sheet.
•No tools required for assembly.
•Product features and decorations may vary from photographs.
¡IMPORTANTE! Guardar estas instrucciones para futura referencia. Leer estas instrucciones antes de ensamblar y usar este producto.
•Requiere montaje por un adulto.
Ver el dorso de esta hoja para las instrucciones de montaje.
•No es necesario usar herramientas para el montaje.
•Las características y decoración del producto pueden variar de las mostradas.
fisher-price.com

CONSUMER ASSISTANCE AYUDA AL CONSUMIDOR
1-800-432-5437 (US)
Fisher-Price, Inc., 636 Girard Avenue, East Aurora, NY 14052.
Hearing-impaired consumers/Clientes con problemas auditivos 1-800-382-7470.
Centro de Servicio en México:
59-05-51-00 Ext. 5206 ó 01-800-463-59-89
MÉXICO
Importado y distribuido por Mattel de México, S.A. de C.V., Miguel de Cervantes Saavedra No. 193, Pisos 10 y 11, Col. Granada, Delegación Miguel Hidalgo, C.P. 11520, México, D.F. R.F.C. MME-920701-NB3.
CHILE
Mattel Chile, S.A., Avenida Américo Vespucio 501-B,
Quilicura, Santiago, Chile.
VENEZUELA
Mattel de Venezuela, C.A., RIF J301596439,
Ave. Mara, C.C. Macaracuay Plaza, Torre B, Piso 8, Colinas de la California, Caracas 1071.
ARGENTINA
Mattel Argentina, S.A., Curupaytí 1186, (1607) –
Villa Adelina, Buenos Aires.
COLOMBIA
Mattel Colombia, S.A., calle 123#7-07 P.5, Bogotá.
PERÚ
Mattel Perú, S.A., Av. Juan de Arona # 151, Centro Empresarial Juan de Arona, Torre C, Piso 7, Oficina 704, San Isidro, Lima 27, Perú. RUC: 20425853865.
Reg. Importador: 02350-12-JUE-DIGESA.
PRINTED IN CHINA |
©2013 Mattel. All Rights Reserved. |
BBK13a-0823 |
|
2

WARNING
Failure to follow these warnings and the instructions could result in serious injury or death.
•ALWAYS use the restraint system.
•ALWAYS use the pad provided, which includes the restraint. NEVER add a mattress, pillow, comforter, or padding.
•SUFFOCATION HAZARD – Infants can suffocate:
-in gaps between an extra pad and the side of the product.
-on soft bedding.
•FALL HAZARD – To prevent falls, DO NOT use this product when the infant begins to push up on hands and knees, can pull up or sit unassisted or has reached 25 lbs (11 kg), whichever comes first.
•Strings can cause strangulation! NEVER place items with a string around a child’s neck such as hood strings or pacifier cords. NEVER suspend strings over product or attach strings to toys.
•NEVER place product near a window where cords from blinds or drapes can strangle a child.
•To reduce the risk of Sudden Infant Death Syndrome (SIDS), pediatricians recommend healthy infants be placed on their backs to sleep, unless otherwise advised by your physician.
•Always provide the supervision necessary for the continued safety of your child.
•When used for playing, never leave child unattended.
3

ADVERTENCIA
El incumplimiento de estas advertencias e instrucciones puede resultar en lesiones graves o la muerte.
•SIEMPRE usar el sistema de sujeción.
•SIEMPRE usar la almohadilla proporcionada que incluye el sistema de sujeción. NO añadir un colchón, almohada, edredón o almohadilla.
•PELIGRO DE ASFIXIA – Los niños pequeños se pueden asfixiar:
-En los espacios entre un colchón adicional y el lado del producto.
-En ropa de cama suave.
•PELIGRO DE CAÍDAS – Para evitar caídas, NO usar este producto cuando el bebé empiece a incorporarse por sí solo con las manos y rodillas, se pare
impulsándose con las manos, se siente por sí solo o llegue a pesar 11 kg, lo que ocurra primero.
•¡Los cordones pueden causar estrangulación! NO poner artículos con cordones, tales como capuchas o chupones, alrededor del cuello del niño. NO suspender cordones sobre el producto ni amarrar cordones a los juguetes.
•NO poner el producto cerca de una ventana donde los cordones de las persianas o cortinas pueden estrangular al niño.
•Para reducir el riesgo de síndrome de muerte súbita del lactante (SMSL), los pediatras recomiendan acostar a dormir a los bebés sanos boca arriba, salvo que se indique lo contrario por un médico.
•Para seguridad del niño, siempre usar bajo la vigilancia de un adulto.
•Cuando se use para jugar, no dejar al niño fuera de su alcance.
4

Securing Your Child Sistema de sujeción
Waist Belt
Cinturón
 Waist Belt
Cinturón
•Asegurarse de que el sistema de sujeción esté bien asegurado, jalándolo en dirección opuesta al niño. El sistema de sujeción debe permanecer conectado.
1 |
Crotch Pad |
Almohadilla de |
|
la entrepierna |
•Place your child in the seat.
•Position the crotch pad between your child’s legs.
•Fasten both waist belts to the crotch pad. Make sure you hear a “click” on both sides.
•Tighten each waist belt so that the restraint system is snug against your child. Please refer to the next section for instructions to tighten the waist belts.
•Check to be sure the restraint system is securely attached by pulling it away from your child. The restraint system should remain attached.
•Sentar al niño en el asiento.
•Colocar la almohadilla de la entrepierna entre las piernas del niño.
•Ajustar ambos cinturones en la almohadilla de la entrepierna. Asegurarse de oír un clic en ambos lados.
•Apretar cada cinturón de modo que el sistema de sujeción quede bien ajustado al niño/a. Consultar la
siguiente sección para mayores detalles sobre cómo apretar los cinturones.
TIGHTEN LOOSEN 2 APRETAR AFLOJAR
To tighten the waist belts:
•Feed the anchored end of the waist belt up through the buckle to form a loop A. Pull the free end of the waist belt B.
To loosen the waist belts:
•Feed the free end of the waist belt up through the buckle to form a loop A. Enlarge the loop by pulling on the end of the loop toward the buckle. Pull the anchored end of the waist belt to shorten the free end of the waist belt B.
Para apretar los cinturones:
•Introducir el extremo fijo del cinturón en la hebilla para formar un espacio A. Jalar el extremo libre del cinturón B.
Para aflojar los cinturones:
•Introducir el extremo libre del cinturón en la hebilla para formar un espacio A. Agrandar el espacio jalando el extremo del cinturón hacia la hebilla. Jalar el extremo fijo del cinturón para acortar el extremo libre del cinturón B.
5
 Loading...