


•INSTRUCTIONS FOR USE
•BEDIENUNGSANLEITUNG
•NÁVOD K OBSLUZE
•GEBRUIKSAANWIJZING
•KEZELÉSI ÉS ÜZEMBE HELYZÉSI ÚTMUTATÓ

EN Page 3
DE Seite 11
CS Straně 19
NL Pagina 27
HU Oldal 35
As part of our commitment to constantly improving our products, we reserve the right to make changes to them based on technical advances to their technical and functional features and appearance.
Warning :
Before installing and using your appliance, please carefully read this Guide of Installation and Use, which will allow you to quickly familiarise yourself with its operation.
Da wir unsere Produkte ständig verbessern möchten, behalten wir uns das Recht vor, ihre technischen, funktionellen und ästhetischen Merkmale zu verändern, damit sie mit der technischen Weiterentwicklung Schritt halten.
Wichtig:
Bitte lesen Sie vor der Inbetriebnahme des Gerätes diese Einbauund Gebrauchsanleitung aufmerksam durch, damit Sie sich sehr rasch mit seinem Betrieb vertraut machen können.
Ve snaze neustále zlepšovat naše výrobky a přizpůsobovat je vývoji si vyhrazujeme právo změnit jejich technické, funkční a estetické parametry.
Důležité :
Před prvním uvedením vašeho přístroje do provozu si pečlivě přečtěte tento návod k instalaci a k použití pro rychlejší seznámení se s jeho funkcemi.
Wij streven voortdurend naar verbetering van onze producten. Daarom behouden we ons het recht voor om aan de technische, functionele of esthetische kenmerken van onze producten wijzigingen aan te brengen die in verband staan met technische ontwikkelingen.
Belangrijk:
Vóór installatie en gebruik van uw apparaat deze installatieen gebruiksgids aandachtig lezen. U zult snel gewend raken aan de werking.
Termékeink állandó fejlesztése érdekében, fenntartjuk a jogot, hogy a fejlődéshez kapcsolódó technikai, működési vagy esztétikai jellemzőket megváltoztassuk.
Fontos:
Mielőtt használná a mosógépet, figyelmesen olvassa el ezt az üzembehelyezési és használati utasítást. Így gyorsabban megismeri a gép működését.
2
1 / INTRODUCTION TO YOUR MACHINE |
|
EN |
|
|
|
•CONTENTS |
Page |
Removing the transport packing . . . . . . . . . . . . . . . . . . . . . . . . . . |
. . . .4 |
Moving your machine . . . . . . . . . . . . . . . . . . . . . . . . . . . . . . . . . . . |
. . . .4 |
Connecting to the cold water supply . . . . . . . . . . . . . . . . . . . . . . . |
. . .4 |
Draining away the waste water . . . . . . . . . . . . . . . . . . . . . . . . . . . . |
. . .4 |
Connecting to the electricity supply . . . . . . . . . . . . . . . . . . . . . . . . |
. . .5 |
Installing your machine . . . . . . . . . . . . . . . . . . . . . . . . . . . . . . . . . . . |
. . .5 |
Loading your washing . . . . . . . . . . . . . . . . . . . . . . . . . . . . . . . . . . . |
. . .5 |
Loading the washing products . . . . . . . . . . . . . . . . . . . . . . . . . . . . |
. . .5 |
Page
Programming . . . . . . . . . . . . . . . . . . . . . . . . . . . . . . . . . . . . . . . . . . . . . .6 Details of the programmes and options . . . . . . . . . . . . . . . . . . . . . . . .7 Modifying a washing programme . . . . . . . . . . . . . . . . . . . . . . . . . . . . .8 Automatic safety systems . . . . . . . . . . . . . . . . . . . . . . . . . . . . . . . . . . .8 Cleaning the pump filter . . . . . . . . . . . . . . . . . . . . . . . . . . . . . . . . . . . . .9 Maintaining your machine . . . . . . . . . . . . . . . . . . . . . . . . . . . . . . . . . . .9 Incidents that may arise . . . . . . . . . . . . . . . . . . . . . . . . . . . . . . . . . . . .10 Messages shown on the display . . . . . . . . . . . . . . . . . . . . . . . . . . . . .10
•SAFETY ADVICE
Important :
This machine is only for domestic use and is designed to wash, rinse and spin machine-washable textiles.
You must observe the following instructions. We refuse to accept any liability and the guarantee if you do not observe these recommendations since this could result in damage to equipment or physical injury.
— This appliance is not intended for use by persons (including children) with reduced physical, sensory or mental capabilities, or lack of experience and knowledge, unless they have been given supervision or instruction concerning use of the appliance by a person responsible for their safety.
— The machine must only be used in accordance with its normal method of operation in order to avoid damaging your washing and your machine. Only use washing and maintenance products certified for use in domestic washing machines.
—If you pre-treat your washing with stain removers, solvents or, in general, any inflammable or potentially highly explosive product, do not insert them into the machine immediately.
Furthermore, you are also recommended not to use solvents or products in aerosol cans near to your washing machine or any electrical appliance in general in a poorly ventilated room (risk of fire and explosion).
—If any incidents occur and you cannot resolve them using the remedies we recommend (see the section “INCIDENTS THAT MAY ARISE”), call in a qualified professional.
—If you have to open your machine during a cycle (for example, to add or remove washing), depending on the stage the programme is at (during washing essentially), be careful of the temperature inside the machine, which may be very high (risk of severe burns).
—When making a new installation, the machine must be connected to the water supply with a new hose: the old hose must not be re-used.
—Do not let children play with the machine and keep your pets away from it.
—You must immediately make any obsolete machine unusable. Disconnect and cut off the power cable flush with the machine. Close the water tap and remove the hose. Disable the door lock.
—If there is a risk of frost, disconnect the water hose and drain off any water that may remain in the drain hose by placing this as low as possible in a bowl.
•SAVING ENERGY
—Only programme a prewash when it is absolutely necessary: for example, for very dirty sports or working clothes, etc.
—A low temperature programme is sufficient for impeccable washing results when your washing is only slightly or moderately dirty.
—For washing that is only slightly dirty, select a short washing cycle .
—Use the right amount of washing products for the hardness of the water, the amount of washing and how dirty it is and follow the instructions on the detergent packs.
•ENVIRONMENTAL PROTECTION
This appliance’s packaging material is recyclable. Help recycle it and protect the environment by dropping it off in the municipal receptacles provided for this purpose.
Your appliance also contains a great amount of recyclable material. It is marked with this label to indicate that in countries that are a members of the European Union the used appliances should
not be mixed with other waste.
This way, the appliance recycling organised by your manufacturer will be done under the best possible conditions, in compliance with European Directive 2002/96/EC on Waste Electrical and Electronic Equipment. Contact your town hall or your retailer for the used appliance collection points closest to your home.
We thank you doing your part to protect the environment.
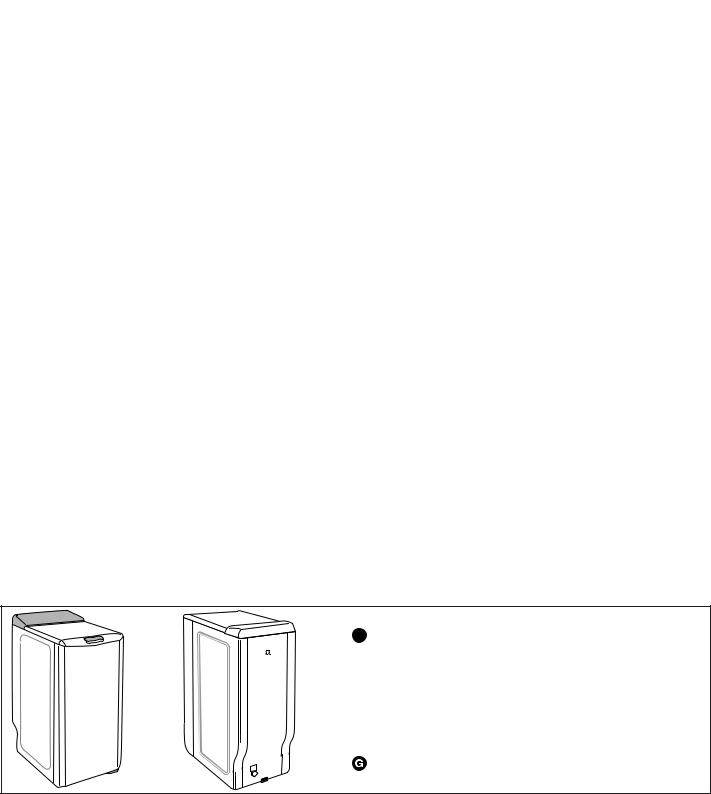
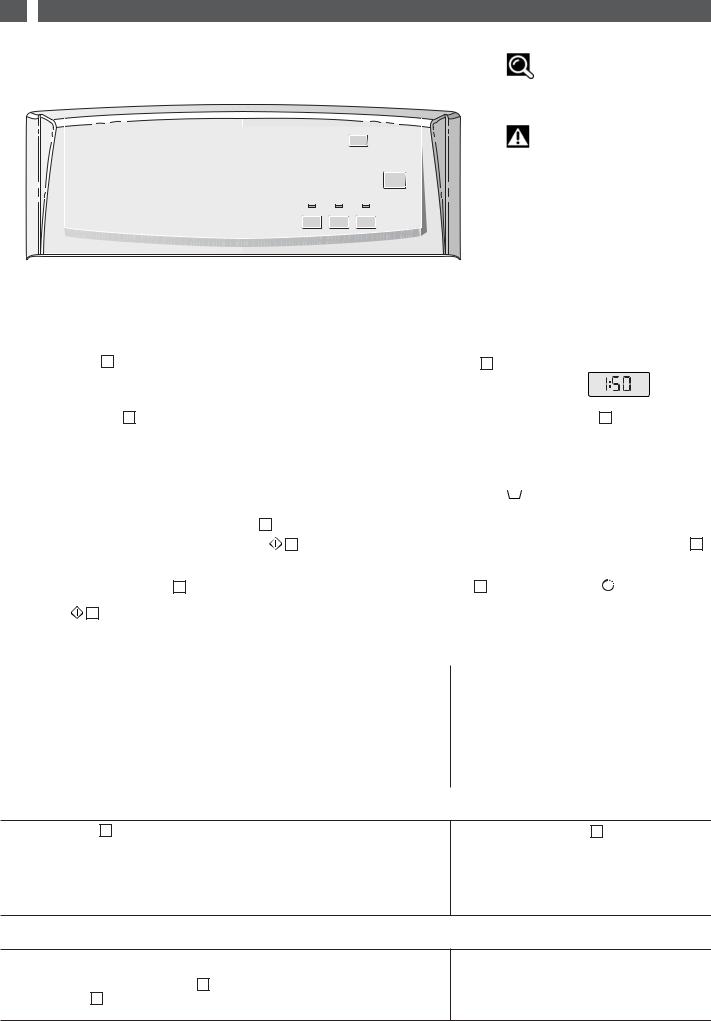
•DESCRIPTION OF YOUR MACHINE
A
A Control panel
 Handle for opening the lid (remains locked during the cycle)
 Lever for raising the machine on castors (depending on the model)
 Drain hose
 Cross clamp
 Water supply hose (not connected)
D 1 |
D 2 |
3

EN 2 / INSTALLING YOUR MACHINE
•REMOVING THE TRANSPORT CLAMPS
Important :
Before using the machine in any way, you must first perform the following operations.
These comprise removing all the components designed to immobilise the drum in your machine during transport.
These so-called “releasing” operations are necessary for your machine to operate correctly and to conform to the prevailing safety standards. If they are not carried out completely, this could cause severe damage to your machine while it is operating.
— Remove the washing machine from its plinth (check that the wedge
A supporting the motor is not still inserted in the machine) (Diagram D3)
—Remove the 4 screws  with a screwdriver (Diagram D4)
—Remove the cross clamp  by removing the 2 screws
  (Diagram D5) using a 10 or 13mm spanner (depending on the model). (Ensure that you remove the two plastic braces fixed on the cross clamp at the same time as the clamp itself).
—Replace the screws  in their initial positions.
Warning:
You must block off the two holes using the hole covers provided  (supplied in the accessories bag) (Diagram D6)
— Remove the drum-tank assembly locking wedge (Diagram D7). To do this:
-Lift the lid on the machine
-Remove wedge 
-Remove wedge  by turning it a quarter turn
-Release the drum doors, locked in the lower position, by pressing down on both eaves simultaneously.
Warning:
Remove the pipe support collars  You must block off the holes revealed with the hole covers
  supplied in the accessories bag (Diagram D8).
Advice:
We would recommend that you keep all the locking components since these must be refitted if you must subsequently transport your machine again.
Information:
Your machine has been scrupulously checked before it left the factory. You may therefore notice a little water still remaining in the tank or the products box.
•MOVING YOUR MACHINE
•Mounting it on castors
If your machine is equipped with removable castors, you will be able to move it quite easily.
To mount it on castors, swivel the lever on the bottom of the machine from the right to the far left (Diagram D9).
Important:
The machine must not rest on the “front” castors while it is operating: remember to return the lever to its initial position.
•CONNECTING TO THE COLD WATER SUPPLY
Connect the supply hose (Diagram D10) :
—At one end to the connection on the back of the machine
—On the other end to a tap fitted with a threaded end 20mm dia. x 27 (3/4 BSP).
If you use a self-piercing tap, the useful aperture must have a minimum diameter of 6mm.
Water supply:
-Minimum water pressure: 0.1 MPa or 1 bar
-Maximum water pressure: 1 MPa or 10 bars
•Replacing a water supply hose
When replacing the hose, ensure that the hose is tightly fastened and that there is a seal at both ends.
•DRAINING AWAY THE WASTE WATER
Fit the hose bracket provided inside your machine to the end of the drain hose and then connect the hose (Diagram D11) :
—Either, temporarily, over a sink or a bathtub.
—Or permanently to a ventilated U-bend.
If your installation does not have a ventilated U-bend, check that the connection is not sealed. In fact, to avoid any waste water flowing back into the machine, you are strongly recommended to leave an air gap between the machine’s drain hose and the drainpipe.
In any case, the drain hose bracket must be placed at a height of 65 to 90cm higher than the base of the machine.
Important:
Ensure that the drain hose is tied firmly in place with cord to avoid the bracket coming loose during draining and causing a flood. For correct draining of the waste water, make sure that the drain hose is as straight as possible. In fact, the more bends the less effective the drain pump.
The waste water can be drained away to the ground provided that the drain hose passes through a point 65 to 90cm higher than the base of the machine (Diagram D12).
D 3 |
|
|
|
D 7 D 8 |
D 9 |
|
|
|
D 4 |
|
|
|
|
|
D 5 |
2 |
1 |
|
|
|
|
|
a |
|
|
|
13 |
|
2 |
|
|
|
|
|
|
|
|
|
|
1 |
b |
|
|
|
|
|
|
A |
|
|
2 |
a |
|
2 |
1 |
|
|
|
|
|
1 |
|
|
|
|
|
|
|
|
|
|
D 10 |
|
3/4 |
D 11 |
D 12 |
|
|
|
|
|
|
|
|
|
|
10 mm |
|
|
|
|
|
|
4 |
|

3 / PREPARING YOUR WASHING AND YOUR MACHINE |
|
EN |
|
|
|
•CONNECTING TO THE ELECTRICITY SUPPLY
Important:
For your safety, you must comply with the instructions below.
— Before connecting your machine, you must ensure that your installation’s electrical characteristics match those of your machine (see the details provided on the information plate affixed to the back of the machine).
The electrical installation must comply with the prevailing standards and the Electricity Board’s regulations in the country concerned, particularly as regards Earthing and installation in shower rooms.
We cannot be held responsible for any incident caused by the machine being incorrectly earthed.
Advice:
Advice on the electrical installation of your machine
—Do not use an extension lead, adapter or multiple socket.
—Never cut out the Earth wire.
—The socket must be readily accessible but out of the reach of children.
If in any doubt, please contact your installer.
Important:
Your machine conforms to European Directives 2006/95/CE (Low Voltage Directive) and 2004/108/CE (Electromagnetic Compatibility).
•INSTALLING YOUR MACHINE
Important:
If you are installing your machine next to another machine or a unit, we recommend that you leave a gap between them to allow for air circulation.
Advice:
We also strongly recommend that you do NOT:
—Install your machine in a damp, poorly ventilated room.
—Install your machine in an area where it could be subject to water splashes.
—Install your machine on a carpeted floor.
If you cannot avoid doing this, please take every precaution to avoid blocking air circulation at the bottom of the machine in order to ensure that the internal components are well ventilated.
•Levelling the machine:
Use a spirit level to check that the floor is horizontal: maximum slope 2°, i.e. a discrepancy of approximately 1cm over the width and of 1.5cm over the depth of the machine.
•Adjustable feet
Some machines are fitted with two adjustable feet at the front to enable you to compensate for any unevenness in the floor. Proceed as follows to adjust the feet to level and stabilize your machine:
—Set the machine on its castors (or tilt it slightly backwards if it does not have retractable castors)
—Screw in or unscrew the feet to adjust the height to suit the shape of the floor (Diagram D13)
—Set the machine back on its feet and check that it is stable.
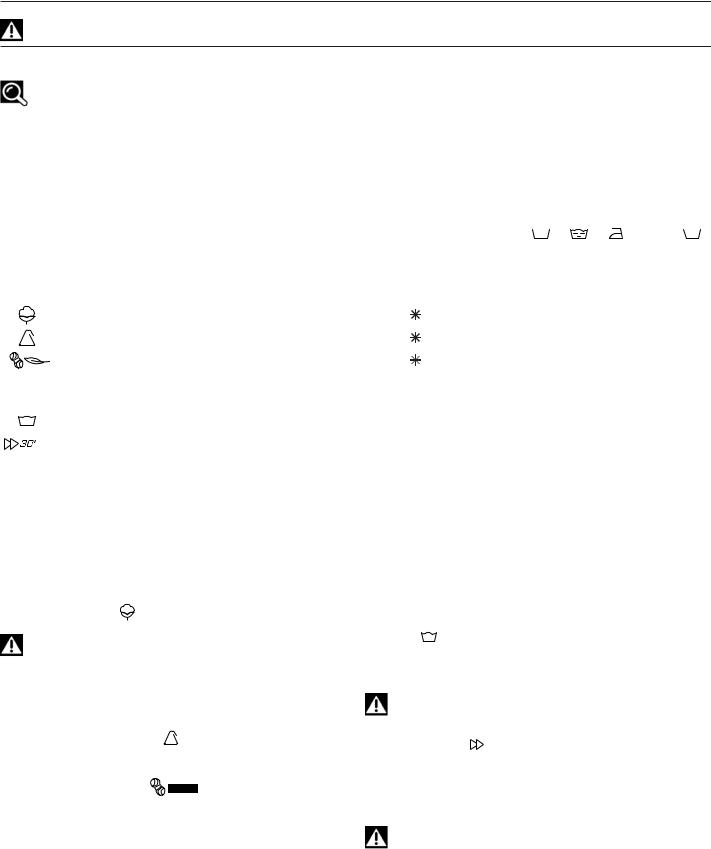
•TEXTILE MAINTENANCE CODES
—Washing  : Never exceed the indicated temperatures
—Use of cold diluted bleach possible: cl
— Iron: Low |
Medium |
High |
|
— Dry clean: mineral spirit |
perchlorethylene |
||
all solvents |
|
|
|
— NB: A crossed-out code indicates that it is forbidden
•LOADING YOUR WASHING
Perform these actions in the following order:
•Open the machine
—Check that the Programme selector is correctly positioned on “O”.
—Depending on the model, lift the opening handle or press the push button on the front of the machine.
The lid will open.
— Open the drum by pressing the button on the front door.
•Insert your washing
For optimum washing performance, place your washing, preferably sorted and folded, in the drum, distributing it evenly without heaping it up. Mix large and small items to obtain an optimum, well-balanced spin.
•Close the drum
Ensure that the drum is correctly closed.
Important:
Check that the three hooks and the border of the button are fully visible.
•LOADING THE WASHING PRODUCTS
Important:
(Diagram D14)
—The “WASH” container may contain powder or liquid but liquid detergent should not be used for programmes WITH Prewash and/or WITH “Delayed Start” (depending on the model).
—Concentrated softener should be diluted with warm water.
—Concentrated bleach must be diluted.
—To fill the product containers correctly, place the lid fully open.
—Do not exceed the MAX level.
•Dispensing the detergent
The amount of detergent to be used depends on the hardness of the water, the extent to which your washing is soiled and the amount of washing to be washed.
Please refer to the dosing instructions on your pack of detergent.
Warning: in most cases, the detergent manufacturer’s recommendations apply to the drum filled to the maximum. Adjust the dosage correctly to the weight of the washing you have placed in the machine.
These recommendations will help you to avoid using too much detergent, which causes foam to be produced. Too much foam can reduce your machine’s performance and increase the length of the washing cycle and the consumption of water.
•Detergents for woollens and delicate fabrics
You are recommended to use an appropriate detergent for washing these fabrics (avoid placing such detergents directly on the drum because they have an aggressive action on the metal).
•Before your first wash
Before making your first wash, we recommend that you carry out a “COTTON 90 wash without pre-wash” and with no washing in the drum, using a 1/2 measure of your usual detergent in order to eliminate any residues from manufacturing that may remain in your machine.
•STANDARD COMPARISON TESTING PROGRAMME
Cotton  60°C - 6 kg - no options – max spin.
To comply with the statement on the label, the tests are conducted in accordance with European Directive 95/12/EEC at nominal capacity, ensuring complete use of the CEI detergent from the start of the washing phase.
D 13 |
D 14 |
|
|
|
Pre-wash container (powder) |
|
|
|
|
|
|
||
|
|
|
|
|
Wash container (powder or liquid) |
|
|
|
|
|
|
Softener |
|
|
|
|
|
cl |
Bleach |
|
|
|
|
|
: POWDERED DETERGENT |
: LIQUID DETERGENT |
|
5
EN 4 / PROGRAMMING YOUR MACHINE
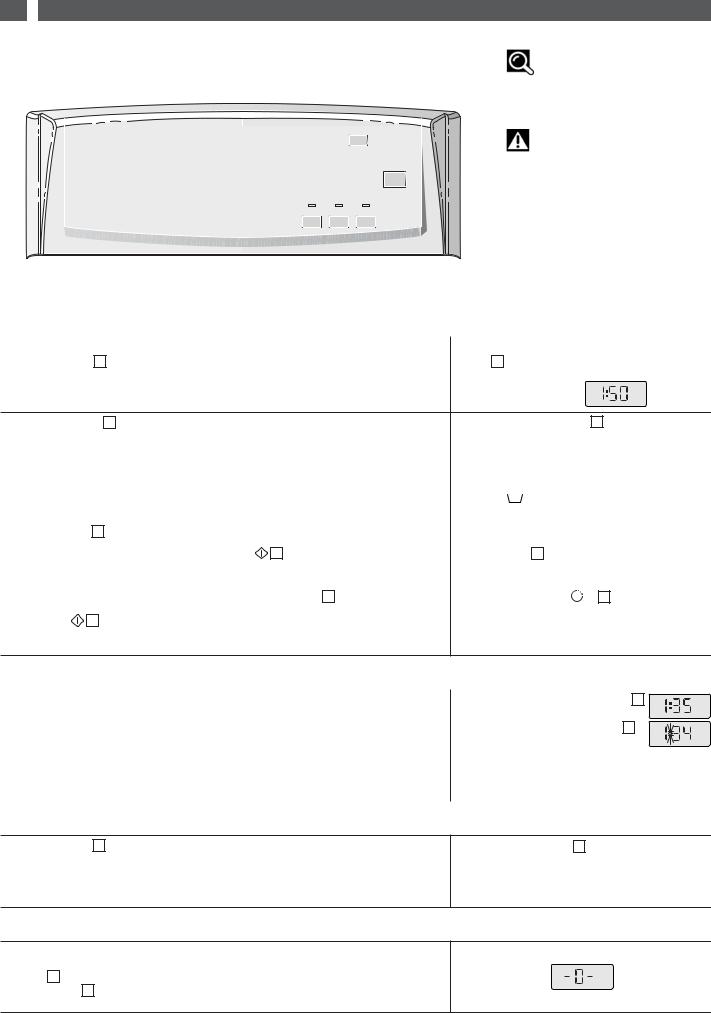
•PROGRAMMING |
|
|
|
|
|
|
|
|
Information: |
|
|
|
|
|
|
|
|
|
|
|
All the buttons are on micro- |
|
Nature of the washing and |
Display of remaining time |
Delayed start setting |
|||||||
|
switches and do not remain depressed. |
|||||||||
|
the temperature |
|
|
|
or delayed start |
|
|
|
|
|
|
1 |
|
A |
|
3 |
|
In any case, the ”Start/Pause” button |
|||
|
|
|
|
|
|
|||||
|
|
|
|
|
|
|
|
|
|
cannot cancel a programme. |
|
|
|
|
|
|
|
|
|
|
|
|
|
|
|
|
|
|
Important : |
|
|
|
|
|
|
|
|
|
|
|
|
|
|
|
|
|
||
|
|
|
|
|
|
|
|
|
|
|
|
|
|
|
|
|
|
Before starting your machine, |
|
|
|
|
|
|
|
|
|
|
|
|
|
|
|
|
|
|
check that the power cable is plugged |
|
|
|
|
|
|
|
|
|
|
|
|
|
|
|
|
|
|
in and the water tap is open. Also |
|
|
|
|
|
|
|
|
|
|
|
|
|
|
|
|
|
|
ensure that the drum doors are closed |
|
|
|
|
|
|
|
|
|
|
|
|
|
|
|
|
|
|
correctly and the machine’s lid is shut. |
|
|
|
|
|
|
|
|
|
|
|
|
|
|
|
|
|
|
During the “End of Cycle” phase, any |
|
|
|
|
|
|
|
|
|
|
|
|
|
|
|
|
|
||
|
|
|
|
|
|
|
|
|
|
|
|
|
|
|
|
|
|
action on one of the controls (the |
|
|
|
|
|
|
|
|
|
|
|
|
|
|
|
|
|
|
selectors or the buttons) returns you to |
|
|
|
|
|
|
|
|
|
|
|
|
|
|
|
|
|
|
“Programming” mode. As a safety |
|
|
|
|
|
|
|
|
|
|
|
|
|
|
|
|
|
|
measure, when the cycle is over, we |
|
|
2 |
|
|
|
|
|
|
|
5 |
|
|
recommend that you unplug the power |
|||||
|
|
|
|
|
|
|
|
|
|
|
||||||||
|
|
|
|
|
|
|
|
|
|
|
|
|
|
|
|
|
cable and turn off the water tap. |
|
Spin speed setting |
|
|
|
|
|
|
4 |
|
|
|
|
Start/Pause |
|
|||||
|
|
|
|
|
|
|
|
|
|
|
|
|
|
|||||
|
|
|
|
|
|
Options |
|
|
||||||||||
|
|
|
|
|
|
|
|
|
|
|
|
|
|
|
|
|
|
|
•Programming a washing cycle: |
|
|
|
|
|
|
|
|
|
|
|
|
Display and position of the selectors |
|||||
|
|
|
|
|
|
|
|
|
|
|
|
|
|
|
|
|
|
|
— Turn the selector 1 to choose the most suitable programme and washing temperature for |
In A , display of the length of the selected |
|||||||||||||||||
the type of fabric to be washed. |
|
|
|
|
|
|
|
|
|
|
|
|
programme |
|||||
NB: Turning the selector to any position other than “O” provides power to the machine.
for example:
— Using the selector 2 , choose: |
|
|
|
Selector 2 on |
|||
- Either a suitable spin speed for your type of washing. |
- Position “800” for example |
||||||
The spin speed is automatically restricted in the “Synthetics” and “Woollens/Delicates” |
|
|
|
|
|
||
programmes. |
|
|
- Position ”100” |
||||
- Or drip dry. |
|
|
|||||
The cycle will finish with a gentle spin at 100 rpm. |
|
|
|
|
|
|
|
- Or stop with tub full of water. |
|
- Position |
|
|
|||
|
|
||||||
Your machine will stop with the tub full of water before the final spin. |
|
|
|
|
|
||
|
|
|
|
||||
— Use the buttons |
4 to select any options you wish. |
|
Light(s) for the option(s) selected |
||||
|
|
|
|||||
— Select immediate start by pressing “Start/Pause” |
5 ... |
Countdown in A of the time remaining before the |
|||||
|
|
|
|
|
end of the cycle |
||
|
|
|
(the two dots flash throughout the whole of the cycle) |
||||
|
|
|
|
||||
— ... or select a start delayed by 1 to 19 hours by pressing button 3 (for how to do this, |
Display of the symbol |
|
in A and countdown of |
||||
|
|||||||
see the section ”DETAILS OF THE OPTIONS • Delayed start”) and then press |
the time remaining before the cycle actually starts. |
||||||
“Start/Pause” |
5 . |
|
An animation (four small elements turning on |
||||
|
|
|
themselves) shows the waiting period before the |
||||
|
|
|
|
|
start of the cycle. |
||
•Adding or removing an item during the cycle (impossible during spin):
— Press the "Start/Pause" |
button 5 |
to interrupt the cycle. |
Countdown of the time is stopped in A |
— Add or remove the items of laundry*. |
|
(the two dots are constantly lit) |
|
— Press the "Start/Pause" |
button 5 |
to restart the cycle. |
Resumption of the countdown in A |
(*) the time the lid remains locked depends on the temperature inside the machine and, |
(the two dots start flashing again) |
||
for safety reasons, may take several minutes if you are interrupting a cycle at more than |
|
||
40 °C. |
|
|
|
NB: If you have selected a delayed start, you can access the drum instantly at any time in the period before the washing cycle starts without having to interrupt and restart the cycle.
•Cancelling while programming, washing or during a pause:
— Set the selector 1 to the “O” position.
This can be done at any time during the cycle or during programming, or even during a pause.
NB :
-In all cases, after cancelling you must reprogramme everything from the start.
-If you have cancelled during the washing phase, remember to empty the water, if necessary.
Selector 1 set to ”O”
All the indicator lights and the display are OFF
•End of the cycle:
NB: After spinning, some models automatically position the drum opening at the top to provide easy access to the washing. This operation lasts at most 3 minutes.
— Screen A then displays ”- 0 -”, indicating that the cycle has finished.
Set the selector 1 to the “O” position.
You can now open the lid and remove your washing.
6
4 / PROGRAMMING YOUR MACHINE |
|
EN |
|
|
|
•Maintaining your machine’s performance (Maintaining the pump filter):
You must clean the drain pump filter regularly (for how to do this, see the section “CLEANING THE PUMP FILTER”).
Important :
Your machine’s performance can be affected if you do not clean the pump filter regularly.
For more details on the various functions, please refer to the sections "DETAILS OF THE PROGRAMMES" and "DETAILS OF THE OPTIONS".
Information:
After a power failure, when the power is restored, the washing cycle automatically resumes at the point where it was interrupted.
•SOME EXAMPLES OF PROGRAMMES
To select the most suitable programme for your type of washing, follow the instructions on the labels that most textiles bear.
|
|
Programmes table |
|
|
|
|
|
|
|
100 |
|
|
|
|
|
|
|
|
|
|
|
|
|
|
|
||
|
|
|
|
|
|
|
|
|
|
|
|
|
|
|
|
Type of textile |
Temperature |
Maximum |
Prewash |
rinseExtra |
Anti creasing |
dry-Drip |
drumFull stop |
||||
|
|
weight of dry |
|
|
|
|
|
|
|
|
|
||
|
|
|
(°C) |
clothes (kg) |
|
|
|
|
|
|
|
|
|
|
|
|
|
|
|
|
|
|
|
|
|
|
|
|
|
|
|
|
|
|
|
|
|
|
|
|
|
|
|
COTTON / WHITES |
- 90° |
6.0 |
● |
● |
● |
● |
|
● |
|||
|
|
|
|
|
|
|
|
|
|
|
|
|
|
|
|
COLOUREDS / SYNTHETICS |
- 60° |
2.5 |
● |
● |
● |
● |
|
● |
|||
|
|
|
|
|
|
|
|
|
|
|
|
|
|
|
|
WOOLLENS / DELICATES |
- 30° |
1.5 |
|
|
|
● |
|
● |
|
● |
|
|
|
|
|
|
|
|
|
|
|
|
|
|
|
|
|
Auxiliary programmes |
|
|
|
|
|
|
|
|
|
|
|
|
|
Sport |
40° |
2.5 |
● |
● |
● |
● |
|
● |
|||
|
|
|
|
|
|
|
|
|
|
|
|
|
|
|
|
RINSE |
|
- |
|
|
|
|
|
● |
|
● |
|
|
|
|
|
|
|
|
|
|
|
|
|
|
|
|
30 min |
RAPID 30 min |
40° |
2.5 |
|
|
|
|
|
● |
|
● |
|
|
|
|
|
|
|
|
|
|
|
|
|
|
|
MIX 45 min |
MIXED 45 min |
40° |
3.0 |
|
|
|
● |
● |
● |
|
● |
||
|
|
|
|
|
|
|
|
|
|
|
|
|
|
● : These functions can be used alone or in combinations: no illogical combinations can be made.
•DETAILS OF THE PROGRAMMES
The main programmes provided by the machine are as follows:
•Cotton / Whites
If your washing comprises hard-wearing white or coloured COTTONS.
Important :
When washing coloureds do not exceed a maximum temperature of 60°C.
NB : During the first few minutes of the programme, your machine automatically evaluates the washing load you have introduced and adapts the water consumption and the length of the programme accordingly to provide a perfect wash
•Coloureds / Synthetics
If your washing comprises of DELICATE COLOURS, HARD-WEARING SYNTHETICS or MIXED FIBRES.
•Woollens / Delicates
If your washing comprises NETTING, DELICATE FABRICS, FRAGILE TEXTILES or ”MACHINE-WASHABLE WOOLLENS”.
NB : A programme with agitation and spin phases specially adapted to these types of fabrics.
This programme is also suitable for washing textiles specified as ‘hand wash’ only. For this, select position ” ”.
”.
•Sport
This programme is for efficient washing of elastane sports and leisure wear, while retaining its elasticity, using a customised washing cycle and an appropriate washing temperature and spin speed.
•Rinse
A separate rinse followed by a choice of:
—Either spin and drain
—Or drain only ("Drip-dry" option)
—Or a stop with the drum full of water.
Important :
In the case of rinse followed by a spin, ensure that you select a suitable spin speed for the type of washing in the machine.
•Rapid 30 min |
30 min |
This programme enables you to refresh a small load of 2.5 kg of lightly soiled washing composed of WHITES, COTTONS, COLOUREDS or HARD-WEARING SYNTHETICS.
The cycle time is restricted to around 30 minutes
In this programme, the washing temperature is automatically programmed at 40°C.
Important :
For this programme, the doses of detergent should be reduced by half.
•Mixed 45 min MIX 45 min
This 40°C cycle washes a normal 3 kg load of cotton and mixed fabrics in 45 minutes, ensuring perfect washing results and maximum energy saving.
7
EN 4 / PROGRAMMING YOUR MACHINE
•DETAILS OF THE OPTIONS
•Prewash
Specially designed for heavily soiled washing (mud, blood, etc.).
A specific initial agitation in cold water precedes a phase of heating to 30°C.
This agitation phase in cold water enables the particles soiling the washing to be removed before the water is heated.
Important :
Detergent must be placed in the " " container in the products
box.
•Extra rinse
"Especially for sensitive and allergic skin": adds an extra rinse to the washing cycle.
•Anti-creasing
This avoids the washing creasing and makes it easier to iron.
•Drip Dry (spin speed ”100”)
This function, for very delicate linen, enables you to remove spinning and to pass directly to the draining of the washing machine.
•Full drum stop
This function enables you to remove the washing from your machine before the spin phase or to delay this phase with you washing remaining in water to prevent creasing.
NB : When the machine is stopped with the tub full of water, the display A shows alternately:
Then:
—If you want to drain after spinning, use the selector 2 to choose a suitable spin speed for your type of washing.
The programme will end automatically.
—If you just want to drain, turn the selector 2 to “Drip Dry” (position ”100”).
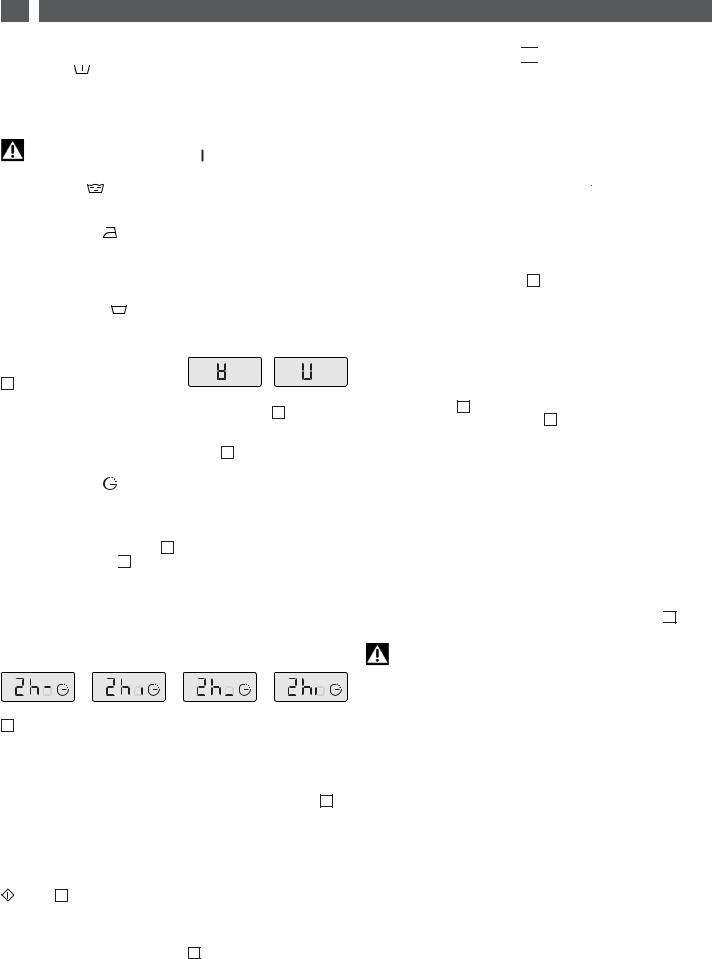
•Delayed start
You can delay the start of your programme by 1 to 19 hours so that you can benefit from cheap rate electricity or to have the cycle finish at a desired time.
To do this, select the time that must pass before the cycle starts by pressing successively on button 3 (this is done hour by hour) and then press ”Start/Pause” 
 5 .
5 .
NB:
-Even if you forget to press the “Start/Pause” button after selecting this option, your choice will still be accepted after a few seconds.
-The time remaining before the start of the cycle is counted down hour by hour from 19 hours to 1 hour and then minute by minute from 59 minutes to 1 minute.
-Throughout the whole waiting period, the delayed start symbol is displayed and the four elements light up in succession.
-At the end of the waiting period, the programme starts and the display A shows the duration of the selected cycle.
—You can alter the spin speed 
 throughout the cycle.
—You can select “Drip Dry” (100) and “Full drum stop”  throughout the washing phase.
—You can activate the “Extra rinse”  option until rinsing starts.
—You can deactivate all the options throughout the cycle provided that their action has not already finished.
•During delayed start:
—Any kind of programme modification is accepted during a delayed start’s waiting period.
—You can alter the length of a delayed start  throughout the waiting period before the cycle effectively starts.
NB :
-During this period, selecting a new time cancels out the previous selection. The new period selected is accepted based on the last selection made.
-If you want to cancel the delayed start completely during this period,
first display “19h” using button 3 . Then press the button again and
briefly press ”Start/pause”  . The cycle will start immediately.
-If you want to reduce the length of time of the delayed start, proceed
in the same way but do not press the ”Start/Pause”  button. Your machine is then ready for a new setting.
— You can activate or amend the “Prewash”  and “Anti-creasing”
  options for the whole of the delayed start’s waiting period.
•When the cycle is over:
When the screen A shows “- 0 -”, you can programme a new cycle without having to reset the selector 1 to the “O” position.
For this, all you have to do is turn one of the selectors or press one of the buttons.
The screen shows the duration of the programme selected. The machine is then ready to be reprogrammed.
•AUTOMATIC SAFETY SYSTEMS
•Lid opening safety system:
As soon as washing commences, the lid on your machine is locked.
When the cycle is finished or when the machine has stopped with the drum full of water, the lid unlocks.
If you have programmed a "Delayed start", the lid is not locked until the waiting period is over and the cycle starts.
If you wish to open the lid during the cycle, press button 
 5 briefly and wait 1-2 minutes for the safety system to unlock the lid.
Important :
Depending on when you wish to open the lid during the cycle, this time delay may be a little longer because a cooling down period may also have to be included.
In fact, to avoid your being severely burnt, the lid safety system will not open during the cycle unless the temperature inside the machine is below a certain threshold.
•MODIFYING A WASHING PROGRAMME
•During programming:
Anything can be changed before the “Start/Pause”  button 5 is pressed.
•After the cycle has started:
You can change the type of textile (for example, switch from “COTTON” to “SYNTHETICS”, etc.). In this case, check that the options you previously selected are still there.
You must confirm your new selection by pressing the “Start/Pause”
button 5 .
The machine may then possibly drain off some of its water.
•Throughout the cycle:
Depending on your model, the following changes are possible without pressing the “Start/Pause”  button 5 .
— You can change the temperature for the same type of textile.
NB: If the temperature achieved by the washing cycle is higher than your new selection, heating the water stops immediately and the cycle continues.
•Water safety system:
During operation, constant control of the water prevents any overflows.
•Spin safety system:
Your washing machine is fitted with a safety system that restricts the spin when poor load distribution is detected.
In this case, your washing may be insufficiently spun. Redistribute your washing in the drum and programme a new spin.
•Anti-foam system:
You machine can detect when too much foam is being produced during spinning.
At such times, spinning stops and the machine drains.
The cycle then restarts, adapting the spin rates and possibly adding an extra rinse.
8
5 / MAINTAINING YOUR MACHINE
•CLEANING THE PUMP FILTER (Option 1)
The way to access your pump filter may differ according to the model of the machine (see options 1 and 2).
This filter collects the small objects you may have inadvertently left in your clothes and prevents them from disrupting the pump’s operation.
To clean the filter, proceed as follows:
—Open the drum doors. At the back of the drum, you will see a plastic component A (Diagram D15)
—Release this (Diagram D16).
To do this:
-Insert a rod (a pencil or a screwdriver, for example) into the hole in the component A
-Press down vertically with the rod, while pushing the component A over to the right until it is released from its housing
—Remove the component A
—Turn the drum slightly towards the front of the machine, with the doors open (Diagram D17)
You can access the pump filter  through the openings freed by removing the plastic component A .
—Remove the filter from its housing (Diagram D17)
—Remove the various objects it may have in it
—Rinse it under the tap (Diagram D18)
—Re-insert it, pushing it firmly into its housing after checking that the housing is clean
—Re-insert the plastic component A , ensuring that it is positioned correctly in the openings at the bottom of the drum and pushing it to the left until it is fully engaged (Diagram D19).
•CLEANING THE PUMP FILTER (Option 2)
if your machine dopes not have the component A shown in Diagram D16, you must proceed as follows to clean your pump filter:
—Turn the drum to position the closed doors facing downwards: this will reveal a plastic component  (Diagram D20)
—If your machine is fitted with one, remove the screw 
—On certain types of machines, the component has a clip.
In this case, release the component  by pressing on this clip
  while sliding the component
  gently to the right
—Then, in all cases, turn the drum again, open the doors and remove the component  by sliding it in the direction of the arrow (Diagram D21)
—Turn the drum slightly towards the front of the machine, with the doors open (Diagram D22).
You can access the pump filter  through the openings freed by removing the plastic component
  .
.
—Remove the filter from its housing (Diagram D22)
—Remove the various objects it may have in it
—Rinse it under the tap (Diagram D23)
—Re-insert it, pushing it firmly into its housing after checking that the housing is clean
—Re-insert the plastic component  and the screw
  by performing all the above operations in reverse order.
EN
•CLEANING THE MACHINE
Important :
To clean the casing, the control panel and all the plastic parts in general, use a sponge or a soft cloth dampened only with water and liquid soap.
In all cases, do not use:
—Abrasive powders
—Metal or plastic sponges
—Alcohol-based products (alcohol, thinners, etc.)
•CARE OF THE INTERNAL COMPONENTS
To ensure better hygiene, we recommend that you:
—Leave the lid open for a short time after washing.
—Clean the plastic and rubber access components to the tank approximately once a month using a slightly chlorinated product. Run a rinsing cycle to remove any residue of this product.
—Run a washing cycle at 90°C at least once a month.
•CLEANING THE PRODUCTS’ BOX
Clean the products’ box regularly. To do this:
—Press the bosses  on each side of the box simultaneously to extract it from its housing(Diagram D24).
—Remove the siphons  from the rear of the box
  and separate the box from its front cover
  (Diagram D25)
—Rinse everything under the tap (taking care to empty any excess water remaining inside the box).
—Refit all the box’ components, ensuring that the box section itself is properly clipped into the cover and then re-insert the complete assembly into its location under the machine’s lid.
•PERIODIC CHECKS
To avoid any water damage, we recommend that you regularly check the condition of the water and drain hoses. If you notice the slightest cracking, do not hesitate to replace the hoses with identical ones available from the manufacturer or his After-Sales Service. For how to replace the water supply hose, please refer to the section “CONNECTING TO THE COLD WATER SUPPLY”
•REPLACING THE POWER SUPPLY CABLE
Warning:
For your safety, the power cable and, depending on the model, the complete electric box and its associated cable must only be replaced by the manufacturer’s After-Sales Service or a qualified electrician.
D 15 |
D 16 |
D 17 |
D 18 |
D 19 |
D 24 |
|
|
|
|
click!CLANG |
|
|
2 |
|
|
2 |
|
A |
|
|
|
1 |
|
|
|
1 |
|
|
|
D 20 |
|
D 21 |
D 22 |
D 23 |
D |
|
|
|
9 |
|
|

EN 6 / INCIDENTS AND PARTICULAR MESSAGES SHOWN ON THE DISPLAY
•INCIDENTS THAT MAY OCCUR •MESSAGES SHOWN ON THE DISPLAY
•The cycle does not start
—You have not pressed the "Start /Pause" button
—There is no power to the machine:
-Check that the plug is correctly in the socket
-Check the circuit breaker and the fuses.
—The water tap is closed
—The machine's lid is not closed properly
•A puddle of water forms around the machine
Warning:
First of all remove the plug and the fuse and shut off the water supply tap.
While the machine is operating, the permanent level control prevents the water from overflowing. If, despite this, water comes out of your machine, it may be that:
—The drain hook is wrongly positioned in the drain pipe.
—The water supply hose is not sealed tightly at the machine or tap end:
-Check that the seals are in place and the connections are tight.
•Heavy vibration during spin
—All the transport materials have not been removed correctly from the machine:
-Check that all the transport wedges have been removed (see
"REMOVING THE TRANSPORT CLAMPS").
—The floor is not level.
—Your machine is resting on its two “front” castors (depending on the model):
-Reset your machine on its feet by pushing the castor engagement lever to the right.
•The washing is not spun or not spun enough
—You have selected a programme with no spin, for example "Drip-dry"
—The spin safety system has detected poor distribution of the washing in the drum:
-Untangle the washing and programme a new spin.
• The machine does not drain
—You have programmed "Full drum stop"
—The pump filter is blocked:
-Clean it (see "CLEANING THE PUMP FILTER" for the relevant procedure)
—The drain hose is kinked or squashed
• The lid does not open
— The programme has not yet finished
The lid remains locked throughout the programme.
• The drum doors open very slowly
(On machines fitted with gently opening doors)
—Your machine has not operated for a long time
—It is located in too cold a position.
—Detergent residue (powder) is blocking the hinges
-In all cases, everything returns to normal after the doors have opened initially
Important :
As a general rule, whatever the anomaly detected, you should stop the machine, unplug the power cable and shut off the water tap
•Incidents indicated, which you can rectify yourself
In this section, we explain how you can rectify these incidents very easily yourself.
Your machine automatically detects some operating incidents and indicates these by particular messages shown on the screen.
Messages Causes / Remedies
The water tap is closed. Check that the water tap is open and then press the “Start/Pause” button again to restart the cycle. This incident may also be caused by the drain hose being poorly connected (see the section “DRAINING AWAY THE WASTE WATER”).
The pump filter is clogged. Clean the pump filter (for how to do this, see the section “CLEANING THE PUMP FILTER”) and then press the “Start/Pause” button again to restart the cycle.
Also check the drain hose’s position in the drain: the connection must not be airtight (see the section “DRAINING AWAY THE WASTE WATER”).
Drain hose not positioned properly. Check the drain hose’s position in the drain: the connection must not be airtight (see the section “DRAINING AWAY THE WASTE WATER”).
Drum blocked. Check that a small item of laundry (e.g. a handkerchief or a sock, etc.) has not slipped down between the tub and the drum and is stopping the drum from turning. To access the bottom of the tub, please refer to the section “CLEANING THE PUMP FILTER”.
Lid not closed properly. Check that the lid is closed and then press the “Start/Pause” button again to restart the cycle.
NB:
If you have experienced an operating incident which is not mentioned above, we recommend proceeding as follows before calling a breakdown engineer:
-Set the Programme selector to the “O” position and remove the electrical plug for at least 10 seconds
-Reconnect the plug and restart a washing cycle.
If the fault persists, call your breakdown engineer .
Important:
Do not restart a washing cycle if the drum remains locked or if you notice water around your machine of if you notice a burning smell.
• AFTER-SALES SERVICE :
Possible maintenance on your washing machine should be undertaken by :
—either your dealer,
—or another qualified mechanic who is an authorized agent for the brand appliances.
When making an appointment, state the complete reference of your equipment (model, type and serial number). This information appears on the manufacturer's nameplate attached to the rear of the equipment.
10
1 / VORSTELLUNG DES GERÄTS |
|
DE |
|
|
|
•INHALT |
Seite |
Entfernen der Transportsicherungen . . . . . . . . . . . . . . . . . . . . . . |
. . .12 |
Versetzen des Geräts . . . . . . . . . . . . . . . . . . . . . . . . . . . . . . . . . . . . |
. .12 |
Kaltwasserversorgung . . . . . . . . . . . . . . . . . . . . . . . . . . . . . . . . . . . |
. .12 |
Abwasserableitung . . . . . . . . . . . . . . . . . . . . . . . . . . . . . . . . . . . . . . |
. .12 |
Stromspeisung . . . . . . . . . . . . . . . . . . . . . . . . . . . . . . . . . . . . . . . . . |
. .13 |
Aufstellen des Geräts . . . . . . . . . . . . . . . . . . . . . . . . . . . . . . . . . . . . |
. .13 |
Beladen der Wäsche . . . . . . . . . . . . . . . . . . . . . . . . . . . . . . . . . . . . . |
. .13 |
Einfüllen der Waschmittel . . . . . . . . . . . . . . . . . . . . . . . . . . . . . . . . |
. .13 |
Seite Programmieren . . . . . . . . . . . . . . . . . . . . . . . . . . . . . . . . . . . . . . . . . . .14 Programmund Optionsdetails . . . . . . . . . . . . . . . . . . . . . . . . . . . . . .15 Änderung eines Waschprogramms . . . . . . . . . . . . . . . . . . . . . . . . . .16 Automatische Sicherungen . . . . . . . . . . . . . . . . . . . . . . . . . . . . . . . . .16 Reinigen des Pumpenfilters . . . . . . . . . . . . . . . . . . . . . . . . . . . . . . . . .17 Pflege des Geräts . . . . . . . . . . . . . . . . . . . . . . . . . . . . . . . . . . . . . . . . .17 Mögliche Störungen . . . . . . . . . . . . . . . . . . . . . . . . . . . . . . . . . . . . . . .18 Anzeigen des Displays . . . . . . . . . . . . . . . . . . . . . . . . . . . . . . . . . . . . .18
•SICHERHEITSVORSCHRIFTEN
Wichtig:
Dieses Gerät ist ausschließlich für den Haushaltsgebrauch bestimmt. Es wurde für das Waschen, Spülen und Schleudern von maschinenwaschbaren Textilien entwickelt.
Unbedingt folgende Vorschriften einhalten. Wir lehnen bei Nichteinhaltung dieser Empfehlungen, was zu Personenund Sachschäden führen kann, jegliche Haftung und Garantie ab.
—Dieses Gerät darf weder von Personen (einschließlich Kindern) in Gebrauch genommen werden, deren körperliche, sensorische oder geistige Fähigkeiten beeinträchtigt sind, noch von Personen, die keine Erfahrung oder keine entsprechenden Kenntnisse besitzen, es sei denn, sie werden von einer für ihre Sicherheit verantwortlichen Person beaufsichtigt, die sie vorher im Gebrauch des Geräts unterweist.
—Das Gerät darf nur entsprechend der Gebrauchsanweisung verwendet werden, um Schäden an der Wäsche und am Gerät zu vermeiden. Ausschließlich Waschund Pflegemittel verwenden, die für den Einsatz in Haushaltswaschmaschinen vorgesehen sind.
—Sollte die Wäsche vor dem Waschen mit Fleckoder Lösungsmitteln oder generell mit brennbaren oder stark detonationsfähigen Produkten behandelt worden sein, darf sie nicht sofort in die Maschine gelegt werden. Desgleichen empfehlen wir Ihnen, Lösungsmittel oder Sprühdosen nicht in der Nähe der Waschmaschine und generell in der Nähe von Elektrogeräten in einem schlecht belüfteten Raum zu benutzen (Brandund Explosionsgefahr).
—Sollten Störungen auftreten, die nicht anhand der empfohlenen Abhilfen gelöst werden können (siehe Kapitel „MÖGLICHE STÖRUNGEN“), einen qualifizierten Fachmann zu Rate ziehen.
—Sollten Sie die Maschine während des Zyklus öffnen müssen (beispielsweise, um Wäsche einzulegen oder herauszunehmen), müssen Sie je nach Phase des Programmablaufs (im Wesentlichen während der Hauptwäsche) auf die möglicherweise sehr hohe Innentemperatur achten (Gefahr schwerer Verbrennungen).
—Bei einer Neuinstallation muss das Gerät mit einem neuen Schlauch am Wassernetz angeschlossen werden. Der gebrauchte Schlauch darf nicht wiederverwendet werden.
—Keine Kinder mit dem Gerät spielen lassen und Haustiere fernhalten.
—Altgeräte müssen sofort unbrauchbar gemacht werden. Den Netzstecker ziehen und das Netzkabel direkt am Gerät abschneiden. Den Wasserzulauf schließen und den Schlauch entfernen. Den Türverschluss unbrauchbar machen.
—Bei Frostgefahr den Wasserzulaufschlauch vom Wasserhahn trennen und alles Wasser entleeren, das im Abwasserschlauch sein könnte, indem dieser so tief wie möglich in eine Wanne gelegt wird.
•ENERGIEEINSPARUNG
—Eine Vorwäsche nur programmieren wenn absolut notwendig: beispielsweise für stark verschmutzte Sportoder Arbeitskleidung usw.
—Bei gering oder normal verschmutzter Wäsche genügt ein Programm bei niedriger Temperatur für ein einwandfreies Waschergebnis.
—Für gering verschmutzte Wäsche ein kurzes Waschprogramm wählen.
—Das Waschmittel entsprechend der Wasserhärte, dem Verschmutzungsgrad und der Wäschemenge dosieren. Die Hinweise auf den Waschmittelpackungen beachten.
•UMWELTSCHUTZ
Die Verpackungsmaterialien dieses Geräts sind recyclebar. Entsorgen Sie sie in den von den Gemeinden eigens zur Verfügung gestellten Containern und trage Sie auf diese Weise zu Ihrem Recycling und zum Umweltschutz bei.
Ihr Gerät enthält zahlreiche recyclingfähige Materialien. Es wurde deshalb mit diesem Zeichen versehen, um Sie darauf hinzuweisen, dass diese Geräte in den Ländern der Europäischen Union nach
 ihrem Gebrauch nicht mit dem übrigen Hausmüll entsorgt werden dürfen. Das von Ihrem Hersteller in die Wege geleitete Recycling kann somit in Übereinstimmung mit der europäischen Richtlinie 2002/96/CE über Elektround Elektronik-Altgeräte unter optimalen Bedingungen erfolgen. Ihre Gemeindebehörden oder Ihr Händler informieren Sie gerne über die zu Ihrem Wohnort am nächsten liegenden Sammelstellen.
Wir danken Ihnen für Ihren Beitrag zum Umweltschutz.
•GERÄTEBESCHREIBUNG
A
A Bedienungstafel
 Öffnungsgriff des Deckels (bleibt während des Zyklus verriegelt)
 Hebel zum Ausfahren der Fußröllchen (je nach Modell)
 Abwasserschlauch
 Transportsicherung
 Wasserzulaufschlauch (nicht angeschlossen)
D 1 |
D 2 |
11

DE 2 / GERÄTEINSTALLATION
•ENTFERNEN DER TRANSPORTSICHERUNGEN
Wichtig:
Vor jeglichem Gebrauch müssen unbedingt die nachfolgend beschriebenen Schritte durchgeführt werden.
Diese Schritte bestehen darin, alle Teile zu entfernen, die zur Sicherung der Gerätetrommel während des Transports dienen.
Das Entfernen der Transportsicherungen ist für den einwandfreien Gerätebetrieb und für die Einhaltung der geltenden Sicherheitsnormen notwendig.
Sollte dies nicht vollständig geschehen, könnte dies zu schweren Beschädigungen des Geräts während dessen Betriebs führen.
—Die Waschmaschine von ihrem Sockel entfernen. (Prüfen, ob die Verkeilung
A die den Motor hält, unter der Maschine geblieben ist.) (Zeichnung D3).
—Die 4 Schrauben  mit einem Schraubendreher entfernen (Zeichnung D4).
—Den Verbindungsriegel  ausbauen: Hierfür die beiden Schrauben
  (Zeichnung D5) mit einem 10er oder 13er Schlüssel (je nach Modell) entfernen.
(Sich davon überzeugen, dass die beiden, auf dem Verbindungsriegel befestigten Kunststoffzwischenstücke gleichzeitig mit dem Riegel entfernt werden).
—Die Schrauben  wieder an der ursprünglichen Stelle einsetzen.
Achtung:
Die beiden Löcher unbedingt mit den hierfür vorgesehenen Abdeckungen  (im Zubehörbeutel enthalten) verschließen.
(Zeichnung D6)
— Den Hemmklotz der Trommel-Wannen-Einheit entfernen (Zeichnung D7). Hierfür:
-den Maschinendeckel anheben
-den Keil  entfernen
-den Hemmklotz  mit einer Viertelumdrehung herausnehmen
-Die in der unteren Position blockierten Trommeltüren durch gleichzeitiges Drücken auf beide Klappen öffnen.
Achtung:
Die Schlauchhalterungen  entfernen und die Löcher unbedingt mit den hierfür vorgesehenen Abdeckungen
  (im Zubehörbeutel enthalten) verschließen (Zeichnung D8).
Tipp:
Wir empfehlen das Aufbewahren aller Transportsicherungen, da diese für den eventuellen, späteren Transport der Maschine unbedingt wieder eingebaut werden müssen
Information:
Vor dem Verlassen des Werks wurde das Gerät sorgfältig geprüft; es ist daher möglich, dass sich etwas Wasser in der Wanne oder in den Waschmittelbehältern befindet.
•VERSETZEN DES GERÄTS
•Auf Fußröllchen stellen:
Wenn die Maschine mit versenkbaren Fußröllchen ausgestattet ist, kann sie leicht verschoben werden
Um die Maschine auf die Fußröllchen zu stellen, den Hebel im unteren Geräteteil von rechts bis zum linken Anschlag drehen (Zeichnung D9).
Wichtig:
Während dem Betrieb darf die Maschine nicht auf den „vorderen“ Fußröllchen ruhen: nicht vergessen, den Hebel wieder in seine Ausgangsstellung zu bringen.
•KALTWASSERVERSORGUNG
Den Zulaufschlauch (Zeichnung D10) :
—einerseits am Anschluss auf der Geräterückseite.
—andererseits an einem Wasserhahn mit Gewindenase, Durchmesser 20x27 (3/4’’ BSP) anschließen.
Beim Einsatz eines selbstbohrenden Hahns muss die geschnittene Öffnung einen Durchmesser von mindestens 6 mm haben.
Wasserzulauf:
-Mindestwasserdruck: 0,1 MPa oder 1 bar
-Höchstwasserdruck: 1 MPa oder 10 bar
•Austausch des Wasserzulaufschlauchs
Beim Austausch auf ein gutes Festdrehen und auf das Vorhandensein der Dichtung an beiden Enden achten.
•ABWASSERABLEITUNG
—Am Ende des Abwasserschlauchs den mit der Maschine mitgelieferten Bogen montieren und den Schlauch (Zeichnung D11) :
—entweder provisorisch an einem Waschbecken oder an einer Badewanne.
—oder dauerhaft an einem belüfteten Geruchverschluss anschließen.
—Sollte die Anlage nicht mit einem belüfteten Geruchverschluss ausgestattet sein, darauf achten, dass der Anschluss nicht luftdicht ist. Um ein Zurückwerfen von Abwasser in die Maschine zu vermeiden, wird in der Tat dringend empfohlen, einen freien Luftdurchlass zwischen dem Ablassschlauch der Maschine und der Abwasserleitung zu lassen.
—Der Entleerungsbogen muss auf jeden Fall in einer Höhe zwischen 65 und 90 cm vom Maschinenboden angebracht werden.
Wichtig:
Darauf achten, dass der Abwasserschlauch mit einem Band gehalten wird, um zu vermeiden, dass sich der Bogen während dem Entleeren löst und eine Überschwemmung verursacht.
Damit das Abwasser richtig abfließen kann, sollte der Abwasserschlauch nicht zu viele Windungen haben. Zu viele Knicke im Schlauch beeinträchtigen die Leistung der Ablaufpumpe.
Das Abwasser kann auch am Boden abgeführt werden, vorausgesetzt, dass der Abwasserschlauch über einen Punkt geführt wird, der sich zwischen 65 und 90 cm über dem Maschinenboden befindet (Zeichnung D12).
D 3 |
|
|
|
D 7 D 8 |
D 9 |
|
|
|
D 4 |
|
|
|
|
|
D 5 |
2 |
1 |
|
|
|
|
|
a |
|
|
|
13 |
|
2 |
|
|
|
|
|
|
|
|
|
|
1 |
b |
|
|
|
|
|
|
A |
|
|
2 |
a |
|
2 |
1 |
|
|
|
|
|
1 |
|
|
|
|
|
|
|
|
|
|
D 10 |
|
3/4 |
D 11 |
D 12 |
|
|
|
|
|
|
|
|
|
|
10 mm |
|
|
|
|
|
|
12 |
|

3 / VORBEREITEN DER WÄSCHE UND DES GERÄTS |
|
DE |
|
|
|
•STROMSPEISUNG
Wichtig:
Aus Sicherheitsgründen müssen folgende Anweisungen unbedingt eingehalten werden.
— Vor dem Anschließen des Geräts muss man sich unbedingt davon überzeugen, dass dessen elektrische Daten mit denen des Stromnetzes übereinstimmen (siehe Typenschildangaben auf der Rückseite des Geräts).
— Die Elektroinstallation muss den geltenden Normen und den Vorschriften der Strombehörden des entsprechenden Landes entsprechen, insbesondere hinsichtlich des Erdanschlusses und der Aufstellung in einem Waschraum.
Wir sind für keine Betriebsstörungen haftbar, die auf eine schlechte Erdung des Geräts zurückzuführen sind.
Tipp:
Hinweise zum Stromanschluss des Geräts
—Keine Verlängerungskabel, Adapter oder Mehrfachsteckdosen verwenden.
—Niemals den Erdanschluss entfernen.
—Die Steckdose muss leicht zugänglich, jedoch für Kinder unerreichbar sein.
Im Zweifelsfall wenden Sie sich bitte an Ihren Elektroinstallateur.
Wichtig:
Das Gerät entspricht den europäischen Richtlinien 2006/95/CE (Niederspannungsrichtlinie) und 2004/108/CE (elektromagnetische Verträglichkeit).
•AUFSTELLEN DES GERÄTS
Wichtig:
Sollte die Maschine neben einem anderen Gerät oder einem Möbelstück aufgestellt werden, muss immer ein Zwischenraum gelassen werden, damit die Luft besser zirkulieren kann.
Tipp:
Des weiteren wird dringend davon abgeraten:
—das Gerät in einem feuchten, schlecht belüfteten Raum aufzustellen.
—das Gerät an einem Ort aufzustellen, an dem er Spritzwasser ausgesetzt werden könnte.
—das Gerät auf Teppichboden aufzustellen.
Sollte sich dies nicht vermeiden lassen, alle notwendigen Vorkehrungen treffen, damit die Luftzirkulation am Boden nicht behindert wird, so dass die inneren Bauteile gut belüftet werden.
•Waagerecht-Einstellung:
Mit Hilfe einer Wasserwaage prüfen, ob der Boden waagerecht ist: Höchstneigung 2°, d. h. eine Abweichung von ca. 1 cm in der Breite und von 1,5 cm in der Tiefe der Maschine.
•Einstellbare Füße
Manche Geräte verfügen an der Front über zwei einstellbare Füße, mit denen Boden-Unebenheiten ausgeglichen werden können. Den waagerechten Stand und die Stabilität der Maschine folgendermaßen einstellen:
—Das Gerät auf die Transportröllchen stellen (oder leicht nach hinten kippen, falls es nicht mit versenkbaren Röllchen ausgestattet ist)
—Je nach Bodenbeschaffenheit den Fuß bzw. die Füße einoder ausschrauben, um die Höhe einzustellen (Zeichnung D13)
—Die Maschine wieder auf die Füße stellen und die Stabilität prüfen.
•PFLEGECODES DER TEXTILIEN
—Hauptwäsche  : niemals die angegebenen Temperaturen überschreiten
—Kaltverdünntes Chloren möglich : cl
— Bügeln : mild |
mittel |
heiß |
— Trockenreinigung : Benzin |
|
|
Perchlorethylen |
alle Lösungsmittel |
|
— Hinweis : ein durchkreuzter Code zeigt dessen Verbot an 
•EINLEGEN DER WÄSCHE
Die Schritte in folgender Reihenfolge durchführen:
•Öffnen der Maschine
—Prüfen, ob der Programmwähler auf „O“ steht.
—Je nach Modell, den Öffnungsgriff anheben oder auf den Druckknopf auf der Vorderseite der Maschine drücken. Der Deckel öffnet sich.
—Auf den Öffnungsdrücker der vorderen Klappe drücken und die Trommel öffnen.
•Einlegen der Wäsche
Für eine optimale Waschleistung die zuvor sortierte und gelockerte Wäsche in die Trommel legen, dabei die Wäsche nicht zusammendrücken und gleichmäßig verteilen. Große und kleine Wäschestücke mischen, um ein optimales Schleuderergebnis zu erzielen, ohne dass sich eine Unwucht bildet.
•Schließen der Trommel
Sich davon überzeugen, dass die Trommel richtig geschlossen ist.
Wichtig:
Prüfen, ob die drei Haken und die Randleiste des Drückers gut sichtbar sind.
• EINFÜLLEN DER WASCHMITTEL
Wichtig:
(Zeichnung D14)
— Der Hauptwaschbehälter kann sowohl Pulver als auch Flüssigkeit enthalten. Jedoch kein Flüssigwaschmittel für Programme MIT Vorwäsche und/oder MIT „verzögertem Start“ (je nach Modell) verwenden.
—Konzentrierter Weichspüler muss mit warmem Wasser verdünnt werden.
—Konzentrierte Javellauge muss unbedingt verdünnt werden.
—Für das richtige Befüllen der Produktbehälter den Deckel so weit wie möglich öffnen.
—Niemals den durch MAX angezeigten Höchststand überschreiten.
•Dosieren des Waschmittels
Die zu verwendende Waschmittelmenge hängt vom Härtegrad des Wassers, dem Verschmutzungsgrad der Wäsche und der Wäschemenge ab.
Es wird immer auf die Dosierhinweise auf den Waschmittelverpackungen verwiesen.
Achtung: Die Empfehlungen der Waschmittelhersteller entsprechen in den meisten Fällen einer maximalen Trommelfüllung. Bitte passen Sie die Dosierung an die eingelegte Wäschemenge an.
Wenn Sie diesen Empfehlungen folgen, verhindern Sie eine Überdosierung, die zur Schaumbildung führt. Eine übermäßige Schaumbildung kann die Maschinenleistungen verringern und die Waschdauer sowie den Wasserverbrauch erhöhen..
•Woll-und Feinwaschmittel
Für das Waschen dieser Textilien wird der Einsatz eines geeigneten Waschmittels empfohlen. (Dieses möglichst nicht direkt auf die Trommel geben, da einiger dieser Mittel Metall angreifen.).
•Vor dem ersten Waschen
Bevor Sie zum ersten Mal Wäsche waschen, empfehlen wir Ihnen, einen Waschzyklus „BAUMWOLLE 90° ohne Vorwäsche“ ohne Wäsche und mit einer halben Dosis Ihres üblichen Waschmittels durchlaufen zu lassen. Damit entfernen Sie eventuelle Produktionsreste, die noch in der Maschine vorhanden sein könnten.
•PROGRAMM FÜR DIE VERGLEICHSUND
NORMTESTS
Baumwolle  60°C - 6 kg - ohne Optionen - maximales Schleudern.
Für die auf dem Energieetikett vermerkte Anzeige erfolgen die Tests gemäß der europäischen Richtlinie 95/12/EWG bei Nennkapazität, wobei man sich davon überzeugt, dass das gesamte Reinigungsmittel CEI sofort bei Beginn der Waschphase verwendet wird.
D 13 |
D 14 |
|
|
|
|
|
|
||
|
|
|
|
|
|
|
|
|
|
|
|
|
|
cl |
Vorwaschbehälter (Pulver)
Hauptwaschbe hälter (Pulver oder Flüssigkeit) Weichspüler
Javellauge
: WASCHPULVER |
: FLÜSSIGWASCHMITTEL |
13
DE 4 / PROGRAMMIEREN DES GERÄTS
•PROGRAMMIEREN |
|
|
Wäscheart und Temperatur |
Anzeige der Zyklusdauer oder |
Einstellen des |
1 |
des verzögerten Starts |
verzögerten Starts |
A |
3 |
|
|
2 |
5 |
Einstellen der Schleudergeschwindigkeit |
4 |
|
Start/Pause |
||
|
Optionen |
|
Information :
Alle Tasten haben einen MikroTastenweg und bleiben nicht gedrückt. Die Taste „Start/Pause“ kann auf keinen Fall ein Programm stornieren.
Wichtig:
Vor dem Einschalten der Maschine prüfen, ob das Netzkabel angeschlossen und der Wasserhahn geöffnet ist. Sich ebenfalls davon überzeugen, dass die Trommeltüren und der Maschinendeckel richtig geschlossen sind.
In der Phase „Zyklusende“ kann man durch Einwirken auf eines der Bedienungselemente (Wahlschalter oder Tasten) in den Programmiermodus zurückkehren.
Aus Sicherheitsgründen wird empfohlen, am Zyklusende den Netzstecker zu ziehen und den Wasserhahn zu schließen.
•Programmieren eines Waschzyklus: |
|
Anzeige und Stellung der Wahlschalter |
||||||
— Den Wahlschalter 1 auf das Programm und die Waschtemperatur drehen, die sich am |
In A , Anzeige der gewählten Programmdauer |
|||||||
besten für die Wäscheart eignen. |
|
|
Zum Beispiel: |
|
||||
Hinweis: Wird der Wahlschalter auf eine andere Position als „O“ gedreht, wird die Maschine |
|
|
||||||
eingeschaltet. |
|
|
|
|
|
|
|
|
— Mit dem Wahlschalter 2 folgendes wählen: |
|
|
|
Wahlschalter 2 |
auf |
|||
- entweder eine für die Wäscheart geeignete Schleudergeschwindigkeit. |
- Position „800“ beispielsweise |
|
||||||
Die Schleudergeschwindigkeit wird in den Programmen „Synthetics“ und „Wolle/ |
|
|
|
|
|
|
||
Feinwäsche“ automatisch begrenzt.. |
|
|
|
|
|
|
|
|
- oder ein Abtropfen. |
|
- position „100“ |
|
|||||
Der Zyklus endet dann mit einem milden Schleudern bei 100 U/min. |
|
|
|
|
|
|
||
- oder einen Halt ohne Abpumpen. |
|
- position |
|
|
|
|||
|
|
|
||||||
Die Maschine bleibt dann vor dem letzten Schleudern voll Wasser stehen. |
|
|
|
|
|
|
||
— Gegebenenfalls die Optionen mit Hilfe der Tasten 4 wählen. |
Kontrollleuchte der gewählten Option(en) |
|||||||
|
|
|
||||||
— Einen sofortigen Start wählen und auf „Start/Pause“ |
5 drücken… |
Abzählen der Restzeit vor dem Zyklusende in A |
||||||
|
|
|
(Die beiden Punkte blinken während der gesamten |
|||||
|
|
|
|
|
Zyklusdauer) |
|
||
|
|
|
|
|
||||
— ... oder durch Drücken der Taste 3 einen um 1 bis 19 Stunden verzögerten Start wählen |
In A , Anzeige des Symbols |
|
|
und Abzählen der |
||||
|
||||||||
(siehe Vorgehensweise im Kapitel „OPTIONSDETAILS • Verzögerter Start”) und danach auf |
Restzeit bis zum effektiven Zyklusbeginn. |
|||||||
„Start/Pause“ |
5 drücken. |
|
Eine Animation (vier umlaufende Segmente) |
|||||
|
|
|
materialisiert die Wartezeit vor dem Zyklusstart. |
|||||
•Ein Wäschestück während dem Zyklus hinzufügen oder herausnehmen (ist während dem Schleudern nicht möglich):
—Auf die Taste „Start/Pause“ 
 5 drücken und den Zyklus unterbrechen.
—Das bzw. die Wäschestücke* einlegen oder herausnehmen.
—Auf die Taste „Start/Pause“ 
 5 drücken und den Zyklus neu starten.
(*)Die Zeit bis zur Entriegelung des Deckels hängt von der Innentemperatur der Maschine ab. Wird ein Zyklus bei über 40°C abgebrochen, kann sie aus Sicherheitsgründen mehrere Minuten betragen.
Hinweis: Sollten Sie einen verzögerten Start gewählt haben, können Sie während der Wartephase vor Beginn des Waschzyklus jederzeit und sofort die Trommel öffnen, ohne den Zyklus unterbrechen und neu starten zu müssen.
Abzählen der Zeit in A gestoppt
(die beiden Punkte brennen „fest“)
Wiederaufnahme des Abzählens in A
(die beiden Punkte blinken wieder)
•Stornieren während dem Programmieren, dem Waschen oder einer Pause:
— Den Wahlschalter 1 auf „O“ drehen.
Dieser Eingriff kann jederzeit erfolgen, während dem Zyklus oder während der Programmierung oder sogar während einer Pause.
Hinweis:
-In jedem Fall muss nach einer Stornierung alles von Anfang an neu programmiert werden.
-Sollten Sie während des Waschens storniert haben, gegebenenfalls daran denken, das Wasser abzupumpen.
Wahlschalter 1 auf „O“
Alle Kontrollleuchten und die Anzeige sind aus
•Zyklusende:
Hinweis: Nach dem Schleudern positionieren manche Modelle automatisch die Trommel mit der Öffnung nach oben, um den Zugriff zur Wäsche zu erleichtern. Dies dauert höchstens 3 Minuten.
— Danach erscheint auf dem Bildschirm A , „- 0 -”. Dies bedeutet, dass der Zyklus fertig ist.
Den Wahlschalter 1 auf „O“ drehen.
Nun kann der Deckel geöffnet und die Wäsche entnommen werden.
14
 Loading...