


 Loading...
D-Link DPH-80
IP Phone
Manual
Version 1.10
Building Networks for People
Contents
Package Contents ................................................................................ |
3 |
Introduction............................................................................................ |
4 |
Features and Benefits ........................................................................... |
5 |
Getting Started ...................................................................................... |
6 |
Using Media Gateway Control Protocol ............................................... |
11 |
Using Session Initiated Protocol .......................................................... |
35 |
Using H.323 Protocol .......................................................................... |
61 |
DPH-80 New Firmware Download Procedure ..................................... |
87 |
Configuration Upload and Download ................................................... |
90 |
SIP and H.323 Phone Book ................................................................ |
93 |
Technical Specifications ...................................................................... |
95 |
Warranty.............................................................................................. |
97 |
Registration ...................................................................................... |
100 |
Contacting Technical Support ............................................................ |
101 |
|
2 |
Package Contents
Contents of Package:
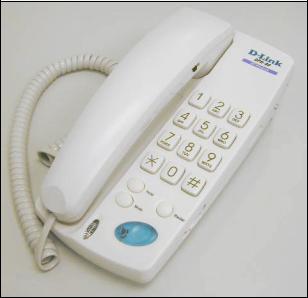
D-Link DPH-80 IP Phone
Handset
Handset cord
Power adapter (9VDC/ 1A)
If any of the above items are missing, please contact your reseller.
Operation Requirements:
Internet connection (via ISP)
Local power outlet
RJ-45 Ethernet Cable
3
Introduction
The D-Link DPH-80 is a fully featured Ethernet business phone that allows both business and residential customers to benefit from IP Telephony services. It reduces costs by receiving local and long distance voice services and data services over a single network connection.
This easy to use IP Phone simply plugs right into the local area network through a standard RJ-45 interface. The DPH-80 utilizes 10/100BASE-TX for Ethernet connectivity and supports telephone network features such as Call Redial. In addition, it provides access to a host of features for business applications, including hold, mute and one-touch dialing.
4
Features and Benefits
Designed for versatility and performance, the DPH-80 IP Phone provides the following features:
IP address assignment using DHCP (Dynamic Host Configuration Protocol), PPPoE, or static configuration
QoS support to ensure voice quality
Adaptive jitter buffer for a smooth voice reception
DTMF tone generation
Lost packet recovery ability for improved voice quality
Adjustable speaker/ringer volume control
Remote software update support
Easy to install
One-touch dialing (Note: this feature is not a speakerphone. It allows you to dial a number without using the handset. Once the party you are calling picks up, you must use the handset to talk.)
Call hold
Last number redial
Mute
Call transfer
Call control protocols: H.323, SIP, MGCP
Voice compression: G.711 (A-Law/W-Law), G.723.1, G729A/AB
WAN connection: through 10/100 Mpbs Fast Ethernet port
H.450 Call transfer/Call on hold (for H.323)
5
Getting Started
Overview
The D-Link DPH-80 is a low cost, simple to use, and extremely versatile IP phone with the look and feel of a normal PSTN phone.
The D-Link IP Phone can operate under any of the three main Internet telephony protocols: Media Gateway Control Protocol (MGCP); Session Initiation Protocol (SIP); and the H.323 protocol. These protocols are used for signaling, maintaining, and tearing down voice calls. The D-Link IP phone allows voice data to be carried over the same path used by your computer for the Internet or Local Area Network (LAN).
The D-Link DPH-80 phone is easy to install and supports plug and play features of the IP network. Out of the box, your IP phone will work in any of the abovementioned three protocol infrastructures with minimal configuration. Advanced, customized configuration is easily achieved through a web-browser configuration utility.
D-Link IP phones support remote maintenance, allowing software to be upgraded remotely for new features and any bug fixes. The DPH-80 supports a unique remote diagnostic feature to monitor phone functions and performance.
Installation
The following are steps will install and power-on your DPH-80 IP phone:
Connect the RJ-45 Ethernet cable from the DPH-80 to a LAN jack.
Plug the power adapter into the appropriate wall outlet.
Plug the power adapter plug into the power jack.
6
Getting Started
Configuring the IP Address
In order to use a Web browser to configure the DPH-80 IP phone, you must make sure the phone has a valid Ethernet connection to a PC or LAN via its Ethernet port. We recommend using a recent version of any widely used browser such as Netscape or Internet Explorer. The browser must have JavaScript enabled. The following illustrations use Windows 2000 and Internet Explorer 5.5.
The DPH-80 comes with a default IP address of 10.1.1.80. Make sure that the IP address on your Ethernet card is in the same subnet as the DPH-80. You can do this by changing the IP address of the PC as shown.
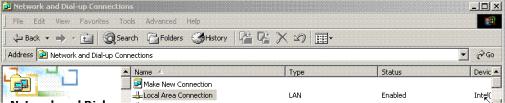
In Windows, go to Start/Settings/Control Panel/Network and DialUp Connections.
Right-click on Local Area Connection (LAN).
Click on Properties.
7
Getting Started
Configuring the IP Address
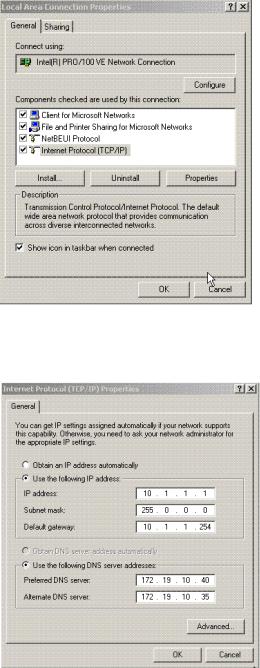
In the General Tab, click on Internet Protocol (TCP/IP).
Click on Properties.
8
Getting Started
Configuring the IP Address
Click on Use the following IP address, and enter a value in the 10.1.1.xx range. (Do not use the IP address 10.1.1.80; this address is already in use by the DPH-80 as a default address.) Change your IP address on your Ethernet adapter to 10.1.1.x, where x is something other than 80. Make sure the subnet mask and default gateway match the DPH-80. This should allow you to use the Web interface to configure the IP phone.
Click OK.
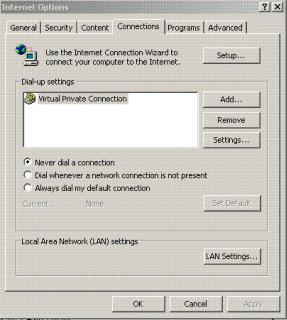
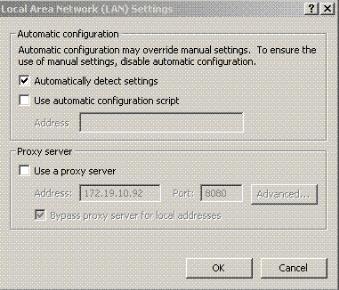
Open Internet Explorer. Click on Tools/Internet Options/Connections
Click on LAN Settings.
9
Getting Started
Configuring the IP Address
Make sure Use a proxy server is disabled.
Click OK.
Loading Factory Defaults
If it is required to reset the DPH-80 and start with default configuration parameters, you can do so by pressing ‘*789*#’ while the phone is in the idle state. The phone will restart in a few seconds with the default parameters. The default configuration password is ‘12345’. The phone’s Internet access and calling card information must be configured again before it can be used.
Note: Upon pressing ‘*789*#’, the DPH-70 will ask for confirmation.
Advance Configuration
The DPH-80 is highly versatile and can be configured to operate in any of the three main Internet telephony protocols – MCGP, SIP, and H.323.
The following sections contain configuration details, instructions for use, and a troubleshooting guide for each protocol.
10
Using Media Gateway Control
Protocol (MGCP)
Infrastructure Requirements
Although the DPH-80 MGCP phone will work in any type of LAN network, a 100mbps, switched network is more suitable for providing good quality voice communications.
MGCP phones need a Media Gateway Controller or Call Agent or Notified Entity.
To operate properly, the DPH-80 needs a set of IP parameters such as IP address, subnet mask, gateway address, and DNS server address. These parameters can be configured either statically through a browser or dynamically through DHCP or PPPoE. A DHCP or PPPoE server in the local LAN is required to provide these parameters.
The D-Link MGCP phone has many configurable parameters. These parameters can be configured through any Java-enabled Internet browser (Netscape 6.2 or above, IE 5.0 or above).
If your LAN network has a firewall and NAT, they should support MGCP to make and receive calls from outside your LAN network.
A TFTP server is required to support remote software upgrades. Please check with your service provider for further information on upgrading your device.
Configuring the MGCP Phone
Once you have the above infrastructure in place, you can power up the MGCP phone. The MGCP phone will play the progress tone until it receives a response from Media Gateway Controller. If it does not receive the dial tone within the expected time, the MGCP phone is not configured. However, the MGCP phone is accessible through an Internet browser for configuration.
11
Using Media Gateway Control Protocol (MGCP)
Configuring the MGCP Phone
Login Page
To access the web interface for the D-Link DPH-80:
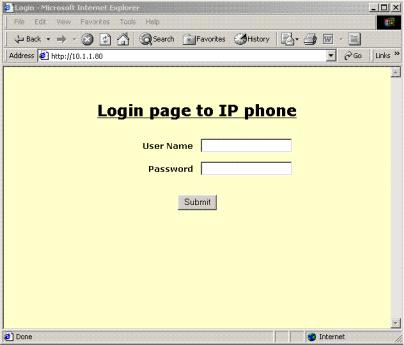
Use a JavaScript-enabled Internet browser (Netscape 6.2 or above, IE 5.0 or above) with the default IP address of the DPH-80 entered in the address box (http://10.1.1.80).
The following page will appear.
The following two parameters control access to the MGCP phone. The default value for both is“dlink”. These values can be changed later using the Change Login Name and Password Page.
User Name: This is case-insensitive with a maximum of 20 characters.
Password: This is case-insensitive with a maximum of 20 characters.
Click Submit.
12

Using Media Gateway Control Protocol (MGCP)
Configuring the MGCP Phone
Main Configuration Page
After logging in, the D-Link DPH-80 phone configuration page is displayed and provides access to the DPH-80.
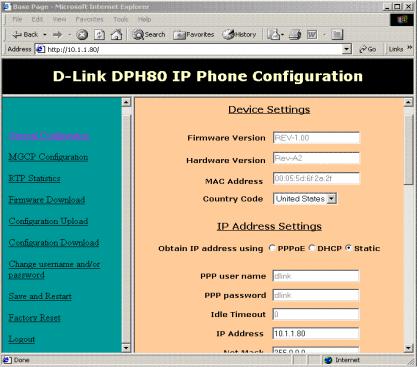
Click on General Configuration. A new page containing information about your system and the DPH-80 will appear.
13
Using Media Gateway Control Protocol (MGCP)
General Configuration
The items on this window are described below:
Firmware Version : This shows the current firmware version of the IP phone. It is updated whenever the MGCP phone software is updated. It cannot be modified.
Hardware Version: This shows the current hardware version of the IP phone. It cannot be modified.
MAC Address: This shows the MAC address of the board in colonseparated hex form. By default the value is ff:ff:ff:ff:ff:ff, once this value is modified it will be grayed out and cannot be changed.
14
Using Media Gateway Control Protocol (MGCP)
General Configuration
Country Code: This is a drop-down menu. Select the appropriate country. This field controls the type of tones played by MGCP phone.
Obtain IP address using:
If static option is selected, then a user-configured IP address, Net Mask, Default gateway, and DNS server address will be used for the phone.
If DHCP is selected, then these values will be obtained using DHCP.
If the PPPoE is selected and uses the PPP username and password for authentication, the PPPoE obtains an IP address for the phone. Default selection is Static-enabled.
Idle Timeout: This is the time interval in seconds of session inactivity after which the PPP session should be terminated. If this is set to 0, then the session will never be terminated. This field is currently grayed out so that it can’t be modified. This will allow the PPP session to be on permanently unless the server closes the connection. This field can be activated later to enable a configuration of the timeout value.
IP Address: This should have the IP address of the phone in dot-sepa- rated IP address form. An illegal IP address won’t be allowed for this field.
Net Mask: This will have the Net Mask of the network to which the IP phone is connected. It must be in dot-separated form. An illegal IP address mask won’t be allowed for this field.
Default Gateway: This is the default gateway for the IP phone. An illegal IP address won’t be allowed for this field.
DNS server Address: This is the IP address of the DNS server, which will respond to the DNS queries from the IP phone. It must be in dotseparated form. An illegal IP address won’t be allowed for this field.
TFTP Server: This has the IP address of the host where the TFTP server is running. It must be in dot-separated form. An illegal IP address won’t be allowed for this field.
15
Using Media Gateway Control Protocol (MGCP)
General Configuration
Firmware Filename (up to 6 characters): This is the filename of the firmware that you want to download from the TFTP server. It may be 6 characters long at maximum. It should start with a letter and should consist of digits, letters, and an underscore.
Upload Filename (up to 6 characters): This is the filename to upload the configuration parameters from the phone to the TFTP server. It may be 6 characters long at maximum. It should start with a letter and should consist of digits, letters, and an underscore.
Download Filename (up to 6 characters): This is the filename to download the configuration parameters from the TFTP server to the phone. It may be 6 characters long at maximum. It should start with a letter and should consist of digits, letters, and an underscore.
Adaptive Jitter: If this is enabled, then the Jitter Buffer will be adaptive. Otherwise it will use a fixed buffer of a size specified in Maximum Buffer Size.
Maximum Buffer Size: If the adaptive jitter is disabled, the phone will use this static value for the Jitter Buffer size. This should be in the range of 0-300 ms.
Log Server: This allows the user to log all debug messages for viewing.
Log Server Address: This has the IP address of the machine where all the log messages should be sent. It must be in dot-separated form. An illegal IP address won’t be allowed for this field.
Log Server Port: This is the port number on the log server to which the log messages are to be sent. It should be a valid port number in the range of 0-65335. The user should make sure that it is not one of the reserved port numbers.
Microphone Gain: This will show the microphone gain in the range of -14 to 14 (unit of dB).
16
Using Media Gateway Control Protocol (MGCP)
General Configuration
Speaker Gain: This will show the speaker gain in the range of -14 to 14 (unit of dB).
Access Settings: The following three key sequences should be unique.
Factory Default: This is the key sequence the user should dial on the phone to get the phone to use all the default values of the parameters. After entering this key sequence on the MGCP phone it will restore the parameters to default upon next restart.
Production Key: This is the key sequence the user should dial on the phone to get to production-test mode. After entering this key sequence, MGCP phone will start in production-test mode upon next restart.
TFTP Upload: This is the key sequence the user should dial on the phone to start the TFTP software update. After getting the new image, the phone will start itself using the new image.
MGCP Configuration
17
Using Media Gateway Control Protocol (MGCP)
General Configuration
The items on this window are described below:
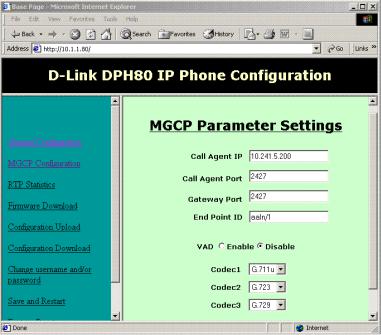
Call Agent IP: It must be in dot-separated form. An illegal IP address won’t be allowed for this field. (Ex: 10.241.5.200).
Call Agent Port Number: This is the port at which the Call Agent receives and sends packets. (Ex: 2427).
Gateway Port: This is the port number at which the MGCP Phone will open the socket to send and receive packets. (Ex: 2427).
Endpoint ID: This is the endpoint identifier as defined in rfc 2705 (endpointname@[IP Address or domain name]). Here we can specify only the endpoint name (up to @) or full identifier with either domain name or IP address. If only the endpoint name (up to @) is given, the identifier will be formed automatically by software by appending the IP address.
Example 1: If the endpoint name is “dlink/1” the identifier will be formed by software by appending IP address like “dlink/1@[10.241.5.231].
Example 2: If the full identifier is given as dlink/1@book. The IP address will not be appended.
VAD: When this is enabled, the MGCP phone uses silence compression to save on bandwidth. This feature works irrespective of the codec selected.
Codec1, Codec2 and Codec3: These are drop-down menus which allow you to select what codecs are to be used by the phone. It also specifies the priority of the codec while negotiating for the codec to use in any call. Codec1 will be given the highest priority.
After entering the appropriate values, click Submit. The following page will appear.
18
Using Media Gateway Control Protocol (MGCP)
General Configuration
Do not click Save and Restart until you have finished configuration.
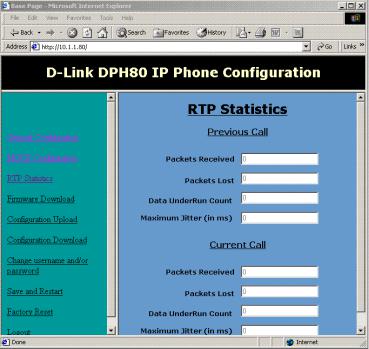
RTP Statistics
This is an informational page and shows the RTP statistical data from the current call and the previous call. This page is automatically refreshed every 5 seconds.
19
Using Media Gateway Control Protocol (MGCP)
General Configuration
The items on this window are described below:
Packets Received: Number of packets that have been received for the call.
Packets Lost: Number of packets that have been lost in the network.
Data Under Run Count: This is the jitter buffer under run count for the entire call.
Maximum Jitter: This is the estimated maximum jitter in the network, shown in units of ms.
Firmware Download
When clicked, this link will display a warning page. Click Yes to download the firmware from the TFTP server to the firmware filename. The TFTP server and filename are set in the General Configuration. Click No on the warning page to return to the previous page.
20

Using Media Gateway Control Protocol (MGCP)
General Configuration
After clicking Yes, the following screen will appear.
21
Using Media Gateway Control Protocol (MGCP)
General Configuration
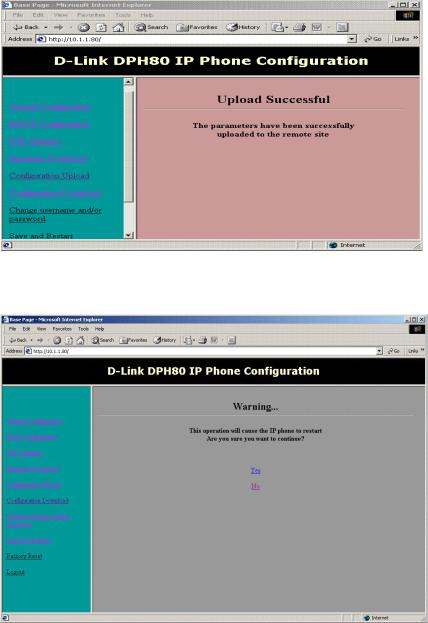
Configuration Upload
Configuration Download
22
Using Media Gateway Control Protocol (MGCP)
General Configuration
When clicked, this link will display a warning page. Click Yes to download the configuration parameters from the TFTP server to the phone as the download filename. The TFTP server and filename are set in the General Configuration. Click No on the warning page to return to the main page.
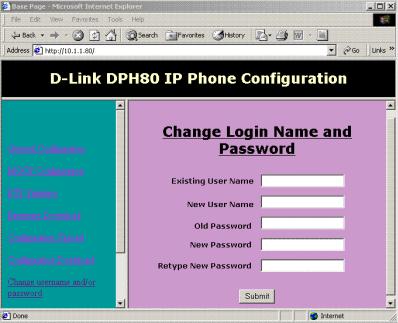
Change Login Name and Password
The items on this window are described below:
Existing User Name: This is the user name that was used to access the MGCP phone from the web browser. This is case-insensitive and may be 20 characters long at maximum.
New User Name: If the user wants to change the login user name, it should be entered here. Otherwise, enter the same user name. This is case-insensitive and may be 20 characters long at maximum.
Old Password: This is the login password used to access the MGCP phone from the web browser. This is case-sensitive and may be 20 characters long at maximum.
23
Using Media Gateway Control Protocol (MGCP)
General Configuration
New Password: A new login password should be entered here. This is case-sensitive and may be 20 characters long at maximum.
Retype New Password: The above field value should be retyped here to confirm that the correct value was entered. If the two don’t match, the user will be prompted to retype them.
After entering the appropriate values, click Submit to save any changes to the Login Name and Password settings.
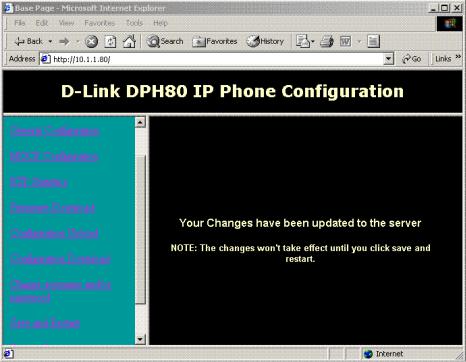
Save and Restart
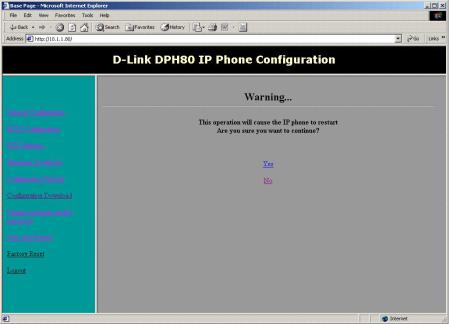
When the Save and Restart link is clicked, it will display the following warning page.
Click Yes to save all the updated parameters to the flash memory and restart the phone so that the latest changes take effect. The You have been successfully logged out page will be displayed. The phone takes about 30 seconds to come up again. Click No on the warning page to return to the main page.
24
Using Media Gateway Control Protocol (MGCP)
General Configuration
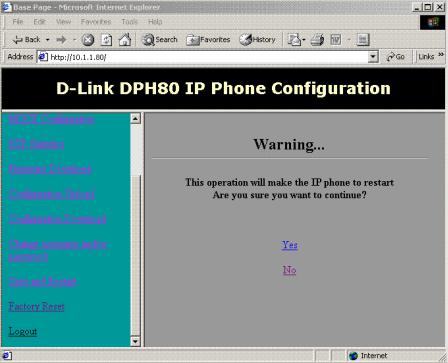
Factory Reset
When the Factory Reset link is clicked, it will display the following warning page.
Click Yes to reset the phone to factory defaults and automatically restart. Click No on the warning page to return to the main page.
25
Using Media Gateway Control Protocol (MGCP)
General Configuration
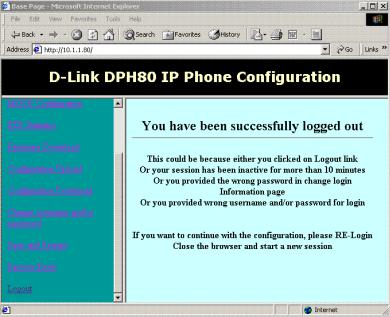
Logout
When the Logout link is clicked, the You have been successfully logged out page is displayed and the current configuration session is terminated.
Note: This page may also be displayed if you provided the wrong username and/or password or if your session has been inactive for more than 10 minutes. If you are having an active session with the server, any other user accessing the MGCP phone’s configuration will get the Server Busy page and will not be al-
lowed access.
Using the MGCP Phone
If the MGCP phone is configured properly and if the support infrastructure is in place, the MGCP phone will play the dial tone on off-hook. You can dial any registered MGCP number by entering the number in sequence; the end of the number will be automatically detected by using the following two methods:
Using “Digit map” algorithm with the digit map supplied by the Call Agent.
Inter digit time out (2 seconds).
26
Using Media Gateway Control Protocol (MGCP)
Using the MGCP Phone
MGCP Phone Features
D-Link DPH-80 works in 10, 100, and 10/100 Mbps Ethernet environments. It has an adjustable handset and speaker volume control and it plays tone for all numerical key press.
LEDs
Link/Activity: Steady on for link up, flashing for activity, and off for link down
Speaker LED (Red): Indicates speaker-on status
Hold (Green): Steady on to indicate Hold status; off indicates normal status
Mute (Red): Steady on to indicate Mute status; off inidcates normal status
Tones
The DPH-80 MGCP phone plays the following tones depending on the phone’s current status. It supports different types of tones for different countries (selected through configuration).
Dial tone
Call progress tone
Ring back tone
Busy tone
Call alert (ringing) tone
Error tone
DTMF tones for all numeric keys
Call Waiting Tone
27
Using Media Gateway Control Protocol (MGCP)
Using the MGCP Phone
Calling Features
MUTE: When pressed, the MGCP phone turns off the microphone signal from the handset but still plays voice from the other party.
HOLD: When pressed, the MGCP phone disconnects both microphone and speaker while the connection is kept alive. No voice packets are transmitted from the D-Link MGCP phone. The hold LED is on. The user may press the button again to release the call. This feature requires support from the remote phone for proper functioning.
REDIAL: When pressed, the phone redials last dialed number.
TRANSFER: Toggle the hook-switch quickly to flash (transfer) the call. The MGCP phone plays a dial tone. Then enter the party to transfer the call by the general dialing method. The MGCP phone transfers the call and plays a busy tone. Flashing the hook twice before dialing the number will restore the call to the normal state (to call-active state).
SPEAKERPHONE: One-touch dialing key. When pressed, the speaker LED is on and speaker itself is on while on-hook. If user off-hooks after dialing or presses this button again the one-touch operation is terminated,and the LED and speaker are both turned off.
Note: This is not a true speakerphone, but is designed to allow one-touch dialing. Although the other party can hear through the speakerphone, the voice quality is very poor.
CALL WAITING: The call-waiting tone will be played whenever a new party calls while a call is in progress. By pressing the hook-switch the MGCP will switch to the incoming call. Pressing again will switch between two parties.
28
Using Media Gateway Control Protocol (MGCP)
Using the MGCP Phone
Algorithms
Codecs: D-Link MGCP phones supports G.711 U/A law, G.723.1, and G.729AB. The browser configuration allows selecting codecs and their priority.
Voice activity detection, silence suppression, and comfort noise generation: The VAD can be disabled in the configuration irrespective of the codec being used.
Adaptive Jitter Buffer: D-Link MGCP phones use a robust adaptive jitter buffer algorithm. It can be disabled and a fixed-size jitter buffer can be used instead through configuration.
Other Features
Remote software upgrade: A predefined key sequence will download the MGCP phone software and restart the phone. The MGCP phone should have been configured with the correct TFTP server IP address.
Remote diagnosis: The MGCP phone will send status and other messages to the log server configured in the MGCP phone. The remote log server should run the server application from D-Link to receive and display these messages. This feature can be disabled through the browser.
Restore factoy defaults: If you enter the specified key sequence, the MGCP phone restores the configurable parameters to default values upon next restart.
Production testing: If you enter the specific key sequence, the D-Link MGCP phone will execute a production test upon the next restart. The production test is described later in this section.
29
Using Media Gateway Control Protocol (MGCP)
MGCP Troubleshooting
Error Conditions
The D-Link MGCP phone will detect the following error conditions and play the error tone.
Error tone on network-connection failure.
Upon network connection, the tone will revert to normal dial tone. The link LED also gives this information.
Error tone if there is no DHCP server.
The phone will revert to a normal dial tone upon detecting a DHCP server.
Error tone if the MGCP proxy is down on power-up.
The phone will revert to a normal dial tone upon detecting an MGCP server.
Some common error situations are described below.
Power UP
There is no tone on power-up.
Check the power adaptor and power source, and restart the phone.
There is no dial tone on power-up.
The MGCP phone takes time to exchange information with DHCP and MGCP call agent. During this time it will play call progress tone. Then the tone will change to a dial tone if the DHCP and connection with the call agent is successful. It will play an error tone if the DHCP or call agent fails.
The phone plays an error tone on power-up.
It means that the information exchange with DHCP or MGCP call agent has failed. Check your network connection and confirm that the DHCP and MGCP call agents are running. Also, restart the phone to check if the MGCP phone is configured properly.
30
Loading...